wm cheng
-
Posts
4311 -
Joined
-
Last visited
Content Type
Profiles
Forums
Events
Gallery
Everything posted by wm cheng
-

1/72 Bandai VF-25F Messiah build-up step-by-step (sort of)
wm cheng replied to wm cheng's topic in The Workshop!
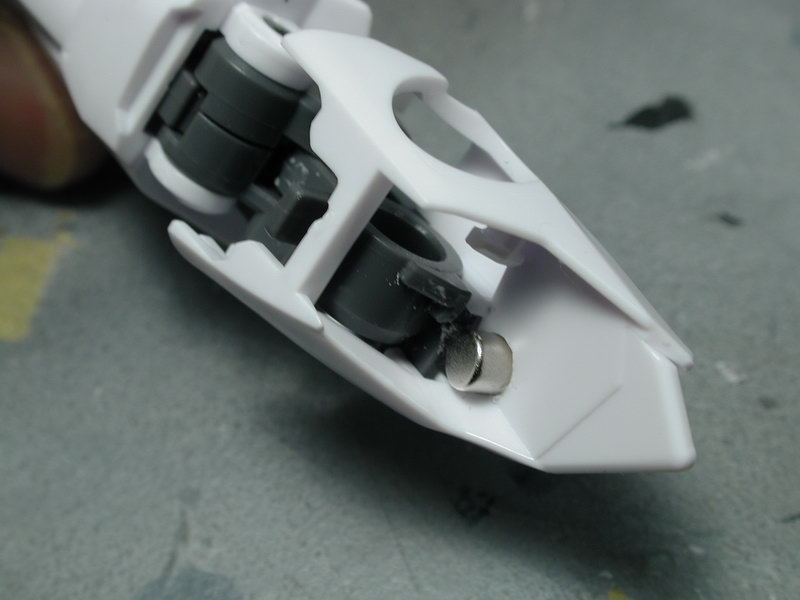
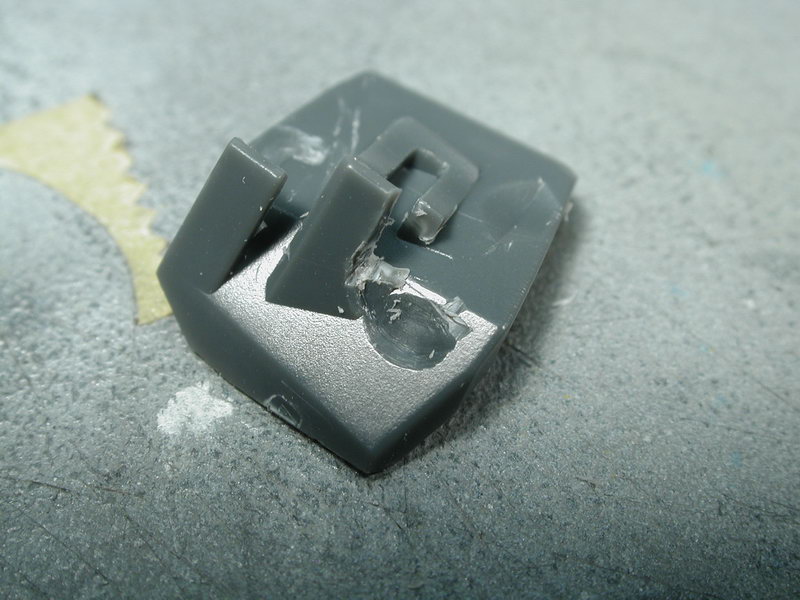
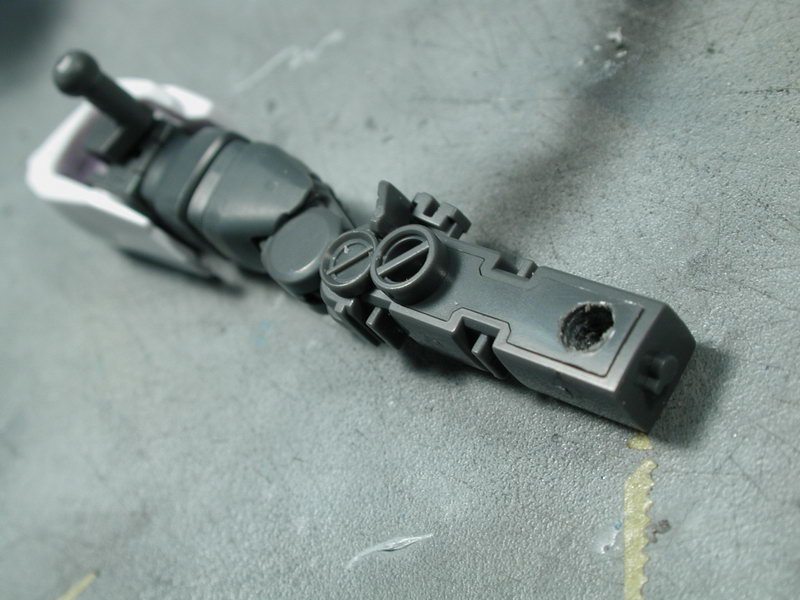
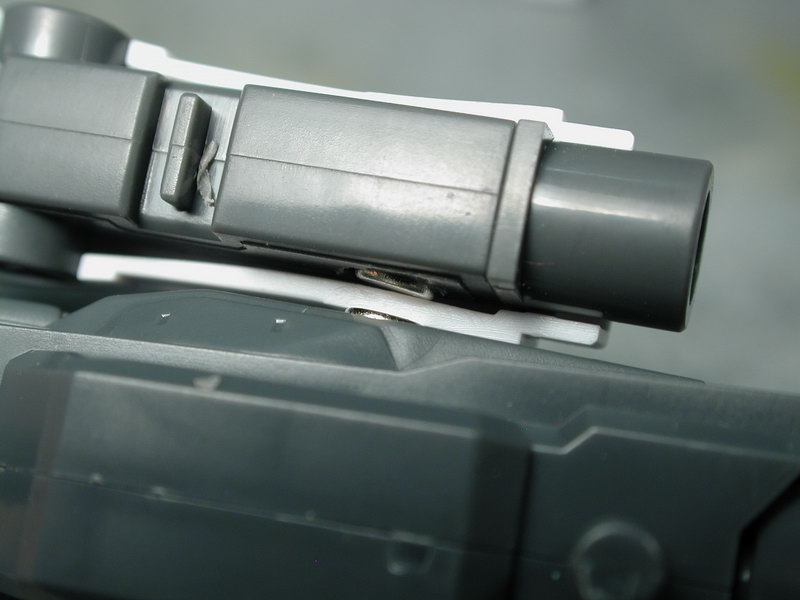
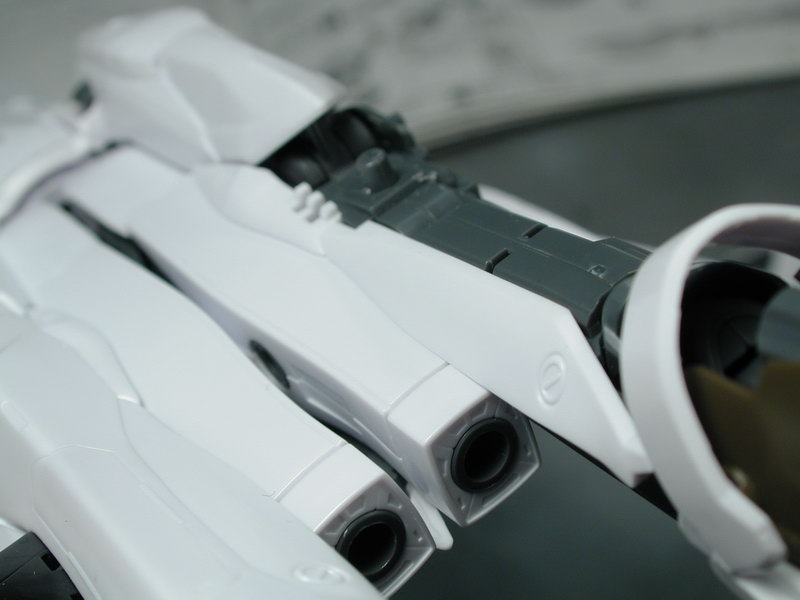
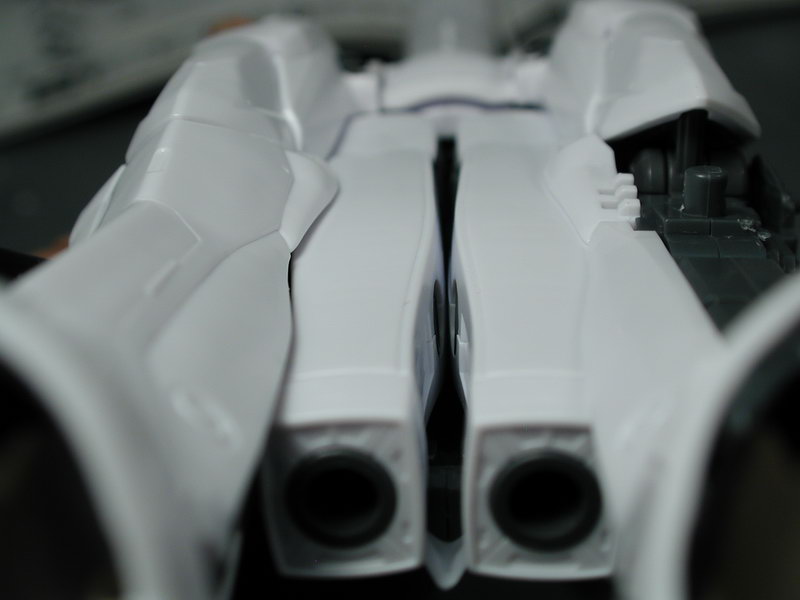
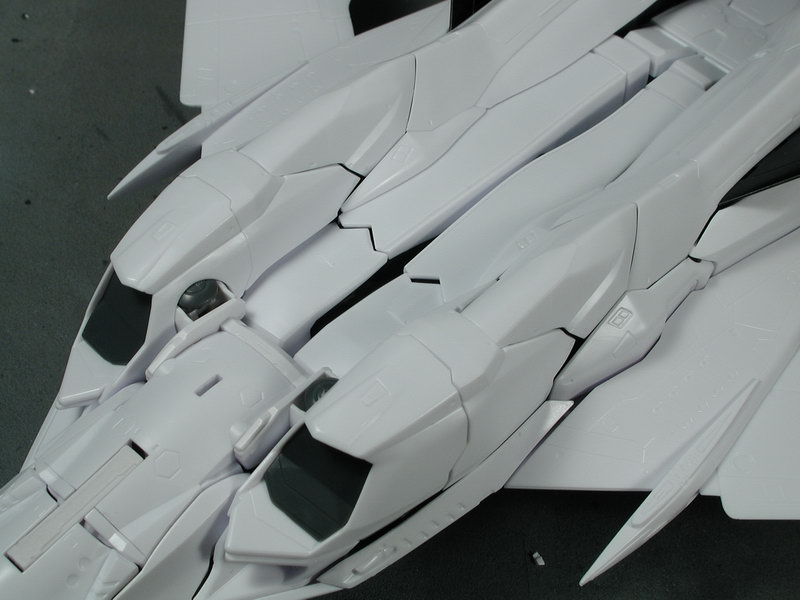
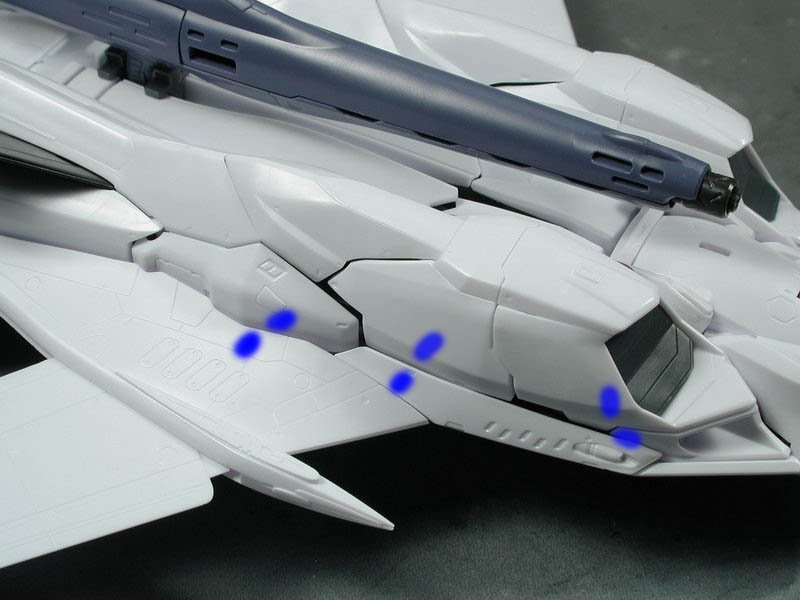
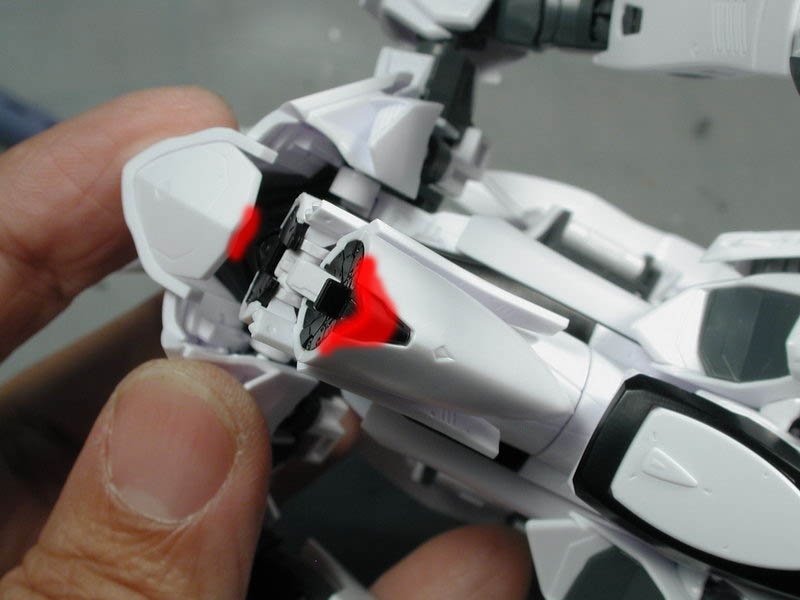
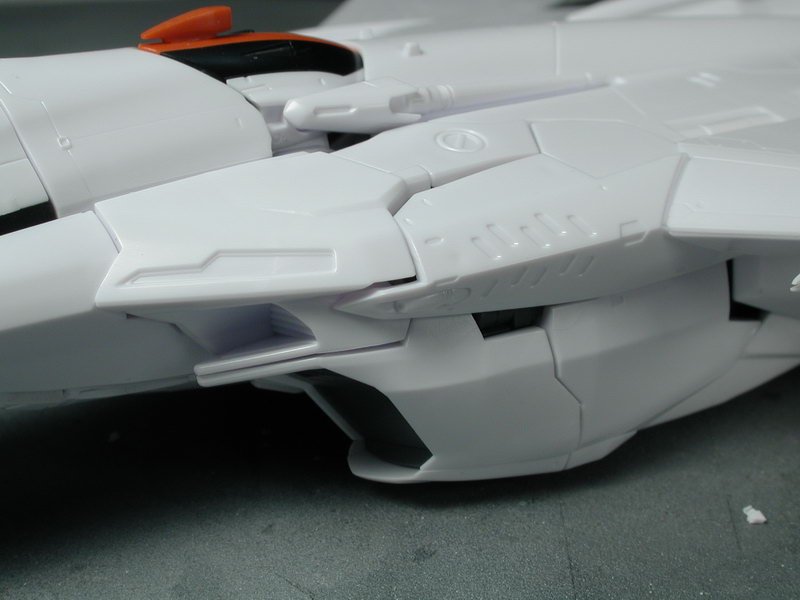
The next spot is the forward intakes, I've always hated this seam between the main lower ones and the smaller upper intakes. I was hoping the magnets will help here. It did work when the parts were free, but the magnets just weren't strong enough to really close the gap when everything was back and assembled again. It does sometimes hold if you press everything together tightly, then the magnets seem to work, but I'm not sure if this is worth the effort now. I'll still do it onto the other side just to make it symmetrical, but I guess I was hoping for more of an effect. You have to dig out a little divit (careful to not go through) on the rear of the intakes because of the depth of the magnet for the intake covers to sit properly again.


-
1/72 Bandai VF-25F Messiah build-up step-by-step (sort of)
wm cheng replied to wm cheng's topic in The Workshop!
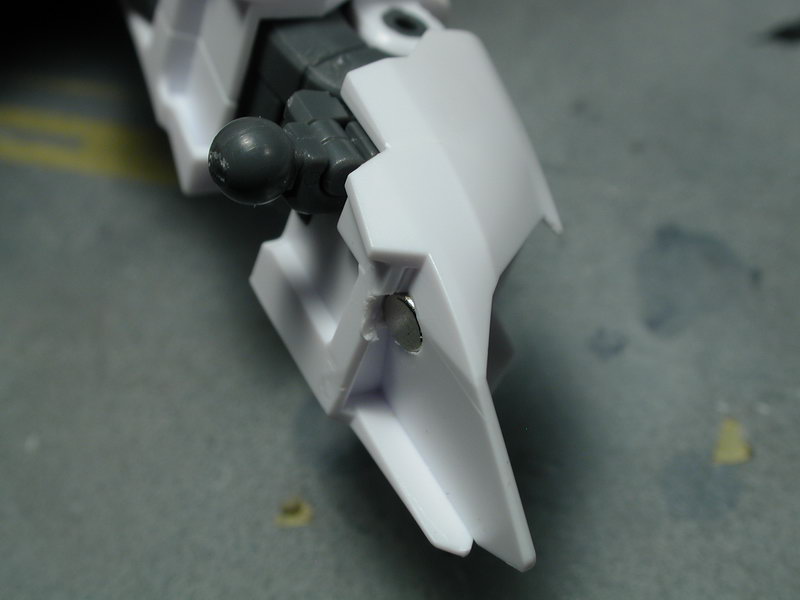
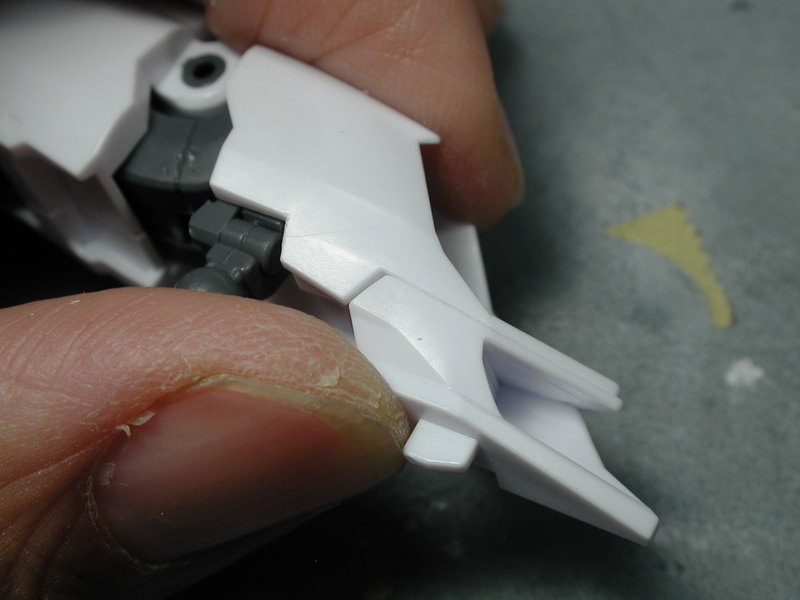
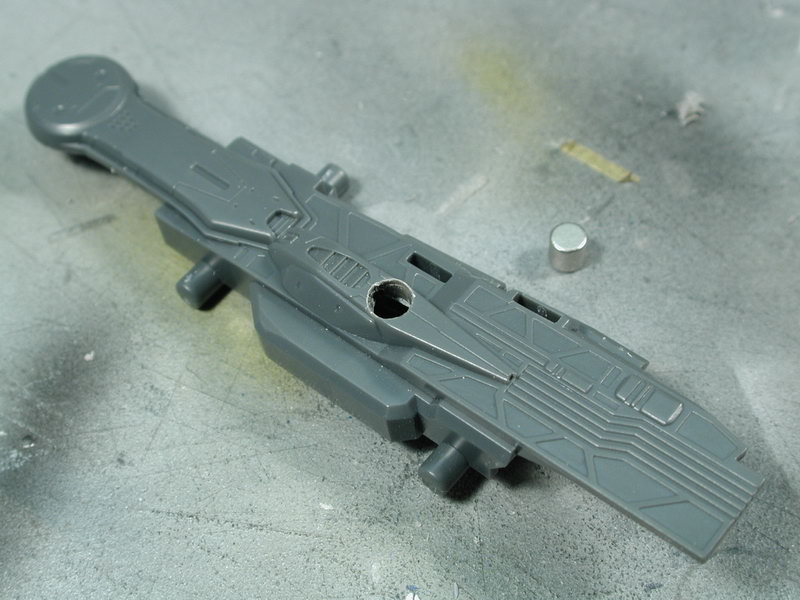
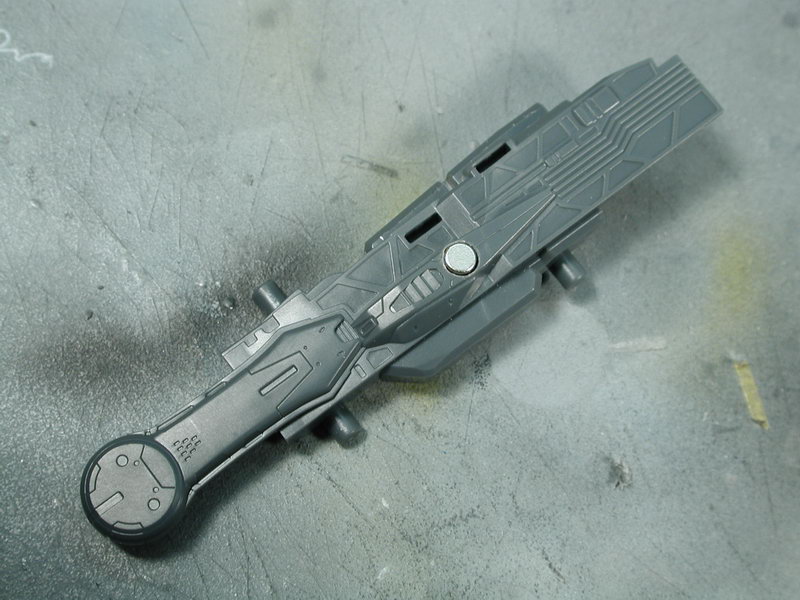
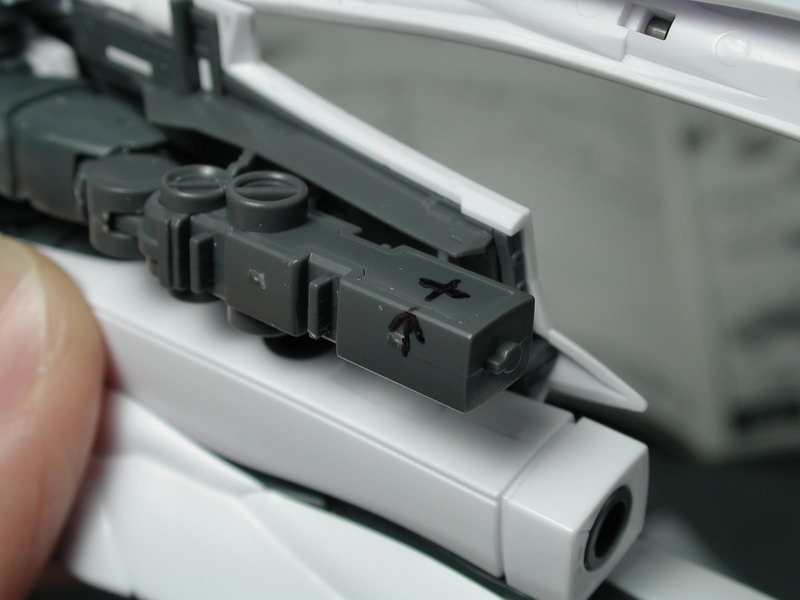
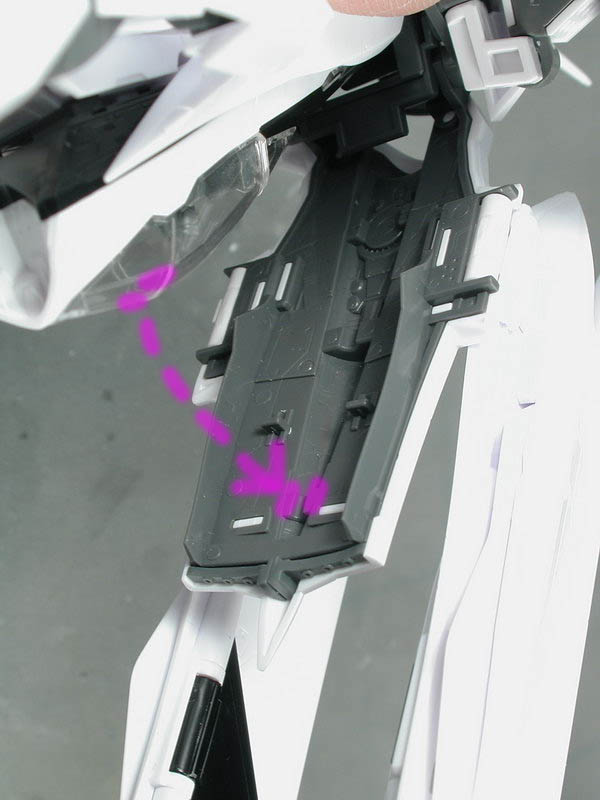
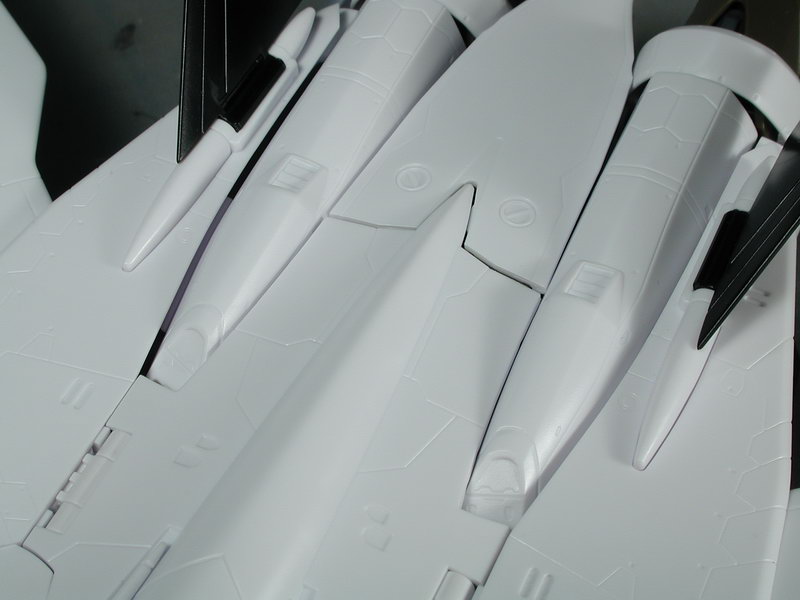
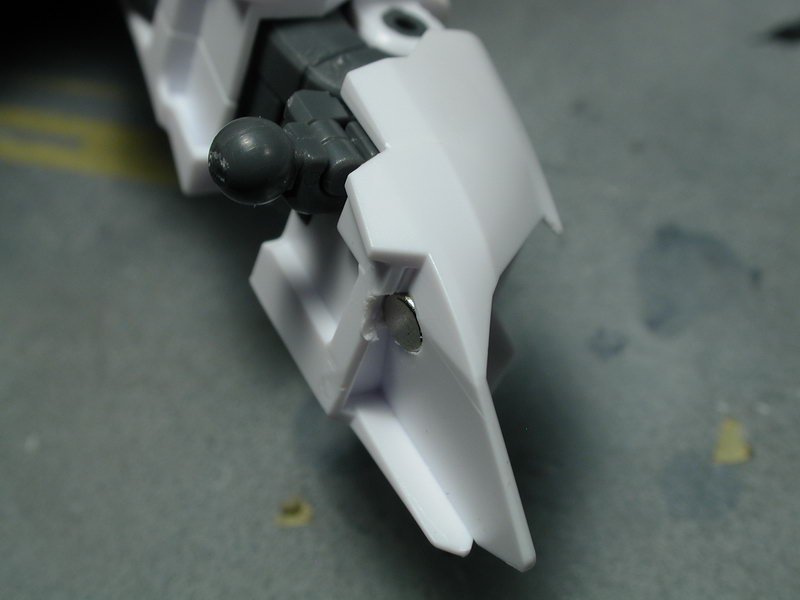
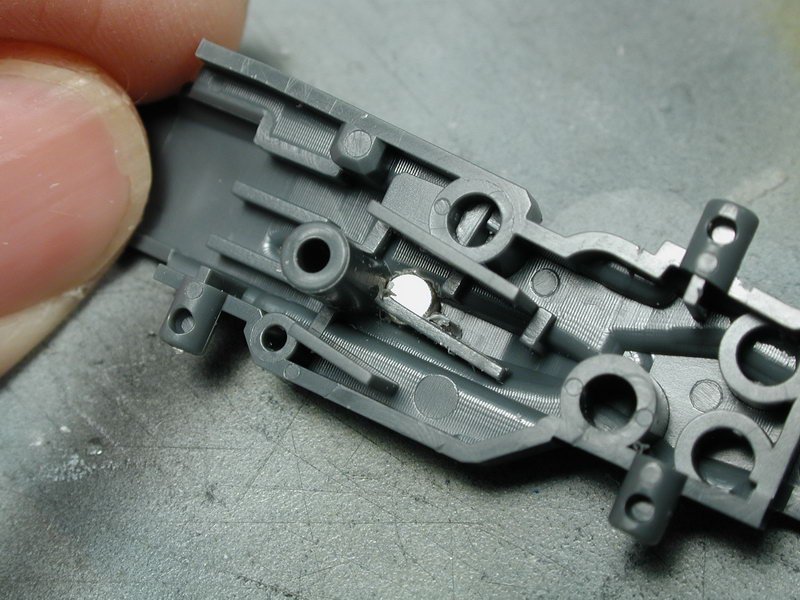
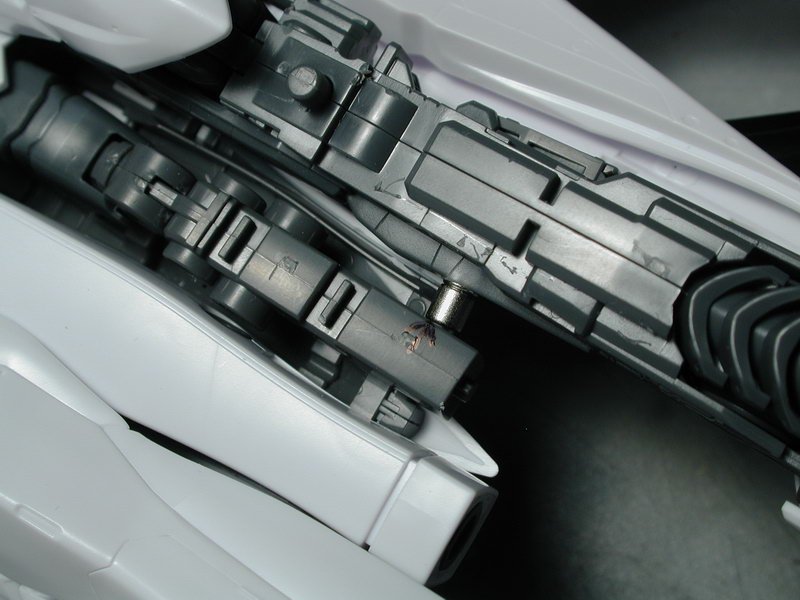
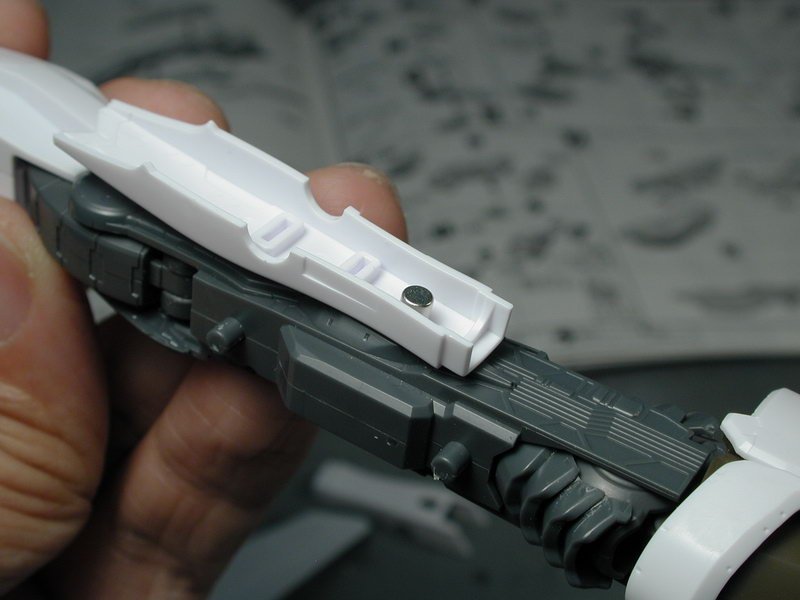
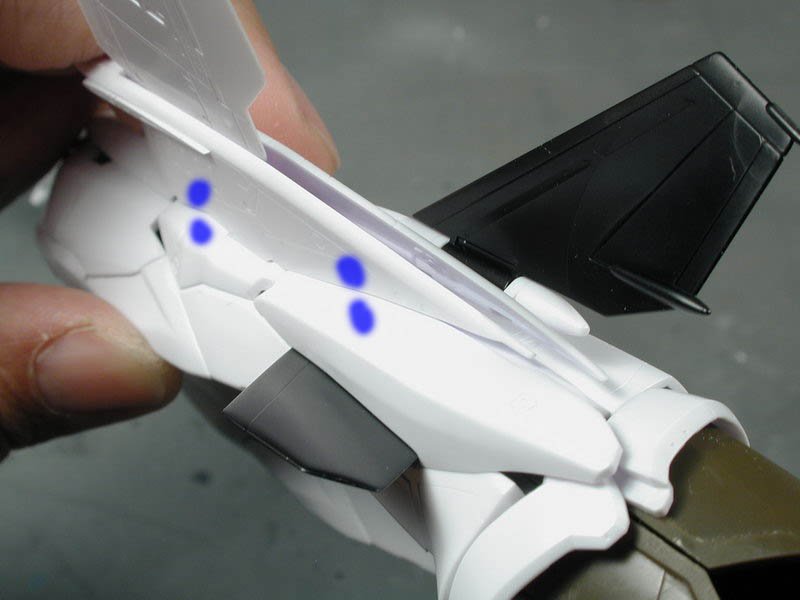
Hey those magnets are even smaller! I wish I knew about those first, I might get myself some to try out on another project, I wonder if they'd be as strong as the ones I got. Well, its been a few days and I've only had a bit of time to try these magnets out and they do seem to be working (not as well as I hoped... but they do tighten up the gaps). I wish they were stronger, because the force giving the gaps in the model seems to just barely equal the strength of the magnets, I was hoping that they'd be strong enough to be completely hidden behind the plastic, but they aren't. So there will be exposed magnets so that they can have actual surface contact - with the exception being the arm pieces, I shallowed out the back so the magnets could be closer to the surface, but I still want that surface to be smooth and the magnet hidden. The first one is the leg, I wanted it to be tucked tighter to the arms in the fighter mode as the arms actually have some tab/peg lock to the underside of the back plate. The magnet is surface mounted so that its flush with the surrounding details, and I think once its painted up, it will just blend in and look like another circular detail in amongst all that made up "gak". I had to make sure that the depth of the magnet didn't interfere with the movement of the foot/ankle assembly too - luckily it isn't deep enough to interfere. In the photos I show where I could mark its corresponding magnet placement on the forearms. The last photos show that it does indeed work, the gap on the left leg between it and the arm is evident (even when the plane is upside down - gravity works for us, when you flip it around, when gravity is no longer our friend, the gap is worst) and the leg on the right has its gap closed up tight due to the magnets working.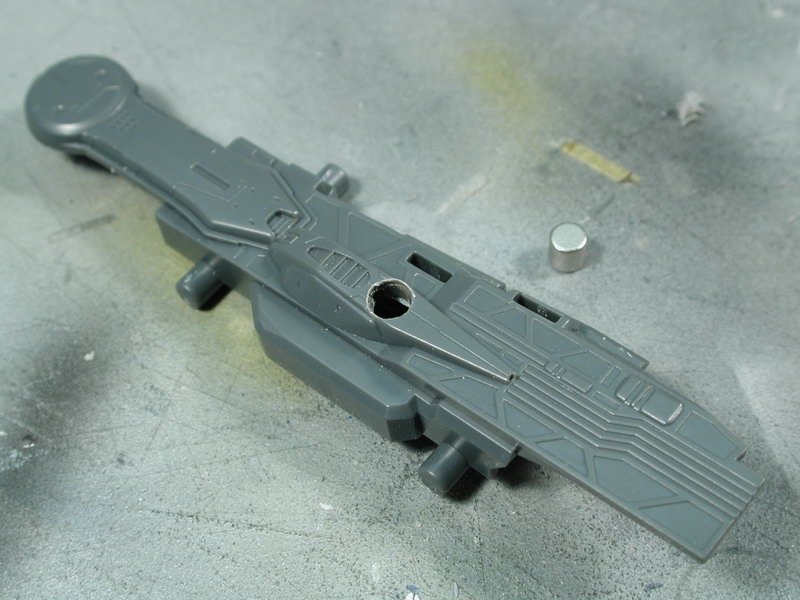


-
1/72 Bandai VF-25F Messiah build-up step-by-step (sort of)
wm cheng replied to wm cheng's topic in The Workshop!
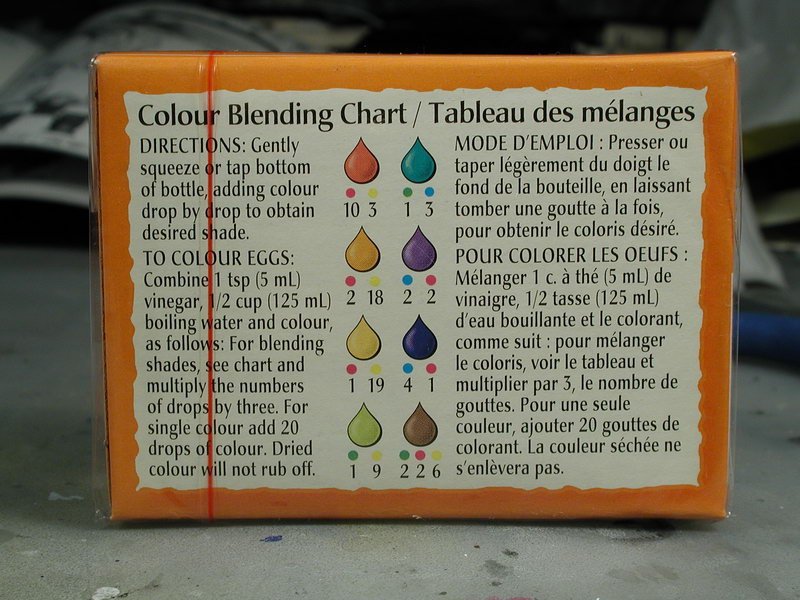
Lastly I ran across this Humbrol clear purple in a spray can for R/C polycarbinate shells - I picked it up. Its my fall back for the canopy tinting and clear-coat over a Aclad metallic base for the gunpod. I also found this food colouring dye at the groceries store, and the pack even has mixing instructions on the back, I will try that with the future first, its more reversible if it fails, I can always strip off the future off the canopy if I don't like the results. The Humbrol clear purple might actually etch into the clear canopy (but its there if all else fails - I too will try the Tamiya red & blue clear paints too). I'm sure the spray can will work for the gun pod though - I just hope the purple is right. But we are getting too far ahead of ourselves, I think I will tackle the magnets problem first and get the plane to hold itself together with all the gaps minimized first before thinking about painting.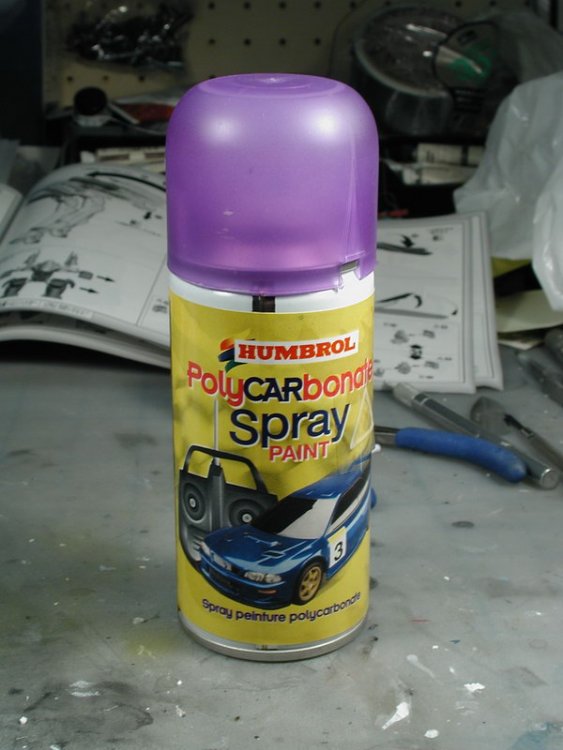

-
1/72 Bandai VF-25F Messiah build-up step-by-step (sort of)
wm cheng replied to wm cheng's topic in The Workshop!
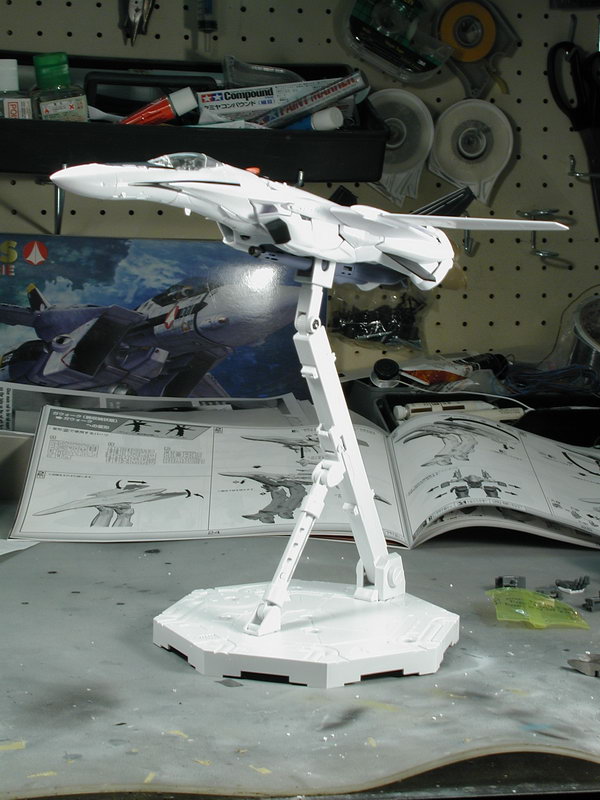
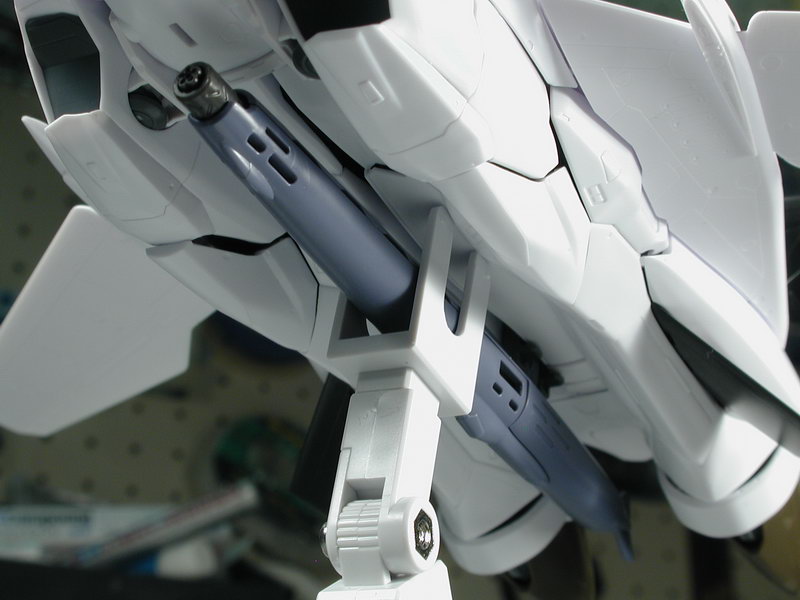
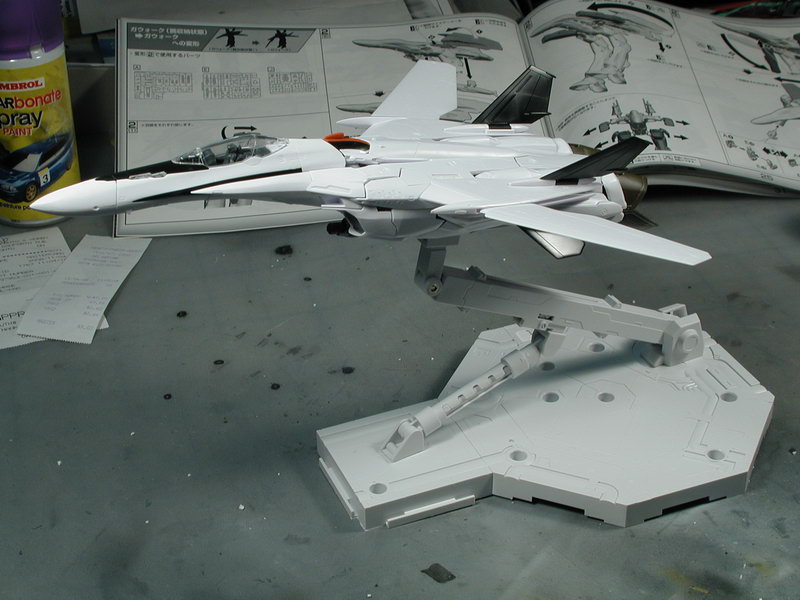
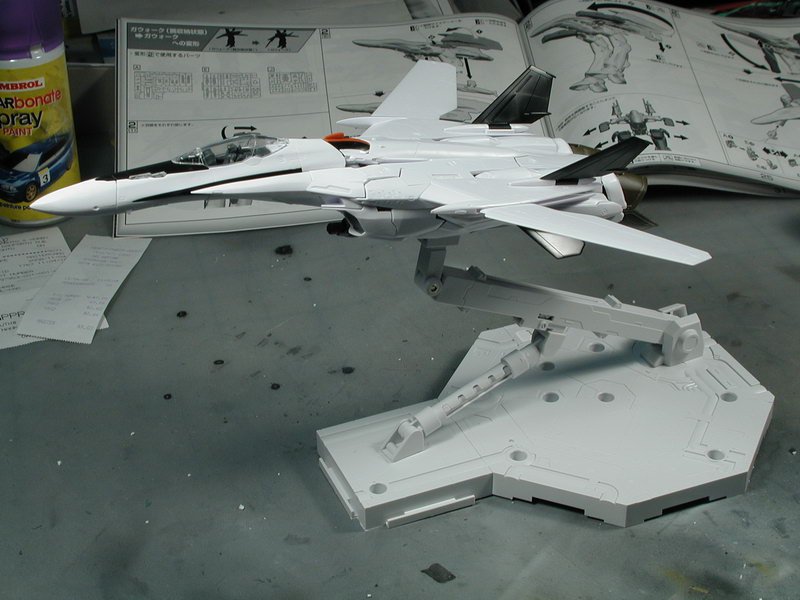
I also put together that Bandai stand (this did not come with the kit - I bought it a few years ago, I thought it was pretty neat when I saw it, little did I know it fits this kit). Mainly I wanted to see if I could modify it so I didn't have to use that stupid piece J4 to attach it to the stand. Its really poorly thought out; A) its not even at the centre point / center of gravity of the model, its too far forward and puts un-necessary torque on the gunpod and B) it so poorly designed that it will scratch the finish on the gunpod everytime its put on or off and lastly C) it just looks like an afterthought, it doesn't work with the design of the Valkryie at all! Well using one of the universal adapters supplied with the stand, I was able to find the middle size to straddle the gunpod and hold the plane up - or course its slides around, but maybe again with some magnets, it might hold to the underside of the arms - I think it will be a better solution than using the kit part J4. Oh, BTW, the way the gunpod holds onto the aircraft mode is a joke! That J25 piece is just a poor afterthought, and the gunpod is constantly mis-aligned - with all this thought gone in to the all the movable pieces, its a shame they couldn't of come up with a more elegant solution to holding the gun in place while in the aircraft mode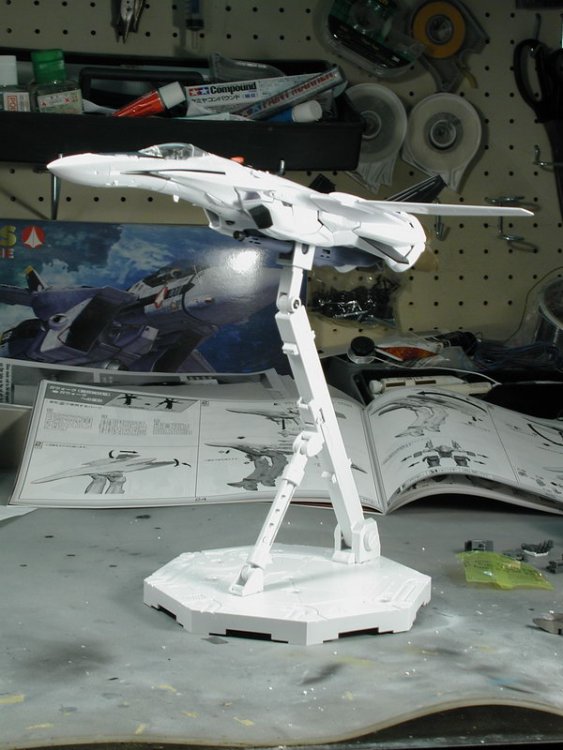

-
1/72 Bandai VF-25F Messiah build-up step-by-step (sort of)
wm cheng replied to wm cheng's topic in The Workshop!
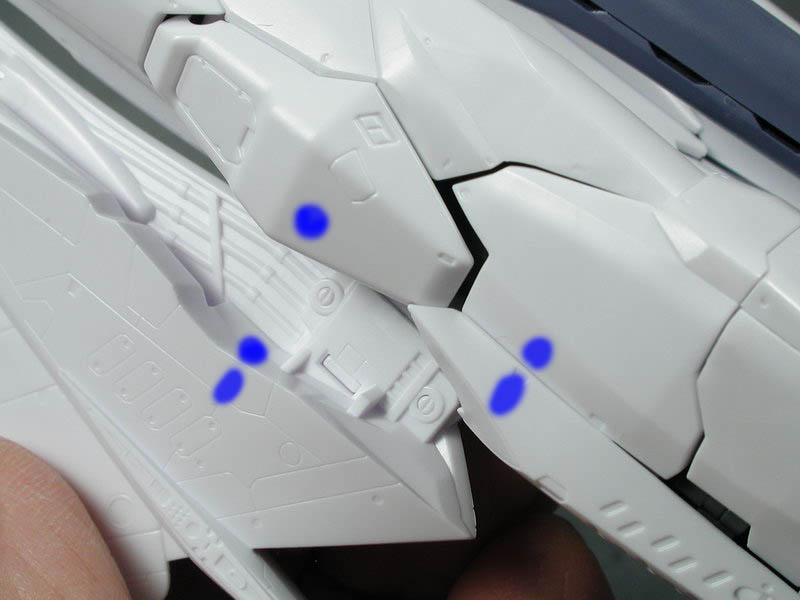
Finally I think I might try and get some small rare earth magnets tomorrow to see if they are small enough to be used in this kit. Unfortunately there aren't a lot of cavities that allow for the placement of these magnets within the plastic parts. They may need to be drilled and surface mounted so they have direct physical contact However, initially I thought that if we had some magnets placed where I outlined in BLUE in these areas that it might help hold the aircraft mode together better. The primary concern is that I wish the legs were snapped closer to the folded arms and higher - they somewhat drag down a bit due to gravity. Additionally if the wing glove was attached more snugly to the leg sides, it would tilt them down a bit and look more natural head on - as it stands now, they have a tendency to sit pointing up at the wingtips which is a bit odd for any aircraft. Lastly those gun shields (B14 & B15) at the hip sides are so problematic, they never seem to sit right maybe a magnet to pull them closer to the lower hip might help them align themselves. I've found these rod-type magnets that are apparently 1/8"X1/8" which is pretty darn small! http://www.leevalley.com/wood/page.aspx?c=...,42348&ap=1 I'll pick some up tomorrow or the next day to see if they'd work.


-
1/72 Bandai VF-25F Messiah build-up step-by-step (sort of)
wm cheng replied to wm cheng's topic in The Workshop!
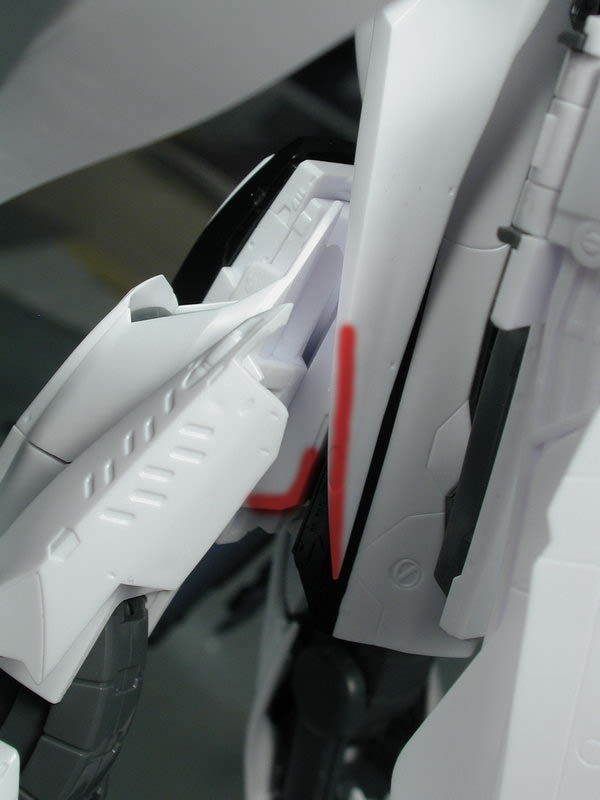
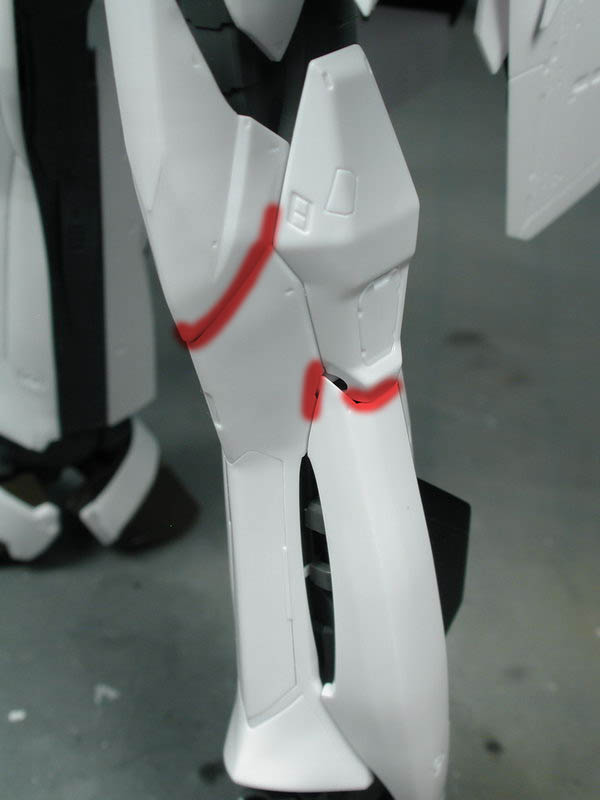
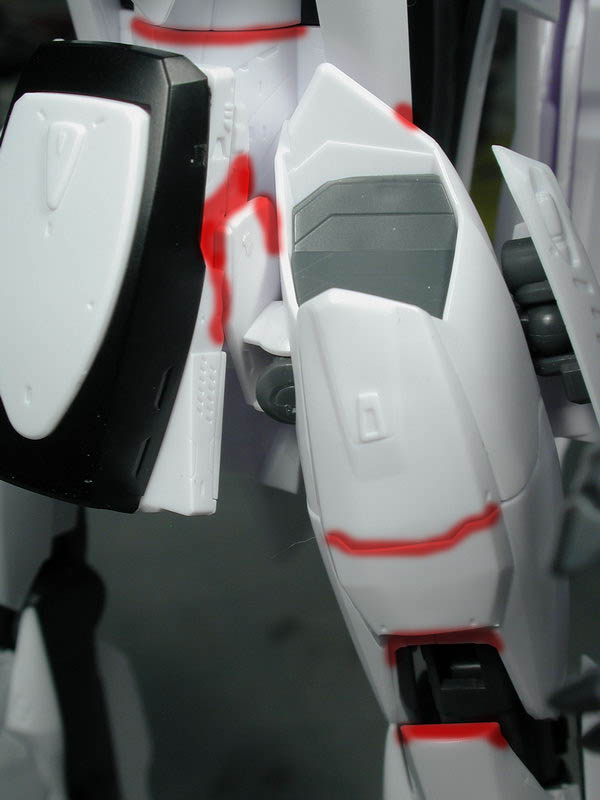
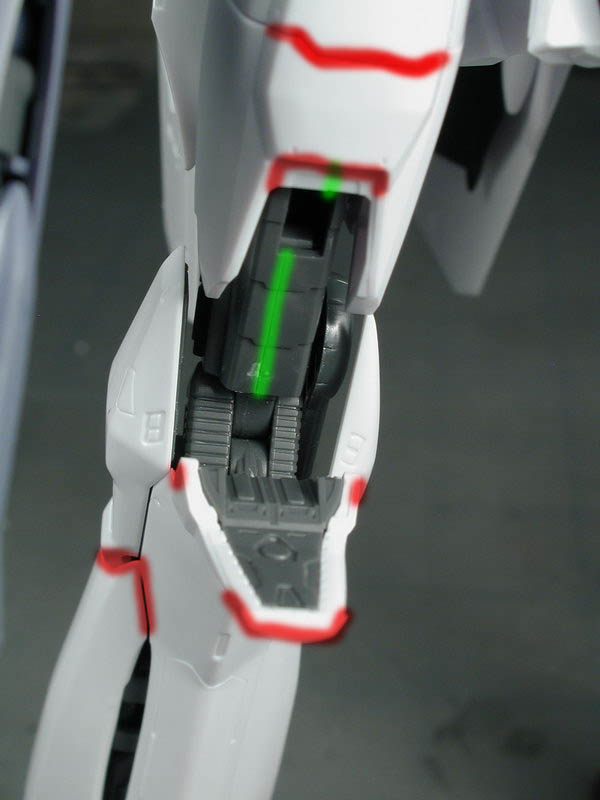
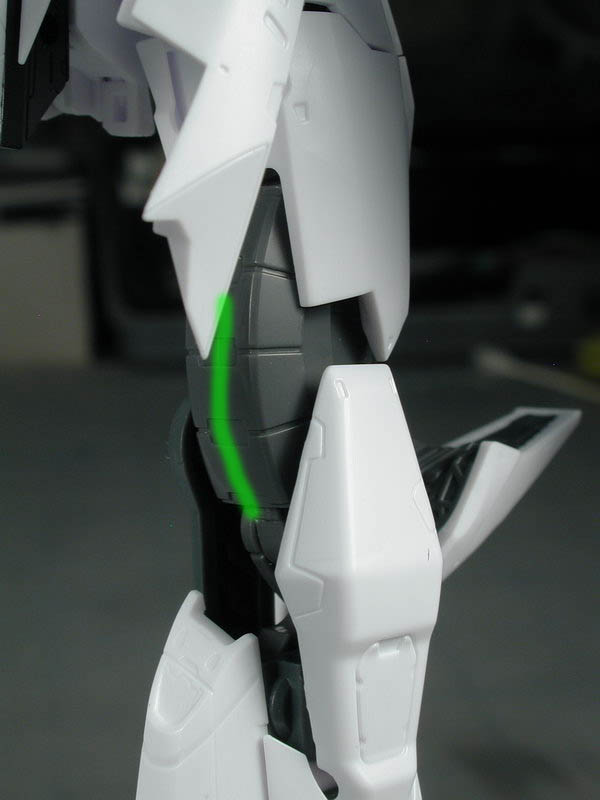
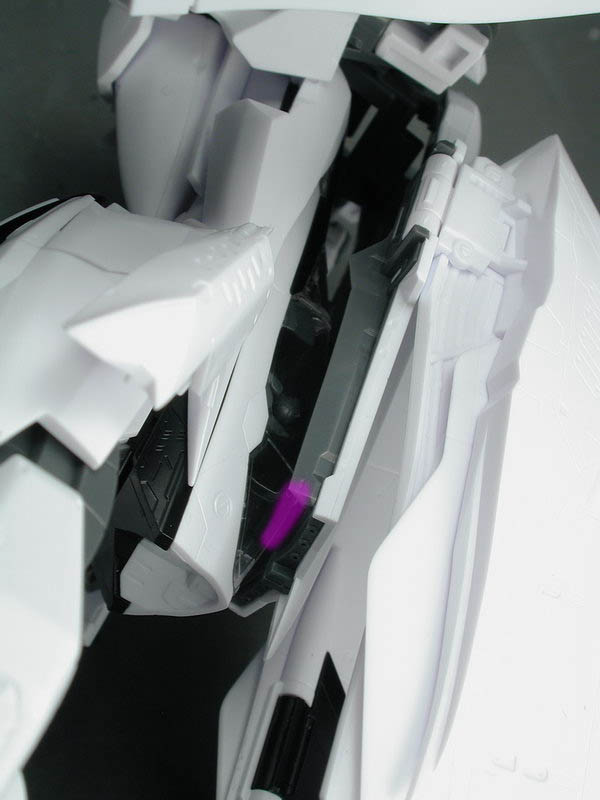
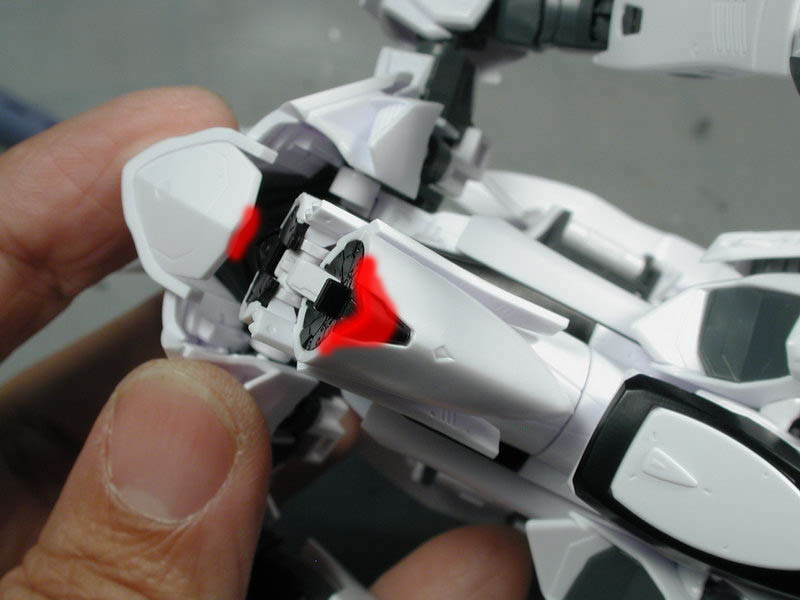
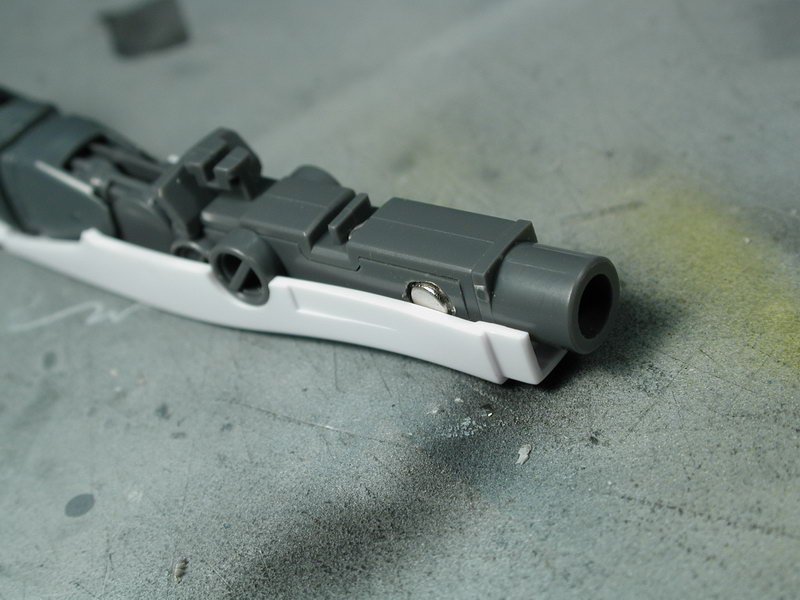
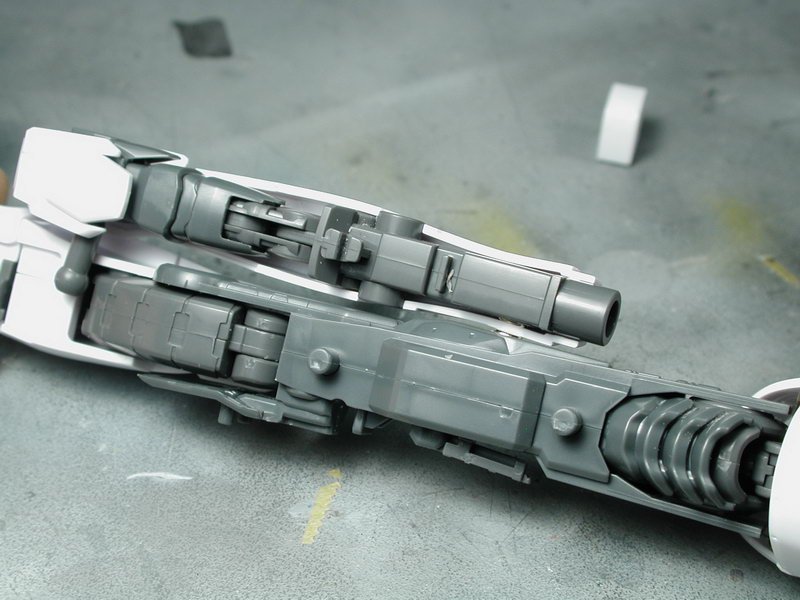
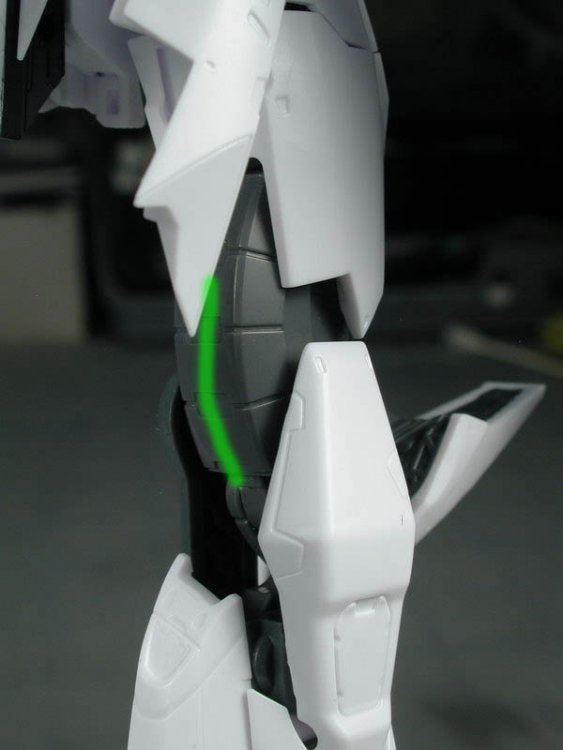
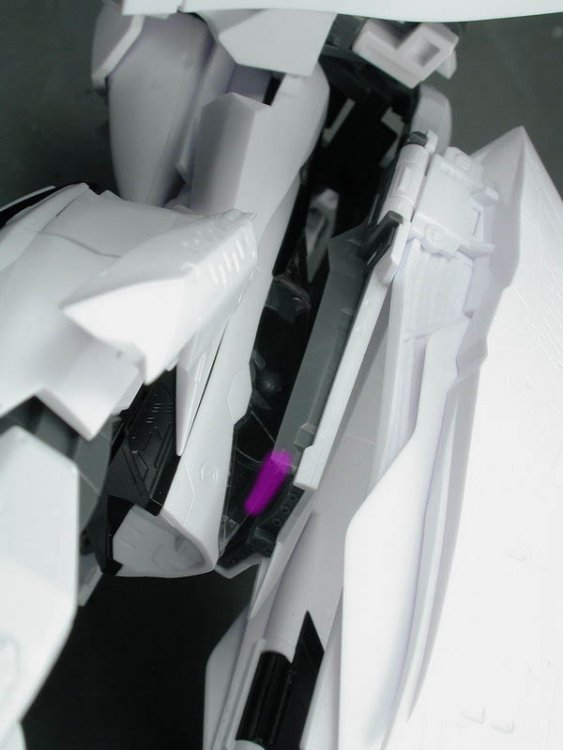
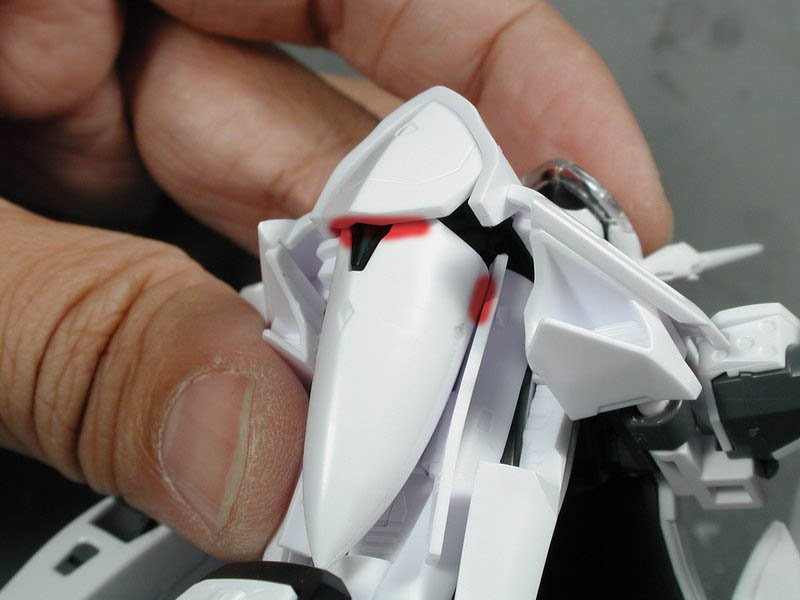
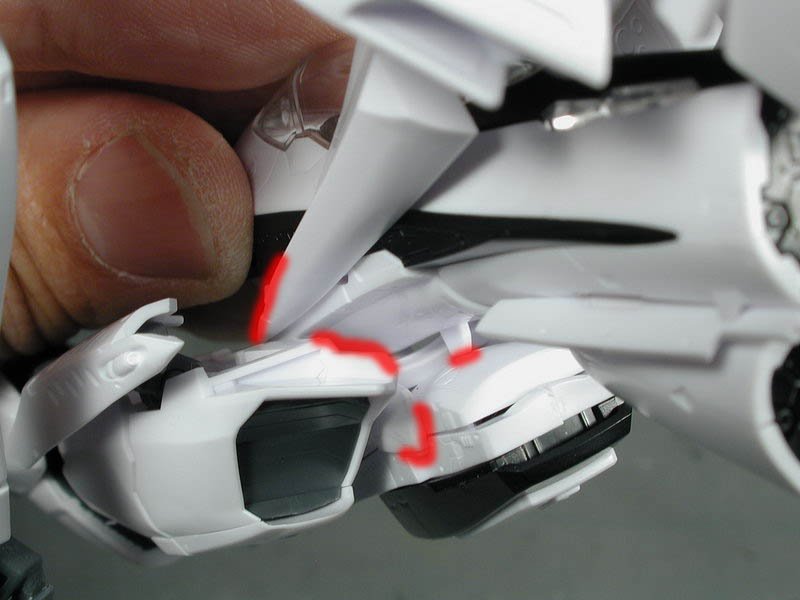
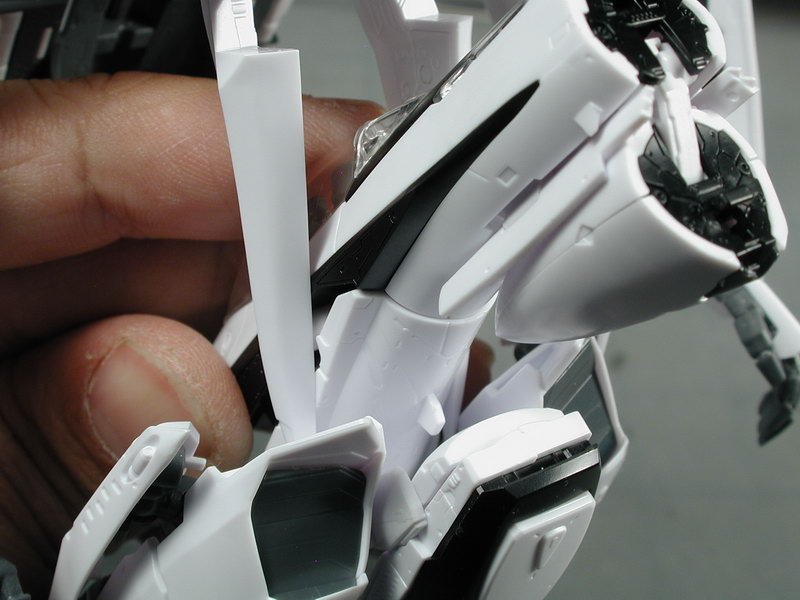
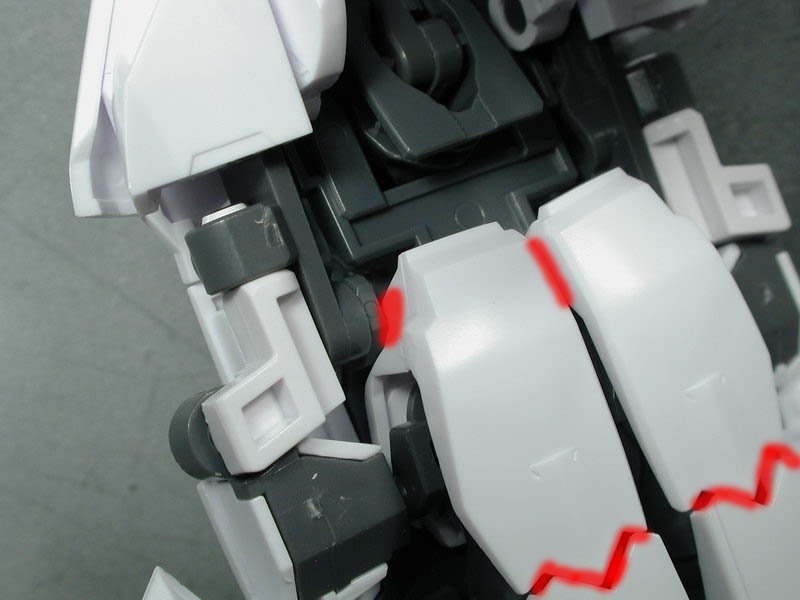
I've identified some of the most problematic areas in terms of paint durability. These areas seem to rub against each other quite a bit, and no matter how much we clear-coat it, I feel its only a matter of time until its worn down enough due to movement that it will eventually damage the paint job. I've outlined the areas which rub in RED. I will definitely apply multiple coats here and multiple clear coats too - but the knee will be a real problem because when the dark grey gets scratched, the white plastic will show through underneath. Also the forward LERX (I don't know what its called, forward wing roots) is a highly visible area and it takes quite a bit of abuse from the upper thighs during Battroid transformation. Additionally I've also identified the only seams that need to be puttied filled and sanded - everything else seems to be pretty well hidden. These seams are outlined in GREEN. Lastly, I don't know what to do about this yet, but the canopy will get scratched eventually by sitting against part J5 - its almostly like I should glue some soft pads there to rest the canopy against when in the Battroid mode. I've outlined the problematic areas in PURPLE. Its also been suggested that one can re-inforce the fat antenna at the bottom of the forward fuselage part D18 which snaps into part A14 crotch piece for the battroid. It was suggested that one could drill through and leave a tiny metal pin or bit within it to re-inforce the tab/antenna. While initially I thought it was a good idea, I didn't do it yet - the other school of thought is that drilling through will weaken the area, which can promote breakage. I would only attempt it as a repair to it if it had broken, I will tempt fates and leave it alone for now.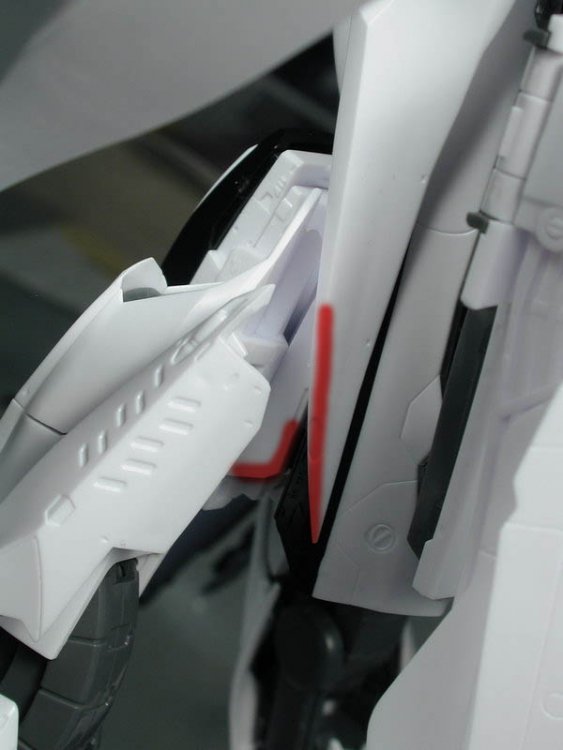


-
1/72 Bandai VF-25F Messiah build-up step-by-step (sort of)
wm cheng replied to wm cheng's topic in The Workshop!
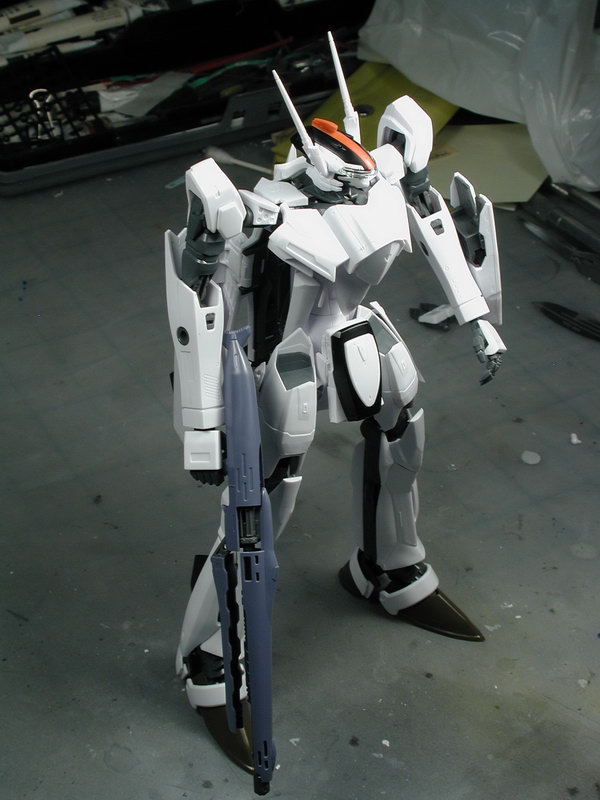
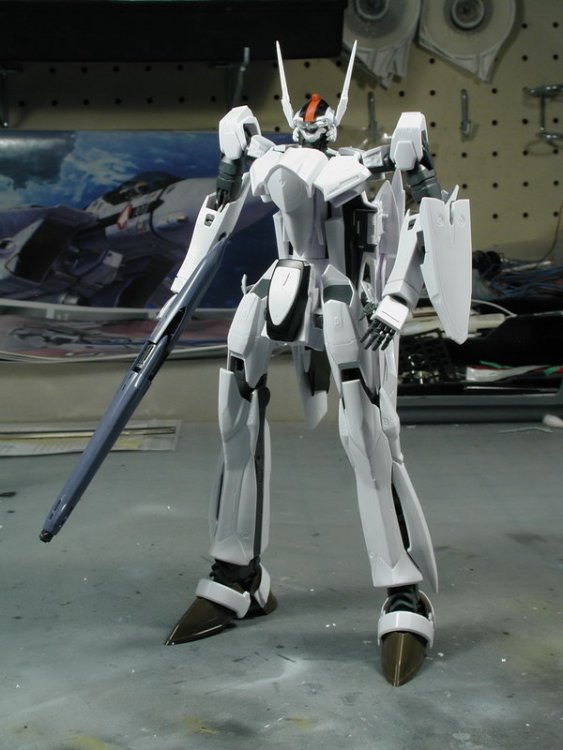
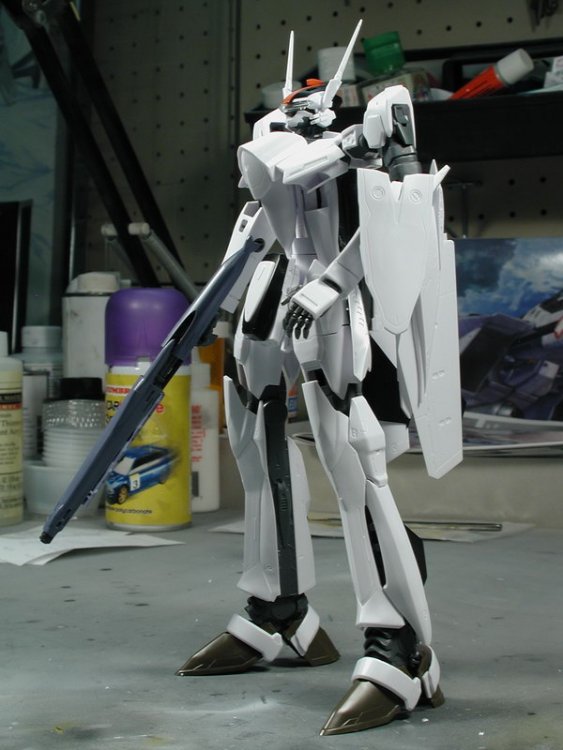
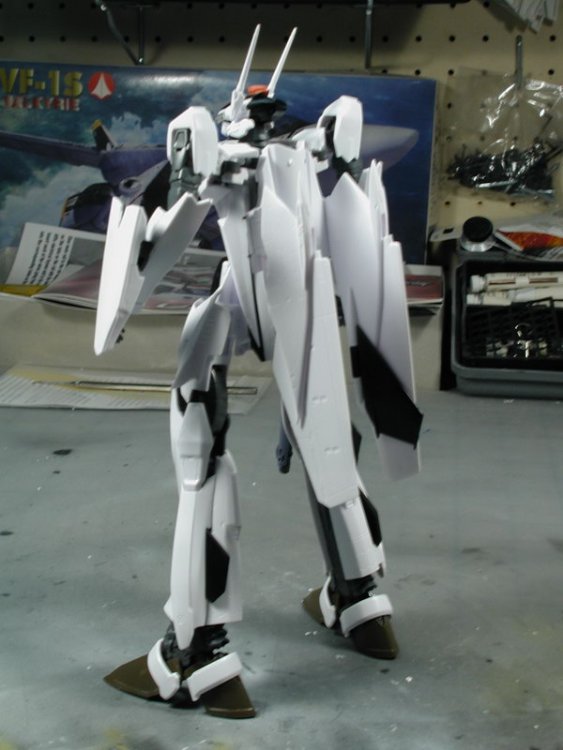
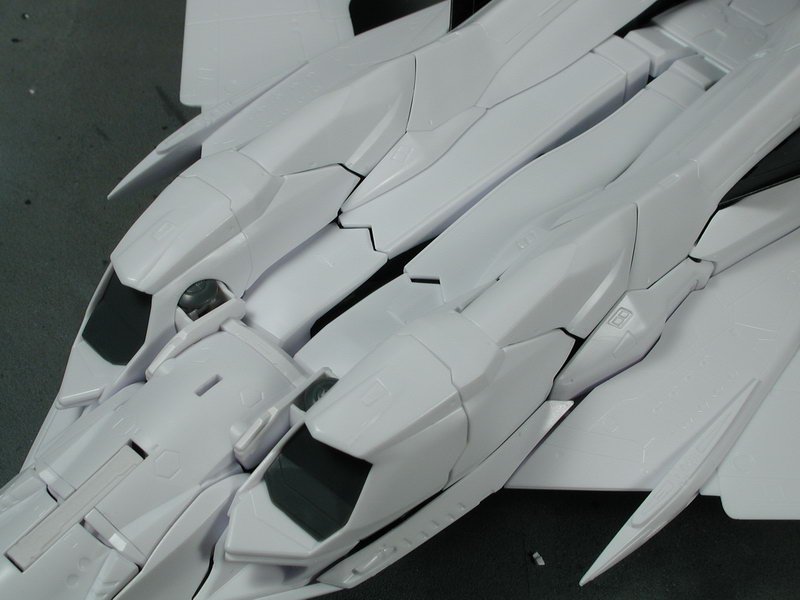
Hi all again... a little more progress. bishop, yes I did get your photos via e-mail, once you get your camera, you should also post a thread here too. Right now your cell phone photos are a little too blurry and grainy to see anything constructive. Nope I did not trim the pegs, I tried a few and managed to successfully pry them apart very gently and carefully. The key is to get something right in to the base of the pegs and twist - I find a soft fast food plastic knife works best and a jeweler's screwdriver (but becareful not to damage the surrounding surfaces) - just gently ease it back and forth and the parts should come apart easily without damage. Yeah it does seem like a waste to forgo all this nifty movement, hence I'll try to make it work on this one, but Ozma's VF-25S might be just an aircraft only mode depending on how crazy this one gets by the time I'm finished with it. There is just so many movement areas that rub that I don't feel any decent paintjob will hold up after any number of transformations regardless of how many coats of clear-coat one applies. Plus, I only really care about the aircraft mode - however Bandai has done a marvelous job on the Battroid mode on this one! So I spent the afternoon transforming it through the Gerwalk to the Battroid modes to get a sense of where the joints are, the extent of movement and where the pieces rub against each other - and unfortunately, there are quite a few problematic areas (as far as paint is concerned). At this point I would suggest anyone to try lacquers and enamels over acrylics (unfortunately I am almost exclusively Tamiya acrylics, since they are soo much easier to clean and better for my working environment) since lacquers and enamels have a better "bite" to the plastic and will probably adhere better and be more durable. That being said, I'd still probably use my Tamiya acrylics since I'm so comfortable and familiar with them. However if anyone has any good White lacquer that they'd recommend me try, I might be open to it. Here's the Battroid mode which exposes the most of the internal mechanism - luckily there aren't a lot of exposed seams. I've included a shot of the base of the neck, there's a sliding plate (E32) that looks like it should lock into an upper position (on top of J5) but I can't seem to get this piece up there - is this the correct alignment/orientation for the neck assembly? (the top of J5 looks like there's a little triangular shelf on the two corners where the collar E32 looks like it should rest on) - however the HJ scans show the same orientation as I have.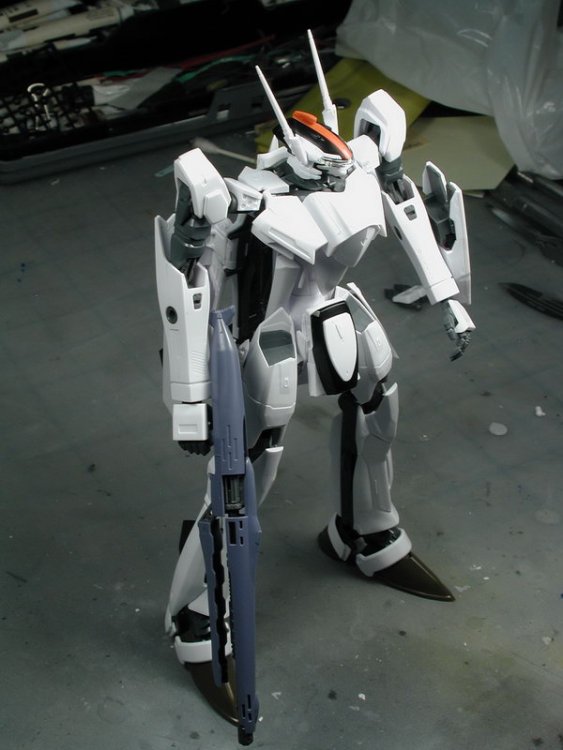

-
Hey guys! I've just finished "snapping" this kit together and started my build-up thread here: http://macrossworld.com/mwf/index.php?show...mp;#entry679310 Please feel free to build along and post your experiences with me!
-
1/72 Bandai VF-25F Messiah build-up step-by-step (sort of)
wm cheng replied to wm cheng's topic in The Workshop!
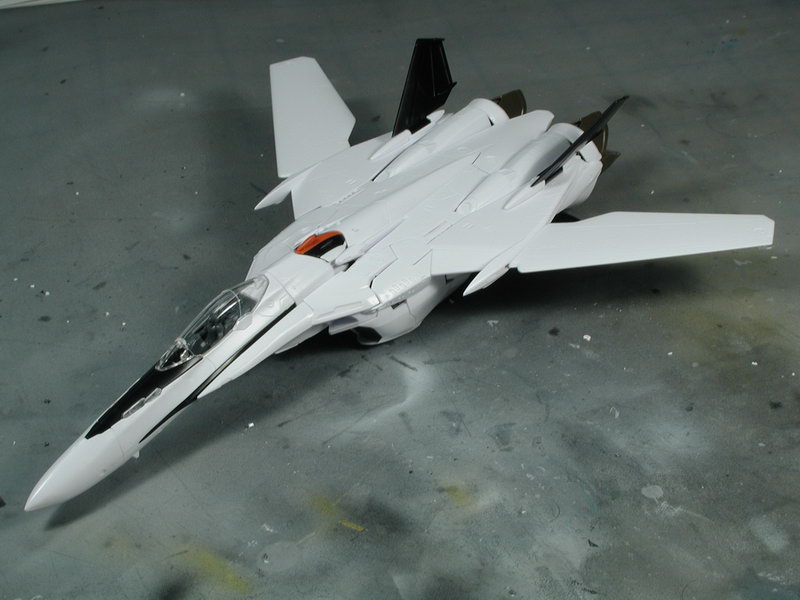
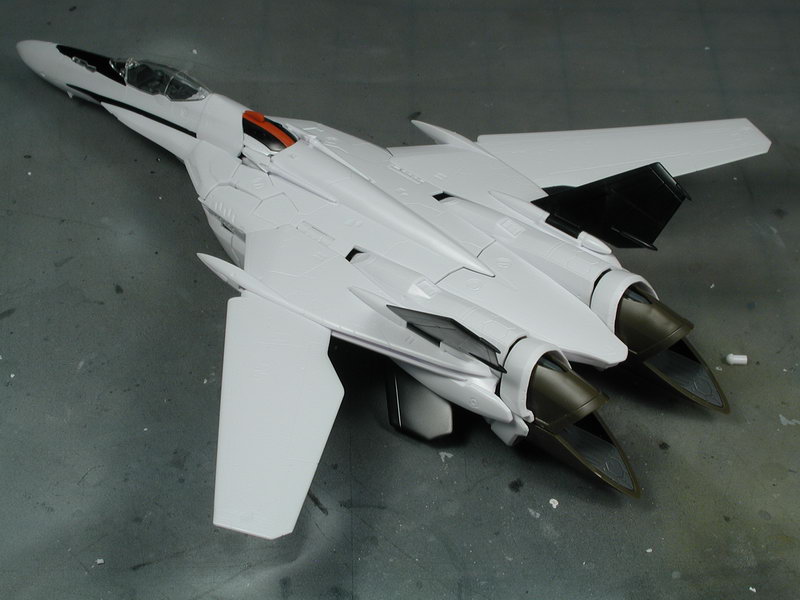
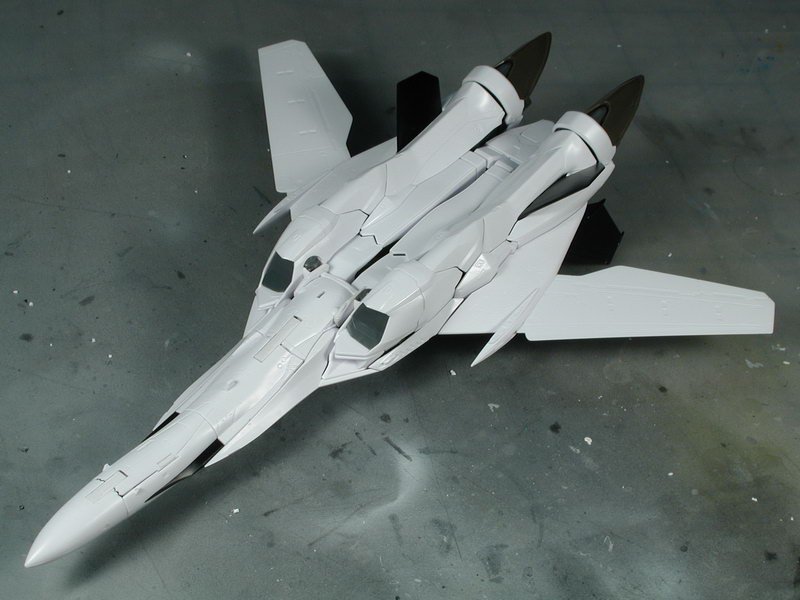
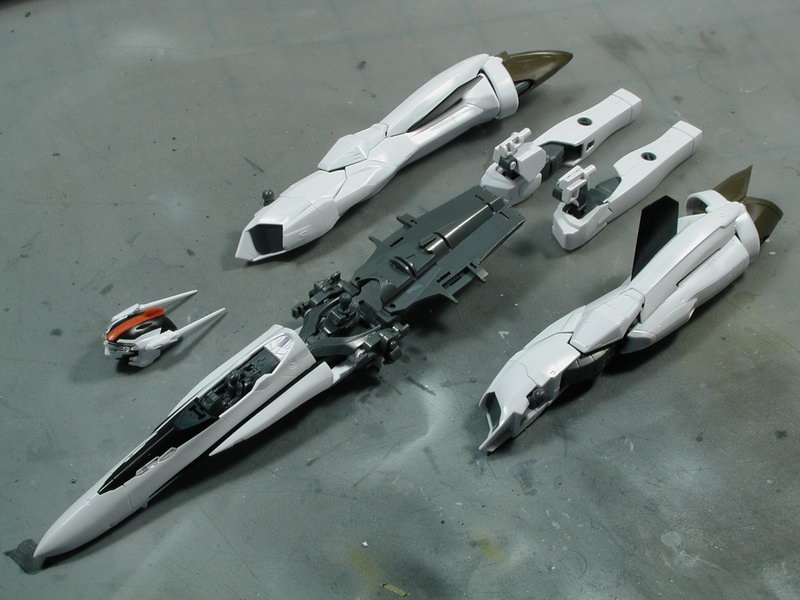
Ok, 10 hours later from start till finish, I've completed the assembly / snap-together of the VF-25F - I only have the gun to do tomorrow. Initial impressions now... its somewhat over-engineered. The model has a nice solid heft to it, unlike most models which are hollow, this one is jammed packed with a internal mechanism, half there to allow the kit to be snapped together, and half there to allow the kit to transform into the other modes. While its a novelty for this to happen, I'd rather get a decent aircraft mode model kit and purchase a real toy for the transformation, but from the ugly looks of the Bandai DX toy, this model might be our best bet at getting a decent looking toy for the time being. Because so many parts move and slide and interlock with each other and each joint is multi-axis, its near impossible for all these parts to align properly. The result is some pretty serious gaps all over the model. Now I don't know what to do, do I glue everything together and fill up all these seams in an attempt to create a decent plane, or do I live with the gaps and keep on trucking towards a transformable model? Some of the worst areas include; the shoulder chest plate sections on either side, its just about impossible to properly seat the hip gun piece to look flush with these shapes and the back leg calf to sit higher up and engage the rear of the wing roots properly (without gluing the wing roots to it). Initially I've identified 3 possible places to add rare earth magnets that MIGHT help to stabilize the aircraft mode. Although I have no idea if they'd work, one in the arm sides and leg sides to pull the leg closer to the folded arms might help, another at the lower wing root section to the leg knee sides to pull the wing roots down closer to the legs might help and lastly maybe one at the split intakes one on the upper half and one on the top of the lower half to help them stay together. For the time being, I'll have to learn to transform this a bit more and to see what is the smallest rare earth magnets I can get before I can decide anymore. I'd love to see what you guys are up to and your thoughts on this model too. Feel free to contribute any ideas and suggestions you might have to this thread and any references. I'd love to get more painting references for my self too.


-
1/72 Bandai VF-25F Messiah build-up step-by-step (sort of)
wm cheng replied to wm cheng's topic in The Workshop!
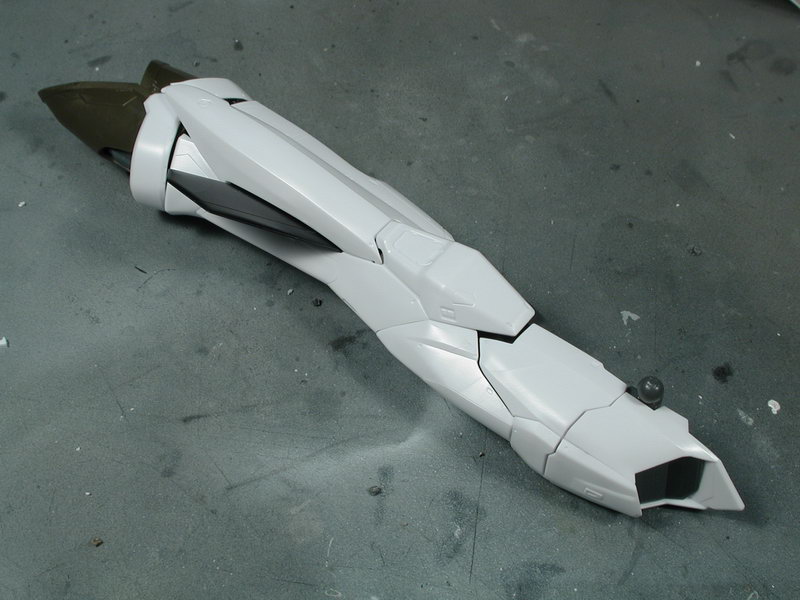
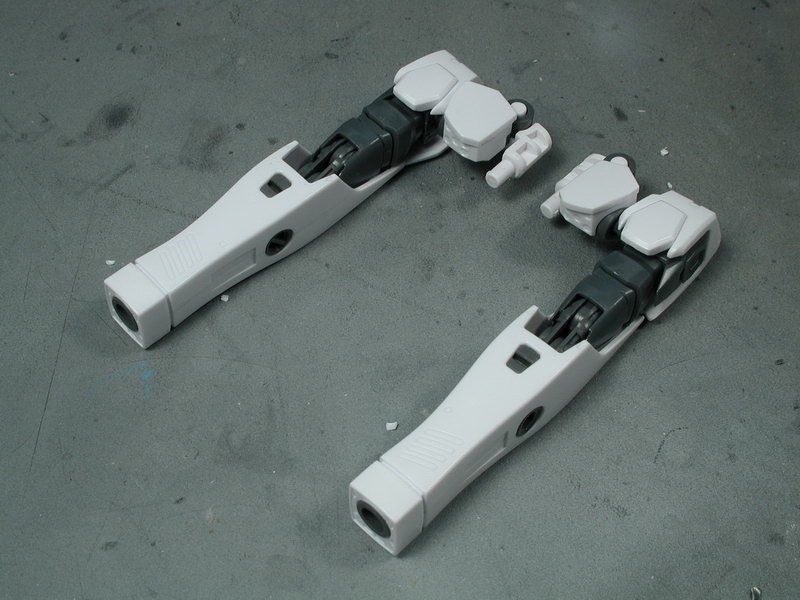
The legs next - again the movement joints designs are amazing, and so is the use of ABS plastics - lets hope my paints stick to this ABS later on! And we'll see if all this joint goodness translates into a good poseability in the battroid mode later on. Not much to say except I followed the instructions explicitly. Once I did one, I thought I understood it and raced through the other leg (just mirrored I thought) - but the joints are so subtlety offset or the tolerances designed so specific that I ended up having to take that leg apart and go through and re-trace my steps with a fine tooth comb to find out that I had two joints reversed. Just pay attention to the hip joints. It all worked, but when I put on the air-intake covers, its fit wasn't as perfect as the other side which was the only hint that I had errored somewhere along the way - so if it doesn't fit like a perfect glove, then there's a problem somewhere in the joints.
-
1/72 Bandai VF-25F Messiah build-up step-by-step (sort of)
wm cheng replied to wm cheng's topic in The Workshop!
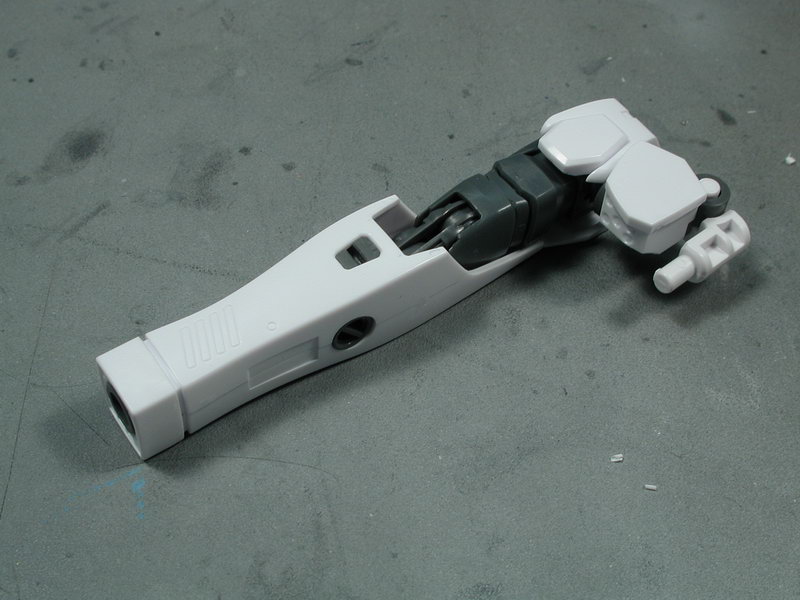
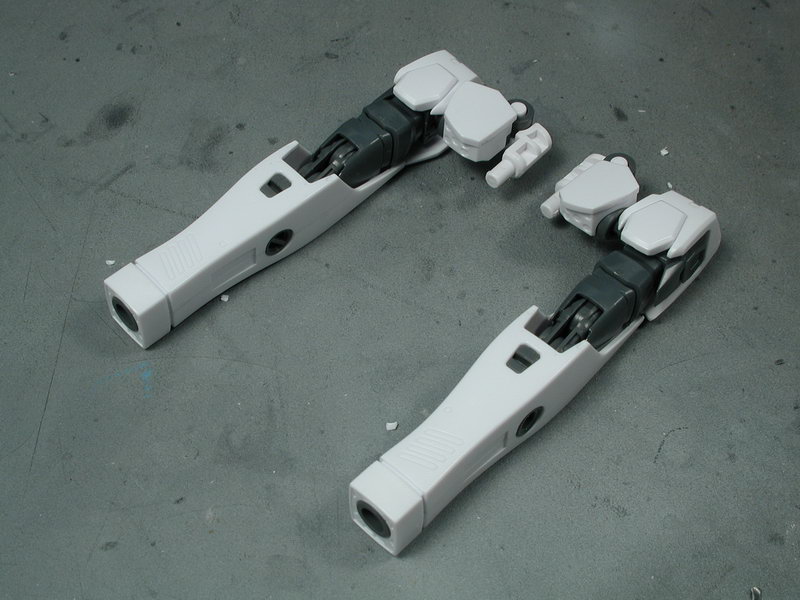
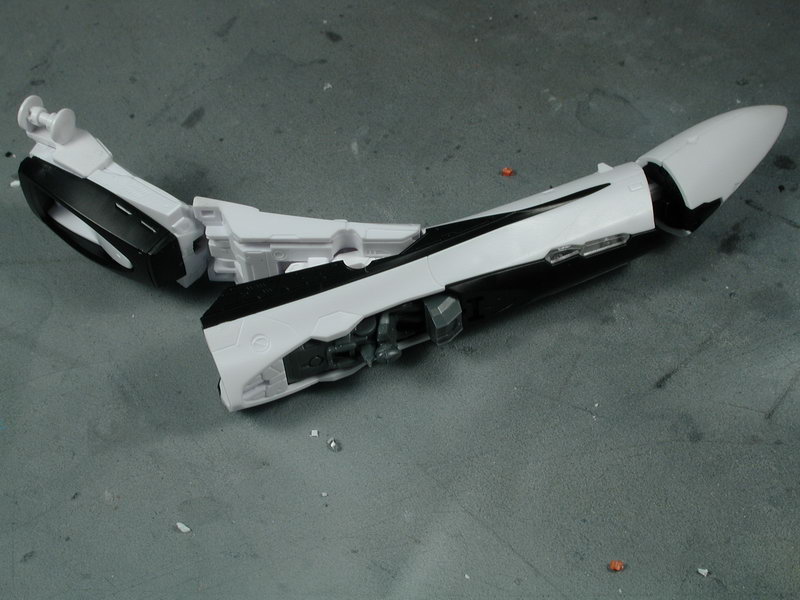
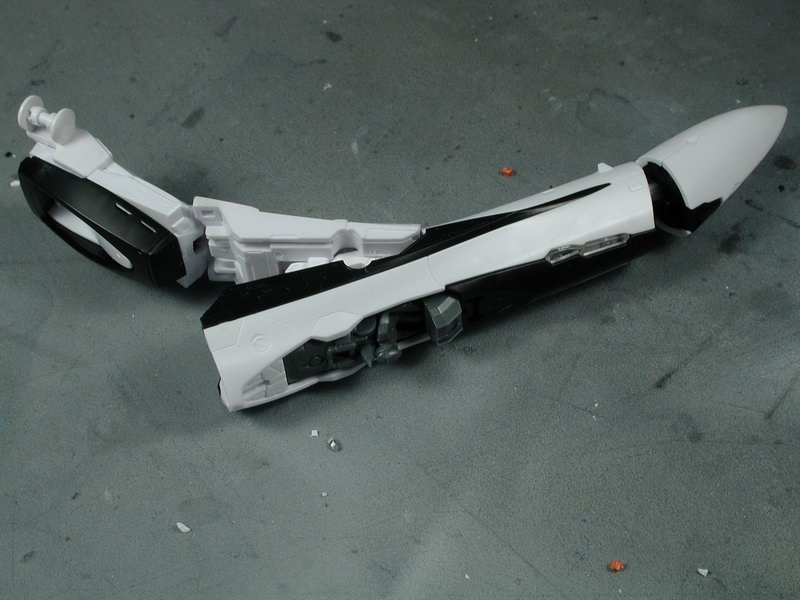
The arms next, nice feat of engineering for movement and joints. Its clear that I will have to eventually glue the two outside shell together and fill and sand the main seam and paint it white, but not before I spray the internal elbow and shoulder mechanism first and have to mask that all away - again they didn't put any thought as to how a modeller would go about painting this. I wished the lower white portion of the arm was removable from the grey portions even after the two halves where glued together.
-
1/72 Bandai VF-25F Messiah build-up step-by-step (sort of)
wm cheng replied to wm cheng's topic in The Workshop!
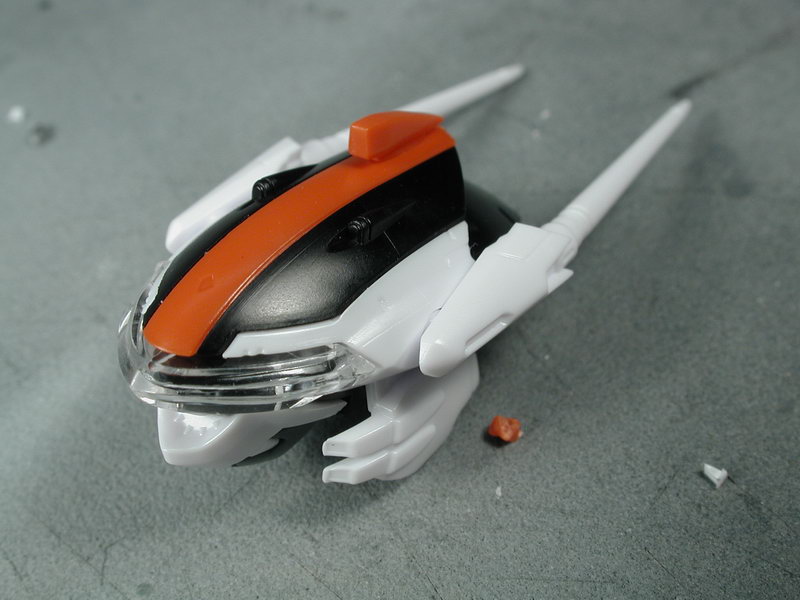
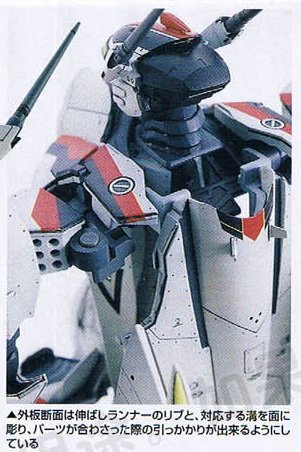
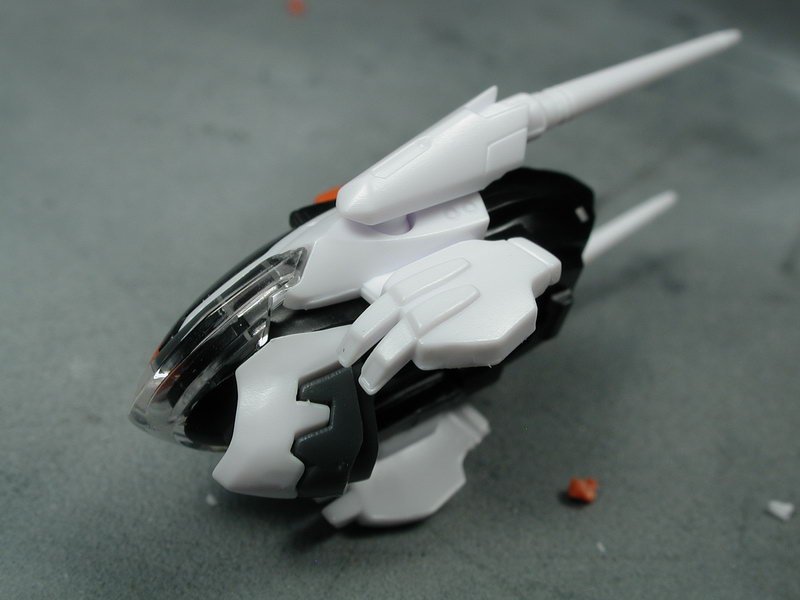
The next stage is the head - very beautiful how this all goes together. Painting it properly will be difficult due to the size. I don't see why they didn't just give the visor to us in clear green - however, due to the sprue attachment points (they could of positioned these at a place were we won't see them) though its probably better to tint it ourselves since the tint will hide the sanded sprue points. Its too bad they chose the ends on the outside to attach this visor piece. Overall, the sprue attachment points are quite good and for the most part hidden, however there are a few places where its awkward or poorly placed and not like the recent Star Wars stuff by Fine Molds where you don't have to worry about these sprue nubs at all!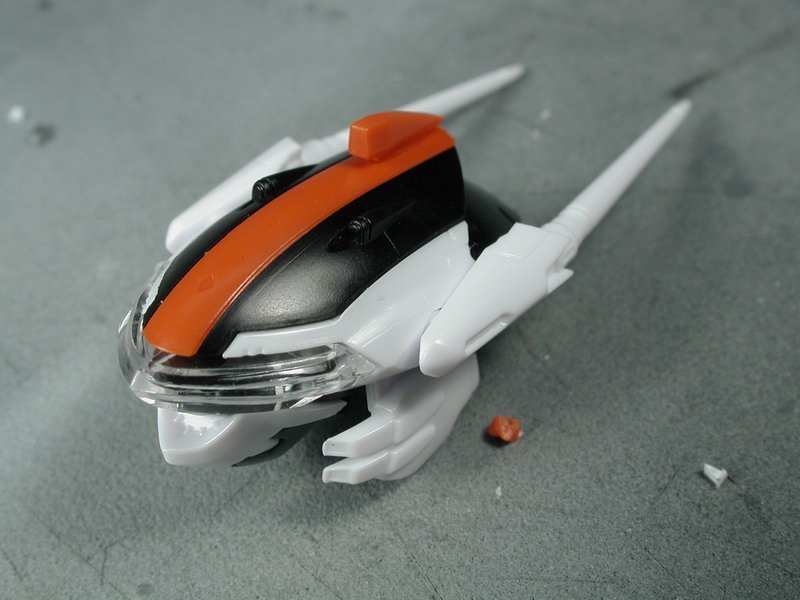
-
1/72 Bandai VF-25F Messiah build-up step-by-step (sort of)
wm cheng replied to wm cheng's topic in The Workshop!
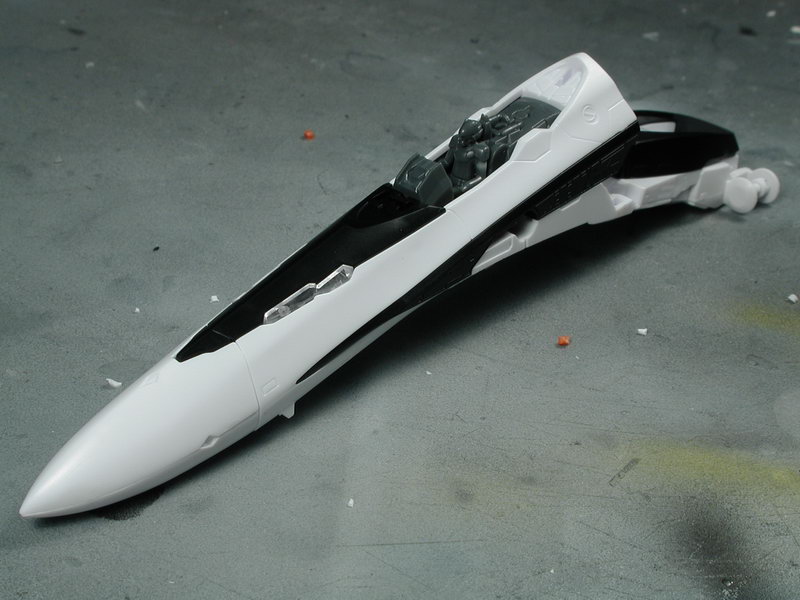
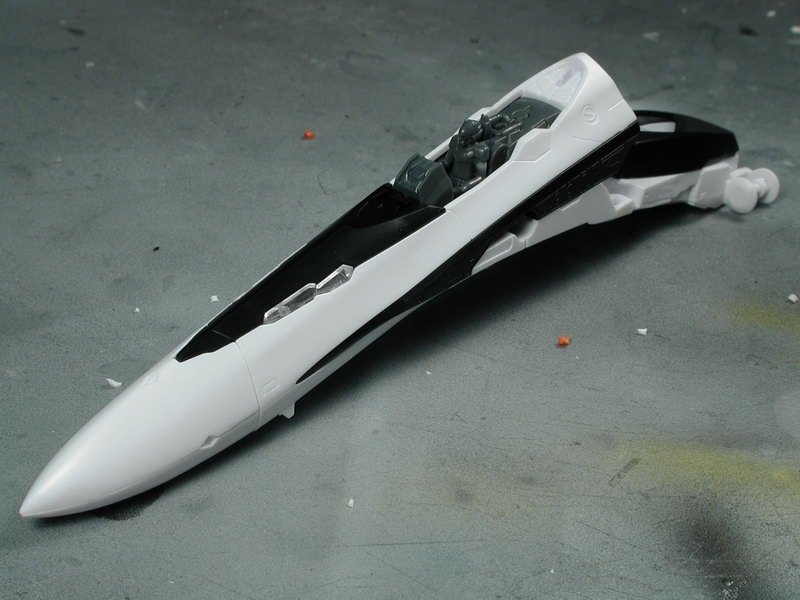
Ok, a few hours into it and I realize what a delight Japanese plastic is! Its perfect, not too soft, but not too brittle. After working on a Korean Academy kit (a little on the hard brittle side) to get me back into the groove again, its so nice to be with Japanese plastic again. This Bandai kit has the same kind of styrene as the Hasegawa kits, although the Hasegawa kits have finer engraved details than this model. In fact, the Hasegawa has more "made-up" aircraft logical details than this - its obvious that their expertise is aircraft construction, and Bandai is robot construction, a lot of the details that are "made-up" are very sci-fi like and not realistic at all, but that's okay for this subject matter. This is the first stages of the kit, we build/snap together the forward fuselage part. The only piece of advice here is to not start with the nose cone as indicated on the instructions, start with the internal hinge mechanism first to get yourself acquainted with cutting the part off the plastic sprue runners and trimming the excess sprue off first. Even a seasoned modeller like me had some problems cutting the sprue nibs off properly and will need some filling and sanding to do when I come to gluing the nosecone halves together. But after a few steps in you'd get the hang of the hardness of the plastic and what to do. Its funny how some of the most basic skills in model making such as cutting the part out and sanding is still some of the toughest skills to master even with lots of experience behind you. Here we run into the first of the "compromises" already, when all the parts collapse together, there are huge un-sightly gaps in the separations between the parts because the pieces need clearance to allow movement - this will be problematic when we paint too so do note of the places where they rub. Unfortunately, the areas which rub are usually at the outside edges or corners which won't hold paint nor clear-coat well. The front landing gear well is a joke - there is no-where near the required room to make it believable that a nose gear can retract into this space. In fact the entire gears are horribly sculpted. They are just like the Yukikaze landing gear sculpts, fat, ill-proportioned and un-believable - as done by a robot company. They are so bad that I think I will skip them all together - not only will I have to rebuild them from other kits, but the modifications to the gear wells (front and rear) will be so extensive that they will interfere with the hinging system and the leg's ability for the ankle to retract. I think I will glue the gear doors closed and forgo the gears themselves, as I will be displaying this with the gears up in the aircraft mode 90% of the time.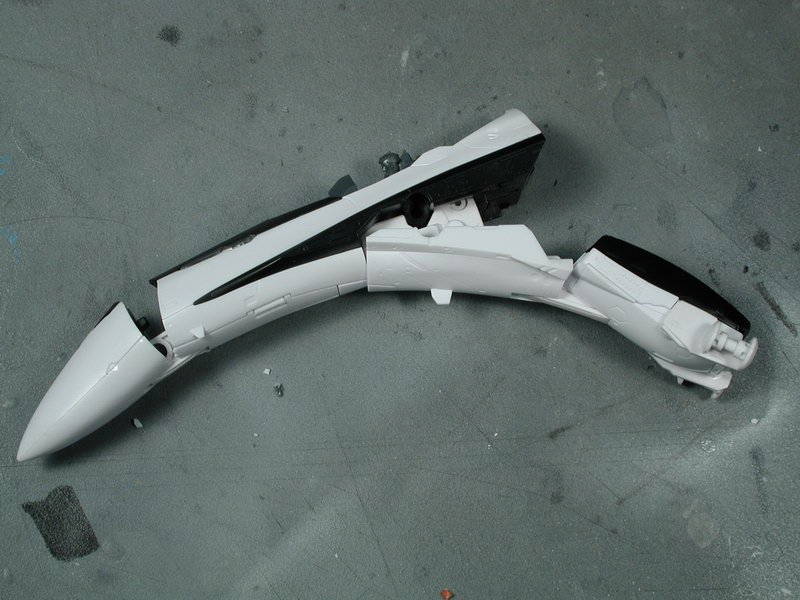
-
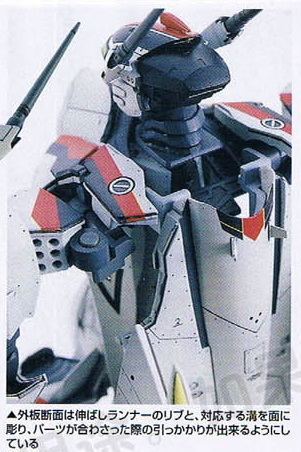
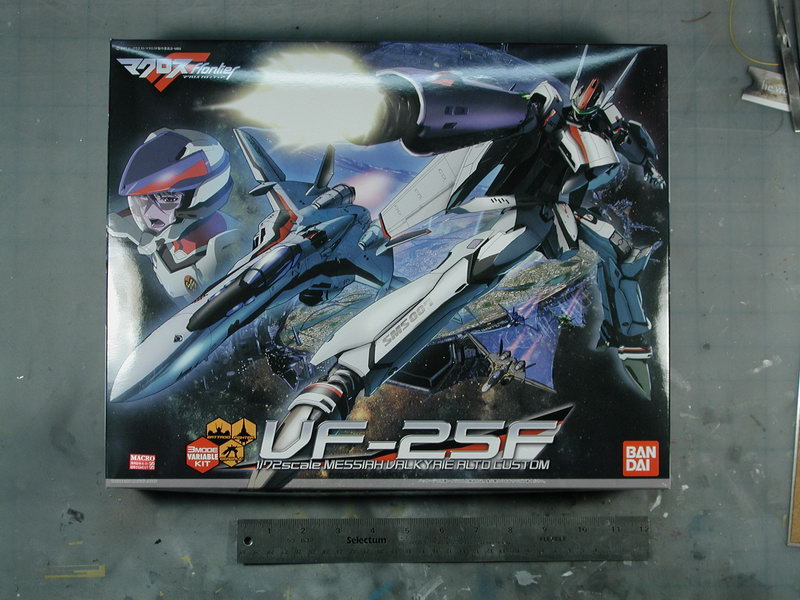
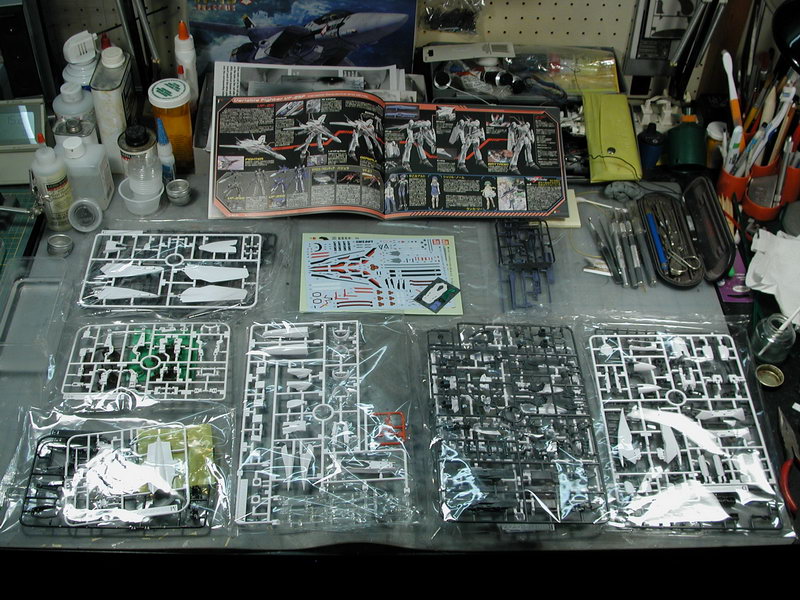
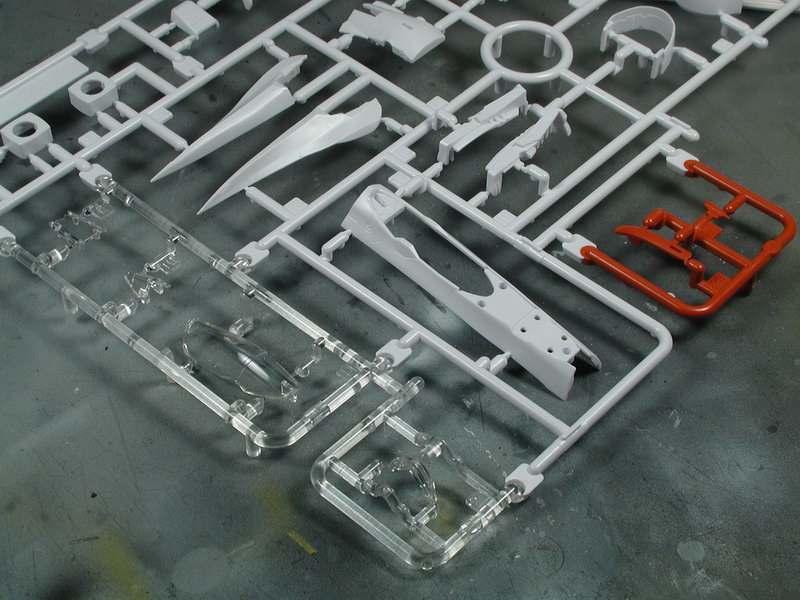
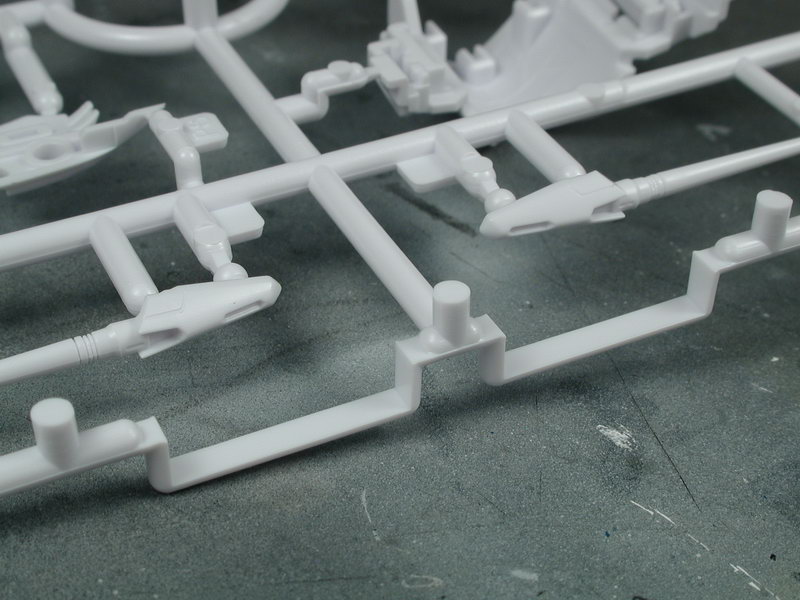
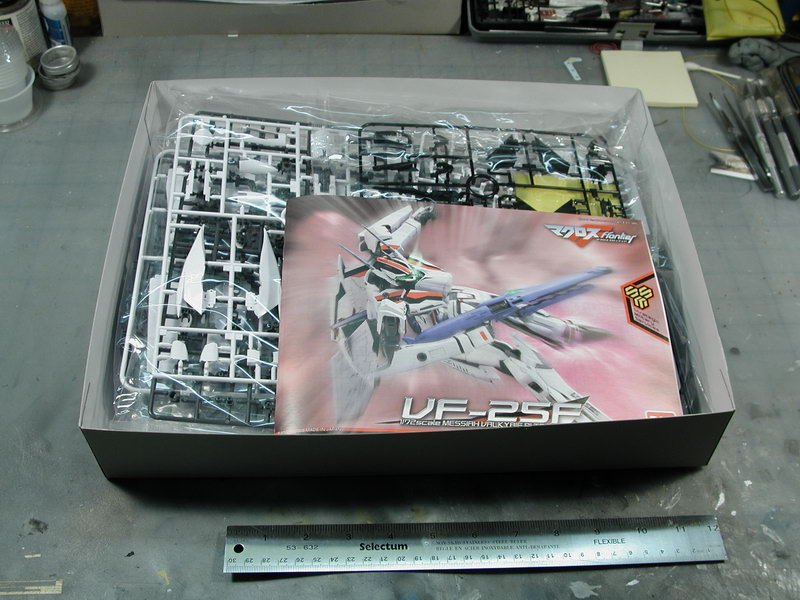
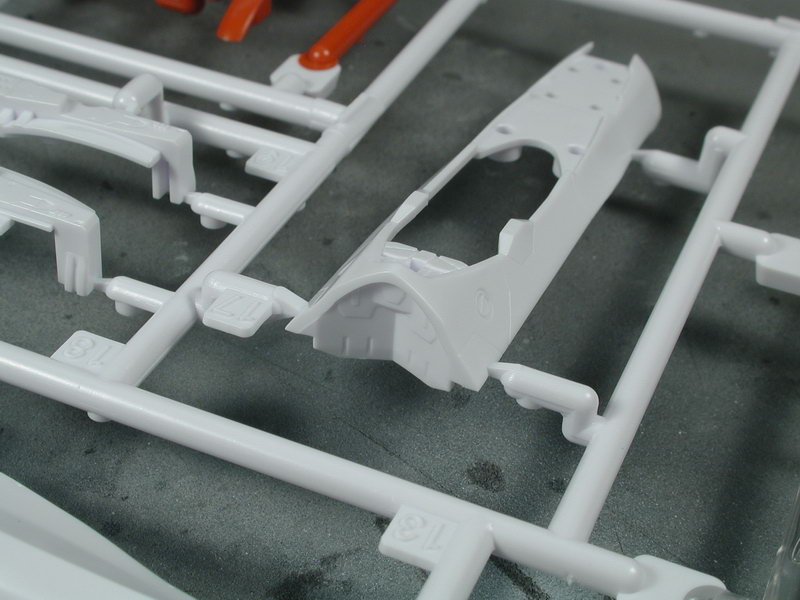
Hi all, As promised, I finally have something to start a thread on my Bandai VF-25F which Graham was so kind to track down for me in Hong Kong at a decent price. The kit price itself was pretty good especially considering what you get - I personally thought that with shipping though, it doubled the price of the kit and the resulting total price was somewhat expensive. I was pretty much against this model from the beginning and wasn't even going to purchase one - mainly due to the fact that its a transforming model. I'm pretty much an aircraft guy - and its obvious that Bandai is pretty much a robot company. However, following the long thread as to its development, it started looking better and better - and it seems like it might be the only decent representation of this aircraft in the near future. Needless to say, I'm not a fan of transforming models - I think models should be models and toys should be toys - I "look" at models but "play" with toys. When I first found out about the "transforming" nature of this kit, I was expecting a lot of compromises that toys make for the sake of movement and durability (which would ruin the accurate representation I would come to expect from a well crafted Japanese kit). I feared the kit would turn out to be like Bandai's previous efforts with Macross Plus with their 1/100 scale VF-2SS (which was also a transformable kit - and unfortunately, the only one Bandai made of this very well designed Mech). Luckily for us all, I am glad to say that this latest effort by Bandai far exceeds those 1980s models and it is an exceptionally engineered kit in terms of movement and joints creating a fairly accurate line-art representation of this Messiah Valkyrie. However, I am still disappointed that although well engineered, it was not engineered from a model builder's point of view, the parts breakdown and assemblies are not geared towards proper painting and finishing easily. The finished product does not lock together well and there are huge un-sightly gaps that I can't seem to close up no matter how I try to align the pieces. It is exceptionally delicate and there are very few locking pegs or devices that hold the various modes together, instead it just relies on the stiffness of its joints. Jarrod also has a great review of this kit up at: http://macrossworld.com/mwf/index.php?showtopic=27823 Ok, upon initial impressions, the box is big, bigger than I'd expected from a 1/72 scale kit. However once I opened it, it was crammed full of parts, it wasn't a matter of just a big box with a few pieces rattling inside, it was crammed full! There are so many parts - mostly for the complicated internal hinging systems and pivot joints as well as the cleverly designed way it all literally "snaps" together. My usual methodology to starting any new model is that I would study the instructions and parts and mentally build the entire kit in my head as I followed through the steps. This is a way for me to imagine the process and visualize where the pitfalls and trouble spots may be (and flag them mentally). It allows me to concentrate on details that will be seen when finished and areas that might need fixing up that are also exposed in the final model – instead of wasting effort on detailing everything including areas that will be closed up and hidden upon final assembly. It allows me to break out of the normal suggested flow from the instructions to make up my own plan of attack that will allow me to airbrush and mask more easily. However, this was a really complicated kit and was too hard for me to visualize all the components and what they did – so many joints and sub-asssemblies! So I decided to depart from my normal way of building a model and follow each and every step in the instructions verbatim. Now don’t get me wrong, there are lots of steps, but its not a complicated model and anyone could follow all the individual steps quite easily, don’t let me sway you into thinking this is too complicated as a kit. It’s quite straightforward as long as you pay attention and follow each and every step. All my extra work is just so that I end up with a model that is more like the Hasegawa Valkyries that I love. Since it was a “snap-together” - my plan would be once I had the entire thing together, I would carefully take apart just the sub-assemblies that are needed be glued, sanded and painted. I'd guess that 75% of all the pieces weren't really necessary if the model was just a single mode dedicated aircraft - however I wasn't able to understand the assembly process enough to just pick out the 25% required pieces to build a single mode aircraft only model - it was my initial intention to build a dedicated aircraft-only mode and correct the transformation compromises. As I started into the building (more like snapping together) I started to appreciate more and more the engineering of the moveable joints and marvelled at its complexity. So I’m not going to go into the snap together of the kit, I just followed the instructions. What I want to concentrate on is what comes after the initial assembly. I want to document taking it apart and fixing it up and painting it properly into a real model. Maybe identify areas that could be modified, improved or magnets applied to help the model hold together. I don’t know about adding pegs, as I can’t imagine any type of glue that will be strong enough to hold a peg in place. I’ve included a few shots of the runners/trees of parts that I find particularly interesting since they obviously use a multi-mode process (more than just a top and bottom to the die). There’s an example of the multiple types of plastics used where we get a clear tree of parts mixed in with the white styrene and red styrene parts. Although it’s a nifty feature to have moulded in colour parts – I personally find it un-necessarily complicates the engineering of the kit and ultimately I have to mask and repaint all the parts anyways. There’s another part that shows the undercut details at the rear of the forward fuselage which could only be done if there was another part mold process that came in to stamp out the rear details, just as the head laser antennas show a deep undercut recessed details that could only be achieved when a third mold press comes in at the sides as evidenced by the plastic trees that have been routed below to allow the die to travel to the laser antennas. Bandai is amazing, showing off their advancement of technology in plastic model making. On with the show!


-
Hey everybody, I managed to start it on Friday and got a few hours on Saturday too so I plan to start the thread tomorrow on Monday. Its very different though, its not like any normal model so my approach will be very different too. I just plan on totally "snapping" it all together completely first to see where everything goes and where it all has to move and rub against each other - THEN I plan of taking it all apart to paint properly and glue and fill the seams and turn it into a proper model. Its this part that I will document, I know I usually take a bunch of photos of the process, but there really isn't much to photograph when I'm just "snapping" the pieces together. I am pretty much following the instructions to the letter... its a pretty complicated model with tons of moving parts. So I'll consider modifications such as magnets and such only after I get a good handle of how it transforms and goes together. I'll document the process where I take it all apart again - this is my "work horse" experiment for my other subsequent VF-25s. David, I tried to look for purple food dyes but had no luck on the weekend. I'll still search on Monday, but I also plan on cutting all the tabs away from inside the canopy - it really detracts away from the model, so it may take a while to carefully cut them out, and re-polish it back to translucency. Plus I'll try to re-build the front of the cockpit hood, it just looks weird that it just ends like that before the front windshield. I am curious as to how everybody tints their canopies.
-
I'm going to start mine today and hopefully post something or start the thread later tonight when I have something to show for it. Yes, the part has too many areas especially on the underside to allow a dip, it may have to be airbrushed only on the outside in many light layers, or I am going to try to dip only the outside portion and leave the interior alone (as this is where all the pegs are that will catch the pooling of the clear tint. I'm sure Bandai will issue a version 1.5 of this kit with all the proper improvements such as pegs and tinted canopies and maybe even a decent landing gear as they have with the Yukikaze kits and screw all us early adopters! Wish me luck!
-
Wow! David... excellent work on the micro-painting... that pilot is SMALL! Its looking good so far...
-
Yeah, I'm not sure if the model is too small, but the cockpit is definitely way too small!
-
I'd second that Windex! The original stuff with Ammonia, its taken off dried hard cake of paint within the old paint bottles to be reused - I think the active ingredient must be ammonia though, but its absolutely harmless to the plastic and should return it to a pristine condition. Good luck!
-
Bandai 1/72 Scale Macross Frontier Plastic Models
wm cheng replied to Graham's topic in Hall Of The Super Topics
wolfx - I don't have the kit yet, but when I do, I'll look at it to determine what's the best way to paint it. dio & evil bones - flowchart... HAHA! I wish it were so linear, modelling is very "organic", each time its different depending on the situation, I would think it would be very therapeutic for an engineer! I have an idea for the brown metallic feet and the purple gun - how about spraying them with a nice Aclad metallic like steel first which has a nice very fine sheen, then clear-coat them with a mix of Tamiya clear brown for the feet and Tamiya clear purple (probably a mix of the red & blue) for the gun pod. That way the metallic sheen should show through the colour clear-coat above. Feel free to try first, but that's my plan unless someone can show me a better way or that this won't work. The problem I find is that the Tamiya metallics have too large of flecks of metal (or large grain) in them and really throws off the scale. As for the canopy, I'd try to dip them in food coloured future. I can't remember but was there a problem with mixing acrylics like Tamiya or Gunze paints into Future? -
Bandai 1/72 Scale Macross Frontier Plastic Models
wm cheng replied to Graham's topic in Hall Of The Super Topics
How about a group build everyone!! Graham was able to find for me a VF-25 kit and as soon as that arrives (7-10days), I intend to do a full build-up thread and go step-by-step with this baby! How about everyone joining in and building it together with me? I'm going to give it the full treatment however, full paint, weathering and decalling (the works! it deserves nothing less) - but you guys can just take whatever steps you find useful and apply it. Hope it will help! Wm -
Bandai 1/72 Scale Macross Frontier Plastic Models
wm cheng replied to Graham's topic in Hall Of The Super Topics
Argh?! - Regult, are you saying the decals are screened?!! They are not spot colour, but screened like newsprint with the colours made up of little dots? Please say it isn't so!! Come on Bandai, are you a fly-by-night garage operation?!! Ok... calm down for a minute here and wait for confirmation... (I thought I'd see the last of screened decals from the AMT/monogram of the 80's) Sorry to hear about your decal problems, can anyone here who have clear-coated the model attest to its durability after transformation? -
Bandai 1/72 Scale Macross Frontier Plastic Models
wm cheng replied to Graham's topic in Hall Of The Super Topics
Hmm, that sucks... thanks for the reply. Its too bad they at least didn't cut away the stripes where there will be overlaid graphics. Not only did Hasegawa provide cutouts on the stripes but they also provided white decals for underneath the graphics (kind of a belt AND suspenders approach!). I guess the only part where there's a problem is the tailfins eh? Maybe I'll have to mask it and spray it first. I plan on building it like a model too, I will initially build this first kit to be able to transform, but I doubt that I will do so often, I'll probably just leave it in the fighter mode most of the time. I will use this kit to inform me how to build a better fighter on subsequent VF-25s and find out which parts rub the most - I hope to do a complete dry-fit build to see where all the moving parts are, maybe sand away parts that are scraping and then disassemble for painting, filling and sanding. -
Jarrod's Exhaustive Bandai VF-25F Review and Gallery
wm cheng replied to Jarrod's topic in Model kits
Fantastic work Jarrod!! I was at first really against this kit, but all the images I've seen lately (including yours) really changed my mind into this "must-have" kit now! A question about the decals... In one of the pictures it shows the new SMS logo applied to the black tailfin, but it seems like the decals don't have enough opacity to read properly against the black background - is this the actual case, or is it just a bad photo? Also some shots show on the main wings that the grey stripe actually reads through the SMS logo, is the decals that thin that it has no opacity, or is there a white decal underlay (like on the Hasegawa kits) or isn't the stripes cut out at the areas where the SMS logo is supposed to be? Thanks again for posting... you did a amazing job on your kit. Do you think there would be any opportunity to place rare-earth magnets inside to help lock it up in the aircraft mode? Wm -
Bandai 1/72 Scale Macross Frontier Plastic Models
wm cheng replied to Graham's topic in Hall Of The Super Topics
A question to anyone who used the decals... In one of the pictures it shows the new SMS logo applied to the black tailfin, but it seems like the decals don't have enough opacity to read properly against the black background - is this the actual case, or is it just a bad photo? Also some shots show on the main wings that the grey stripe actually reads through the SMS logo, is the decals that thin that it has no opacity, or is there a white decal underlay (like on the Hasegawa kits) or isn't the stripes cut out at the areas where the SMS logo is supposed to be? Thanks, Wm