wm cheng
-
Posts
4312 -
Joined
-
Last visited
Content Type
Profiles
Forums
Events
Gallery
Everything posted by wm cheng
-
Good discussion... I'm still of two minds on the whole issue. I would personally prefer Hasegawa's style of models myself (its just fits my "old-timers" style of building better). BUT, having said that and seeing all the real bricks and mortar hobby shops around town closing up - its clear that this is a dying hobby (wasn't there a japanese hobby (real model only) magazine that ceased print last year?). Anything that attracts new builders is a good thing for the hobby as a whole. And I've seen tons of posts about people who have never tried to put together a model before attempt to build the new Bandai VF-25 - what a great thing that is! Well, to be fair, they were driven to it due to Bandai's own poor execution of their DX toy line - but still good for the modelling hobby! So I must commend Bandai for that! Me personally, I'm having a really hard time building up the VF-25 from Bandai properly, and its all these "easy" features that they attempt to engineer into it that screws up the traditional modelling build. You can hear me whine about it on my build up thread, I won't bore you with the details. Let just say Bandai kits have their own audience and they cater to that extremely well, but that is not to be confused with the traditional modellers out there. Also lets keep in mind about the panel lines issue... Gundam designed universe uses extremely large panels and assemblies, if you look at some of the chest pieces and where they chose to break up the sections into panel lines, they work out to be huge (easily 10-14ft sections!) pieces - fine for anime, but pretty impractical for real-world construction. I understand that the anime art doesn't want the sweat shops to have to draw in all the necessary panel line lines for every frame of the animation. But if we are to linger on a model for more than 1/24 of a second, there needs to be a bit more interest in the model to captivate our gaze. This is where Hasegawa shines! It makes up additional detail that is realistic and convincing drawn upon their years of making real-world aircraft (maybe their YF-19 & 22 should be excluded from this statement, I was a bit dissapointed with their lack of additional details for these entries). Bandai never has put anything more into their models than what was originally drawn - as a result, the models still look like anime, it never transcends that cartoony look to become something that may have been real (which is generally the goal of most traditional modellers). Also with such large pieces, its easy to break down the plastic parts into these components for building along existing lineart panels and creases, because the Gundam design permits such crude parts breakdown (also I'm sure the anime design is always designed with merchandising in mind right from the beginning). Real aircraft is usually more complex... too complex for such simple breakdowns. An example is their Yukikaze EX line of static models, aside from the fact that Bandai has never gotten their landing gears right or really knows how to scale properly, they seem to always undersize their models somehow - they follow all these panel lines in the line art that start and end in the middle of a surface?!! They don't have any understanding of how real world things are built, they just slavishly follow the anime lineart without thinking. I'm sure it was a design or animation error, but its pretty wierd to have a static model with the etched panel lines end without terminating in an enclosed panel. OK, believe it or not, I would also like to add that I hate it when the pieces breakdown and assemble right on the panel lines. I find that often when you glue it (of course this is key, you snap together a Gundam kit) no matter how careful you are with the glue, it often oozes slightly out of the cracks, which in this case it means it will ooze into the panel lines. So I have to then repair the panel line and take out the ooze, which is harder to remove the ooze than from a surface since its in a recess valley (panel line). Often, I find I have to completely erase the panel line with putty, then sand smooth just to re-scribe that panel line (which no matter what you do, will be a slightly different panel line than the surrounding molded in panel lines - you have to find the closest tool you have that will re-create the trench to match the other panel lines). I would much rather they put the piece separations on some part of the assembly that is either hidden when built or some smooth piece with relatively little detail around it so that it can be sanded down without obscuring any details. Ok, thats my two cents. I am looking forward to this Hasegawa 1/48 entry, but personally at 1/48 scale, it would take too much work to properly detail this thing up as the size demands. For example, at 1/48 scale, the landing gear wells and structs really need all the hydraulic break lines, disc brakes, hydraulic fluid reservoirs and cylinders modelled, the myriad of electrical bundles in the bays added to do this scale justice. Also, out of all the Hasegawa 1/72 scale kits, I find the YF-19 to be most lacking in detail of all of them - great generall overall shape, but not a lot of additional detail (plus they got the rear gears wrong). Odd choice for a first 1/48 entry - I'd still love a VF-1 in 1/48 from them!
-

Whats Lying on your Workbench MKIII
wm cheng replied to HWR MKII's topic in Hall Of The Super Topics
OMG!! I'm speechless... that's amazing, it would be my wetdream to paint that!!! Wow, I definitely want to see it finished, how big is it? You wouldn't be making something like that of the old original big G would ya? Any resin copies coming out? ;-) -
1/72 Bandai VF-25F Messiah build-up step-by-step (sort of)
wm cheng replied to wm cheng's topic in The Workshop!
Yes, I find the decals really poor quality. They just flake off or is really brittle, even after application and it had the chance to dry. You really need the clear-coats to protect the decals just from handling, let along the scraping due to transformations. -
1/72 Bandai VF-25F Messiah build-up step-by-step (sort of)
wm cheng replied to wm cheng's topic in The Workshop!
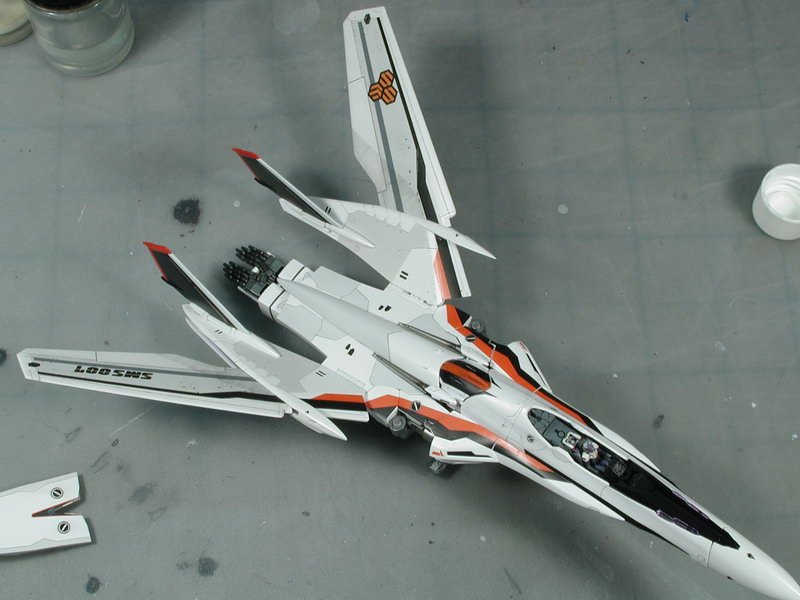
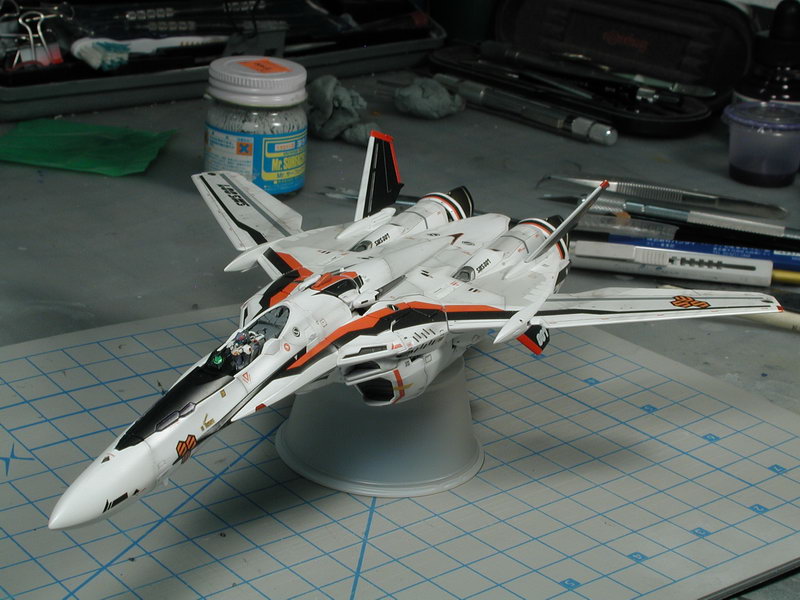
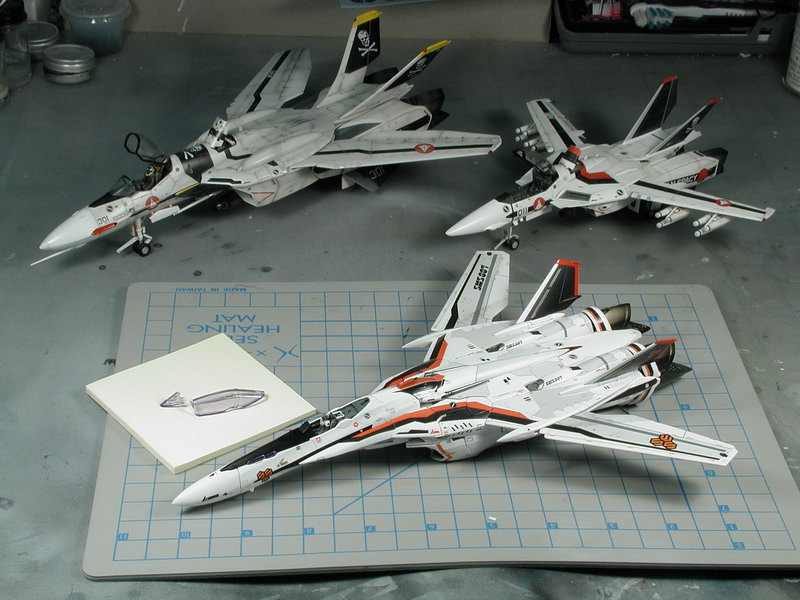
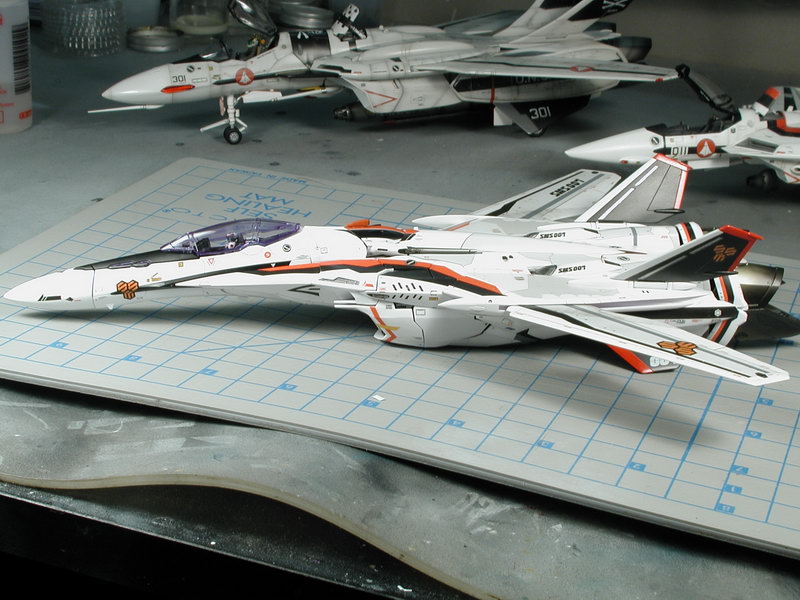
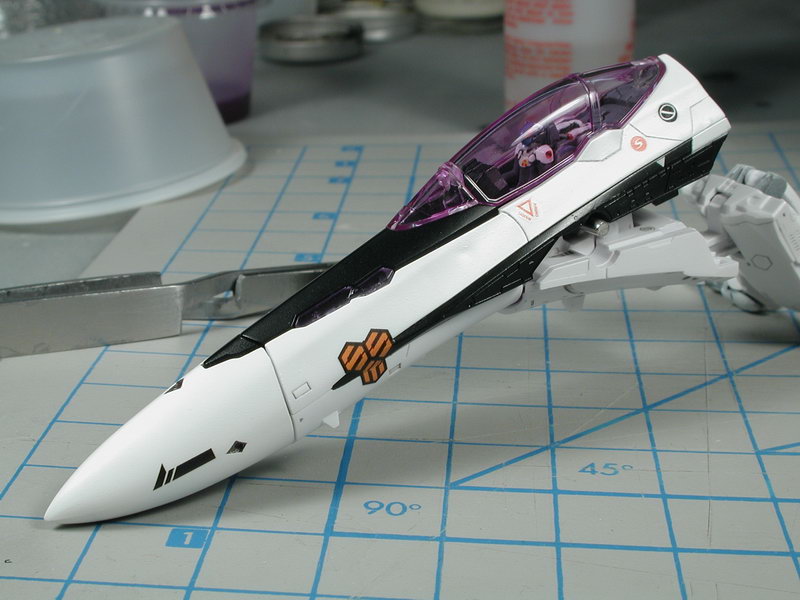
Thanks for the kudos! I still haven't managed to get to the light white filter yet, it should tie the contrasty black and red stripes in a bit more to the white paint finish. I've got to take the who thing apart again! to weather the arms and inside legs so it doesn't look weirdly clean when its in the Battroid mode (maybe a few data/stencil decals too in that mode). We'll see how long this "flawless" paint finish holds up after a few transformations ;-) Jardann, the great thing about this kit is that there are so few seams. Its only really the nosecone (but that was my personal preference as the anime art does show a panel line running down where the parts separate, its the crack that separates that bugs me, plus usually real aircraft nosecones are seamless) and a knee internals that need the joint filling - everything else is just "snapped" together, no real gluing. Oh I forgot the forearms are glued and puttied and sanded to remove the seam - but its pretty minimal. Great work Cowpeeler! I love the super look especially in the plane mode, I have considered many times to glue it all together in the aircraft mode. -
1/72 Bandai VF-25F Messiah build-up step-by-step (sort of)
wm cheng replied to wm cheng's topic in The Workshop!
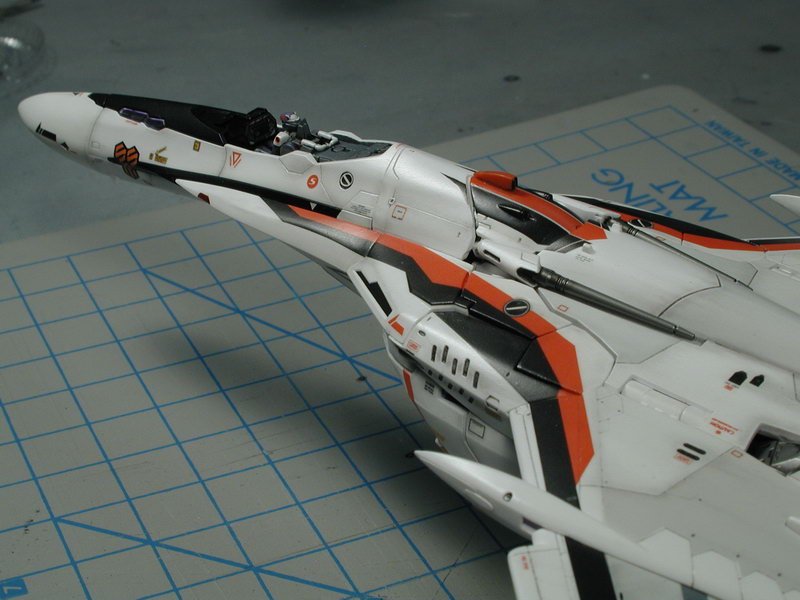
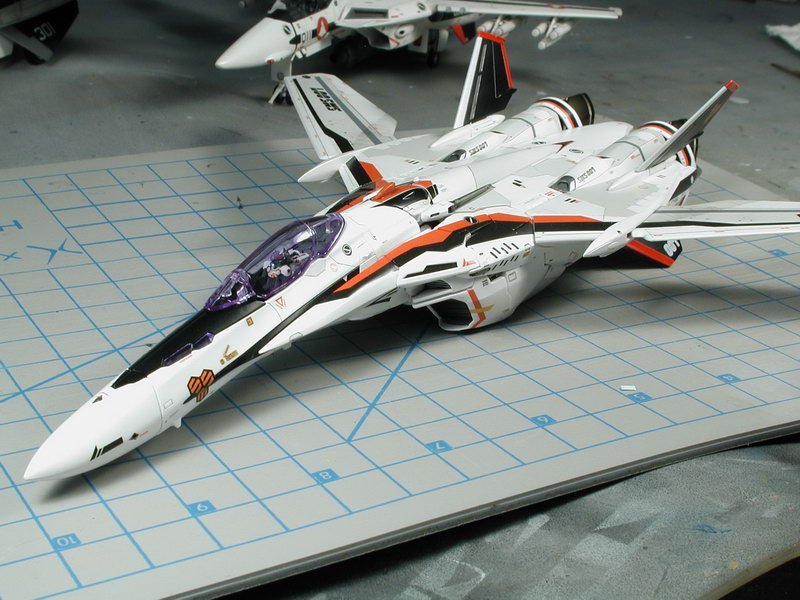
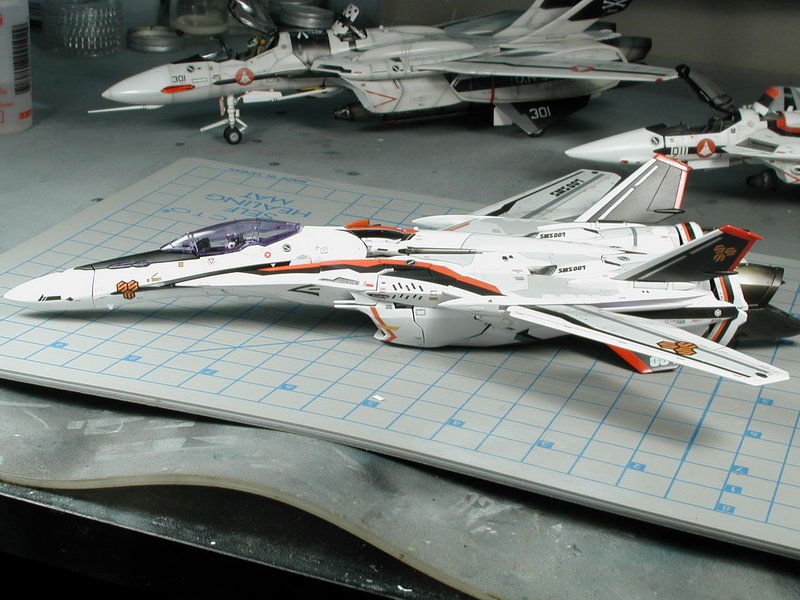
Lolicon, that looks fantastic! That was my plan too until David got me that perfect screenshot of the console. Pretty great for a blind monkey!! Could I borrow him sometime... David, thanks so much for the references. I'm sure its fine, show us your build, I'm dying to see! Well, my canopy is awaiting masking and spraying for the frame. I got a few hours in to play with the smudge stick with some graphite to do a preliminary light weathering over the clear-coat protected decals. Ahh, its starting to look like a plane! I sealed in this graphite rubbing with another cloat of semi-gloss clear-coat to prevent further smudging with my fingers once I had it the way I liked. Its a bit on the light side, but I build up in layers, this is the first step. I will then take it apart again to get at the legs and arms so that that I don't get this brand new naked Battroid mode. Then I'll re-assemble it back in plane mode and do a light post-shading with a very thinned light grey to tone down some of the white hotspots and bring up some of the black decalled areas to overall blend it all together a bit more (currently the black stands out too much) - then I might do another layer of graphite weathering on top of that to get it to a point that I like. I don't want to over do this like the VF-0, I think this bird is a bit cleaner since we really didn't see any weathering in the anime. Just enough to tie all the high-viz black and red stripes together and blend the various white/grey panels a bit. (p.s. I should have waited to do the nav lights and hud green lens, all the movement and handling has caused me to chip some some of the wingtip nav lights and the subsequent clear-coat semi-gloss has dulled the light finish, I will have to touch them up and brush a bit of future over them in the end to get back the lens effect (I painted Tamiya marker silver underneath and Tamiya clear blue and red over top to get bit more depth an refection to them - next time wait till the very end before doing up the lights!)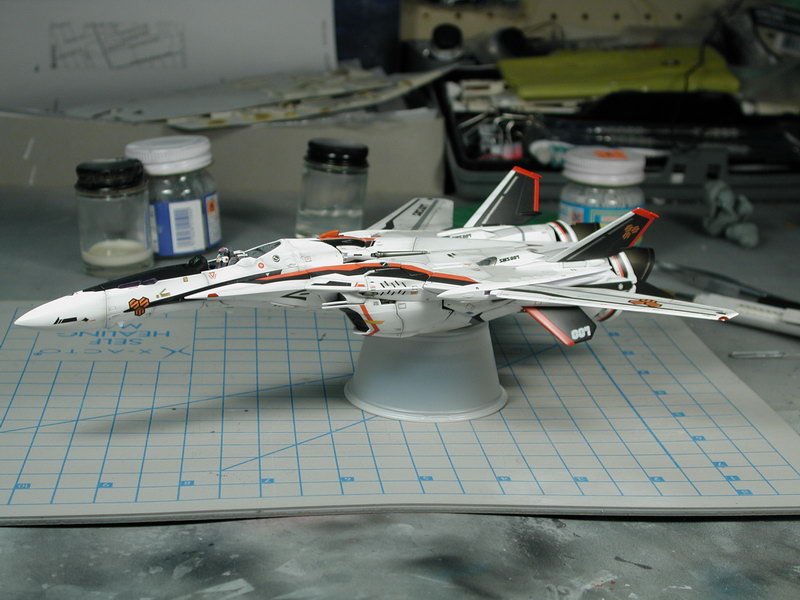


-
1/72 Bandai VF-25F Messiah build-up step-by-step (sort of)
wm cheng replied to wm cheng's topic in The Workshop!
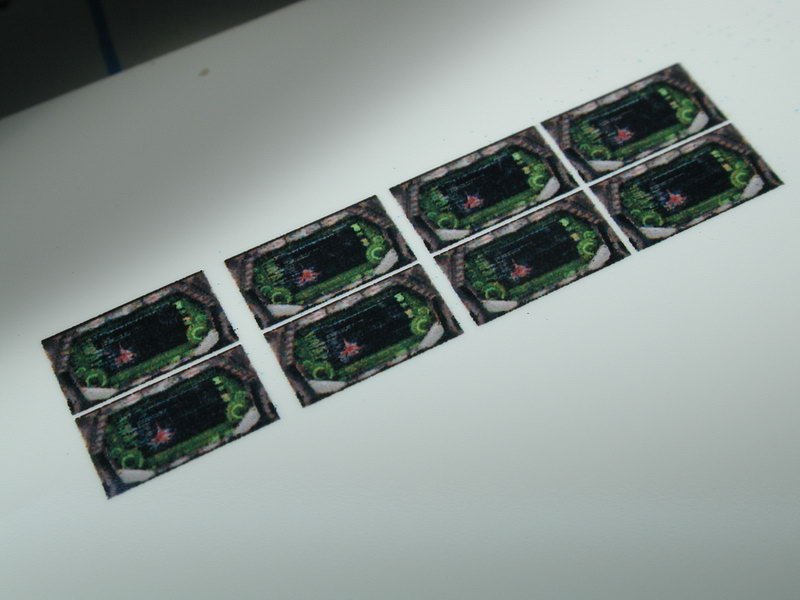
Thanks! I'm printing it on a 10yr old Epson Photo Stylus 1200 - on best quality mode 1440dpi onto photo quality gloss film. I think its the film that does the trick, the film is like a thin sheet of plastic mylar, so the ink just sits on top and doesn't soak into the paper and spread. Once its printed, you need to let it dry for at least 15mins before handling it, and be really careful when cutting - I suppose you could spray a light clear coat over it, but I was lazy! I started to weather it, starting with some ground graphite on a smudge stick to get some tight post shading and streaking going on, will post pictures later. -
1/72 Bandai VF-25F Messiah build-up step-by-step (sort of)
wm cheng replied to wm cheng's topic in The Workshop!
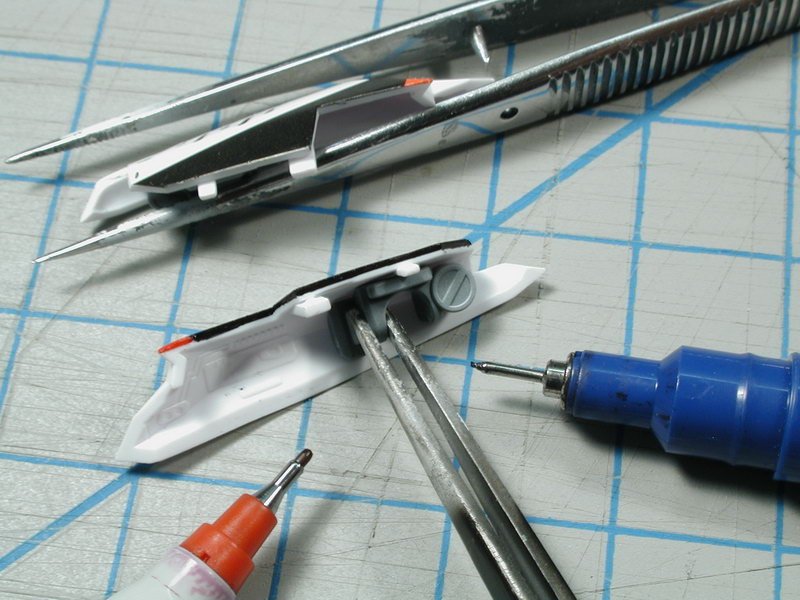
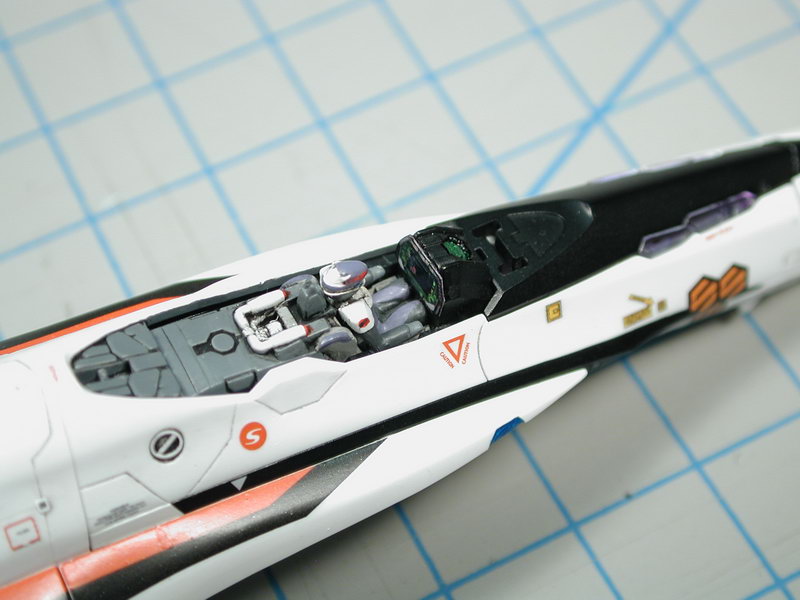
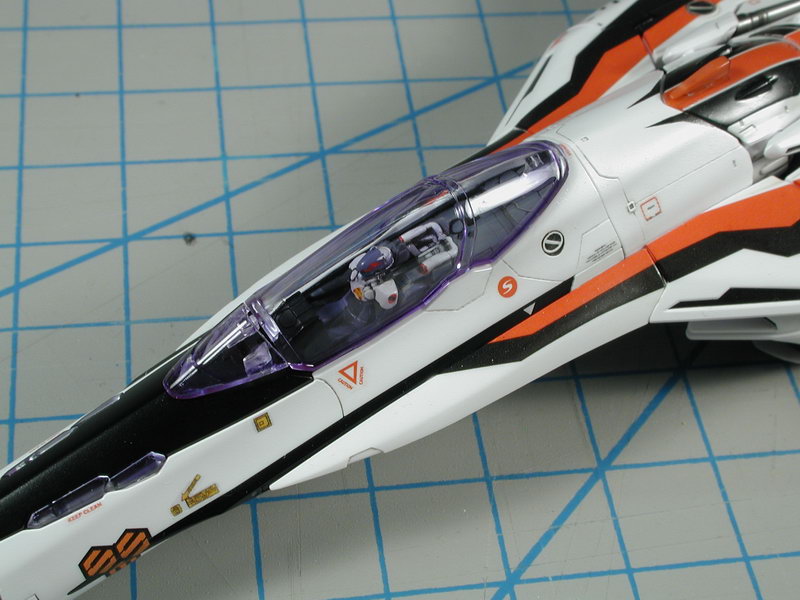
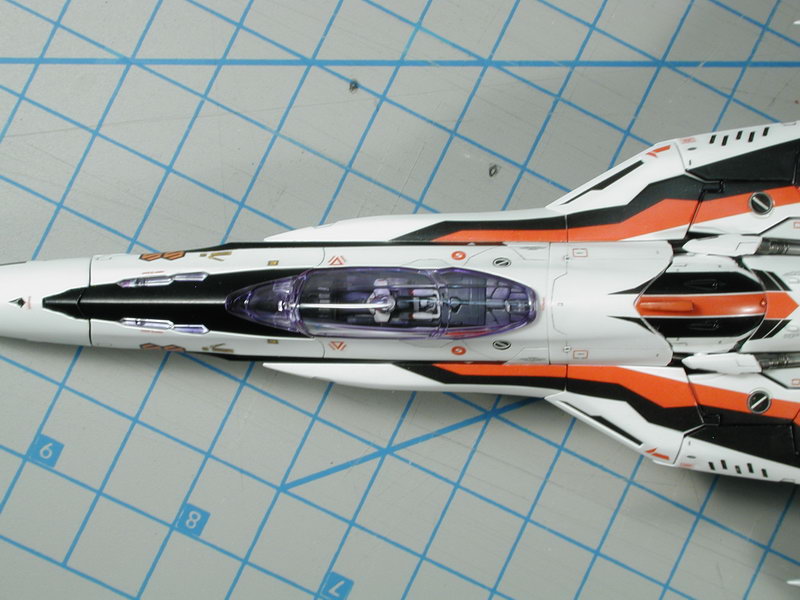
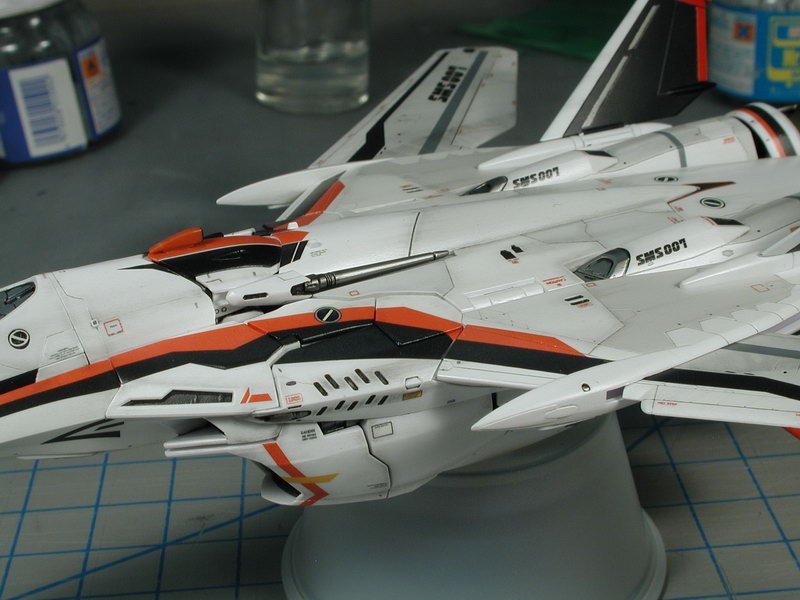
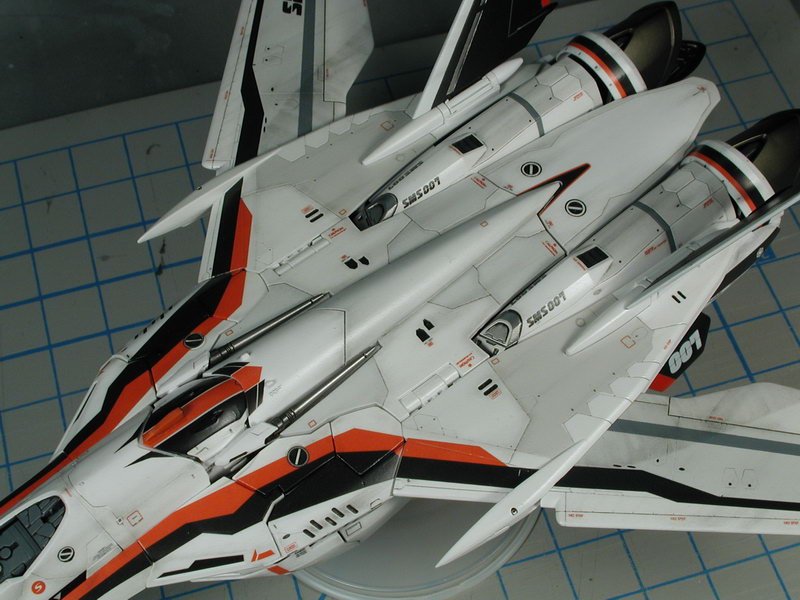
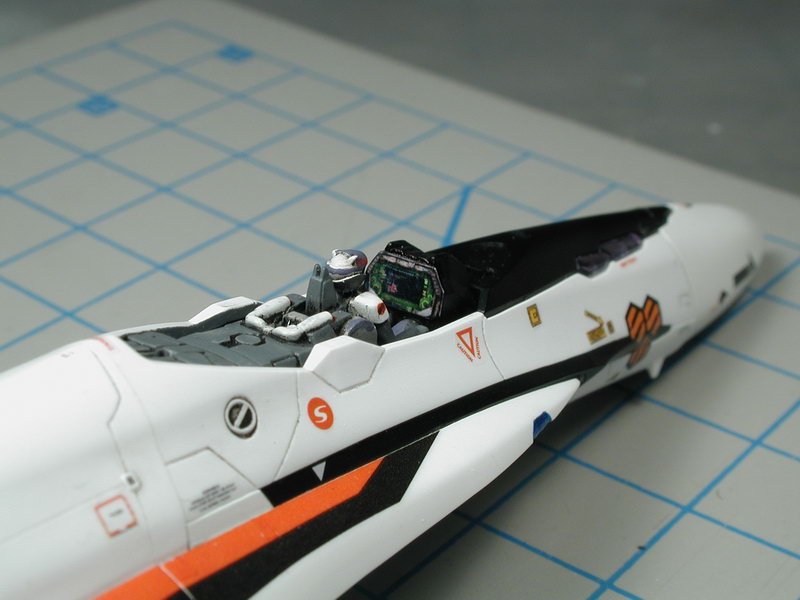
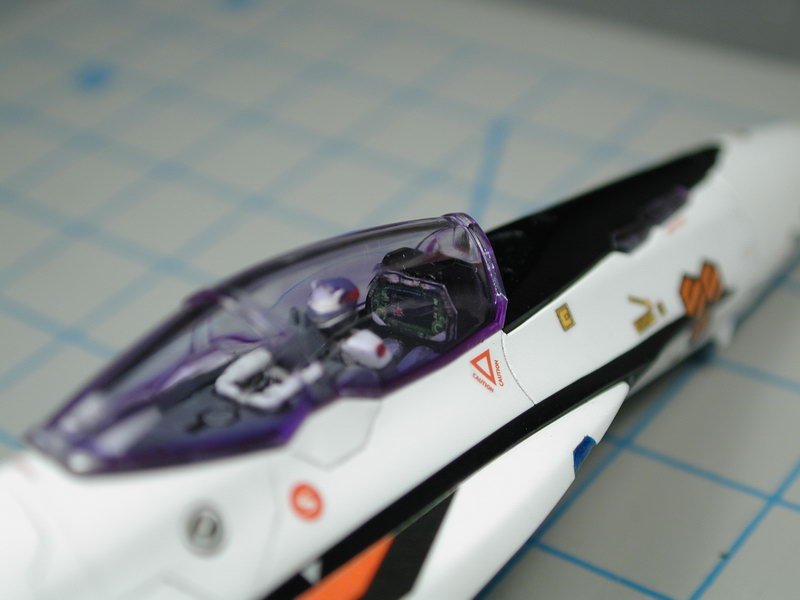
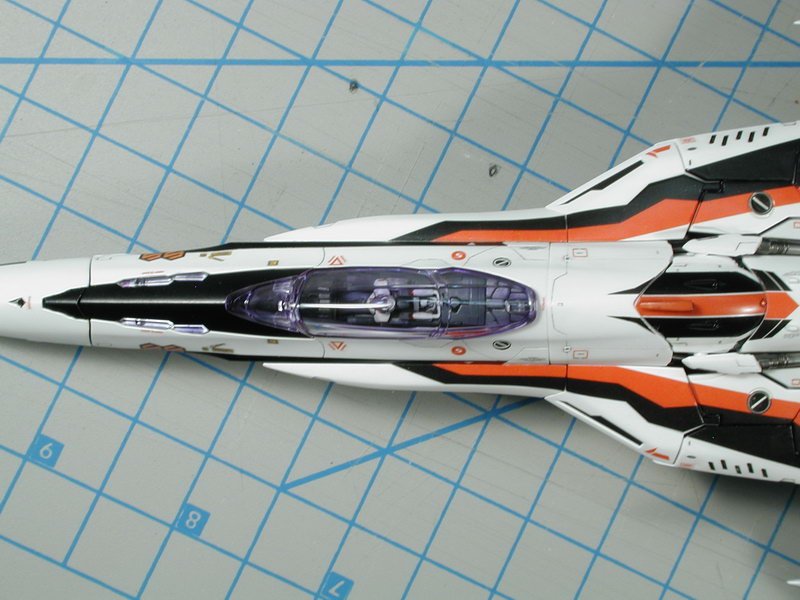
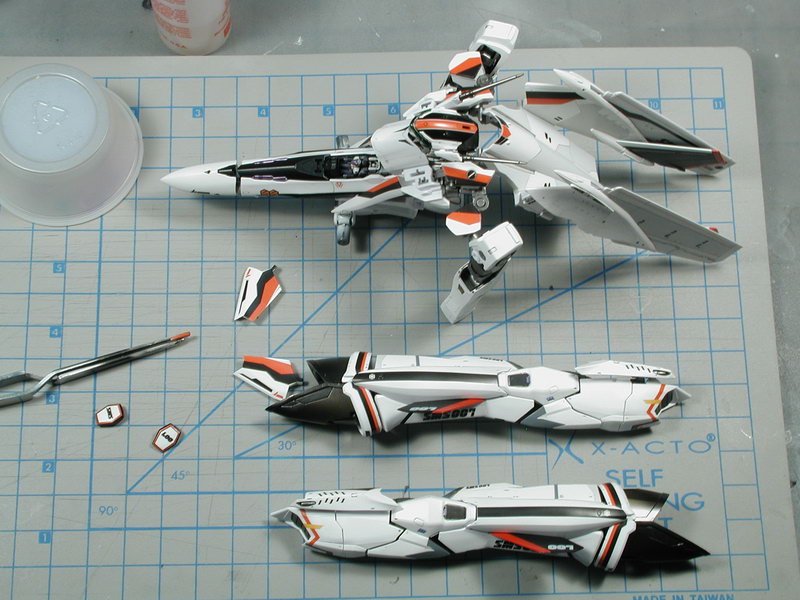
Before I forgot and closed up the cockpit with the canopy. I decided to do the front instrument panel. Thanks to David who did the screen captures for me, I resized and cropped the front panel image to about 7mm wide which would fit the front console. I have provided the properly resized graphic. I printed it onto photo-quality gloss film (better than paper since it doesn't bleed) but you can print it onto whatever you want. I placed a few in one go so that I'd have enough for the squadron later on without having to print it again. I just used white glue to set it in place, once the canopy is on, its pretty well protected. Once the glue dries, I'll take a fine brush and edge the film with flat black to blend it into the front console and prevent the edge from catching the light as its doing so in these photos. I think it adds a nice touch once the canopy is on, its something Bandai should have included - oh well. Lets let this sucker dry before I clear coat it tonight!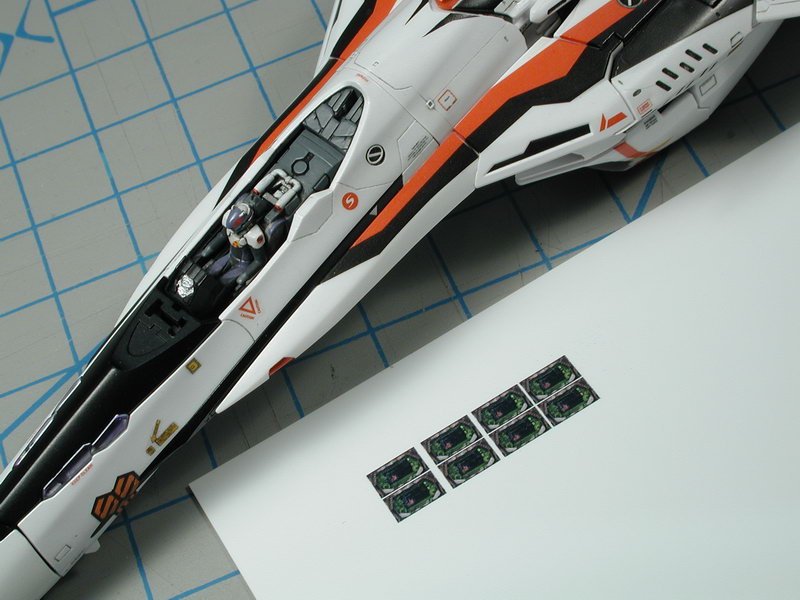


-
1/72 Bandai VF-25F Messiah build-up step-by-step (sort of)
wm cheng replied to wm cheng's topic in The Workshop!
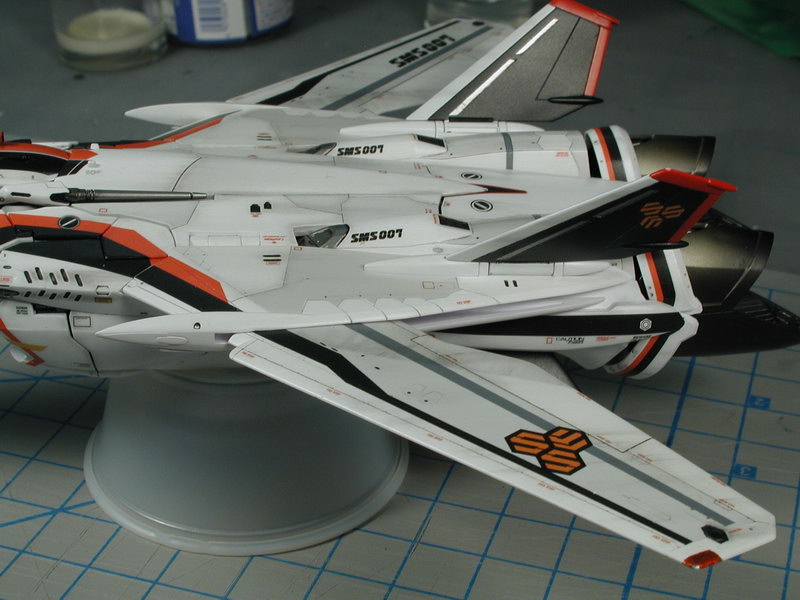
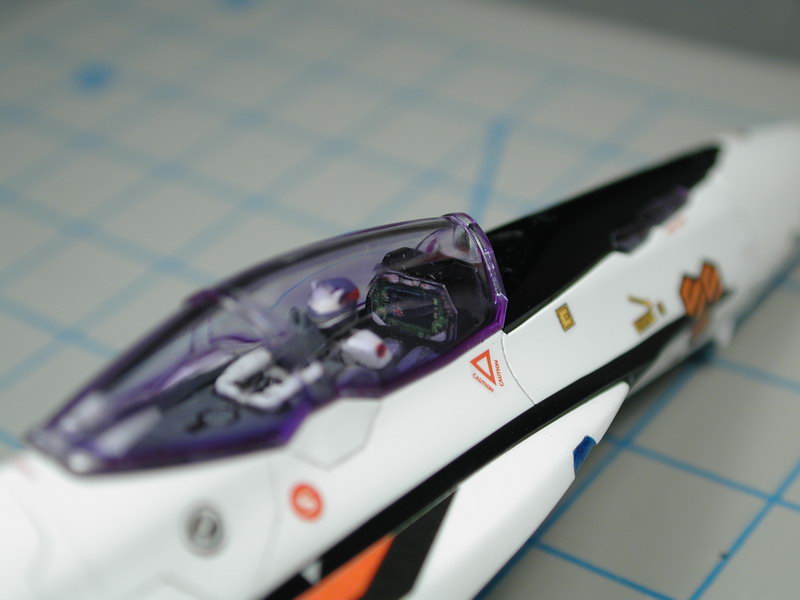
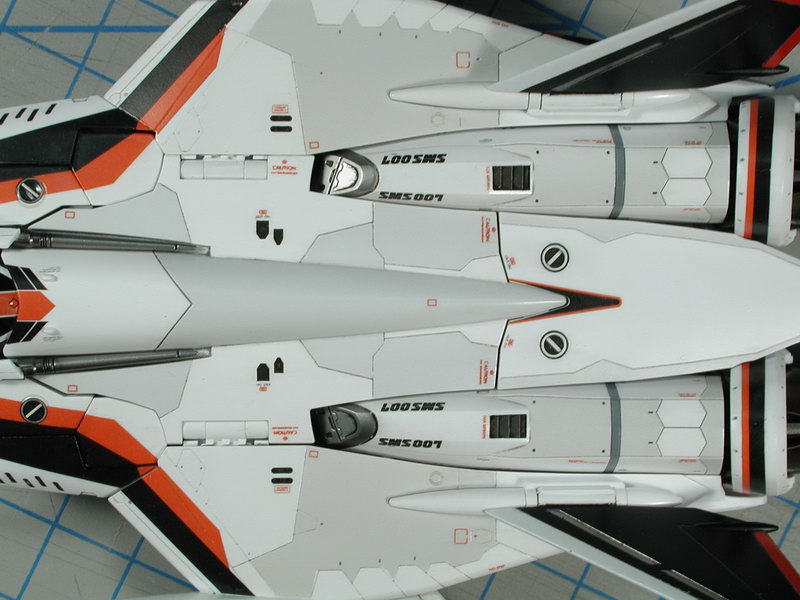
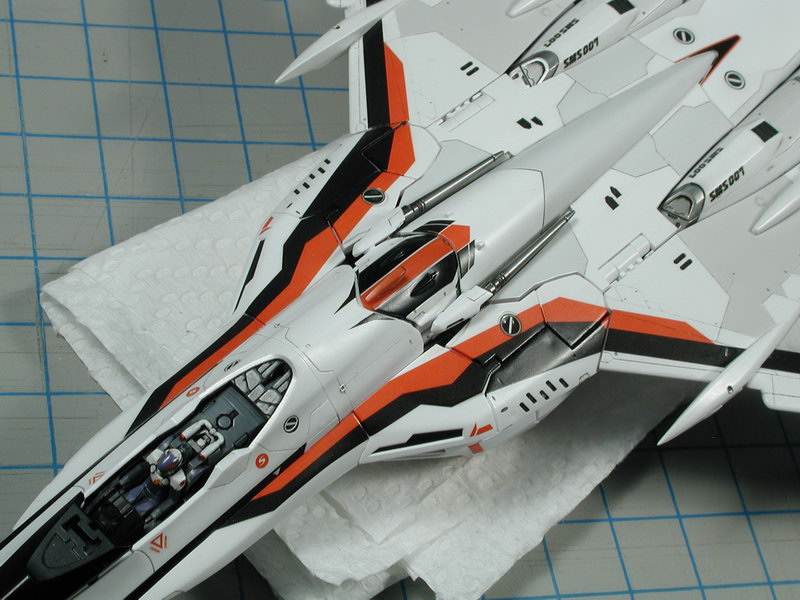
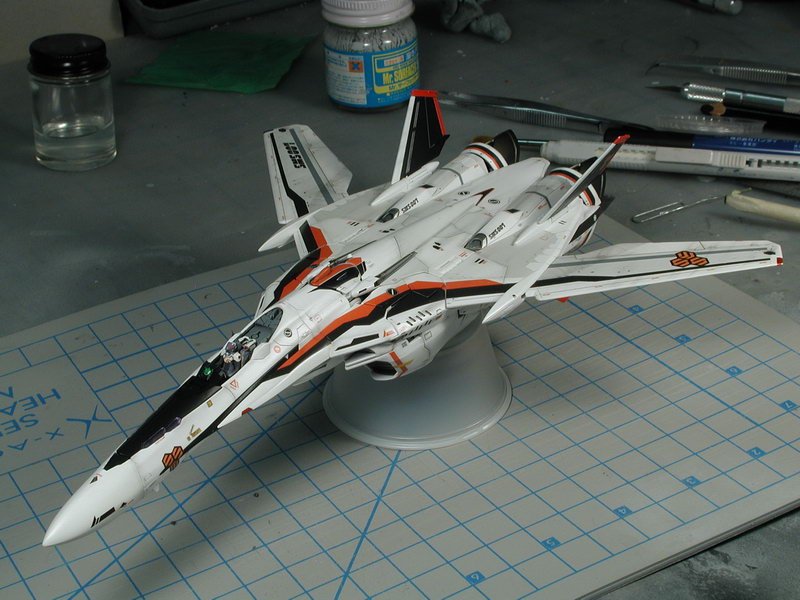
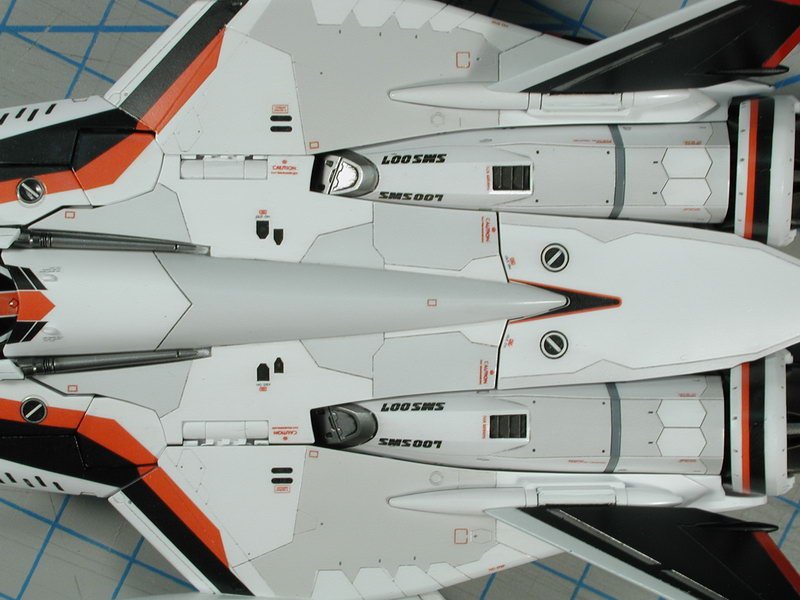
To dunk only the outside, I held onto the inside pegs with a set of tweezers and put the ink/future solution in a small mixing cup, I tilted the cup and dunked only the outside of the canopy, just allowing the plastic surface to touch the ink/future mixture, but don't emmerse the entire canopy in. Then took it out and kind of swirled it a bit allowing the excess to run all over the top surface to get an even coating. Once its even I set it down proper and took a paper tower to wick a the excess pooling around the canopy frame - even with this wicking, its still thicker/more purple around the frame (opposite from what you showed in your photo - don't know why). But this extra thickening isn't too bad, since I'll be painting a black canopy frame right there the contrast of the black will lessen the purple tint. It appears more purple now than when I get the black frame painted. I'm pretty happy with this second round of tinting with the shade and density. I found that dipping it and letting dry and repeating the coats gives a more even finish than one heavy dark coat (that's where you see the colour tint running un-evenly. So I got almost 5hrs today to finish up the data/warning stenciling. I got out my older VF-0 and VF-1 as guides to where would be appropriate places to add these extra decals. I feel they make a world of difference. They are mostly made up of extra bits from other models, I scanned the Hasegawa sheets and printed them from a colour laser onto decal paper and coated them with a decal spray so I got my own sheet of extras that I can draw from (hopefully enough to do the entire squadron). The great thing about a mostly white model is that these laser printed decals will work, however on the darker Luca blue one, I don't think any of these will show up. I wished we could print white! I've got some old Wave Option decals saved for that one. So everybody, keep all your old unused decals or decals from failed builds, they come in useful eventually. I wished Bandai added some more, but I guess since they weren't in the anime, they didn't improvise. I will let it set and spray a clear-coat Model Master Acryl semi-gloss over them a few times to seal and protect them in before my next stage. Post Shading and weathering. I guess I've got to look a the gunpod sometime too. Enjoy... (Father's day is coming up... I hope to get another chunk of time then!)


-
Thanks, just backordered it on HLJ (it wasn't that long ago it came out) - hope they get it in again.
-
Hey, what Macross Frontier art books are available? Any details? Where can I get/order these? I'm looking for good mech art and drawings. Thanks, Wm
-
1/72 Bandai VF-25F Messiah build-up step-by-step (sort of)
wm cheng replied to wm cheng's topic in The Workshop!
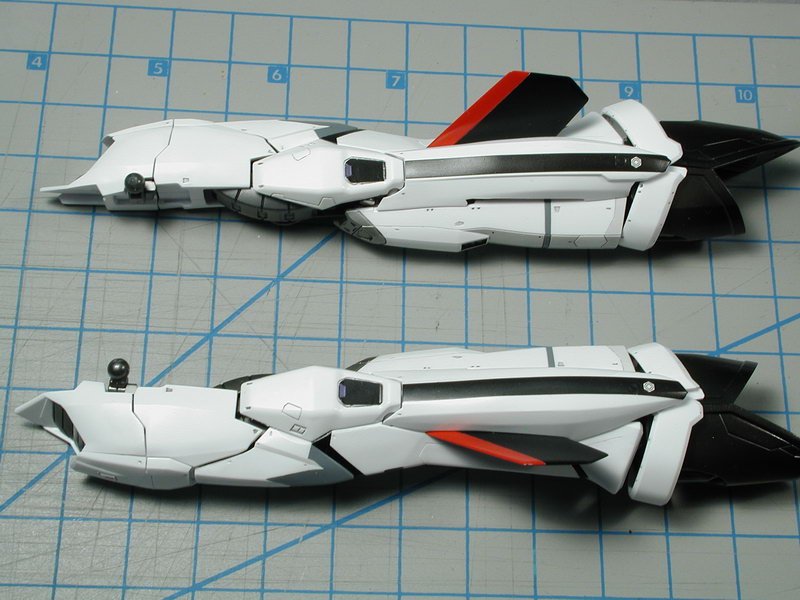
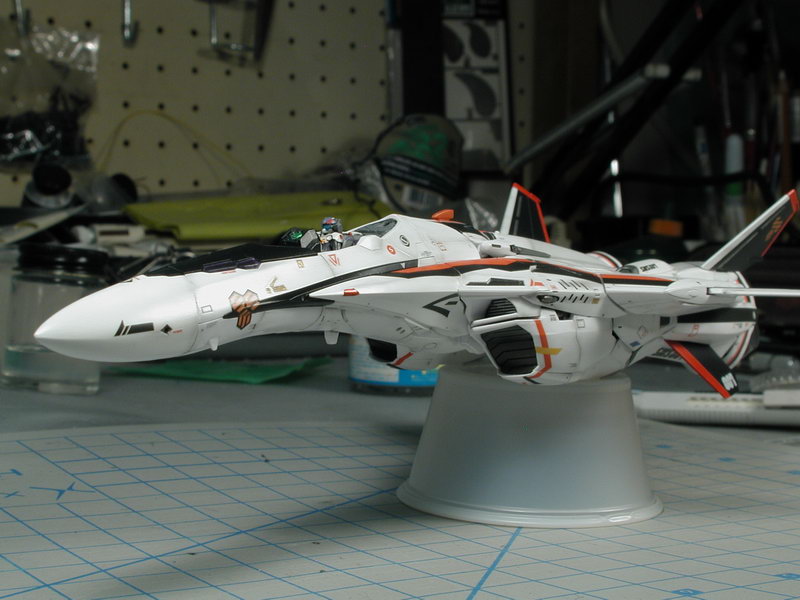
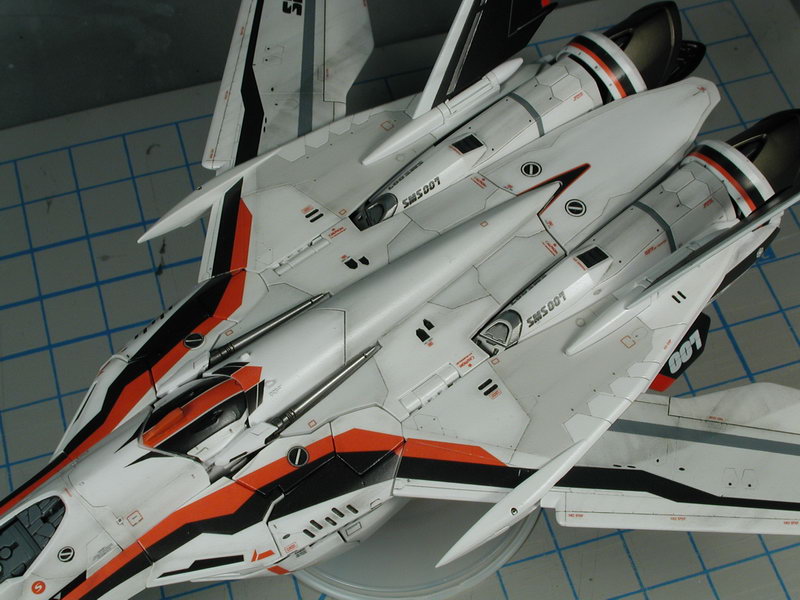
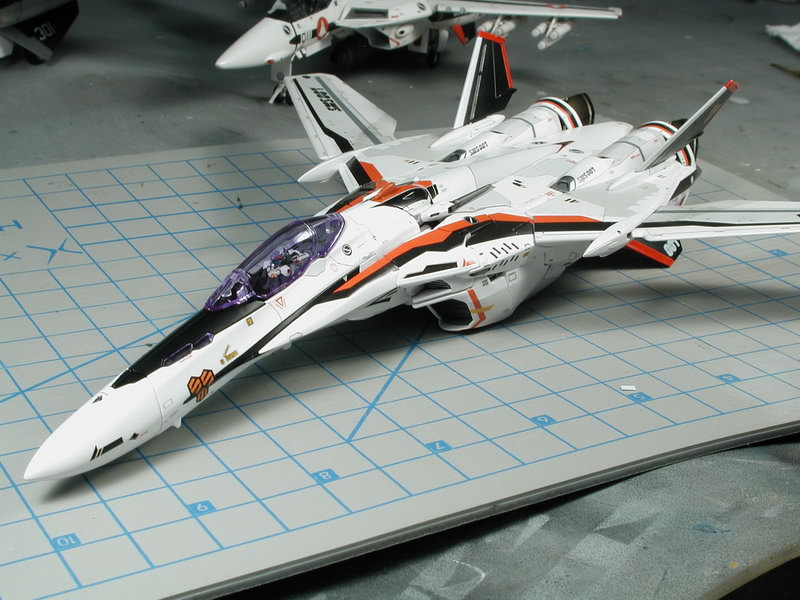
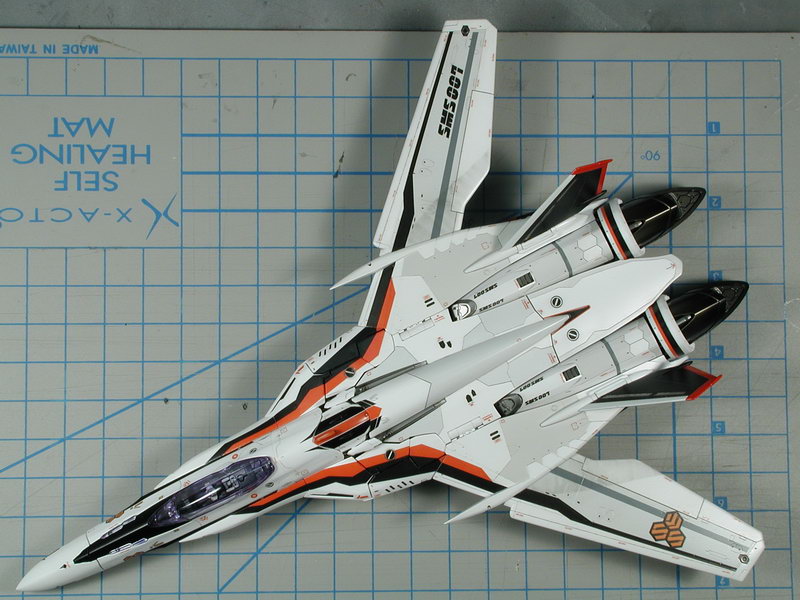
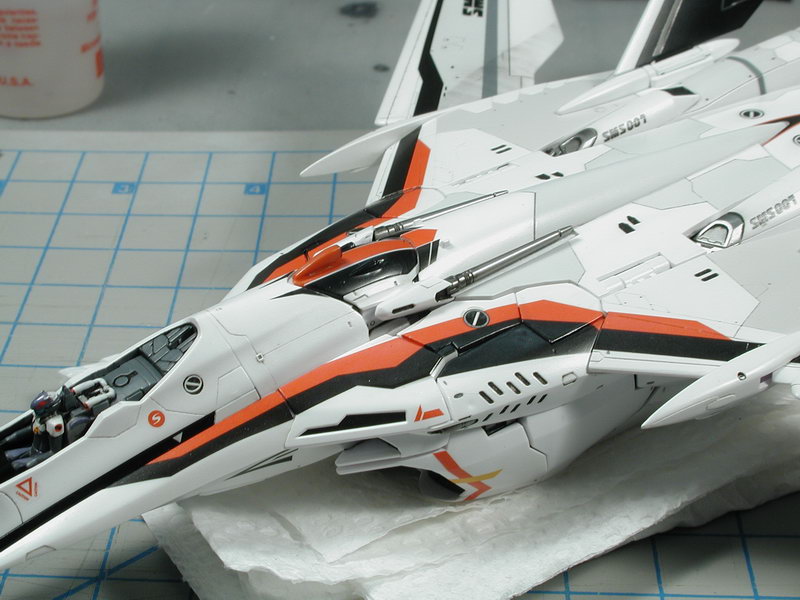
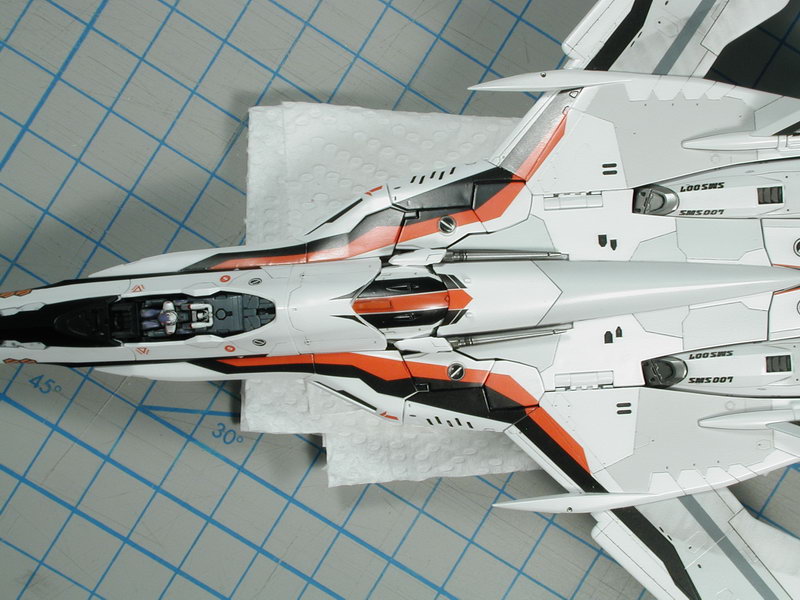
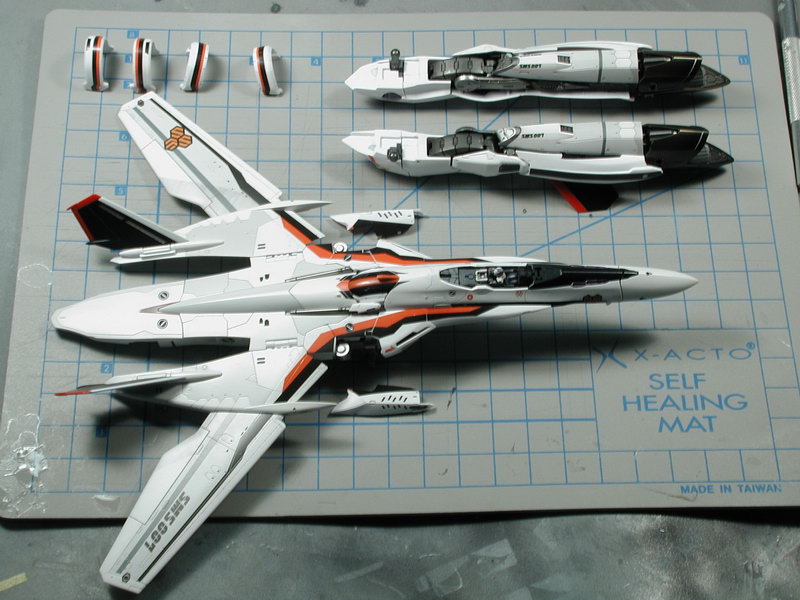
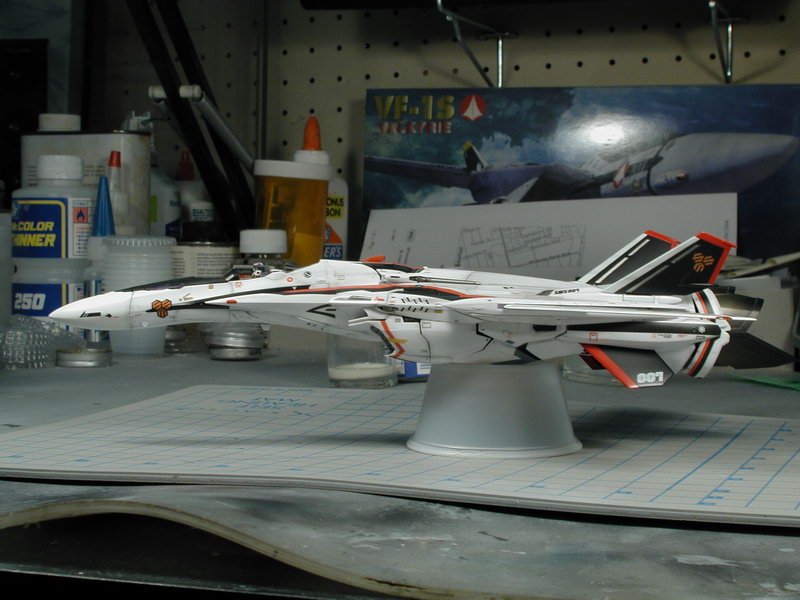
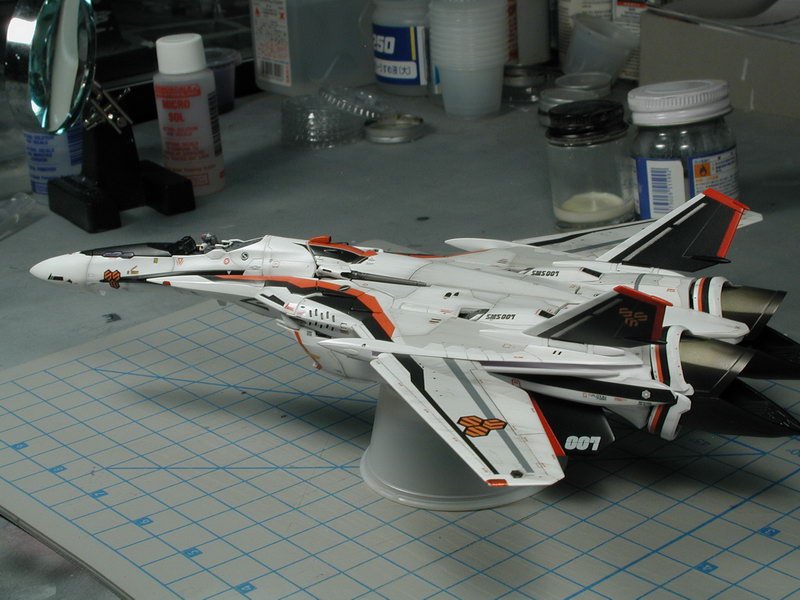
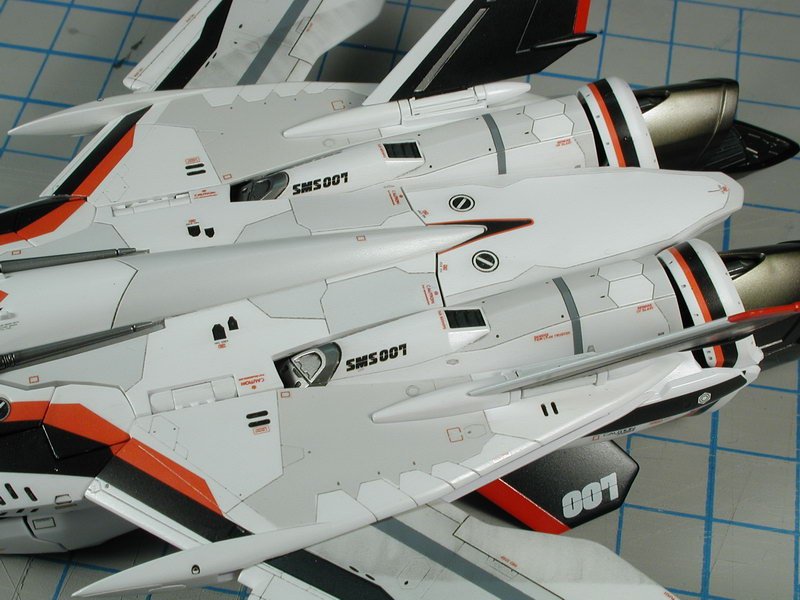
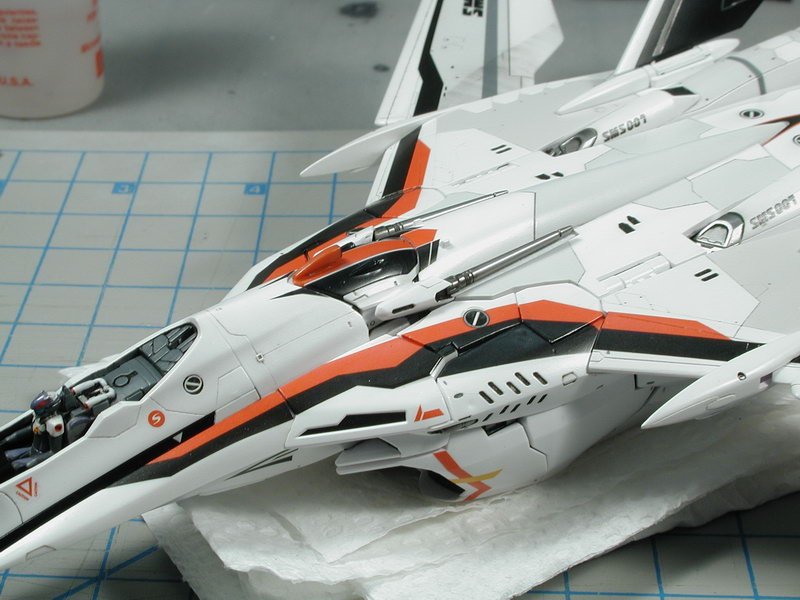
I had to transform it back into the plane mode to start with the data/warning stenciling. Wrapping the black and red down around the edge of the panels worked wonders in blending all the decals together and minimizing the gaps left behind due to the complicated shoulder/back transformation pieces. I could probably massage the pieces in a little better to tighten up the gaps, but its good enough now for me to decal (hopefully I might sneak a few hours this weekend).

-
1/72 Bandai VF-25F Messiah build-up step-by-step (sort of)
wm cheng replied to wm cheng's topic in The Workshop!
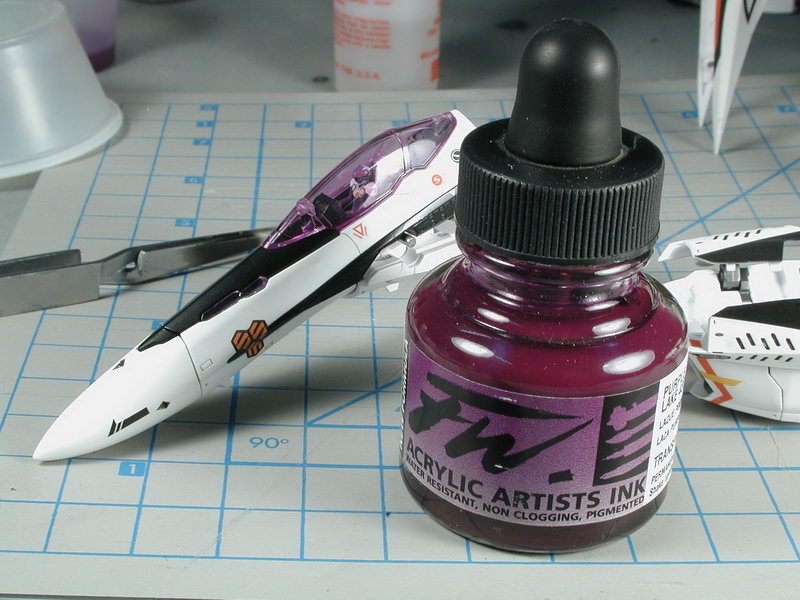
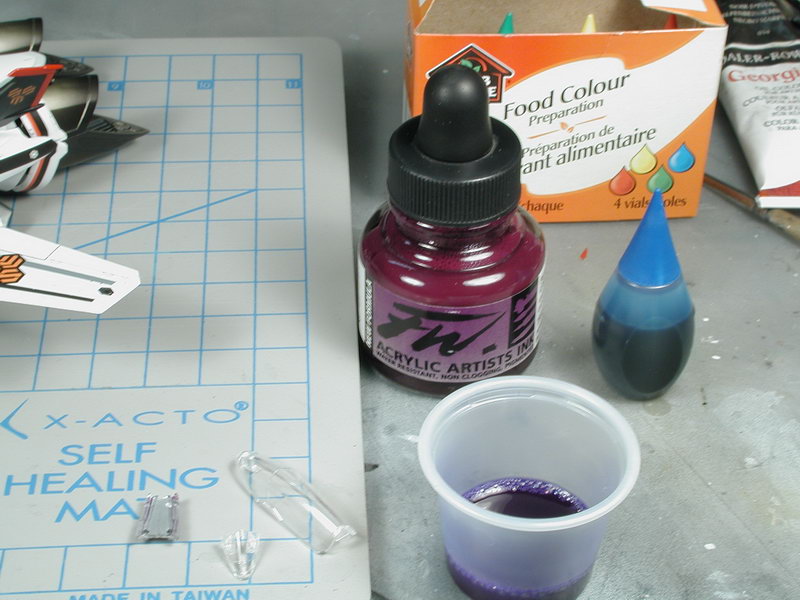
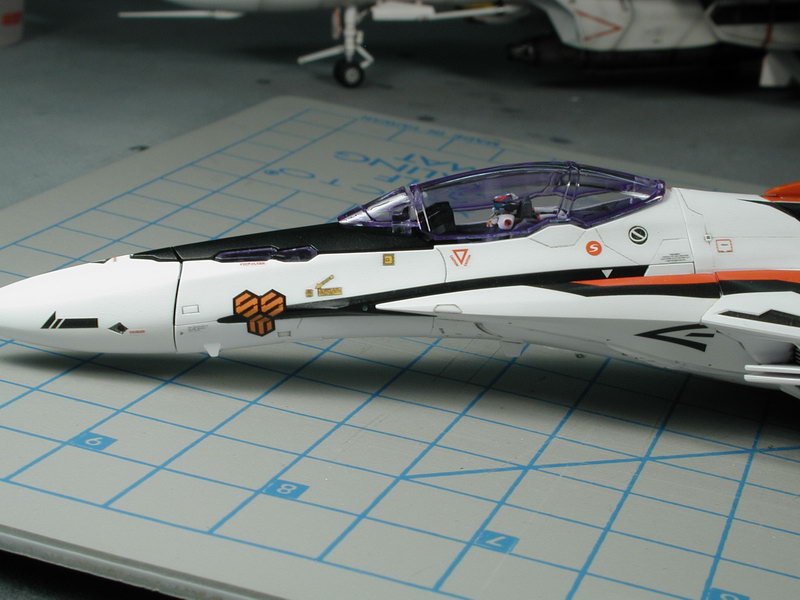
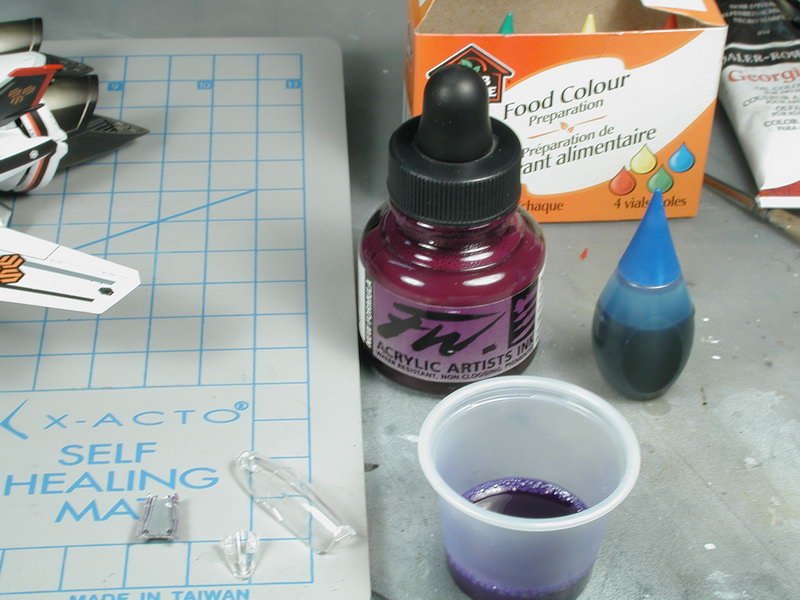
OK, here's my first sucessful attempt at tinting the canopy purple... I just used the ink mixed with future 2-3 drops in - straight colour. After a few days, I wasn't happy with the purple, its too reddish and too strong - the anime had a more bluish cast and I thought that a lighter bluer tint might look a bit more realistic with the model - the strong purple looks anime cartoony. I tried to add some blue food colouring to the mix. I stripped the old tint by dunking it windex (with ammonia). I tried a lighter 2-coat this time. The first time was only one coat, but I feel that if I did two light coats, it would be more even. I grabbed the canopy with tweezers by the mounting pegs on the underside (very handy - if you don't remove them, I was going to remove them to get a more realistic model effect, but all the other effort I had to do to this Bandai kit compunded with the fact that it still had big ass hinges exposed made me forget that idea - it wasn't offensive enough to me to justify the added effort). I've dunked only the outside surface, careful to not get it into the inside where the pegs are so that there won't be any pooling of colour around the pegs. Its under a cup drying now, after my second coat, I'll post some shots again.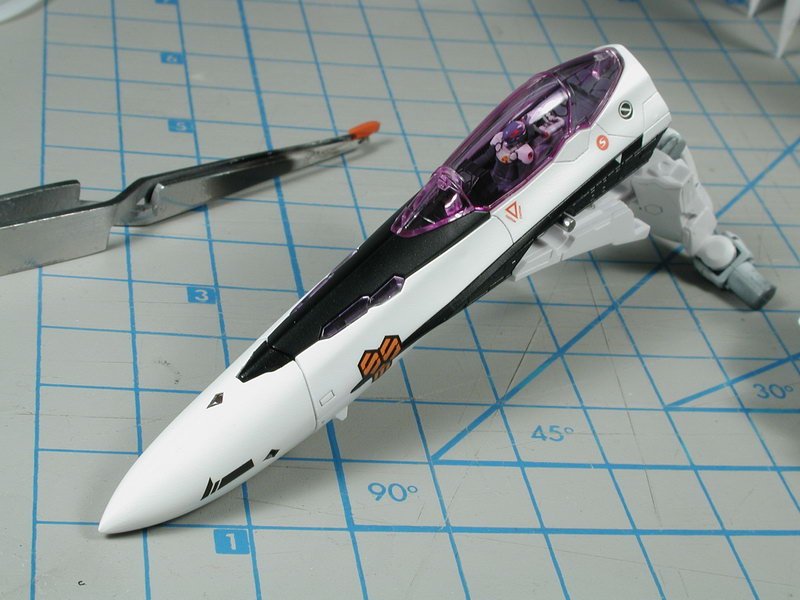


-
1/72 Bandai VF-25F Messiah build-up step-by-step (sort of)
wm cheng replied to wm cheng's topic in The Workshop!
Yes, technology sure has come a long way from my first model when I was 7! I think it was the AMT X-Wing fighter, it had stickers and I loved that thing and zoomed it around till it literally fell apart in my hands. So good to hear Jay, please post pictures when you do start! No dumb questions! I actually don't use Tamiya smoke, I use a very thinned down flat black only, however I might try smoke since everyone else uses it and it might be more durable (more scratch resistant) - I'd usually mix 9:1 thinner to paint ratio for the black paint, maybe I'd alter it a bit for the smoke since its already a transparent clear colour to 6:1 I use a Iwata double action airbrush (I used to use a badger single action - which is just fine) now so there are no nozzles per se, its just the finest setting you can get. Just remember less is more, you can always build up, but its a lot more effort to remove if you go too heavy. Look up one of my older threads, I'm sure I've outlined my panel post shading process. Remember... SUBTLE! goes a long way. Post pics when you get the chance. -
Yeah... just remember the bigger it is, the more detail you have to put into it to make it decent! Generally, with each doubling of scale, you need to put four times as much detailing to make the Wow factor come back. All the flat surfaces become bigger and more bare... becareful what you wish for
-
Bandai 1/48 Scale Macross Frontier Model Kit Thread
wm cheng replied to azrael's topic in Model kits
+1 (couldn't agree more, or said it better myself) ...yes, true modelers are a bit sadistic self torturing bunch, but its through this pain that we appreciate the final results -
Whats Lying on your Workbench MKIII
wm cheng replied to HWR MKII's topic in Hall Of The Super Topics
Love the paint work and chipping - Absolutely fantastic! HWK MRII -
Whats Lying on your Workbench MKIII
wm cheng replied to HWR MKII's topic in Hall Of The Super Topics
That's just Miclone crazy!! I love tiny stuff... way to go!! Microscopic insanity... -
Bandai 1/48 Scale Macross Frontier Model Kit Thread
wm cheng replied to azrael's topic in Model kits
Boo! sniff... sniff... ;-( (never say never, I wasn't going to bite on the 1/72 scale... but I know have them all and will get the Armoured Ozma when it comes out...) -
Bandai 1/48 Scale Macross Frontier Model Kit Thread
wm cheng replied to azrael's topic in Model kits
Oh good... I feel better now that I'm not the only one in this boat, all alone... ;-( I haven't read anyone word of discontentment about Bandai since these models came out. I thought I was the only nay-sayer around here (and I hate being the bearer of bad news). I was beginning to think maybe its just me (I haven't built in a while so I thought I was just rusty). -
Bandai 1/48 Scale Macross Frontier Model Kit Thread
wm cheng replied to azrael's topic in Model kits
I think Graham was talking about ME! hehe, I have to agree, if its another transformable model, then I'll definitely pass on it. I'll only be interested if its a static aircraft model... (although I thought I was going to pass on the 1/72 transformable one, but I caved and all that I feared has come true during the course of building it - you can following along my miserable trek in the build up thread, I'm not even really having fun anymore trying to finish it - and its all because of the transformations!). There are so many horrible compromises for transformation I can't even begin to list... the most hideous is the huge big-ass backplate hinges that are not in the original lineart - these really ruin the scale of the model and reduces it to a "toy". Come on, are these giant 36" hinges made with 6" thick steel in scale?! The alignment of all the various back/shoulder/hip gun pieces are completely problematic and ruins the flowing lines of the aircraft fuselage with these giant cracks! Due to the moveability of numerous pieces, the construction steps and construction order makes it really hard, if not impossible to properly paint and mask in a logical order, I find I have to assemble and keep disassemble pieces and partially paint bits and bobs here and there to get it painted before assembly. It is impossible to properly protect all the decals and paint from the binding and rubbing of surfaces during transformations, whatever effort you put into all that work, it WILL eventually be ruined with each time you transform it. Its a great kit to just not paint it, and slap on the stickers and call it a day! But its a nightmare for anyone wanting to do a little more. I'd prefer a static mode model like Hasegawa anyday! I thought about glueing my kit in the aircraft mode only, but you still have to assemble all the innards and hinges in the (@ss-backwards order) anyways to get it to into the plane mode - which still doesn't make it any easier to paint. Argh! are you sensing my frustration!! Don't get me started on the joke they call a landing gear and gear well and the severely undersized 1/100 scale pilot and cockpit - I didn't know Alto was a muchkin at 4 feet tall? I could go on... Simply said; If I want a toy, I'd buy one... but I want to build a model properly. I'm a plane/aircraft nut anyways! I agree with the Captain, given Bandai's expertise, its highly unlikely that it will be a static model. I'm sure I'm the small/minority demographic here, and the vast majority wants a fun toy that they can snap together, play with and not worry about painting. -
1/72 Bandai VF-25F Messiah build-up step-by-step (sort of)
wm cheng replied to wm cheng's topic in The Workshop!
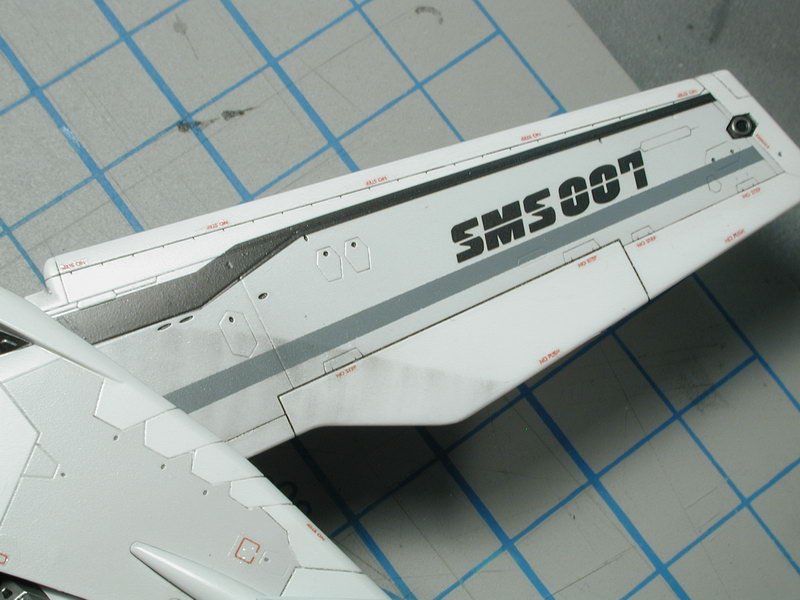
Thanks for the kudos, The real challenge lately has been trying to find time to get back into modeling. So a lot of my decisions are governed by a lack of time and the desire to finish this model - maybe not the wisest but I like to get things done. I will paint more of the decals next time (I knew the grey stripes were screened/dots so I painted those, I had no idea that they were such ill fitting decals before I started - no one else who has built these models had bothered to mention that the actual shapes were incorrect, I just assumed Bandai knew what they were doing). Now I know and this will serve as a reference for my other Vf-25s and what I choose to decal - however I read somewhere that the decals for Alto were the worst fitting ones, and that Bandai had corrected their mistakes with the other release - is this true? can anyone confirm this? I'm so happy to hear that I actually got someone back into modeling!! Its such a dying art, that it really makes all this posting up worthwhile if it got one more modeler into the world. I always try to get my friends into it, but sadly, they're not interested with all the electronic games around, parenthood or work. This is the site that got me back into modeling too! I built in high school, but dropped it for University and work afterwards, it was when I discovered this site and got back into Macross that I decided to get back into modeling. Gotta thank Shawn & Graham for that! Yeah, the dot printing really irks me, but I can't imagine masking and painting all the SMS symbols - that's insane! More power to ya if you try. Maybe someday Wave Option parts might put out a option decals set like they did for Macross a while back. Oh well. Not much on the model front in the next few days, I will just let it dry thoroughly (hand brushed clear coats are much thicker) and should be allowed to cure several days before "mashing" it back together in the aircraft mode. I worried that if it doesn't cure properly that it might weld the parts together and crack on first transformation again. The plan is to transform it back into the aircraft mode before I airbrush a clear coat over the entire plane and continue to decal the warning data stencils from my spares box (not included by Bandai) whenever I get some time again. -
1/72 Bandai VF-25F Messiah build-up step-by-step (sort of)
wm cheng replied to wm cheng's topic in The Workshop!
Oh! p.s. I finally got the purple tint on the canopy to work! Woohoo, I can't believe what an ordeal that was. What finally did it was purple acrylic ink from an art supply store mixed into future (maybe 1:10 ratio) and then I dunked just the outside surface (so it didn't get caught in all the pegs on the inside) and used a paper towel to wick the excess mixture and allowed it to dry under a cup (to keep dust out). I'm pretty happy with it, will take pictures of it the next round. -
1/72 Bandai VF-25F Messiah build-up step-by-step (sort of)
wm cheng replied to wm cheng's topic in The Workshop!
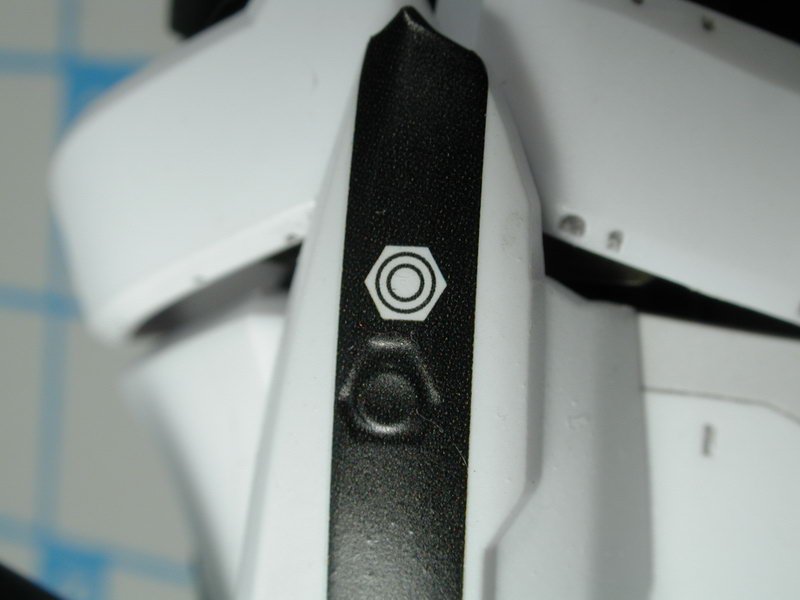
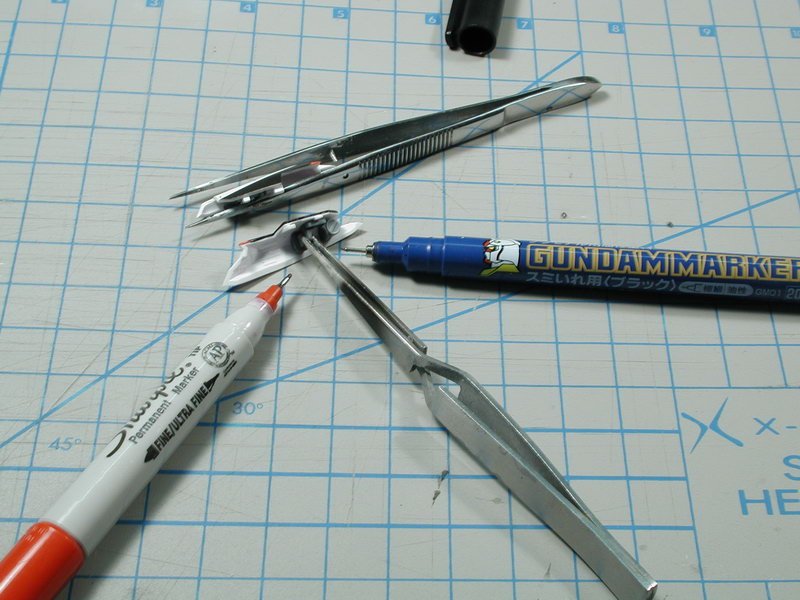
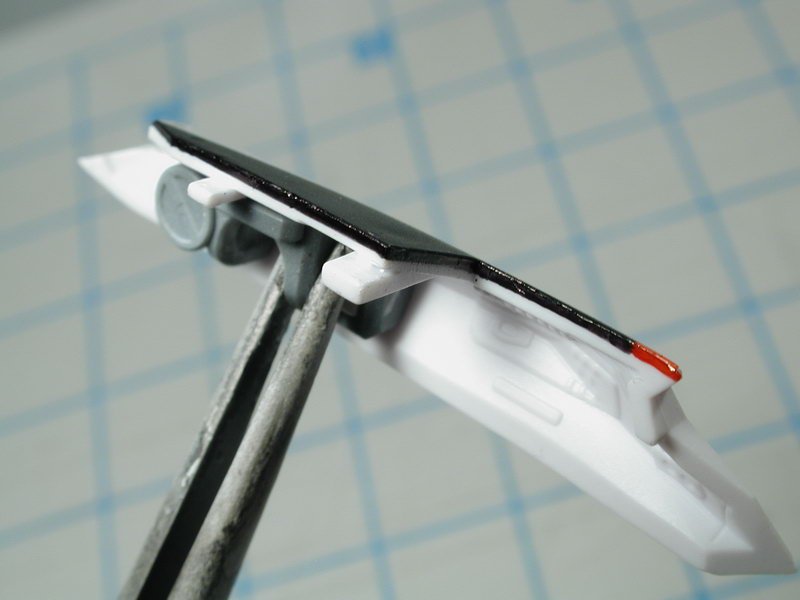
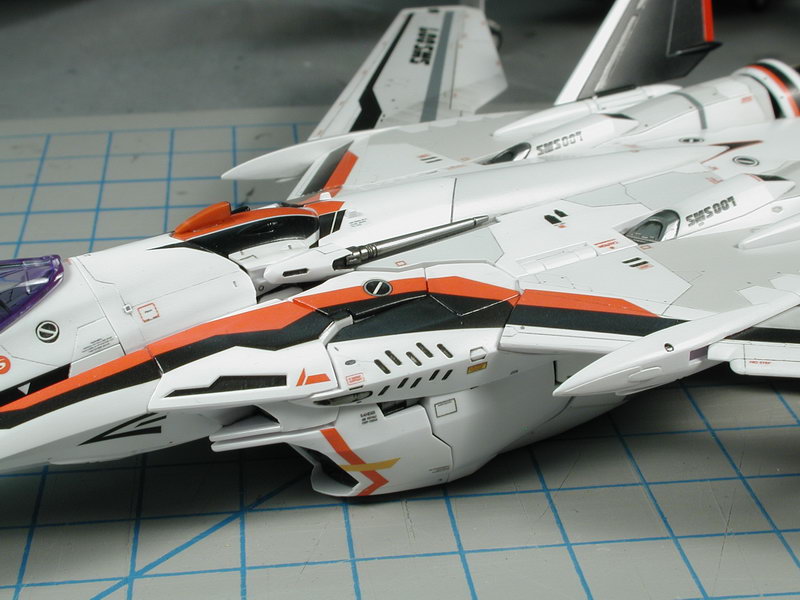
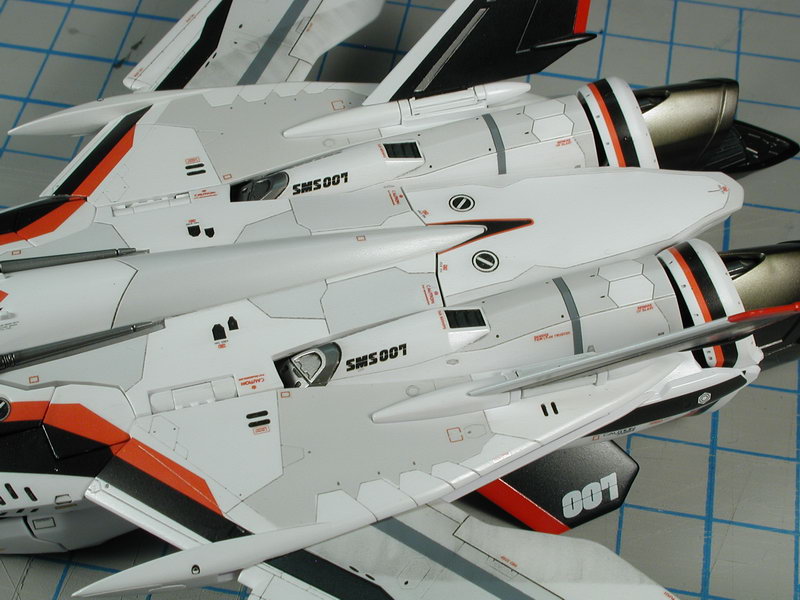
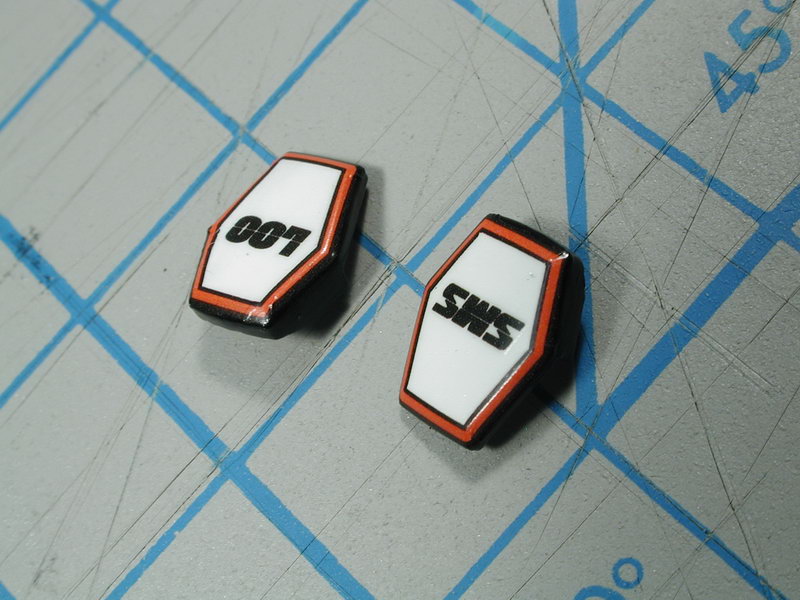
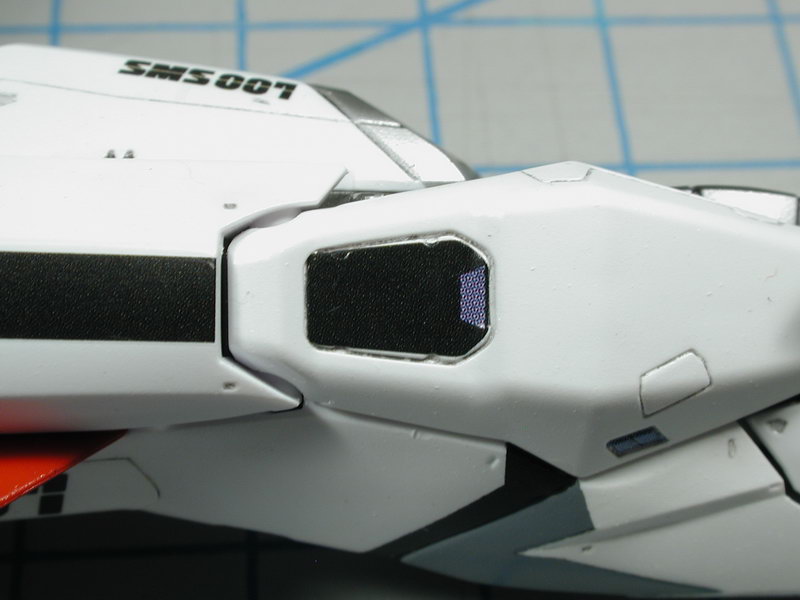
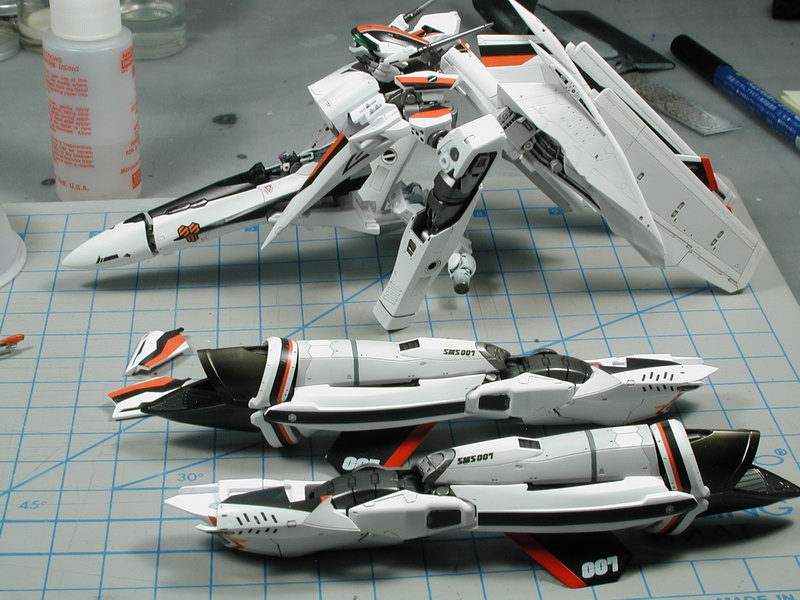
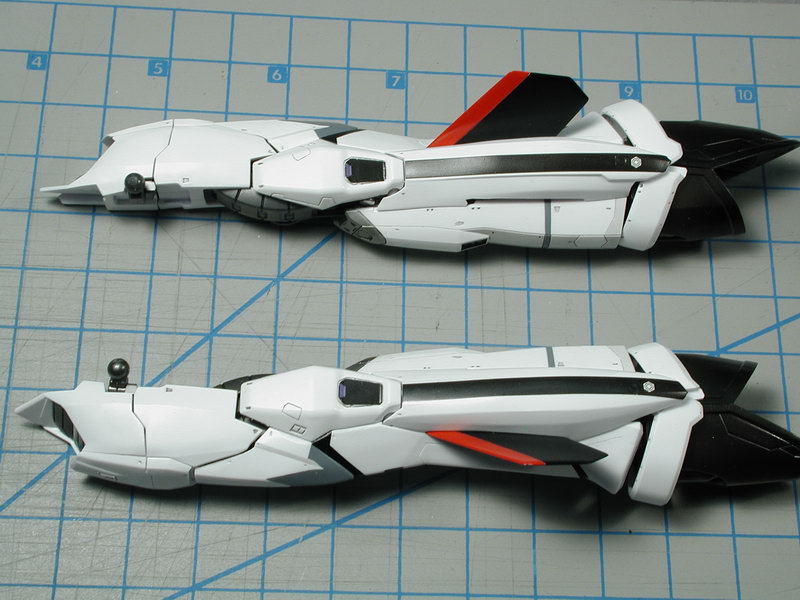
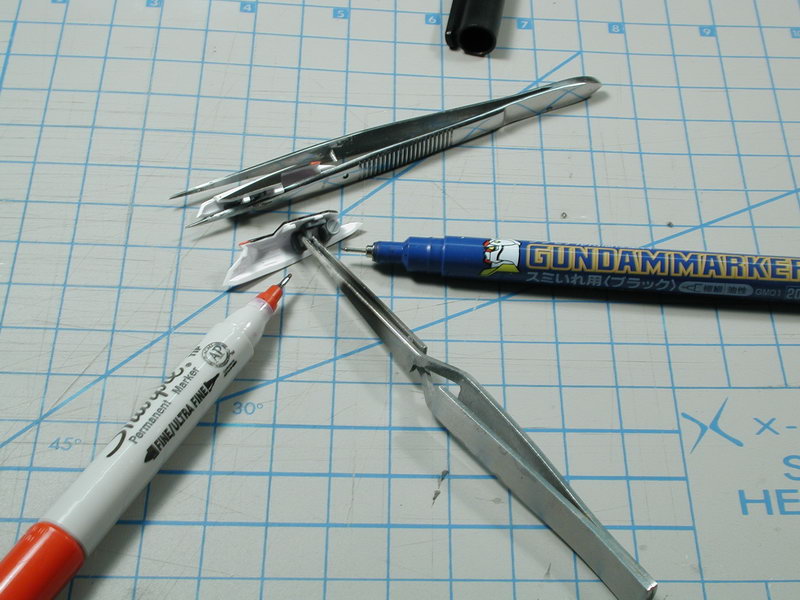
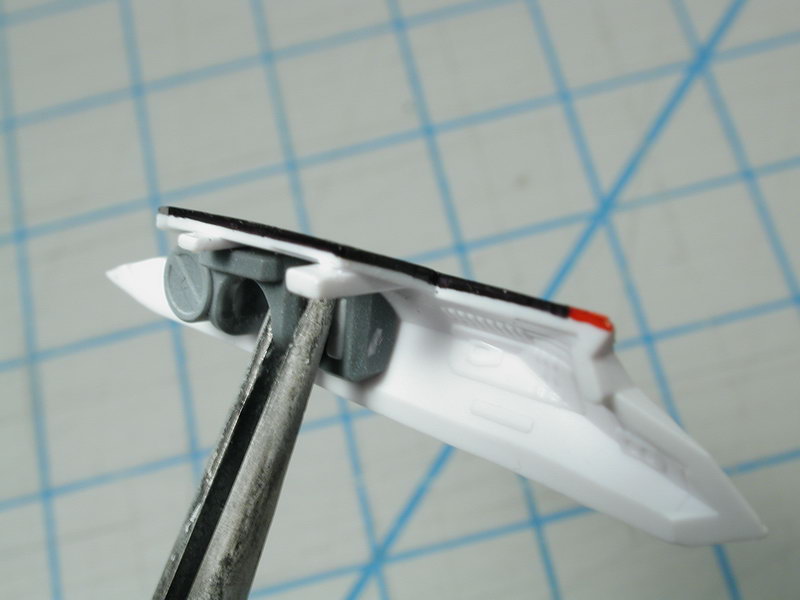
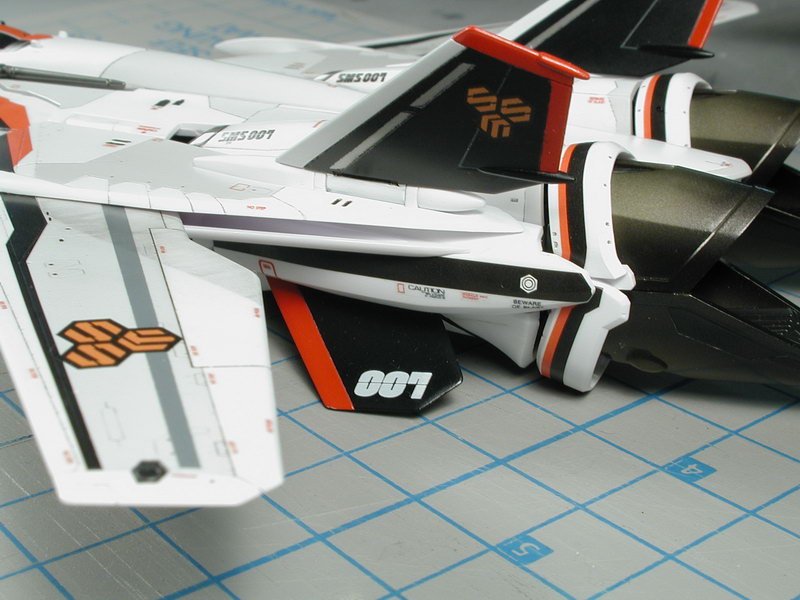
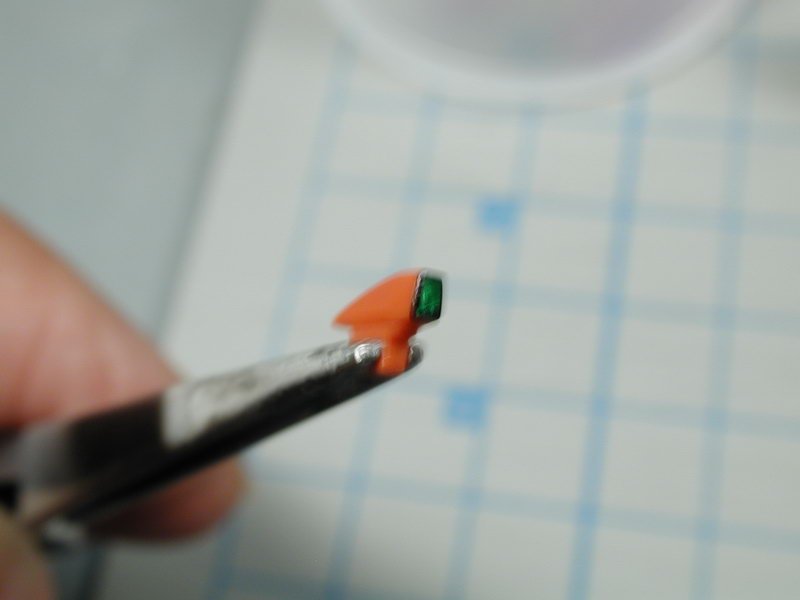
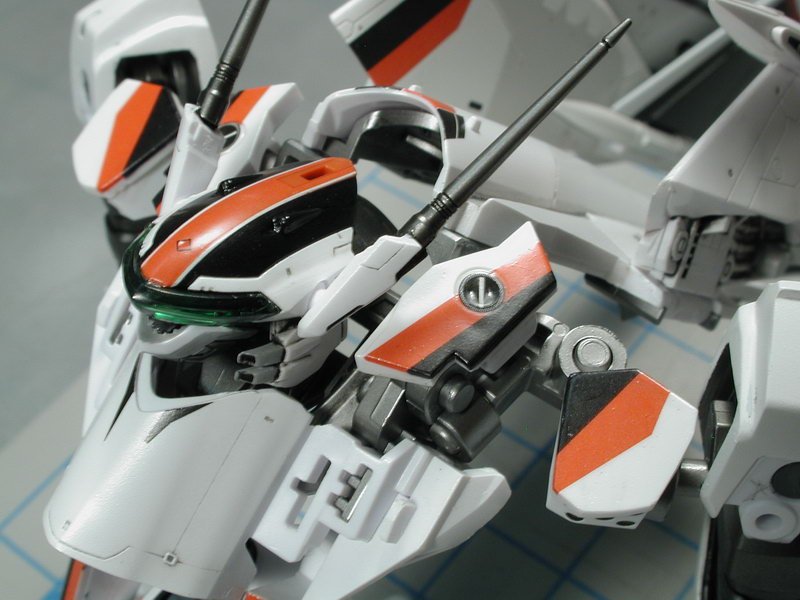
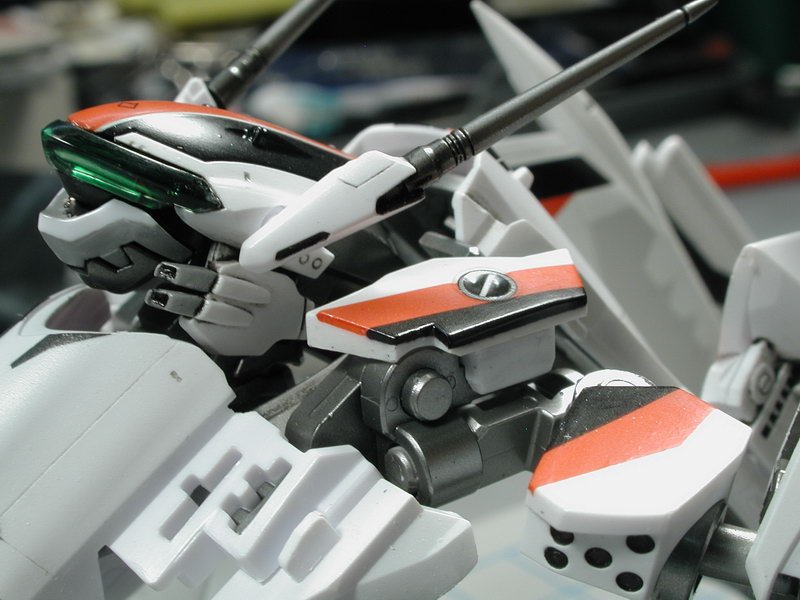
Now I took those little shoulder shield pieces out to apply the #2 black/red border surround, after a lot of tweaking I finally got it where I wanted them and got them to lay down flat against the plastic. I then painted the white areas around the outside black up to the decal so it looked more like the anime marking. Why Bandai didn't include more black border to allow this to happen without painting I'd never know. I also dabbed a little silver in the end of the head sensor piece, then some Tamiya clear green and used my black gundam marker to edge around it (I had considered hollowing it out, but it was so small and I already had to do so much to get to this stage that I feel like just taking the short-cut way out of this one. (sorry for the blurry photo, it's so small that I had to hand hold both the piece and camera). These photos show the model in partial transformation to get at all the edges of the back piece to allow me to clear coat them to protect the edges from chipping. I hand brushed Model Master Acryl semi-gloss clear coat on them. I hand brushed because I wanted several thick coats - it would take dozens of airbrush coats to come up to the thickness of a few hand brushed coats. The problem is the edge, the clear coat doesn't like to stick to any edge conditions, so you have to build it up in layers, the problem is that when you build it up, it makes the parts bigger and the transformation may not be as tight due to the slight over sizing of the parts due to the multiple clear coats. Oh, well, its a lose-lose situation if you want to use this model as a transformable toy. I'd be happy if it stands up to a few transformations, enough for a photoshoot without damage. Lastly another shot of the decal #52 and that its undersized, but not evenly so, its actually not the correct shape, not just uniformly too small. You can see the horrible dot screening in the purple area. I may paint it next time (omg, I have 3 more of these too build... argh!) Lastly it will sit in this dissassembled state for the next few days as I add a few more clear coat layers - then I will transform it back into the plane mode to add the additional warning data stencils. The remaining forward LERX nav lights and wingtip lights I was planning to not use the decals and paint some silver with clear red at the end with a coat of future, it looks better than the decals.


-
1/72 Bandai VF-25F Messiah build-up step-by-step (sort of)
wm cheng replied to wm cheng's topic in The Workshop!
Now I leave to dry and disassemble the model again to get to parts that are only revealed in Battroid mode. Also this allows me to get at all the edges of this complicated back red/black stripe pattern - I use the black marker and red sharpie to edges around all the pieces and fill in the white slivers left by the decal movement. Once I apply a clear-coat to protect it, the black marker and red sharpie are a pretty good match on the white paint to blend in the areas left behind by the decals.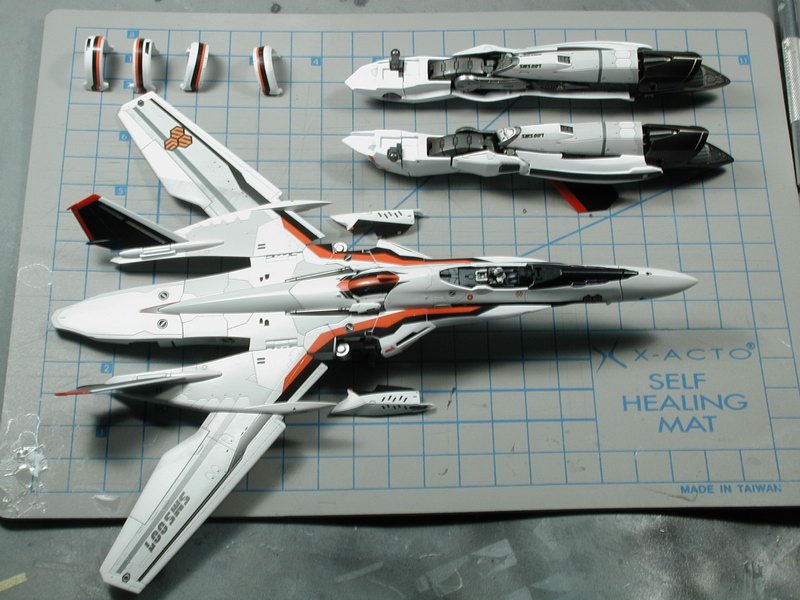
-
1/72 Bandai VF-25F Messiah build-up step-by-step (sort of)
wm cheng replied to wm cheng's topic in The Workshop!
Thanks for the translations! I'm such a banana!! ;-) I too would like to go back and re-learn some of the stuff I forgot in my earlier days - but sadly I don't have the old threads, I have all the old photos, but I have no record of the stuff I typed. Well I got a full day 2 weeks ago and a few hours this last Victoria Day weekend to finish (don't get you're hopes up) the Bandai supplied decals on this bird. Keep in mind that this is the first stage of decals, there are other warning data stenciling (like "no step") that I want to add, some more oil wash over the decals to allow the panel lines to run through them, some post shading weathering to lighten them and tie them in (look a little bleached and faded into the white to look painted in) and some oil staining and streaking over them on the moveable surfaces (I will keep the weathering light on these since they don't seem to be as used as the VF-0). Of course to protect all this delicate weathering with many, many, many protective coats of sealant (semi-gloss clear coats). Ok, first off, my thoughts on the Bandai decals... they aren't the greatest unfortunately. They are better than the Revell or AMT stuff of the 80s, but they are definitely not state of the art or even what I'd expect from a tier A Japanese company. I'm quite dissapointed. My issues; 1. They achieve their colours by screening. WTF?! Its the newsprint pattern of dots that I'm talking about, good quality decals are "spot colours" which means every colour on the decals is achieved by the actual ink in that colour - not mixed together through some pattern of dots - very amaturish, and gives the finished model a toy-like appearance - definite giveaway that decals were used for the markings (the whole goal of good decalling is to make it look like its painted on - no one paints a pattern of dots?!). Its most apparent on the lighter colours such as the orange in the SMS symbol or purple areas, but even in extreme close up you can make out some patterning even in the blacks! Very dissappointing. 2. The do not react at all to MicroSET and hardly react at all to MicroSOL (decal setting solvent). I don't know what they are made of, but you can dump a bottle of MicroSOL on this stuff and it won't melt the decal. Good if you don't want to damage them, bad if you want them to conform to unusual contours. The decals themselves are quite thick, and do not conform to a lot of the unusual contours well anyways. #17 on the rear ankle didn't conform well (it didn't help that it wasn't printed in the correct curve to start with) and #2 red/black borders on the shoulders didn't conform well to the 3D shape. I wonder if I used some other type of decal setting solution such as Mr. Mark or Mr. Setter would work better? 3. Not only are the decals thick with a lot of excess carrier film that needs to be trimed off around each image, they are brittle. The decals from a Korean manufacturer Academy (my recent F-16CJ in 1/72 scale) were amazing!! The carrier film hardly needed to be trimed and they were so thin that they appeared painted on even without MicroSOL. I was expecting more of the same, if the Korean manufacturer could do it, then of course Bandai could, but I was sadly mistaken. Its so weird that they are thick decals (don't like to telegraph much detail through them) but they are also brittle and tended to flake apart as I was moving them around. There are several where I had to piece some broken pieces together. It may be a bad reaction to my MicroSET/MicroSOL combination, but I consider myself pretty good at decaling and still flaked at least 3 spots. I actually accidentally flaked a piece after it had dried on the model just through handling - that has never happened to me before, I thought once it has set, it's pretty permanent. Funny though, once it has dried, I cannot re-soak it or apply liberal MicroSOL to lift it back up to move it - its really weird stuff, I've never come across this type of decal before. Needless to say, I didn't like it. ;-( 4. They're not cut to the right size or the right pattern! Come on Bandai!! This is modeling making 101, yes there are some contours, but the least you could do is work out the proper 2D patterns and create the artwork to the right size or curvature. Luckily thanks to David, I was made aware that the red rudder and ventral fin edges don't fit so I painted those. And luckily the head decal #15 with the two thin white stripes actually fit, I was lead to believe that they didn't work out and the white fell in between the cracks, but it did work out. The curvature of the two top ankle bits #17 were the worst, they had to bunch up to maintain the curvature of the part and no amount of MicroSOL (since it had little if no effect) would cure this - funny since the lower ankle ring (decal #5 are properly curved to fit the part). Additionally #2 took a few tries to lay it properly and then still a lot of finaggling to get it lay down correctly, I'd suggest to cut a slice at the 4 corners so they can fold and lay flat. Remarkably decal #16 fit perfectly?! and its one of the most complicated contours I couldn't believe it was a single decal - but it worked out. #52 is undersized and don't follow the panel lines and of course the black stripes #54 the thruster doesn't line up with the molded detail on the plastic. I think I will add some plant-on detail to cover this up. Anyways, my suggestion is to assemble the aircraft in the plane mode - get all the pieces of the back plate aligned as best you can and decal the red stripes #24,25,26,27 all together - that way you can move them about, tweak here and there so the red and black parts line up and create a continuous pattern. Since they are not too accurately created, it will create some slight white cracks on the edges in order to line up the pattern. I had to fiddle for hours to get both sides looking good and leave the edges for a later step. Once its in position, I left it alone to dry and set. Then my plan was to fill in the white slivers at the edges with a black Gundam Marker and red sharpie marker. In fact I tried to extend the decals to wrap around and down each of the edges slightly - since this is what you'd see if some of the back panel pieces are improperly aligned - it will minimize the effect of seeing the cracks which accentuates the misalignment. I just wished they oversized the decals to allow some wrap-around - but they didn't. Hey, I'd just be happy if they were the correct shapes - they couldn't even get that right?! This edge condition will get sealed in and protected by clear coat.