wm cheng
-
Posts
4311 -
Joined
-
Last visited
Content Type
Profiles
Forums
Events
Gallery
Everything posted by wm cheng
-

Bandai 1/72 Scale Macross Frontier Plastic Models
wm cheng replied to Graham's topic in Hall Of The Super Topics
I love 1/72 scale! I can't wait for these suckers... if they're anything like the Bandai EX line for the Yukikaze, then I'd be satisfied (I only wished they were larger, with landing gears more in scale, they were too chunky for the size). However, they aren't cheap - in fact they were quite pricey for little 1/100 models and they were limited release too. Also with the first SuperSlyph, they made a version 1.5 which corrected some mistakes of the first kit and added much needed decals too - so it punished the early adopters too (me included - oh well...) -
They look great! I'm glad that people are taking the time to eliminate the seams and touching them up. I'm also happy that they went with waterslide decals instead of stickers - a little harder to put on, but looks so much better. Definitely worth the effort. Through all the great work on this thread here, its convinced me to order up a set of my own - thanks! Wonderful little gems! I think they can look pretty wonderful with minimal effort. I'd like to see if I can miniaturize my Hasegawa decal set to 1/144 and print them with our colour laser - they mostly go on white surfaces anyways. I might be crazy enough to decal all the "NO STEP" stenciling onto one of these little birds!
-
The PlayStation 3 Thread 80GB Edition
wm cheng replied to Gaijin's topic in Hall Of The Super Topics
Thanks, but what if its the only demo I've been interested in downloading? Its the only one I've got - can't I default the PS3 startup to something else other than demos? -
The PlayStation 3 Thread 80GB Edition
wm cheng replied to Gaijin's topic in Hall Of The Super Topics
I've downloaded the Gran Turismo HD demo - is there anyway to get it to not go onto the GT HD demo screen and music everytime I turn on the PS3? -
Can anyone help me as to where I can get a full set of Vol 1 & Vol 2? preferably or the random boxes of 10 as long as they are the same price or cheaper than the full sets. (other than HLJ) If I get a case of 10 each, are my chances pretty good at getting a complete set out of that?
-
So where are you guys buying these from and how much are you paying for them? Any place in Toronto?
-
OK, I'll jump on this as well, but I'm looking for a complete set of both series (not the whole random box thing) and I'd rather hear first from the members of this great board than go to ebay as an alternative. Or, can anyone suggest a reputable online store to purchase a complete set from at reasonable prices? I'm in the Toronto, Canada area - anyone with extras in the area - I might even treat them to a private viewing of my model collection... ;-)
-
Thanks for sharing! Very nice collection. A question, what are those plexiglas covered display cases? I've been looking for something to cover my Valks for a long time, but never found anything that would fit aircrafft, most of the cases I've seen are for model cars and are shaped like rectangular shoeboxes.
-
Here! here! with the writers strike, there's no TV (of any kind other than crappy reality shows) anymore! It at least encouraging to see any type of effort put into any new show, especially a science fiction show (they cost more to produce and draws a much narrower slice of the demographics - its such a hard sell to get any sci-fi made!).
-
I would 3rd that!
-
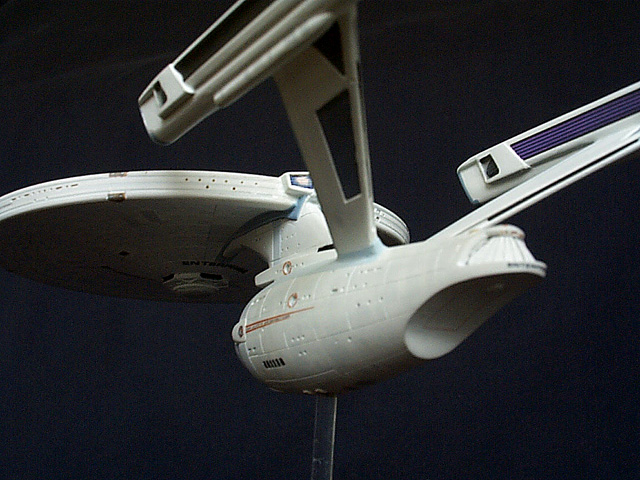
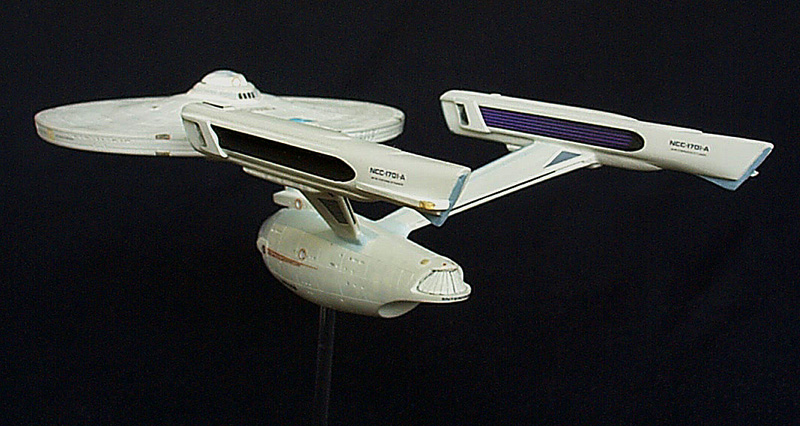
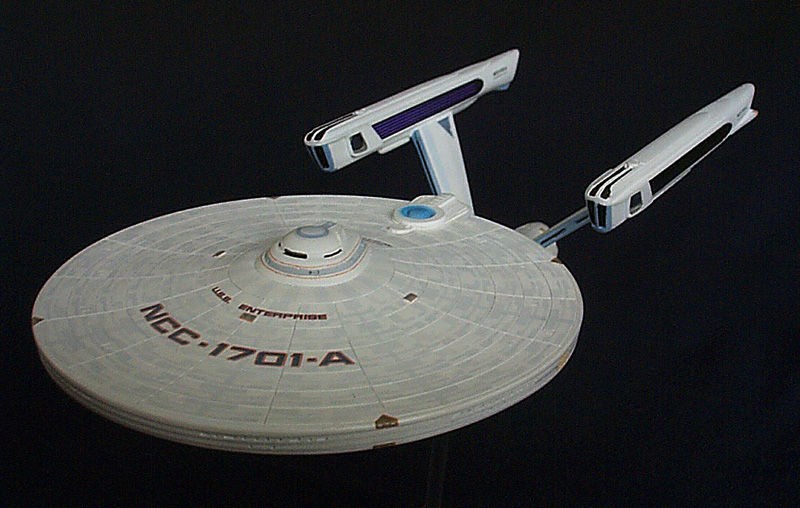
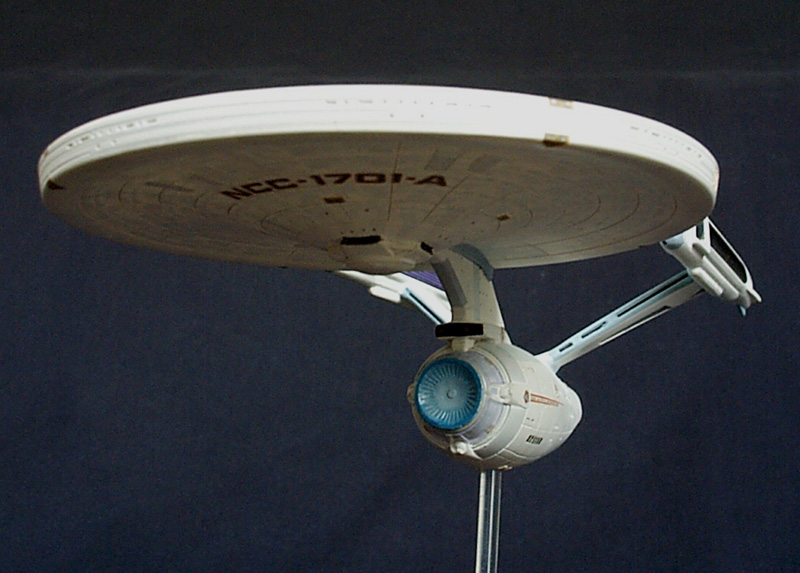
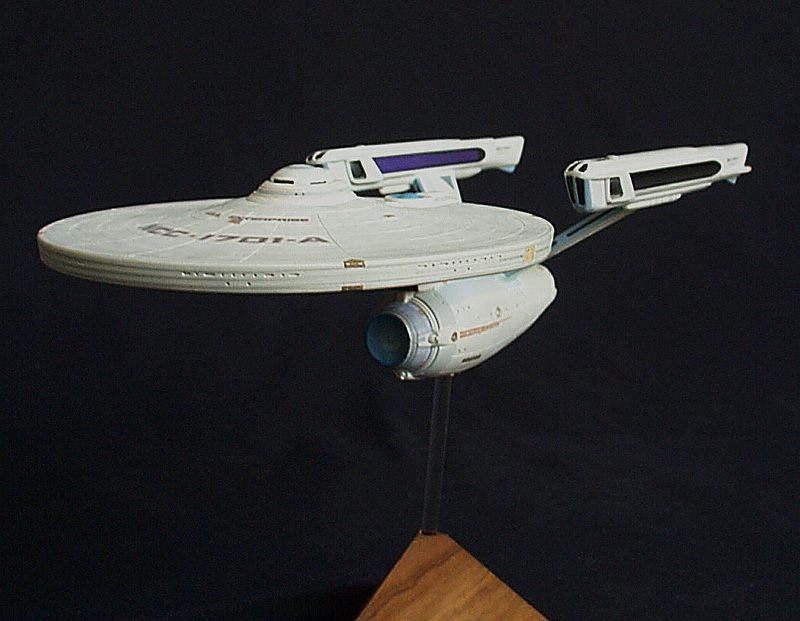
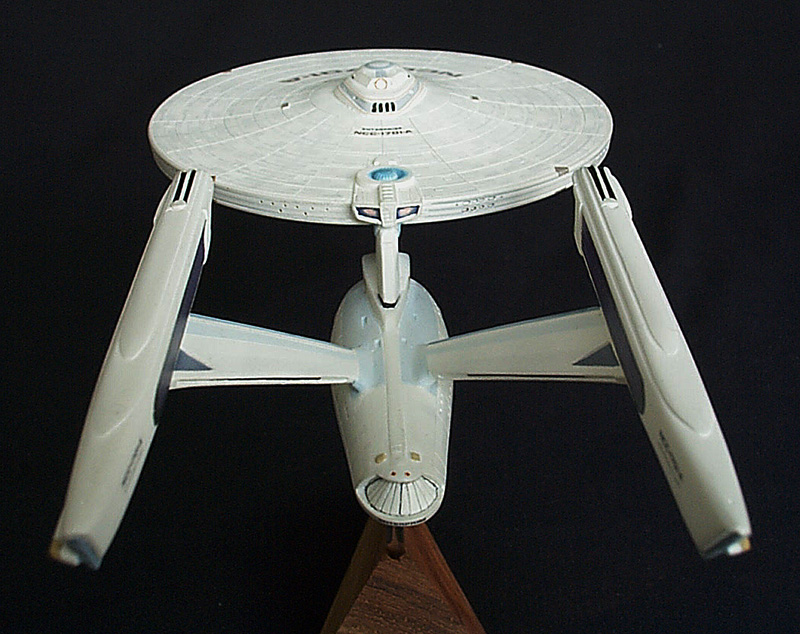
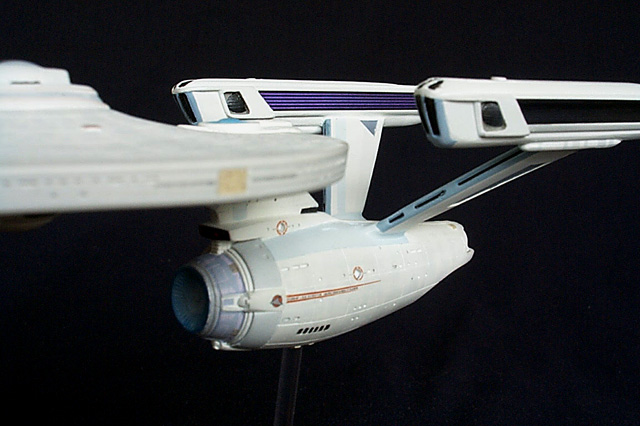
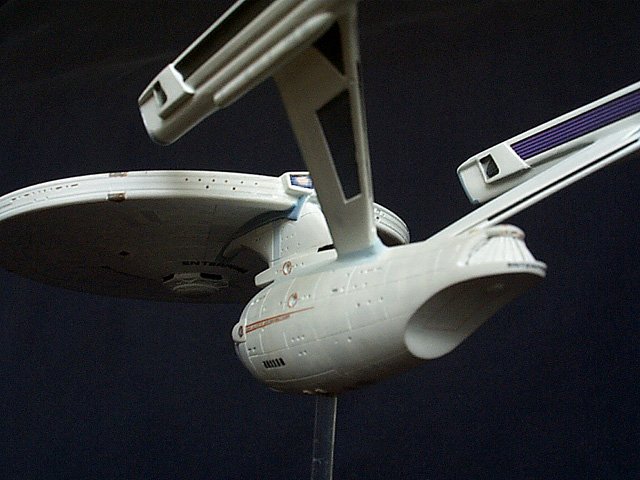
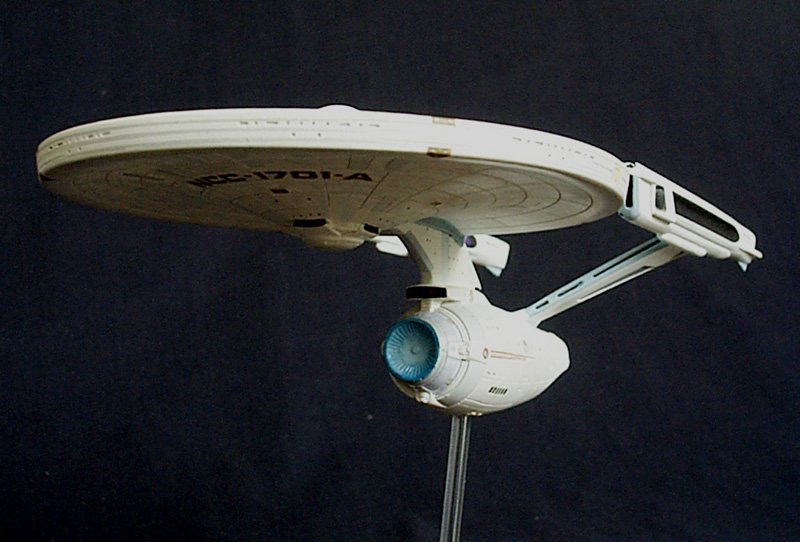
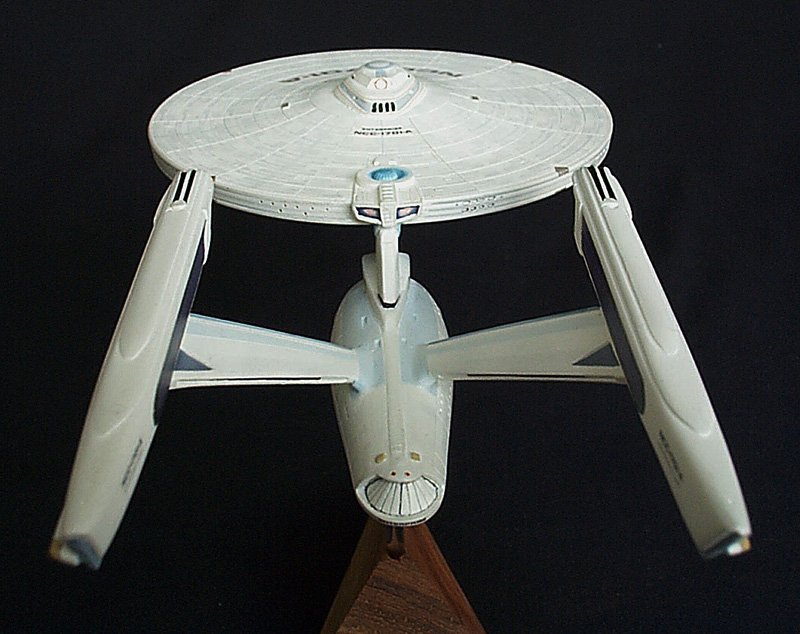
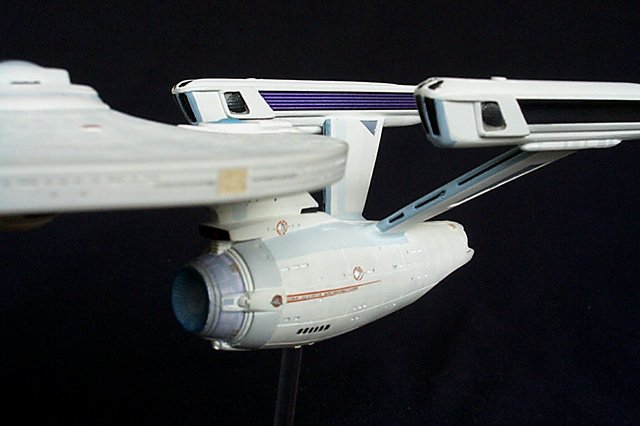
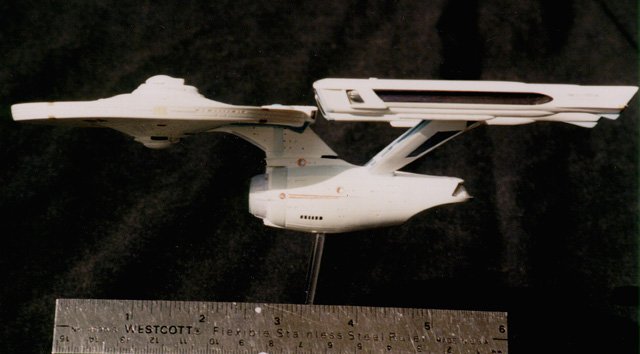
Hey HWR MKII - I wished I knew about your 1/1400 build, I did my Enterprise (same kit as yours I believe) over ten years ago (I think when the kit first came out) and I spent the time scanning all the parts in and making decals for everything, even down to the tiny Federation stenciling on either side of the main entry hatch on the primary saucer and text on either side of the red docking ring. If you're interested I can see if I can dig up the old graphics, I think I did them in photoshop with the correct fonts, but I have to go through my old back ups - they were outputted to a colour laser printer. Here are some shots of the finished model - state of digital photographic technology is pretty poor back then so the photos don't really do it justice. BTW, all the paneling was airbrushed on, I went and drafted the aztec pattern in CAD and printed it onto frisket film - this was way before they had the pattern available as a decal - I'm a sucker for punishment!! I also did the matte/semi-gloss thing to differenciate the panel patterning - which was a bitch on something this small. I remember there was a lot of work in correcting warpage, inconsistent thicknesses, sloppy molding - generally it really was a US made yellow resin garage kit, but the only decent thing available at the time - certainly nothing like these newer Japanese Resin kits


-
The PlayStation 3 Thread 80GB Edition
wm cheng replied to Gaijin's topic in Hall Of The Super Topics
So when does Ace Combat come out for the PS3? Are they still in that XBox360 exclusive contract or can we expect to see AC6 sometime soon? -
Anyone know how much in the way of turnaround time we can expect....
wm cheng replied to SebastianP's topic in Model kits
I agree if Hasegawa finally gets around to a VF-25, it will probably be 1/72 and be amazing. I am definitely waiting for one of these (but I won't hold my breath, I would guess its still years away). If its Bandai, it could be a EX kit (which I hope, since they are really quite nice - hey HWR MKII, you should look at their Yukikaze fighter kits, the engraved panel lines are even more crisp than Hasegawa and more in keeping to 1/100 scale than Hasegawa's exaggerated 1/72 scale - not that I'm knocking Hasegawa, but some of the Bandai EX kits are extrodinary) if its a EX, then it will probaby be 1/100. Most of their EX aircraft (which I have) Yukikaze series, Yamato fighters and the Ace Combat Falken are all 1/100 scale and are excellent in terms of panel line details and shape. They can't do landing gears though, they are all too heavy and thick for the scale. I also have the Bandai 1/350 Yamato kit, and its really superb - their molding technology is just incredible. Bandai can do high quality stuff when they want to, but its just who are their target audience/consumer, the 12 yr old that actually watches the cartoon or the adult collector? -
High Definition Media & Technology Thread
wm cheng replied to JsARCLIGHT's topic in Hall Of The Super Topics
Hey JsARCLIGHT, I would be interested in what you consider as the flagship or demo-worthy BR-DVD titles (I'm interested in building up my collection). I find that the new Blade Runner is a simply amazing transfer and is my demo disk (tons of inky blacks! very 3D). I'll jump in finally (been a lurker on this thread for months - but I finally got a HD 1080p projector Panasonic PT-AE2000 with a 100" screen and a PS3 over the Holidays) as I finally have some experience in the issue now. I was format neutral and wanted to sit and wait the war out - being an original Beta AND Laserdisc owner, I am understandably cautious when another format war opens up. However, after getting a taste of HD on a 100" screen - I just had to jump in, plus the PS3 upscales and deinterlaces SD-DVDs so much better than any of my existing DVD players did. Hmm spend $200 on a decent Oppi DVD player or $400 for a new blu-ray player that networks and plays media from my desktop upstairs and allows me onto the internet while in the basement - seemed like a no brainer for me. Ultimately it was the cheap cost of the PS3 and that it had more titles that I was interested in that won me over. Plus I swore I would never own any Toshiba equipment again! I've literally thrown away a Toshiba TV, VCR and HTiB DVD/Amp/Speaker combo and my wife even supported me doing so - since she experienced how infuriating I was when ever I used such poorly designed cheap crap!! The mere fact that Toshiba was the only manufacturer that produced HD-DVD players pretty much made my decision for me. From the hardware side, you've got Sony, Panasonic, Denon, Marantz, Onkyo, Pioneer, LG, Samsung - almost all the major A/V players and NOT a computer software company running the show. Just like cameras, I would stick with Nikon or Canon (traditional photographic manufacturers) instead of the Casio, HP or other computer manufacturers. Thats just my cent and a half. I am glad the war is coming to an end mostly because I hope once it ends, most of the titles I care about will be released - the current crop is slim pickins. And its nice to finally be on the winning side for once (and porn wasn't the deciding factor this time around - did we grow as a society?! ) -
Sorry if I missed it in these 128pgs, but has Graham or anyone else (anywhere else) made a transformation guide for this puppy yet? I still haven't transformed my baby yet...
-
The PlayStation 3 Thread 80GB Edition
wm cheng replied to Gaijin's topic in Hall Of The Super Topics
Oh! thats such great news!! thanks Gaijin... Getting a 1080p projector in the next few weeks and a 100" screen, the reason I wanted to get a blu-ray player (and PS3 being the cheapest BR player around was just a bonus!) - now I can look forward to AC6 on 100" screen in 1080p!! I love Ace Combat! Yay! thanks. -
The PlayStation 3 Thread 80GB Edition
wm cheng replied to Gaijin's topic in Hall Of The Super Topics
A question: does the USB flightstick controllers from Ace Combat 5 (PS2) work on newer PS3 consoles? If so, are there any decent Ace Combat like flight games for the PS3 (I understand that AC6 is only for XBox360 right?)? Thanks, -
Hey redfinger61 - 1/2" wouldn't be overkill... get the thickest, or at least vertically tallest metal stock you can find inside that arm! it can be quite laterally thin, just tall. I'd go with 1/2" bar stock at least 1/2" the way up the arm, then dress it out with gak to hide it. I mounted my arm horizontal and after a bit of time, it has unfortunately begun to sag considerably (you'd think a 1/72 Hasegawa kit wasn't that heavy?!) I suppose if you mounted the arm vertically it wouldn't sag as much. But if I were to do it again, I'd definitely beef up the metal stock inside the arm. Just something to look out for - you can tell the sag especially because the secondary arm holding the light "GO" unit is still straight and provides a contrast to the arm holding the Valkyrie.
-
Take your time - I understand busy. I for one ain't transforming it till your review... no pressure!
-
Great job!! I love the weathering - armour is so rich in textures to detail, and you did a fantastic job bringing them out. Keep posting, I can only get my "fix" living vicariously through you! Keep up the great work. And, yeah... where do you keep it all?
-
What is the "blue & purple" art book? Is that the same as that small one that came with the DVD? or is there something else out there - I really would like anything there is on their technology mech designs - love the aircrafts!
-
High Definition Media & Technology Thread
wm cheng replied to JsARCLIGHT's topic in Hall Of The Super Topics
I've found the exact same thing! it really bugs me too... However, through some trial and error (just my opinion, with no technical knowledge behind what I'm about to say) I found that my cheapo Toshiba Home Theatre in a Box all in one thingy in the bedroom to be much worse at this dialogue being quiet than my basement home theatre with a IMHO fantastic 2nd generation Sony DVD (back then when they cost $600 and weighed 50lbs) and a decent Yamaha amp with a separate DSP decoding the Dolby Digital signal - plus much larger and better speakers. So I would suspect that the el-cheapo HTIB doesn't decode the soundtrack properly or as well as some other systems. What I do is turn up the centre channel - usually you can adjust the volume and delay for the individual speakers to tune it to your room and speaker placement - I found that if you boost the centre channel speakers, the majority of the dialogue comes through this channel (not exclusively, but mostly) and you can also turn down the rear left and right channels if you find the ambient stuff too distracting (this is usually the effects channels). I hate it when there is important dialog going on at a restaurant, and you can hear the nonsense conversations around you almost as well as the main actors. I've been finding that with broadcast TV, the dialog is quiet too, but when the commercials hit - WHAM! its so loud... -
No, unfortunately not... it was just too expensive and the proportions were too high. I am hoping that this "re-issue" might address the tall proportions and make it a little more affordable. Any news on the "re-issue" would be appreciated!
-
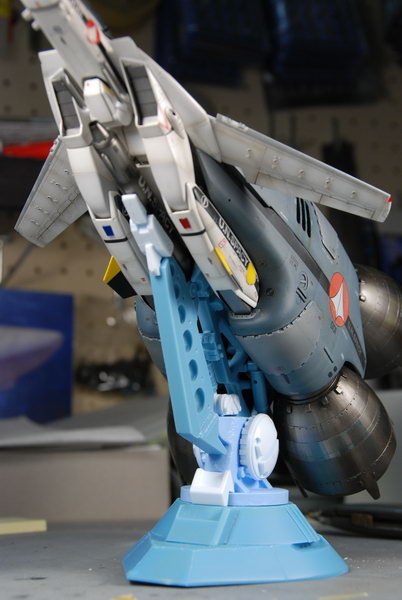
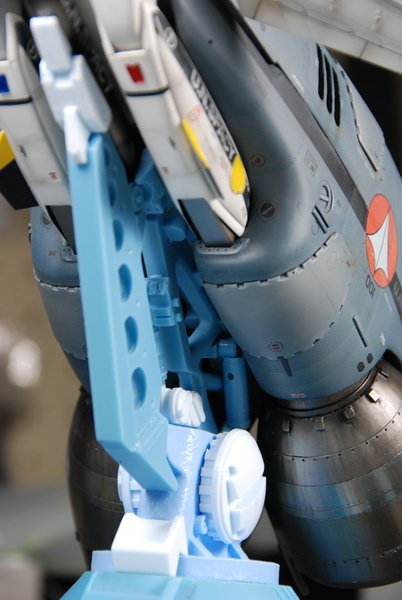
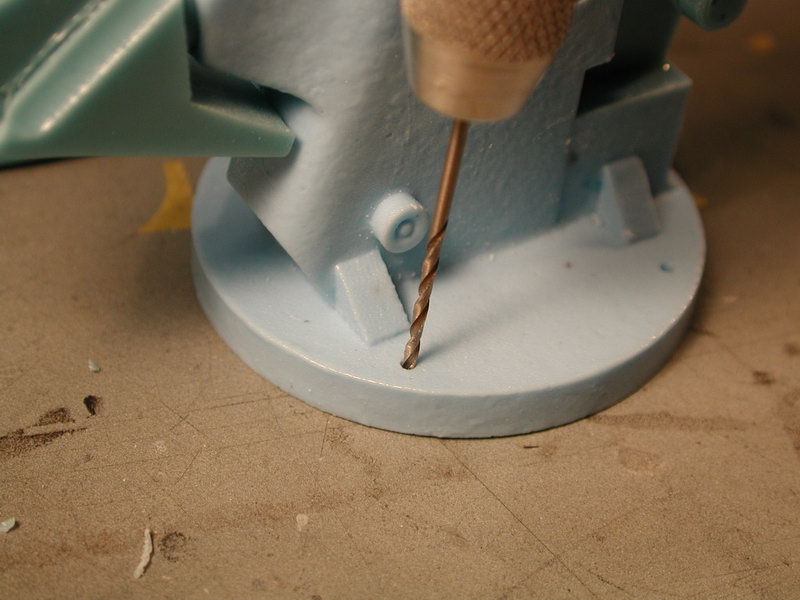
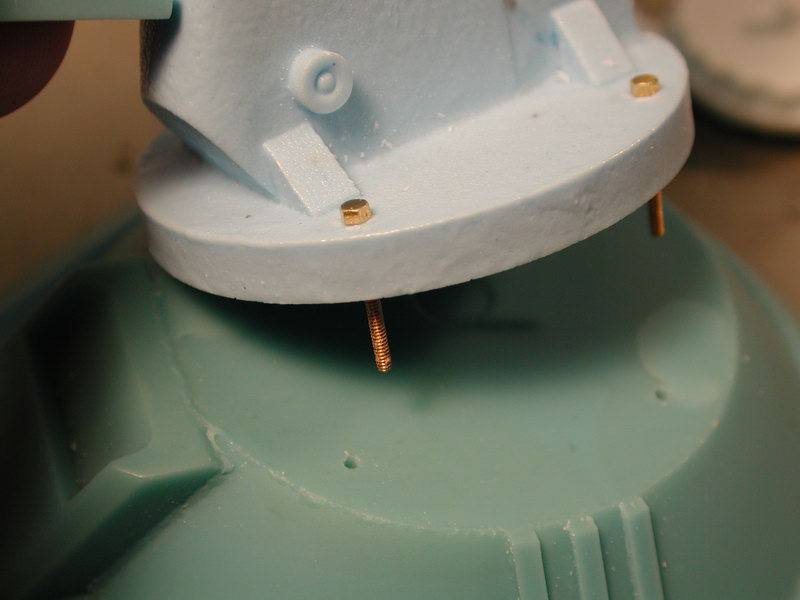
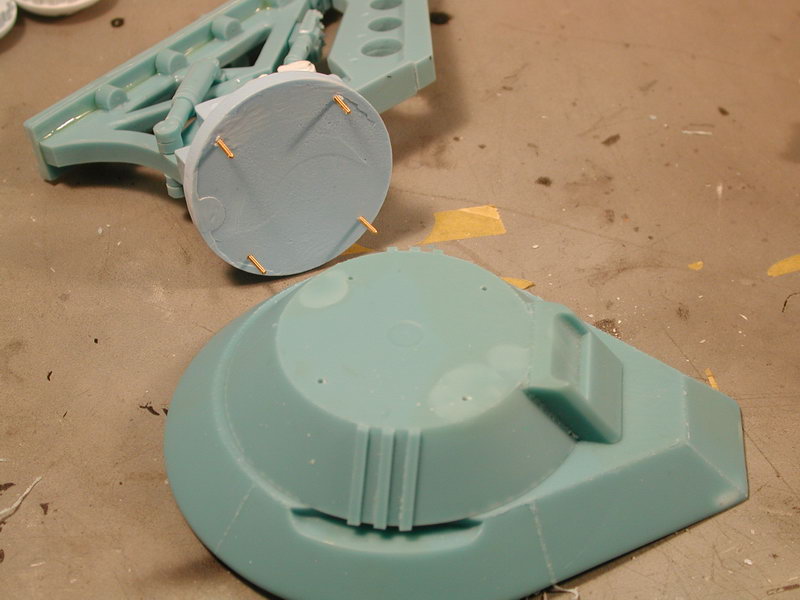
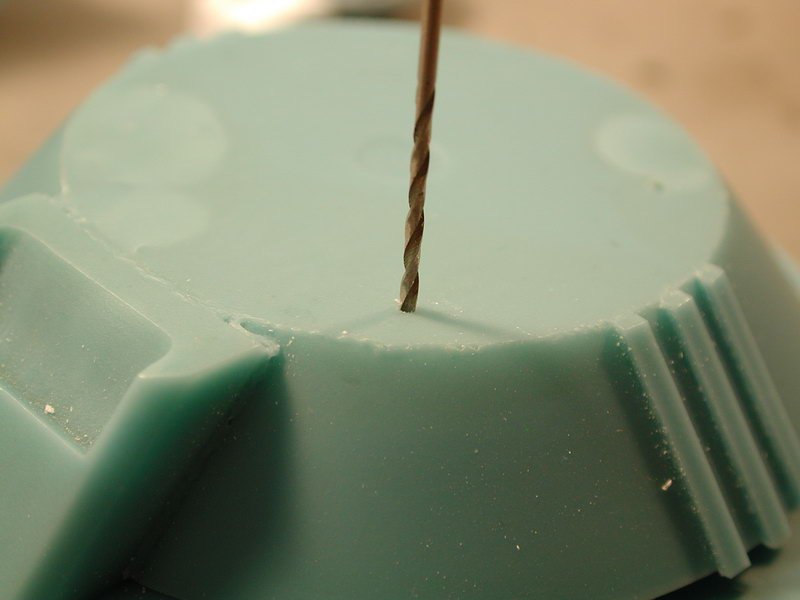
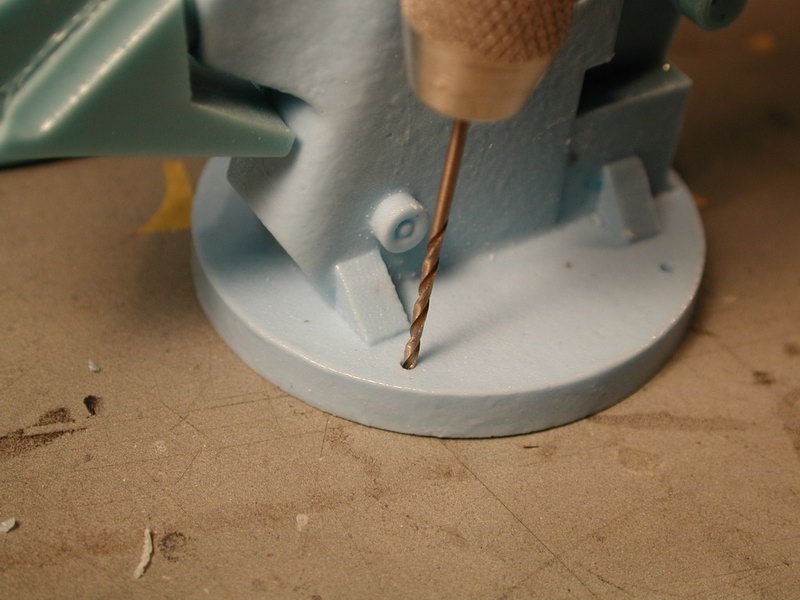
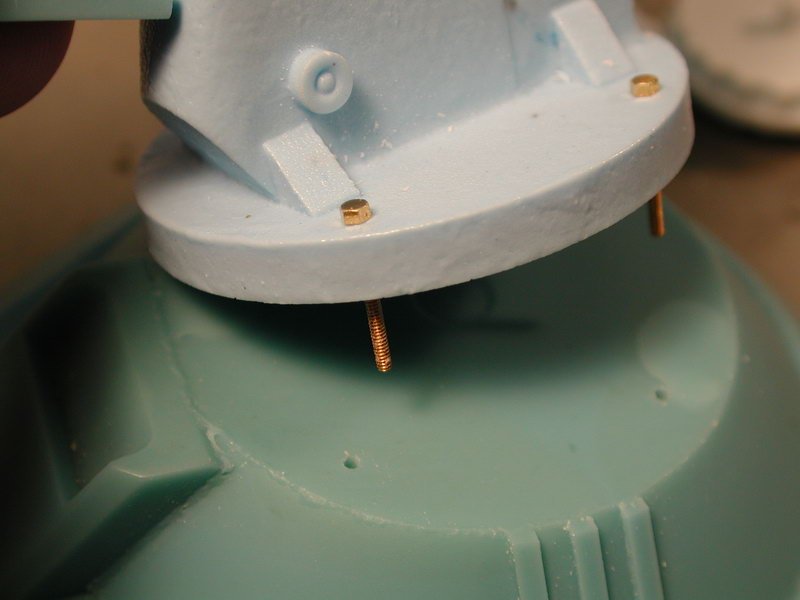
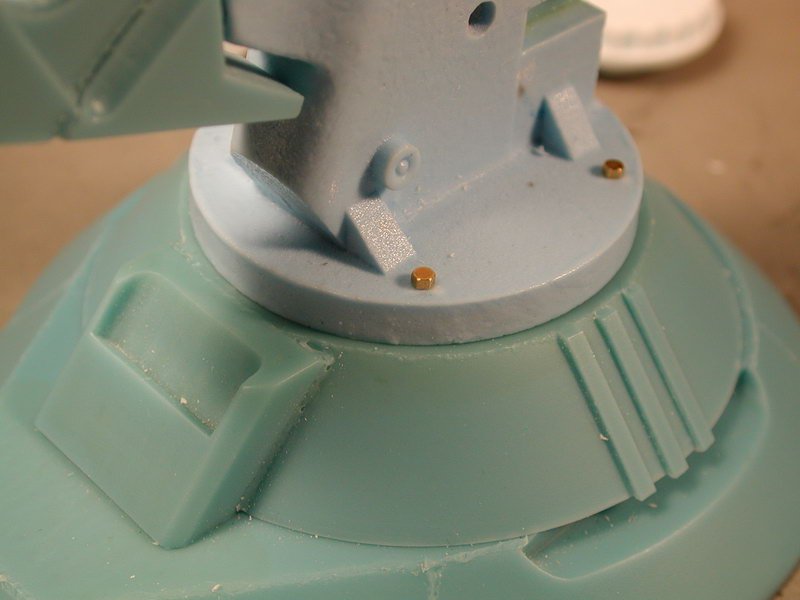
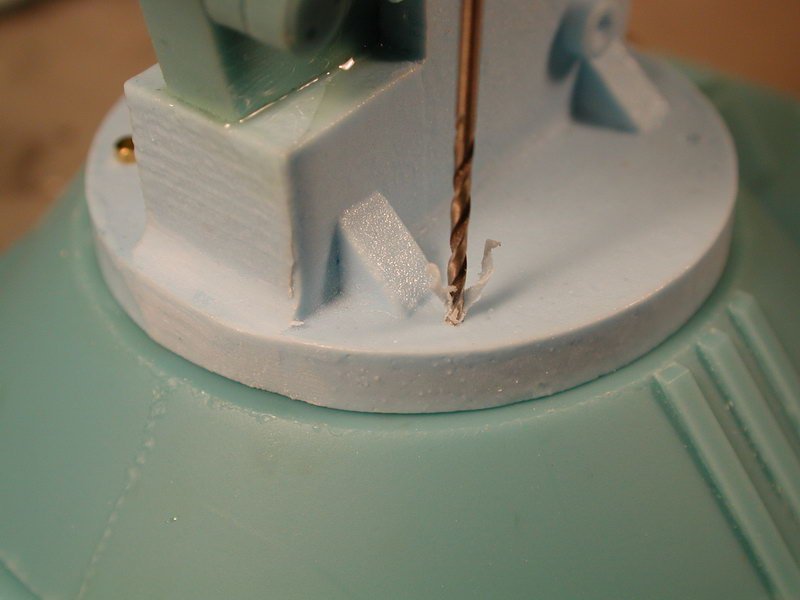
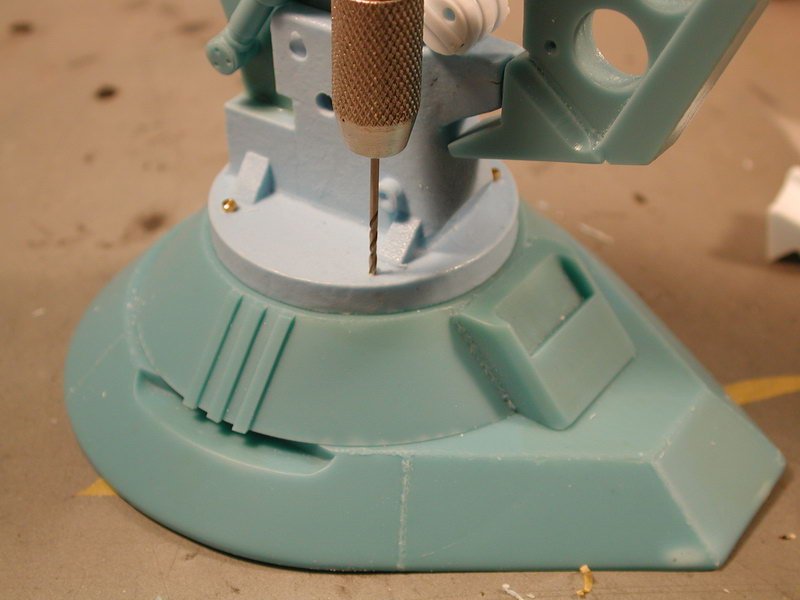
Now to finally glue the main launch rail supports to the base section. The Captain had graciously included these tiny brass hex bolts (they're fantastic, I never knew they made them so small!) to attach the main support to the base. I am using them as location pins, but the actual strength will come from 5 minute epoxy cement. The kit has divits where the holes for the brass bolts should be, I just followed them and used my pin vise to create the holes. The holes line up perfectly, but just in case (since I'm pretty paranoid with shrinkage and such) I drilled all the holes on the upper support piece first, fed the brass bolts through, and lined them up to see if they actually land on the divits on the base piece - and of course true to John's fastidious nature, they line up perfectly. However, I would always drill from the top down and proceed around just in case sometimes they don't line up properly due to some warpage or uneven shrinkage in resin - remember resin garage kits aren't always as high quality as John's sculpts (I guess I'm old school and used to some pretty crappy resin offerings in the past) Once its properly located, I rough up the mating surfaces above and below and slather on some 5 minute epoxy cement and glue the two main sections together. That's it for now... (oh, this last batch of photos are not colour correct, they are with my older Nikon990 and have a incandescent colour cast to them)

-
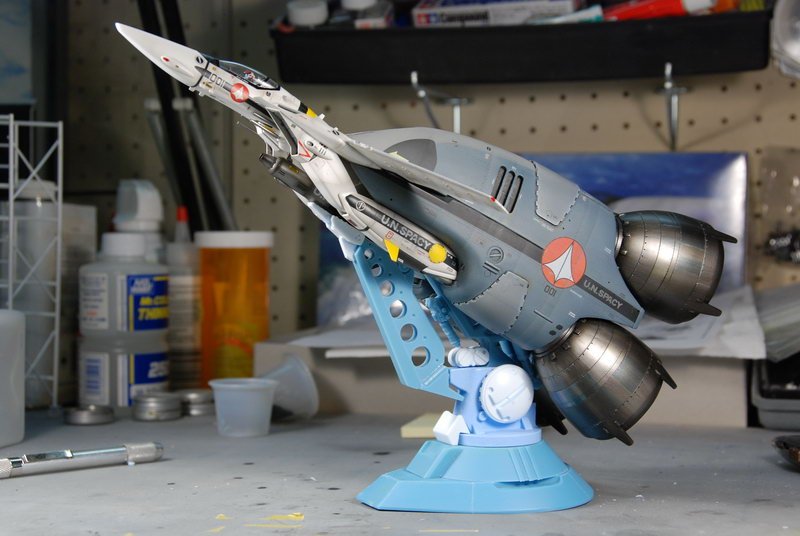
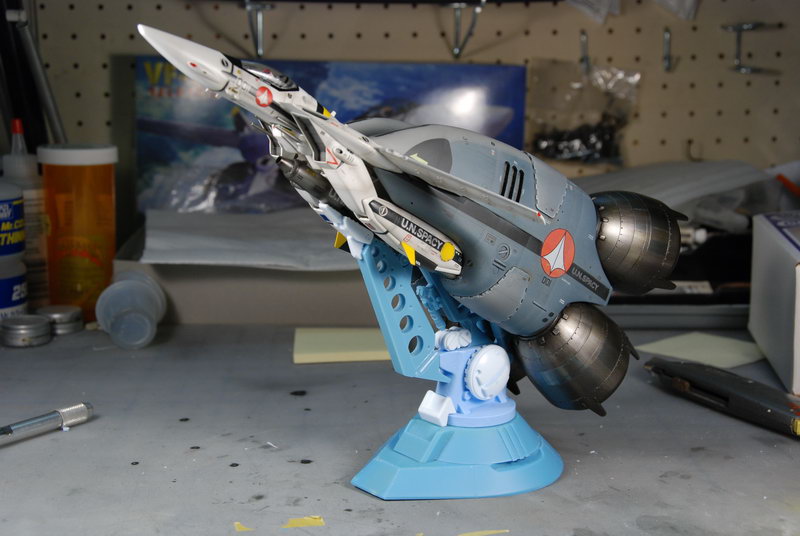
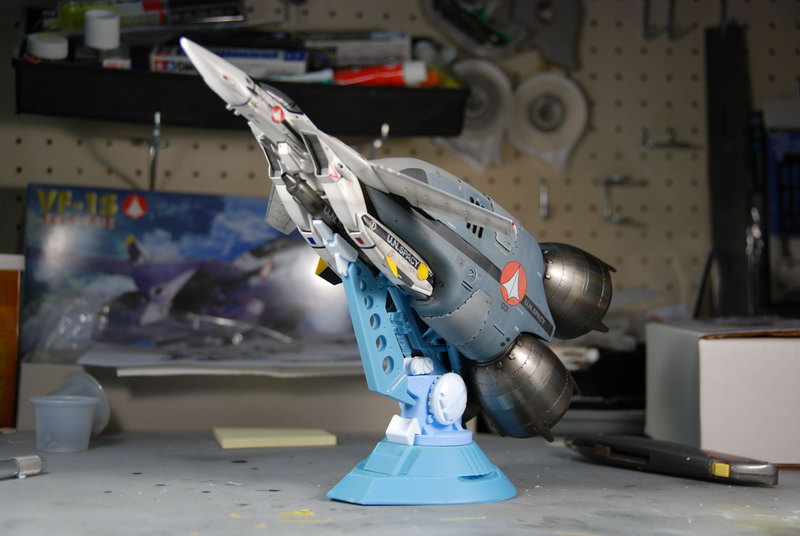
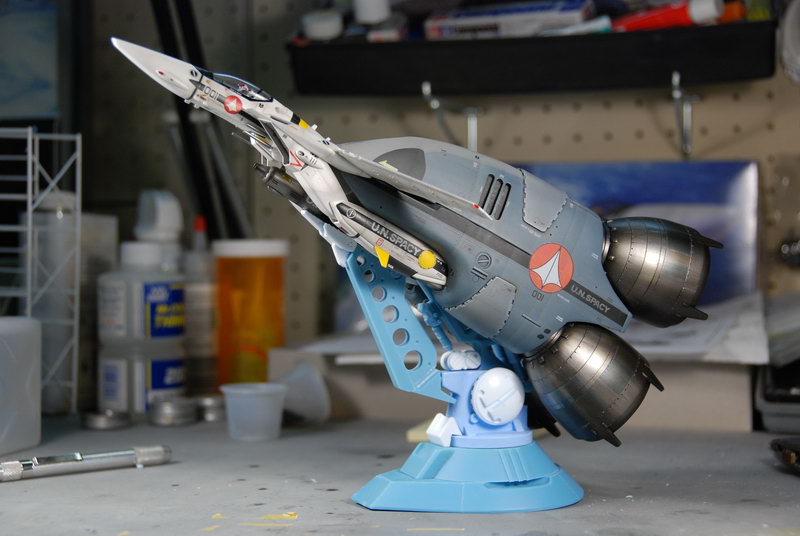
So I flipped the whole thing around to check on stability. Its really tight and snug - just the way I want it, since its going to be sitting on this launch rail 90% of the time. The gunpod modifications really lock the whole rail thing together. Its starting to come together - I can't wait to start painting this thing! I still need to assemble the entire thing and add a few greebles here and there. Now that its finally together, it has confirmed a sneaking suspicion of mine, its a little too tall and lean. I just wish it was a little lower or squatter - it seems as though the whole thing including the boosters could be 10-15% shorter and 10-15% wider - IMHO it would convey the sense of weight more convincingly and be closer to the lineart. (just my 2 cents - but it does seem to match the Launch Vehicle produced - I wish that was 20% lower and fatter too).