Die, Alien Scum!
-
Posts
606 -
Joined
-
Last visited
Content Type
Profiles
Forums
Events
Gallery
Everything posted by Die, Alien Scum!
-
Welcome to MW. First and foremost before anyone screams at you for being a noob and not using the search function - it's not working again. That said, read on... I don't know how much experience you have with the 1/60 line, but you'll find that many of us here have vastly different opinions on the matter. Personally, I like my 1/60s while others think they downright suck. As display pieces they're nice, but for play, they're not very user-friendly. For a review of the 1/60 VF-1J, look here. Though this review is for the Super version, the valk itself is exactly the same. As for the GBP armor, it's alright. Some of it's pros are that all the missile hatches can open, unlike the old school Takatoku 1/55 GBP. Also, it's a nice addition to the most complete line of Yamato's Macross toys. Truly, that's about it. Here's a few of its lesser points: first of all, the front and rear crotch pieces don't fit together particularly well, thus the front piece has a real tendency to fall off. Second, the missiles are molded into the armor so you can't remove them. Third, the hip armors don't really allow you to splay the legs open, so you're pretty much stuck with it standing straight-legged. While the 1/60s really aren't all that poseable from the start, the added bulk of the GBP really limits your options. All in all, I'd say it's nice to have if you're a completist, but really not worth messing with if it's going to be your only valk. If that's the case, you're much better off getting a 1/48 valk and the GBP armor. Sure, it's a lot more expensive, but well worth it. Okay, I finally got the search function to work and found this. I don't know if it will be helpful since I didn't bother to read it - I was just happy the search finally worked.
-
Minmei's Birthday Guft From Hikaru
Die, Alien Scum! replied to gian7675's topic in Movies and TV Series
Damn, learn something new everyday. Now I won't get so pissed off every time Forrest gives Jenny his Medal of Honor. 400425[/snapback] I never loved anyone except my Jen-nay. There's another one who should've been bitchslapped! Okay, that's enough thread hijacking for now. Back to the topic. -
Newbie ANSWERS thread!
Die, Alien Scum! replied to Shin Densetsu Kai 7.0's topic in Hall Of The Super Topics
Huh, that's weird. Graham's review in the Yamato Toys section from the main page says that they fixed that nose cone problem when they released the Max 1A. I was under the impression that there's only been one release, which is why Max usually sells for a bit more than the others in the DYRL line. But then I'm no expert by any stretch of the imagination, so I could be way off. -
Newbie ANSWERS thread!
Die, Alien Scum! replied to Shin Densetsu Kai 7.0's topic in Hall Of The Super Topics
Are you sure about that, fansubs? I don't think the Max 1A was ever reissued. Someone please correct me if I'm wrong. -
I hope the production version doesn't come with that white antenna on the backpack. That looks messed up. Other than that, I like the look of this new Low-Vis. And I have to agree with Graham; that green gunpod looks sweet.
-
Any Fan Of Southern Cross Out There?
Die, Alien Scum! replied to guncross2's topic in Anime or Science Fiction
Here's the link to area-zero's eBay auction for Logan blueprints. -
You can transform from fighter to battroid and back in 30??? I'd like to see a vid of that. 399823[/snapback] Sorry, I should have been more specific - that's 30 seconds from fighter to battroid only. If I could do fighter to battroid to fighter that fast, I'd probably end up breaking something.
-
Yeah, I had a similar experience. For the first transformation, I'd say the worst part was not being able to read Japanese. I kept looking at the pictures and thinking, "How in the hell did they get that piece to move that way without snapping something?" I fumbled around with it for probably 45 minutes or so, trying my best not to break anything. When I heard that slight crack as you separate the cockpit section from the chestplate I almost had a heart attack! Of course, I then realized that I had done it properly and nothing was busted. Now, I'd say around 30 seconds is all I need. That goes up just a little if it has FAST Packs on because I always remove the boosters from the backpack first. I'm not taking any chances with extra weight that darn BP8!
-
Let's see 'em! Just because they might not have turned out like Kurt's or Jung's stuff doesn't mean they're not worth a look. If I'm brave enough to post pics of my crappy customs, so are you!
-
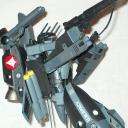
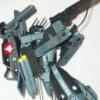
Yeah, I actually would have prefered to use Low-Viz grey kites on my Stealth, but the wing already has a red kite tampo printed on it and I thought it would look better to keep them all the same color.
-
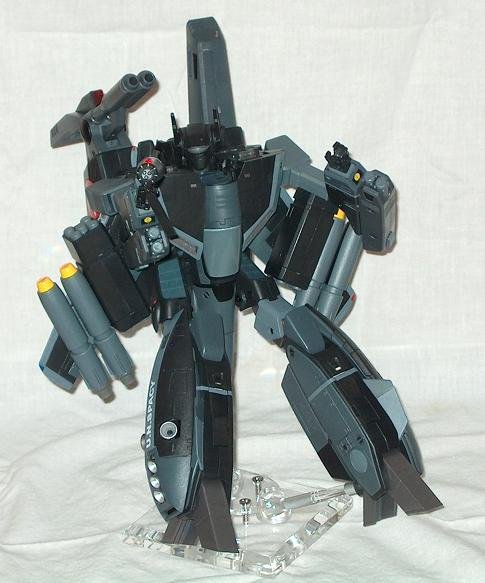
Thanks for the kind words, everyone. That flexistand has one of each length of rod. I find that mixing and matching the rods gives you a lot more options when it comes to your poses. The downside is that the screws that apply tension to the rods need to be extremely tight to hold up the weight of a valk with the FAST Packs or GBP attached, so you've got to be really careful not to strip the threads or crack the thin, notched piece that the screws go through. I've already cracked that piece on another stand, so be warned.
-
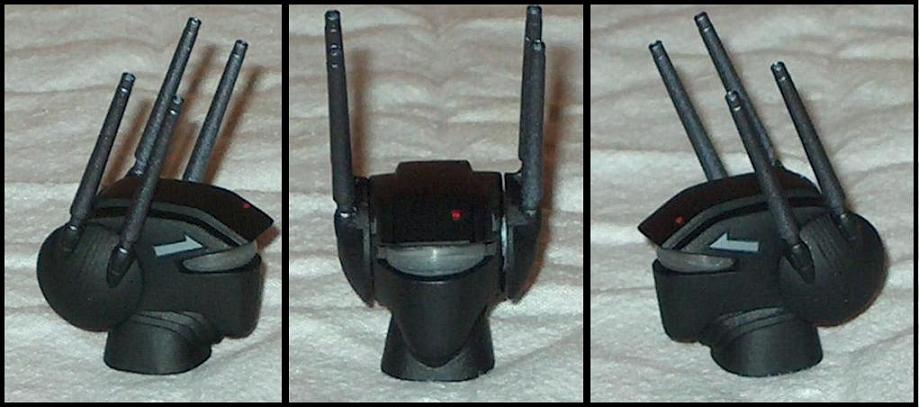
And for you, kyatsu, here's how I did this. Keep in mind this is a resin recast head that started out in five pieces: two head laser assemblies, two halves of the head, and the neck. 1. I cut the two head lasers from their sprue and trimmed, filed, and sanded away any extra material on them. I did the same for the neck and the two head pieces. Then I dry fit the pieces and again sanded any excess material left over and any high spots along the seams. 2. Next, I thoroughly scrubbed the parts with dishwashing liquid soap and a toothbrush to remove any resin dust and mold release agent and let them air dry. 3. I sprayed two light coats of primer on the neck and head lasers. When that was dry, I put the neck into one half of the head. I put a thin line of CA glue (super/crazy glue) along the seam and fit the other half of the head into place. This stuff sets up pretty fast, so I only had to hold the two pieces together for about 15 seconds. 4. After the glue had dried for about 5 minutes, I again sanded around the seam to remove any excess glue that had been pushed out. I then used a toothbrush to remove any resin dust and laid down a thin layer of putty across the entire length of the seam. After this dried for about 30 minutes, I filed and sanded away the excess, leaving only a thin strip that filled the seam. I used the toothbrush again to remove the leftover dust. 5. Next, I sprayed two light coats of primer on the head/neck assembly and let it dry. Then I gently wet-sanded the primer to remove any high spots and/or imperfections. After this, I again gave it a quick scrubbing with the toothbrush and dish soap, let it air dry, and sprayed another light coat of primer. 6. While the head/neck assembly was drying, I sprayed two light coats of gun-metal grey on the head lasers, focusing primarily on the barrels rather than their round bases. When this was dry, I taped off the barrels. 7. Then I sprayed several light coats of flat black on the bases of the lasers and the head/neck assembly. I can't remember how many coats of black I laid down, but it was at least four. After the head lasers were dry, I removed the tape from the barrels. 8. When the head/neck assembly was completely dry, I carefully taped off the two arrows on the sides of the head and sprayed two more light coats of black to seal the tape lines. This helps avoid any bleeding of the next color to be used. After this had dried, I sprayed three light coats of a medium grey on the arrows and let it dry. 9. Next, I peeled away the tape and added the red dot on the left front of the head with an extremely fine point paintbrush. Basically, I just placed a very small drop of red paint on the spot and carefully pulled it around until the circle was filled up to the shallow panel line around it. 10. After the paint had set up for several hours, I carefully rinsed the pieces with water to remove any dust that may have settled on them. I let them air dry and then sprayed several light coats of a matte finish clear coat on everything. I let this dry for several more hours. 11. I added a thin coat of clear nail polish to the posts on the back side of the head lasers and let it dry. While I was waiting, I glued the eyepiece into place. When the nail polish was dry, I simply pushed each head laser into place. 12. I did have to remove some of the material on the underside of the neck to get it to fit onto its post, but that was an easy 2 minute job with a sharp X-acto knife. That's it. Pretty simple for the most part - just a lot of waiting for the various coats of paint to dry. Just so you know, while the paint was drying I made the eyepiece by hand with a translucent piece of plastic and a file. This took some time, but I think it looks better than having a tinted eyepiece on the black head. I hope this information is helpful. Just remember, if you mess it up you can always strip the paint and start over - that's part of why it took me so long to finish. Good luck and remember to have patience. If you rush, you're more likely to have problems.
-
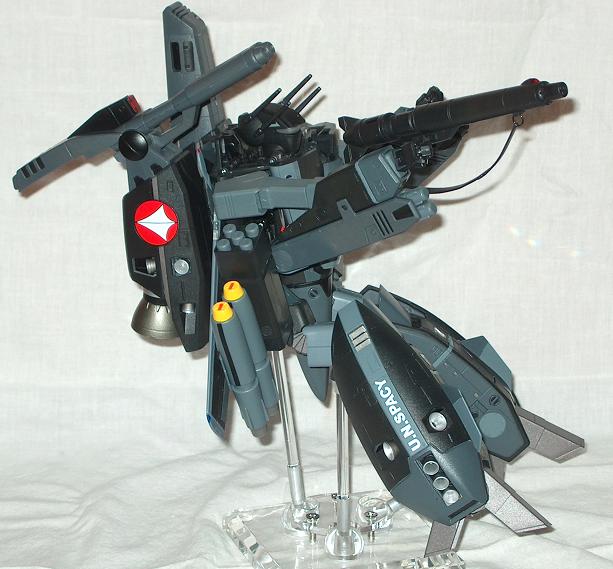
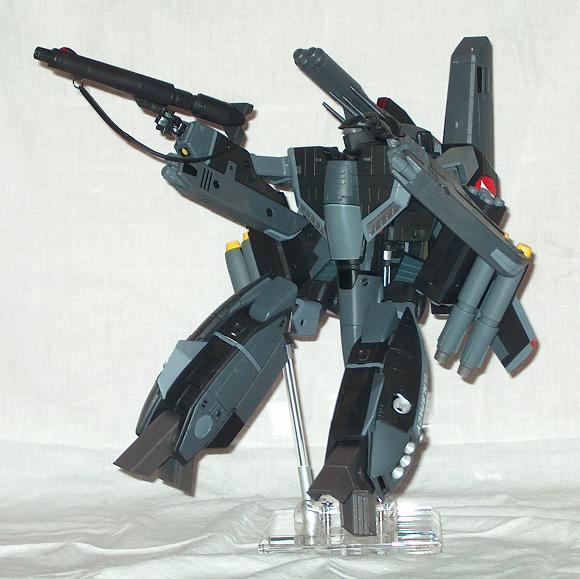
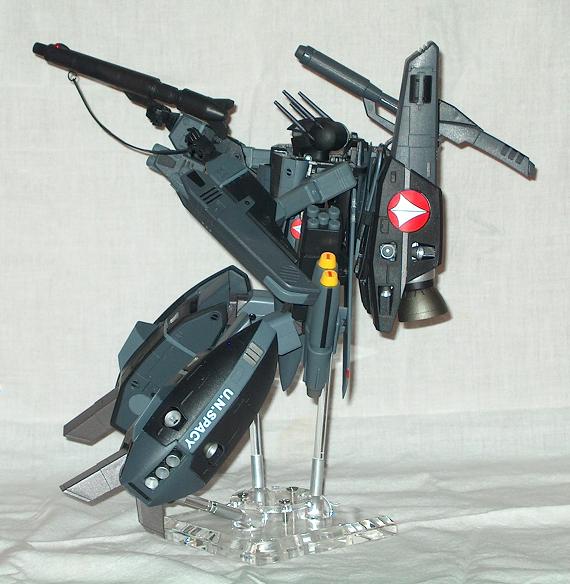
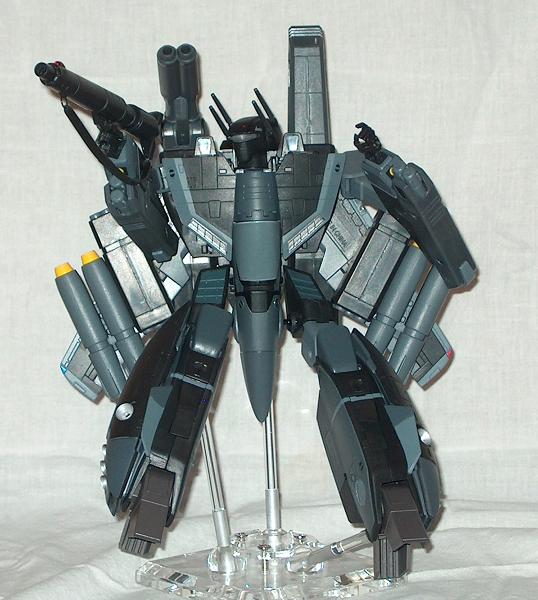
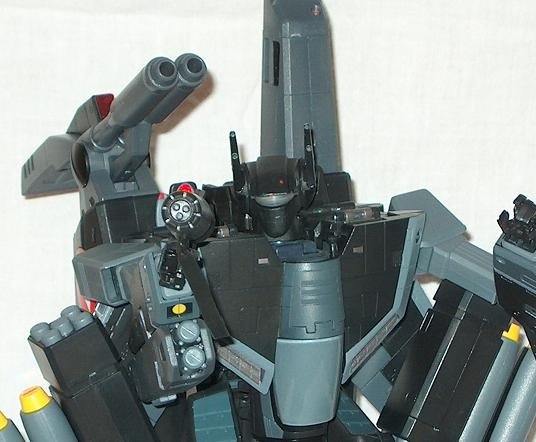
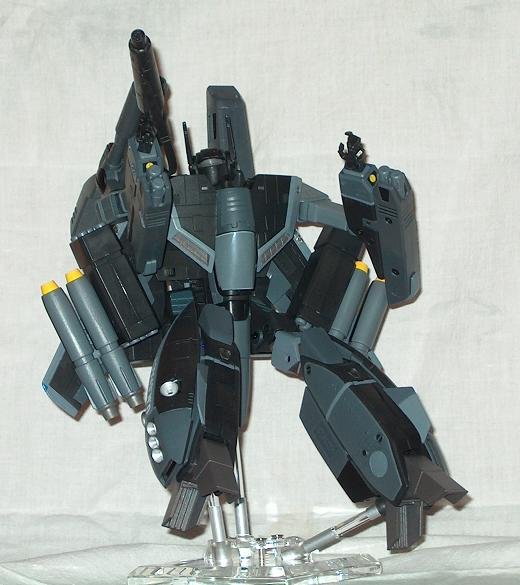
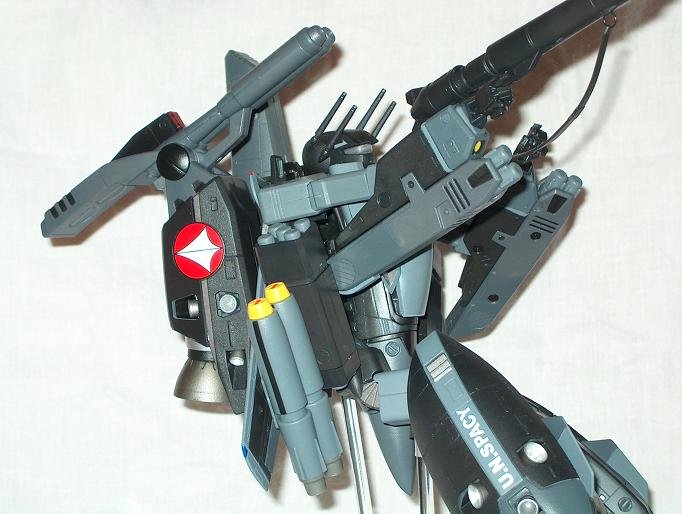
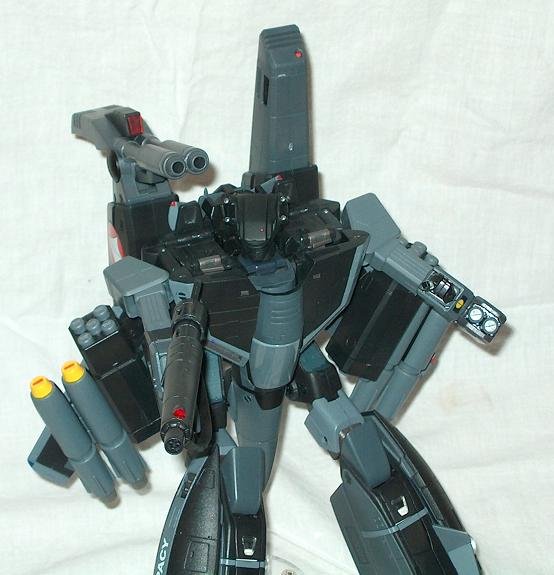
As promised, here are some more pics. However, I did put a couple of small blemishes on it when I installed it on the valk. Nothing major - I was pissed for about five minutes, but then I said to hell with it. I'll call 'em battle scars and be happy.


-
The Stealth has the same stickers as the VF-1J Hikaru and the Stealth FAST Packs have the same stickers as the regular FAST Packs. So there's no need to make any different sheets for these. Sorry, I can't help you with any of the others listed.
-
Minmei's Birthday Guft From Hikaru
Die, Alien Scum! replied to gian7675's topic in Movies and TV Series
He should have given her what she got in DYRL - a bitchslap across the face! Not that I condone violence against women, but hey, sometimes ya gotta do what ya gotta do. Happy birthday, biiiiiiiiiiiiitch! WHACK! -
This Logo Is Cool!
Die, Alien Scum! replied to terry the lone wolf's topic in Anime or Science Fiction
Forgive my ignorance, but what in the hell is that floating ball thing on the end? That's got to be the worst super hero ever! If it had arms or legs, I'm quite sure it would find some way to kill itself! -
I'm no great artist or comedian, but I've gotta say that those really suck. I think if I ate a pound of magic mushrooms, drank a gallon of anti-freeze, and bashed myself in the head with a ball pein hammer until I was mentally retarded, I still wouldn't find any humor in those shitty cartoons. No offense to the mentally retarded; I'm just making my point.
-
Well, it took me a bit longer to finish, but I'm pretty pleased with the results. Unfortunately, I only got a few pictures taken before my camera's batteries ran out of juice. I'll buy some more tomorrow and take more pics. I can tell you that the black isn't an exact match, but that's because Yamato's black is actually more of a really, really dark grey. If I was mixing paint and airbrushing, I'm sure I could've had a better match, but it's good enough for me. Oh, and kyatsu, I'll post a step-by-step list of how I did this when I add more pics tomorrow.

-
Help:need A Full Yamato 1/48 Release Schedule
Die, Alien Scum! replied to Hayao Kakizaki's topic in Toys
Damn, those are nice looking models! That Ivanov gerwalk with the extended neck is the shiz-nit! -
That's kinda neat. I was wondering what Yamato would do about attaching the ghost to this. That seems like a pretty good idea. Thanks for the pic, eugimon.
-
X-men 3 Pics: Beast And Angel Revealed
Die, Alien Scum! replied to bsu legato's topic in Anime or Science Fiction
Yes, it's true... ... Cyclops is gay. Just kidding. -
I wonder if he went around asking people to help him find the droids he was looking for?
-
I surely will, but I got anxious and touched the paint before it was ready. I decided to strip it off and start over because I left a finger and thumb print on the base of each laser - D'OH! But in truth, I'm kinda glad I started over since I didn't do a very good job of filling the seam the first time around. Hopefully I'll have pics up tomorrow.
-
I'm just using Tamiya rattle-can acrylics I picked up at the local hobby shop. Flat black with grey arrows and gun-metal lasers is my plan. I'm not using a stock 1S head, though; I've got one of Rohby's recast heads with fulcy's hollow head lasers.
-
Well, I just received one of mine today. It may not be canon, but I still think it's pretty sweet. I'd post some pics, but I'm currently in the process of painting a 1S head for it. I'll put up photos when it's ready.