

Urashiman
-
Posts
630 -
Joined
-
Last visited
Content Type
Profiles
Forums
Events
Gallery
Posts posted by Urashiman
-
-
9 hours ago, peter said:
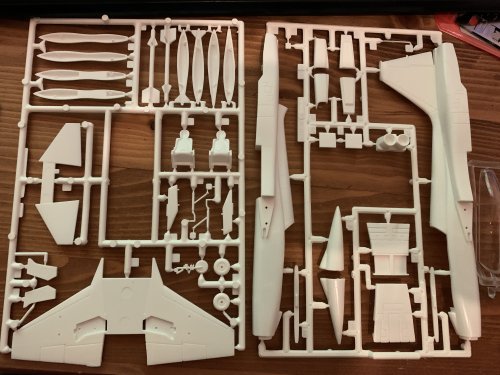
Oh man, I feel bad, but I haven't opened it beyond slightly unwrapping the Tamiya wrapping paper that the clerk originally wrapped my kit in when I bought it almost 20 yrs ago, lol!
Maybe I'll get to it after a few more VF-1s
")

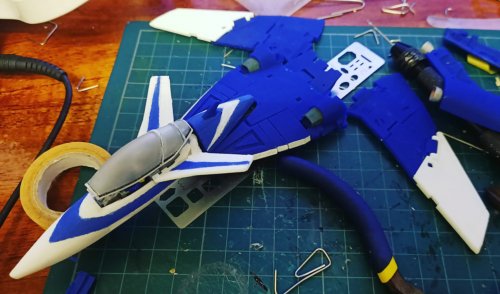
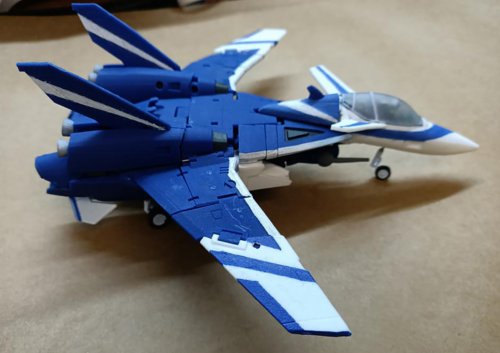
I think this build might be a lot easier now that I'm finally using an airbrush.....or it might be worse, who knows, lol!
So, last year this time, when I built those 4 Super/Strike Valks, I was only using rattle cans and brush painting.
Those dark spots inside the leg I hammered out in a few minutes. Last summer, it probably took me 20 minutes per Valk with a Sharpie, lol!
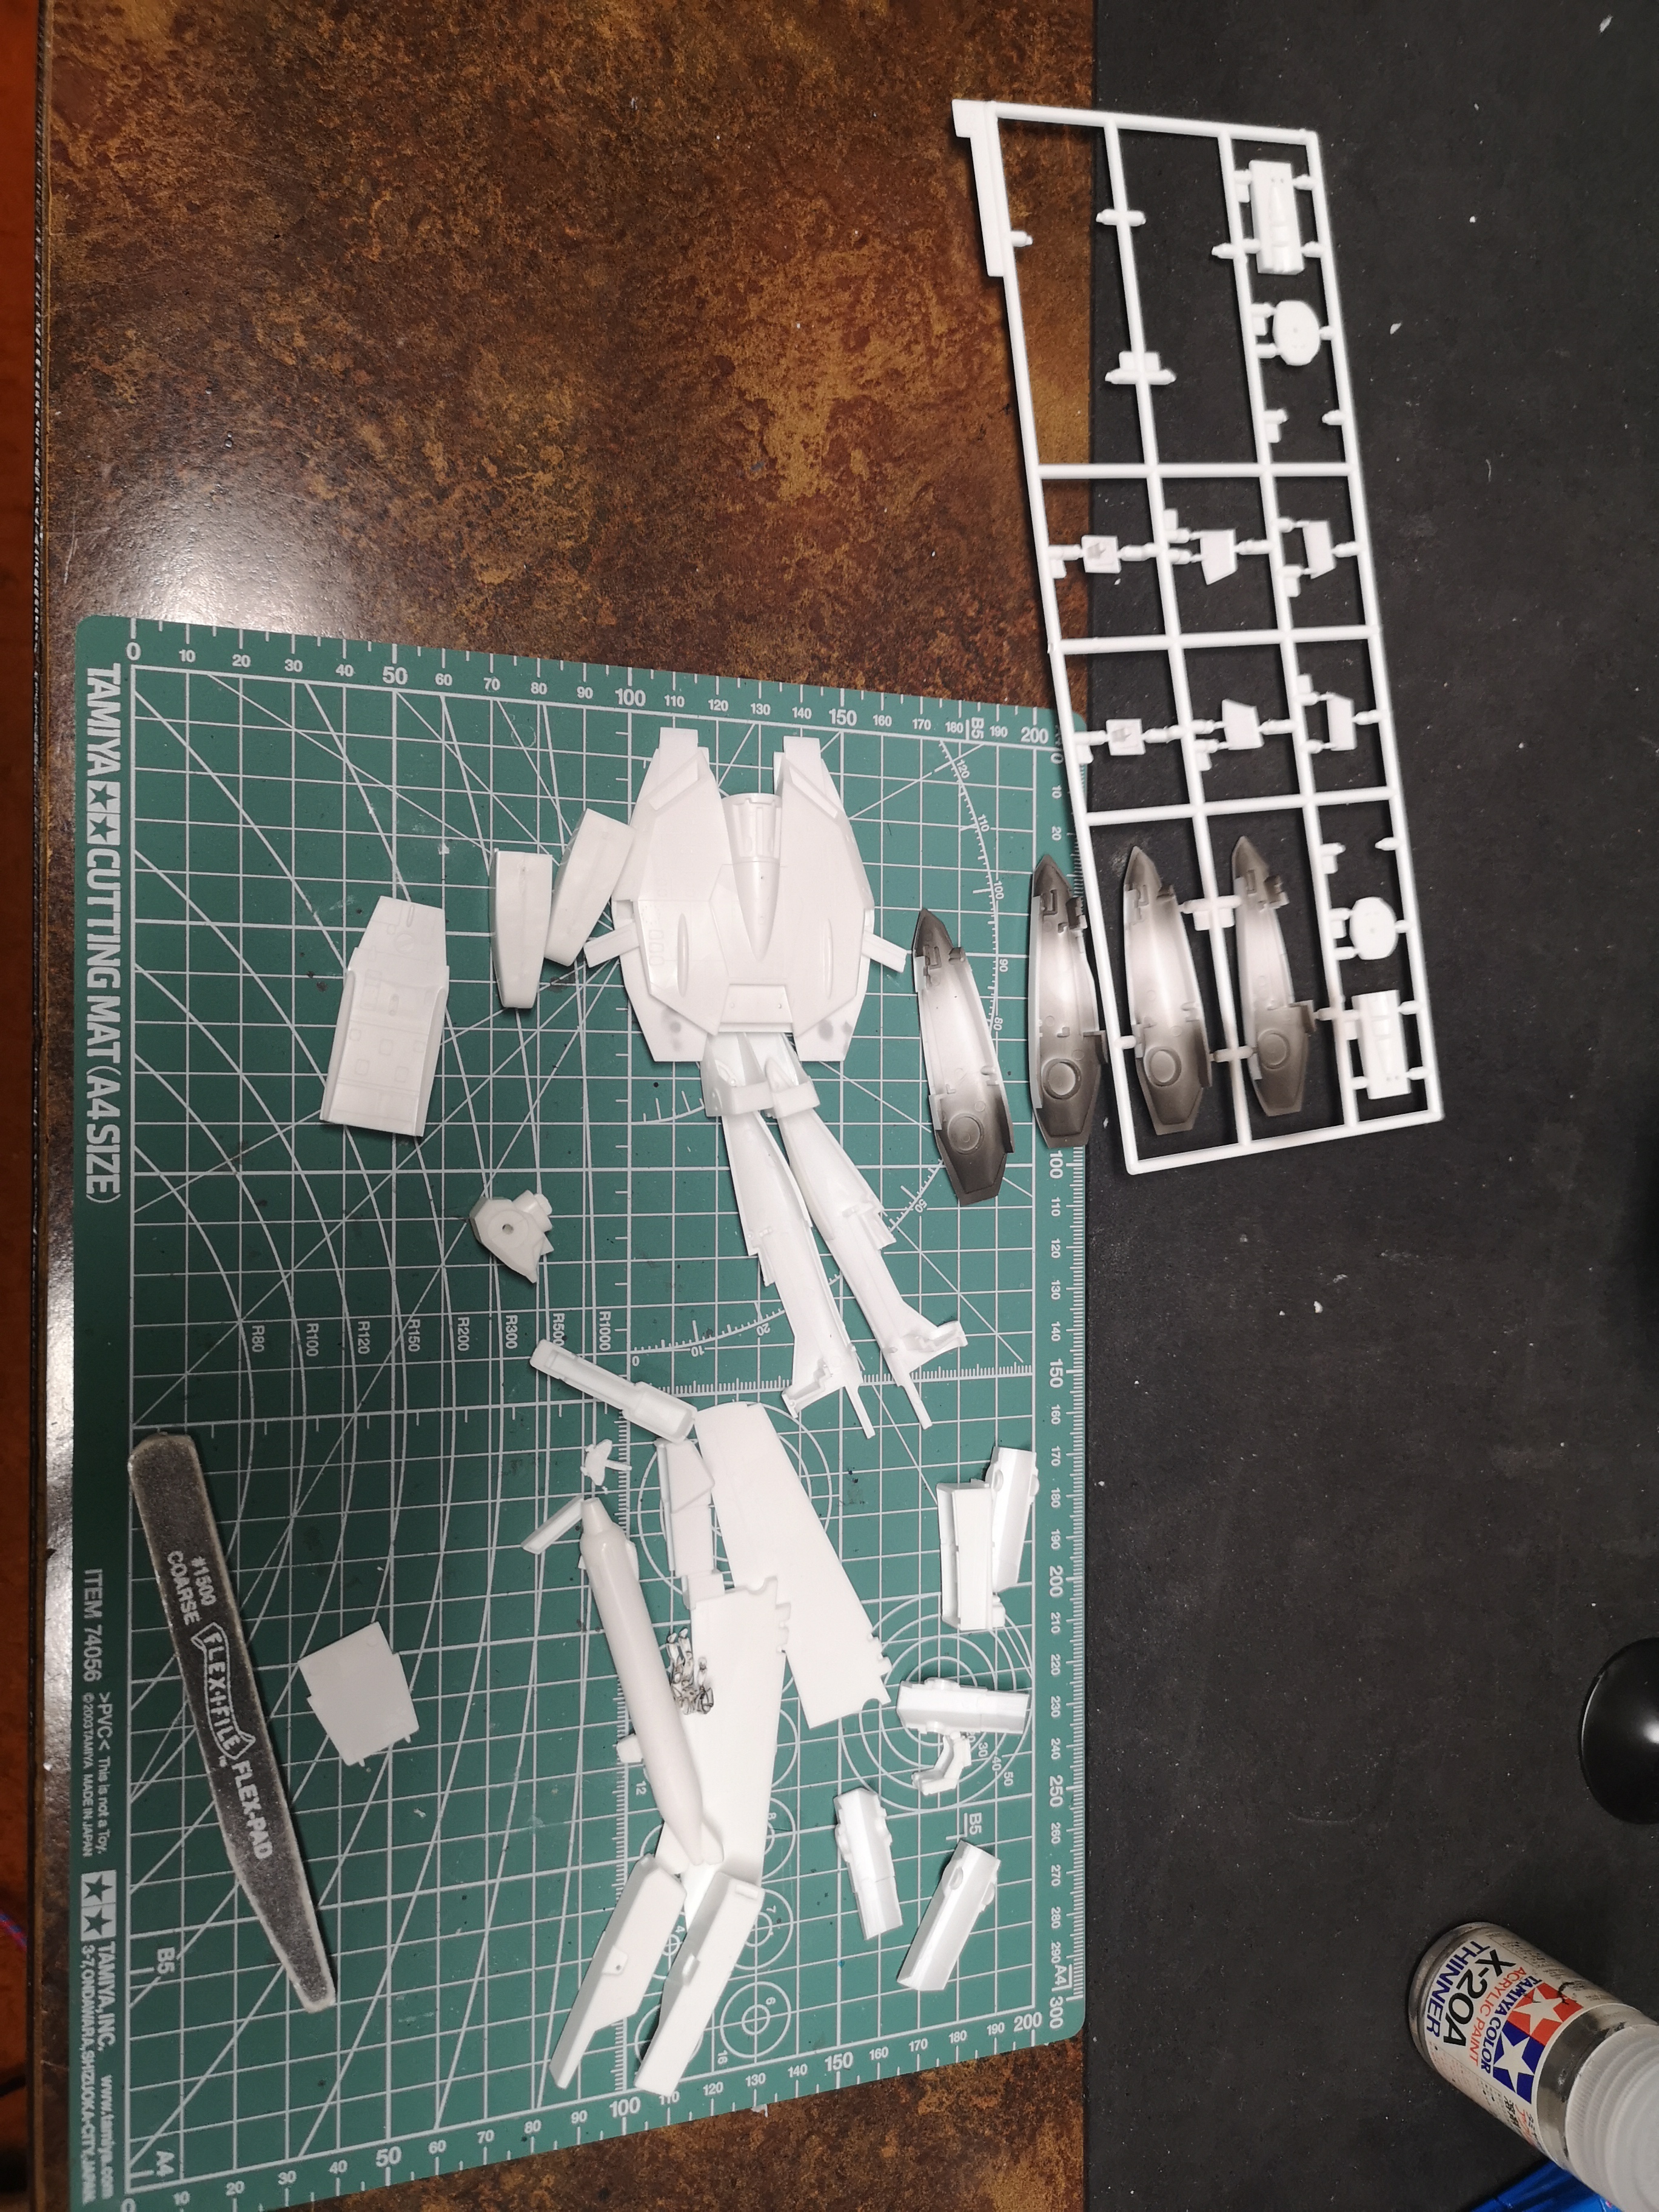
I'm just refamiliarizing myself with the VF-1, but it's coming back to me. I can barely make out some of the details and some of the parts are so small for my sausage fingers that it's hard to work on them.
I dunno - I have sausage fingers as well and build four VF-1s from Hasegawa already. They were a pleasure to build. Only thing I noticed is the mold degration over time. My First VF-1 was build somewhen 2003-2004ish (but originally purchased in 2001) when the molds were still new. My latest build was from a VF-1A/J/S (2005 rebox, purchased in 2013) around 2016ish. The parts were a bit distorted, the panel lines less accentuated and I had to sand a bit more here and there compared to my 2001 VF-1 purchase. Do you remember (love?) when your kit was issued/purchased? Maybe you got one of the bad molds.
The YF-19 was almost a perfect fit for me. I had a first issue kit and everything was a dream, except for the intakes. There were some nasty seams and it wasn't easy to sand them away. Really nice kit - thrilled to see what you will come up with as soon as you are on it
-
man - this looks awesome! Great build!
-
On 3/17/2021 at 4:20 AM, peter said:
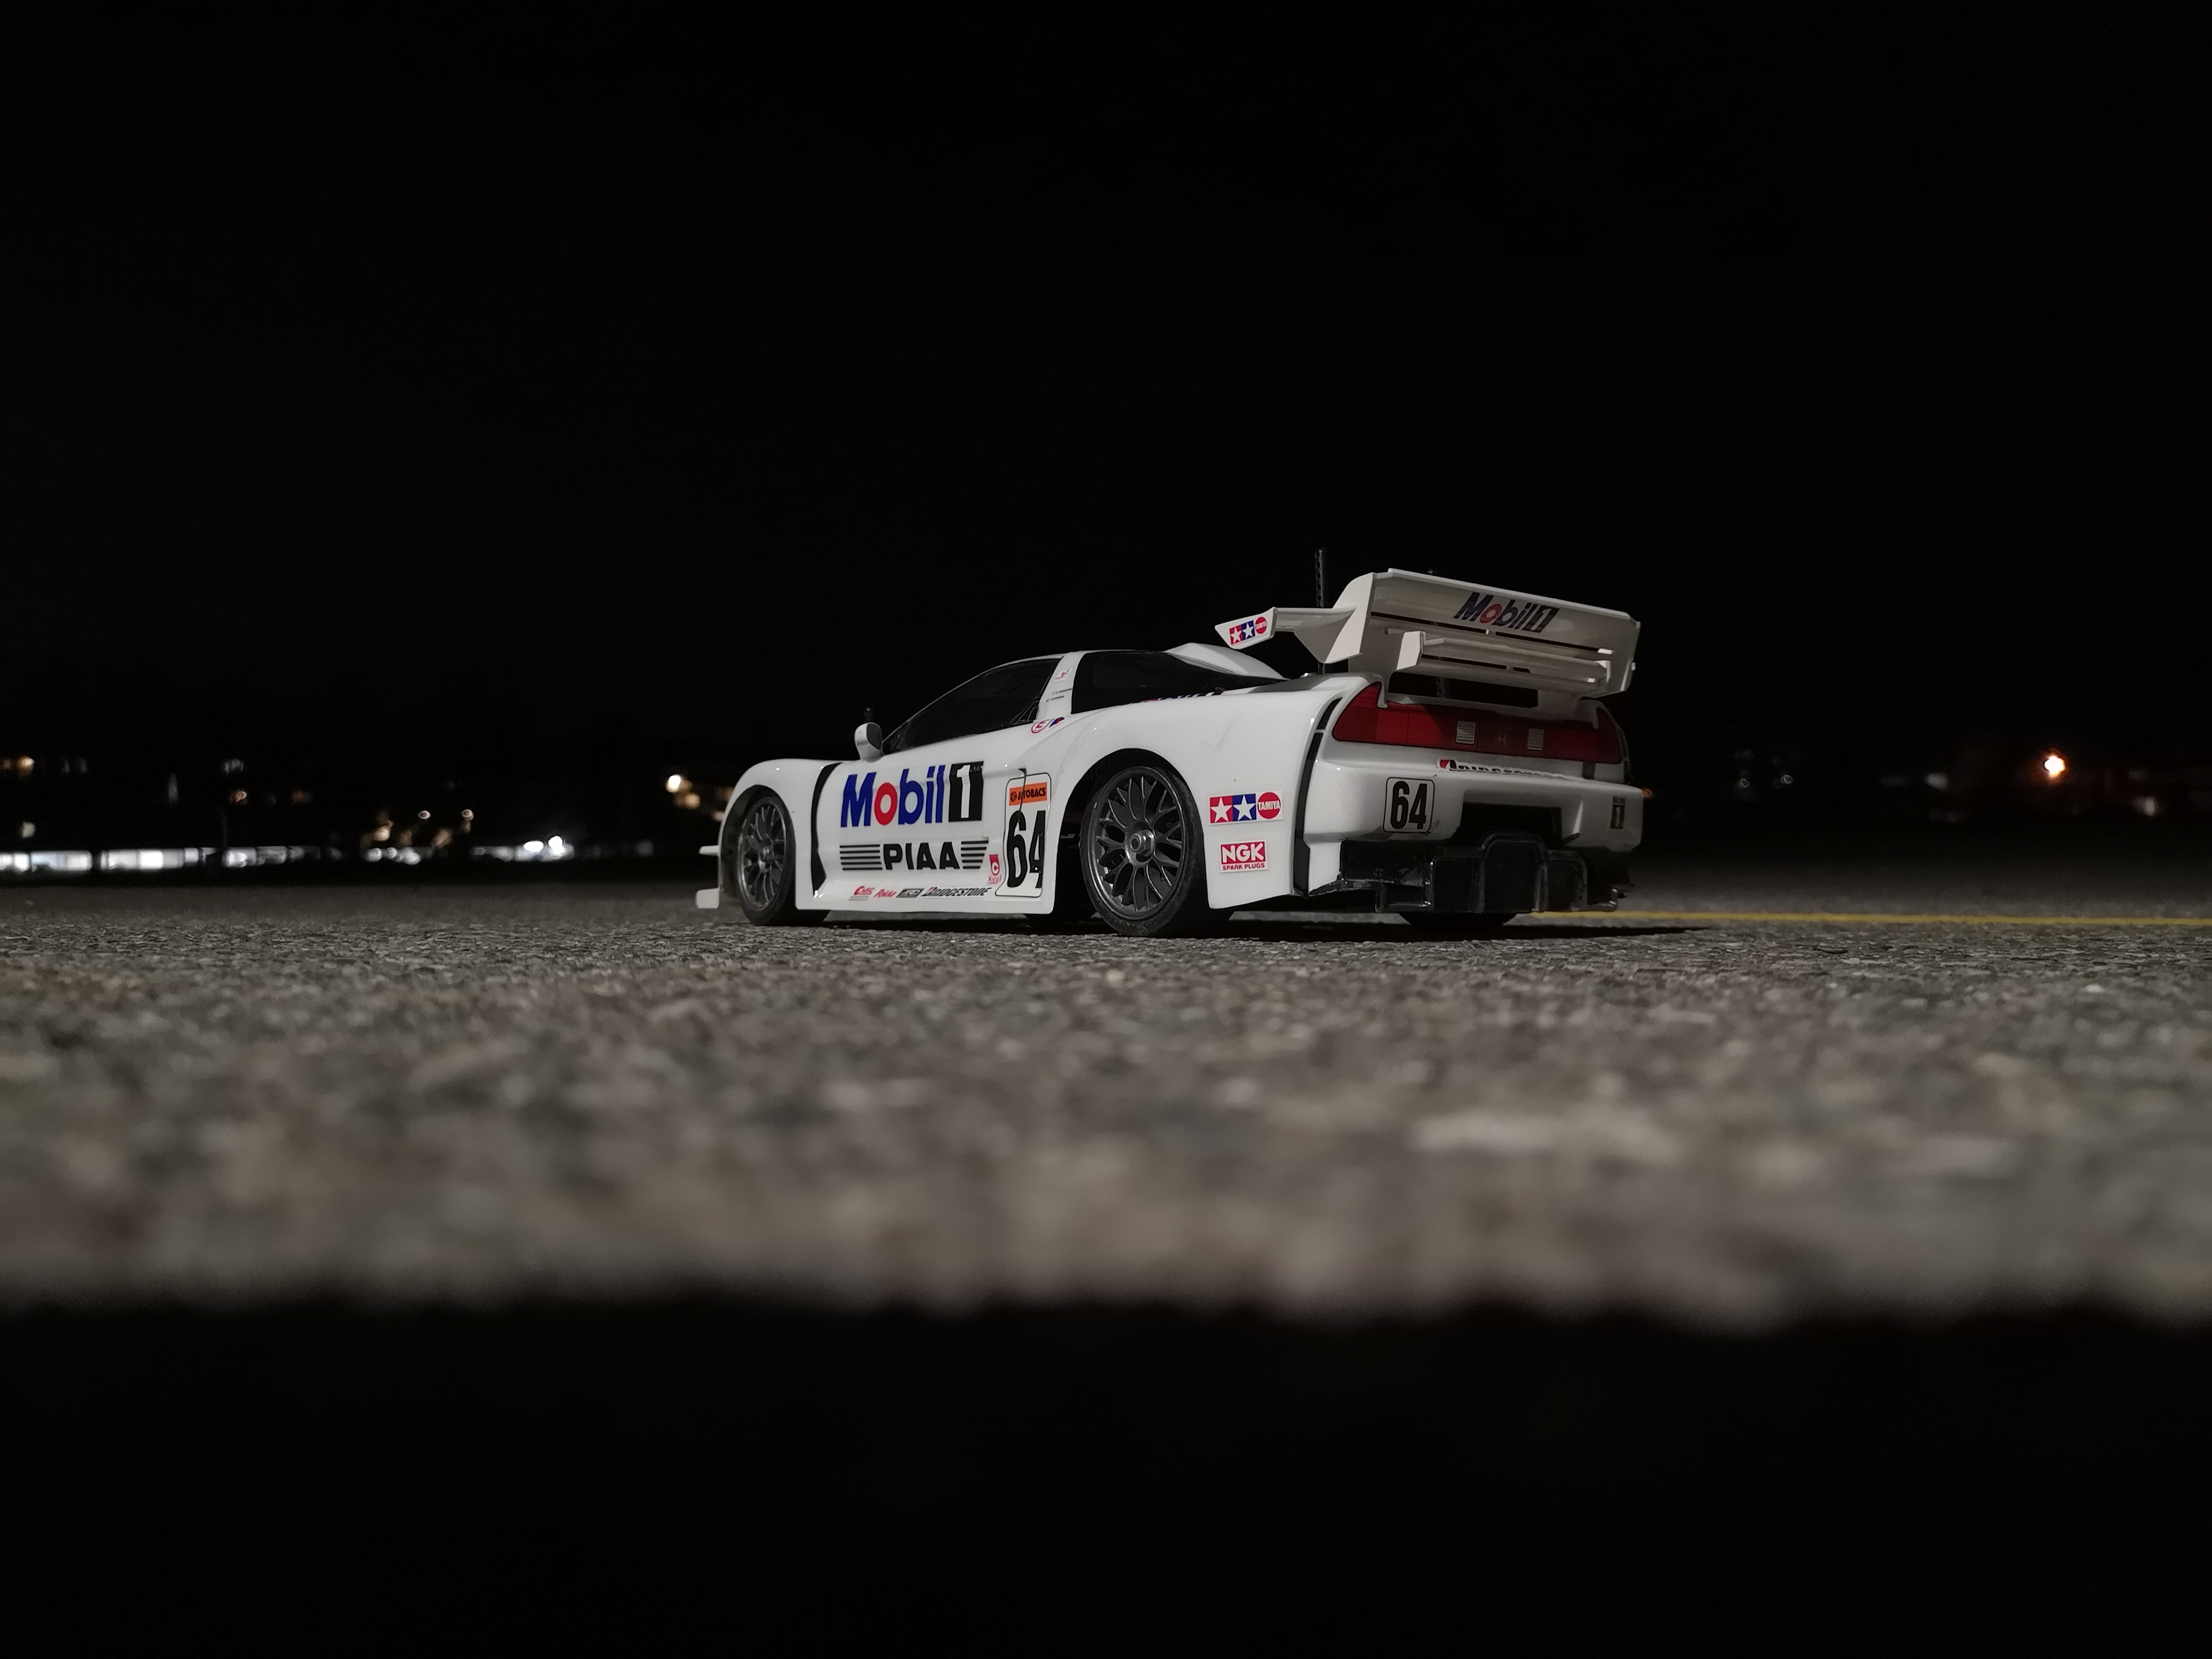
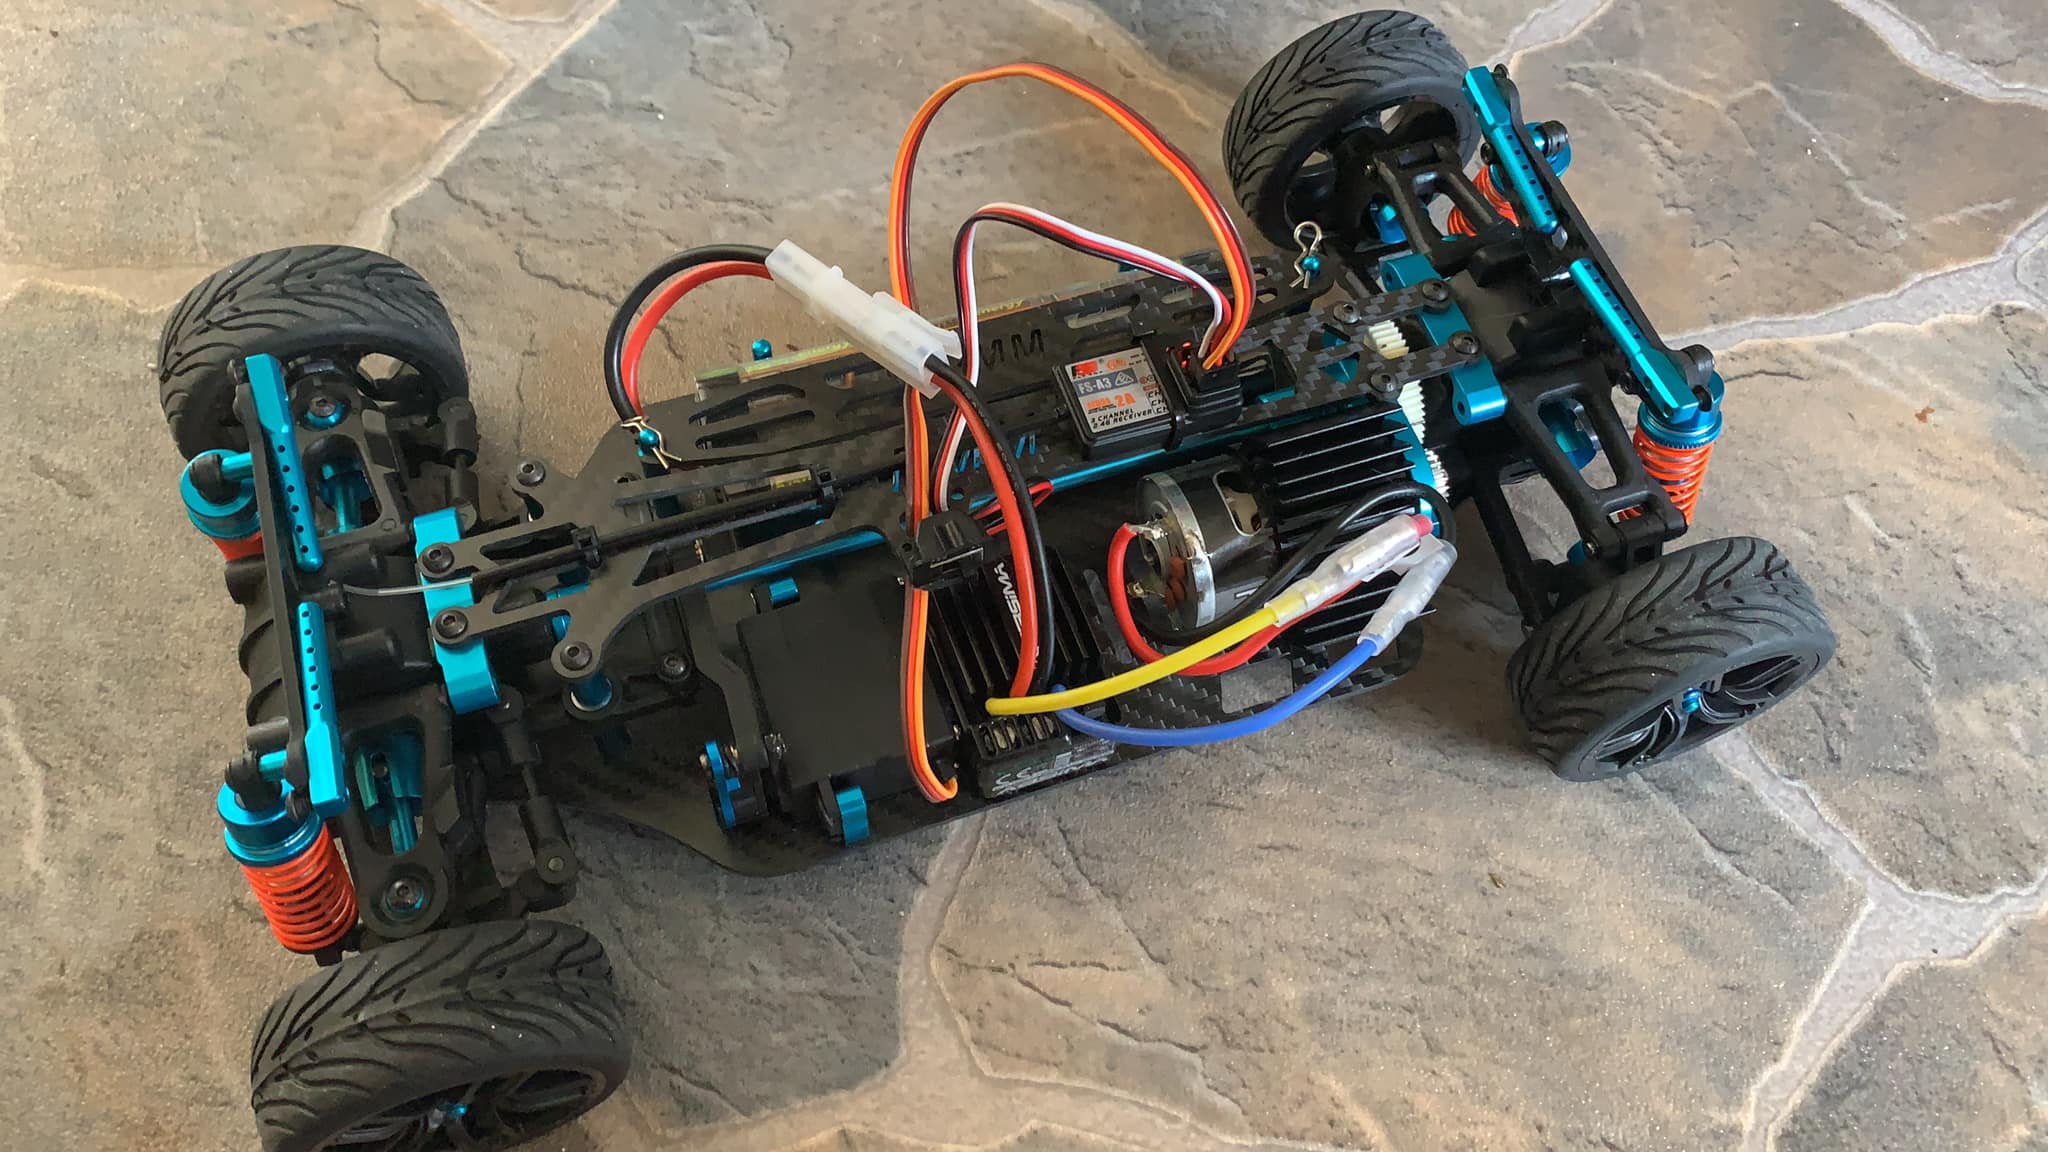
I know nothing of RC cars, but I got this from a buddy ages ago. Played with it for a bit, then the remote died and the car sat on a shelf for more than 20 years. Just dug it out the other day, got a new remote and fresh batteries and took it for a spin, forgot how fun they can be
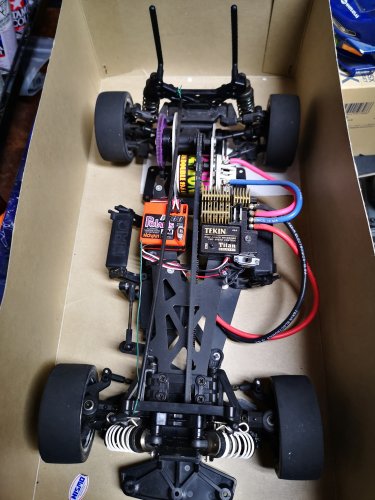
Oooh Nice! What kind of chassis is that? Looks like one of those fancy TT-02 custom chassis with cambelt transmission for 4WD.
-
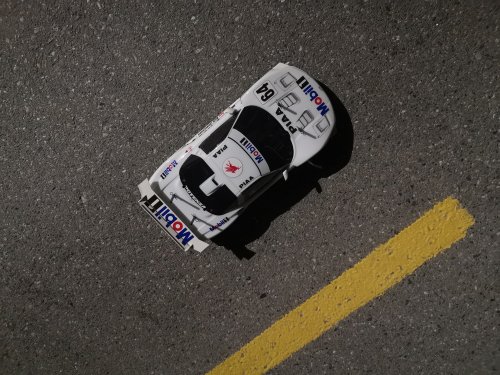
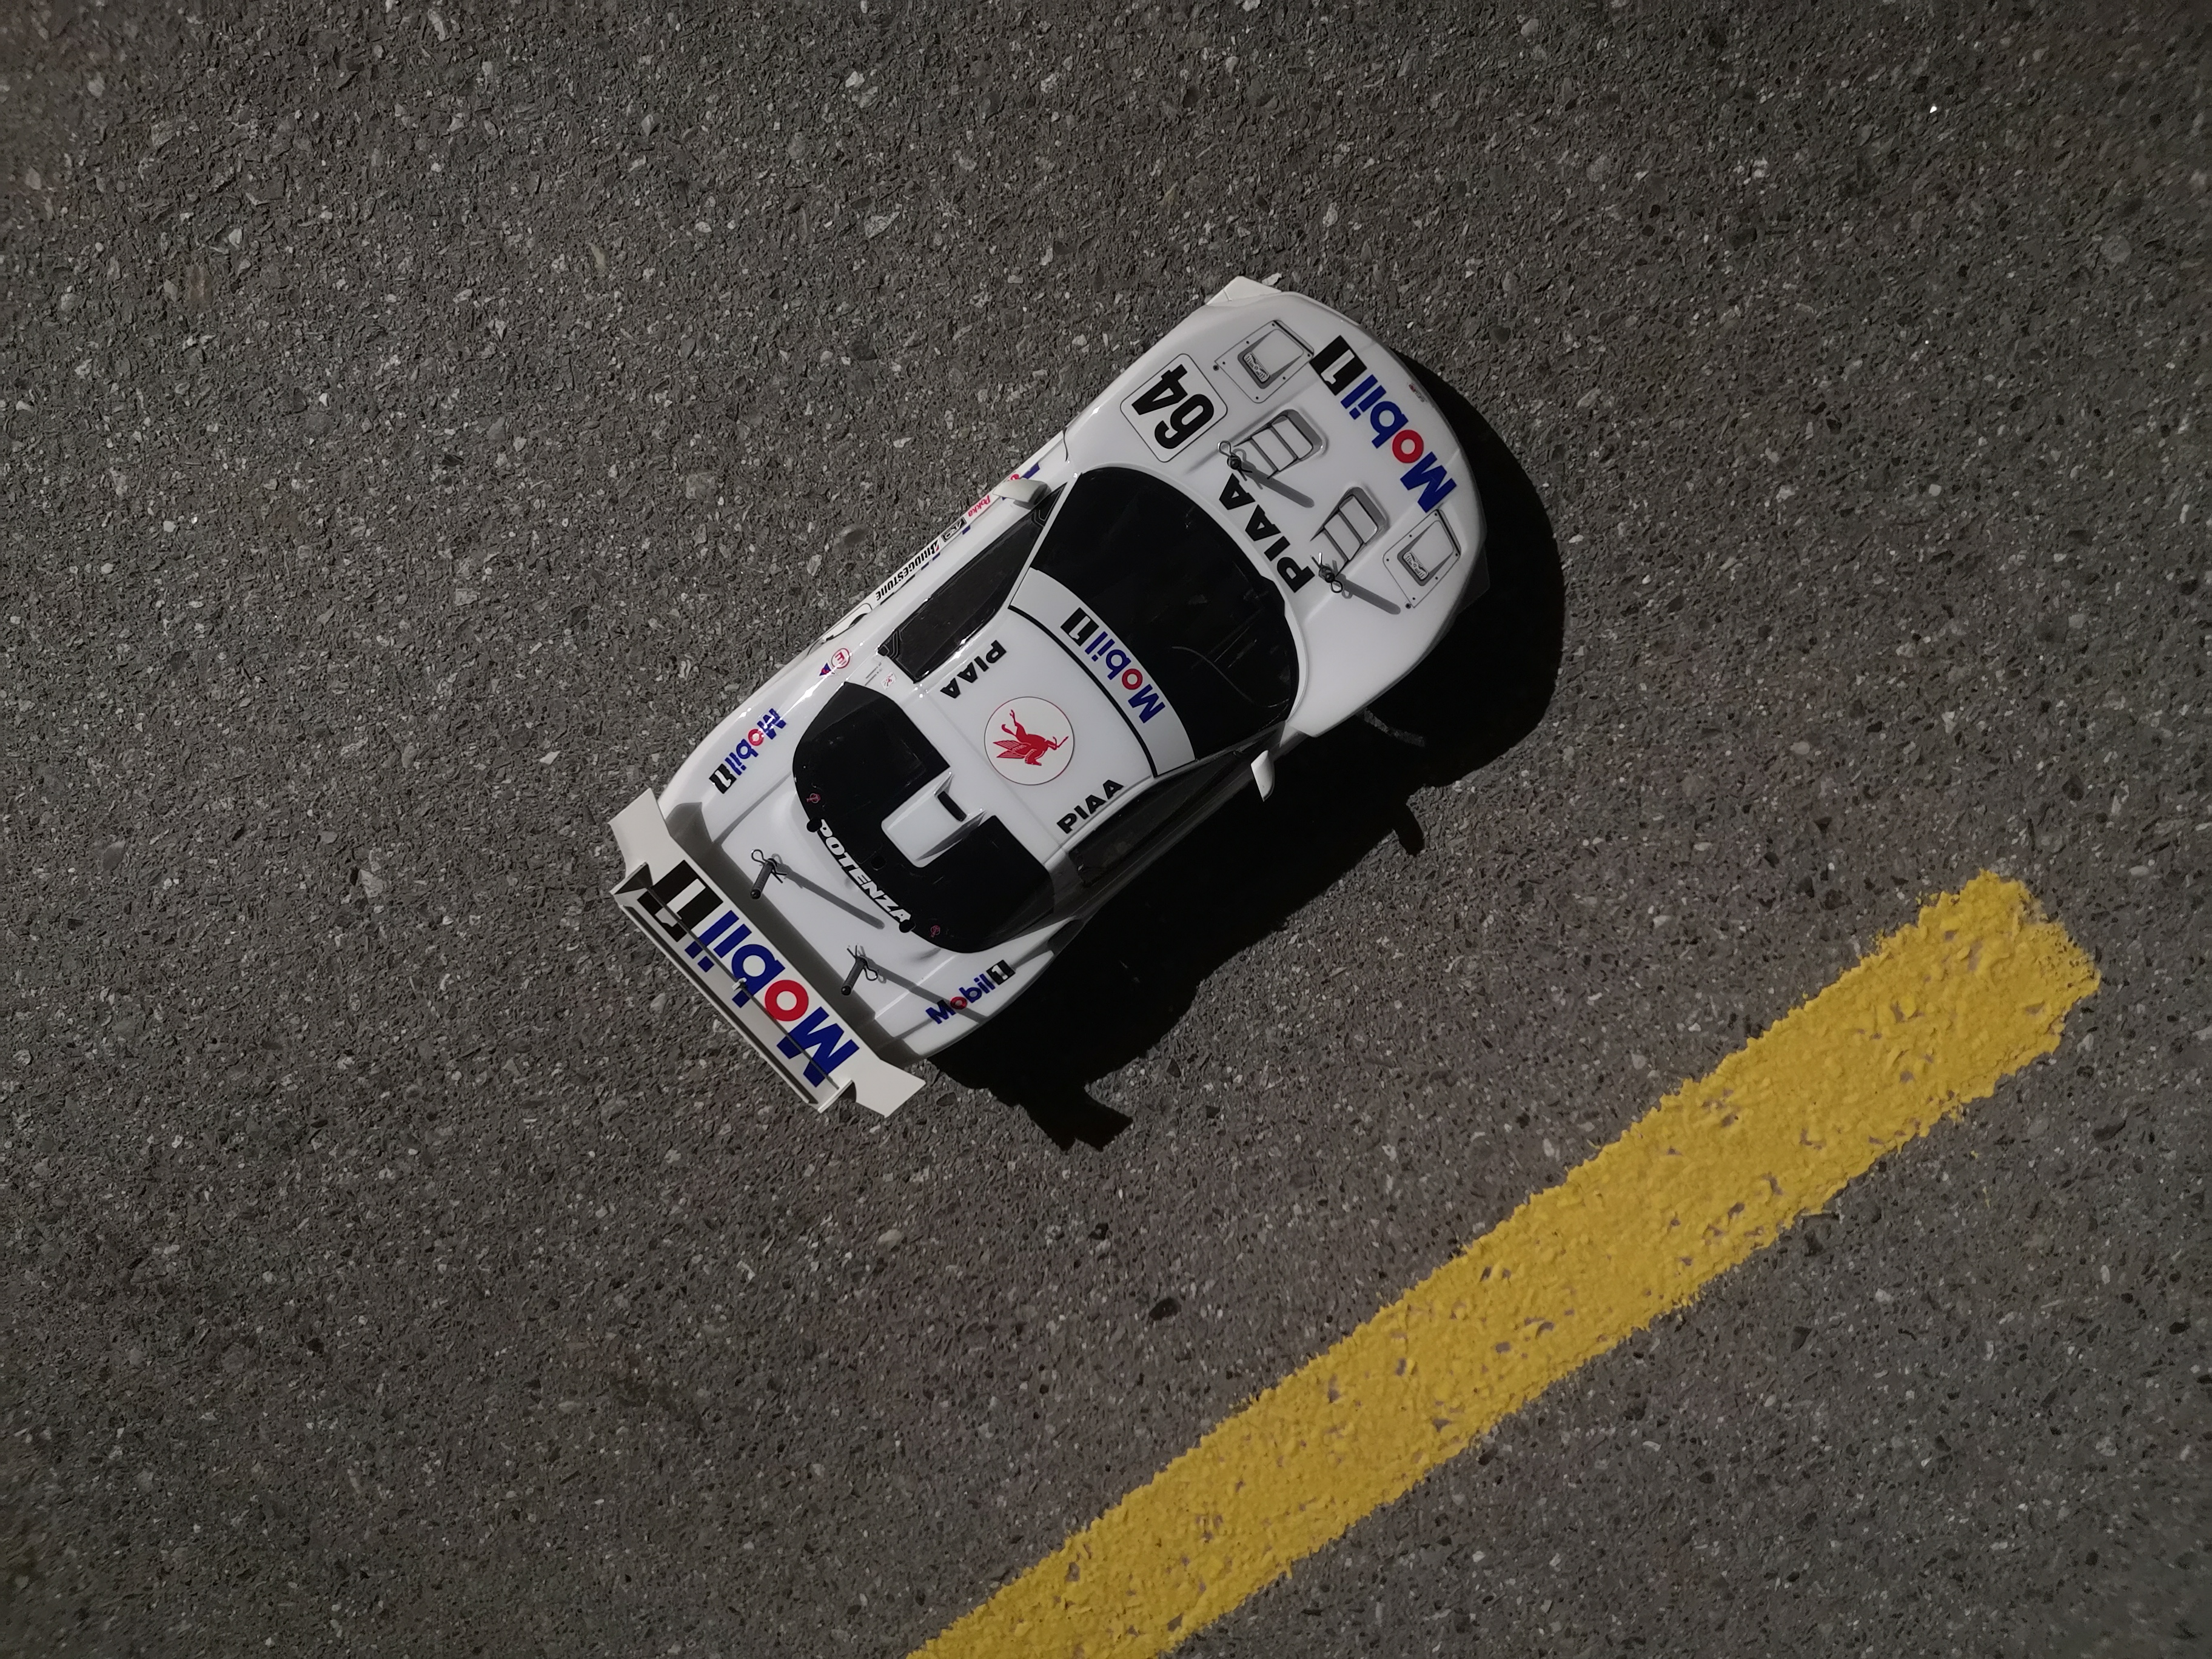
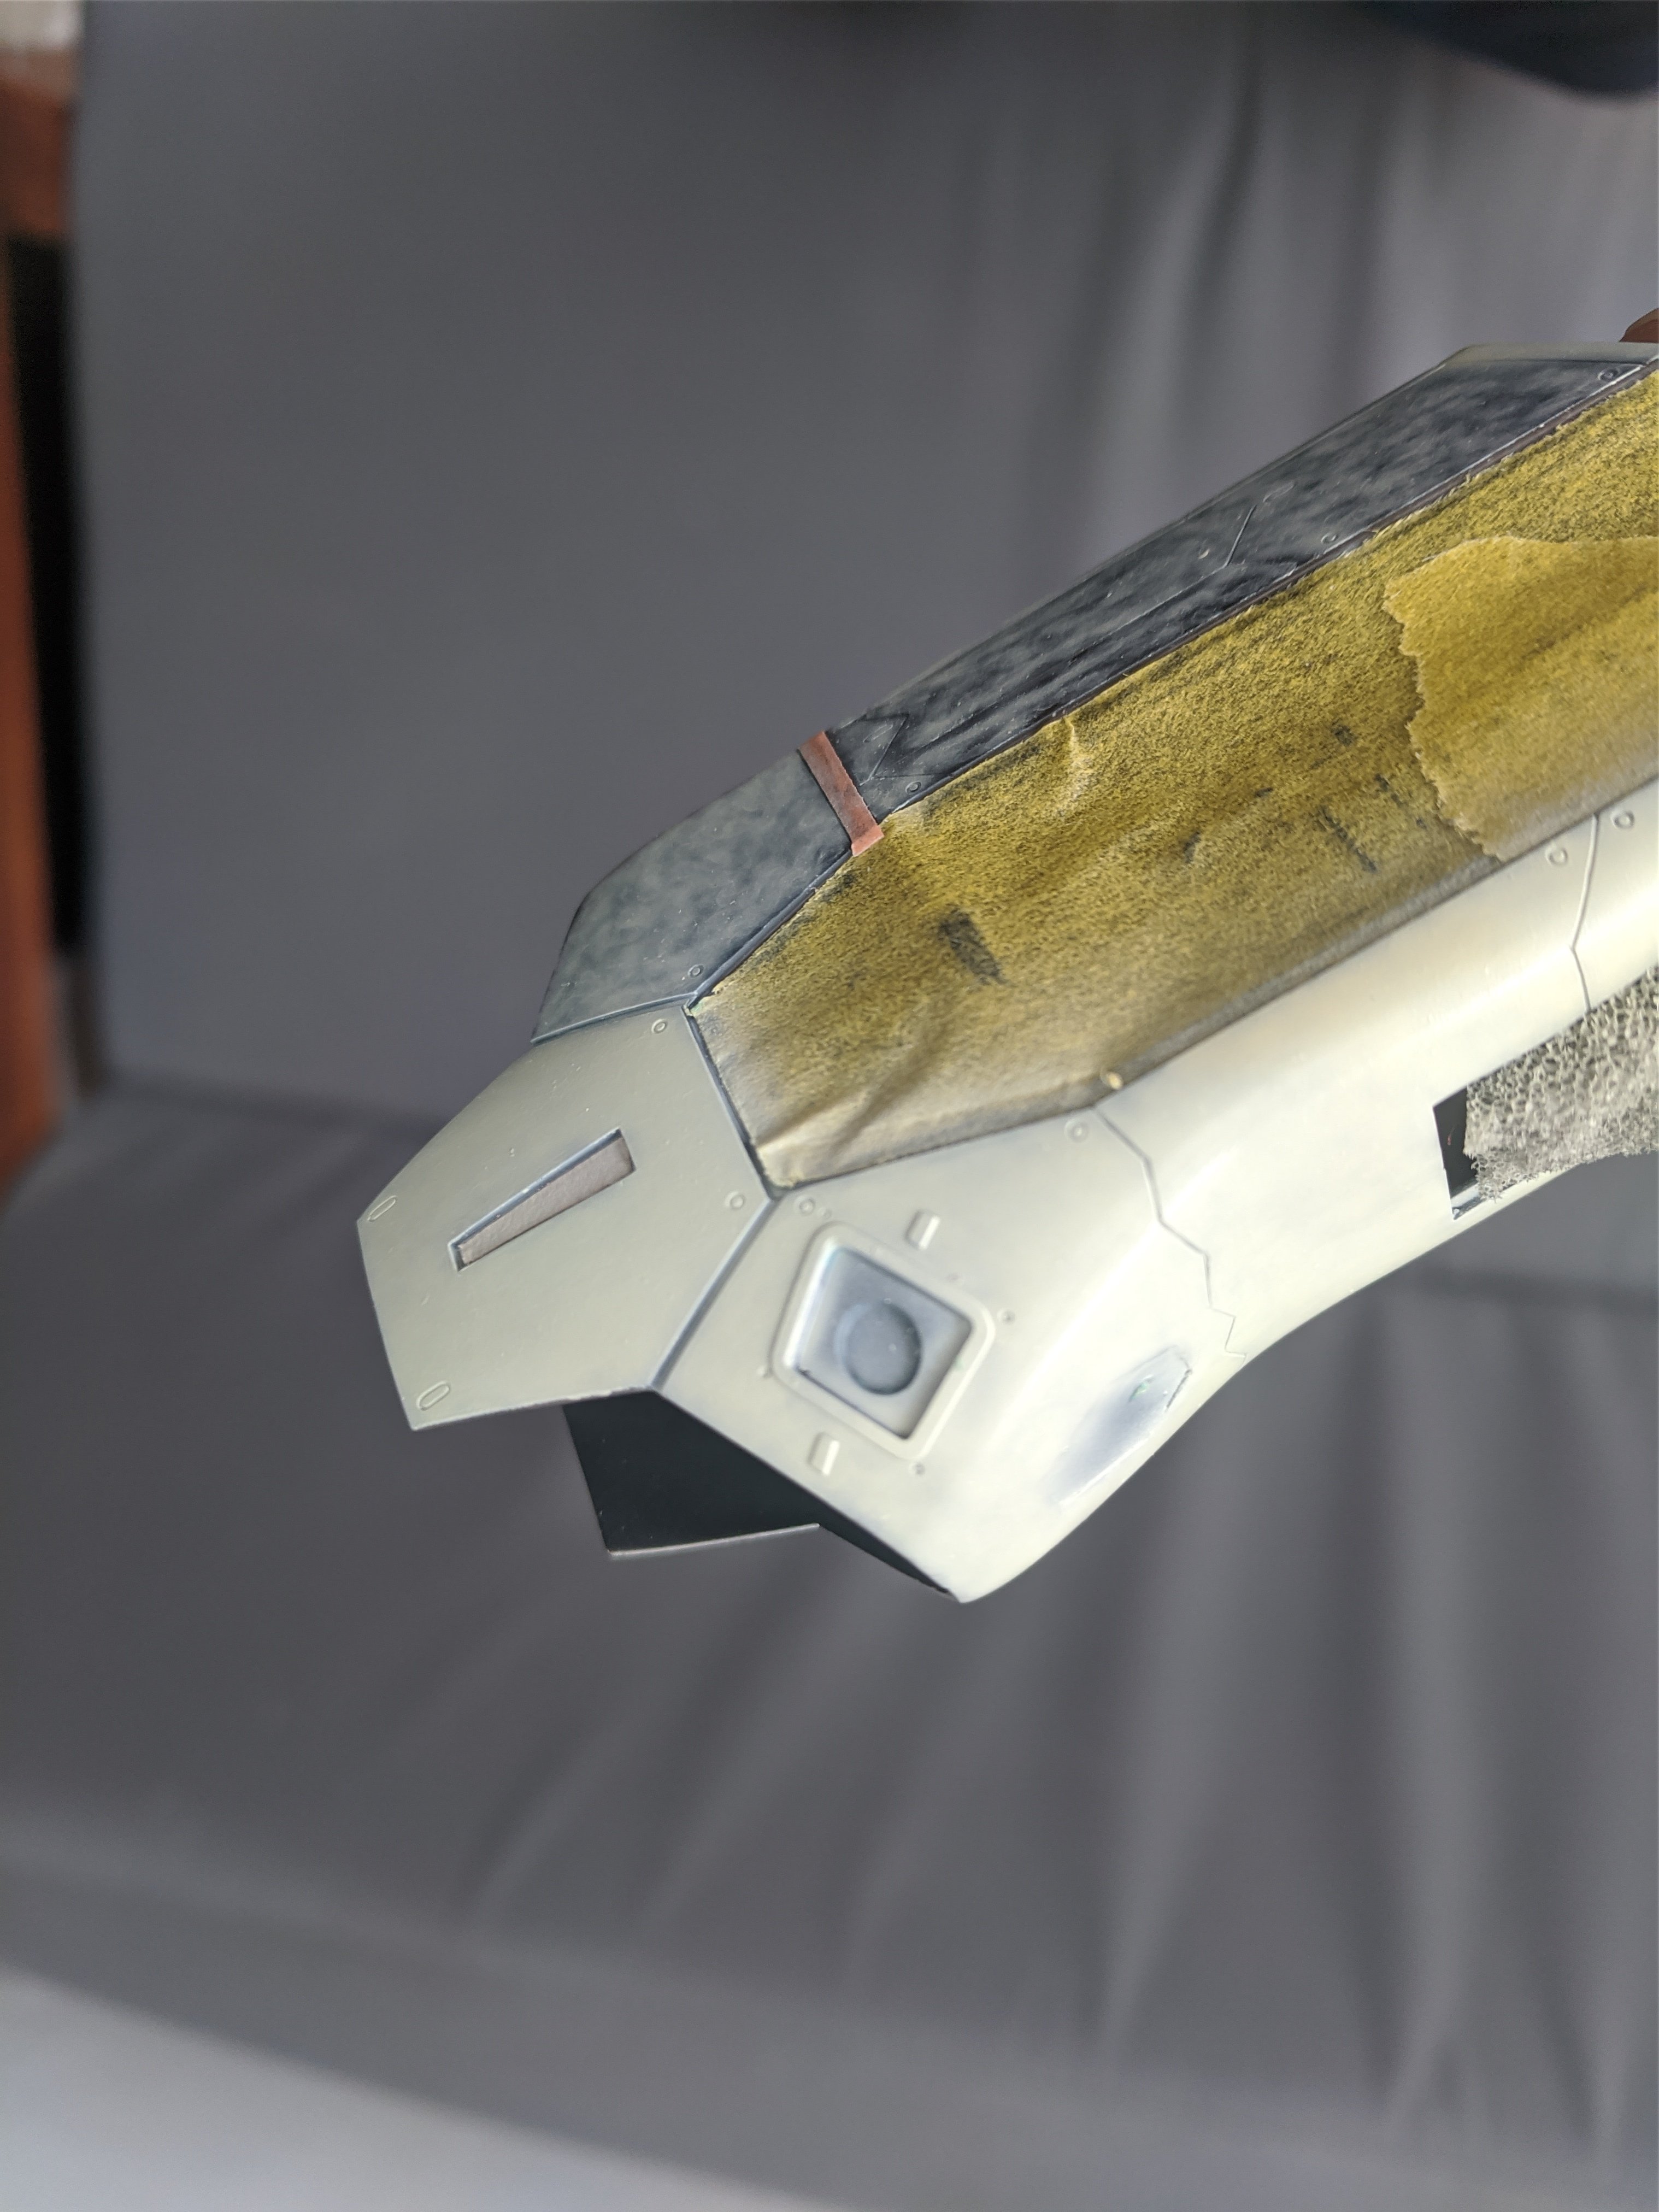
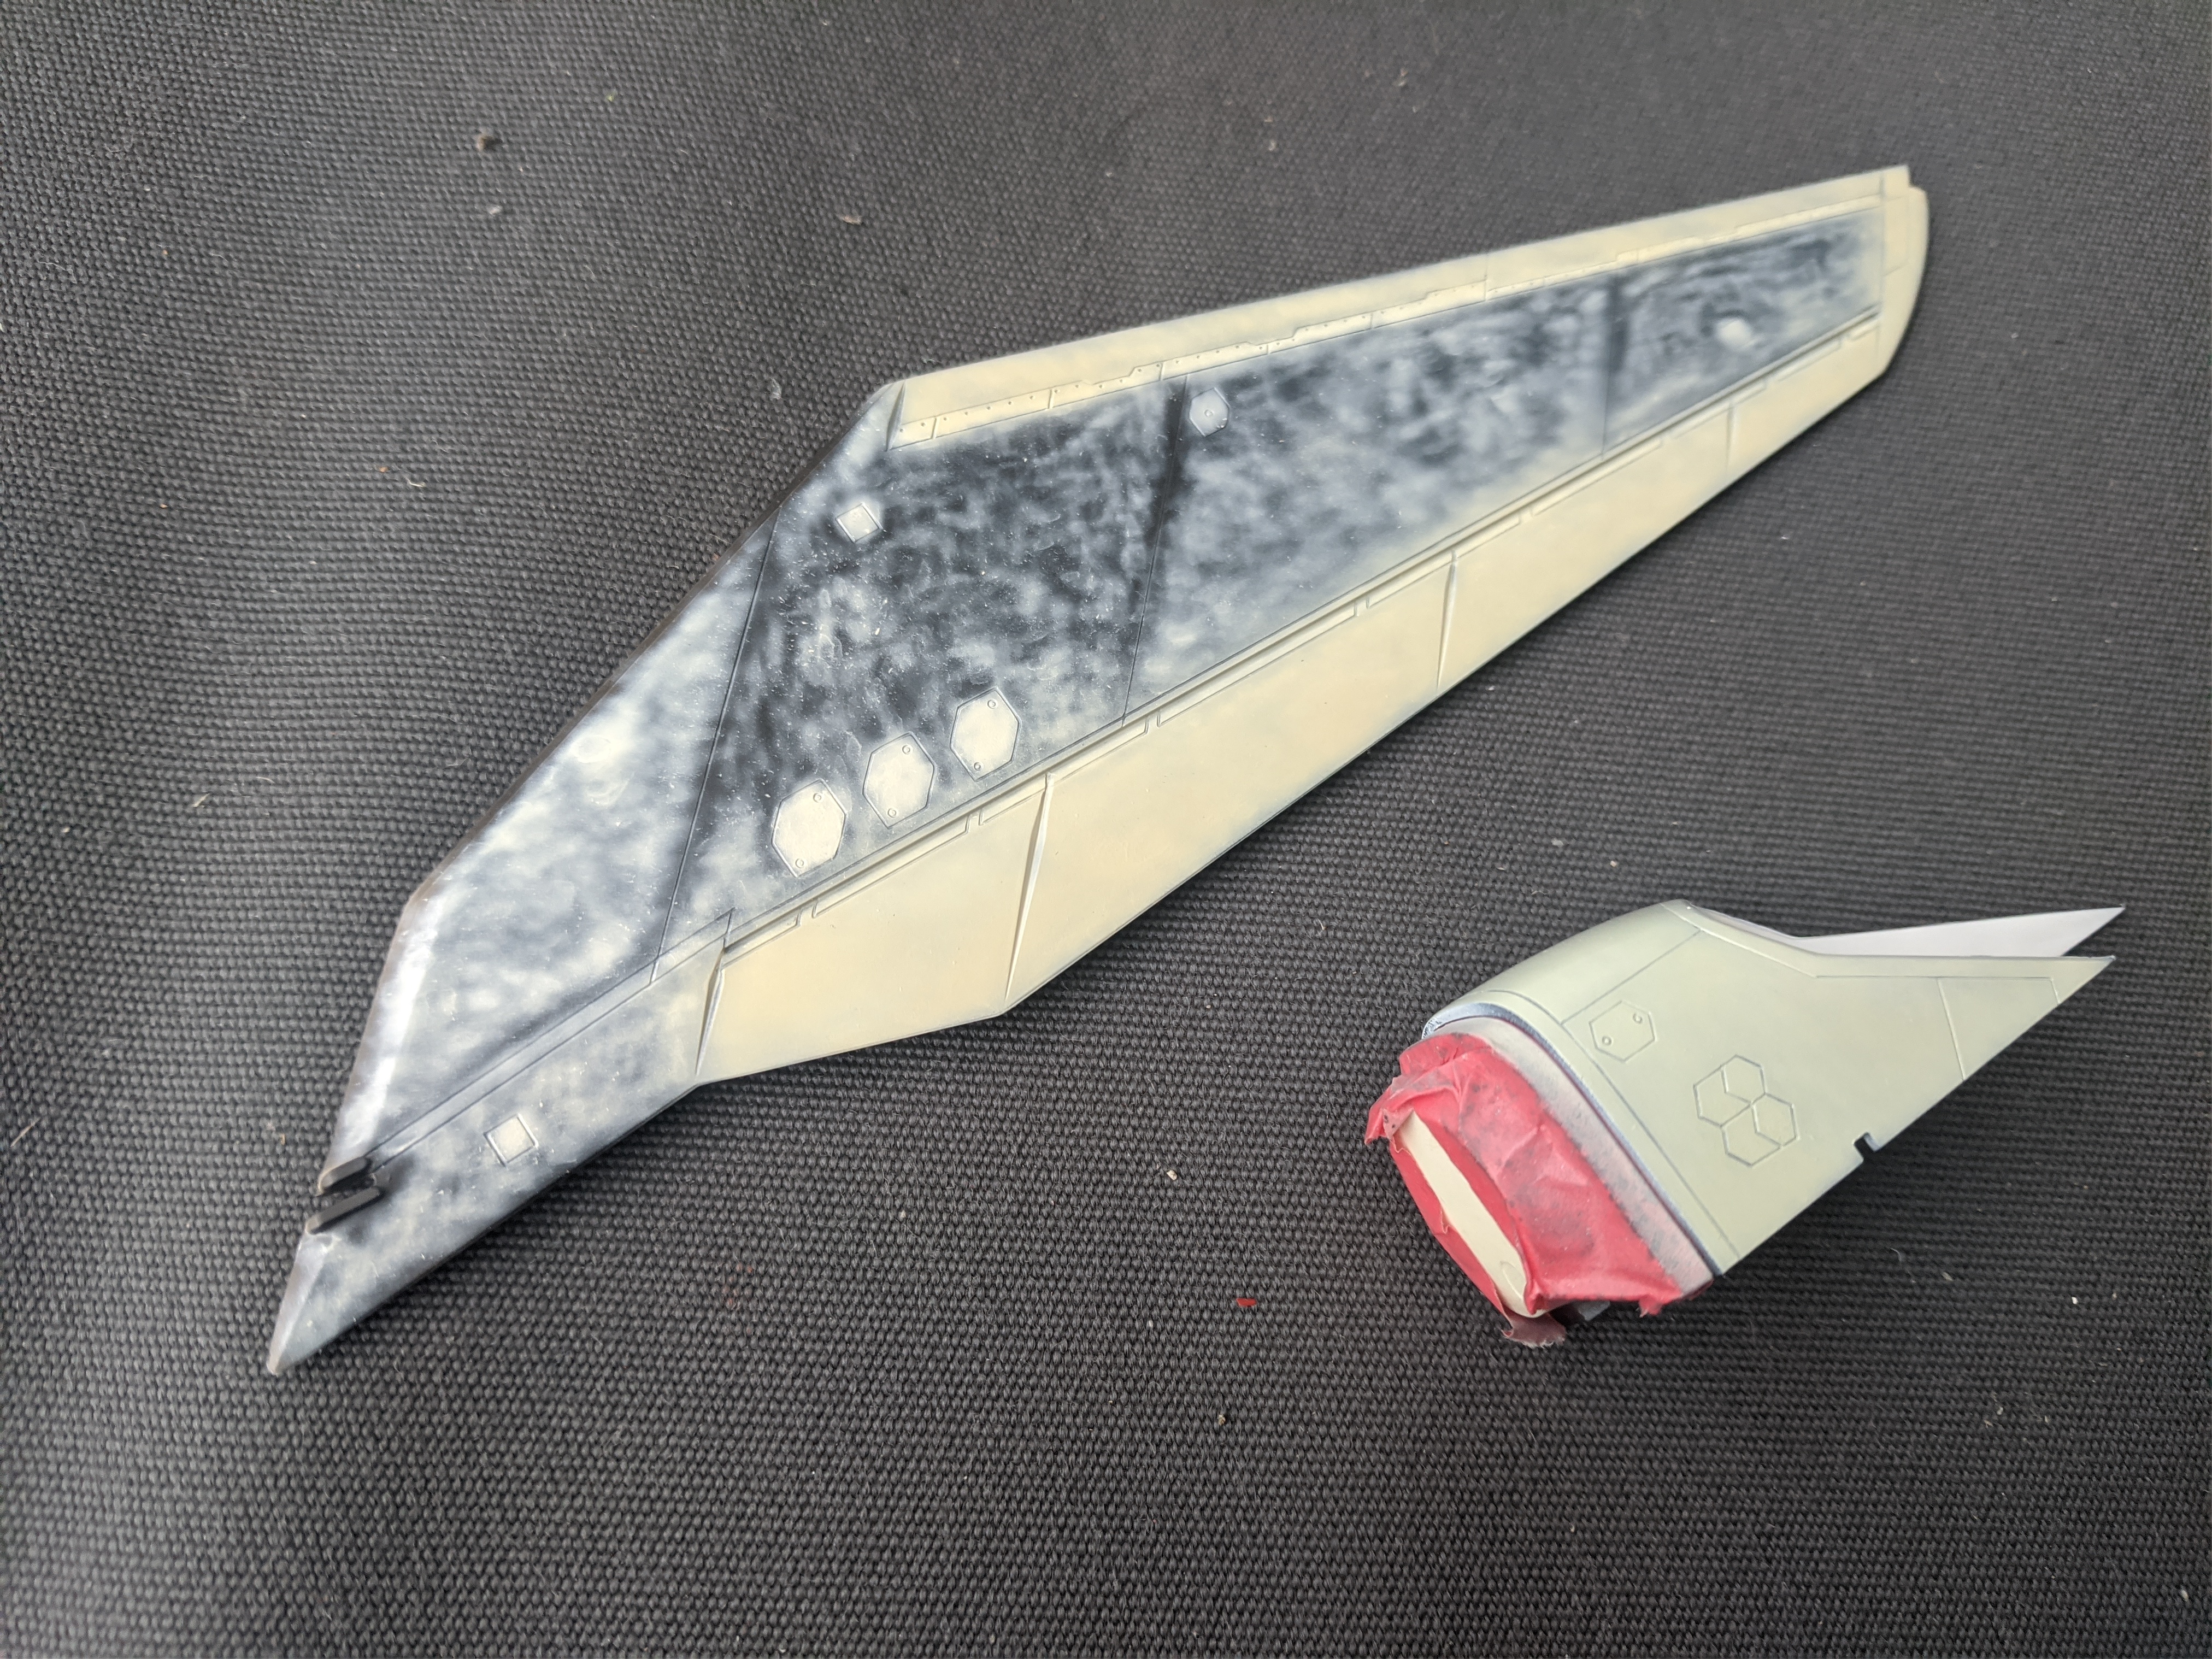
This was on my workbench today.
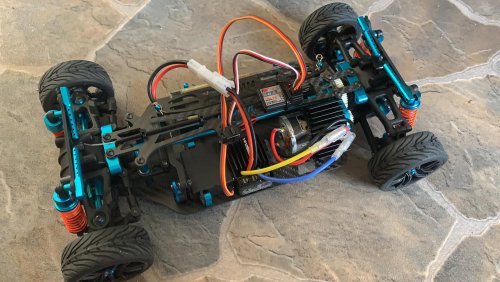
Cheap PMM TT-01E clone off eBay. But man - this thing is great! Speed test showed it was going 41.2km/h.
-
3 hours ago, MechTech said:
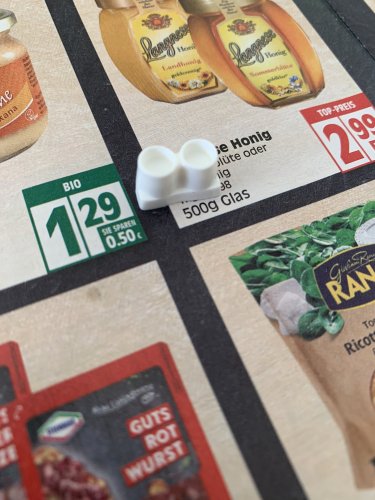
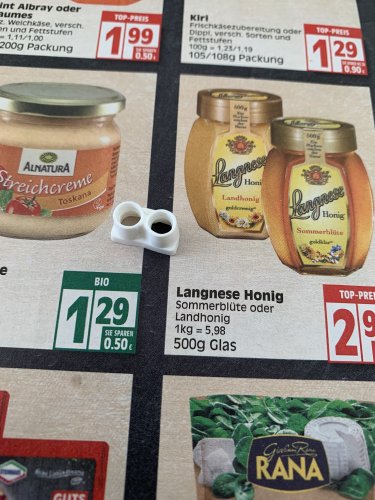
@Urashiman Ooooh, Langnese honey is on sale!
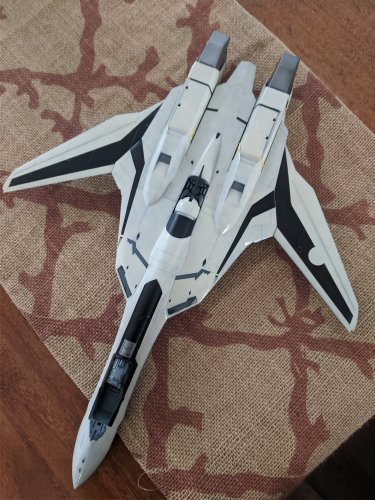
 C'mon, tell the truth, that is multiple kits you are putting together! That nose seam is horrible and the winshield. But you're making it SOOOoooo much better!
@Thom The Joxer looks like the muscle car of Starfleet! It's all nacelles and little ship. It just needs a supercharger scoop on the hood somewhere
 Great build! Nice-n-clean finish too!
yeah .. the good honey haha.
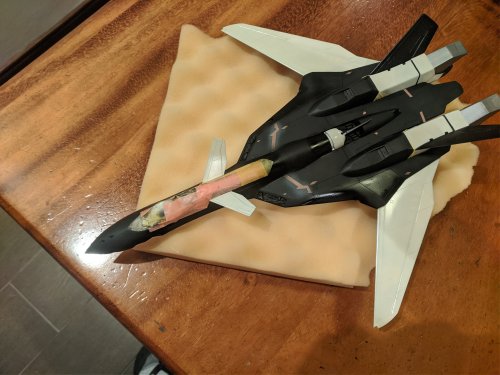
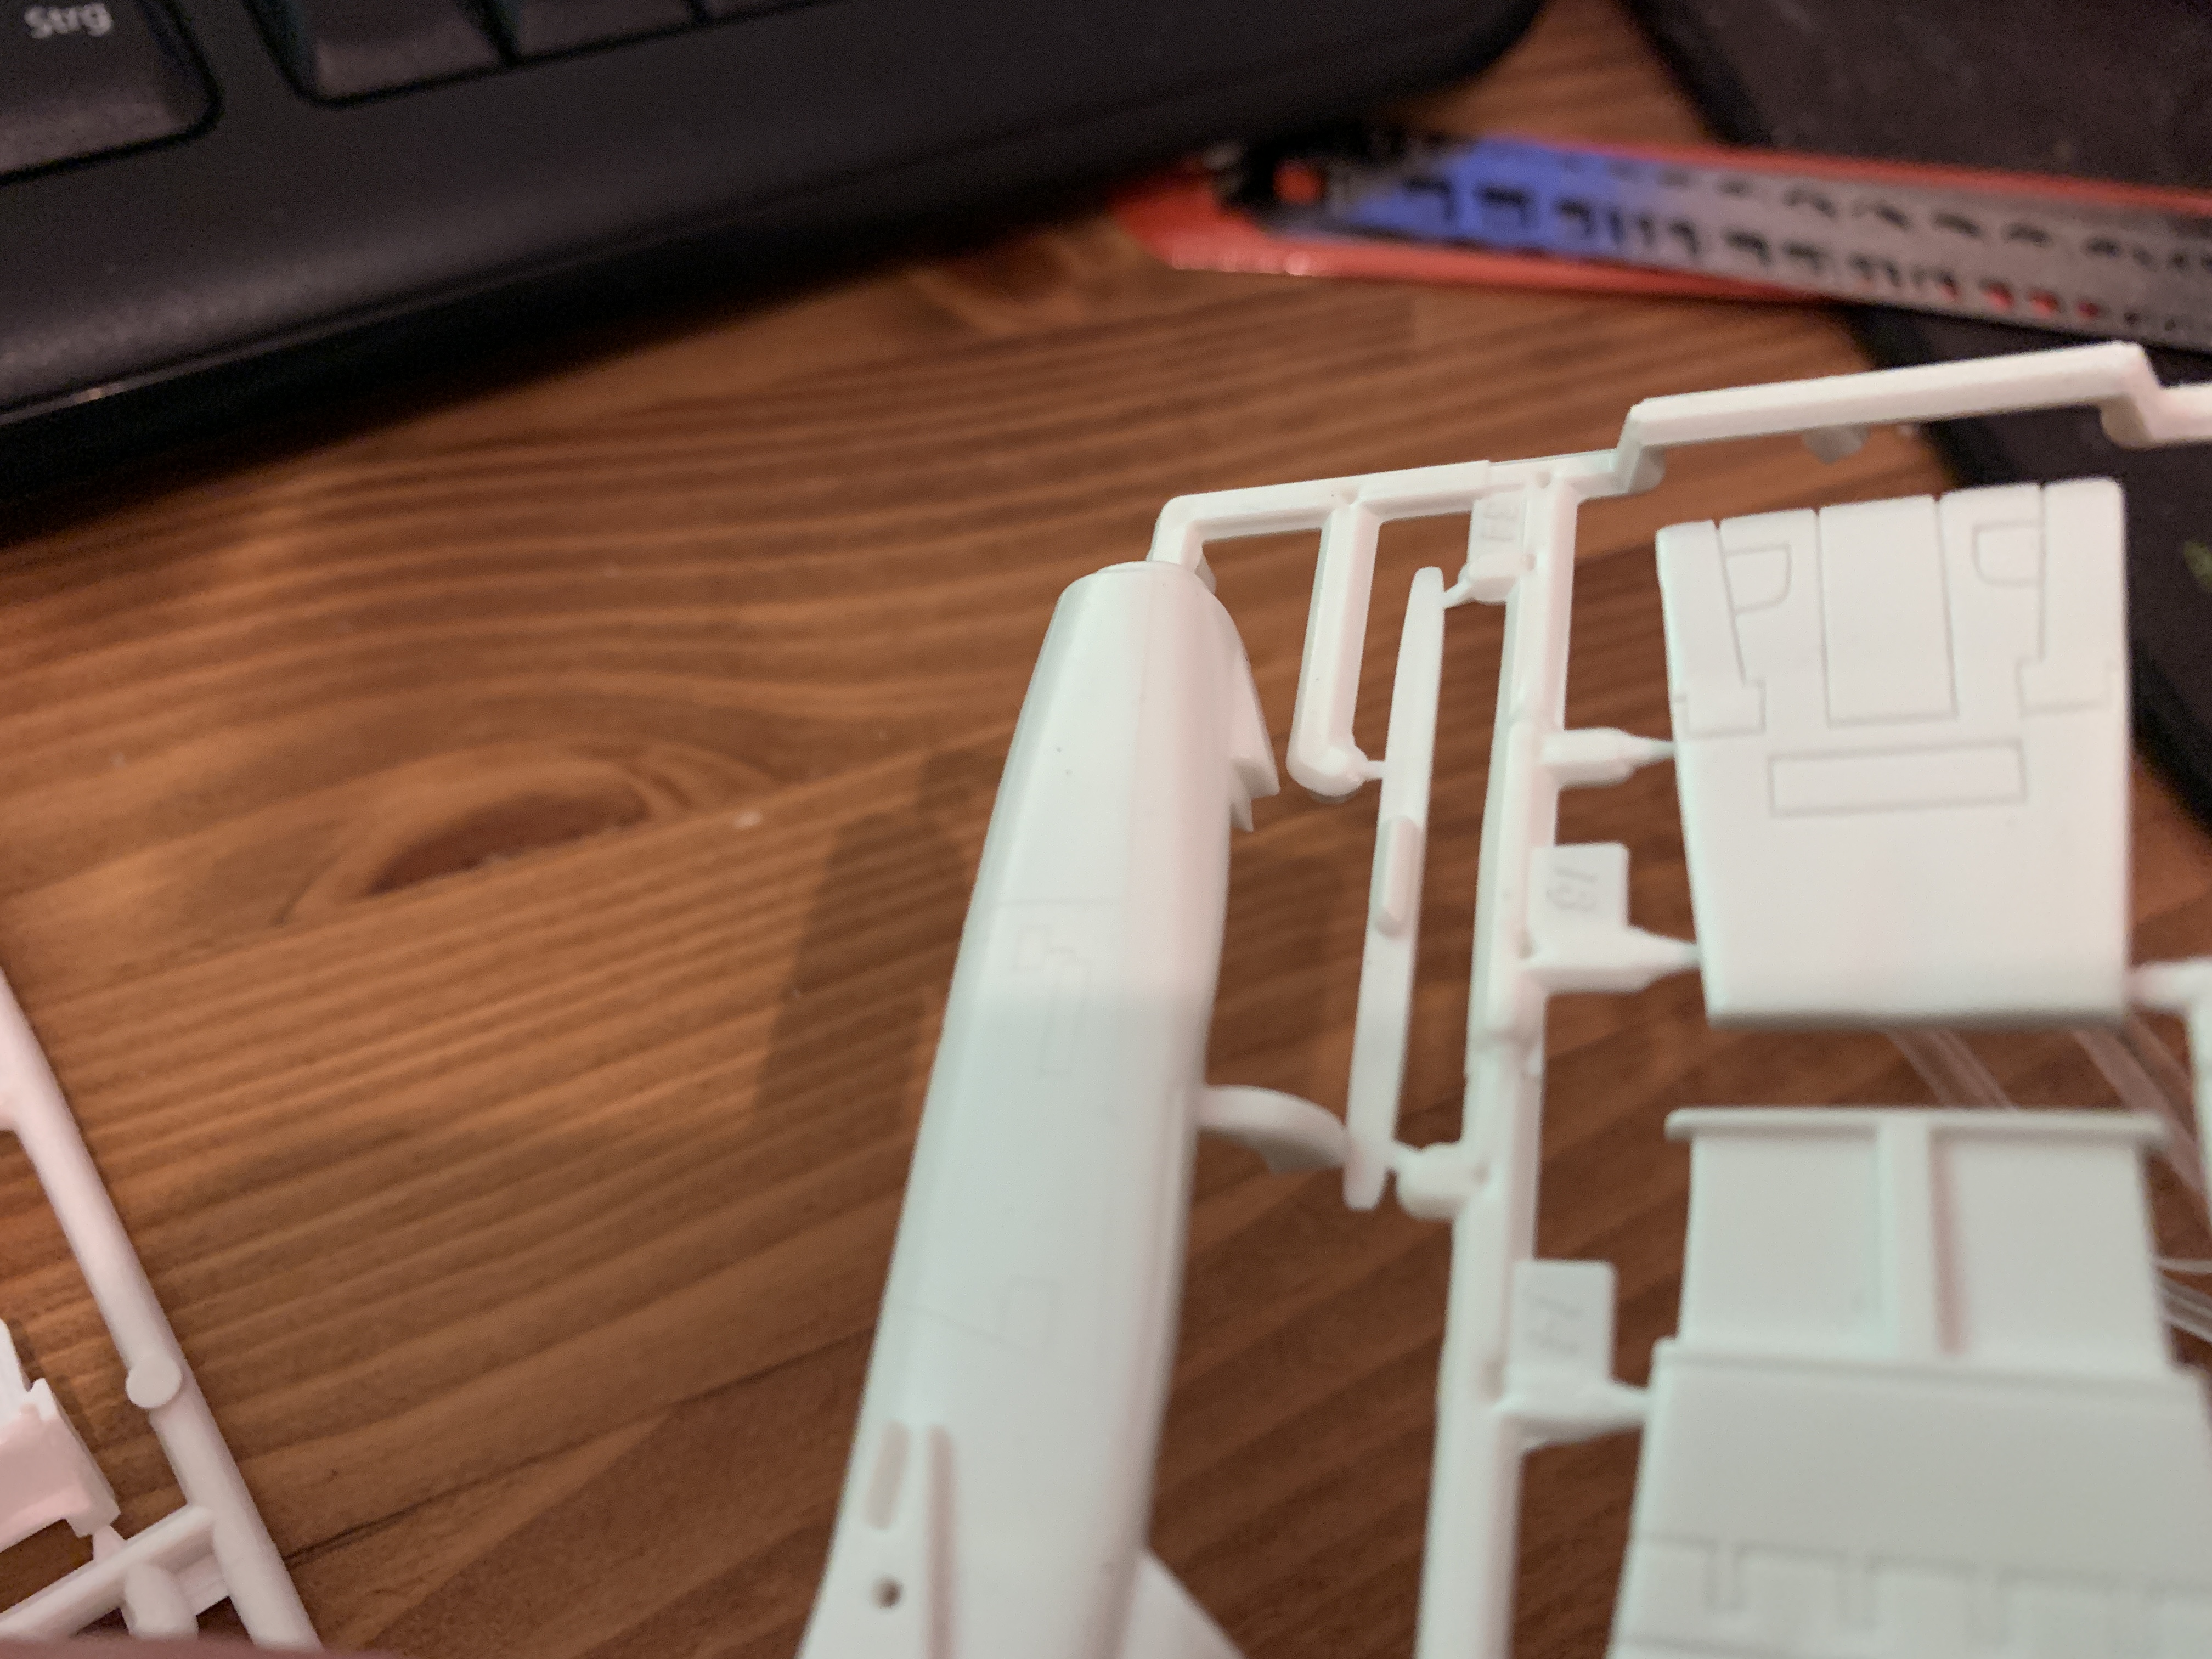
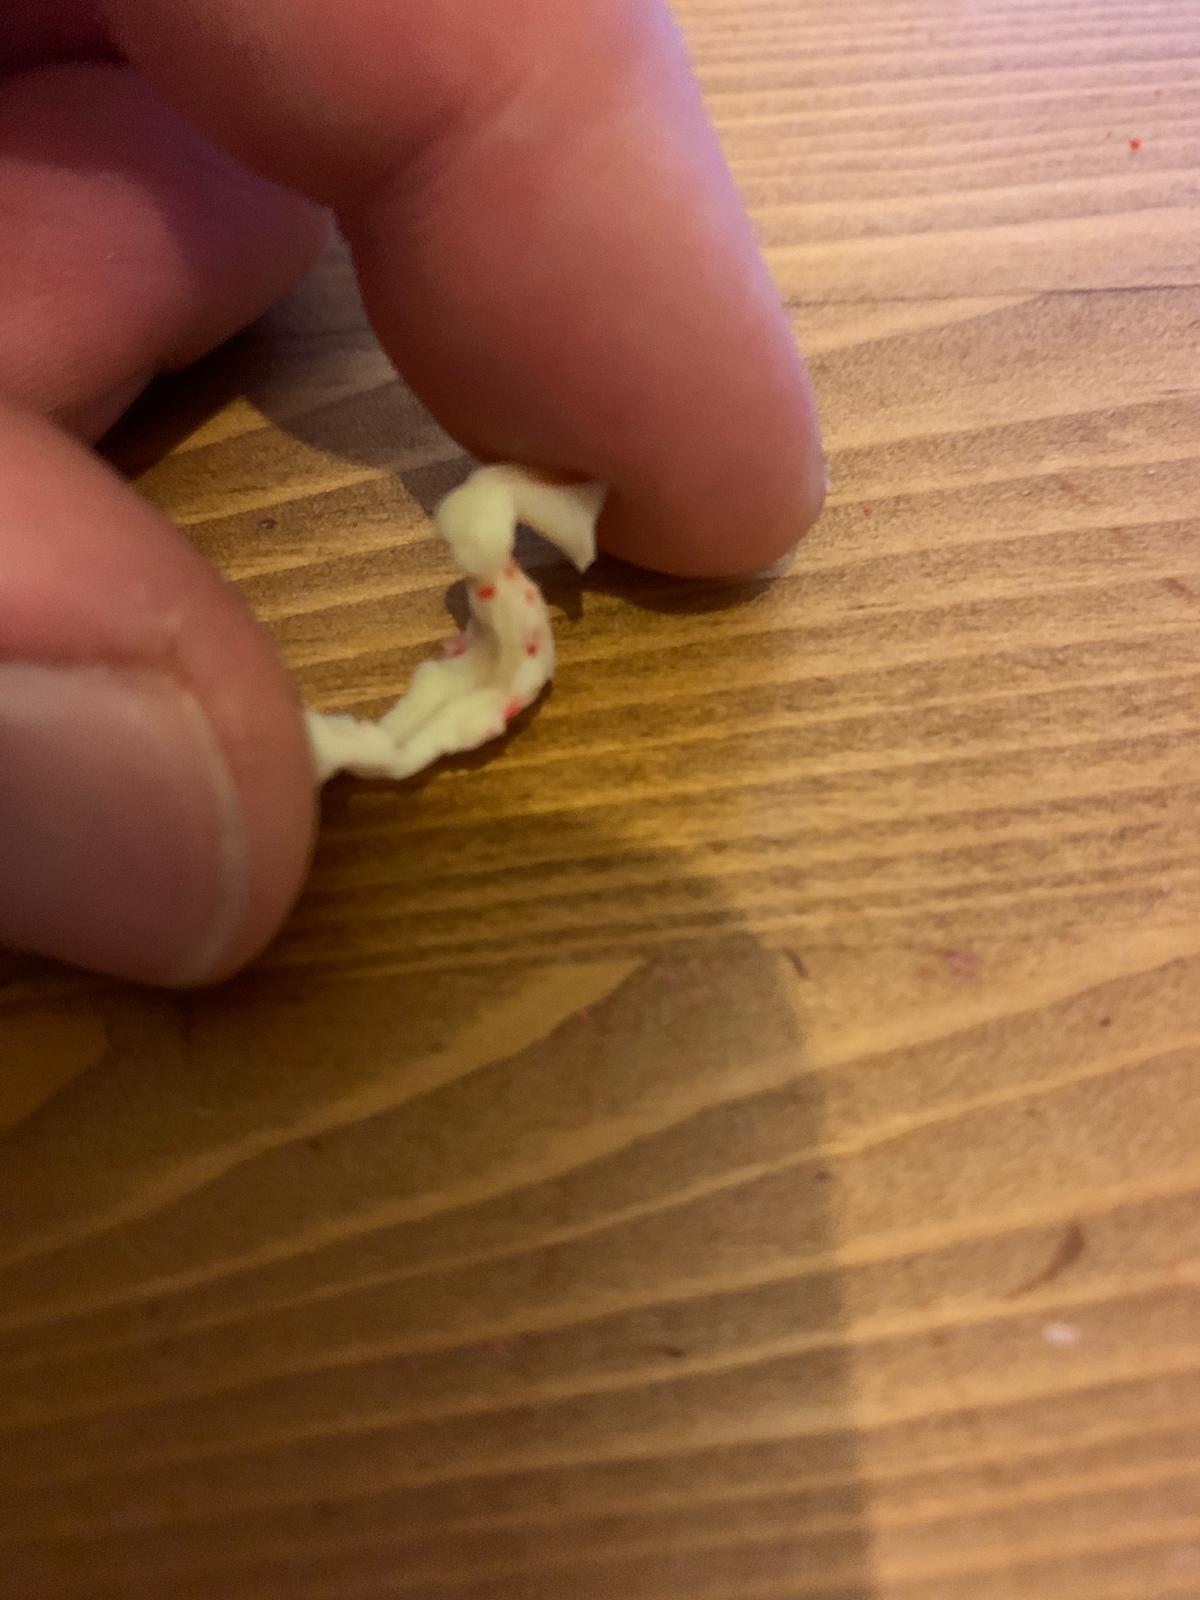
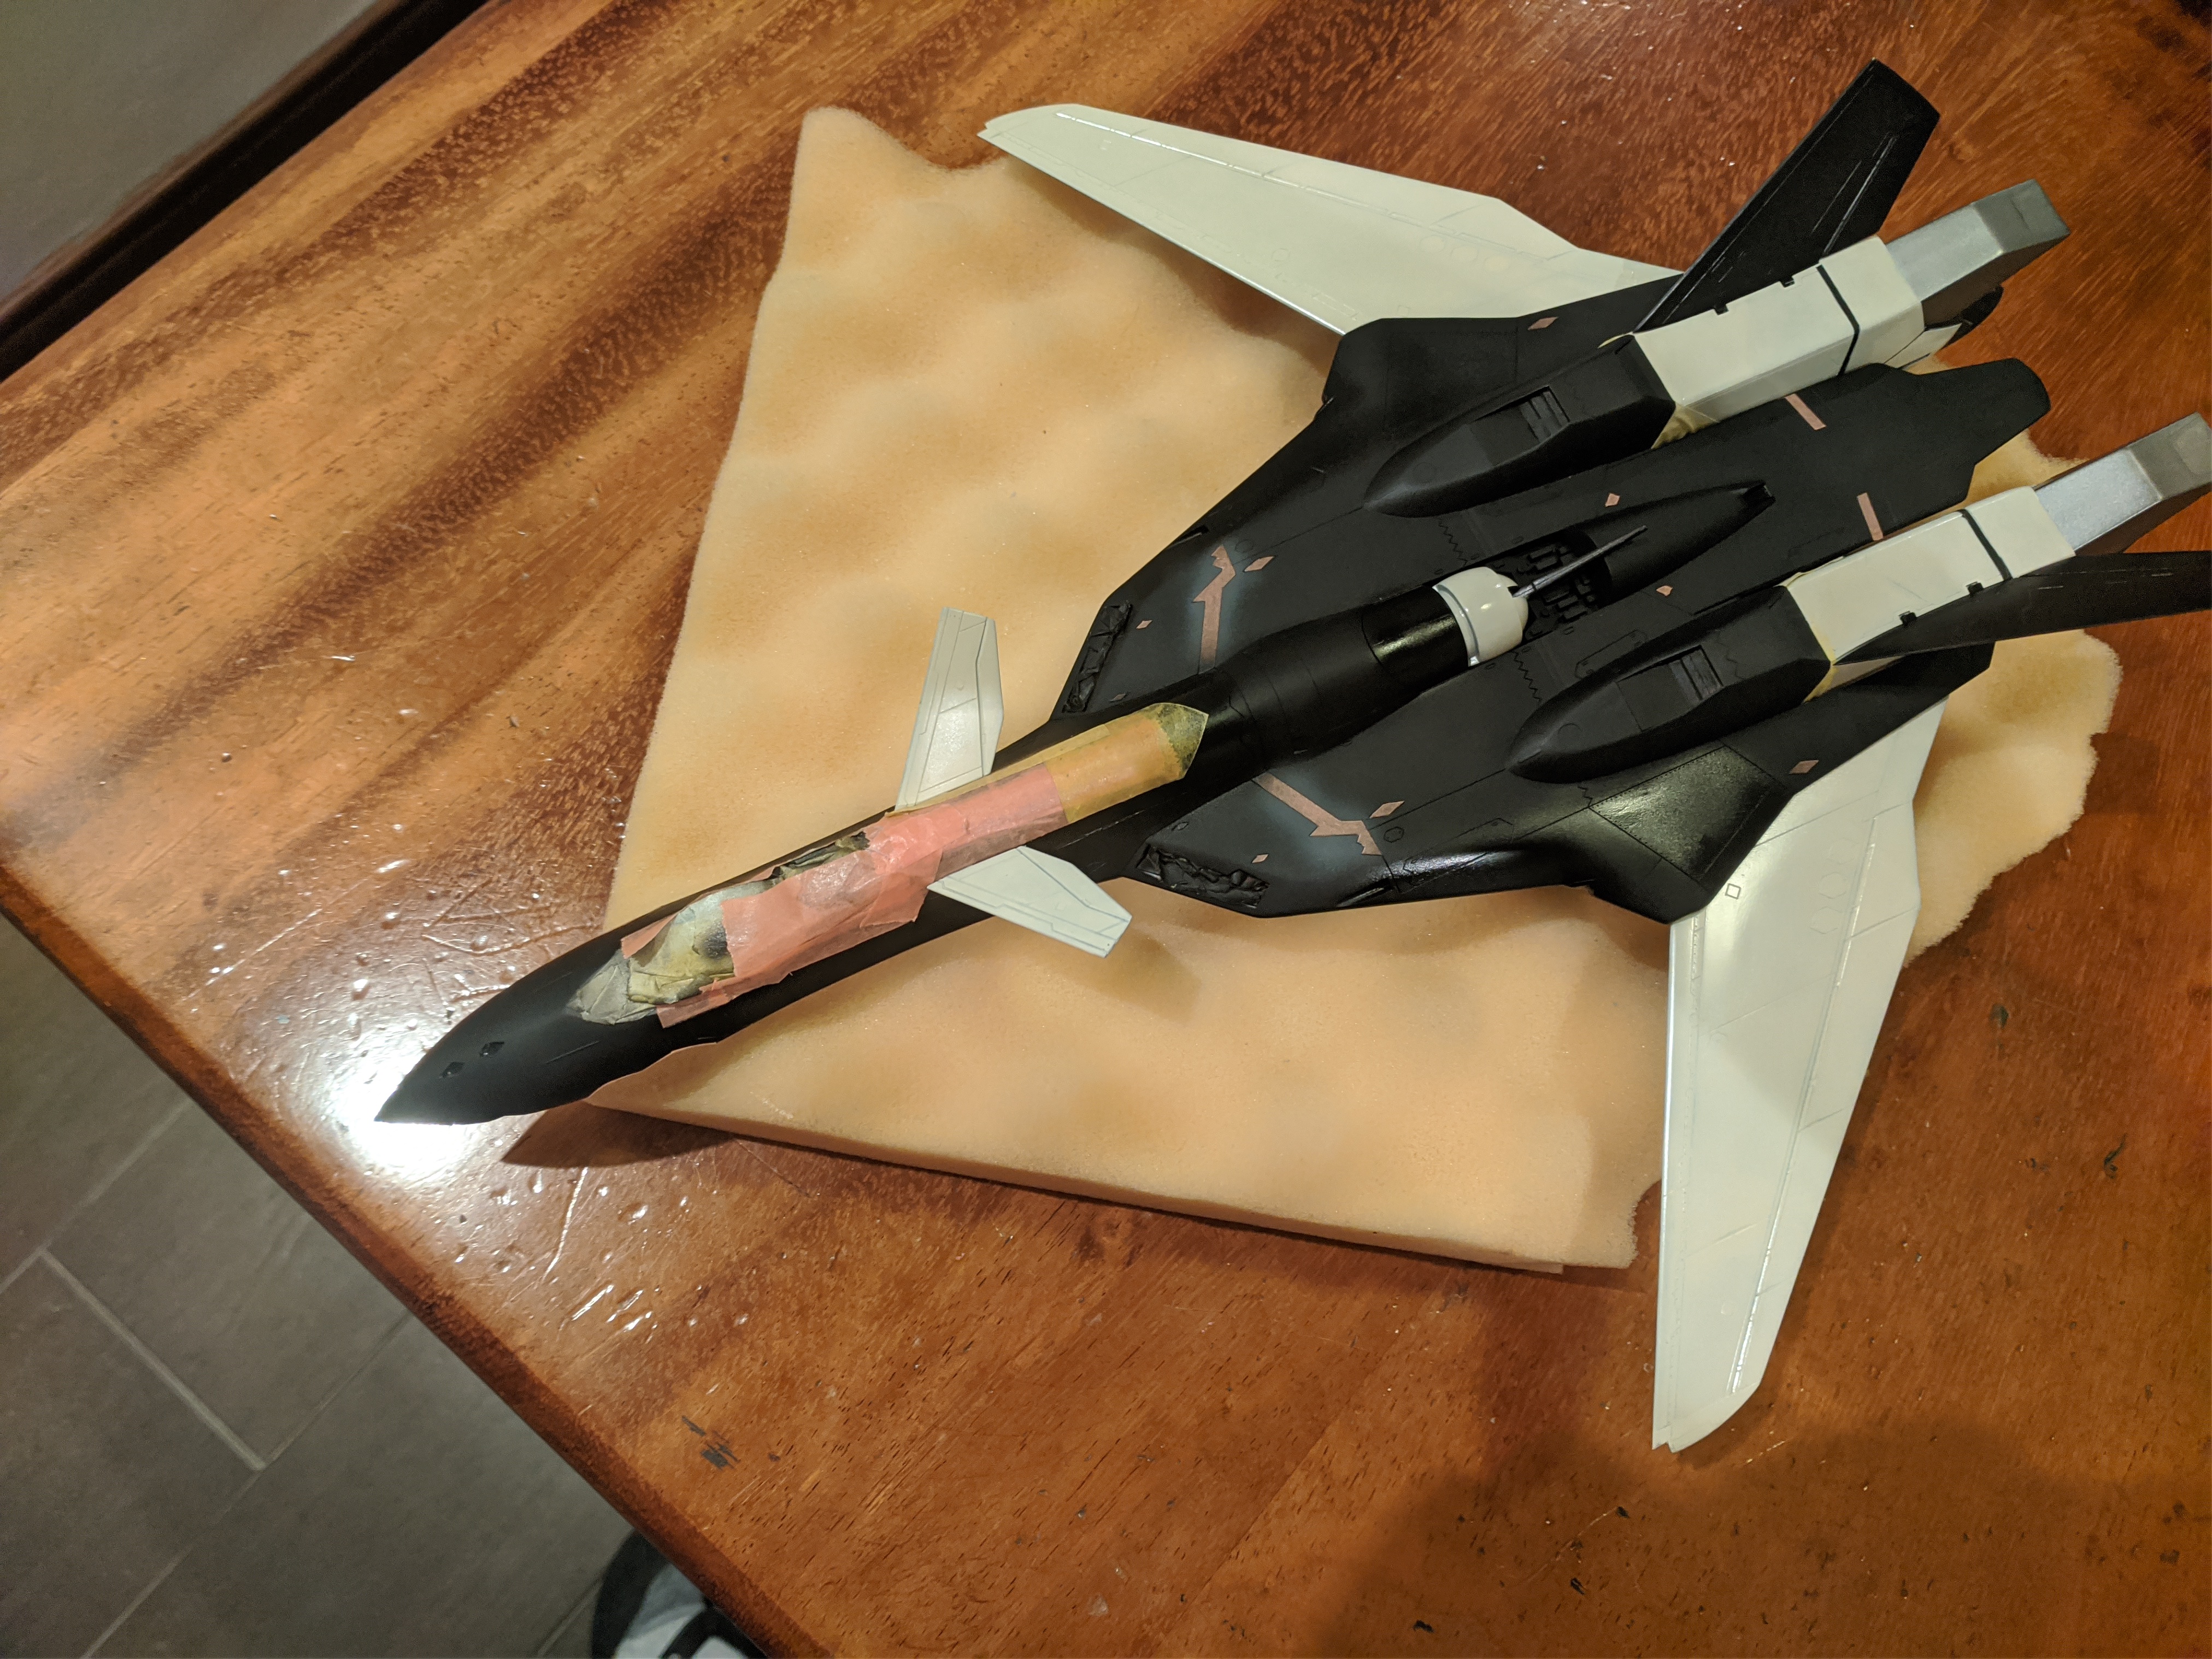
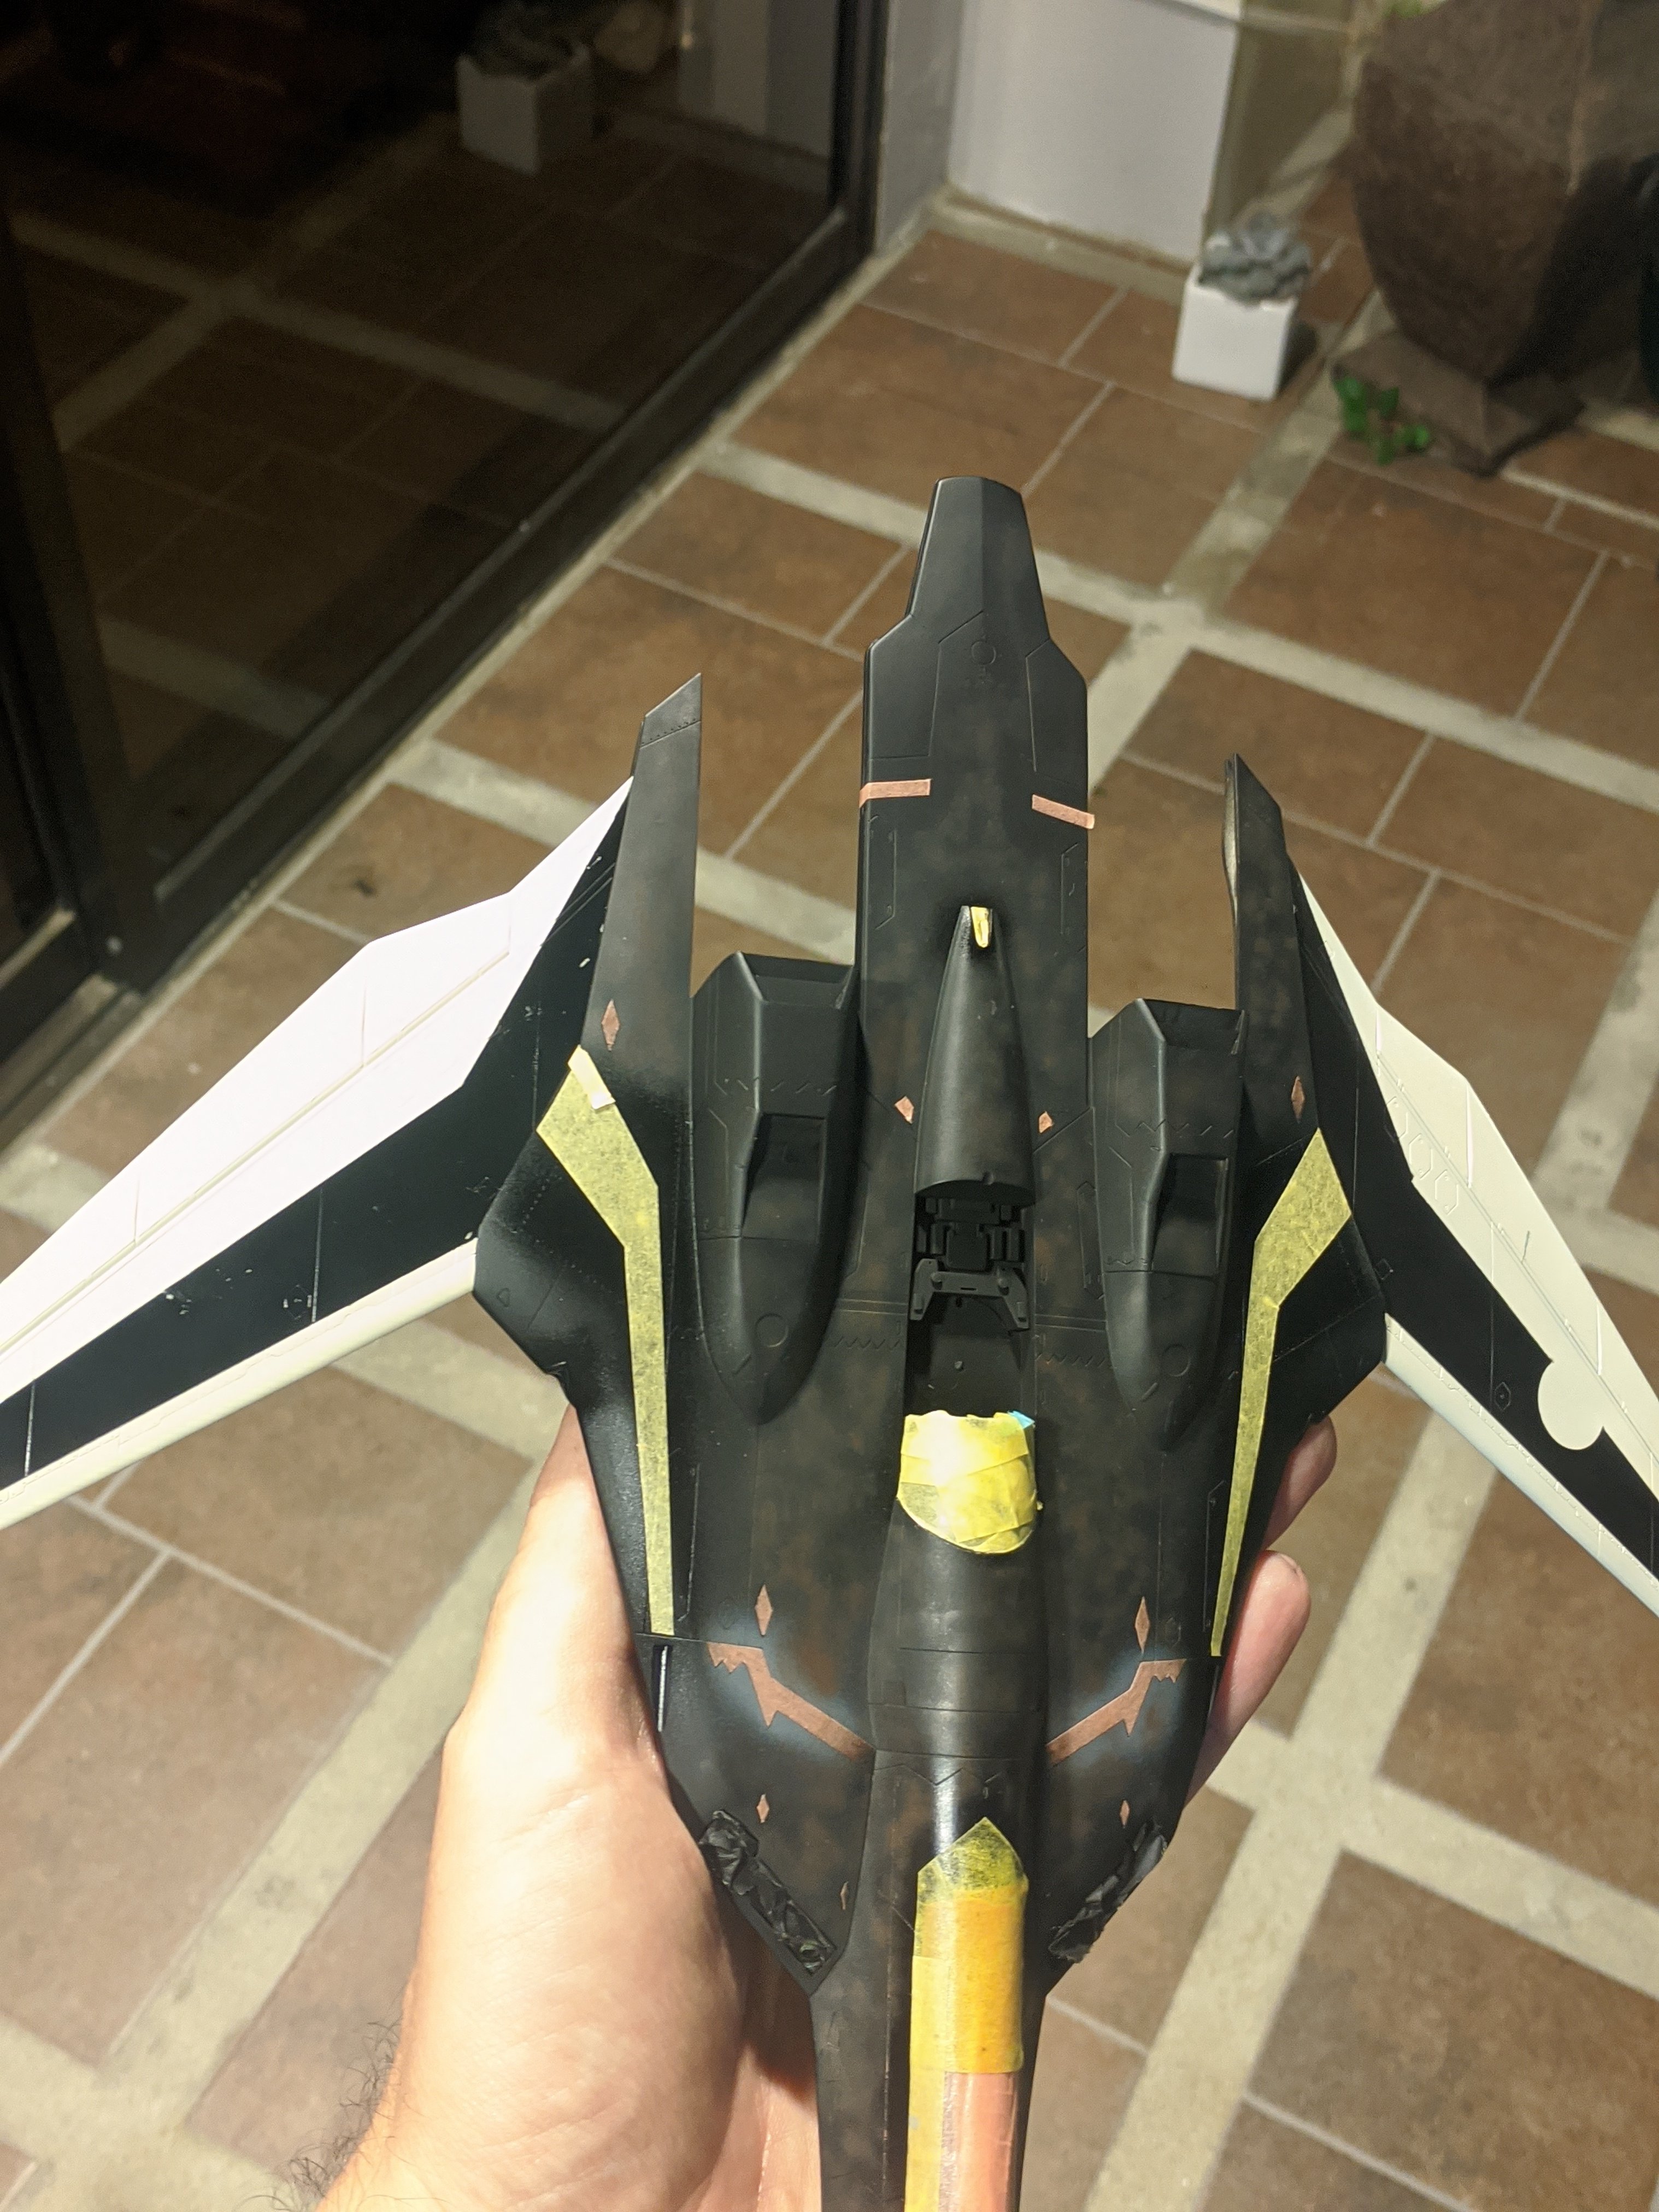
WELL ... I put together the F14 cockpit and the F-5B. So kinda the truth there. To test if everything fits, I use UHU Patafix. That is the white stuff squeezing out through the seems. I also use it fix the parts to little wood sticks for airbrushing. That stuff comes in really handy. Doesn't work so much for posters, but for modelkits.
-
Hey, nice work! What's the 3D program you use?
-
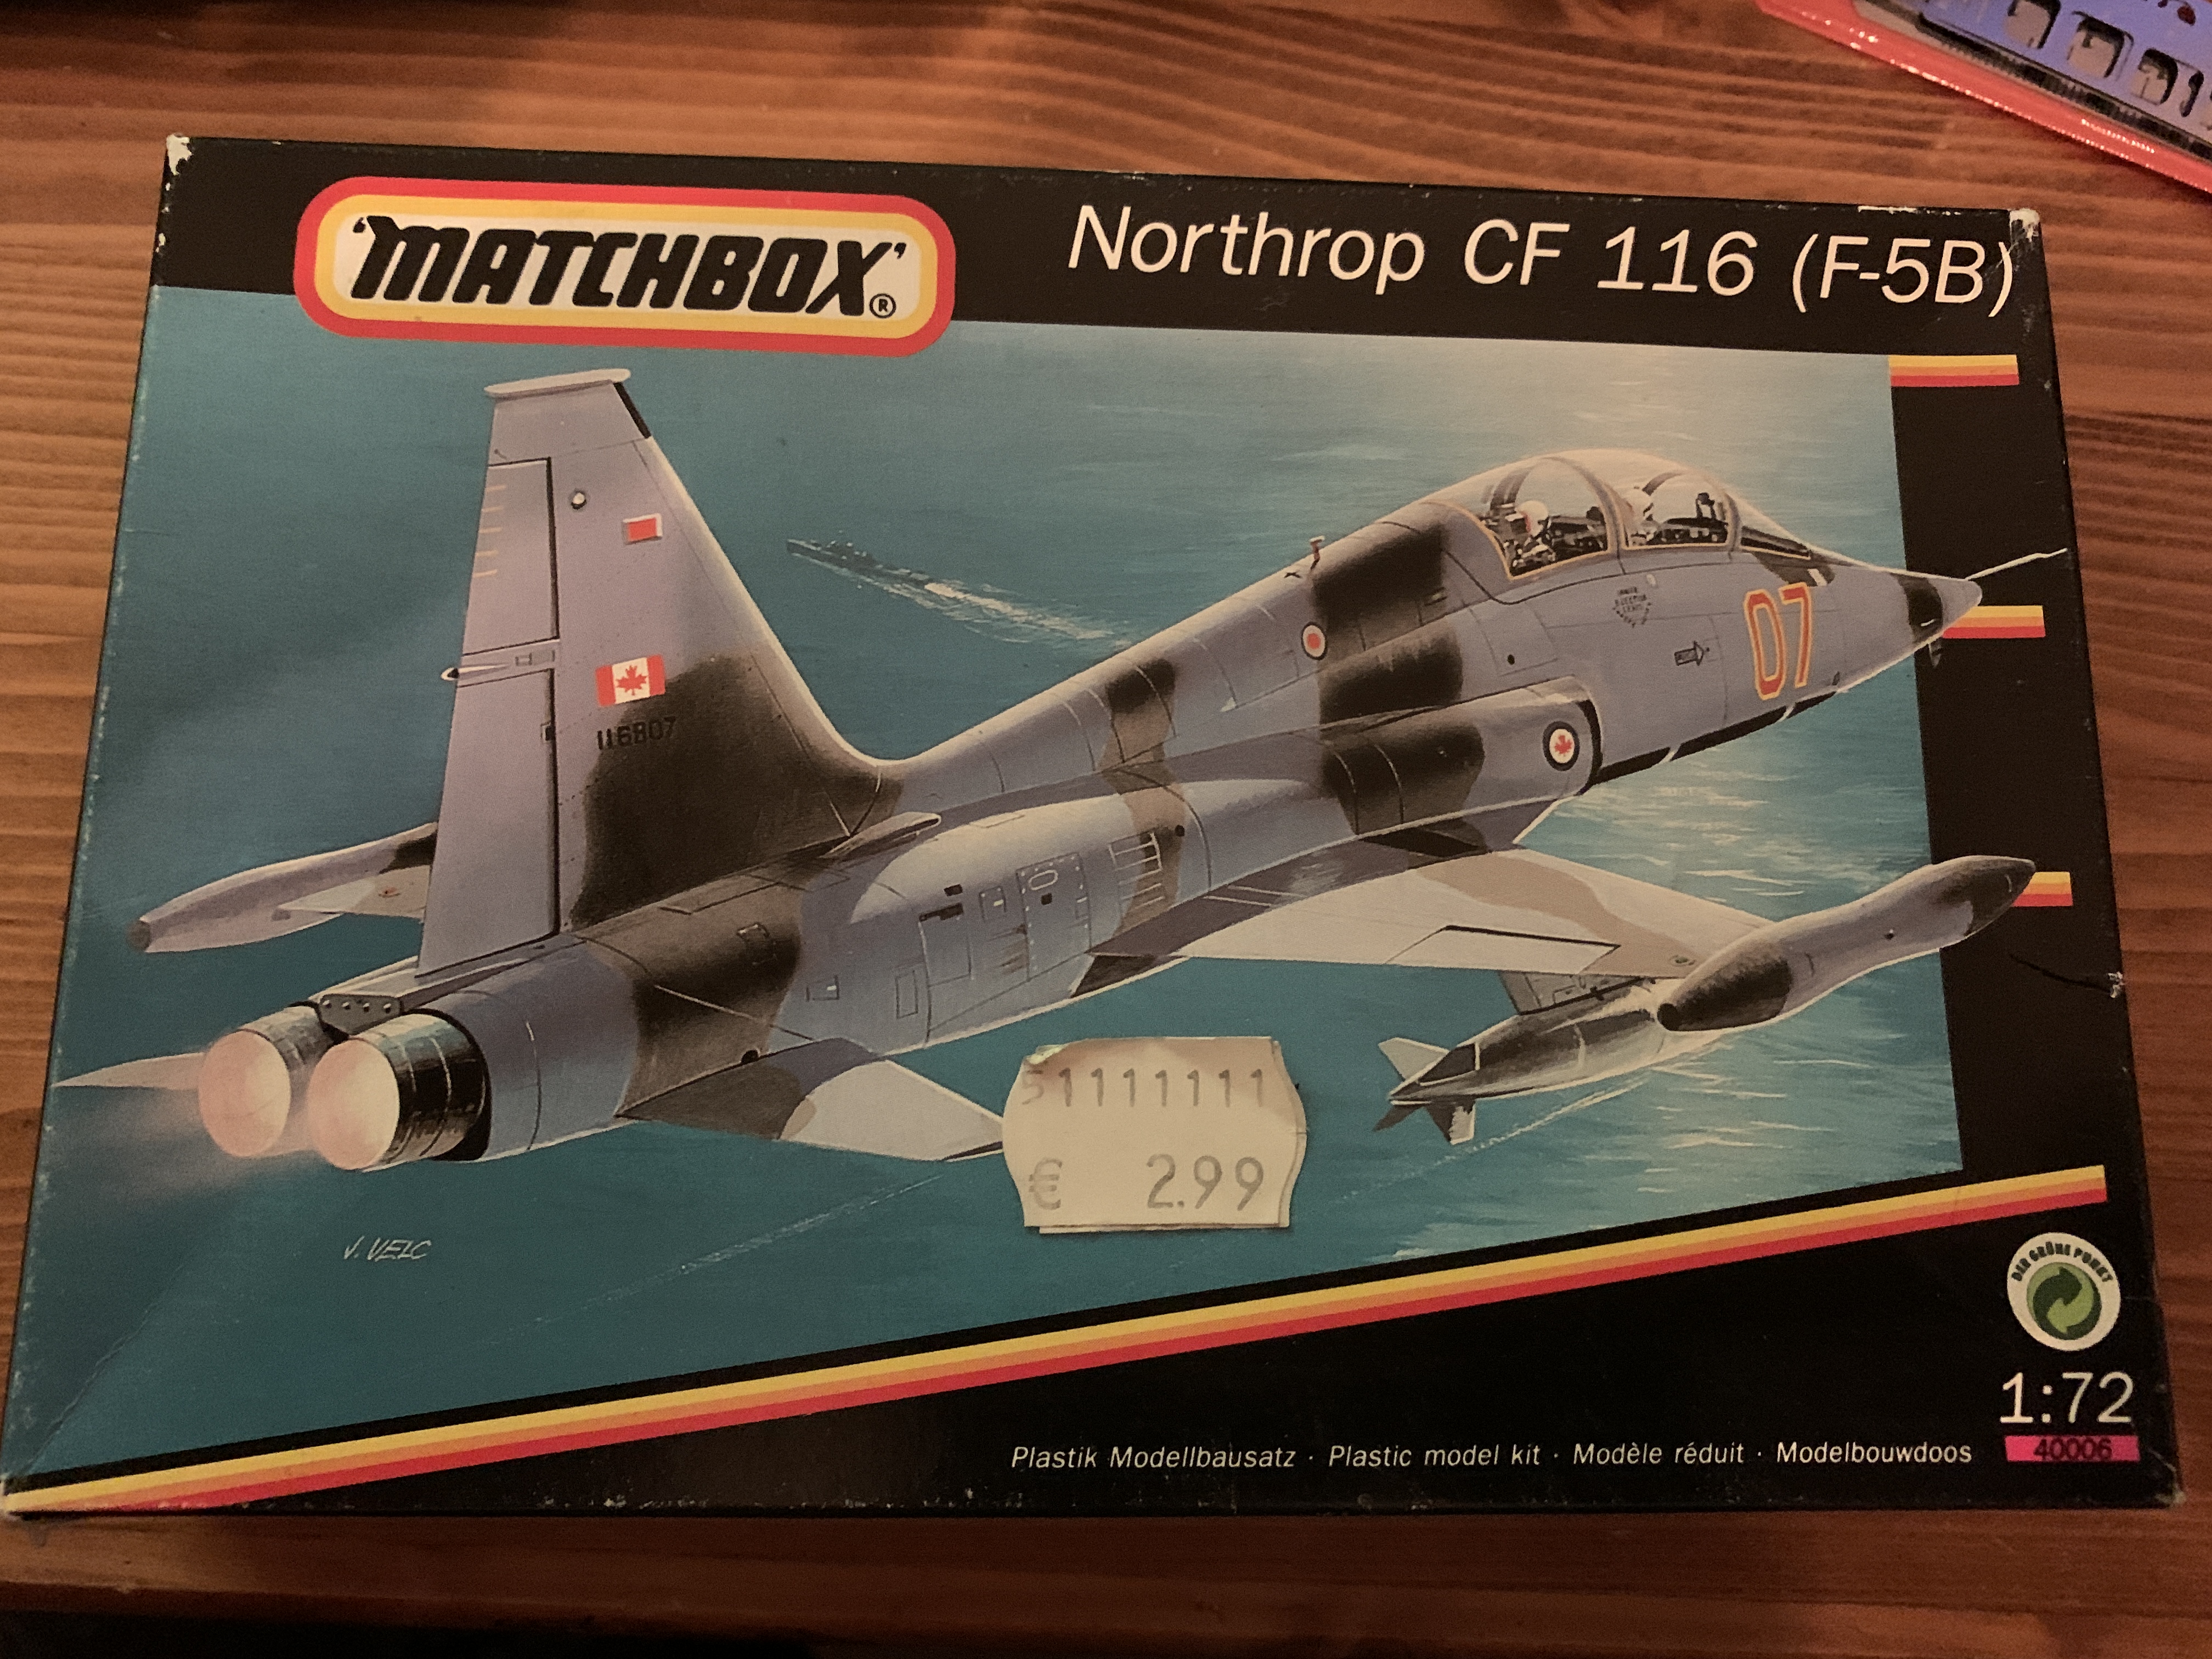
I thought about having a bit fun, so I digged up this kit my older brother gave me a while ago:

He got that one of the bargain bin from one of the many hobby stores years ago. A whopping € 2.99! Please be aware, that a simple kebap is more expensive than this.
Anyway. The kit is really simple, based upon a mold that was created by revell somewhen in the 1970s.
This kit is terrible. It has rised and engraved panel lines and the detail in general is horrible. BUT! it kinda fits well. On a scale from 1 to 10 the whole kit would be a 2/10.

What's the plan?
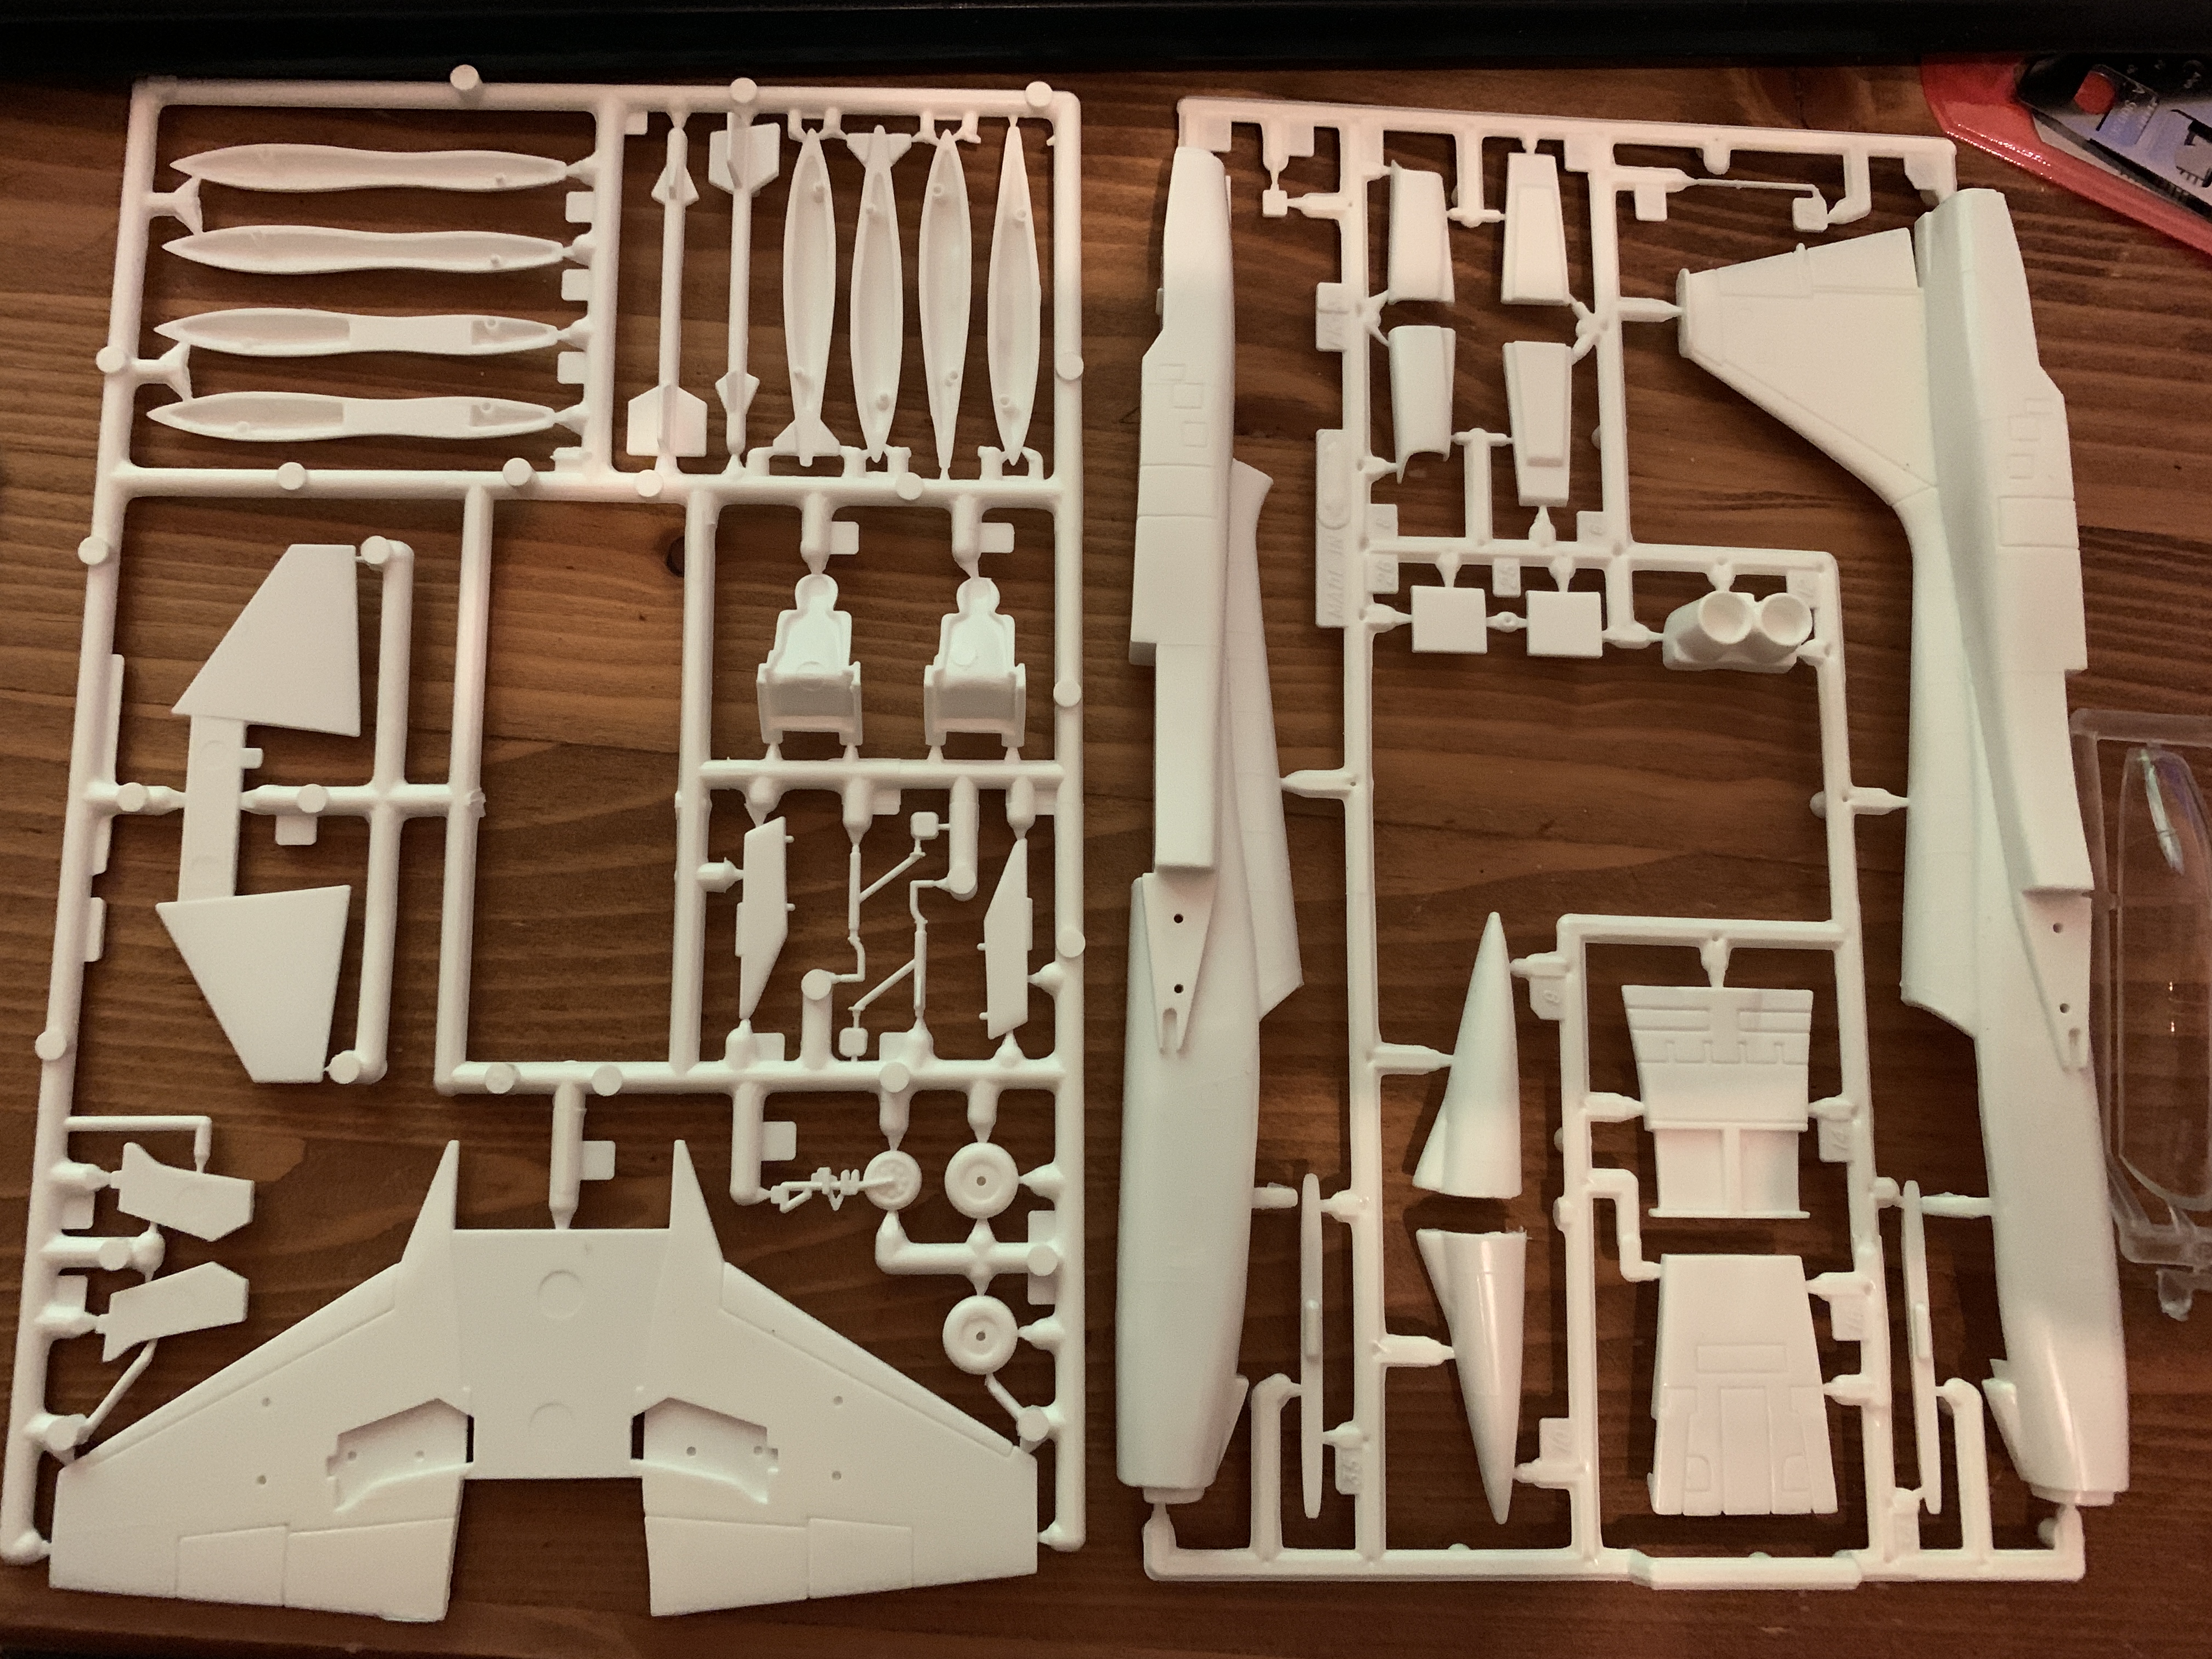
- Get a somewhat proper cockpit into this kit, as the original cockpit detail consists of only two simple pilot seats (see below pictures)
- Rescribe the rised panel lines
- Fix the canopy
- Fix the exhaust
- Fix whatever comes up during building to make it look somehow acceptable.
I am not going for a 100% scale build here, just something that won't give you eye cancer while looking at it.
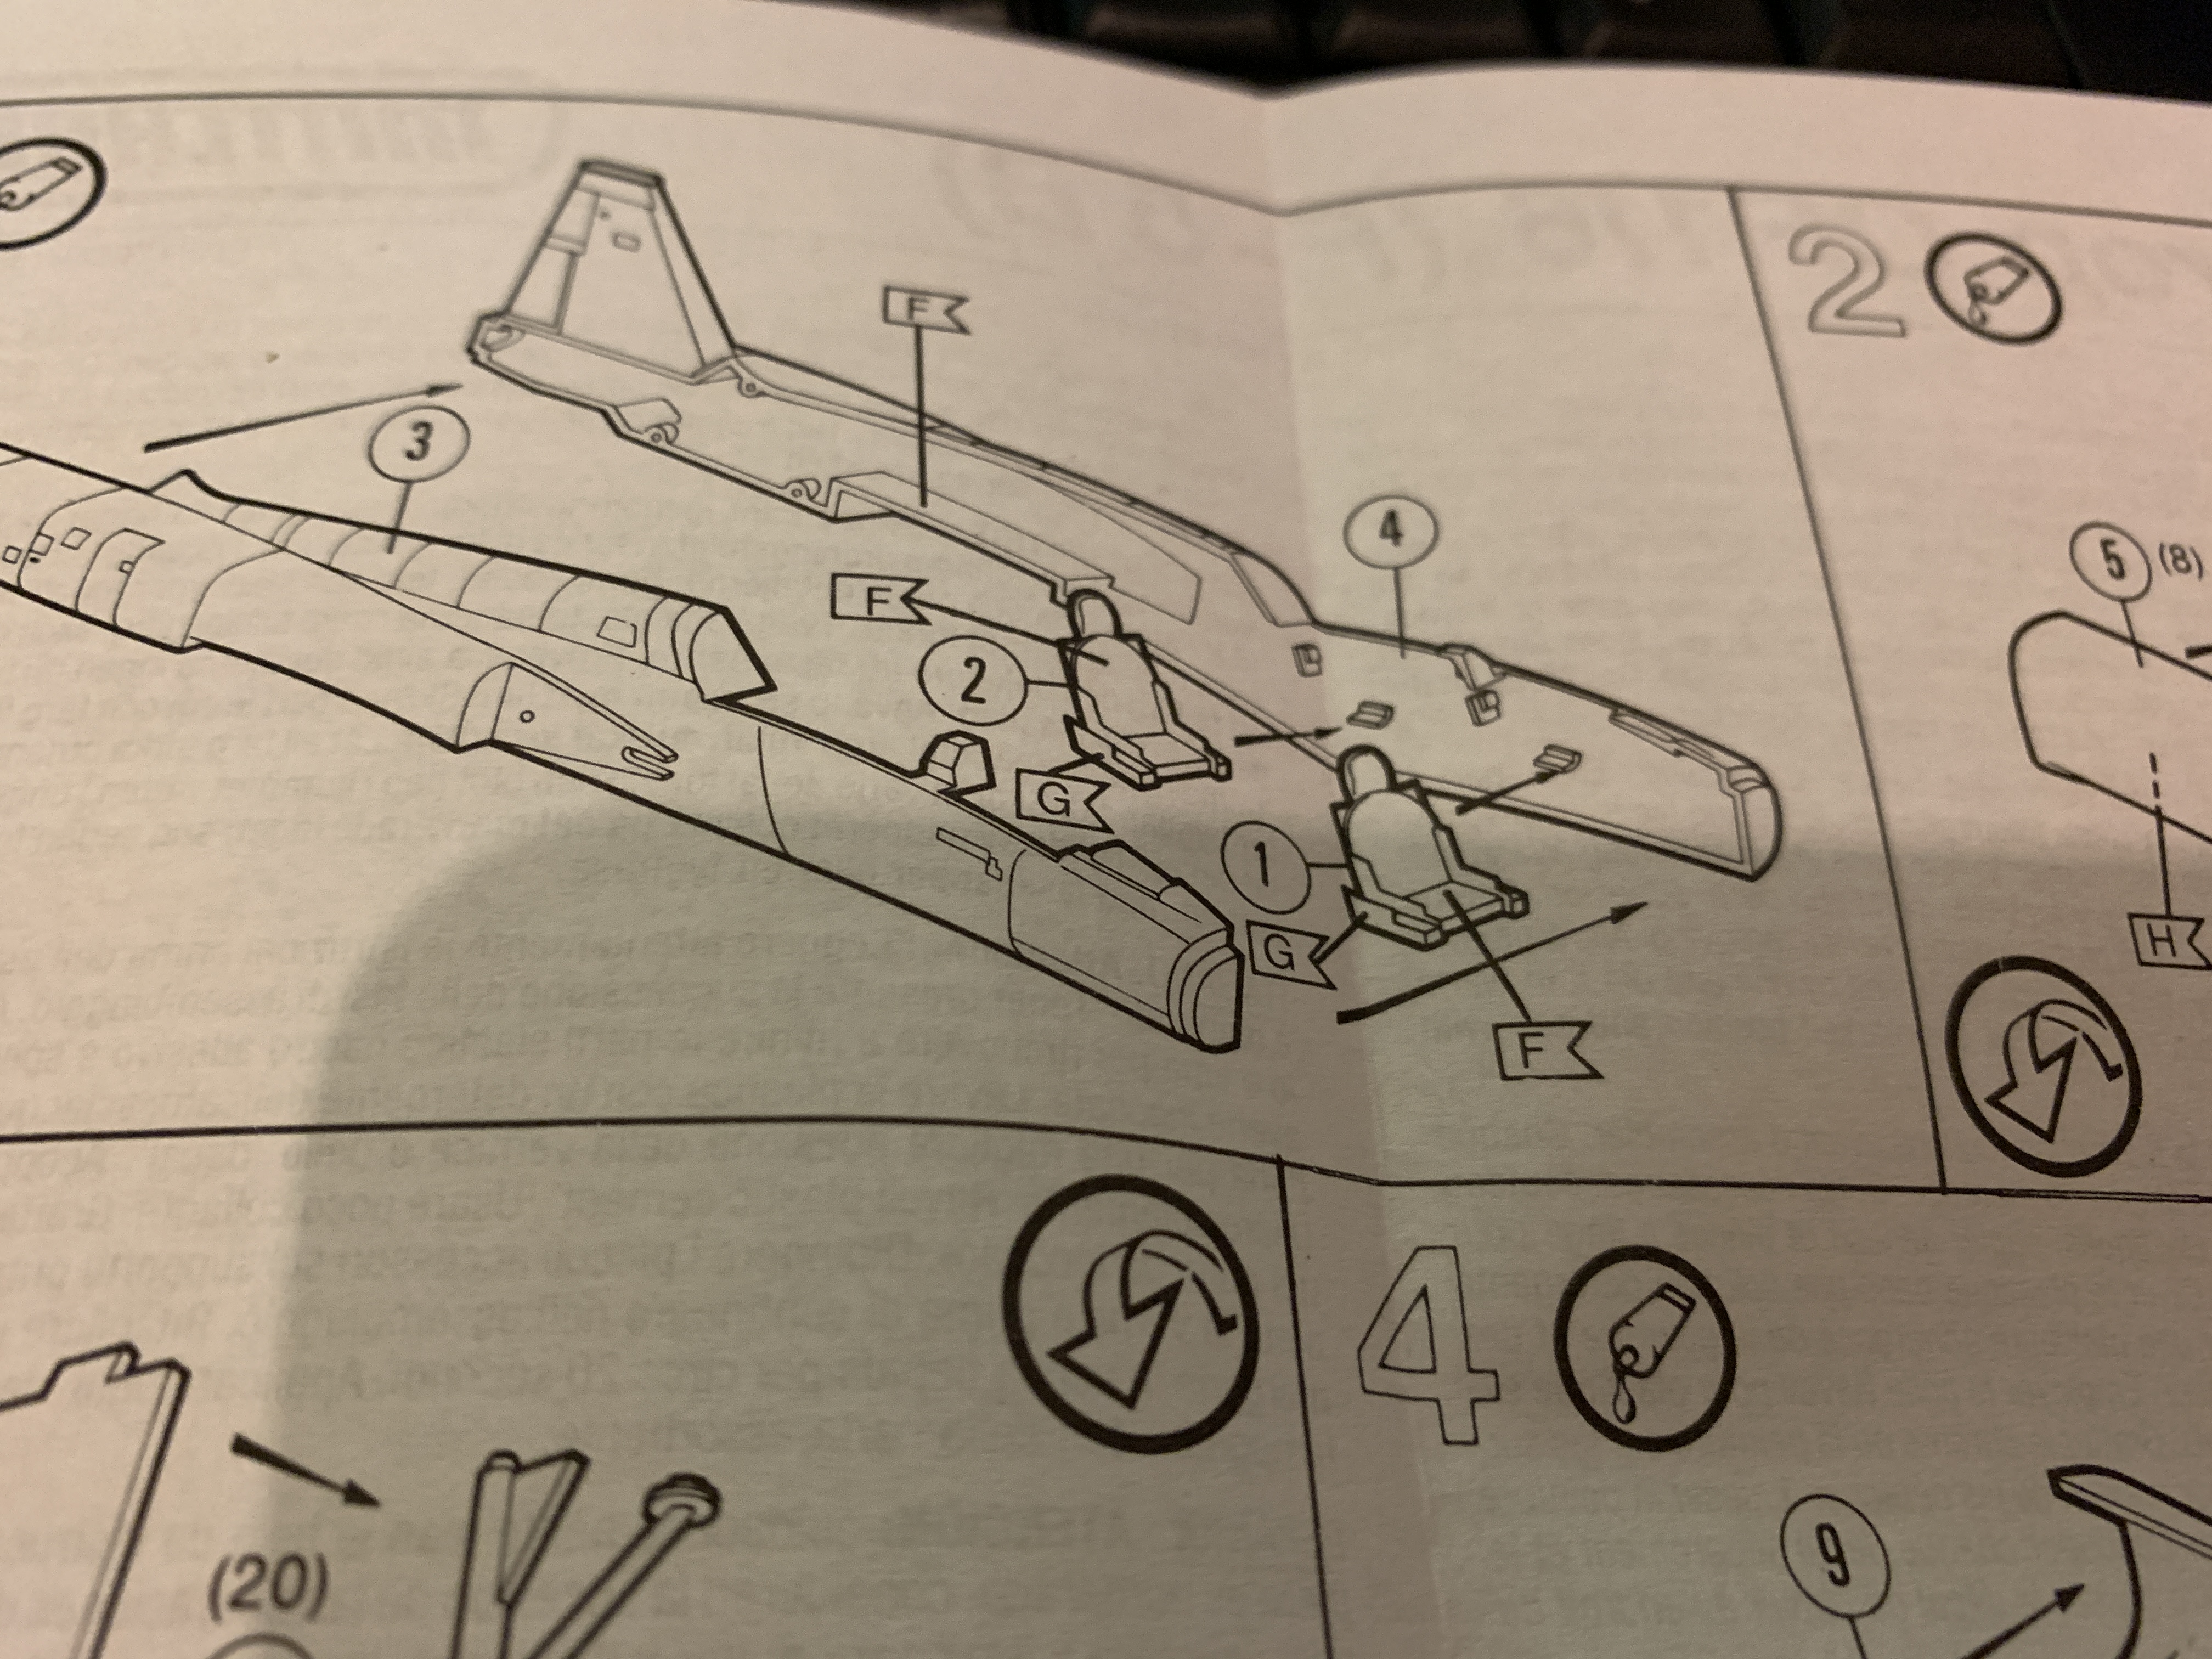
Cockpit work:This is what the manual says. Glue the two seats and done.
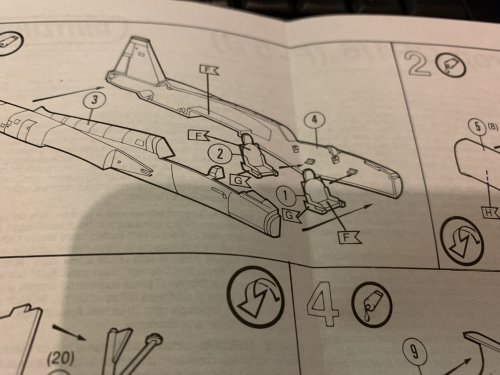
I am going to recycle an old F-14 cockpit for this one. It's from the 1977 Hasegawa F-14 mold (the one that comes with the Macross Zero F-14).
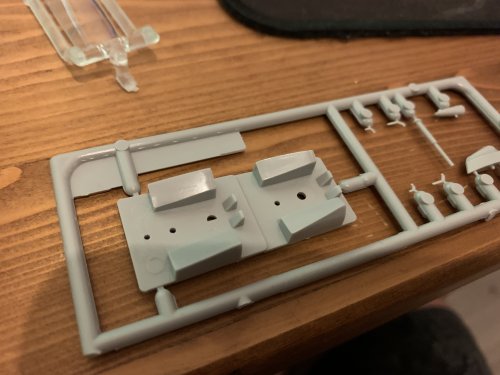
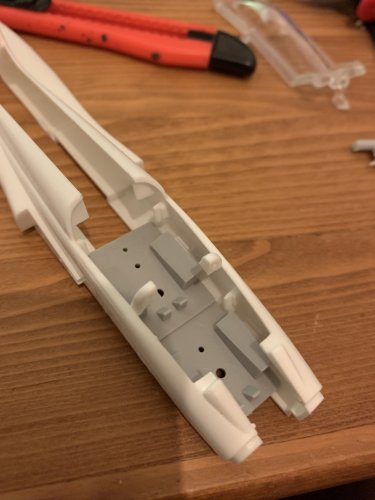
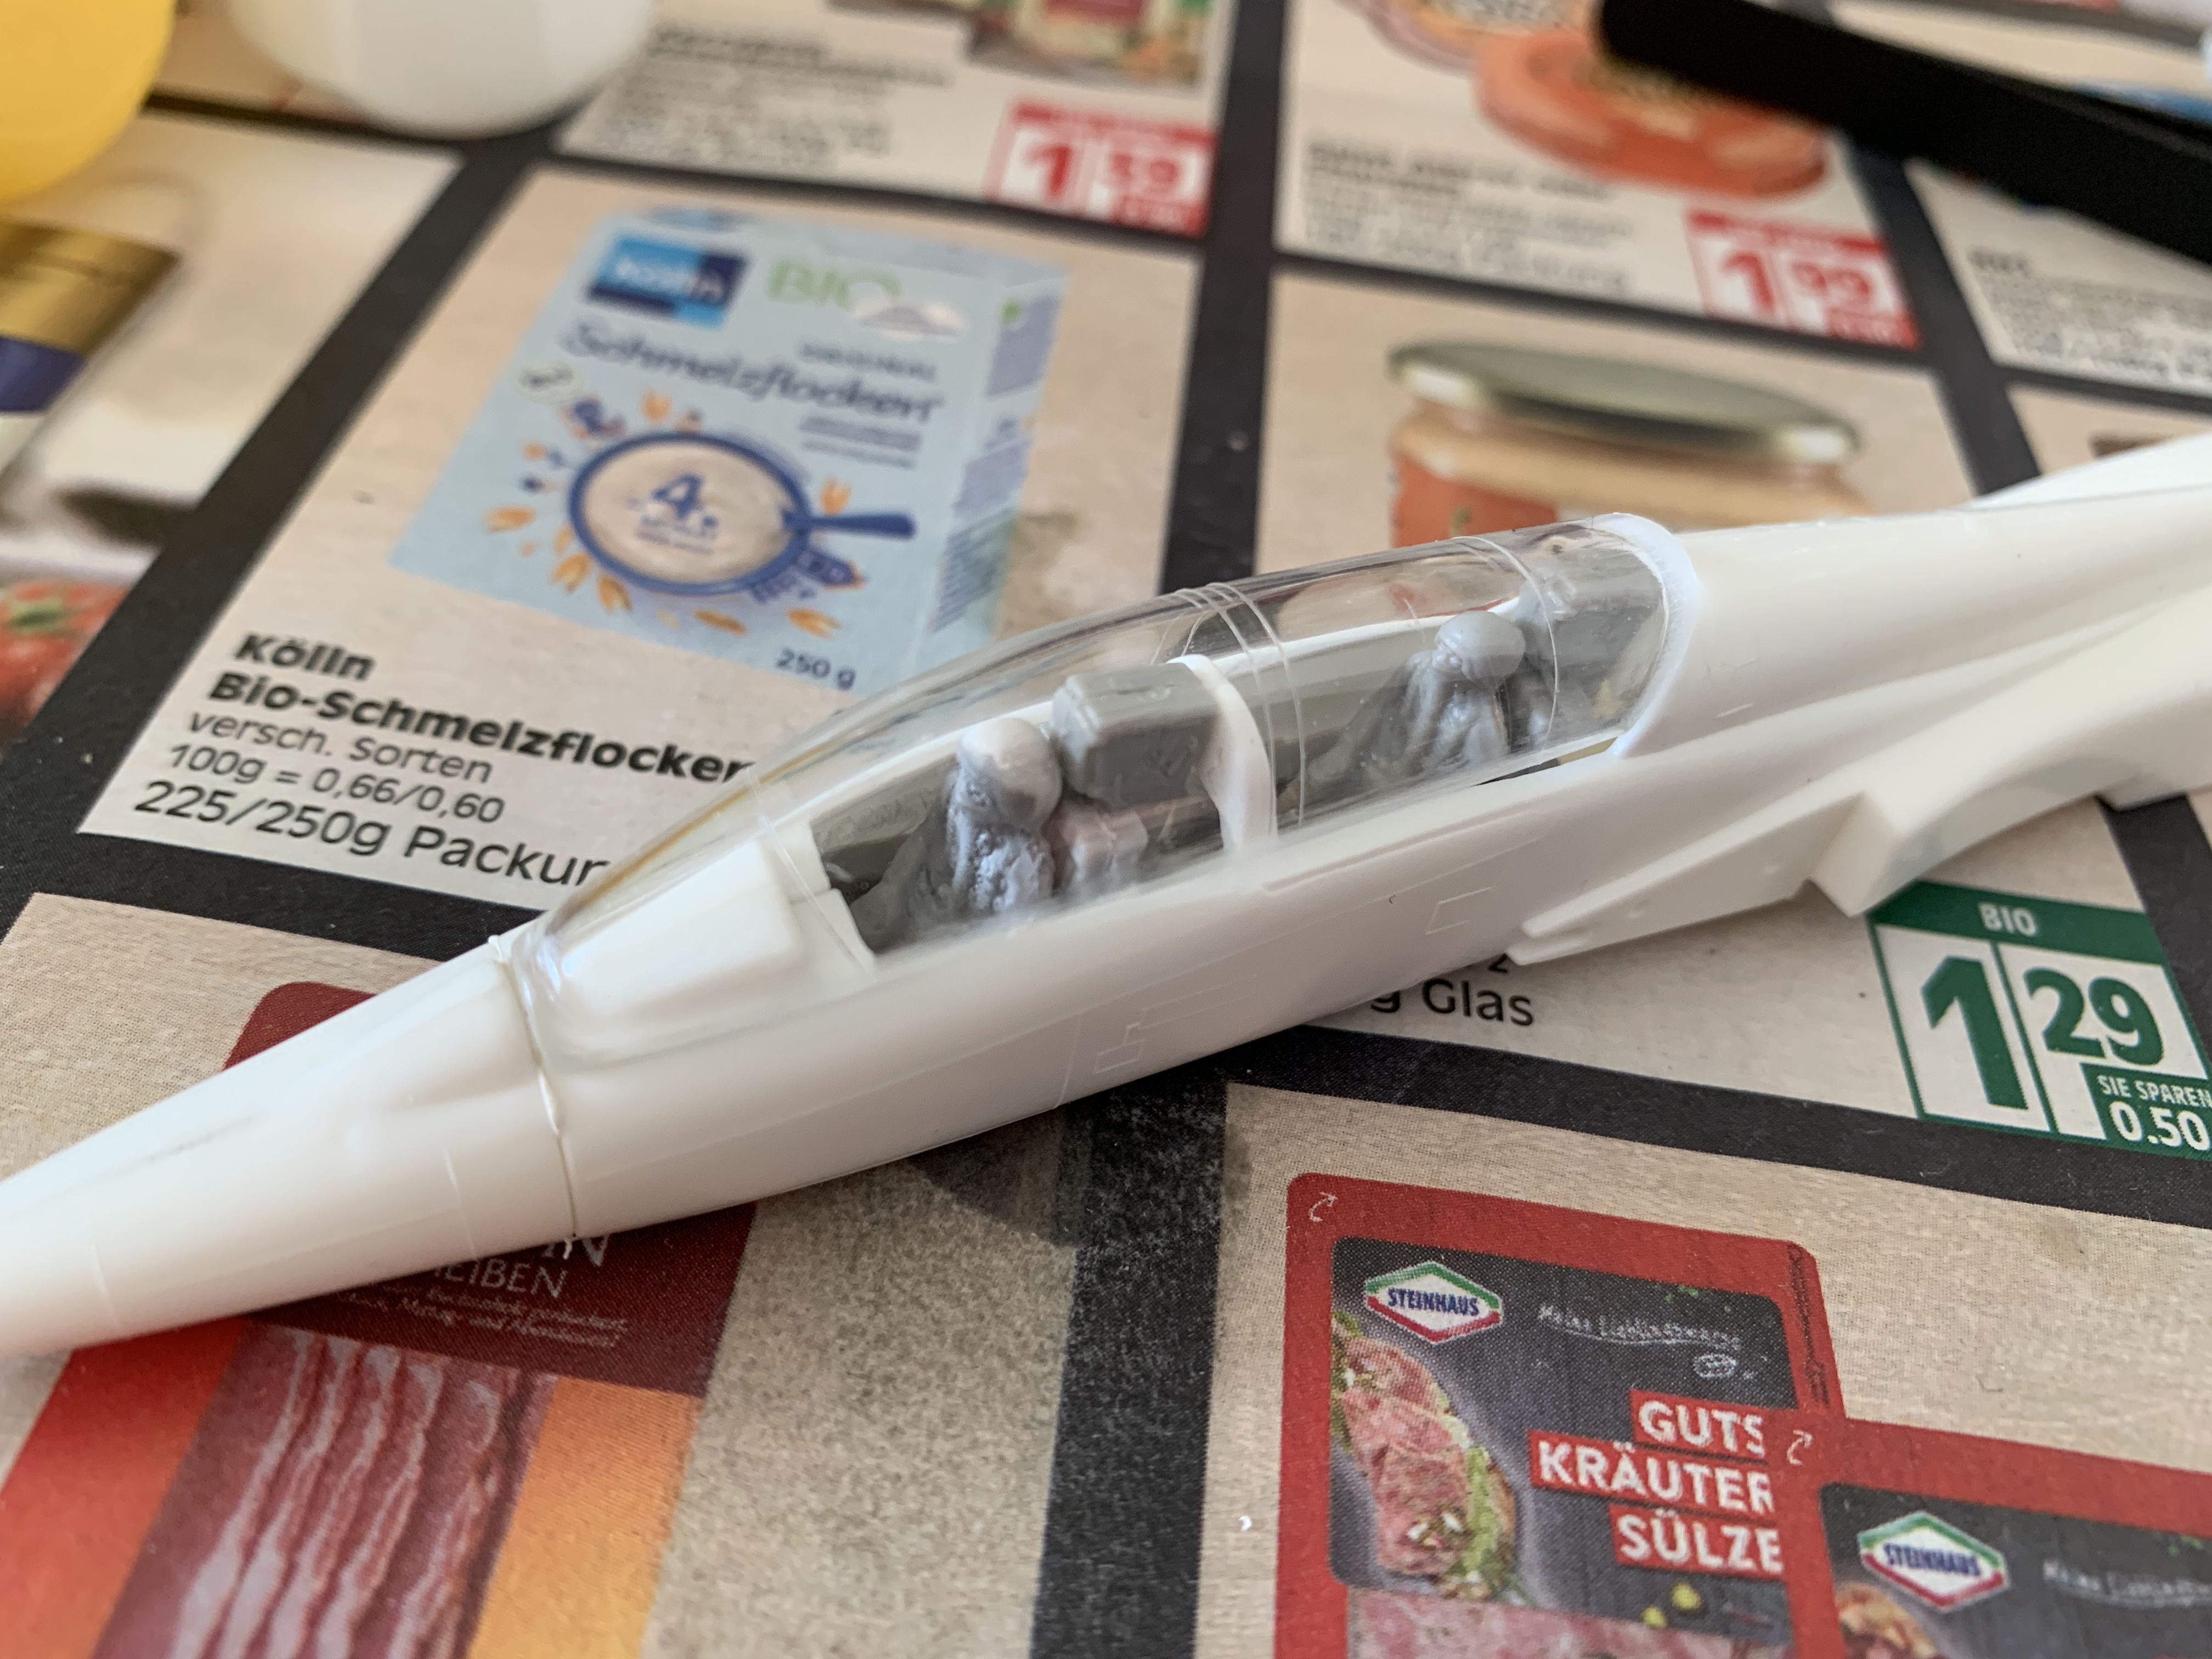
Awesome fit, right? Looks like this one needs a lot of sanding. After casting some pilots with resin and a lot of sanding, I was able to go from basically no cockpit at all, to this.

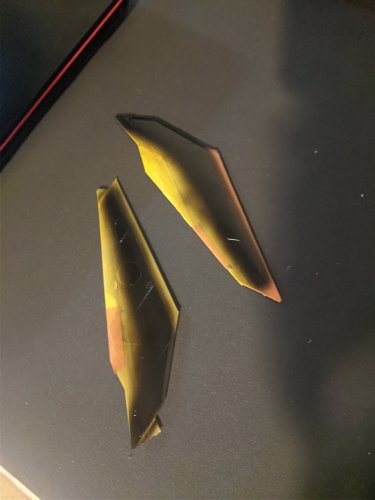
It still needs fixing. The F-5B head rests are rounded, so I going to sand them down a bit. The piece in the middle of the cockpit needs to be cutted away as well. It seems to be some kind of rudimentary console for the guy in the back, but it is not looking like anything the F-5B would have. Here's another issue.

The canopy doesn't fit. It has huge gaps in the front and the back. It's also pushed up a bit due to the backseat. That'll be adjusted by sanding.
Now to the exhausts:
Just a simple part. No detail at all, so I just went all the way to drill holes into the exhausts.
So that's the current process on that. The plan is to build some exhaust detail and finish the cockpit. Then I am redoing the rised panel lines on the main body.
-
13 hours ago, Gidiot said:
so did we get any news?
I haven't seen anything, only the plamax updates.
But in the original announcement pictures it says "2021", so there might be news around the year.

-
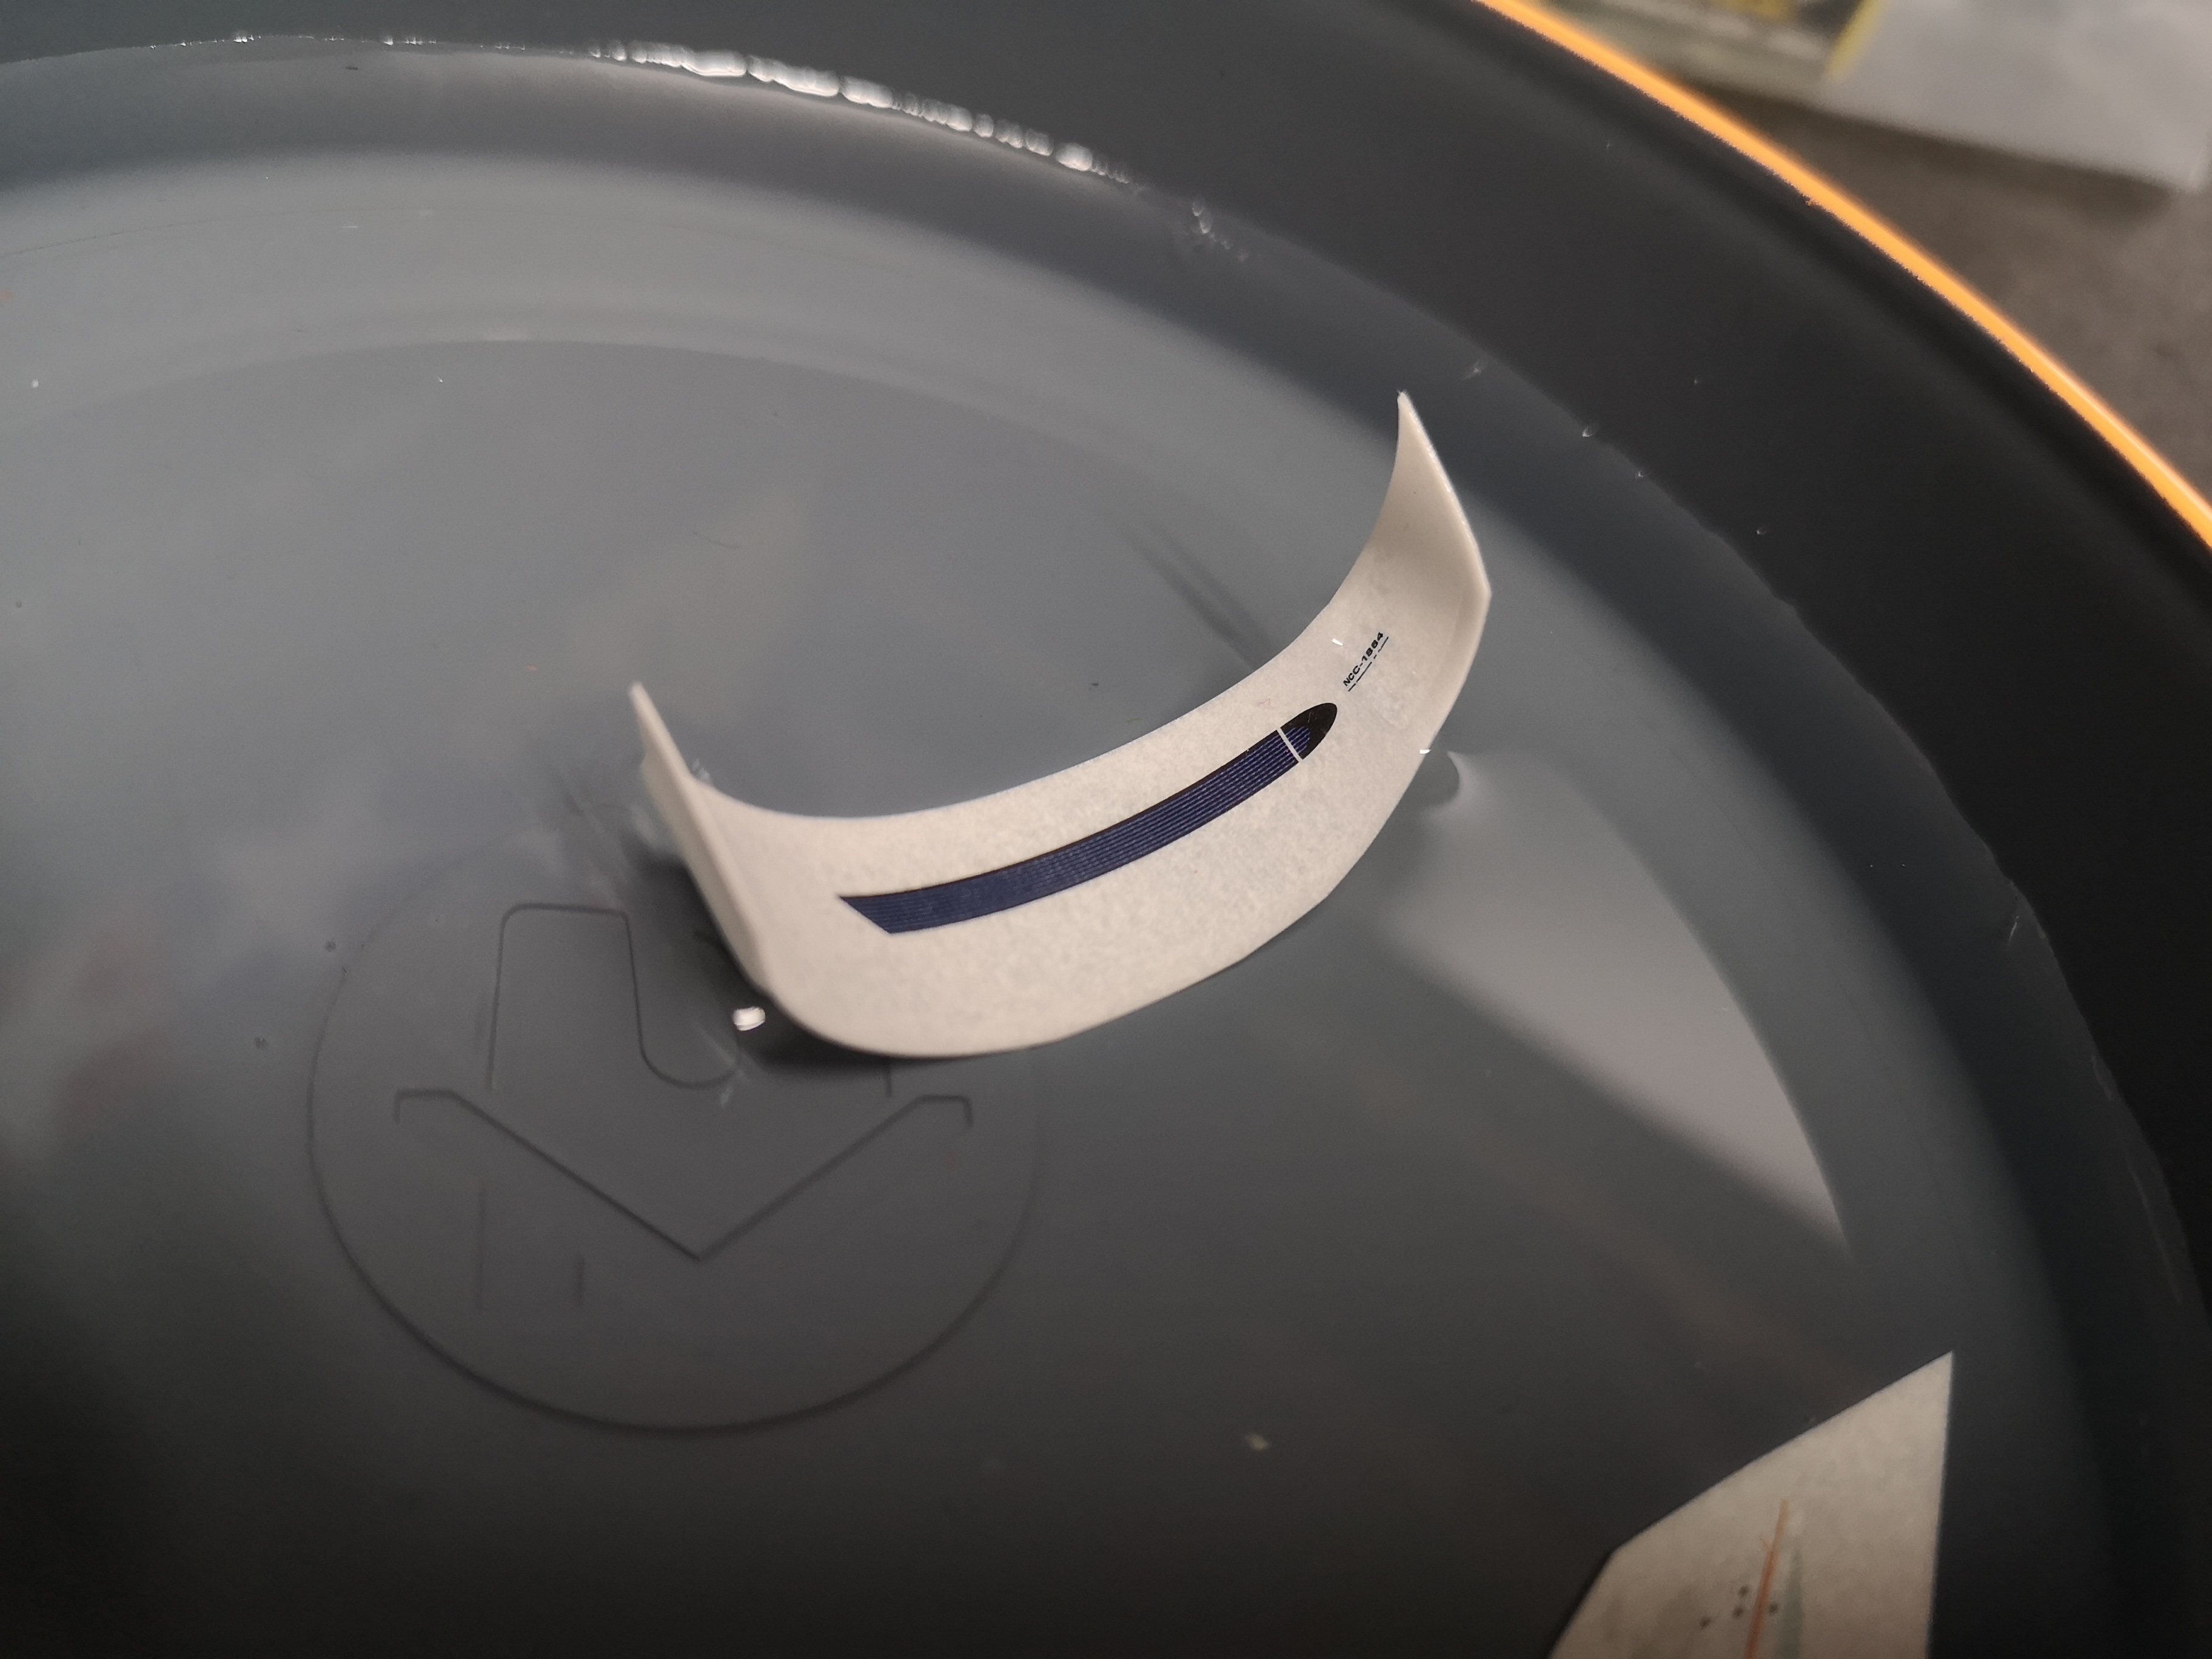
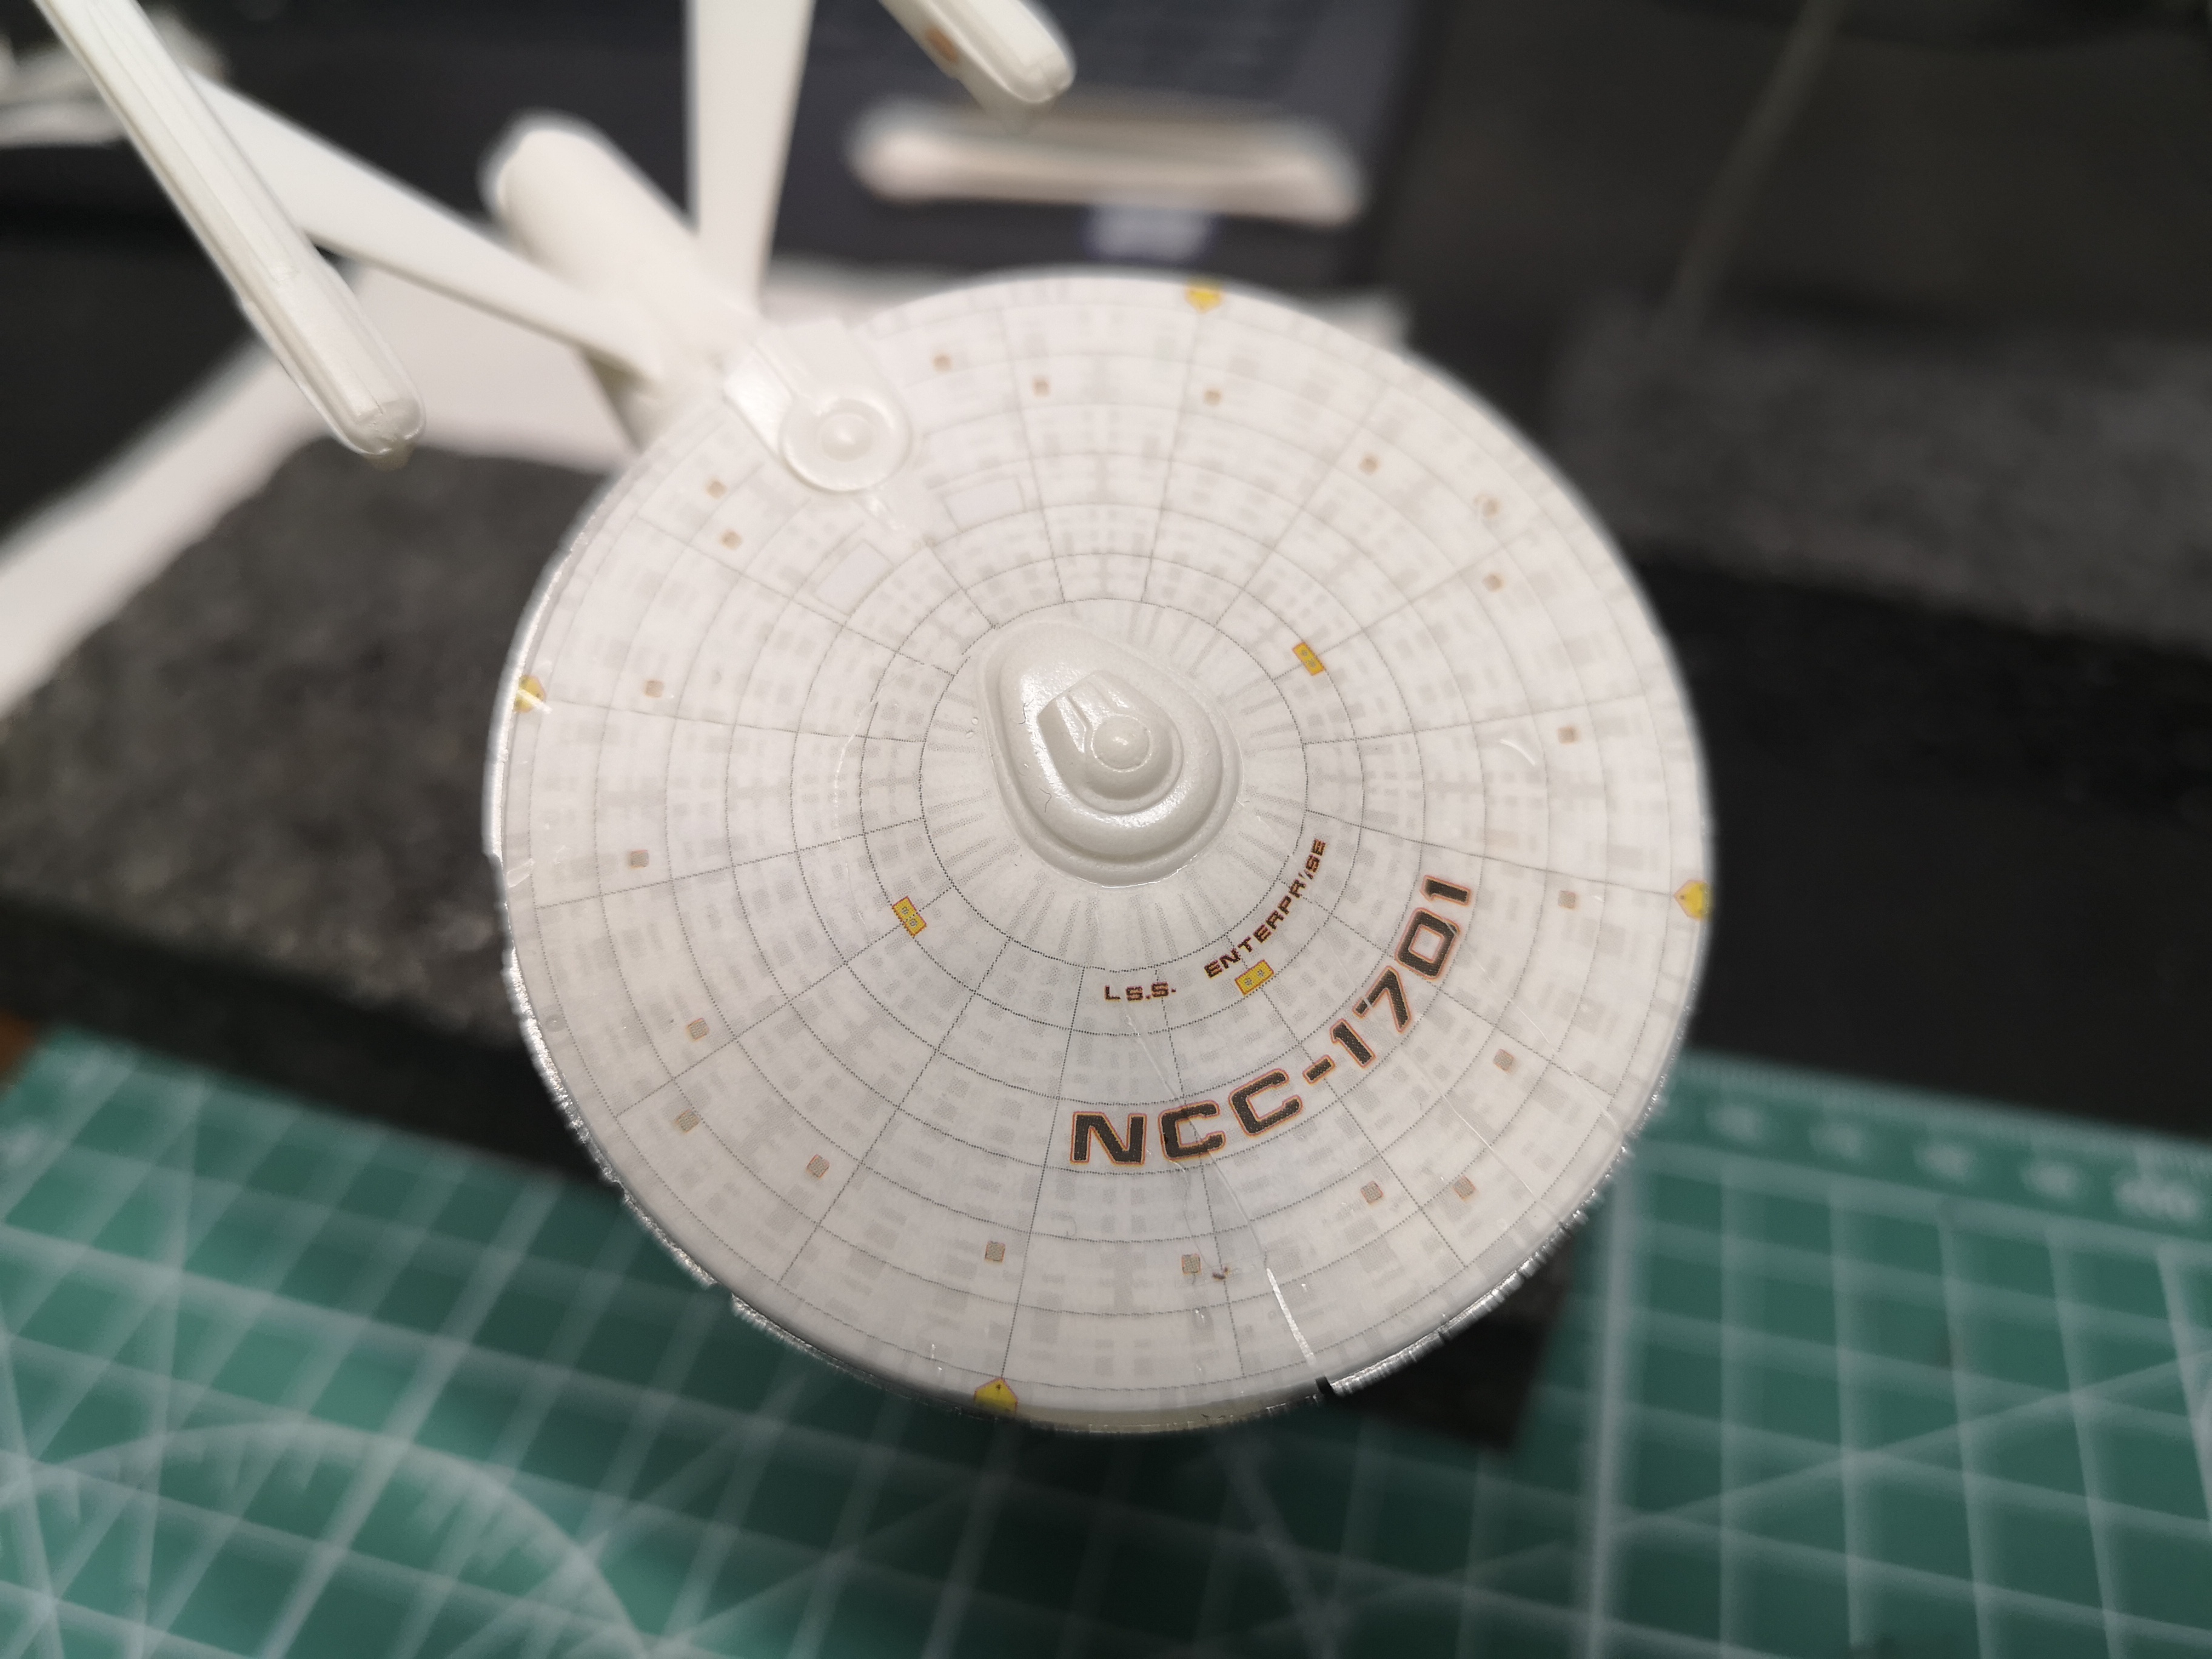
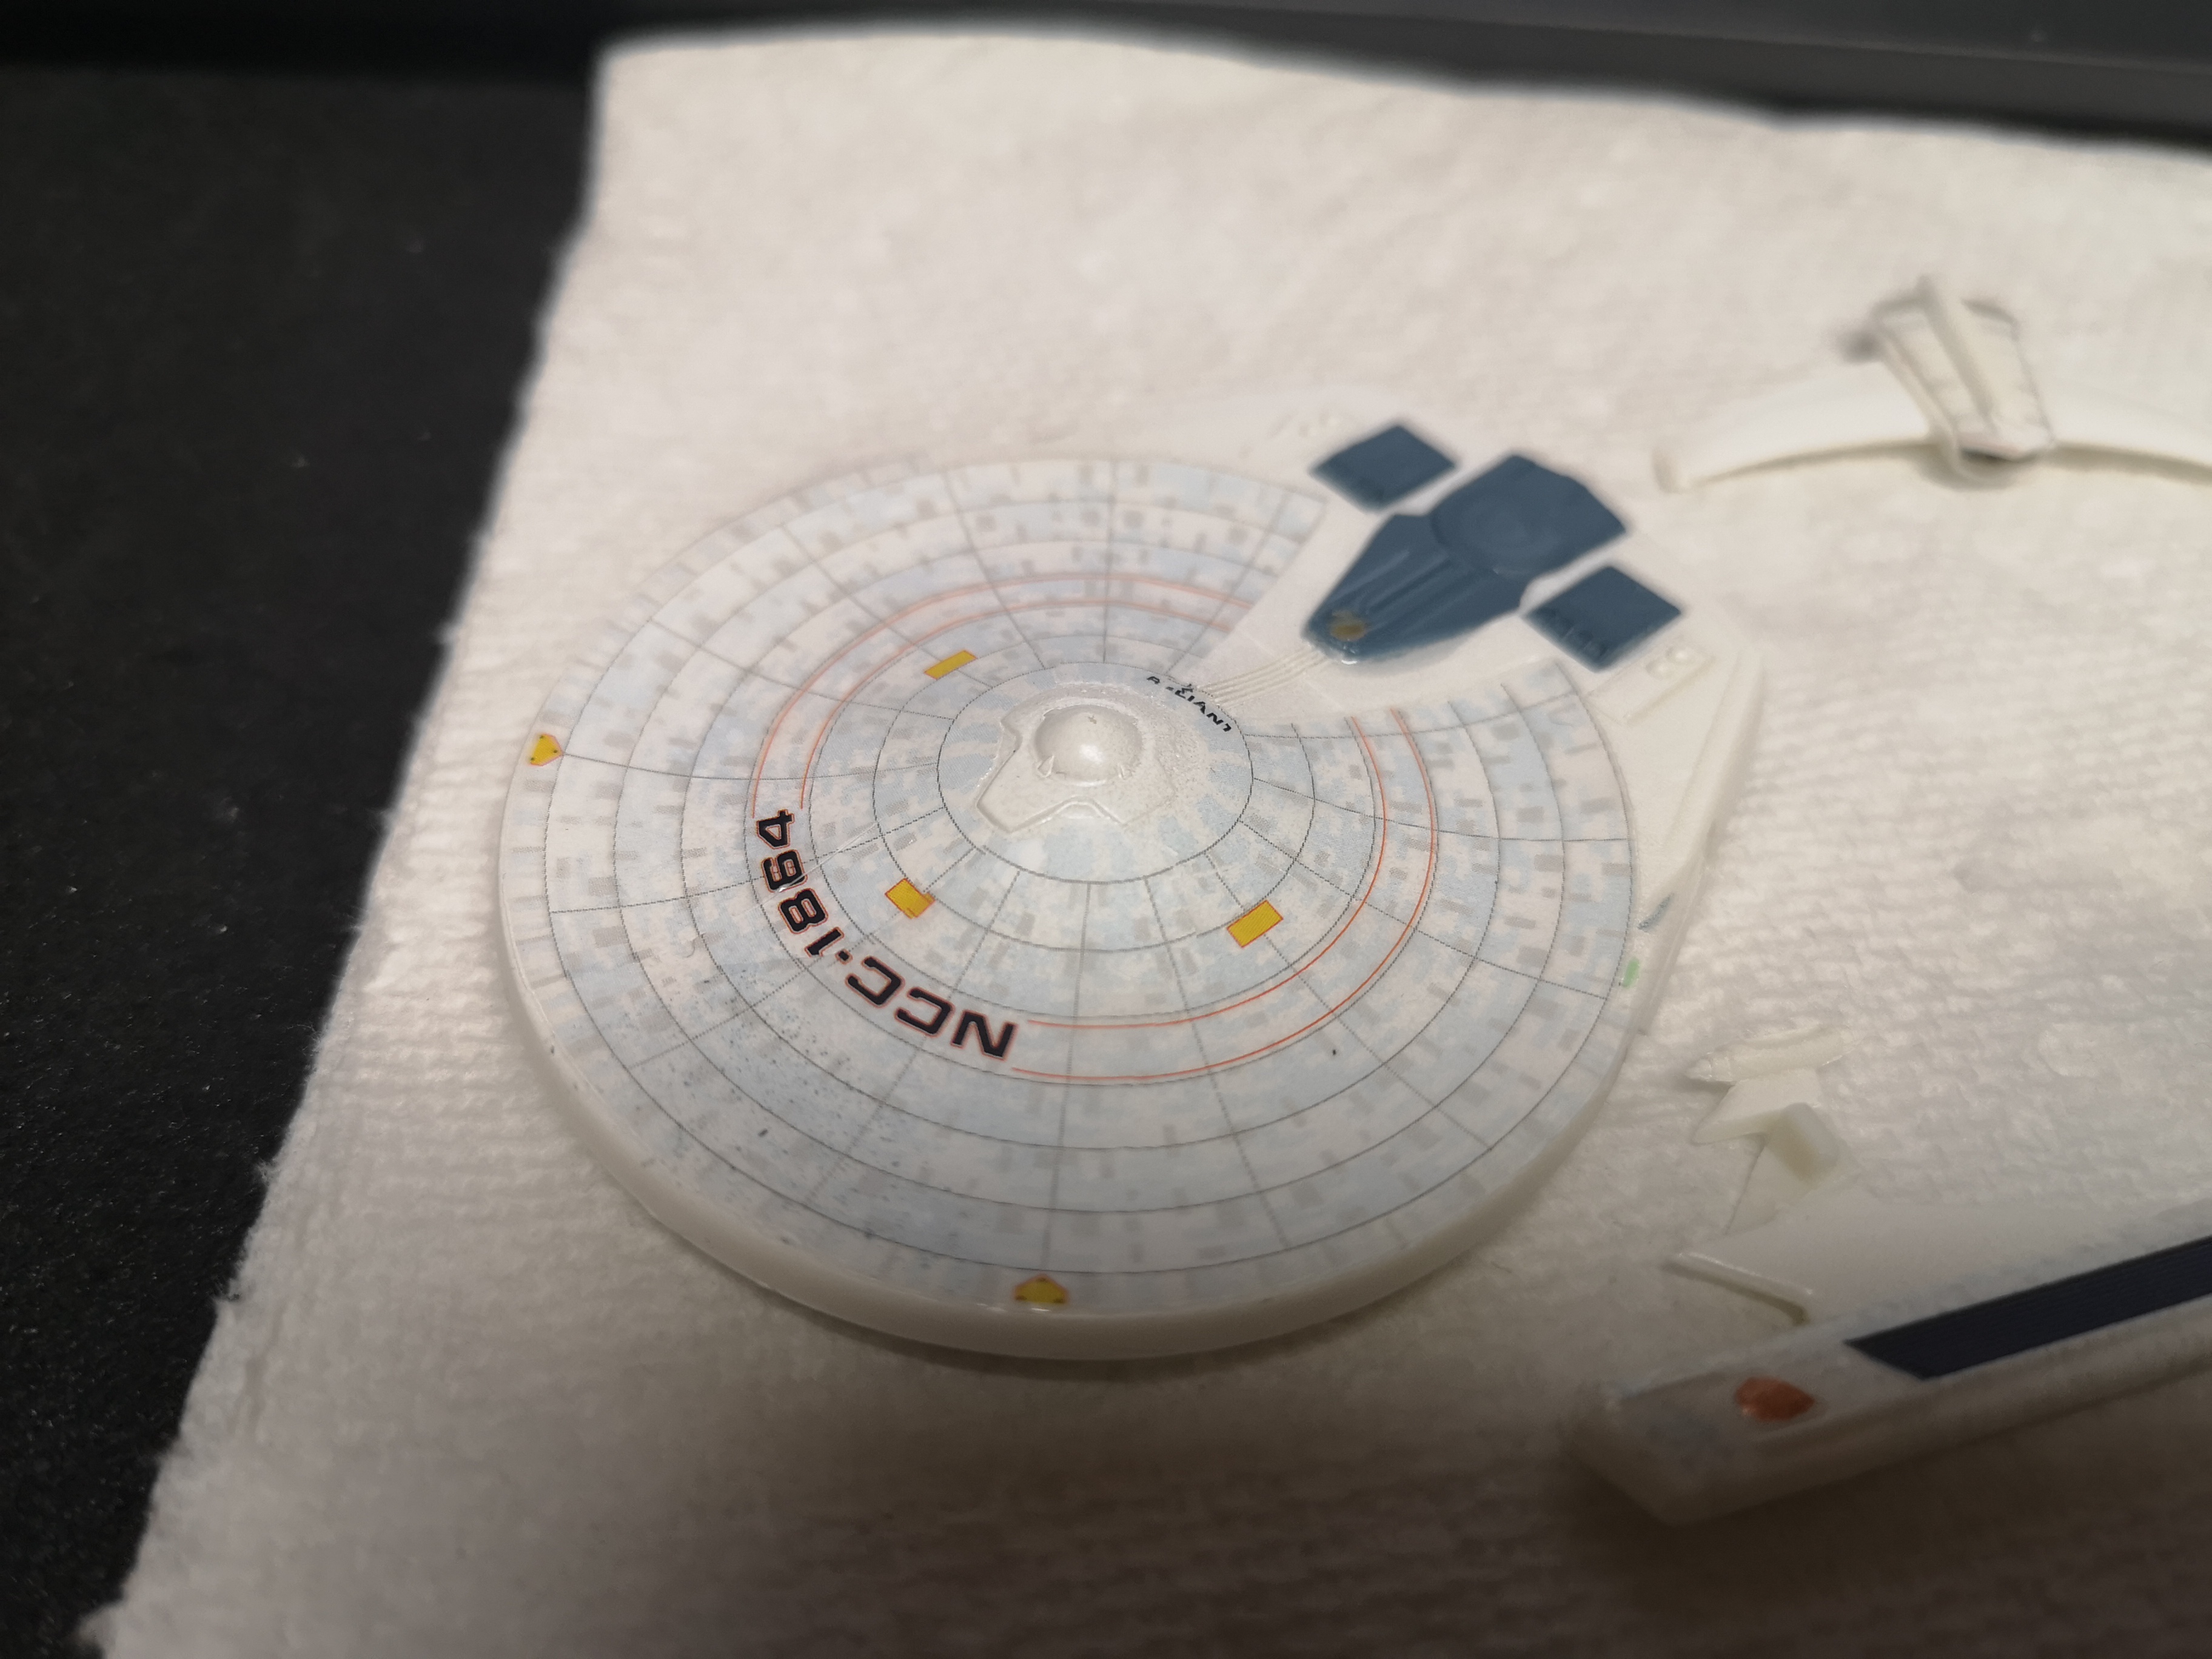
5 hours ago, peter said:
I think AMT should be charged with crimes against humanity for giving us decals of this quality.
And also for giving us the 1/537 Refit.
This decal cracked just soaking in the water.
Just a friggin cluster fuk.
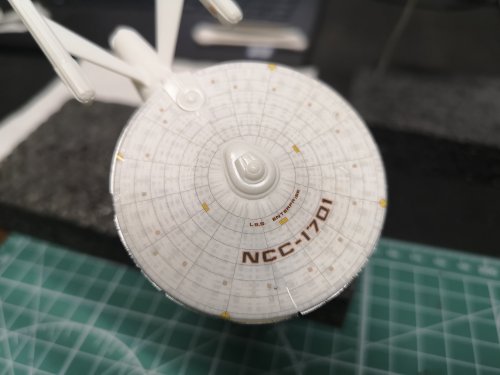
The saucer top of the Enterprise was in about 3-4 pieces.
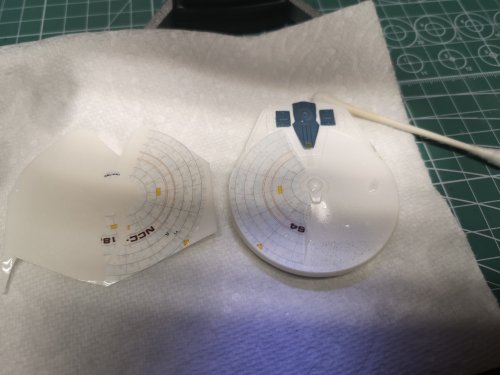
Reliant bottom wasn't much better.
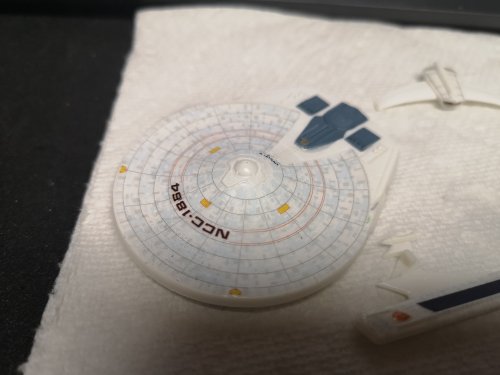
I sort of salvaged them, but the Reliant marking is pooched.
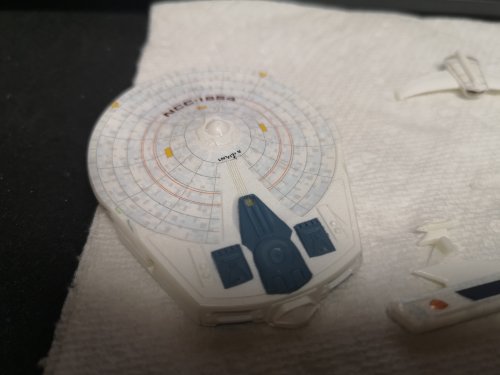
It was just too far gone and there was no saving it. Good thing this is the bottom.
More to follow.
okay .... not going to buy this set then haha
-
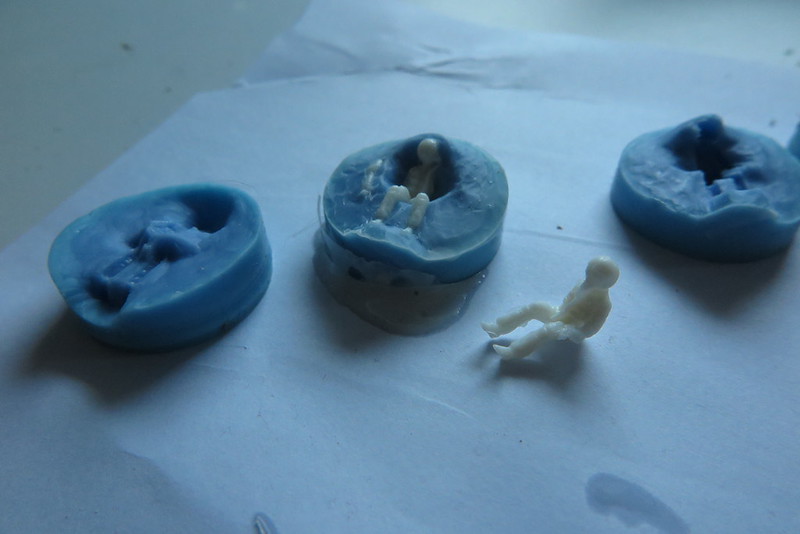
I did some experimenting today on casting. With all the stuff I have at home - how can I use that to clone pilot figures.
Here is my first attempt at making a mold and producing a recast.
For the mold, I used FIMO.
For the cast, I used some Ponal dual component putty.
Step one:
Produce the mold
Step two: bake the mold

Step three:
casting (no picture available).
Step four:
trying to free the cast from the mold and accidently breaking the mold.
.thumb.jpeg.41eba7c005b243ce4be2b1da4839de7e.jpeg)
.thumb.jpeg.d13680a0b9266a81905fd67ccd6ff0a9.jpeg)
It kinda worked, but the mold is lost. Thinking about how much power it takes to bake FIMO in the oven, this is probably not the best approach for cloning.
The putty is also really gum like when dry, so probably not the best material to use for casting, except you would like to have something rubber like.


-
14 hours ago, electric indigo said:
Good to know!
While you're ordering, get some of their Modelliermasse. I had a bad experience with plasticine reacting with the silicone and preventing the surface from curing.
Good luck!
Ah ... good advise. Will get some as well.
-
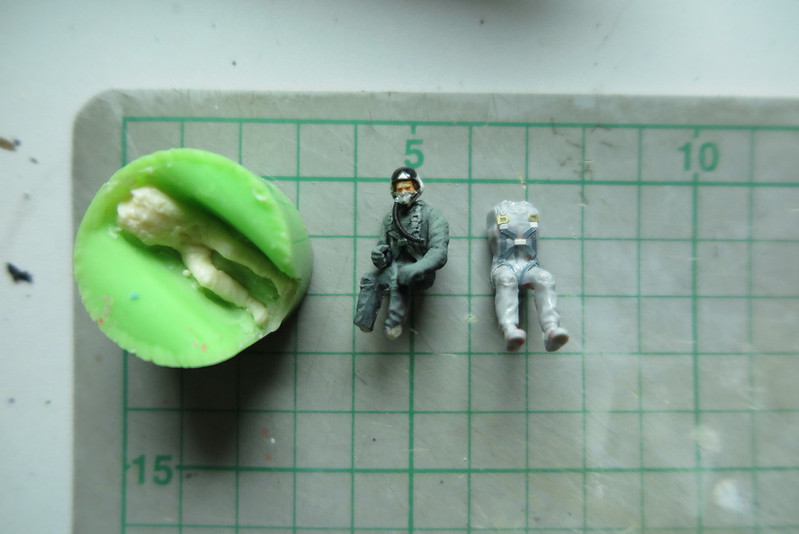
20 hours ago, electric indigo said:
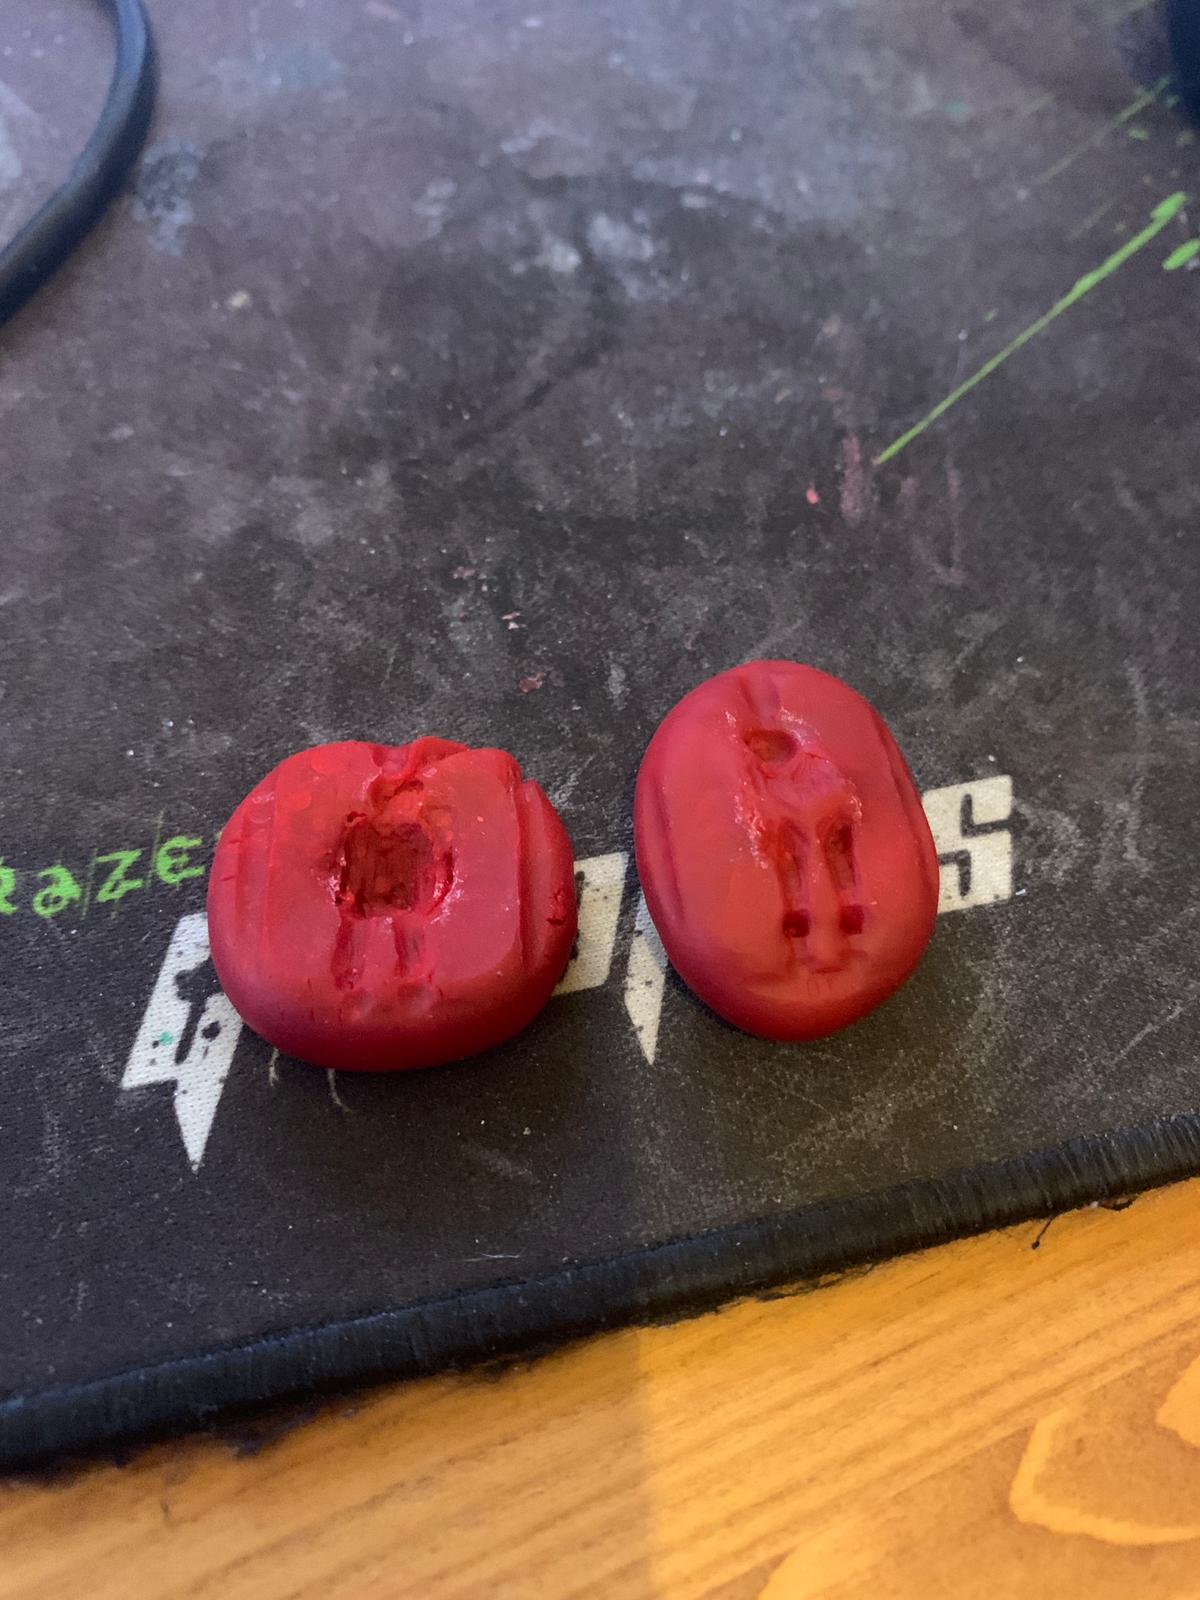
I bought Trollfactory Kautschuk Typ 2 & PU resin from their Amazon shop. Both come in affordable 2 x 250g bottles. The new pilot is 1/48 scale, but I have also copied Hasegawa pilots from their 1/72 figures set. The mold looks like this:
The 1/48 mold has pouring and venting channels, but for the smaller figures I built open molds; I fill both halves with resin, let it cure until it gets viscous and then squash the molds together.
To make the molds, I first embed the figure in plasticine and push a short tube into this, resulting in what you see in the middle of the pic above. The tube is filled with silicone, after this is cured, you turn the tube around, remove the plasticine and brush some talcum powder on the silicone to keep the mold halves from sticking together, then pour the second part.
Thanks a lot man! Time to make some clones
edit:
just checked the trollfactory site:
Their products are much cheaper compared to amazon. 22,90€ compared to 28,90€.
-
On 1/30/2021 at 4:49 PM, electric indigo said:
Very nice finish, looking forward to see the completed work!
_
After failing to find convincing aftermarket eastern bloc pilots, I decided to fire up my clone factory again. Did some gene splicing first by removing the voluptuos vest from a Hasegawa F-14 pilot and building up the iconic soviet harness pattern with adhesive foil strips and leftover etch parts. The first cast was painted for the croatian MiG.
Whoa! Awesome! I need one of those for my newest member on my modelkit stack of shame.

I will probably take the Hasegawa F-14 pilots as well. Thanks for the idea!
PS: What do you use for the molds and what kind of resin are you using for casting?
-
On 1/17/2021 at 11:29 PM, Gidiot said:
Awesome! I can use this for both the VF-14 and as a good base if the FZ-109 Elgerzorene! Thank you!
You're welcome.
-
1 hour ago, Gidiot said:
I can wait
") and Thank you!
and Thank you!
Done
-
17 hours ago, Gidiot said:
Those are great! it's alright that they aren't "perfect" it gives a good base to work with! Thank you!!!
currently finishing the more accurate line arts if you can wait for a bit.
-
On 1/14/2021 at 4:03 PM, jvmacross said:
Searched Google for VF-14.....
http://sd-sascha.blogspot.com/search/label/VF-14
https://www.deviantart.com/eastcoastcanuck/art/VF-14-Vampire-347888153

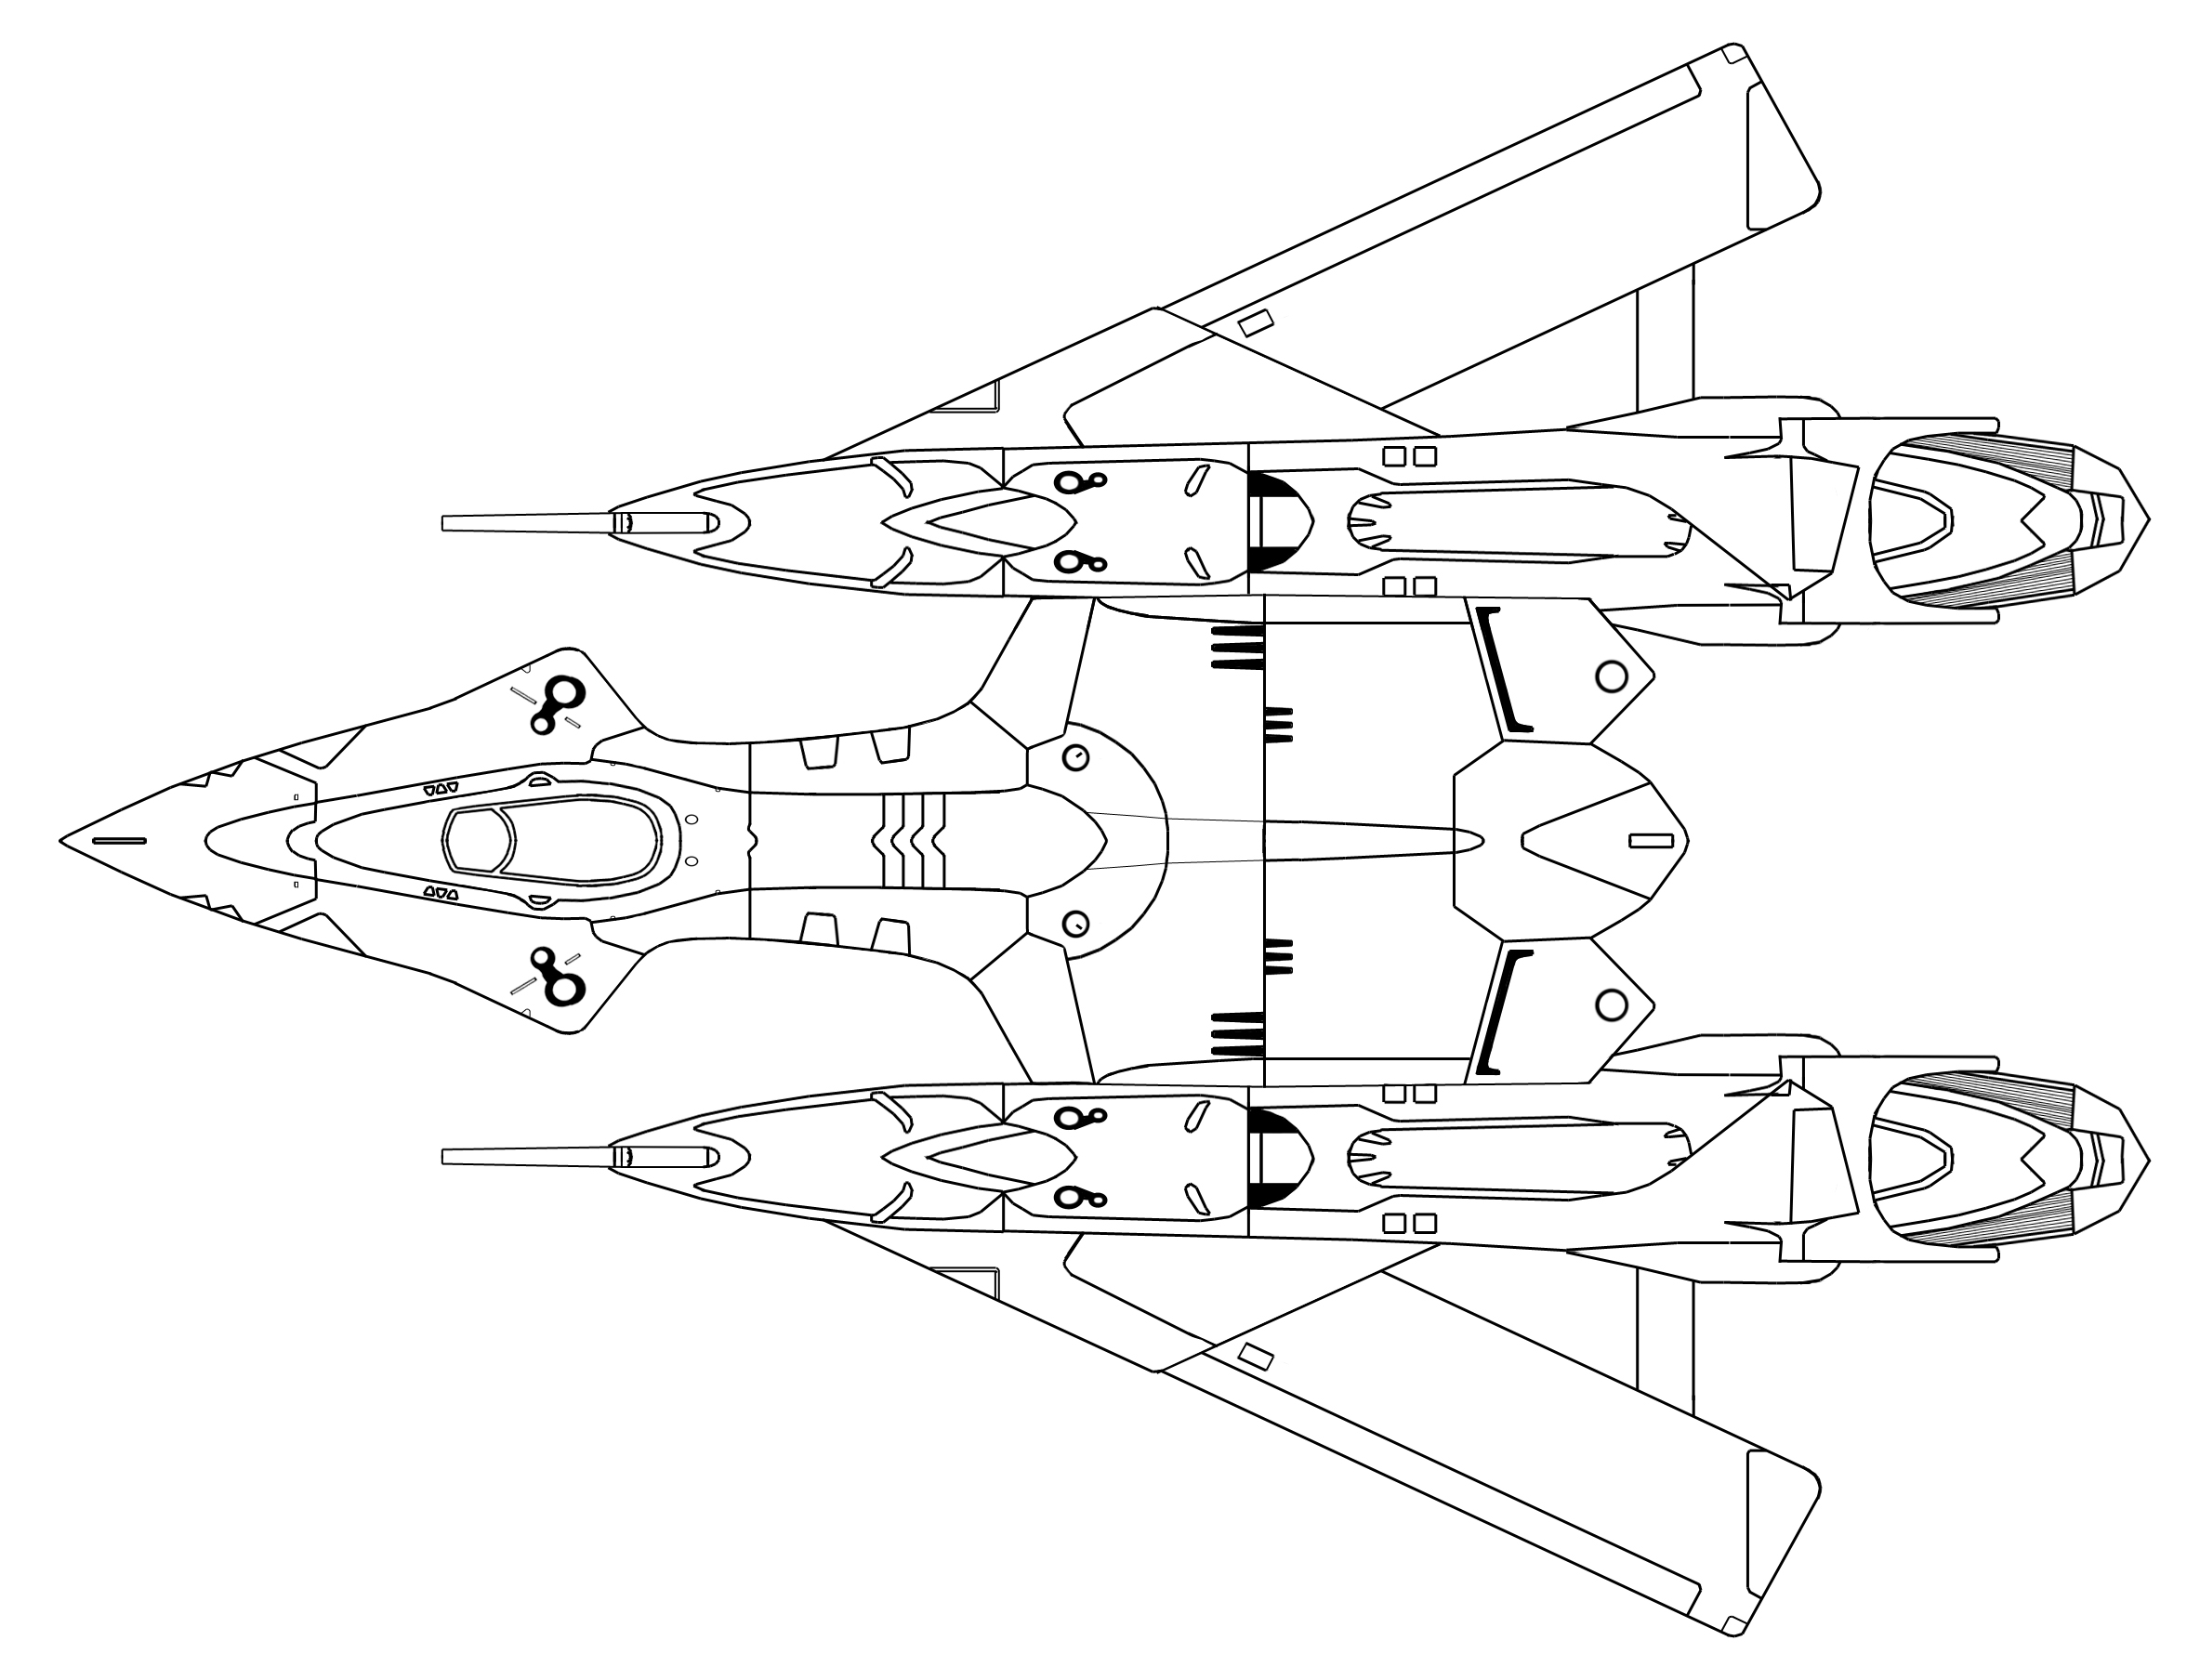
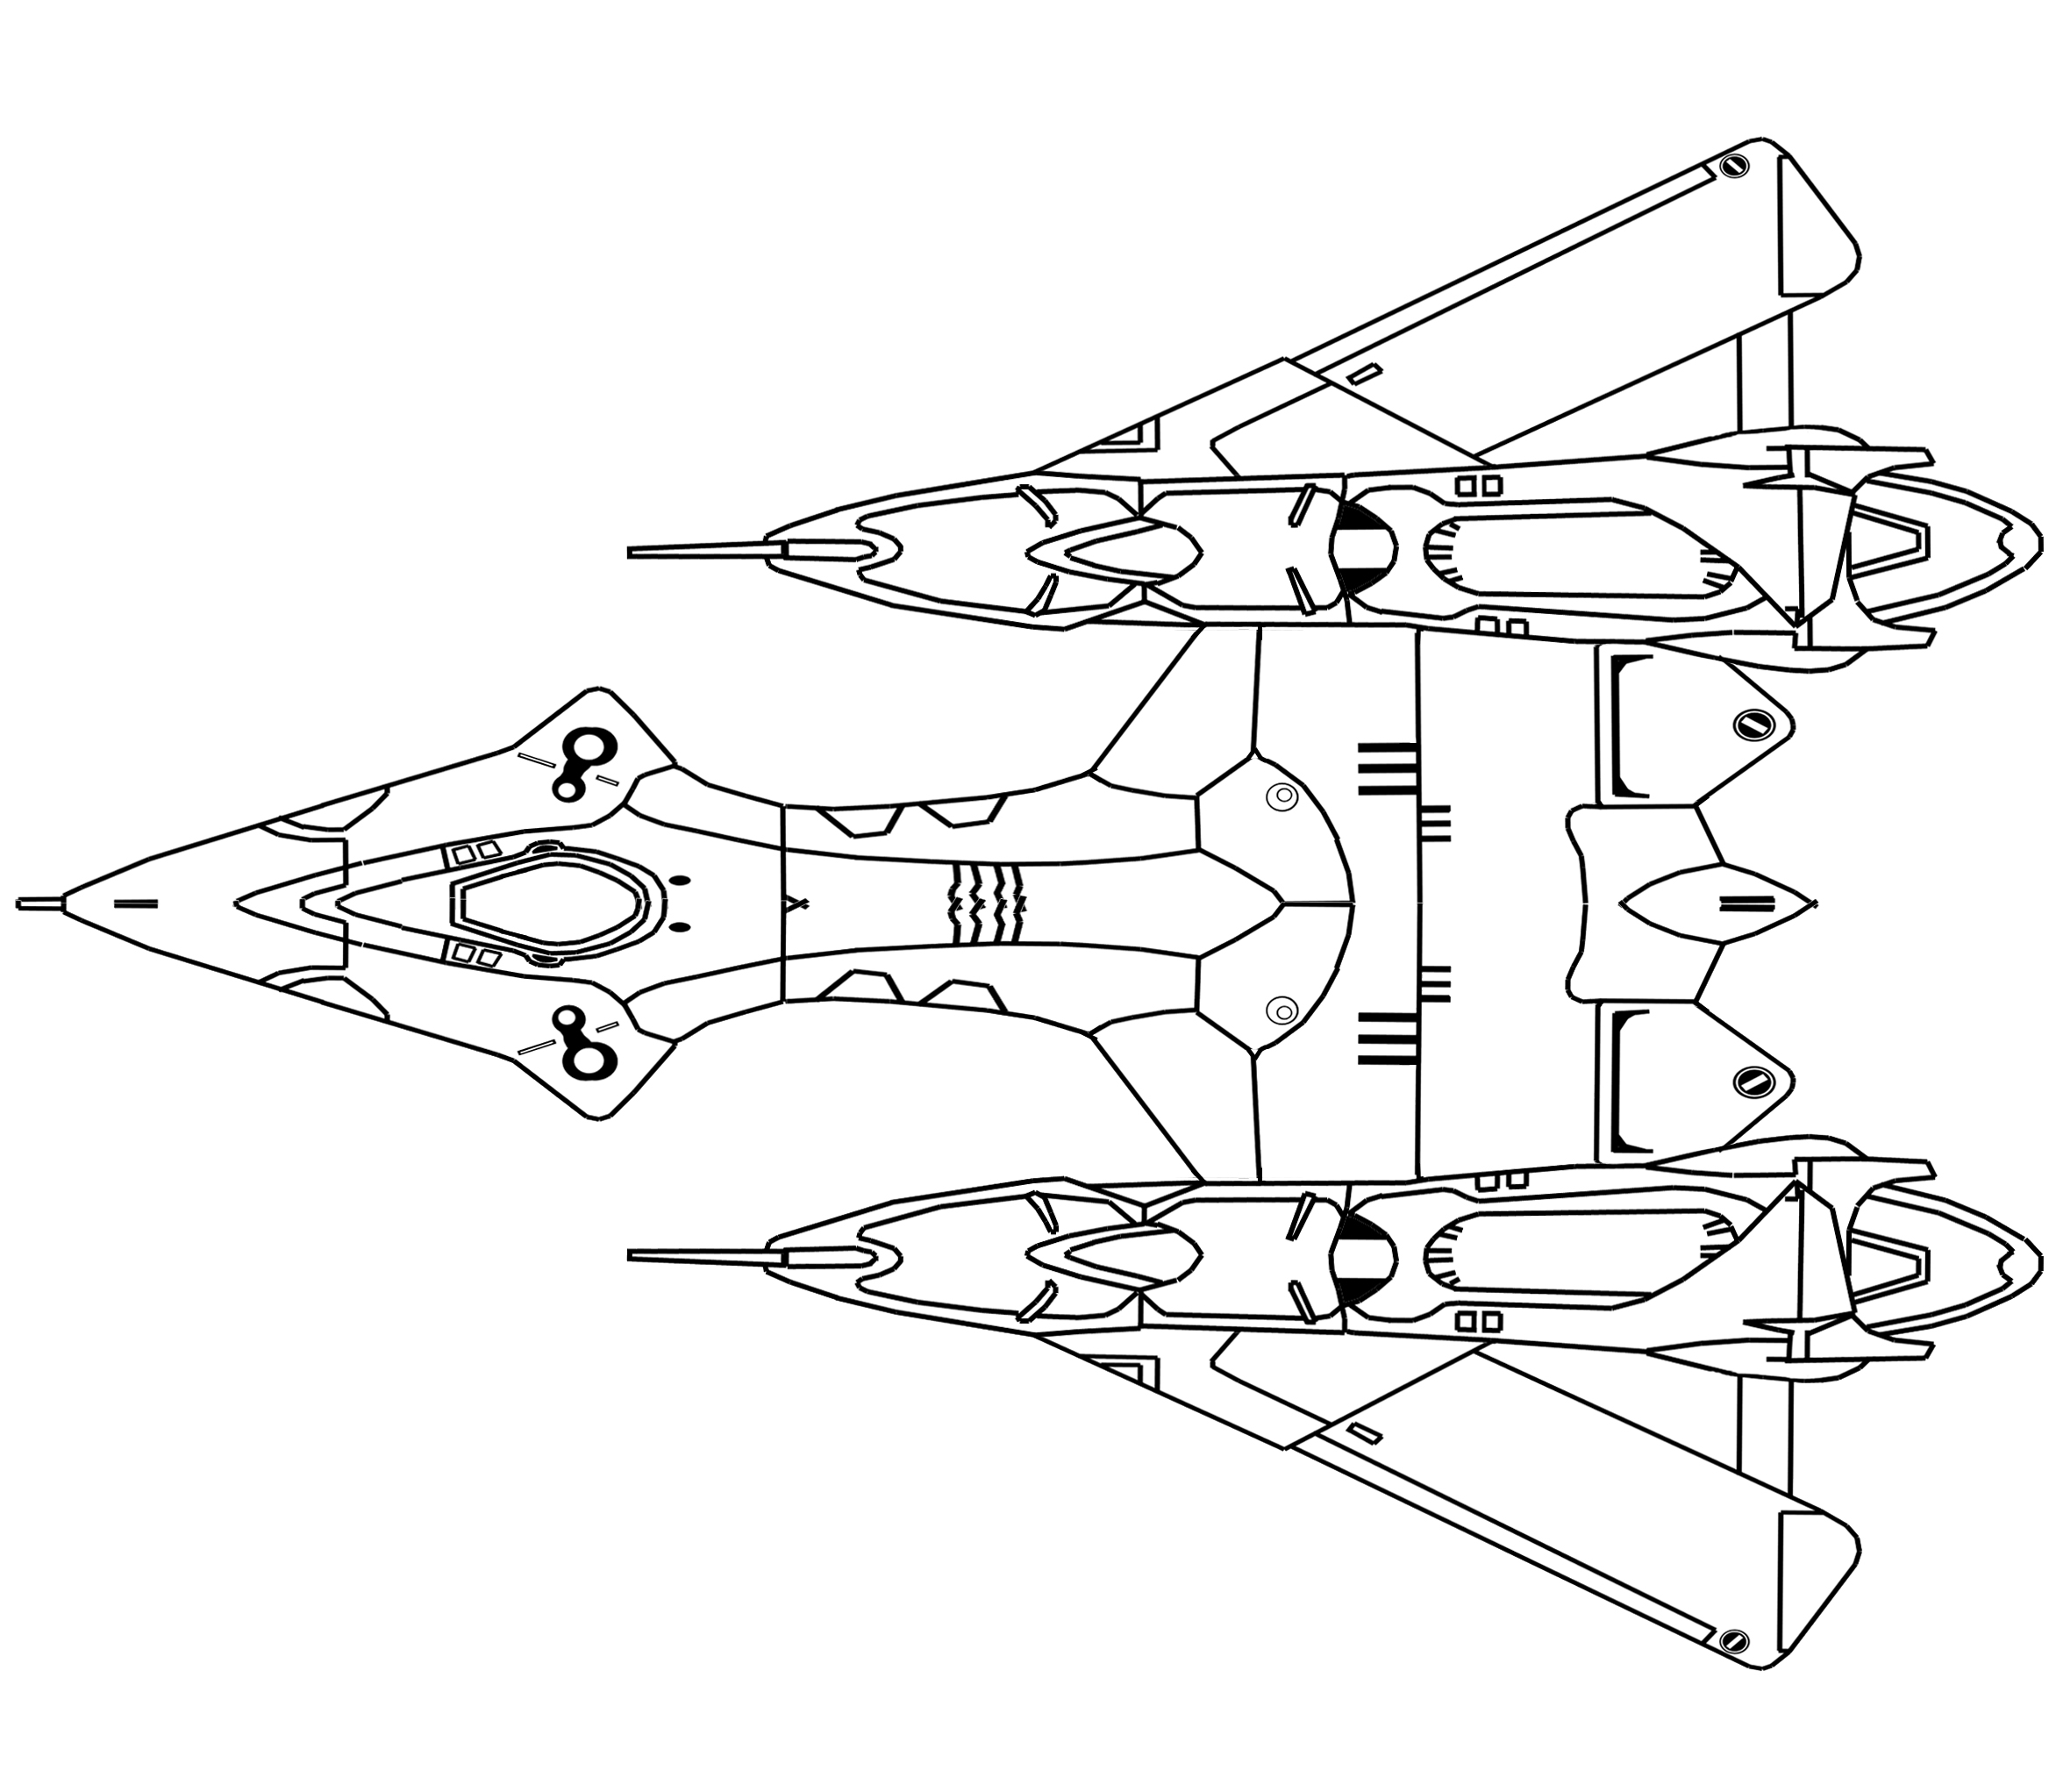
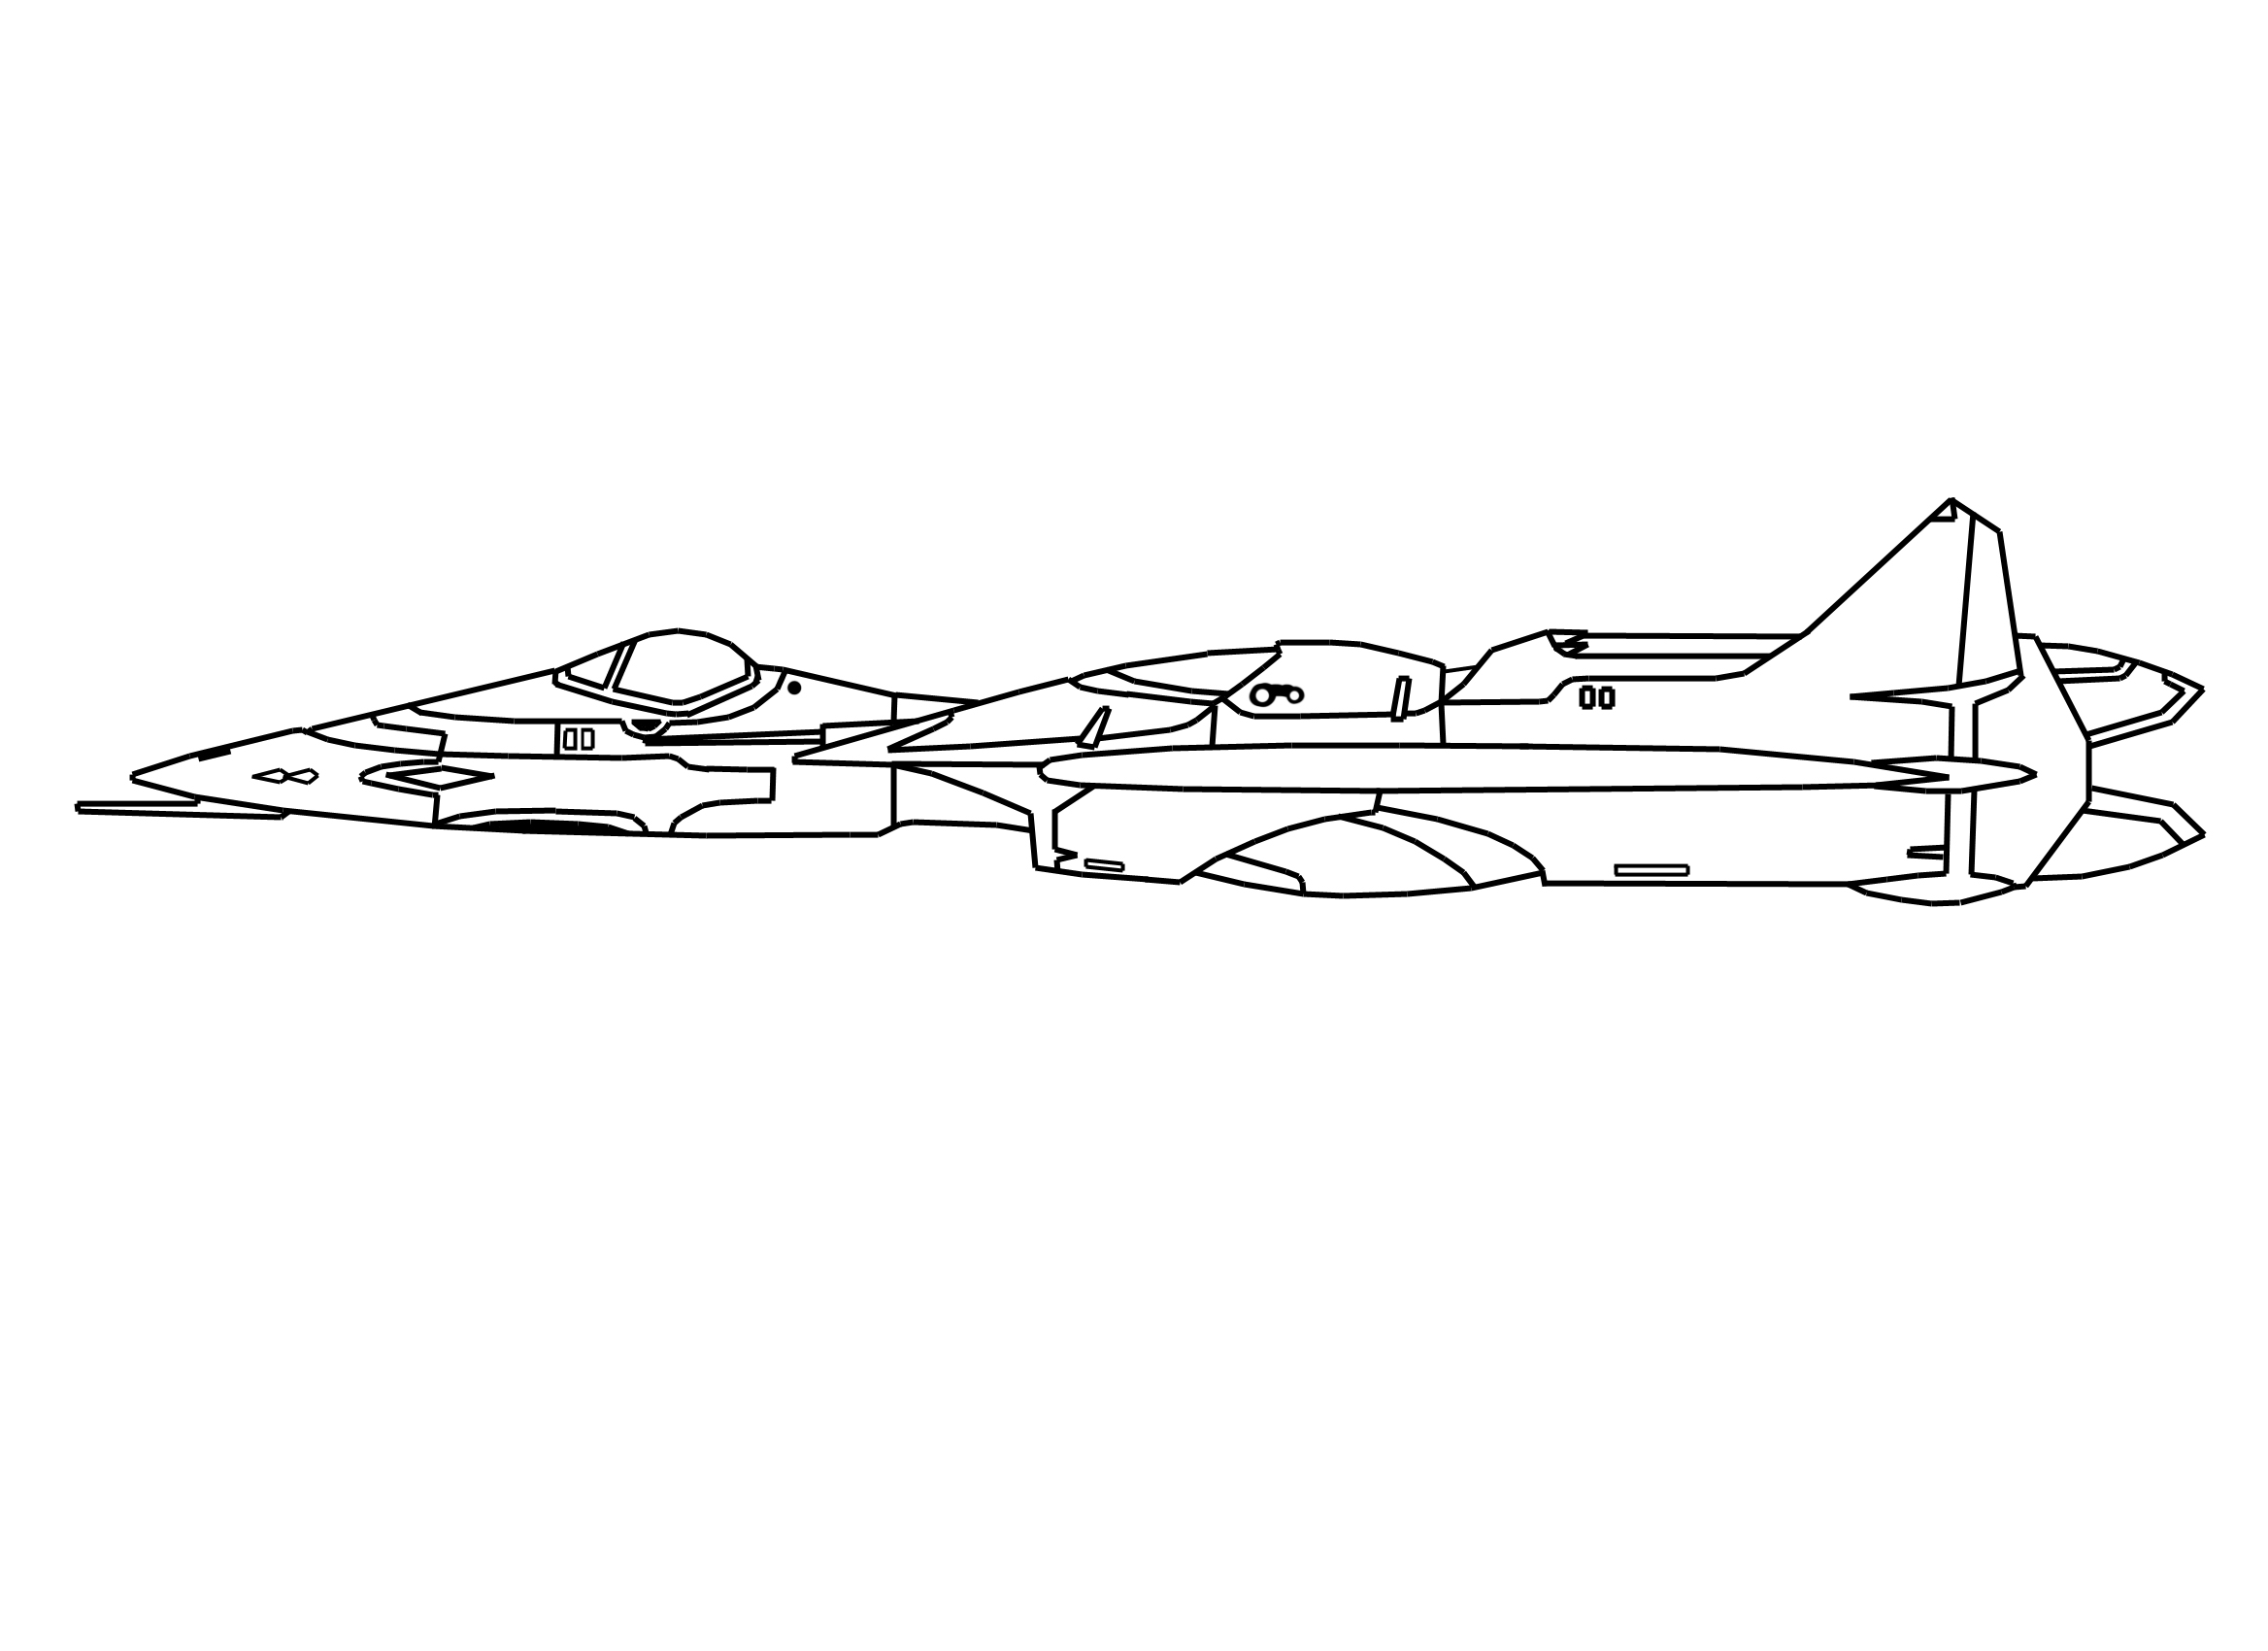
Those views are based upon my papercraft and unfortunately are not acurate. Well, they are the most acurate you can find at the moment, but they are not 100% correct.
Here is the original from the papercraft model:
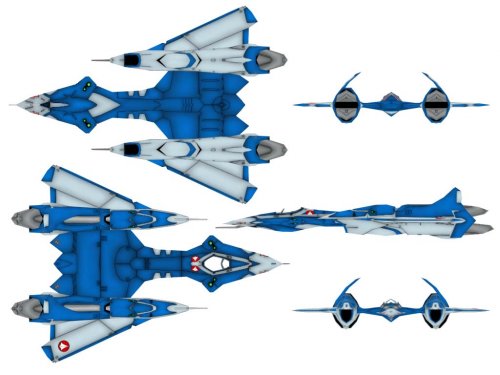
and my bad line art for the VF-14:
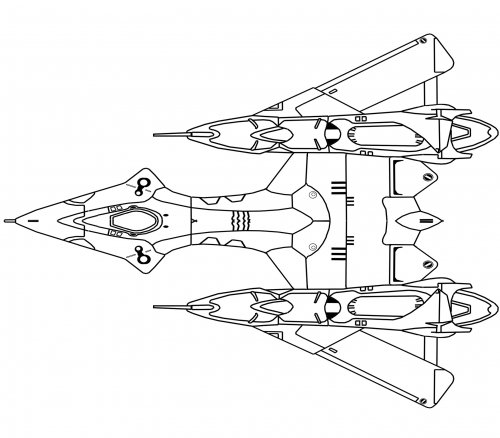
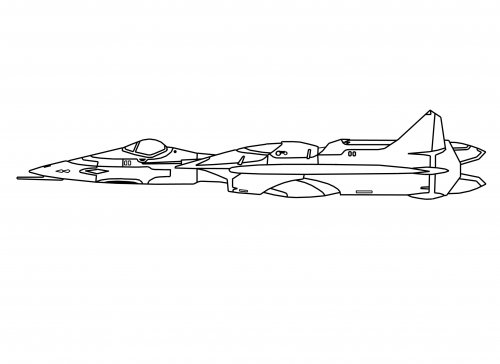
There was a lot of tweaking and changing done from line art to the 3D model. Hope that helps.
-
On 1/7/2021 at 4:44 PM, joscasle said:
Continue:


Looks good! Keep us updated
-
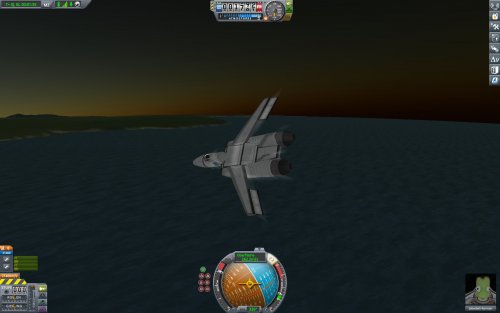
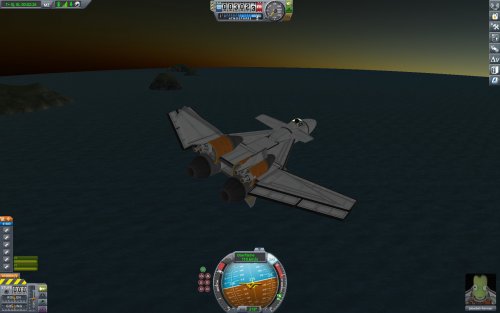
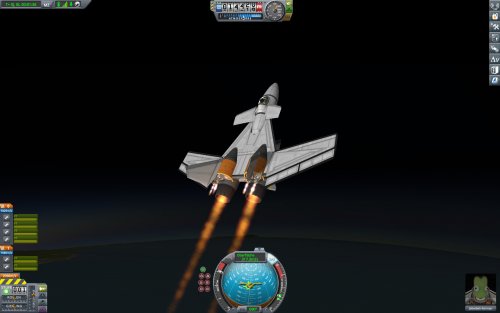
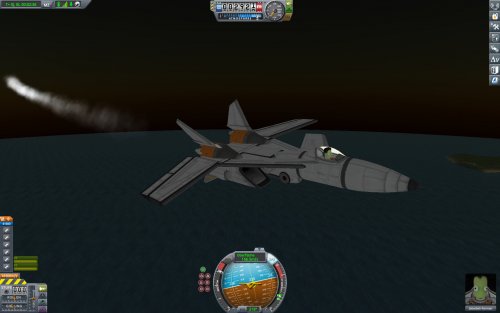
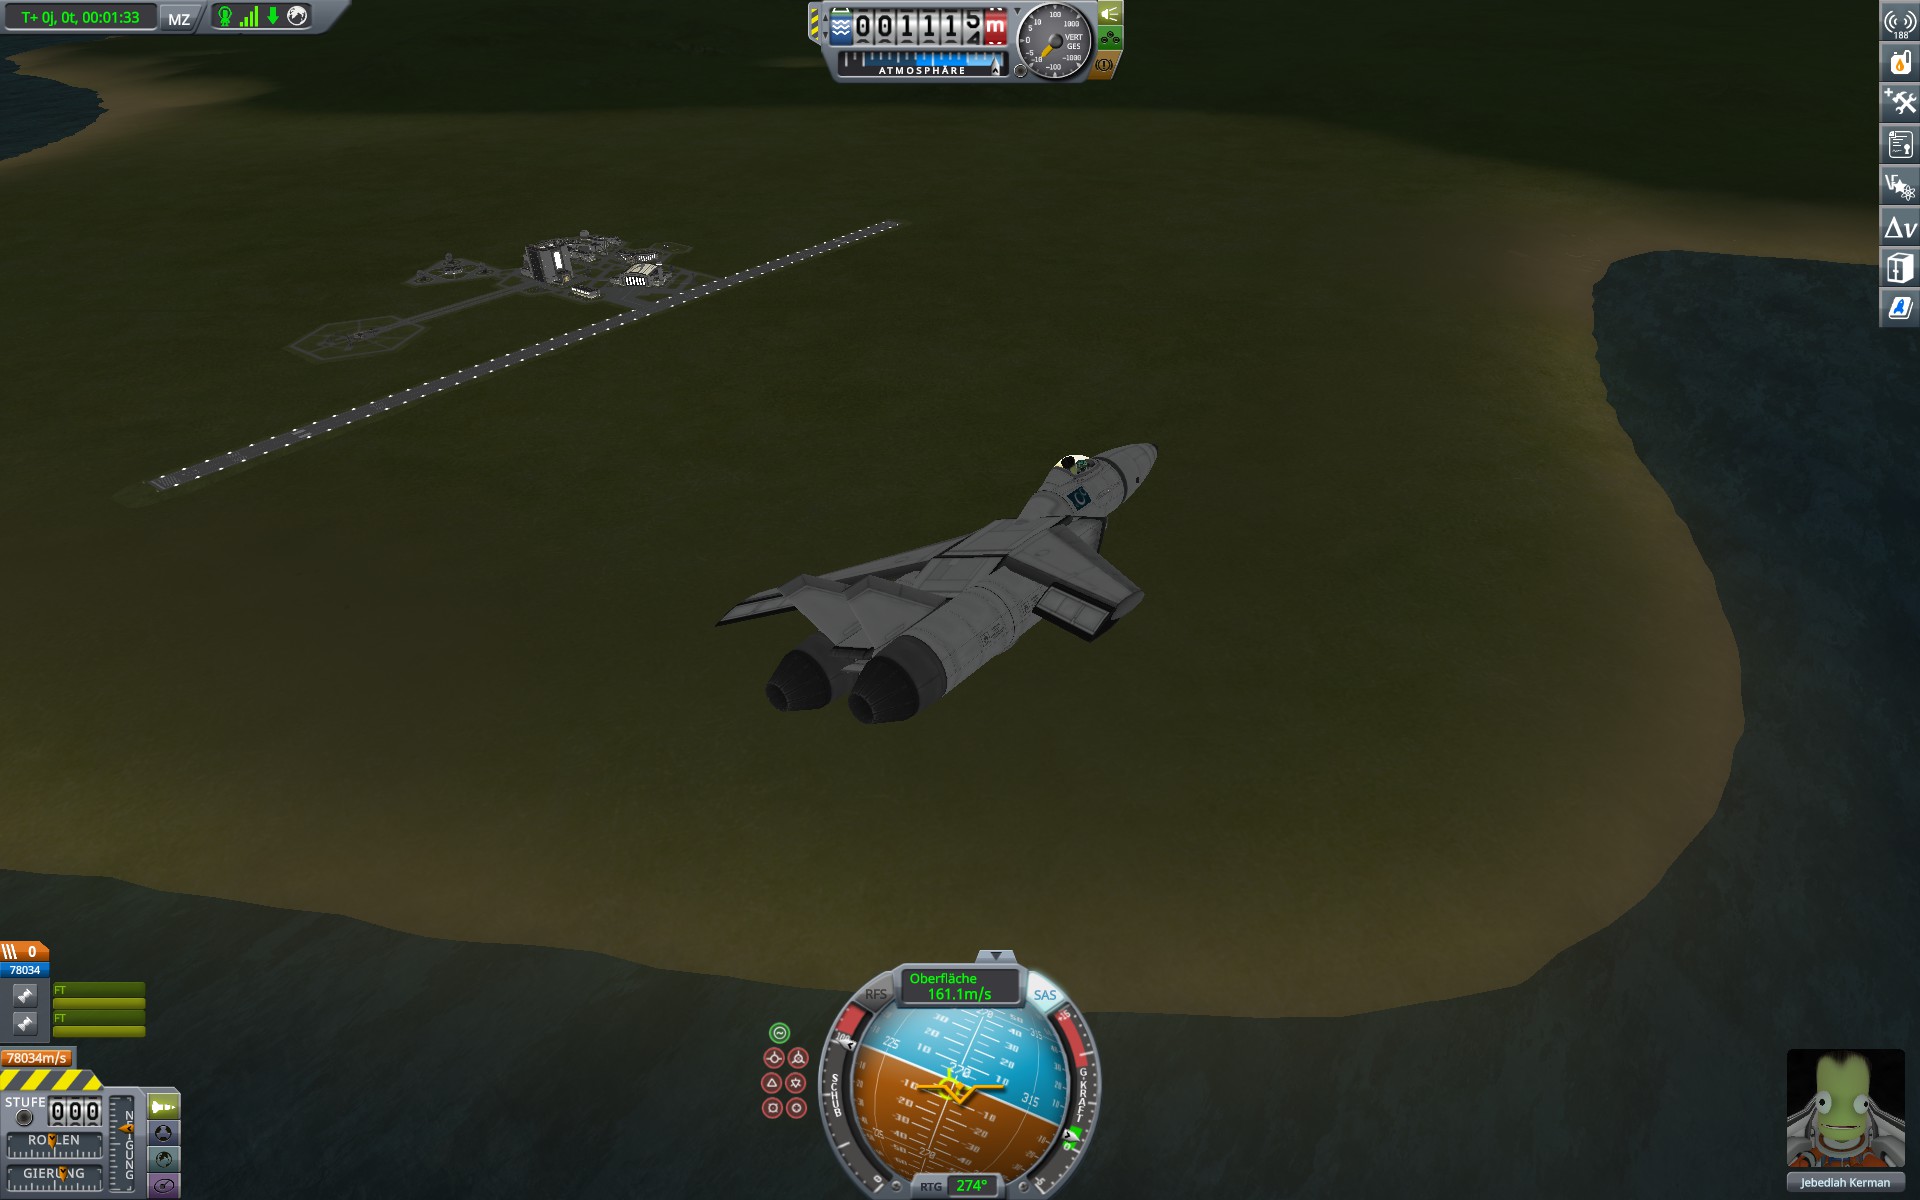
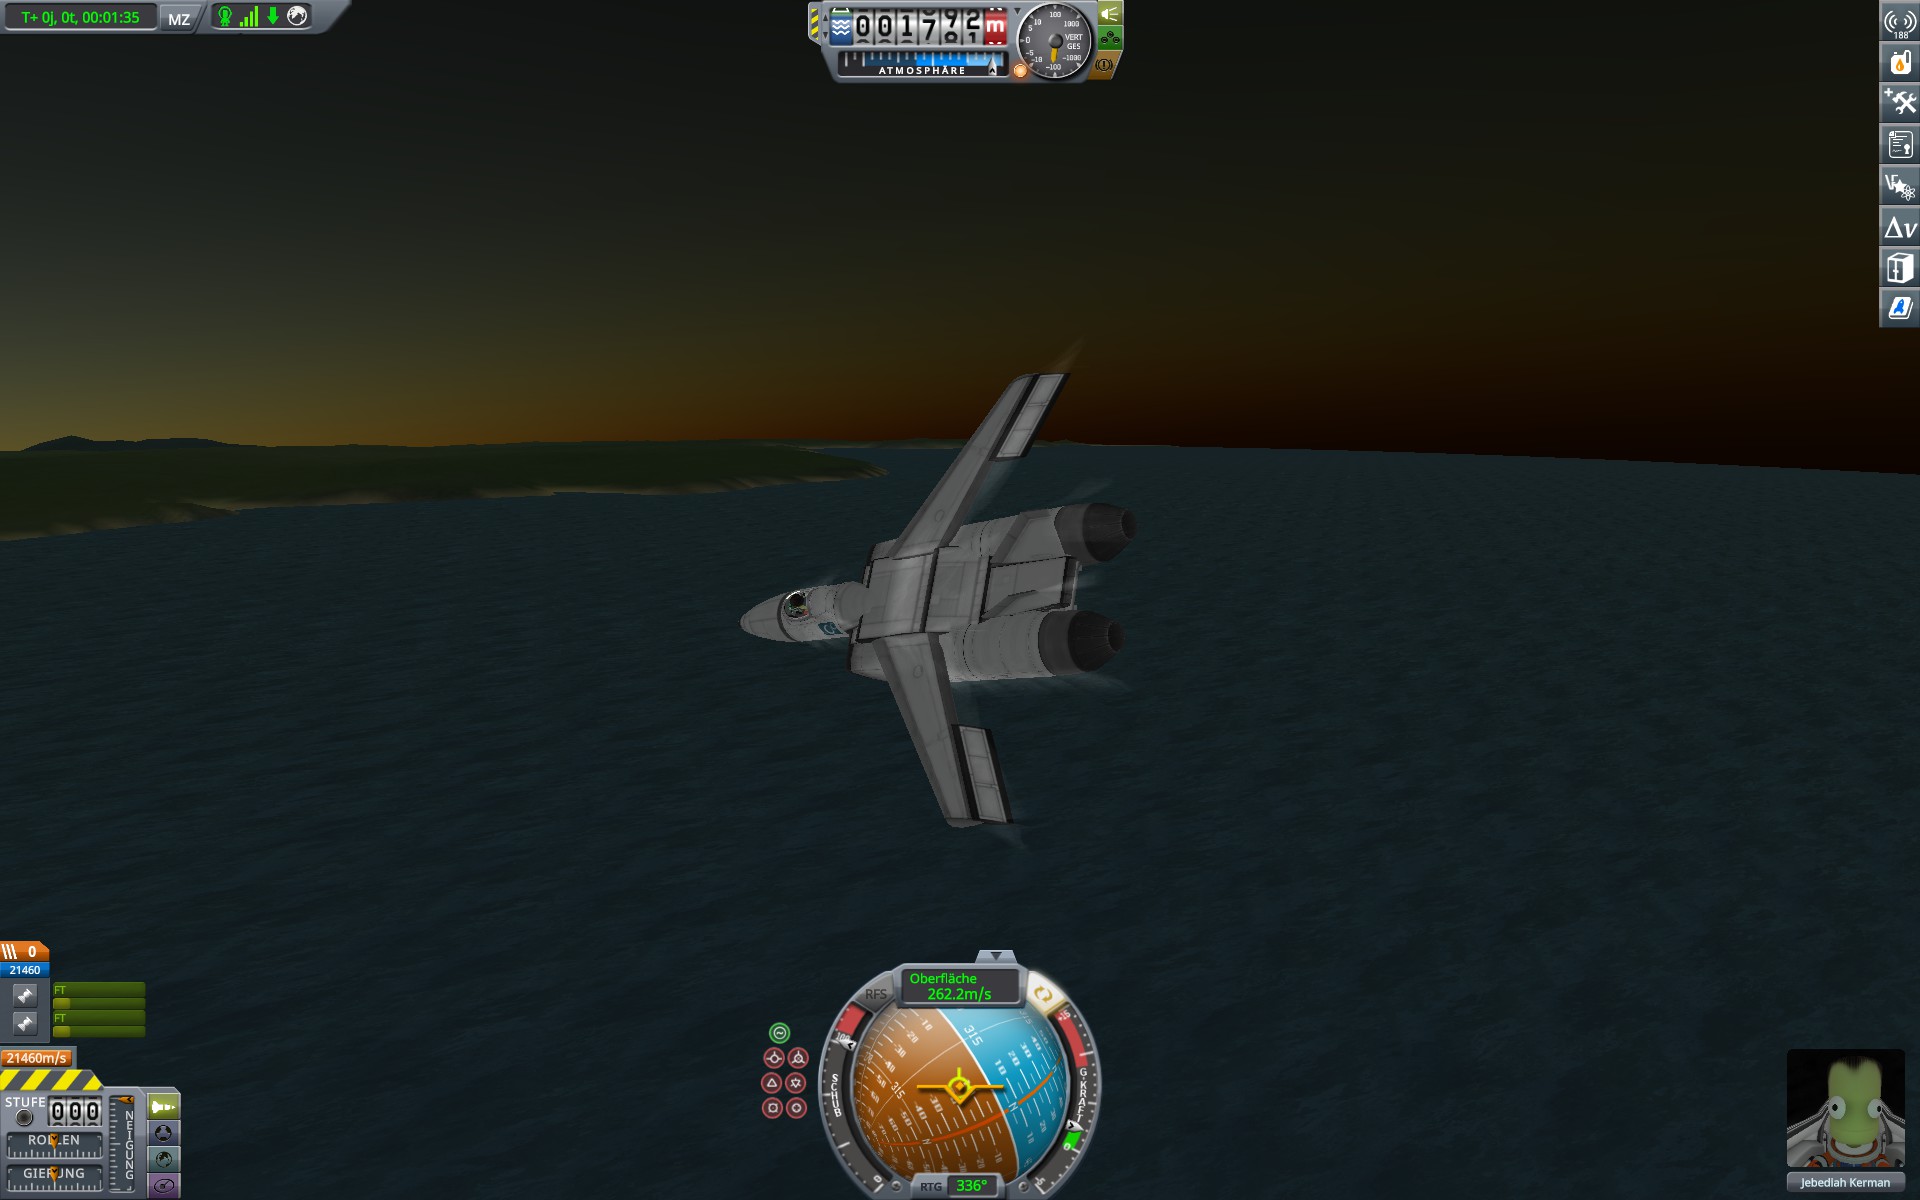
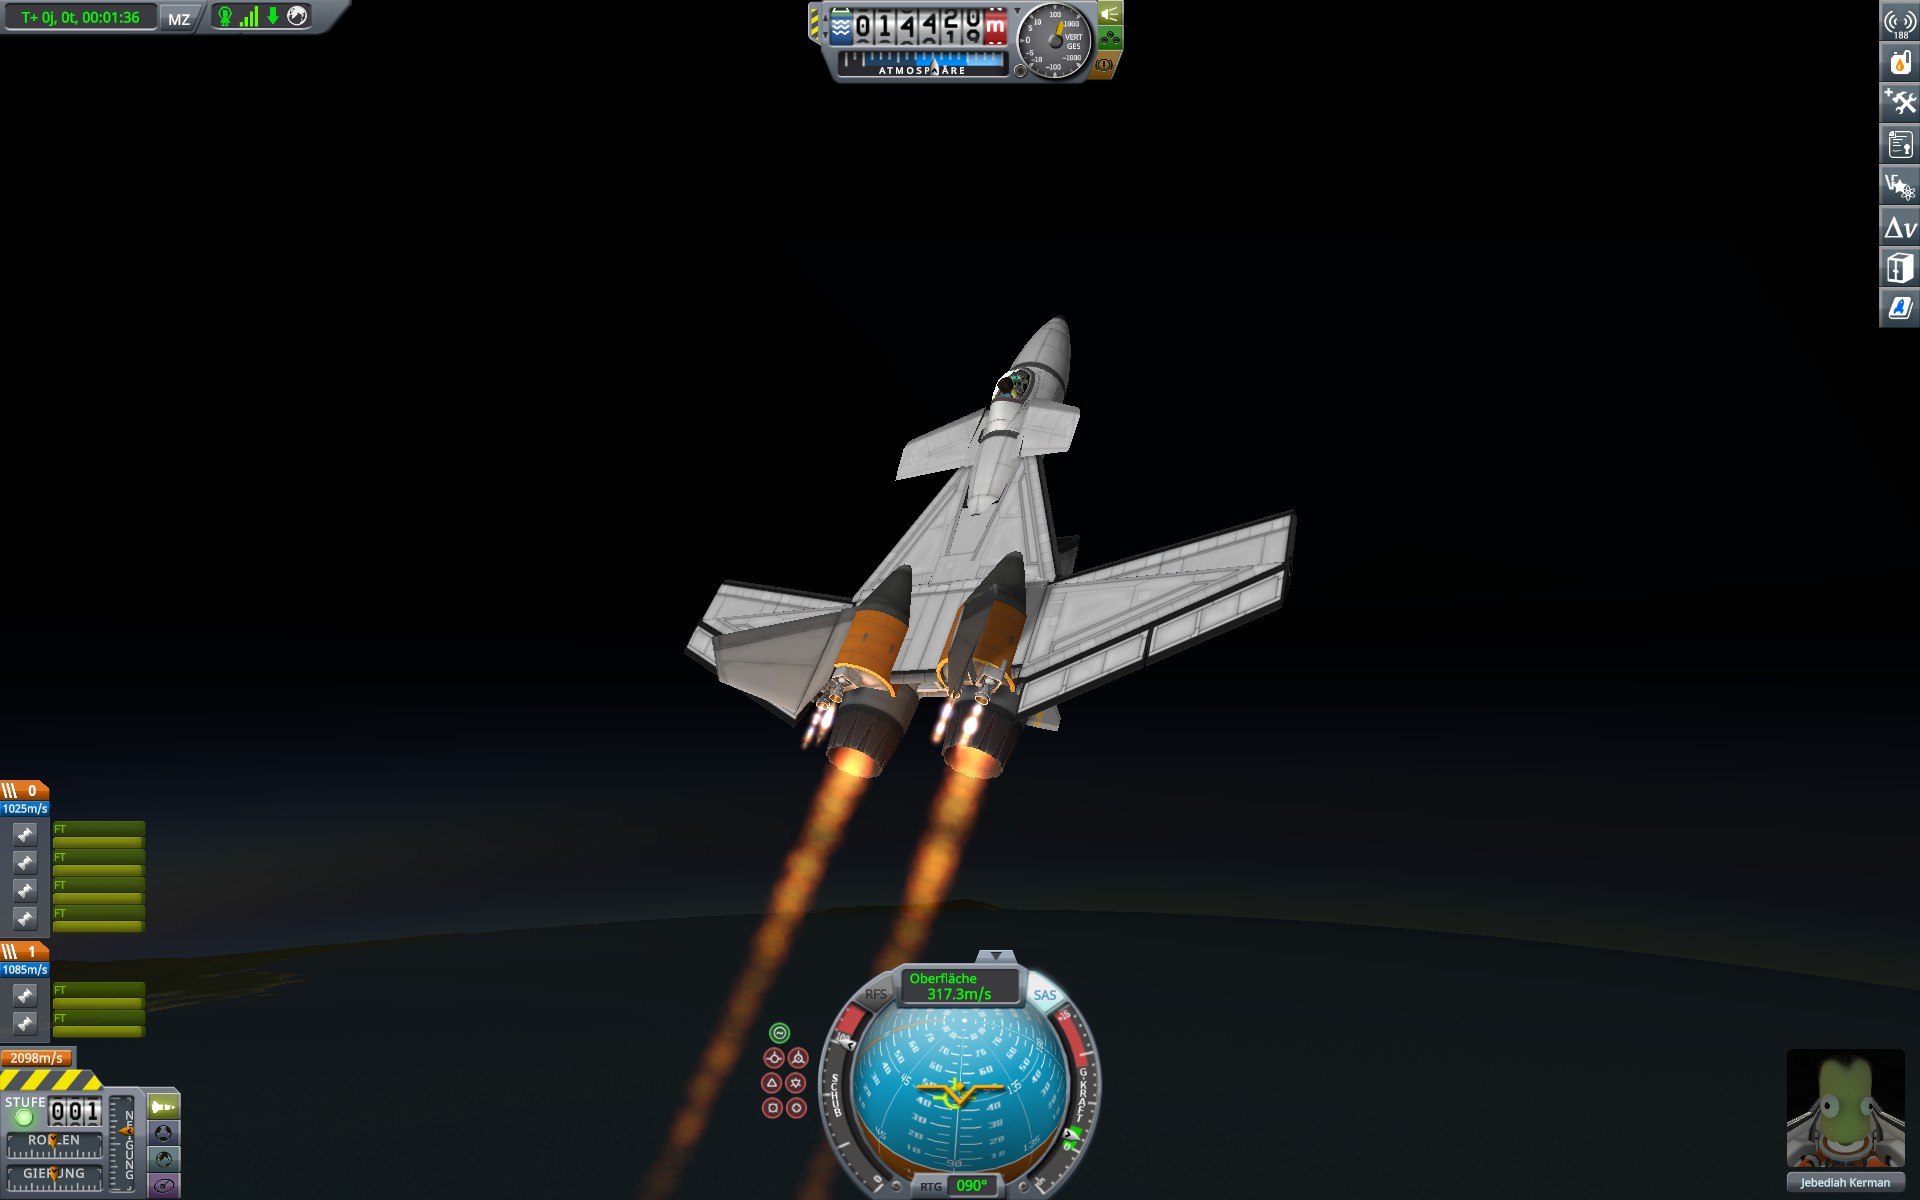
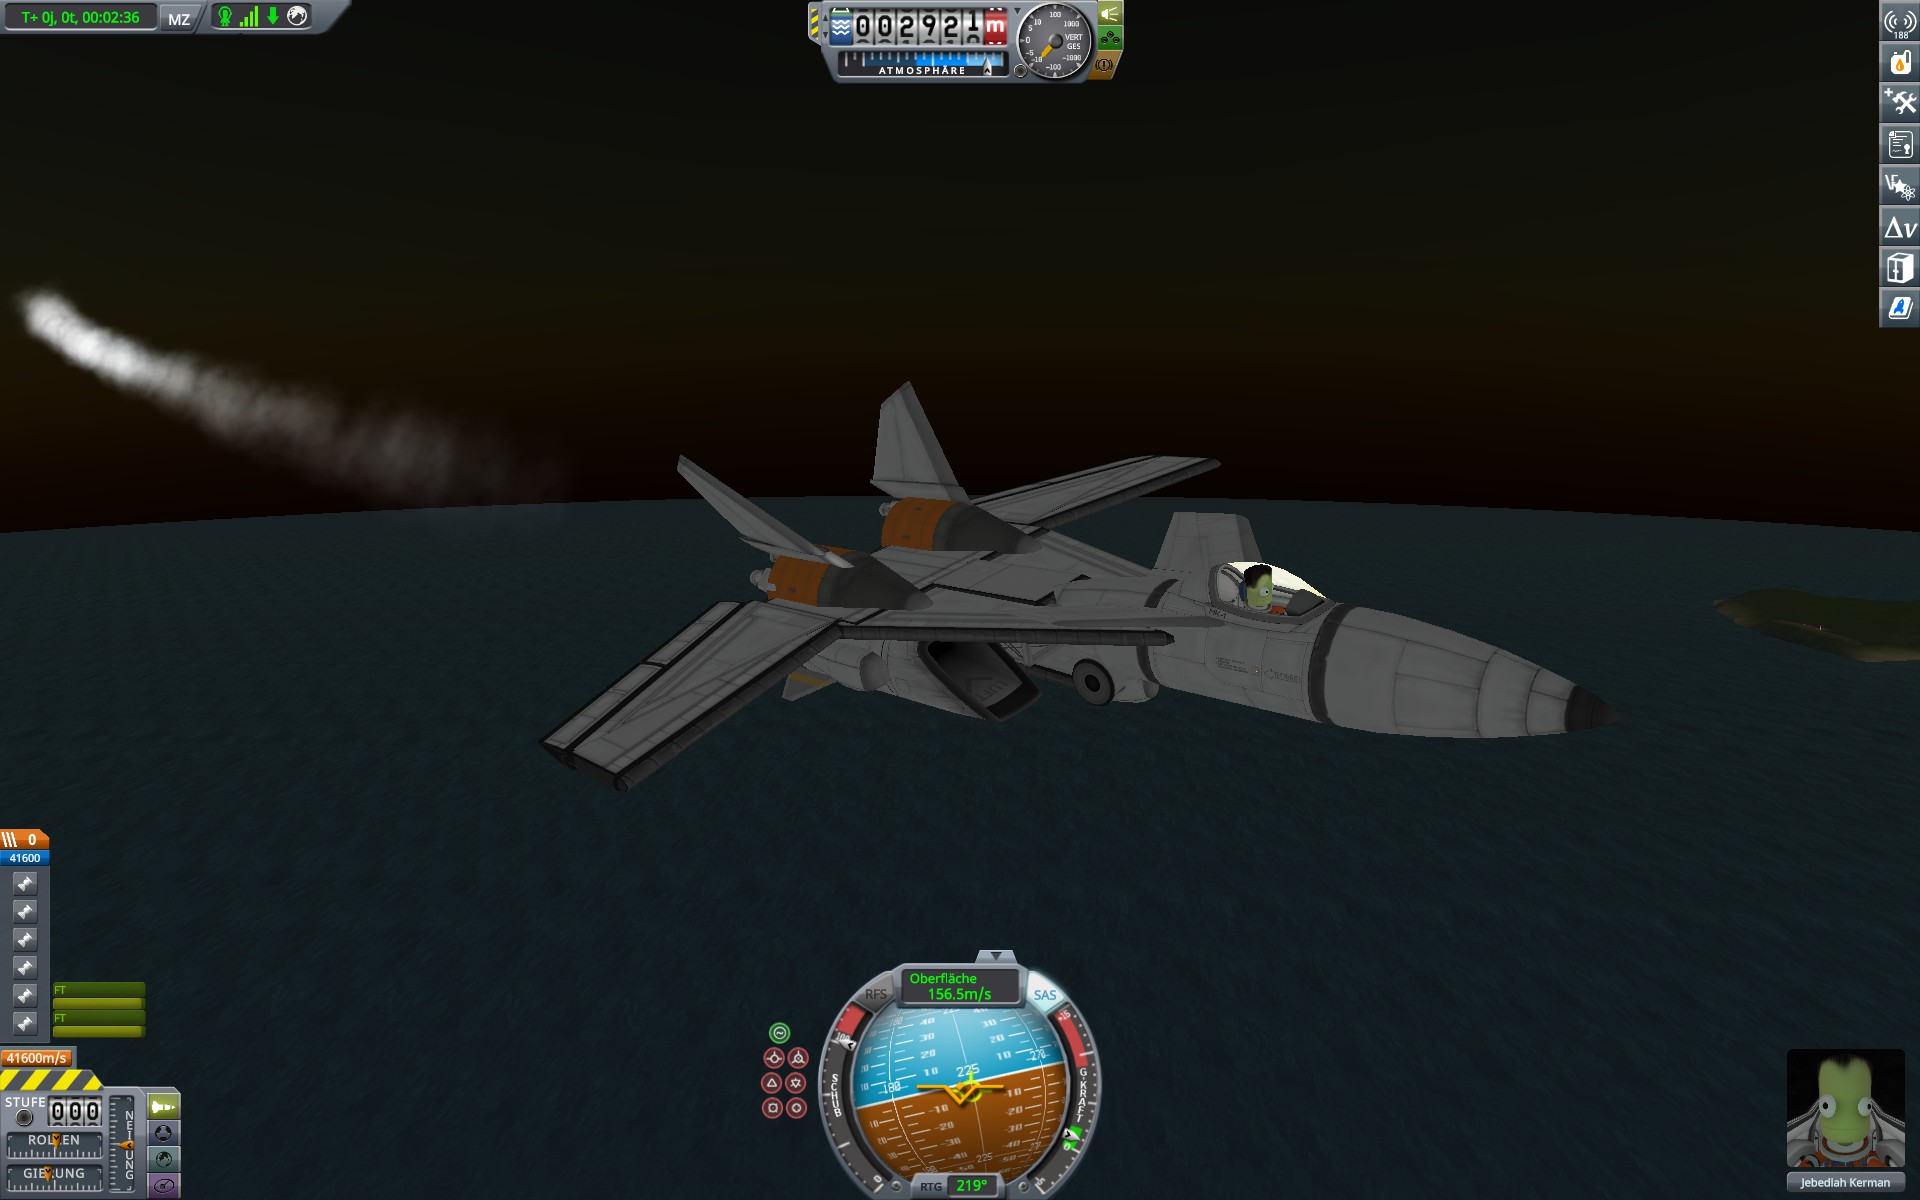
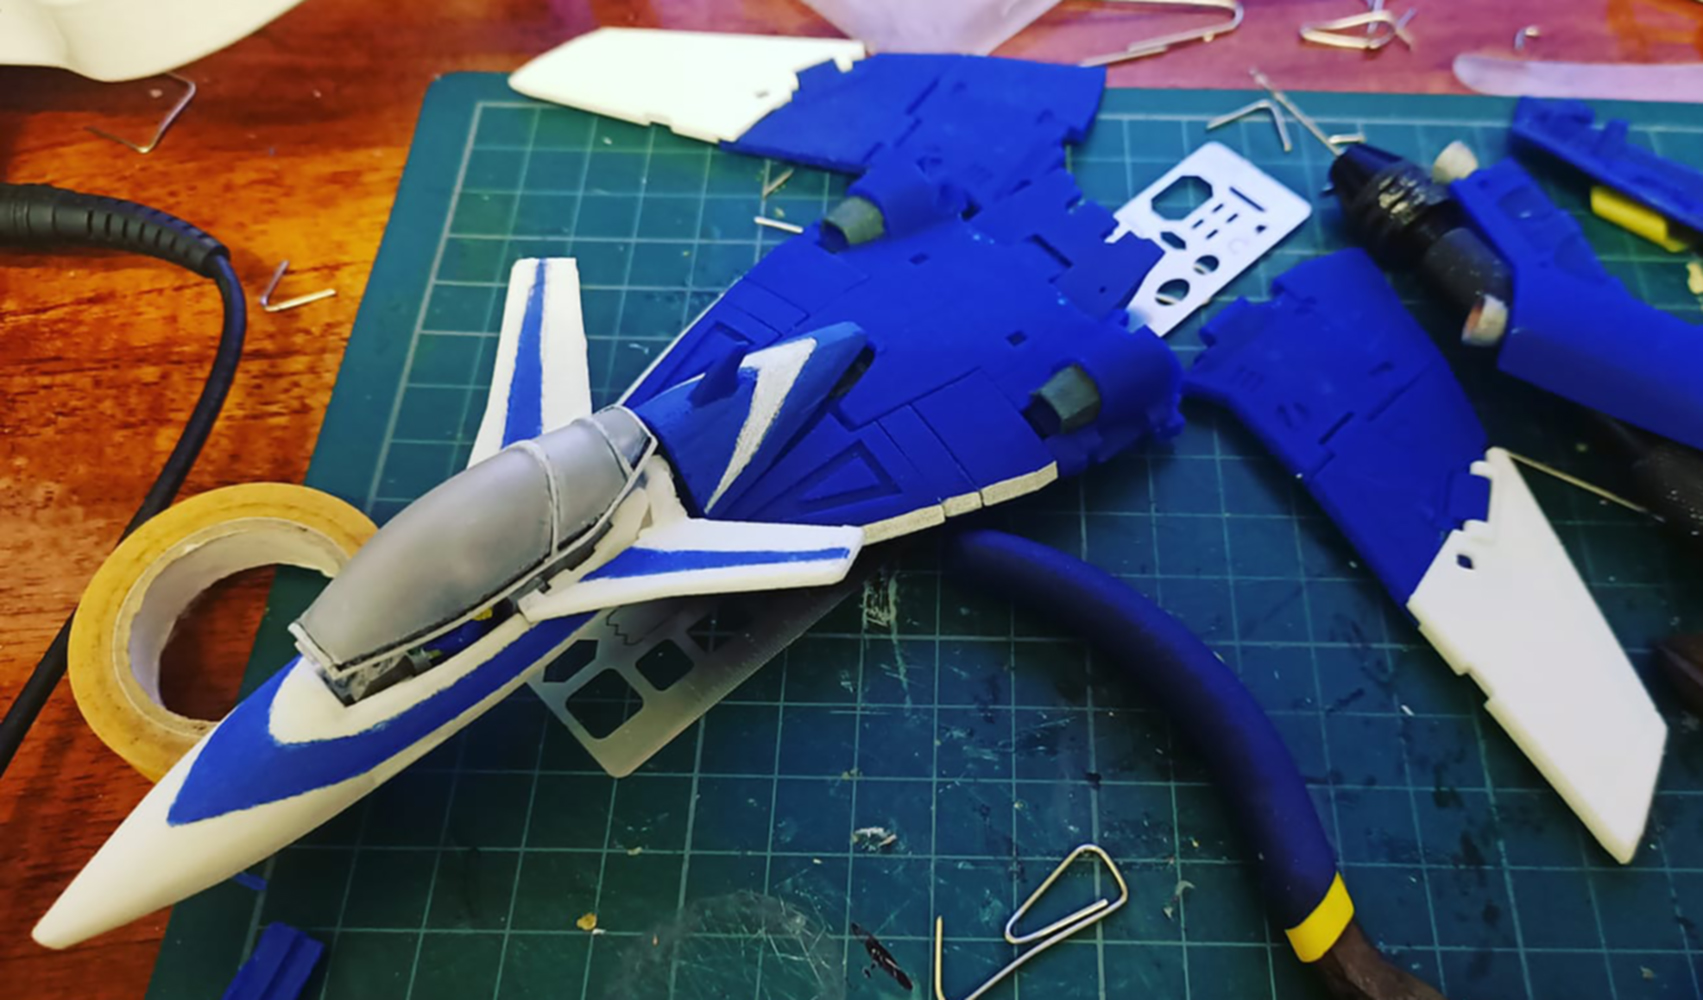
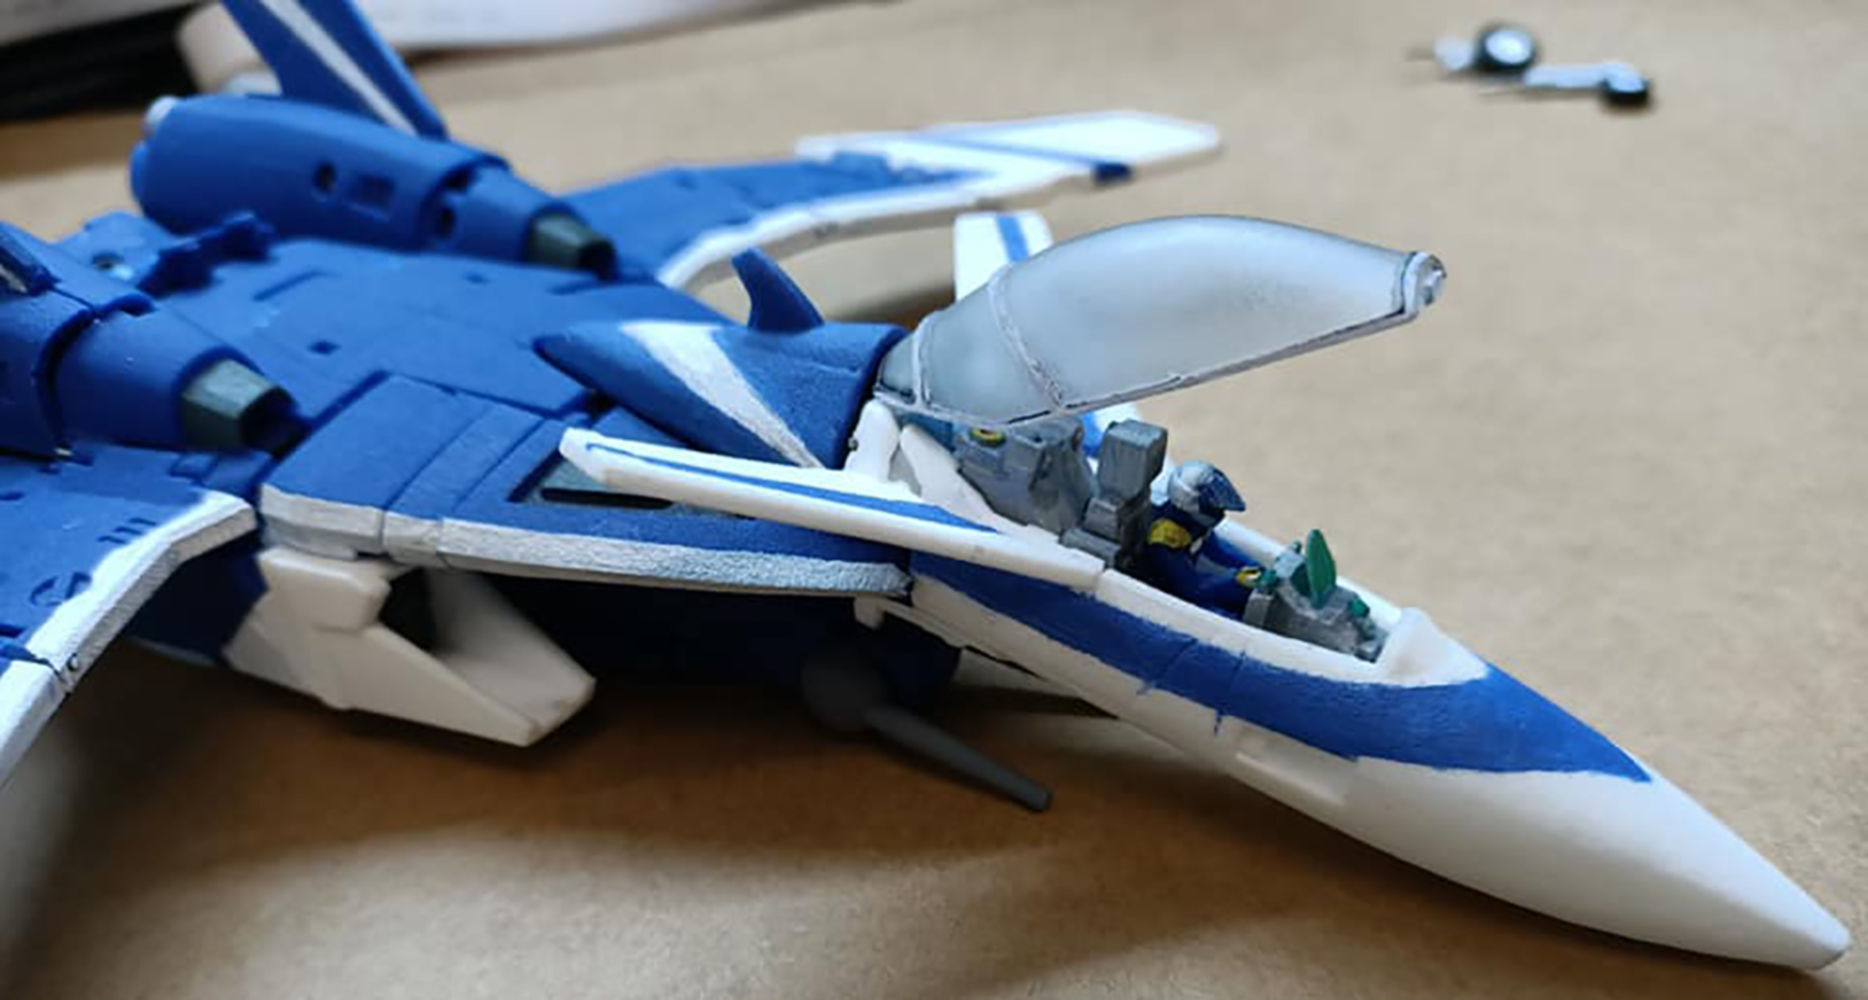
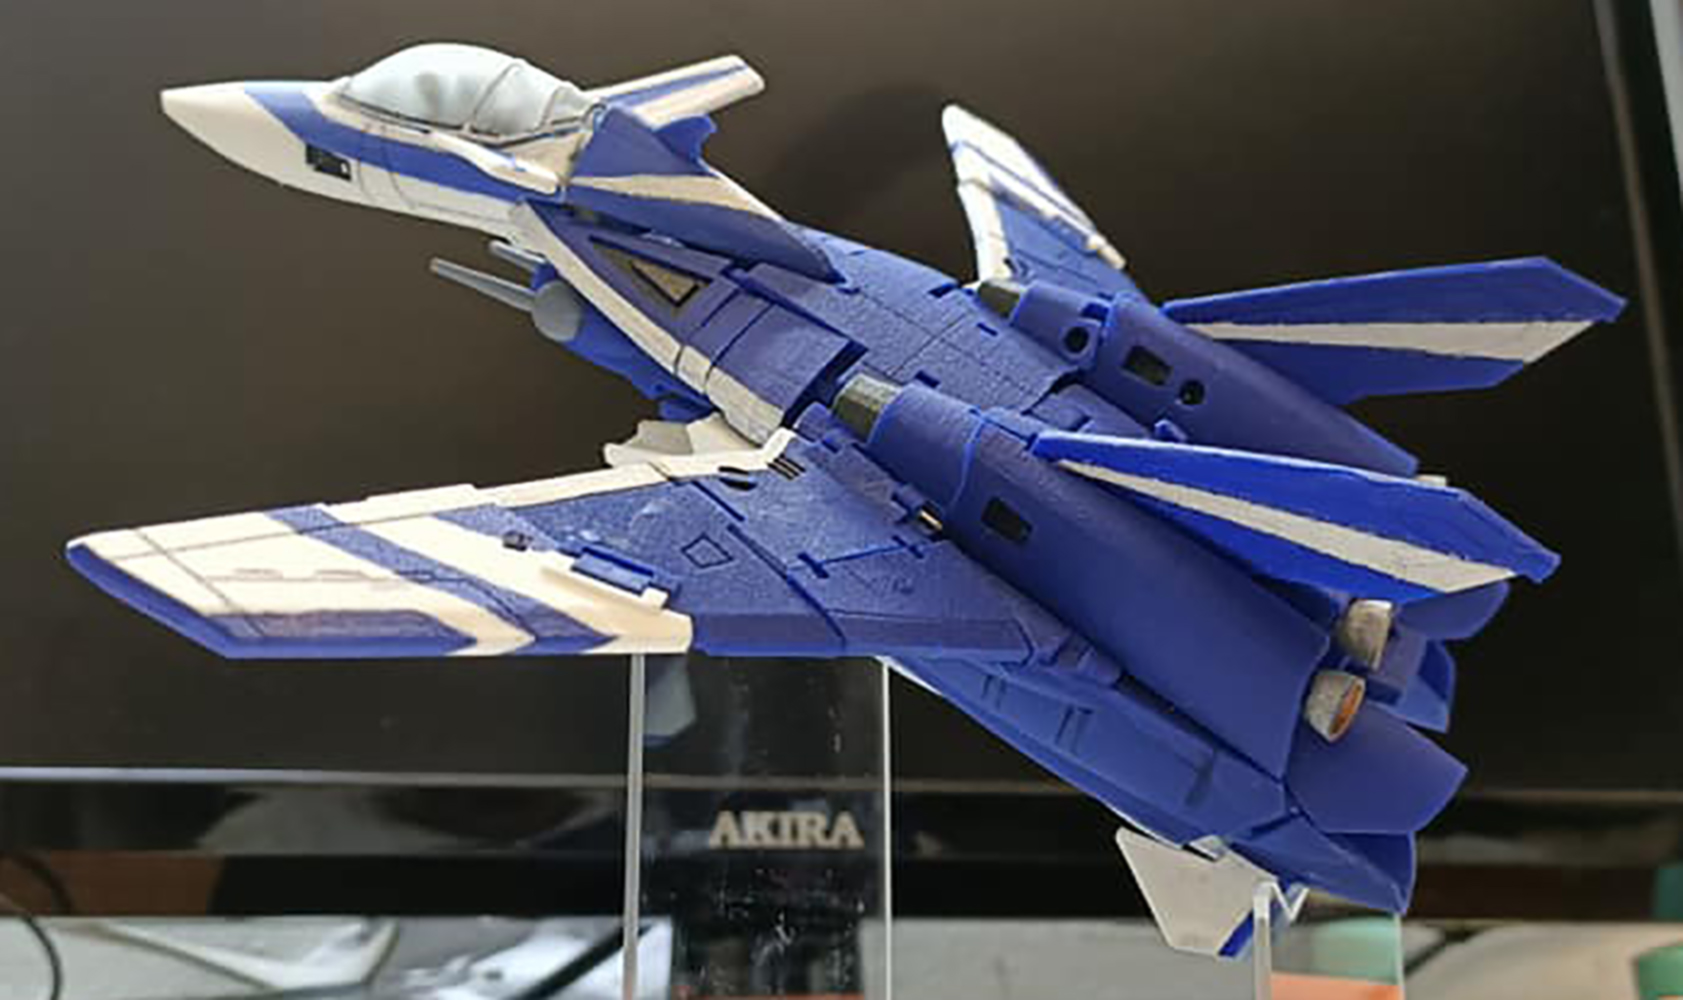
Hey everyone,
I was a bit bored today and had some fun in KSP. Everything was done without mods. Doesn't transform, flight model only
VF-1
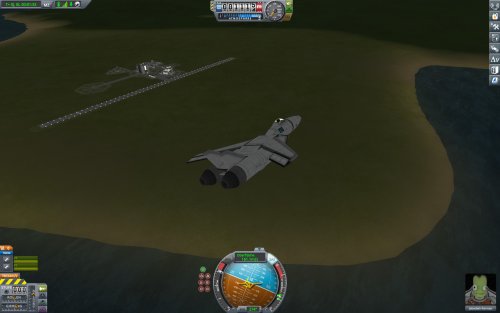

VF-9
-
@MechTech jep, thats the 1/48 VF-1A/S Strike
-
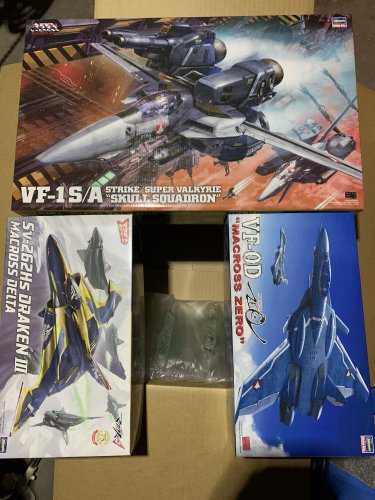
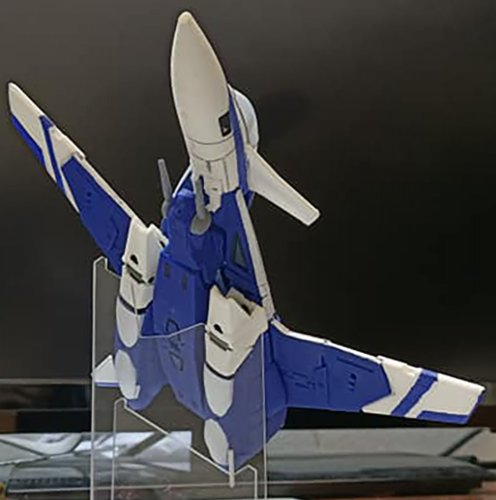
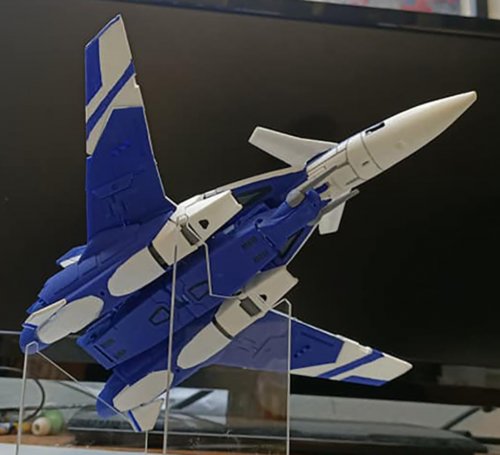
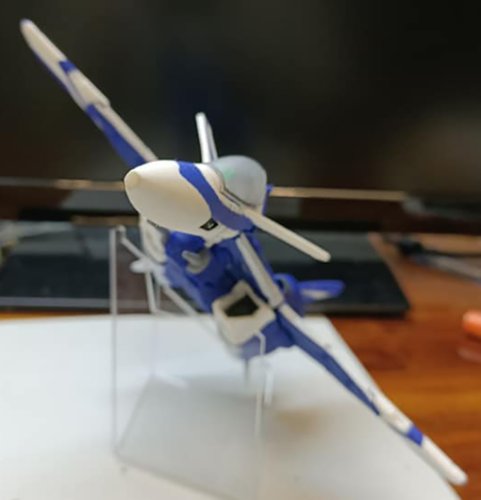
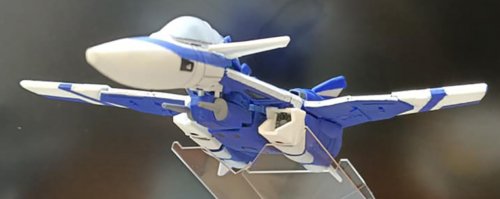
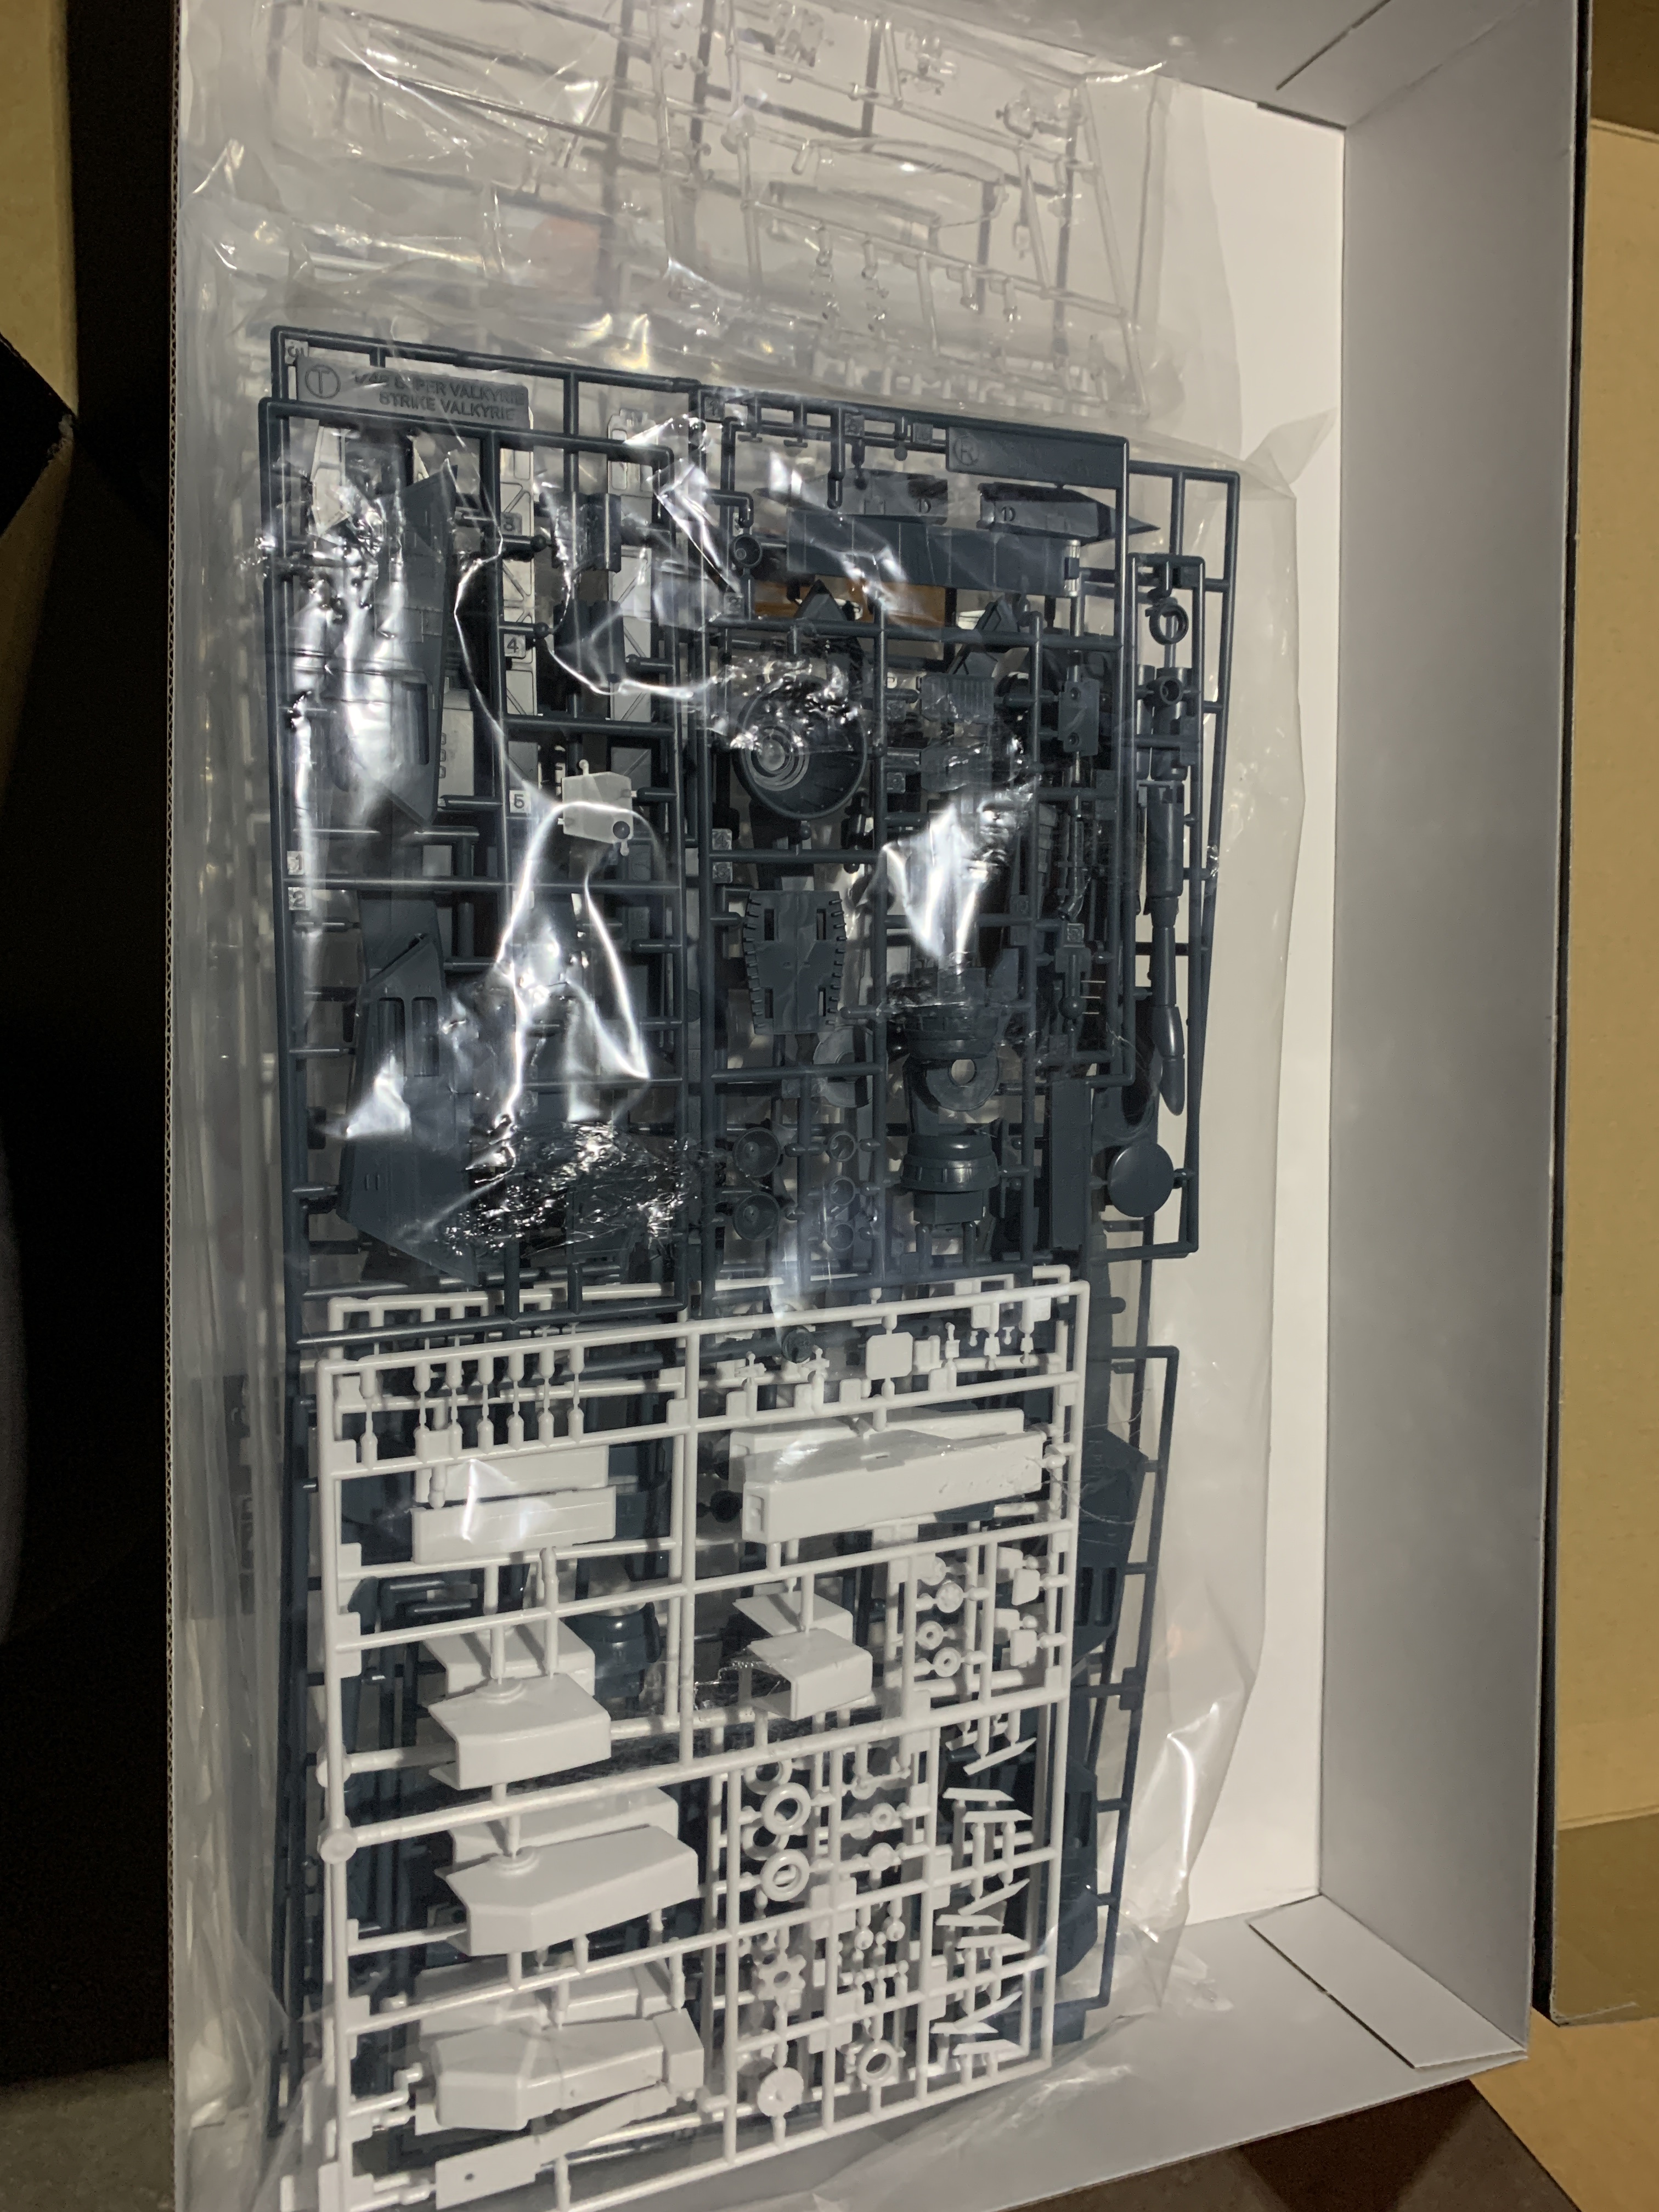
Got new stuff ... and that VF-1S/A Hasegawa box is just huge, man!
Even bigger than the 1/48 YF-19 box.

-
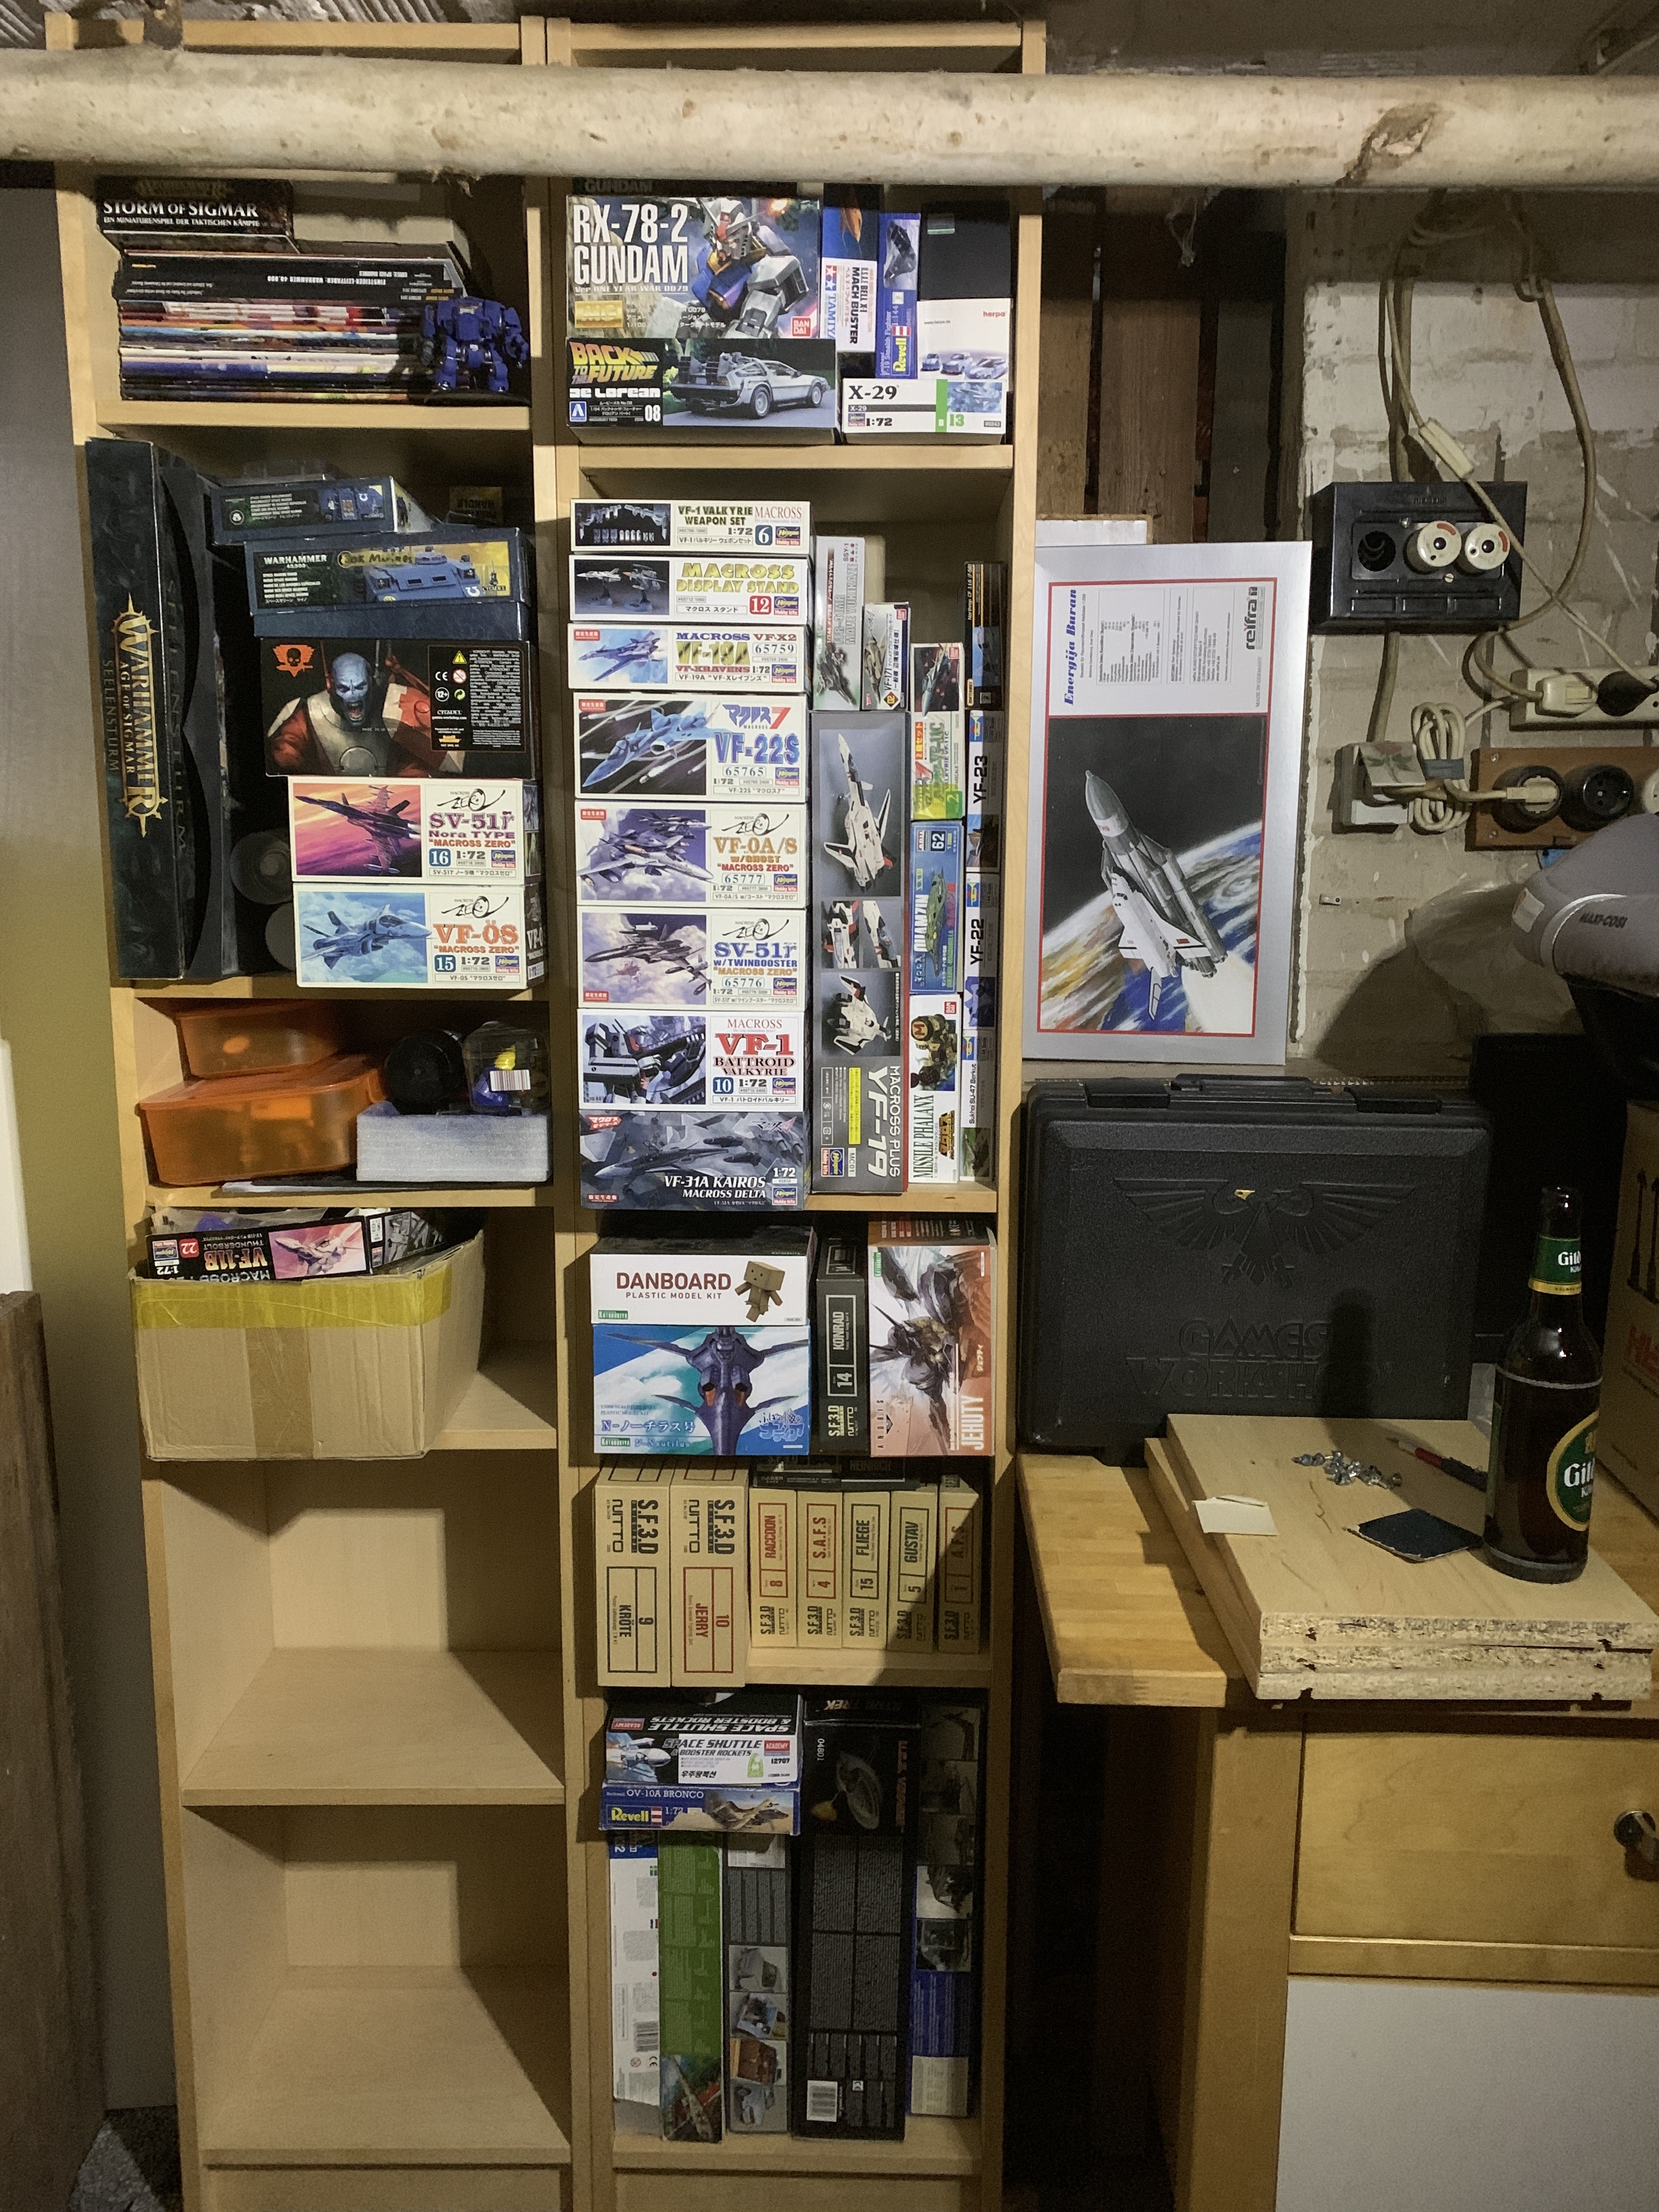
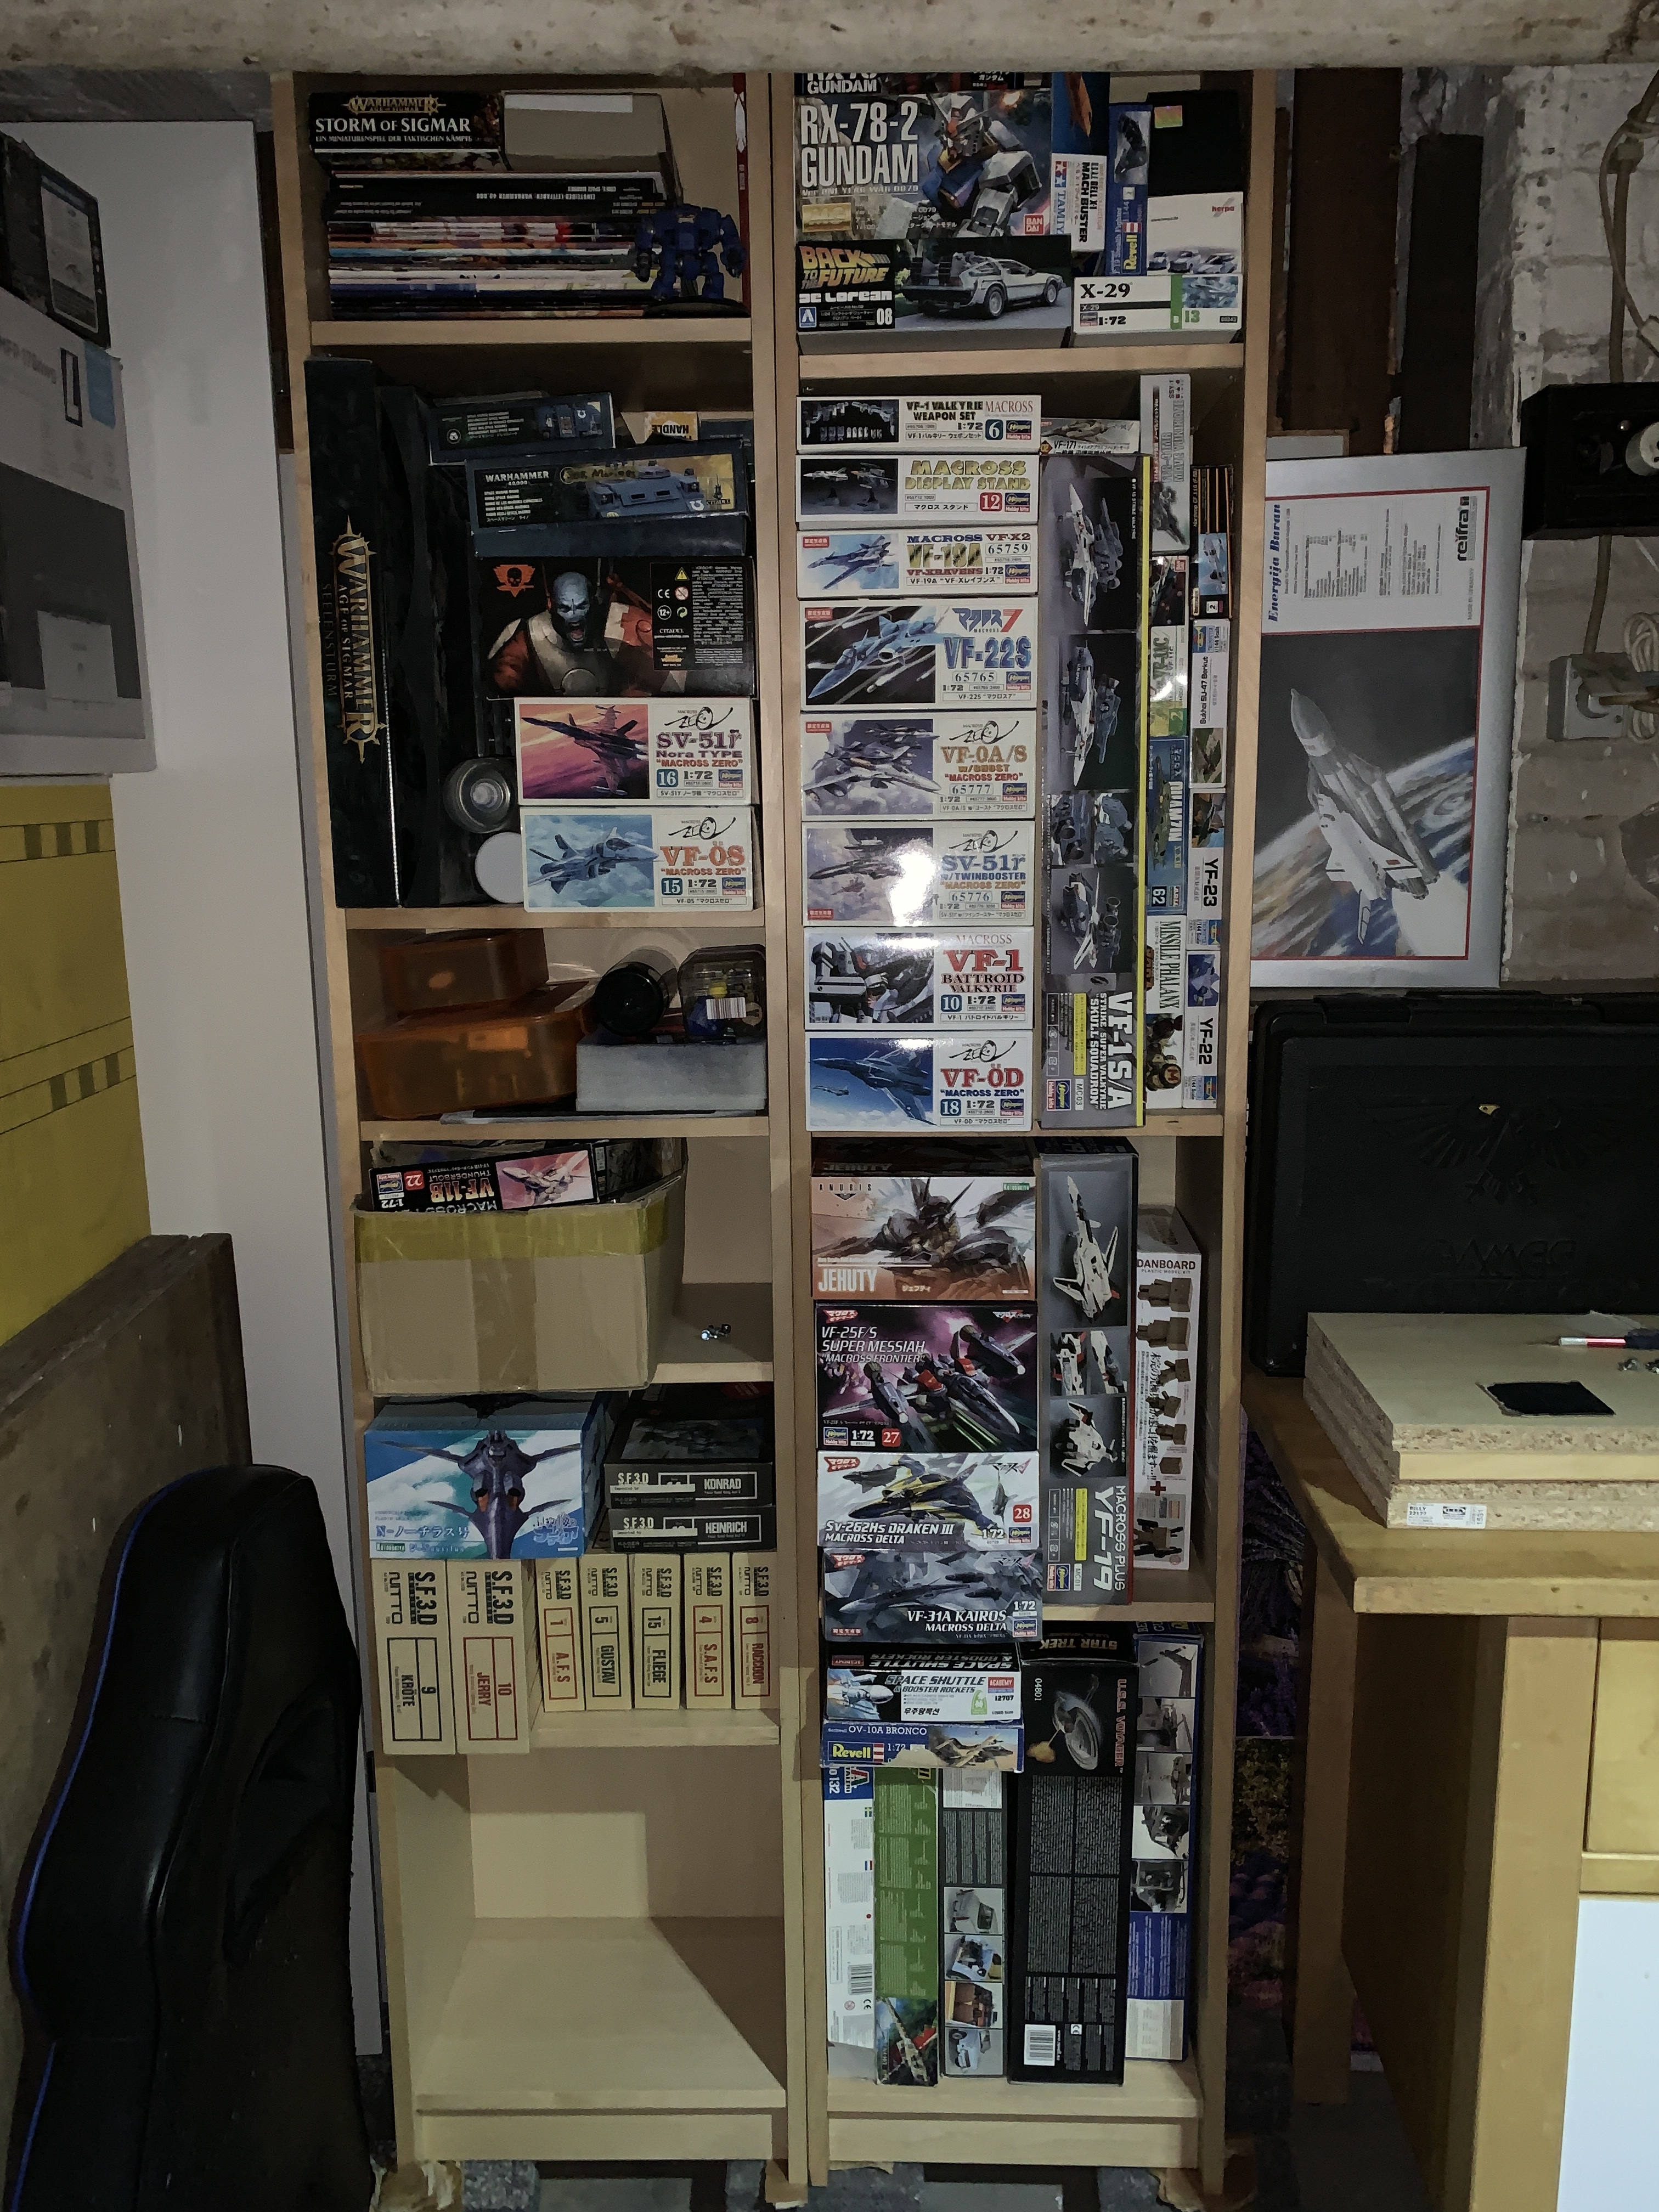
So - May stash moved from the living room into the basement. The VF-0S and the SV-51 Nora Type box on the left are "empty". Well actually, full of sprues from other kits.
The stash will be extended by a VF-1S Strike 1/48, VF-0D, VF-25 Super and a SV-262 as soon as the HLJ holiday sale package arrives
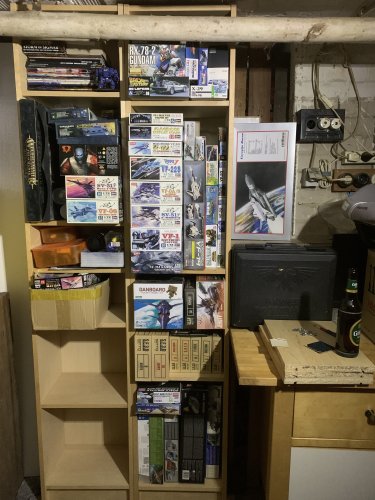
Update:
The stuff is here:

-
On 12/15/2020 at 10:44 PM, valhary said:
One of our first buyers (a long time ago) finally started to work this bird
https://zh-cn.facebook.com/pg/dislexicons/posts/?ref=page_internal


Yeah - I just saw this build on FB as well!
NIce one
-
1 hour ago, MechTech said:
@Ignacio Ocamica That's looking awesome! You gonna make casts we can buy?
")
@Urashiman That would be an excellent kit to own! I know I thought about making one a while back, but too much going on. Are you going to sell to us too? - Phill
@MechTechI don't think I will start selling it. Too much trouble with business taxes in Germany. I was thinking of releasing it under GPL, so anyone can print it.
@Thomthanks! Only 3D printing, no casting


.jpeg.4fe0e919c0140a540f8123a9e04f28f3.jpeg)
.jpeg.251d9caeb52ffa5e917cb1b687dba3e1.jpeg)

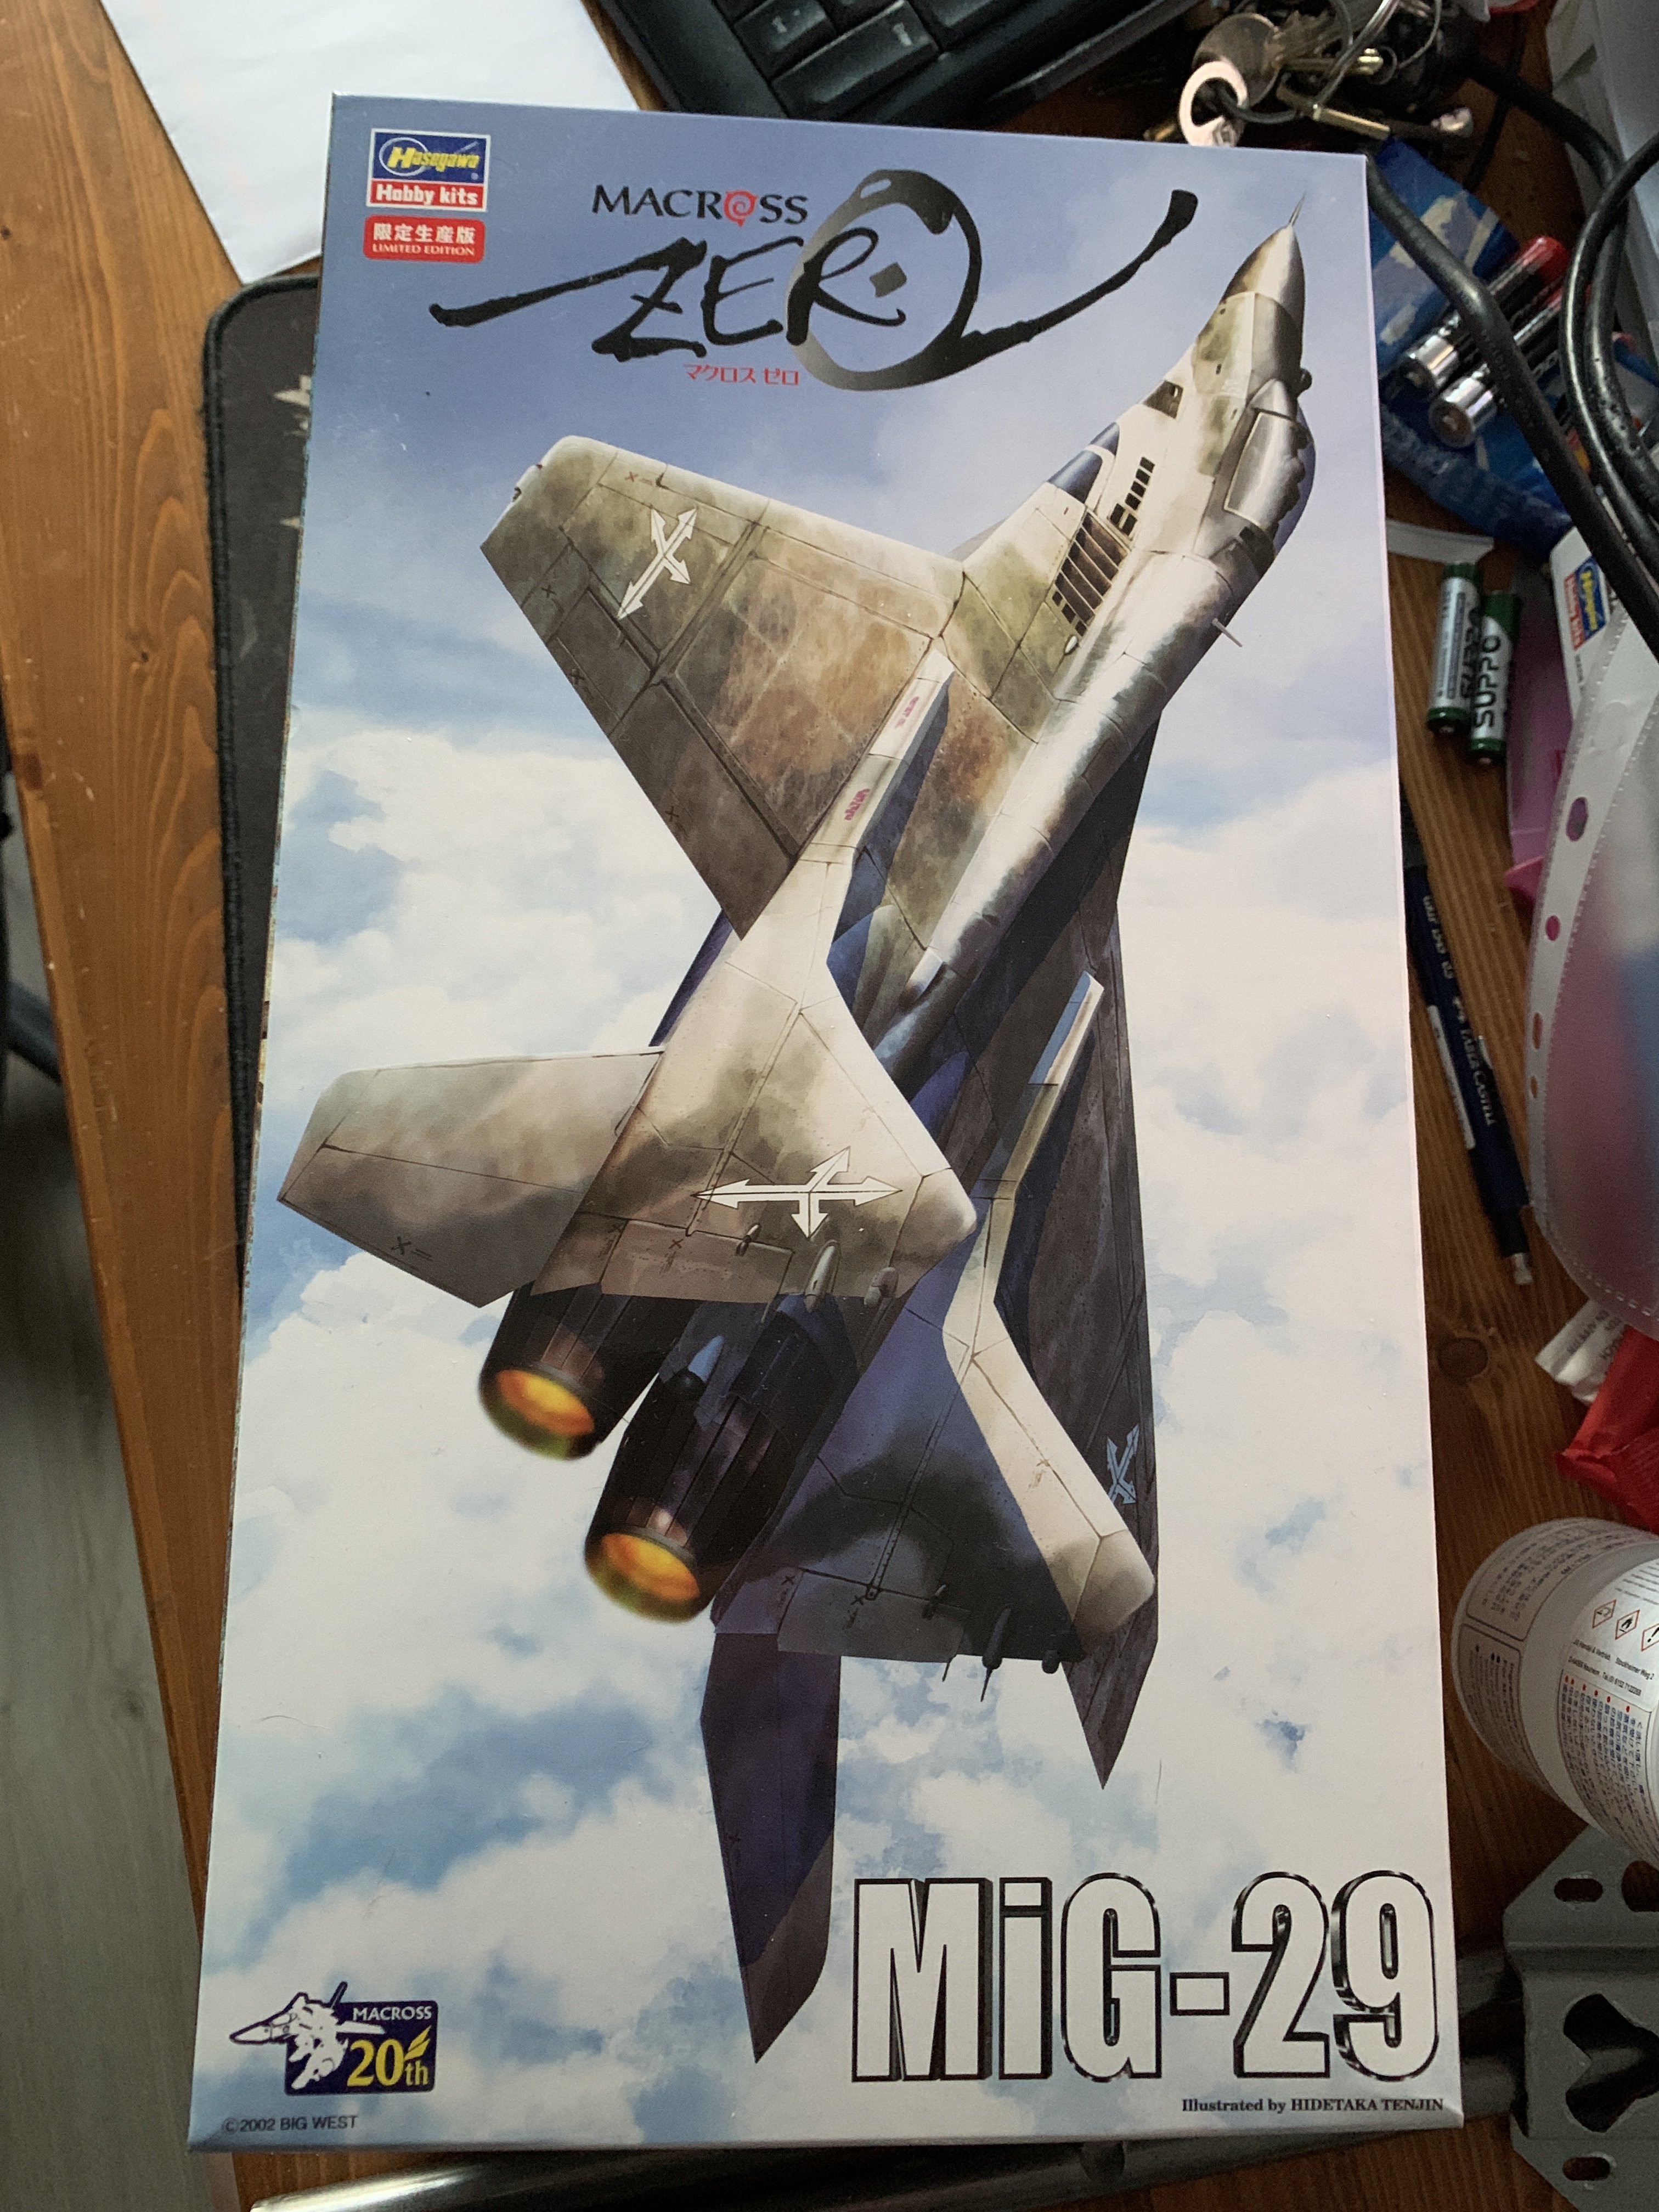


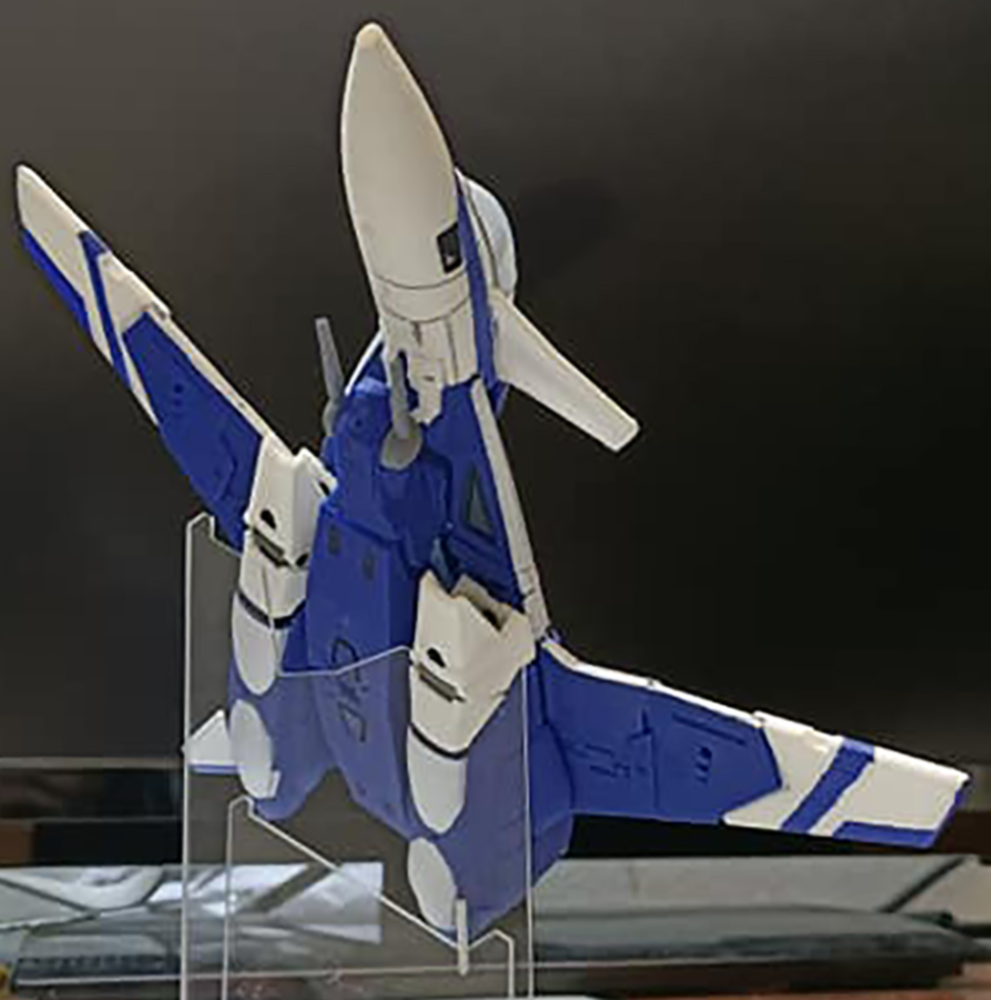


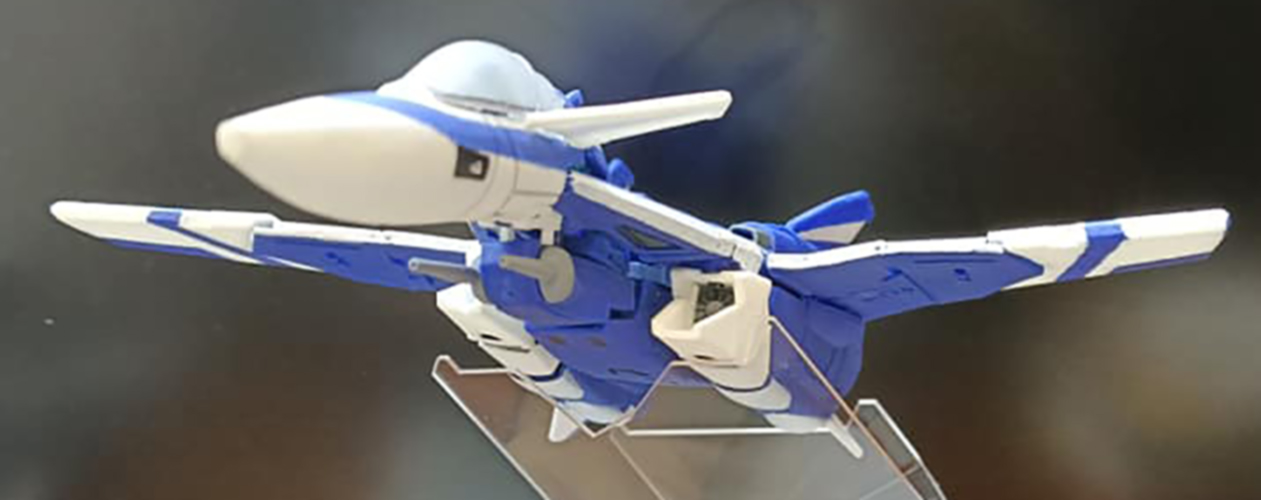


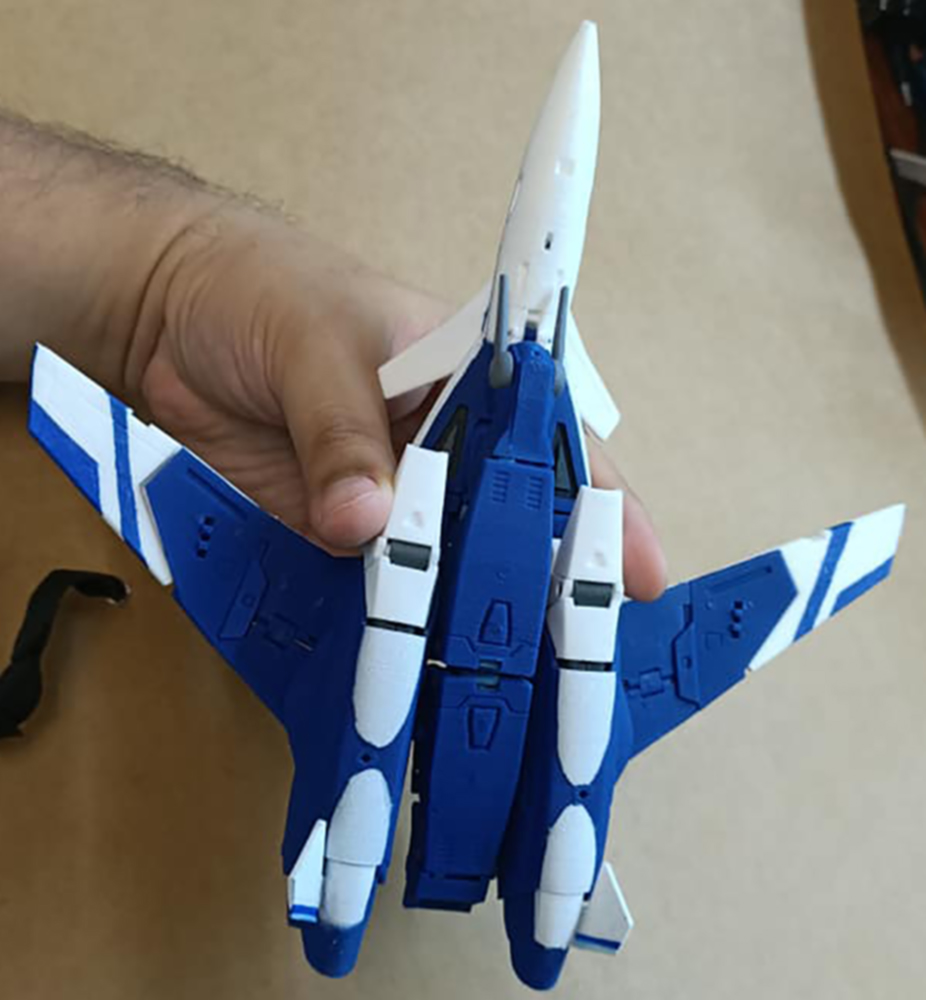
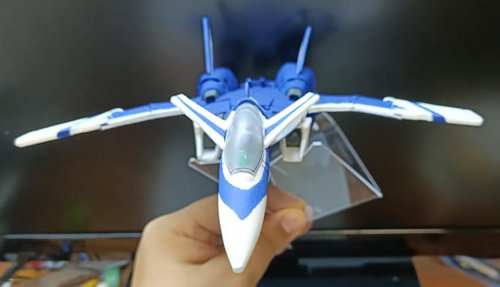
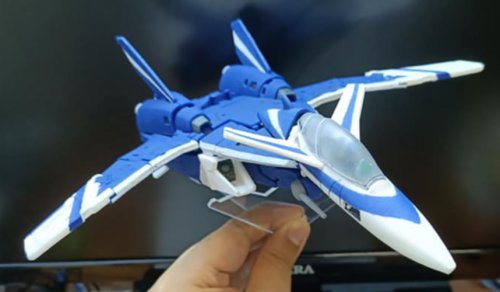
PLAMAX 1/72 VF-1 Valkyrie
in Model kits
Posted
Finally, a sign of life from the Plamax 1/72 VF-1. Can't wait to get one")