mickyg
-
Posts
2632 -
Joined
-
Last visited
Content Type
Profiles
Forums
Events
Gallery
Everything posted by mickyg
-
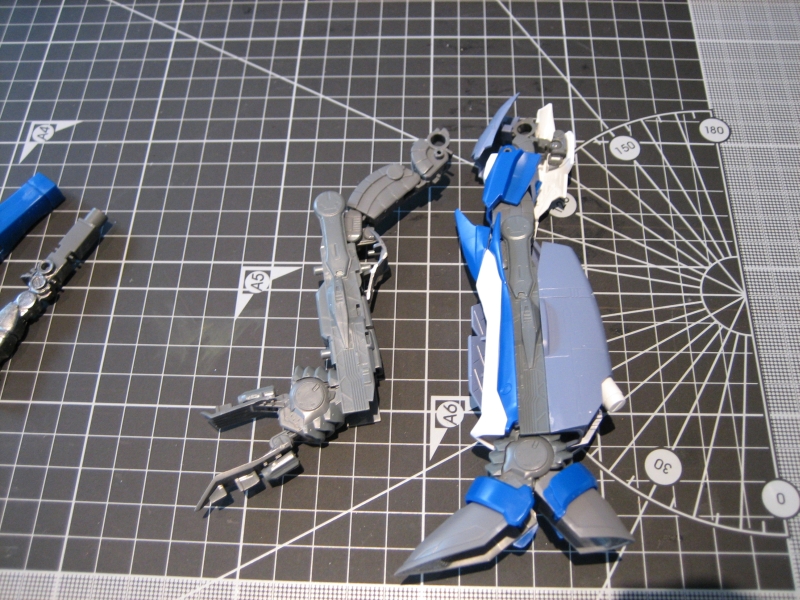
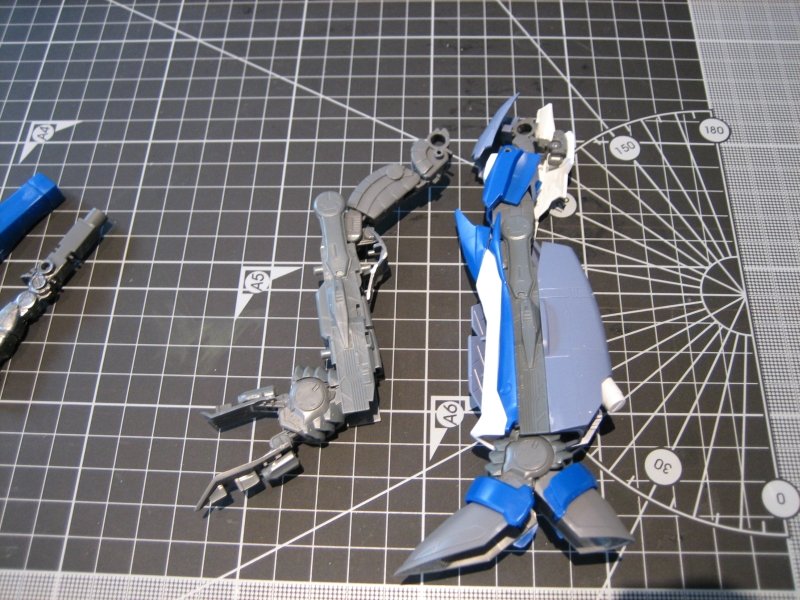
Made a bit more progress over the last week. This is going very slowly (hence the title). I'll upload pics soon but the gist of the last week is painting the inner framework parts. The grey parts on the arms and legs, specifically. I've seen both the metal effect and the flat grey one and decided to go the metal route. I haven't got any Alclad or other lacquer based metal paints so decided to just experiment with Tamiya gun metal in acrylic, thinned fairly heavily (almost 50/50). As I'm doing a lot of this on my lunch break at work, I can't airbrush. So that left hand brushing as my only option. I figured if it didn't work out, I'd come back and air brush it over the weekend at home. I was quite surprised at how it turned out. There's good and bad when using a metal type acrylic paint and hand brushing. The good is that brush strokes were non existent. I'm guessing the thinner is responsible for this and I'm quite impressed with this aspect. The bad news is that with thinner, the metal flecks seems to "float" for lack of a better description. So the paint goes on dark and then the flecks settle out to the surface. This actually looks really cool but the flecks, in my opinion are too big for the scale of the model and while it looks metallic, it also looks a bit fake. Perhaps an oil wash will tone this down a bit. I may also end up applying a clearcoat to tie things together a bit as well. The next issue I encountered was not paint related but instead a problem with how the parts on the legs are designed. The pivot point just after the hips has a real flaw in that the bottom of the intake for the super parts fouls on the leg. This is probably only an issue when in Gerwalk, as the legs don't need to bend this way for any other mode. But still, I've almost broken the post that the bottom of the super parts intake piece mounts to (this will make more sense when I post the pics later today).

-

1/72 Hasegawa SV-51 Gamma w/ twin boosters (DD Ivanov type)
mickyg replied to nickster's topic in The Workshop!
Ah but you get the skills by doing Com'mon Schiz - you can do it! Practice with a cheapy model. I started modeling again because of people posting on this site (Thanks again, everyone!) and practiced on a 1/72 scale P-51 that cost 5 bucks or something. You can start with something like that - mine had like 10 parts I think. Anyway, that way you're not destroying the good stuff and you can still learn some of the techniques. A lot of the stuff people are doing, they do because it's easy, not hard. Some of the best techniques come around because someone's found a better/easier way to do something. That said, Nickster - you're making me want to buy Mac Zero stuff now! Your builds are lots of fun to watch. Thanks for sharing! -
Alrighty then... It at least appears this isn't something people are going to be interested in, based purely on the lack of any replies since a bit over a week ago. That's OK. However, if people care to comment, would you mind letting me know why the lack of interest? Please feel free to post anything you feel weighs into the argument. IE, price, necessity, lack of a history/trust (talking about mine, not yours), etc... Feel free to PM me if you'd rather. If the issues are something I can resolve, I'd obviously like to still do this.
-
1/72 Bandai VF-25F Messiah build-up step-by-step (sort of)
mickyg replied to wm cheng's topic in The Workshop!
Try Googling "the complete future" and you'll find all kinds of information about what it is, how it works and what it's called in other countries. You might need to experiment a little though. Some behave quite differently to Future. -
I know, it'd cost more than the whole model kit though! Not that they're overpriced, just way more than I need.
-
Any time! I'd buy a set too but I've got a VF-1D and want a Hikaru and Minmei. All the pilot kits come with only male or female but not both. Shouldn't be a problem on your build!
-
Checked into PetarB's stuff: http://www.studiostarforge.com/ Certainly simpler as his figures actually fit Hasegawa stuff without modification.
-
1/72 Bandai VF-25F Messiah build-up step-by-step (sort of)
mickyg replied to wm cheng's topic in The Workshop!
Did you mean Mikhail's? Or are you referring to Luca's green as blue? I guess it's more "mint" coloured which could be a type of blue What did you have in mind? I've already started my Mikhail and posted up my build (and would love your feedback;)). I've also got a Hasegawa VF-1D I'll start on when the 25G is completed. -
Bandai 1/72 Scale Macross Frontier Model Kit Thread Ver.3
mickyg replied to azrael's topic in Hall Of The Super Topics
They all look painted to me. The super packs on Mikhail's custom aren't the out of the box colour so I always thought he painted at least those. The white on the fighter also looks a bit more off-white than how it comes moulded. My thoughts at least. -
Bandai 1/72 Scale Macross Frontier Model Kit Thread Ver.3
mickyg replied to azrael's topic in Hall Of The Super Topics
Hah! I've already downloaded it yesterday - just haven't read it yet! Thanks. I'll sheepishly walk away now... -
Bandai 1/72 Scale Macross Frontier Model Kit Thread Ver.3
mickyg replied to azrael's topic in Hall Of The Super Topics
What magazine was that from? Can't say I've seen that one posted here before. -
Bandai 1/72 Scale Macross Frontier Model Kit Thread Ver.3
mickyg replied to azrael's topic in Hall Of The Super Topics
Ooh, thanks for those - especially that last one! Looks much more like what we see in the Anime. And yeah, now that you mention it, perhaps Alto's is more obvious for being purple. Half the problem with colour accuracy is that Mikhail spends most of his time in the shadows, where he can snipe better. It's possible purple is grey, due purely to shadows. -
Bandai 1/72 Scale Macross Frontier Model Kit Thread Ver.3
mickyg replied to azrael's topic in Hall Of The Super Topics
That's something I've been curious about. I haven't compared episodes, but I can't recal any where the super packs looked purple. They always look grey to me. Anyone have any screen captures where the packs (super or armoured) look purple? Edit: Ignore the bit about the armoured pack. The pics some posts back show they're clearly moulded in dark grey. The question about the super pack still stands though. -
Bandai 1/72 Scale Macross Frontier Model Kit Thread Ver.3
mickyg replied to azrael's topic in Hall Of The Super Topics
Hey, nice work there. Feel free to post on my G build, if you've got any tips especially! I know what you mean by trolling. I did that for months too. Great when you can finally dive in and start putting what you've read to work, isn't it? Oh, and welcome to the forums! -
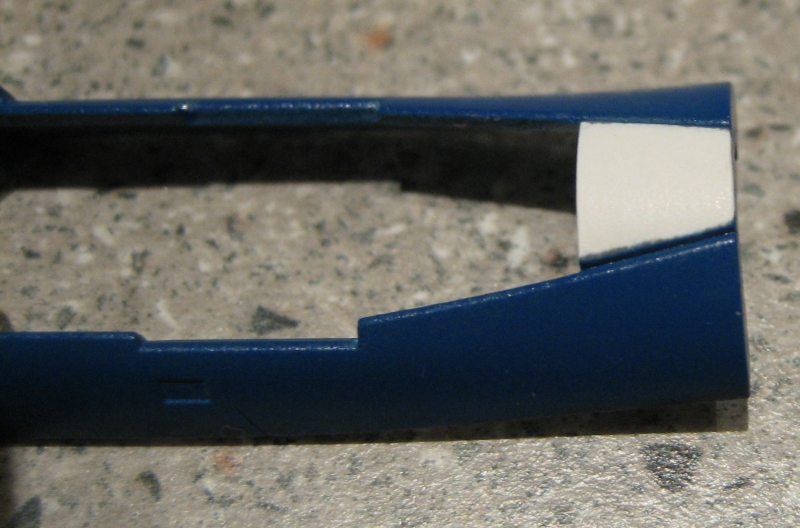
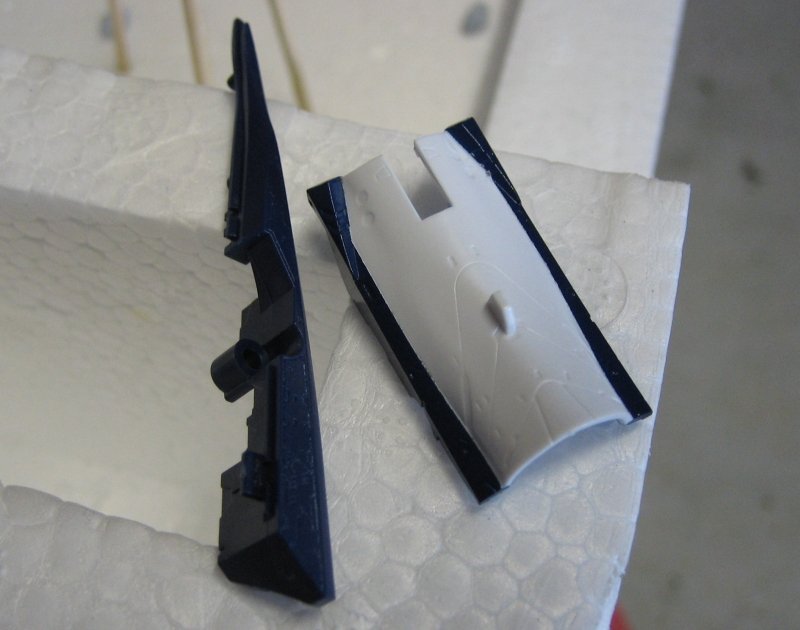
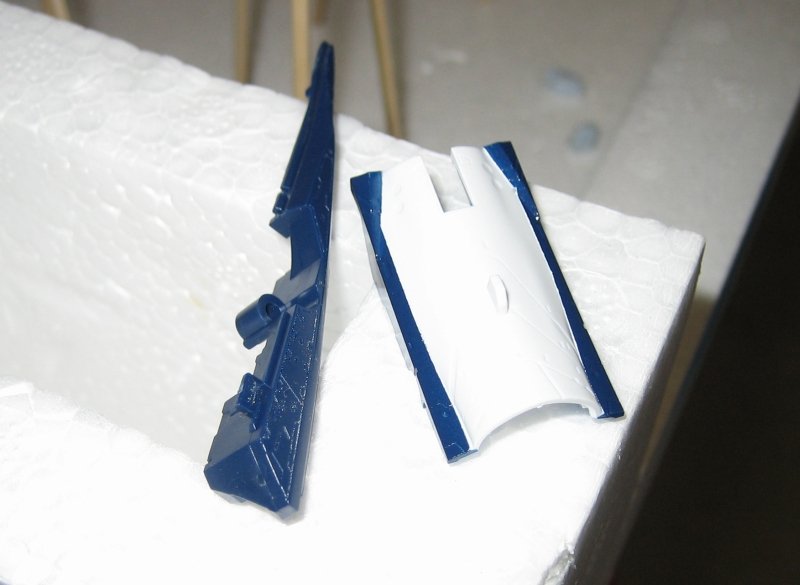
Finally made some progress today! Firstly, pressure seems to be the fix for my spattered paint issues. I cranked it up closer to 25psi and the finish is much more even. It also looks like temperature, while super cold is probably not recommened, at looks like it wasn't as big an issue as I though (today wasn't much warmer than last time I tried to paint). Here's some progress pics: Firstly, I "erased" the previous blue and grey coats from the middle panel, just to see if white undercoat was going to change the blue much. I was very impressed with what a bit of windex and a Qtip can do! The next step was to see if my mix of dark blue actually matched the moulded colour of the kit. To my surprise, it's close enough that I don't think I'll worry about priming all the dark pieces before I paint them (if they even need paint). This step is more about covering sprue marks or discolourations in the plastic. Or, if any putty/filling is needed (so far this hasn't been the case). (with and without flash): After the masking is removed: Here's a shot of the middle fusalage section after painting, compaired to the molded colour, and a second to highlight some tested spots where I'd brush painted (red to highlight the panel, green to show a sprue mark that's a bit more muted after the paint - still needs work): And an overall colour comparison. I'm happy with it! I think you can just barely tell the middle panel was white under the blue. After a few clear coats, I doubt it'll be possible to tell.


-
1/72 Bandai VF-25F Messiah build-up step-by-step (sort of)
mickyg replied to wm cheng's topic in The Workshop!
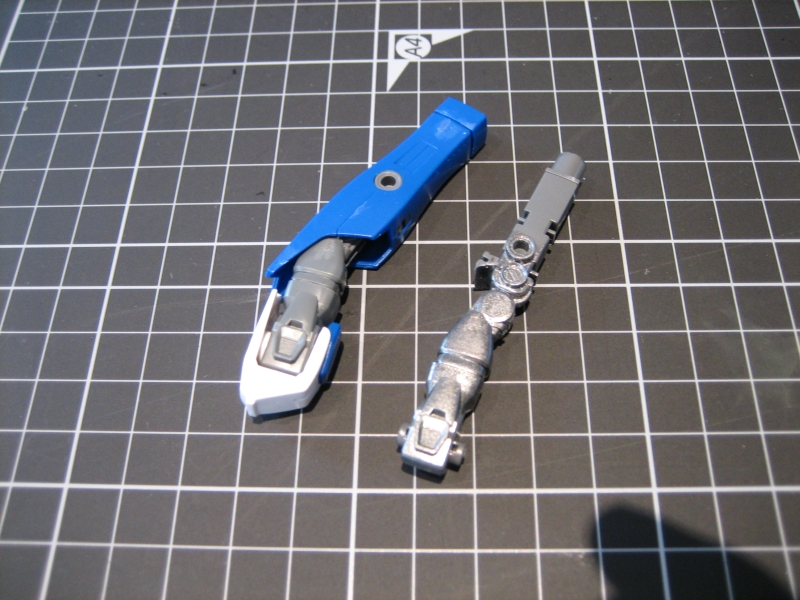
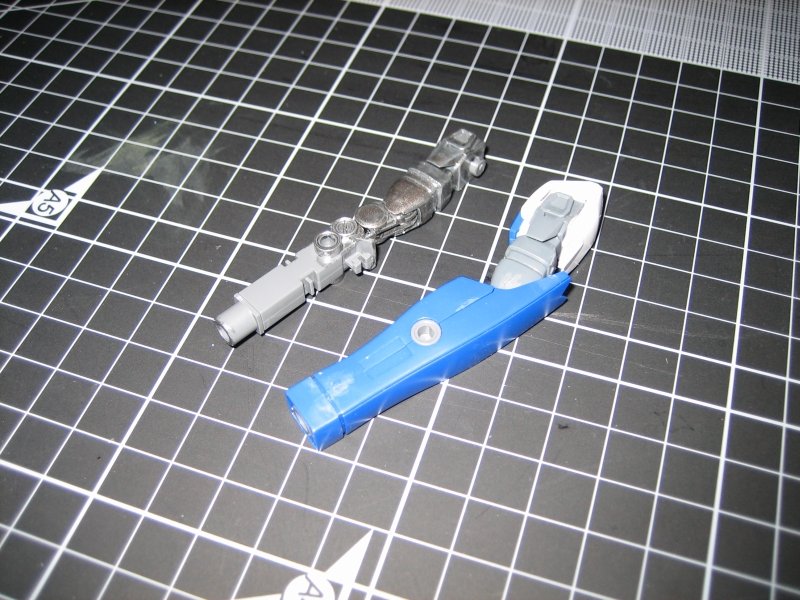
That looks amazing! How many coats of purple future did you use? I'm planning to make my sniper gun on the VF-25G look as realistic as possible so will metalise with something. There are 3 dark metallic colours on the gun, not counting the strange green and purple markings, according to the instructions. I guess I'll have some fun figuring out what works. I love seeing how your stuff comes up. Once again, inspires the rest of us to try new things! -
I'm not sure if anyone noticed my reply a few posts up but these are looking to be somewhere between $30-$40 (US Dollars) for a pair. The price will be closer to the lower end if I can get this to over 100 pieces (50 pairs). Apologies if people have already seen this.
-
Ah, I actually meant an etch primer - the type that chemically combines with the skin of the metal to prevent corrosion. This isn't going to be pure Al so corroding won't be a massive problem, but Al alloys tend to dull when left uncoated. Still, it's probably going to be up to the final tally on these as to whether it's cost effective to pre coat the units. Dangard, thanks for the tip! I'm having a hard time putting a firm number/price on these because it's still so early. There are a lot of variables to consider so I can't really do a firm analysis on price/numbers until I get some feedback (even if it's sketchy) from the community on demand. If this is something that people want to go ahead with, I'd then get a firmer price locked in (plus or minus 10% or something) and start asking for deposits. Due to the nature of this thing, it won't be worth my time or effort if there aren't enough to make. Setting up the jigs to machine the parts will be costly and time consuming so if the demand's not there, we won't ever get to that stage.
-
Probably would be. I haven't got Gundam paints available to me here in Australia (not easily at my local hobby store, that is) and ordering from HLJ is always done via SAL to avoid outrageous fees, so it'd be weeks before I could use it. That, and having invested a fair bit into my paints, means I'll need to stick with what I'm doing. That's OK though, just gives me an excuse to paint the whole thing and likely primer it all first anyway. Means the colour will likely be a bit different to how it was molded but I like unique. Also gives me a chance to experiment with pre-shading. The great thing about acrylics is that they wipe off with windex! So if I screw up, I can start over again without harming the plastic. Thanks for your comments Lolicon - you're the only one replying so far! I'll do some searching for air brush techniques. I'm probably doing something really simple to get the results I'm seeing.
-
I've done some checking into this and bearing in mind this is preliminary figuring only, mostly dependant on interest/quantity, the price could be anywhere from $30 - $40 for a pair of shoulder hinges (For simplicity, this is in US Dollars). What I haven't factored in is the cost of the tool to remove/insert the pin. This could be negligable or add another $5 depending on how complicated it ends up. So please factor that into any expressions of interest. If there is enough interest, the lower of the price estimates is much more possible. Thanks for the feedback so far - I was happy to see so many responses in less than 24 hours. So, who's (still) interested?
-
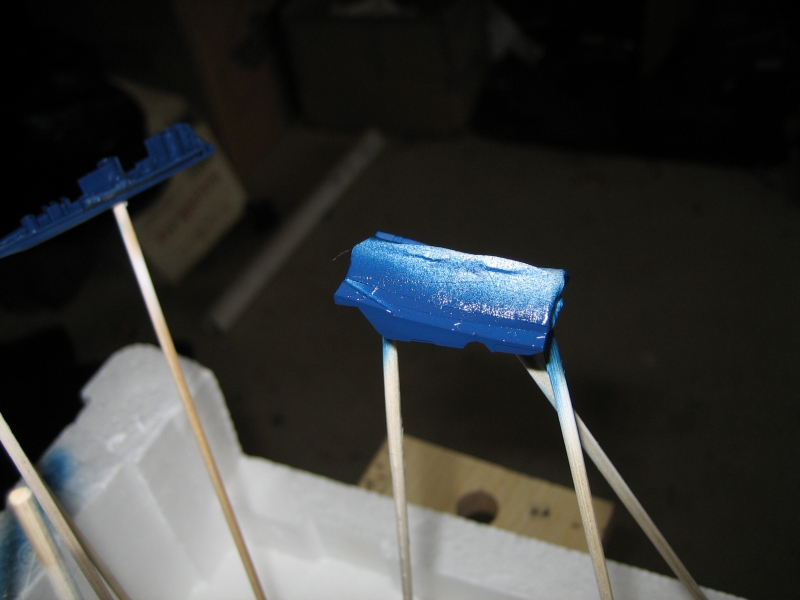
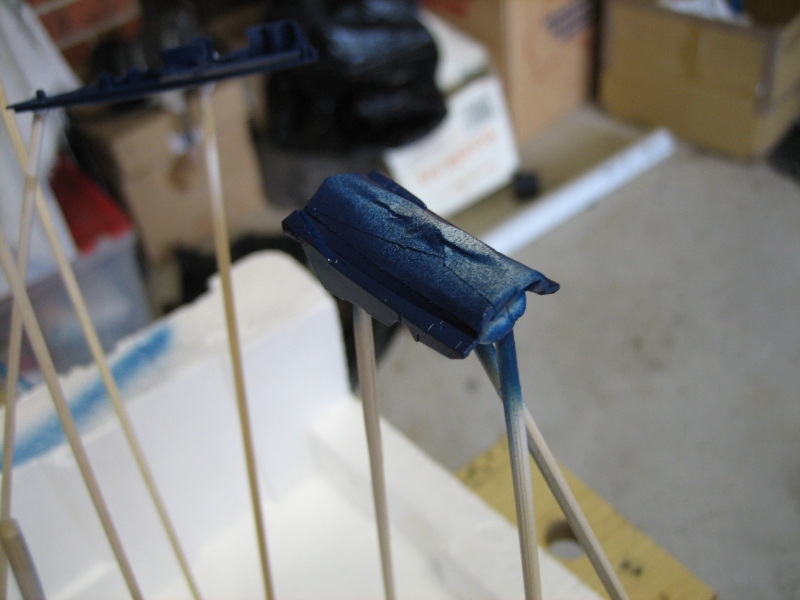
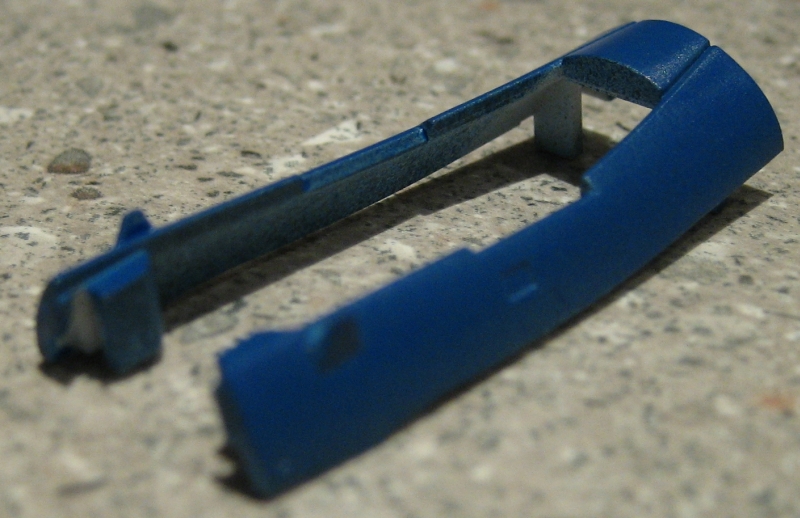
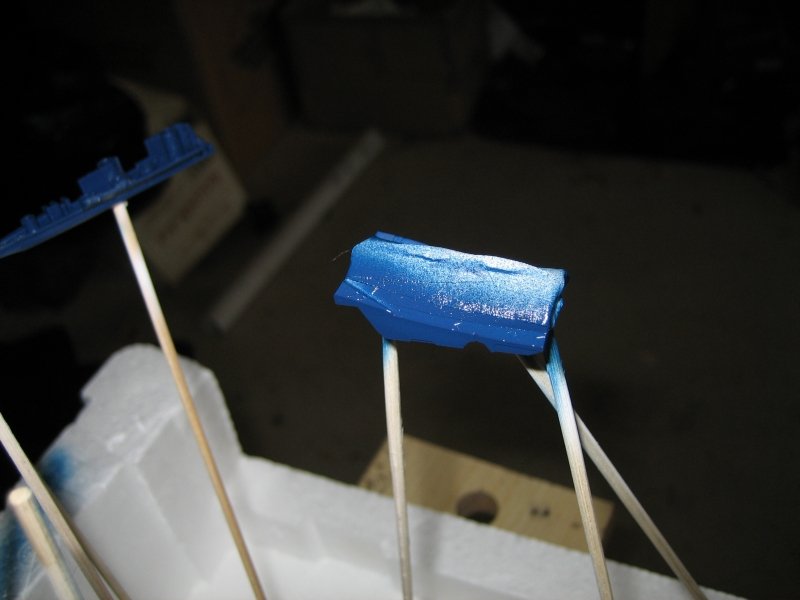
Not sure I'd call it good yet but thanks! I'm really impressed with the finish you got by using a spray can! And yes, very smart to go with Gundam paint - hadn't made that connection at all. Would have saved me mixing paints! Here's some more shots of the blue, taken under halogen ceiling lights. The colour's actually a bit brighter than what these show. The important thing to note here is that the 2 paints I combined (bright blue and lavender) are both gloss paints. This does not look glossy in real life (and I hope you can see that in the pics). That last one's a different part (the Lerx bottom) but shows how a light coat isn't glossy and is a very dull blue. This won't matter cause it's going to be dark blue but for the sake of argument, it shows the results I'm getting and not liking. Here's my thoughts: This is being done in a cold garage - 15 degrees C or around 60 F air pressure is being regulated but the meter for pressure is possibly not accurate. I'm shooting for 15-20psi paint flow is minimal. 4 or 5 passes gets me enough colour to tell it's been painted the paint looks wet and glossy after it's been applied. It goes flat after it dries, even though it's gloss paint I'm using at least a 50/50 ratio of Tamiya thinner to paint, but possibly more thinner than paint Any ideas?

-
Well it'd be less work for me that way if I don't have to paint. But I figure silver on an otherwise white/light grey valk won't look fantastic. Primered would at least get you part way to blending.
-
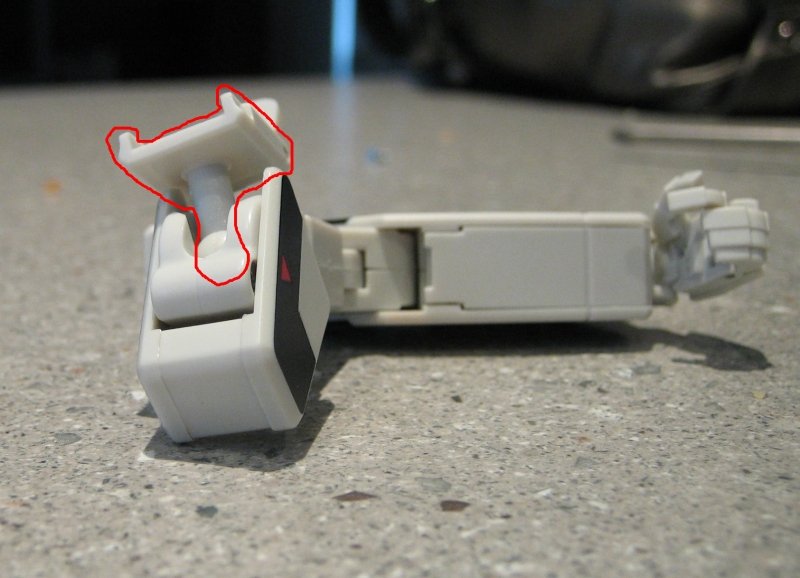
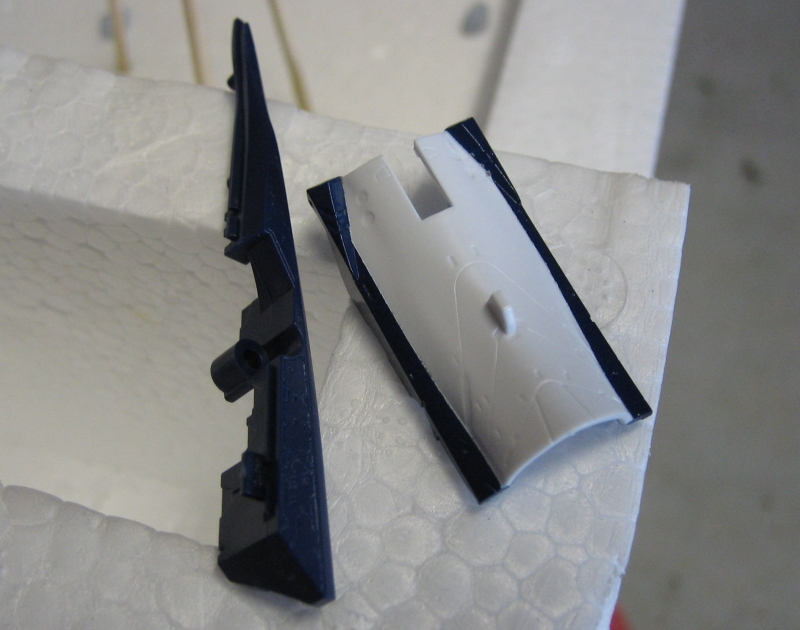
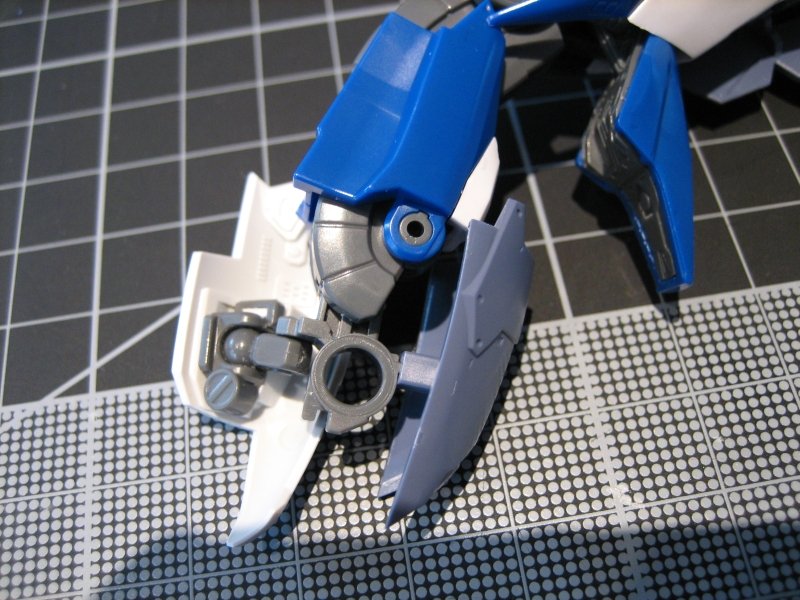
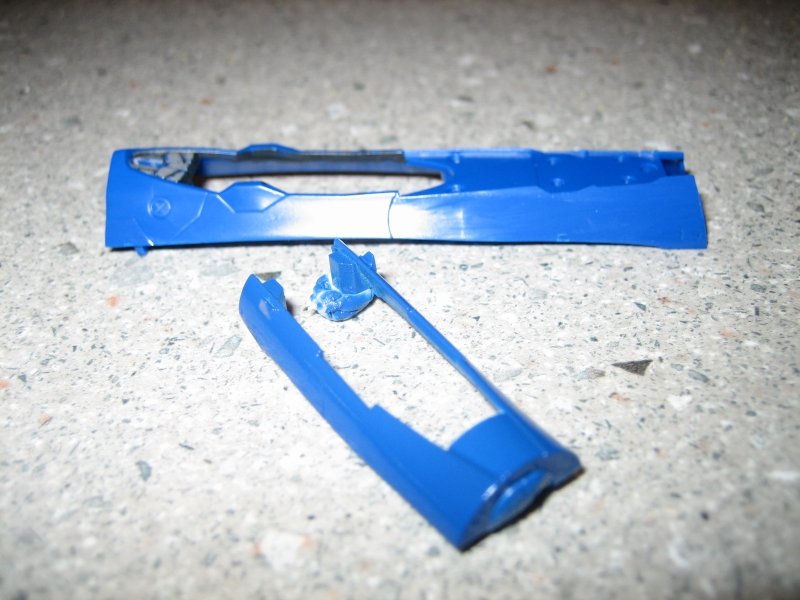
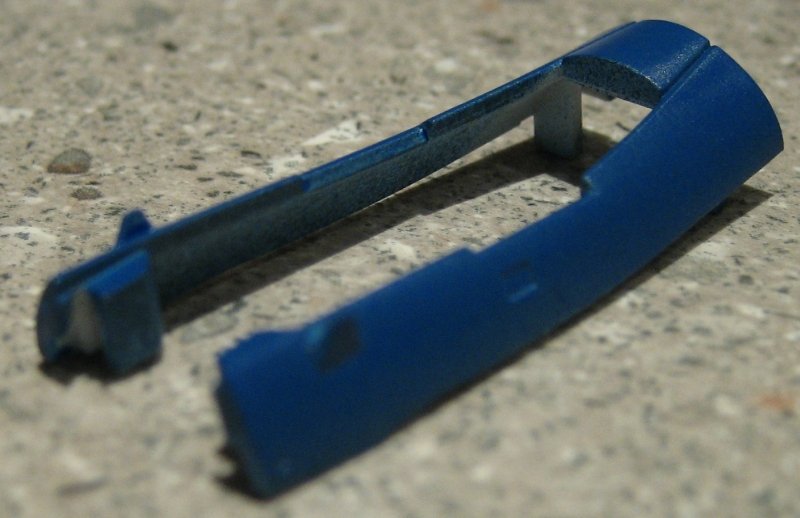
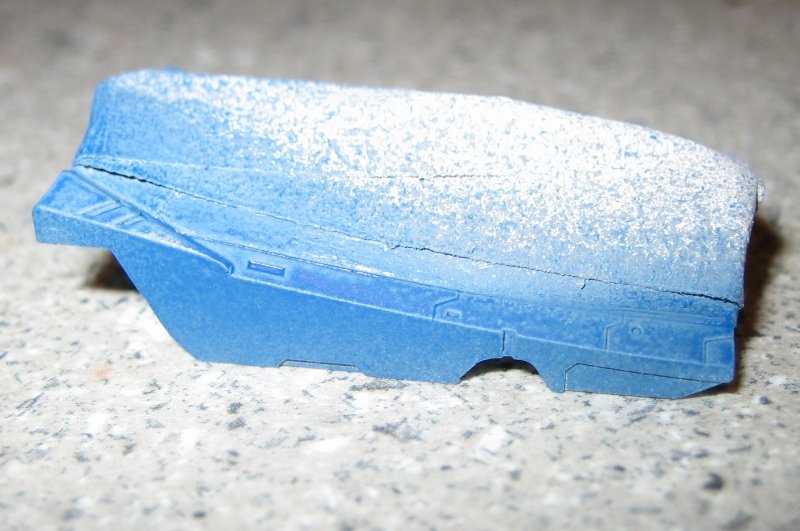
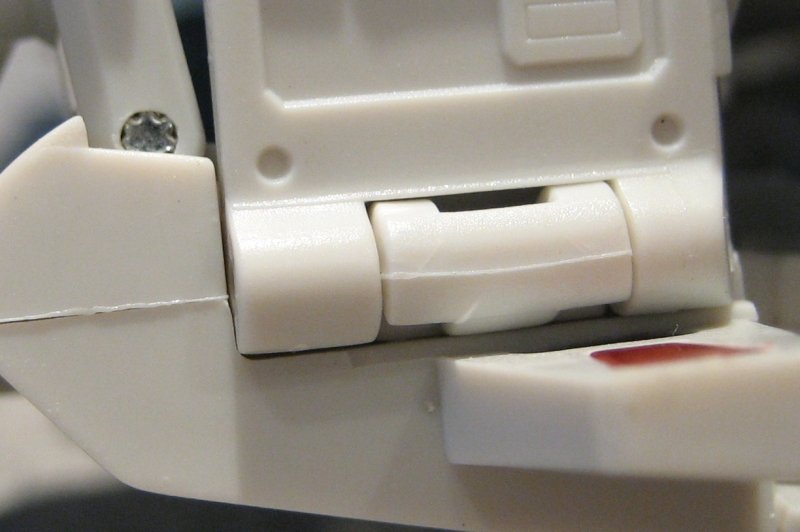
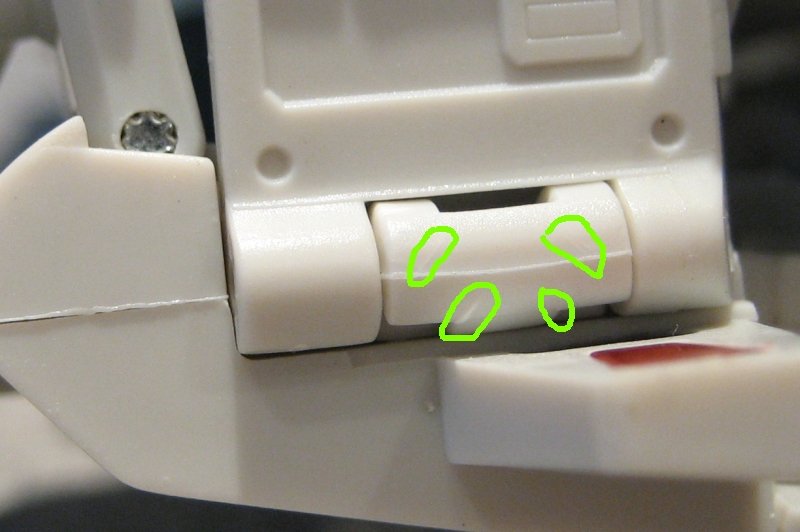
This is also a good point. However, how many people out there have already purchased the first run v.2s? My rationale for this was that there are a lot of the "fragile shoulder" units out there already. Some people are happy to try the DIY fixes, but a lot of others would appreciate a packaged replacement that removed all doubt of there being any problems. That and a nice instruction guide to show them how to do it! Regarding the metal ball in a plastic socket I thought about this too but I don't think there'd be any real issues as long as the ball were smooth enough. Depending on how fine the machine work is, I doubt this would be much of an issue. The socket is actually constructed of 3 parts on the arm, the two white side pieces of the arm and a black plastic backing, inside the arm. I think the black part is a bit softer to allow it to "squish" instead of wear away. I think a metal ball would be right at home with this arrangement. Regarding the nose/hip door Another good area to look at. I can't say mine's been too troublesome. It's fiddly to get engaged for me but not an issue to pull the legs out (I use the "seperate the chest/backplate to introduce an angle to the swingbar, then rotate the legs to pop it free" manouvre and it works really well). What does concern me though is the hinge area between the battroid's chest and back plates (those on top of the body/adjacent to neck). Mine shows evidence of cracking on those hinges. Whether this was there from the start or a result of careless transforming on my part, I'm not sure. Here's some pics to show what I mean: Part: Cracks Highlighted:
-
Good point! I'm reluctant to guess at this stage because it depends so heavily on how many of these we make. But I can say that the part, while being small and looking simple, really isn't. All the little shapes in the piece are necessary for the various modes so we can't just get away with machining a flat square with a post/ball on the end of it. That and the CNC is set up to do big stuff, so a smaller cutter would need to be purchased. Combine that with the setup time, prototyping, test fitting, etc... and it's not going to be simple. I'll see if I can crunch some figures for at least a rough idea of price. Really depends on quantity though.
-
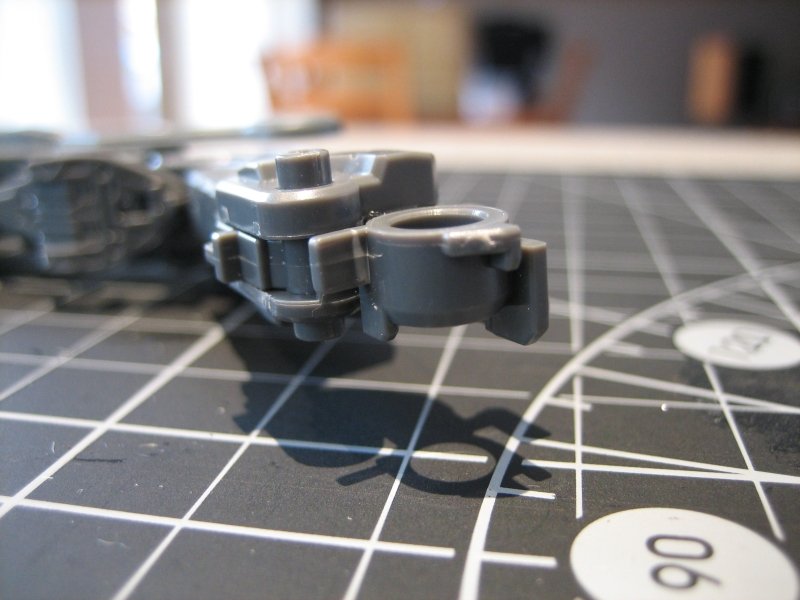
I'm thinking of doing some custom replacement shoulders for our v.2 VF-1 yammies. If you've got one, you know the problem: weakened plastic around the pin for the shoulder hinge. This sometimes results in a crack, sometimes just a faint stress line. I need some feedback to get an idea of how many people are interested and how much you'd be willing to pay for it. Here's what I'm thinking: CNC'd aluminium construction - possibly one piece but not necessarily only looking to reproduce the "trouble part" and not the second half of the hinge. To clarify, the part with the ball joint (Highlighted in red here): potentially pre-primered in white I'd like to include a tool to remove the old pin and insert the new one so factor that into what you'd be willing to pay would sell them as pairs but singles would be an option shipping worldwide these won't be cheap I won't be able to come up with a price without some rough idea of quantity so if you're interested, please post and let me know. If you've got ideas you'd like to see integrated, feel free to put that in here too. If you think I'm insane, and that this'll never work, lemme know!