mickyg
-
Posts
2632 -
Joined
-
Last visited
Content Type
Profiles
Forums
Events
Gallery
Everything posted by mickyg
-
I'd love to see those pics! Even if it's just a quick post on this (or my) thread. Your RVF was VERY nice to look at!
-
Looking very good! I'm inspired by this build. I hope to grab Alto's in the coming months. Wouldn't it be great if it were on sale by then? Hah, who am I kidding...
-

What's wrong with my Yamato, Bandai, etc.
mickyg replied to UN Spacy's topic in Hall Of The Super Topics
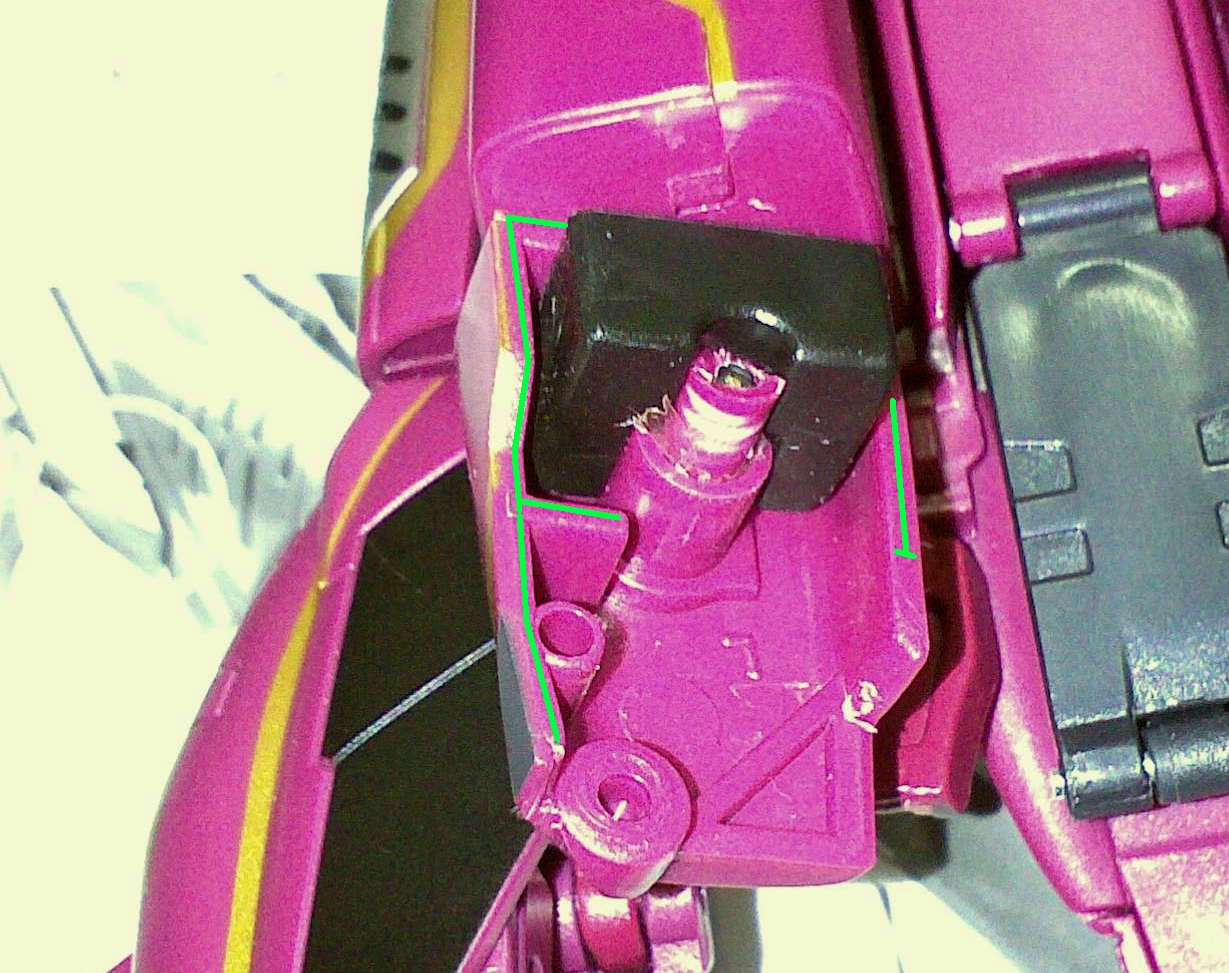
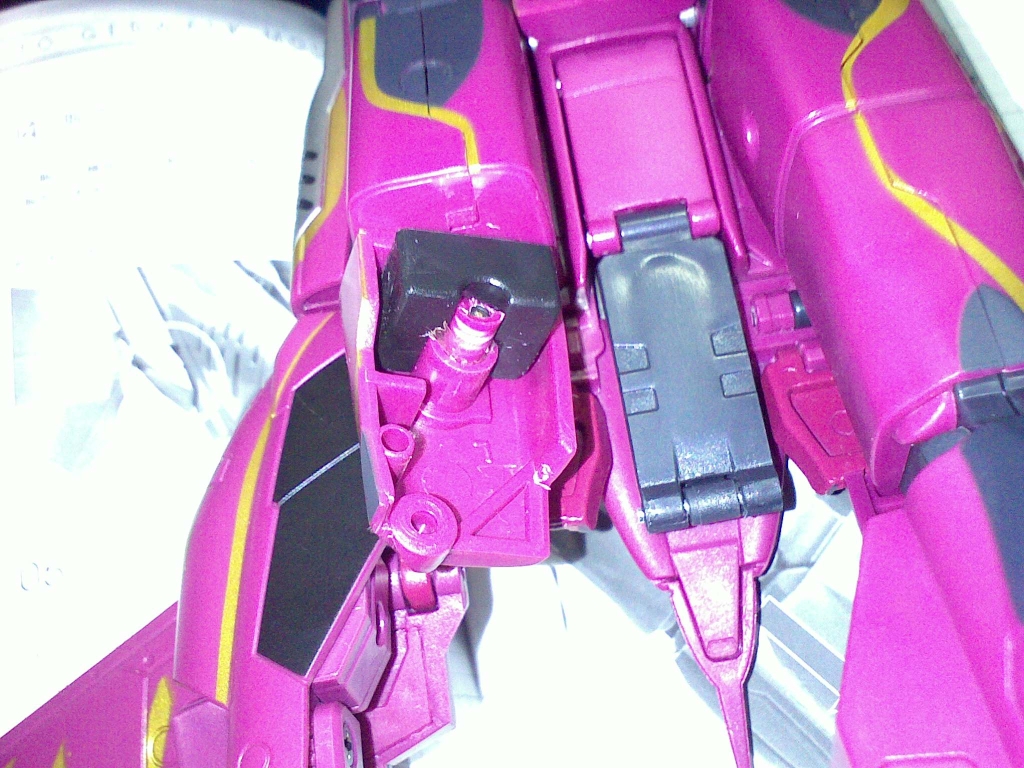
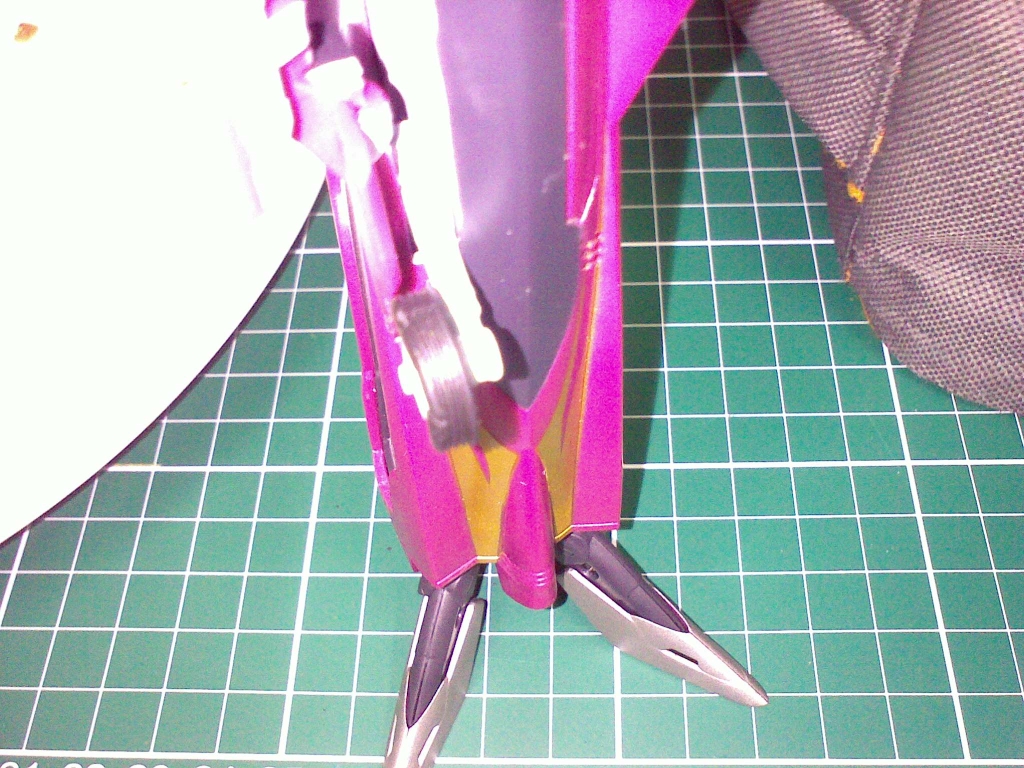
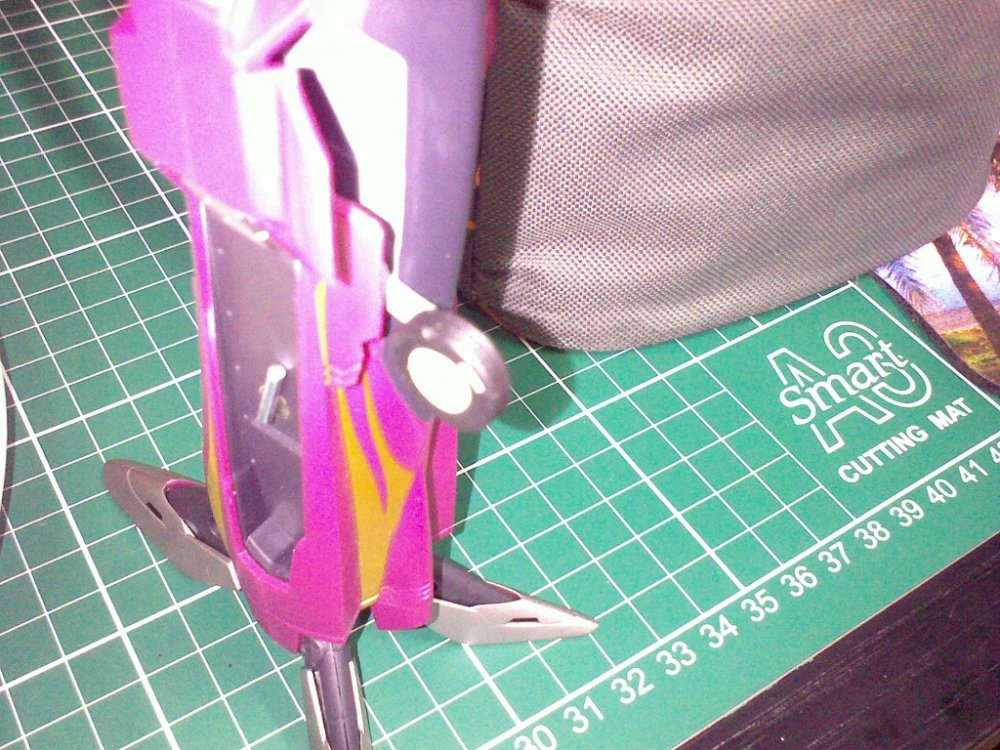
Super glue is indeed an impressive thing! I'm quite surprised to report, my fix from yesterday appears to be holding up! I've swung the leg out a few times and everything seems to be OK. Here's a shot of where I glued. The little barred area at the end of the green line is where I was careful to stop the glue, so that area just beyond can still flex. This is what's in contact with the detents on the gerwalk hips. It has to flex a bit to allow the joint to click. I expect this won't last forever and I plan to use a machine bolt and nut to hold the shell together. It won't be completely hidden but I think I'm OK with that. The joint is not all that visible in fighter mode, where it'll spend most of its time. We'll see about the other modes... So it can be repaired! It's just not a pretty repair when it breaks the way mine did. If I had it to do over again, I'd have been more careful with that cap over the screw and just drilled a few progressively larger holes until I could get the screw out. The cap won't just pop off, as I was attempting to do at the start. Anyway, I hope someone finds this helpful at some point.
-
Thanks again for the comments. I think my days of tinkering with things to make other things, all in the name of saving a few dollars, are severely limited. I just don't have the time or patience anymore and likely more importantly, my wife has even less! So if my 12v compressor dies or becomes too frustrating, I'll just give up the whole hobby... Hah, as if! No if it dies, I'll just go out and buy a small AC powered compressor. I saw one at an auto parts store the other day on sale for $90 AUD so they're hardly expensive these days. And given my typical usage (charge my air tank, use the airbrush, recharge the airtank), It'll likely last me a few years. So yeah, right tool for the job is great advice. The refrigerator compressor sounds really cool and the tinkerer inside me wants to try it. But if I did that, I'd likely not finish my model till next year! Heck, at the rate I'm going, that might still be the case! Next topic, paint. I mentioned a few posts back that I've gone from my MM Lacquer clears to Acrylics from GSI. I bought two jars of flat, two jars of gloss. Tamiya don't do flat clear, so I went with GSI. I figured I could mix the two for varying sheens. While I was there, I noticed GSI does a flat base as well, so grabbed a bottle of that too. I figured it might be easier to mix up custom sheens, plus you can add it to gloss paints (not sure I'd be doing that, but hey, it's cheap). So I think I'm fully armed and ready to start experimenting. I've also acquired a bottle of Future! I had a friend visit the states recently and he was kind enough to bring some back for me. So I might experiment with how well our Aussie equivalent actually stacks up. Fun times!
-
What's wrong with my Yamato, Bandai, etc.
mickyg replied to UN Spacy's topic in Hall Of The Super Topics
I thought I did! Some good news (for me) and bad (for anyone else with this sort of breakage). The good news is that Over-drive kindly replaced my broken SV-51, free of charge. Over-dive is in my opinion, THE BEST online Macross retailer I've used so far, and not just because of this little incedent (although it can't hurt). The bad news is that I don't think this can be fixed. I thought this was going to be easy. I was very wrong. The first problem is getting to the screw. The screw cap is most likely glued on, so in the end, I drilled through the cap, in order to loosen the screw. Only my drill bit wasn't big enough to make a proper sized hole so I ended up making a tapered one with the end of my screw driver. That allowed me to extract the broken plastic sleeve so I could glue it back to the opposite half. That went OK with super glue but I thought I would do well to reinforce the screw posts with epoxy. That looked promising. Right up until I realised all the "stuff" that goes into the leg in this area would foul on the epoxy. Luckily the epoxy was only just starting to set up, so I was able to dig it out in areas where the top of the leg fits, and also where the rubber swivel joint gets pressed in. Unfortunately, removing the extra epoxy also removed pretty much all the strengthening I'd added. So when it came time to screw it back together, the internal posts where the screw goes, failed again. No big deal, I though. I'll just super glue the two shell halves together... This won't work either, as there's a great deal of stress placed on the outsides of the shell, due to the ratcheting mechanism in the gerwalk hip joint. So it's now sitting, waiting for the super glue to dry, being held together with electrical tape. I'm sure as soon as I remove the tape and attempt to utilise the ratcheting mechanism, the two halves will pop apart again. So in the end, it was a good excercise, but I'm pretty certain this sort of break on the SV-51 is terminal. Come to think of it, it's probably why Over-drive went back to Yamato for a replacement on my behalf! If anyone's interested in parts, there may be a for sale up soon for this (the broken one). -
Thanks for the comments guys! I've been away for a week in Far North Queensland (Cairns). Awesome place that I definitely want to get back to when it's not just for work. Before I left, I managed to actually return my Testors Model Master clear lacquers and with the refund, buy 5 bottles of GSI clear acrylics. 2 Gloss, 2 Flat and one Flat Base for mixing with gloss paints to obtain any combination of gloss to flat (I'll have to read up on that one, sounds like potential for disaster too). I'm guessing these won't be the most durable thing around but they'll certainly do the trick! I'm now singing the praises of my local Hobby shop, and remembering why they're so convenient! You couldn't do that with mail order - "sorry bought the wrong supplies, can I exchange them?" The air compressor idea is starting to grow on me. I'll have to look into the refrigerator compressor idea. I've even got an old A/C compressor for my car that could work with some modification.
-
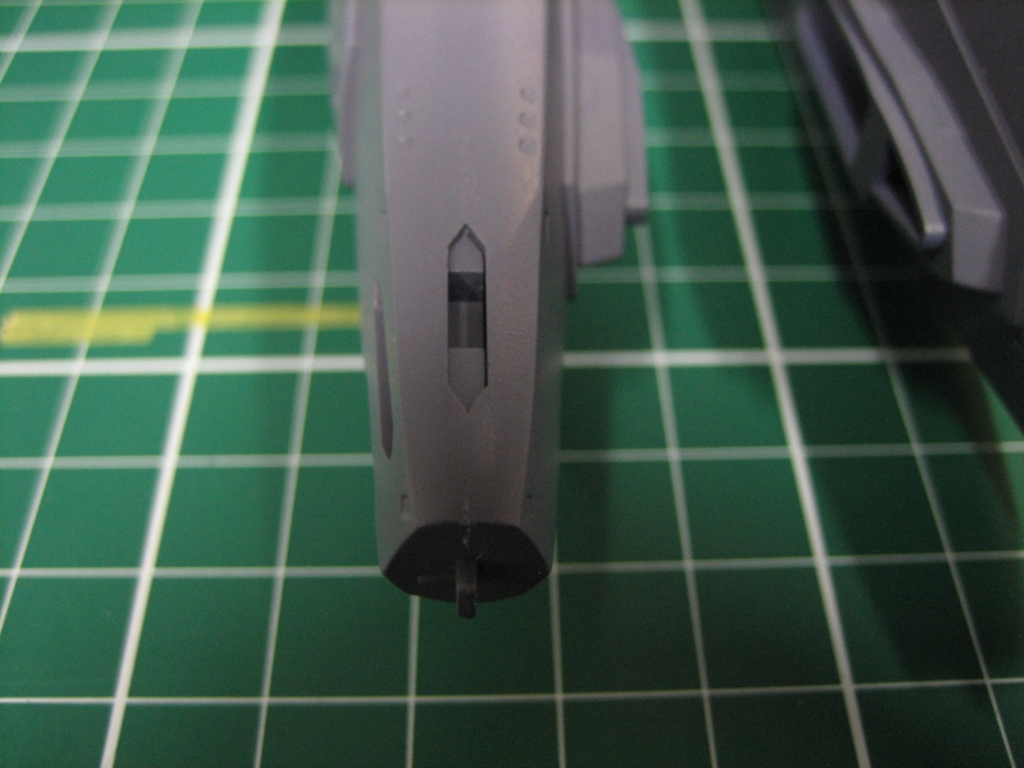
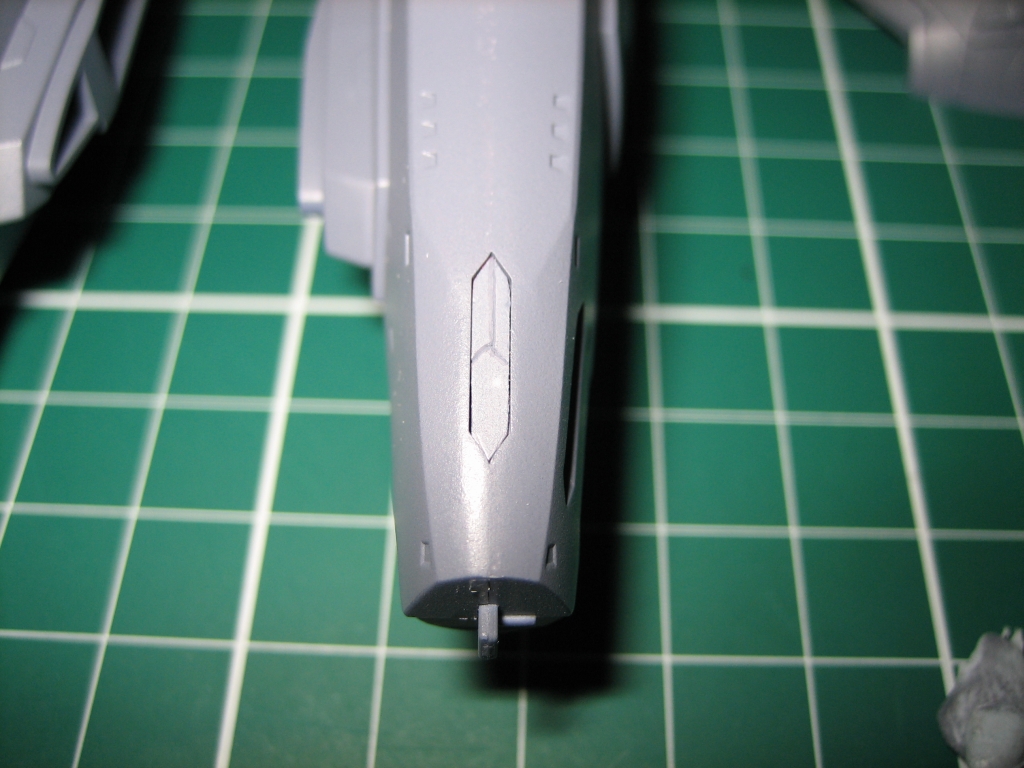
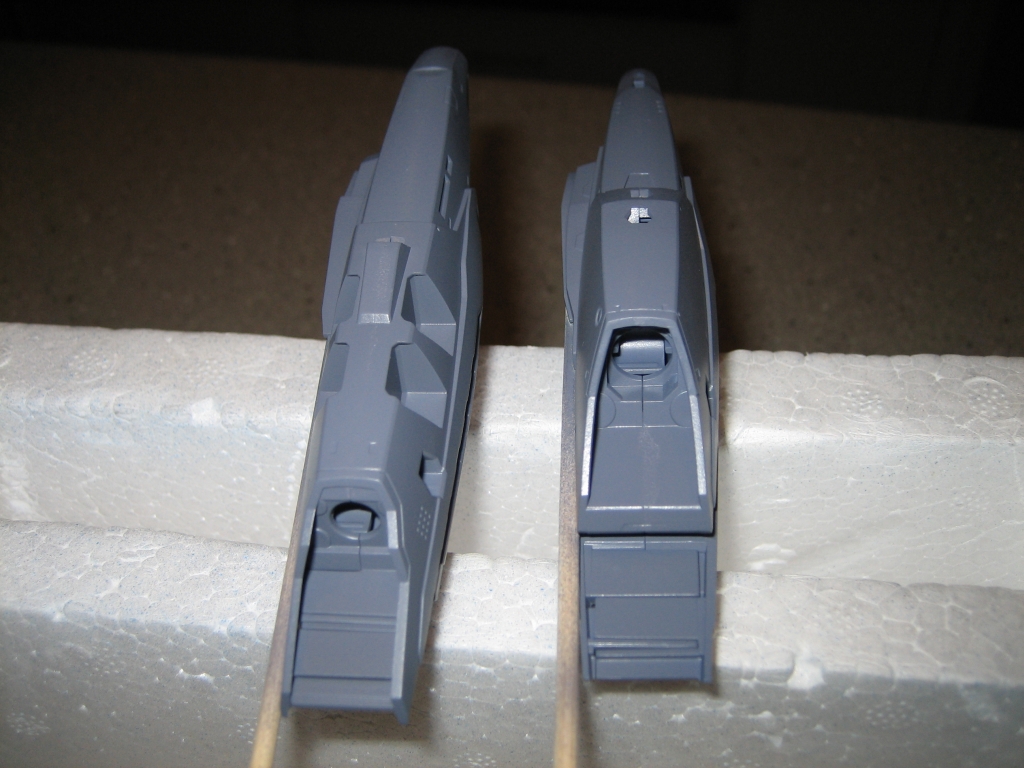
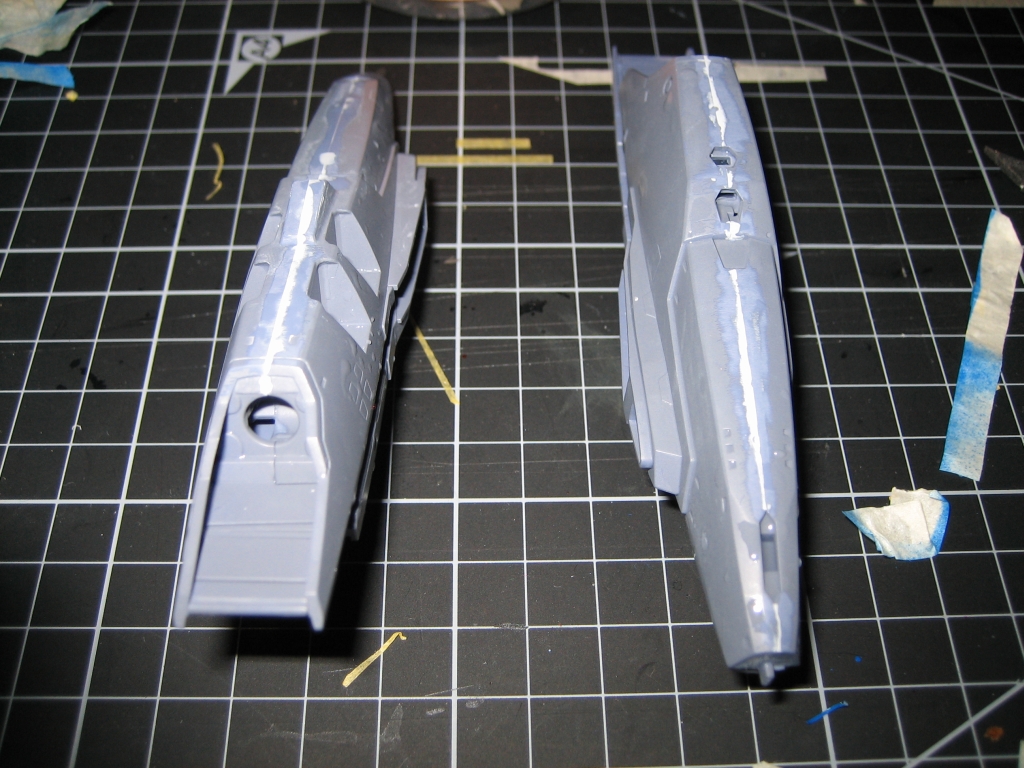
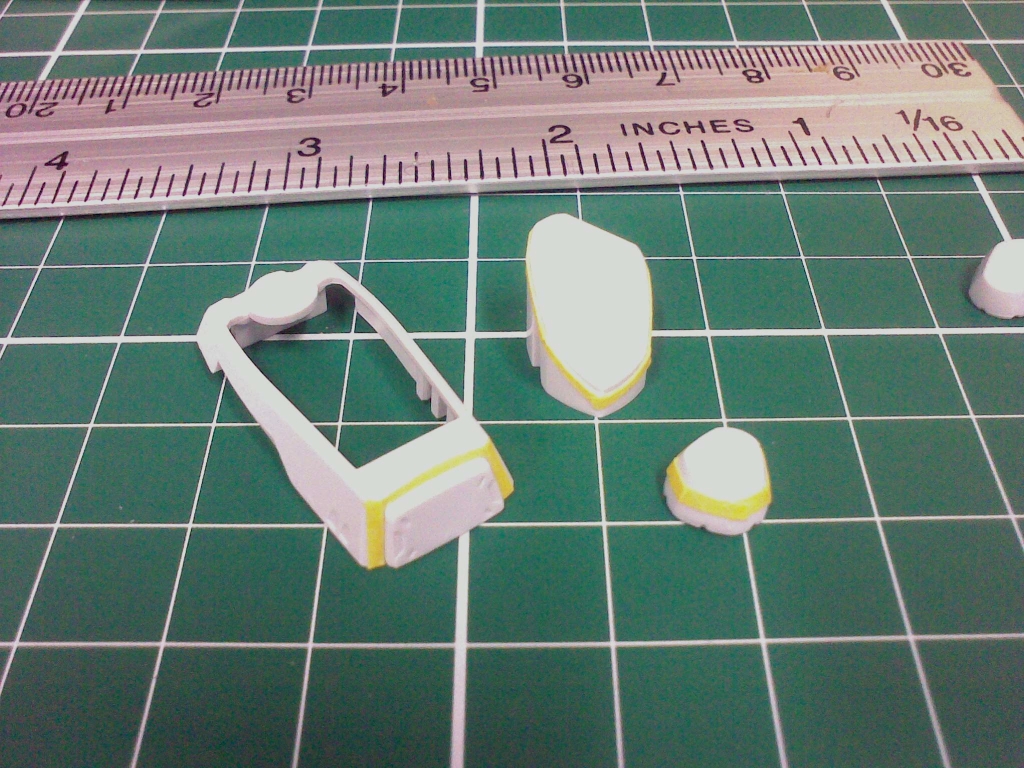
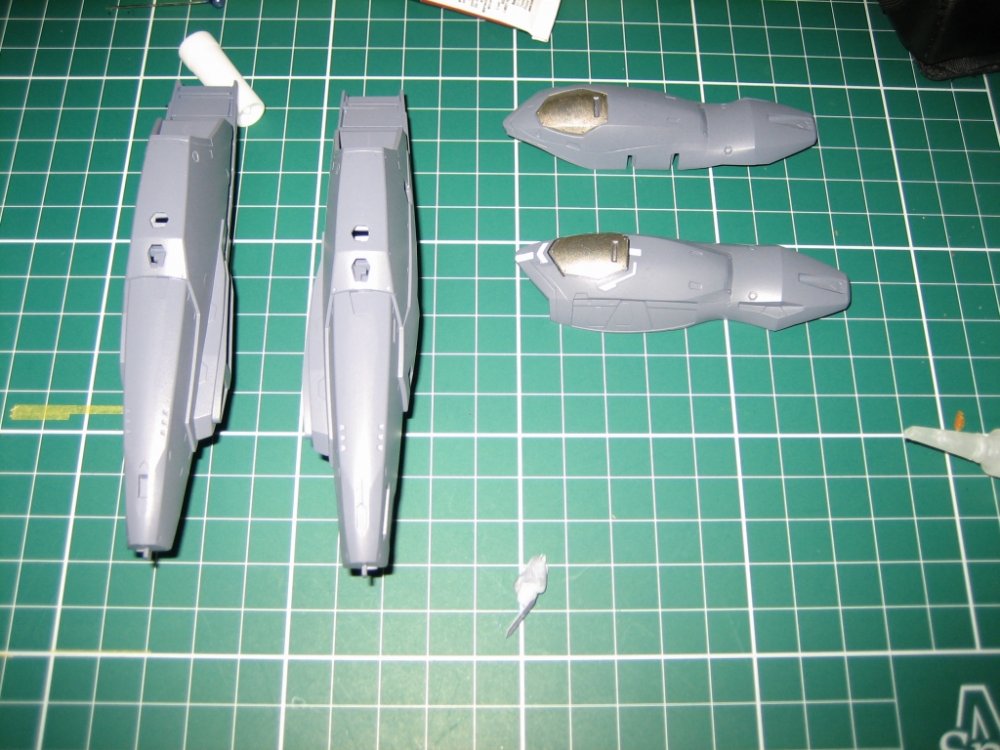
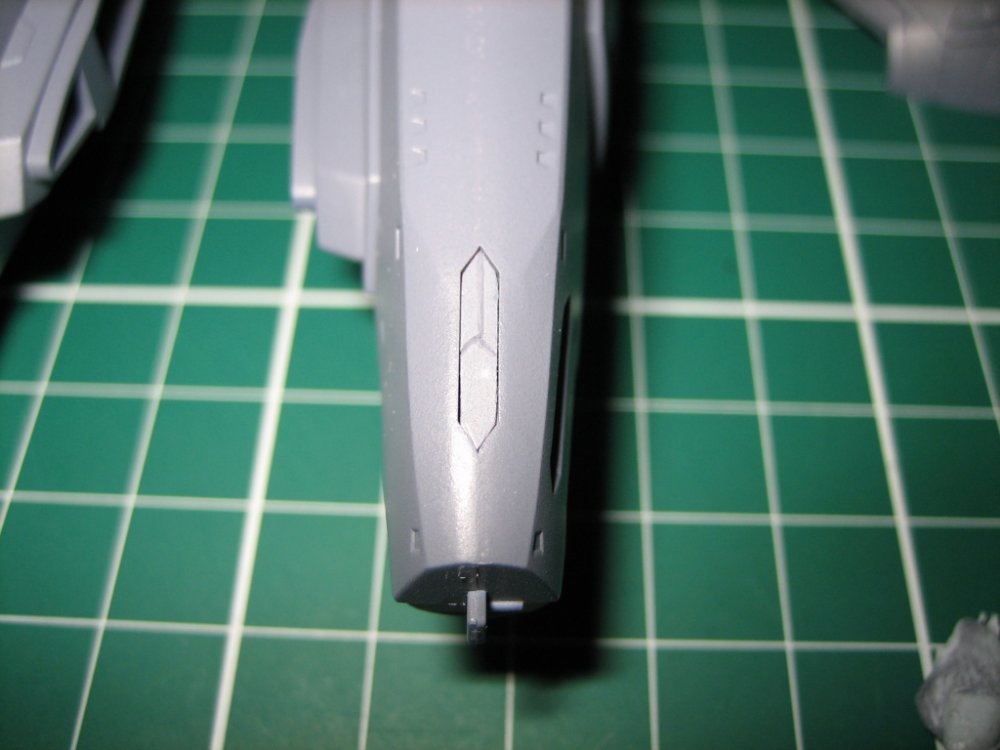
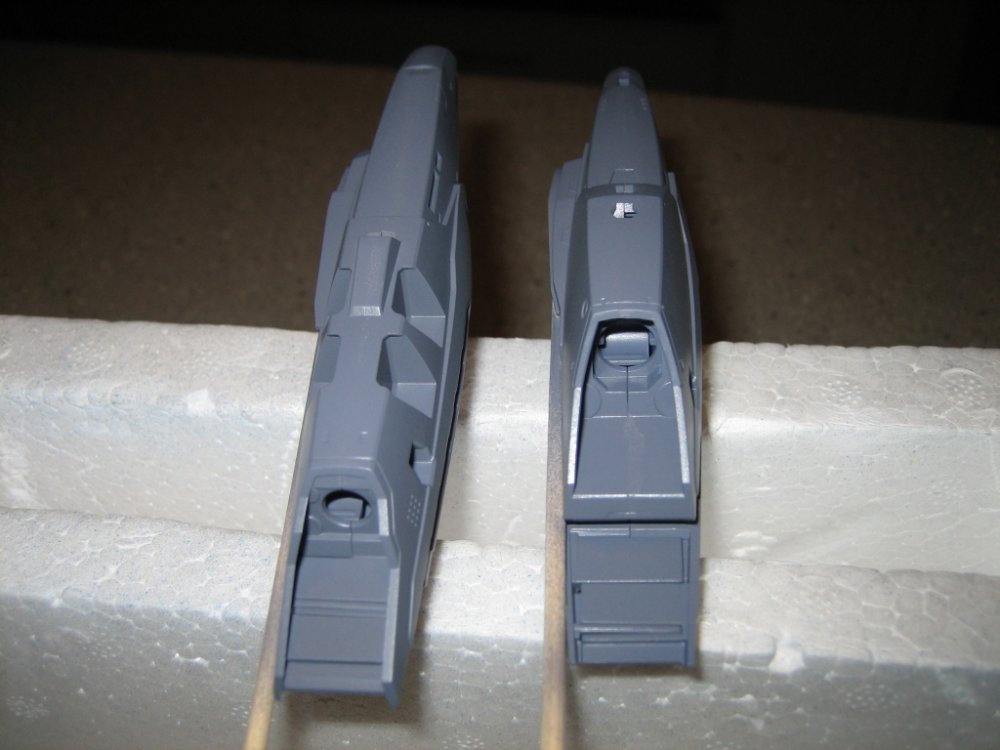
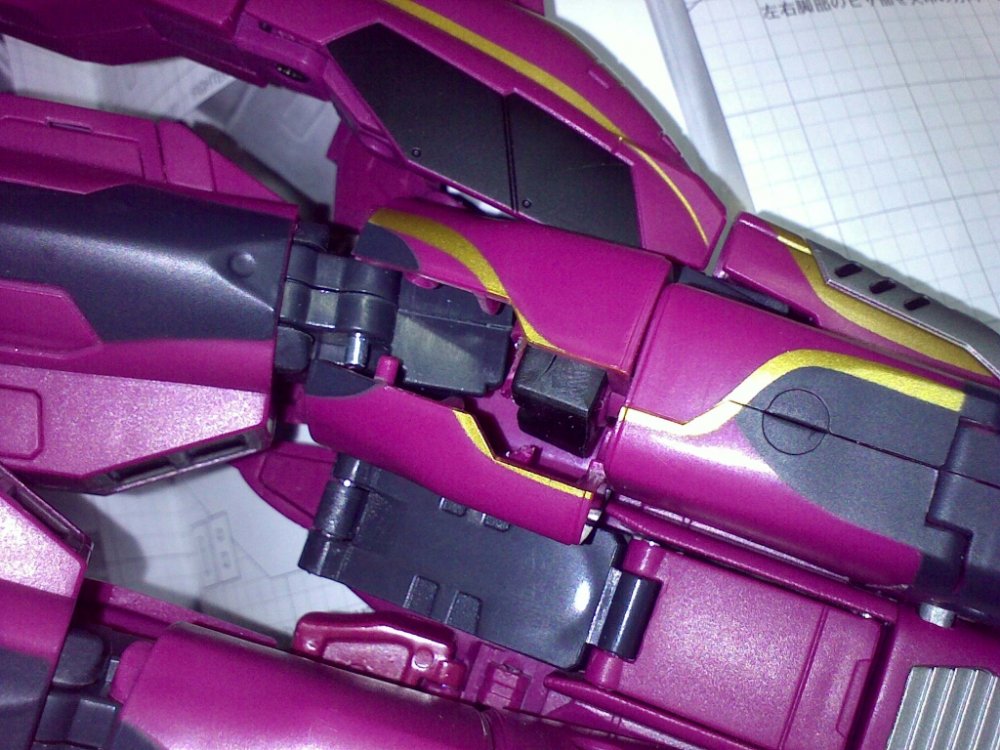
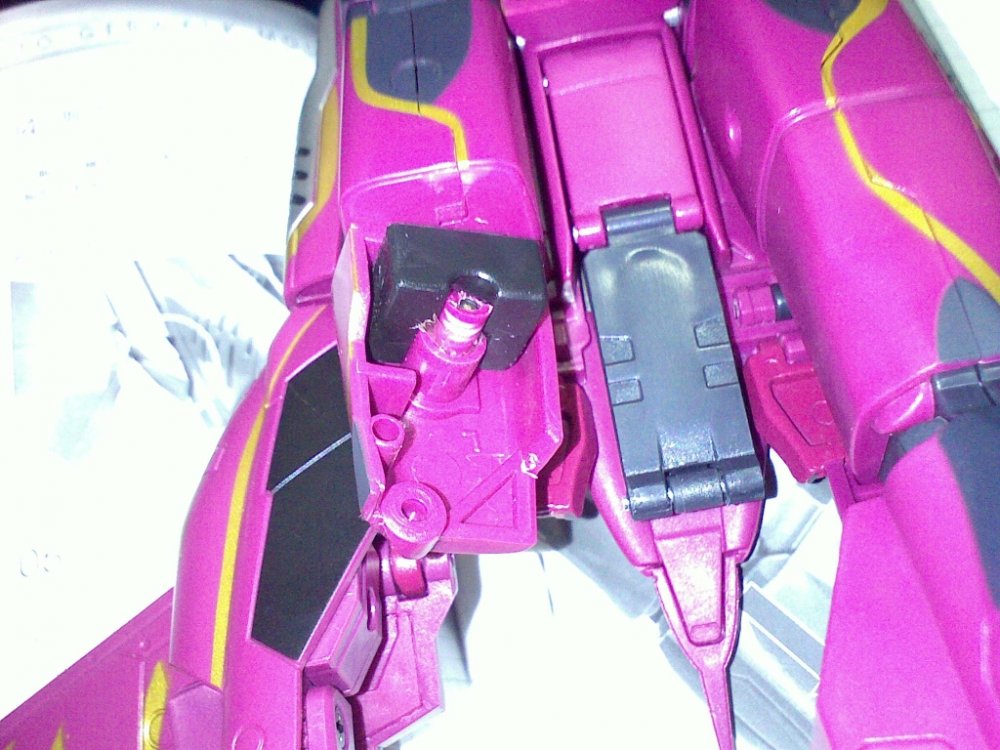
Not a whole lot accomplished this week. It's been very busy work-wise so my normal 1 hour break for lunch has been chopped up into several 10 minute segments. So no major updates. Just some pics that I've previously left out. I did manage to get the missile door glued to the boosters. They don't look great but they're not painted black/sooty yet so that should help. The other pic is my custom leg armour colour. I'm not sure I like how gold it is but then again, it's as close to the decal as I could get it. I wish I knew what these parts were, as it might make it easier for me to figure out what colour they should be. Without cover: Cover: With cover:


-
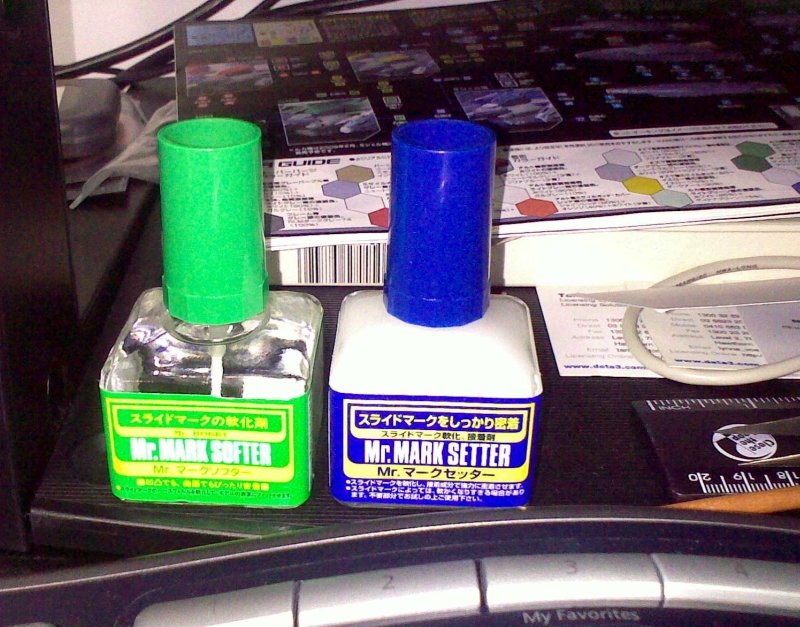
Man, all this GSI stuff that I just don't see at my LHS! I must get my hands on some of this. You know, I just ordered some Mr Mark Setter and was in my local today and saw they had it too! Maybe I just need to request stuff. Of course it costs 2 and a half times as much to get it locally than to mail order it. So I take it retarder mild is for acrylics? I'm guessing the normal stuff is for GSI's Mr Color lacquers?
-
Very nice work on those hands! Care to share your method in a little more detail?
-
Damn! You can actually see the Mr Surfacer through the paint in those shots! I doubt I'm going to bother applying a second coat. Just too much trouble, I'm afraid. I don't know if I've described my airbrush setup but it's a major headache! I'm trying to do as much of this as I can, without spending truckloads of money. So with that in mind, I grabbed a 3 gallon stainless steel fire extinguisher that I happened to get for free (old fashioned water type), bought some fittings, and a moisture/dust filter. That sorted my air storage needs. That would have been enough to get me started but I found this only stored up enough air (even at 140psi) for about 5 minutes of airbrushing. The routine was to take it down to a service station that had a free air compressor on hand. And there is only one in a 5 minute radius of my house that had pressure above 60psi. So anyway, one charge usually got me enough pressure to paint a few small parts, with just enough left over to do a quick cleaning blast. Annoying, in other words! I then managed to get my hands on a 12volt car compressor. The type used for 4X4 applications (supposedly). I've got a friend who works for a company that makes these and he was able to get me 2 defective ones, that I repaired to make one good one. These work but they're slow and extremely noisy. Not to mention you've got to connect it to the battery of your car to get it working. I already had a Paasche VL airbrush kit, along with a regulator I'd bought when I was still living in the states. So I was pretty well sorted. At least I thought. The problem I have now is that most of my airbrushing gets done ~8pm, after my son has gone to sleep for the night (he's 16 months old). And his bedroom is directly adjacent to the garage. So any noise in that vicinity can wake him and then I've got my wife to deal with! So yeah, airbrushing is very important to me but such a pain that if I do it, it needs to be worth while, quick, well planned, etc... I really should invest in a normal compressor. This car thing is proving to be more of a paint than I thought! Sorry about the rant - probably more about me than anyone cared to know!
-
Yeah, it's a good haul, indeed! Nowhere near what I've seen some people grab but certainly sizable for me! I think I've been bitten... Bummer about the aerosol shipping thing. I saw a notice on Rainbow Ten's website a few months back, where they advised they would stop shipping aerosols. I was actually surprised to see HLJ was still offering them. In fact, they had them even a few days ago. I didn't get any because I was afraid Australia customs would reject them. And when it comes to shipping, I'm hopelessly impatient! I didn't want anything slowing down my package. Even though it's going to be months before I can start on the other models! Pretty stupid really. Thanks for the advice about the mark setter. I was surprised to see it was white and gave it a good shake before using it yesterday, just in case. I'll get more use out of it over the next few days I'm sure. Here's a quick pic of the boosters. This was taken 2 days ago and I haven't done anything on these parts since.
-
I'm sure you'll get lots of feedback from this community! I think the simplest thing to do is just include two pieces of thin cardboard - one on the front, one on the back. If you put the plastic bag between the two cardboard pieces, it should protect the contents quite well. It also shouldn't add too much extra weight or cost.
-
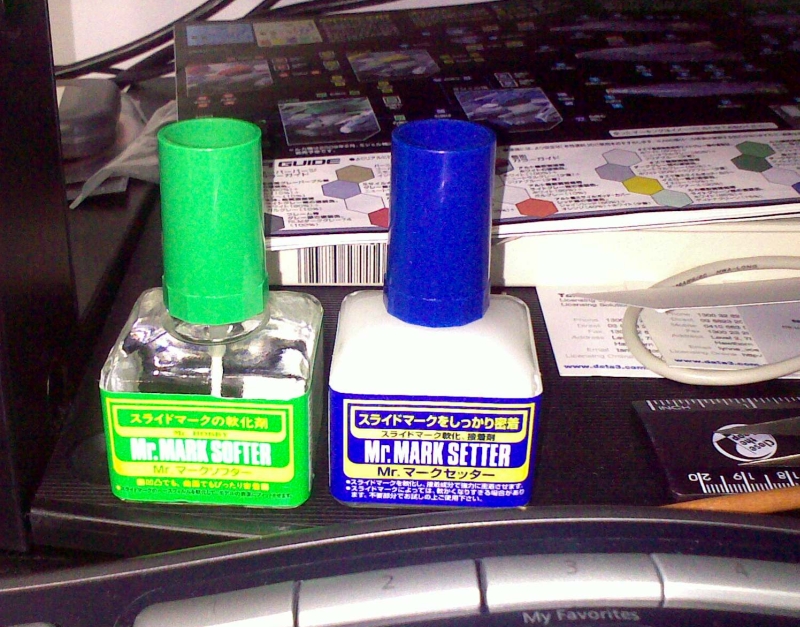
Had a bit of an interruption again today: I've got to get this VF-25 done! The VF-1D I've had for quite a few months now and haven't touched it (though it's been very tempting). The Zero models were an impulse buy from HLJ for their free shipping sale. Luckily, I nabbed them just before their site showed them as "discontinued." Whether or not that's true, remains to be seen (their site doesn't show the SV-51 and the VF-0S is backordered). So yeah. I'm scared to start these, knowing how great some people's efforts have been: WM Cheng... Anyway, part of that order was this guy on the right: I had a chance to use it today on one of super part decals and the results were surprising. It seemed to suck the decal down onto the plastic (it was a bare plastic part). And it did this even better than the Mark Softer, which is odd because I figured the softer was more of solvent than the setter. Either way, great grab and I'm sure I'll get lots of use out of it. Some more good news was a session with the air brush last night! I managed to get the paint to thinner ratio and air pressure just right and the results were very good. I had been concentrating on getting rid of the seams on the boosters and while the results aren't perfect, they're a whole lot better than what they were. And since the tops get decals, any slight imperfections will be either covered or less noticeable than the high contrast white. I don't have pics up yet but will update tomorrow.

-
I got my HLJ order in today and had a chance to quickly play with the one stand I got. I'm glad I only got one. I think these could/should have been much better. Having said that, I discovered the stand constantly wanted to flip backwards, just like others have said here and there. But then I realised I hadn't tightened the screw at the base of the arm. I did that and it actually held up then. It still feels really unstable though and there's no way I'd put it up anywhere high, where it could fall. By the way, I'm displaying a Super VF-1A, so it's as heavy as a VF-1 is going to get.
-
Thanks guys! That helps a lot. Here's my current dilemna: I can't get Model Master Acryl range (anything) at my LHS I can only get Model Master Lacquers in bottle form Most of my LHS around here keep both Tamiya and GSI products but I can't find any spray clears from GSI that don't cost at least $12 a can and the range is extremely poor (gloss or flat is it, no topcoat acrylics, no uv cut, etc...) My experience with rattle cans is that no matter how careful I am, orange peal is always a reality. I can get Tamiya clear in rattle cans but don't know if it's lacquer or water based (a quick search should clear that up for me though). Even Tamiya rattle cans are $11 a pop And finally, and perhaps most importantly, I already have 2 bottles of MM lacquer (gloss and semi-gloss) and I'm stubborn, paid a lot for them, and really wanted to use them! All that said, I may be stubborn but I'm not stupid. If the MM bottles are going to kill my paint, they'll go unused until I know what I put them on will handle it. It was perhaps $25? That's not going to kill me. So, I can either import some GSI stuff via HLJ and hope customs lets spray paint into the country. Or I can check out the Tamiya stuff and see what other's experience has been with it. And I guess, I could test on a spare piece of PS to see if perhaps the MM lacquers I have are gentle enough to be used on acrylics. I keep saying I'll do that but end up writing these "Oh crap" posts instead... Anyway, thanks again for your comments WM and Lolicon!
-
Hi William, Thanks for your comments. We really should put stuff like that in an FAQ for this section of the forum! Yes, that was me - but the story's a bit different for my gun experience. I painted the gun in Tamiya acrylics (gun metal + neutral grey mixture), then sprayed a coat of Testor's Dull Cote flat clear. I had no problems at all. Where it all came apart was when I decided, "hey wait, I want a gloss coat over this so I can do the oil wash and not have a terrible time wiping it off a flat coated surface" so I then used an automotive spray can of lacquer based, high gloss acrylic. That's where my problem was originally. That didn't really melt the paint so much as cause this nasty, crazing/wrinkle effect. There were no places in the paint were it looked like it had dissolved through or thinned the paint like it did on my blue parts. Hopefully that clarifies why I'd try this a second time. But just to re-iterate: I used Tamiya Acrylics - a metal and a flat mixed for the gun, then overcoated with my Testor's flat, clear coat - no problems here. I had problems not with the flat, but with my gloss clear, automotive lacquer acrylic that I sprayed over the flat The blue parts are all Gunze Sangyo (GSI) acrylics (Bright blue, sky blue and a few drops of clear blue) and they're all gloss Since I had the problem with the gun but only with the automotive, gloss clear coat, I figured there'd be no reason to worry about the blue paint and flat clear coat. So either the flat clear reacted differently to gloss paints, or it reacts to GSI paints and not Tamiya (I'm thinking this is doubtful), or the only other option I can think of is that perhaps the flat clear has separated over the last 10+ years I've had it and rather than spraying paint, I was spraying the lacquer solvent. That might also explain why there was such a thin layer of clear over the blue and why I was able to simply soak the parts in windex for a few seconds to remove the paint. In places where it was just white plastic, I really couldn't see much flat clear coat remaining. Anyway. I'm at a bit of a stuck point now. I wanted to use lacquers for my clear coats for the reasons you've outlined. It bites better, and so ends up being a lot more durable. I was hoping I could get away with using a more aggressive clear so it would bond with the underlying paint better and be more chip/wear resistant. In fact, this is what Lolicon is doing and I'm sure he'll chime in. I think he uses acrylic paints with a GSI lacquer clear over the top, then an acrylic "topcoat" as the last coat. Lolicon, can you comment on how whether or not you use gloss acrylics or flats before your clear coats?
-
PHEW!!! I started sanding with very fine grit paper (1200 I think) and noticed the paint was either very thin, or very soft. Either way, it came off the face of the intake cover very easily. For some reason, I decided to spray a bit of windex on the part. Maybe it was because I thought the edges of paint exposed under the clear would soak some of it up, who knows. Anyway, to my surprise, the paint disolved! Thinking it was a fluke, I sprayed about a teaspoon of windex into a cup, dropped the rest of the parts in and was astonished to find they all responded to the windex! So I've got white parts again and no real effort to get rid of the paint and flat clearcoat. My guess is that this clearcoat didn't go on very thick at all. I'm also thinking perhaps 10 year old canned paint shouldn't be expected to perform as new! Either way, from now on, I'll be taking a scrap piece of polystyrene with me any time I paint to make sure I'm not going to screw up my work. Next step will be after I repaint these parts. I'll test out using the testors bottle clear coats and their recommended lacquer thinner. I'm hoping several very light coats at a low pressure will be OK on this. But this time I'll test it first to see what happens. Oh, and BeyondTheGrave: No doubt it's more aggressive! I just didn't know or hadn't heard anyone say that testors lacquer flat ("dull cote" as they call it) would behave like windex! I especially wasn't prepaired for it given what an easy time I had with it a few months back when I did the sniper rifle. Oh well, you live and learn.
-
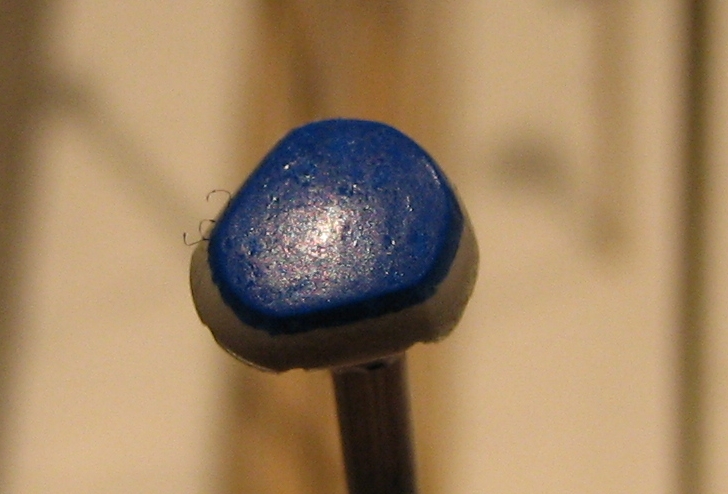
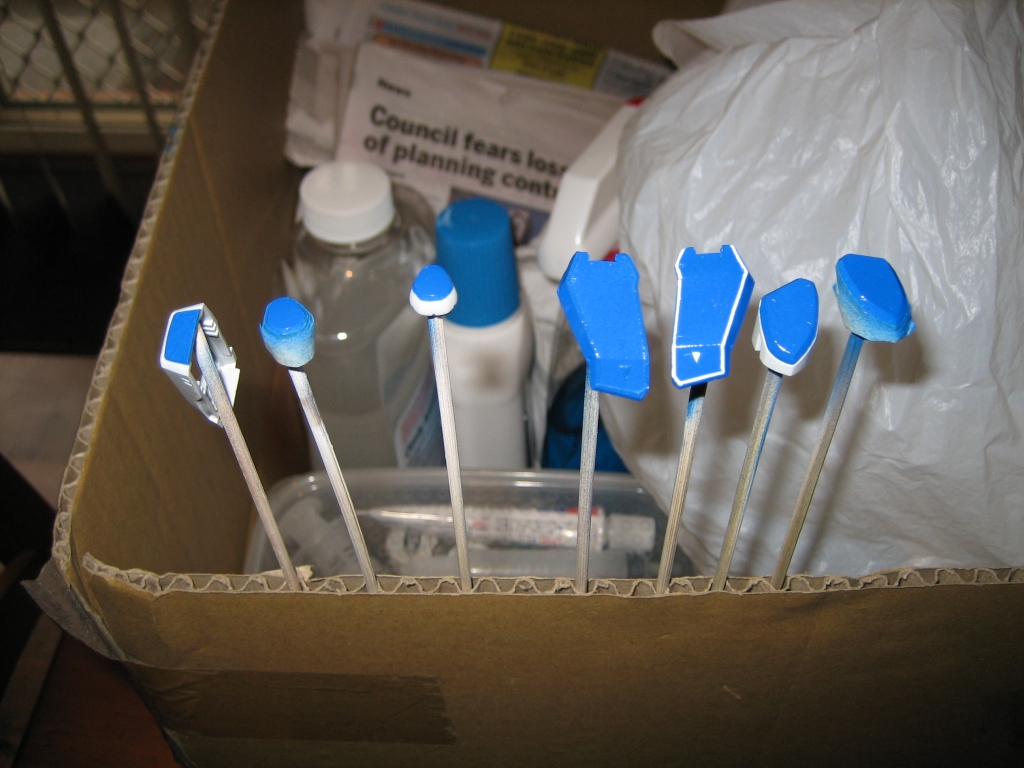
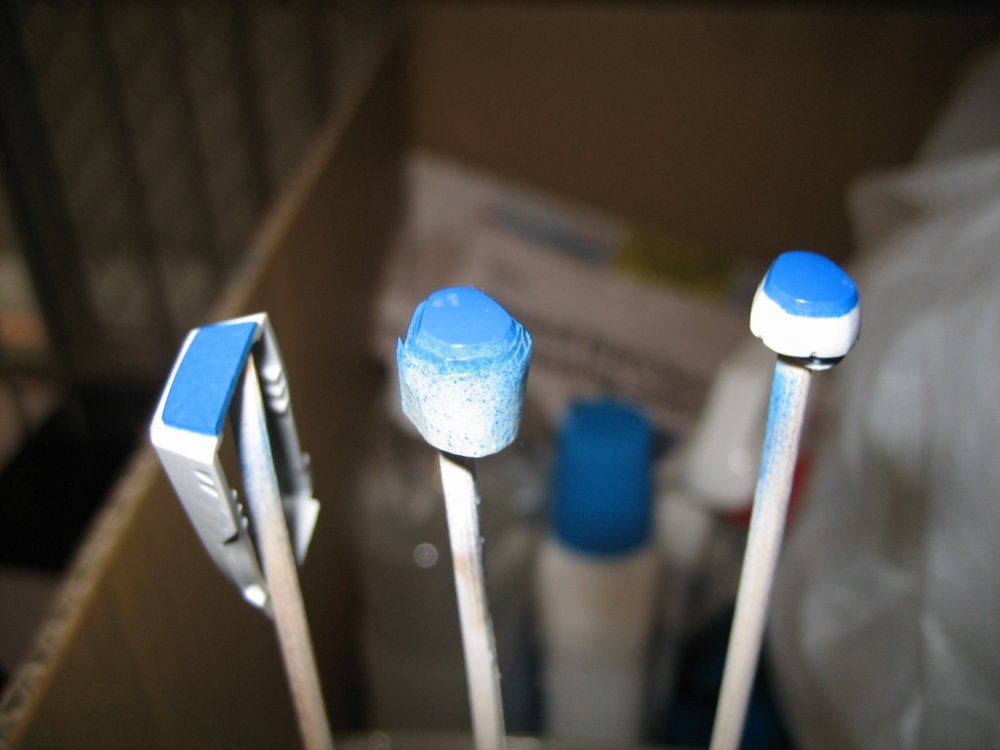
How to Ruin a Meticulous Paint Job: So I thought I'd spray some of that Testor's dull cote on my freshly painted, blue super part pieces yesterday. I figured they weren't going to have any decals on them and a flat coat would seal them up so they didn't get scratched while I'm working on everything else. It was a nice sunny day, so I put the parts back on bamboo skewers and took them outside. I did everything I've always done, shook the can up, made sure there was no wind or bugs around, and then just sprayed from the normal 10-12" distance. To my horror, I watched as the paint just started to run! It was like I'd painted them 5 minutes ago and, since they're acrylics, sprayed windex on them! This did not happen when I painted the sniper rifle with my grey metallic concoction (gun metal plus neutral grey, I think). There must be something about the gloss paints that's different to metallics or flat paint. So here's the damage: So I figure I'll sand everything back and start again. Luckily, most of these pieces are made up of relatively flat faces, so sanding shouldn't be terribly difficult. And as complicated as the masking looked, it's not too bad and will be easier the second time around. Look on the bright side, right?

-
Uh oh. I got one of these too. My order isn't due in till next week. I've got a super VF-1A that will be living on it. I hope someone chimes in with an "oh, you need to do X to get it to work right" comment...
-
I've got the sniper rifle, remember? Plus, I already finished that a few pages back. If I can imagine I was lucky enough to have an armoured, I would likely paint it a similar colour to what I've done the super parts with. I don't know, I don't have a huge problem with the default colour because in my mind, the guns looks decidedly Zentradi anyway. That whole split thing just reminds me of their cap ships. So yeah, when I look at it that way, at least it's not green, right? Another take would be what WM Cheng did with his gun pod - I think he went Alclad aluminum, then dipped it in the same future mix he did the canopy with. Some may hate that candy, purpley, sort of colour, but I thought it looked very cool!
-
thanks man. If I can inspire people to try new things, I'm a happy man! I didn't get much done this week. Work has been crazy busy and my typical free lunch break has been pretty chaotic. I got my PE parts from newca this week so will likely do the cockpit first and hopefully soon. Anyway, about the only item got done this week is the metallicy brown bits on the leg super parts. No pics yet and I'm not even sure I like the colour yet. More tomorrow...
-
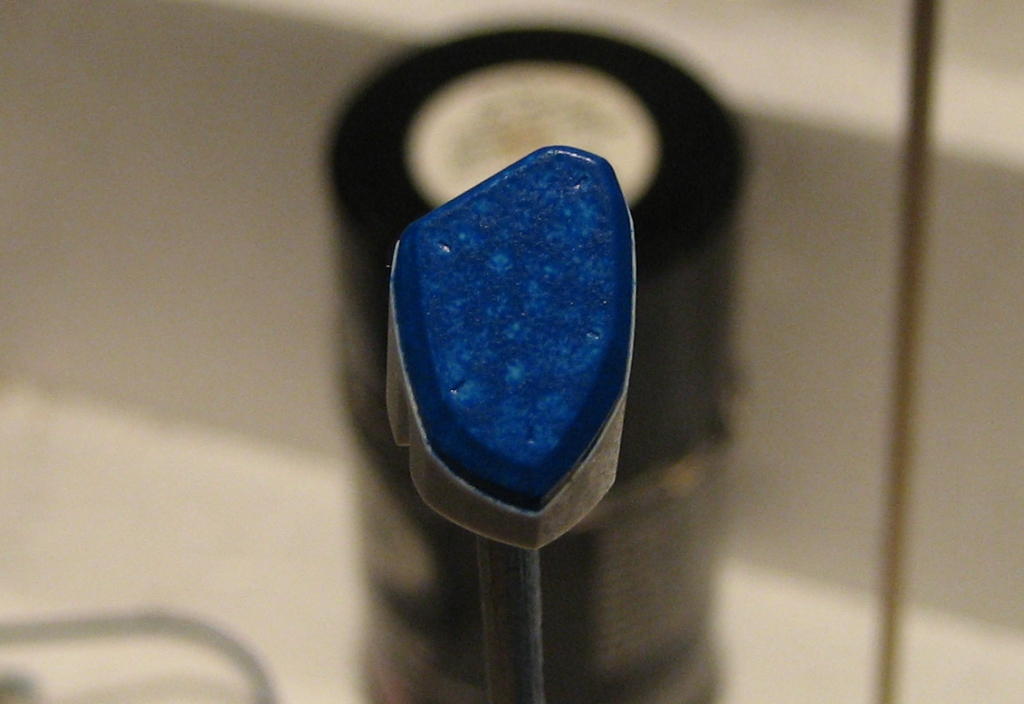
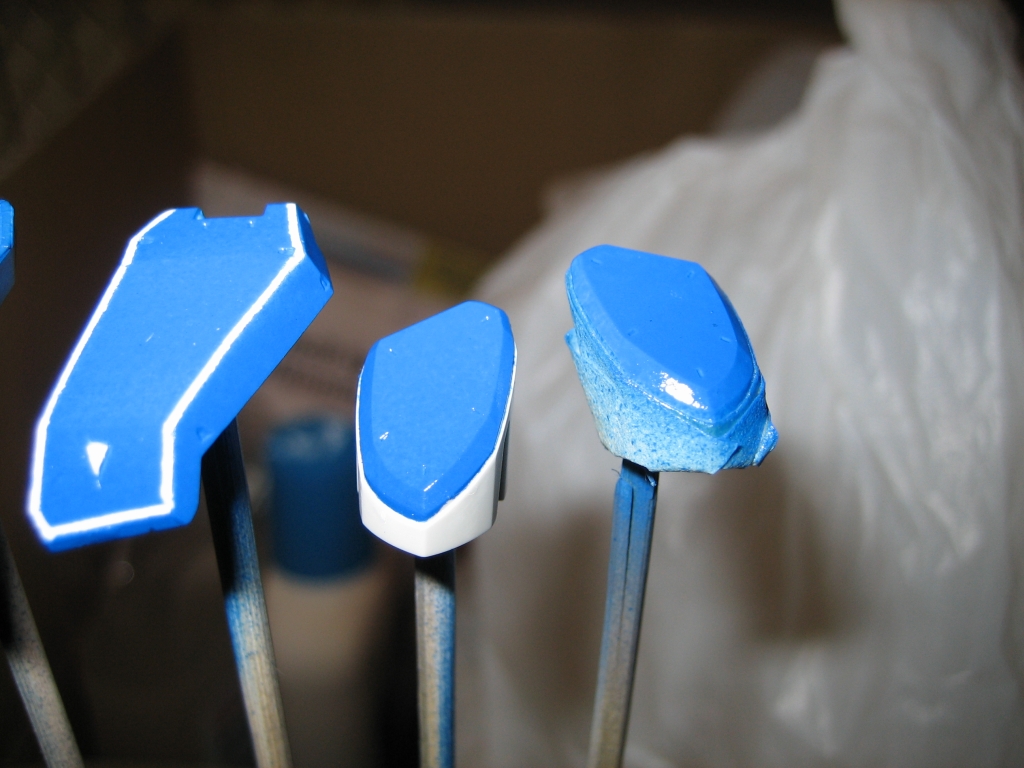
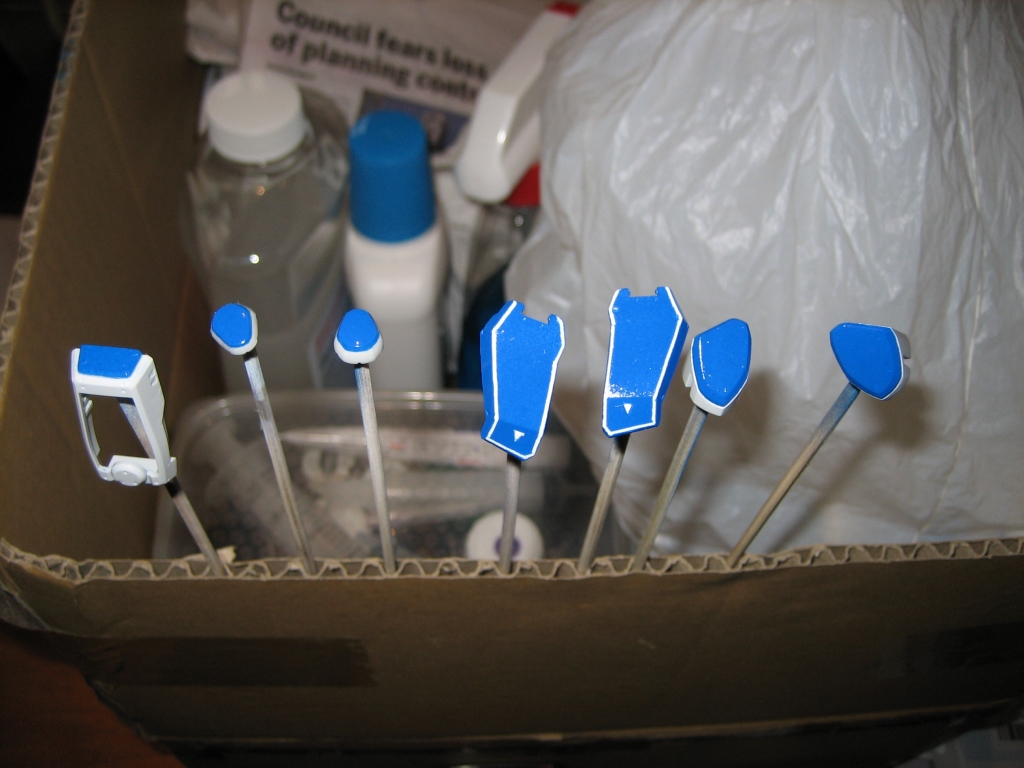
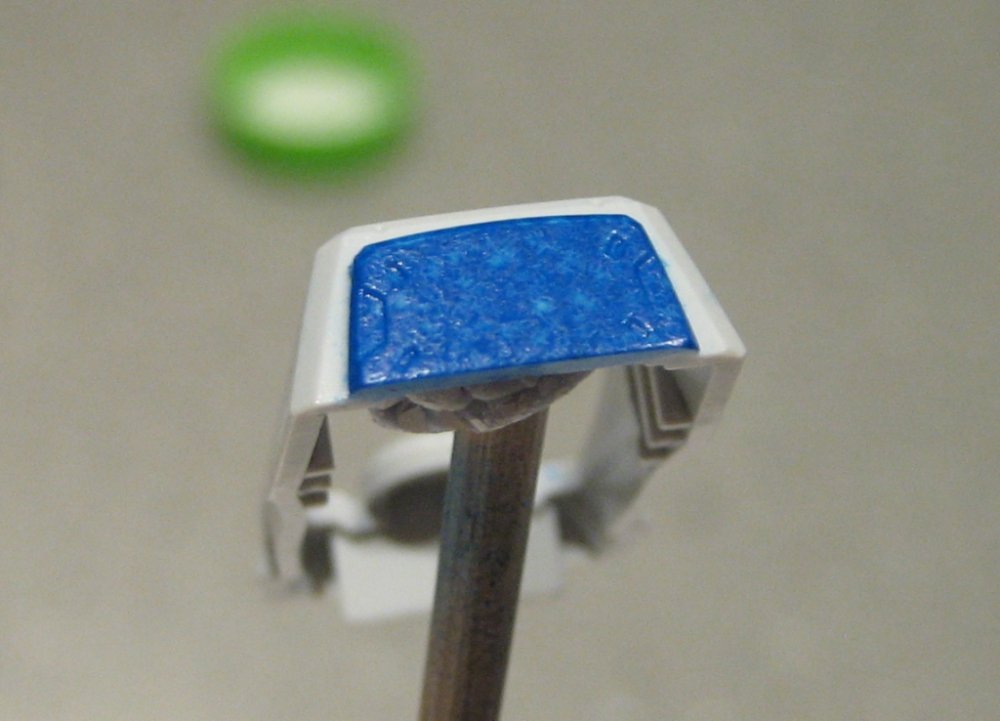
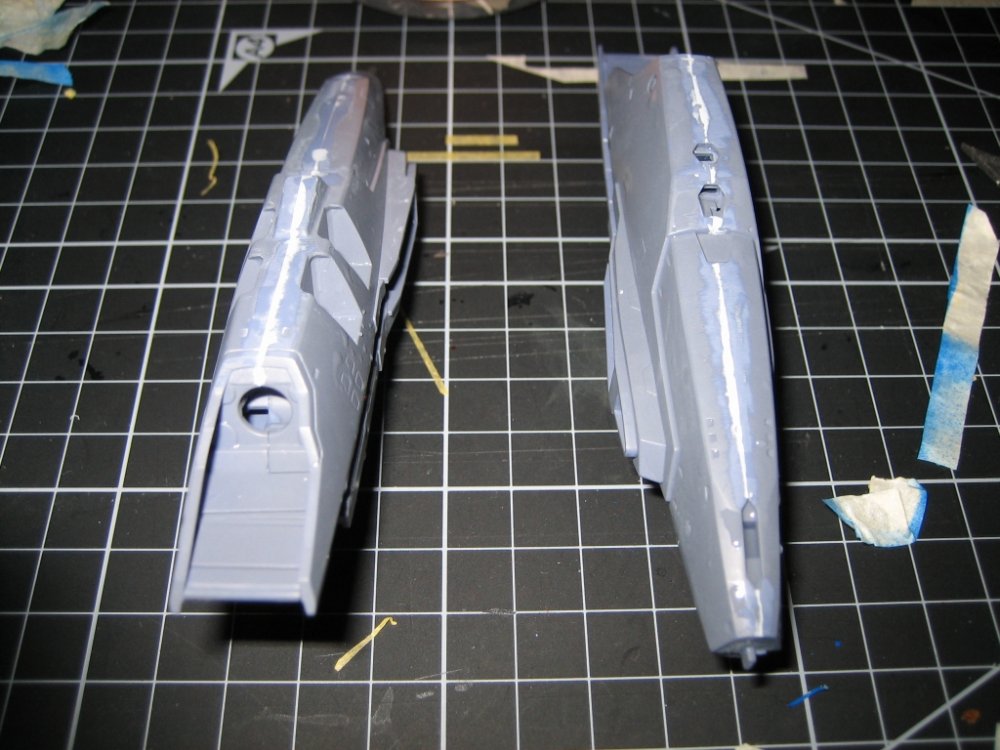
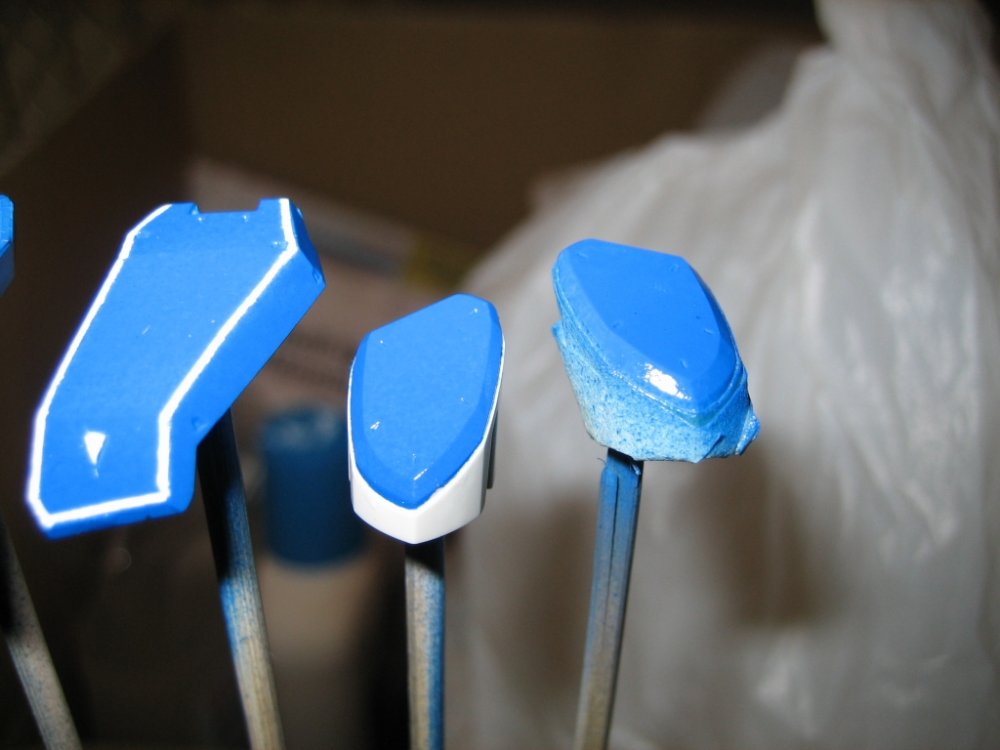
I did some more on Friday but not tons. I got a bit annoyed with the seam line in the super booster packs, so glued them together, then used Mr. Surfacer to fill in the seam. I don't have any lacquer thinner with me at work and hate using the stuff if I can help it so just used a toothpick to put the surfacer on. I like this stuff because it both spreads out and dries quickly, something which would seem impossible. Anyway, I sanded it down after a few hours, applied another layer to areas that still needed it and sanded again. I also managed to get the blue on the super parts done this weekend. these came out good but not as good as I'd hoped. The paint mixture was a bit too thinned and required a few fairly wet coats to really cover the white parts. The booster tips came up best, with a very glossy blue that you probably can't see in the pictures. I'll flat coat all these so any gloss will disappear. as you can see, the lines aren't the cleanest. They're really small though so I hope a slight bit of cleanup, the scale and a flat coat will make it look a bit better.


-
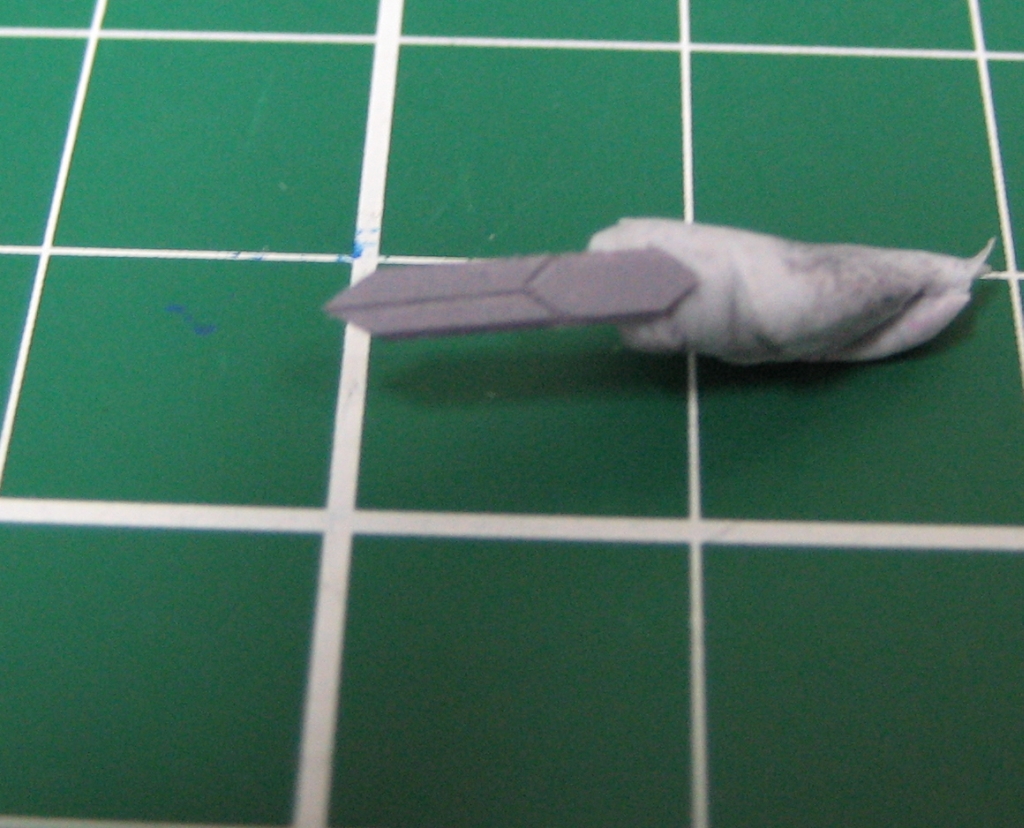
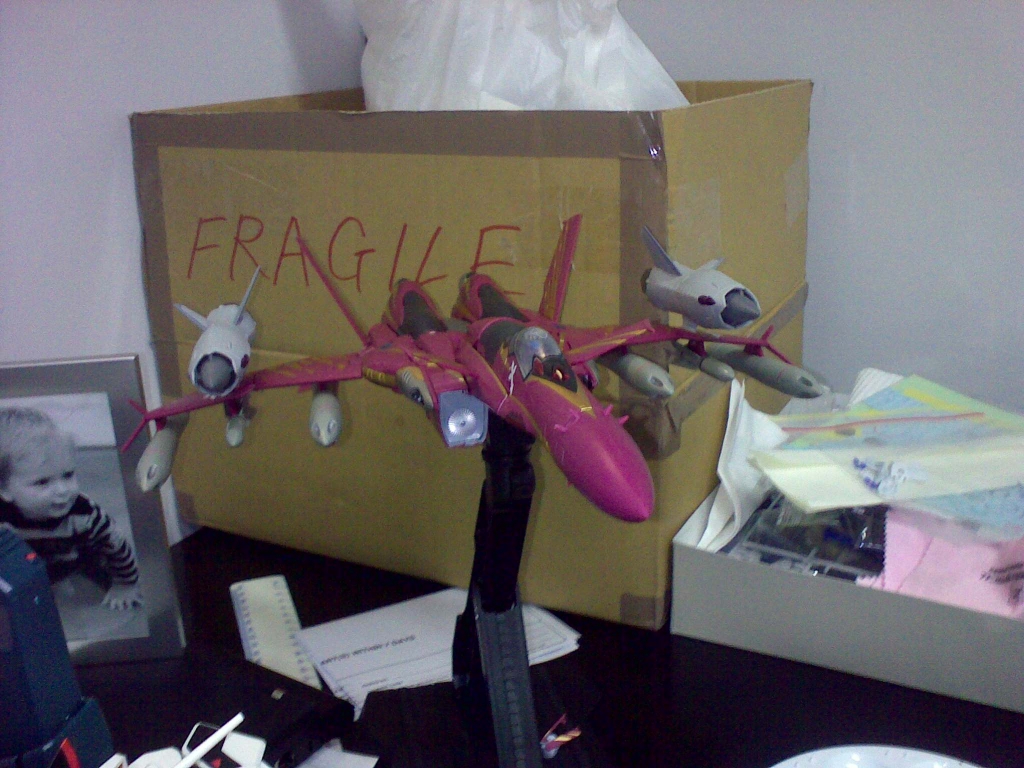
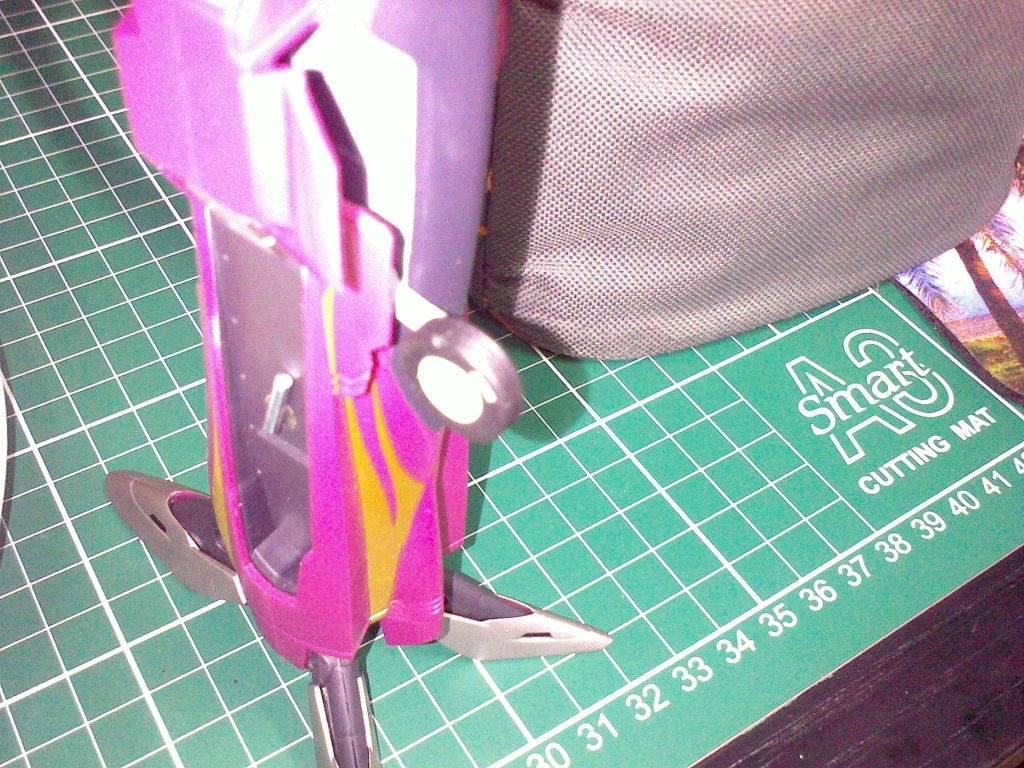
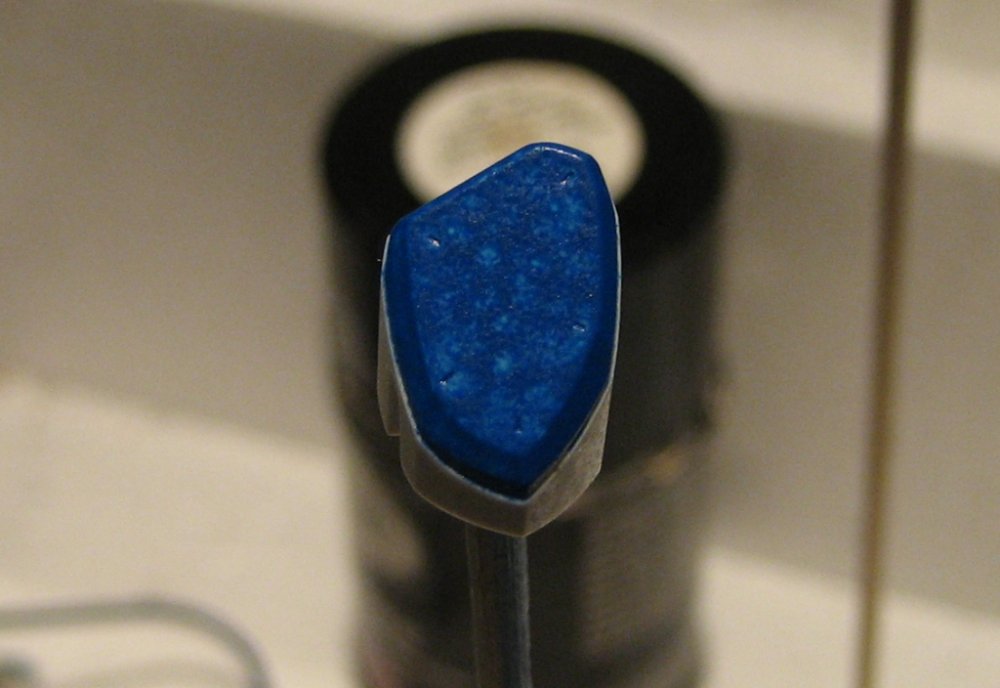
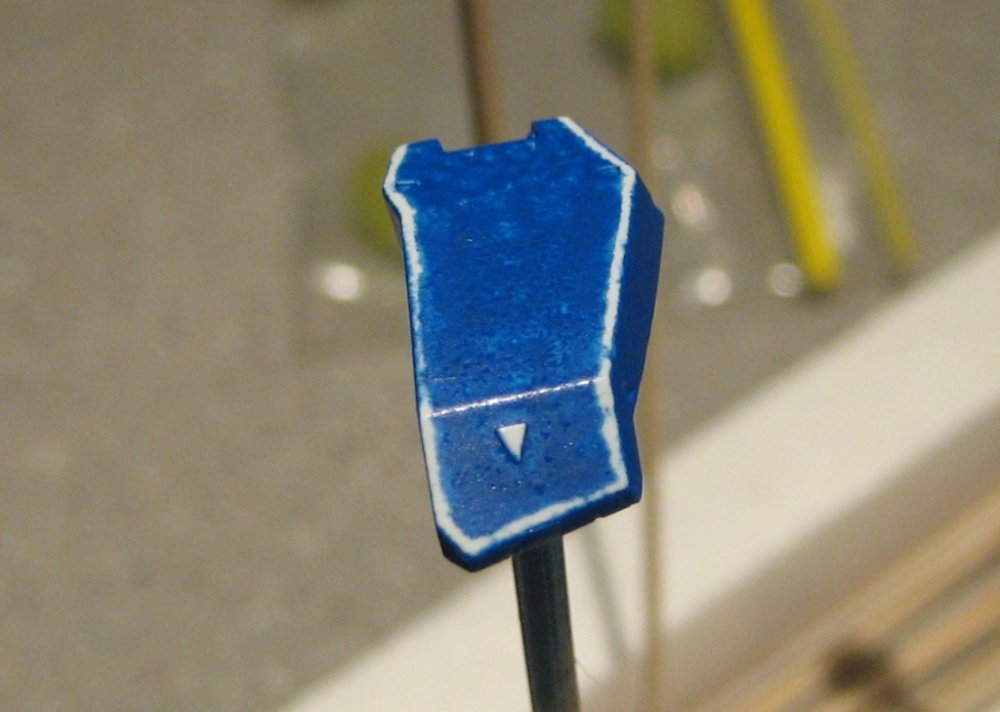
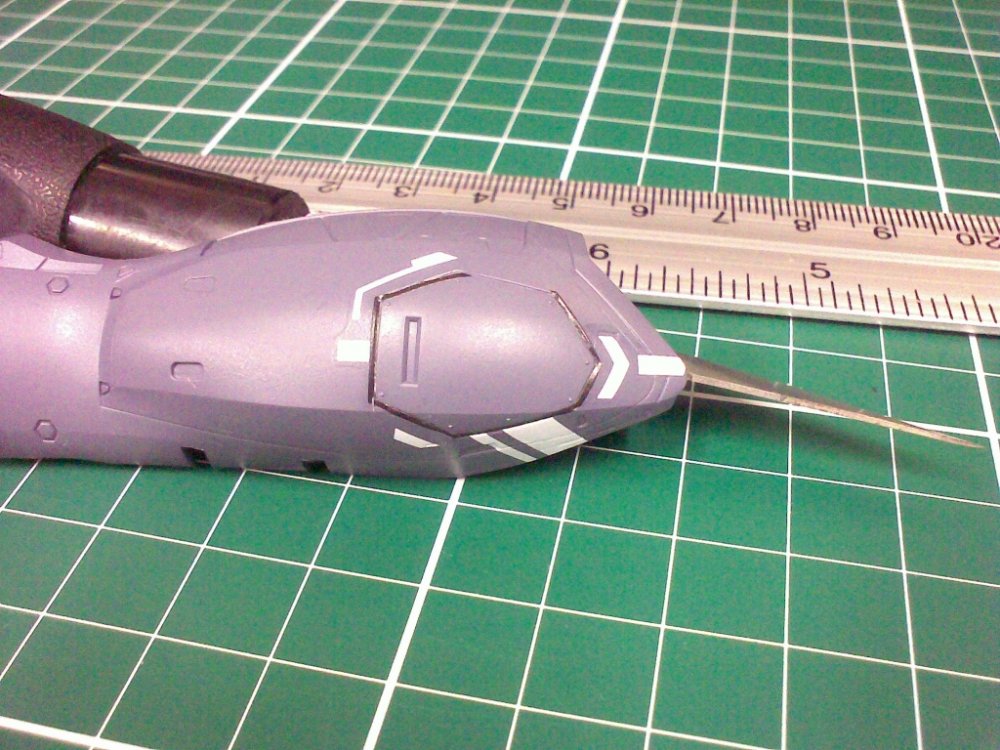
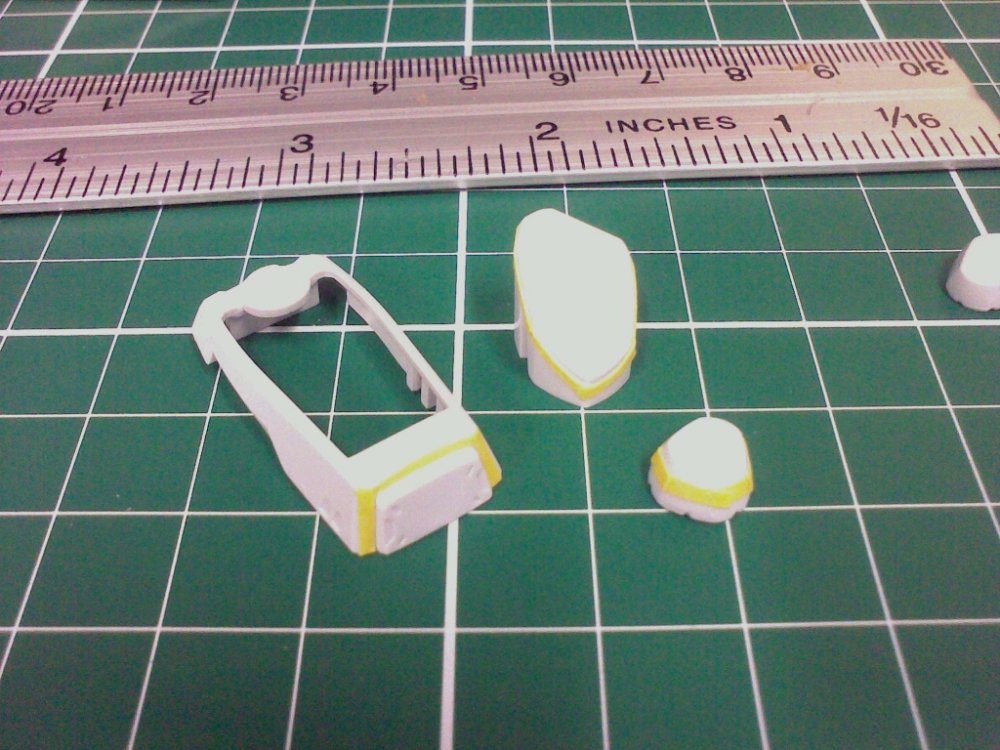
Small progress these last few days. Got some decaling done 2 days ago: I decided against using the nasty, dotty, brown-like panel and will paint it with some mix of metallic colours I've got on hand. I also ended up cutting this into 3 sections. Kind of as an experiment. If I had it to do again, I would not have left the black "panel line filler" there and would just have cut it off. I thought it'd help me align the decal better with it on though. And I suppose it did. But the black doesn't really conform to the shape of the panel lines all that great and if you look closely, you can see it coming outside the lines. I may scrape the black off if it offends me too much! I didn't do any model yesterday, due to this new arrival: Very impressive but not up to the same quality level as the guy in the lower left corner. No, not my son, the valk! (My son trumps all my toys, by the way). I think Yamato did an incredible job with the v2 VF-1s and you really start to appreciate it when you get an older valk. It's like these weren't even made by the same company! And the SV is a cool toy, don't get me wrong. Oh, and did I mention it was broken out of the box? Yeah. Anyway, that's for another thread. Today, got more masking done. Pics are crap again but the technique is pretty repeatable for this sort of thing: Trim thin strips with a ruler (preferably a metal one so you don't cut chunks out of it). Place them over any panel lines or sharp contours. Press them down with something sharp, like a toothpick Cut along the depressed lines Remove what you don't want. More to do still!

-
What's wrong with my Yamato, Bandai, etc.
mickyg replied to UN Spacy's topic in Hall Of The Super Topics
Grrr... Just got an SV-51 (Nora type) from Overdrive - AWESOME service and shipping by the way! I got it out of the box, opened up the instruction manual to be safe, started transforming it and the leg fell off! Looks like the screw caused a bit of stress in the female side of the plastic shell, and it just snapped. I also noticed the tire on one of the wheels is pretty misshapen. I think it was pressed with some foreign object in the mold as there's a white part on it and this is where the tire sort of distorts. It's not a huge deal but annoying, nonetheless. I'll contact Overdrive but I don't like my chances for a quick resolution, as their most recent newsletter mentioned something about a 2 month turn around for Yamato parts. Frustrating - This thing was not even 15 minutes old out of the box!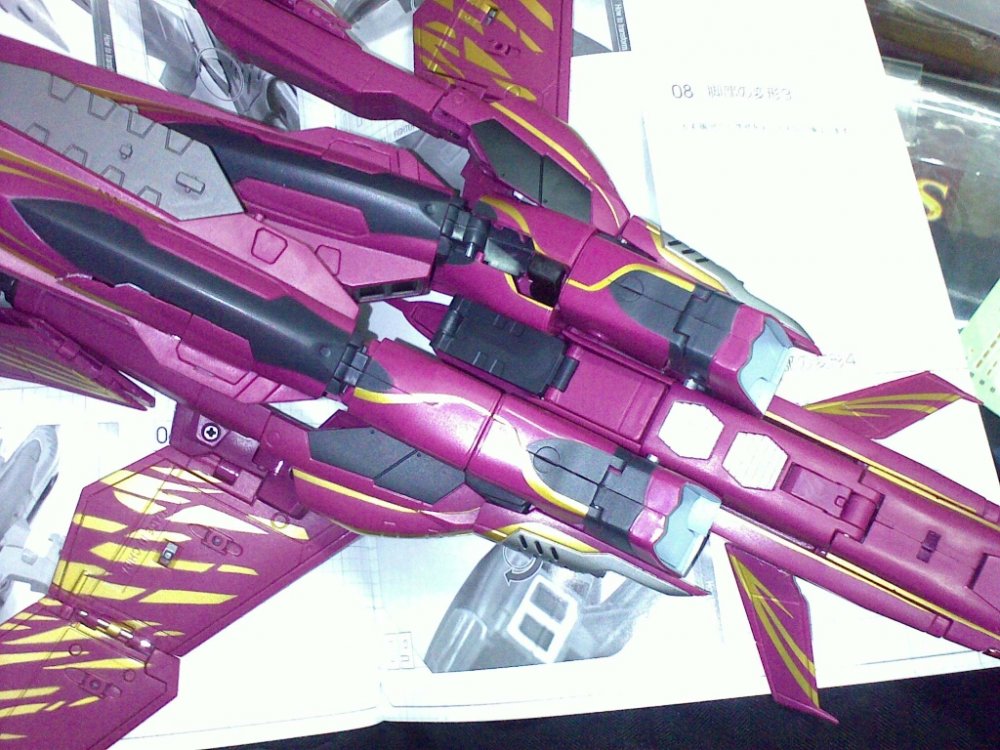

-
Some call it fortitude and precision, others call in "anal retentive!" Either way, thanks! This wasn't actually so bad, all the tape was applied to a straight edge so it wasn't too difficult to line it all up properly. I'm sure more complex surfaces will give me more problems. I'll try that out on the booster and intake covers/tips. So I'm assuming you're referring to the landing gear door in that last pic? I'm going to clear coat it, perhaps put a second one on too (gloss) then go over it with a flat coat. As much as I love the results you've gotten with Gunze spray clears, I've got a few dollars invested in testors lacquers that I'm going to have to at least try! I'll see how it goes and update accordingly. More progress on decalling only yesterday. I'll post again with more details and pics later.