mickyg
-
Posts
2632 -
Joined
-
Last visited
Content Type
Profiles
Forums
Events
Gallery
Everything posted by mickyg
-

Official Bandai 1/60 Scale DX Toy Thread Ver.6
mickyg replied to Duke Togo's topic in Hall Of The Super Topics
Aren't there some extra holes in the fighter to accommodate the armer parts (one for the radar, on the back at least)? That might explain the lack of parts swapping. Edit: DOH! I didn't refresh the page. Ok, so the holes aren't specifically for the armor then? Now I'm confused... -
Man, that is looking very, very nice! Those panel lines look great! Pencil huh? I had no idea pencil could look so good. My 25G is continuing to frustrate and seeing your results both inspires me and makes me a little jealous. Keep up the phenomenal work Lolicon!
-
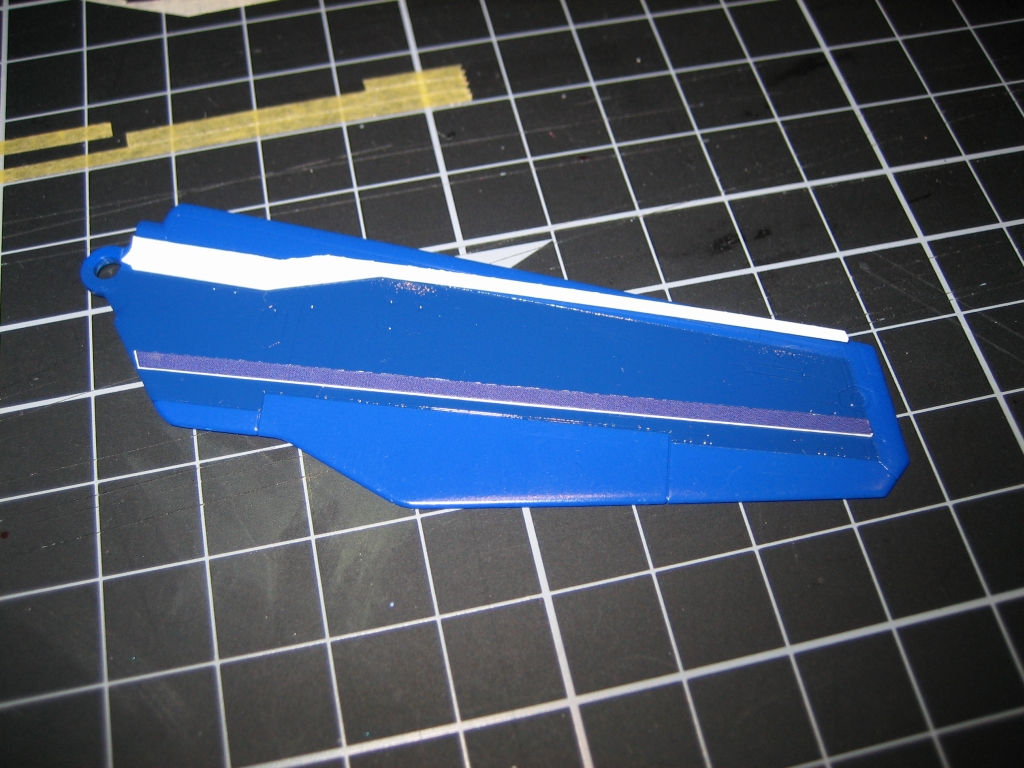
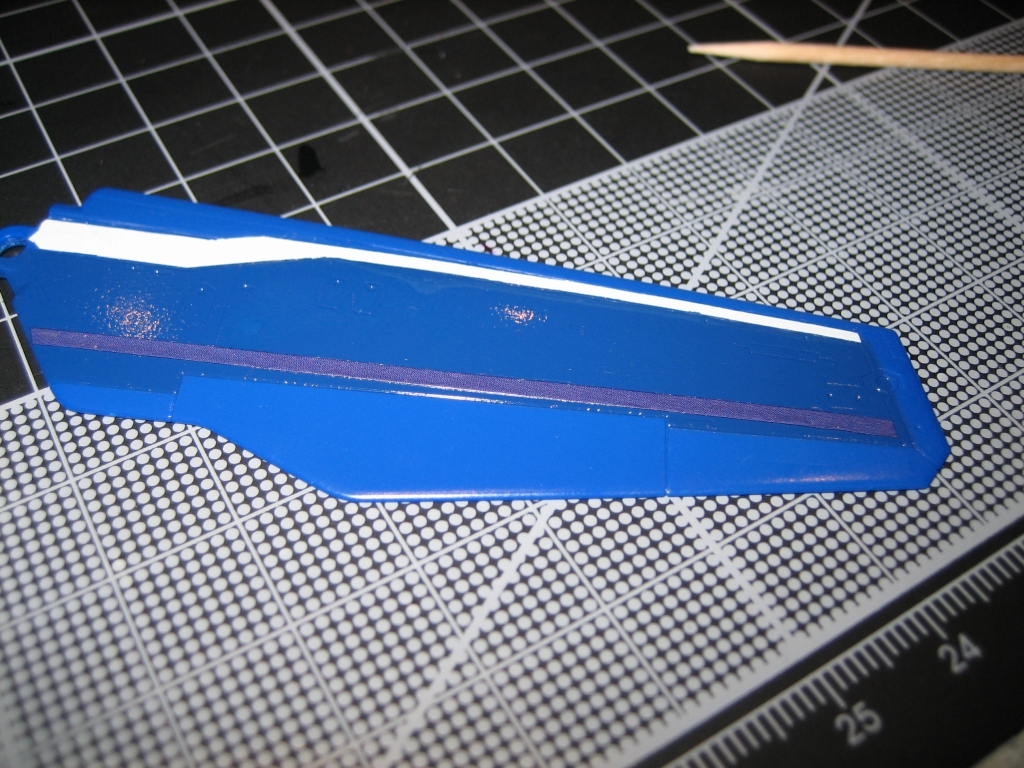
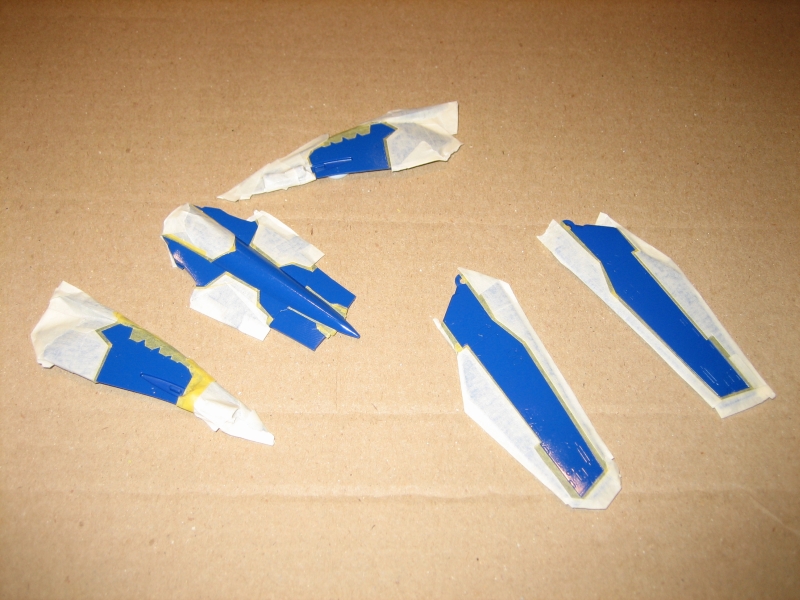
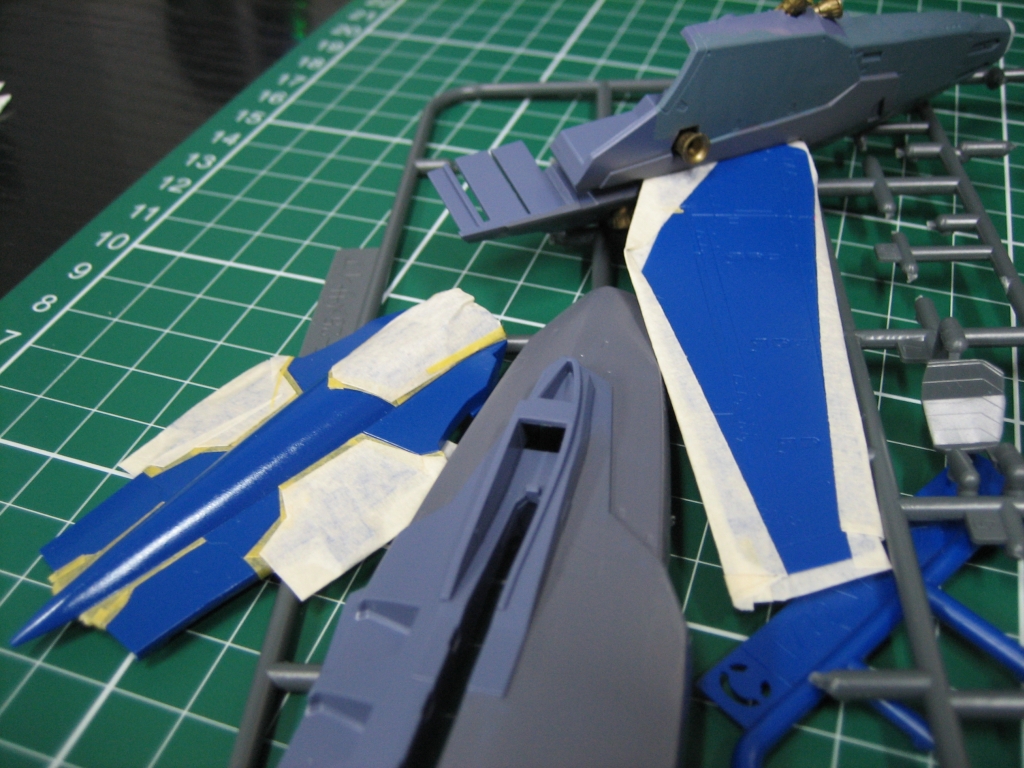
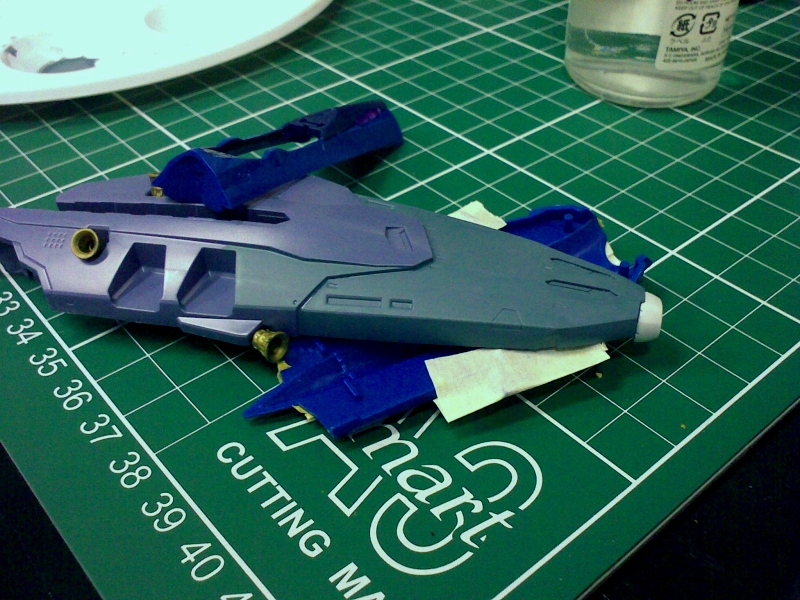
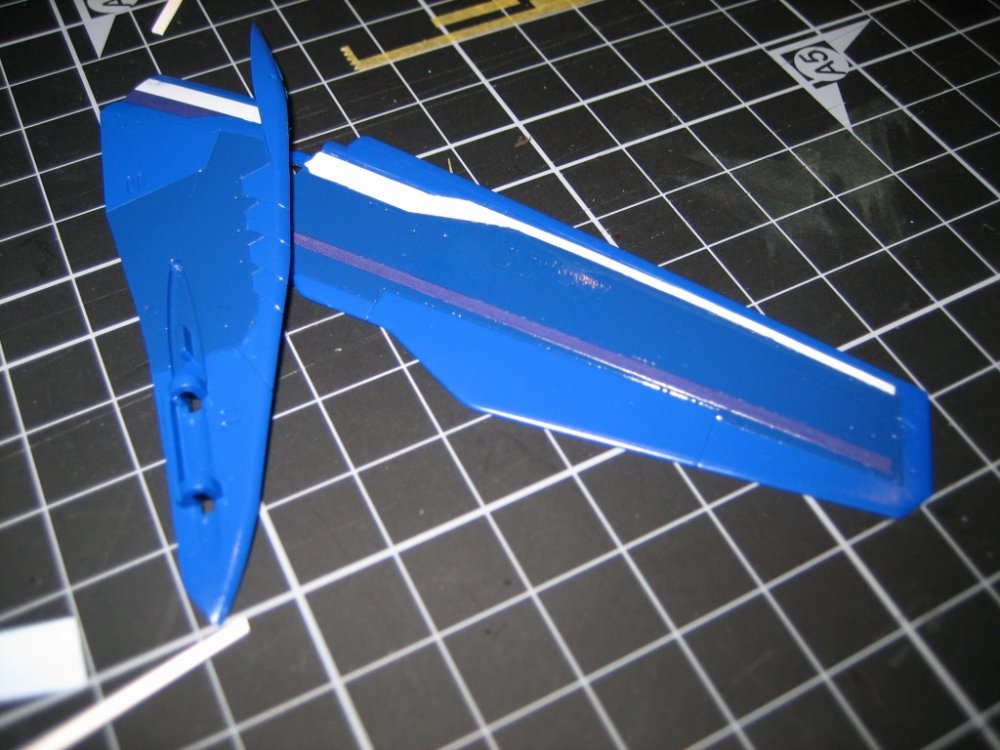
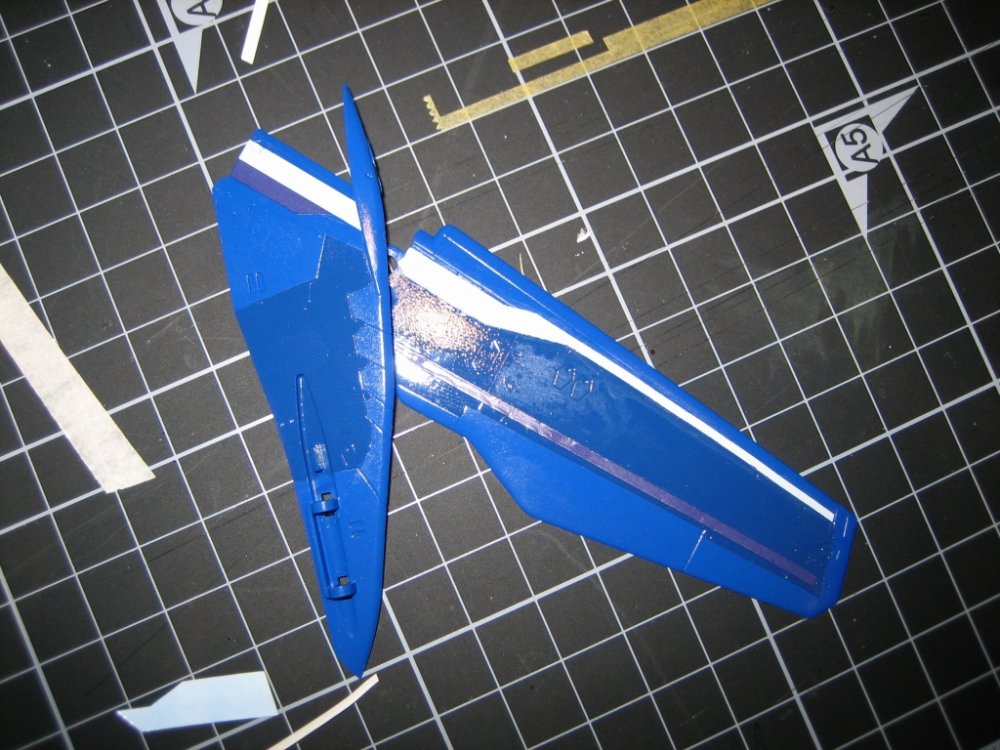
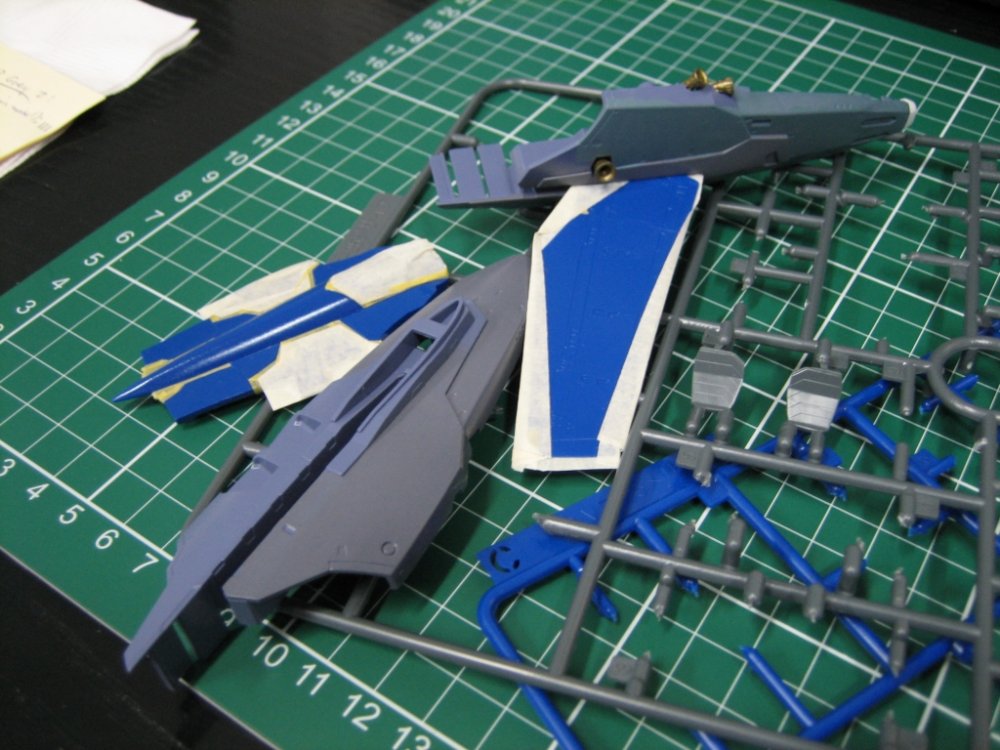
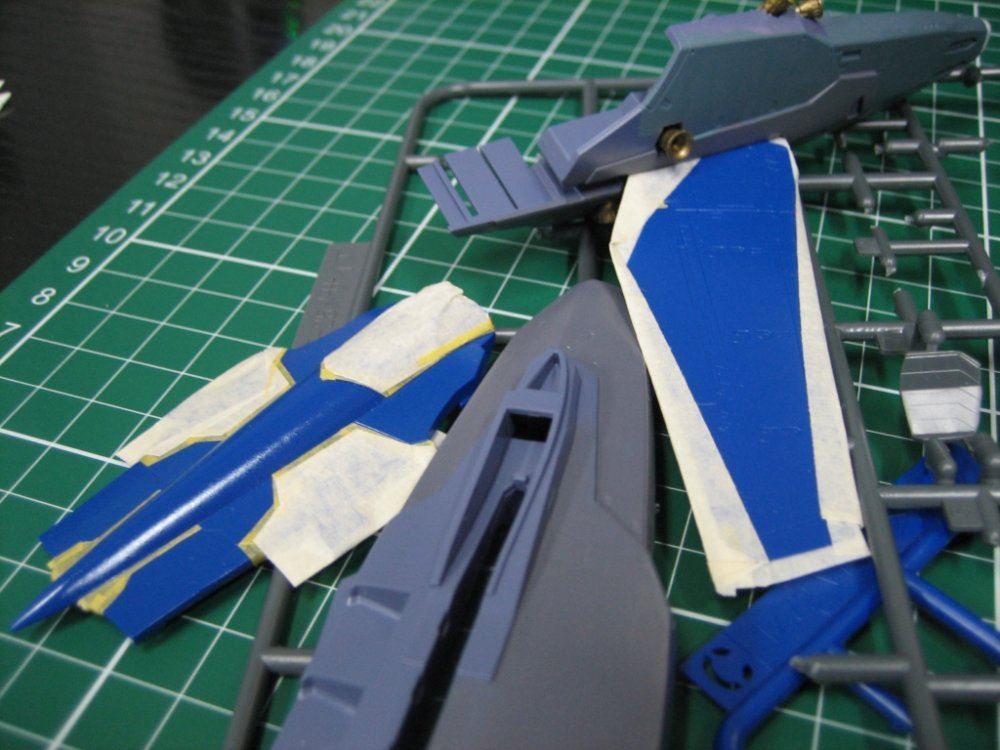
Ok, I know it's been said numerous times already but man, do these decals suck! I decided to start decaling the wings and bits I've just painted, as I want to get the panel lining done before I put the clearcoat on. My reasoning is that the paint was a bit thick and I'm afraid I'll lose the panel details if I clearcoat first. So I set to work on trimming the decals exactly on the colour demarcation lines, rather than roughly cutting them out and letting the carrier film potentially show up. This went really well. After that, it was all pain! Firstly, the decals for the wings aren't really shaped properly to follow the panel lines - for the leading edge of the wing at least. No matter, I'll just slightly bend the decal to make it work. Bzzzt!!! Wrong! These decals are weird. They remind me of vinyl and they don't bend without some sort of decal softener. No problem, I'll use Mr Mark Softer. that actually worked a lot better than I'd hoped and I didn't have the beading problems that Lolicon did in his Armored build. But I used a lot of it. I should point out now that I didn't even think about chemical composition of the decal softener. It became apparent only after I'd liberally applied it and was starting to massage the decal into position that I started thinking "hey, what's this blue that's showing up on the white decal?" Yes folks, Mr Mark Softer and likely a lot of other softeners desolves acrylic paints! It wasn't terrible and not like it completely ate through the paints and made a horrible mess, but it does seem to desolve the top layer of paint and had I noticed this with the first decal (on the inside of the wing root pointy thing) I could have saved myself some grief on the white wing decal. Oh well, you live and learn. My advice, use the softener sparingly so it just goes on the decal and doesn't run onto the paint. This probably sounds more difficult than it is. Just use the edge of the supplied brush and sparingly apply it. Oh, and did I mention the colour innaccuracies? Yeah, the dark, dark blue in the instructions is, well, it's purple. Not happy about this either. I think I mentioned I was going to paint these instead of decaling. Perhaps, that would have been the best option, after all... PICS: Just after cutting - showing the way the decal doesn't fit the panel lines: And various stages of placement: Last one shows the trailing edge line and it's not dry or settled down yet. But you can see the PURPLE!


-
A bit of both, actually. On the lighter blue, I sprayed 4 or 5 very light coats but all in the course of about 5 minutes. The darker blue, I did 3 very light coats, noticed it was probably drying before it hit the surface, then adjusted the flow to give me more paint and did about 2 more quick coats. I've got a Pasche VL dual action airbrush and I'm still learning how to use it and how to set it up consistently each time. It's not necessarily a steep learning curve but it seems it's different each time I use it.
-
Now you've got me worried! I'm about to start decaling some parts on mine (I think) and I've got Mr Mark Softer too. Previous use on some Academy model decals was awesome but if you're saying it doesn't soak in on these, I'm very afraid! I can't believe that missile cover is one decal - that's MENTAL! Very nice work, by the way!
-
Thanks! I saw that effect on your YF-21 build too. Loved the end result but I'm not sure if I've got the patience to remask the whole thing after I finish! I'll have to cross that bridge when I get to it, I guess. I hope you saw all your "fingerprints" on this stage of the build! Inspired completely by your 25F build. And don't worry, if it turns out crappy, I won't blame you. ; ) Thanks Lolicon! I know what you mean by lazy. I actually had fun masking it but I'm pretty sure I don't want to do it again! It's tedious and if you slip while trimming the tape, you've gouged your precious work. Luckily that didn't happen to me - sharp knife and deep panel lines helped a lot. To answer your super parts colour question - I'm trying to match the anime mostly but also want some sort of colour combination that looks good and isn't to starkly contrasting. As for the "studio model" you're referring to, I didn't know one existed! Do tell. What did you mean by masking over clear coated decals? I'm trying to think of a point on this that I'd have to do that and am coming up blank. Are you meaning the application of different types of clear coat? I agree on the semi-gloss. I'm hoping that since all the main aircraft will be semi-gloss, regardless of colour that any darkening/lightening will be uniform. However, given PetarB's comanche build and what a gloss, then matt did to his meticulous camo pattern, I could be surprised! And as for the harsh difference, that's mostly due to the way I sprayed the lighter and darker blues. The lighter one was a fine mist that probably dried too quickly, giving it an almost flat finish. The darker blue I sprayed on thicker and it went glossy as a result. Both are made up entirely of gloss paints so they should have looked the same in terms of sheen. Still, the lighter will likely darken up once the clear coat brings the glossy-ness to a more uniform level. I'm rambling again, aren't I?
-
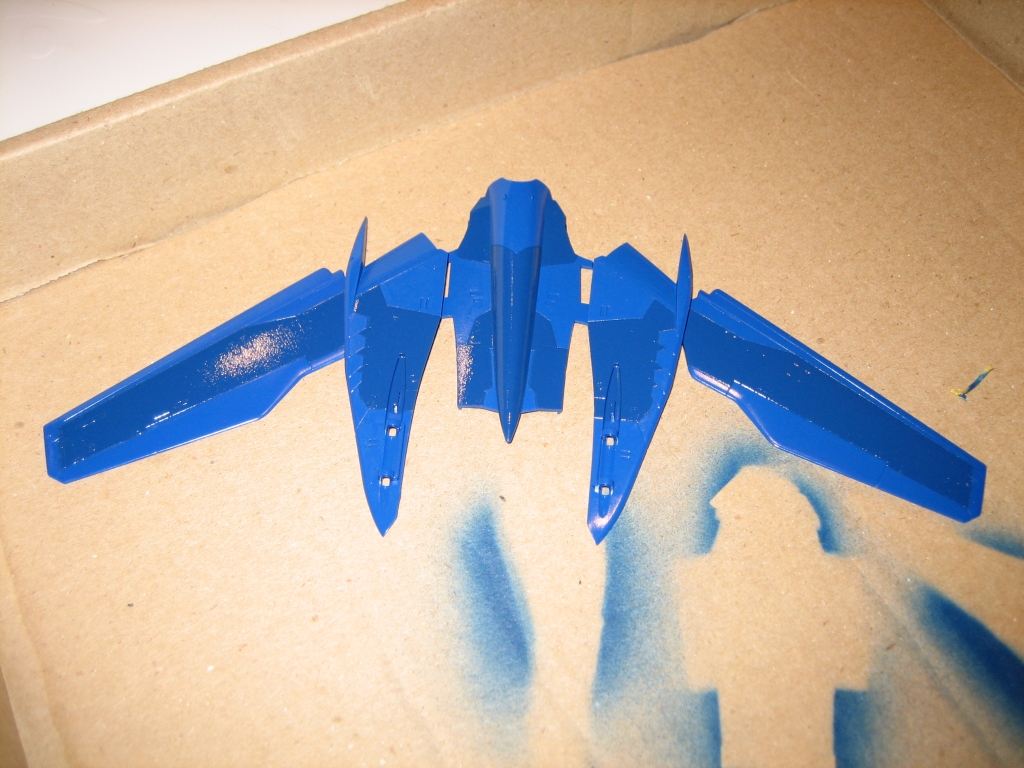
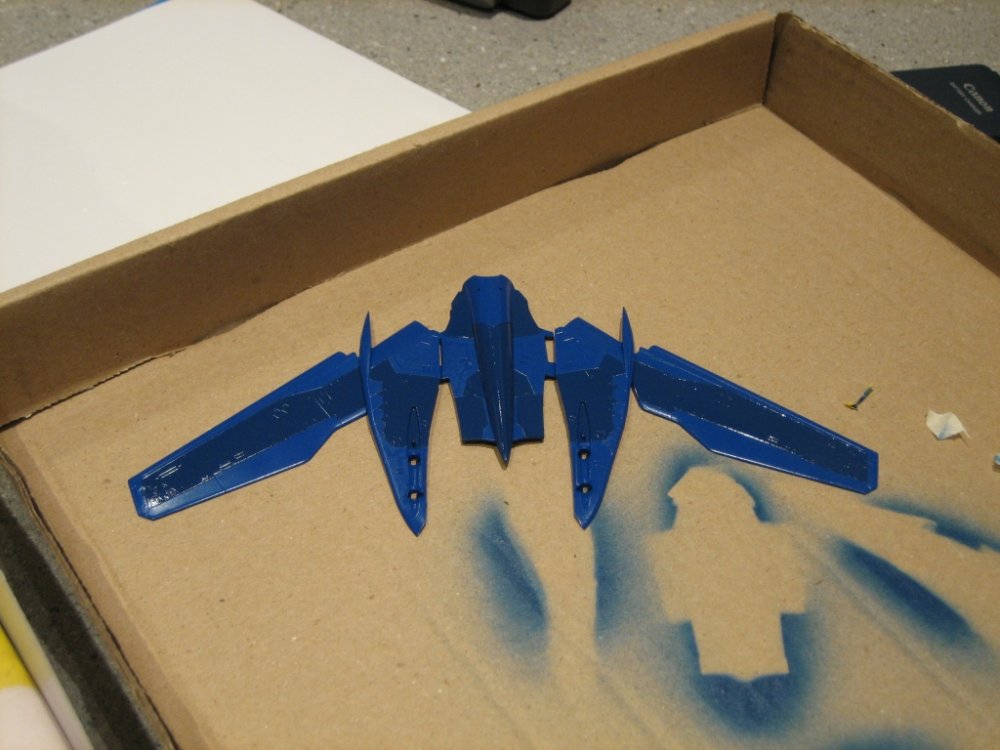
Some progress with the darker blue panels on the top of the model tonight. I found a mixture that was just dark enough but I'm not sure how it'll look once I get a semigloss top coat on it at the end. I could end up losing any differentiation. I also had some issues with the amount of paint I let flow and the pressure, resulting in some pebbling before I got it right. I don't think I care enough to do it over though. Anyway, here's some pics: Before I forget, it's one part dark blue to two parts regular. Those are model colours, not generic terms. So refer to the parts around the nose area for the "regular" and "dark" I'm referring to.

-
PE = Photo Etched Refers to the way they're made. Look up photo etching for details. They're usually made of brass, which gives them their gold colour. Don't worry, you paint them! They're just shown in their "naked" state so you can actually see them. I'd grab these in an instant but can only use the cockpit parts, really. The rest is going to be hidden on my "super" build. Bummer.
-
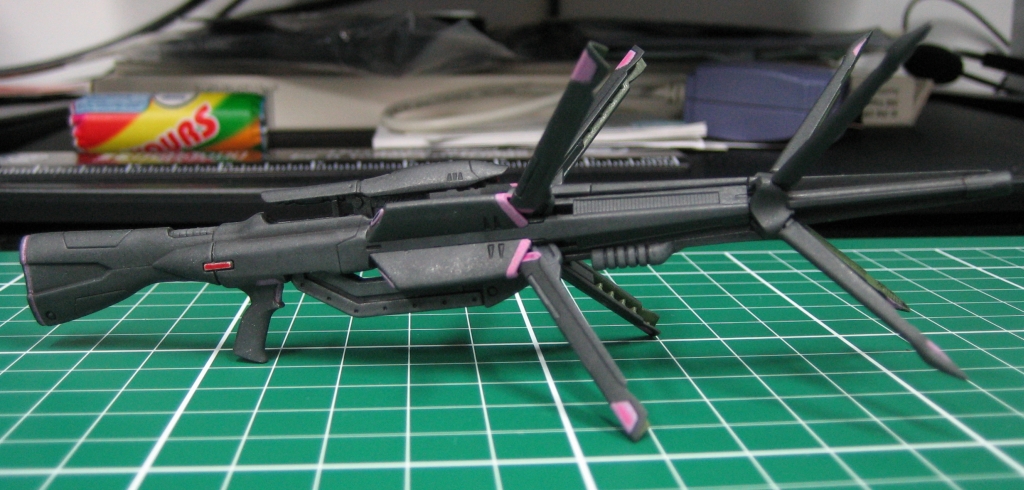
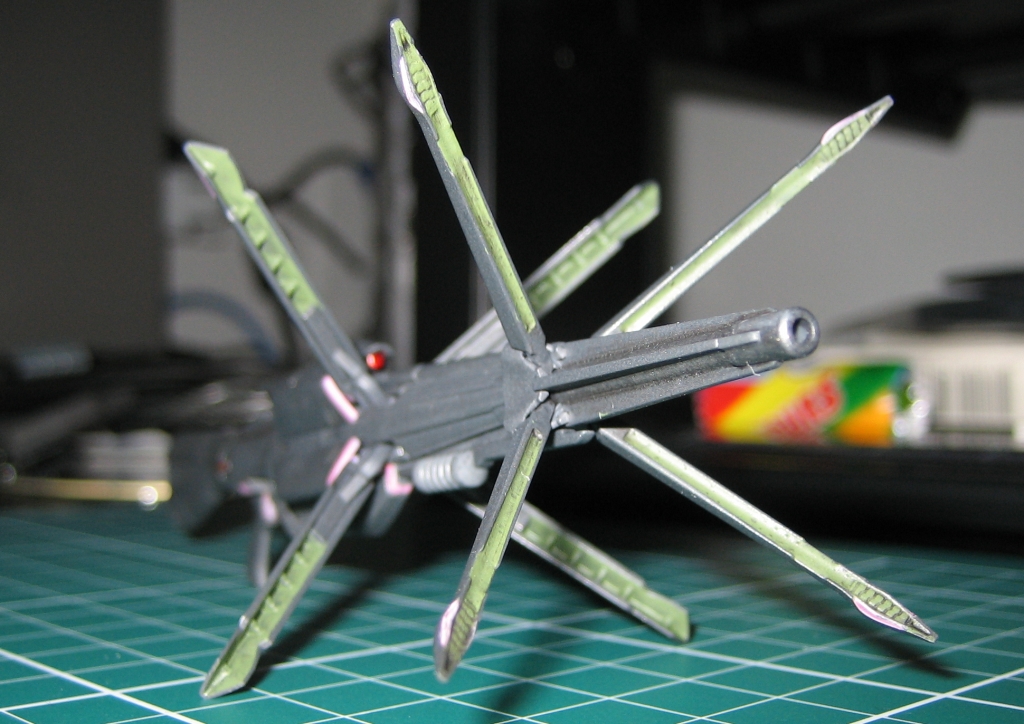
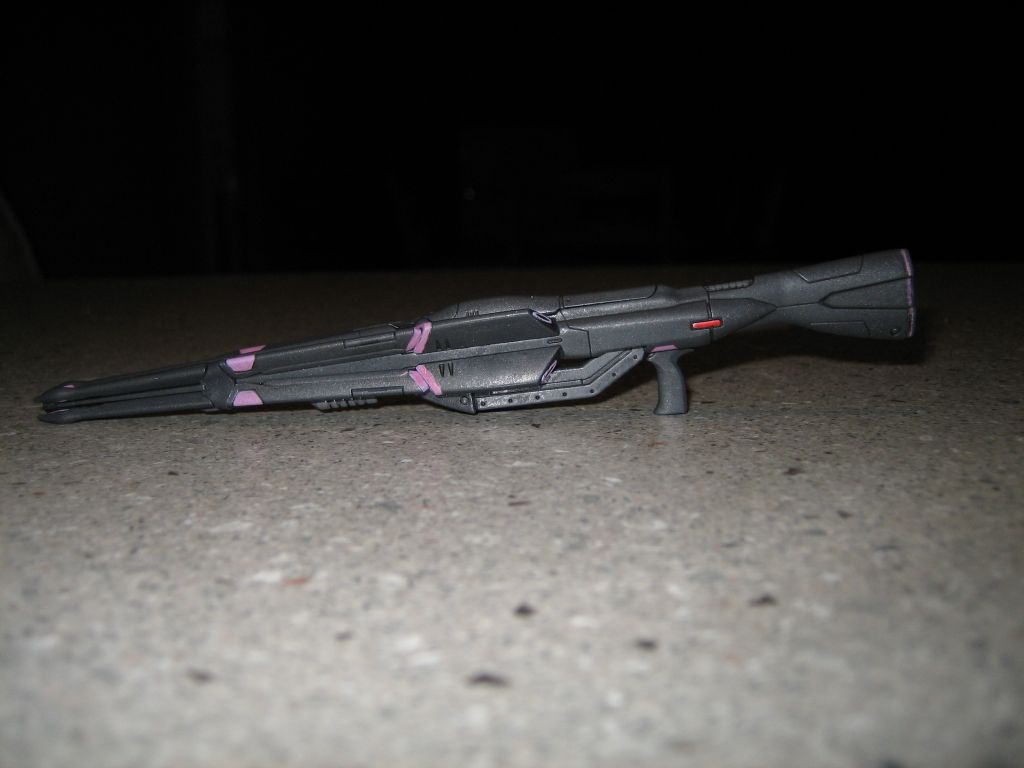
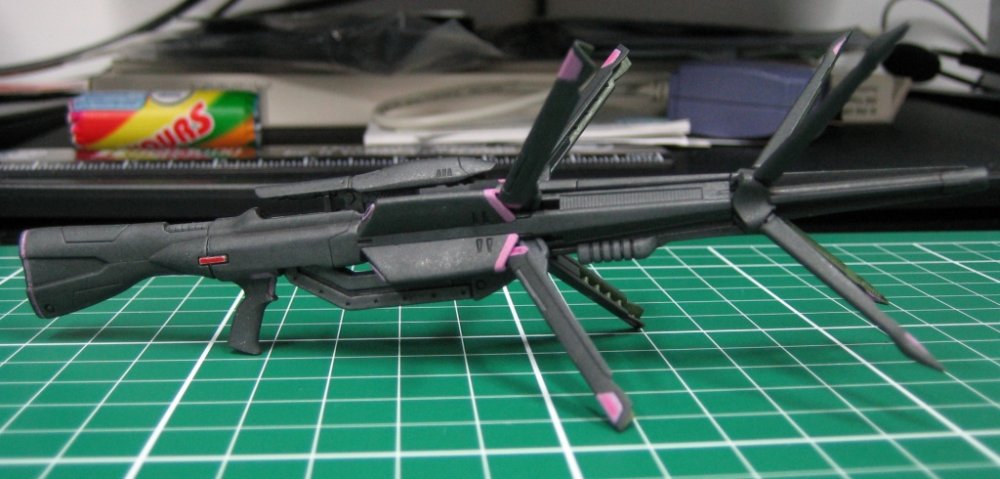
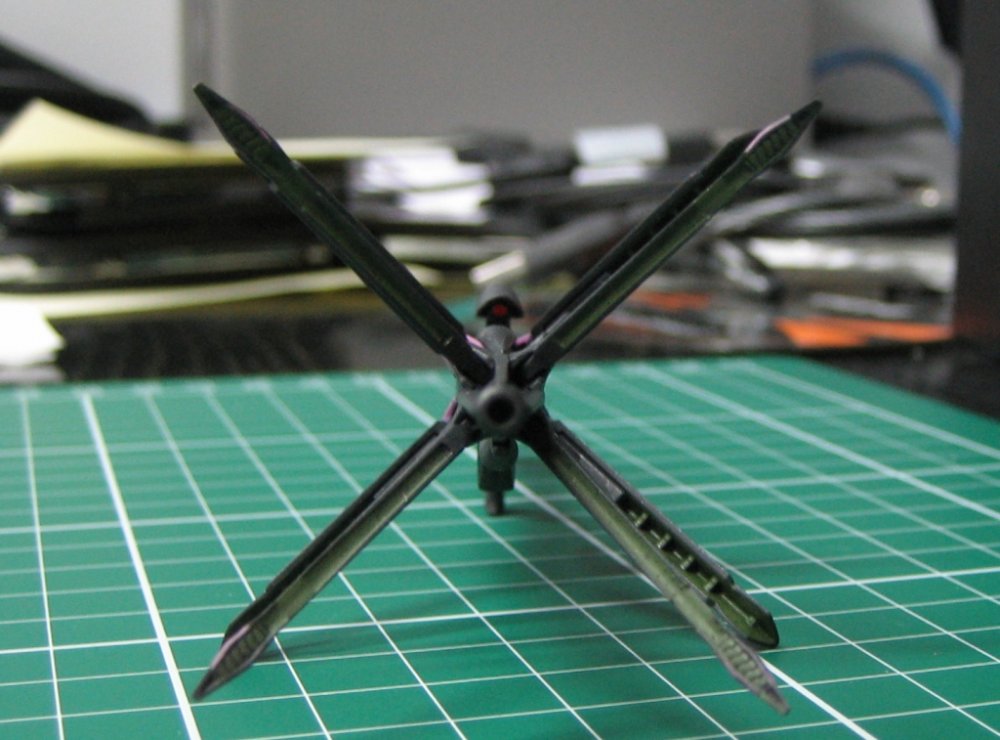
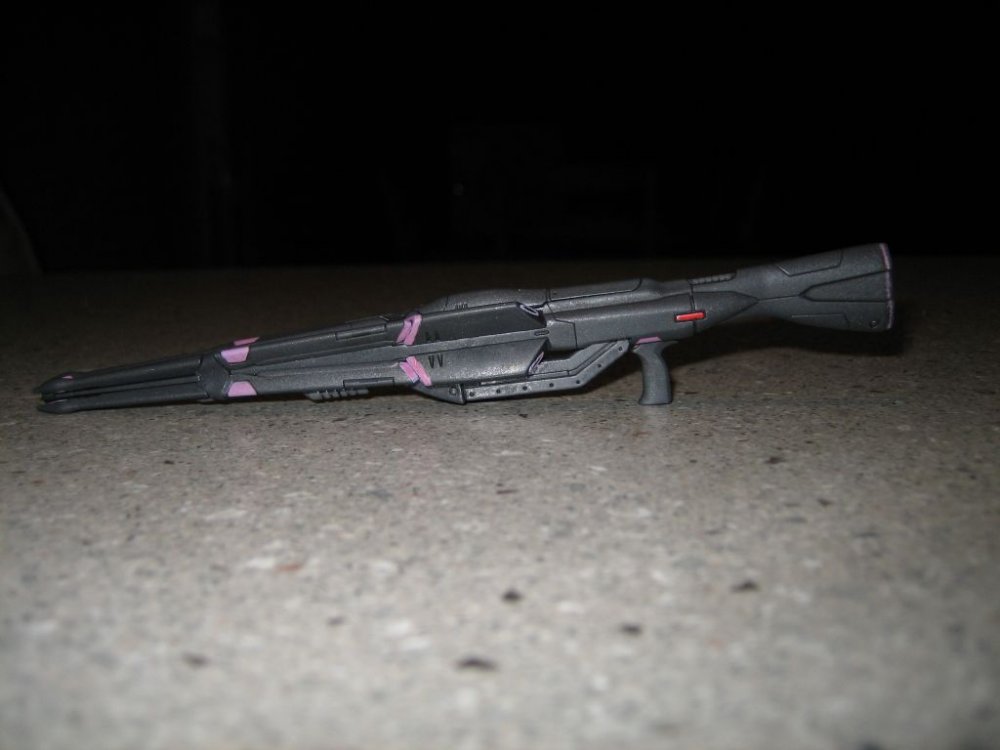
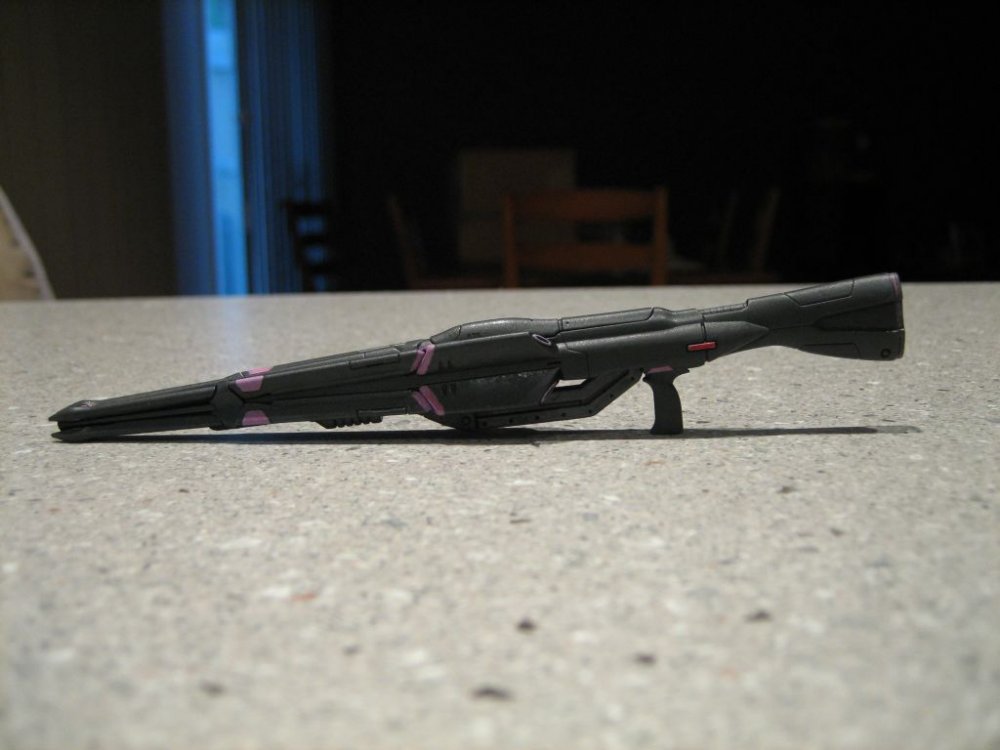
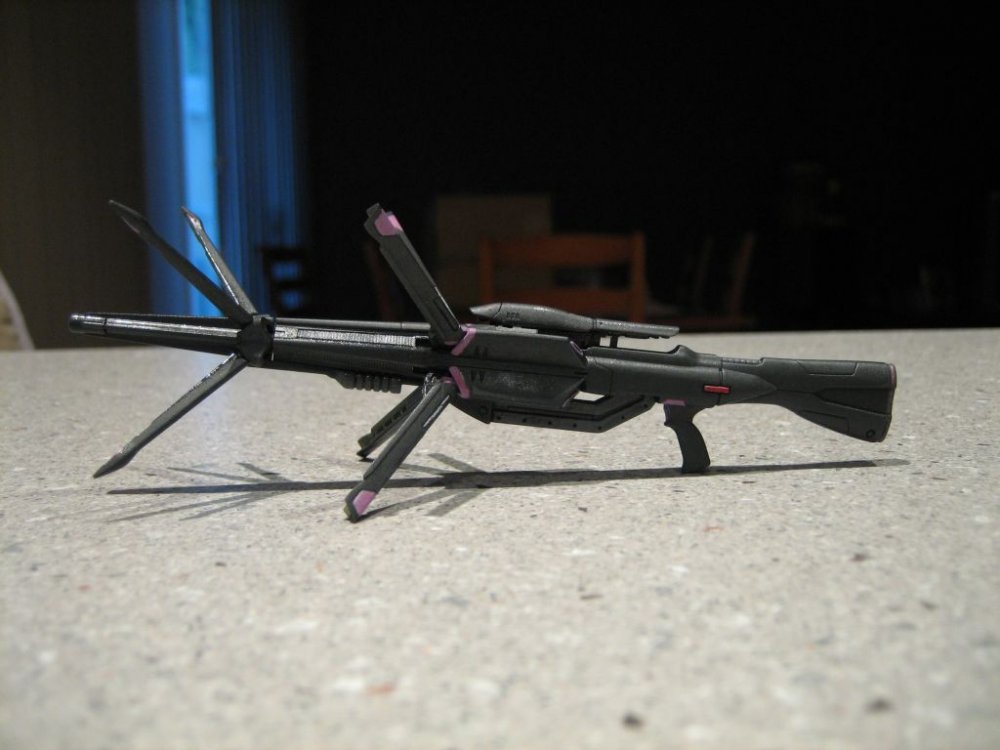
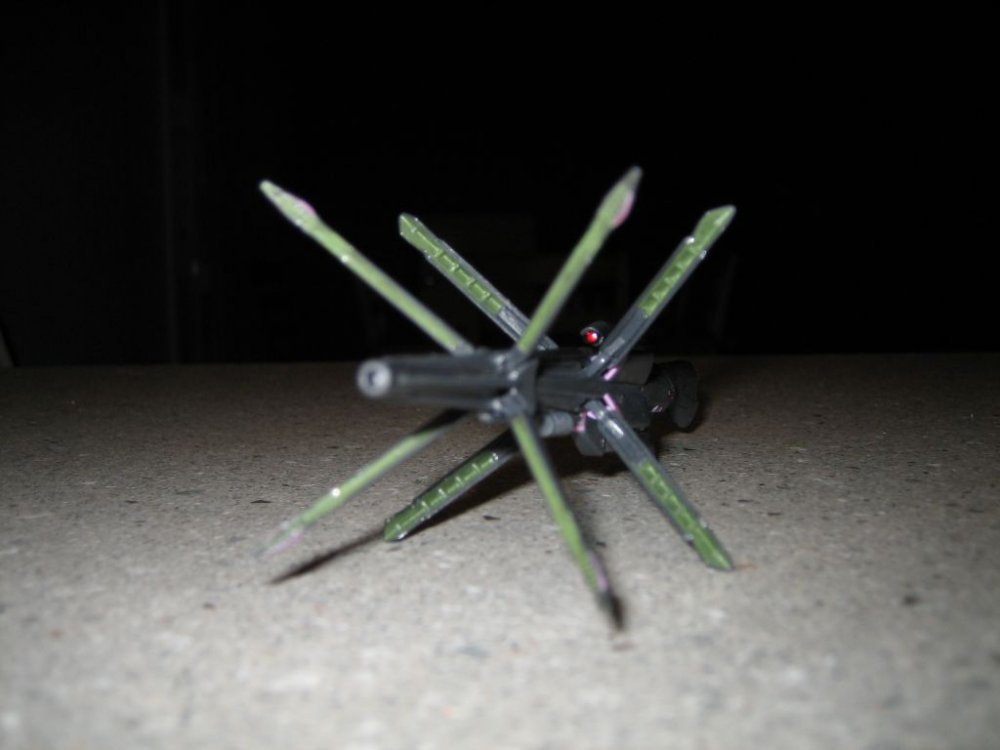
I stole my wife's camera and brought it to work this morning so I could get some decent pics of this pesky super parts colour. Hopefully she doesn't need it today! So here are two pics that show a few things. Firstly, some blue sprue for contrast, a few body parts that will be close to the boosters (along with all the masking...) and perhaps most important, some of the grey sprue (with intake covers) to give an idea of how close this "custom" colour is to the grey in the kit. There's a hint more purple going on here but not much. I think the colour will look even better once I put a matt clear over it. If you hadn't noticed, I think I'm 90% ready to choose this as my final colour for the super parts. Here's some comparison shots of what's in the anime (best I could find in my stash): And what I'm up against in terms of realism (from yahoo japan - these have been floating around these forums a fair bit): I absolutely love this guy's work, but in my opinion, the super parts are too blue for what I'm going for. And finally, the finished pics of the sniper rifle, completely flat coated now. I gave up on dry brushing (for now). Still, I'm pretty happy with it.


-
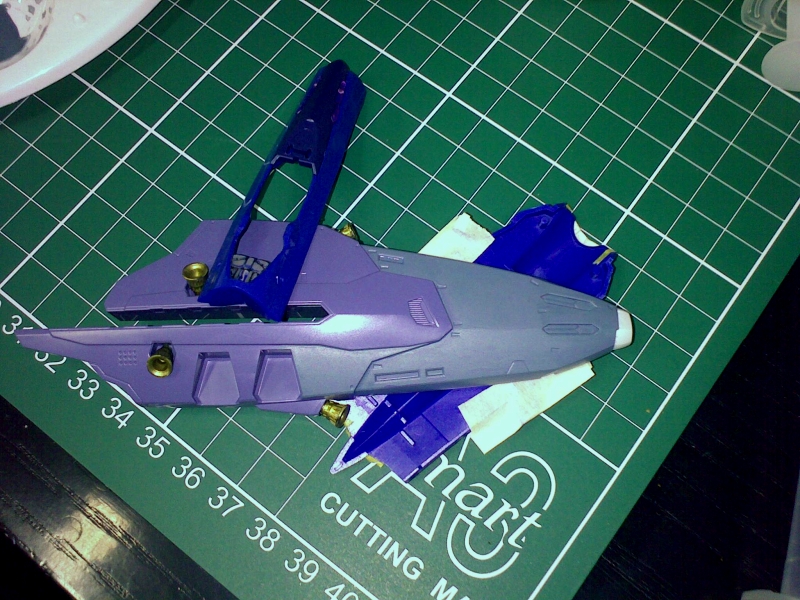
I know what you mean. I put the two together yesterday for that reason (some blue parts). But it won't look right till I have it mounted on the wing. And I can't do that while the wing's all taped up for painting. So I'll need to get that second, darker contrast coat on the wing/back parts before I can get another picture up.
-
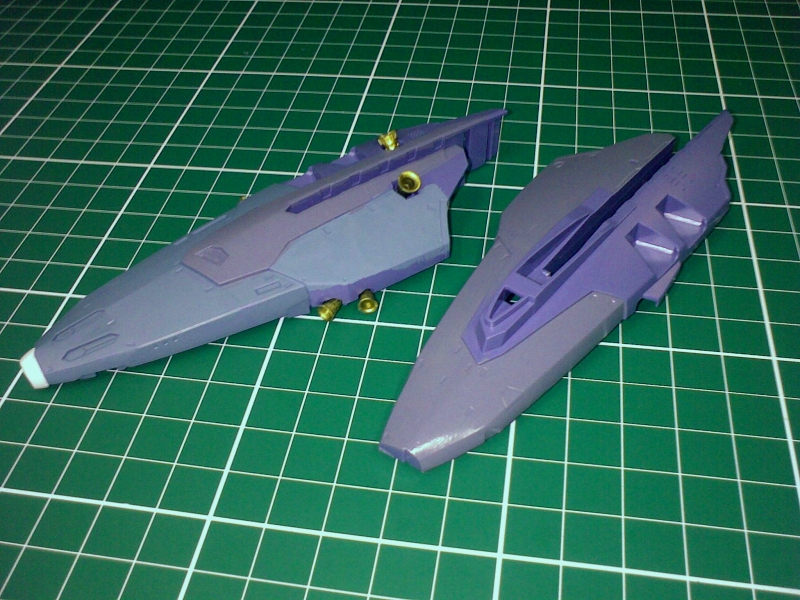
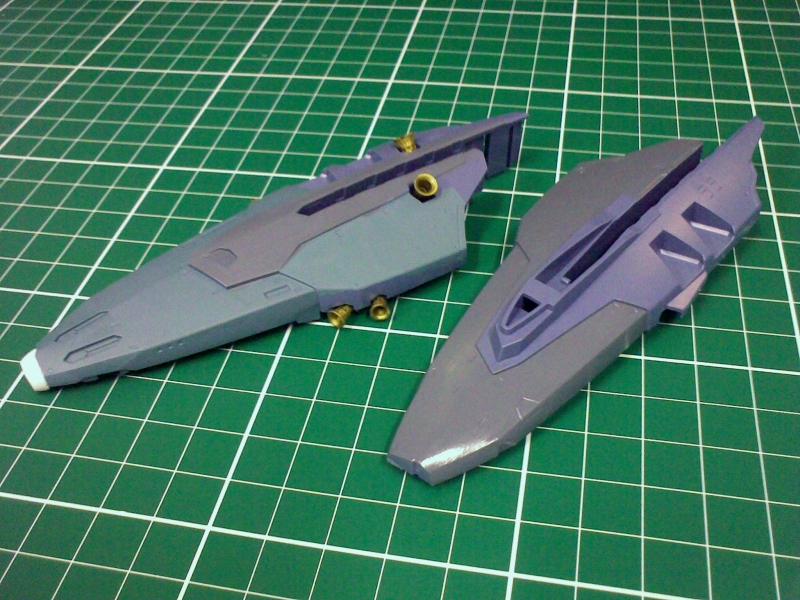
I think I may have found something that will work for super parts colours. It's the colour listed on the box but lots more grey and a touch of tire black. Actually, the box shows "dark grey" and by adding tire black, I probably made the same colour. I experimented with just adding grey to the darker blue from the main model, but that was so close to what I did yesterday that it might as well have been the same colour. Pics (the first with crappy LED flash, the second without): You can just make out the colour difference between the blue-greys in that bottom panel with the three thrusters. The middle portion is the new purple-grey, and the second half is just the new purple-grey (with the original purple so you can see the difference). Again, all the parts will be one colour eventually. Colour mixing guide: Violet: 4 parts Purple: 1 part Neutral Grey: 4 parts Tire Black: 1 part


-
Bandai 1/72 Scale Macross Frontier Model Kit Thread Ver.3
mickyg replied to azrael's topic in Hall Of The Super Topics
I don't know, kinda looks like Alto and Michael's mutant love child! It's cool but man is it busy! -
Hey, did you mean the colour or the grey on purple scheme? Because the "scheme" wasn't intentional. The whole part will be painted whatever colour I decide on. The half grey/purple was just me getting an idea of the difference in colour. As you can probably tell, I'm still trying to decide what I'll do. The anime shows a fairly dark grey with a purple cast to it, and I'm not sure I like that. I'm going for something that looks believable. Maybe the anime colours would be but I'm not going to be convinced till I actually see it!
-
Not sure what you mean. Where did I do that? Oh, are you talking about the gun? The dullcoat folowed by gloss was kind of an accident. If you're referring to something else, I'm a bit lost. But if you're wondering what would be the rational behind dullcoat, then gloss. It comes in handy if you want to drybrush, as drybrushing over a dull surface is easier than a gloss (sticks better). You could then go over it with a gloss, if that's the effect you're after. I don't know what that effect would be though! Most of what I'll be doing though will likely be gloss first, then flat or semi over the gloss. Gloss is easier to apply a wash over then wipe off, whereas a dull would tend to stain when you wipe it off. Gloss is also necessary for decals to look like part of the paint work. If you apply a decal over a matt finish, you'll likely get tiny bubbles under the surface, which will make the carrier film appear opaque (also called silvering). So you usually gloss, apply decals, then put whatever matt, semi-gloss, or gloss over that to seal it all in. Anyway, hope that answers your question.
-
Thanks Honkhet! No, TV max isn't intentional. Probably subconscious though. The more I look at it, the more it starts looking green. Crap! I guess nothing ventured, nothing gained, right? I might try doing a bit more of a blue cast to it. I think midnight blue is responsible for the green component. I might go neutral grey mixed with bright blue next time. Or just regular blue. We'll see how it looks with that.
-
I played around a bit today with colours for the super parts. I thought a grey with some blue cast to it would be appropriate. I'm not sure I like it yet so wanted people's opinions. Of course my crappy phone cam isn't going to help here. I've colour corrected the shots but they're still too purple with flash and too grey without. The real colour is somewhere in between what you see here. Oh, and because I know I'll forget, I'll put the colour mix here. At least I know it's here and not committed to my (terrible) memory! 5 parts Neutral Grey, one part Midnight Blue, one part Blue, one part white. The "parts" here were drops off the end of a toothpick. Hard to believe only 8 drops of paint, with some thinner covered that much of the booster part. And I had some leftover! I've put the blue parts in the shot to offer some contrast. Opinions? Oh, and if I decide I hate it, I can wipe it off with windex. I love that aspect!


-
WOW! Knowing how small some of those details are, I'm just blown away! Welcome to Macross World! I'm sure you're about to get a lot more comments.
-
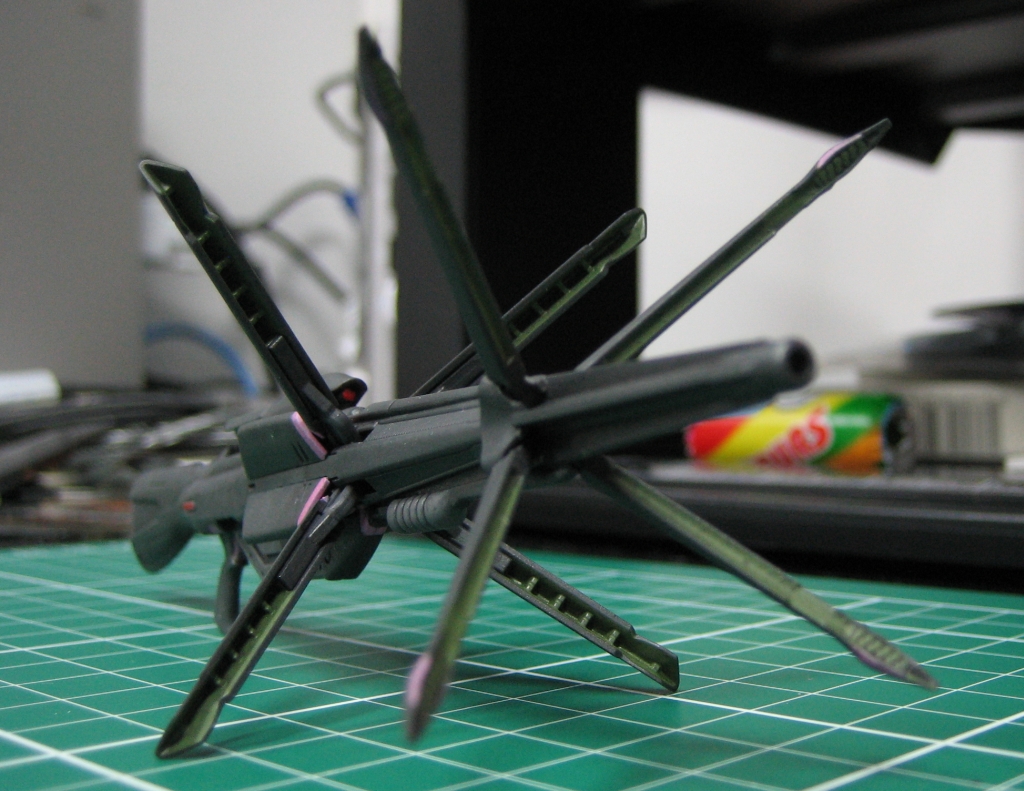
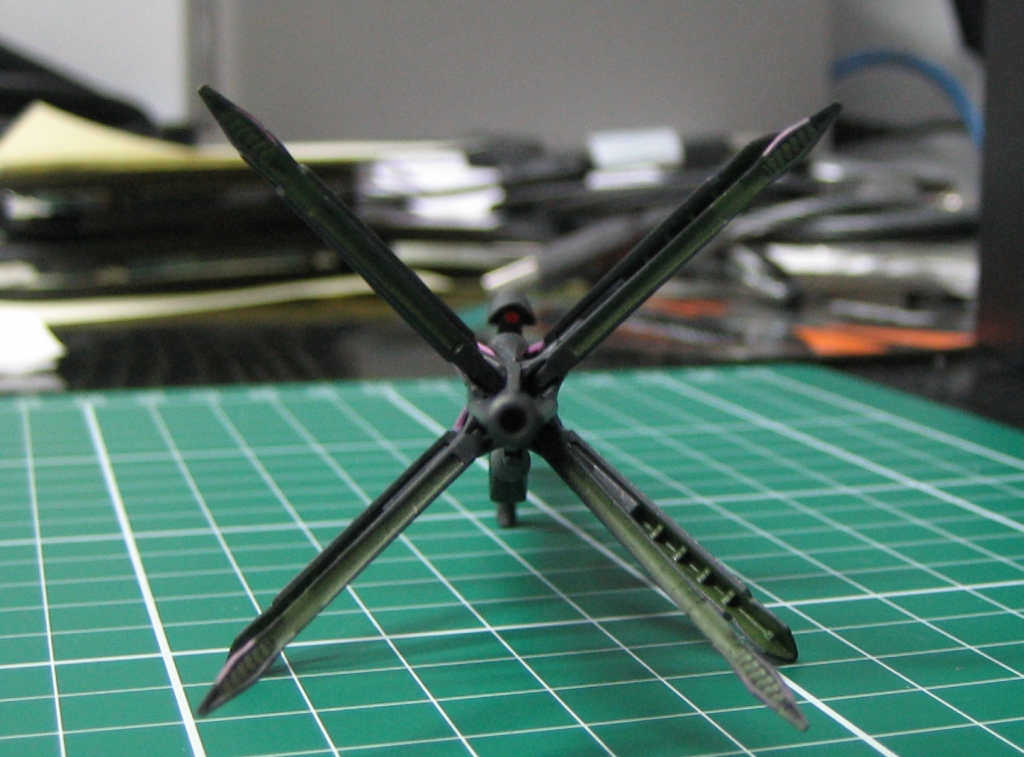
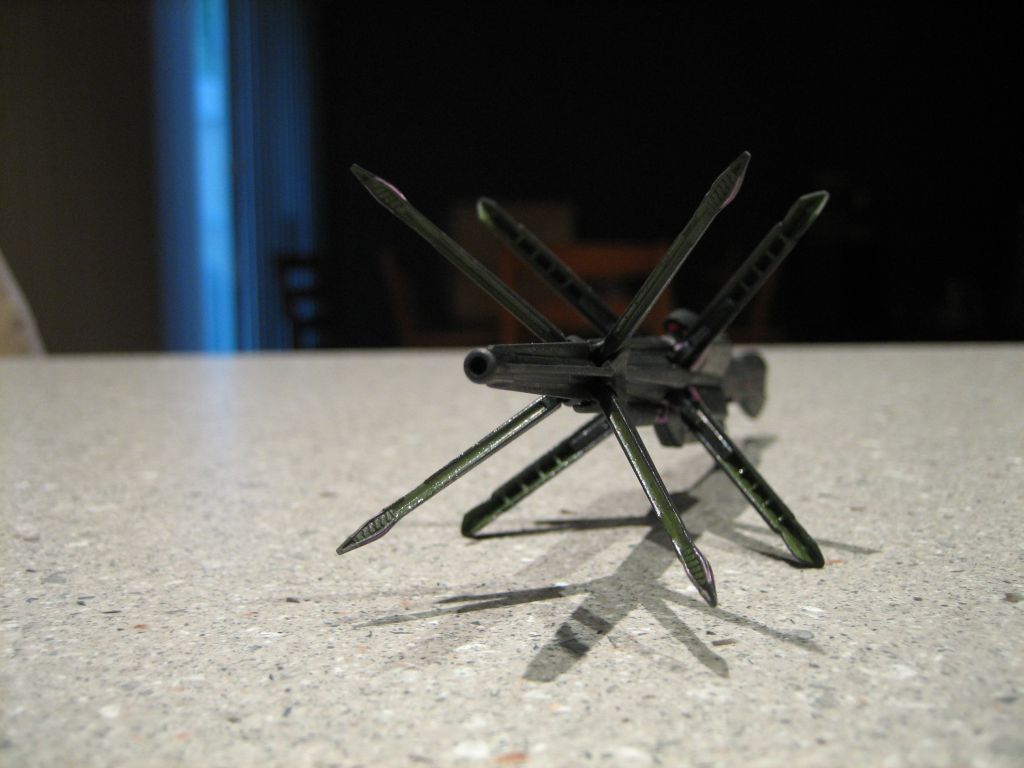
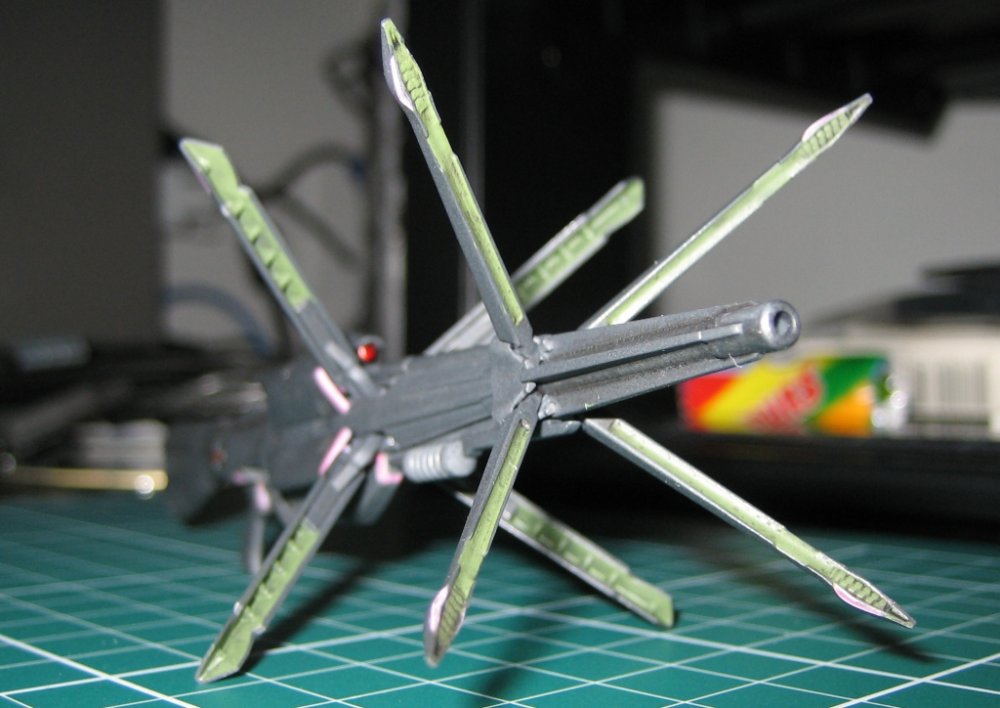
I had some success with the gun this weekend. I managed to wet sand the wrinkles out of the top gloss coat and then sprayed it down with the dullcote (flat) again. I know, I know, what am I thinking using the dullcote again?! I had a hunch I wanted to test though and it seems I proved it right! The dullcote is not the problem, it's the much harsher, highly lacquer based gloss coat that was reacting with the dullcote. So I'll relegate that gloss to something that I don't care about in the future. I'm still looking for a less reactive lacquer thinner for my Testors clear coats I've got. I think there will end up being something that'll work, just have to keep checking my local hobby stores for something. Maybe Gunze mr colour thinner? I think that's all I've seen at my local stores here in Australia. Anyway, here's some pics of the gun in its almost finished state. I've applied a black wash but it's mostly lost in the darker paint. The parts not covered by the tines were what got dull coted. So the insides of the tines, and the parts directly underneath are still glossy. I'll give those a quick spray as well and then the gun will be finished.

-
I'm definitely interested - the cockpit parts and sniper rifle especially! Any idea what sort of price we're talking?
-
I had a darker grey in mind but not quite german grey as I've seen done on an Ozma S floating around here somewhere. Not sure about metallic though. I think that might potentially clash with the metal inner frame parts. I'll experiment a bit. Still a few weeks off before I get to that point.
-
That one hit me too. Main site was up, even the forum was up but no topics came up and any searches/"updates since last visit" stuff didn't work. I noticed it about 40 minutes before your post, Shawn. And it lasted for what I thought was an hour. However, I noticed it was working only after reloading the page. So it's possible the problem was resolved and I didn't know about it until I refreshed.
-
I don't have specific times but the forums and even the main site haven't been available for at least the last 30 minutes. I was getting another IPS error message when going to either the main site or the forum site in Firefox.
-
Hmmm... I'm not sure why you'd be getting those results. There are a couple of things that come to mind though. First, the consistency is important, but I've had reasonable luck with too thick and too thin so I'm not sure that'd be your issue. But just in case, too thin is probably better than too thick. But too thick just means it's messier, in my experience. Second, I find too thin dries quicker and gives a better result. I typically use maybe a bottle cap worth of thinner to half a pea sized glob of artist oil paint. Mix well and dab it on. The brush I use is a crappy testors angle type - about the worst brush you could imagine but the pointed tip (if you can call it that) helps the solution to "drip" into the lines well enough for my liking. Point being, don't worry about your brush too much! Anyway, the other thing I've noticed is the cotton swab method tends to be a bit too good. In other words, the cotton conforms to the part probably better than what you'd want, removing more from the grooves than is ideal. I must say I haven't used it much and prefer to use a paper towel instead. However, the engine nozzles are pretty irregular and might be harder with the paper towel approach. Main point - getting the oil to dry is probably what you're aiming for. Too thick and it'll take days to properly dry. Too thin and it will take hours instead and might be lighter than you'd expected but no big deal. I've had the odd occasion where I left the paint on too long and it was starting to set. Just a bit of thinner on a paper towel got it to come off perfectly. Sorry, that probably asked more questions than it answered! Just to make that whole post totally irrelevant (), whatever you're doing looks great. So if you don't mind the methods you're using now, I see no real reason to adopt the oil one unless you just want to expand your skills a bit.
-
So what colour did you use on the boosters? I really like the effect! Is that just silver with a black wash? And what sort of wash? I originally thought the bronze look of the boosters was really cool when I got the super pack but now I think it looks pretty unrealistic. Going the silver colour seems to be a lot more believable. Try out the purple future mix and see you think. If you don't like, you can always windex it! Or if that's not strong enough, just ammonia works too. I do wonder if it's going to cover up the swirl marks in the plastic though.
-
Wow, that's looking great! You'll have some followers, I'm sure, as popular as this kit is! I'm considering a different approach to the missiles on my super kit. You know how the parts are already molded in colour, right? I'm thinking I'll paint the whole thing white, then wash the base with grey/black, then since the paints I'm using are acrylic, I'll just use windex and a cotton swab to remove the paint from the tips. I'll come back with a clearcoat, black wash the tips and it should look pretty good. If that fails, I'll use your method! Just have to get a red gundam marker first (which is probably why I'm opting for this other method in the first place)... Question: are those boosters painted or just molded that colour? They look a lot darker (more realistic) compared to the super parts versions.