mickyg
-
Posts
2632 -
Joined
-
Last visited
Content Type
Profiles
Forums
Events
Gallery
Everything posted by mickyg
-

MickyG's Yamato VF-1S Unpainted, Unassembled Kit Build
mickyg replied to mickyg's topic in The Workshop!
That is most appreciated! Nothing quite like the real thing for reference and someone who's worked on the real thing is icing on the cake! Thanks heaps! Any chance you ever saw the aggressor scheme I'll be doing? I'm guessing the cockpit would be the same - far too much trouble to repaint the interior to simulate an enemy plane! -
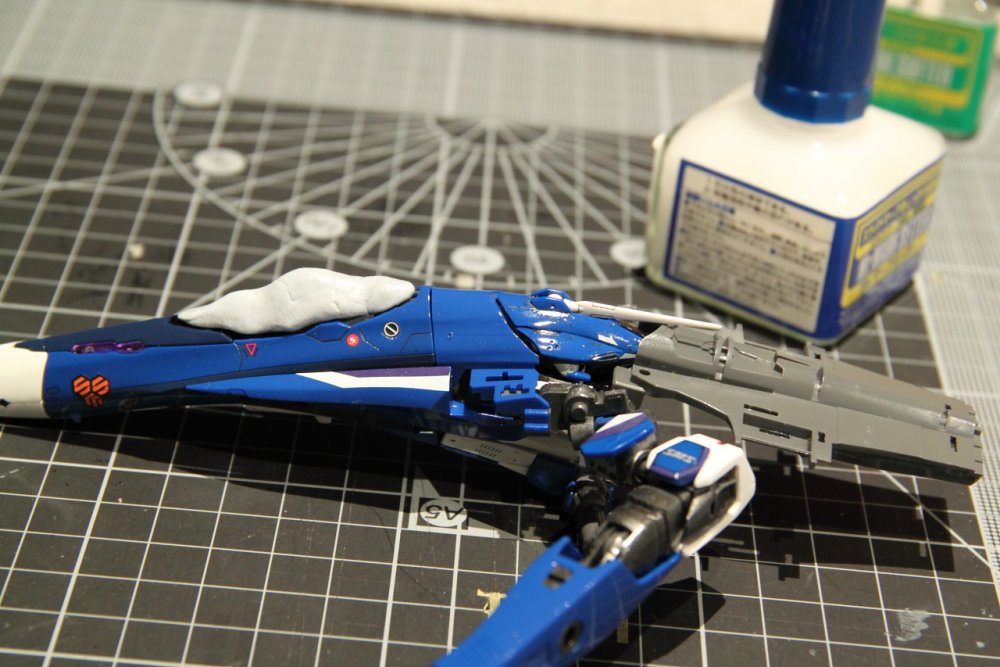
Nothing like tiny updates... Painted the white tips. Twice. Yeah, the first time went on not so smooth so I figured I'd spray some of the same colour, thinned with windex. Bad move. Blotchy mess. Actually it looked fine until it dried. Anyway, wiped off the white with a paper towel dampened in windex. Worked fine! Boring.... Whoo hoo! And for the first time, I managed to tear a decal with masking tape. Tamiya masking tape, no less! And this, after I sprayed it with a clear coat. I thought the clear coat was meant to protect the decals. Oh well, nothing I can't touch up with a brush.

-
Doh! I forgot to paint the ankle disks! And here I thought I was making progress...
-
Did you use super glue or model glue? Model glue won't work on the ABS parts in the kit and I think the joint parts are ABS. Loving your tips so far man! Thanks for putting the effort into your pics and documentation - there will be some very grateful people out there reading this for a long time, I expect!
-
I think 21 was last week - just don't have any comments on it yet (and I'm too scared to do a review ) We should be watching 22 in a couple days (tomorrow for me but I get friday before most of you).
-
MickyG's Yamato VF-1S Unpainted, Unassembled Kit Build
mickyg replied to mickyg's topic in The Workshop!
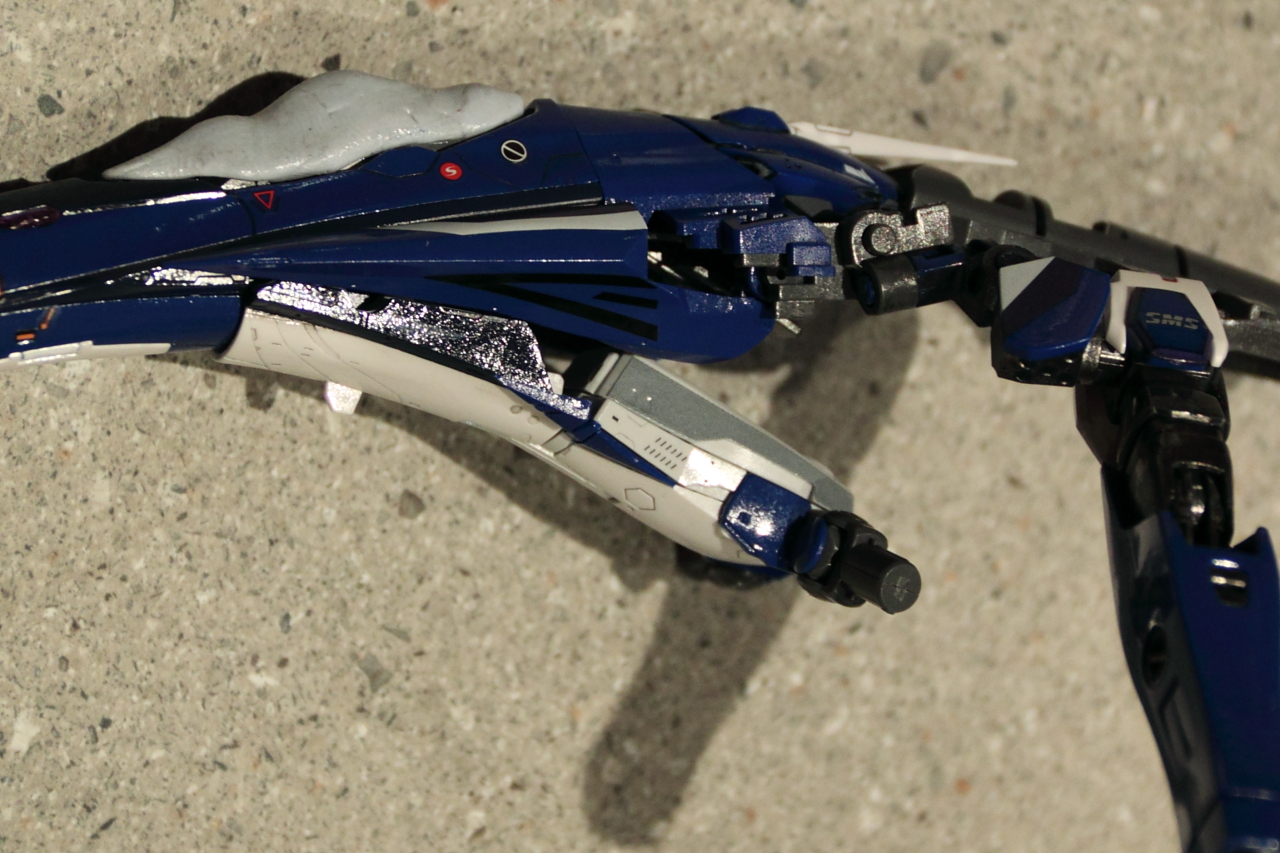
Precisely what I was thinking! I like the idea of making this similar to other aircraft at the time. Within reason though, I mean there isn't a HUD projector or glass, for instance - do I want to add one or go with the futuristic DYRL style where everything is holo projected onto the inside of the canopy? I do like the idea of adding missing details but I'm not sure how crazy I want to get. There is an awful lot missing, after all! -
MickyG's Yamato VF-1S Unpainted, Unassembled Kit Build
mickyg replied to mickyg's topic in The Workshop!
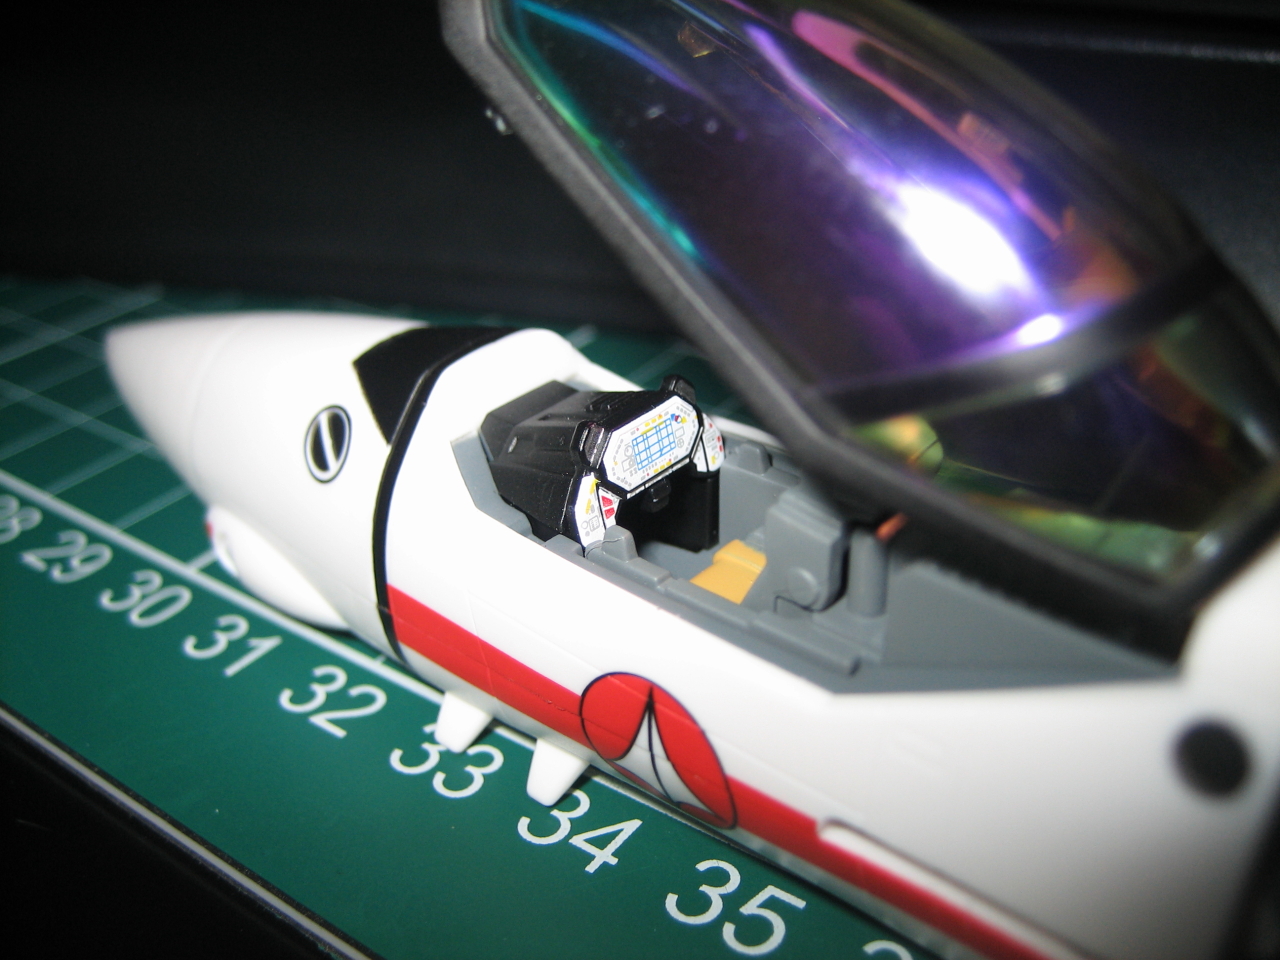
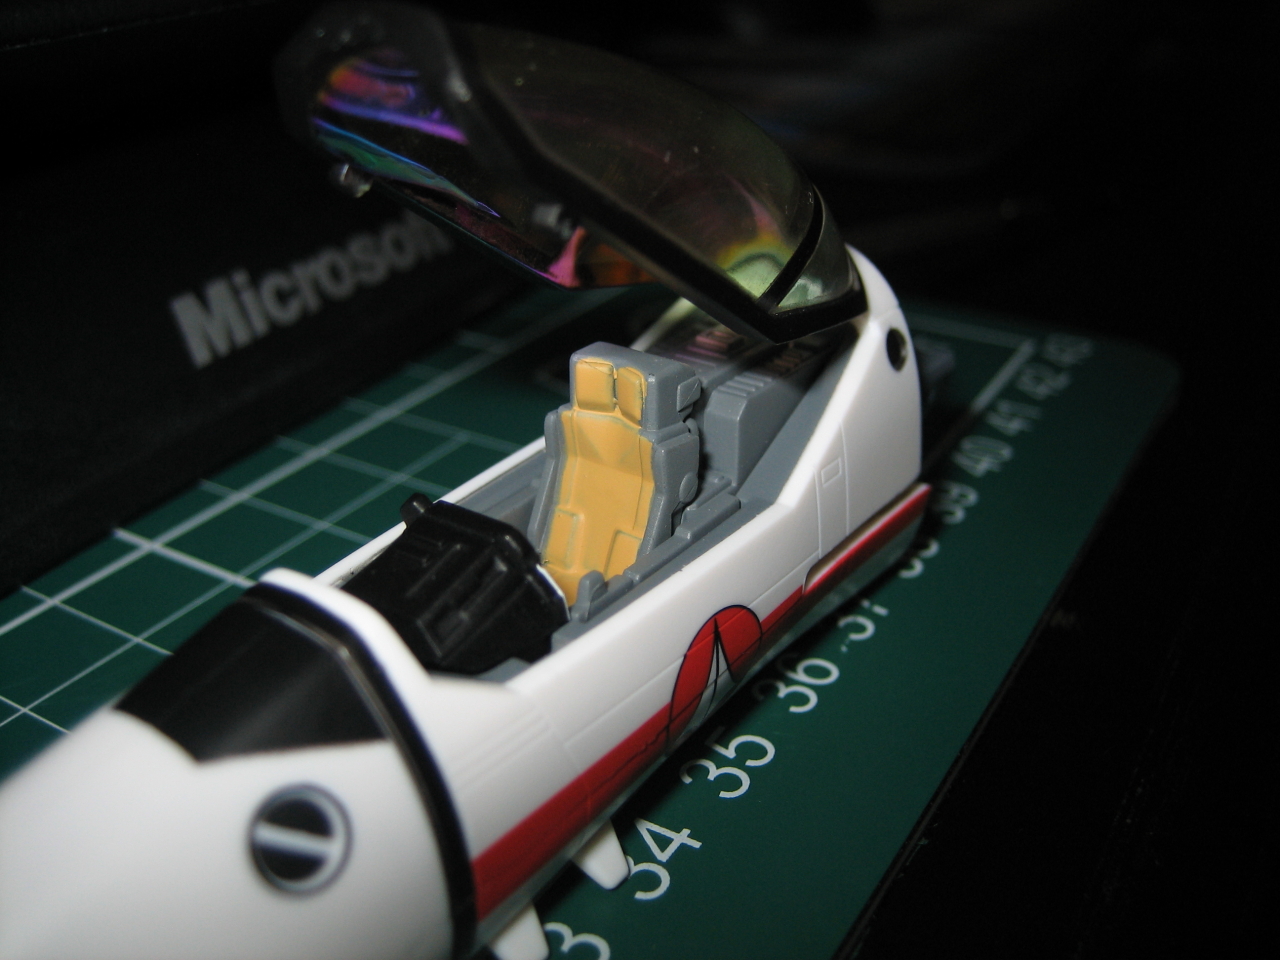
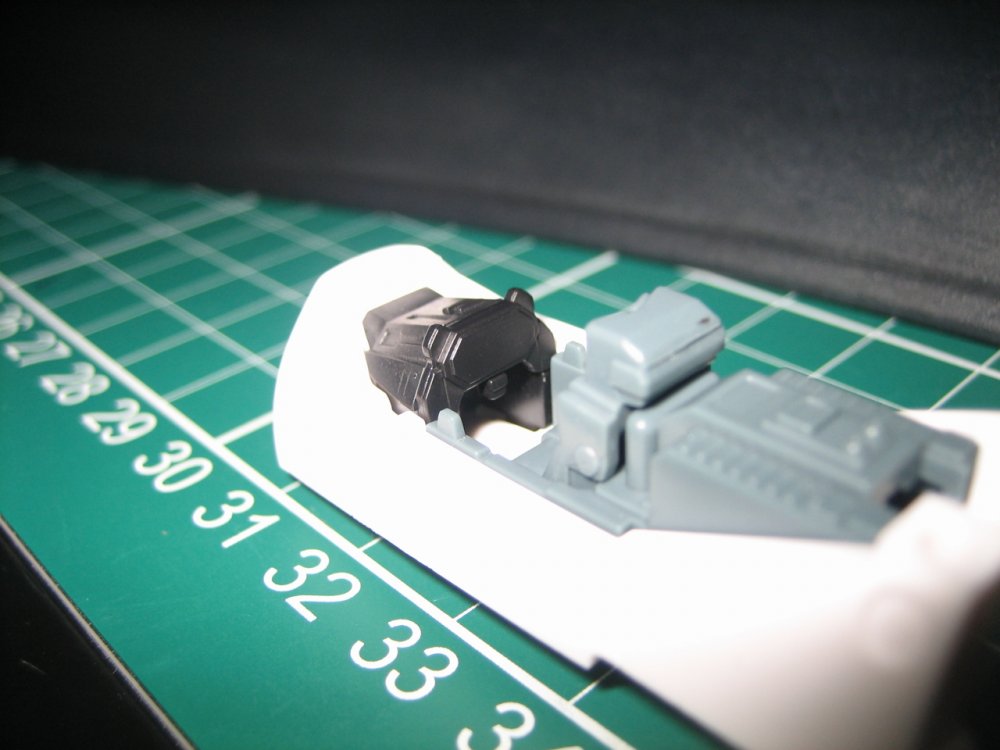
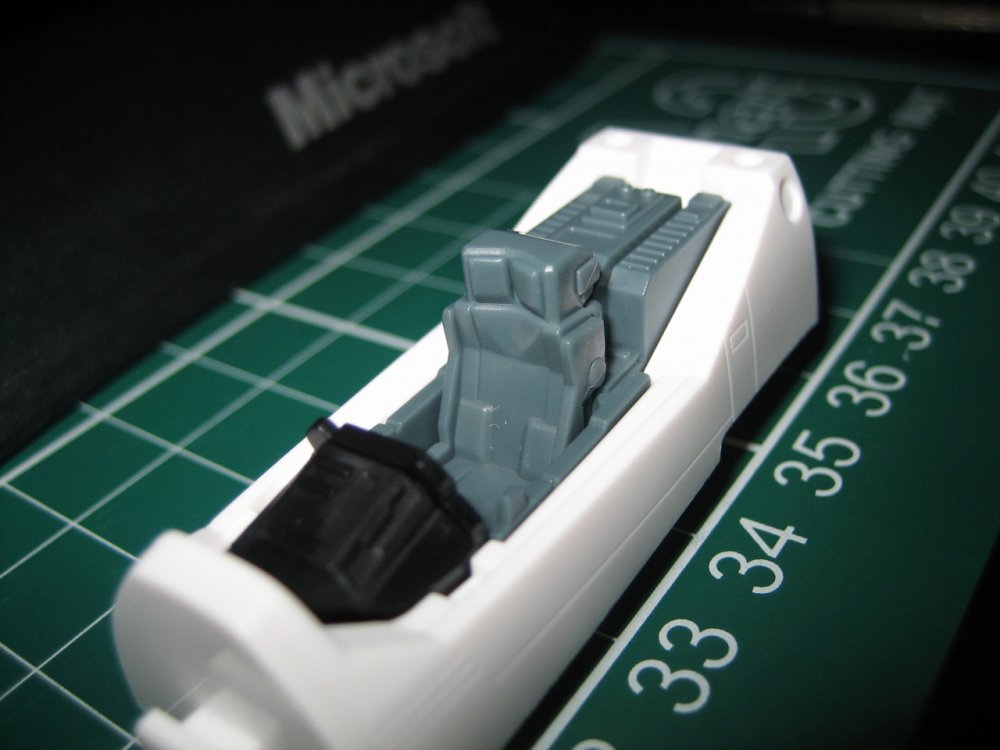
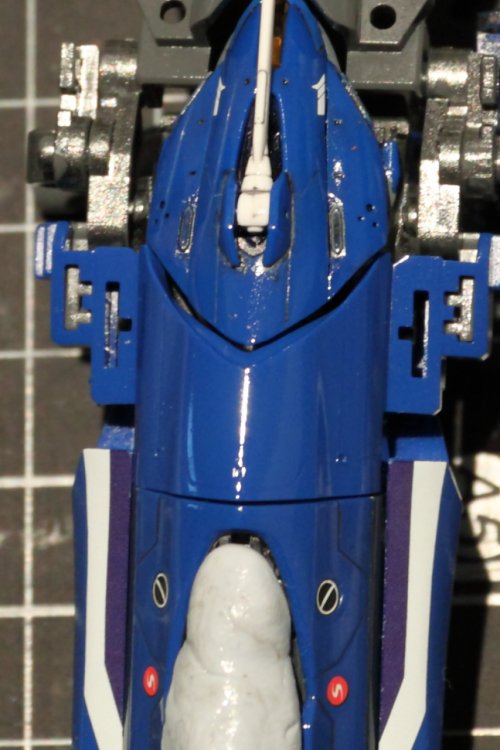
I assembled the cockpit/fuselage section yesterday, to get a feel for what will need to be painted and how it's going to fit together. It's not bad but I really take for granted the painting on this toy. Here's a comparison between my 1J and the unassembled: So I'm going to have to paint the inside of the fuselage section in a dark grey. I'll likely paint the grey stuff too because getting a perfect match will be nearly impossible. The instrument cluster and cowl appear to be black on the completed toy so perhaps I'll stick with that. Then again, I should really look to some production aircraft to see what the typical scheme really is. After all, there are hardly any "rules" to how this should look, right?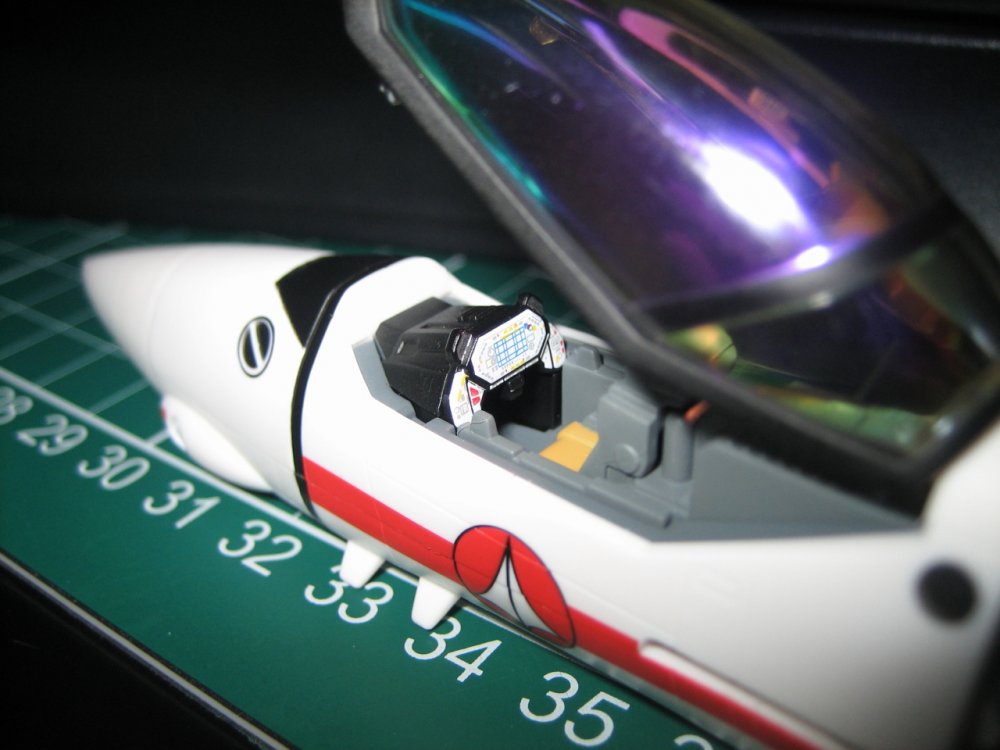

-
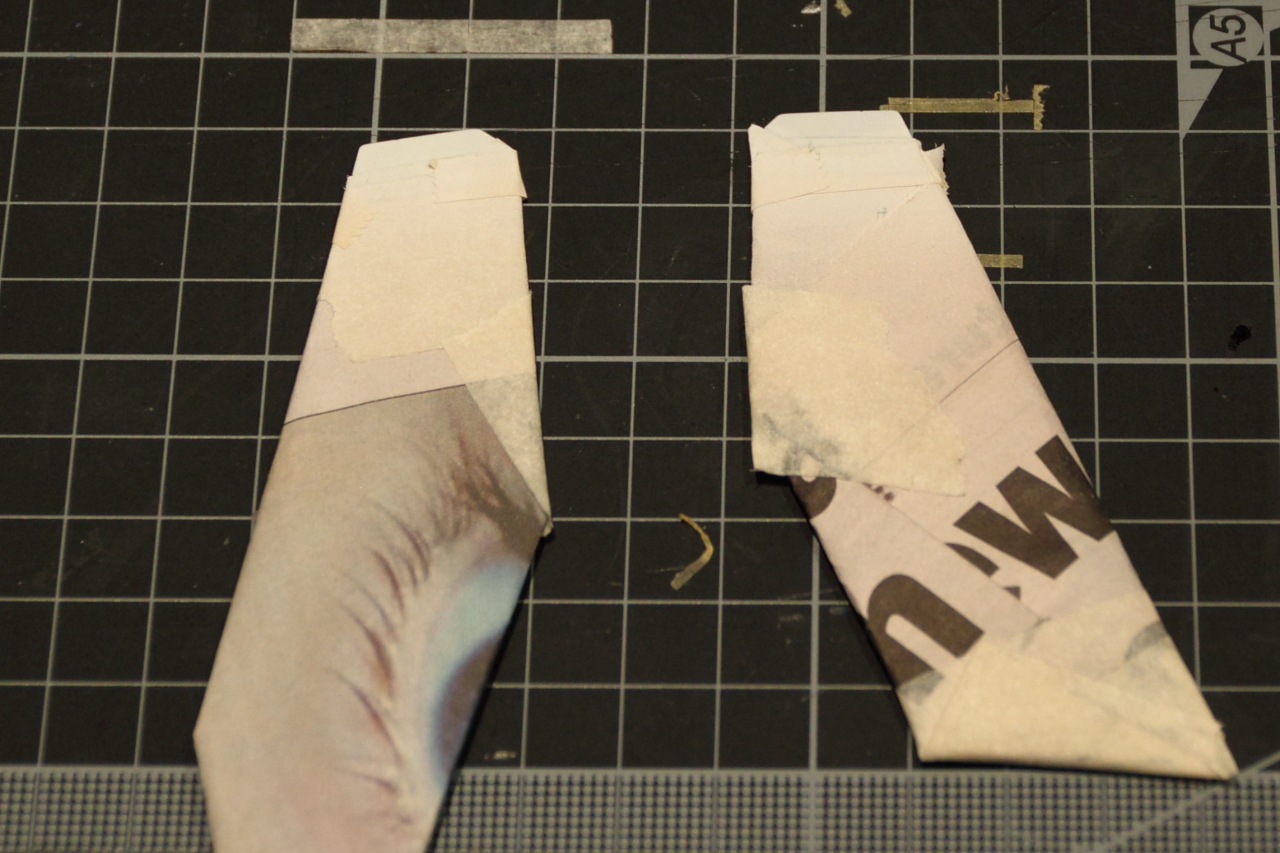
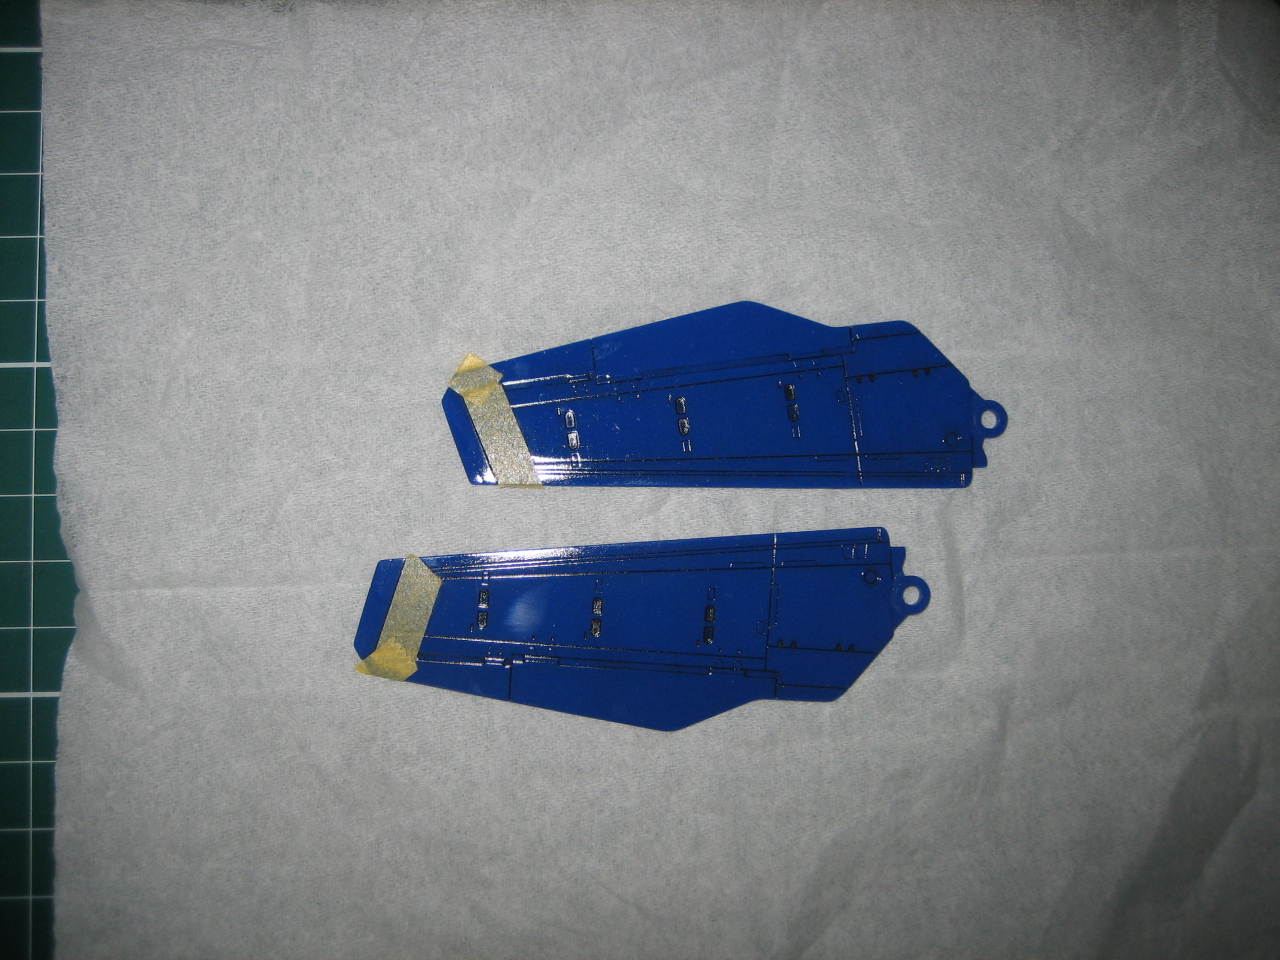
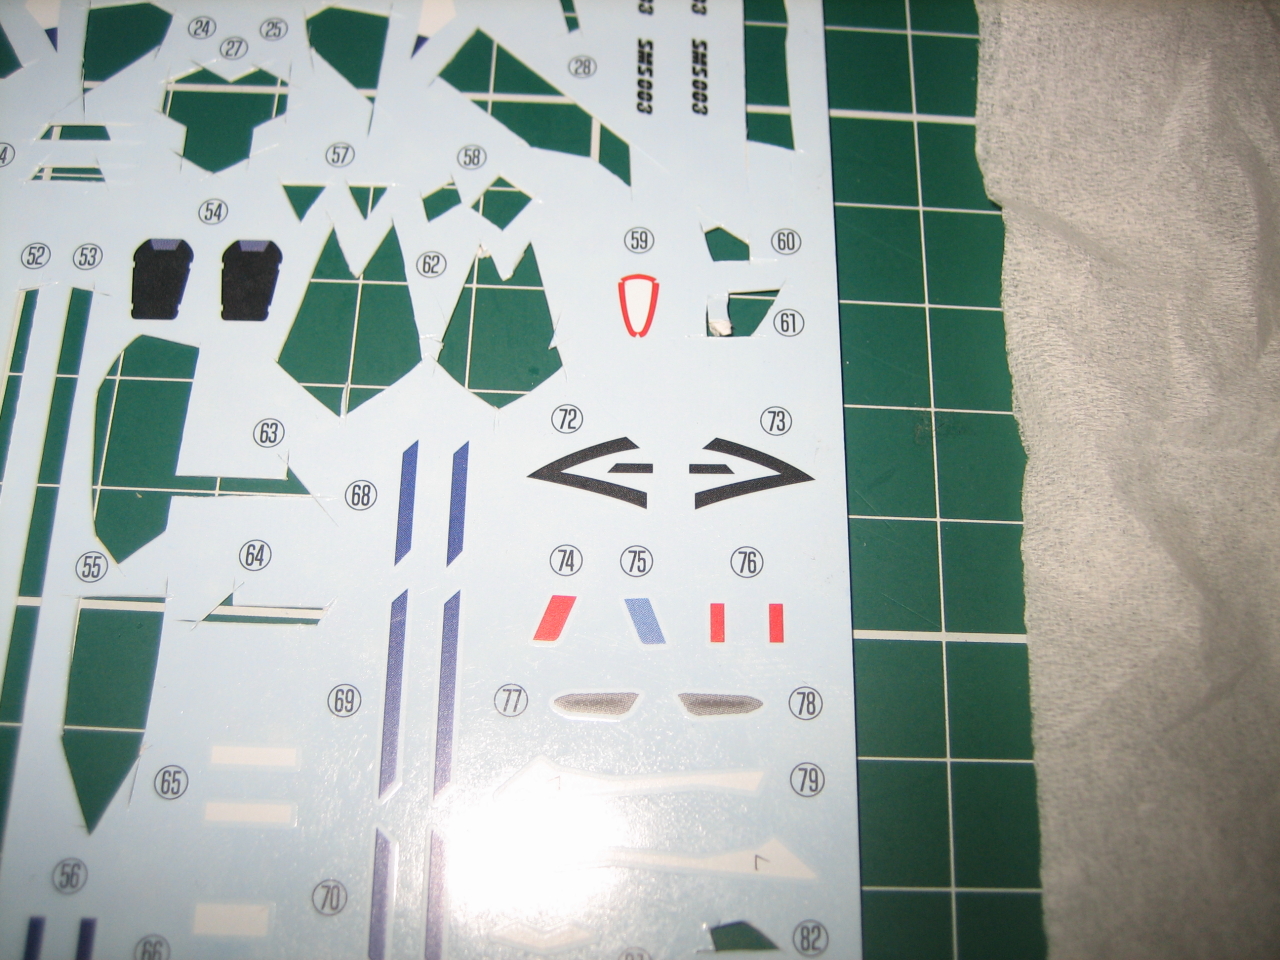
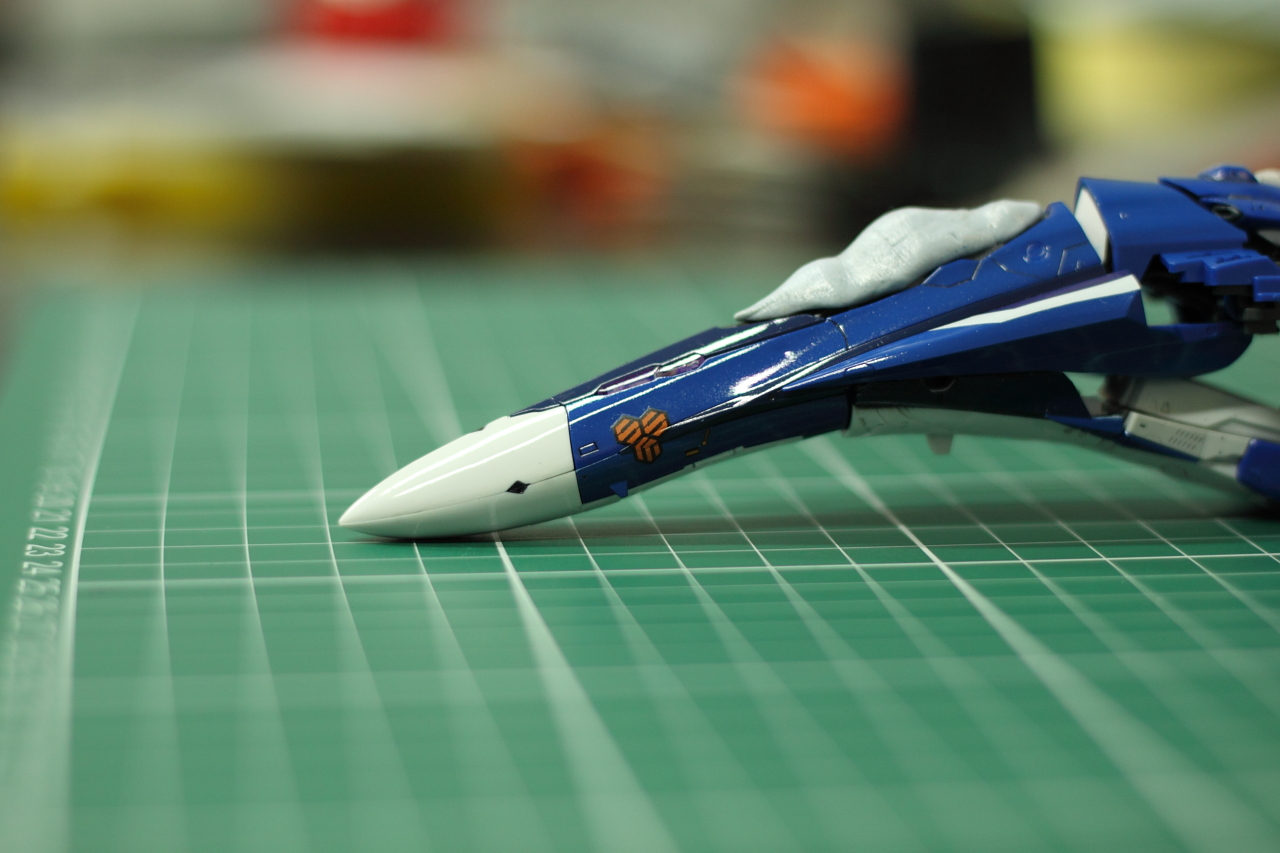
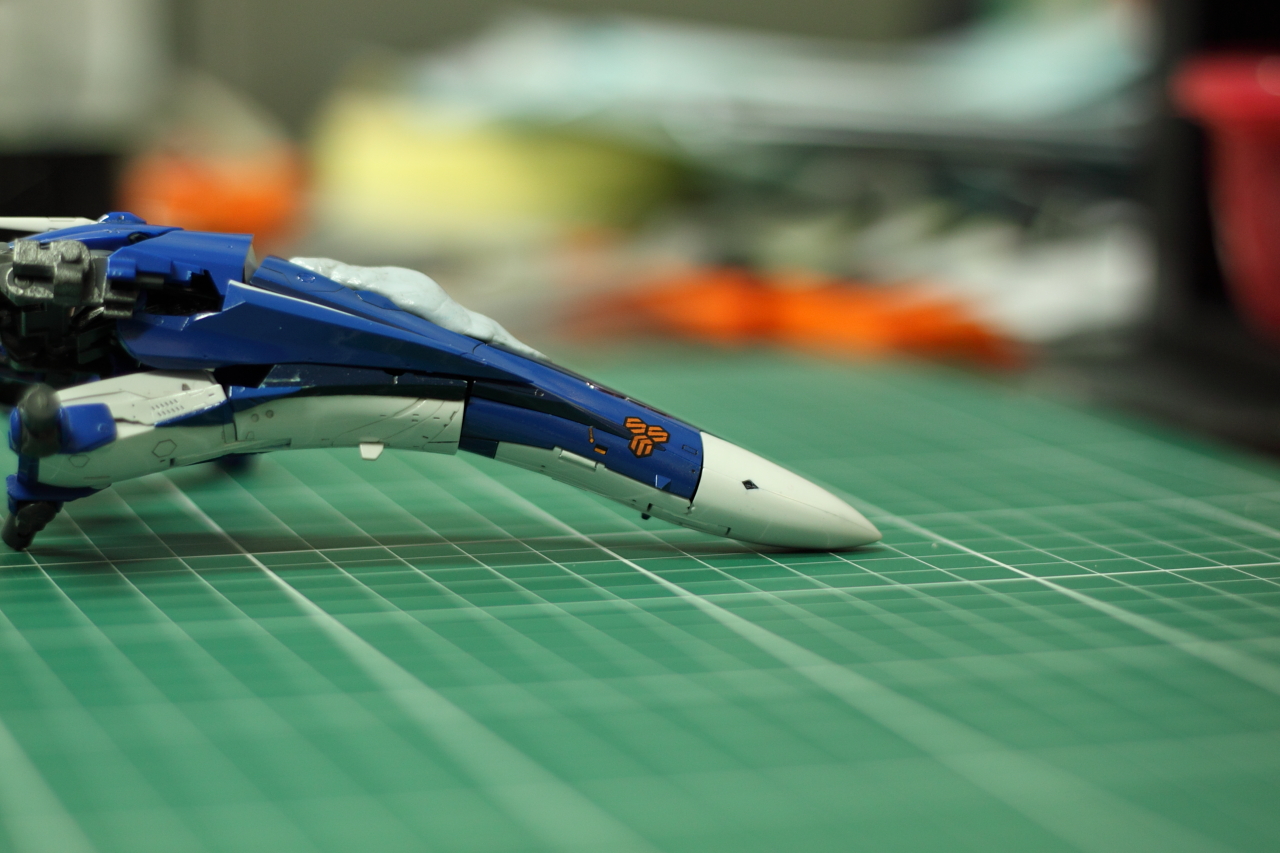
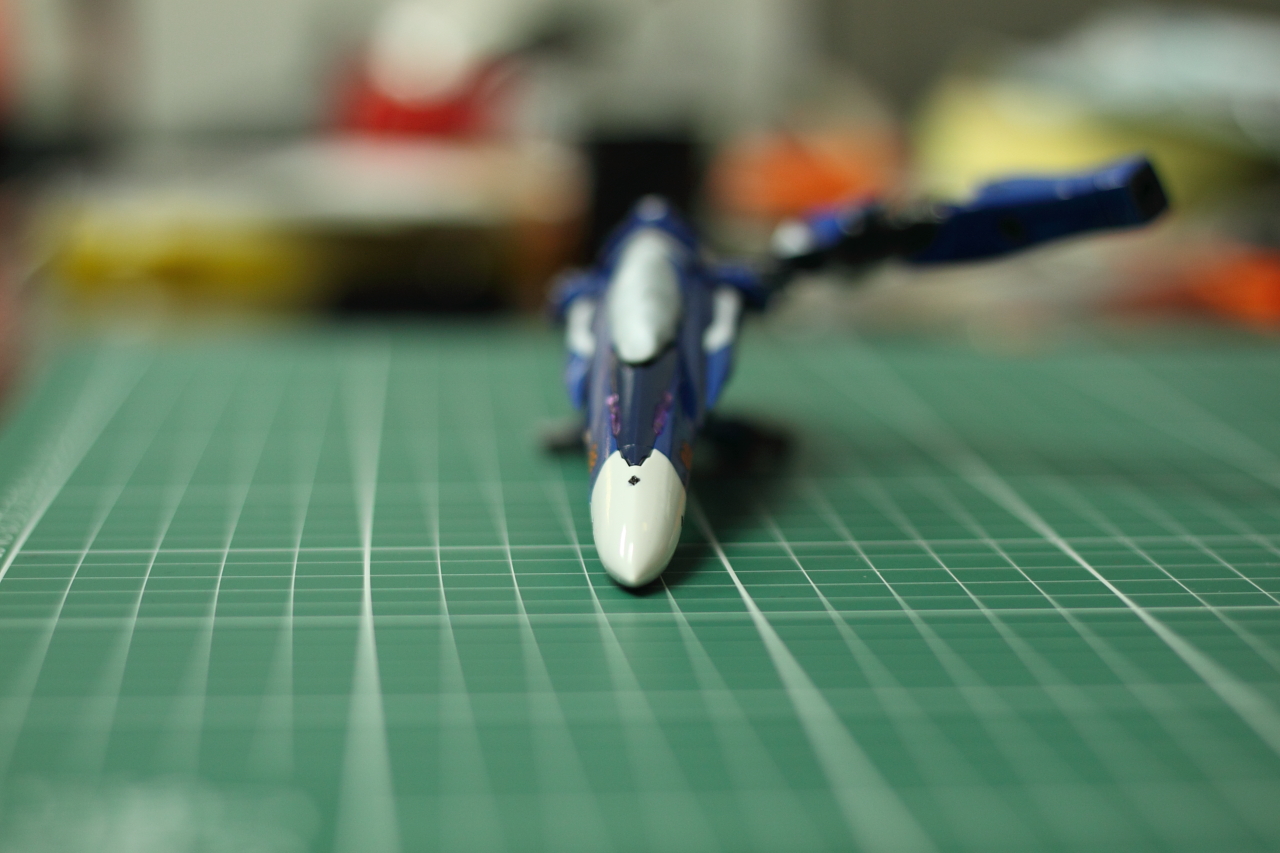
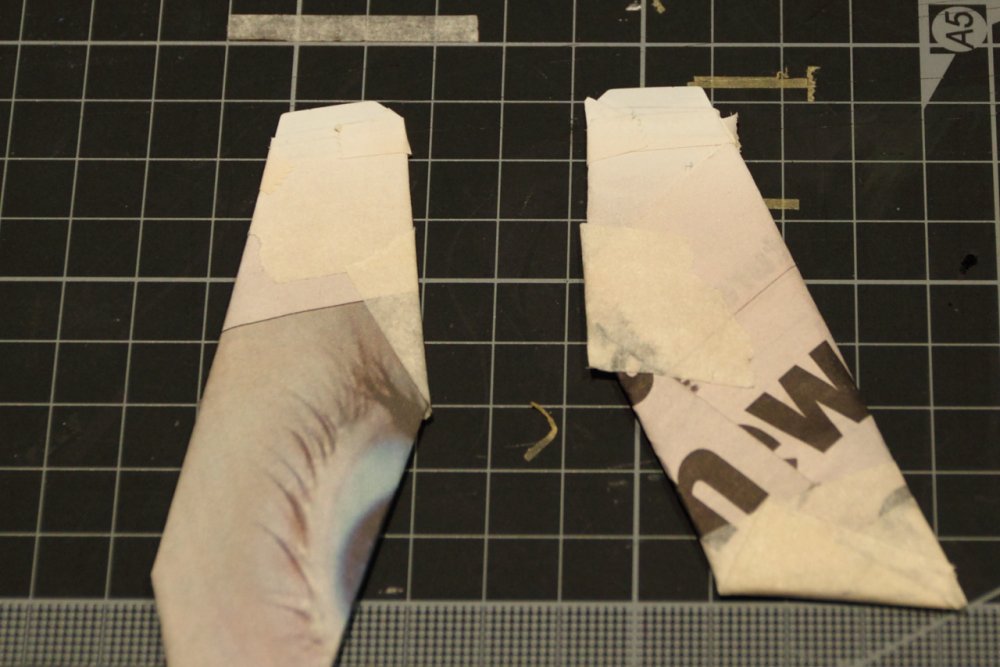
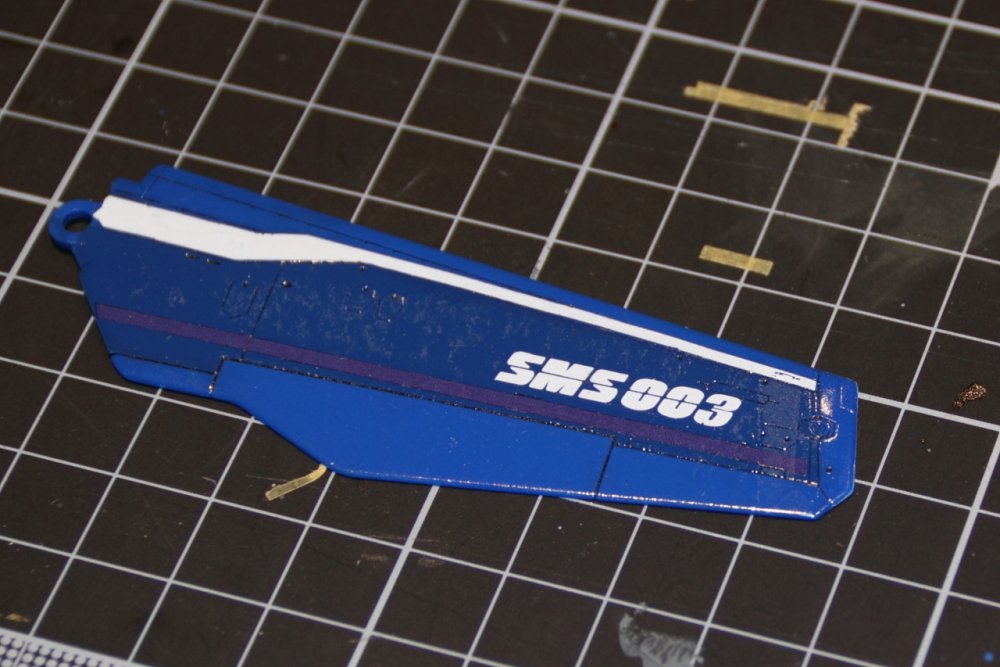
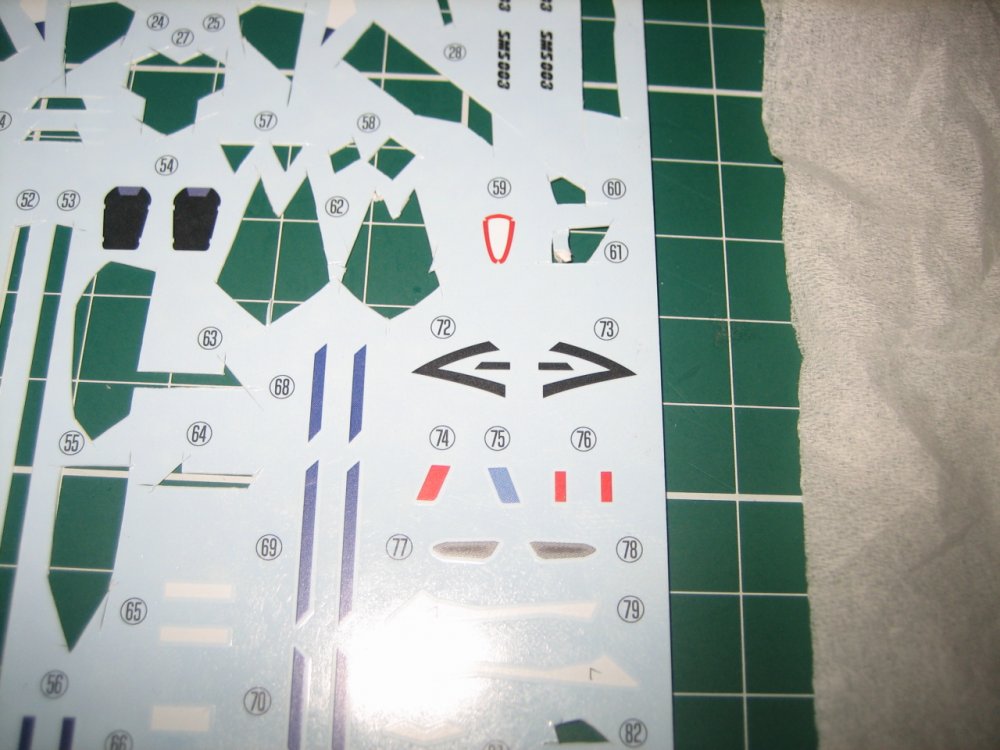
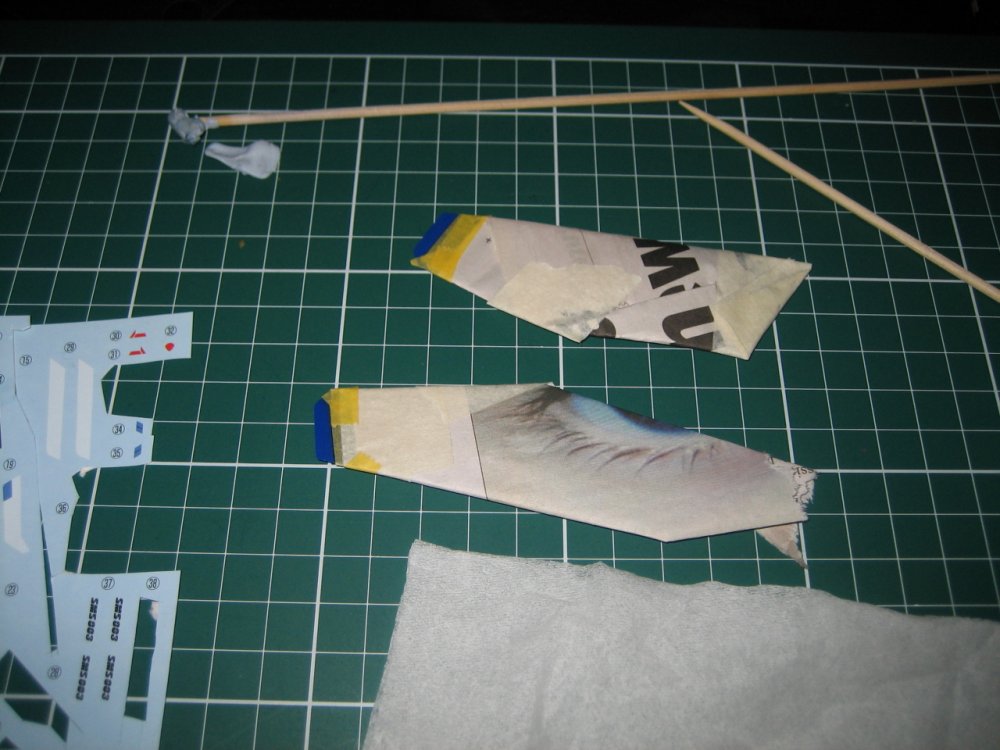
Got the last 4 decals on yesterday!!! That leaves maybe a few for the super parts (though I can't remember which, off the top of my head). Next is another clearcoat (think I'll go another light gloss coat), followed by a more semi-gloss final coat. I got to use more of my custom Jasmine Model decals on these last ones. I don't like the included Bandai ones, not because of the quality (that's well established) but because of their size and shape. The Jasmine ones are much longer, and to my eye, look more accurate to the anime. Bandai decals: What I did yesterday (intake marking and crotch grey piece): I still have the wing tip white areas to do (underside only) so these were masked off today. Don't know why I don't use newspaper more often. Saves me using up lots of tape!

-
Wait, I thought Iwata made one called "Revolution" I didn't know they made a "revelation" too! You've got me thinking about upgrading now! What version did you get, as I see there are quite a few variants in the Eclipse line. Or is that all just top vs. bottom feed differences? Oh, and now that I've asked that, what's the consensus on gravity vs. siphon feed (top vs. bottom)? I know the gravity feeds are easier for small amounts of paint and tend to use all of it instead of leaving a small pool at the bottom of the cup that can't be sucked up.
-
MW skin: Under construction, please be patient.
mickyg replied to Gunpod71's topic in MW Site News & Member Feedback
Looking really good everyone! Thanks for all the feedback and updates following the feedback. I work in IT myself and know this stuff is often a thankless job (of course, that's when you're getting paid to do it). Much appreciated! -
Thanks man. The photos are pretty kind though. There's some carrier film to be seen on the round decals (can't cut that off with my shaky hands!) but it should disappear after the next clear coat.
-
More decals today. I really hate the verniers but somehow these went on way easier than the ones for the legs. I did the typical approach I use for decaling (cut it out, soak it for a few seconds in hot water, apply with a soft brush, use more water if it's wanting to stick too soon, etc...) but this time I dabbed down a bit of Mr Mark Setter first, got the decal into position, then applied a small amount of Mr Mark Softer, let it sit for about 10 seconds, then soaked up the excess with a damp brush. Seems to have worked OK (although you can't tell from the photos). The rest of the decals were pretty straight forward. Pics:


-
Iwata seems to be the most recommended airbrush on these boards and I don't doubt they're pretty amazing. However, Badger seems to be a close second (WM Cheng has one-single action, I think). I'm using a Paasche VL and it seems OK to me. But I haven't done any detail work with it yet so it could be quite horrible with finer needles (of which I have but just haven't used). The Paasche and Badgers are a lot cheaper than the Iwatas. Check some ebay buy it now items for all three and see what you find. I tend to use Ebay for price comparisons more and more these days, as it seems like everyone's got an online store with a "buy it now" price. Hope that helps!
-
Good stuff man! And don't worry, you've never derailed my thread. I'm still all for your own though - I like the variety these boards offer!
-
What Lolicon said. Although, I haven't had as much of an issue with the solution beading up on the surface. I have experienced the "melted carrier film" feature though. It's good if you can plan for it. Not so great when it disolves and leaves this gooey mess around the decal though! Aren't GSI (Mr Hobby products) also the makers of Gundam paints, therefore the recommended supplies for all of Bandai's kits? Surely they wouldn't have made the decals with Mr Mark products in mind, would they?
-
I believe this is indicative of the situation
-
It's Mr Mark Softer (and Setter). I don't know that it's much different to the Microscale products but it at least seems to soften the decals somewhat. So in that regard, I guess it must be a little different. I've got no idea how it's going to go with my cartograph decals on the Hasegawa VF-1D I plan to build at some point (or any of the other regular Hasegawa decals on my other kits).
-
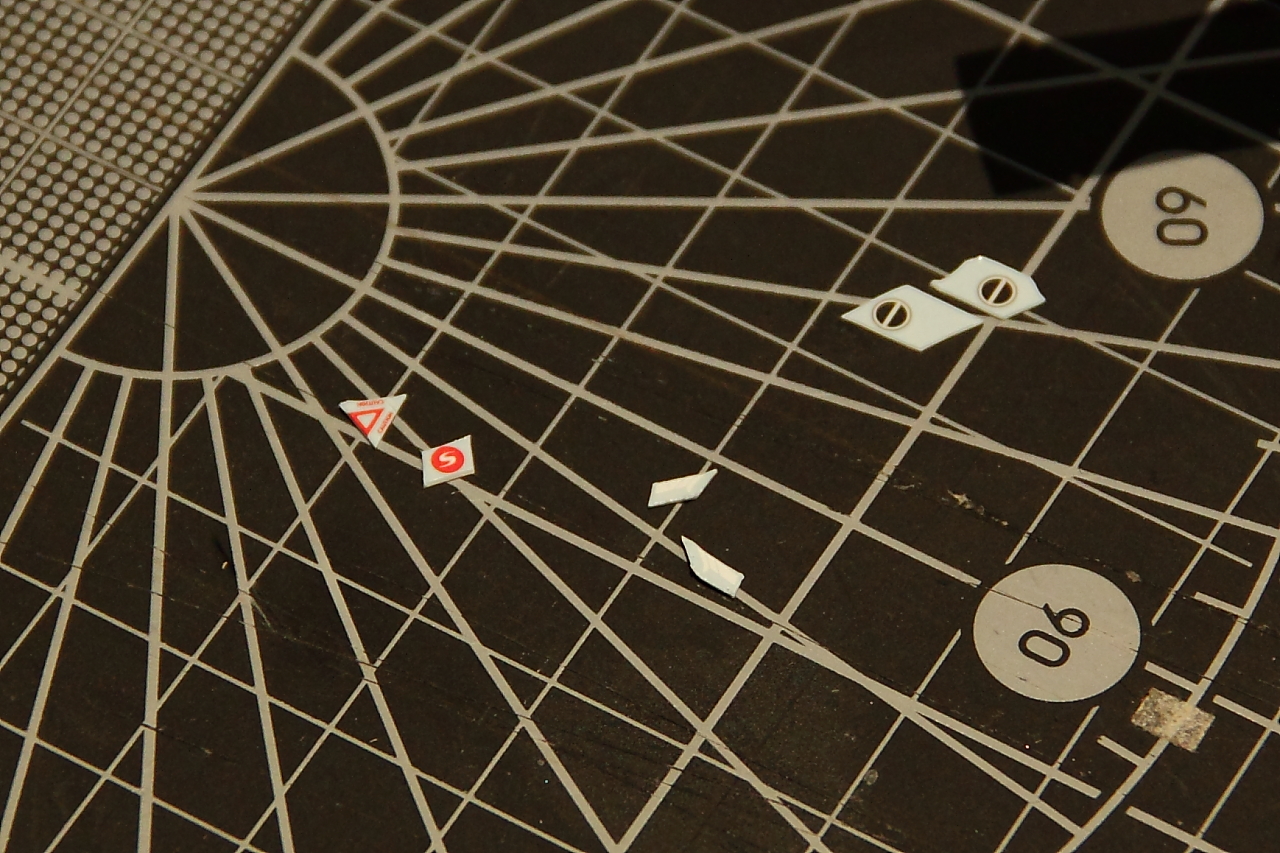
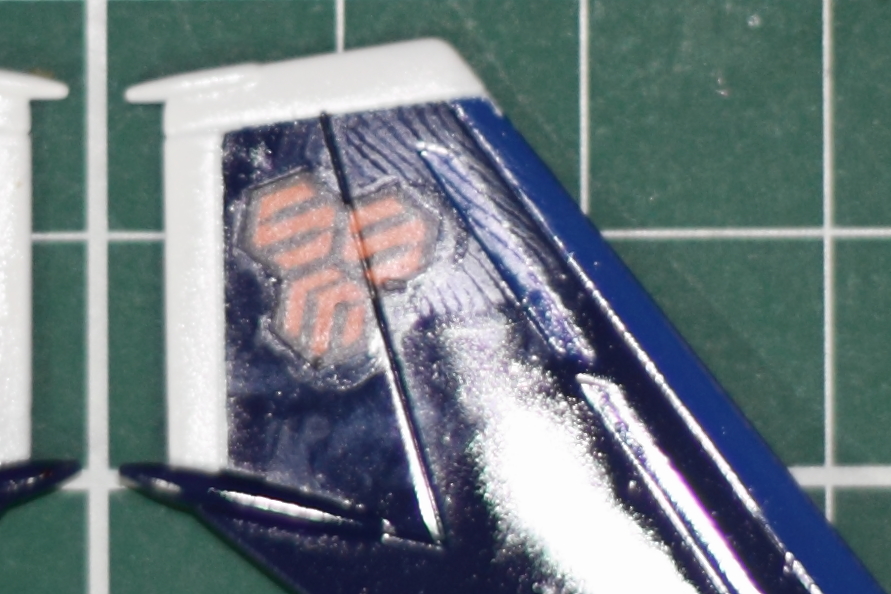
Got 4 decals on today. Whoo hoo! Can you find them?
-
MickyG's Yamato VF-1S Unpainted, Unassembled Kit Build
mickyg replied to mickyg's topic in The Workshop!
Only had time to scan the one page. Hope that helps. It looks like putting an LED in might not be too difficult. Anyone want to translate the second scan? It's an addendum in the manual. I think it's just pointing out an error in the length of the pin mentioned. It shows 13mm but should be 10mm, if I'm not mistaken. 20100512112337295.pdf 20100512112448806.pdf -
Great advice! I was planning to cut it but thought I'd wait till it was dry, then micro-sol it. It's worked in the past to soften the decal up a touch (enough to get it to sit down). Doing it before it's completely dry is probably much better though. My technique if you can call it that is as follows: cut out as much of the clear film as possible from the decal (not possible with complex shapes - well, not worth it to me, at least) dip it in hot to warm water for as long as it takes for the decal to change colour and the bubbles to stop coming out (usually 6 or 7 seconds with hot and longer for warm). sometimes let it sit on a paper towel, mostly just straight on though dab a bit of water on the part with a small brush hold decal with sharp tweezers and use said brush to slide decal into position dab on some Mr Mark Setter and let it soak in for a few seconds until it isn't all beaded up on the surface reposition the decal with my brush when it's in place, dab away any excess setting solution if it's not sitting down into the recesses, apply a bit of Mr Mark Softer and "push" the decal into the recesses with my damp brush As long as I make sure the softening solution doesn't stay wet on the decal (sitting on top and not actually soaking in) it doesn't damage the decal. Let it sit more than 20-30 seconds with it looking wet though, and you're in for a ruined decal! So I always let it sit for 10 seconds or slightly more, then soak up the excess with a damp paint brush.
-
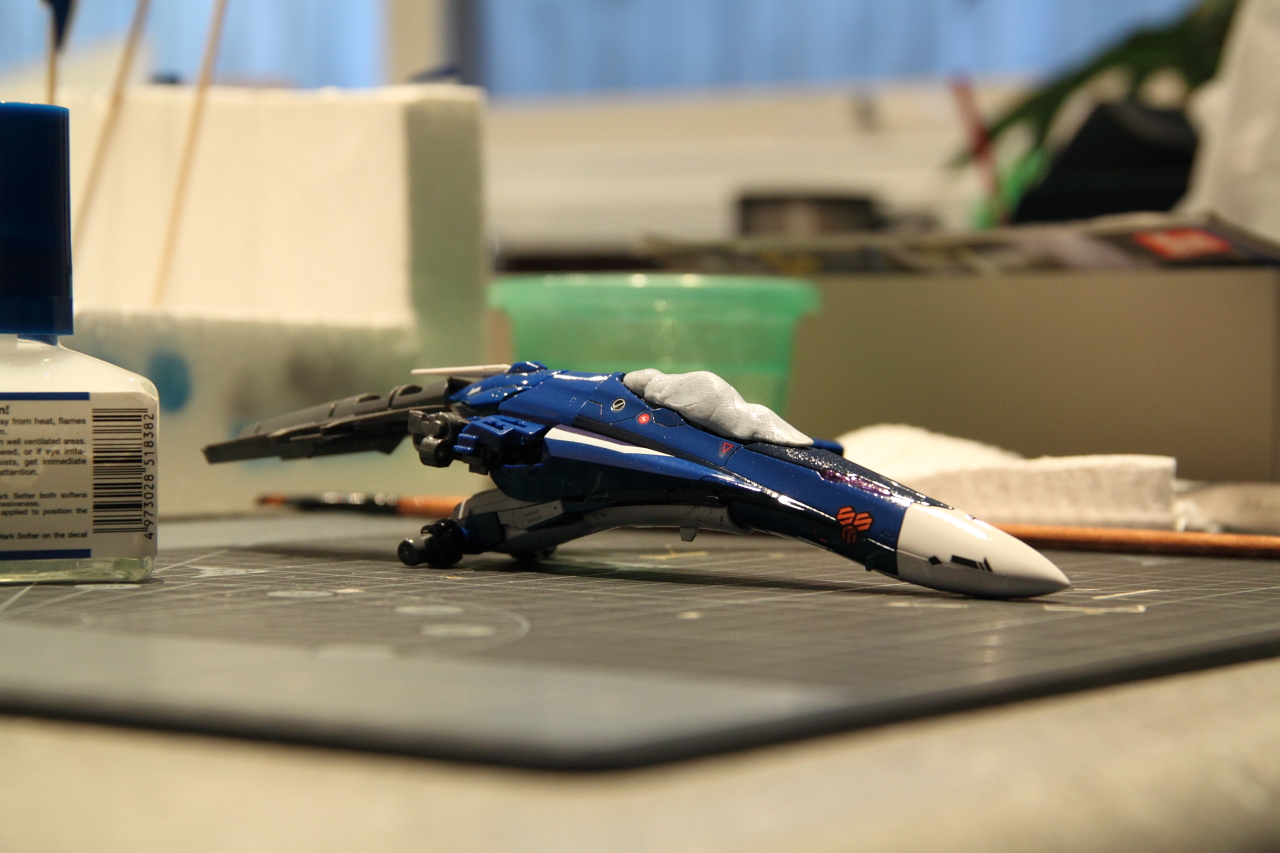
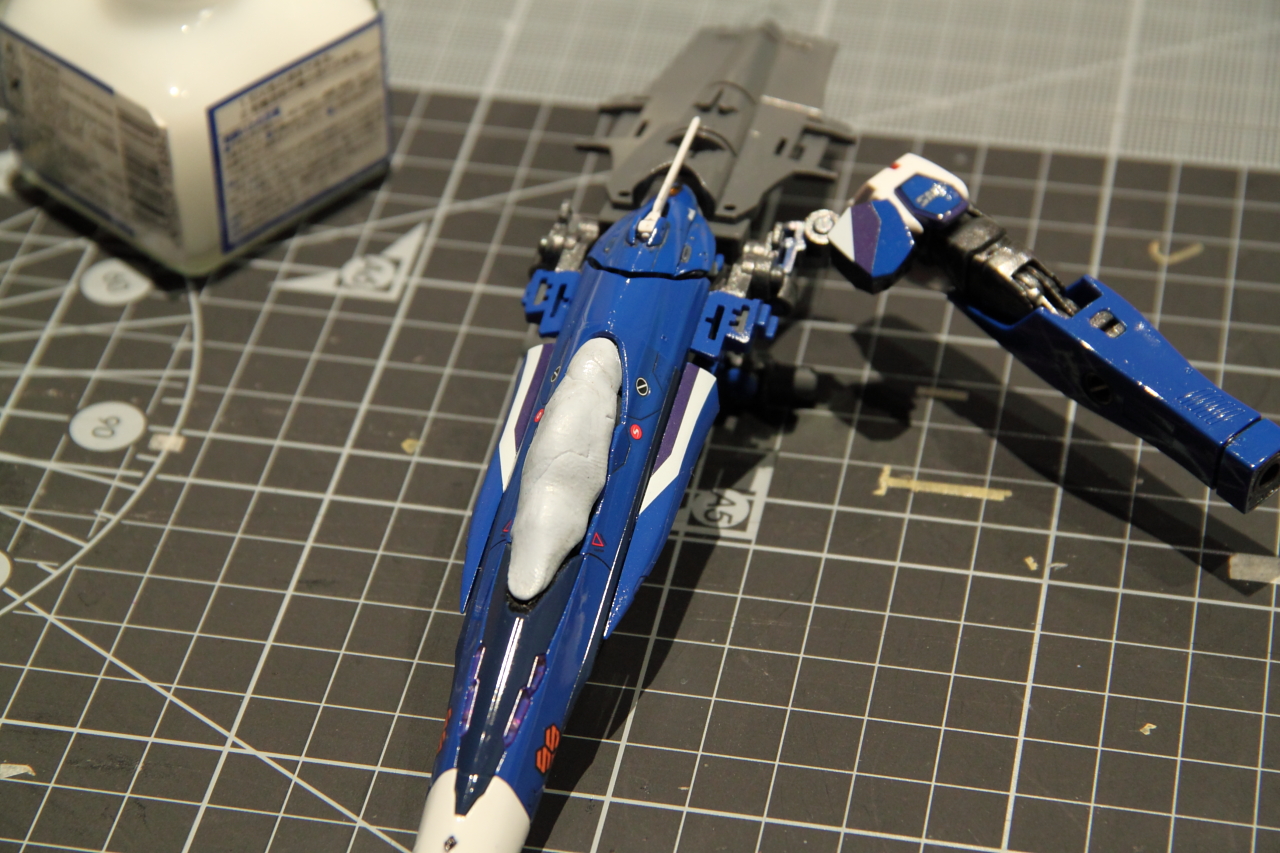
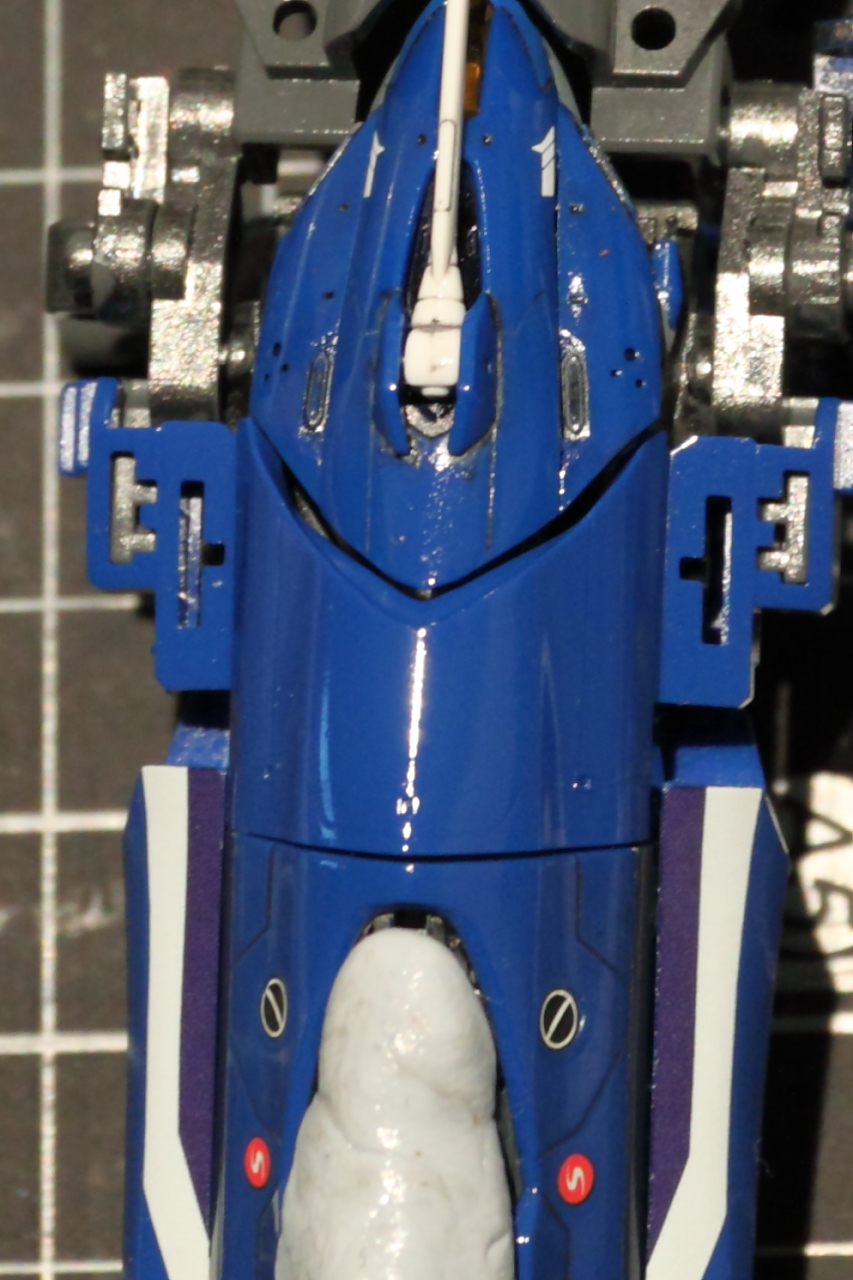
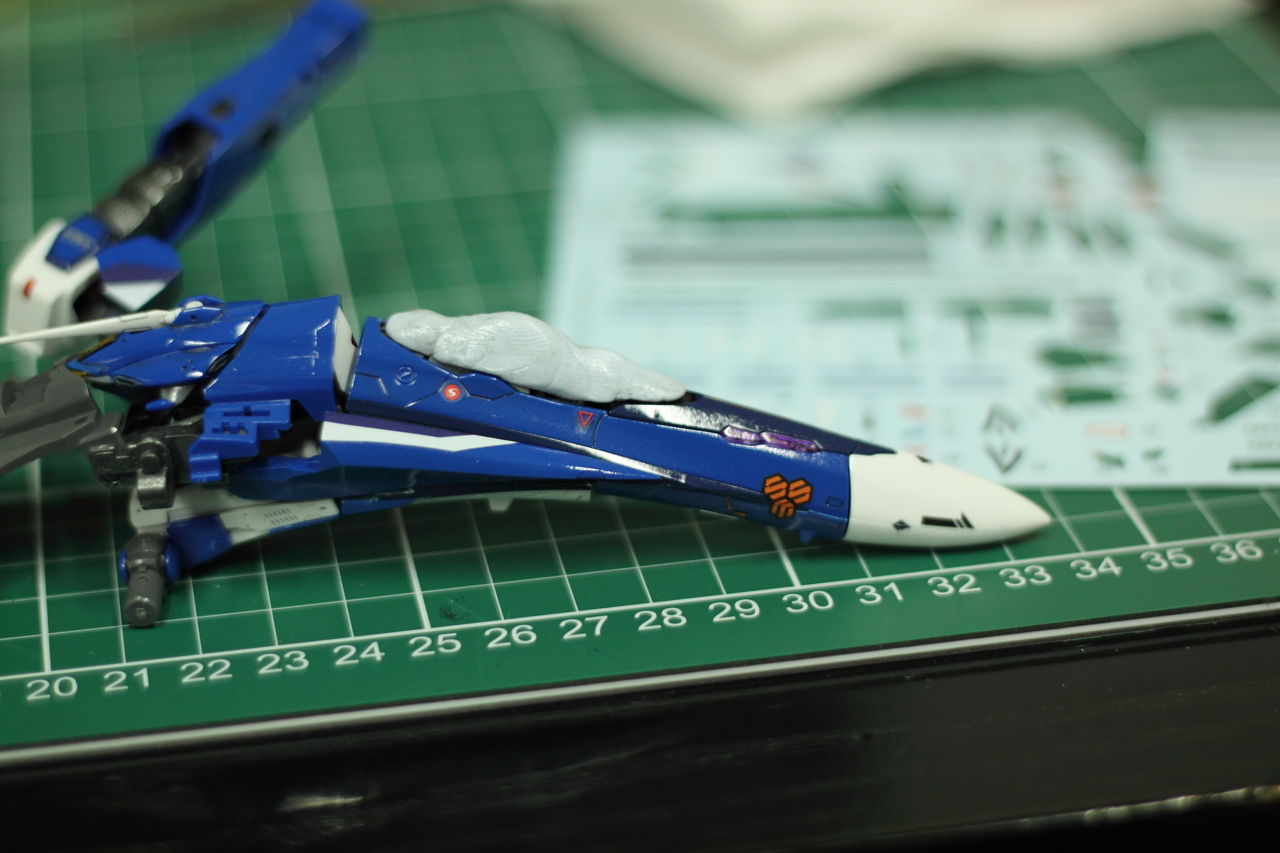
Here's the stuff I did yesterday: Left side, showing some of the panel line sinking (I think this side is better than the next): Right side - this didn't sink as well as the other: Please complete meeeeeee!


-
I can't say I've ever seen the Gnerl done by anyone - so that's my vote! I'm sure I'll find plenty of builds now that I know it even exists, but still... Your work inspires so whatever you go with, I'll be watching!
-
Tweaks are a great reason to document! And for slow builds like mine, it's also a great way to remember how you did what. I wish I'd thought to cut the sensor pegs. Now that it's together, I can't bear to take it apart though. Oh well... I didn't take pictures today but here are the ones from yesterday (first shows tiny little tear that folded under, right in the middle of the pic, the second is a general, flash blown shot to show the decals about 5 minutes after they were applied, the final is a less blown out shot to show colour): Ignore the fingerprints, they'll rub off with a bit of polishing compound.
-
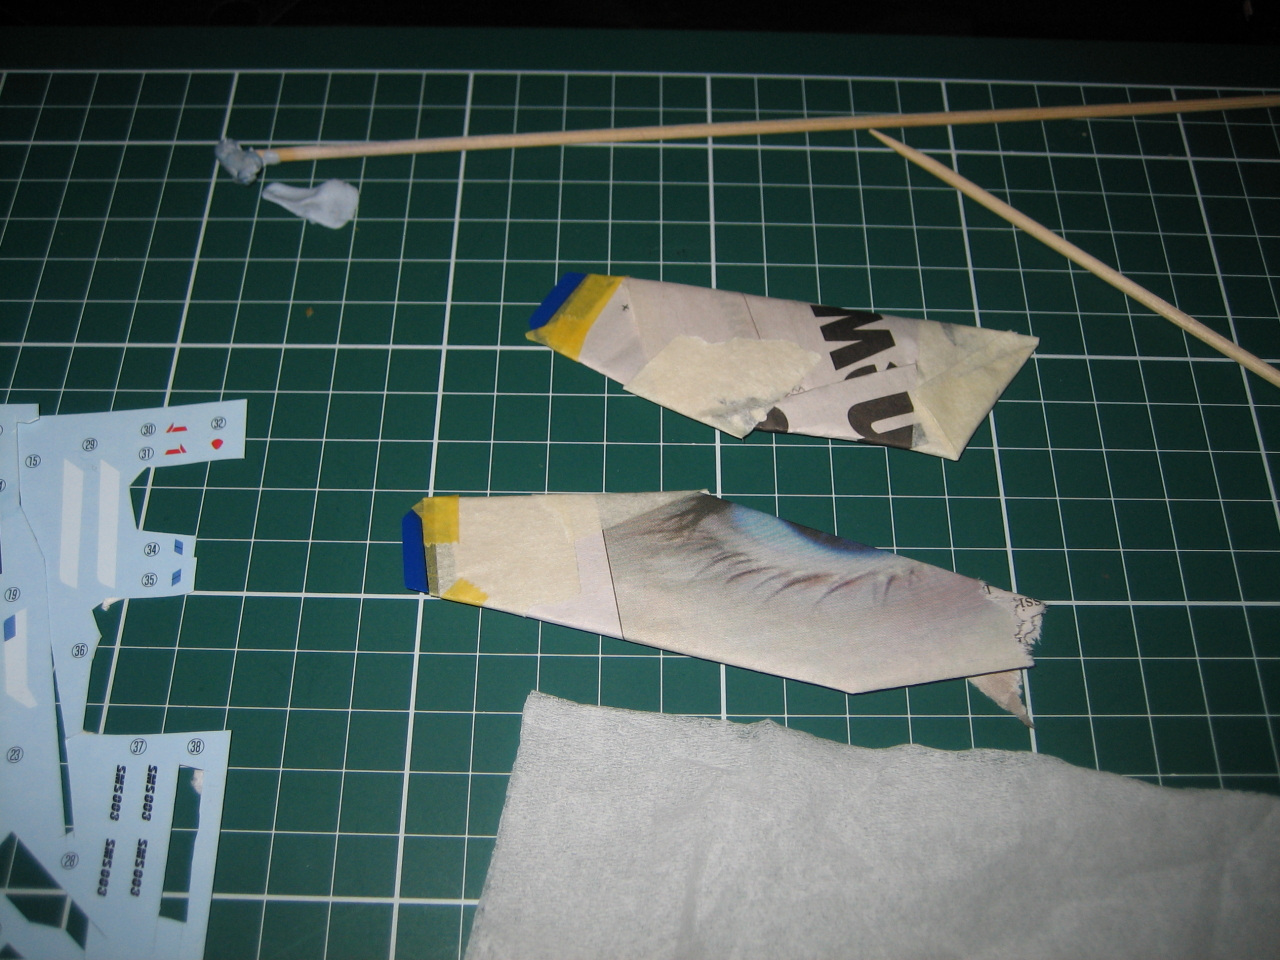
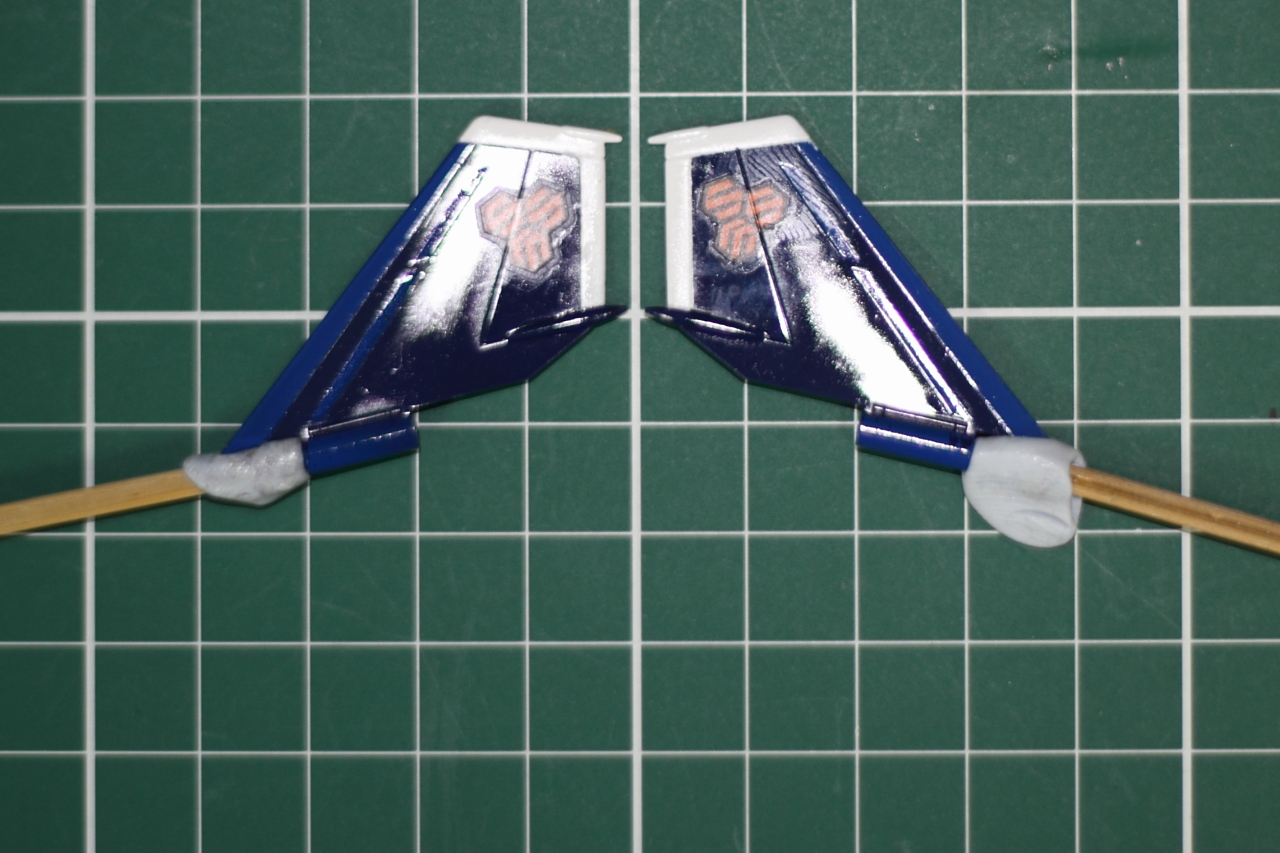
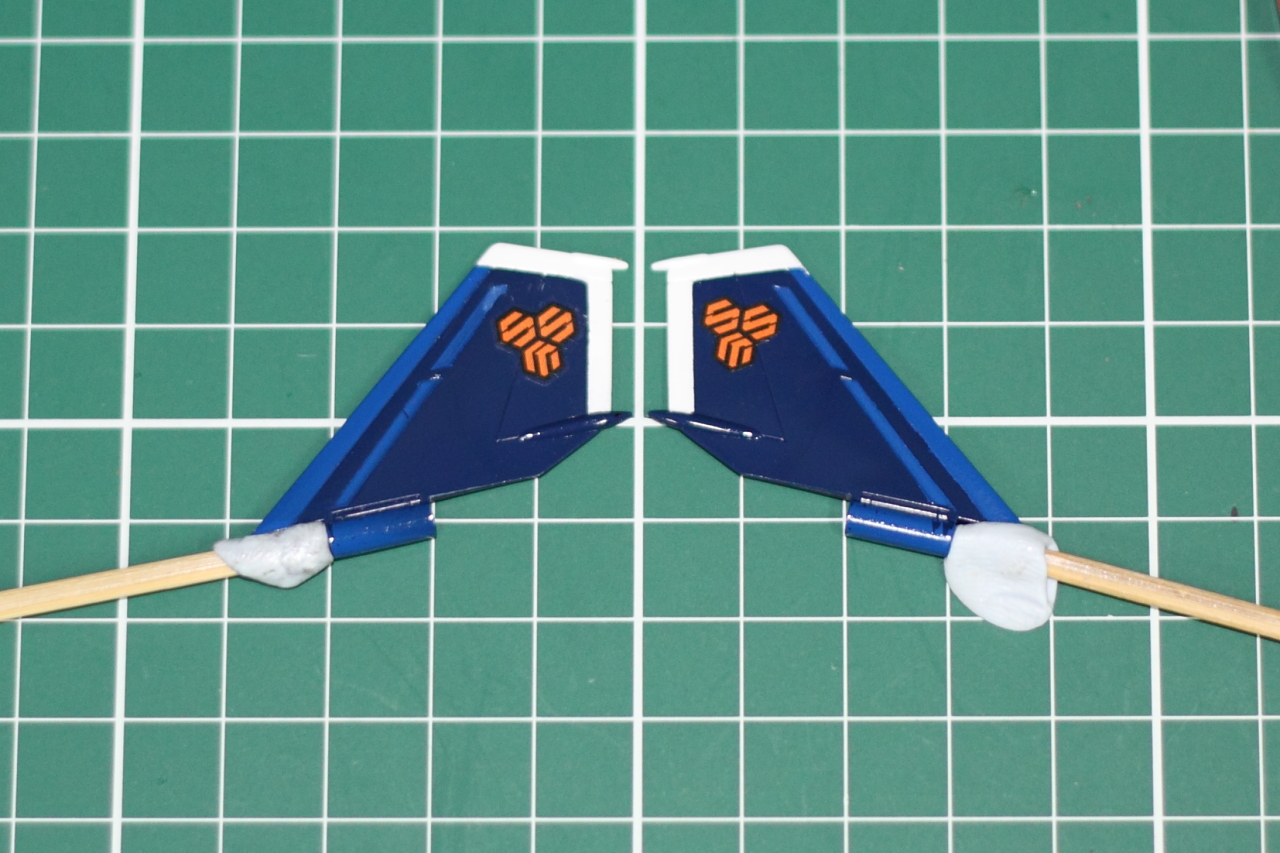
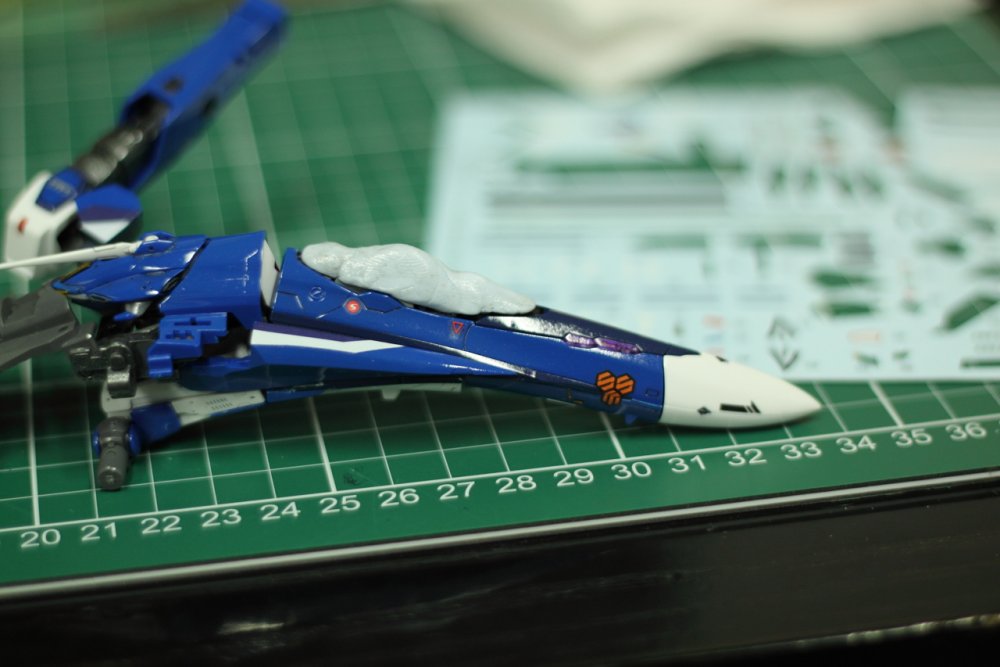
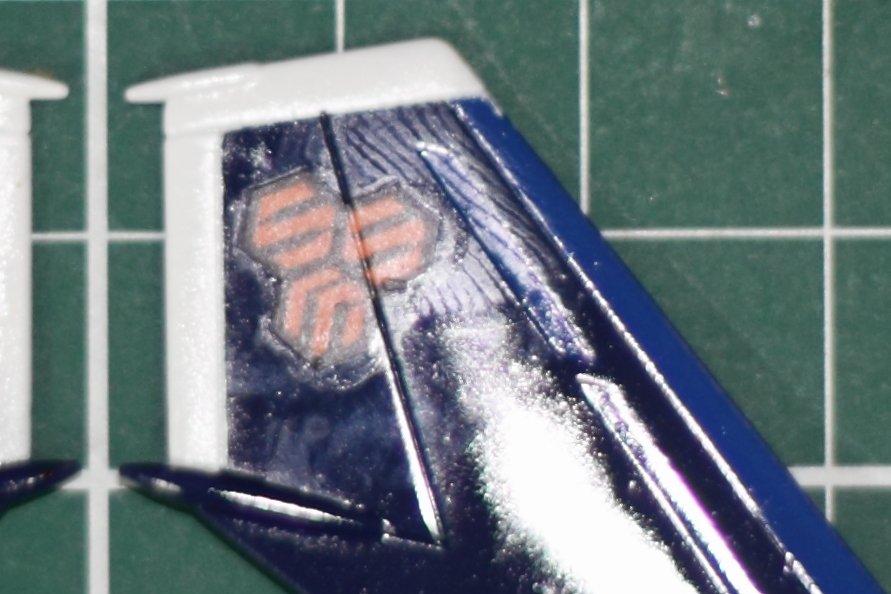
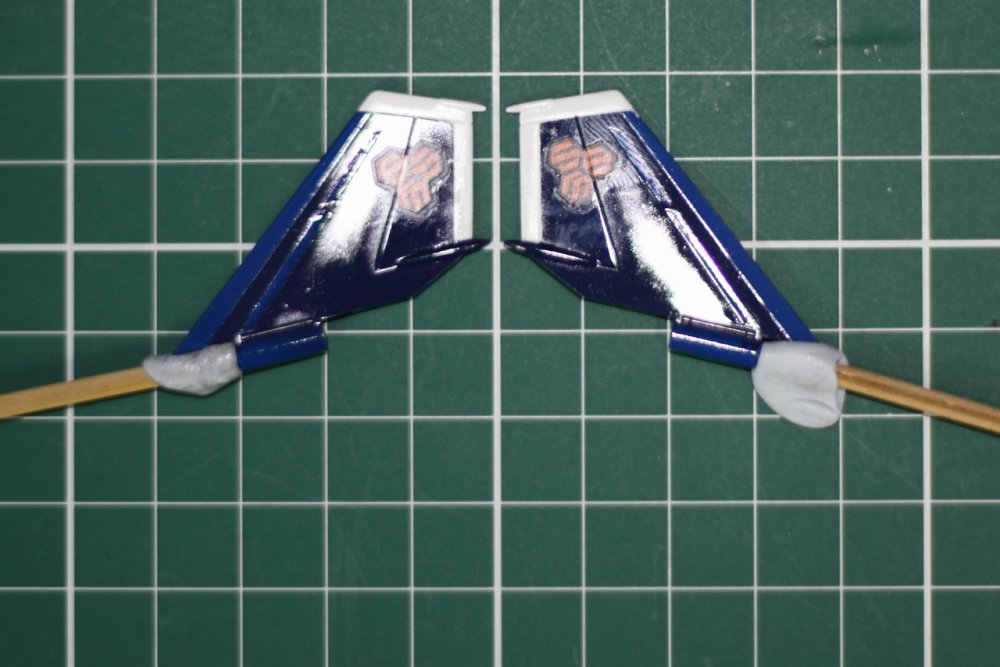
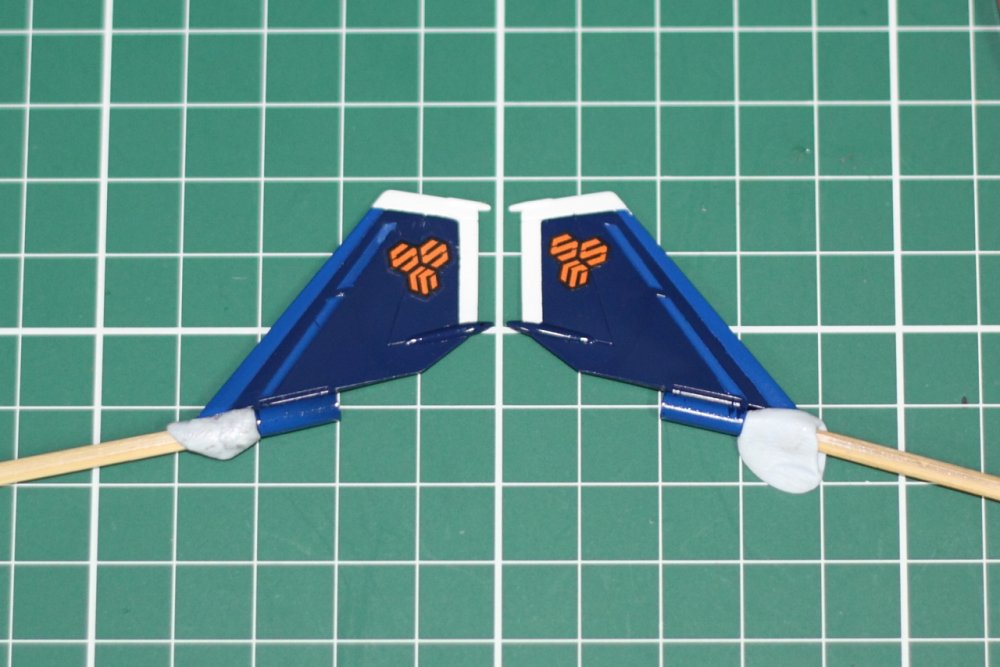
New board version - new look (for now)! I've been working on decals the last few days. Got the tail SMS logos done yesterday and the cockpit SMS and rescue markers done today. Both were a pain but the tails were much harder due to being out of practice! I also made the mistake of cutting the carrier film off the SMS logo for one tail, but not leaving anything to grab onto. Since the water I was using was very hot, the decal curled up and off the paper in a second! I had a very difficult time fetching it and applying it. Amazingly, it went on but I managed to tear one small section of the black outline. It's not terribly obvious but I learned a valuable lesson - always leave something on the decal to hold onto. If you must cut all the clear off, just cut through the clear only in one section, leaving a paper "finger" to hold onto. Move the decal into position and usually the clear cut section will stay behind and the decal will be applied. It helps if your tweezers are actually grabbing the clear part you don't want applied, too. I used that approach today and the results were much better! However, I had a very hard time getting the decals to pull down into the fuselage panel lines. I'm still not totally satisfied with how they went and will probably cut through them, prior to weathering and clear coating the final time. Pics later today...
-
Wow, that tail section is seriously cool! Very well thought out. Can't wait to see how this goes together!