mickyg
-
Posts
2632 -
Joined
-
Last visited
Content Type
Profiles
Forums
Events
Gallery
Everything posted by mickyg
-
You're far too kind! Mods, if you actually considered this - could you also find some way to make it look like I've done all this in a month, rather than a year? In all seriousness, I think the stuff of stickies is what you currently see in this section - there's no way I'm up to that level yet! Maybe a sticky for "how to build a Bandai VF-25 kit very slowly, think of all kinds of ways to make it perfect, lose patience with ever actually doing any of those things, then cut corners wherever possible to make it look 'good enough' on a work desk" I'd be OK with that.
-
I also would like to know - I know they're known for being very durable so that aspect interests me quite a bit. I'm also very interested to know what colour you chose for your SV-51 - I've got one I plan to build in a few months/years/decades . At any rate, top notch work - very, very nice!
-
Not heaps to report - I did manage to get a gloss clear coat on the non-super parts. I didn't manage to get the pressure right on the airbrush (not sure how, it's been fine before) so the finish isn't consistent, with some orange peal on some parts but not on others. I'm not overly concerned though, it's not as bad as efforts in the past. I still have a few decals to apply so this was in prep for that. I'll either go one more gloss coat and follow up with a satin (semi-gloss) or just go satin after the decals. I guess it depends on how motivated I am when I get to that point.

-

MickyG's Yamato VF-1S Unpainted, Unassembled Kit Build
mickyg replied to mickyg's topic in The Workshop!
I've got some. I just thought it'd be risky to use on a "toy" that I plan to transform/"play" with. I don't actually do much playing though. Mostly just posing it on the mightyblock (I think that's what it's called) stand that I have and the occasional transformation. I suppose I could test it. -
Thanks for the links - I think these are great for people who've seen this and appreciate the back story. I prefer to read this sort of thing after I've experienced the story (same practice I use with movies, too). So I'll be referring back to these after I finish the series. And thanks for the spoiler warnings - always nice to have that up front so I don't inadvertently read something I shouldn't.
-
MickyG's Yamato VF-1S Unpainted, Unassembled Kit Build
mickyg replied to mickyg's topic in The Workshop!
Very good to know! I have it in my head to only use glue in places where it actually needs it. Most of the parts interlock so gluing isn't actually necessary. However, the clear parts, the nosecone, and a few others that I haven't specifically identified yet, will have to have something to hold them on. Speaking of clear parts - anyone know if the glue is going to make the clear parts cloudy? I'll likely have to test the glue on some sprue to be sure. -
MickyG's Yamato VF-1S Unpainted, Unassembled Kit Build
mickyg replied to mickyg's topic in The Workshop!
Thanks David! As for plastic, the box says ABS, POM on the outside. I've always seen this on the details of HLJ's ordering page (I think that's where I've seen it) but didn't know that was straight from Yamato. So yeah, I'm guessing the ABS is the majority of hte kit and that (possibly) the purple tinted plastic is the POM. Either way, it looks like Plastic Weld is what I'll be looking for. Although, given how hard it is to find anything here in Australia that's common in the States, I might be looking for something not made by Plastruct. I asked the hobby store guy the other day what he'd recommend for ABS and he said there's some sort of Testors product, also in a glass bottle. He was out but said the main ingredient was MEK (nasty stuff). Perhaps that's going to be the ingredient to look for. -
MickyG's Yamato VF-1S Unpainted, Unassembled Kit Build
mickyg replied to mickyg's topic in The Workshop!
Yeah, I'm looking forward to this too. Gives me a chance to tone down the green a bit and possibly add some detail with a small drill bit (maybe). -
MickyG's Yamato VF-1S Unpainted, Unassembled Kit Build
mickyg replied to mickyg's topic in The Workshop!
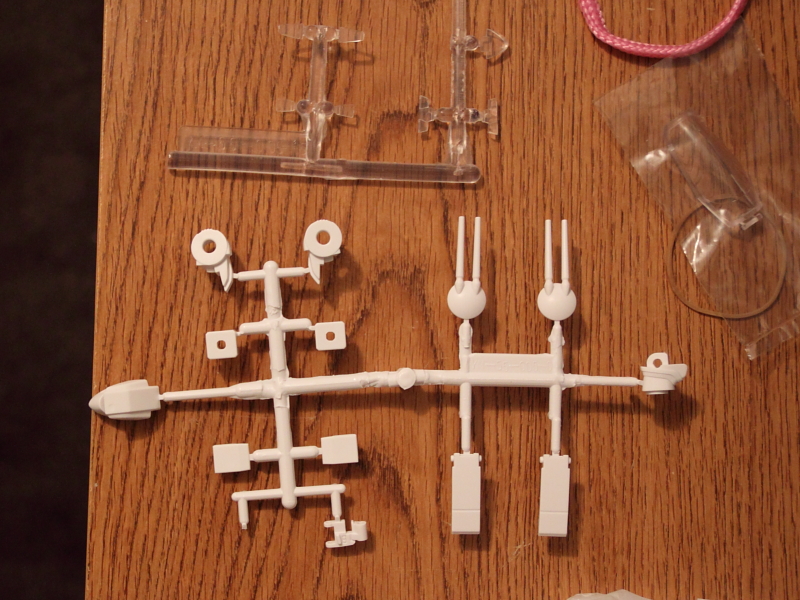
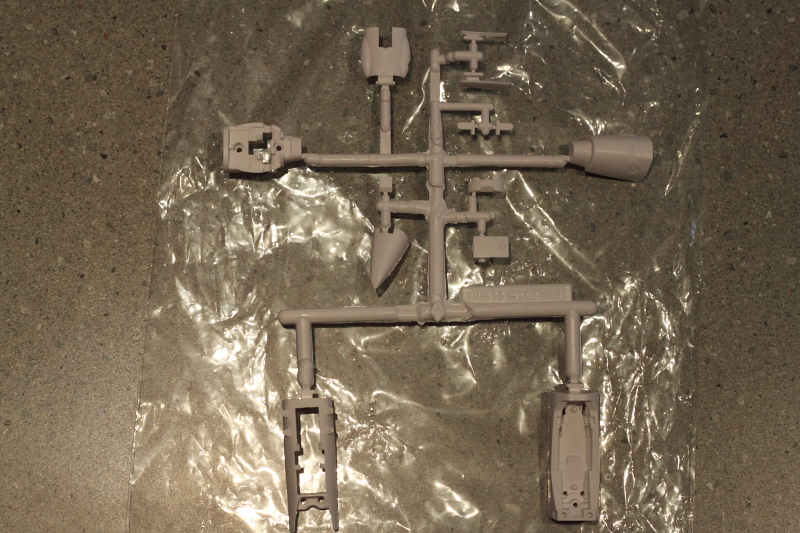
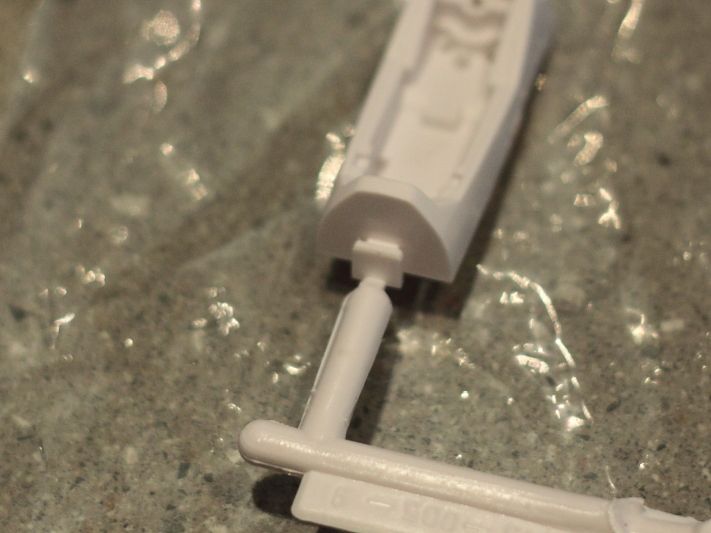
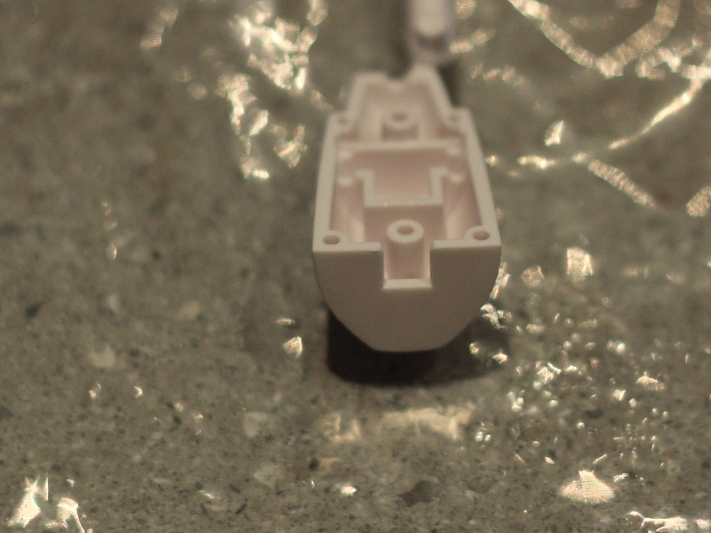
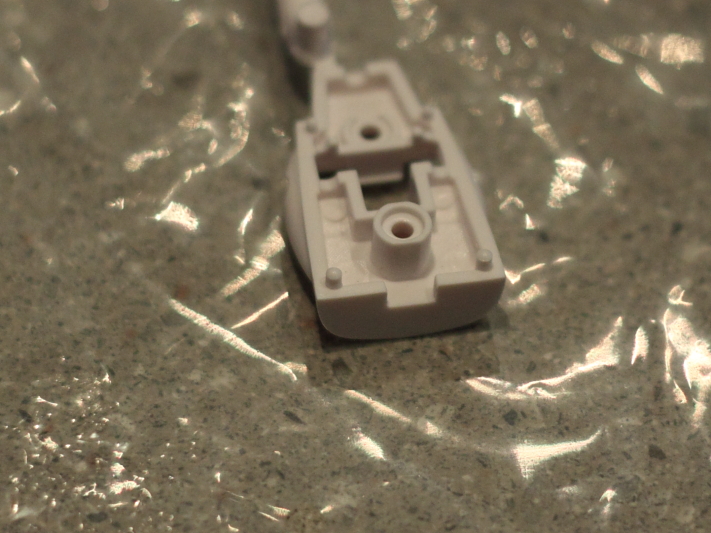
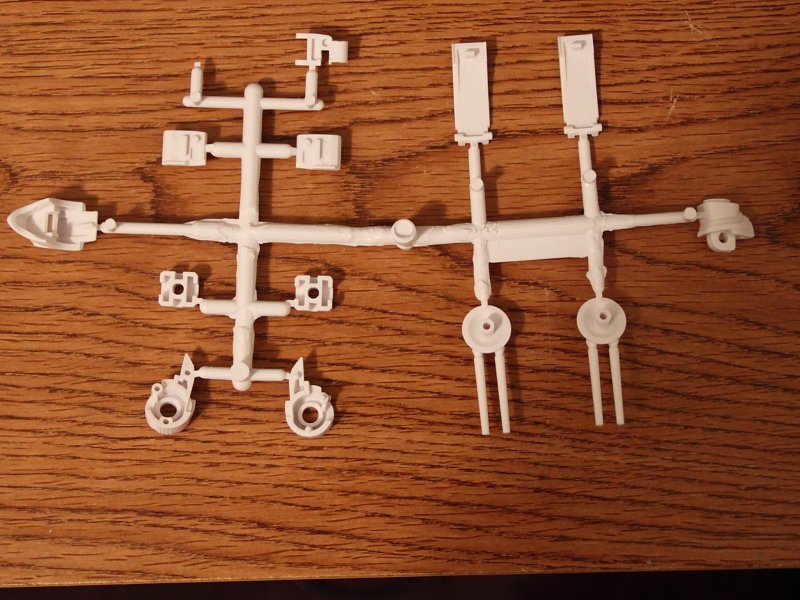
For Valhary: These are resized WAY down so if you need more detail of any individual part, let me know and I can crop just that section out, but blown up. I've included the clear parts to show the visor. No green molded clear plastic here.
-
We'll be here when you get back! Family comes first man. Hope everything sorts itself out.
-
MickyG's Yamato VF-1S Unpainted, Unassembled Kit Build
mickyg replied to mickyg's topic in The Workshop!
I went out to get some paints on my lunch break today. Man, I didn't realise how hard it'd be to get these colors in Australia! Well, my LHS at least. I ended up getting some acrylics from a company I'd never heard of. Anyone have any experience with Lifecolor? I found everything except for the dark bluegrey (FS35109) so went with FS35164 instead. It's called Intermediate Blue and might need to be mixed with a bit of grey to get it right. I'll try it as is and see what I think though. -
MickyG's Yamato VF-1S Unpainted, Unassembled Kit Build
mickyg replied to mickyg's topic in The Workshop!
That's very cool! I read the reviews on anymoon at least twice (for every release Jenius did a review on) and I never caught that! Hey Valhary, I'll get head photos as soon as I get a chance - once again, I'm in one place with the camera and the kit is in another. Doh! -
MickyG's Yamato VF-1S Unpainted, Unassembled Kit Build
mickyg replied to mickyg's topic in The Workshop!
Wait, what? The 1/48s have a working waist joint? That's awesome! How does it get used because I thought the 1/48s had a swing bar too. I'm sure you can surmise that I don't have a 1/48. Never even seen one up close, to be honest (unless you count one in a cabinet at a shop in Akihabara in Tokyo). How do they get the swing bar to work with the swivel? -
Exactly. I haven't heard of Project M except in duscussions from fans about the series. I've deliberately kept away from plot synopses to make this is as fresh as possible. Back to the topic, Sivil's reaction and method of "infiltration" into City 7 sure are different to the vampires, that's for sure. I'm looking forward to the next episode - although, zerodigit, you have hyped it for me! Hope you don't disappoint!
-
Good wrap up of ep 19! I had those same questions myself. I would have to add the following observation as well - at the beginning of the episode, during the narration informing us of what's happened so far, Gepelnitch is shown taking the mask/visor thing off, as though it was a previous scene. I can't say I recall that. Did I miss something in a previous episode? He really does look rather womanly! It is nice that that same narrative sort of explains that they planet is the 4th in the Varauta system (again, maybe that was touched on already and I just missed it) and that Sivil is awakened by a huge dose of spiritia (how much, it doesn't really say - was that the whole take up to that point?). I don't yet understand what Gigil's connection is to Sivil and why he's sort of gone rogue to get her awakened/being her personal detail, but I'm sure that will come. Oh, and Sivil sucking the spiritia out of the bird was a nice touch! I was impressed with Milia's ability to remain calm under pressure during the hostage situation - that line where she tells Michael to get out of the way is classic! Overall, an enjoyable episode and the suspense is steadily building. I have to resist watching ahead!
-
MickyG's Yamato VF-1S Unpainted, Unassembled Kit Build
mickyg replied to mickyg's topic in The Workshop!
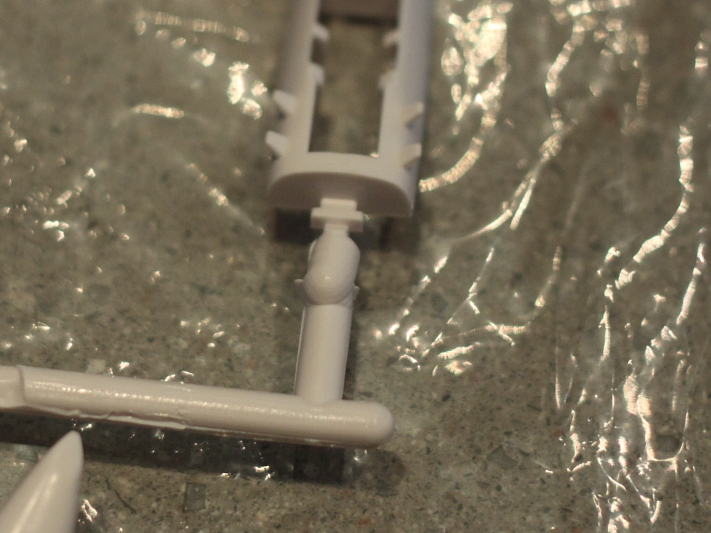
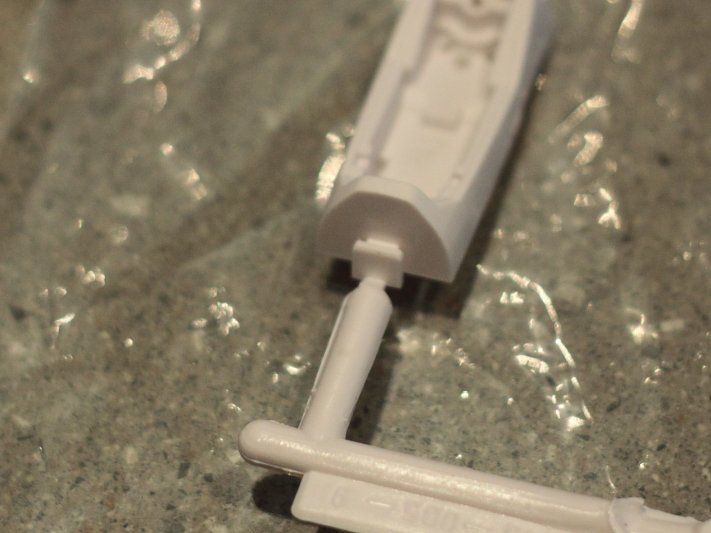
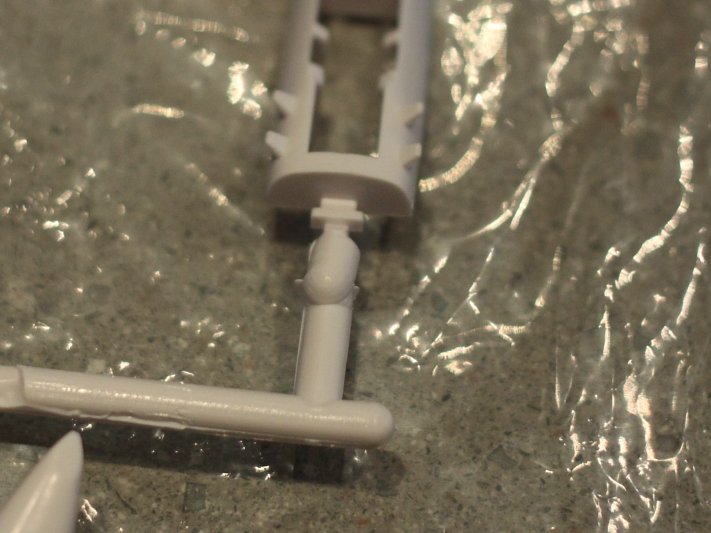
Here you go Lechuck. Sorry about the focus (not sure why but everything was focusing closer to me than what it should have) and the less than perfect lighting. The white looks pink and it's not quite that bad in real life (even after I corrected my white balance). Anyway, the hip joint/swivel is technically possible with this setup. But you'd have to replace that box setup with a cylinder one. I'm not sure how you'd get the pieces to do it and a metal one would be much better/more durable than the ABS. I thought of just rounding the edges of the plastic but I don't think there's enough material to allow for that. Hope that helps! By the way, these parts all fit very tightly. I think glue is not completely necessary for any of these sections.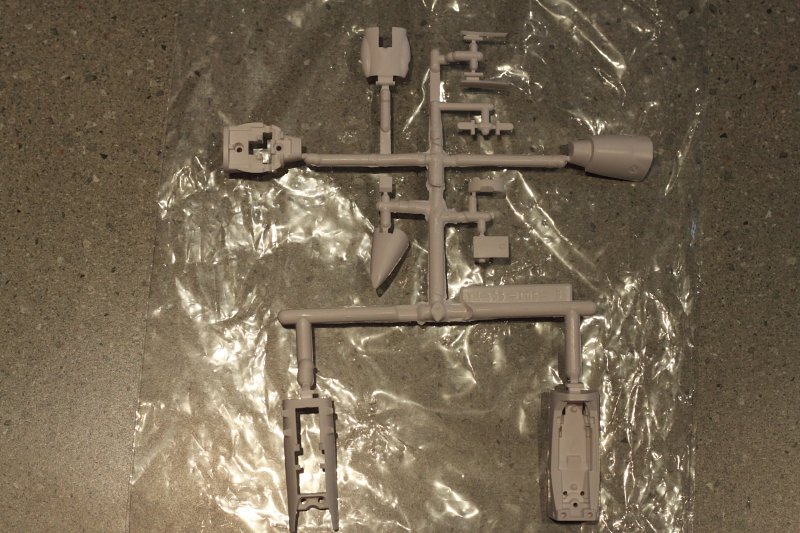


-
MickyG's Yamato VF-1S Unpainted, Unassembled Kit Build
mickyg replied to mickyg's topic in The Workshop!
Most certainly! I was curious about that too. It'll likely be a day or two, as the kit and the camera are in two different places this weekend. I'll definitely get it posted though. -
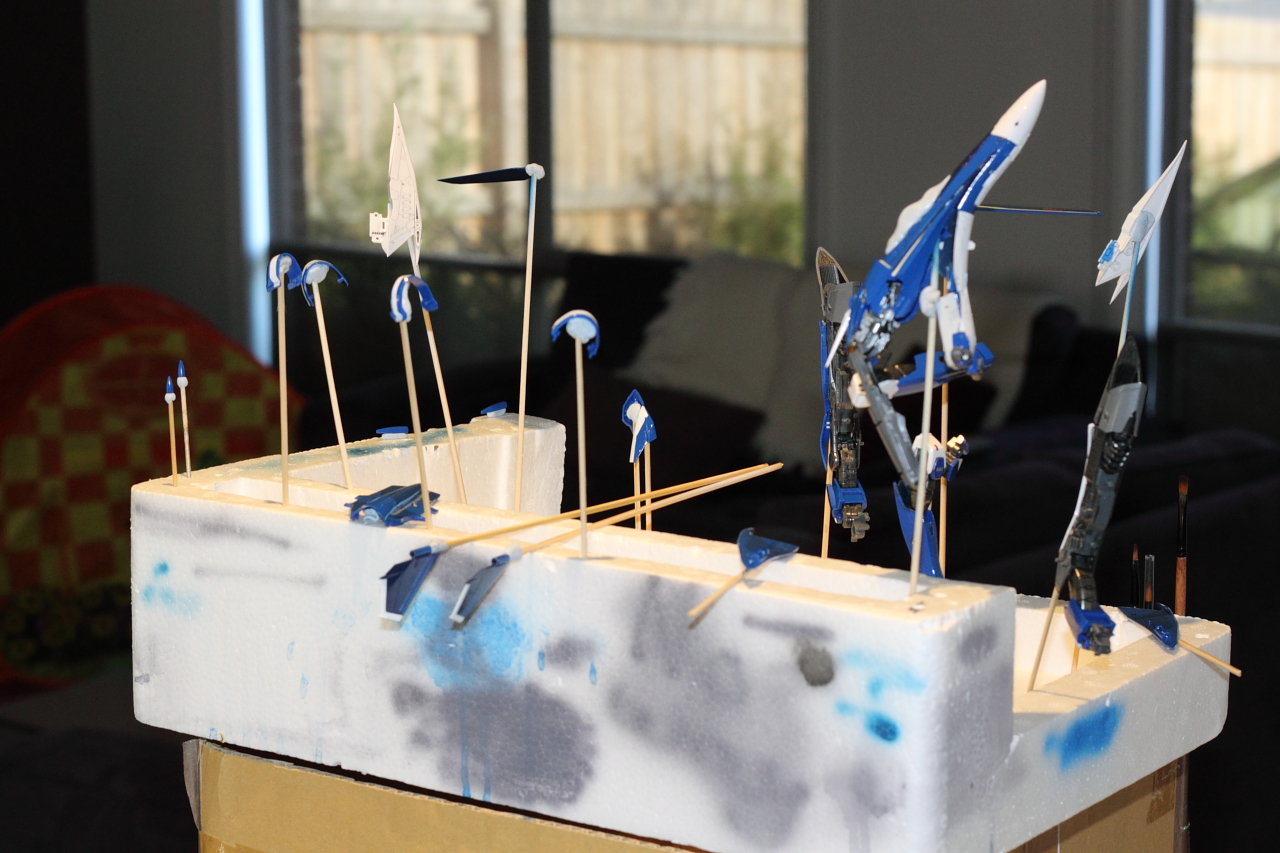
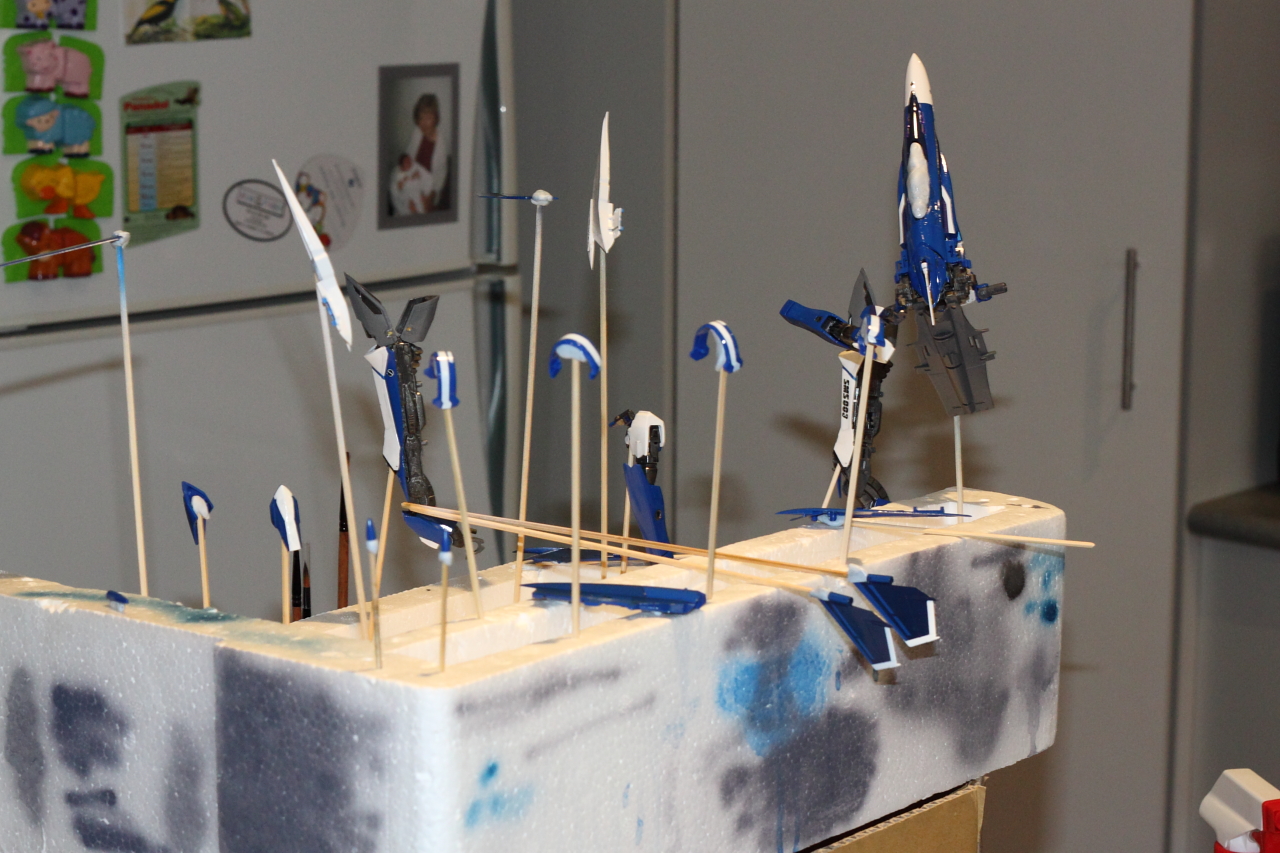
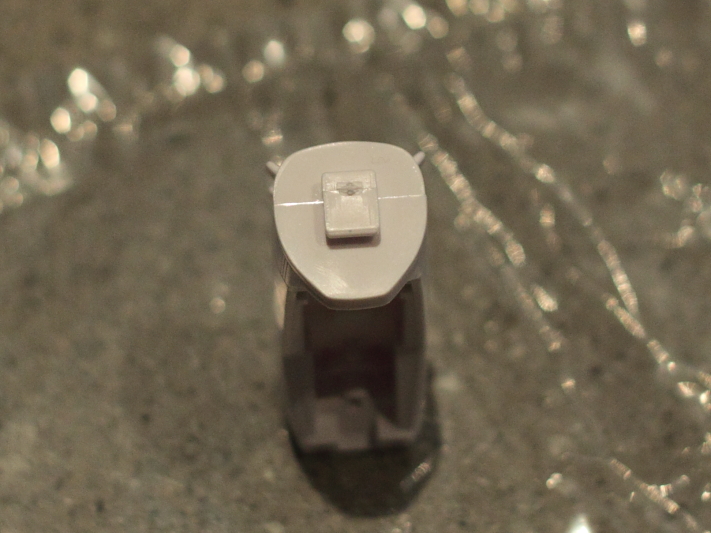
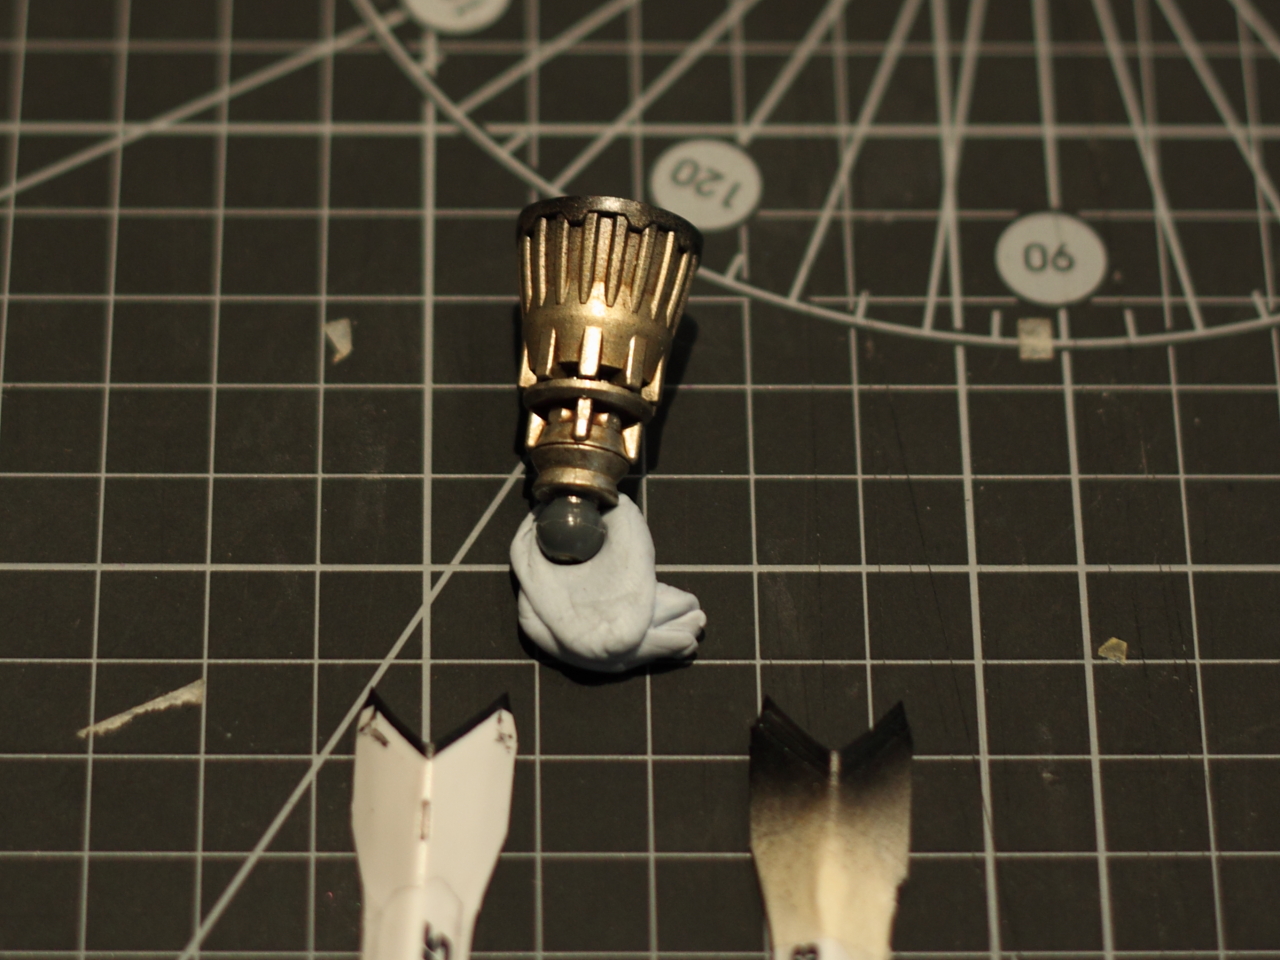
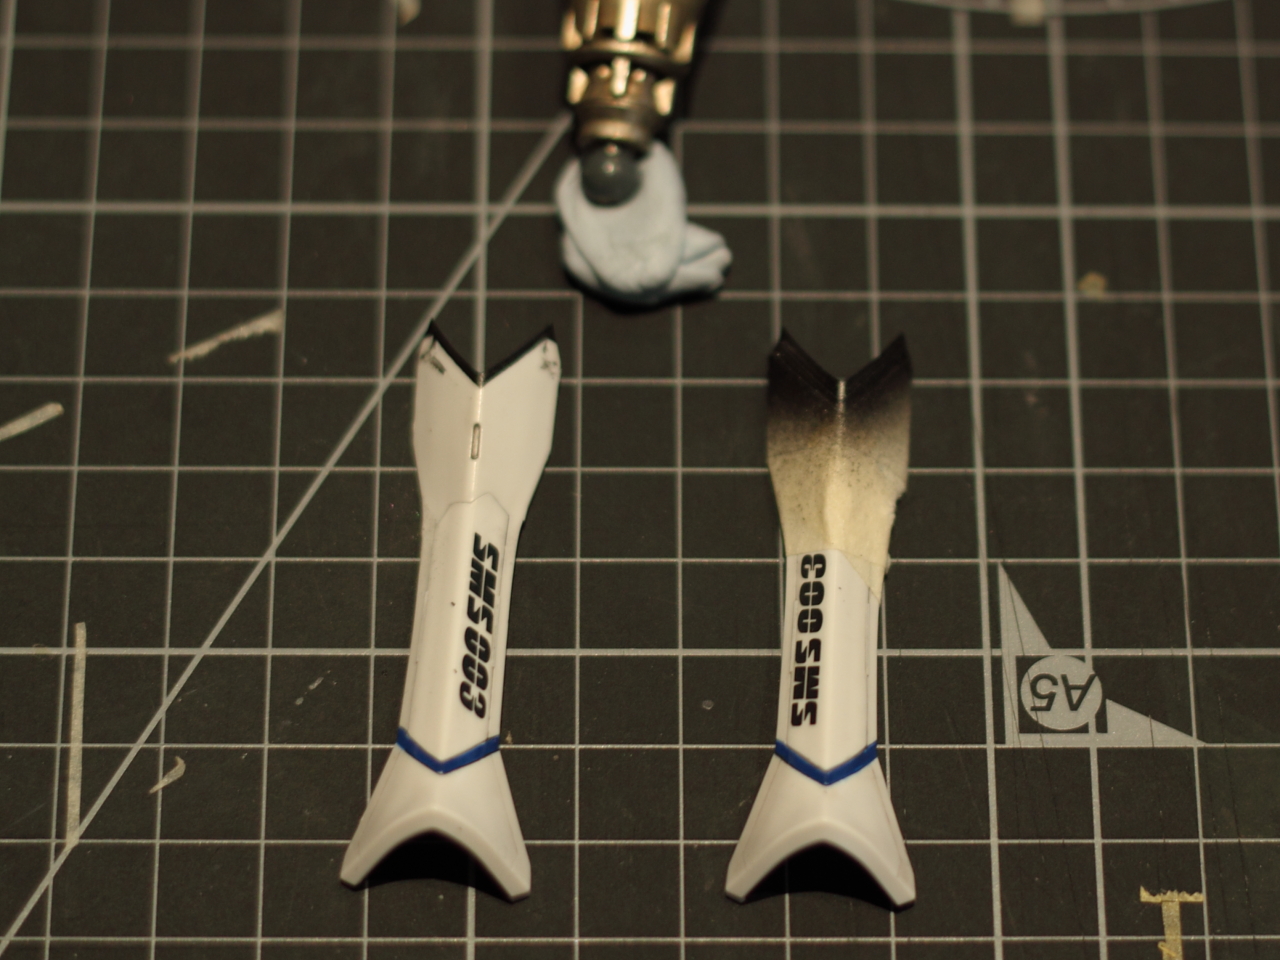
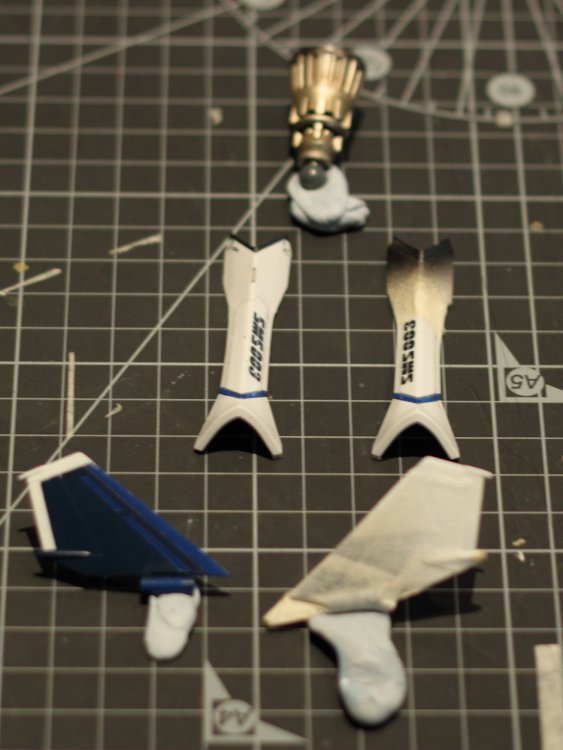
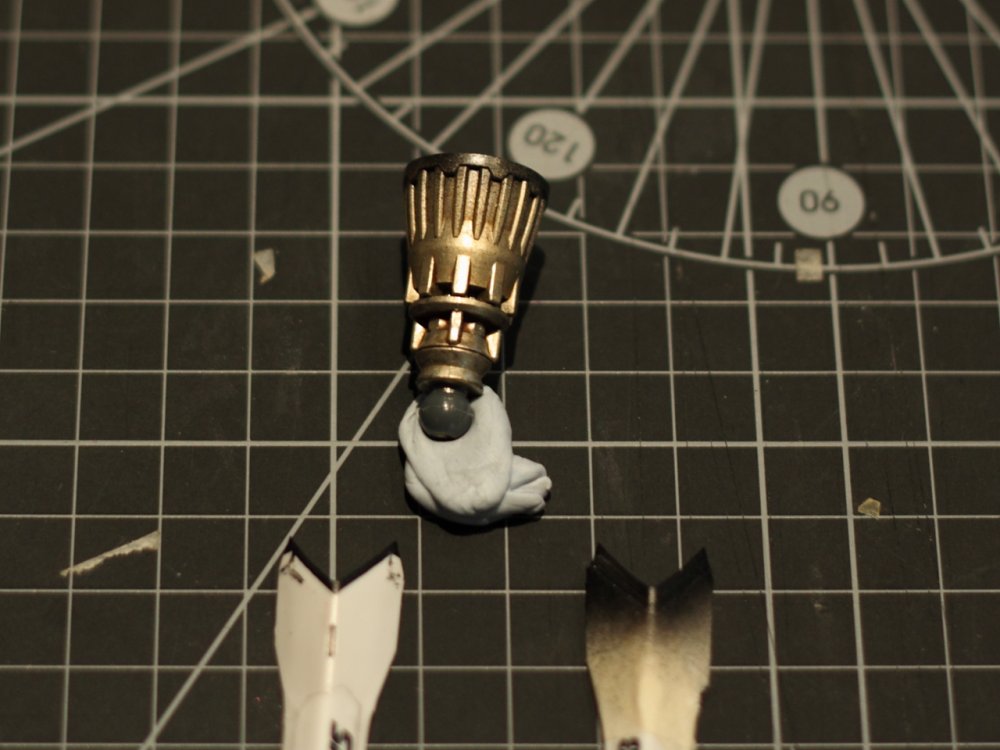
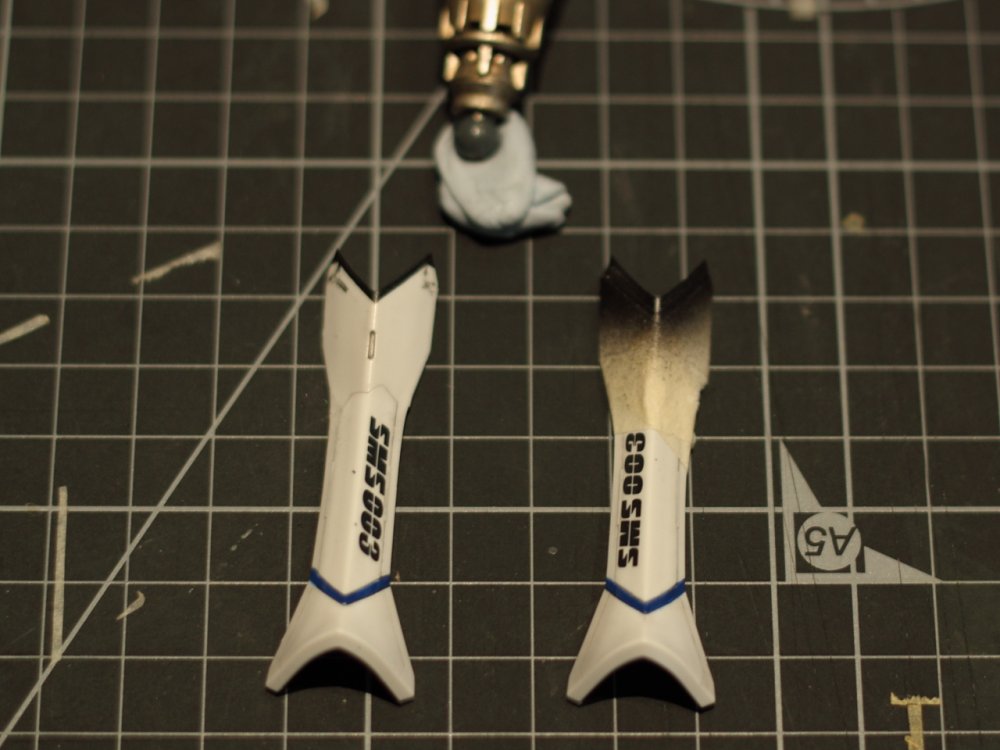
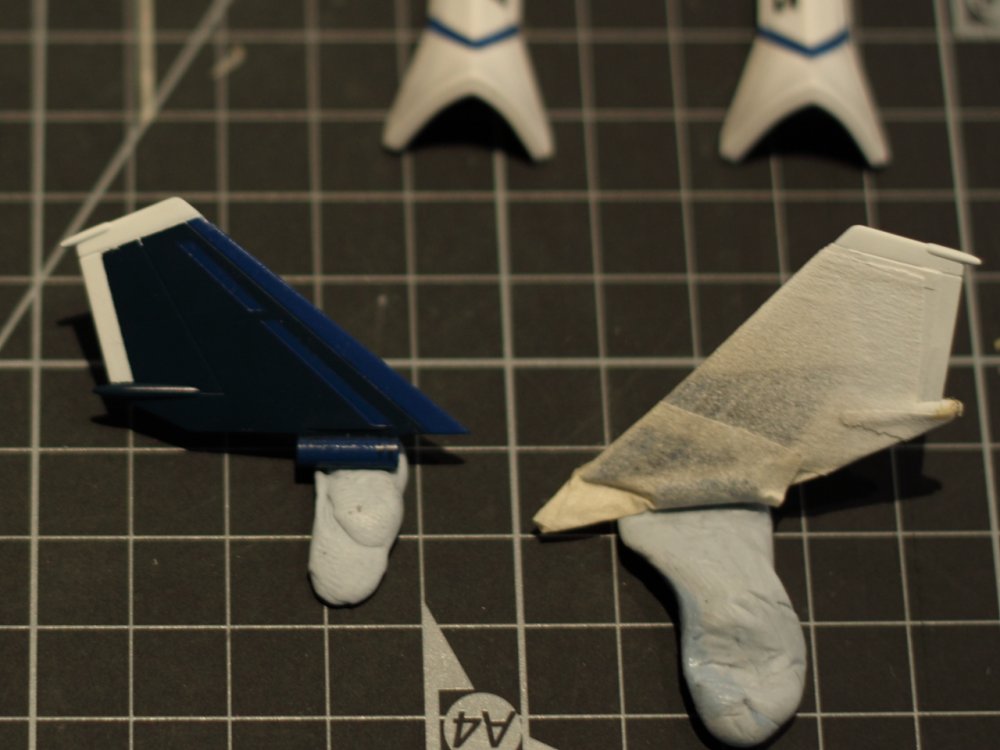
Got some more painting done today. In fact, this might be the last detail painting on the main part of the valk. The only part left is the missile covers on the super parts, and the intake covers. I'm not including all the clear coating I need to do, that's still to be done. And still a lot of decals. I'm never going to finish this stupid thing. So for today, I finally finished painting the tail pieces (not sure what to call them, as they're neither vertical, nor horizontal). Then moved on to the blacked out "stripe" area at the top of the shin. And for kicks, I practiced painting a burnt look on the booster nozzles. It came out OK but it might not really be subtle enough. That, and I don't know that rocket nozzles really burn in real life. Who knows... I managed to get the white on the stabilizers, way too thin. As a result, it crept under the masking tape. I was able to clean it up with a toothpic. Luckily, I've left the dark blue as bare plastic, so this made it much easier to scrape of without damaging anything. Except for one small spot on the painted lighter blue areas. That ended up scratching both layers off. So a quick dab with a tiny brush fixed that up. Same deal with the black stripes - too thin so crept under the masking. Again, bare white plastic, so no big deal. For the black, I went half steel, half flat black. I like it. I also used that for the burnt exhaust look on the booster. I might have to thin it a bit more on my next application (only did 4 nozzles this time). Anyway, more progress pics (apologies for the out of focus nature - been playing around with a big aperture lens and I still haven't found a good setting to get everything in focus yet):
-
MickyG's Yamato VF-1S Unpainted, Unassembled Kit Build
mickyg replied to mickyg's topic in The Workshop!
Thanks for the tips Chris! Very much appreciated. So you used the enamel because it's what you had, it wasn't available in anything but enamel, or some other reason? I gotta admit, I'm afraid of anything but acrylics because if you screw up, they're very hard to remove. I've come to love the windex approach for mistakes! Interesting that you used lacquer clear over everything without problems. Everytime I've tried that with any of my acrylics, they run or worse. I agree about the areas on the intakes. I'm not sure what I'll do there yet. But since those are areas that will be light ghost grey (I'm guessing that's not the same as light gull grey too, I'd better look into that) the white underneath won't be too start a contrast if it does scratch. And glad we had the same starting point - that can't be a bad omen! -
MickyG's Yamato VF-1S Unpainted, Unassembled Kit Build
mickyg replied to mickyg's topic in The Workshop!
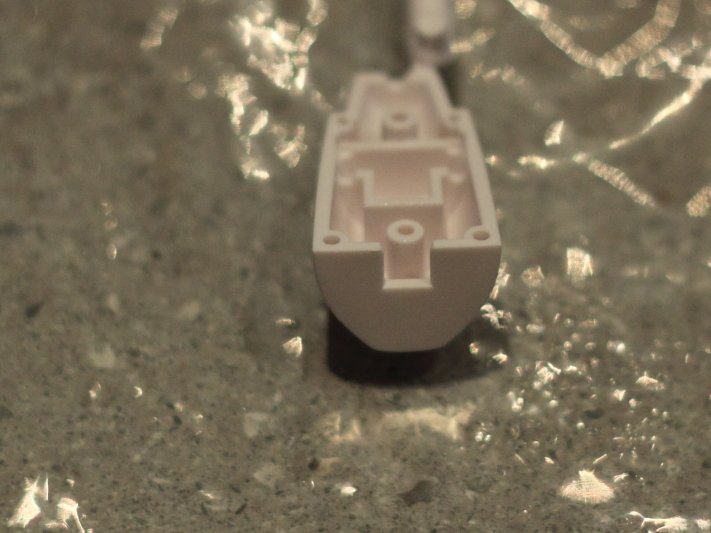
I'm going to start assembling today. Just rough fitting to see what sorts of issues I'll encounter. The manual starts with the arms. I'll likely skip that and go on to the nose. The arms are the notorious pin sholder hinge things and I'd rather not assemble those until I know how I'm going to paint them. They'll be the first to get scratched paint, otherwise! Just a quick comment - the shoulder triangle stickers (black "L" shaped items) are not included as decals or stickers. What the? EDIT: OK, scratch that. I started on the intakes (top of the thigh). The parts are very sturdy and very cleverly designed. I've never liked the "turbine blades are outragiously close to the intake opening" comprimise of any of the valks out there, but there's just no other way to do it. You couldn't move them back even if you wanted to. There's just too much reinforcement in the area behind the turbine plate. And once you put the ratcheting mechanism together, you can understand why. Sorry, no pics today. Will get some soon though and post what I'm talking about. I didn't finish the upper thigh because it calls for a pin. I can't read which type though and there are many to choose from. Is it knurled, straight, taper ended, rough? I don't know. All it shows is 11mm. Perhaps there's only one that length. Also, there are two types of screws in the kit but I don't know which is which. The CG instructions seem to show both used interchangeably with the Japanese for either type. Again, I'll take some pics to explain what I mean. -
MickyG's Yamato VF-1S Unpainted, Unassembled Kit Build
mickyg replied to mickyg's topic in The Workshop!
Thanks for stopping in Lolicon! Yes, these are just unassembled versions of the toy. No difference at all, as far as I can tell. The plastic is the same. The only difference is no paint, and no glue. You really appreciate all the tampo printing on the completed toys, let me tell you! As best I can tell, the plastic is either ABS or POM. There may be a third as well (I don't know what the clear parts are, for instance). I still don't know what sort of glue to use and I'm also curious about what sort of putty will bond well too. I may try a few things on the sprue before I commit it to the actual part. Your second paragraph is exactly how I was feeling. I was going to do this up as a TV Roy. But the more I thought about it, the less I liked that idea. I mean the DYRL one is almost the same and now that Yamato has announced a TV release, what's the point. Plus, any attempts at painting/decaling it up would be terrible compared to how the toy comes completed. So it had to be a custom. Your last comment is another reason I decided to do this particular custom scheme. Look at the F-14 markings - there's hardly anything on it! So the decals I'll be applying will be minimal. Even if I went nuts, there's not a whole lot of surfaces with decaling or printing on the completed toy that actually rub. So I'm not terribly concerned about wear. I transform my (now 3) valks about once a month and am pretty careful with them so that's another plus in my case. That's not to say there won't be some scratching though. I'll just have to figure out a way to minimise it. -
MickyG's Yamato VF-1S Unpainted, Unassembled Kit Build
mickyg replied to mickyg's topic in The Workshop!
Looks like a lot of fun! You going to find some way to do the Zentradi soldier? Speaking of paint schemes, I may as well get some opinions on mine too. Firstly, I love Dobber's custom SV-51. I think it looks awesome and is easily the best looking non-standard paint scheme I've seen on any Valk! I liked it so much, I thought about doing it on my VF-1. But then thought it'd look dumb. I mean, the SV looks so cool because it's modelled after a Russian fighter to start with. So it's a natural thing to paint it like one too, right? Of course. So what to do? We've seen camo schemes on VF-1s and while they're unique, I'm not a huge fan of the urban camo Yamato 1/48 offering. It's different but it looks a bit too fat to me - not sure if that's the paint scheme or just my imagination. Anyway, I wanted something lighter and light camo, while common enough, just isn't really what I want. I want Dobber's scheme! Then I found this: Now that's what I'm talking about! The whole page can be found here. So we have a scheme used in the Top Gun program to represent an enemy plane - perfect! And it's real too! So I just need some low-vis decals, which might not be that difficult. I might even be able to make my own. I can't see too much that needs to be white and since white decals are impossible with what I have at my disposal, this should be ideal. If you read through the article, you'll find there were very few markings at all. It looks like this might have been relatively common for non-standard US machines that were set up for training (and made to look like enemy fighters). David H, chime in here if you're reading this! There are a few difficulties I can foresee. Firstly, the camo on top, but gull grey on bottom thing, while it works well for fighter, it might look a bit silly in gerwalk and battroid, as there will be grey on camo in spots and might break things up enough to actually look very clashy. Or maybe it'll look great! I'll practice on some technical drawings before I start painting the real thing. The other concern is what I've already mentioned in my first initial thoughts about painting in general. Can I paint the light grey everywhere that needs it and not have it scrape off the first time I transform this? And since I want to use acrylics, is that just asking for trouble? So what do you all think? Is it too blatently ripped off of Dobber's idea? I'll admit, that's my main inspiration! -
MickyG's Yamato VF-1S Unpainted, Unassembled Kit Build
mickyg replied to mickyg's topic in The Workshop!
Updated first post with some pics and comments. Haven't started yet! Haven't even opened the bags. Only so much I can get done with my lunch break. -
MickyG's Yamato VF-1S Unpainted, Unassembled Kit Build
mickyg replied to mickyg's topic in The Workshop!
Good idea. I was going to play around with dry fitting today (if time permits). I know there are a few parts that won't stay on without glue. Just off the top of my head, the wing lights, the rear landing lights, and likely the shoulder lights (the amber coloured ones), these all need something to hold them in. And by looking at the instructions, I think there are a few more parts that don't have anything holding them in place, so glue is probably required. Not secret, just not sure I can pull it off yet and I don't want to get my hopes up prematurely! ...or maybe it's secret -
MickyG's Yamato VF-1S Unpainted, Unassembled Kit Build
mickyg replied to mickyg's topic in The Workshop!
Yes and no. I think it depends on your skill level, personally. There's no way I'd have ever attacked my first Macross kit with the enthusiasm and confidence I did, had I not seen it demonstrated before. Each person is different, obviously. But for me, I like seeing people's how tos for ideas and sometimes, just for the confidence it gives me. I'm hoping I can encourage others similarly. As for "the whole idea of modelling" I don't think there's a hard and fast rule there, Gunny!