captain america
-
Posts
3471 -
Joined
-
Last visited
8 Followers


Recent Profile Visitors
30777 profile views


captain america's Achievements
")
SMS Squadron Leader (11/15)
764
Reputation
-
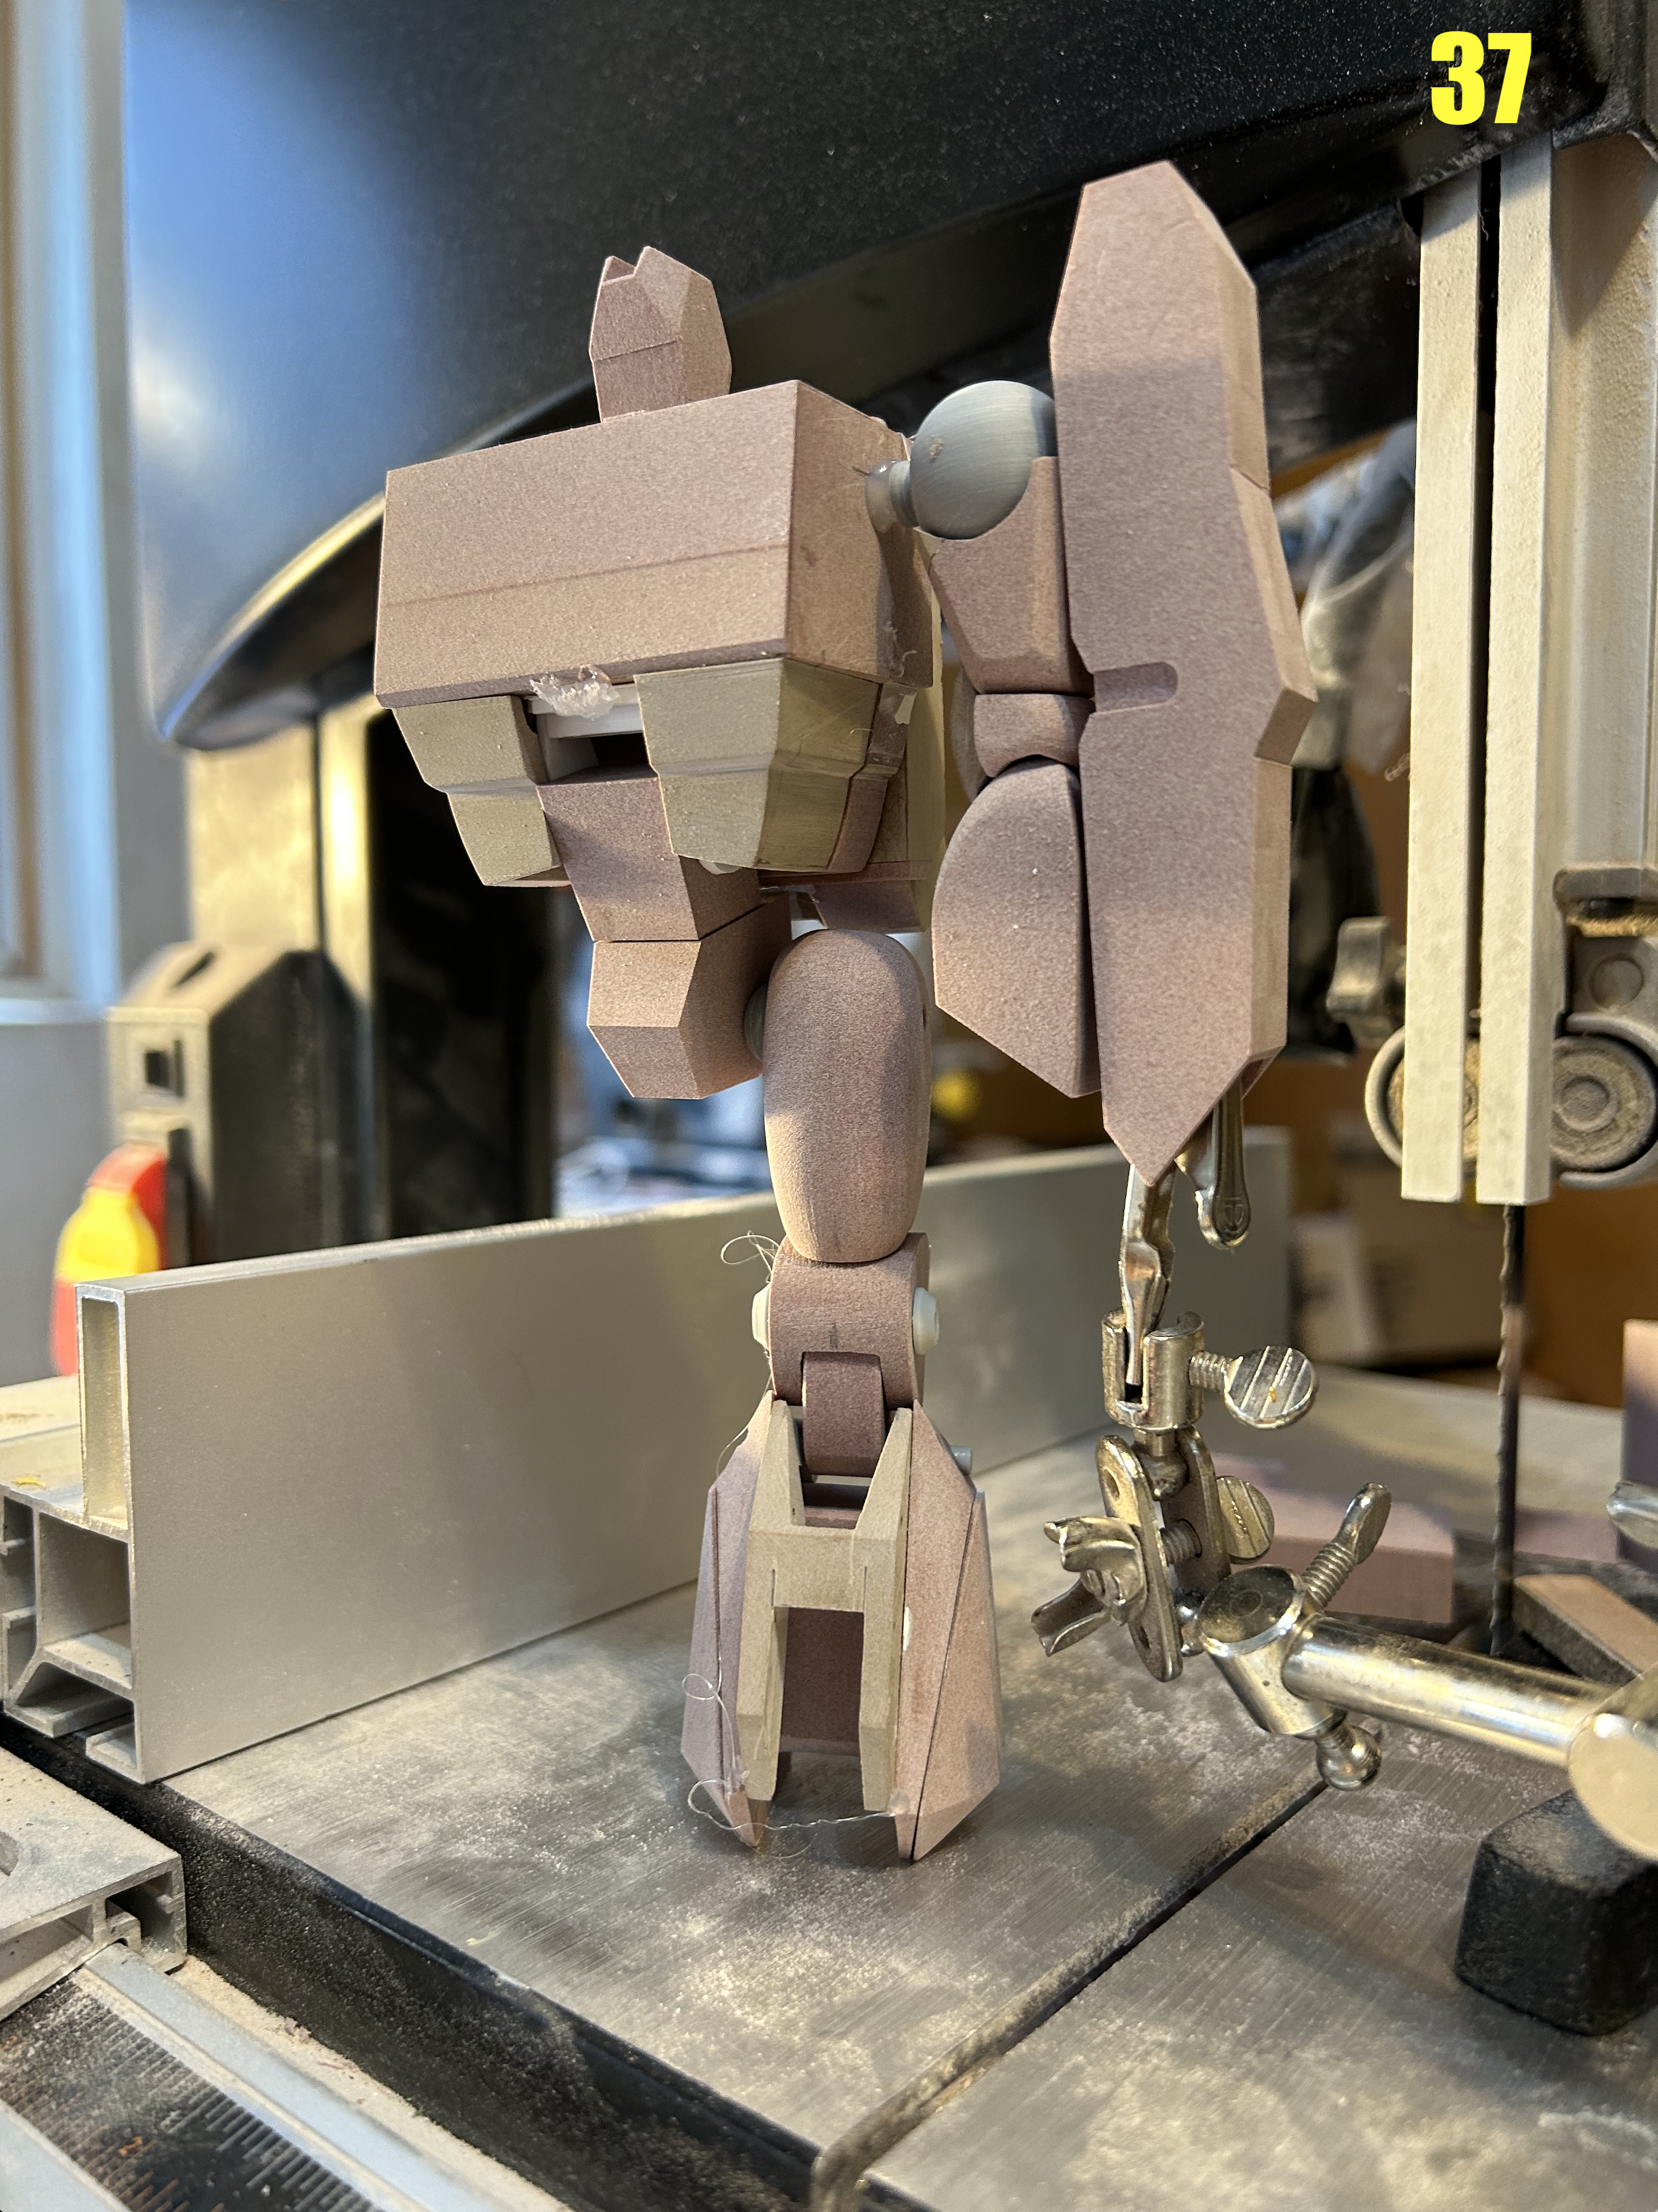
 Pic 35: another critical joint on the figure is the hinge at the solar plexus. I made the parts here from styrene for the sake of simplicity. What's interesting is that this can also serve as an ab-crunch joint, and I added a swivel at the waist, so robot mode will have an unusually decent range of motion. Pic 37: this is what I have after about 3 weeks of work. Once the feet and the extra armor parts are added, it will make much more visual sense. That's it for this week, and stay tuned for the next update
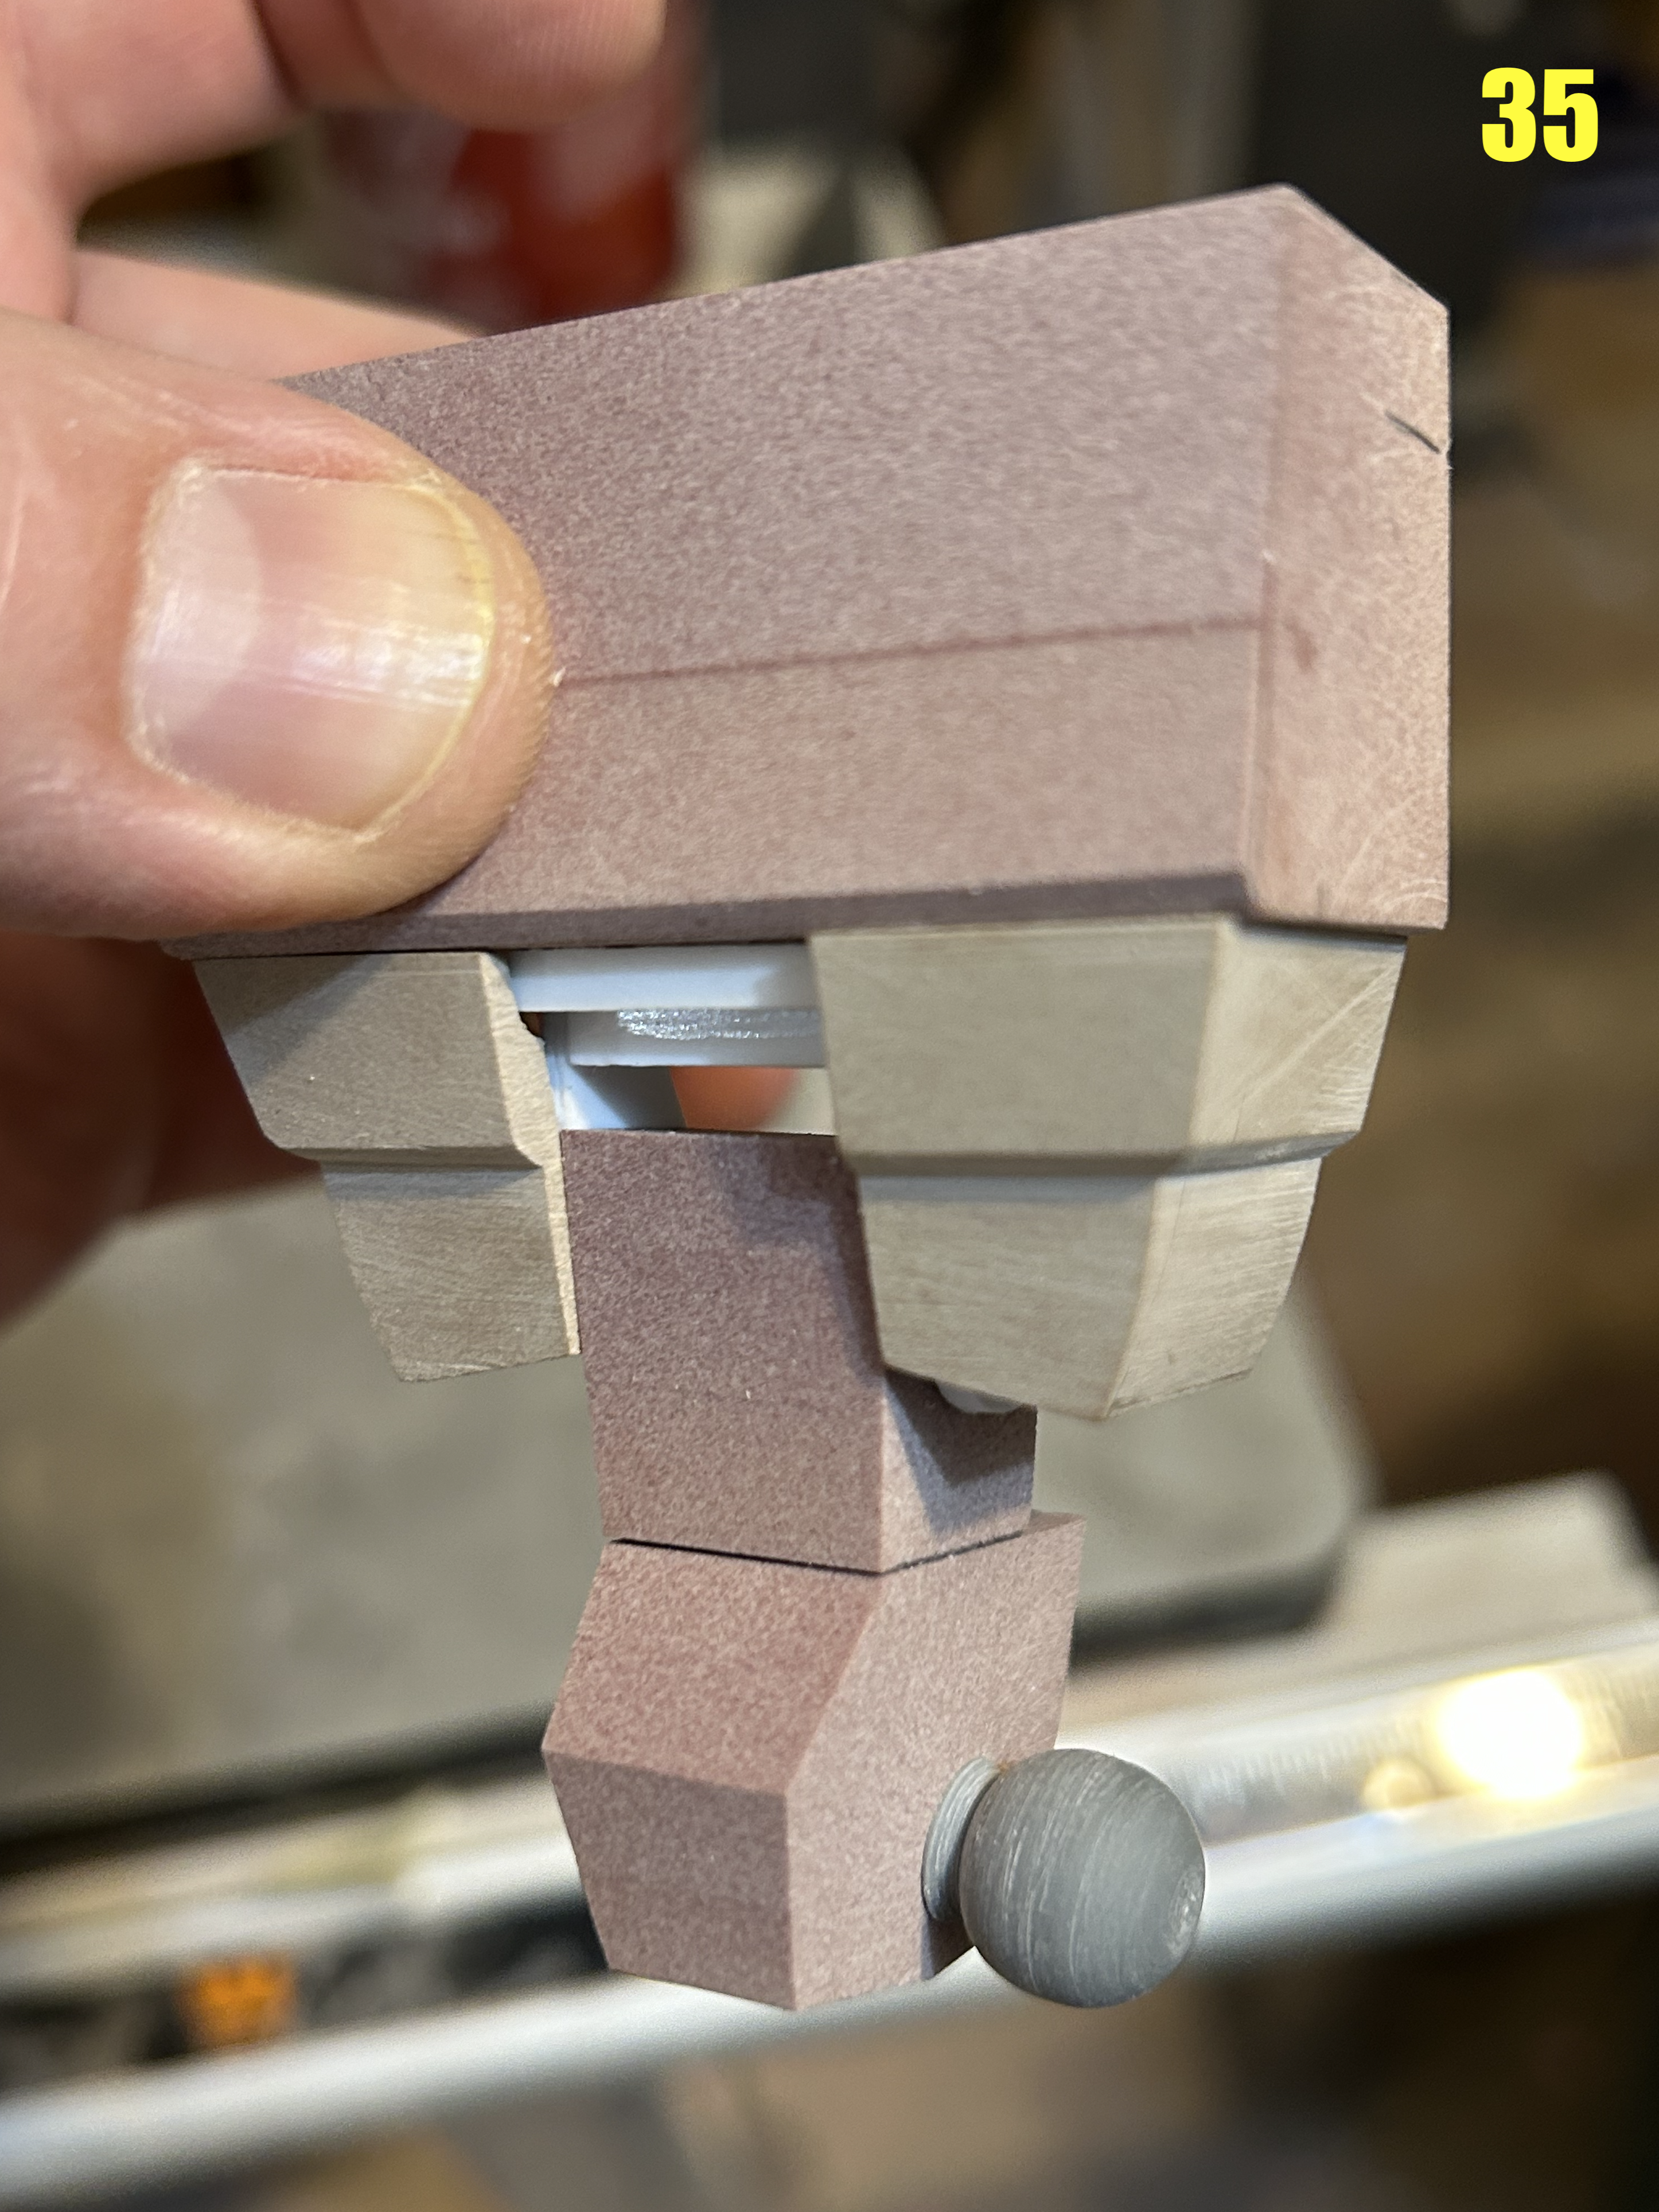
-
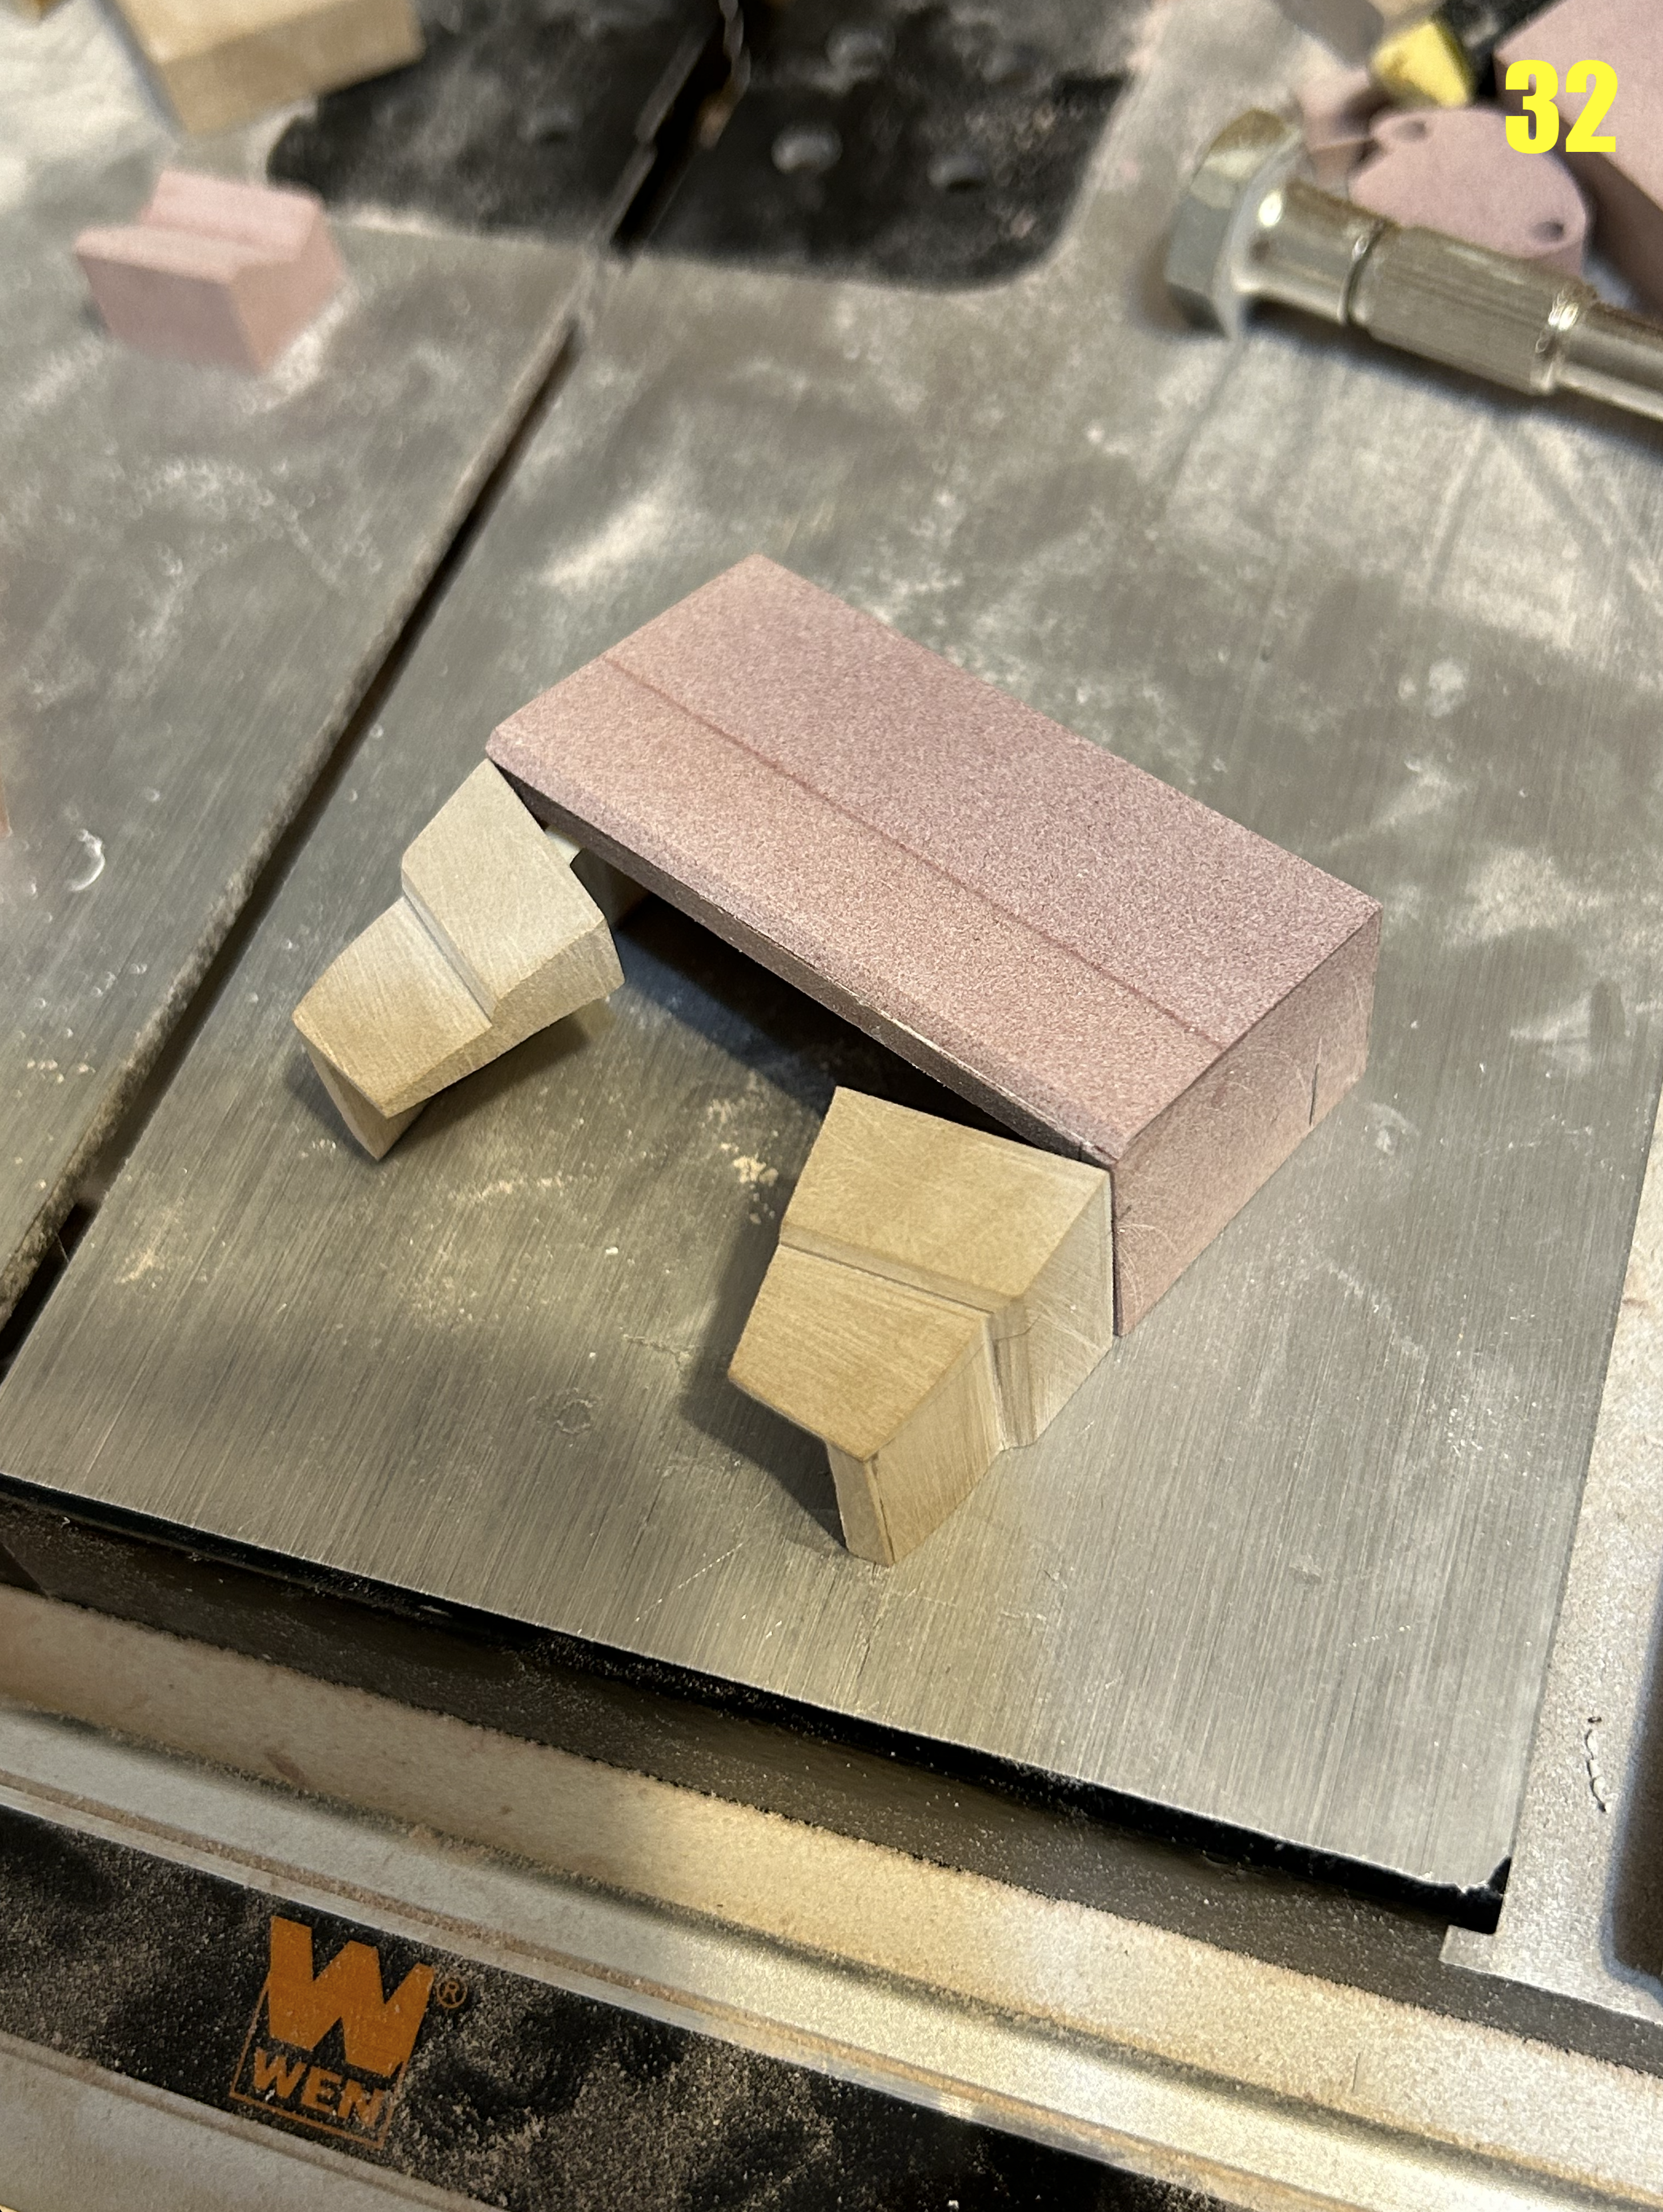
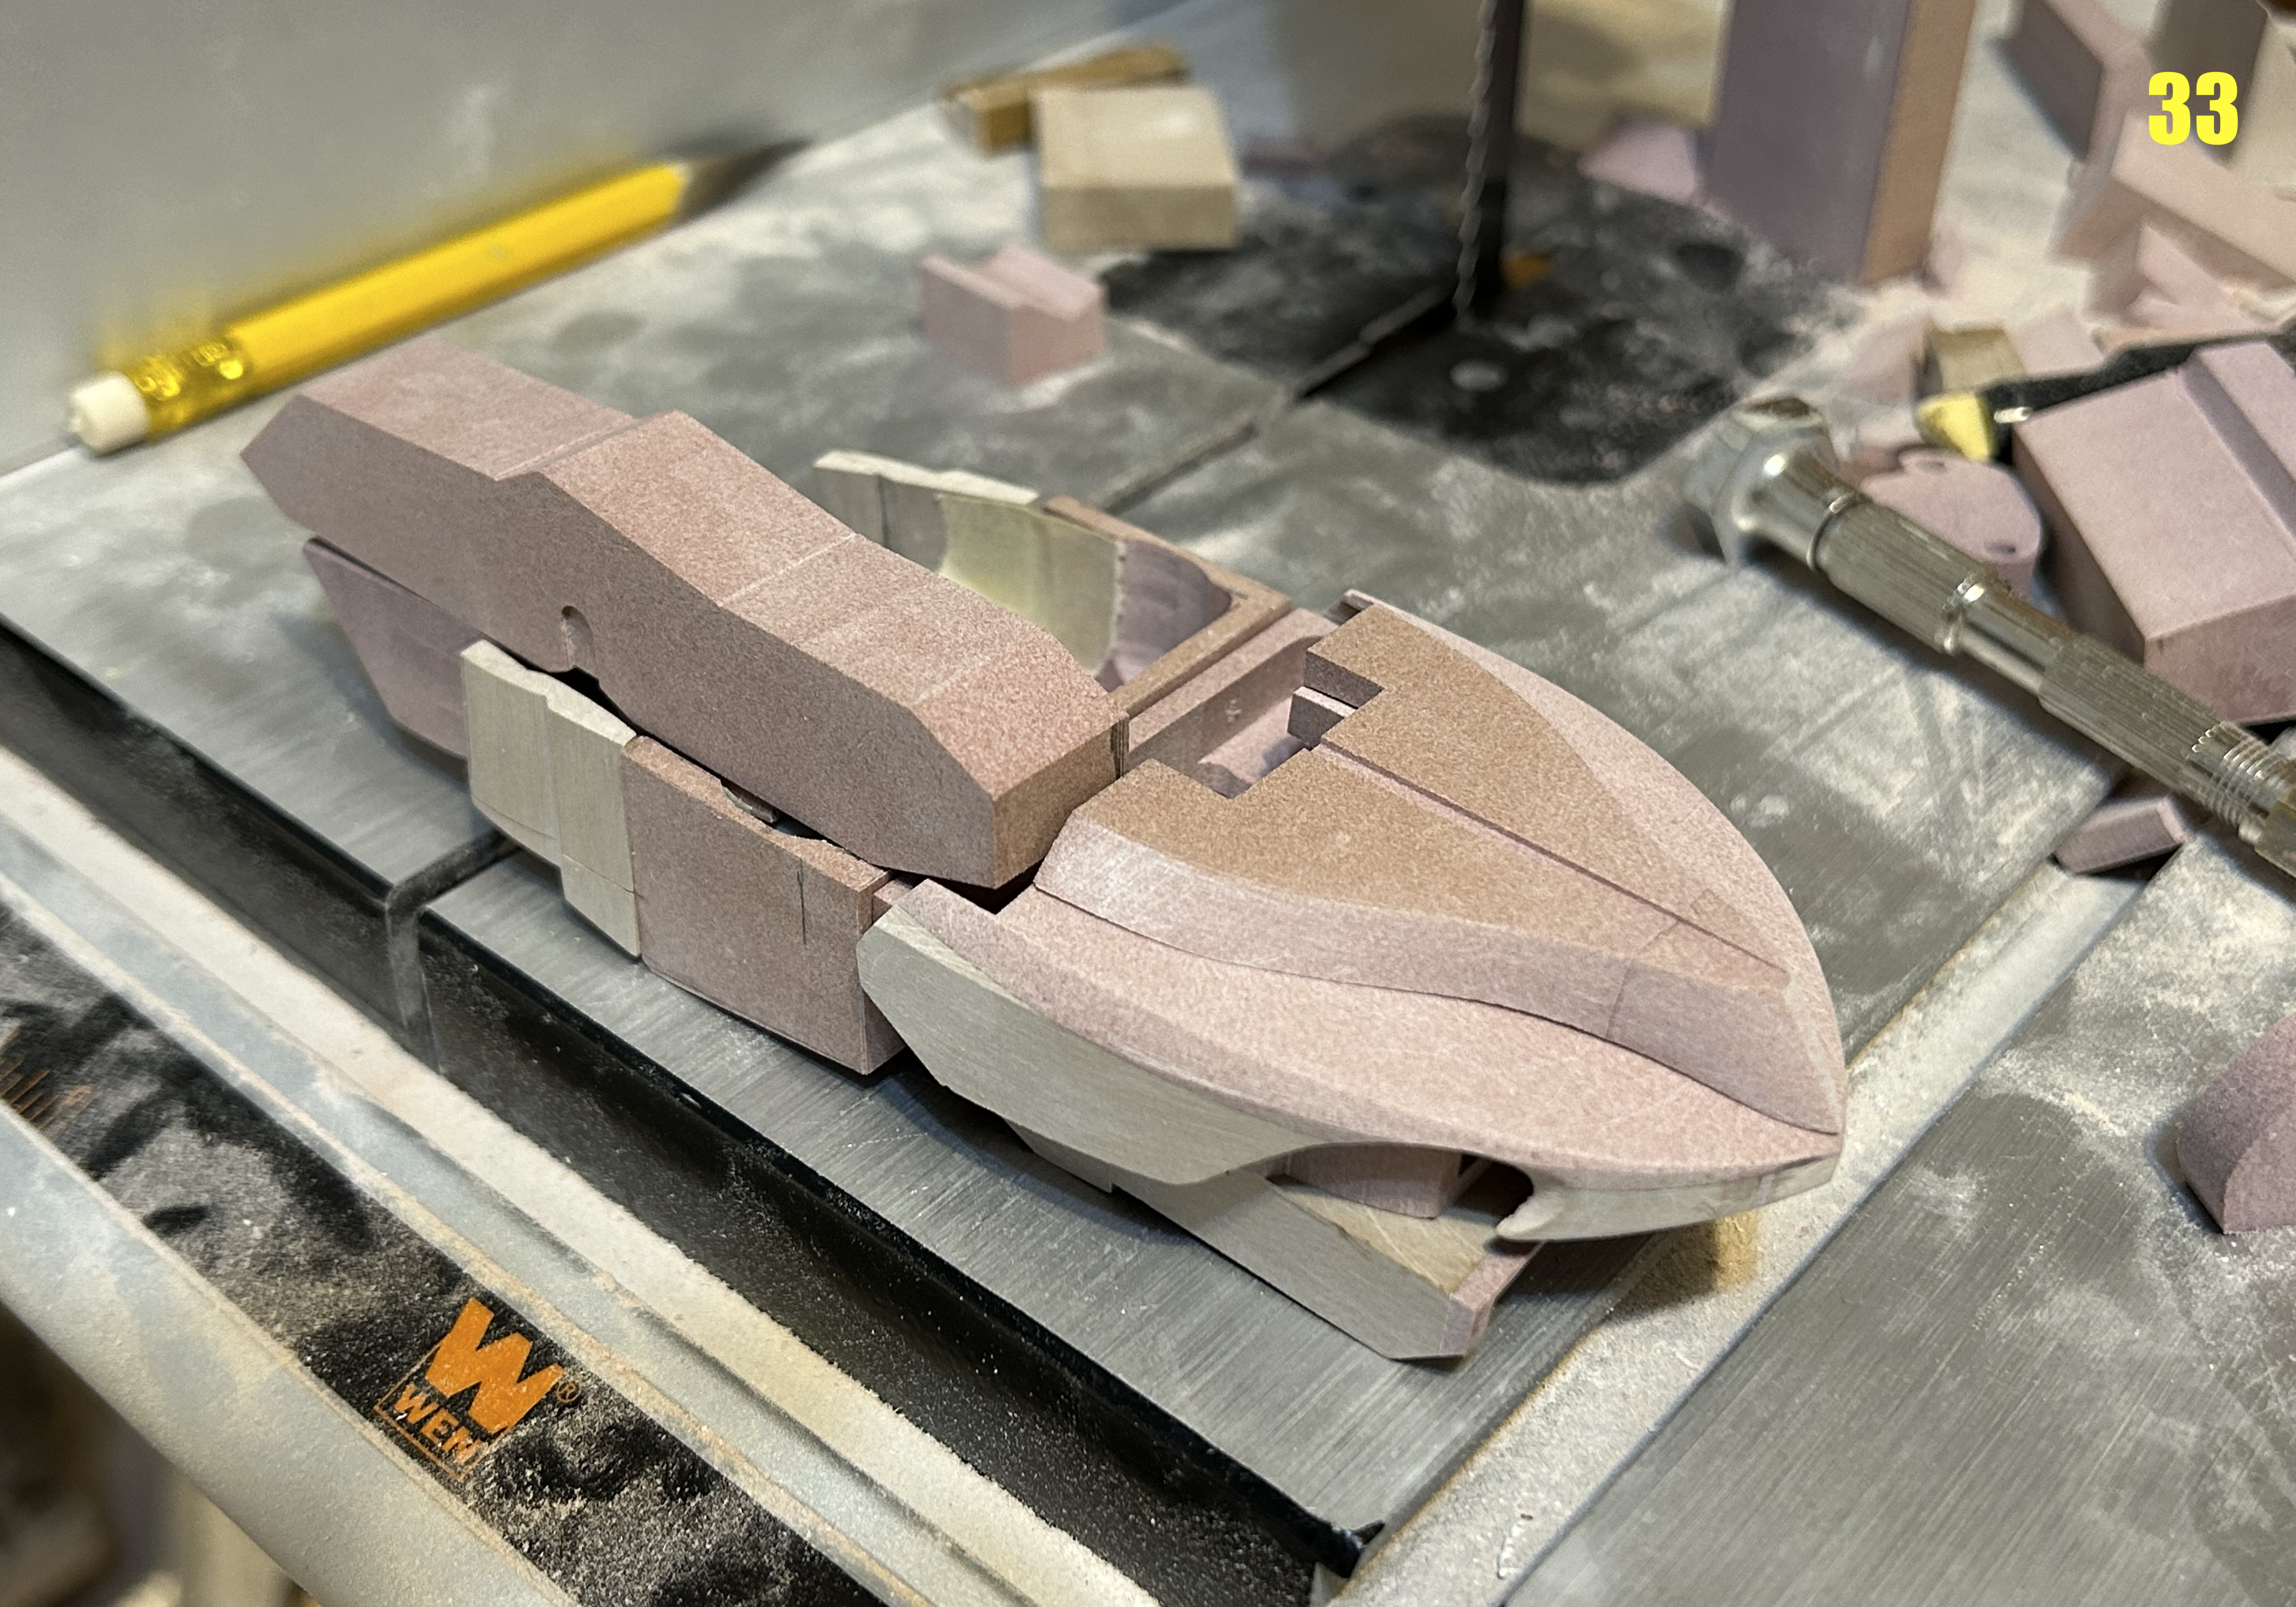
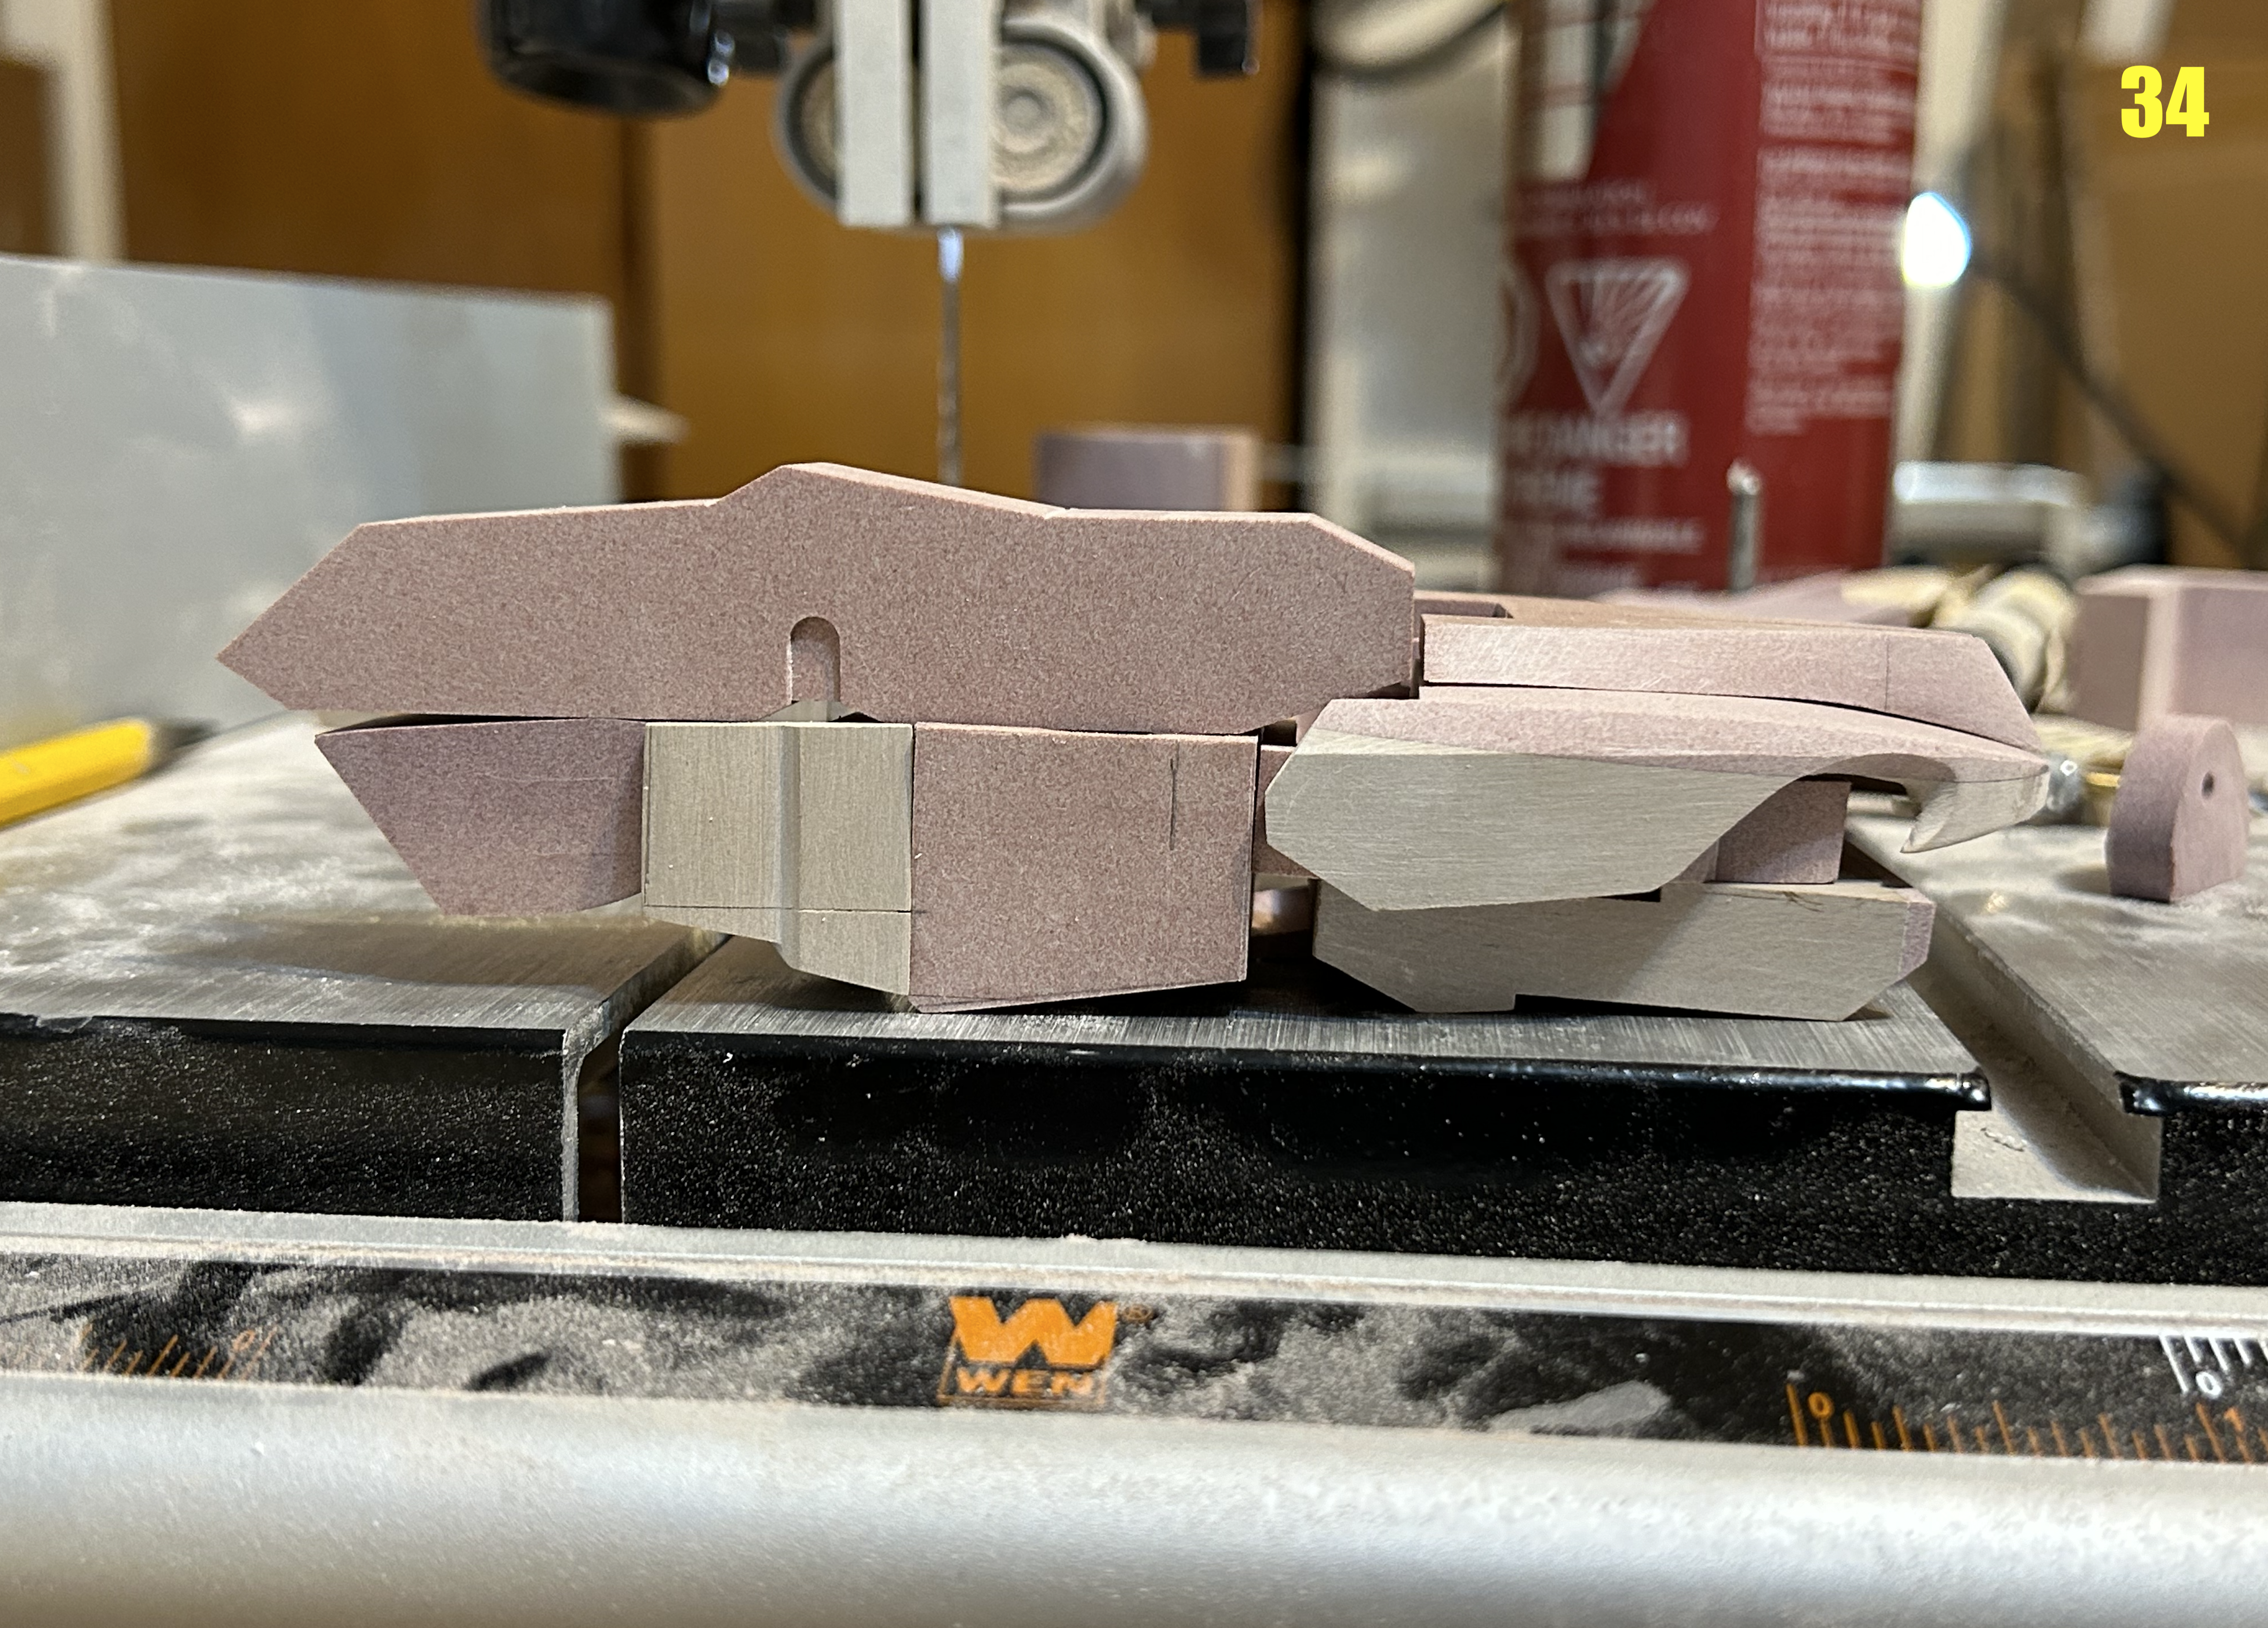
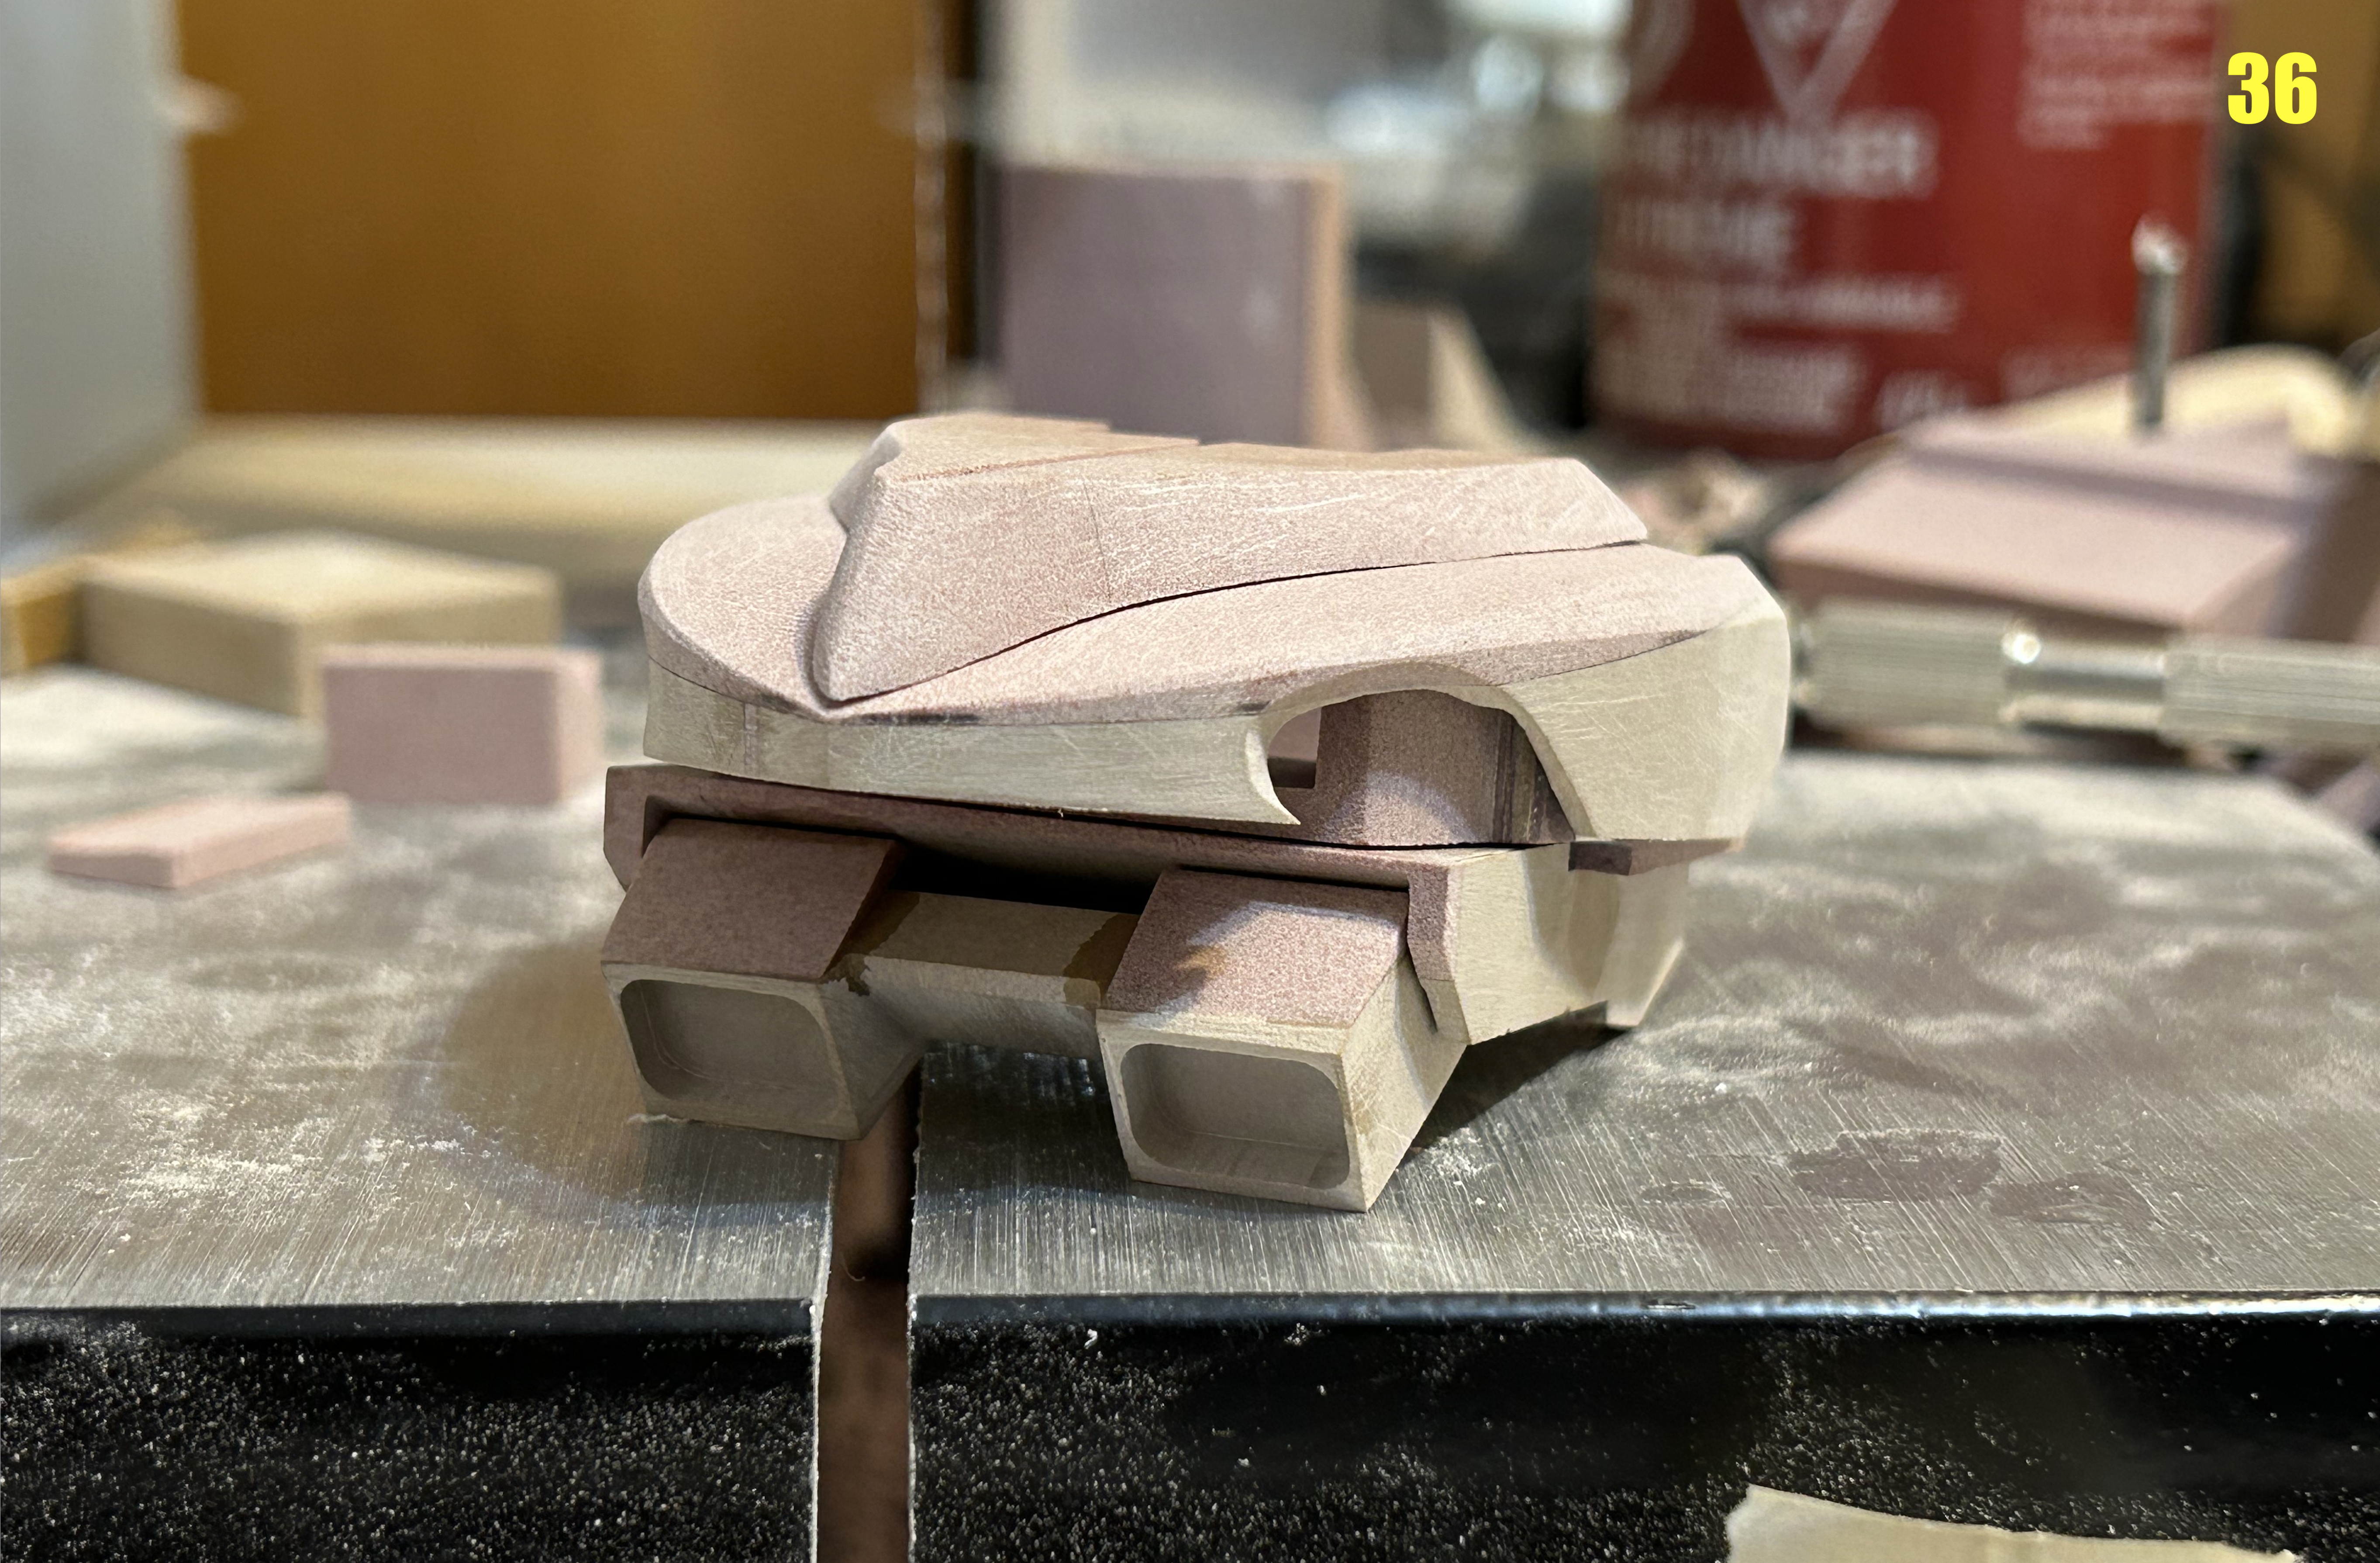
Pic 32: in order to allow the mecha to have a smaller waist as well as have clearance for the arms inside the mid-torso in Transport mode, the abdomen panels are also collapsible. They were a veritable bear to make, but the end result was worth it! In fact, you can see in pics 33 and 34 how nicely the sides transition to accommodate the arms and still offer relatively flat sides. Pic 36: the front hood along with the lower part of the backpack and the two square openings at the bottom, which I assume are thrusters of some sort.
-
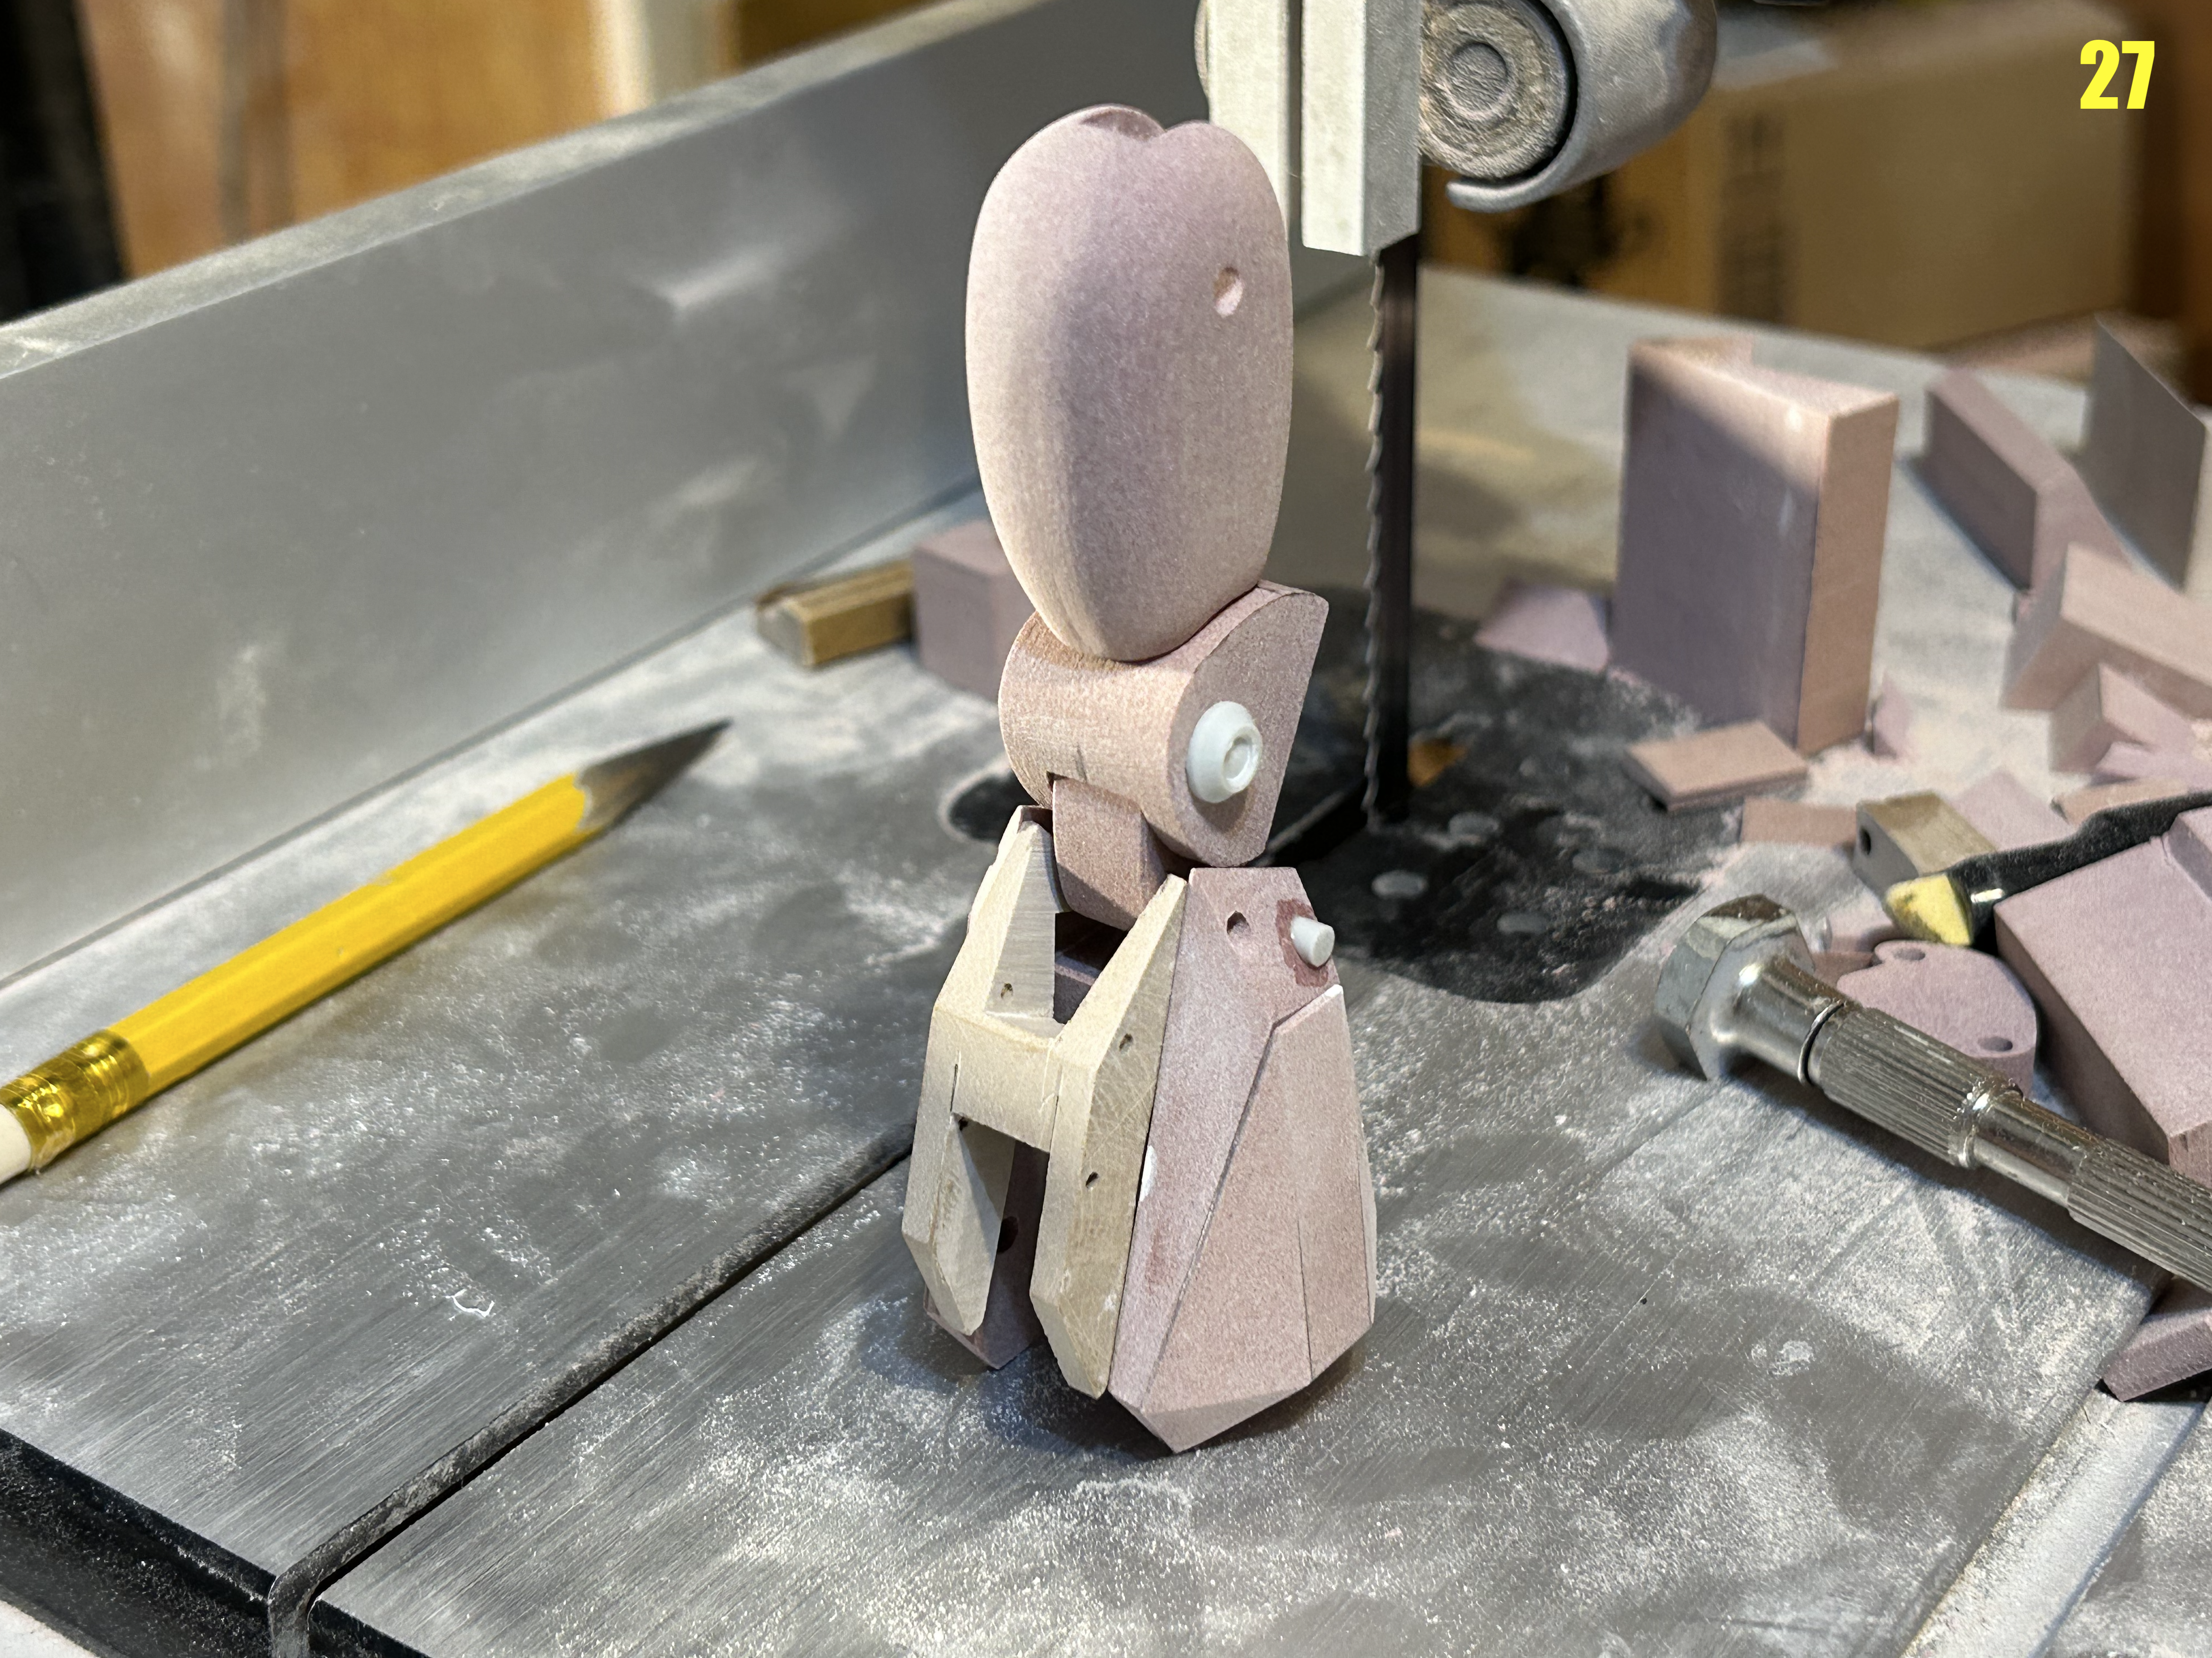
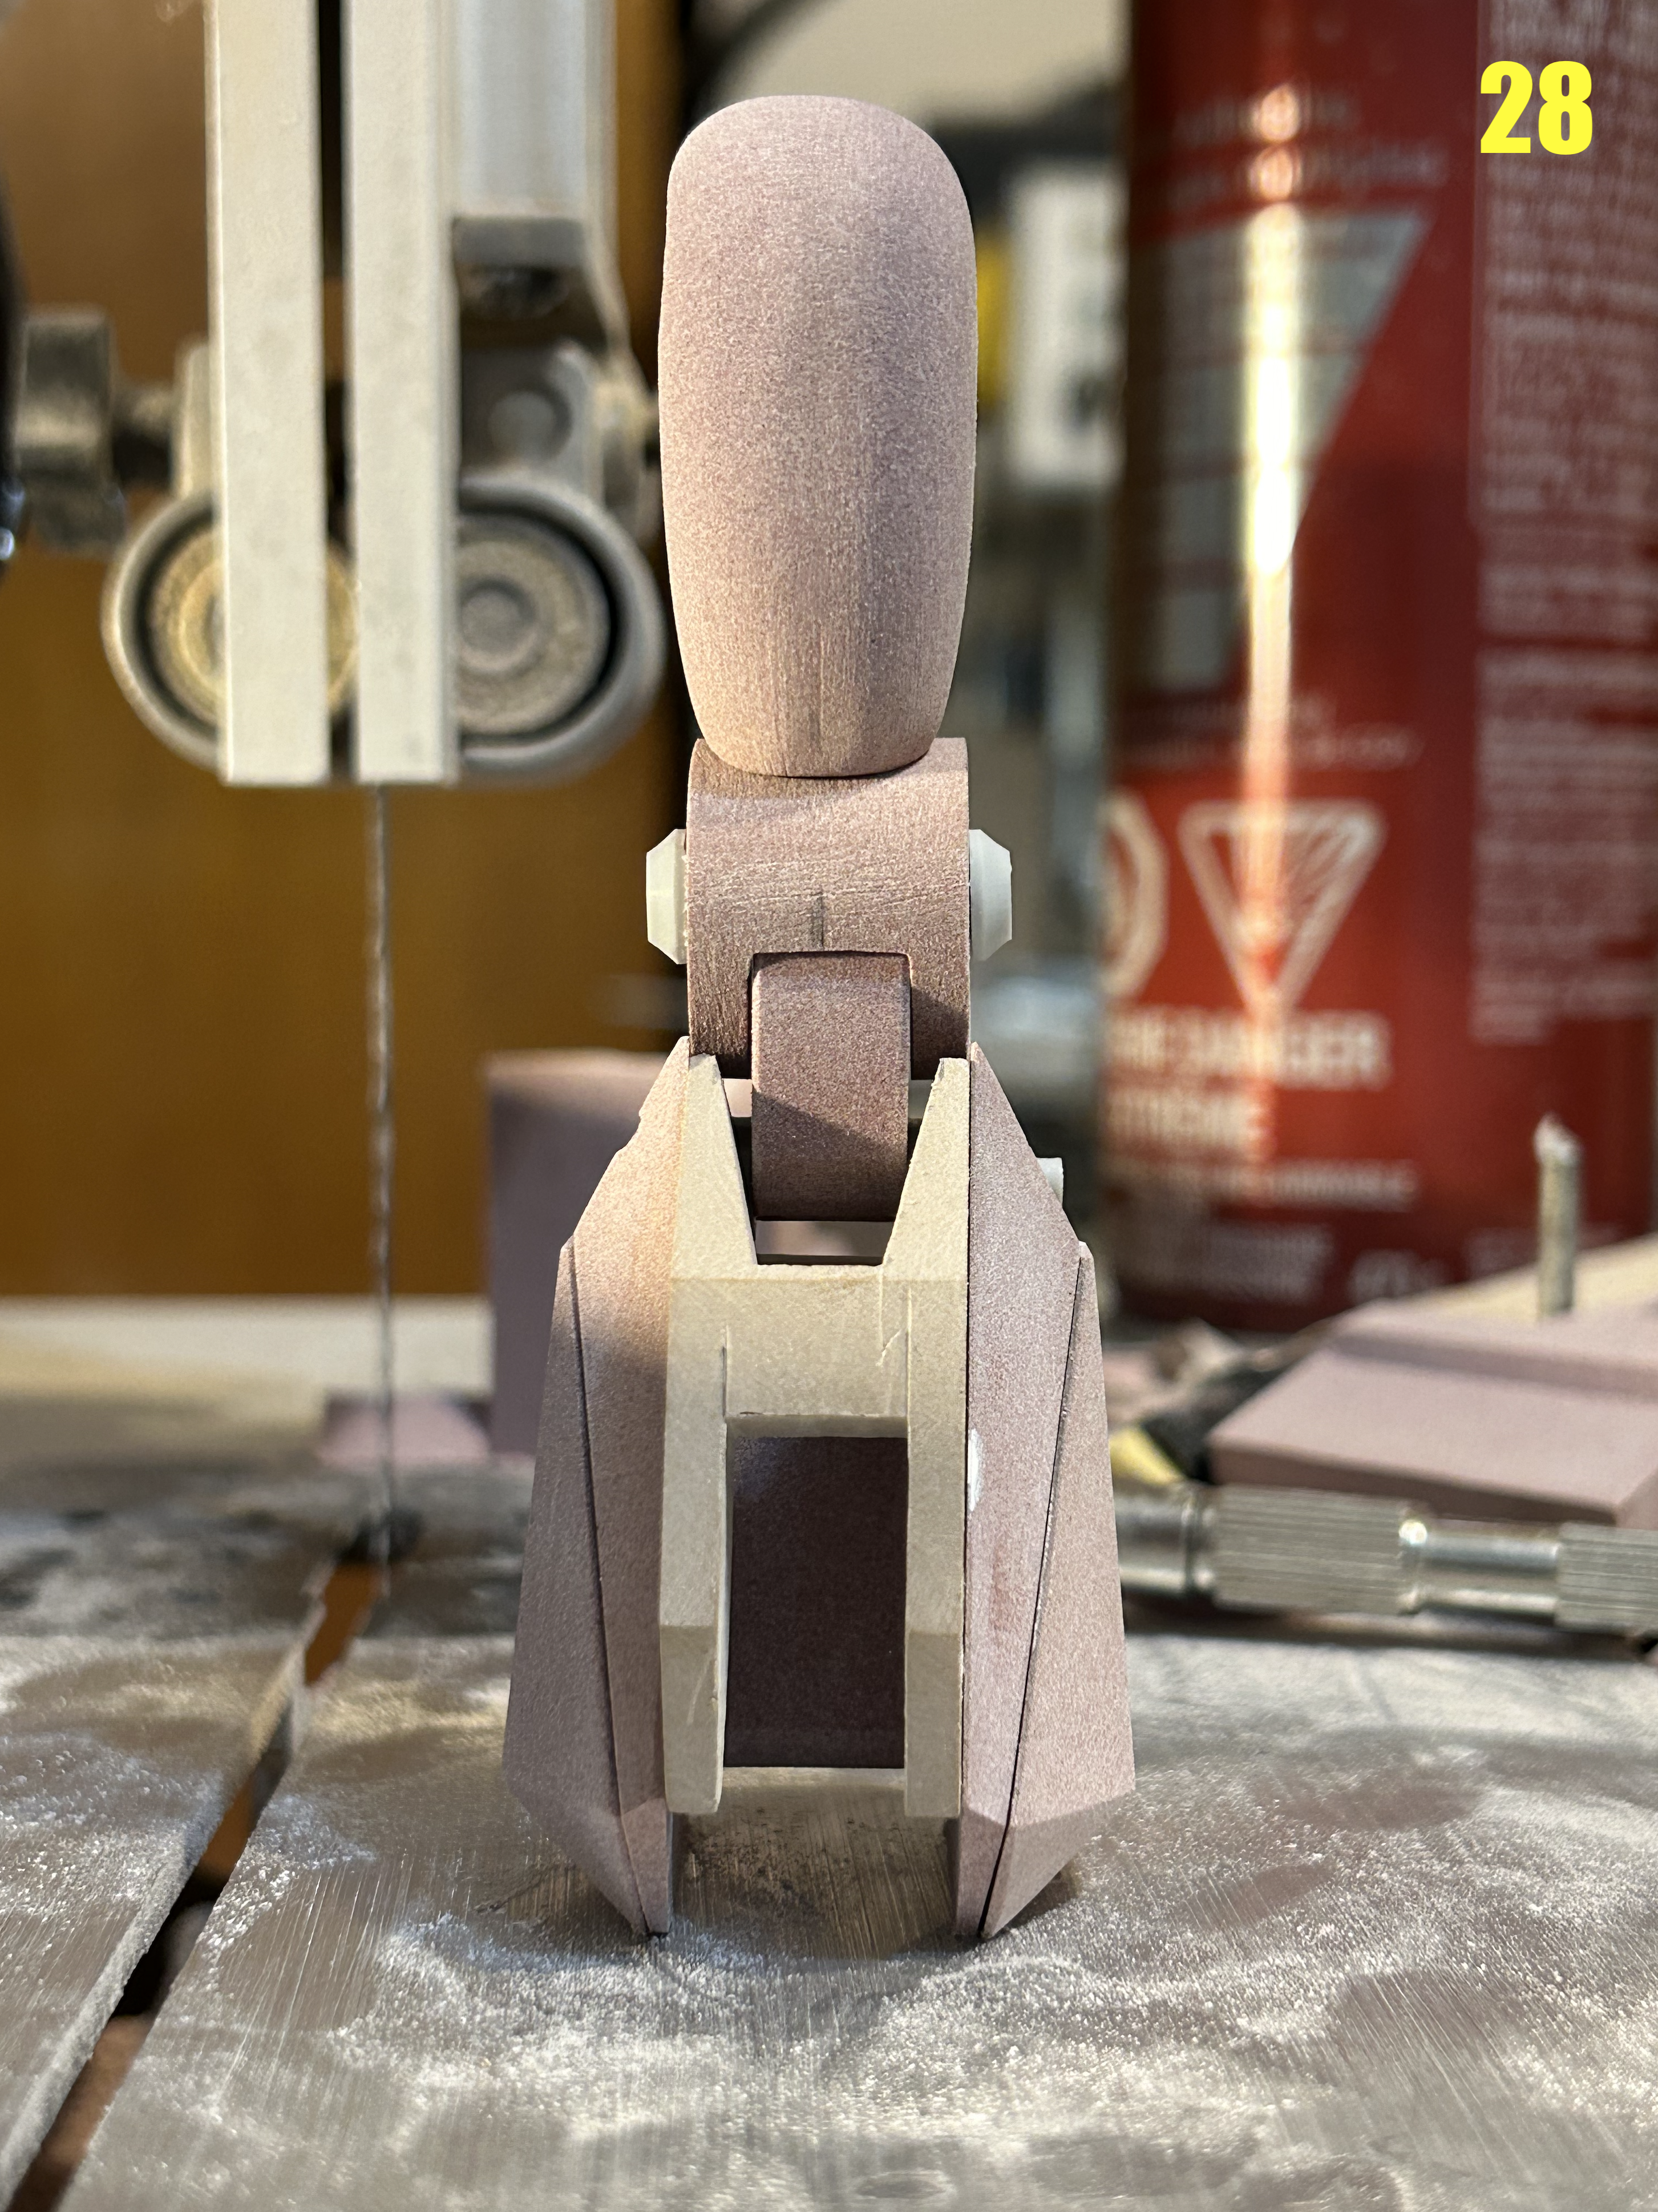
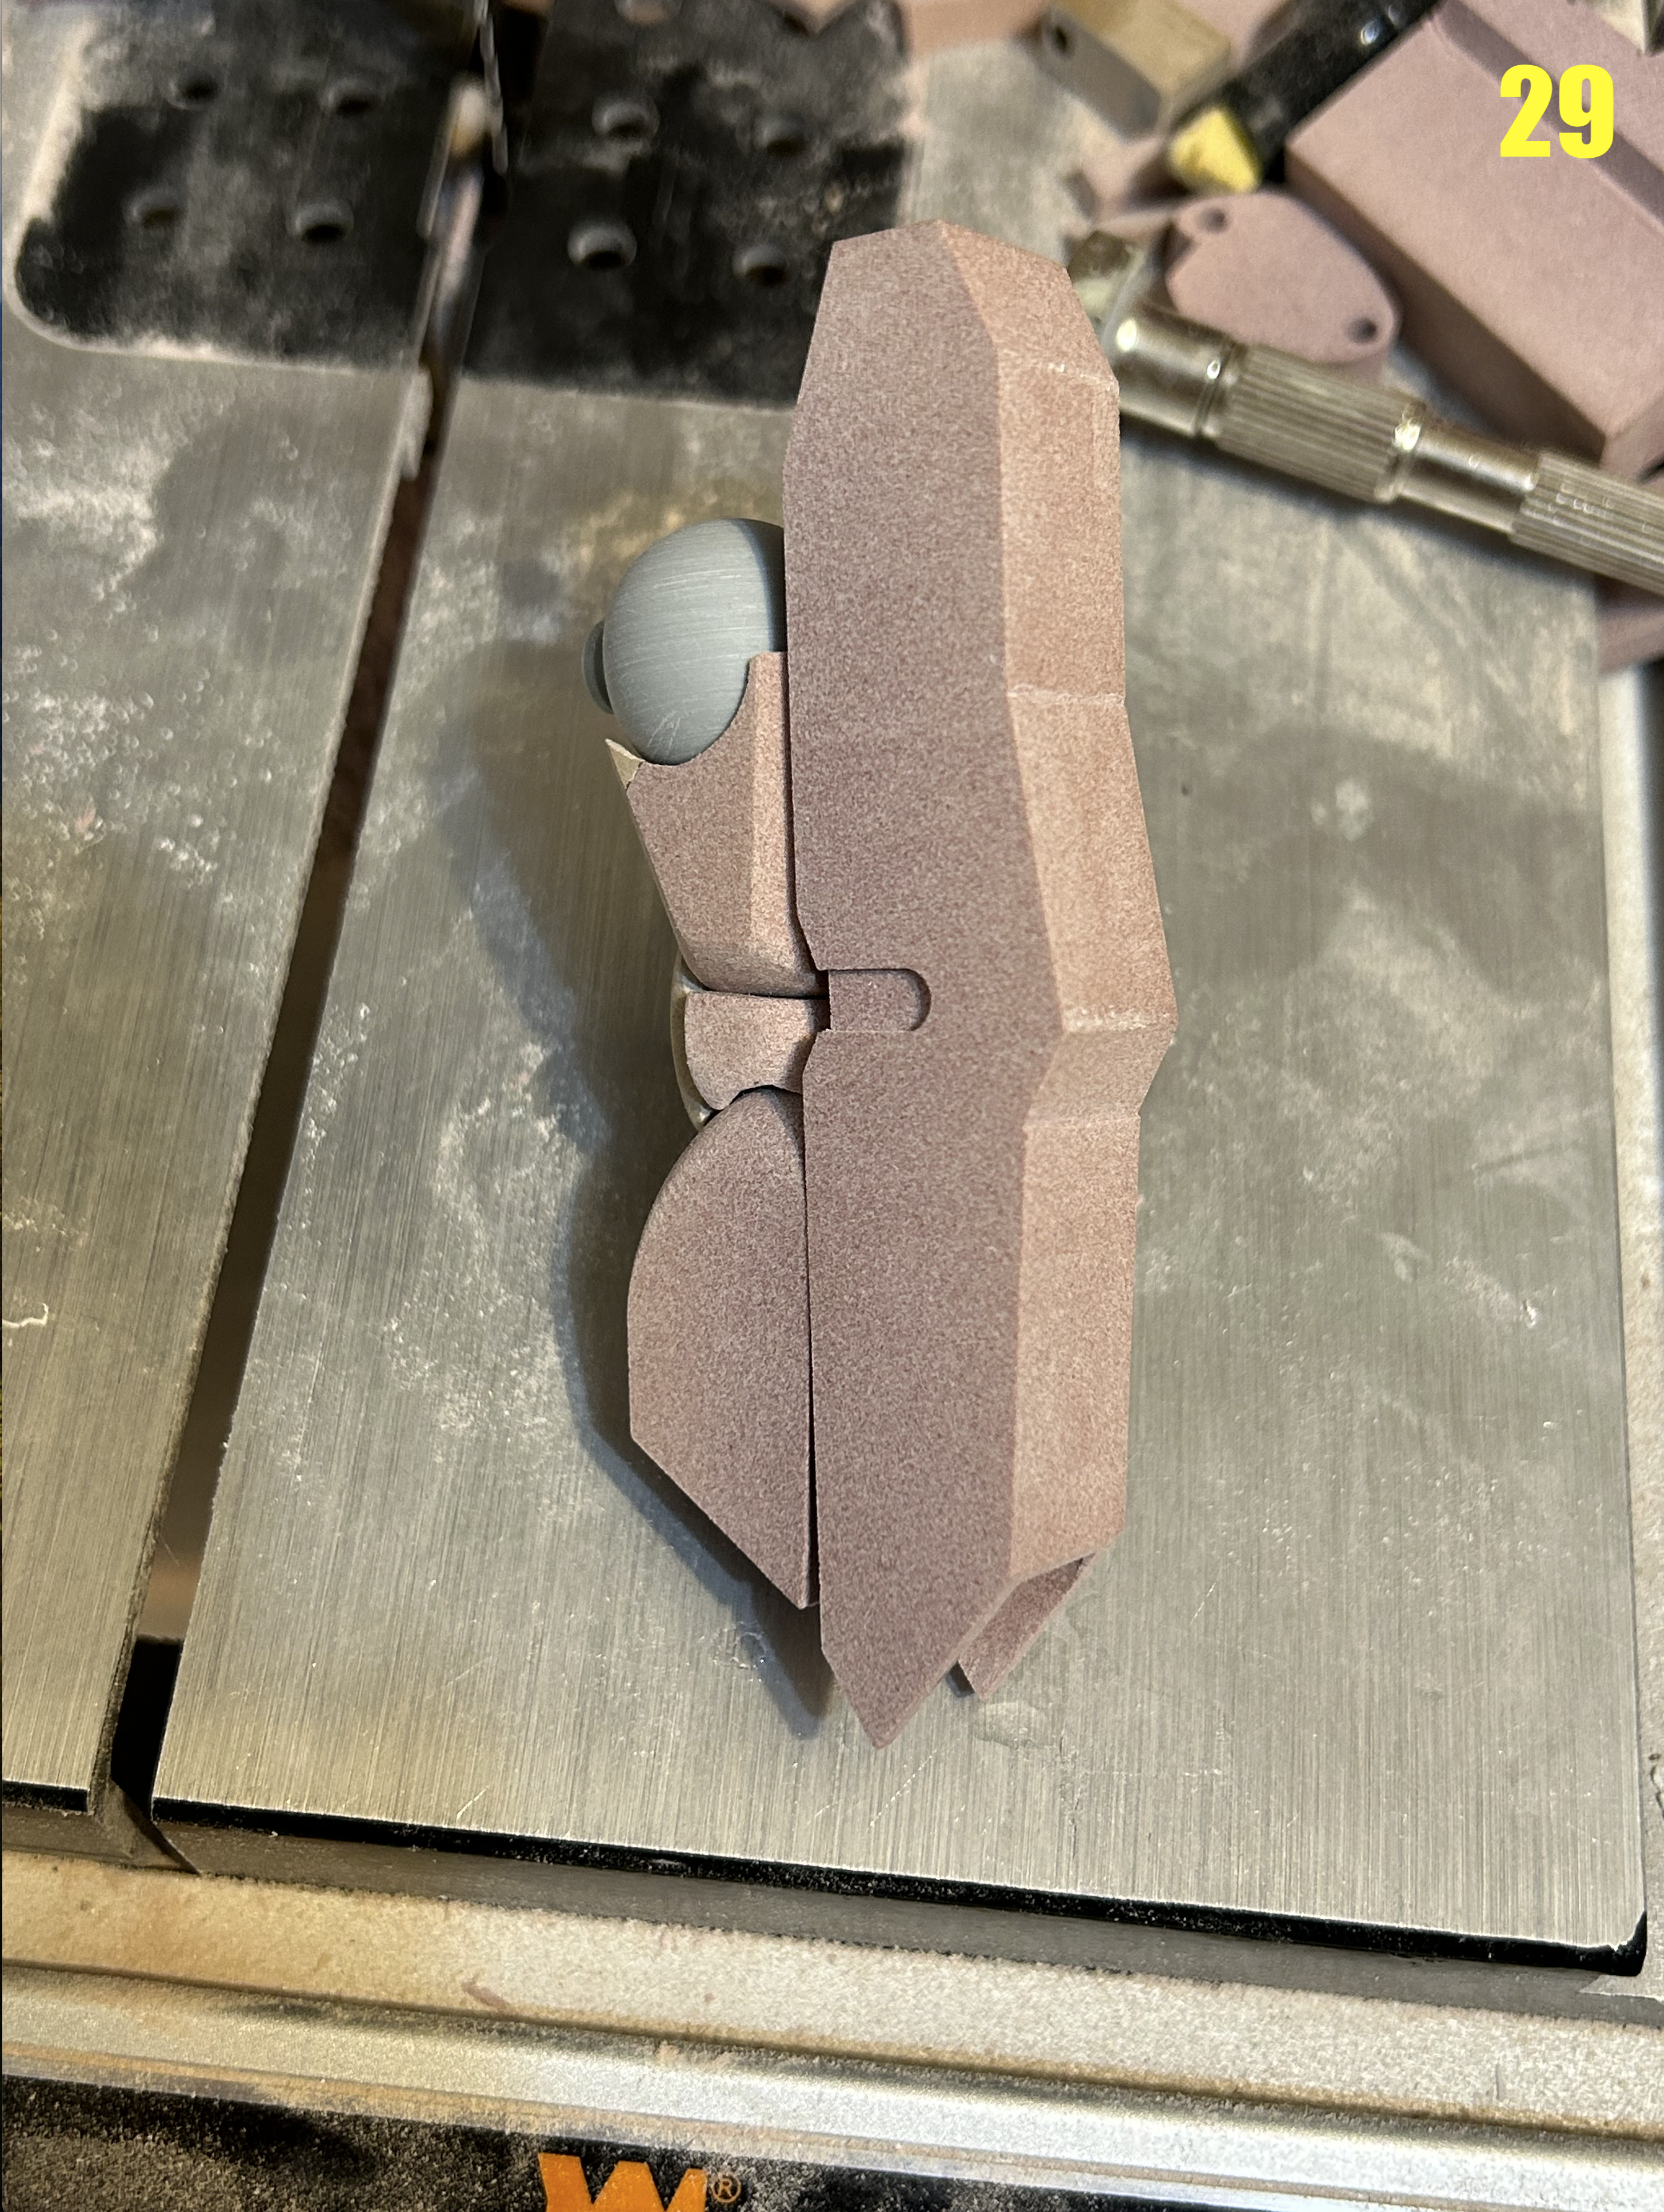
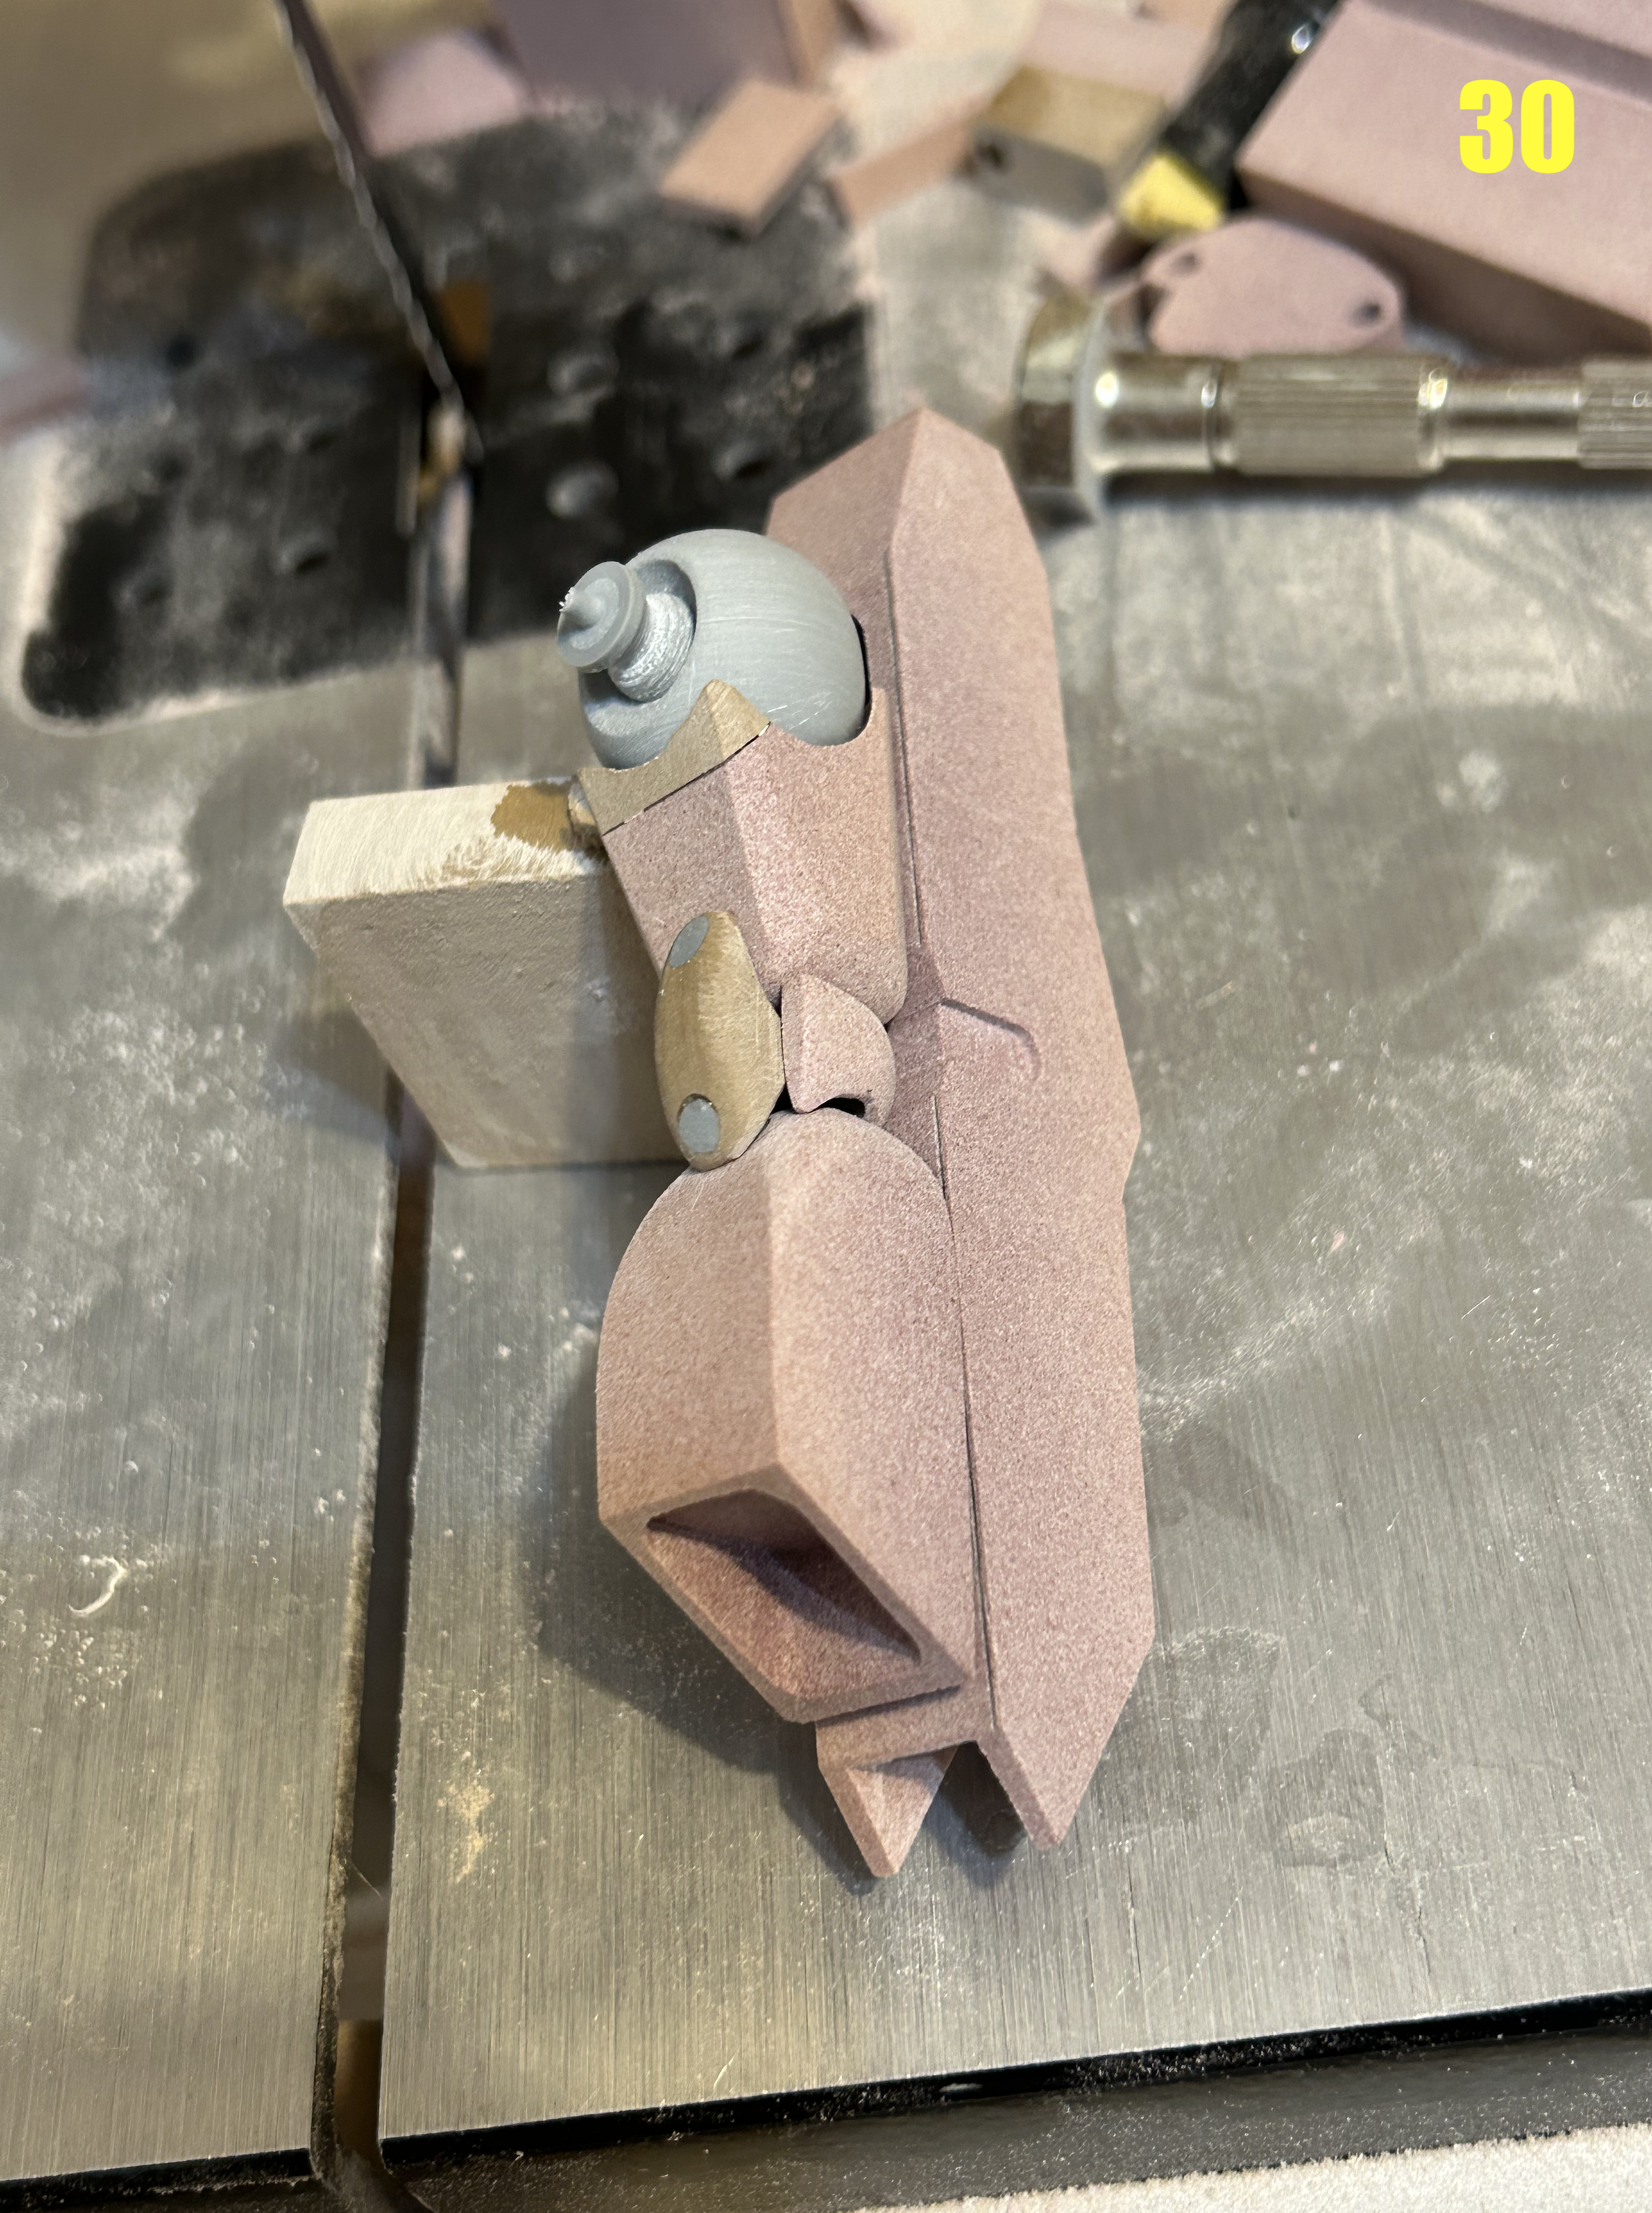
Captain's log: Thursday, May 9th, 2024. I'll start this week's update with a quick image of the pilot figure (pic 27A), currently undergoing a serious 3D overhaul, courtesy of Carlos P. While Ted had pointed us to a pre-existing file, the file was probably intended to be much larger, owing to the fact that the creator had made the figure hollow—presumably to save on material when printing—the end result being a figure which is paper-thin in 1/48 scale, and as such requires a complete redo! The main mecha itself is coming along quite nicely! Pics 27 and 28 show the leg, and all the complex engineering which is going into it. The shin-guard holder is made collapsible, which will allow Transport mode to sit flatter without sacrificing the look in robot mode. What may not be immediately evident is how painstaking it is to create all these sharp angles on the lower leg armor. The parts are small, and one wrong swipe with the sanding block would mean at least an hour of puttying and refinishing. I will wait to show you all the range of motion when the parts are further along. Pics 29-31 (inclusive) show the arm, which is another wonderful clusterscrew. I'm talking specifically about the elbow. The good: I was able to retain a swivel at the shoulder, and reasonably good range of motion so it'll be able to hold its rifle up, though the joint itself may end up being rather fragile.

-
Whatever a 1/48 Jeanne Francaix is, that's what the pilot will be! Seems the 3D Dana Sterling pilot figure you linked to earlier is a real clusterscrew of a file. So bad in fact, that Carlos abandoned fixing it and is starting completely from scratch.
-
Certain smartphones are now using .heic format for photos, which I understand offers higher resolution in a compressable format which takes up less storage space. Works perfectly on FB and IG, but I guess Invision is still playing catch-up.
-
@everyone Captain's log: Thurday, May 2nd, 2024. Work on the 1/48 Tanku-Robo project proceeds! In pic 12, you see the paper patterns affixed to some prepped blocks of modelling board, just waiting to be sculpted into shape. 012.HEIC *Pic 13: under the band saw go the blocks. I avoid cutting too close, because the blade is known to bend and can create warped cuts. Rather, I proceed by removing the large stuff first, and leave at least 1mm if clearance all around. The excess will be removed in another operation.013.HEIC *Pic 14: here I've CA glued some cast resin cylinders together to help in the machining process. The jaws of the lathe chuck need a minimum amount of surface to grab on to, so this is my solution. This is just one of the things you can't do with metal! 014.HEIC *Pic 15: once the CA glue has set, I can now (carefully) turn the part. 015.HEIC *Pic 16: Now in the mill, I'm using it as an improvised drill press. The holes I've bored out represent the hinge points for the lower knee joint, as well as for various armor bits. The holes go all the way through, so I get perfect left/right symmetry. 016.HEIC *Pic 17: some of the shapes previously trimmed on the band saw undergoing the milling process to remove the last bit of excess. With the mill, I can go right to the paper line and get perfectly flat shapes. 017.HEIC *Pic 18: some parts, like the thighs, need to be rounded. Here I'm finishing the shaping with a manual sanding block, though I took this part to the bench grinder first. 018.HEIC *Pic 19: the front upper hull of the hovercraft is seen here. I decided to cobble it together from various other parts because of its complexity. In **pic 20, you see what the underside looks like, as I wait for the glue to dry. 019.HEIC020.HEIC *Pic 21: I now proceed to remove the excess material on the band saw. 021.HEIC *Pic 22: next, I take the part to the grinder to get that perfectly vertical, curved outer shape. Once again, I take my time here, as removing too much can be very costly! 022.HEIC *Pic 23: Same part, now having some cut-outs machined. 023.HEIC *Pic 24: here I've created the upper, secondary shape and make sure everything ligns up before I continue carving.024.HEIC *Pic 25: Once all the shapes are satisfactory in their squareness, I can begin implementing some hand-sanding to bring out just the right curvature.025.HEIC *Pic 26: Still not done, but now much more recognizable!026.HEIC My apologies for the slow progress: this mecha, by virtue of its variable geometry, is made up of many, many small parts and they require lots of time to shape properly. The model is actually more advanced than I'm showing you now, because I want to save that for next week. A fellow MWer is currently working on the modeling of the pilot figure, and what he's doing so far looks excellent! Stay tuned for a very cool update coming next week!
-
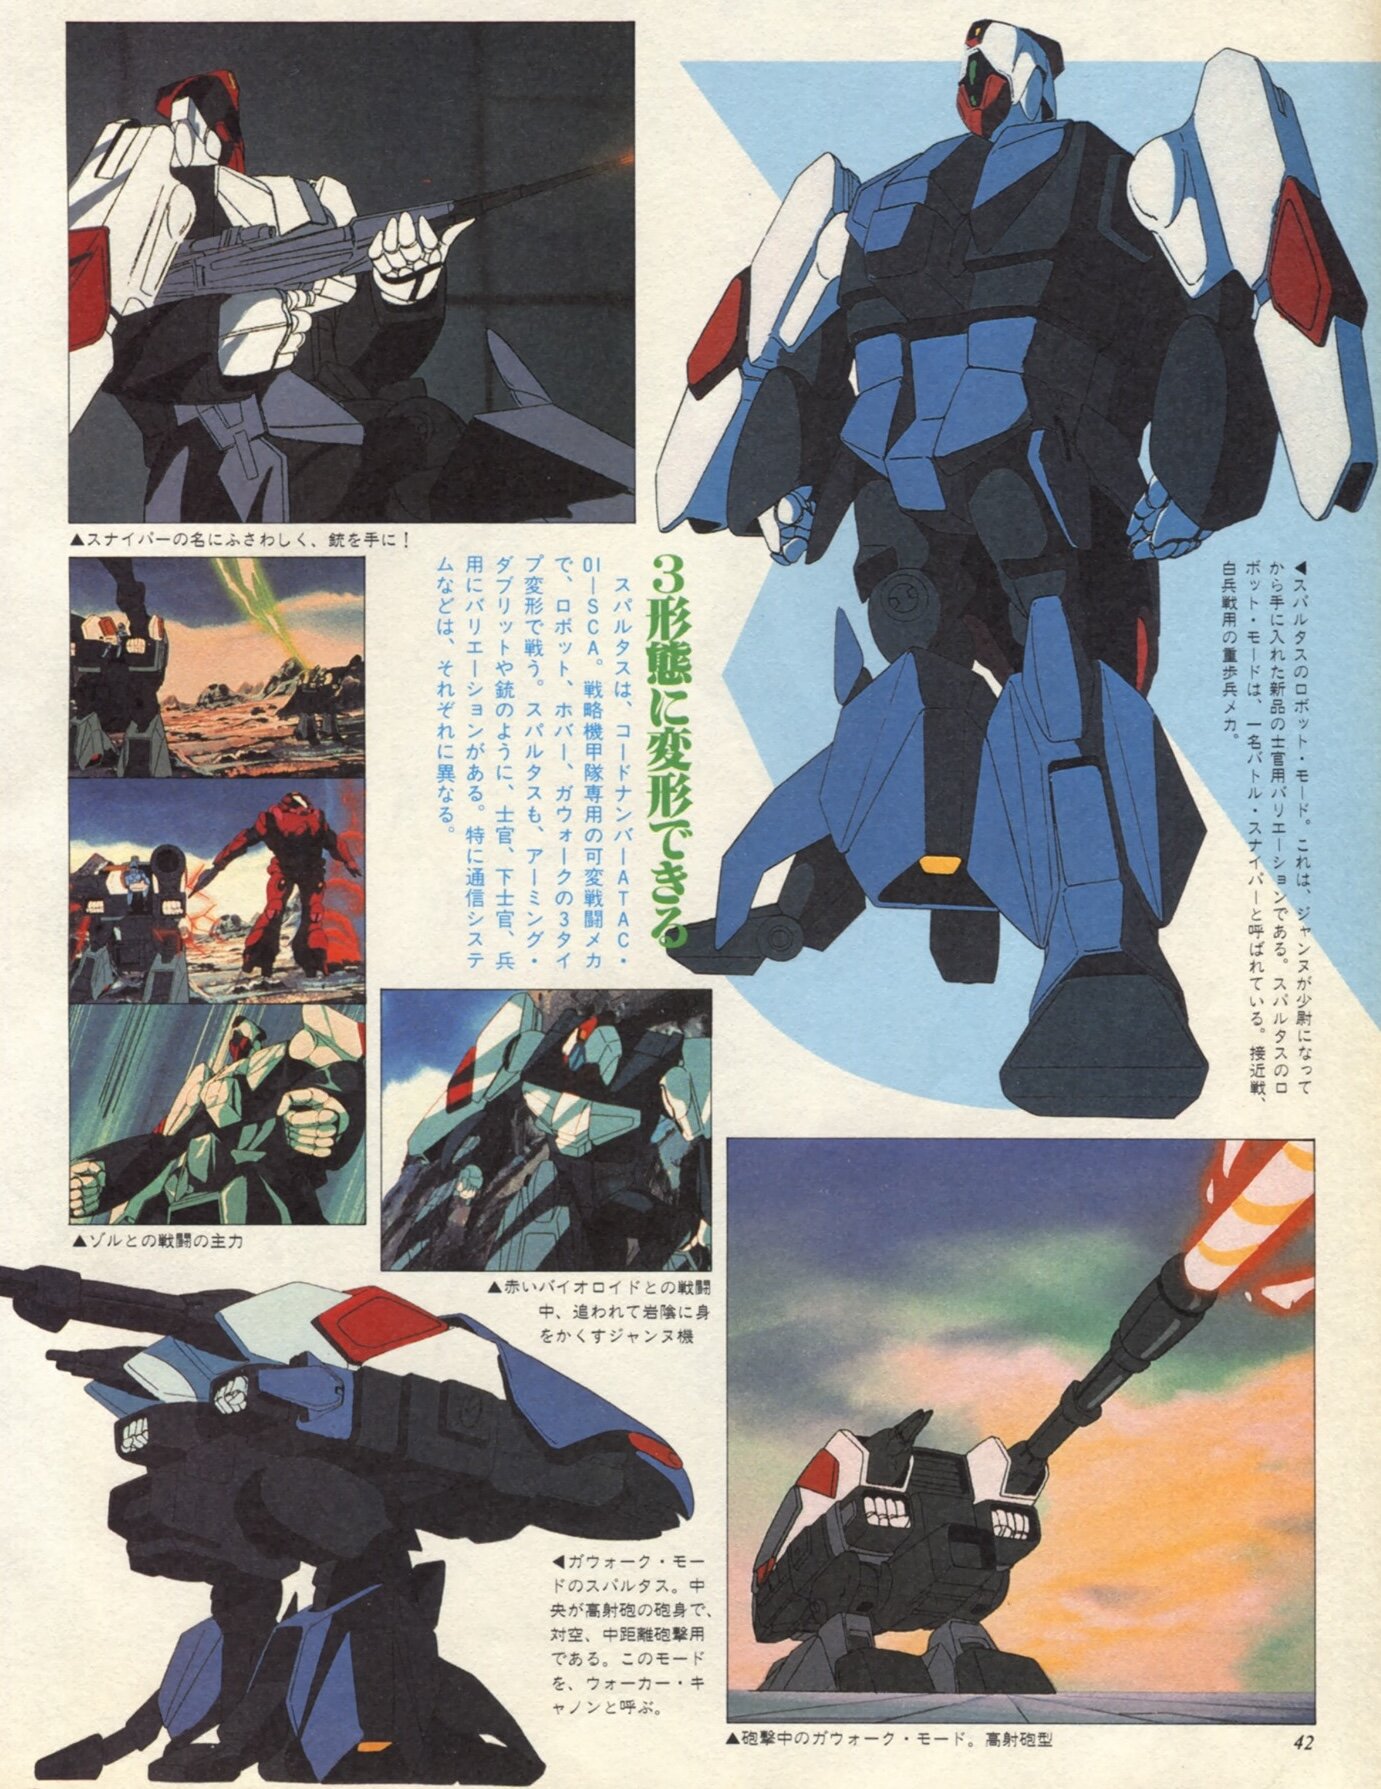
Captain's log: Thurday, April 25, 2024. Work on the 1/48 TANKU-ROBO has begun and is off to an excellent start. I had actually done some drafting a couple of months ago on my private time, just to see if there were any irreconcilable geometry problems. My biggest concern was for the Sniping Clapper mode, hereafter Transport mode because many renderings had an absurdly thick and clumsy profile: nowhere near the more flat and uniform appearance we see in the animation. Either there was a significant problem in the fundamental geometry, or these guys weren't trying very hard. I'm happy to tell you it's the latter, but with a caveat. I was able to get a flatter profile because I opted to incorporate collapsing panels in strategic areas. That is to say, certain modules are hinged and can be made more compact in certain modes. This is actually quite feasible in a toy like the old Matchbox Hovertank because it's large and offers more breathing room for screws, joint reinforcements, etc. In 1/48 scale, the geometry is still sound, but due to the smaller size, sturdiness and playability would be greatly sacrificed: bad news for toy designers, but not a factor for a display model! As you can see in images 1-4, I was able to get Transport mode very flat and elegant without sacrificing the other modes, and without cheating! 004.HEIC003.HEIC002.HEIC001.HEIC With the drafting process now largely done, I can begin proper construction. Pic 05 shows the basics: a pile of modelling board chunks, some analog calipers, a ruler, and of course the plots. 005.HEIC Pic 06: I need to cut some of the modelling board into more manageable pieces, so under the band saw it goes. 006.HEIC Pic 07: with every cut of the band saw comes a rough, uneven texture left by the blade, so those pieces are then milled flat. 07.HEIC Pic 08: in order to achieve precise results, precision must be maintained at every step of the construction process. If I allowed deviation to occur at this early stage, the end result would be a sloppy, irregular mess! 008.HEIC Pic 09: now that I have a few decent blocks to work with, I begin the tedious process of cutting out my paper patterns, which will guide my construction. 009.HEIC Pic 10: as a bonus, I thought I'd show you some of the cutting tools I use on the milling machine. On the far left is the faced-end mill: I use this for creating flats over larger surfaces. It does the same work as a regular mill shank (second-from-the-left) but does it much quicker. Then comes a large bull-nose cutter. The many cutting edges denote this to be used for fine cutting. It differs from the smaller bull-nose flute in that despite being small, it has fewer knife edges, meaning it can remove more material more quickly. The last two are smaller, square end cutters which I use for detailing. Sometimes removing too much excess material can cause a part to crack, so these are used for fine work in sensitive areas. 010.HEIC Pic 11: with certain blocks which are too thin and awkward to hold in the milling vise, I use my trusty drill press with a sharpening stone as an improvised end-mill. When using this method, I usually only have to remove a millimeter or less, and it does so very effectively, with the drawback being lots of fine dust. 011.HEIC That covers the progress for this week. Things should start getting more interesting in the next update, when you'll start to see some (almost) recognizable shapes, so stay tuned!
-
Hey Ted. My intention was to make the Sergeant head as the alternate. This way, if someone wants the Private model, they can simply remove the crest and putty over the ear flaps.
-
Hey guys! I've been hard at work drafting the diagrams for TANKU-ROBO, and it's going well--VERY well! Because this is a quasi-transformable mecha, it obviously poses some extra engineering challenges, but that only makes it more interesting. I have overcome most of the hurdles and will have a proper update next week. In the meantime, I have a request: can anyone take this file and print it out for me in 1/48 scale? It needs to be: -ultra-fine resolution -1/48 scale (can specify max dimensions for you) -no display base required If you have a printer and are so inclined, send me a private message with your fees and timetable, thank you! The file in question: https://cults3d.com/en/3d-model/various/asiento-y-piloto-de-spartan-hovertank-robotech
-
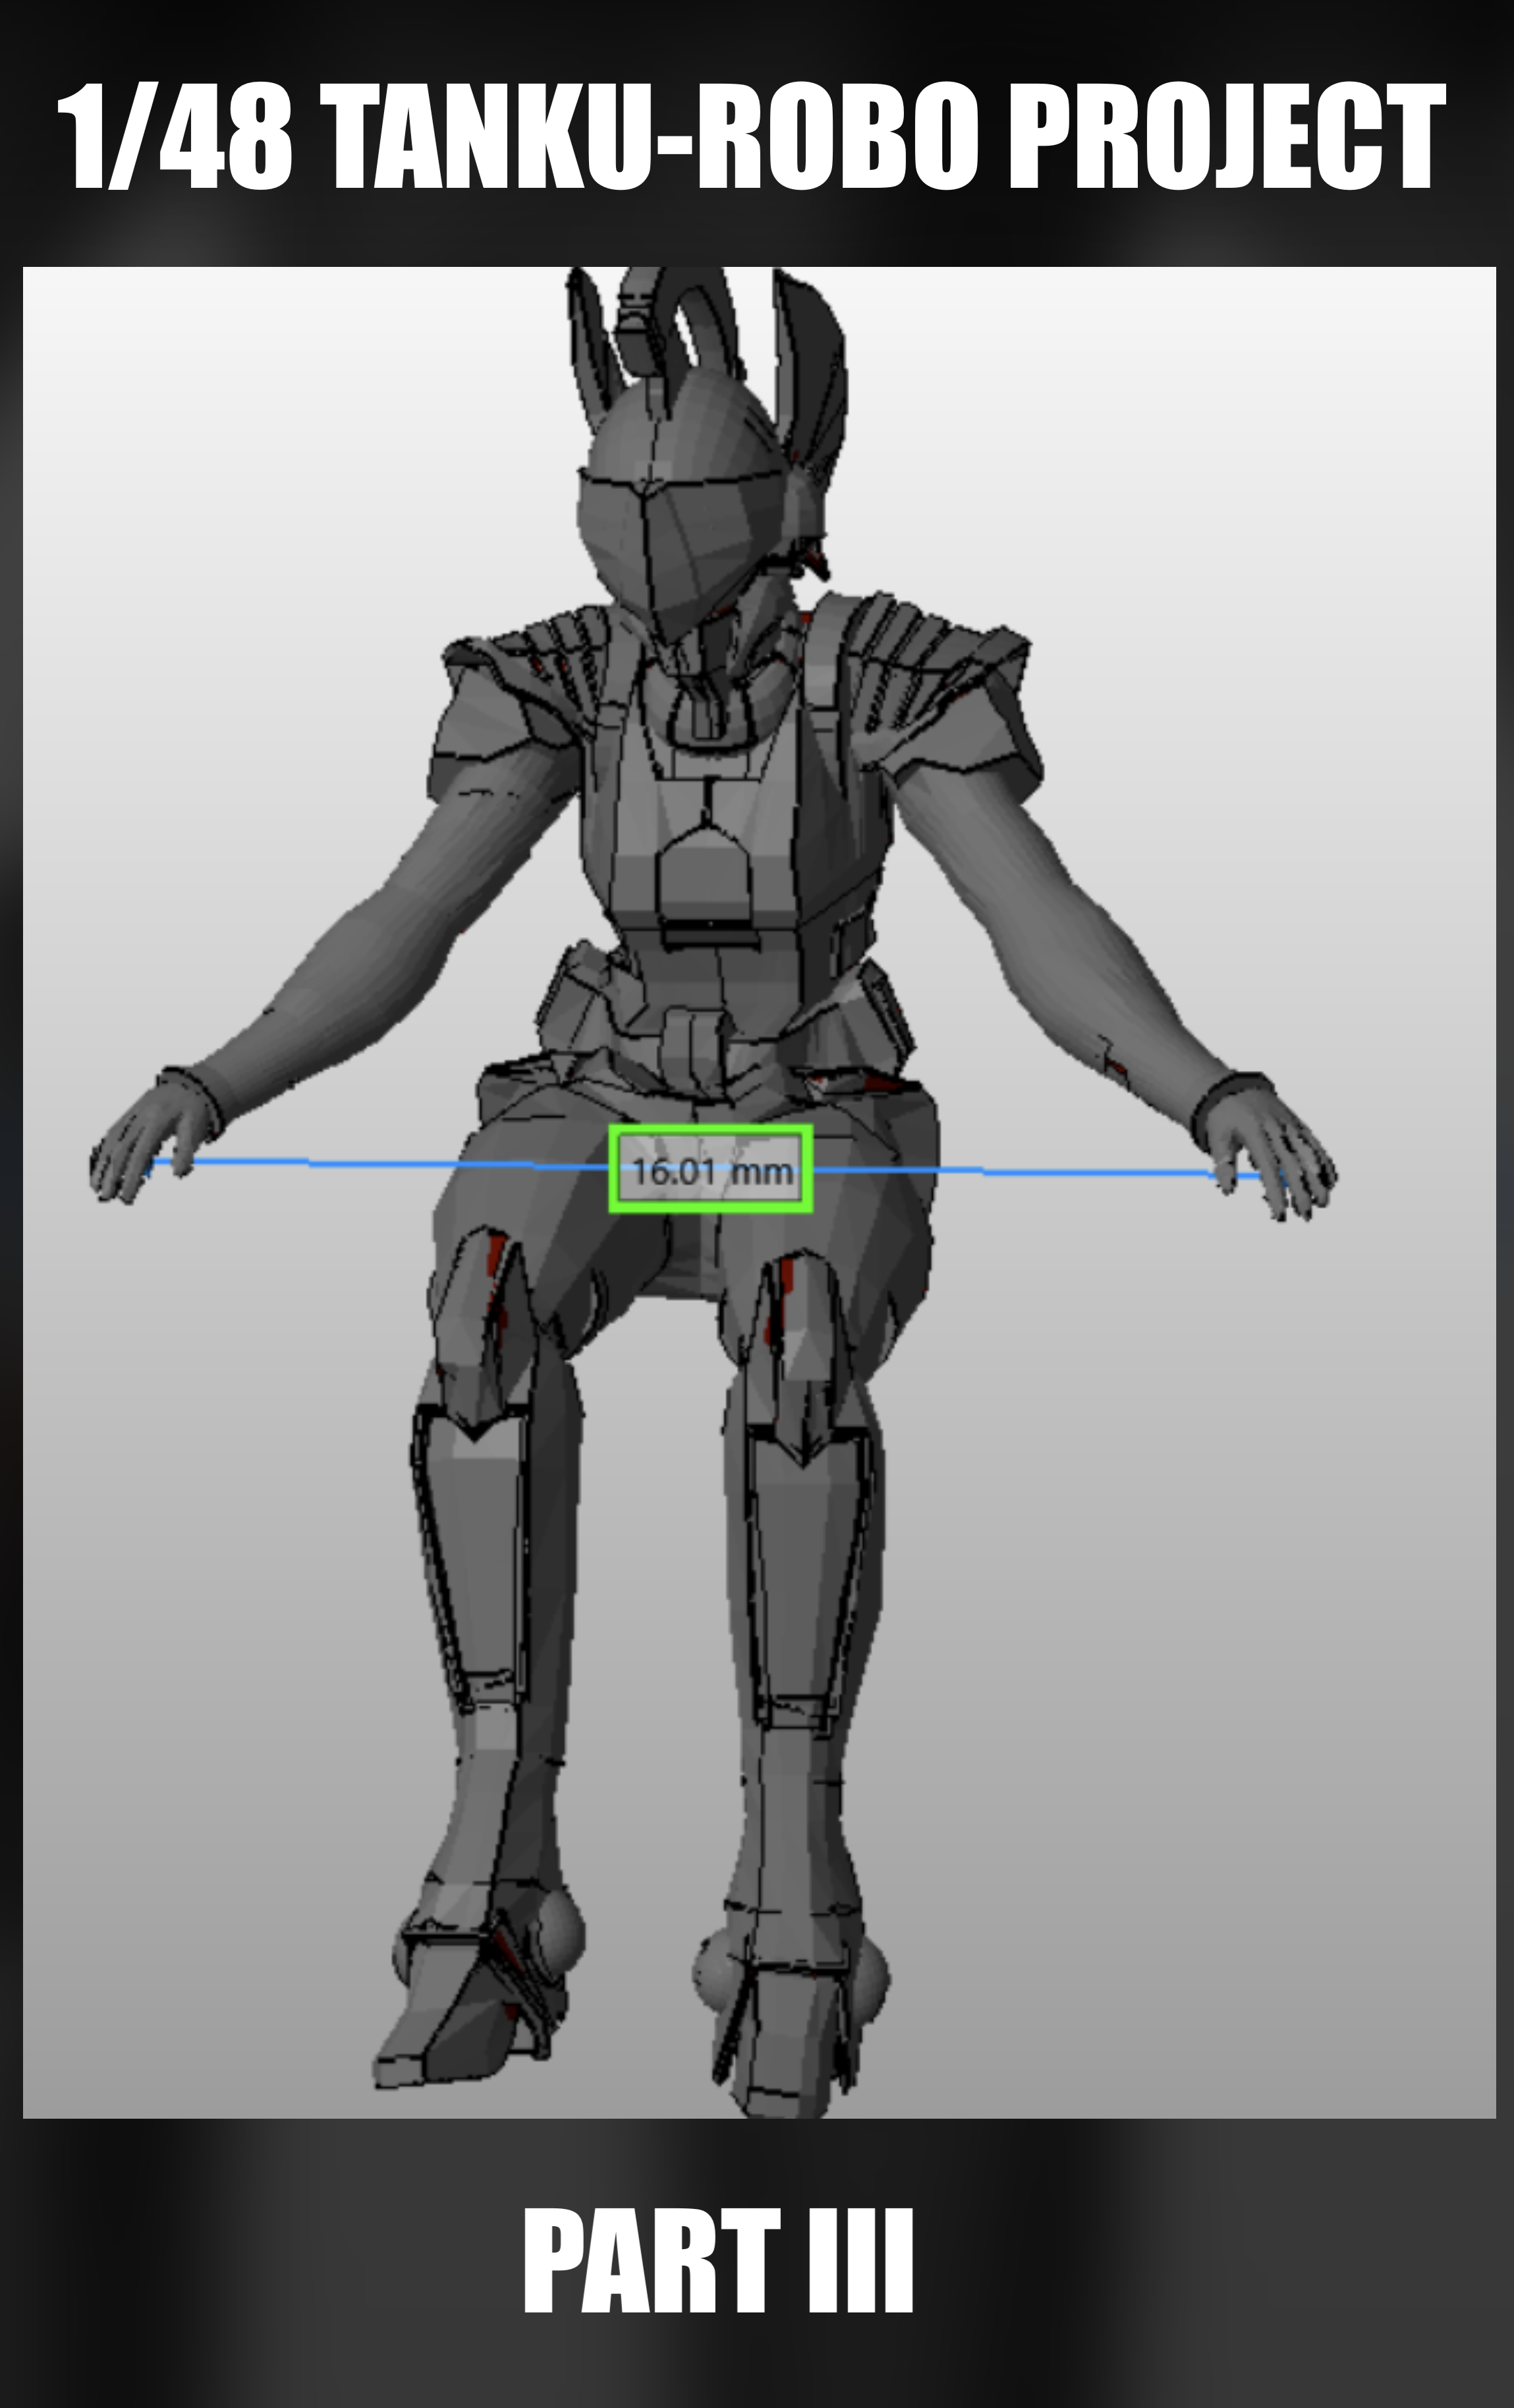
The 1/48 TANKU-ROBO project is going ahead.
-
2 spots remain open for the first 30. Orders 31 and up will see the price changed to $415 CAD + shipping. The first run of 30 is locked-up.
-
Sadly, no. Australian import fees made the distribution for my kits untenable.
-
MIND: BLOWN! Demand for the 1/48 TANKU-ROBO has exceeded the first run in just 48 hours! Payment requests are sent out to all those whose email is on file. The speed at which you respond to the payment request will determine whether you end up in the First 30 group, or the >30 group.

-
Whoa! 20 in the first day!! Keep it up, guys!
-
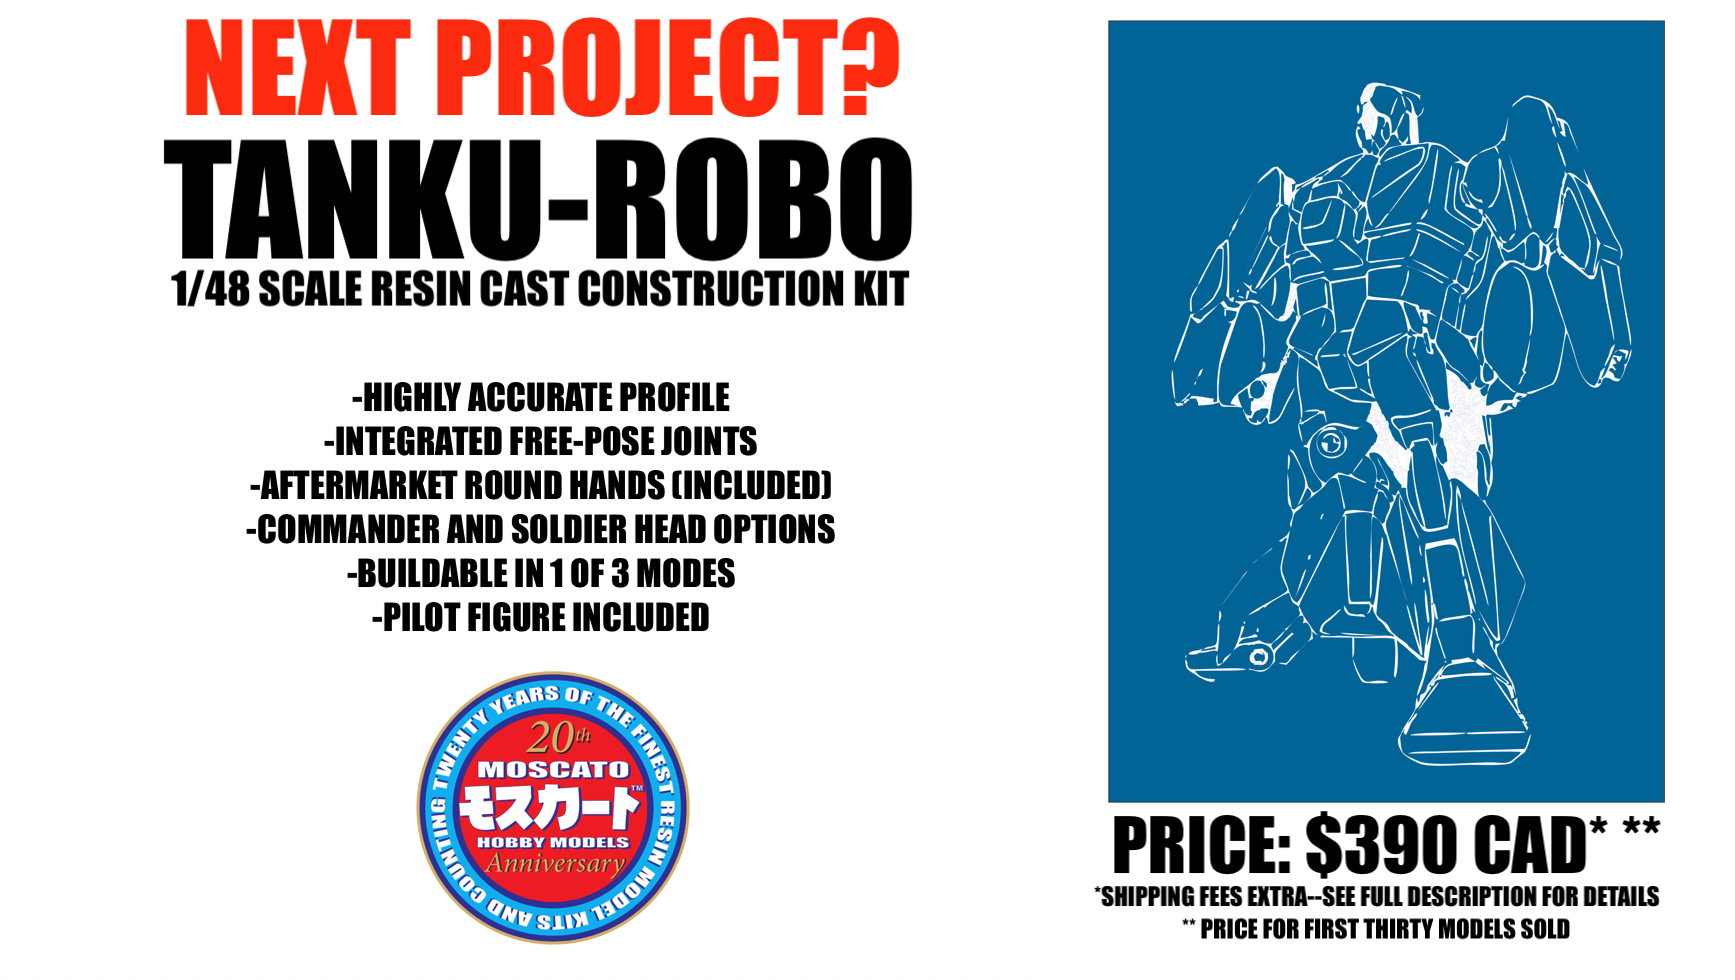
A happy belated Easter to you all, and I hope you had the opportunity to get some much-needed R&R. As some of you may know, 2024 marks the 20th anniversary of Moscato Hobby Models! To celebrate this milestone, I would like to propose the next original build project for your consideration in 1/48 scale, I call it TANKU-ROBO (AKA SOUTHERN CROSS SPARTAS/Veritech Hovertank). The kit would have the following features: -built in accordance with original, primary visual source material -integrated (free-pose) ball-joint system -aftermarket round hands included -two different head options -may be built in any one of three modes (not directly transformable!) -pilot figure included In order for this project to go ahead, I need a minimum of 30 orders, non-negotiable. Please read the following carefully. If you are interested in getting this model, send me a PRIVATE message. Posting in the comments will NOT be construed as interest. Kit price for the first thirty: $390 Canadian dollars Kit price > 30: $415 Canadian dollars Shipping will be calculated and collected once the kits are closer to completion. There will be a standard shipping price for the US and Canada, while international shipping will be calculated based on destination and order size. You have until April 19th (inclusive) to place your order. If I fail to get the requisite orders by that date, I will simply refund everyone and move to another project—this is a one time offer! With regards to shipping: I will try to give you at least a one-week heads up before I collect, and a 2 week grace period to allow you to make payment. If you fail to make your shipping payment within the allotted time, your kit payment will be refunded. If you then decide to re-order, you will be charged the >30 price along with shipping. Go!!