
peter
-
Posts
4487 -
Joined
-
Last visited
Content Type
Profiles
Forums
Events
Gallery
Posts posted by peter
-
-
Just now, borgified said:
AJ's price for me is off the roof for Canuckle heads.
My wife would have my balls if I successfully got one of these tonight. $409 CAD before shipping from HLJ
-
Lol, I got one in my cart at HLJ but now it shows order stopped.
%*$#@!
-
Woah, you lit it too! I have no idea how to photo shop or edit photos.... That looks really good!
-
1 hour ago, Bolt said:
Great job @peter ! I love the wear and tear on that baby

Thanks
")
-
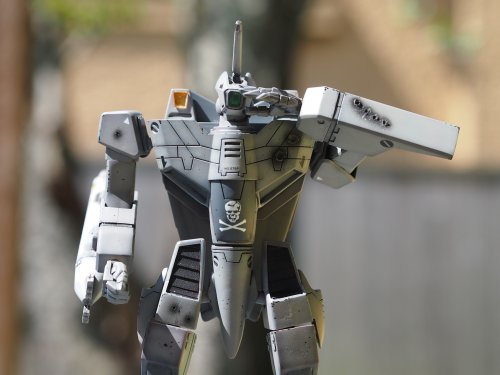

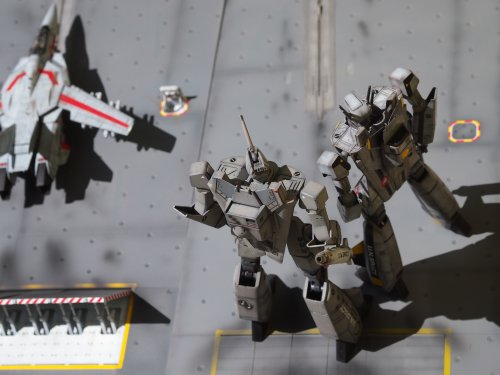
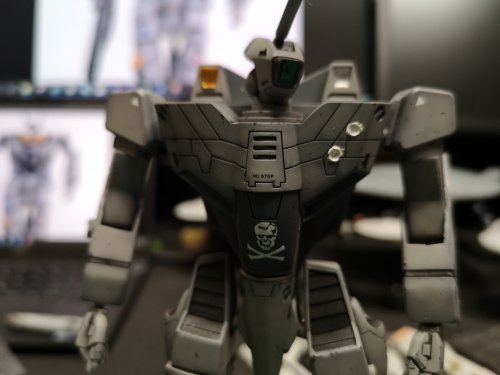
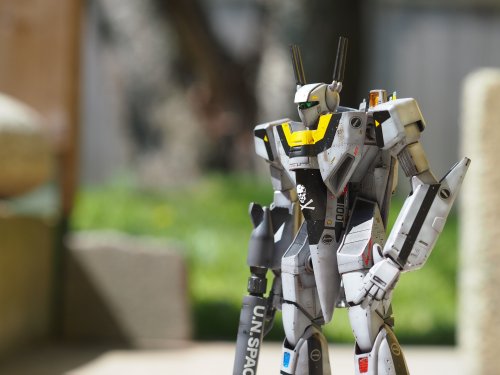
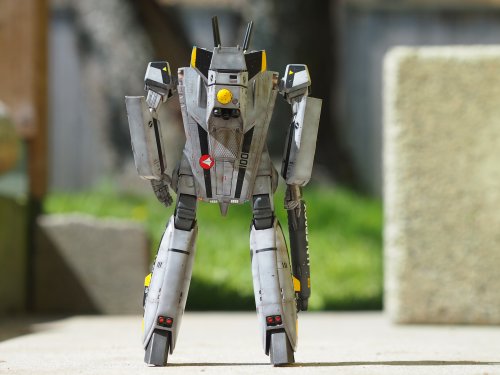
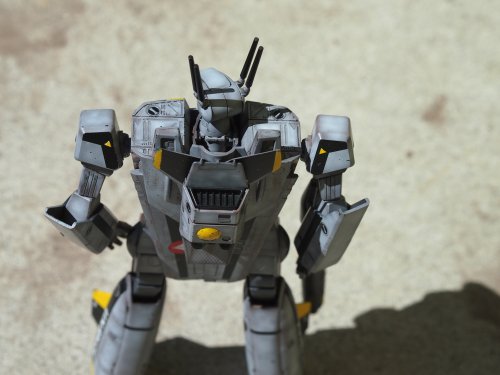
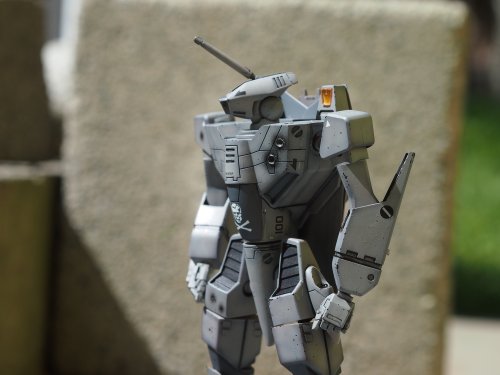
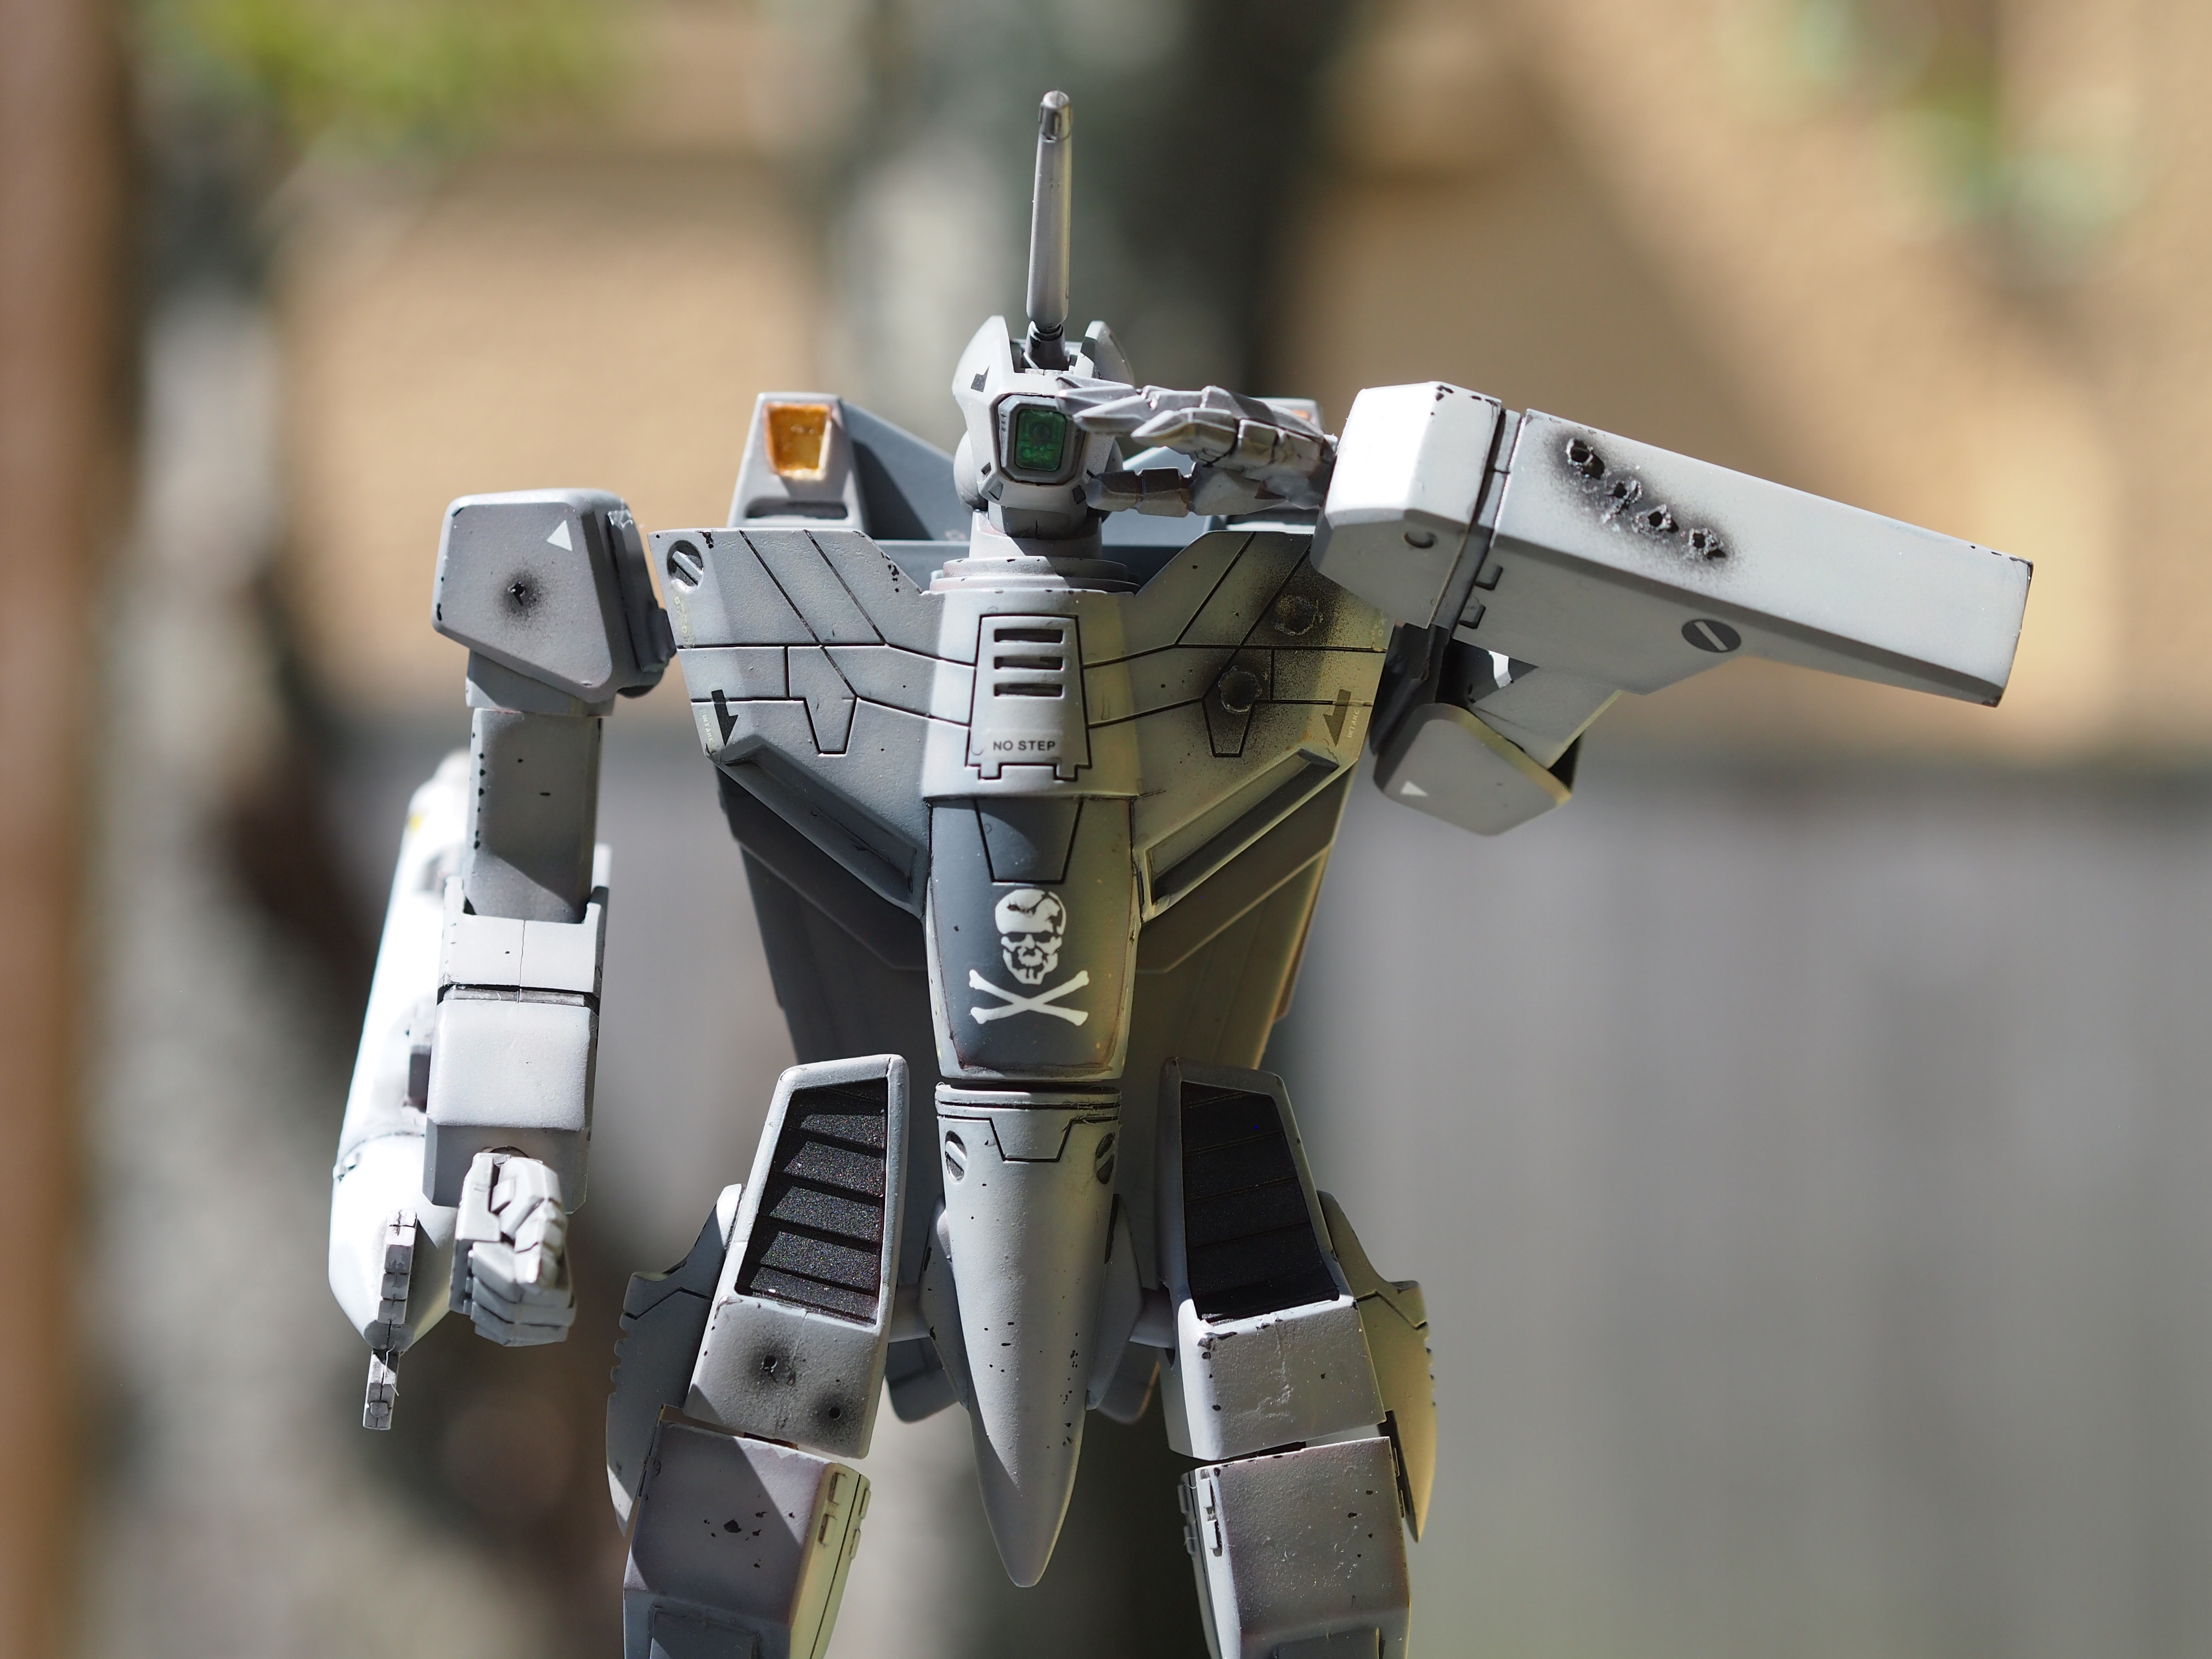
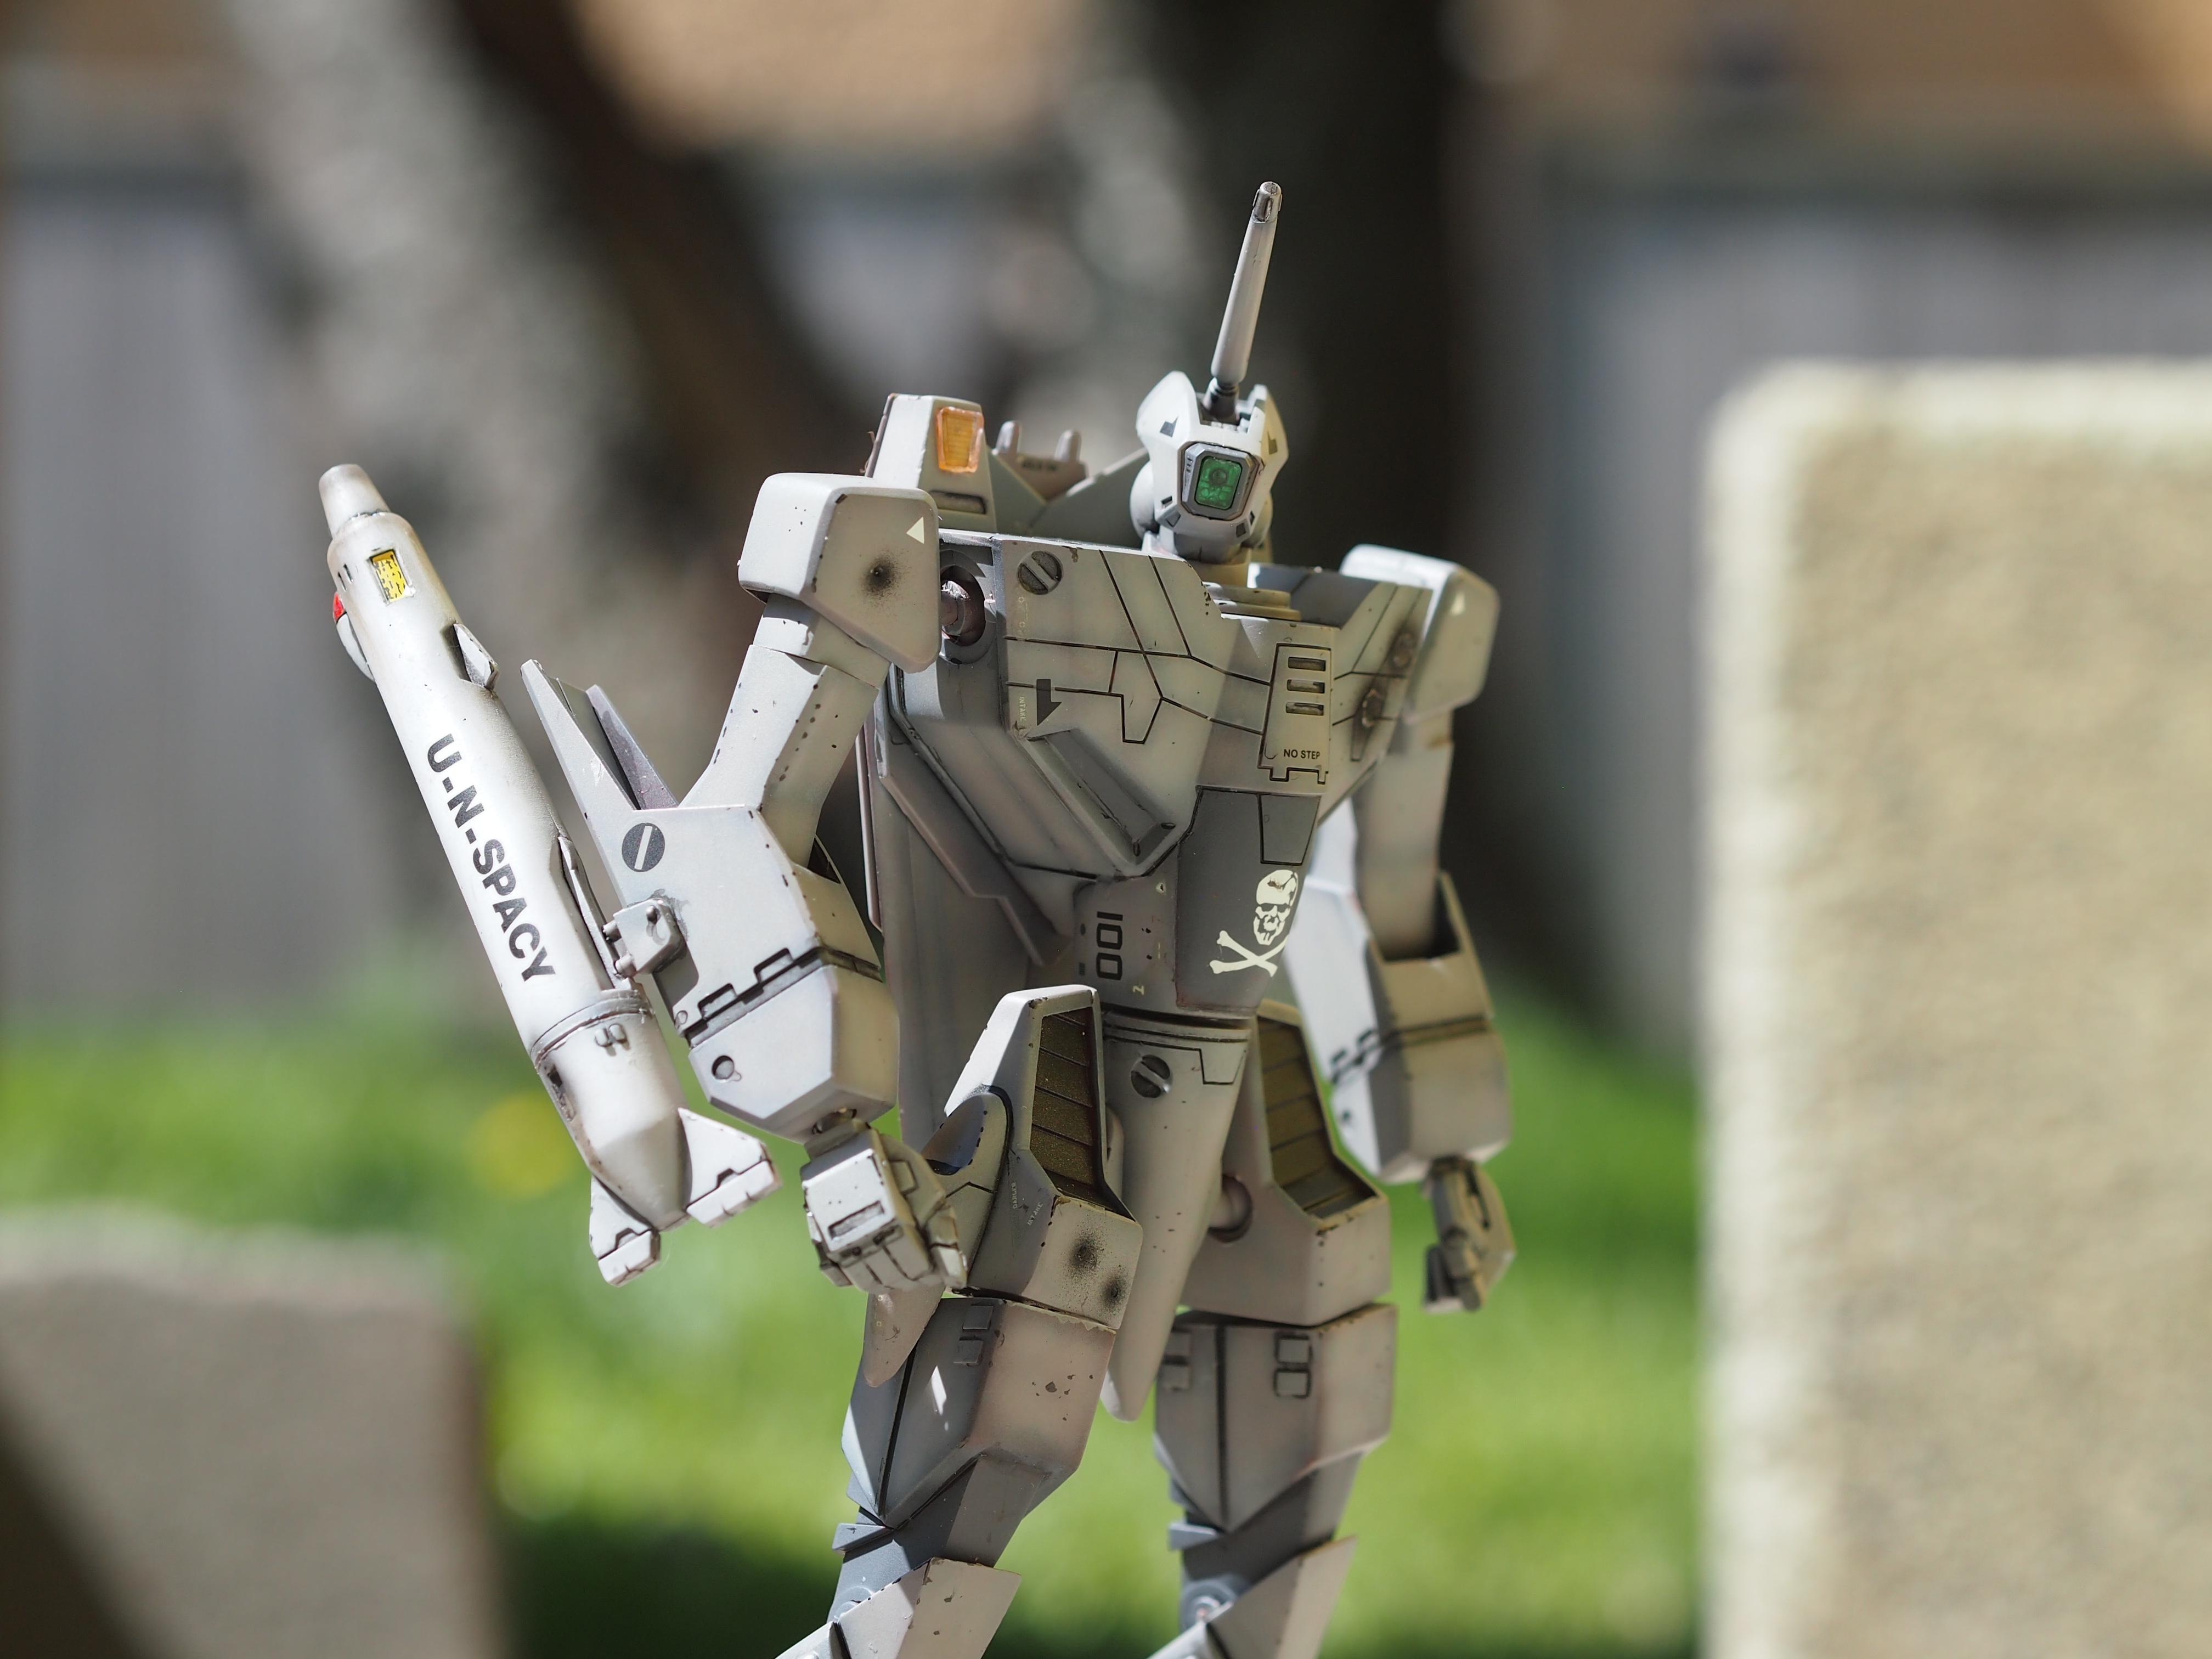
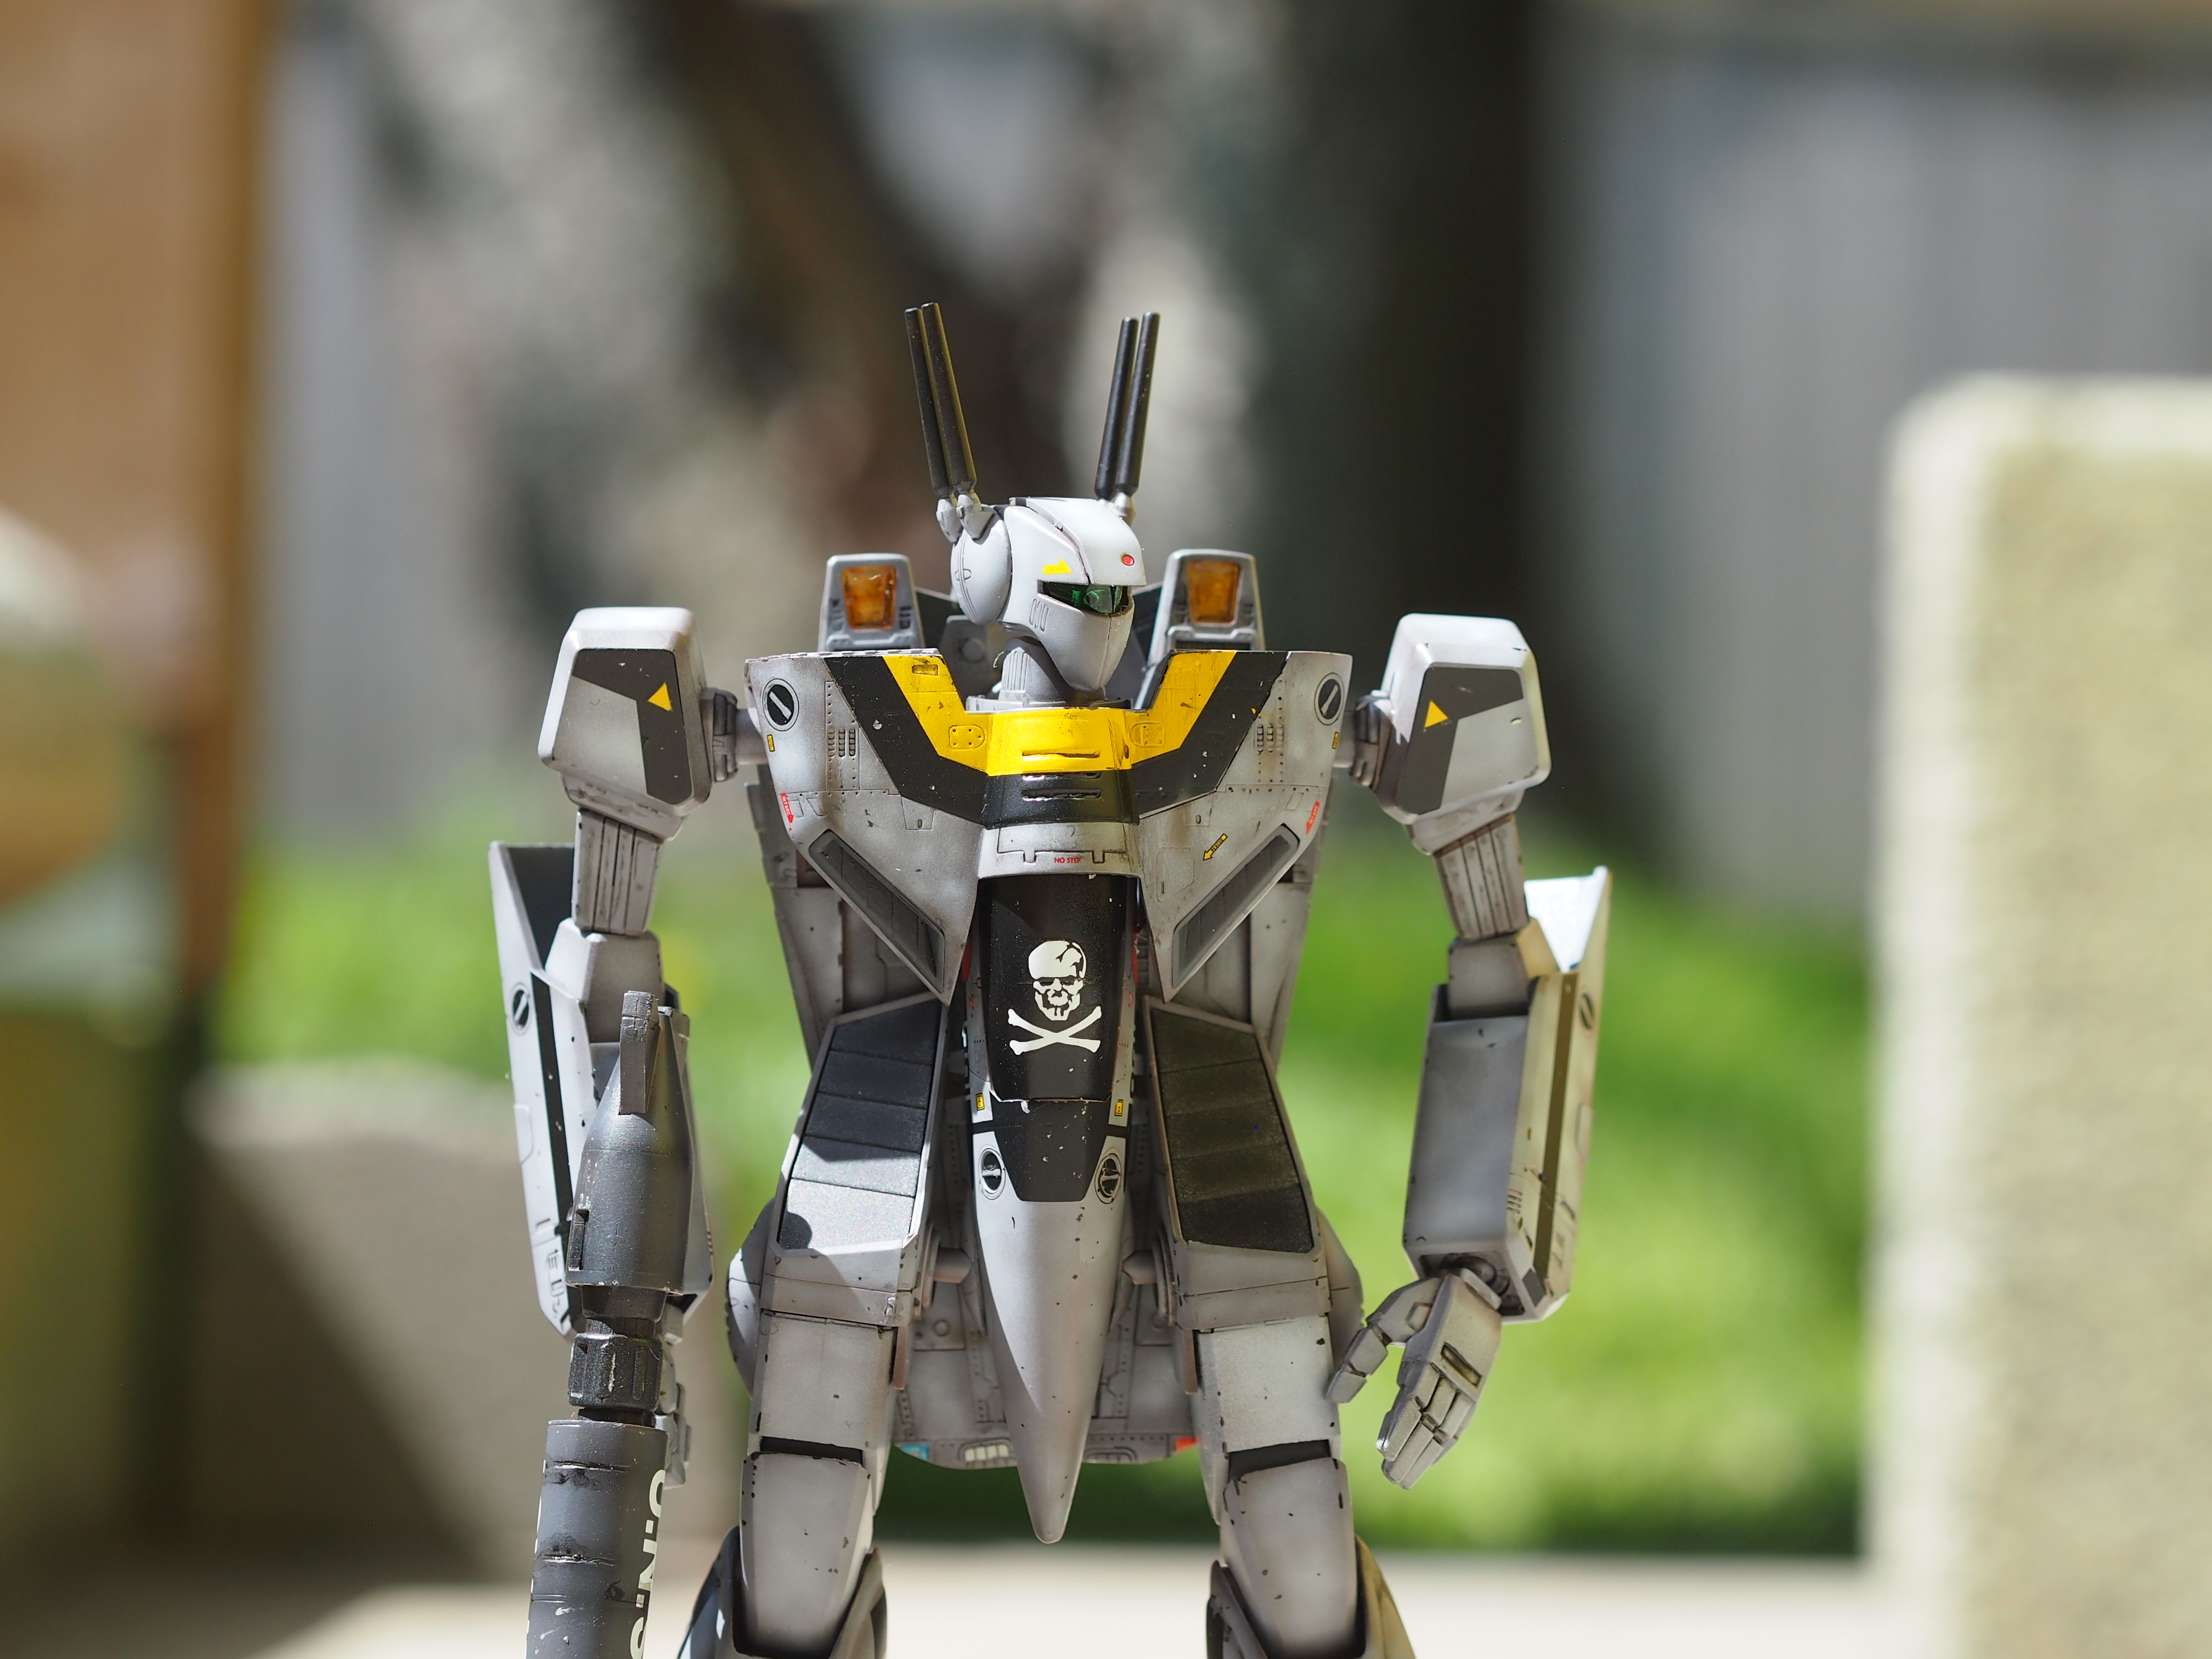
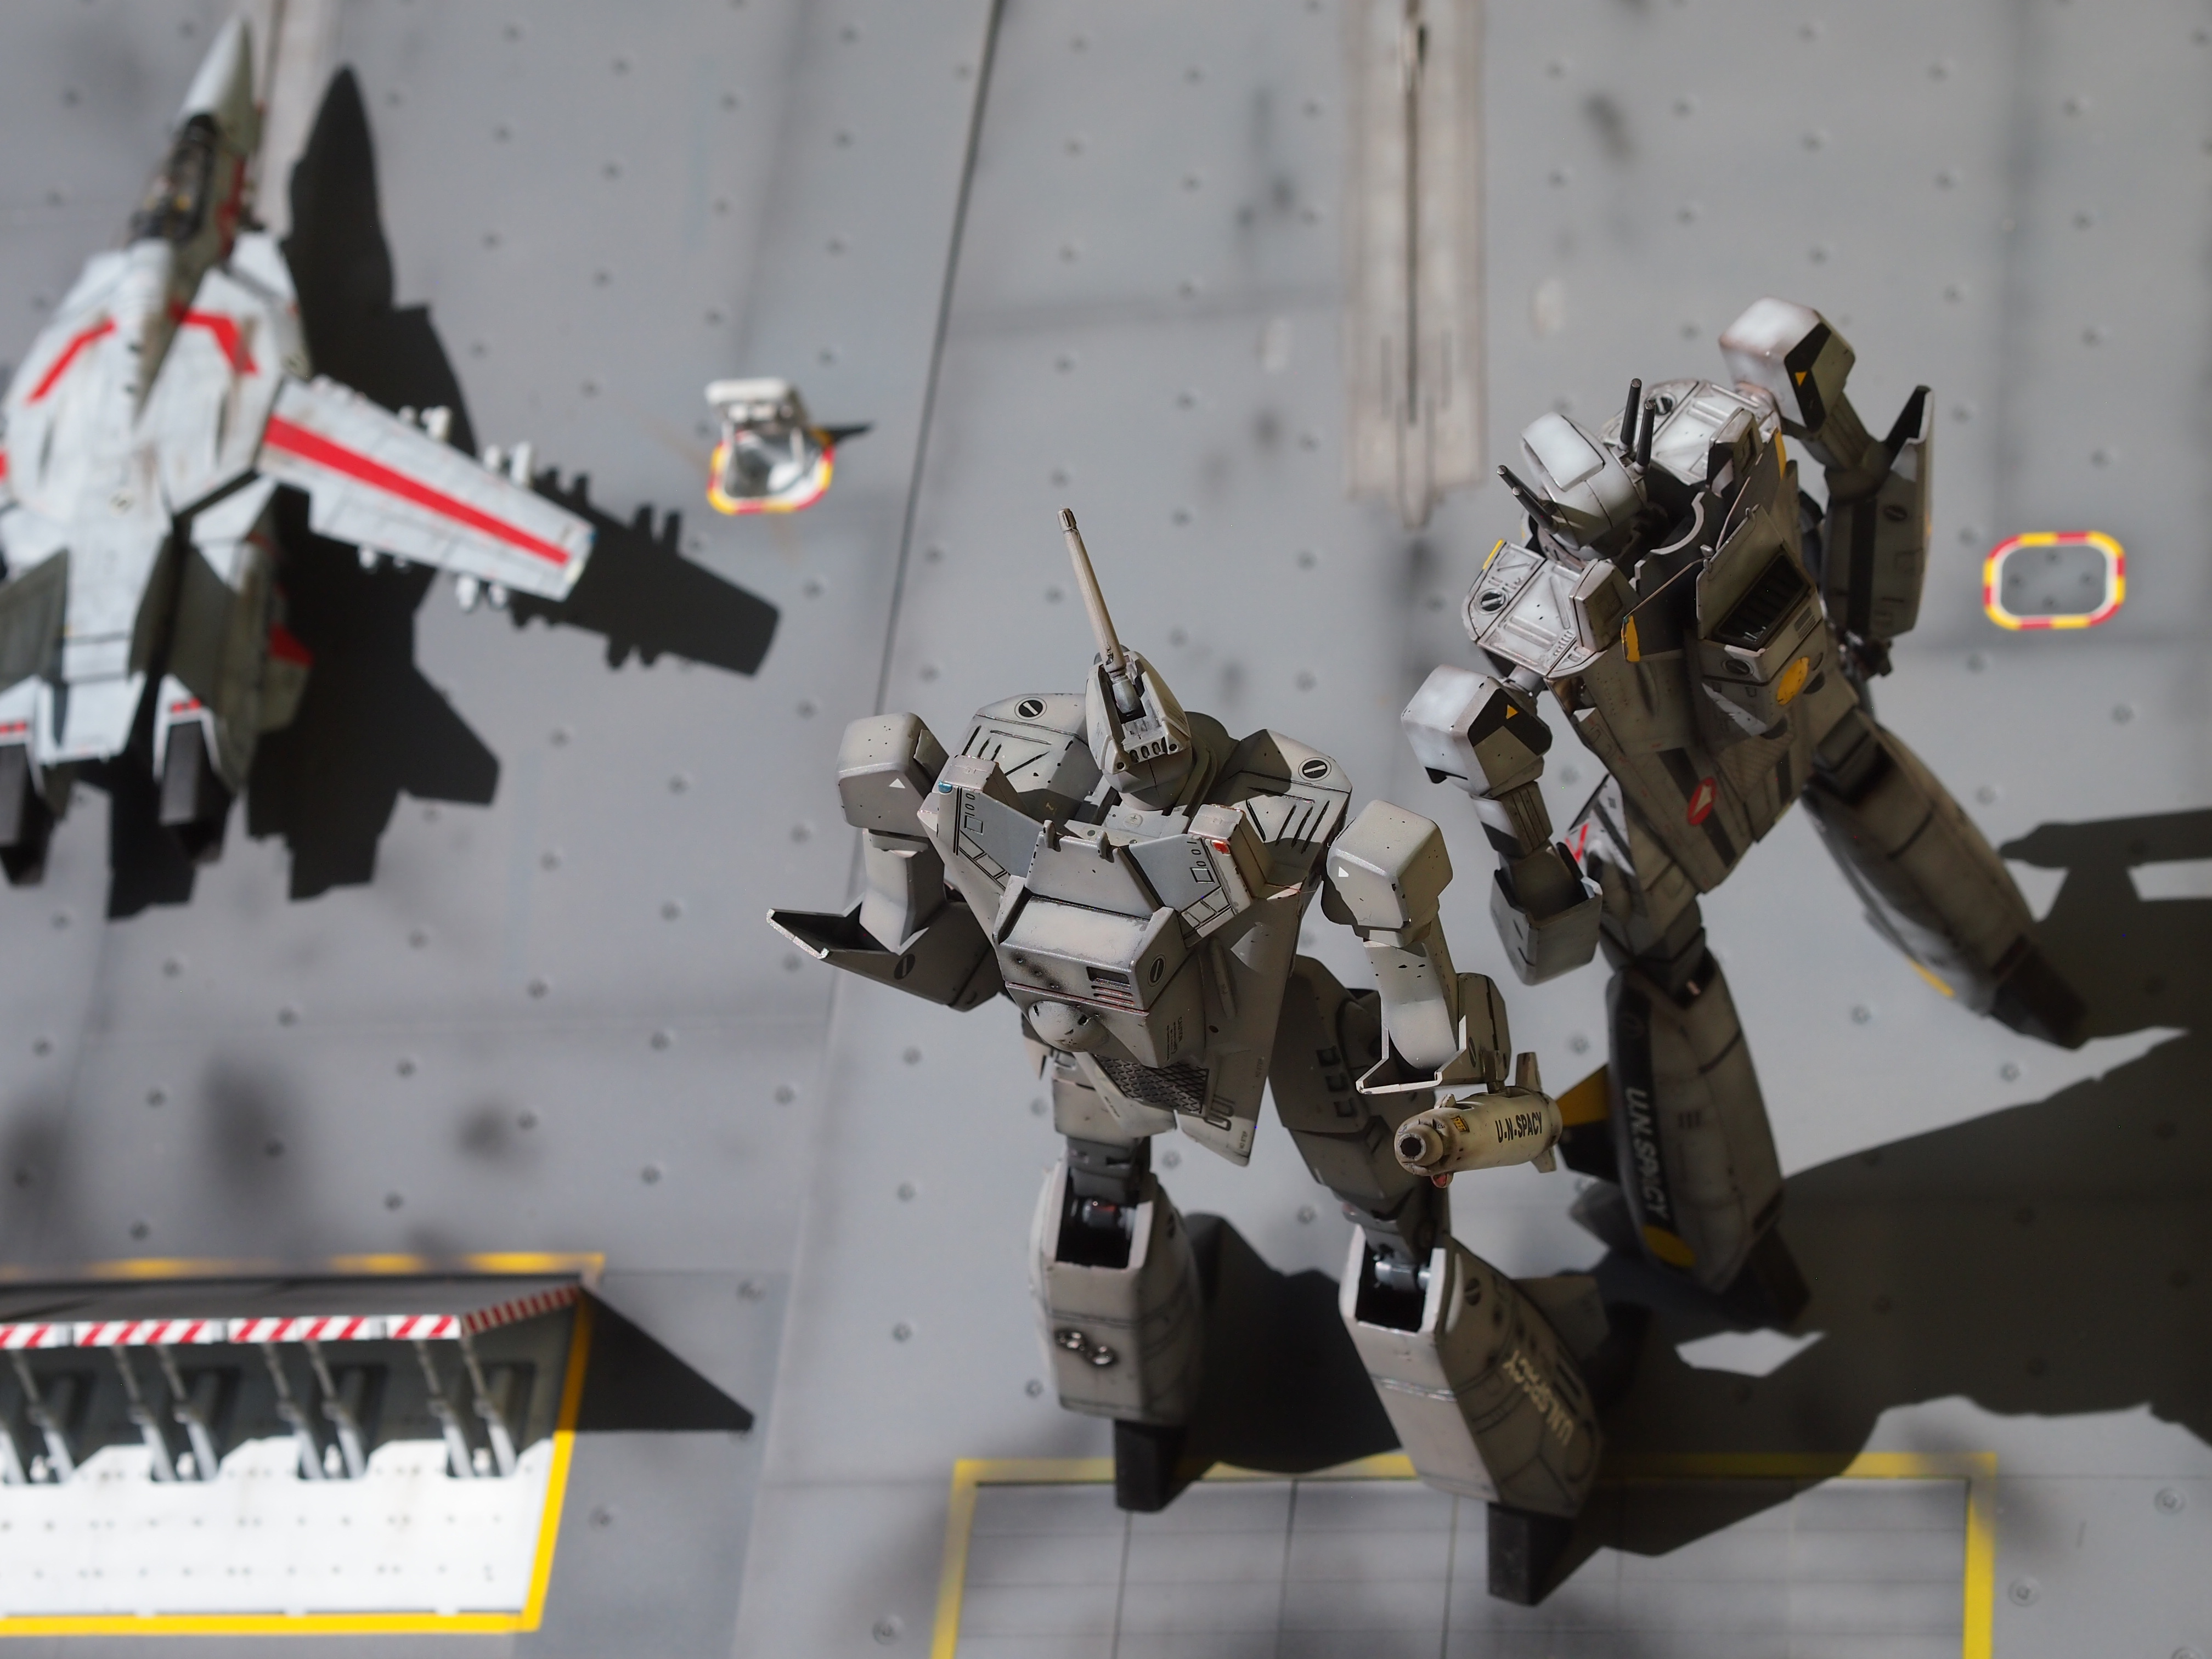
Giving the high-five to the boss.
-
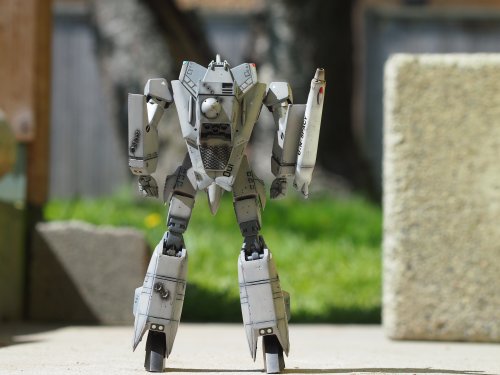
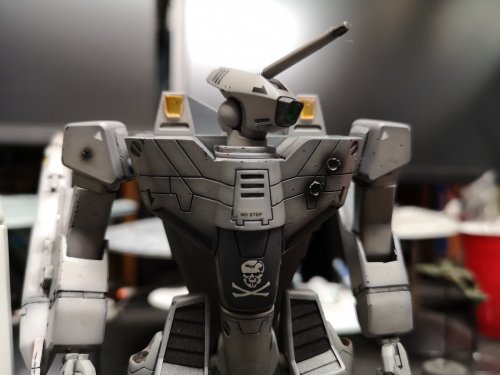
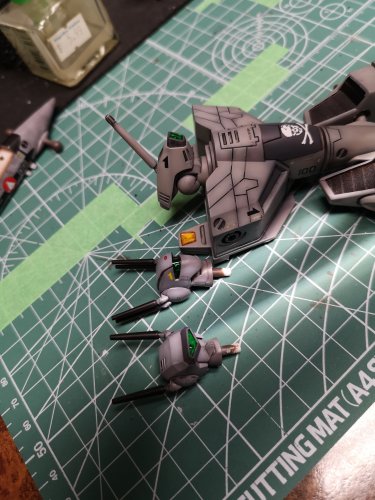
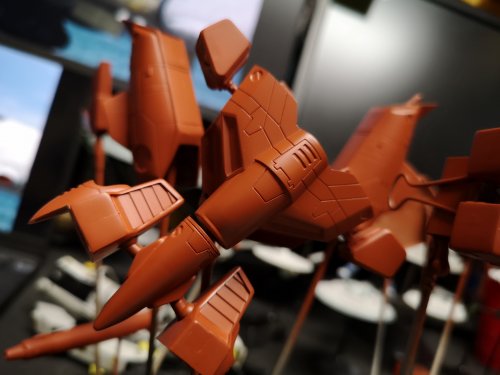
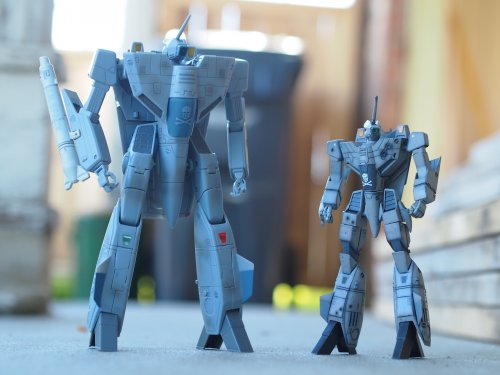
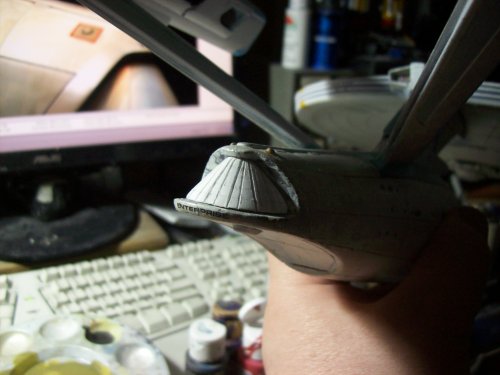
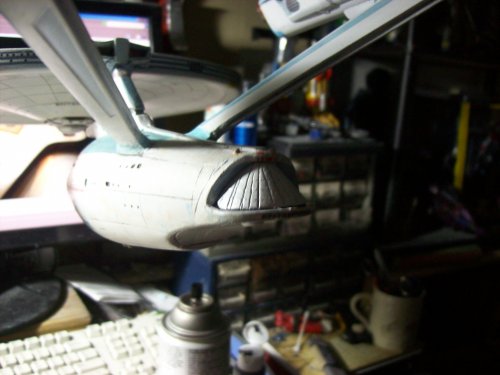
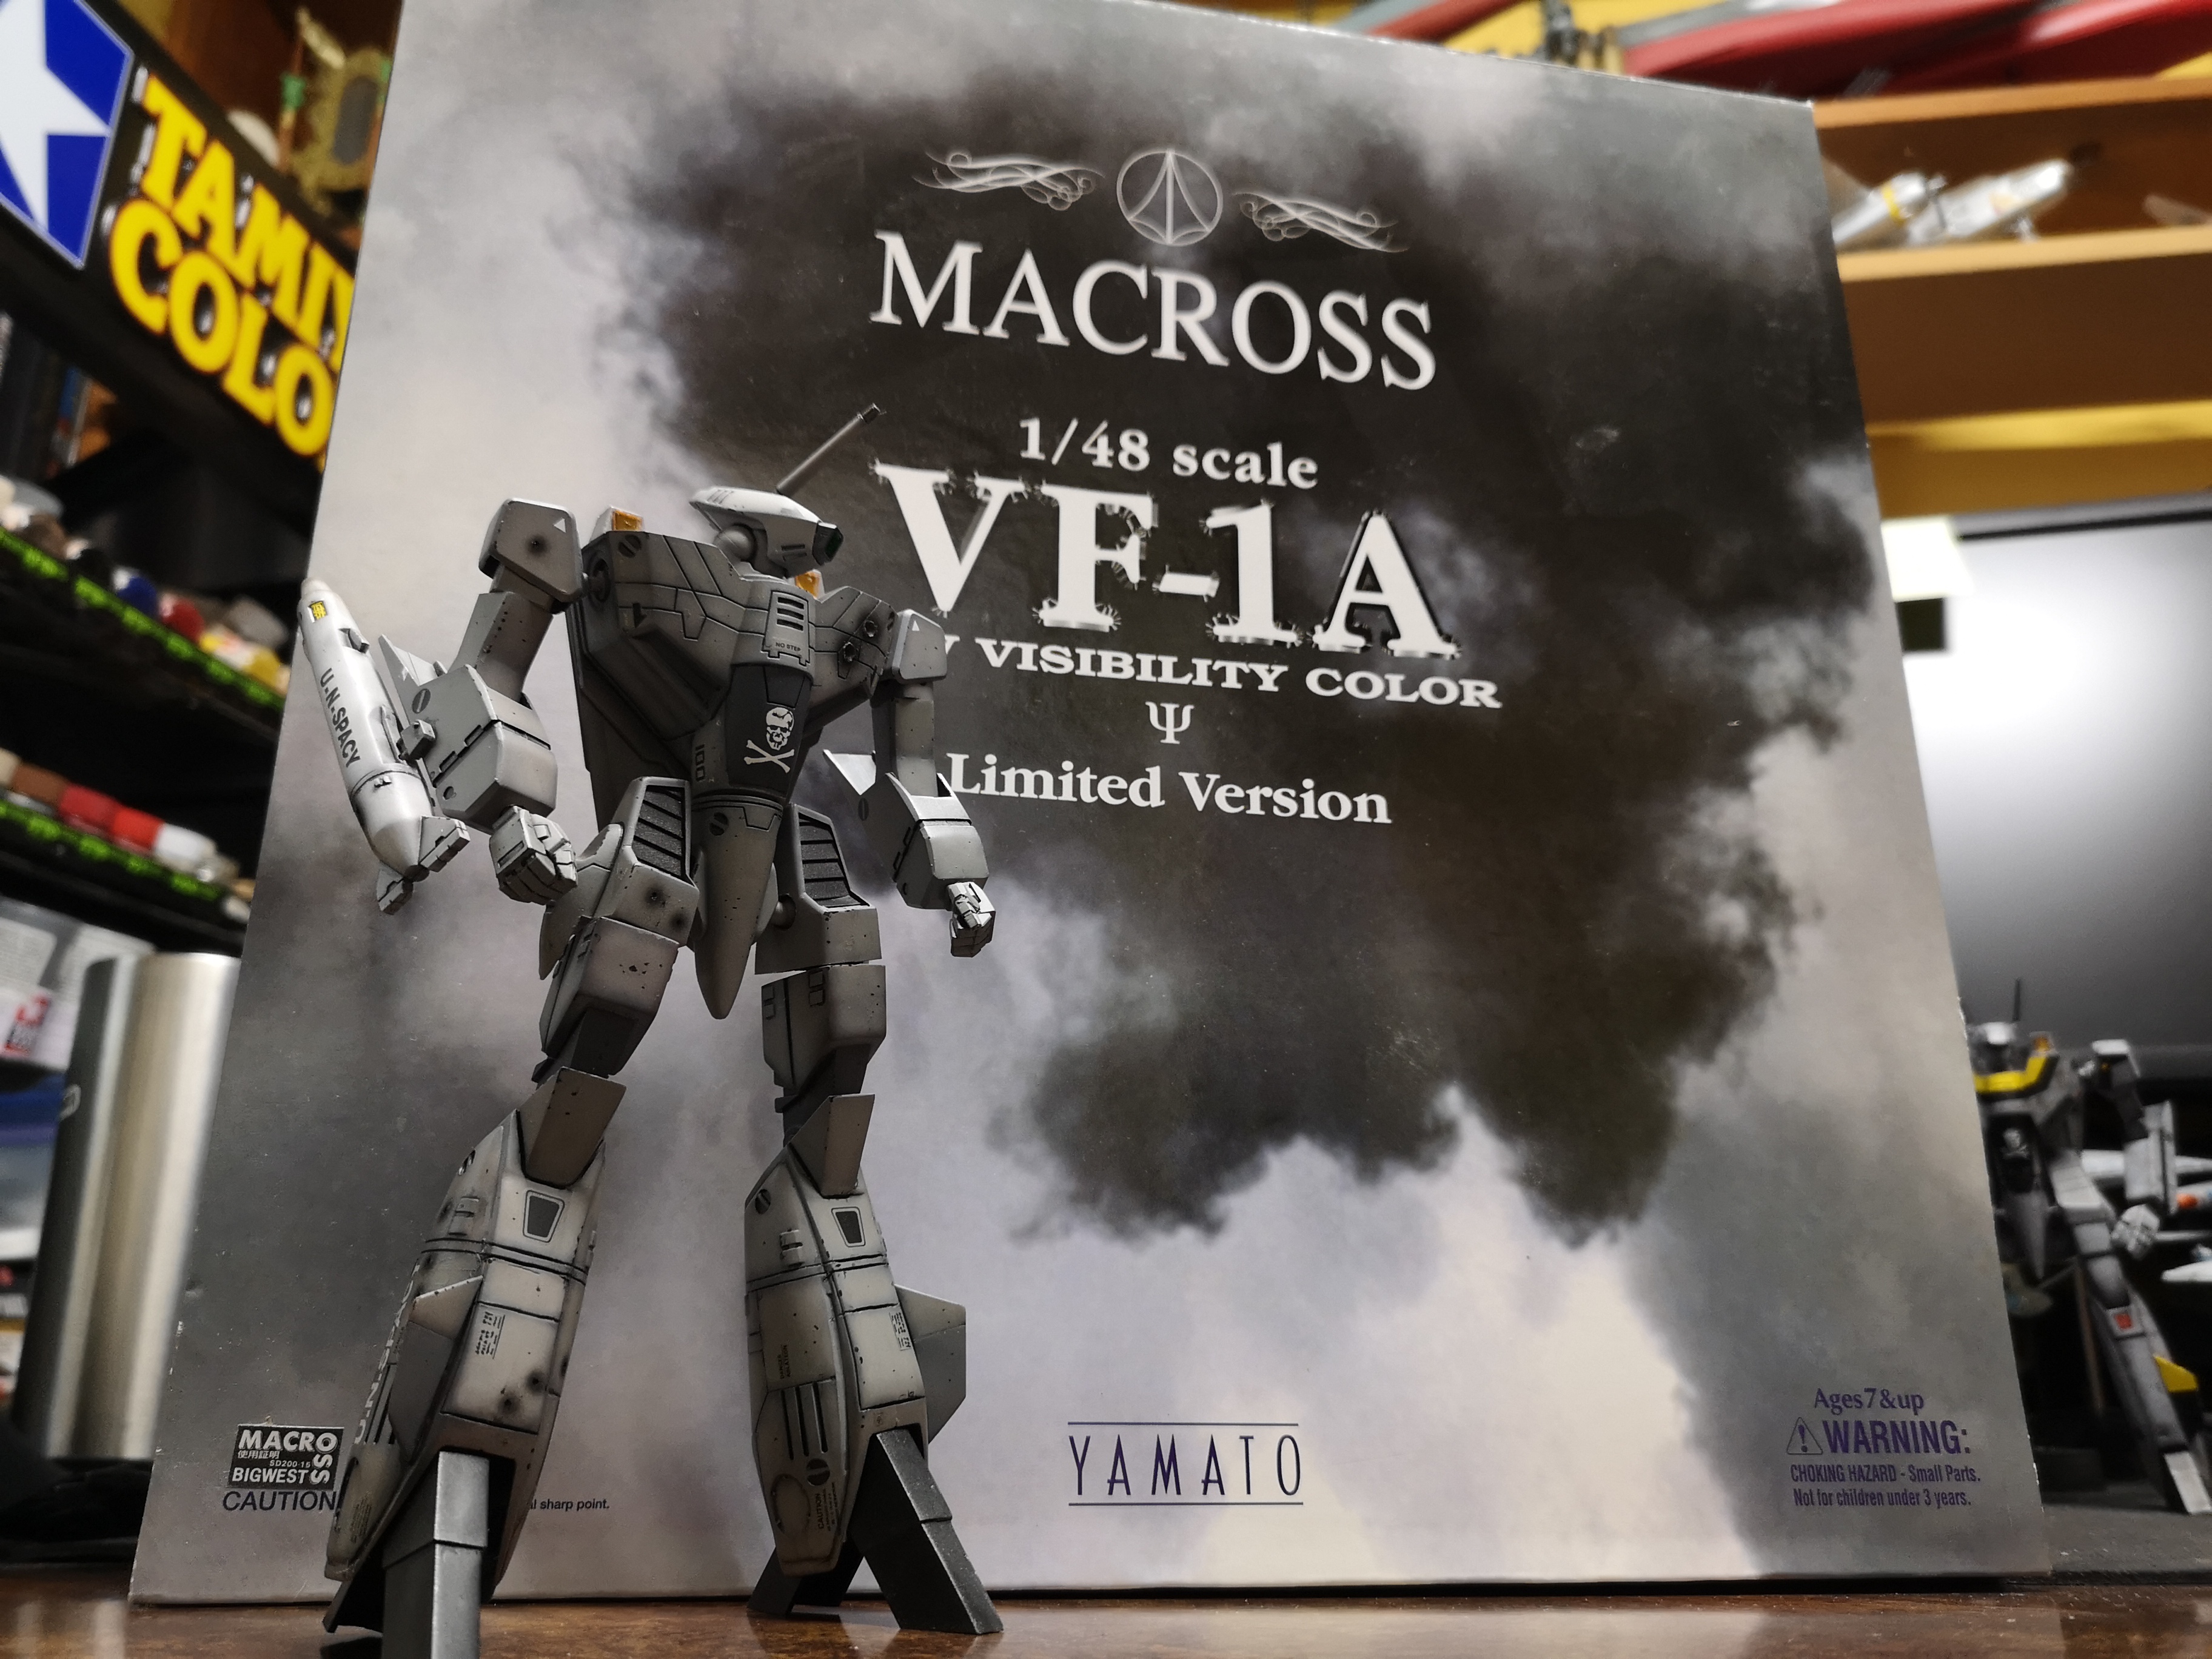
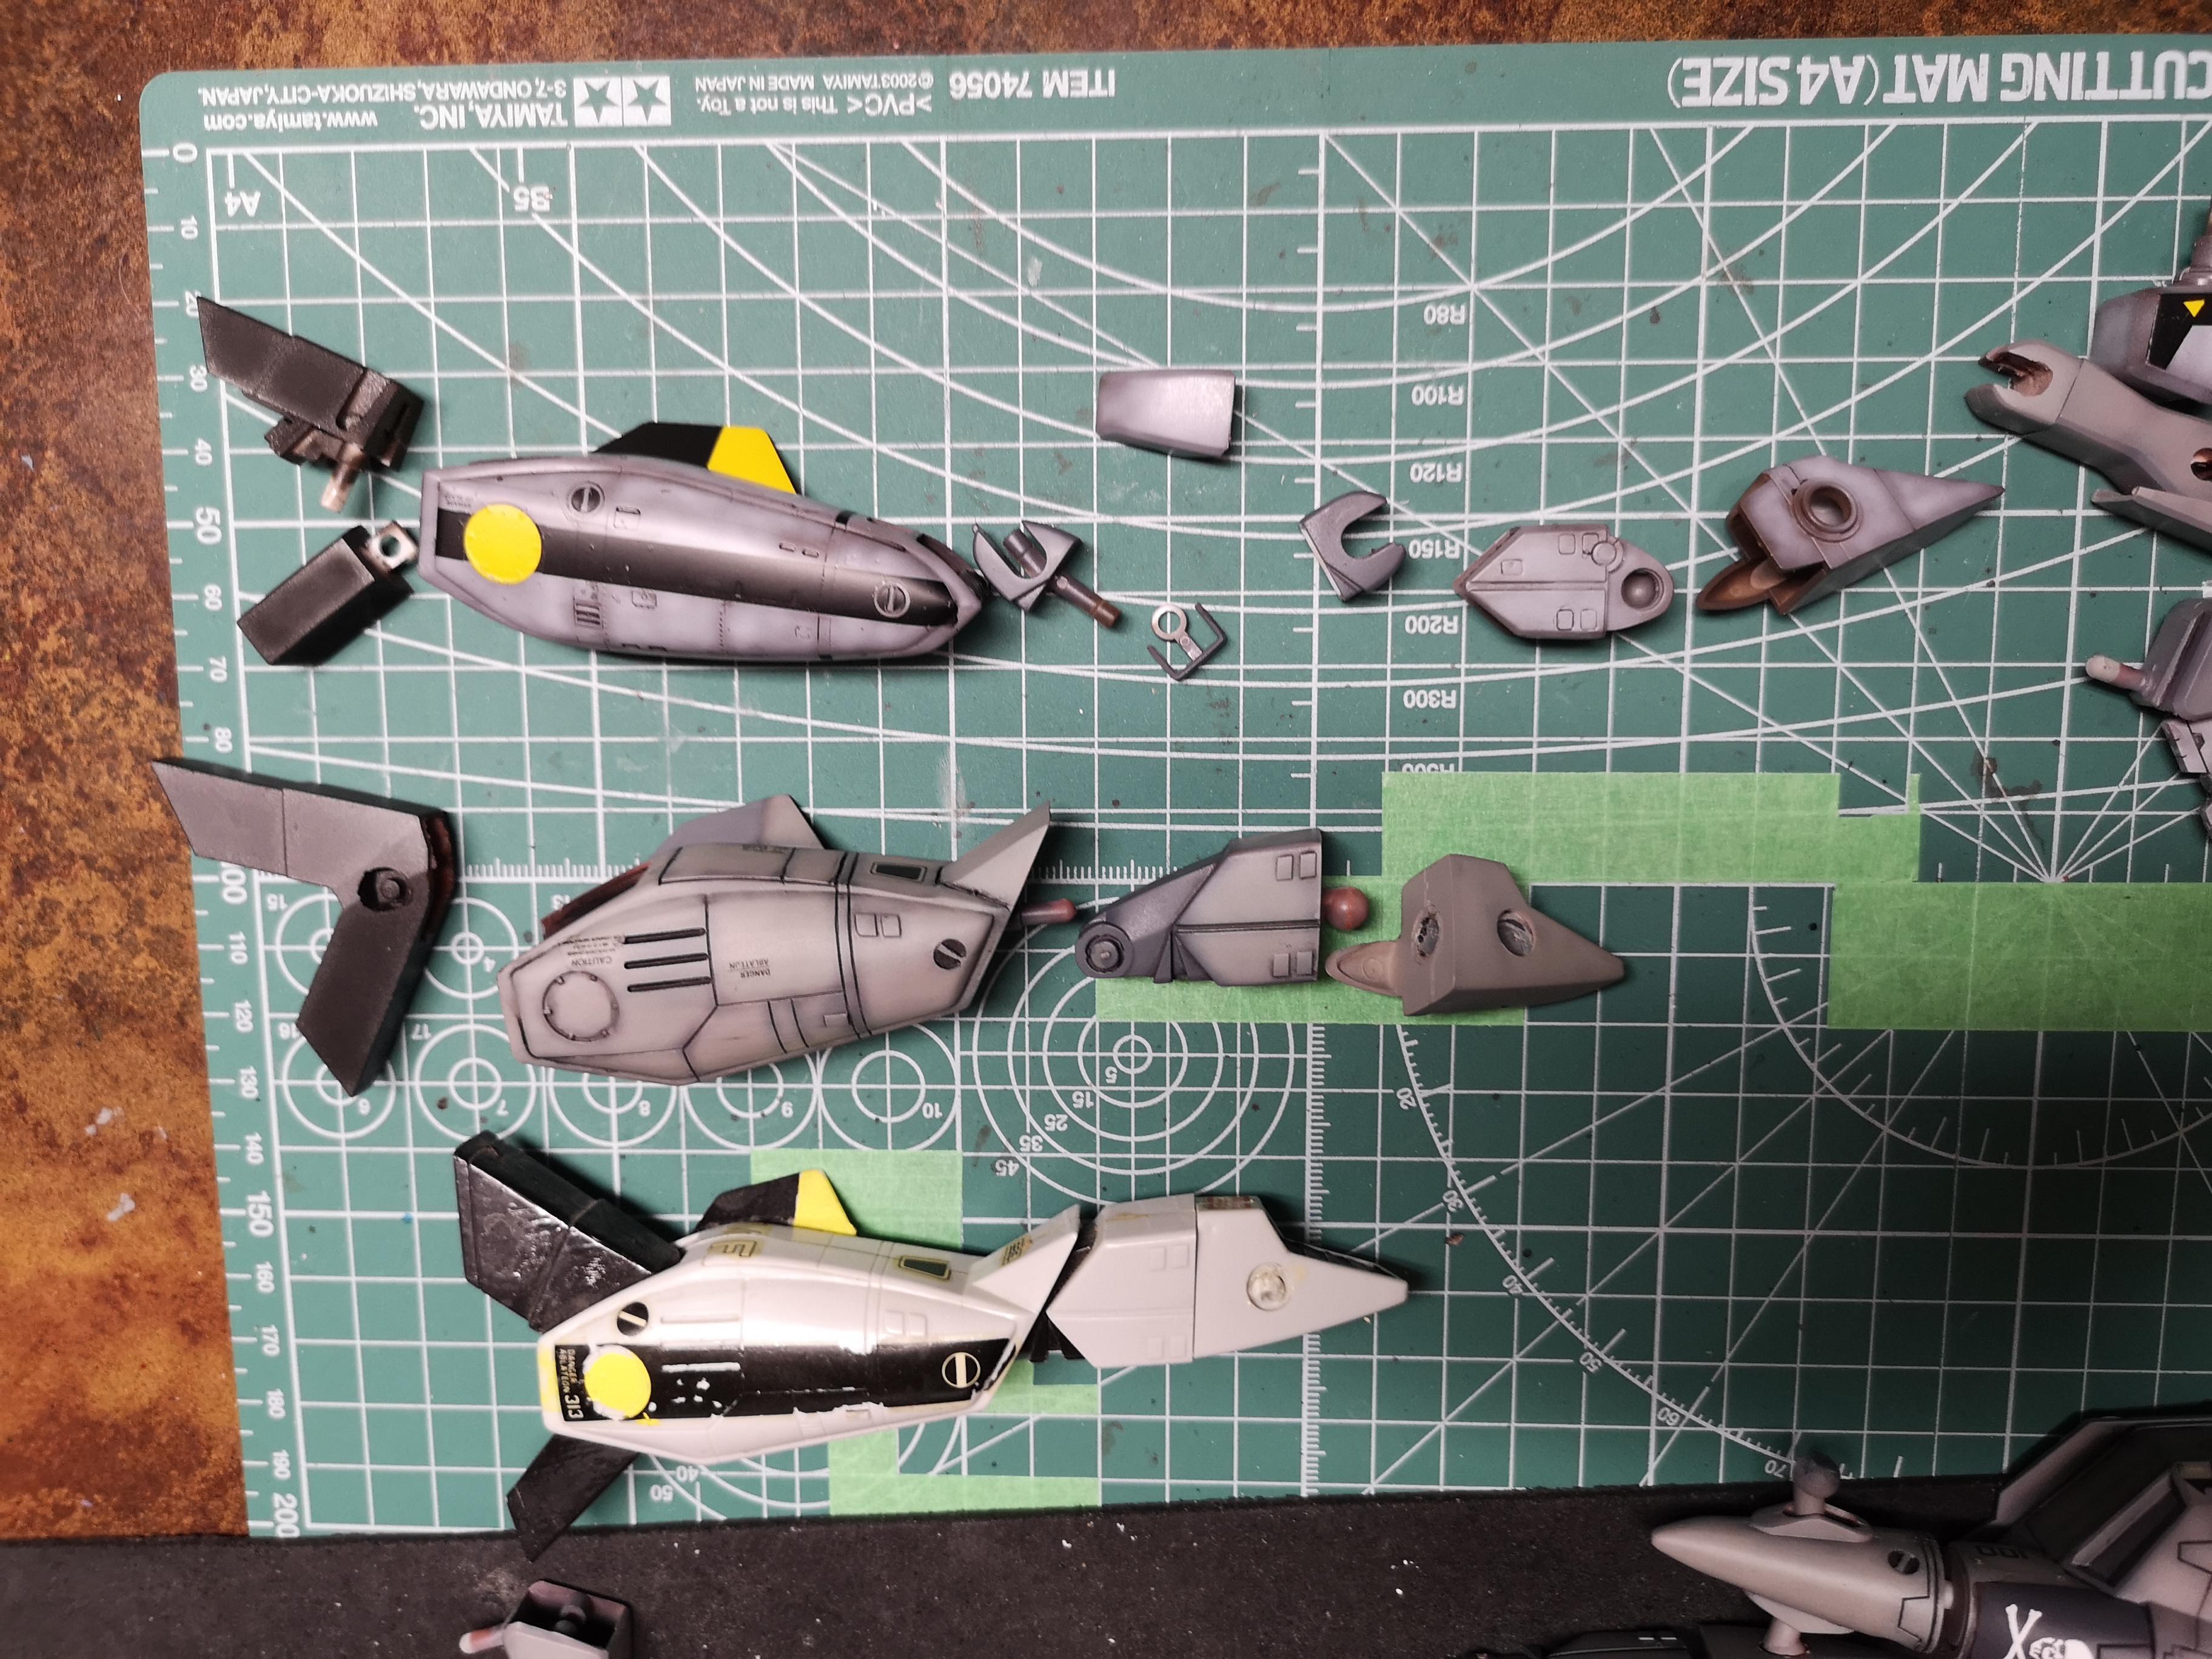
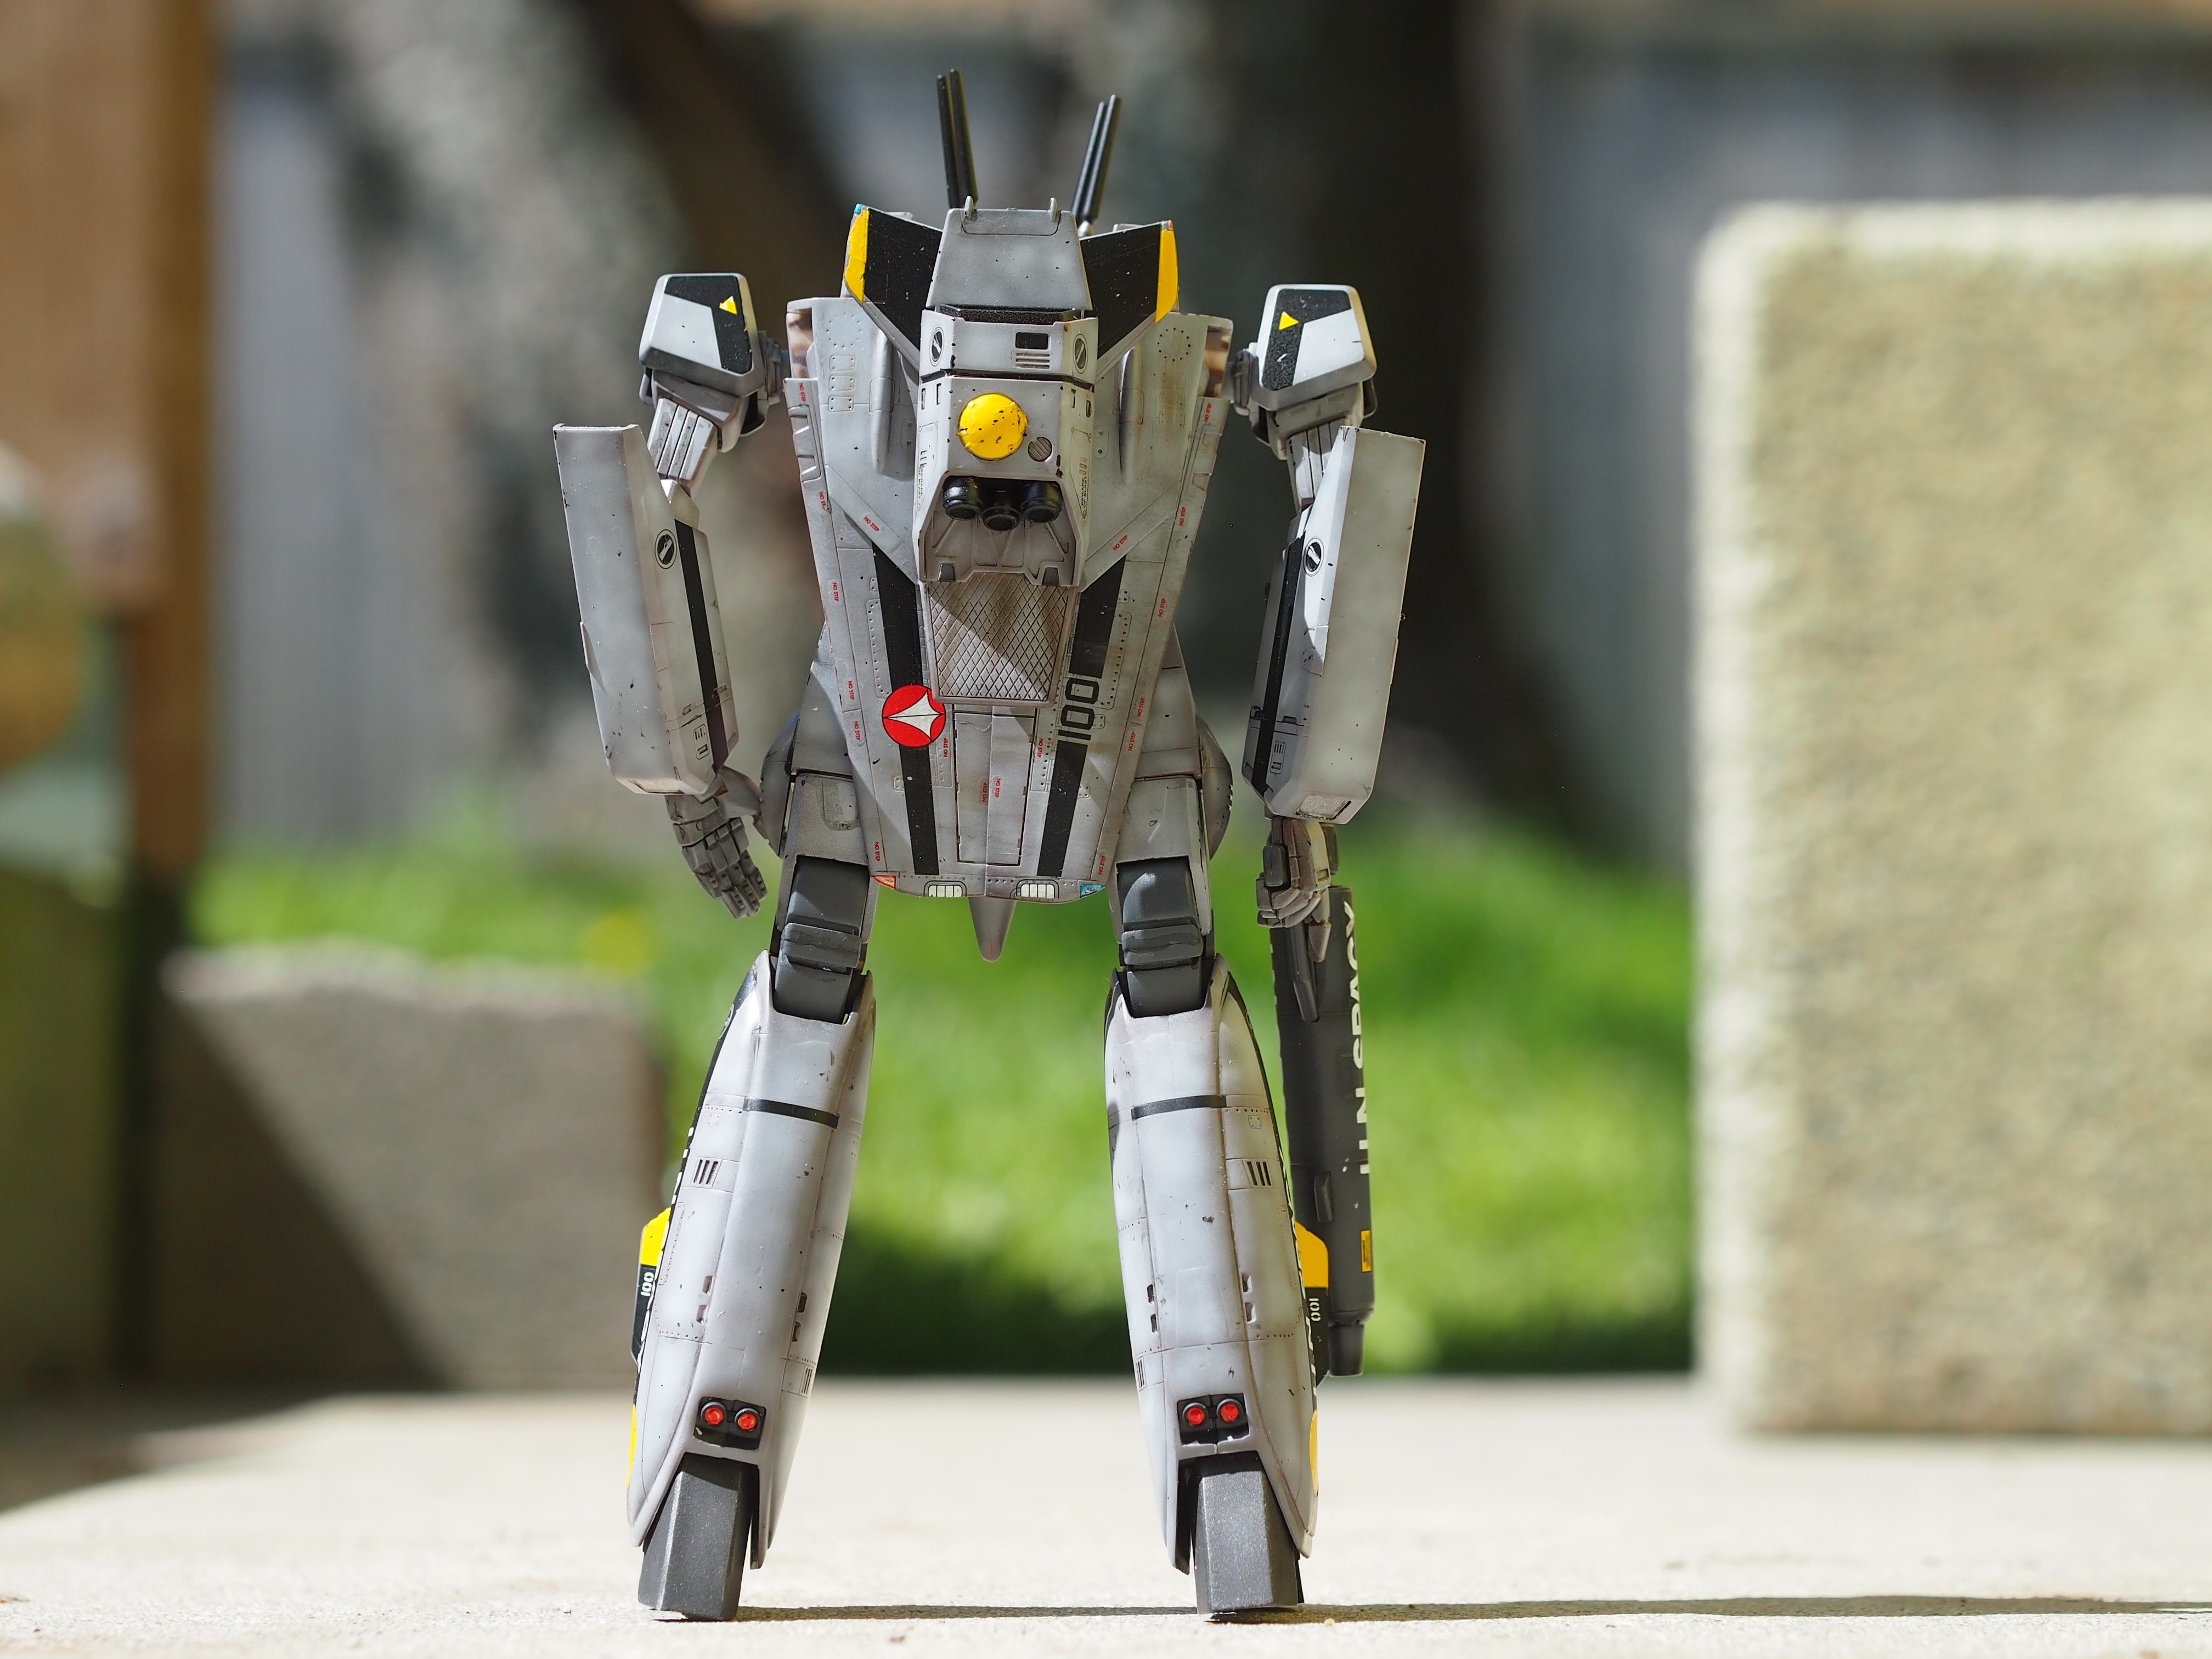
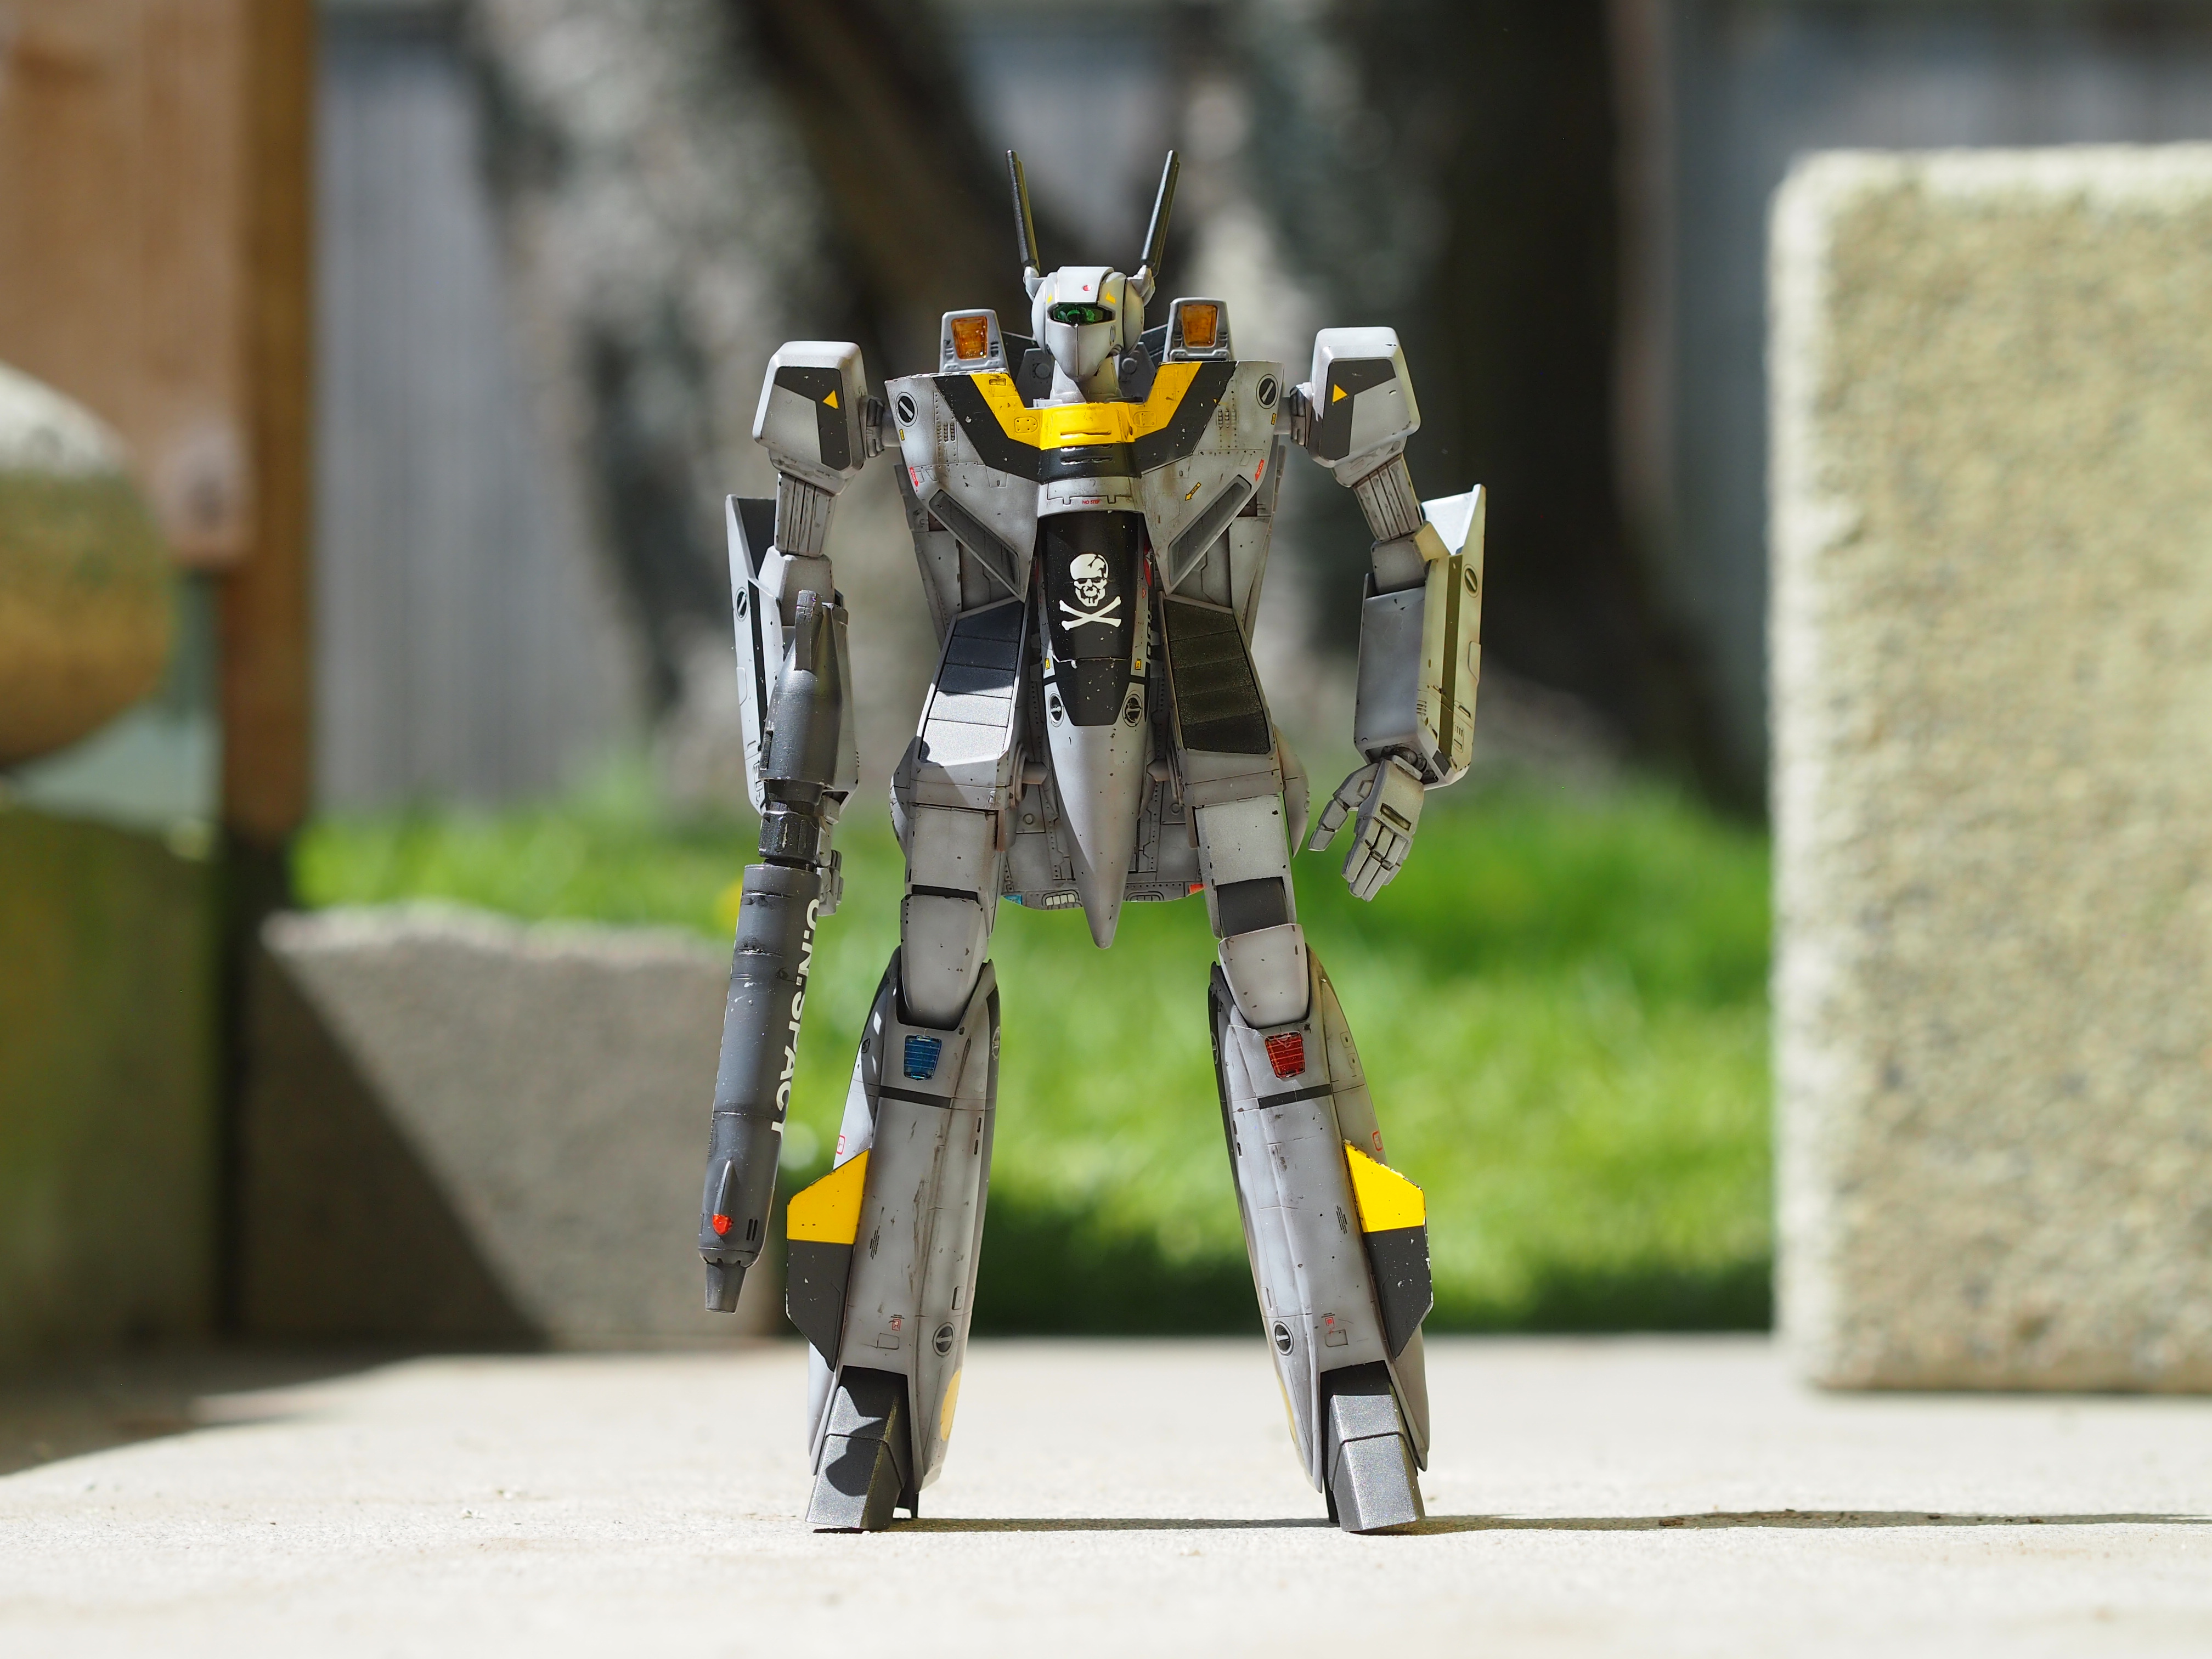
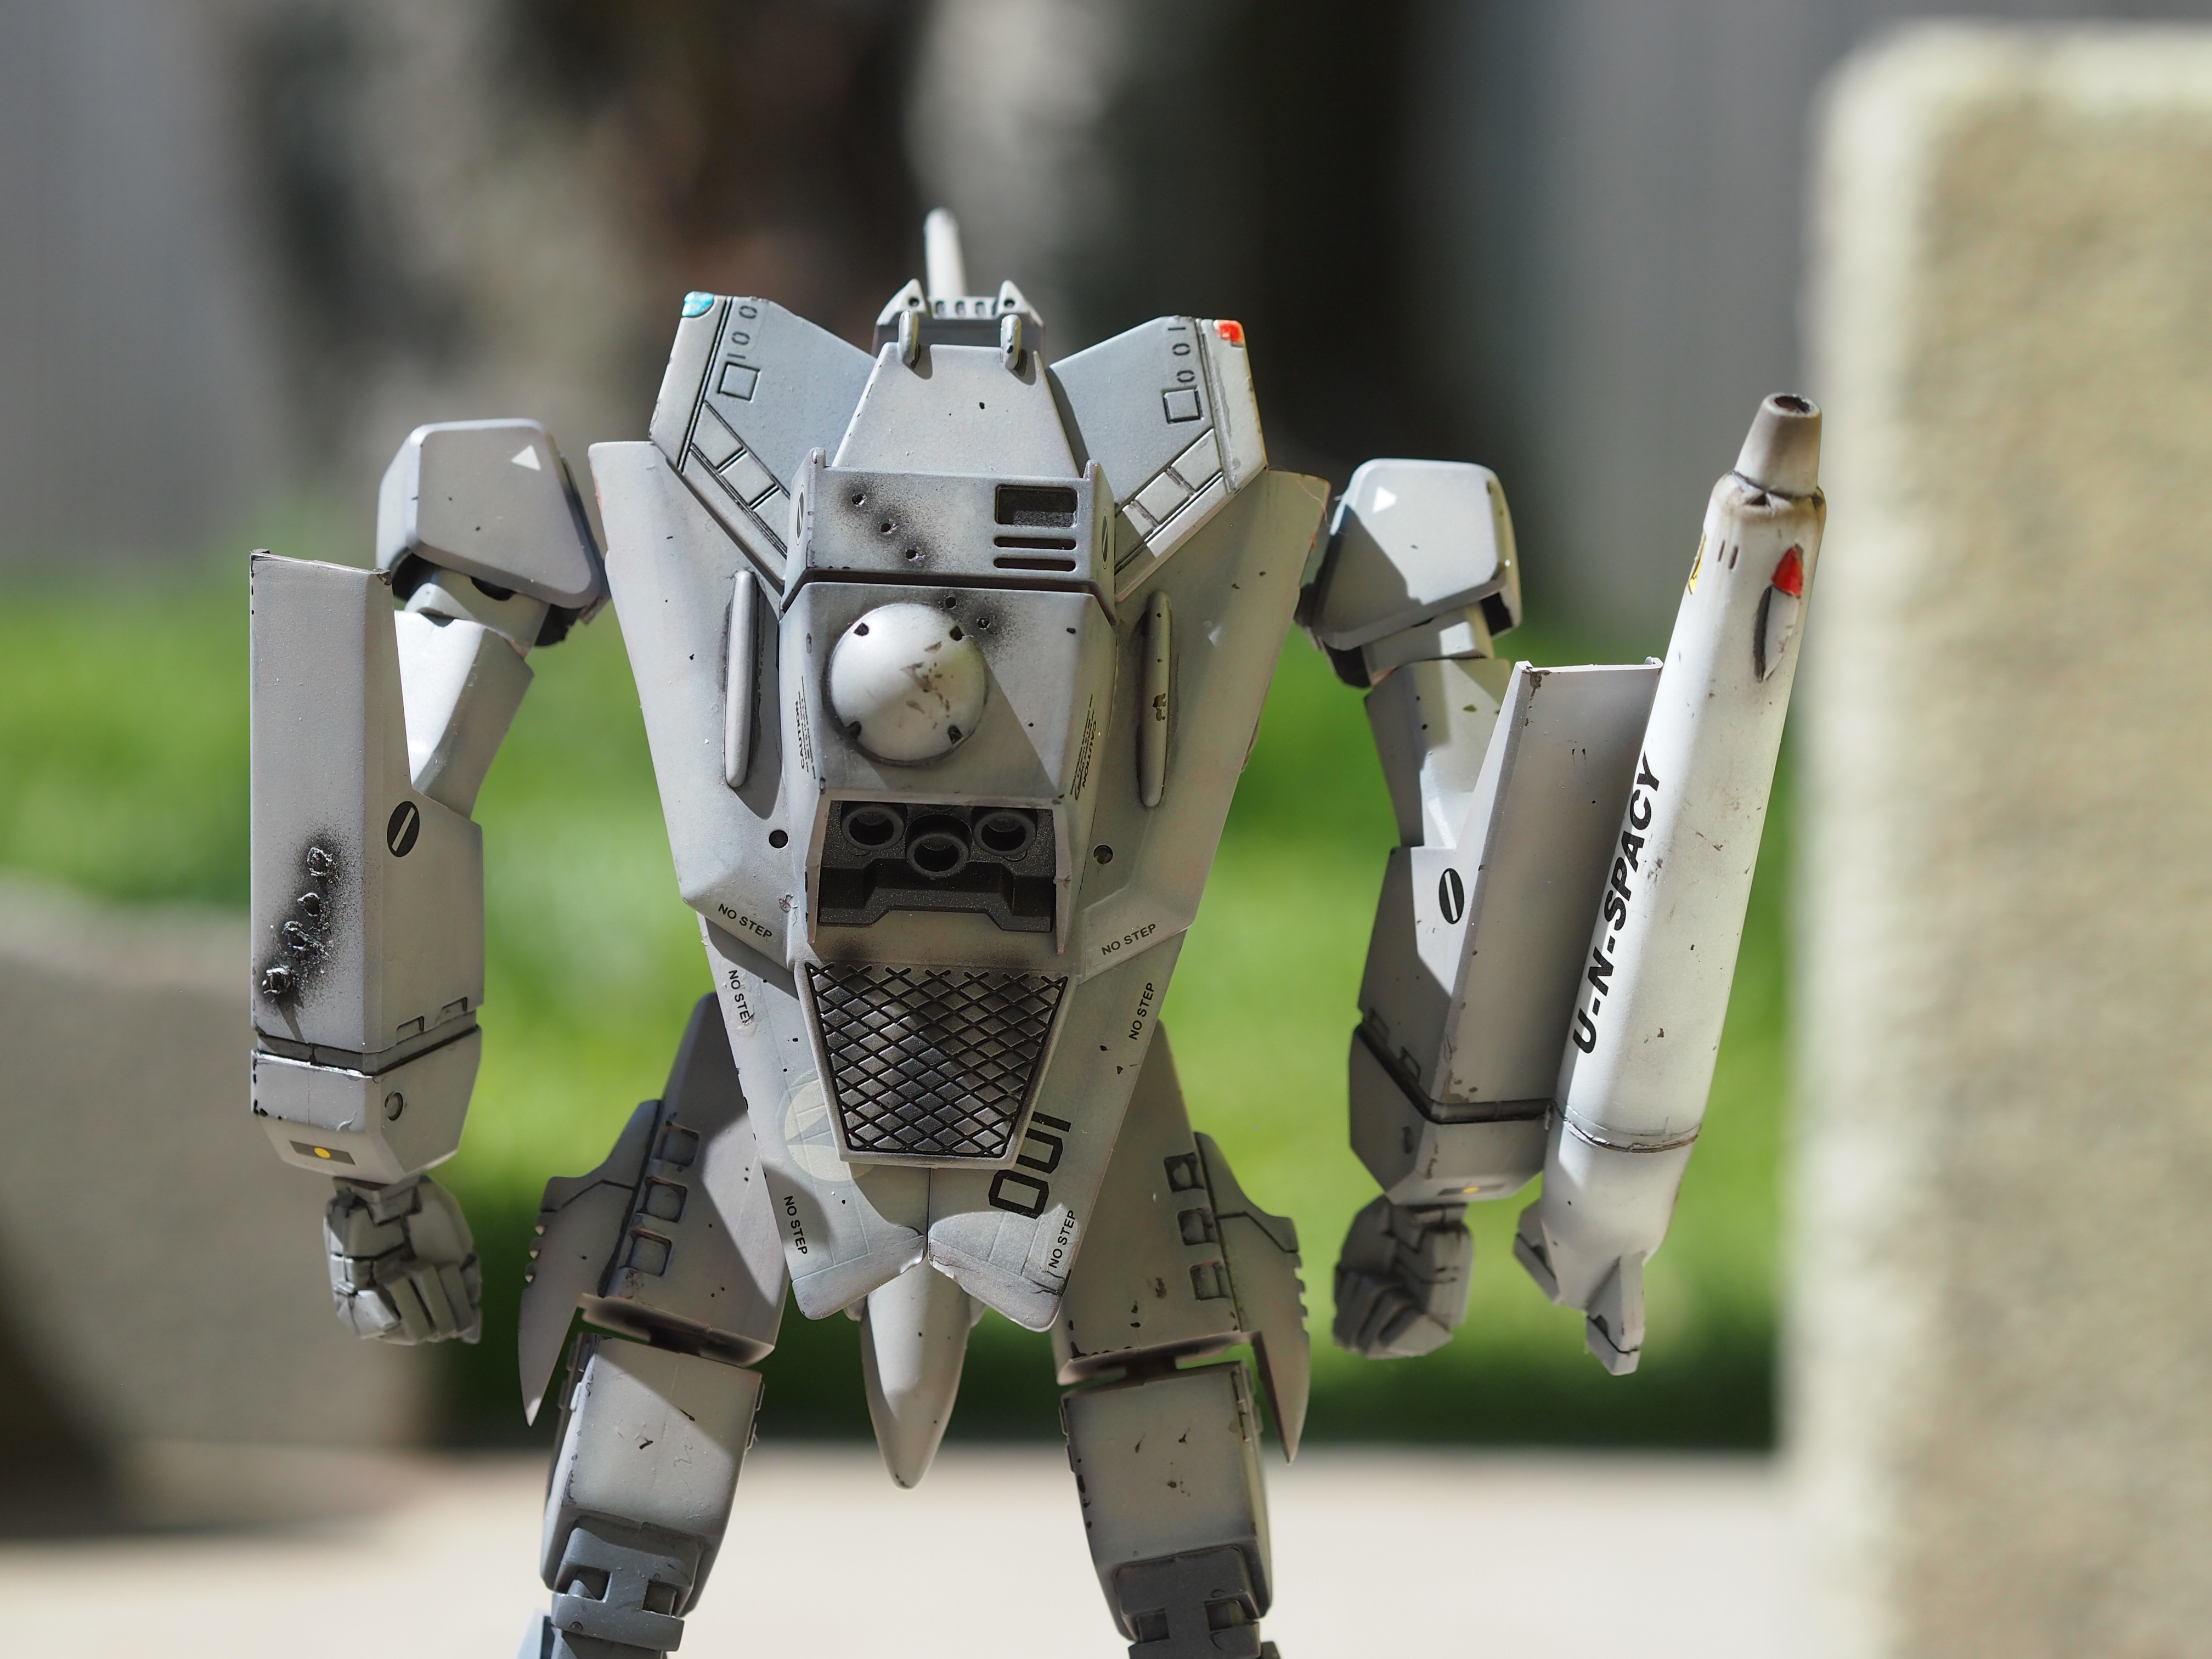
Some beauty shots

The original inspiration for the 1A build. Did Bandai ever come out with a 1/72 scale 1A?
Roy's Battroid with the fighter I just completed recently. Colors don't quite match, lol!


Not an exact color match, but you get the idea.
.thumb.jpg.5ee69034d510af1f88d14774b30bc976.jpg)


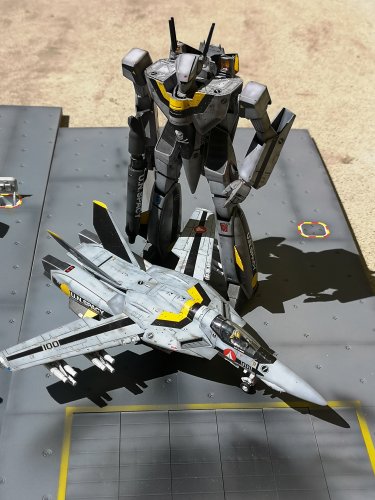
Roy and the Low Vis watch Hikaru sortie for the first time in his 1J

-
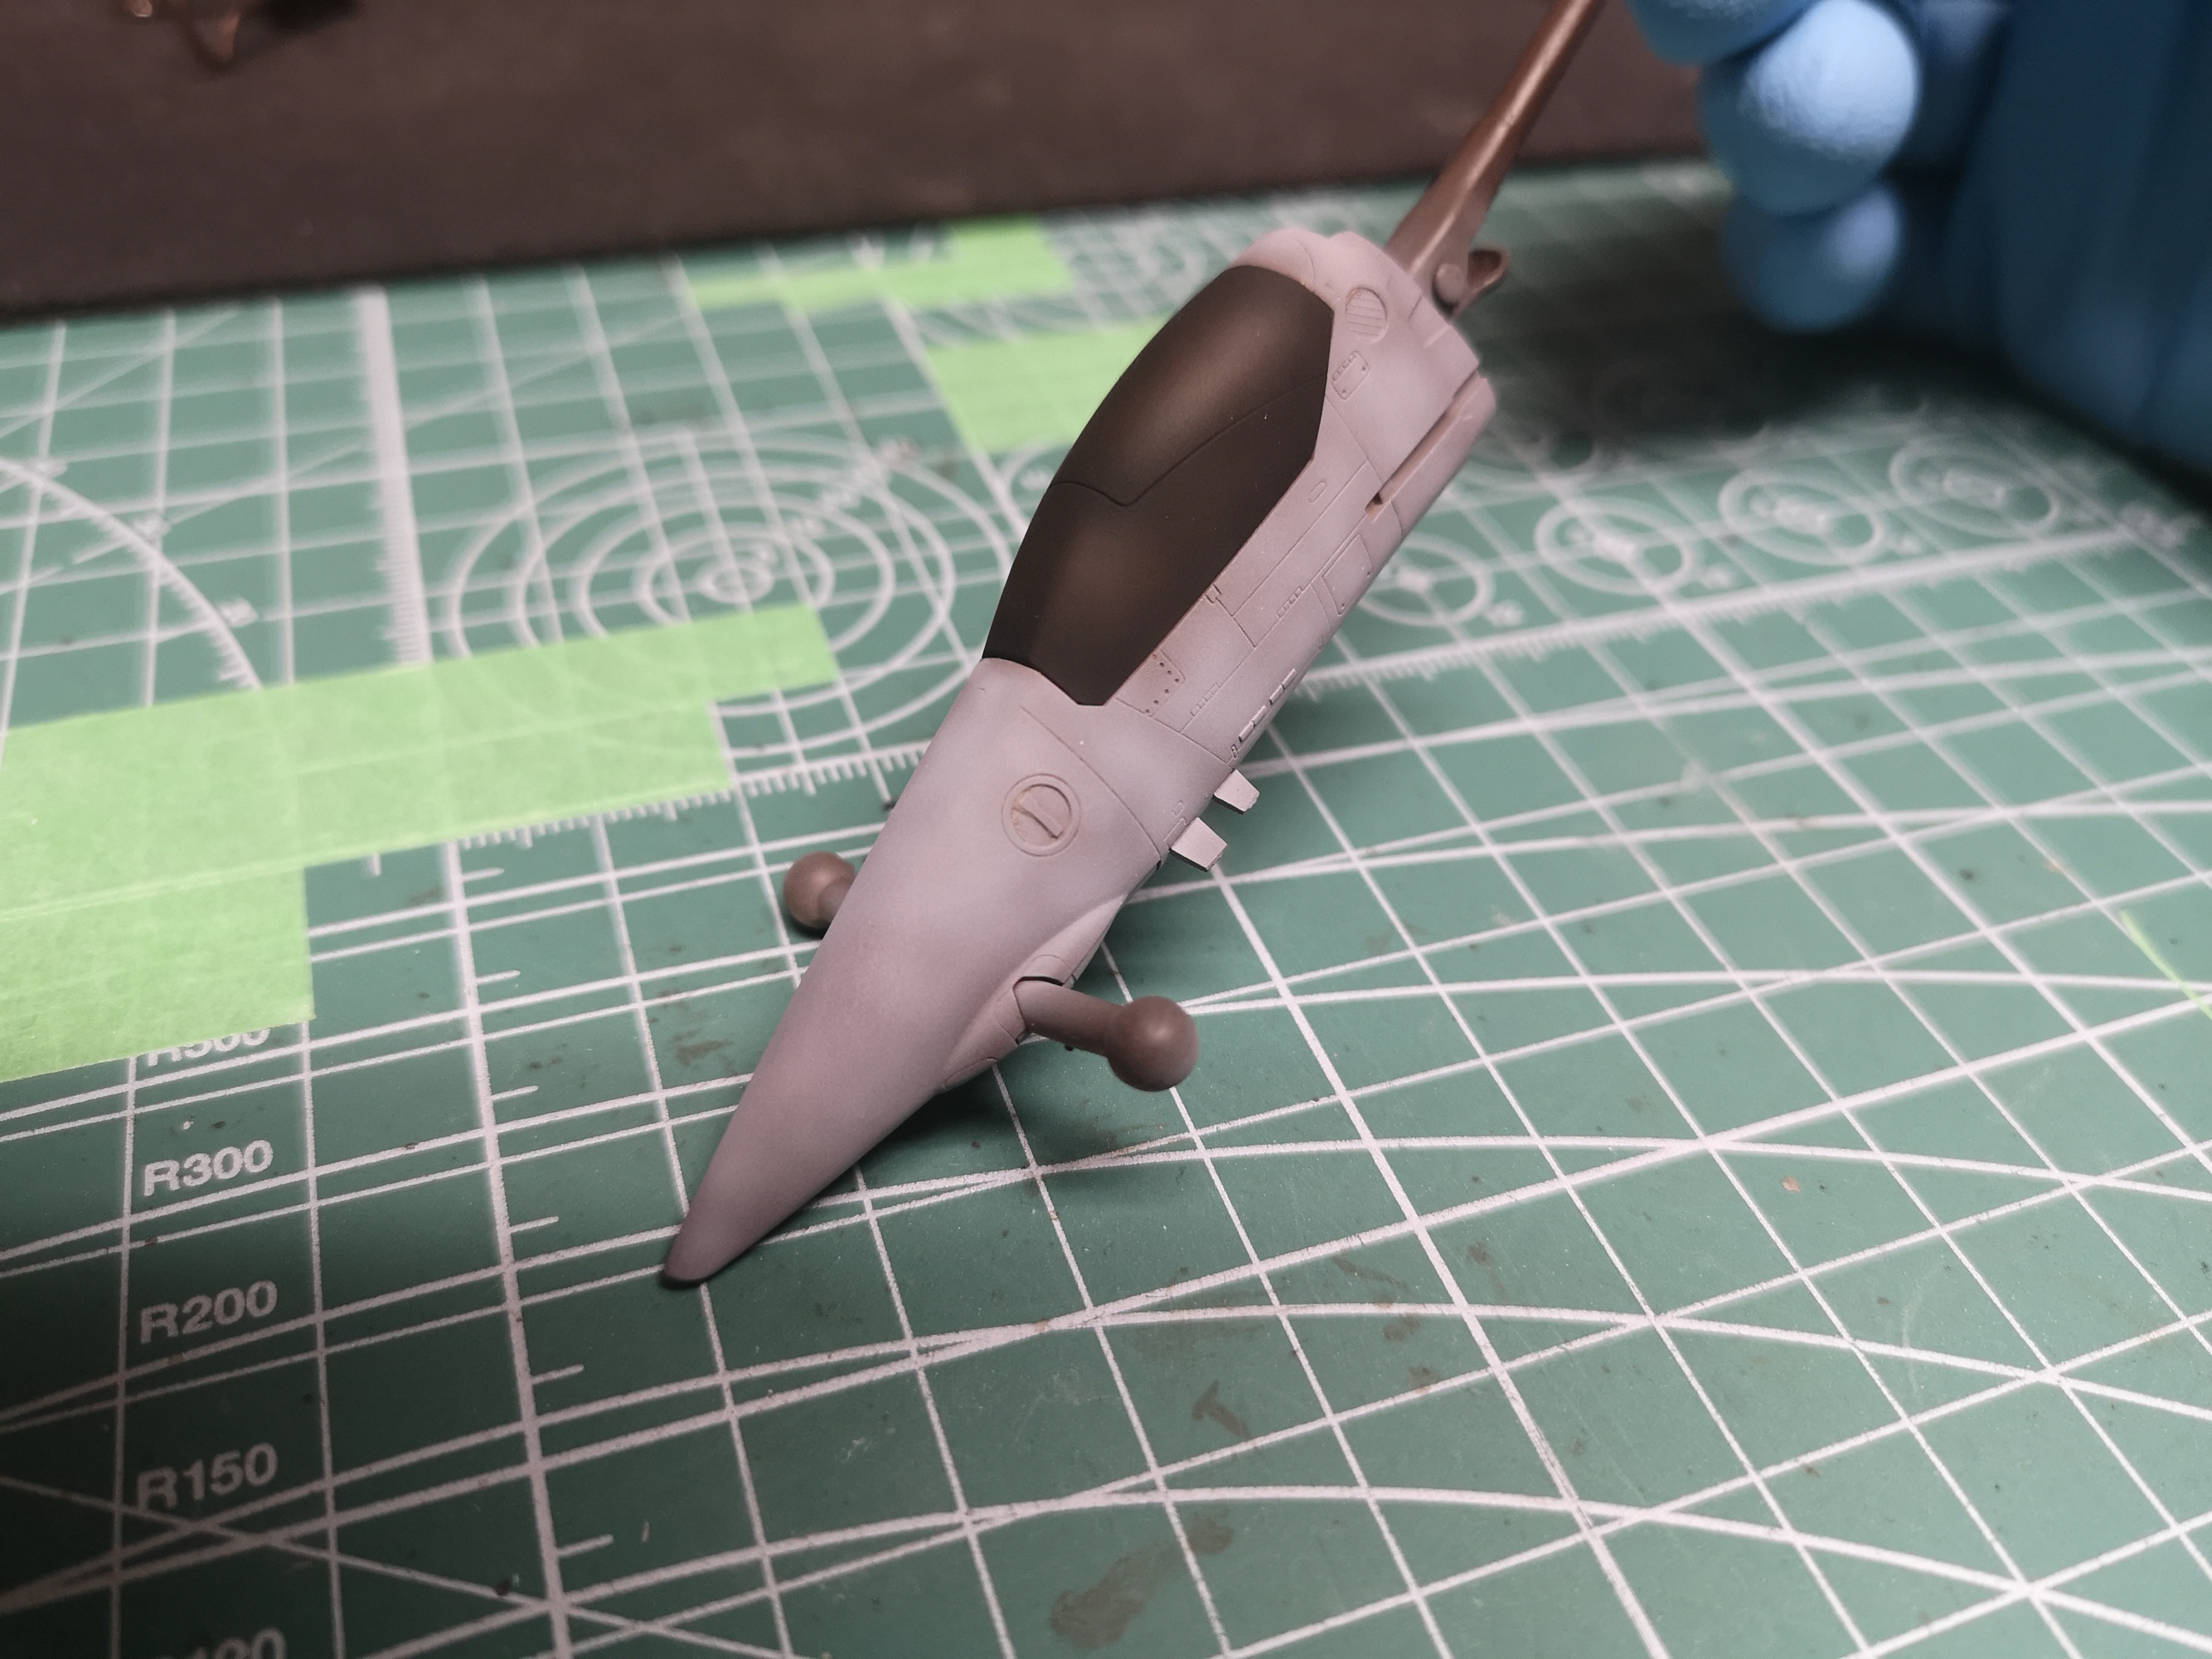
Ok, so my drunken Roy heatshield debacle......
Sanded off the old decal, some more brown primer, black and gloss (too much black this time, but I guess more screen accurate).

Fixed within a few hours.

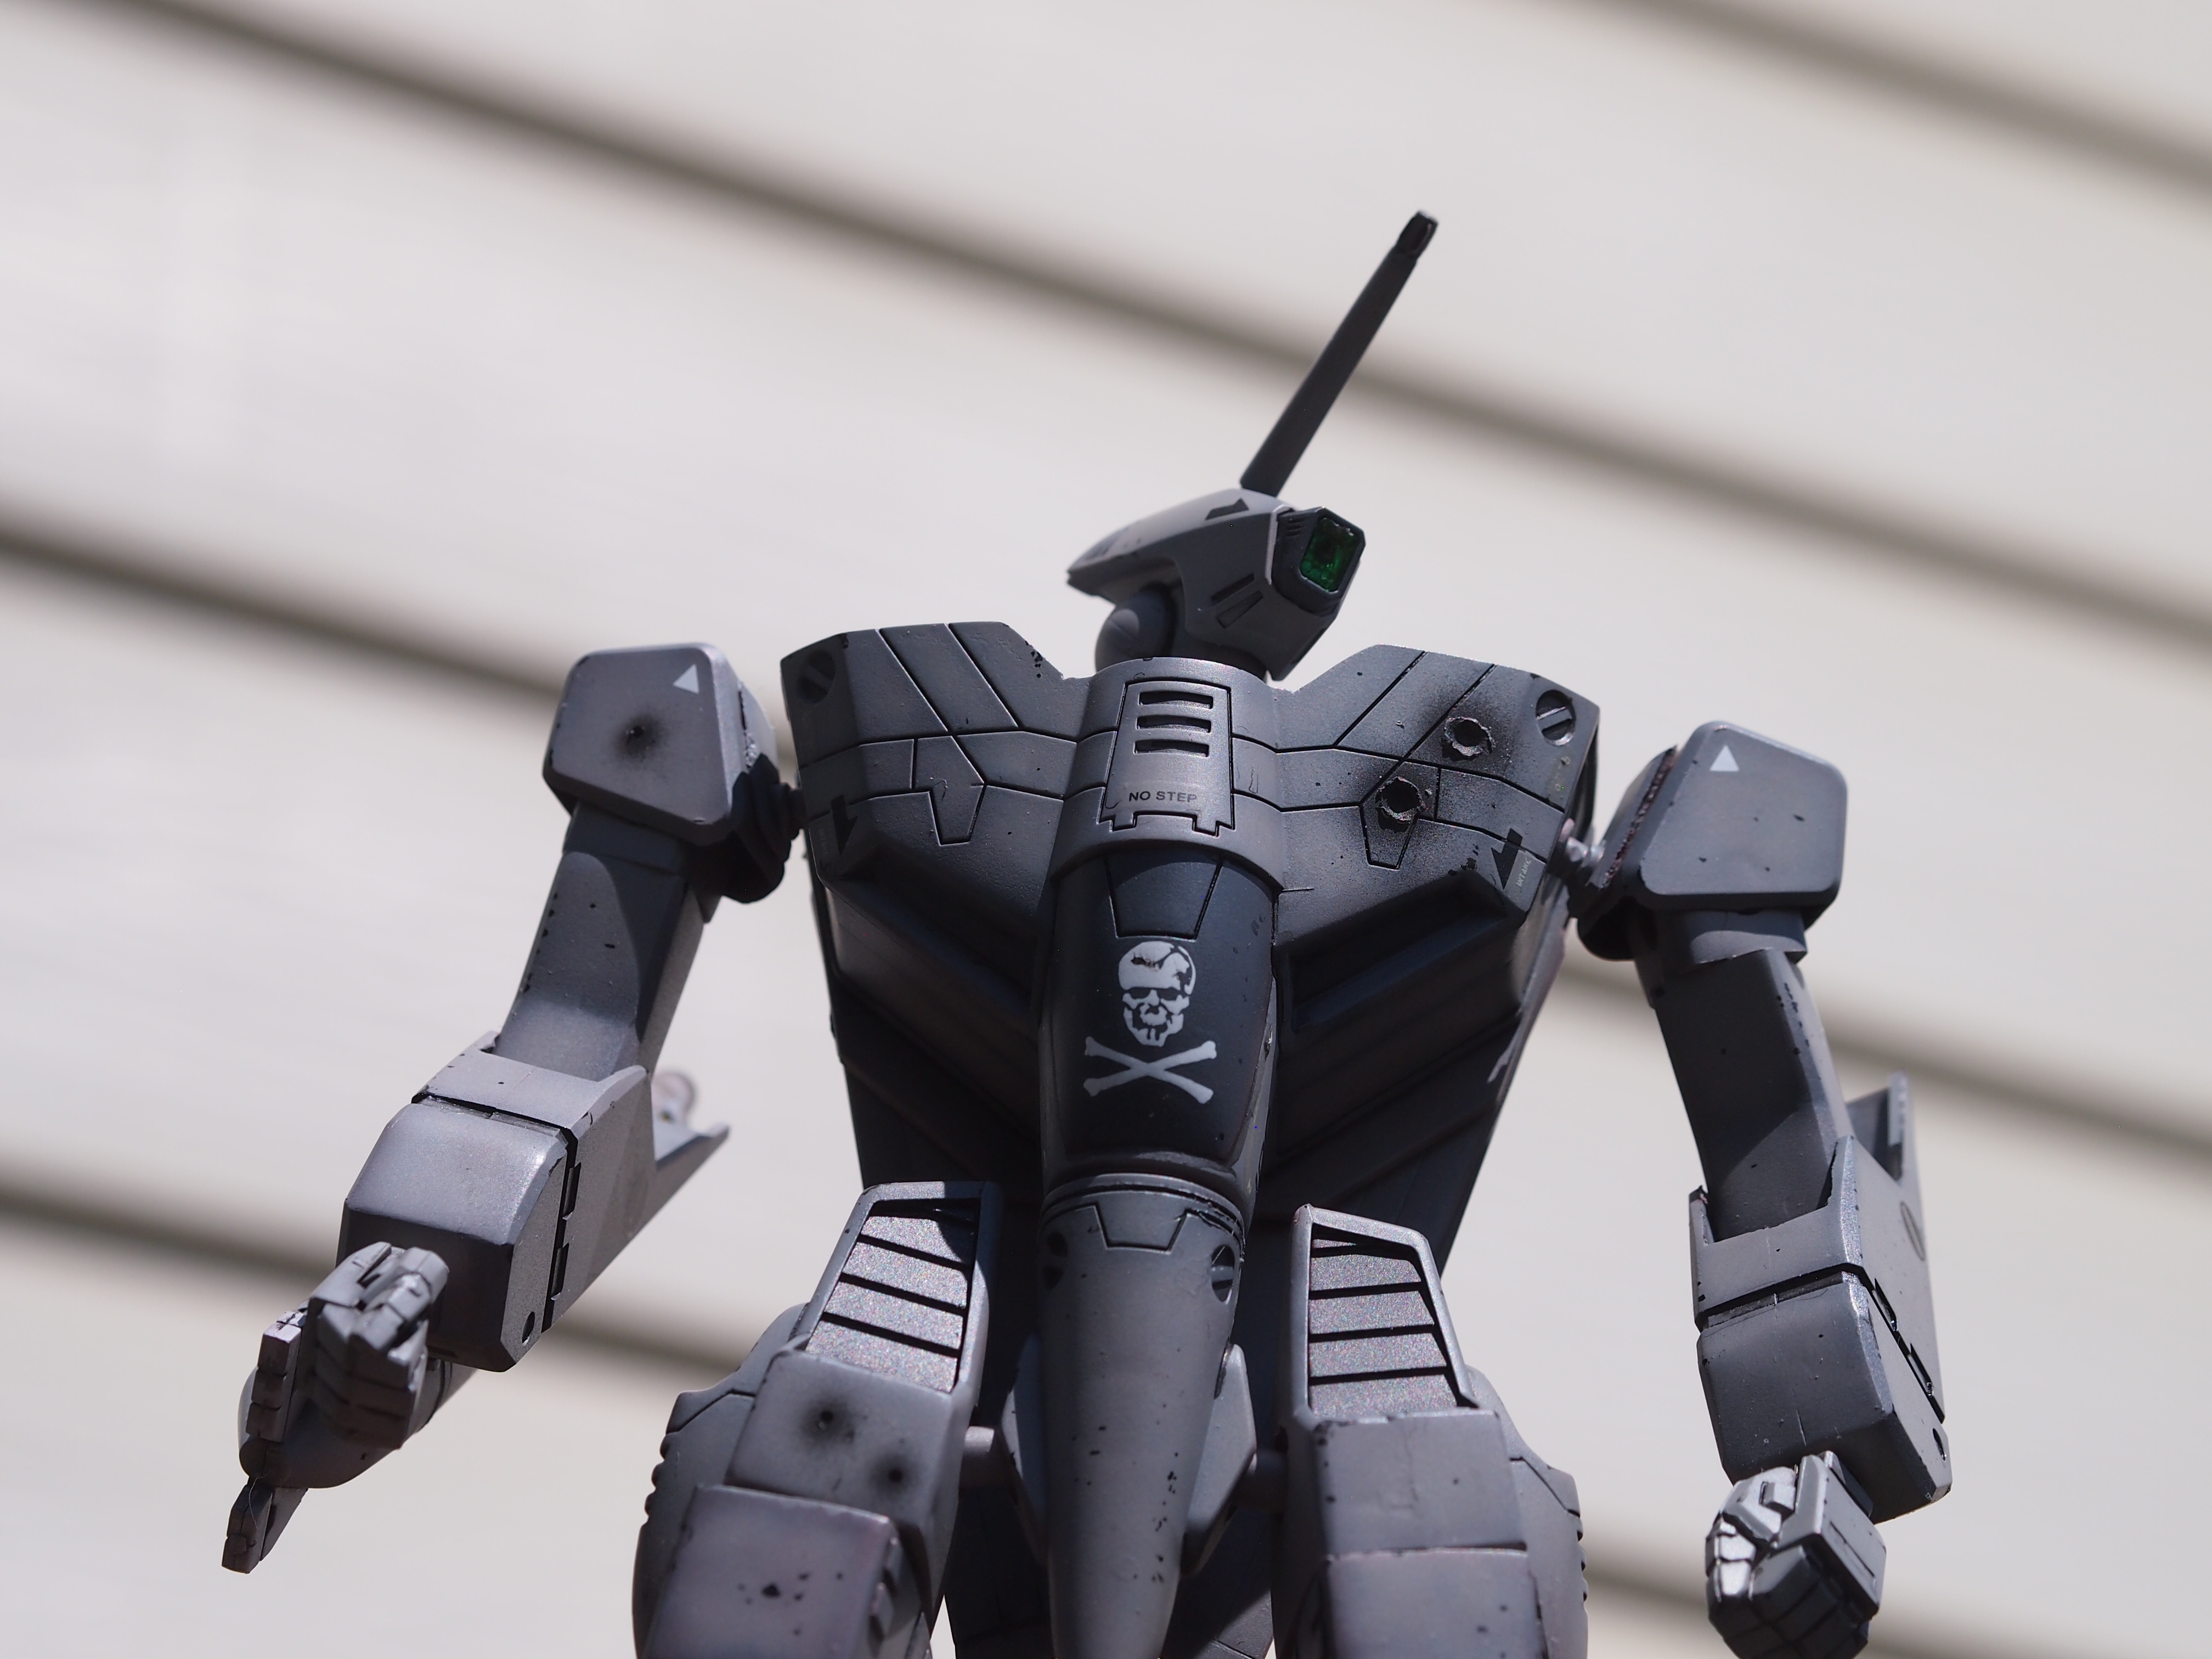
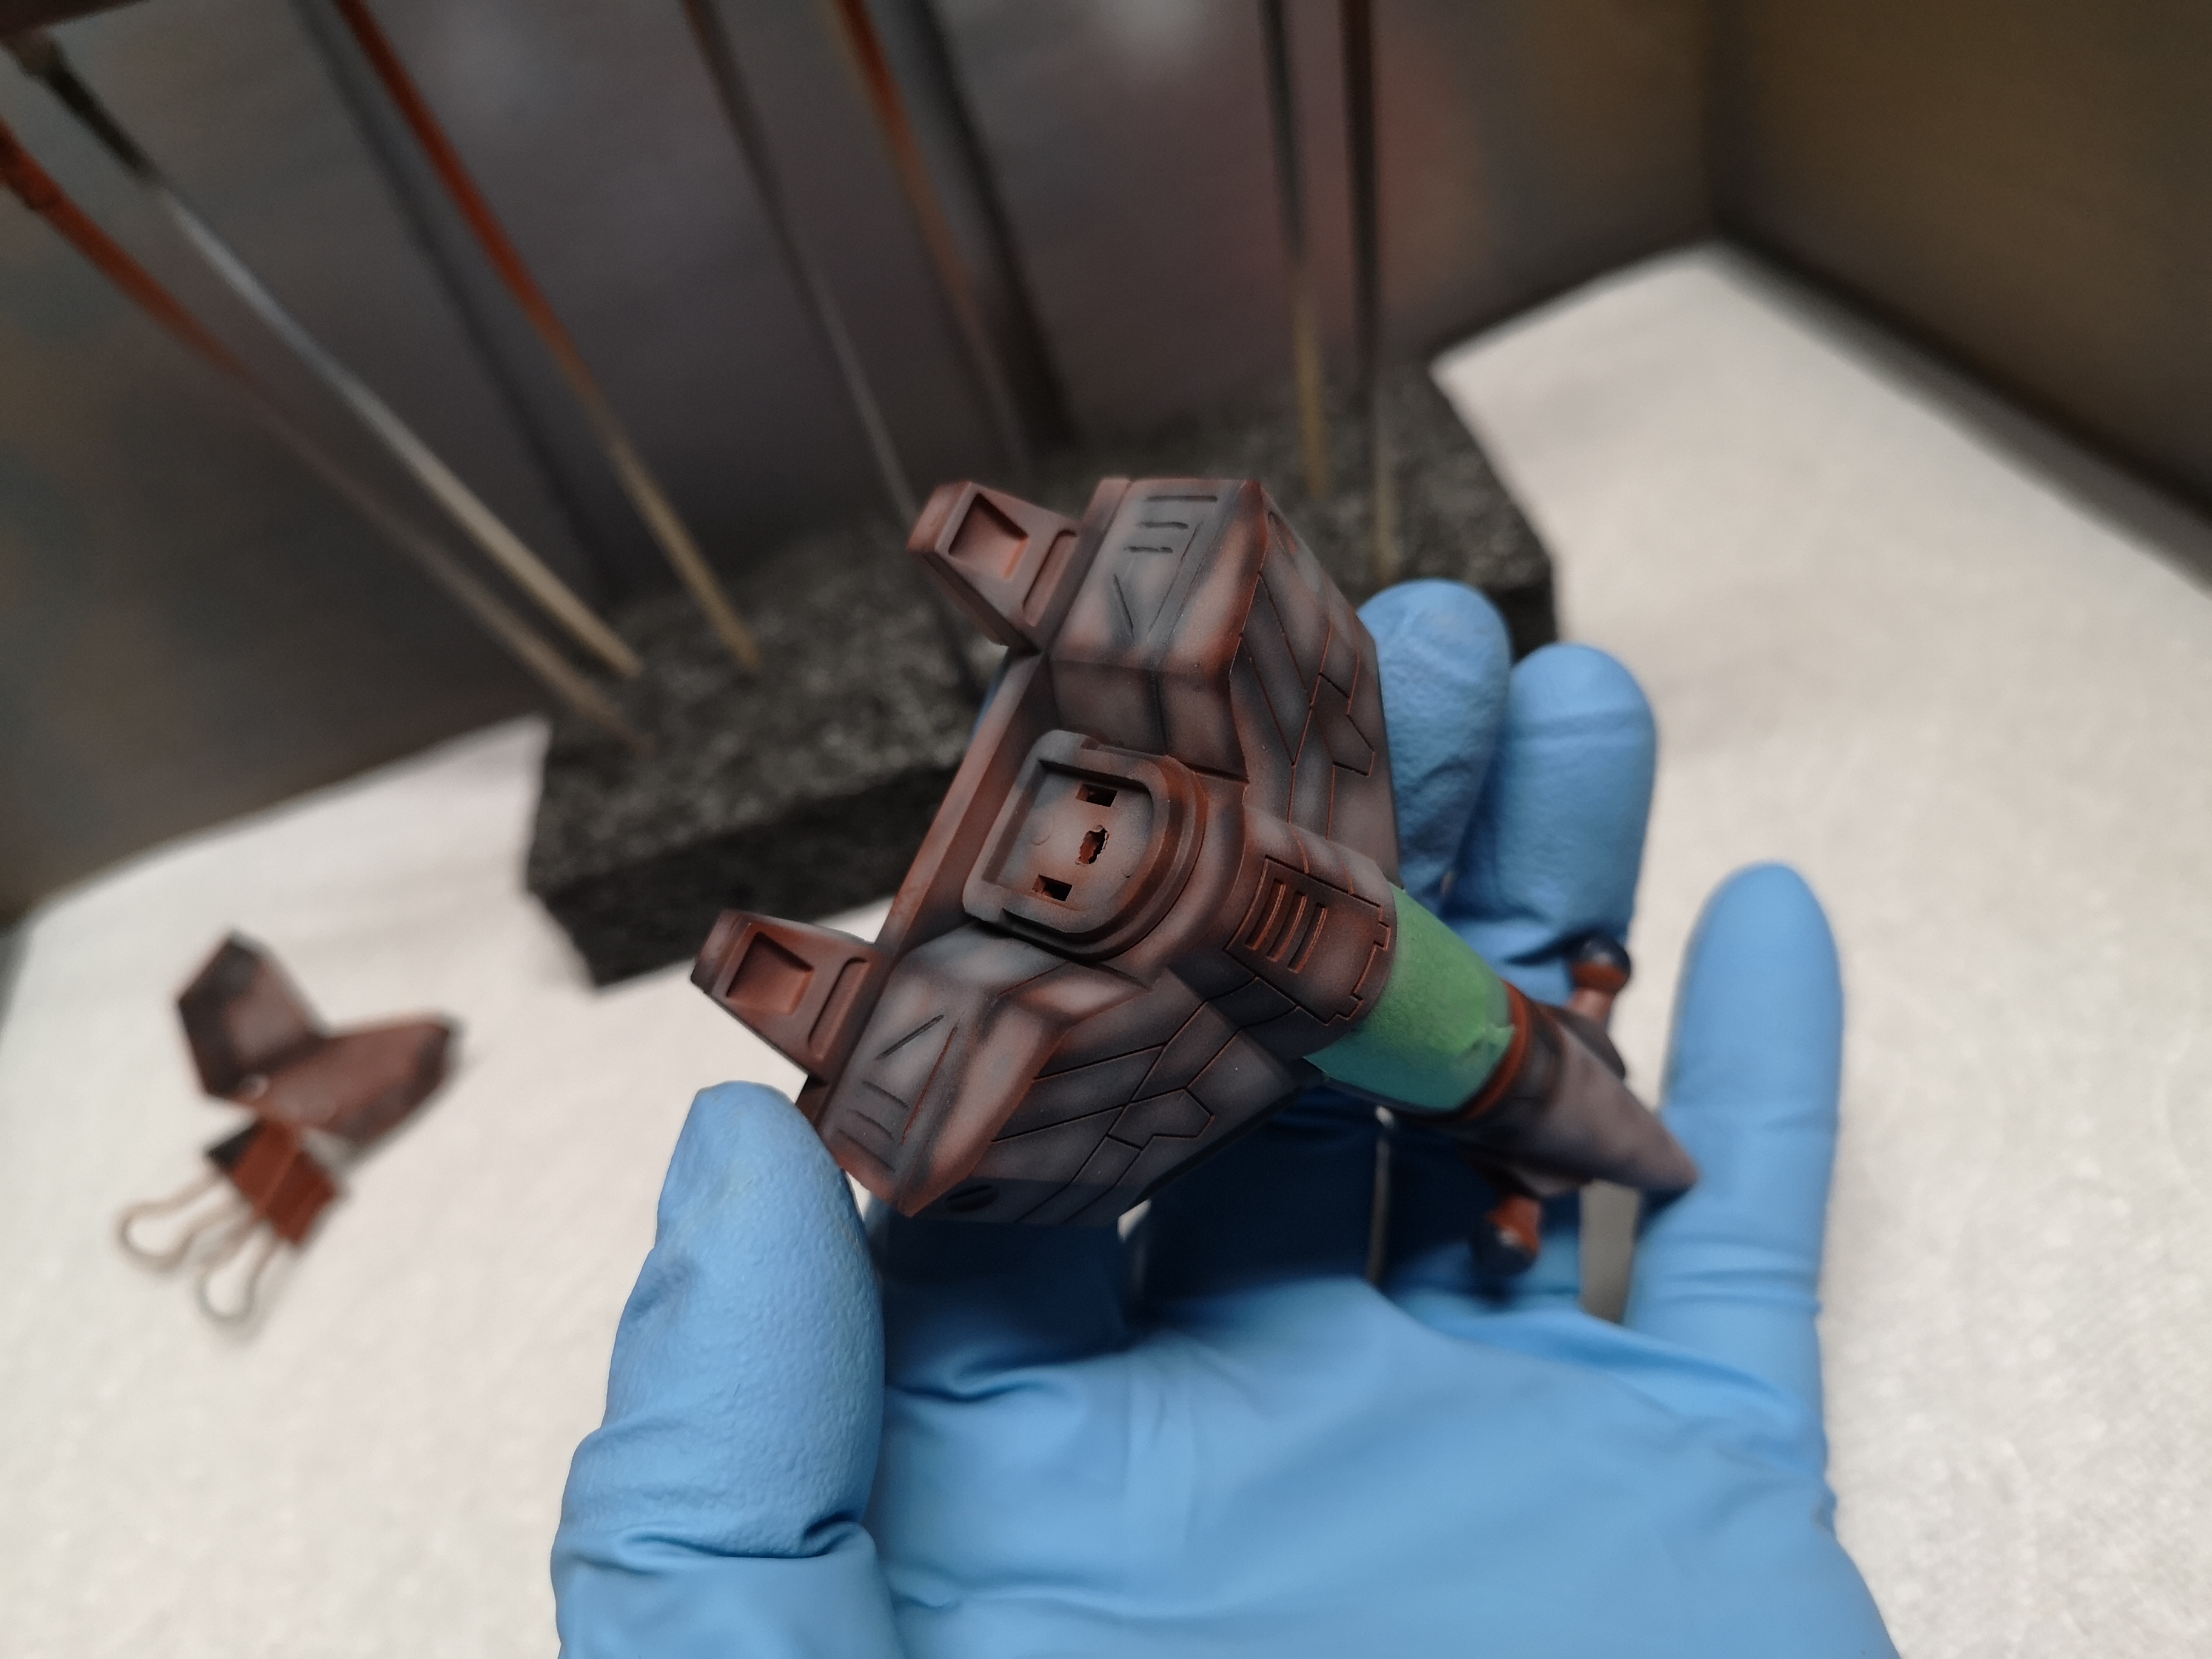
Time to add some wear and tear.
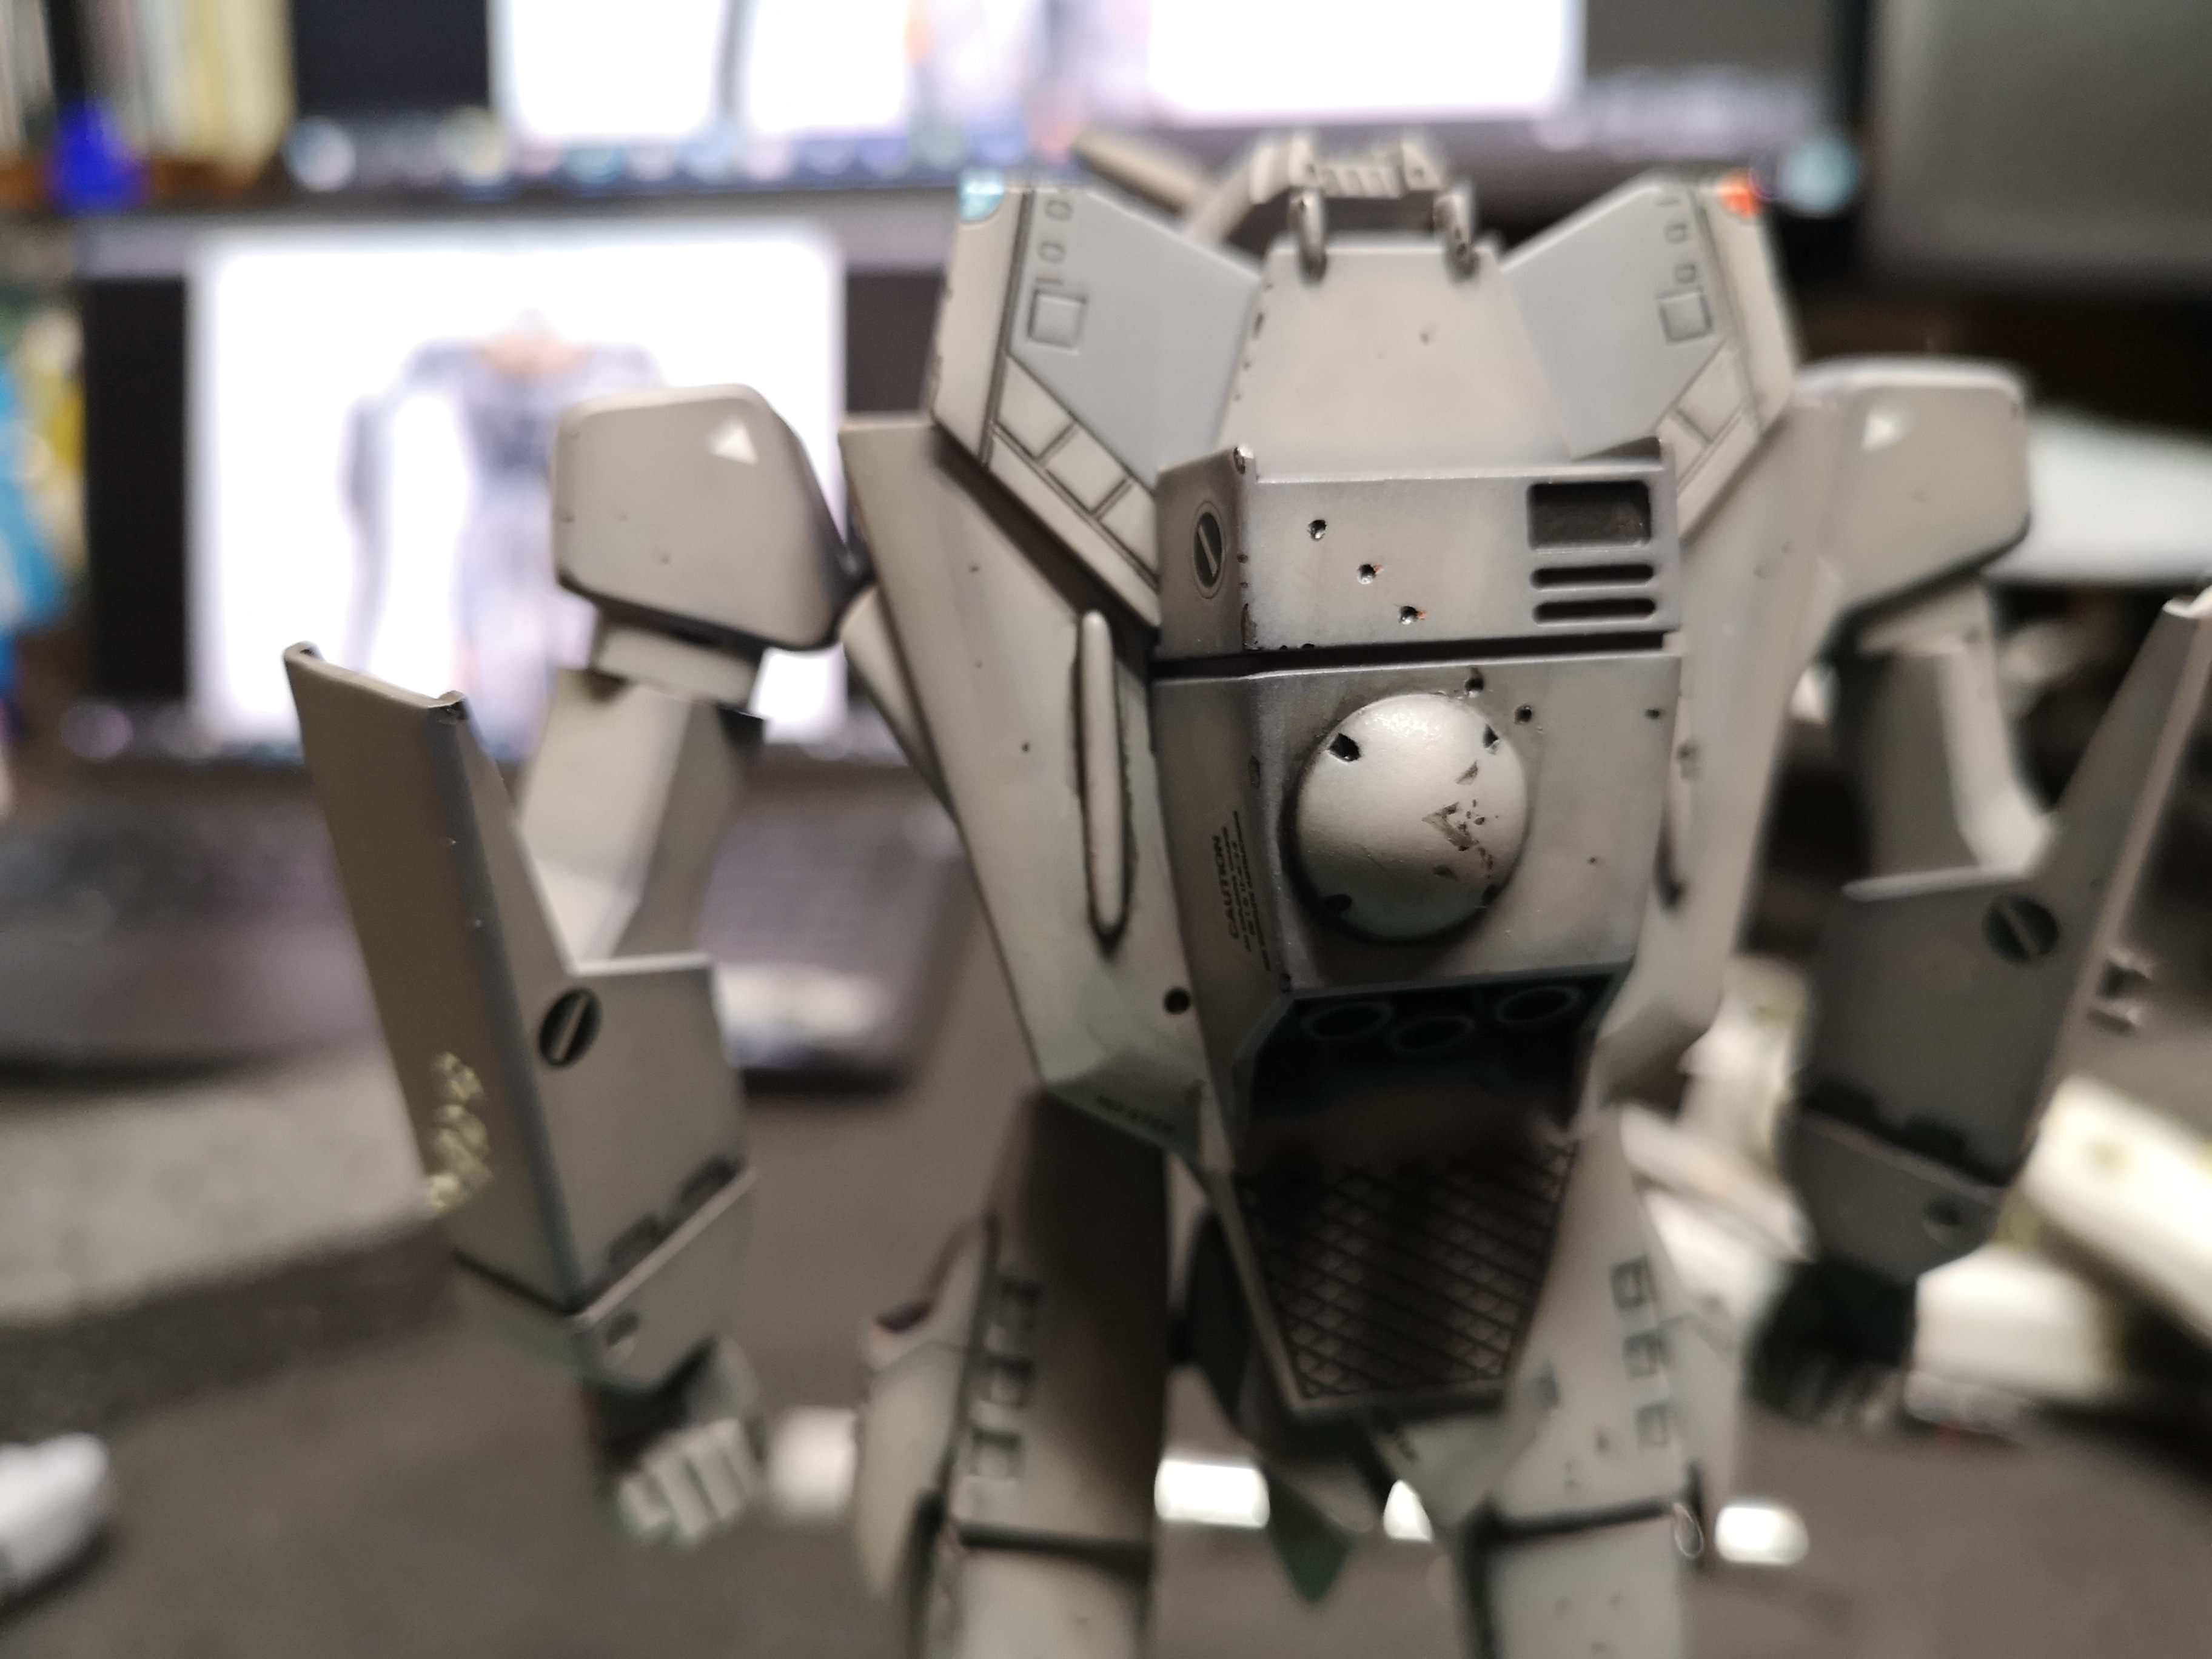
Decided the 1A would have seen some abuse being at the pointy end of things.

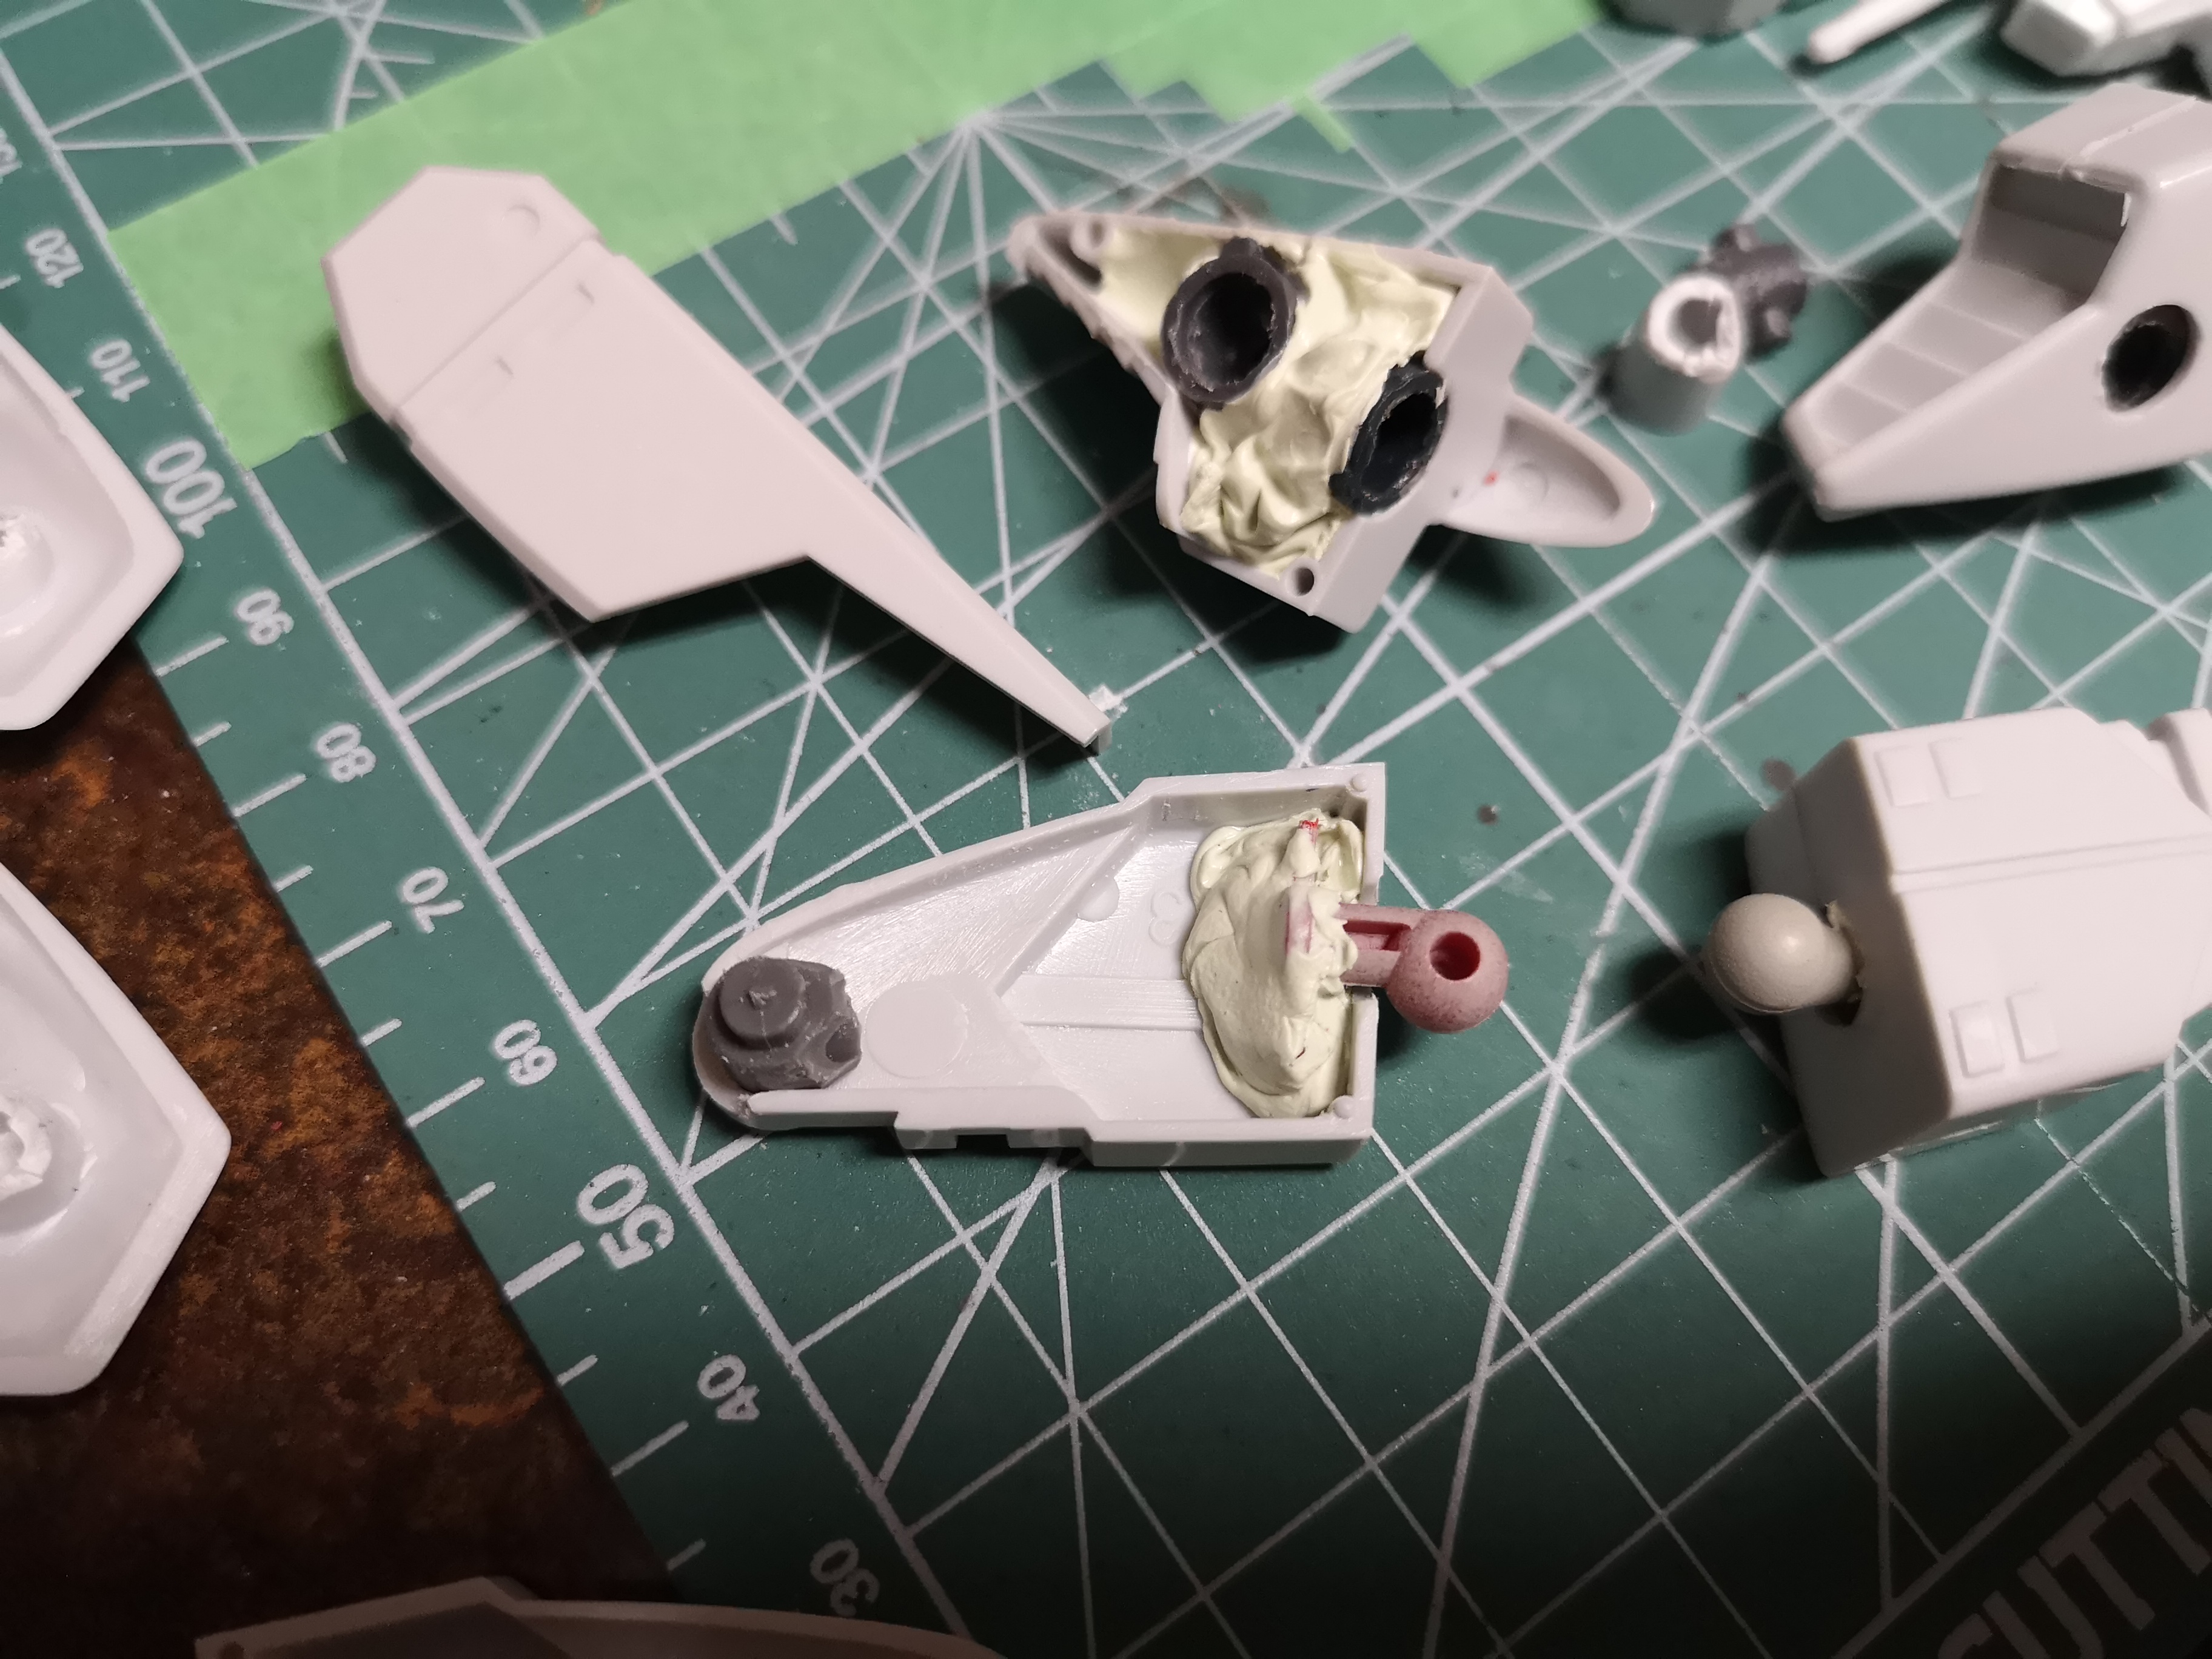
Just drilled some holes, added putty to the holes and pushed the excess out with the bottom of a paint brush.

Small arms fire? Or maybe just different calibre weapons.
Added scorch marks/powder burns..... This doesn't actually happen on all impacts, but I'll admit, it does look better.
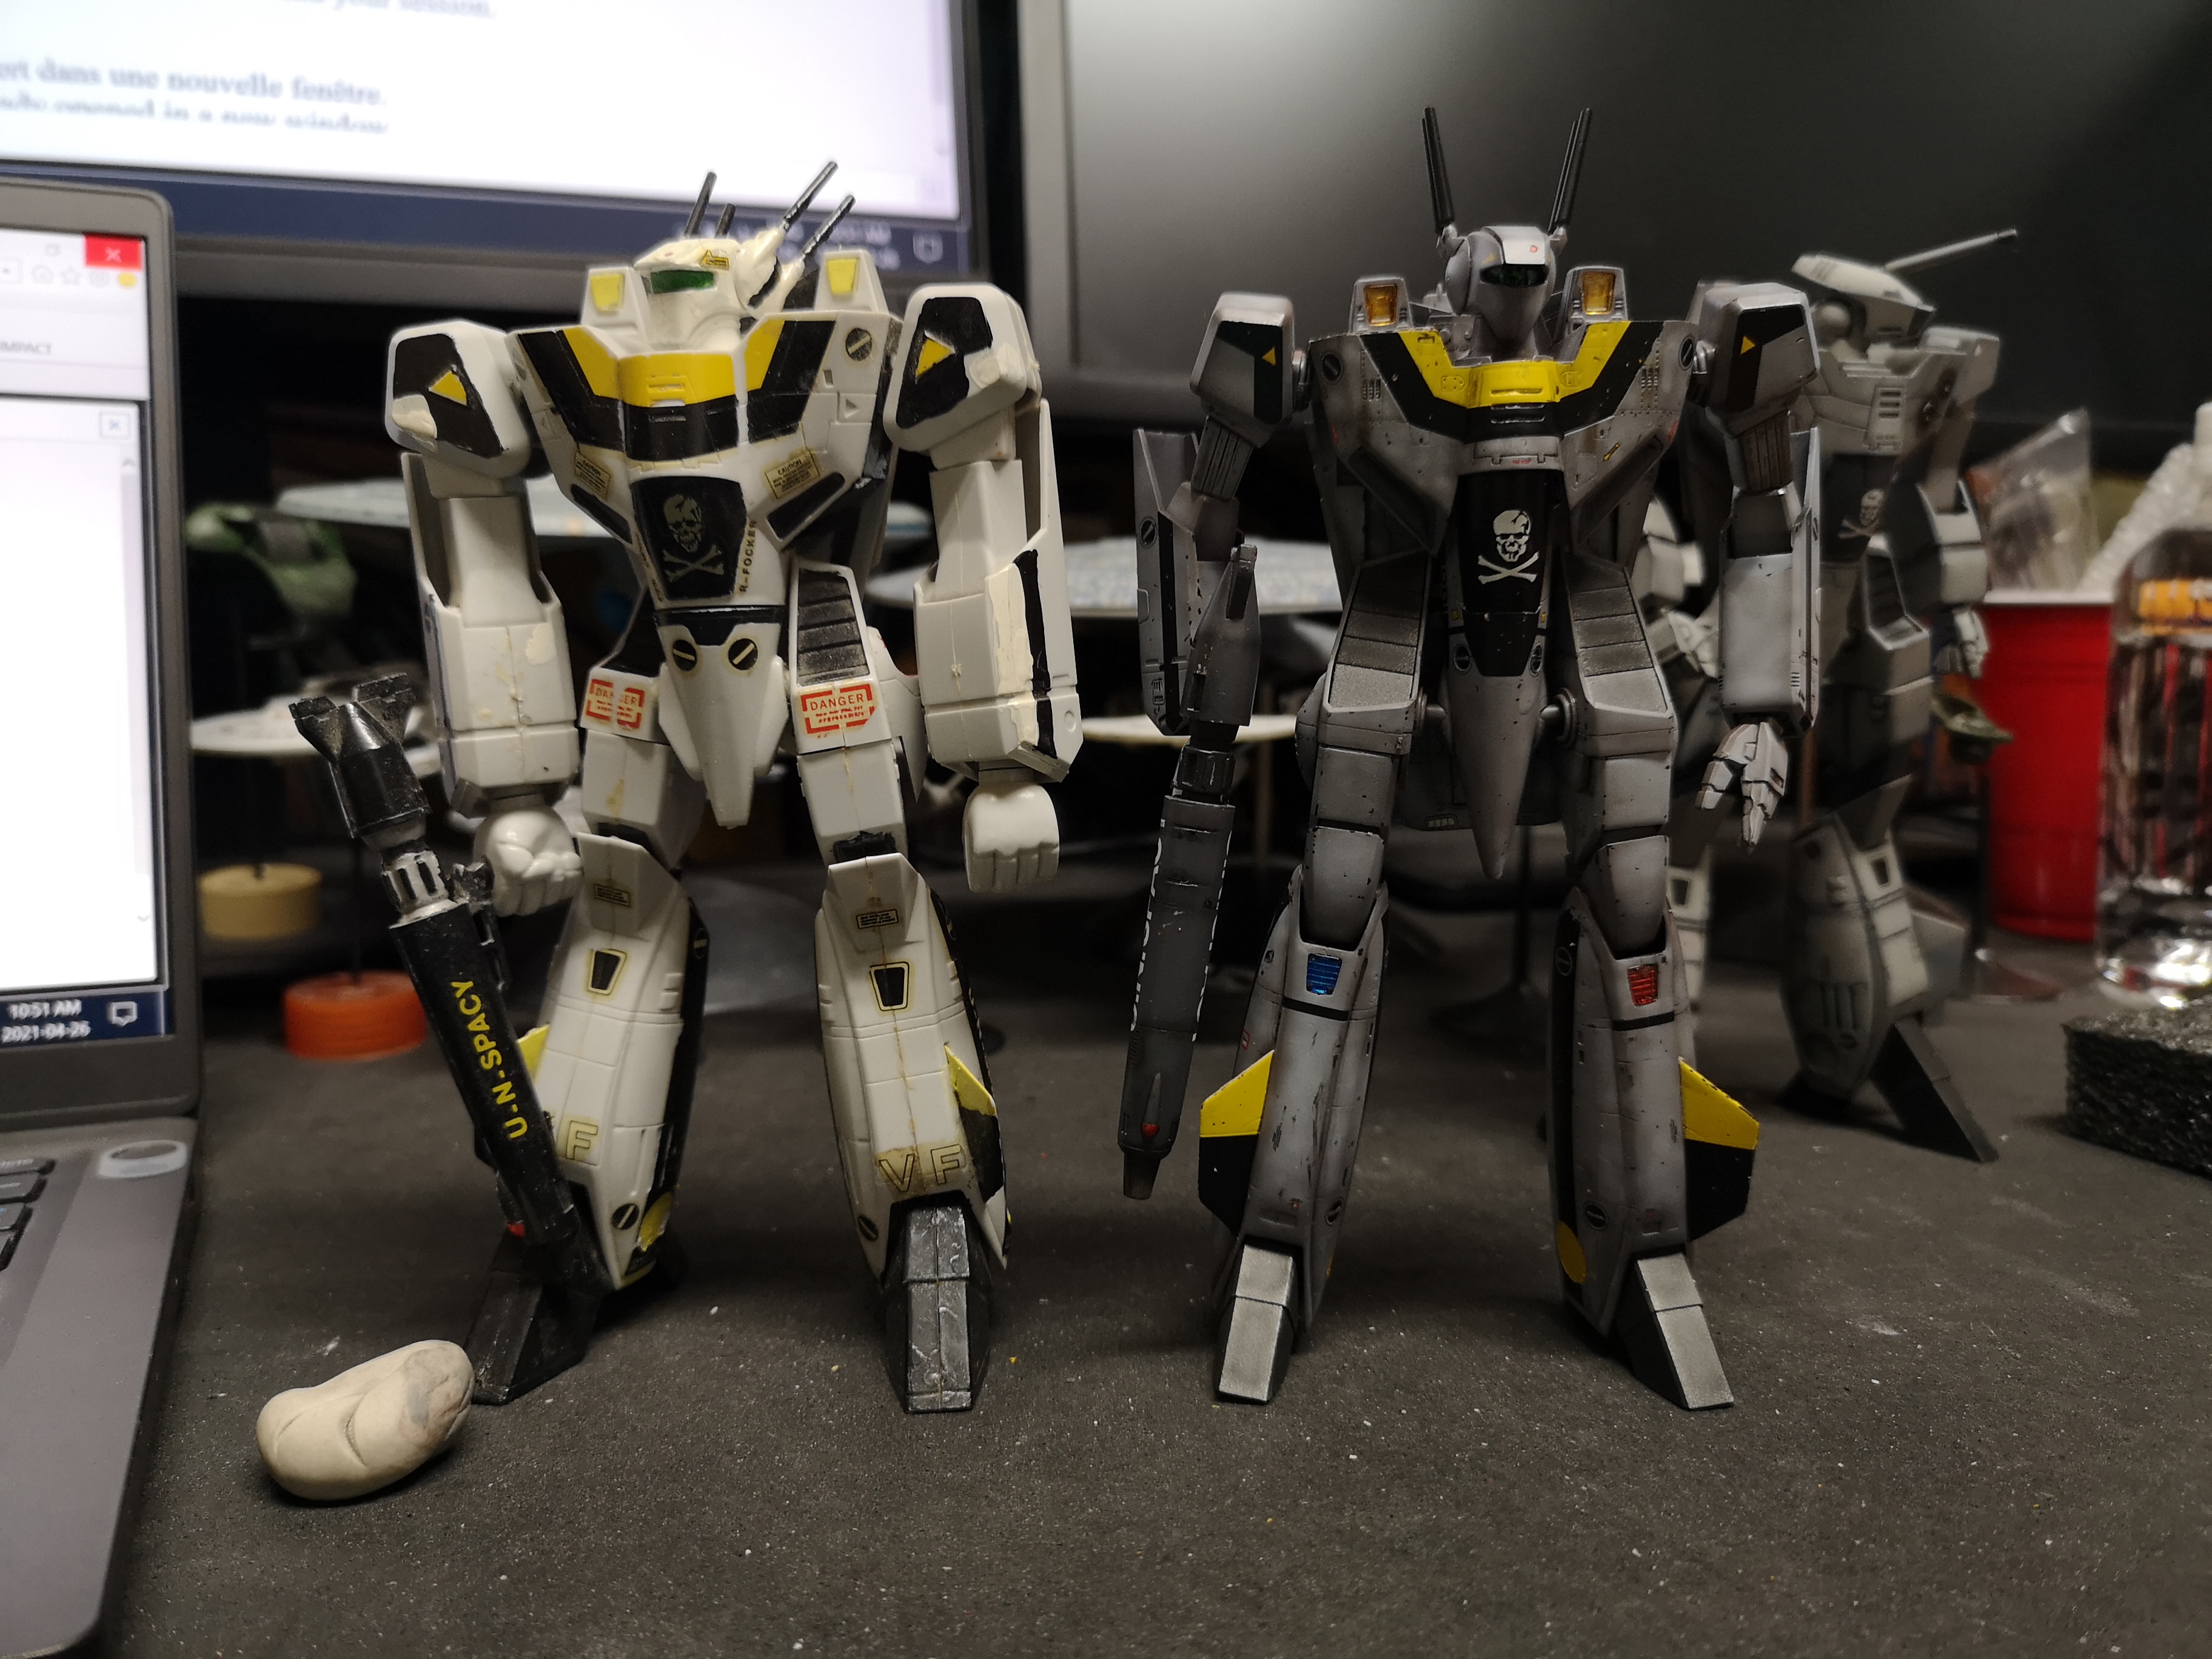
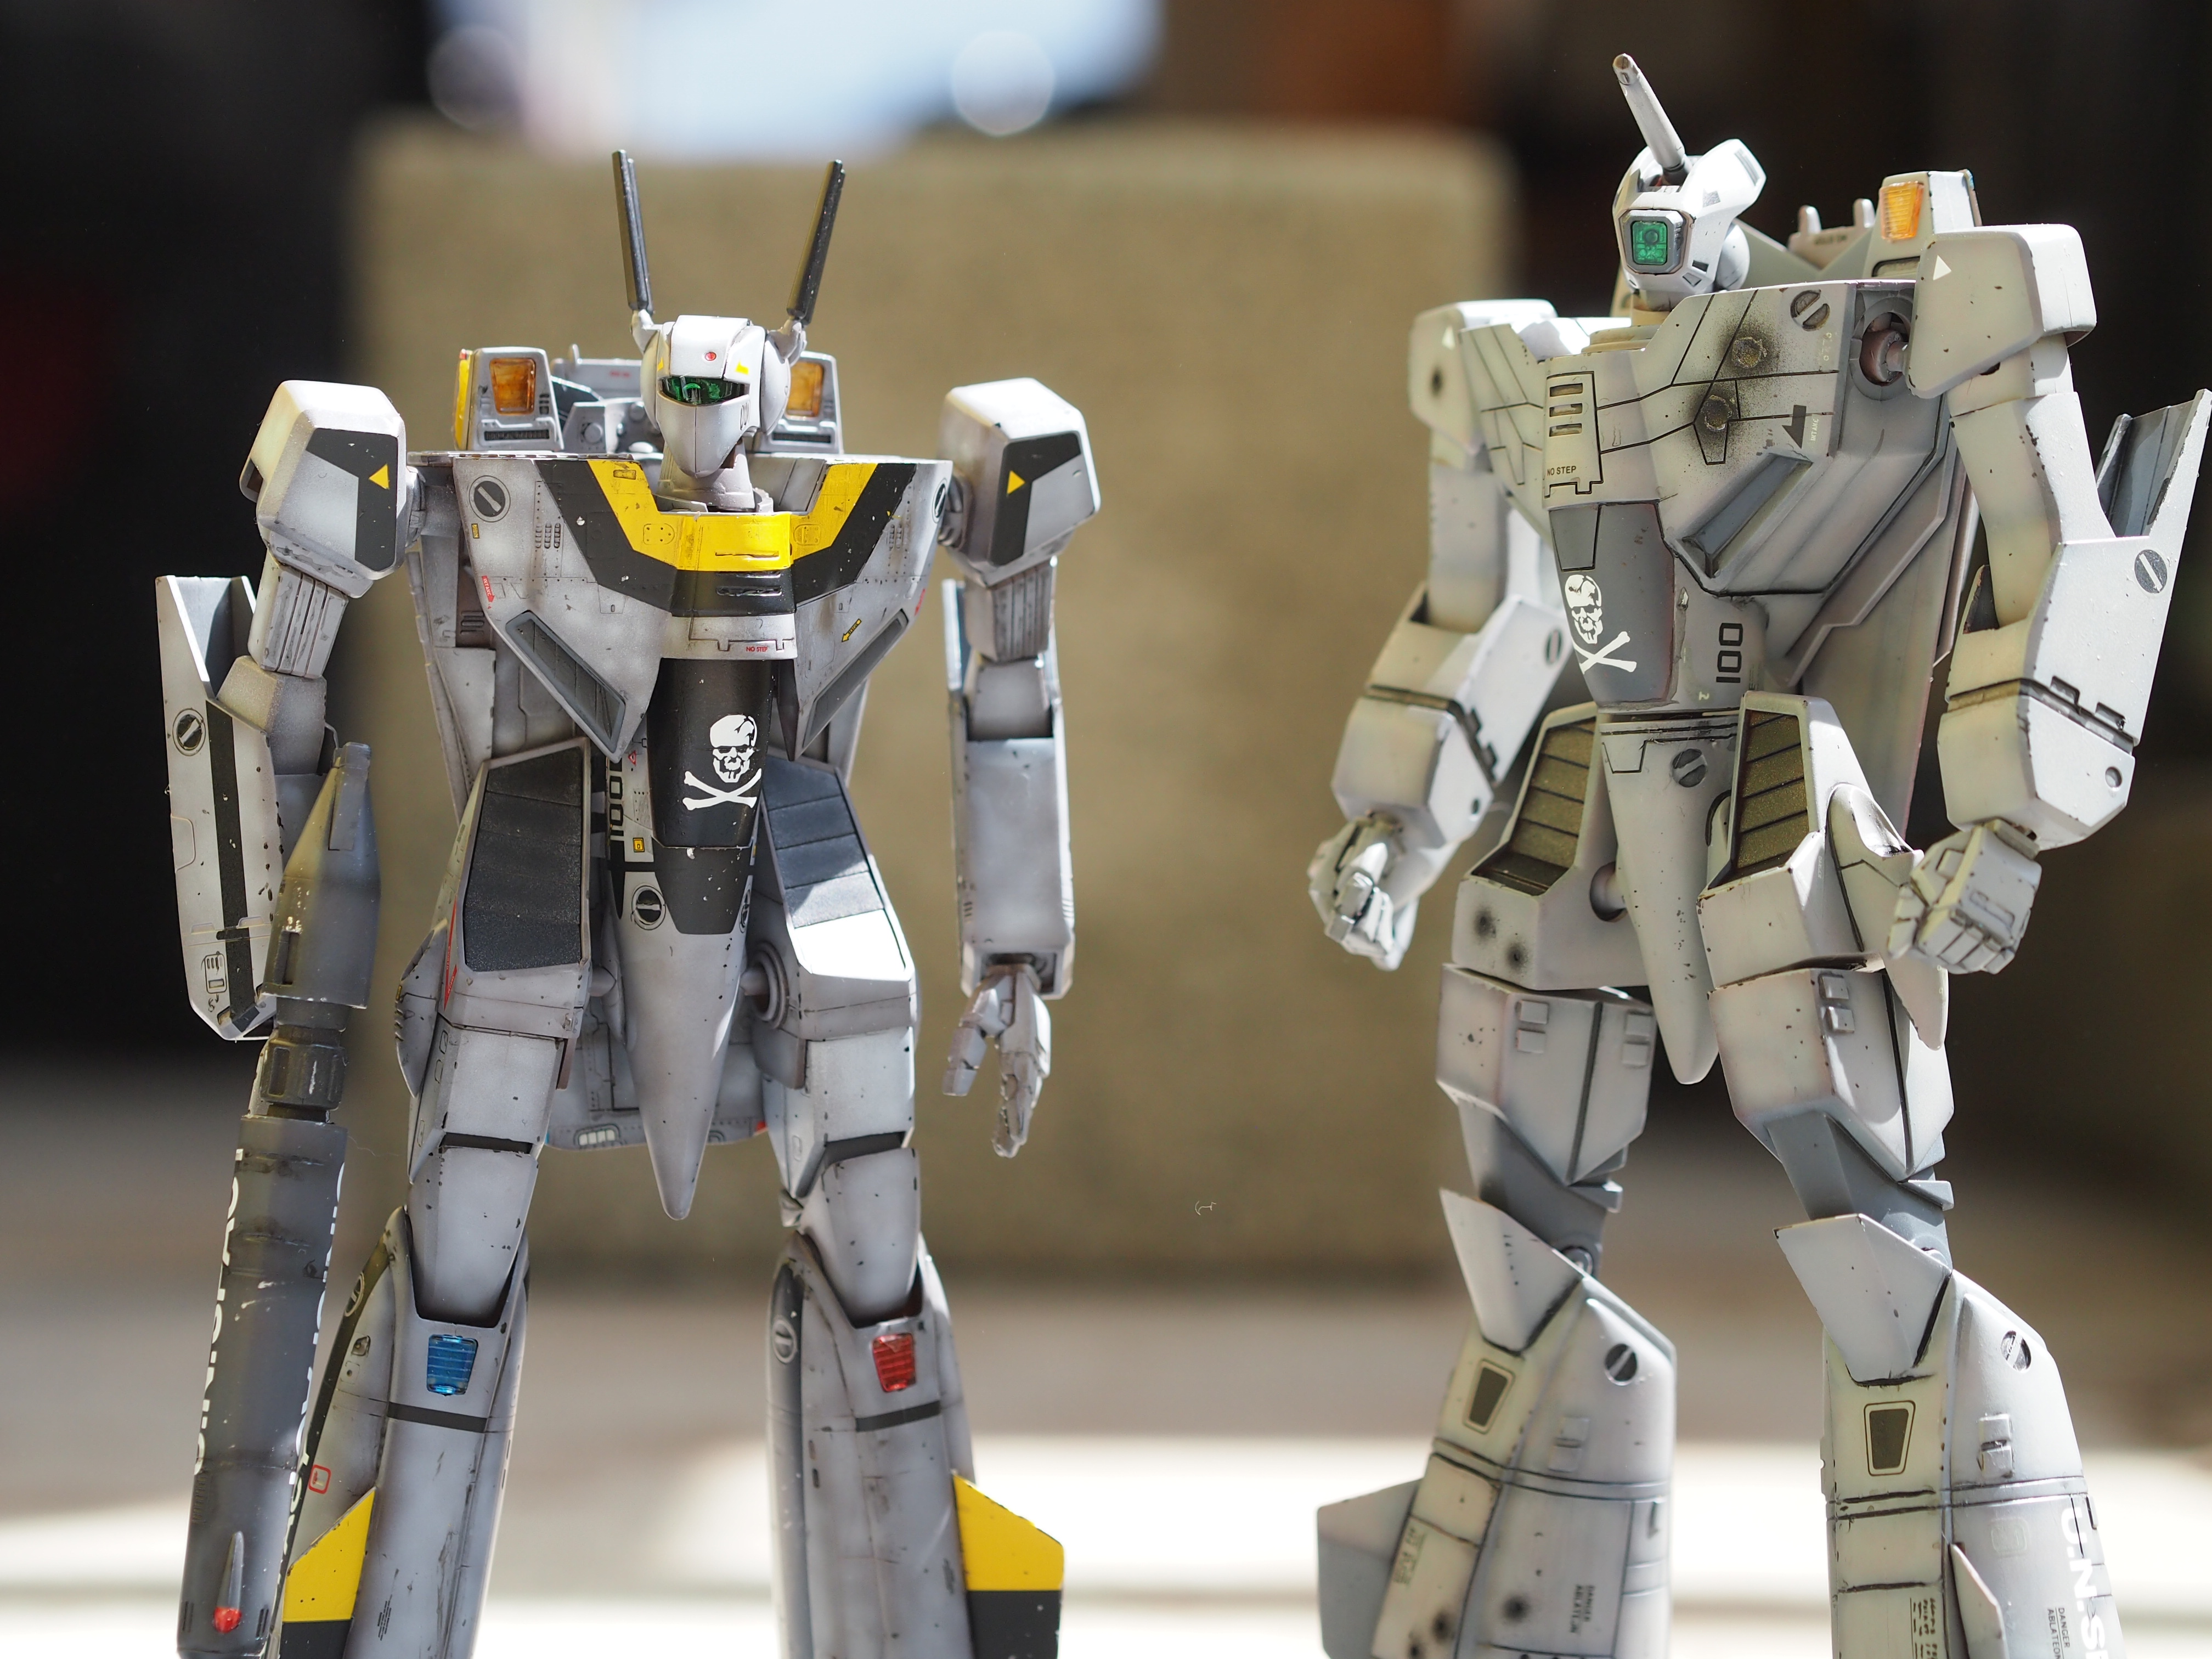
My customized vintage Bandai on the left, original on the right.
On final assembly the 1A came out a lot taller than I had imagined. The added knee joint and the bigger feet added some height... Oops.

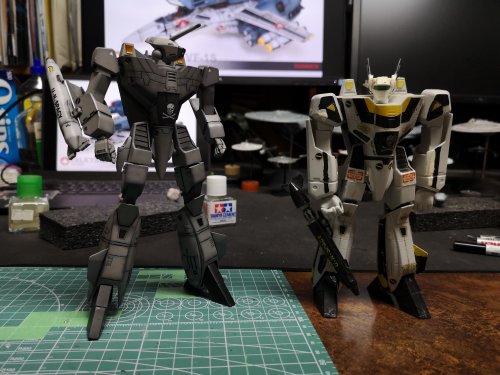
Old Bandai vs new Hasegawa.

Hasegawa vs custom Bandai
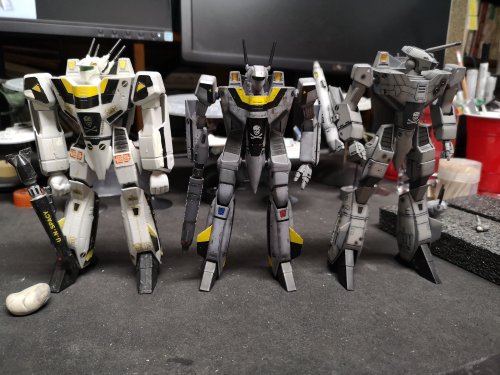
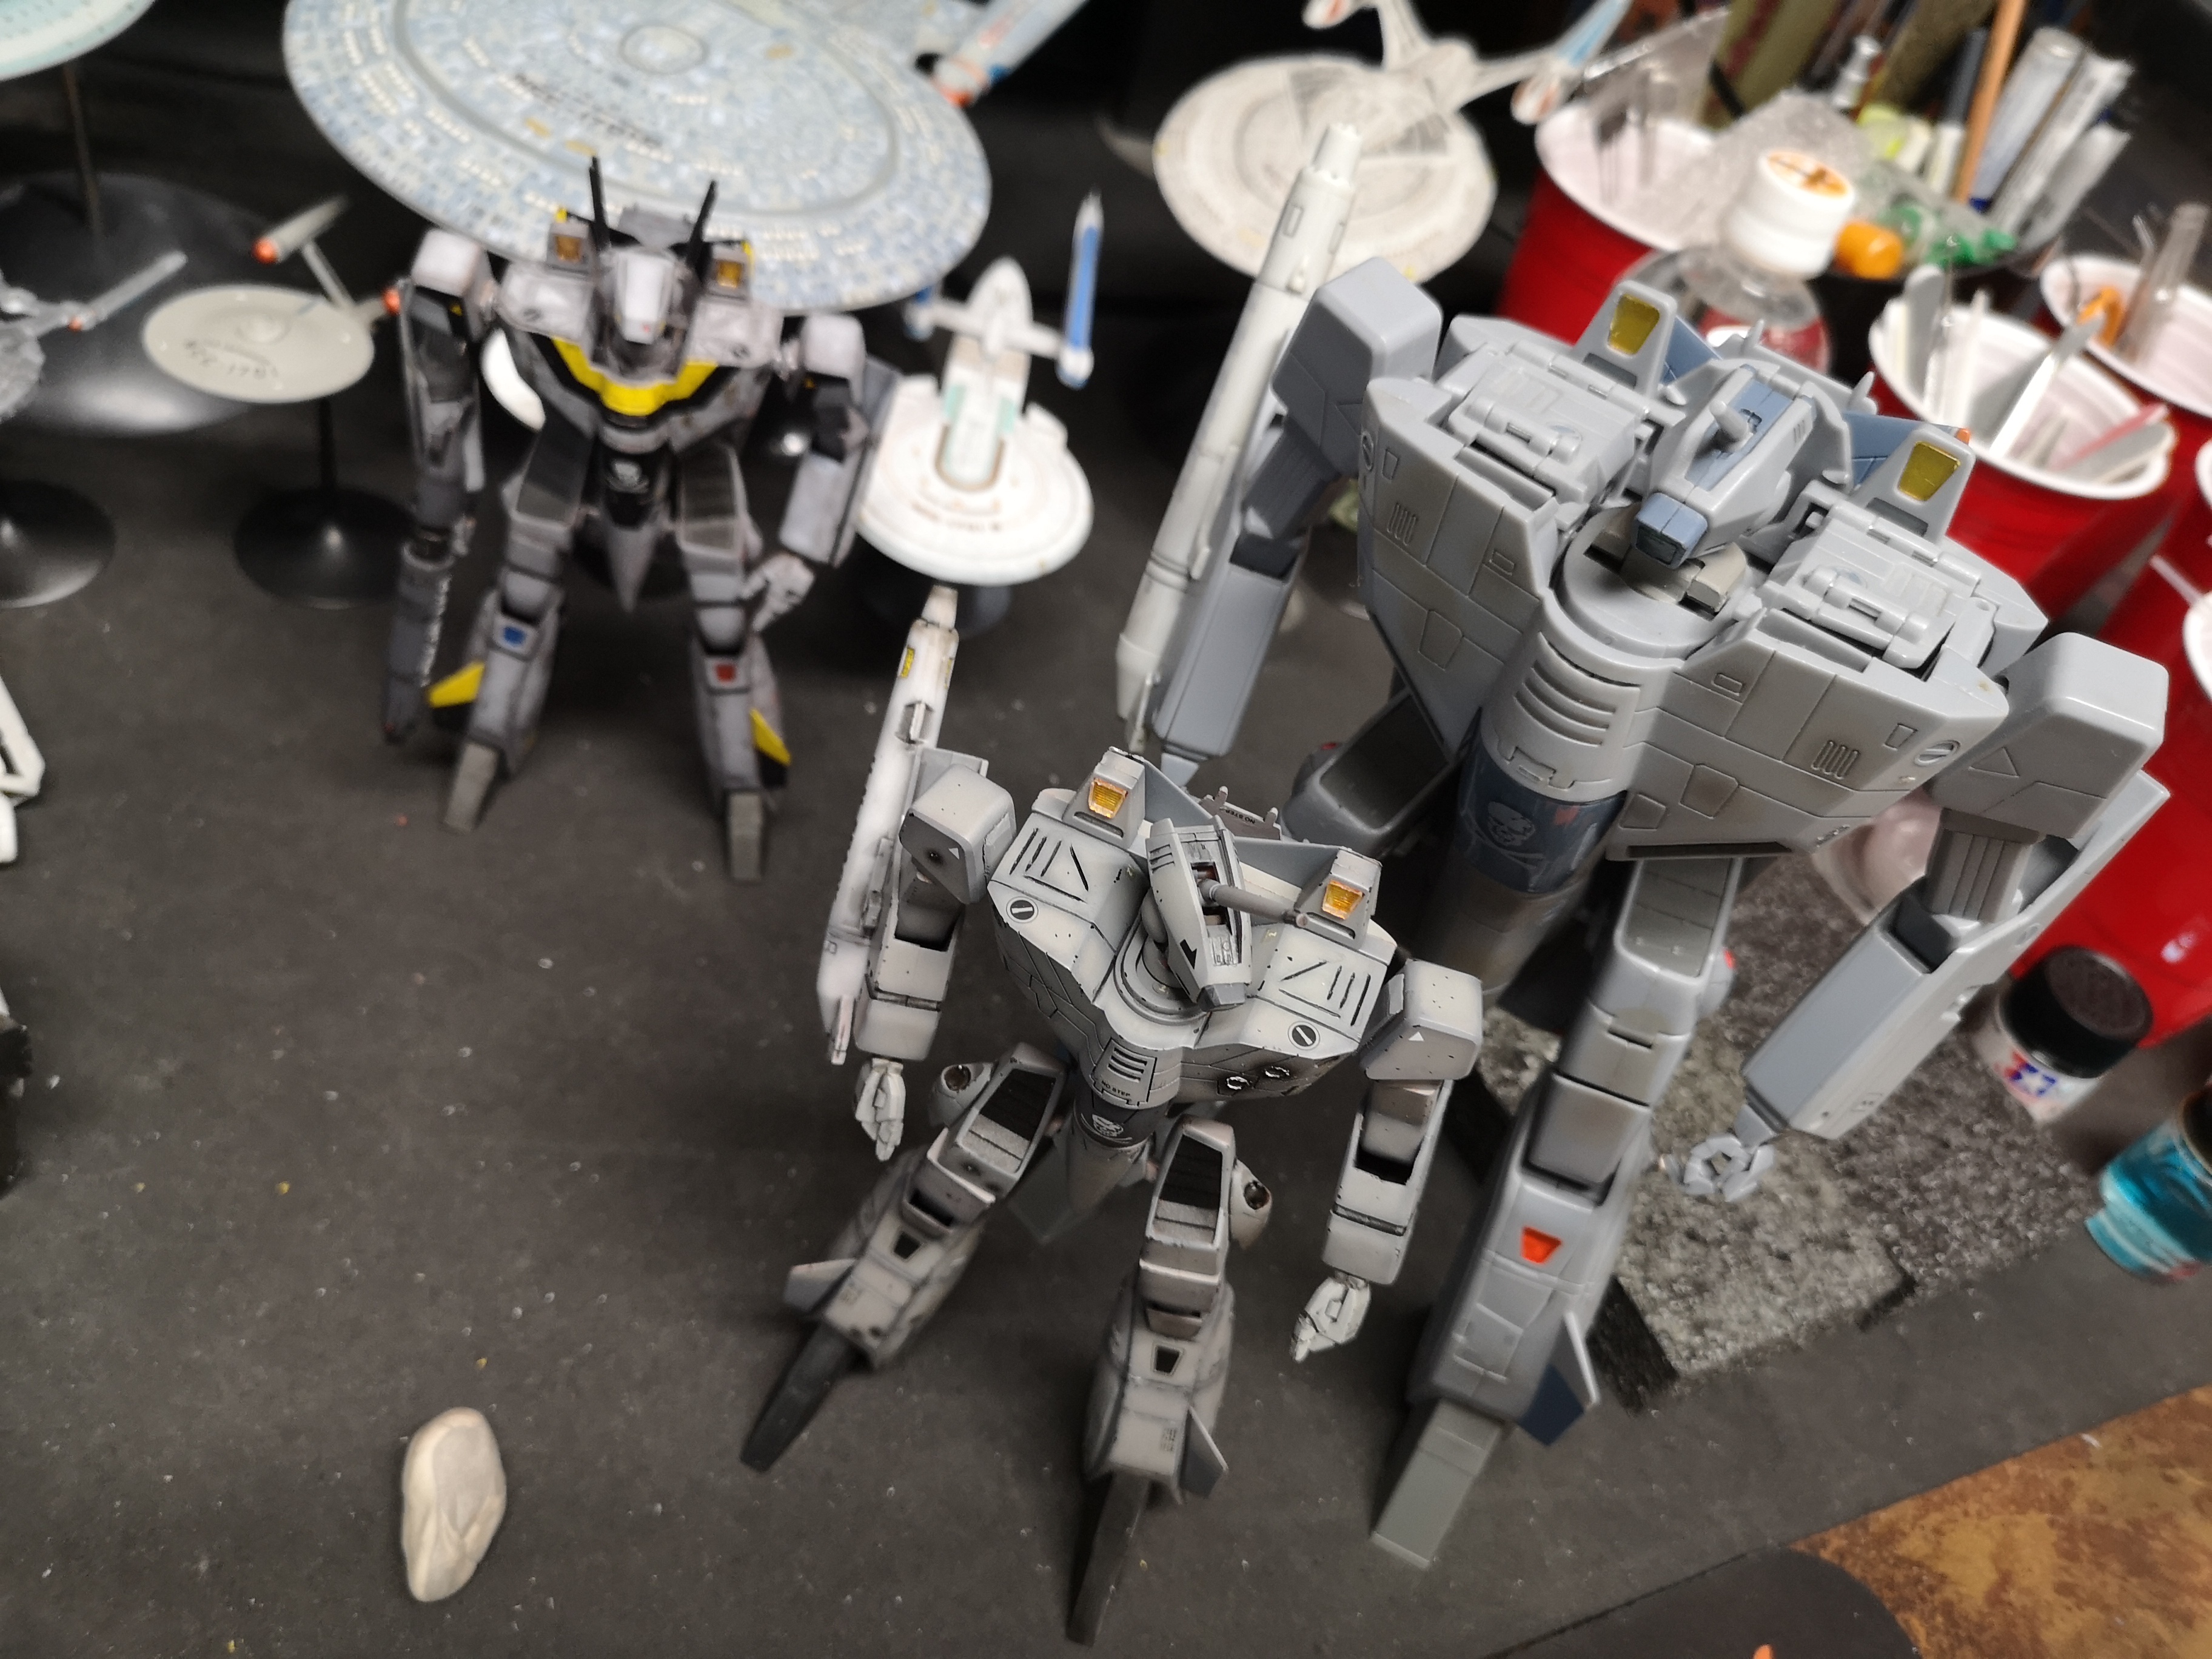
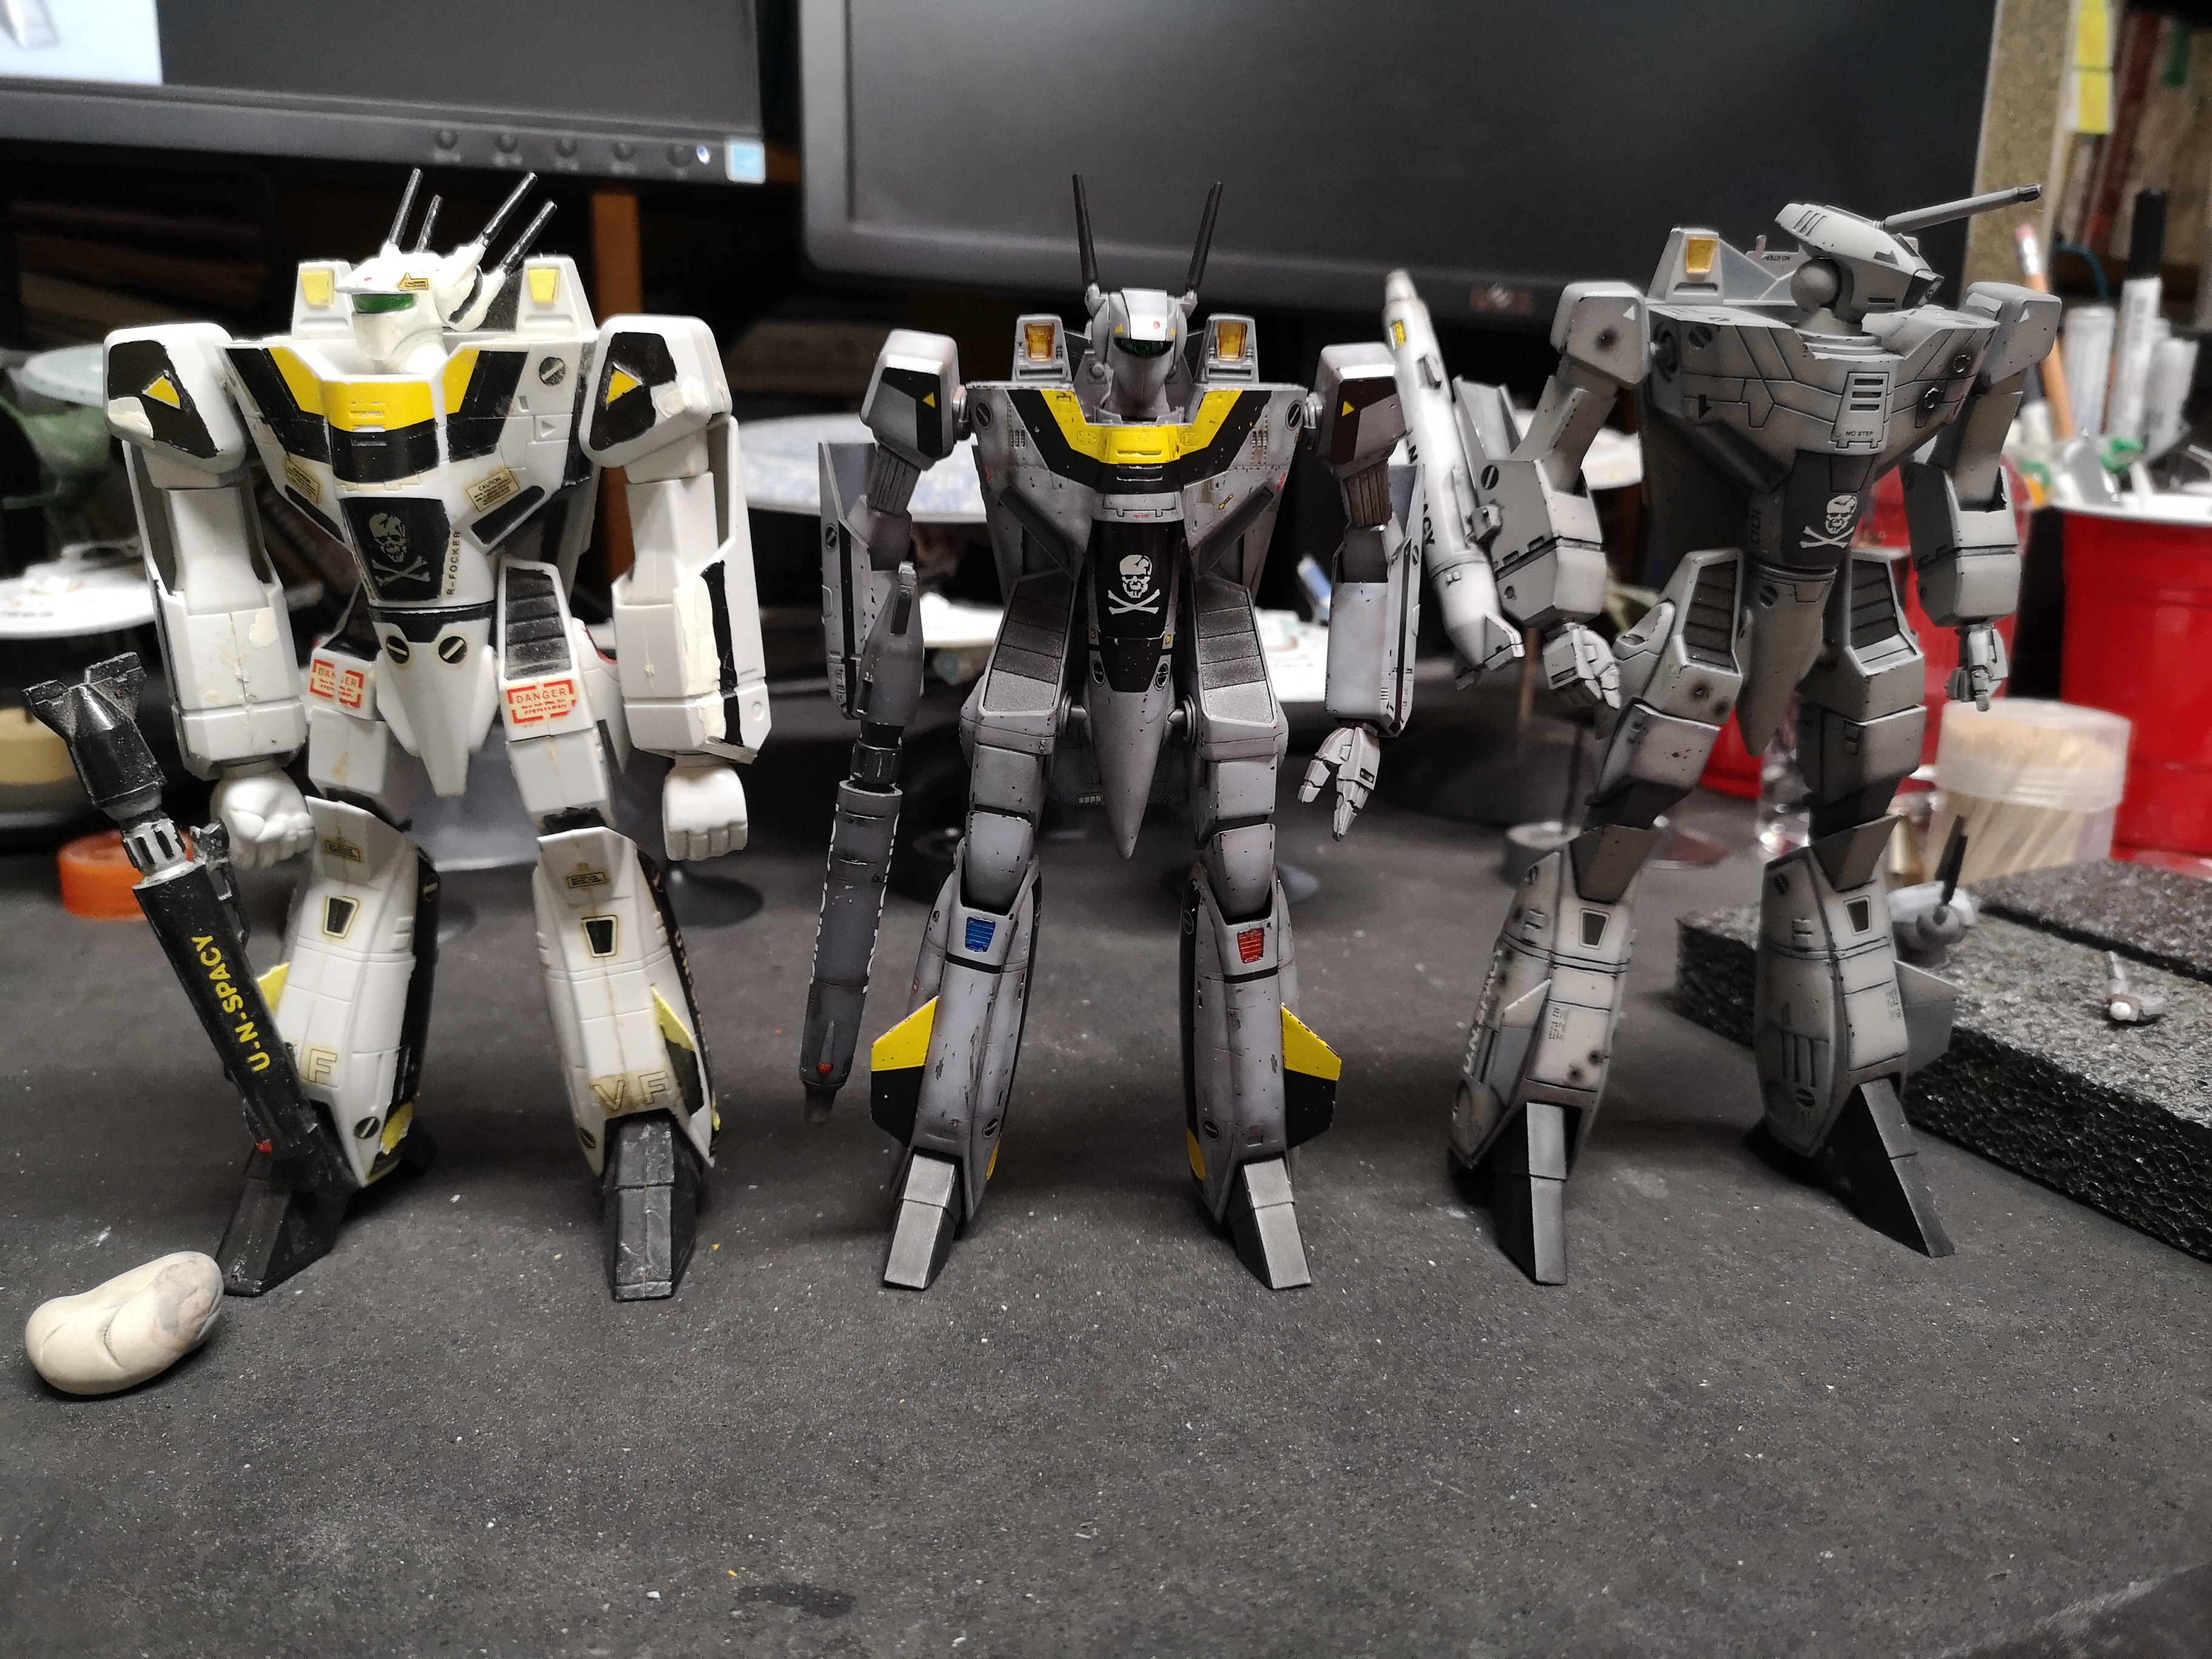
All three.

-
Ok, some parts comparisons

My old Bandai on the left.... Yeeesh... Can't believe I'm showing people this. The only reason the head was painted at all was because I botched the lasers and had to "touch up" some spots.... The rest of the Valk is mostly unpainted.
Anyway, original chest detail and my Mickey Mouse attempt to add detail.

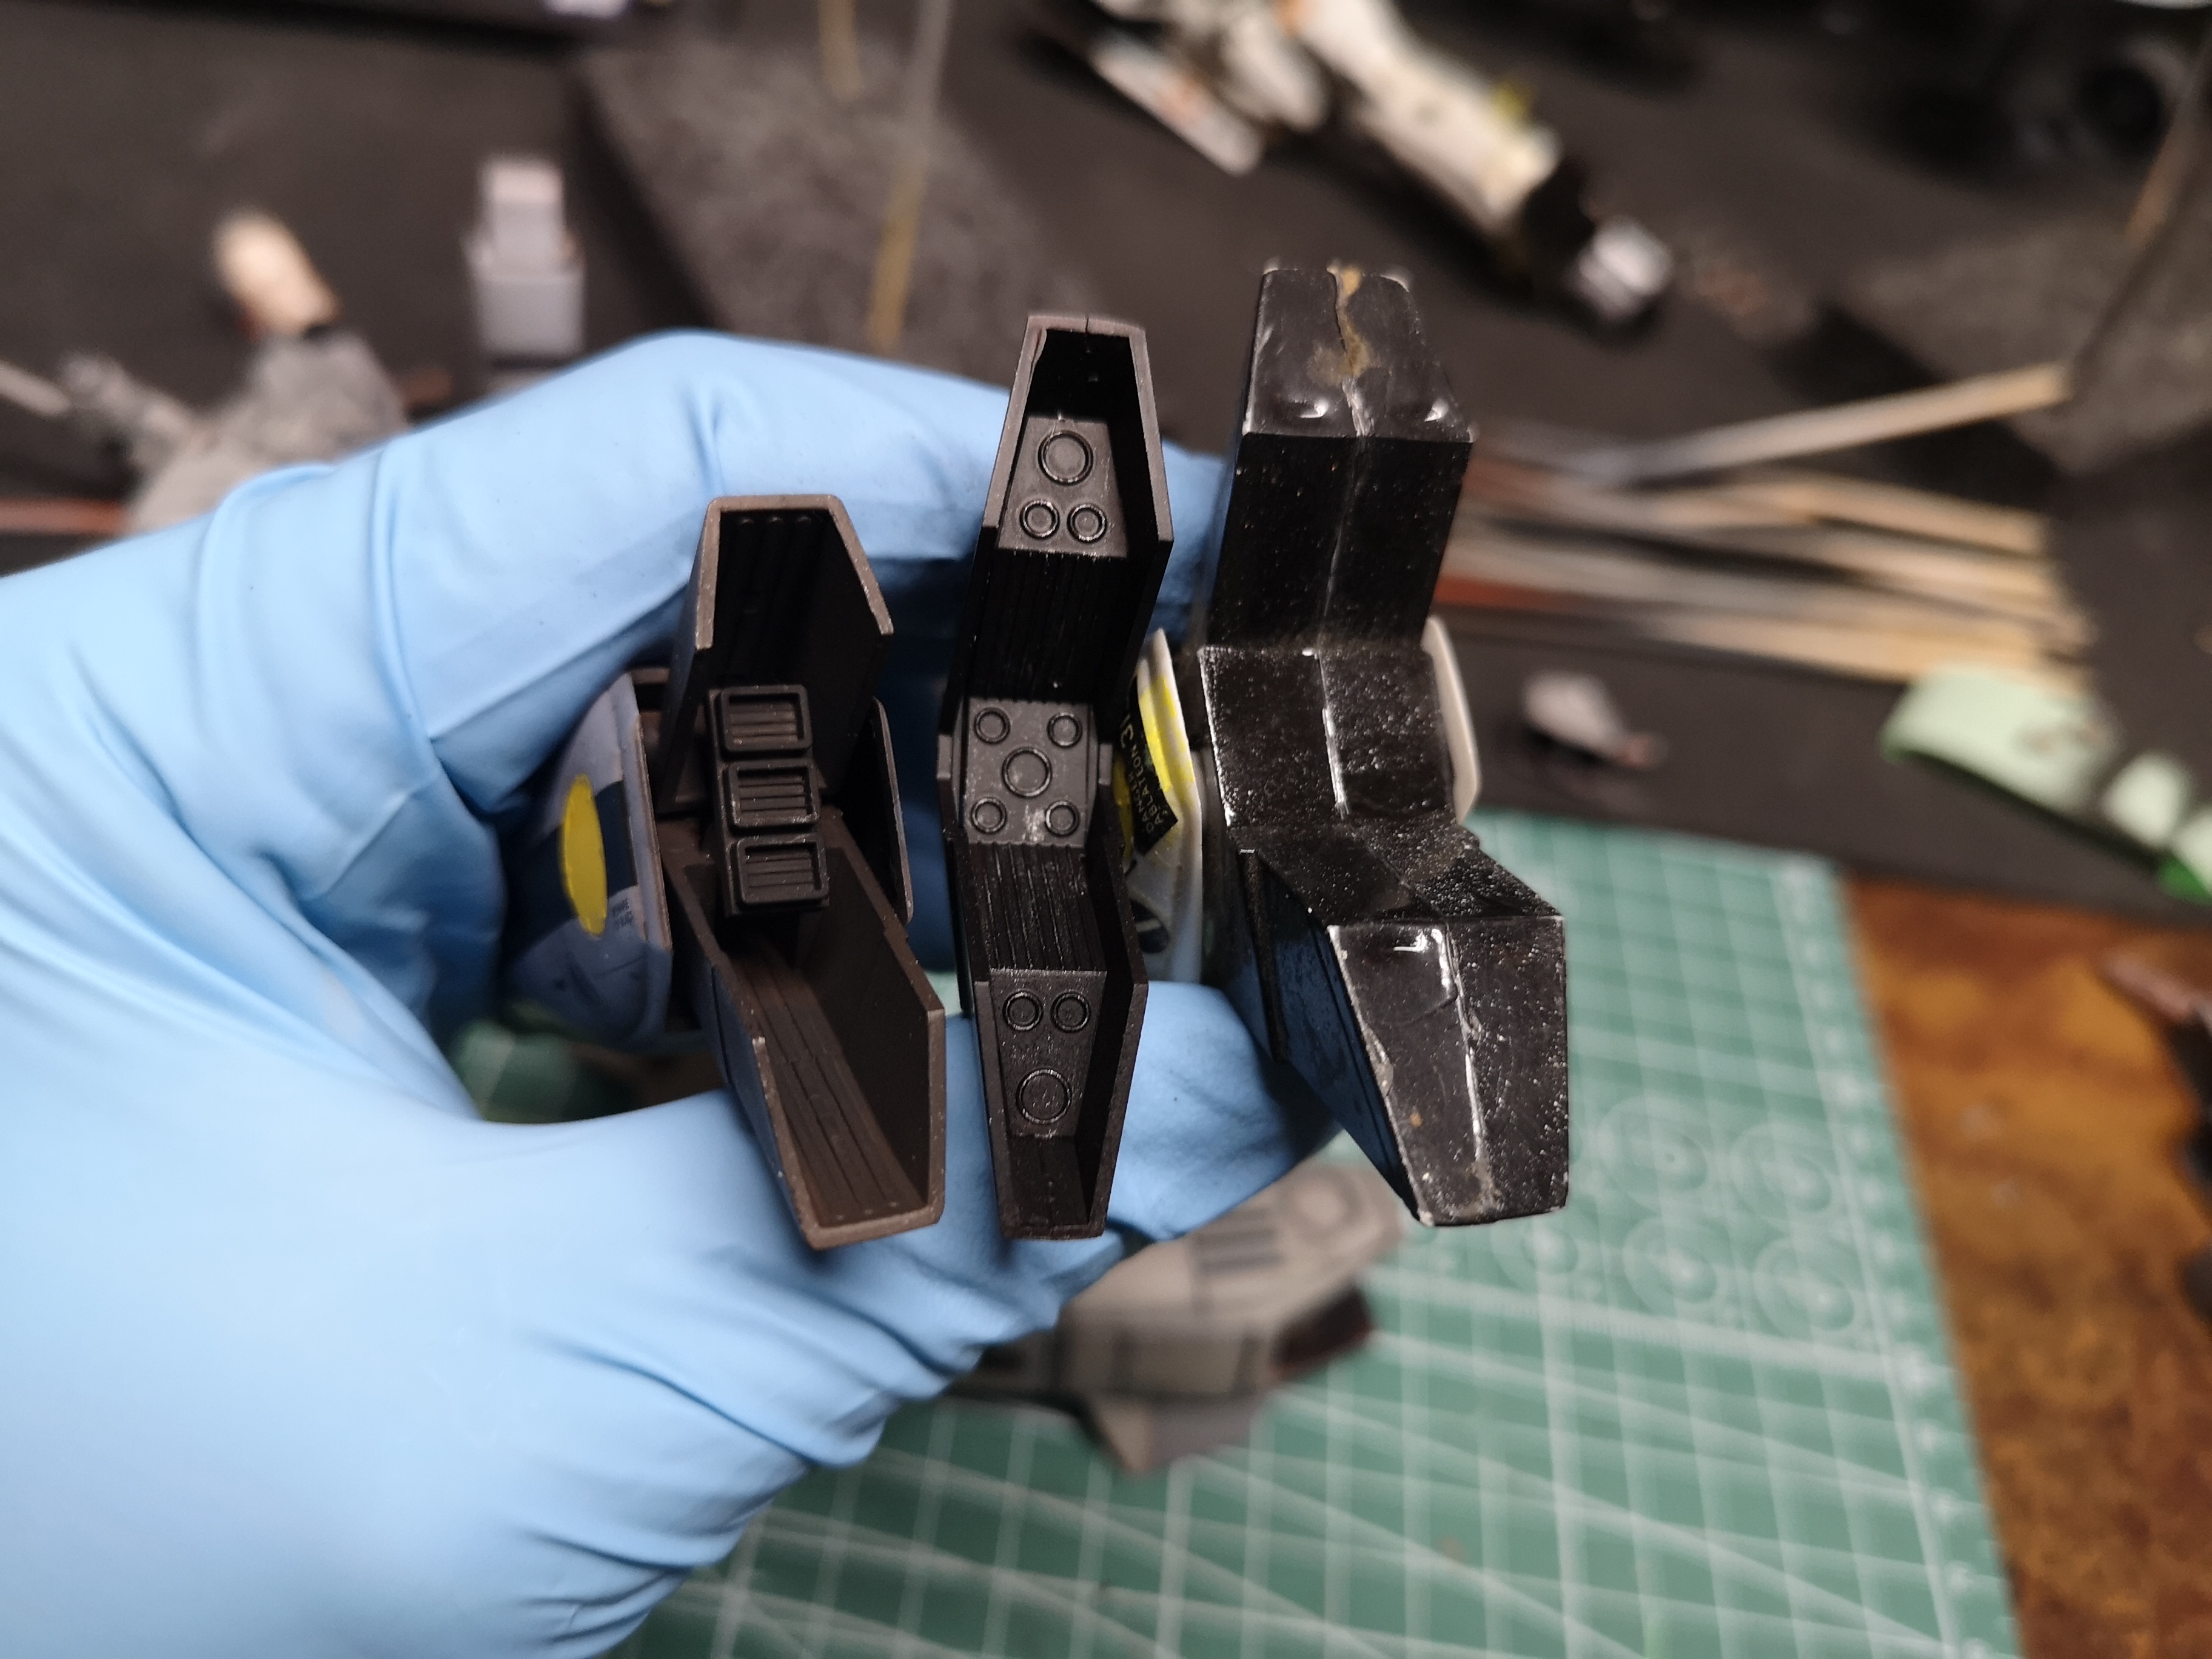
Arms. Top is built out of the box with everything captured.
Middle is my modded Gerwalk arms and the bottom is Hasegawa out of the box.
The original Battroid arms look like it ate one too many Pineapple salads.
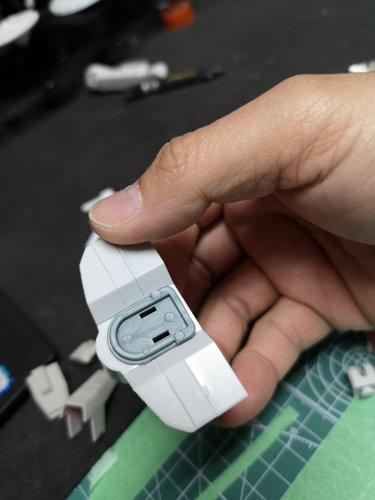
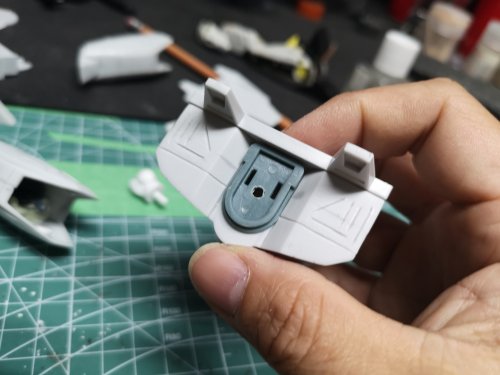
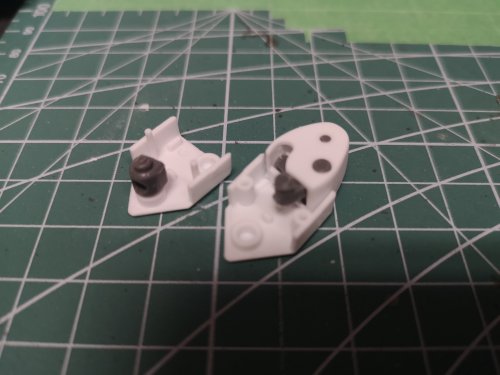
Shoulder joints.... My cannibalized Gundam shoulder socket on the left and the original Bandai on the right, plastic peg into plastic socket..... Recipe to loose joints.
My messy ball joint hips compared to the broken plastic on plastic Bandai hip assembly.

Hasegawa leg assembly on top, my custom attempt in the middle and the craptacular vintage Bandai leg assembly, all capture red, on the bottom.

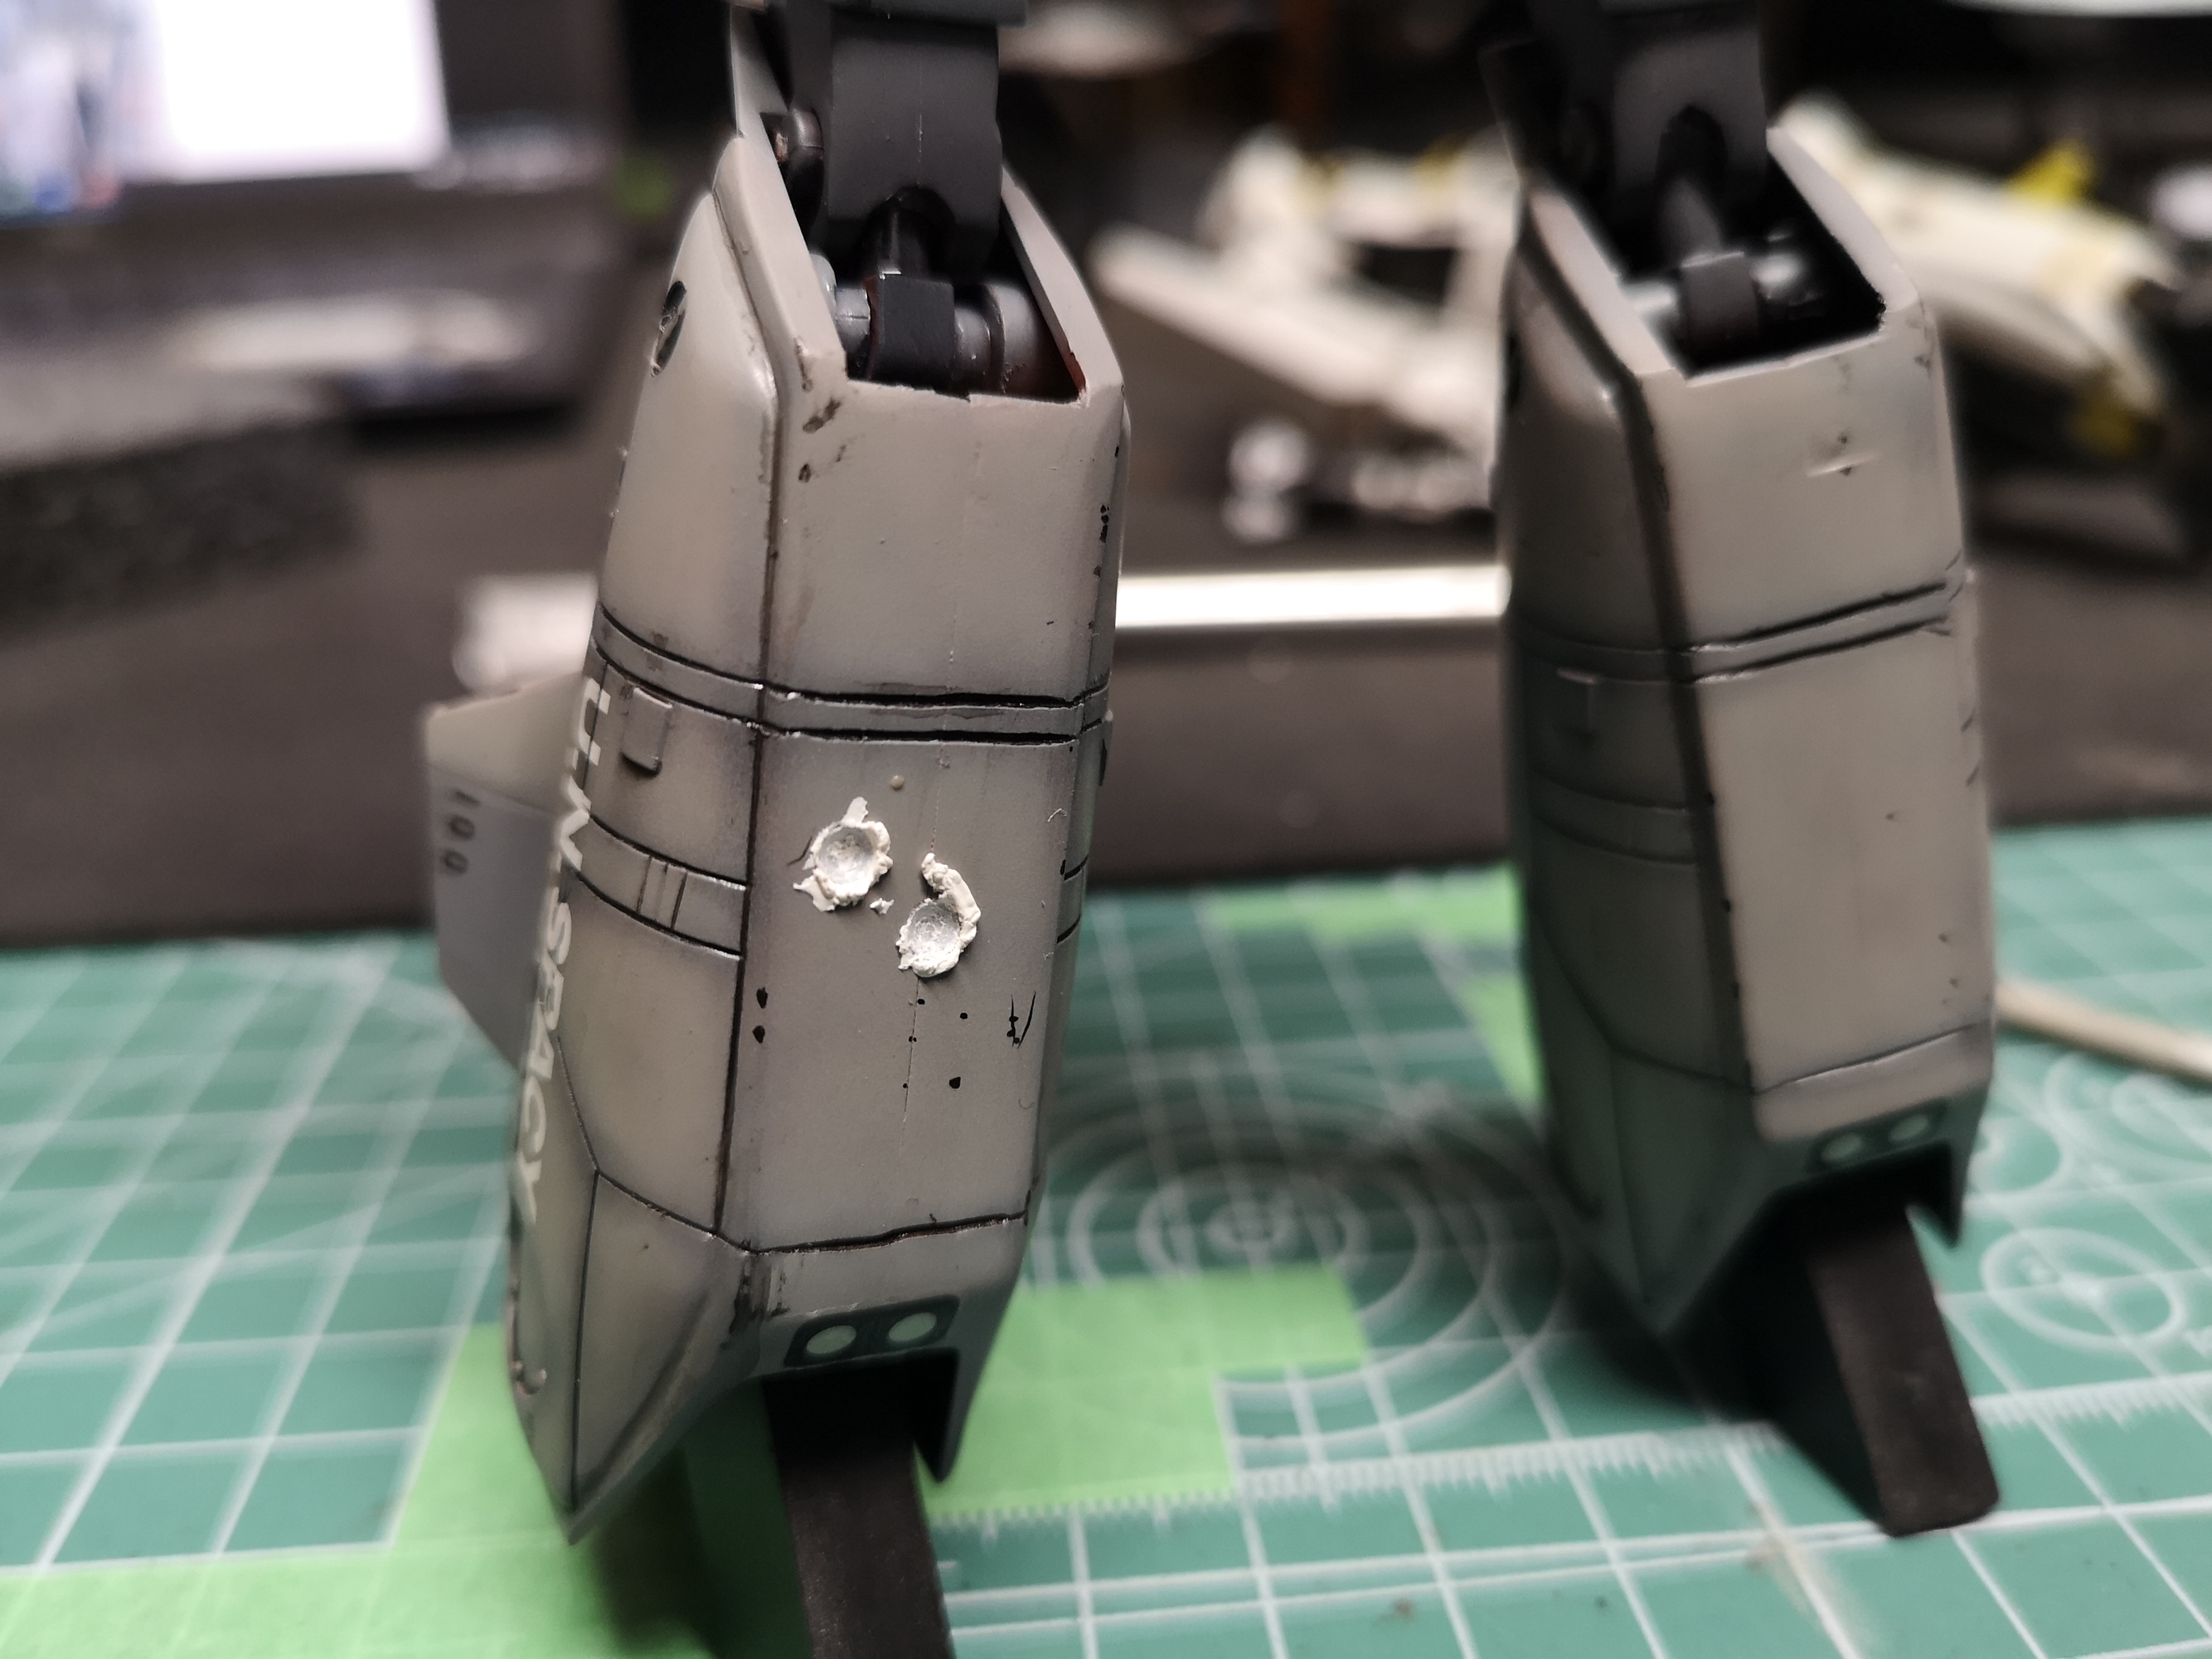
Hasegawa foot on the left, Bandai Gerwalk foot in the middle and the monster Bandai Battroid foot on the right.
All three Hasegawa heads... I didn't even bother with the Bandai heads.

My attempt to use Hasegawa hands in Bandai arms..... A bit floppy because I didn't have any proper ball joints so I used a poly cap that sort of fit.

-
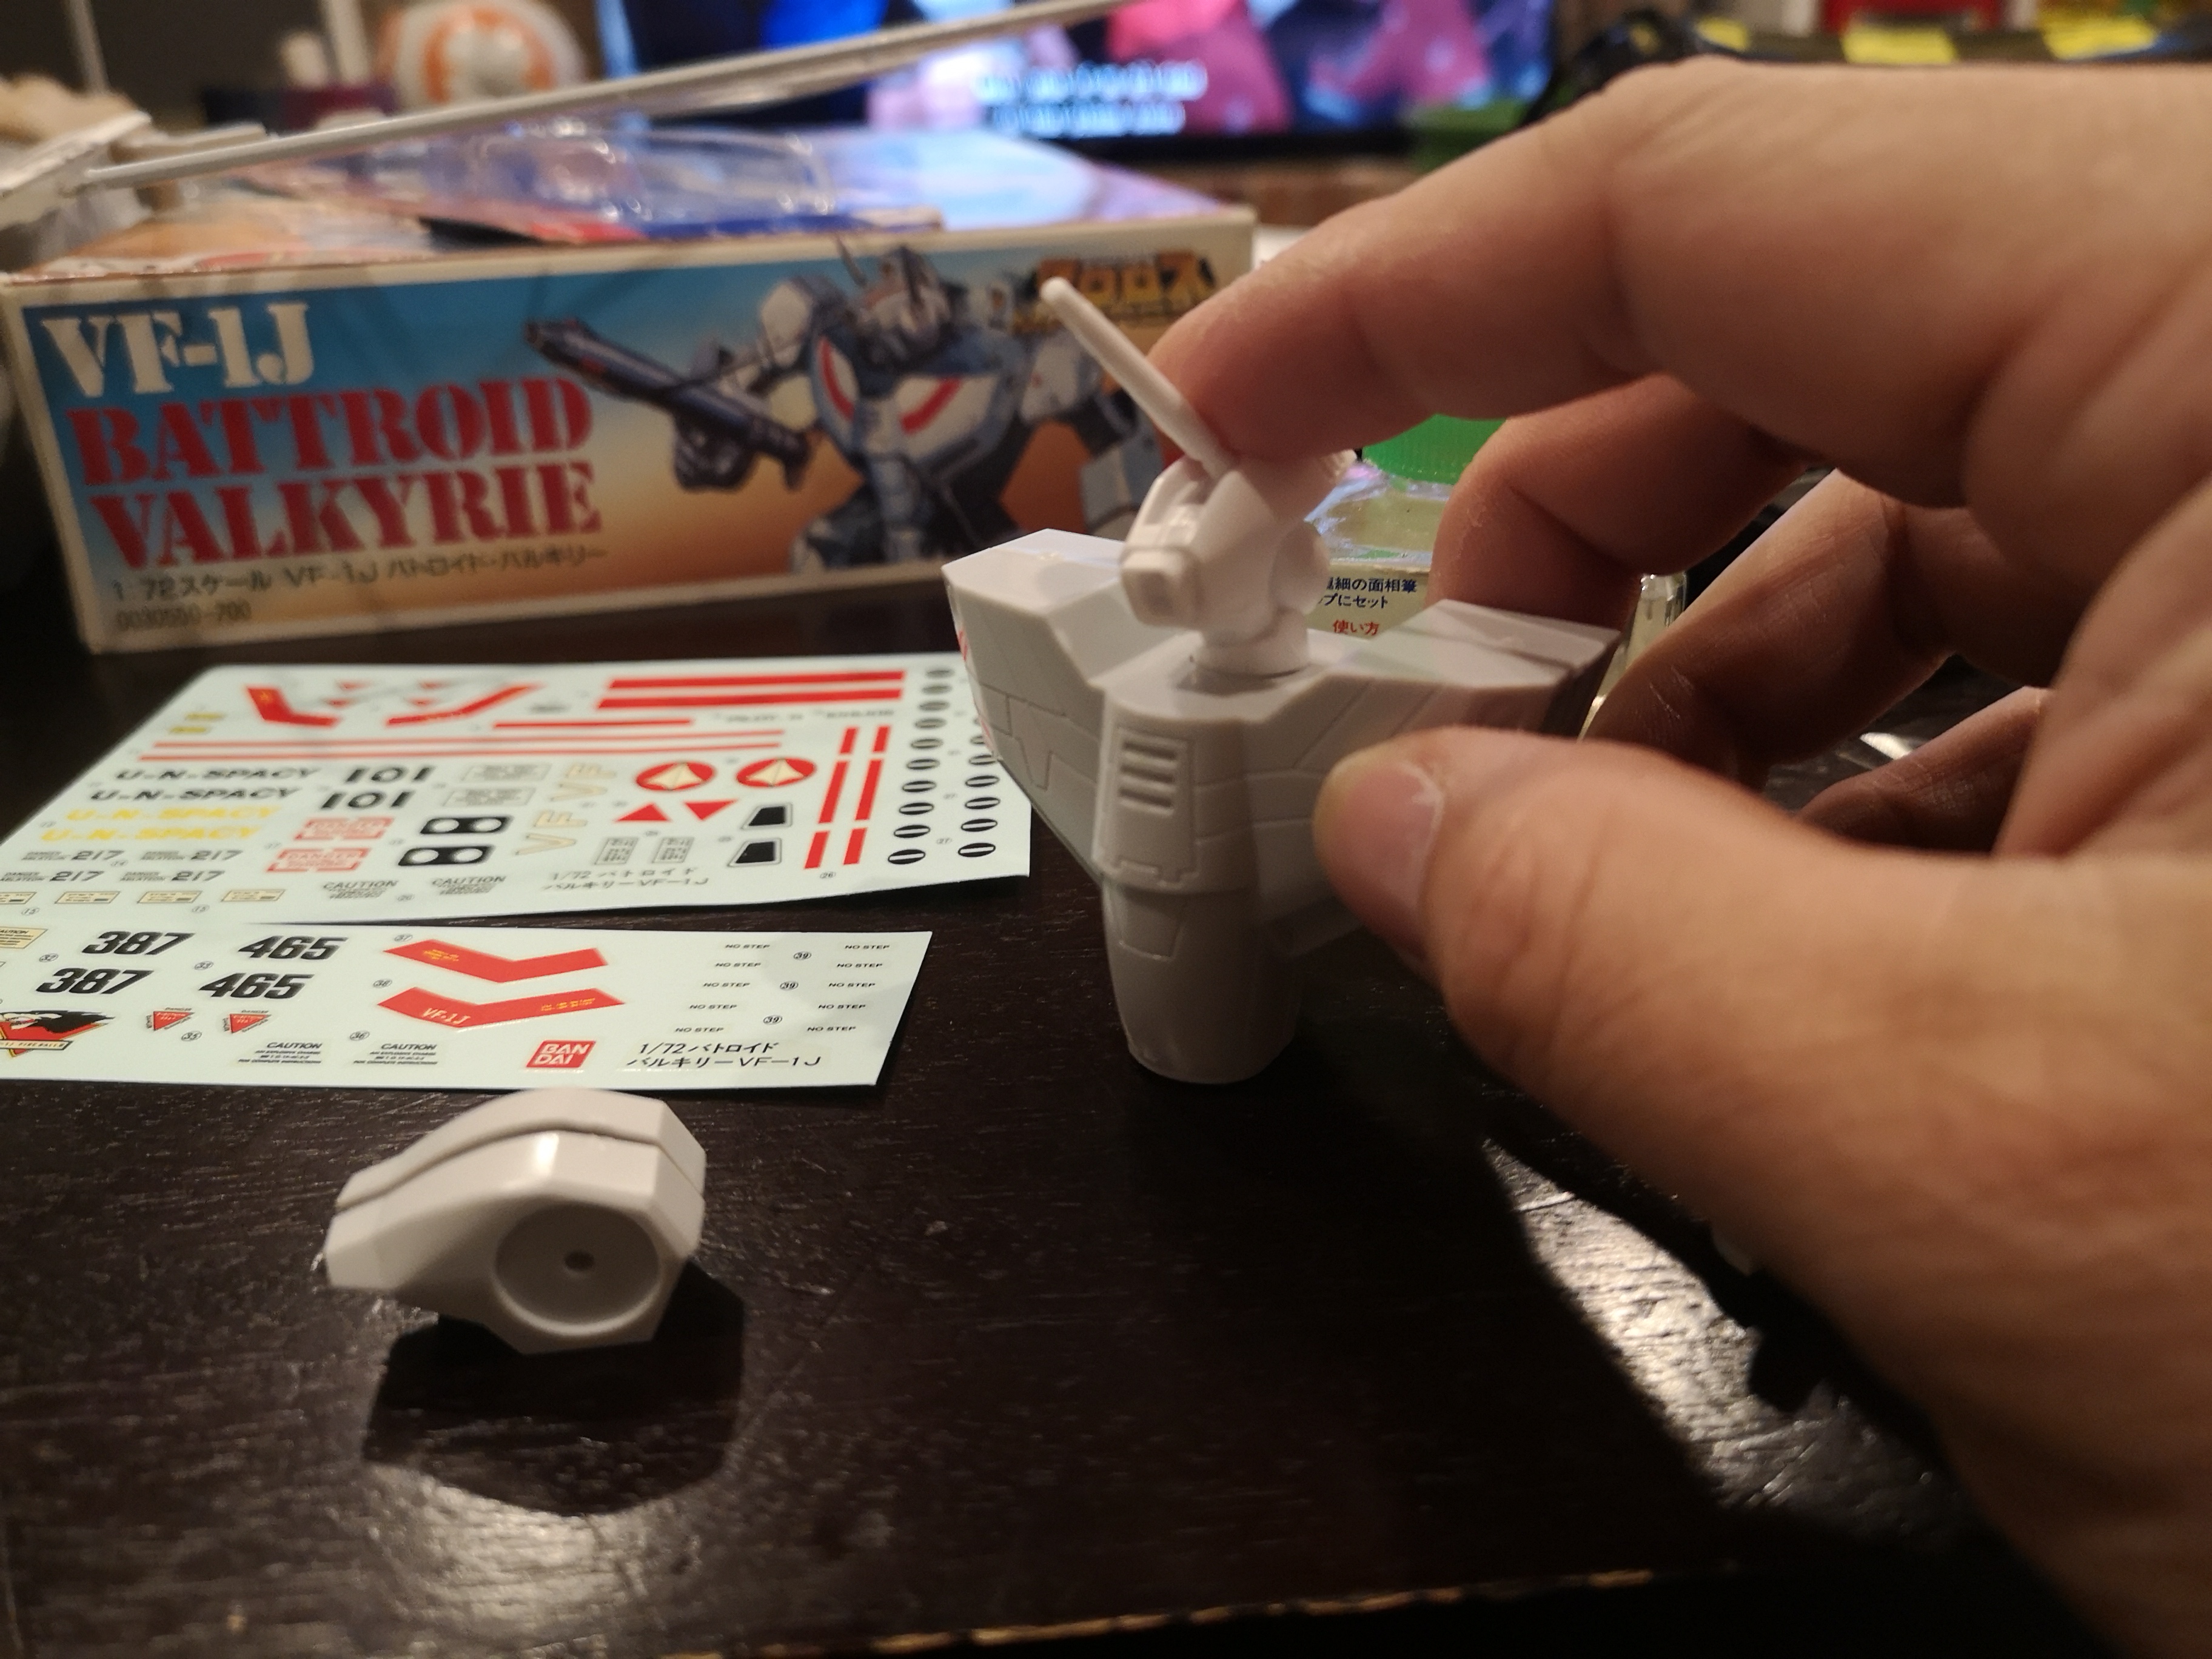
Not a whole lot to discuss about the finishing process that people don't know already. After the main color and detail colors, gloss clear (I used Pledge), decals, wash/panel lines, clean, gloss clear, then flat clear.

I found some Low Vis Macross kites that came with the 1A, but proper Low Vis decals were hard to scrounge for.

I Iiked the brownish, but it wasn't meant to be and I'll explain later, lol!
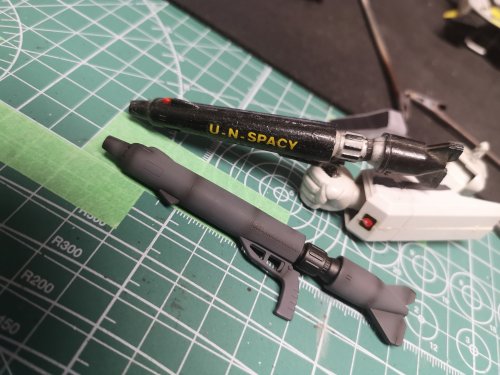
Old Bandai gun pod compared to Hasegawa's beautifully detailed version.

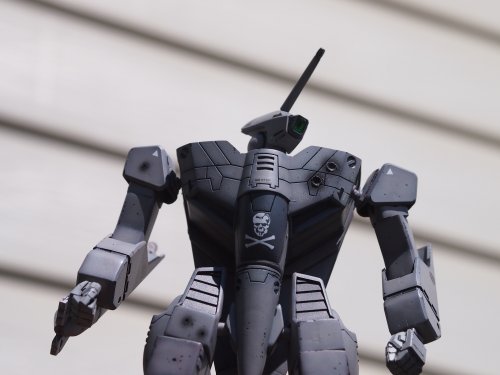
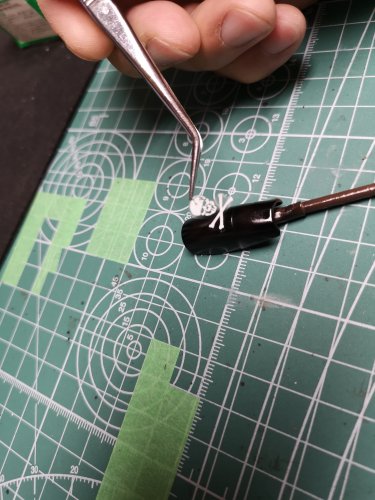
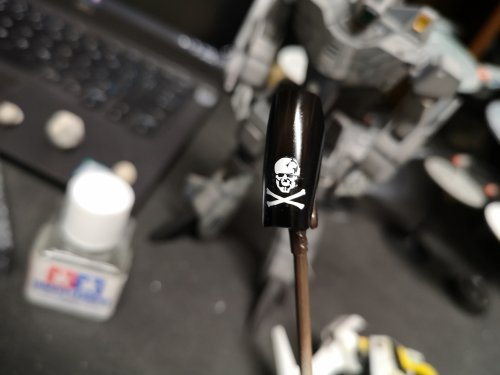
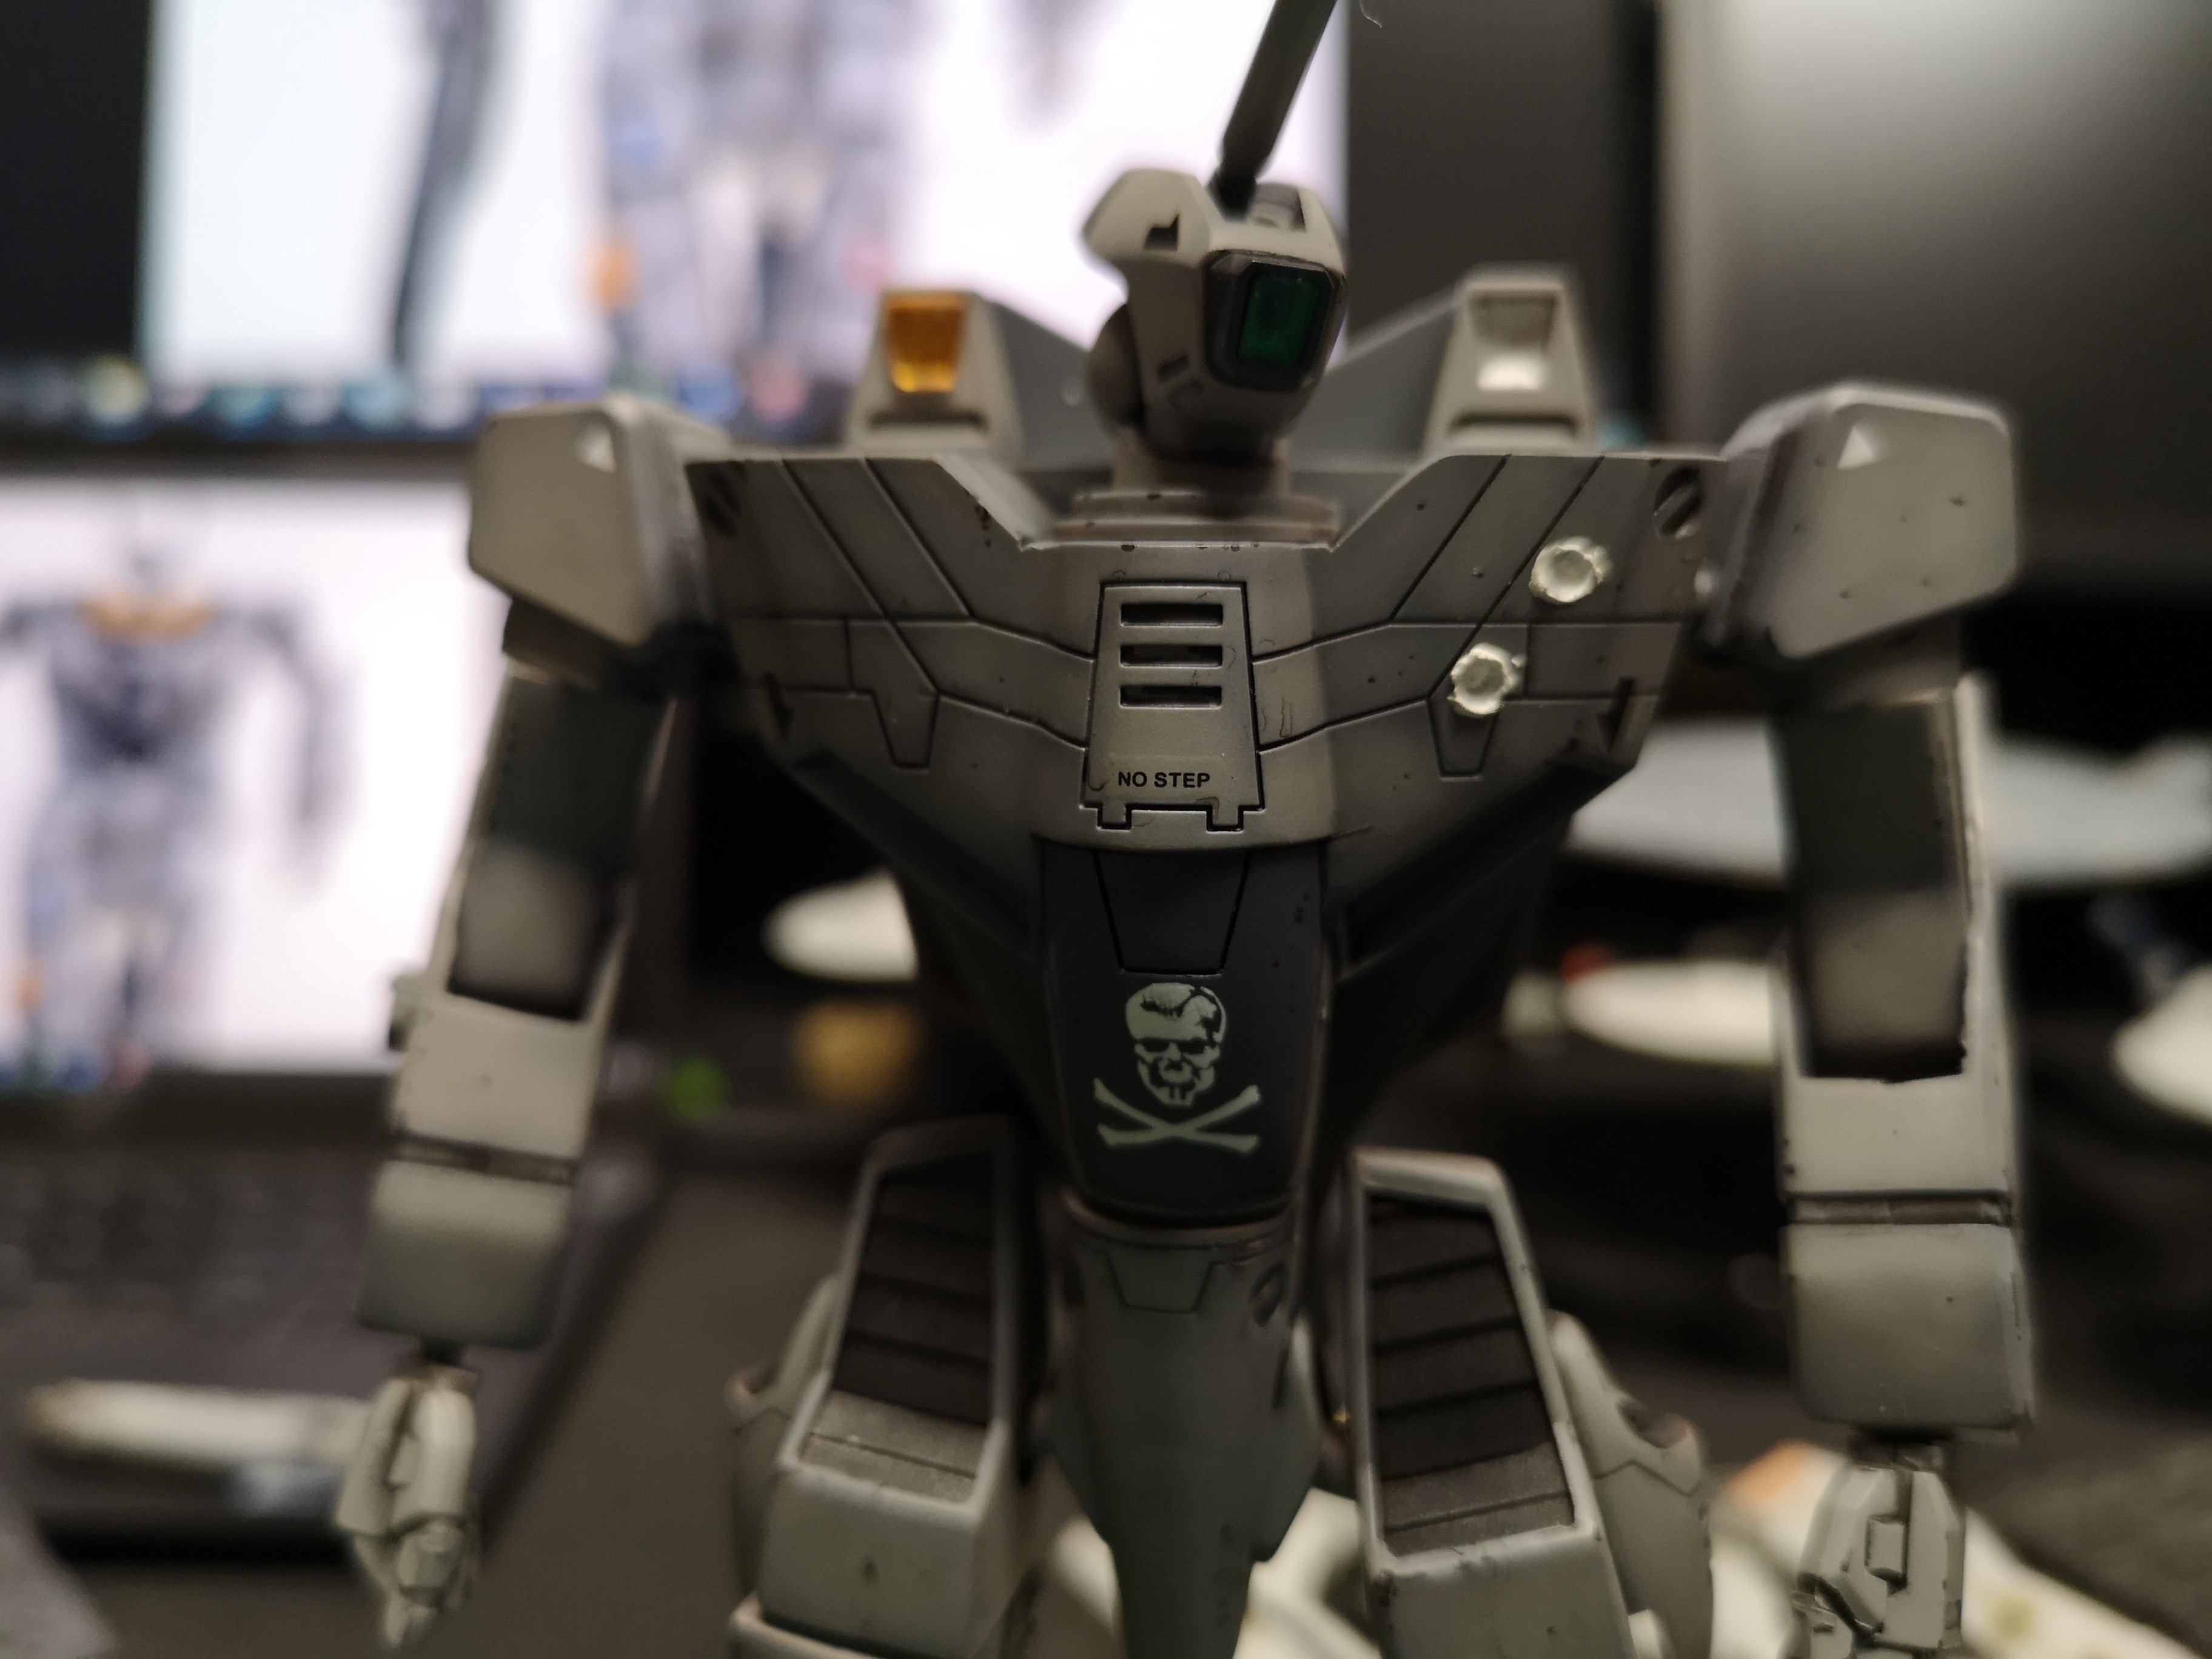
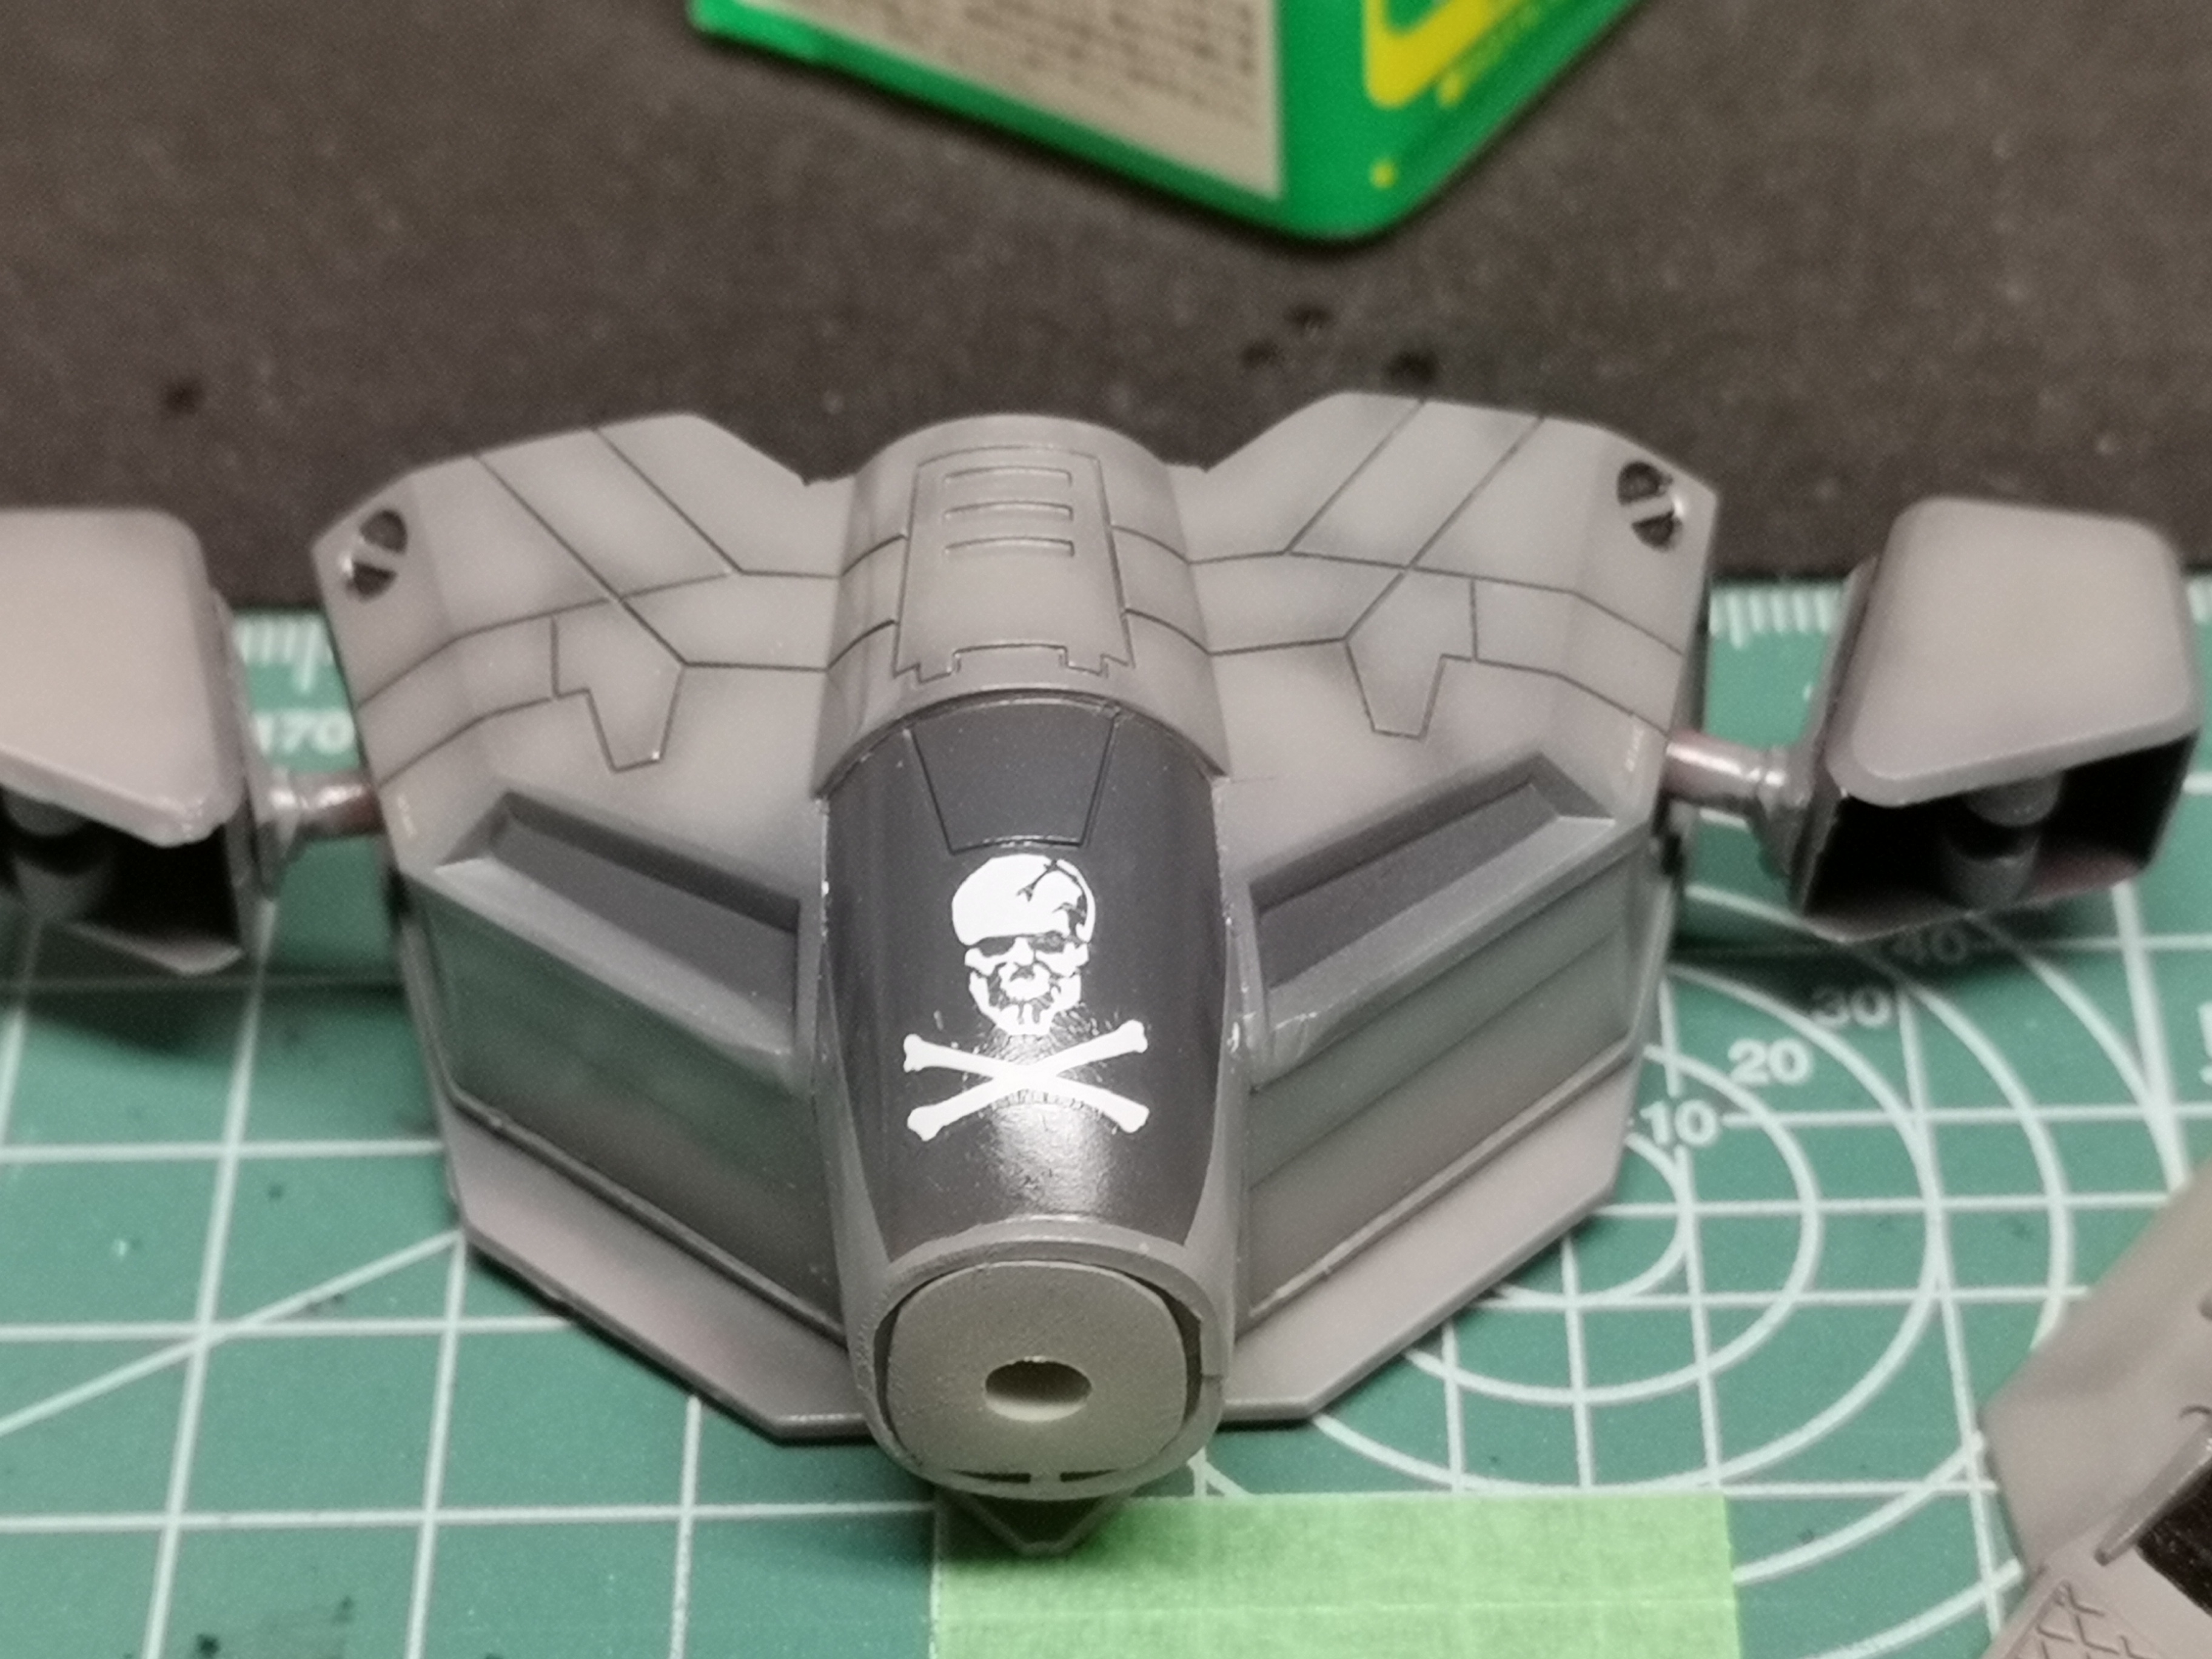
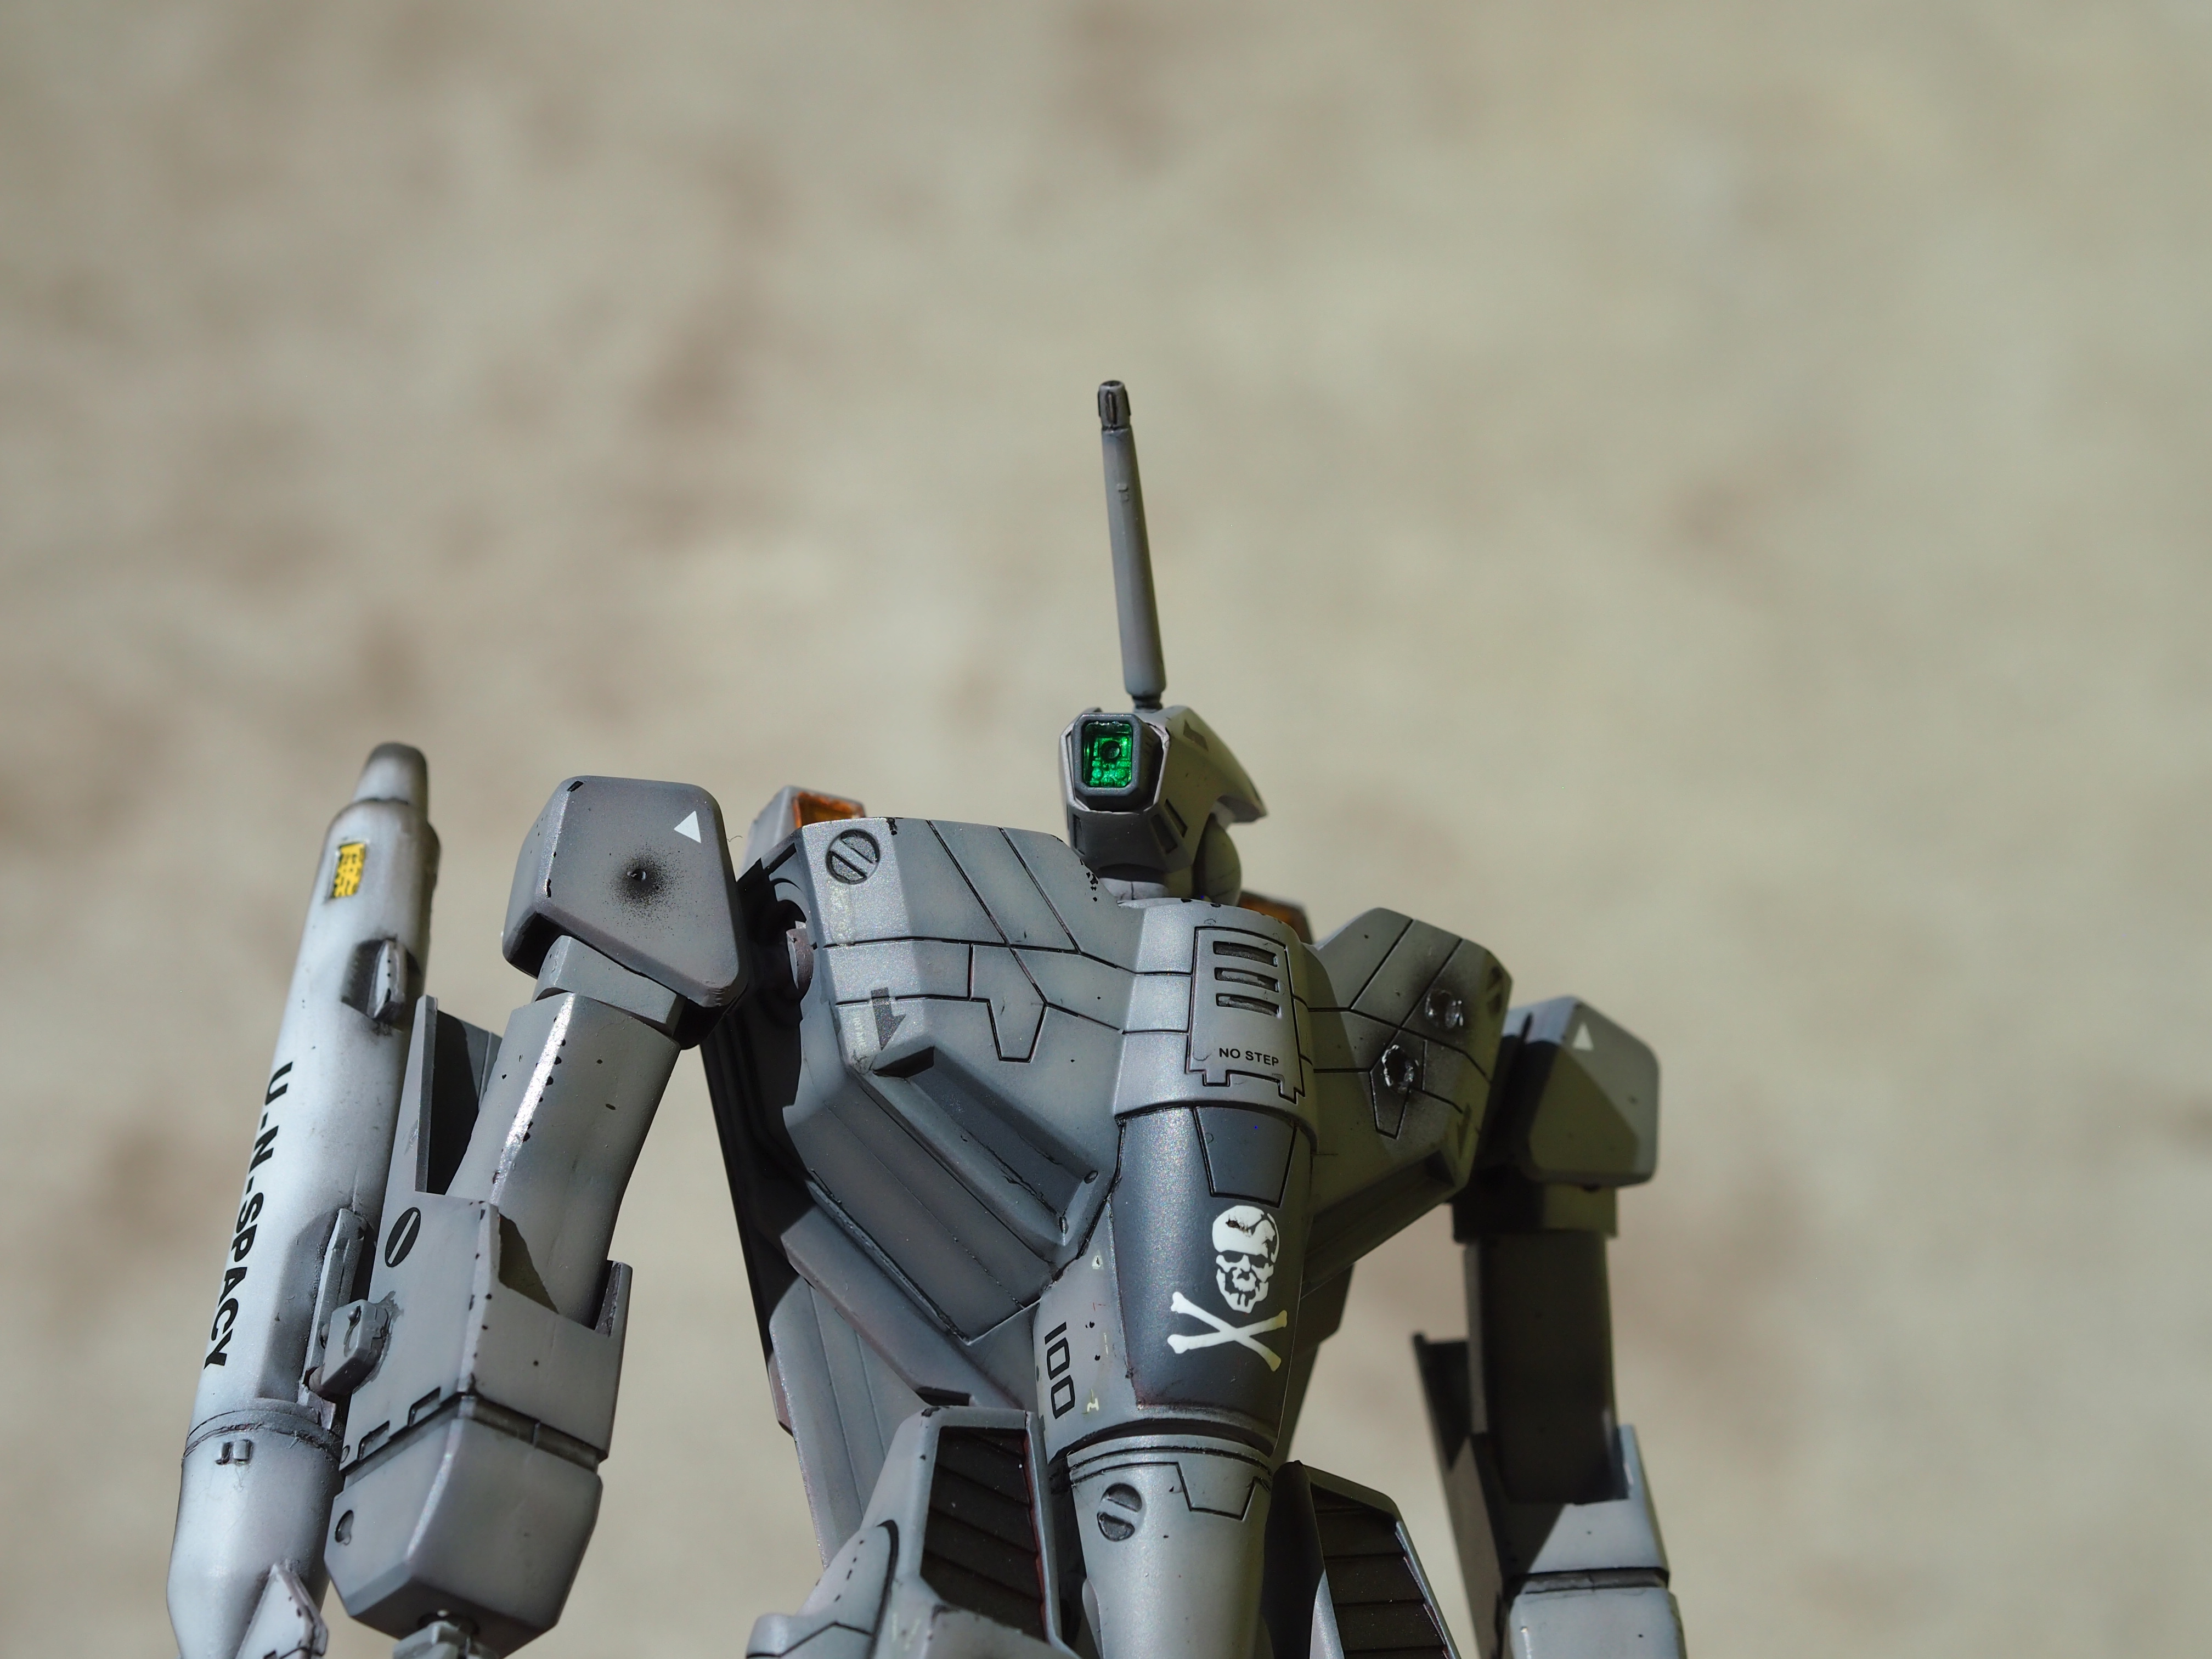
I think I laid the skull on a bit too low.... I don't even know what I used for a reference for this decal.

I may have gone a little too heavy with the Pledge..... Will have to try and remember to lay it on a bit lighter in the future because there were a lot of drips I didn't notice until after the build was done.

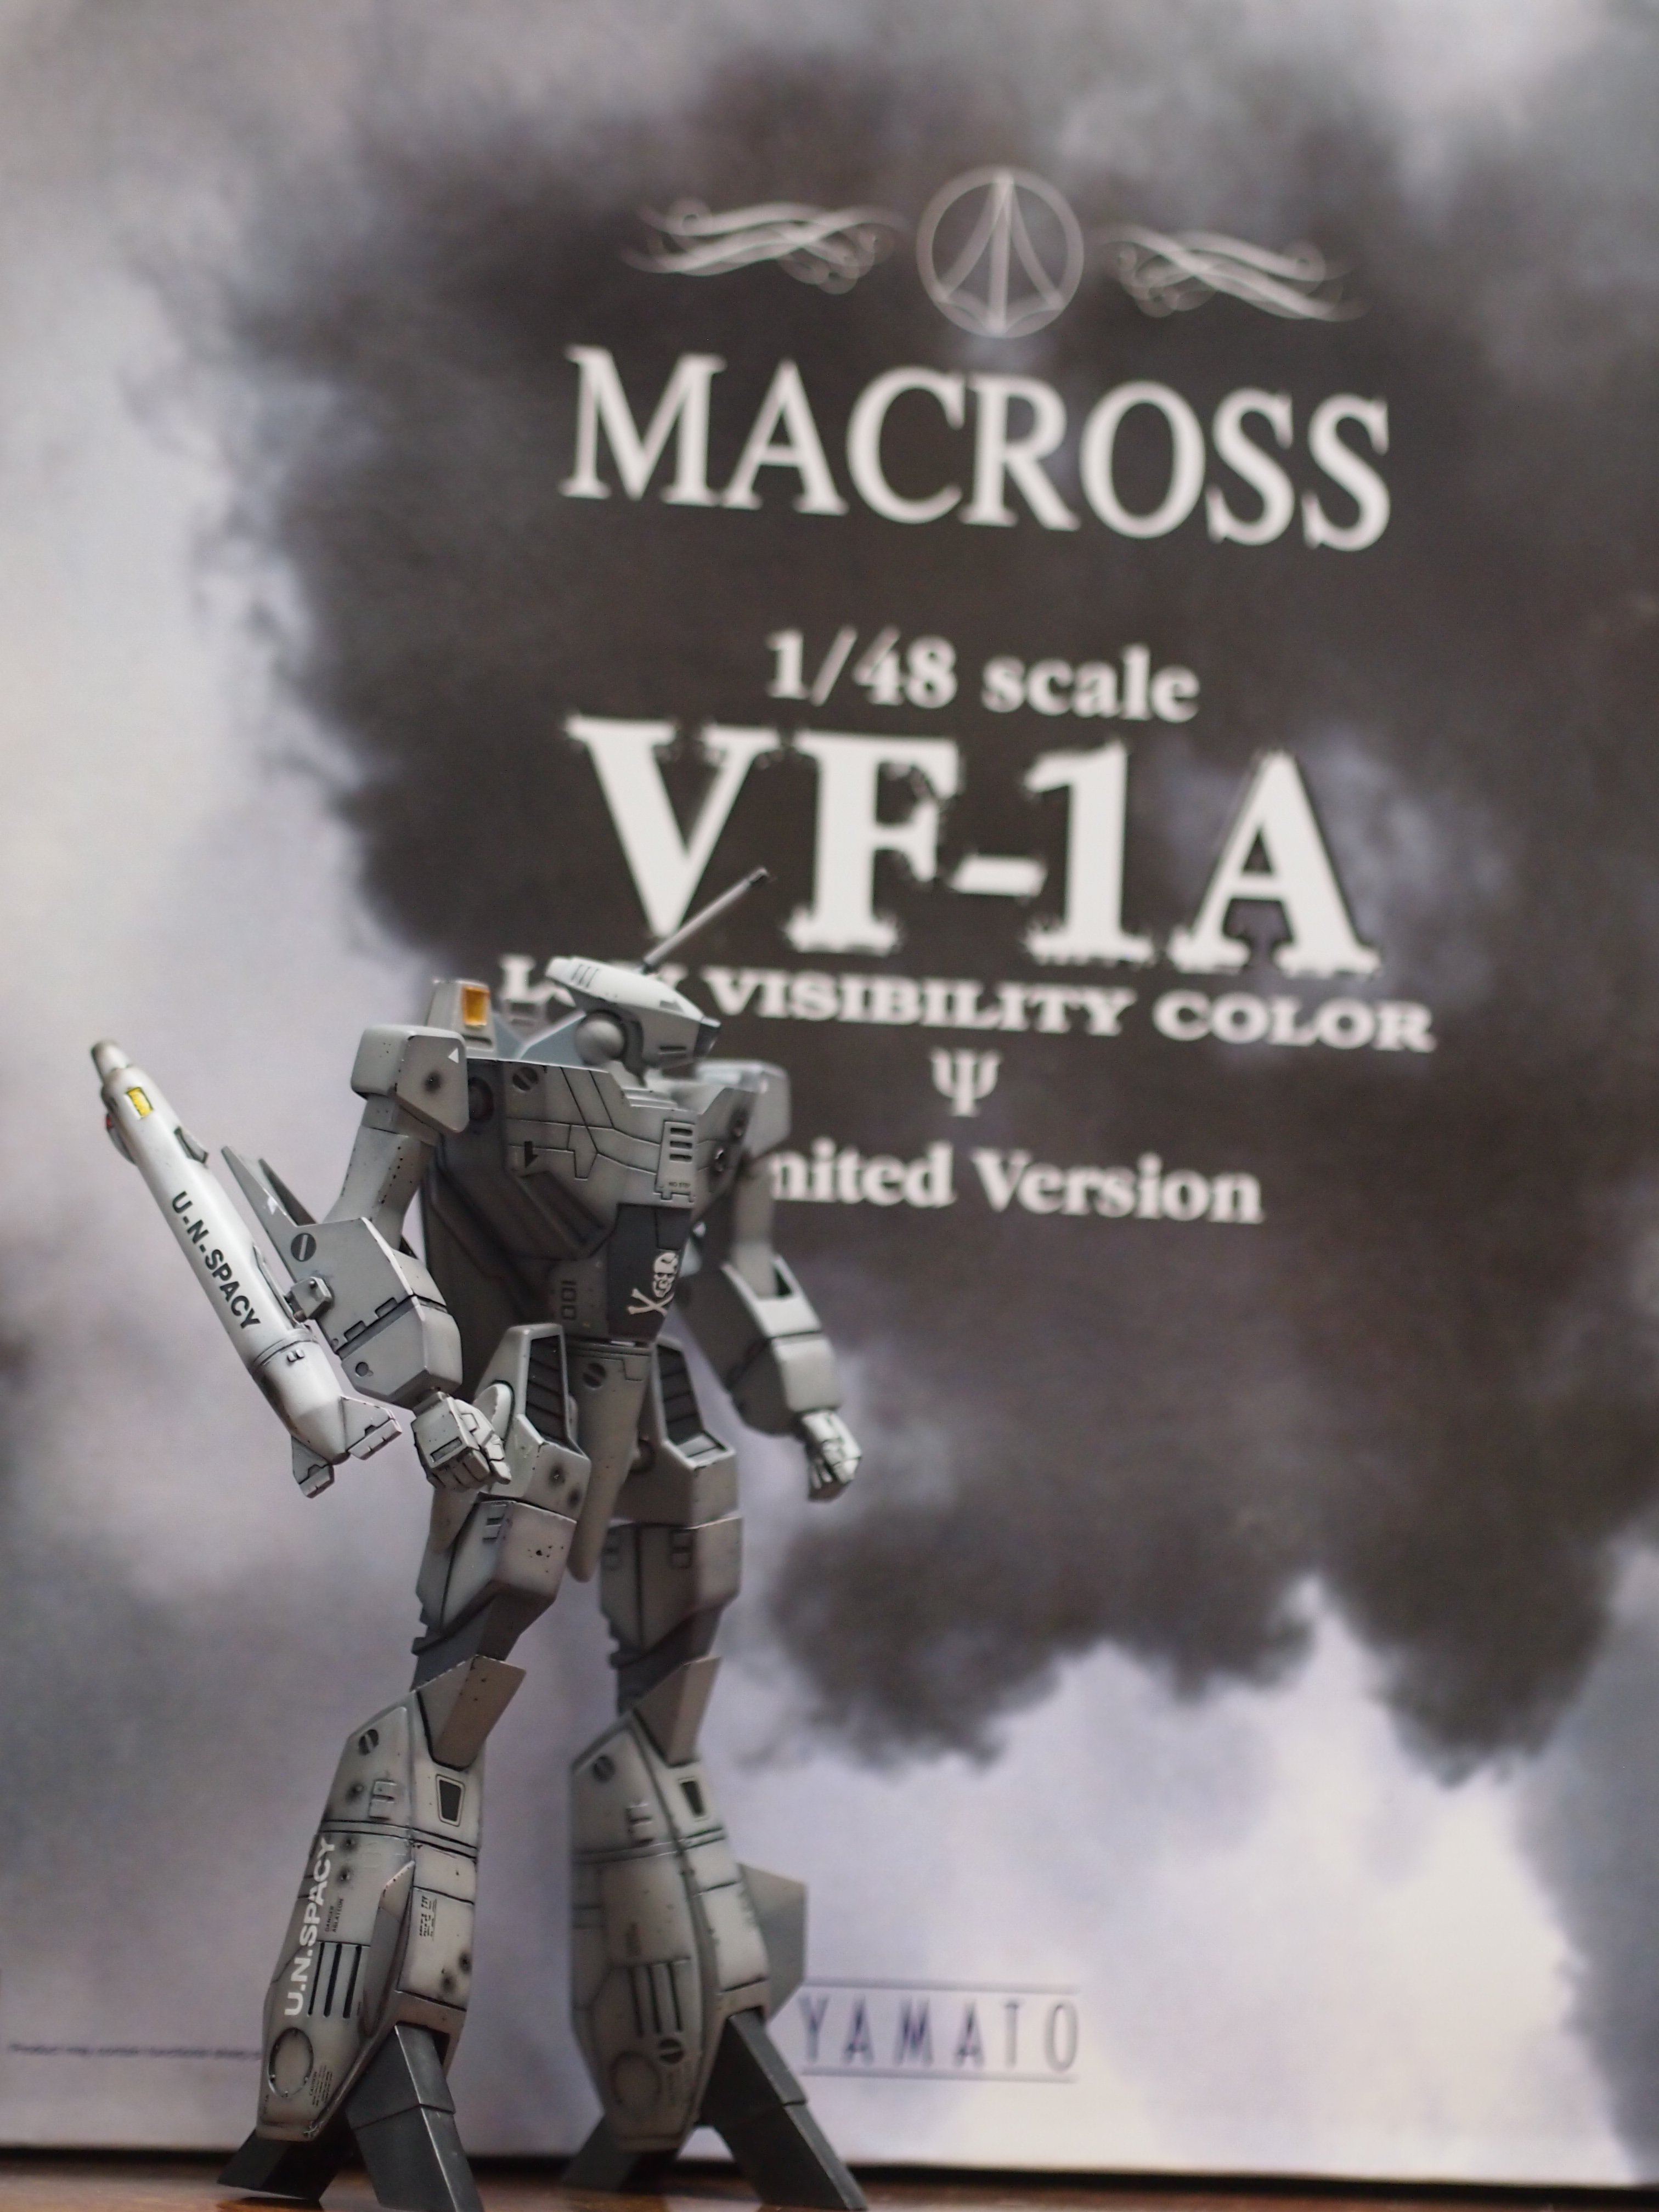
The Low Vis nearing completion.
The part count is clearly more with the Hasegawa.

And this is why you don't drink and decal.
-
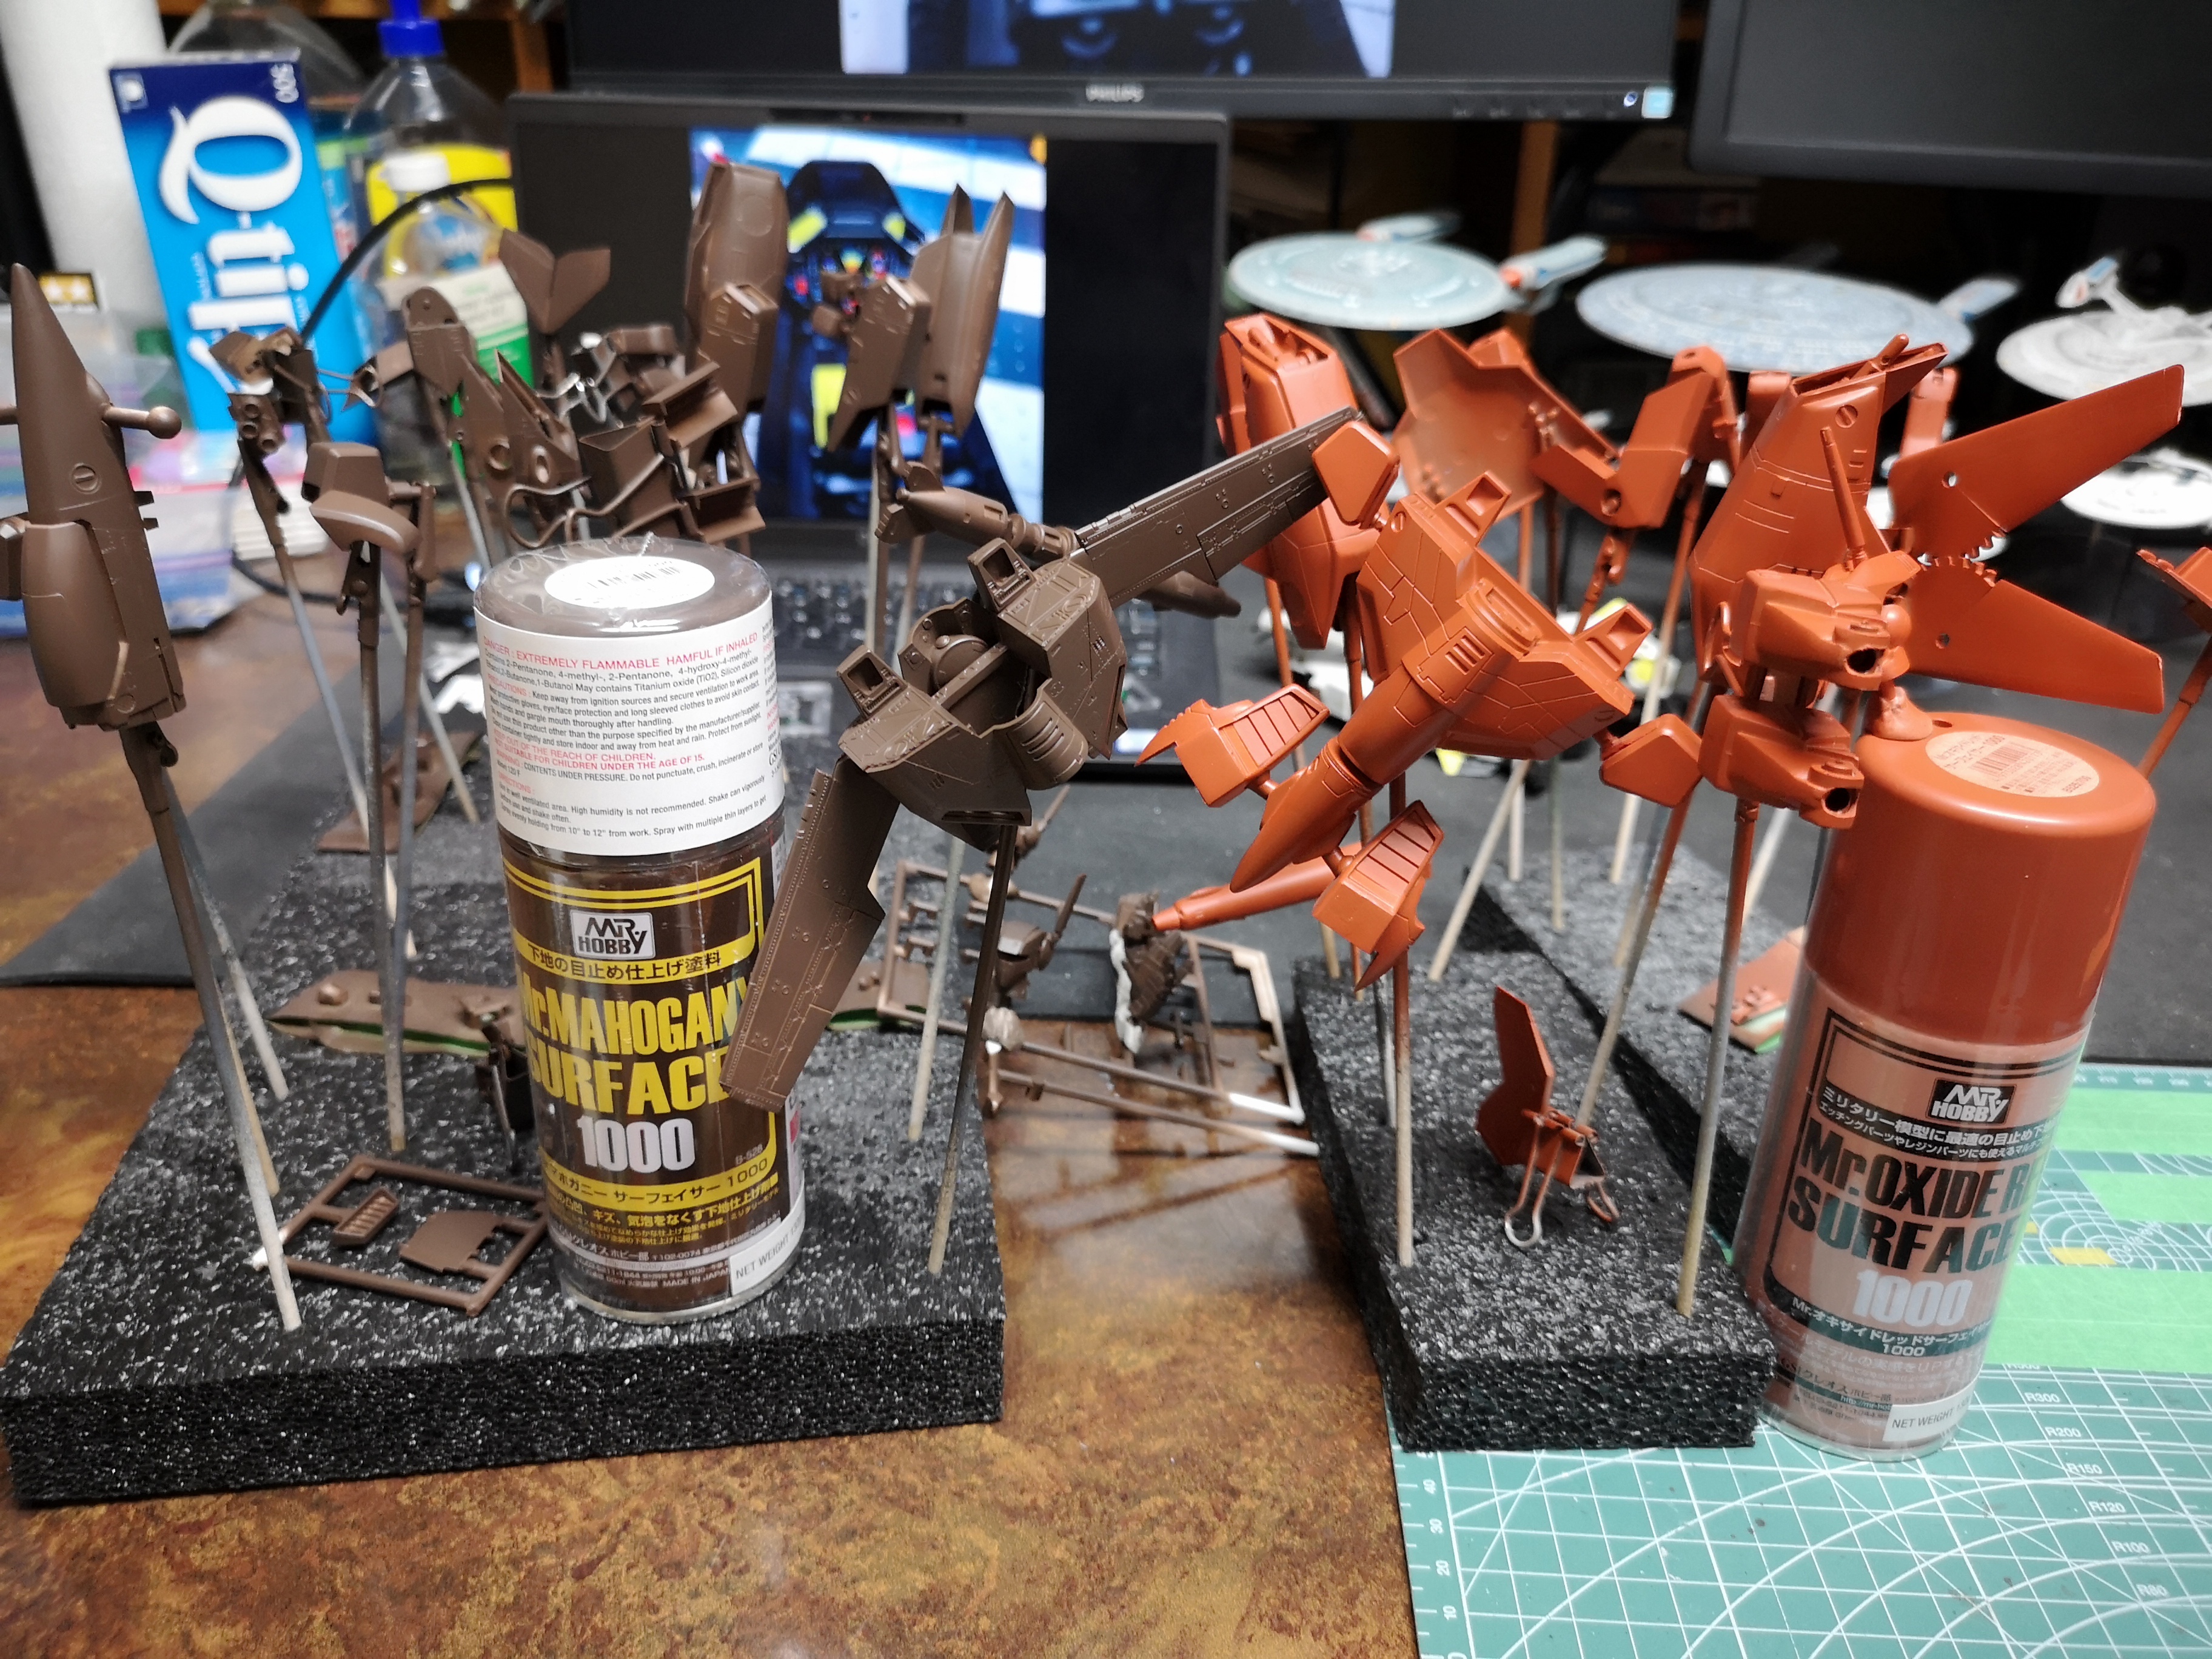
Another experiment. Since there is a bit of a primer shortage in my area, I decided to try some unconventional colors that seem to be plentiful at the local hobby shops.
Mr. Hobby's Mahogany and Red Oxide.
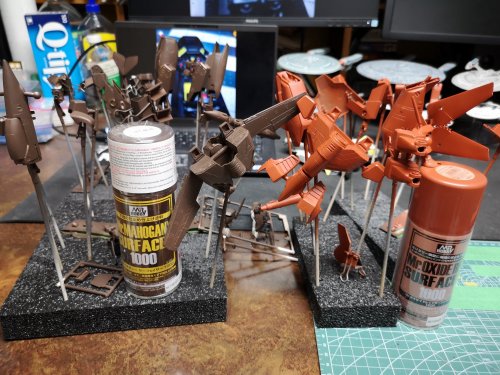
Hasegawa on the left and Bandai on the right.
Looks like Maximillion from the Black Hole.
Chocolate Valkyrie.
I found the red a bit of a pain to cover.
It definitely required pre-shading.... Which is something I'm still very new to and still learning about.


It turned out ok, but since I laid on the main color so heavily to cover up the red, I had to post-shade, something I'd never done before and also had to experiment with.
The chocolate one was much easier, did not require pre-shading and I think it's almost a passable substitute for a black or grey primer for black - basing.

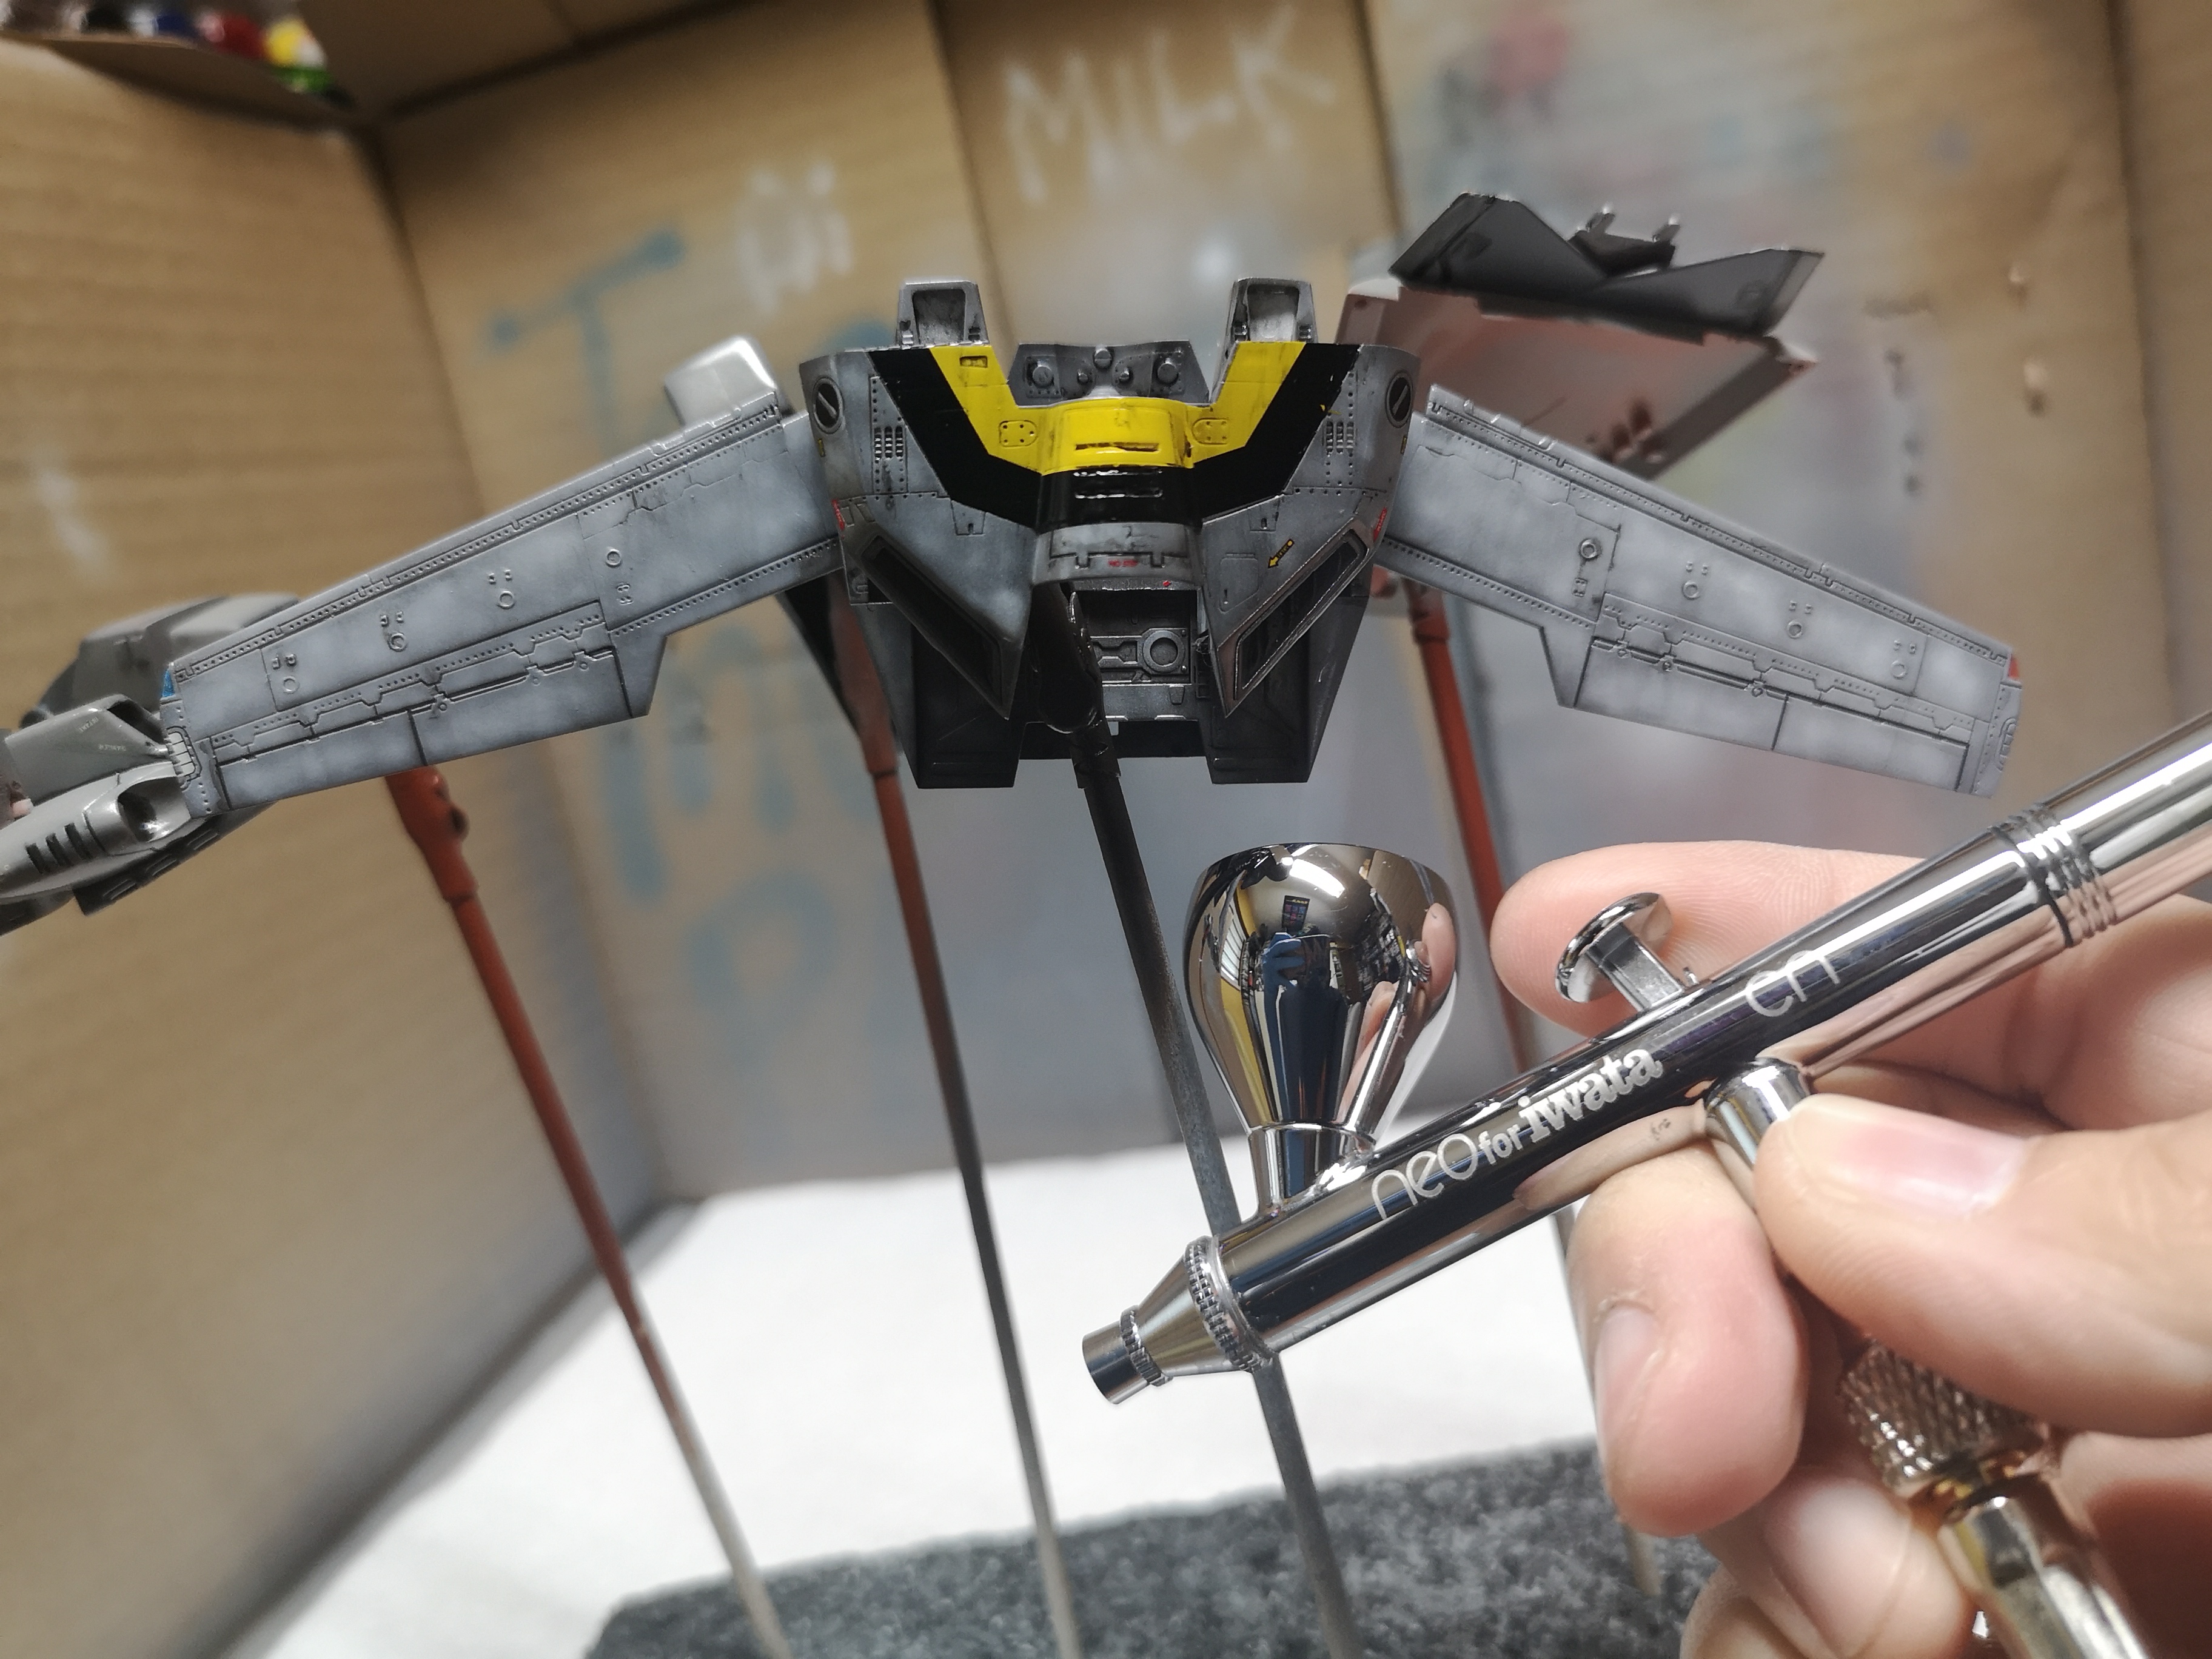
I recently built two Hasegawa Valks in fighter mode and found the gloss coat and final Flat Clear washed out most of the mottle/marble effects so I decided to leave it appear more prominently on the Hasegawa.

Another interesting effect was the Flat Black on brown primer. I sort of liked this look, but since Roy has a completely black heat shield, I covered most of this up.
-
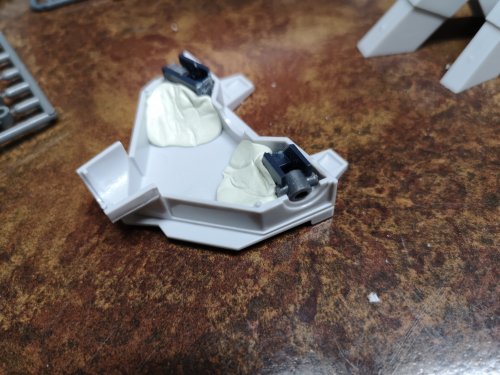
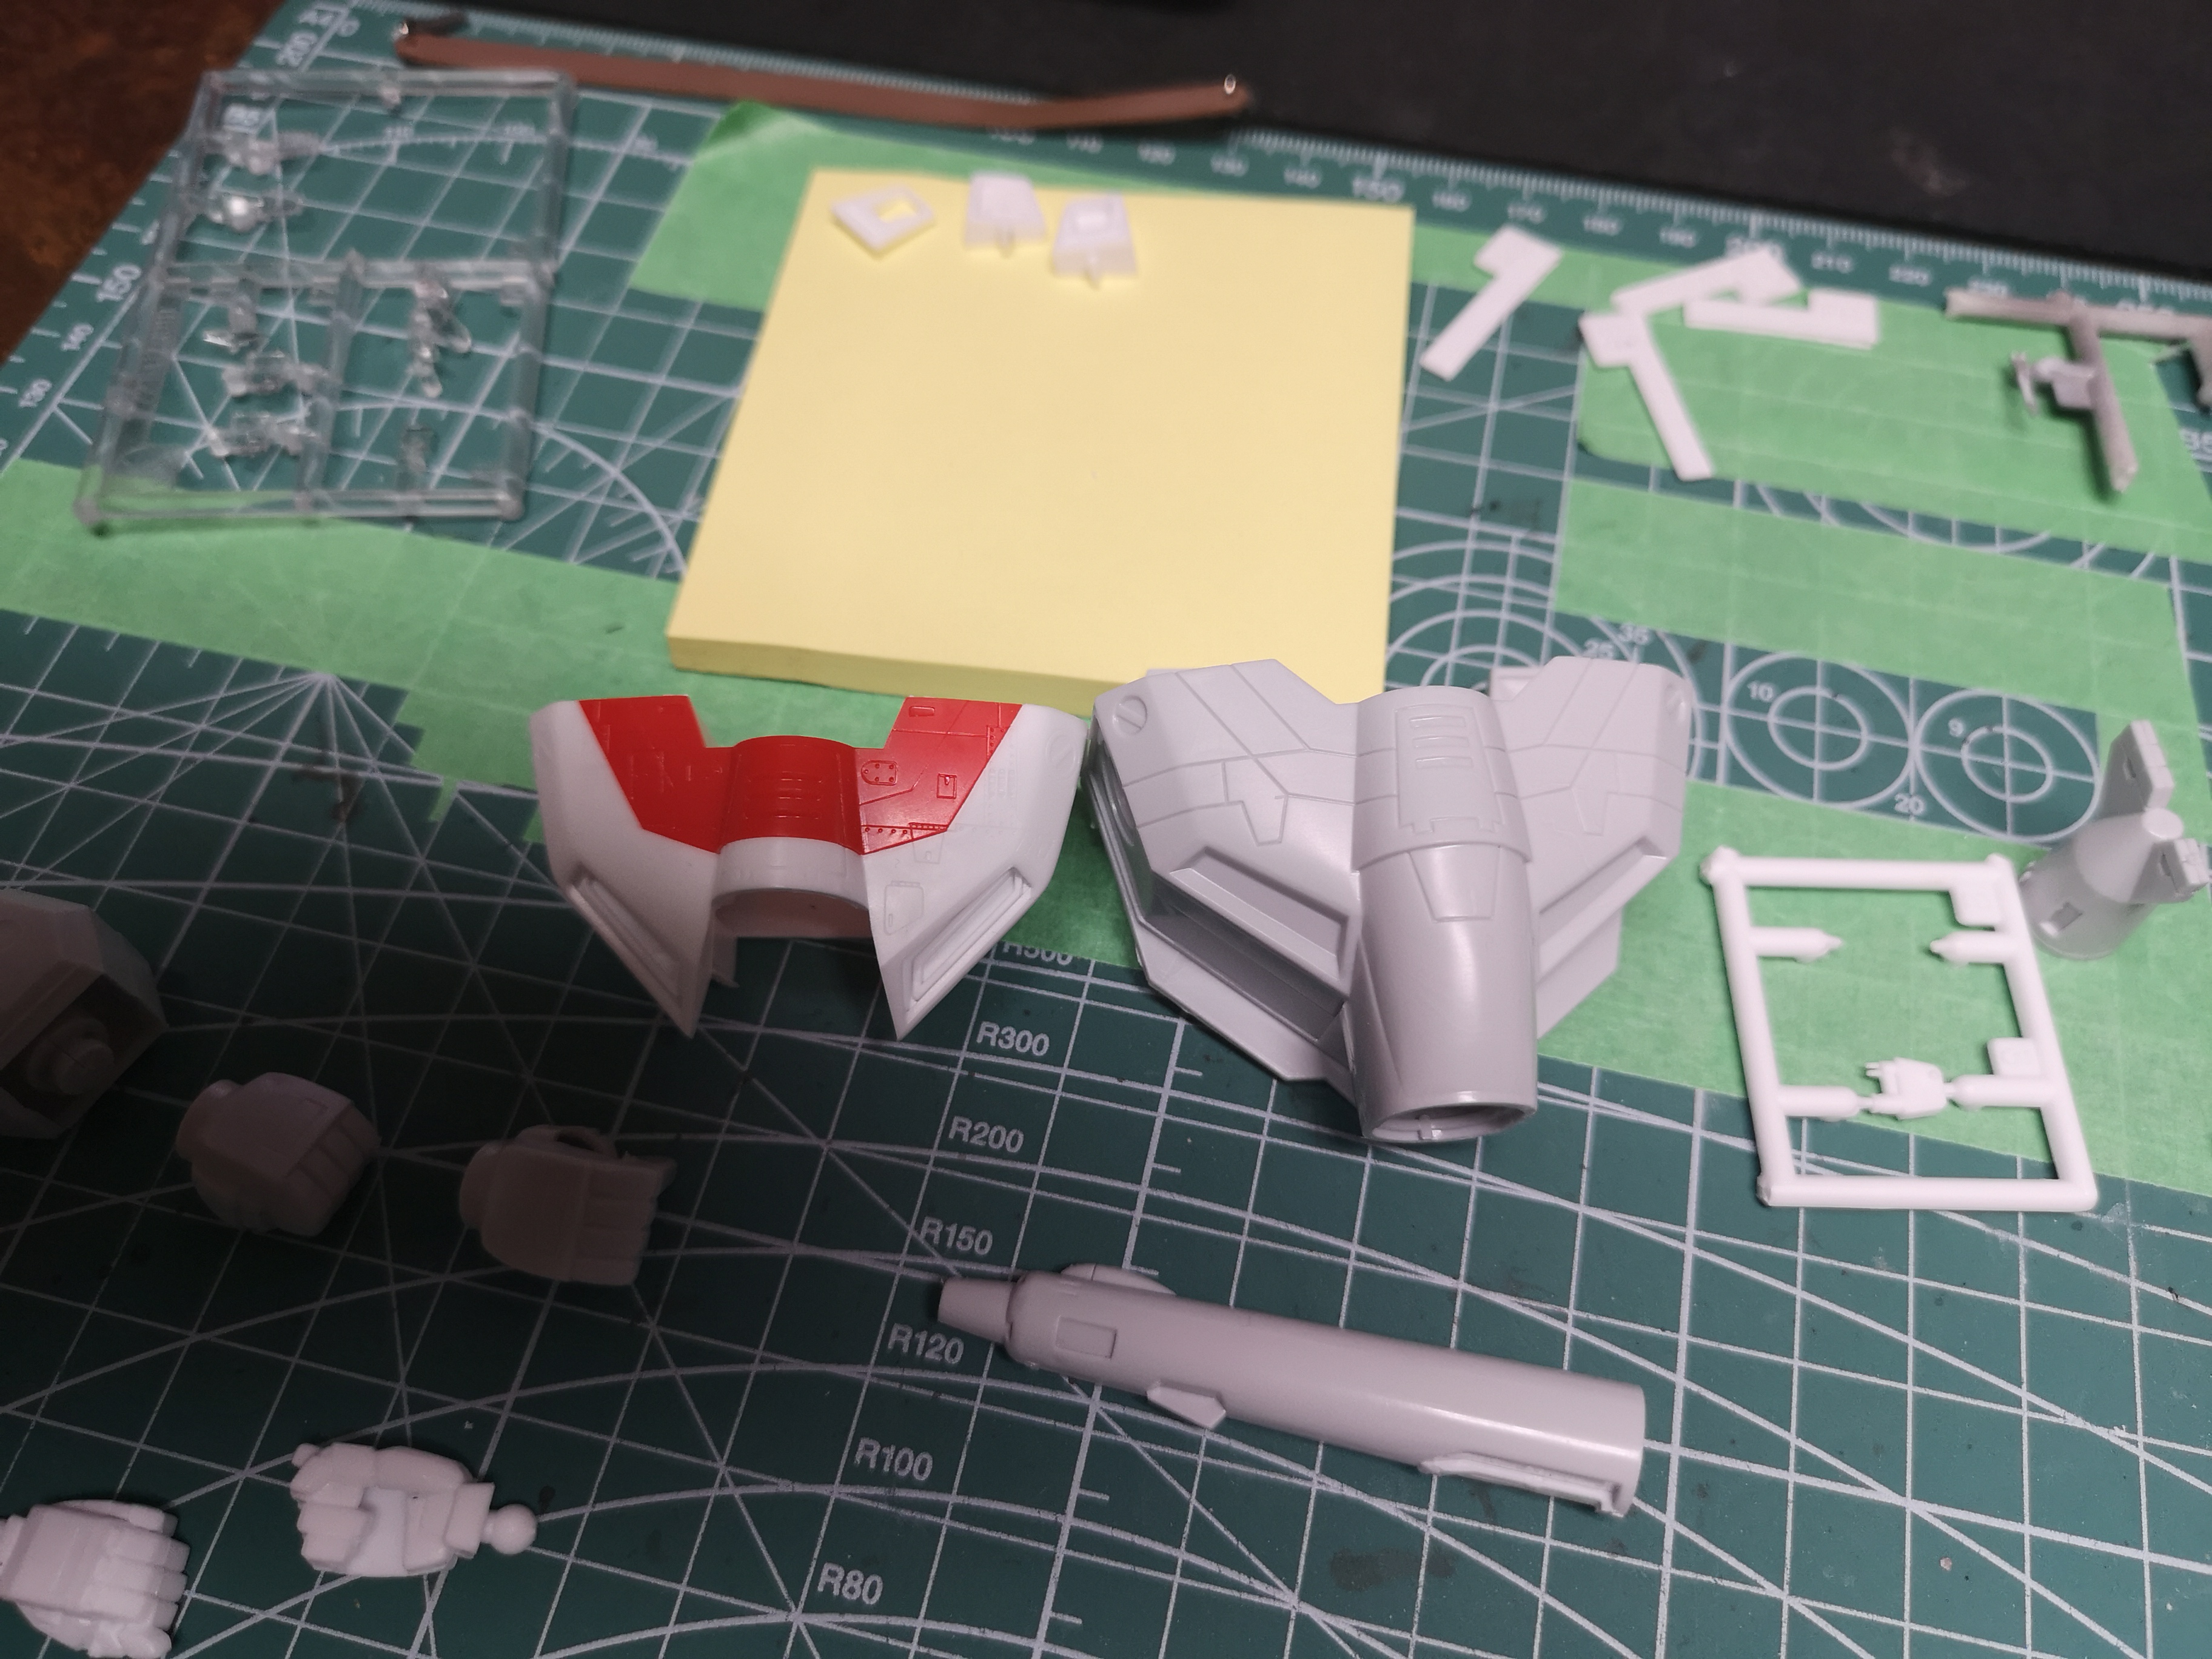
At the point, I was looking at the top of the chest pieces for both the Hasegawa and the Bandai and thought there was no way I could display these two together and believe they come from the same universe.
So I decided to add some detail (I have no idea what I'm doing). The actual seam line is in the wrong place, so I had to sand and fill it, then scribe a new panel line in the right place..... But I am not at the level to match the complex Hasegawa panel lines. That gray part was a spare part from a 1/350 Yamato.... It is supposed to resemble the back end of the nose section of the Valk..... Better than nothing at all I guess?
My lame attempt at adding panel lines.... Like a drunk blind guy did them.
At this point, I realized the 15th anniversary release, it's actually a different tooling than the one I built as a kid. The chest piece at least.... And the hands too.
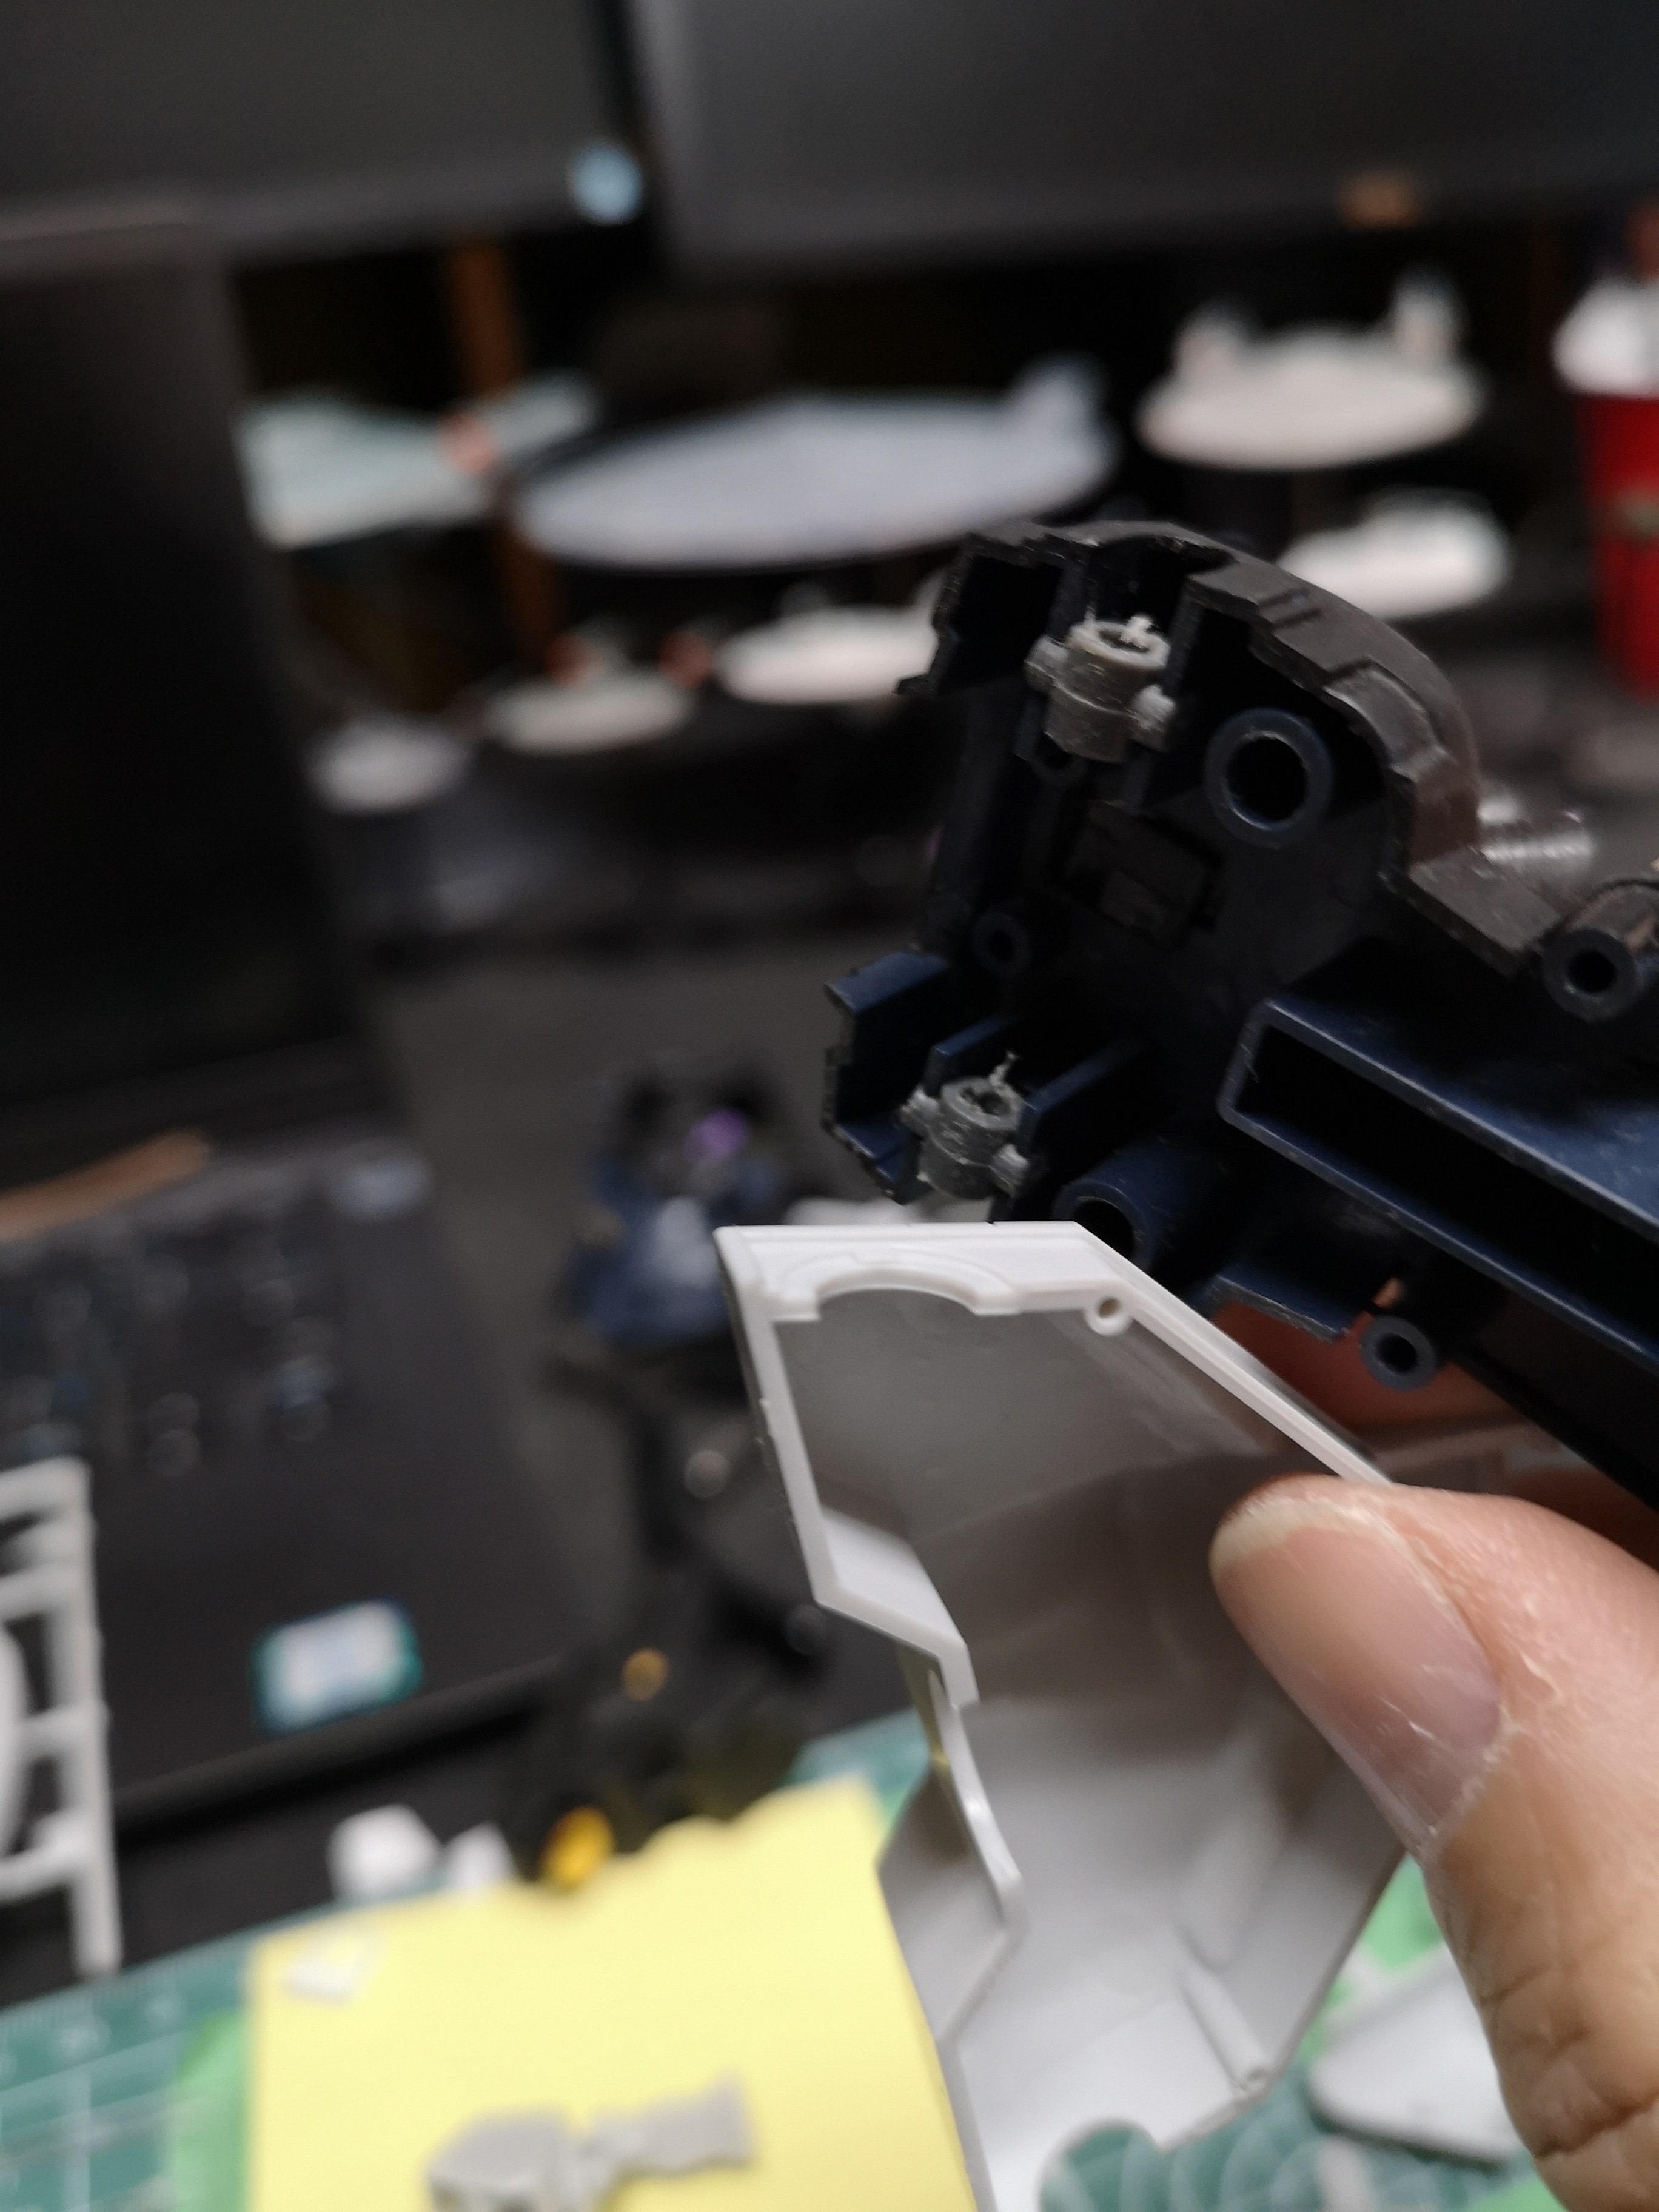
I didn't like the captured parts for the Bandai, so I opened them up SO I could paint them separetly. In this case, I didn't even use the Battroid arms that came with the kit, I took the arm pieces from the Gerwalk (weird that they came as extra parts with the Super Fighter).

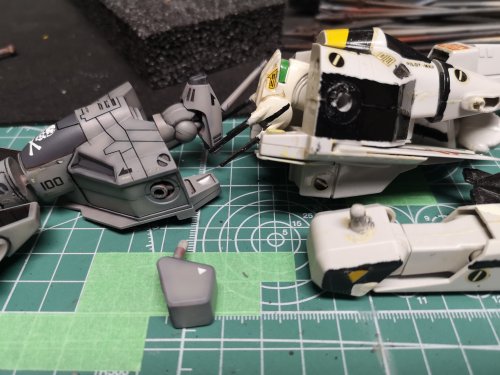
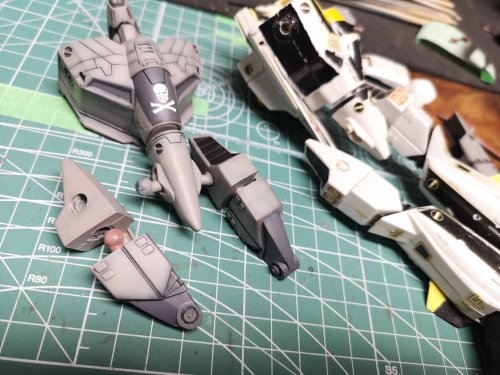
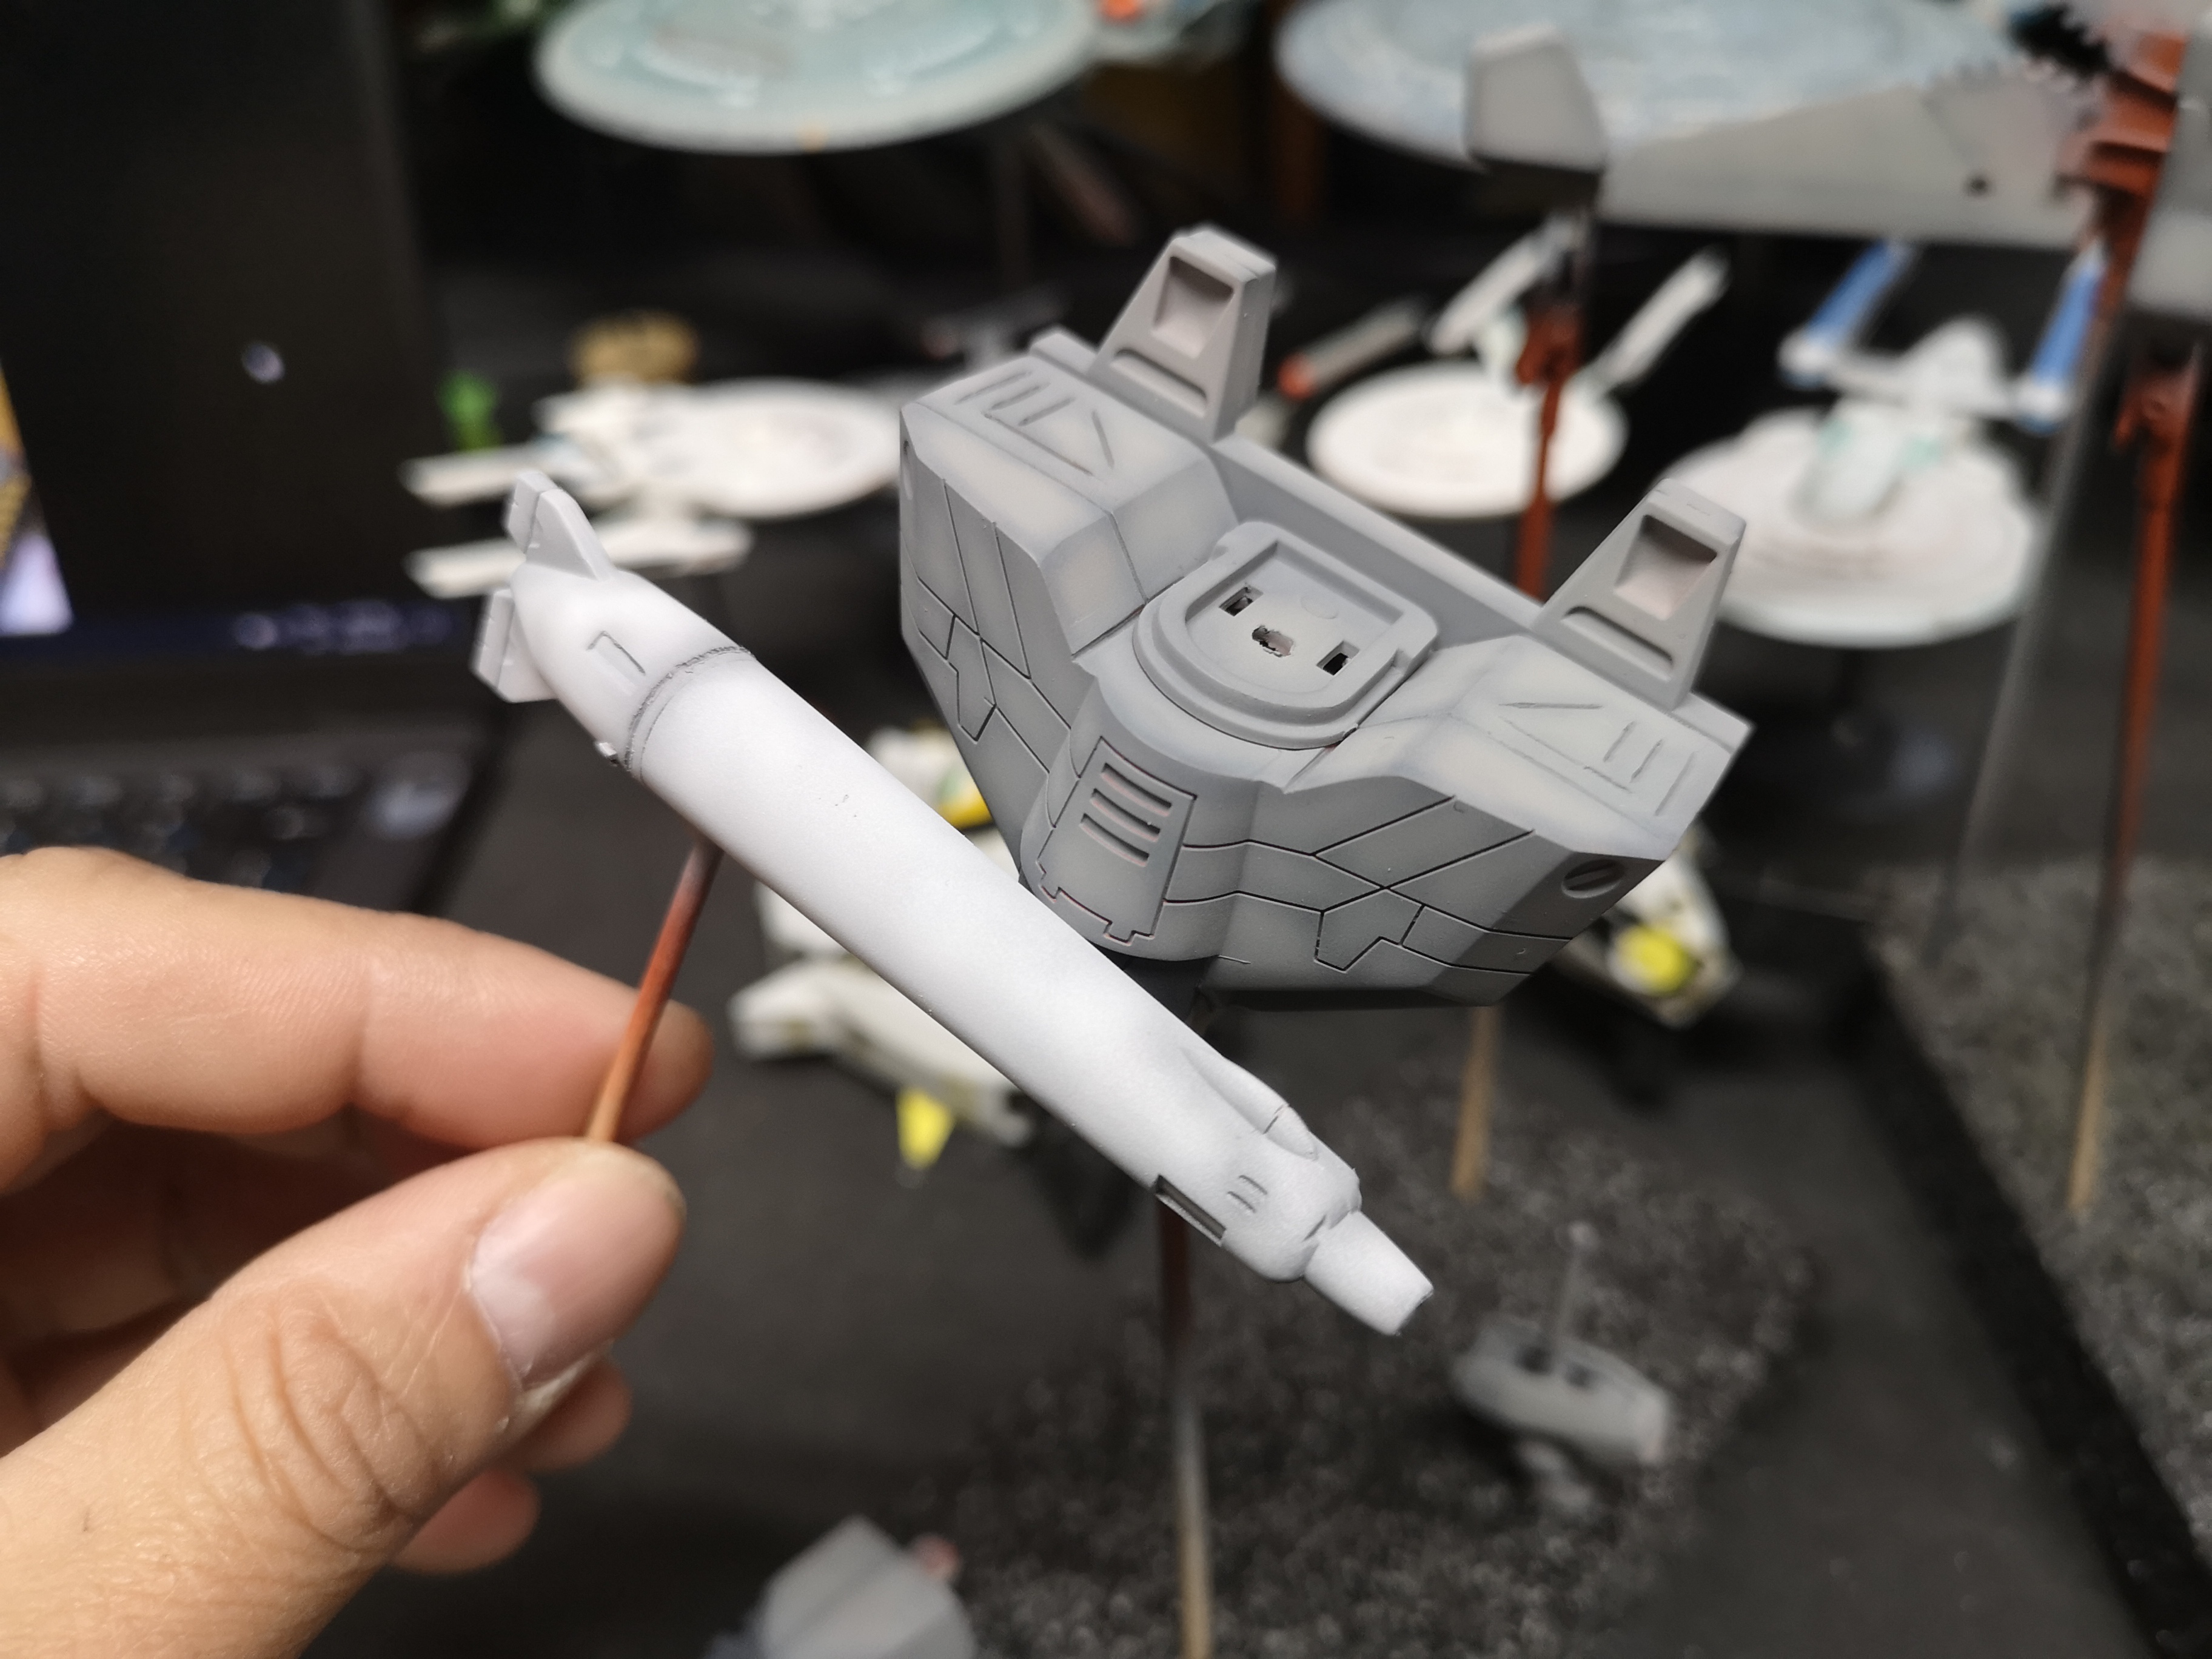
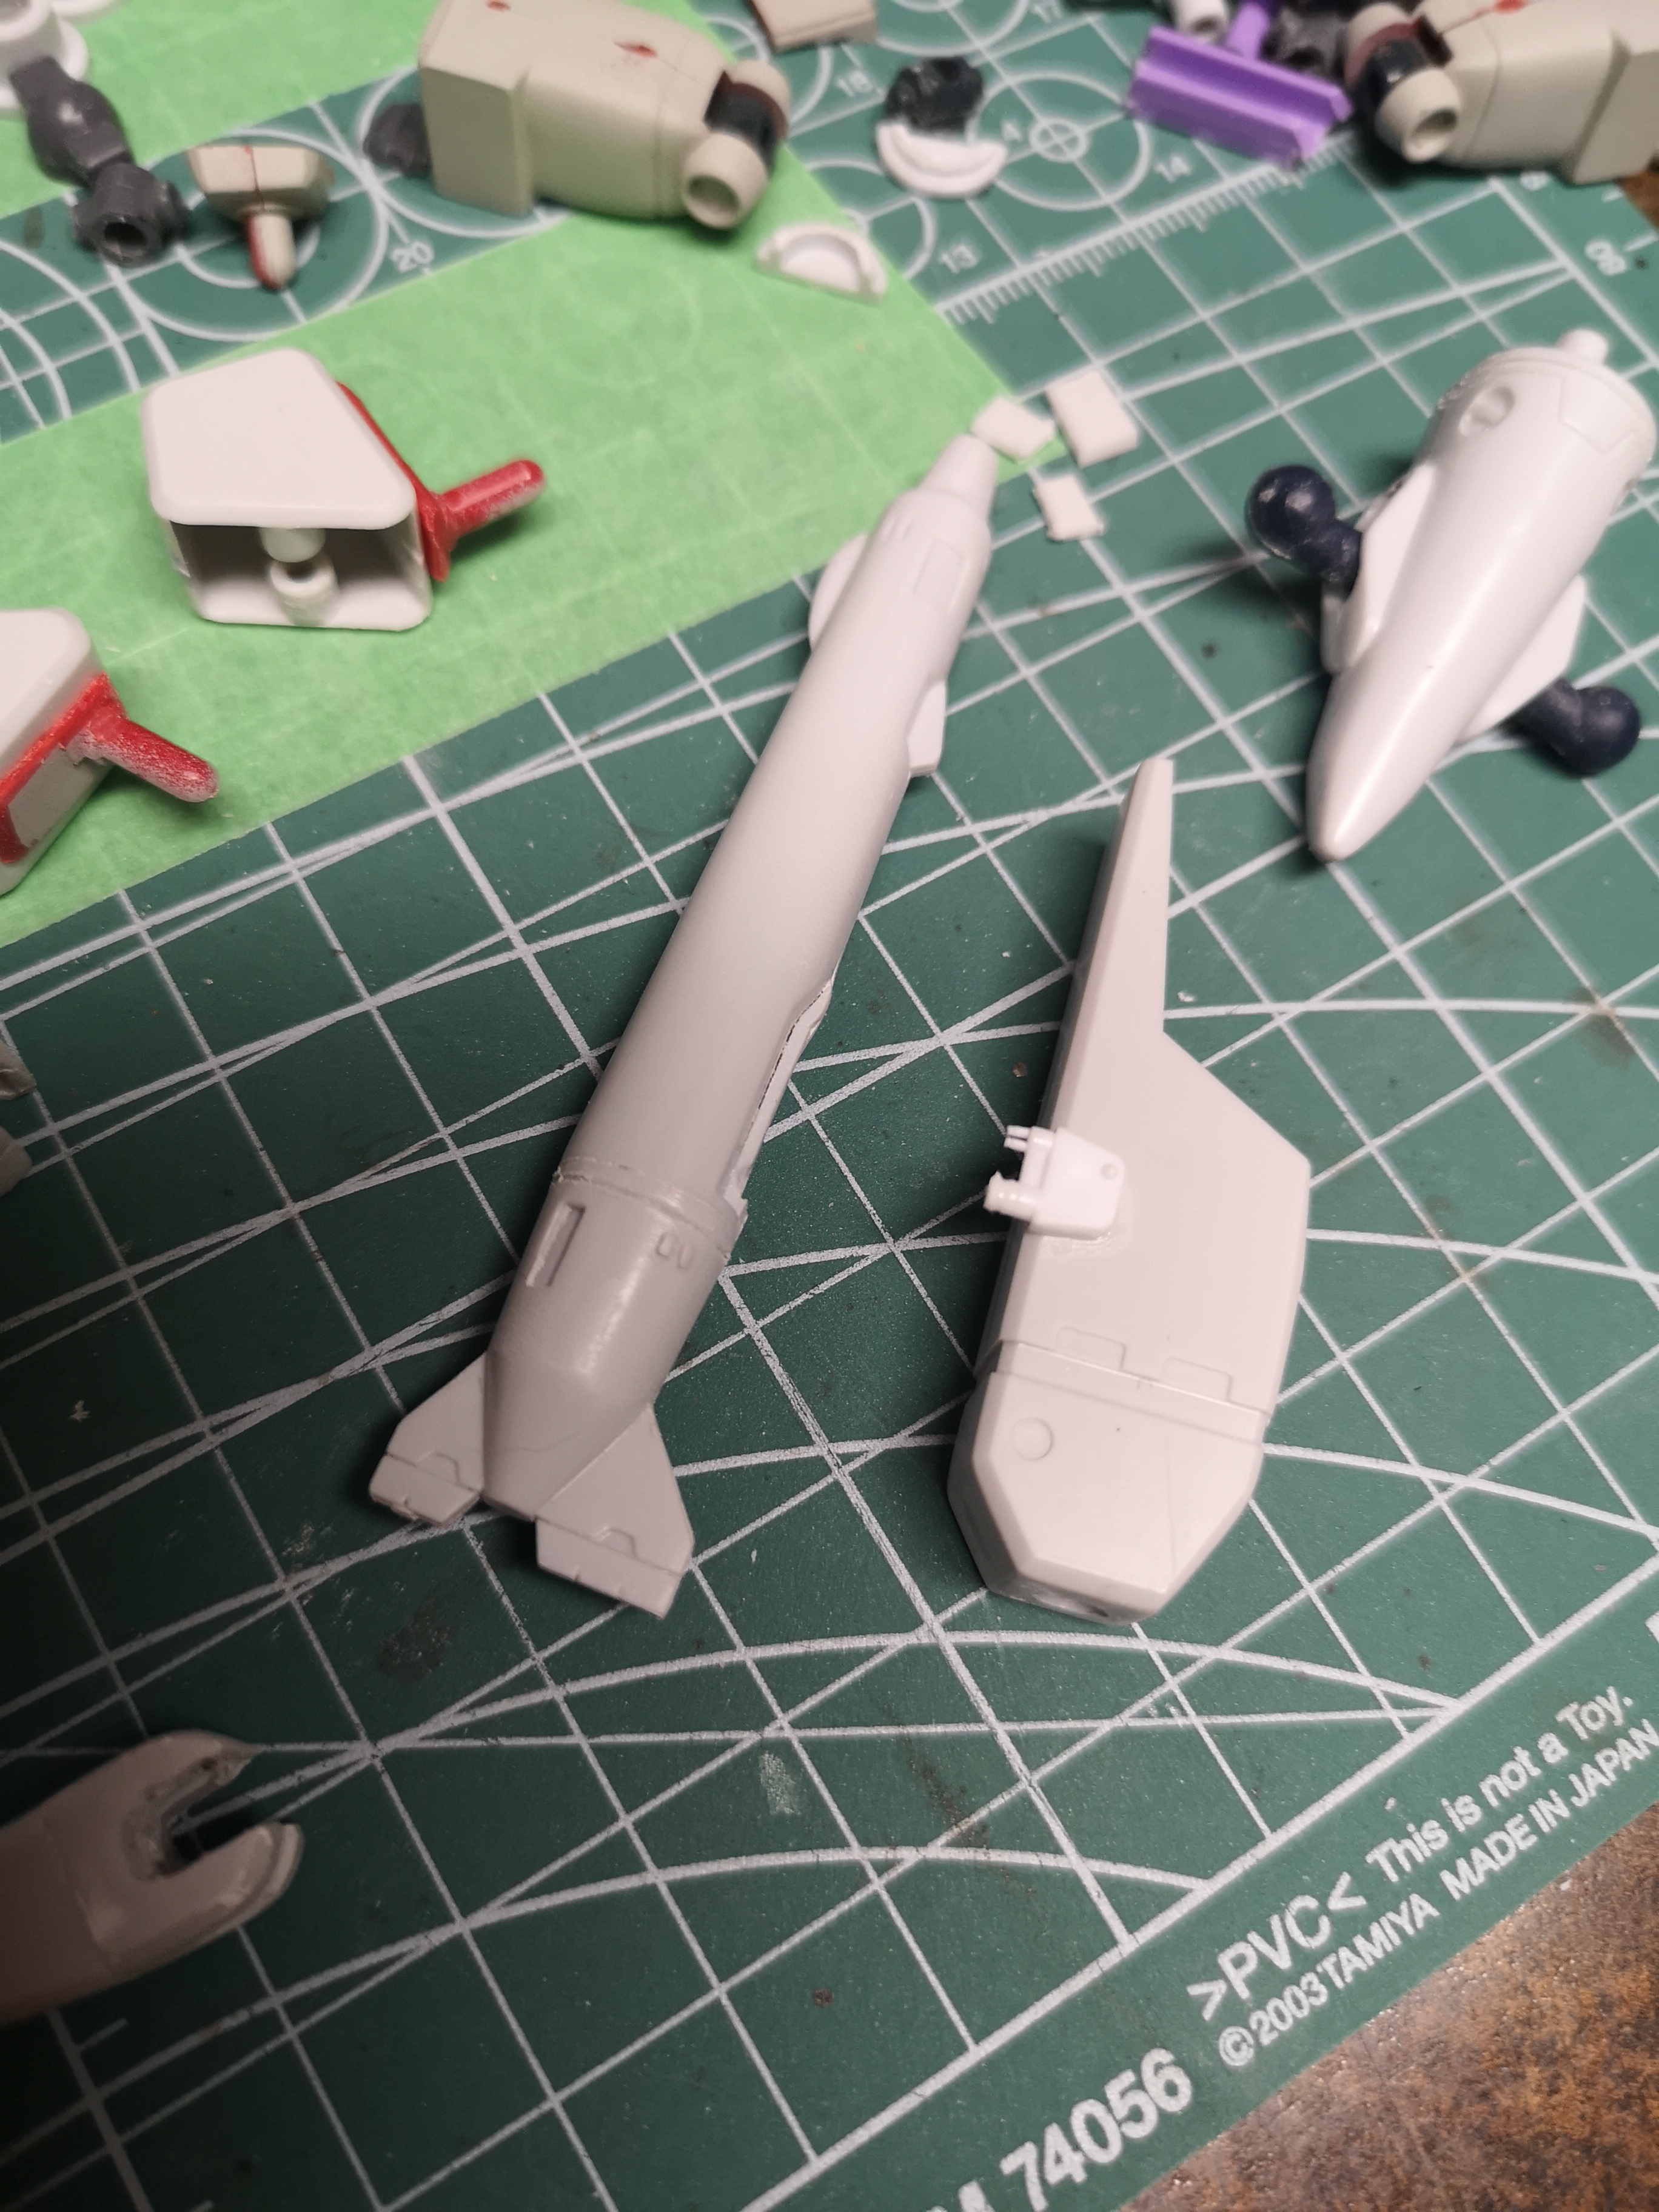
Collapsed gunpod and Hasegawa arm mount.
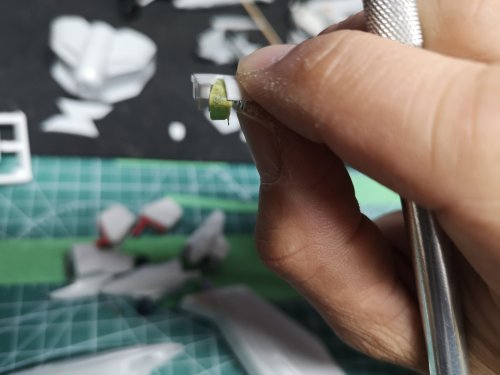
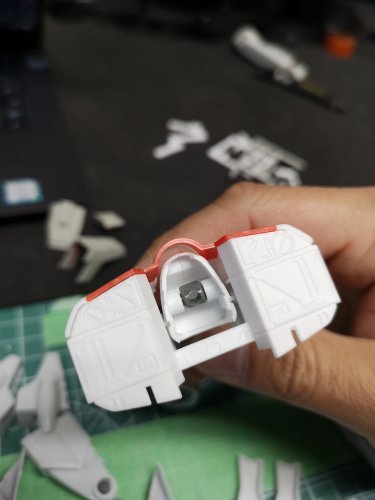
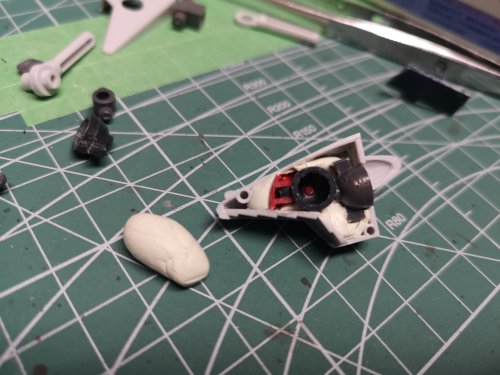
I made a mess with the 1S visor so I decided to live with the seam line down the front of the face and paint the parts separately and assemble the parts after.
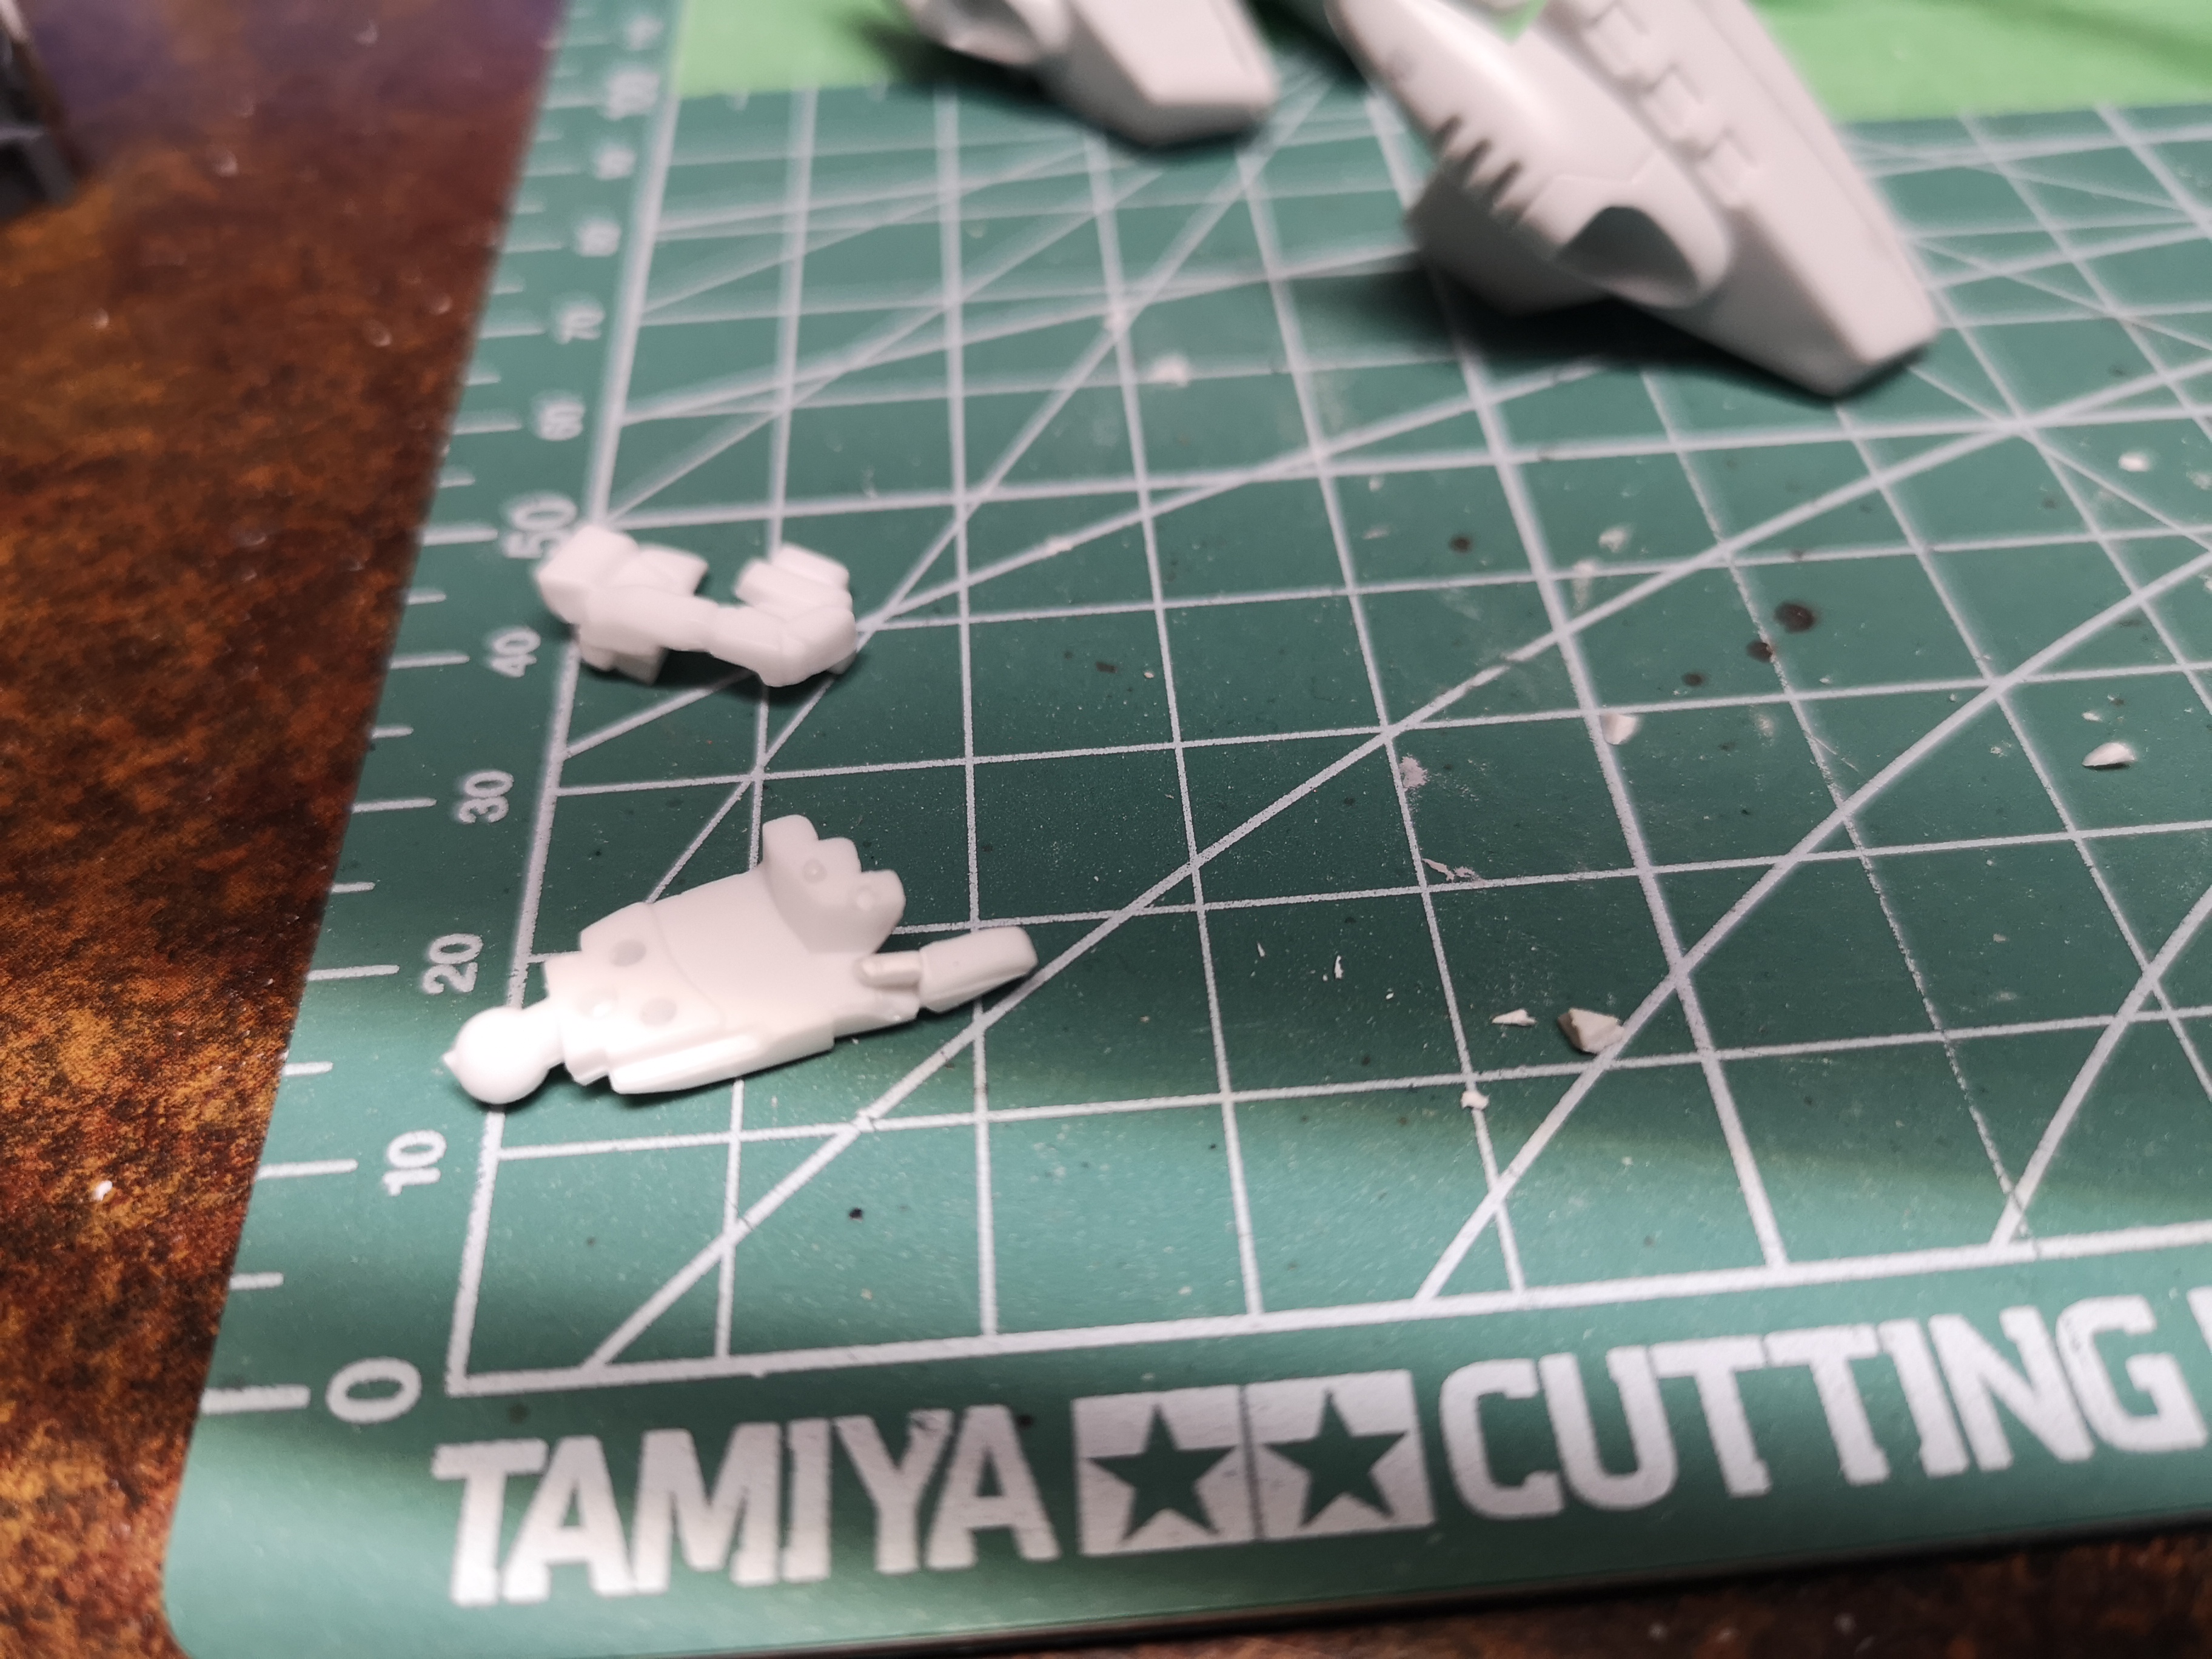
One thing that irks me about some mecha hands is the trigger finger is always set on the trigger. As a firearms user, safety first and the finger never touches the trigger until you are ready to fire.
I know, a small detail most won't notice or care about, lol! Anyway, I straightened out thay finger, hahahaha!
-
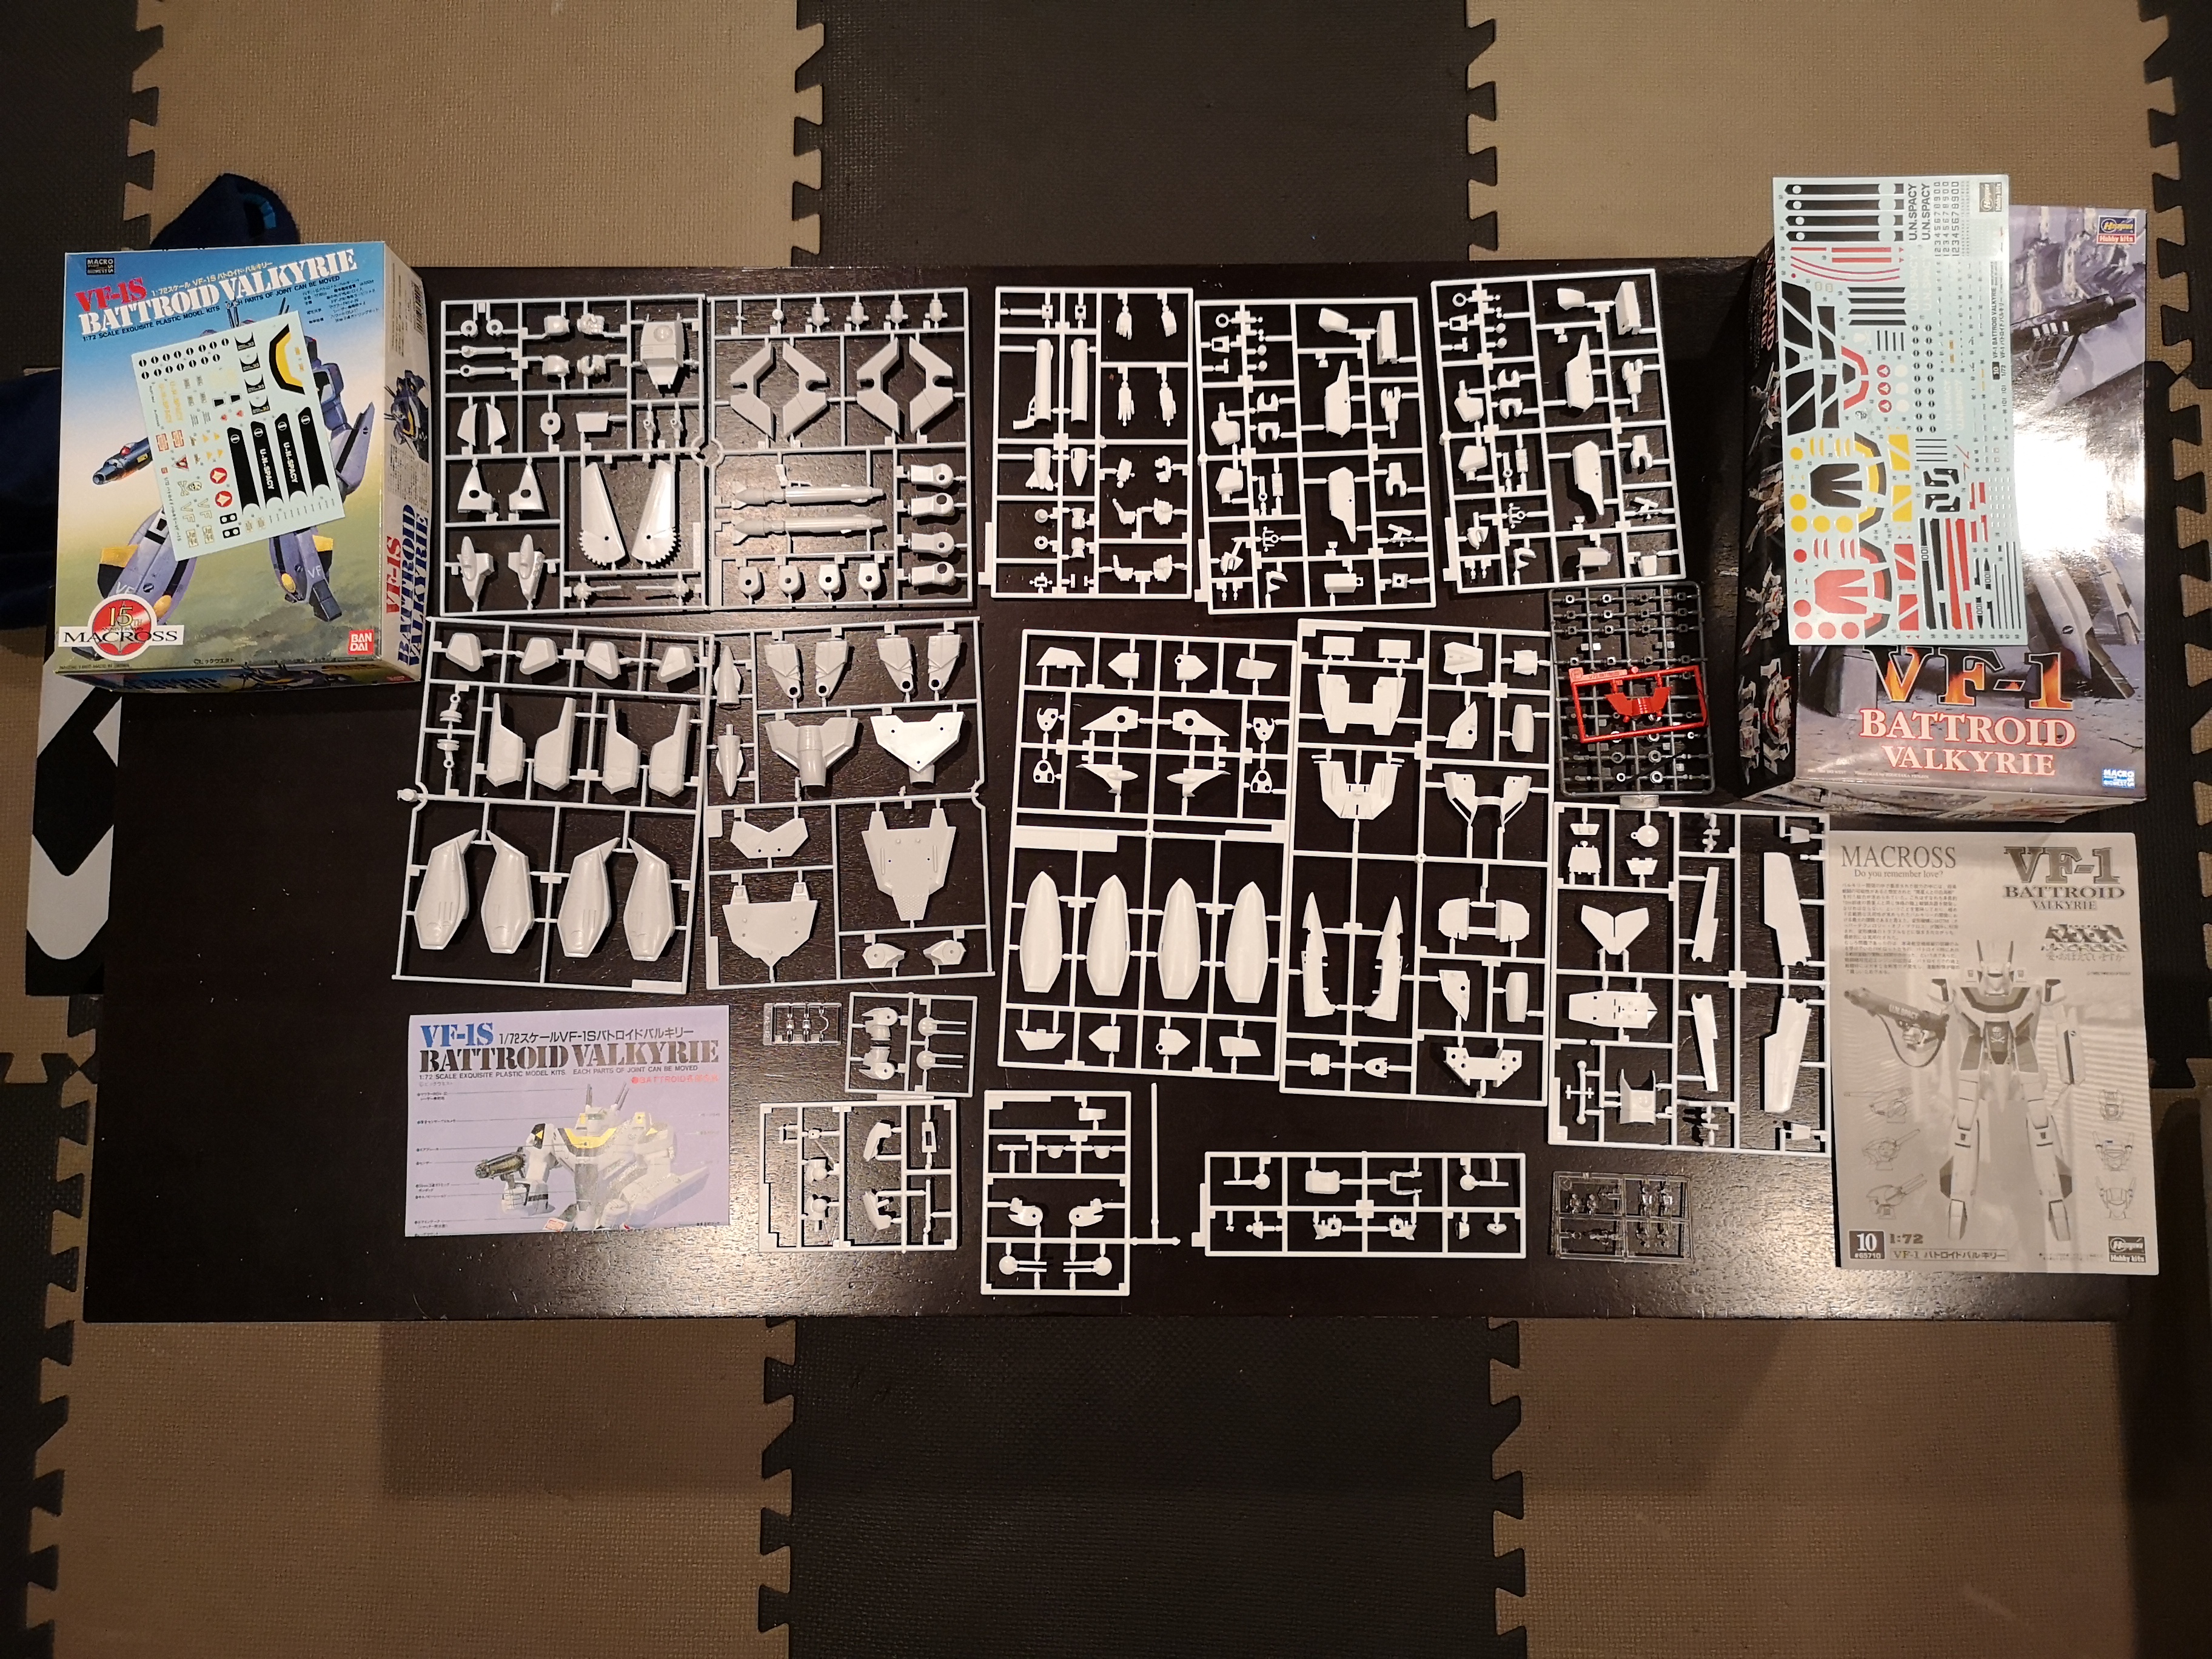
I was going to do separate threads, on these builds, but since I built these two together at the same time, it might just be easier to post these together.
I haven't seen many comparison pics between the Hasegawa Battroid and the old Bandai version so I decided to build them together.

I originally planned to build the Bandai 1S but decided I wanted to experiment so I ended up building the 1J instead... But not as a 1J....if that makes any sense.
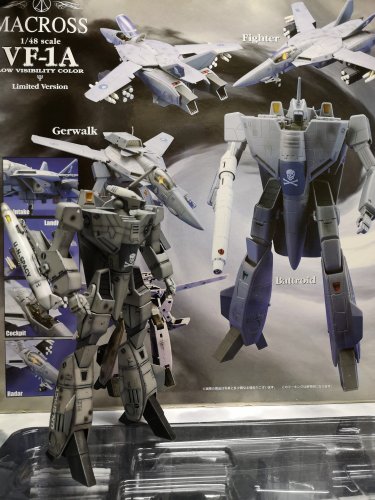
Anyway, onto some Hasegawa build. This was my first Battroid kit from Hasegawa, and my first mecha kit since I was 8 or 9 yrs old. I had some serious reservations because my last experience with the old Bandai Battroid kit was that it was a floppy mess, and the last Hasegawa fighter kit was super fragile, which fell apart or broke if I breathed wrong. But despite all of my reservations, I found the Hasegawa Battroid kit was a breath of fresh air.
It went together so easily.
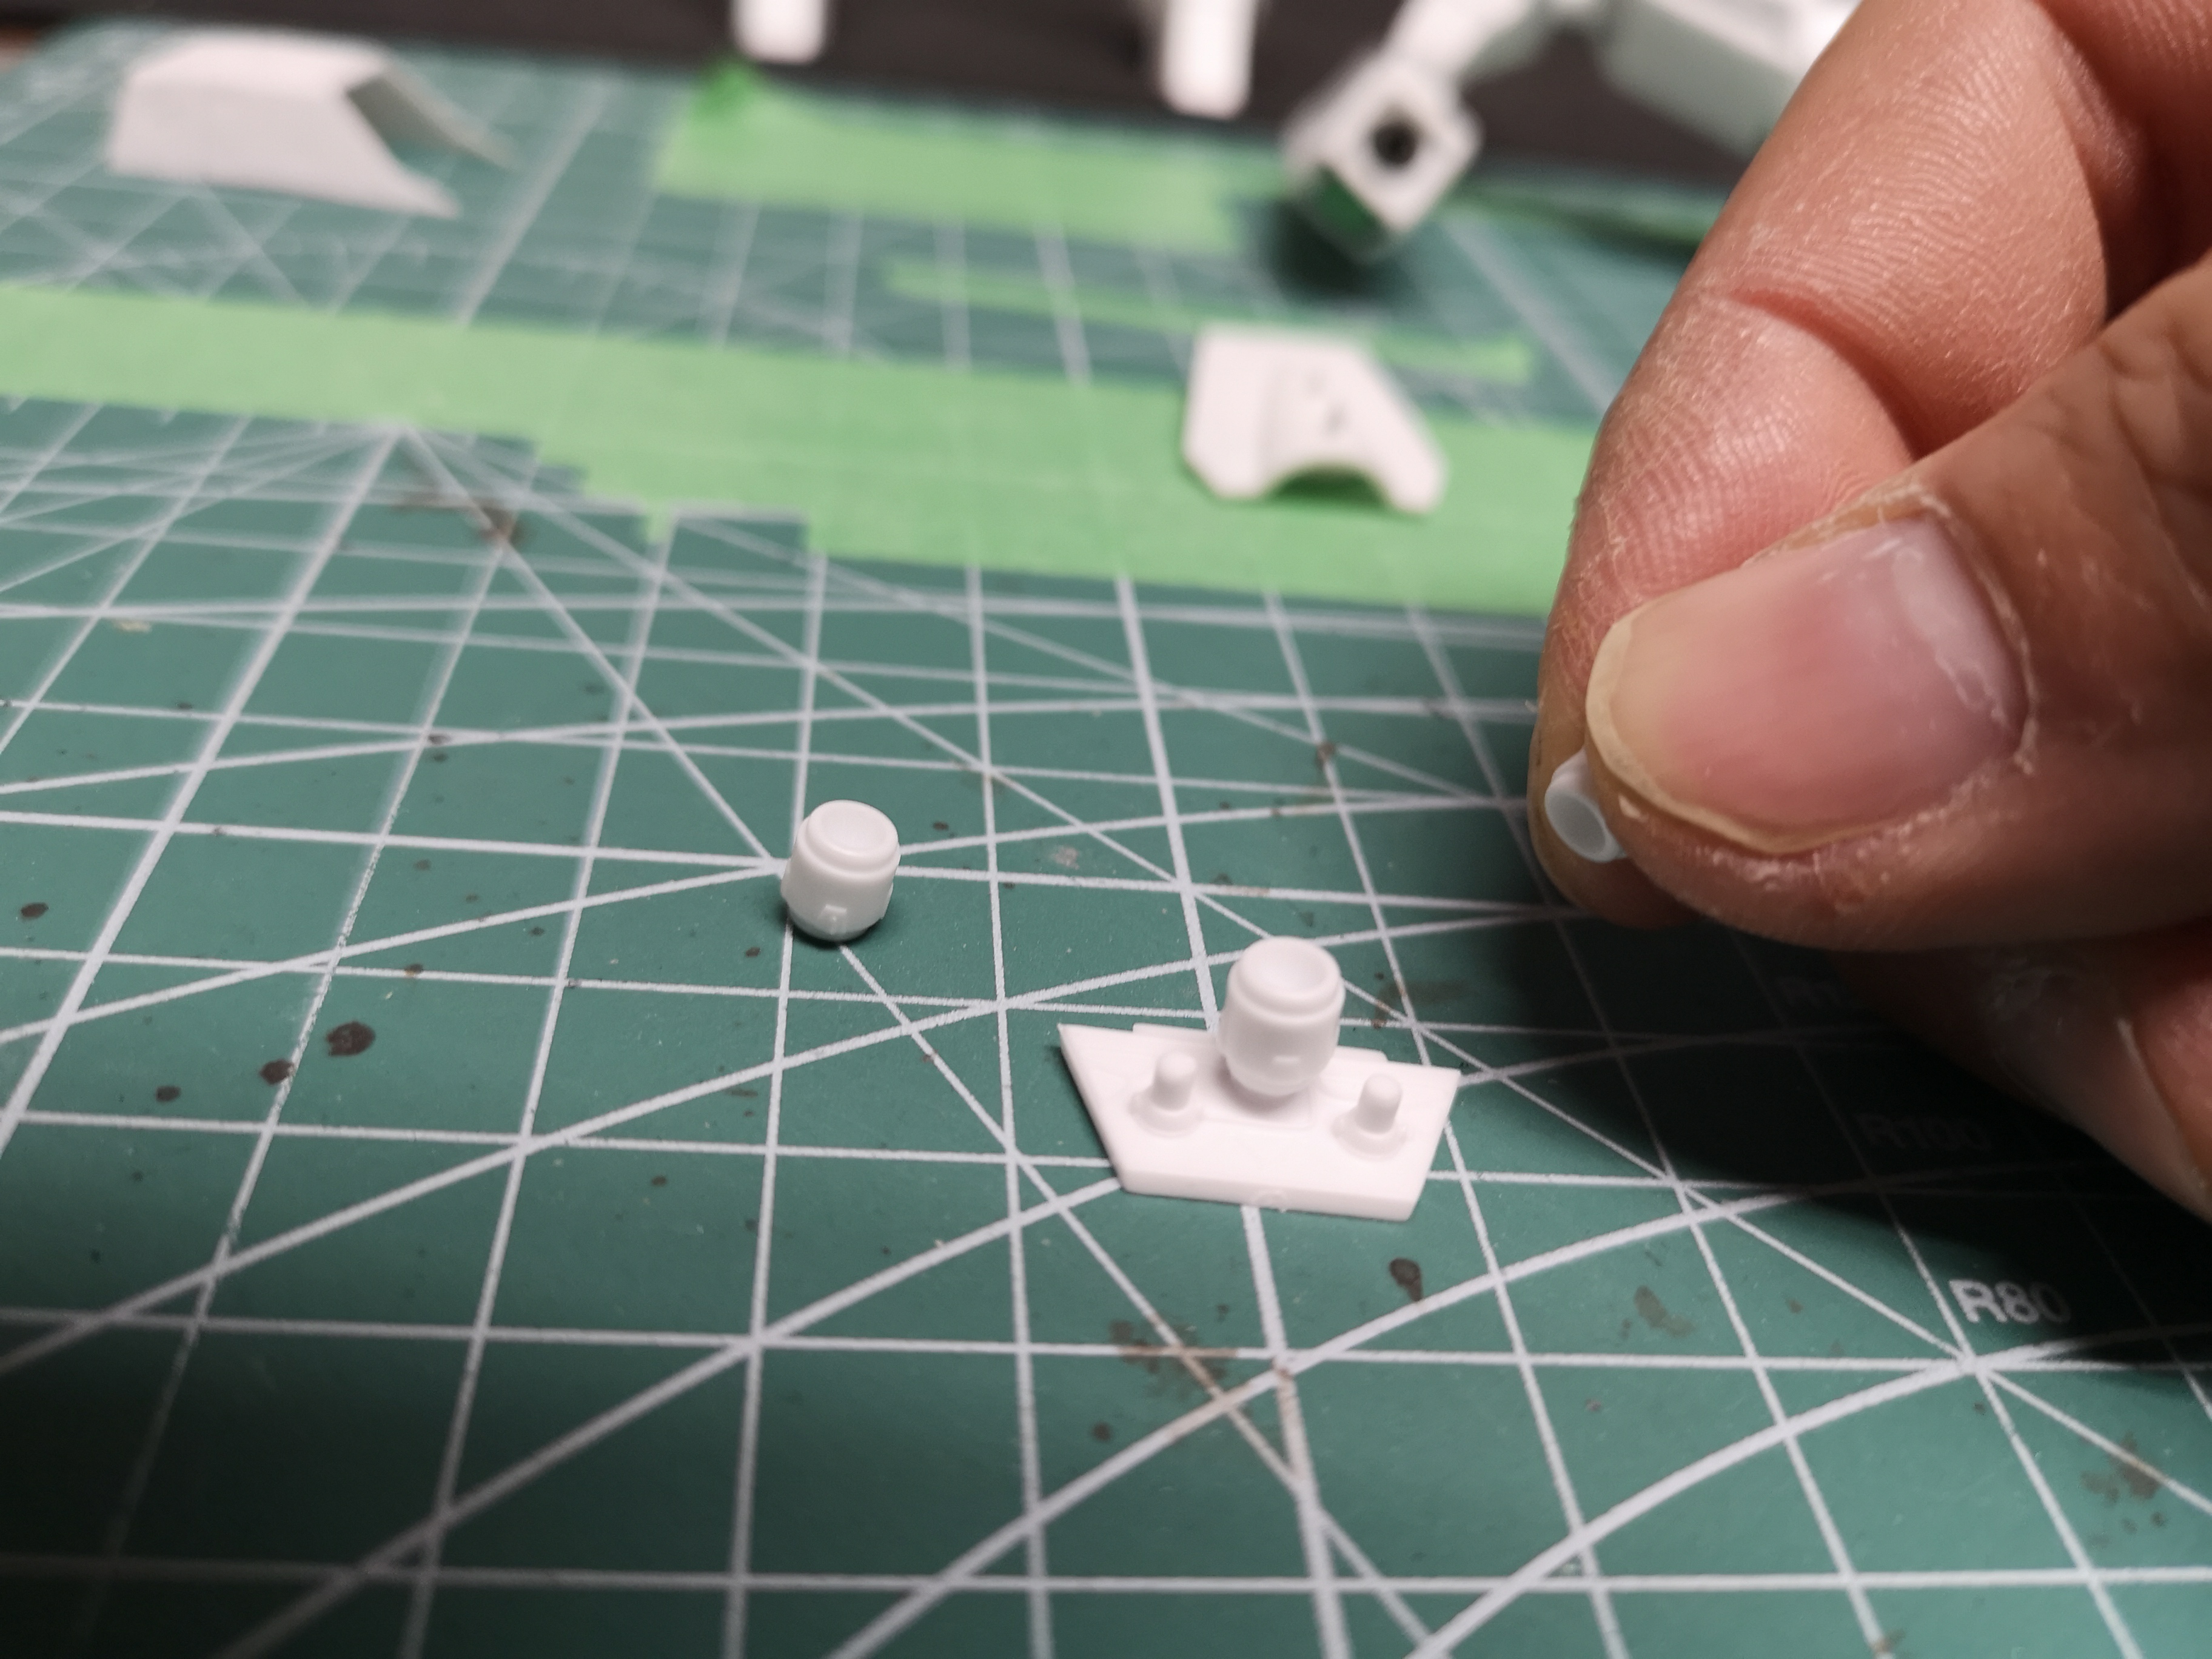
The clear window for the forearm and the visor for the 1S head were the only parts that were really captured and could not be added after assemble of the main parts.
Maybe I can figure out a way on later kits.
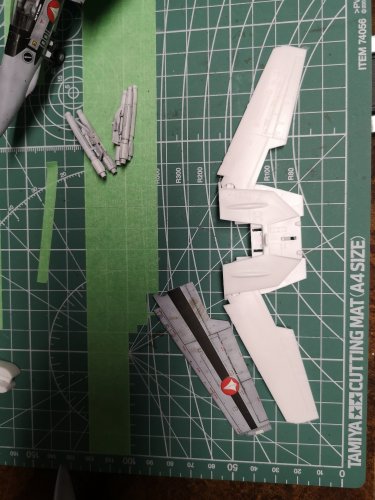
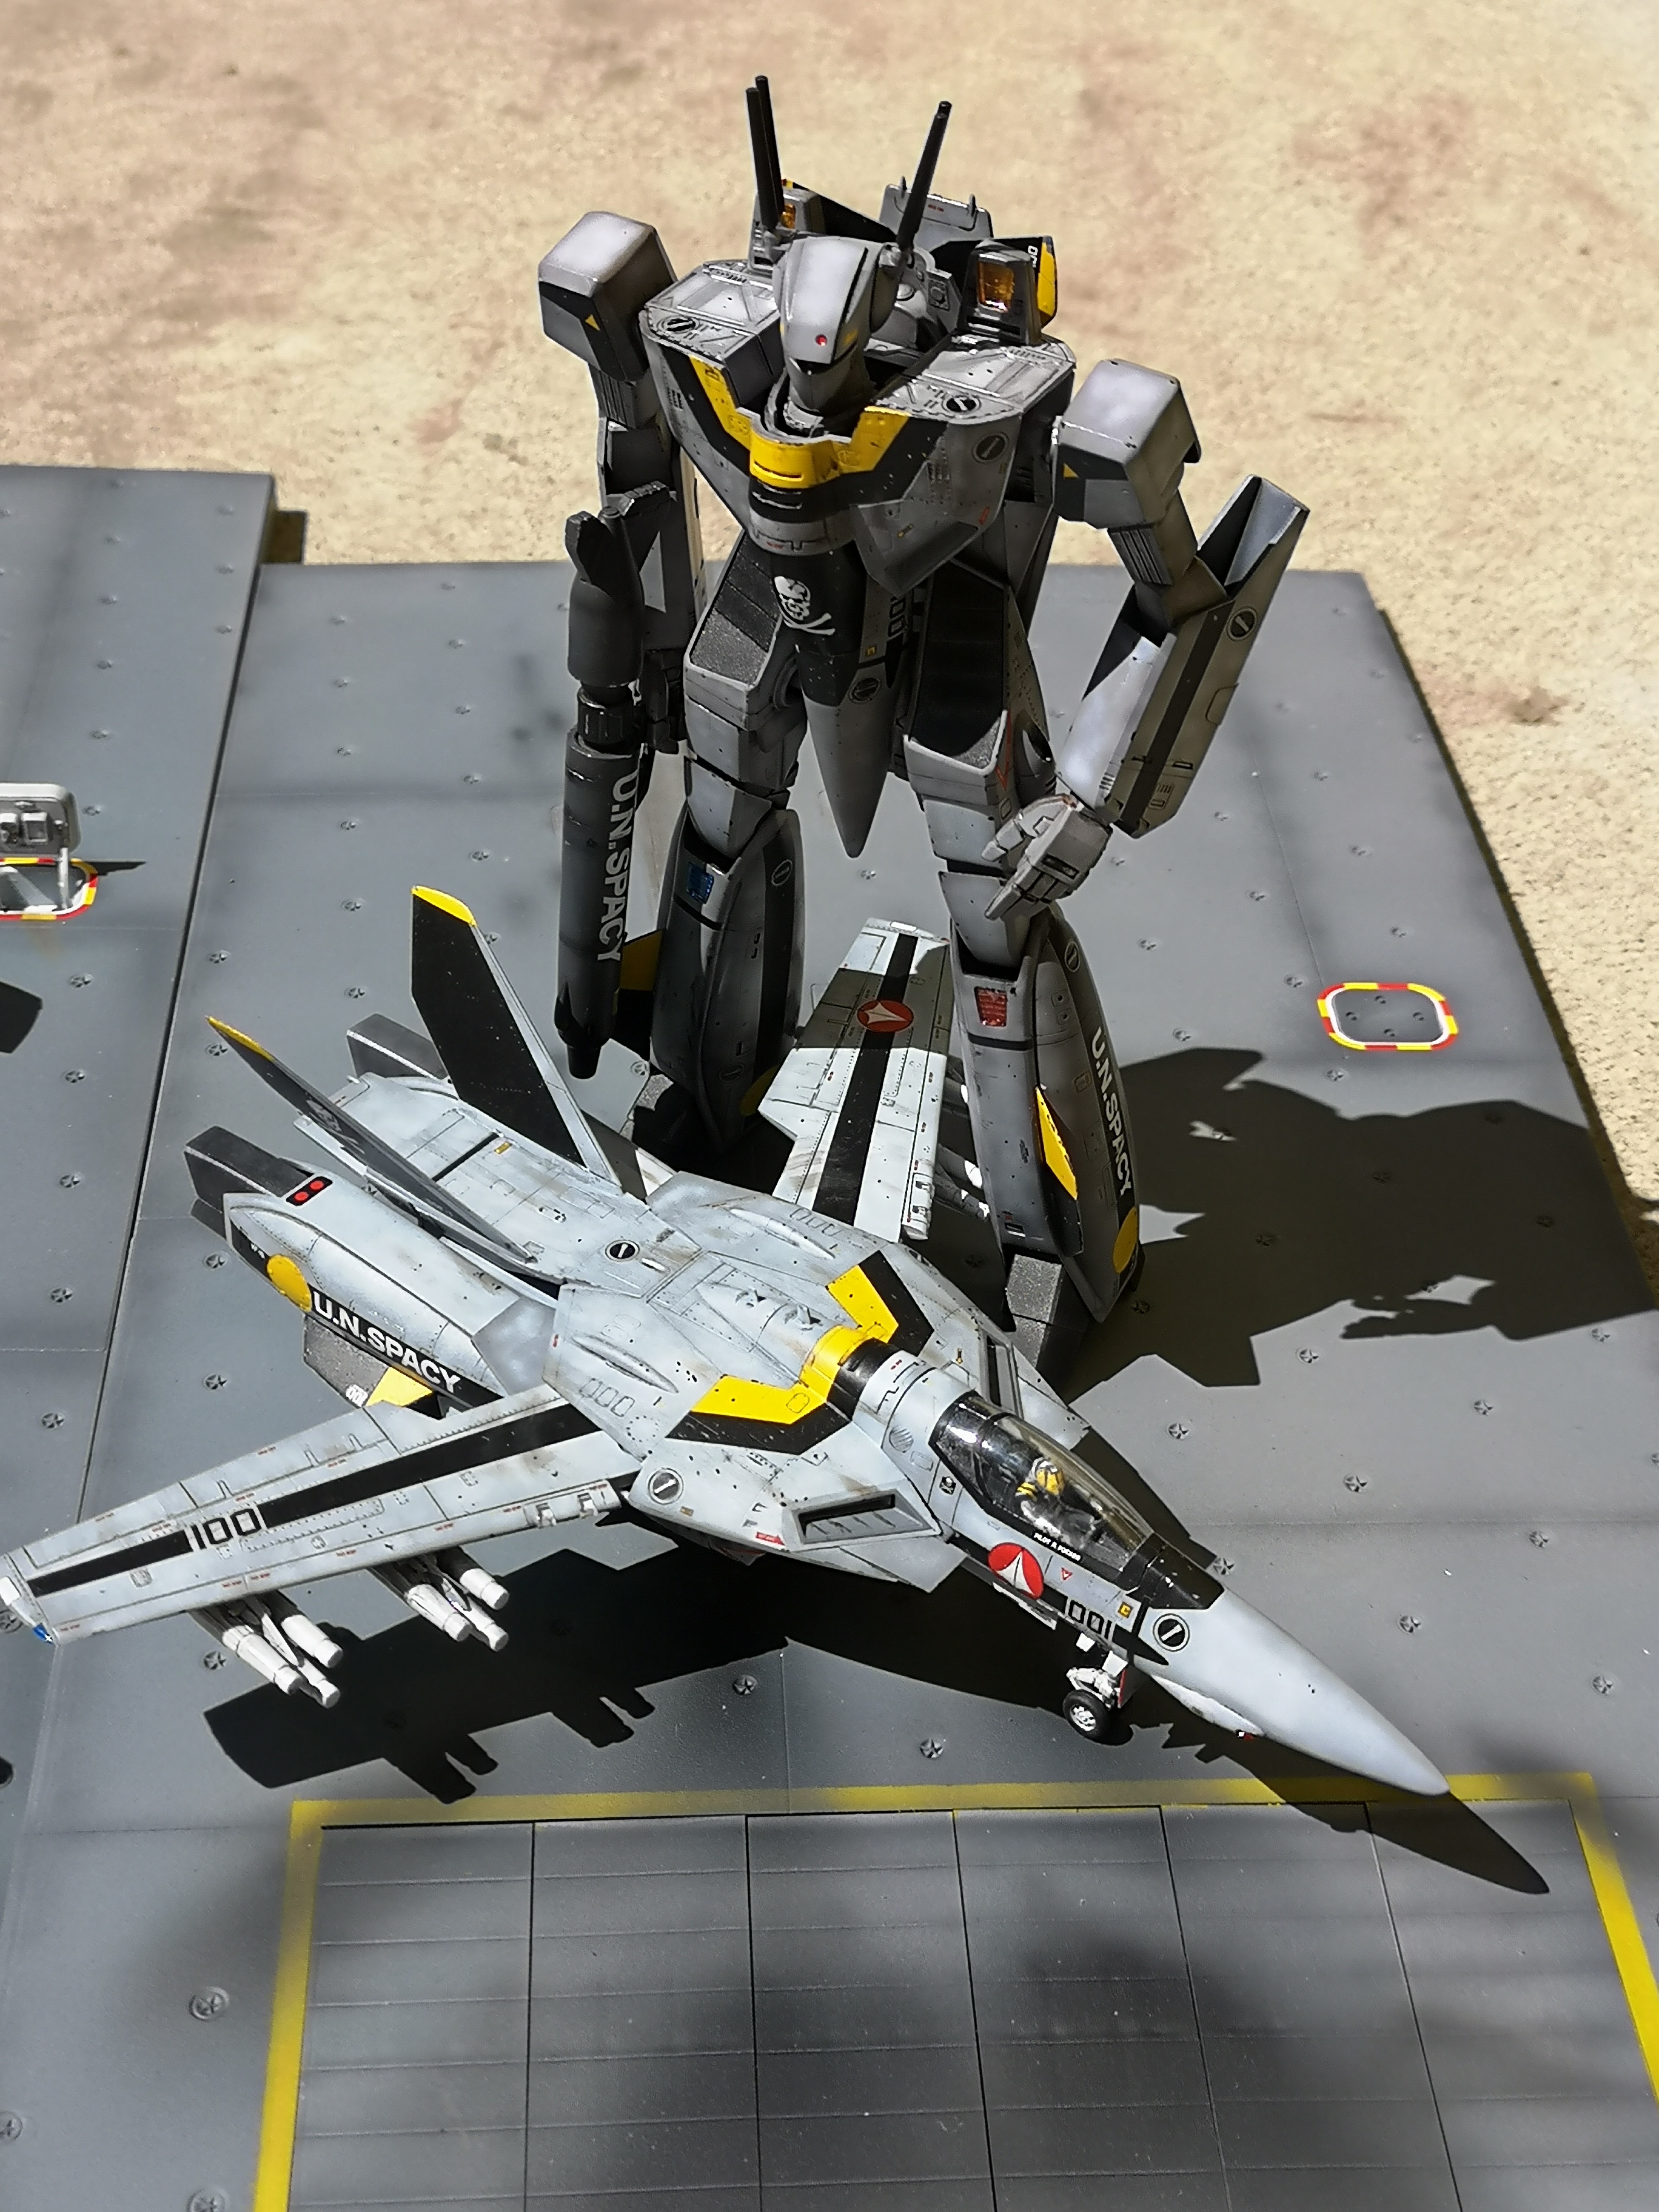
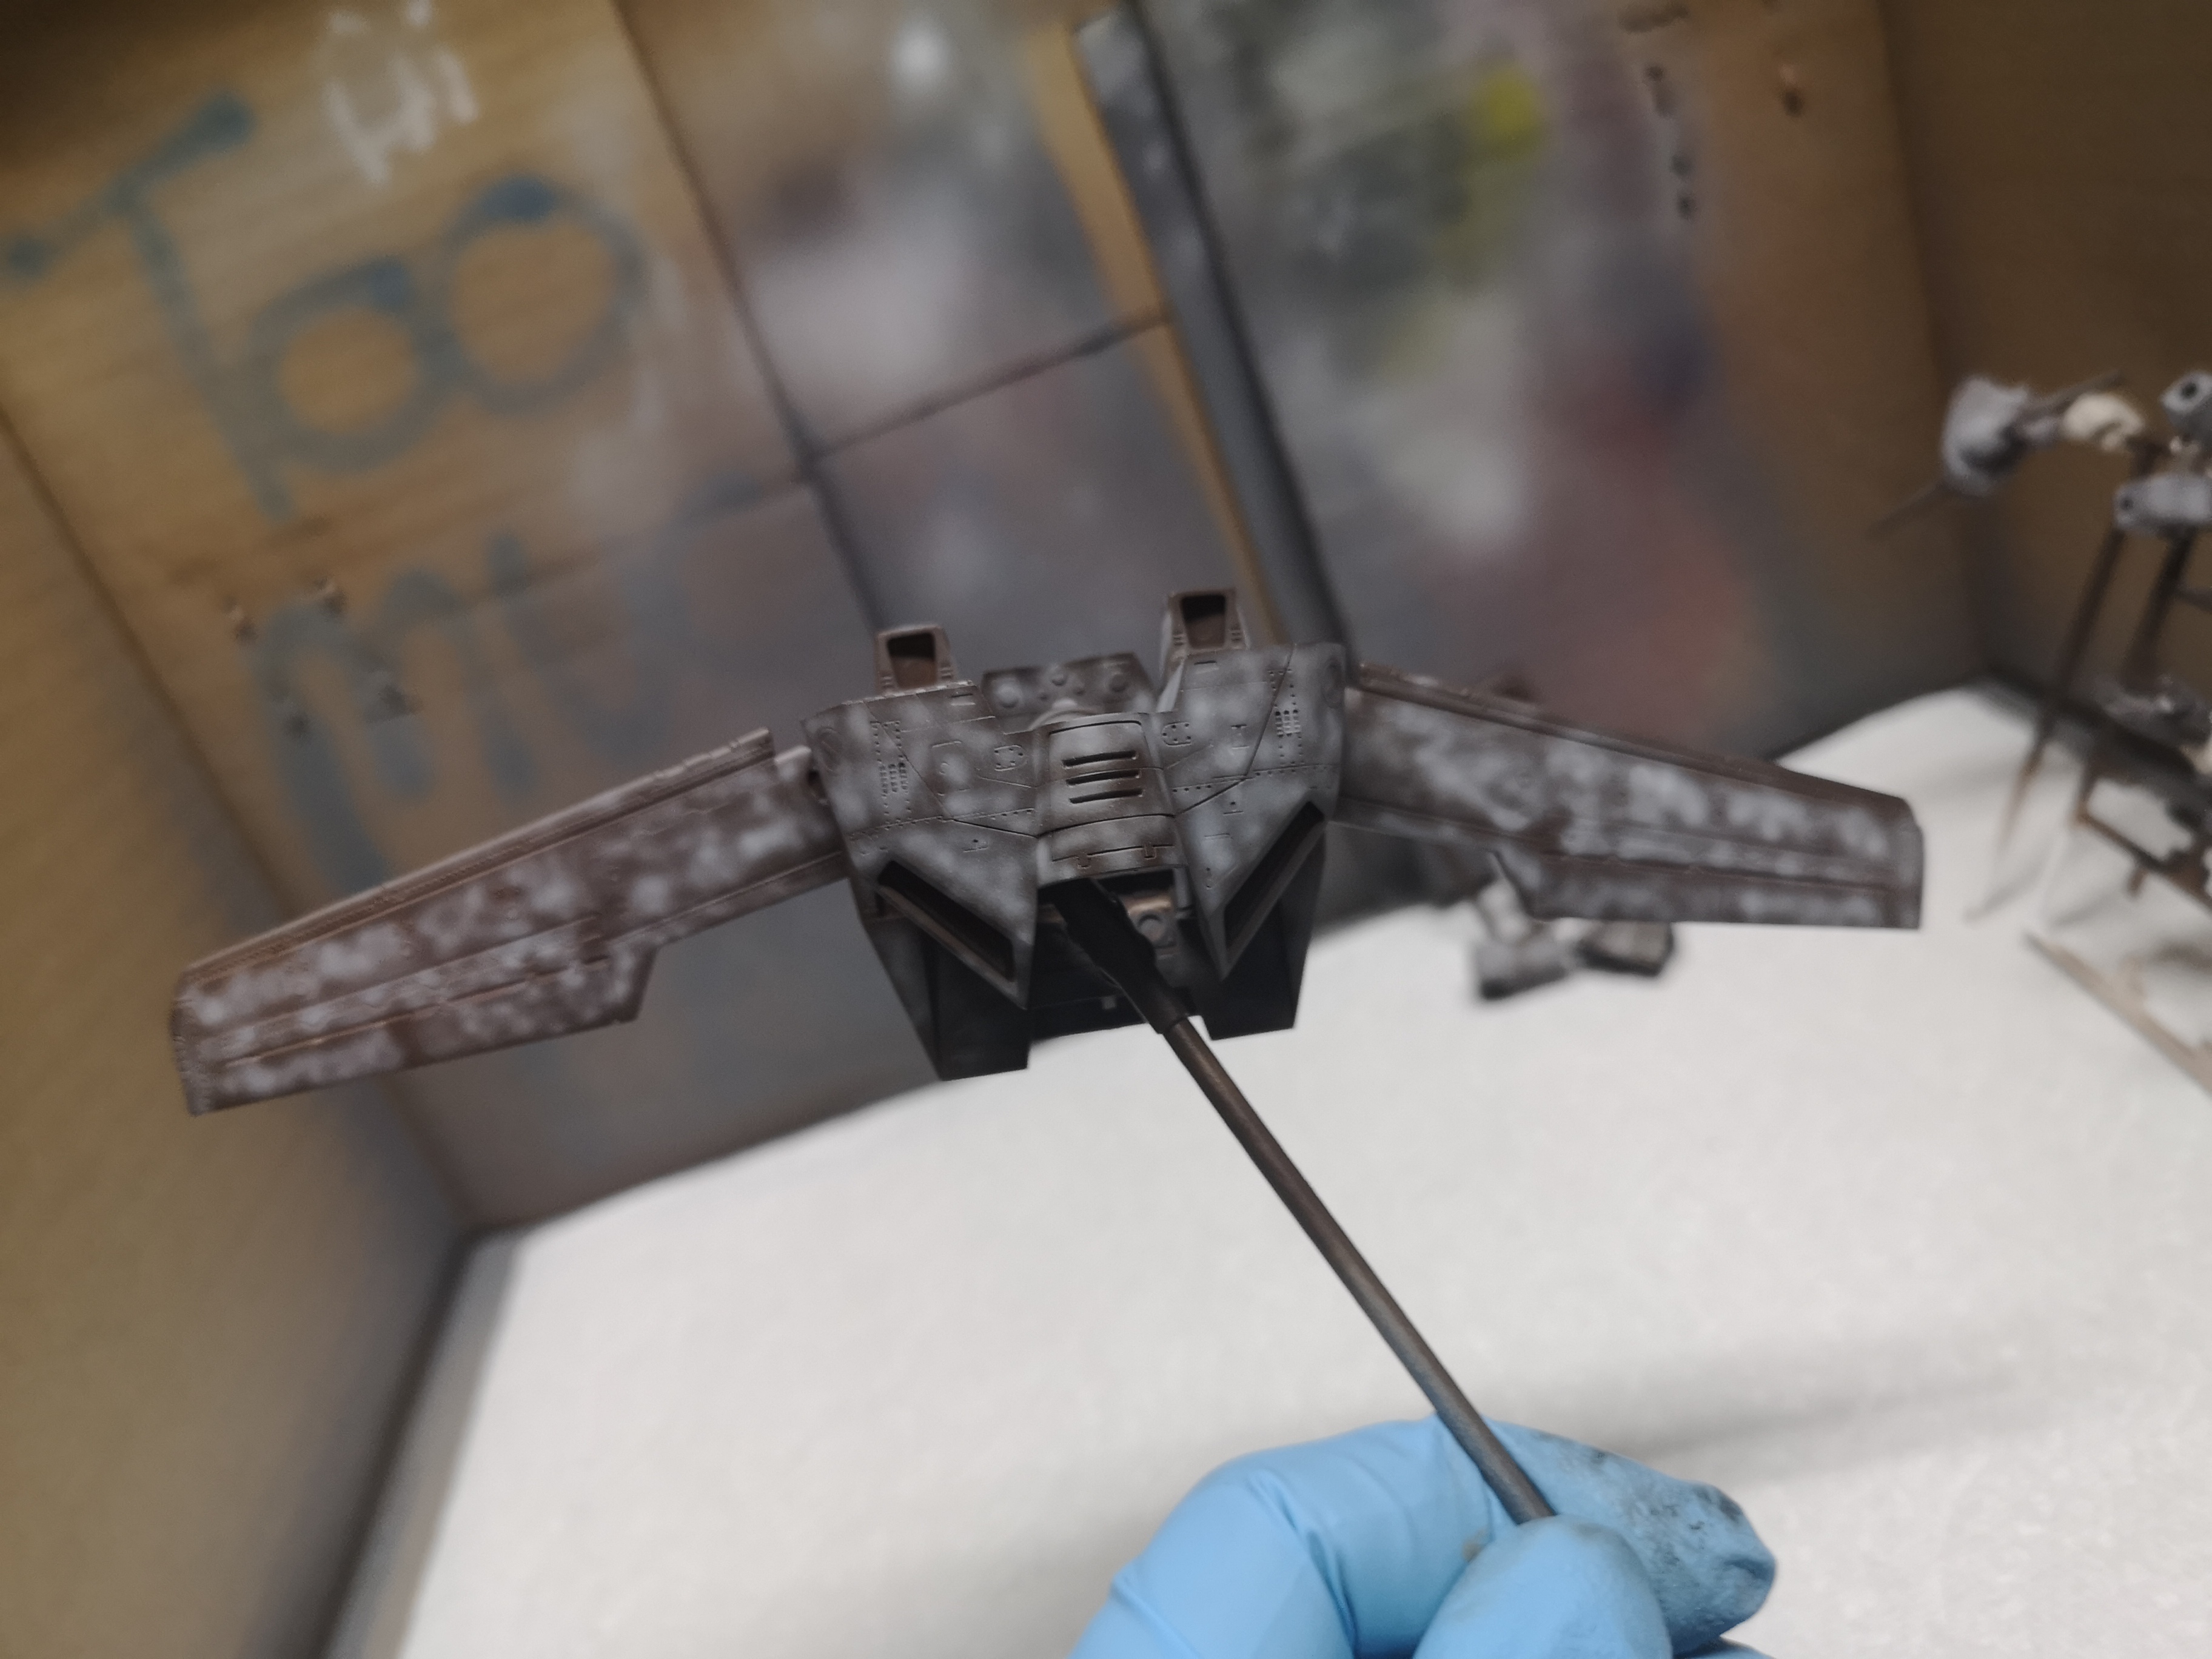
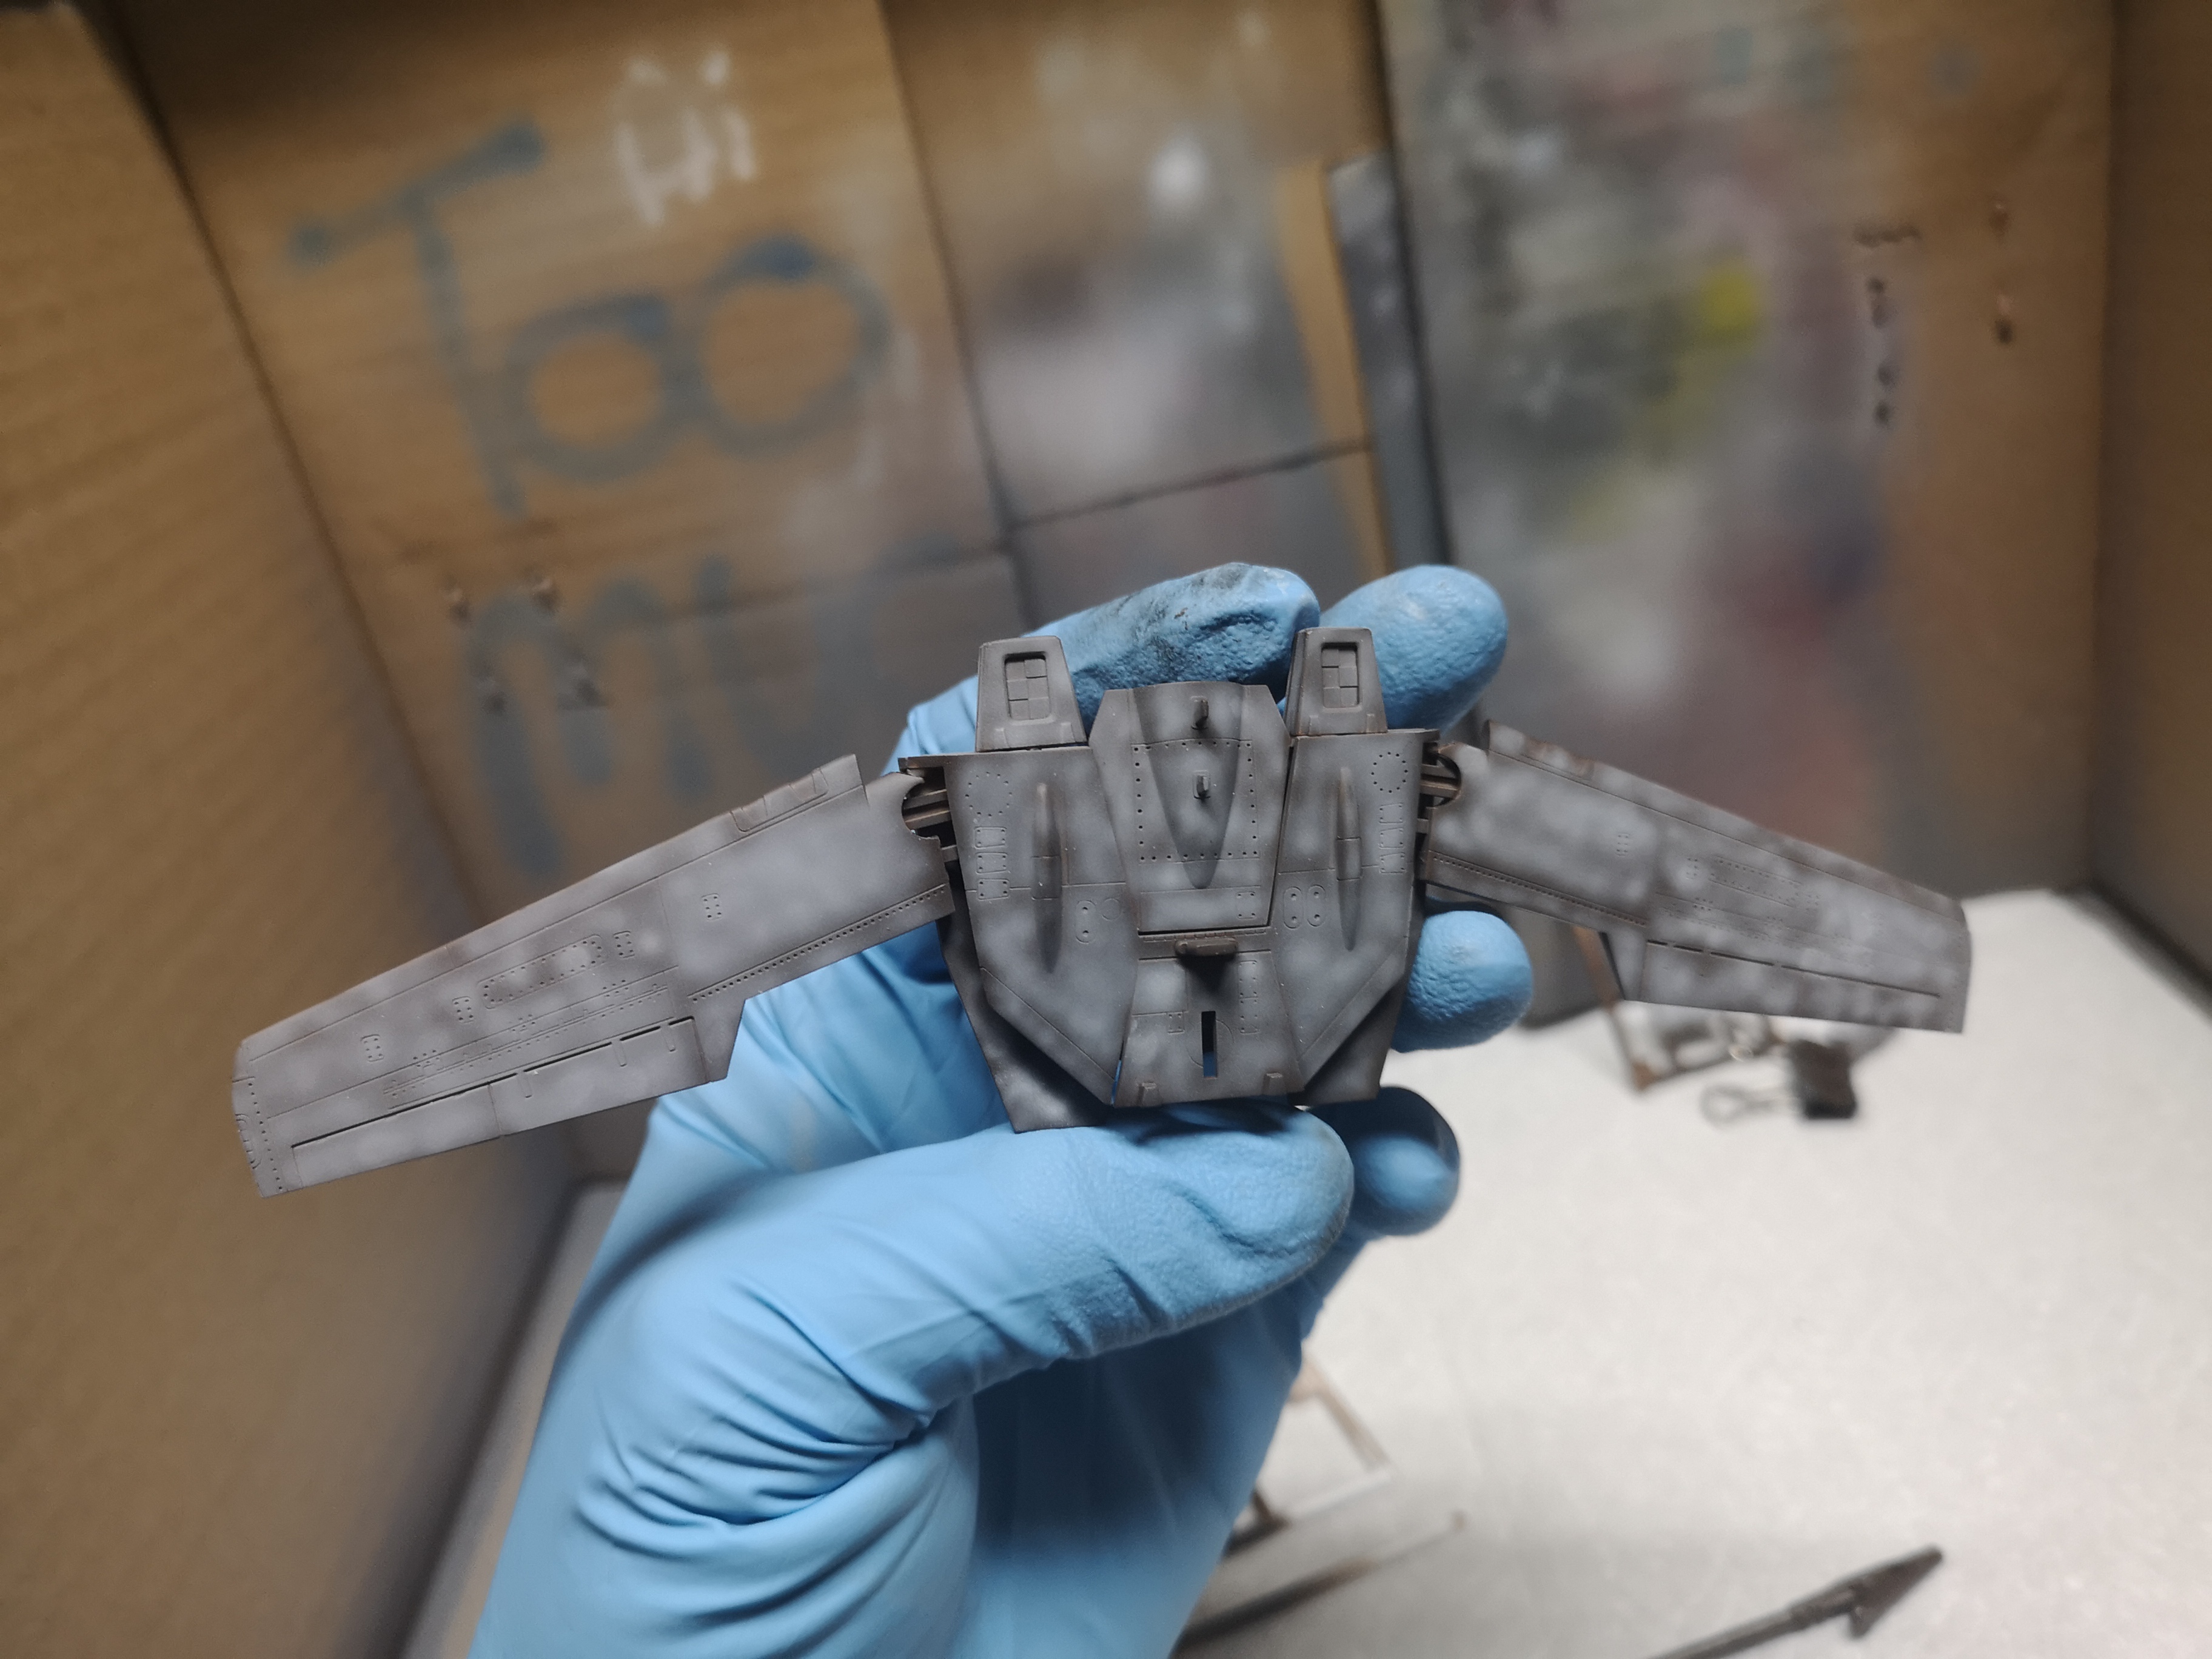
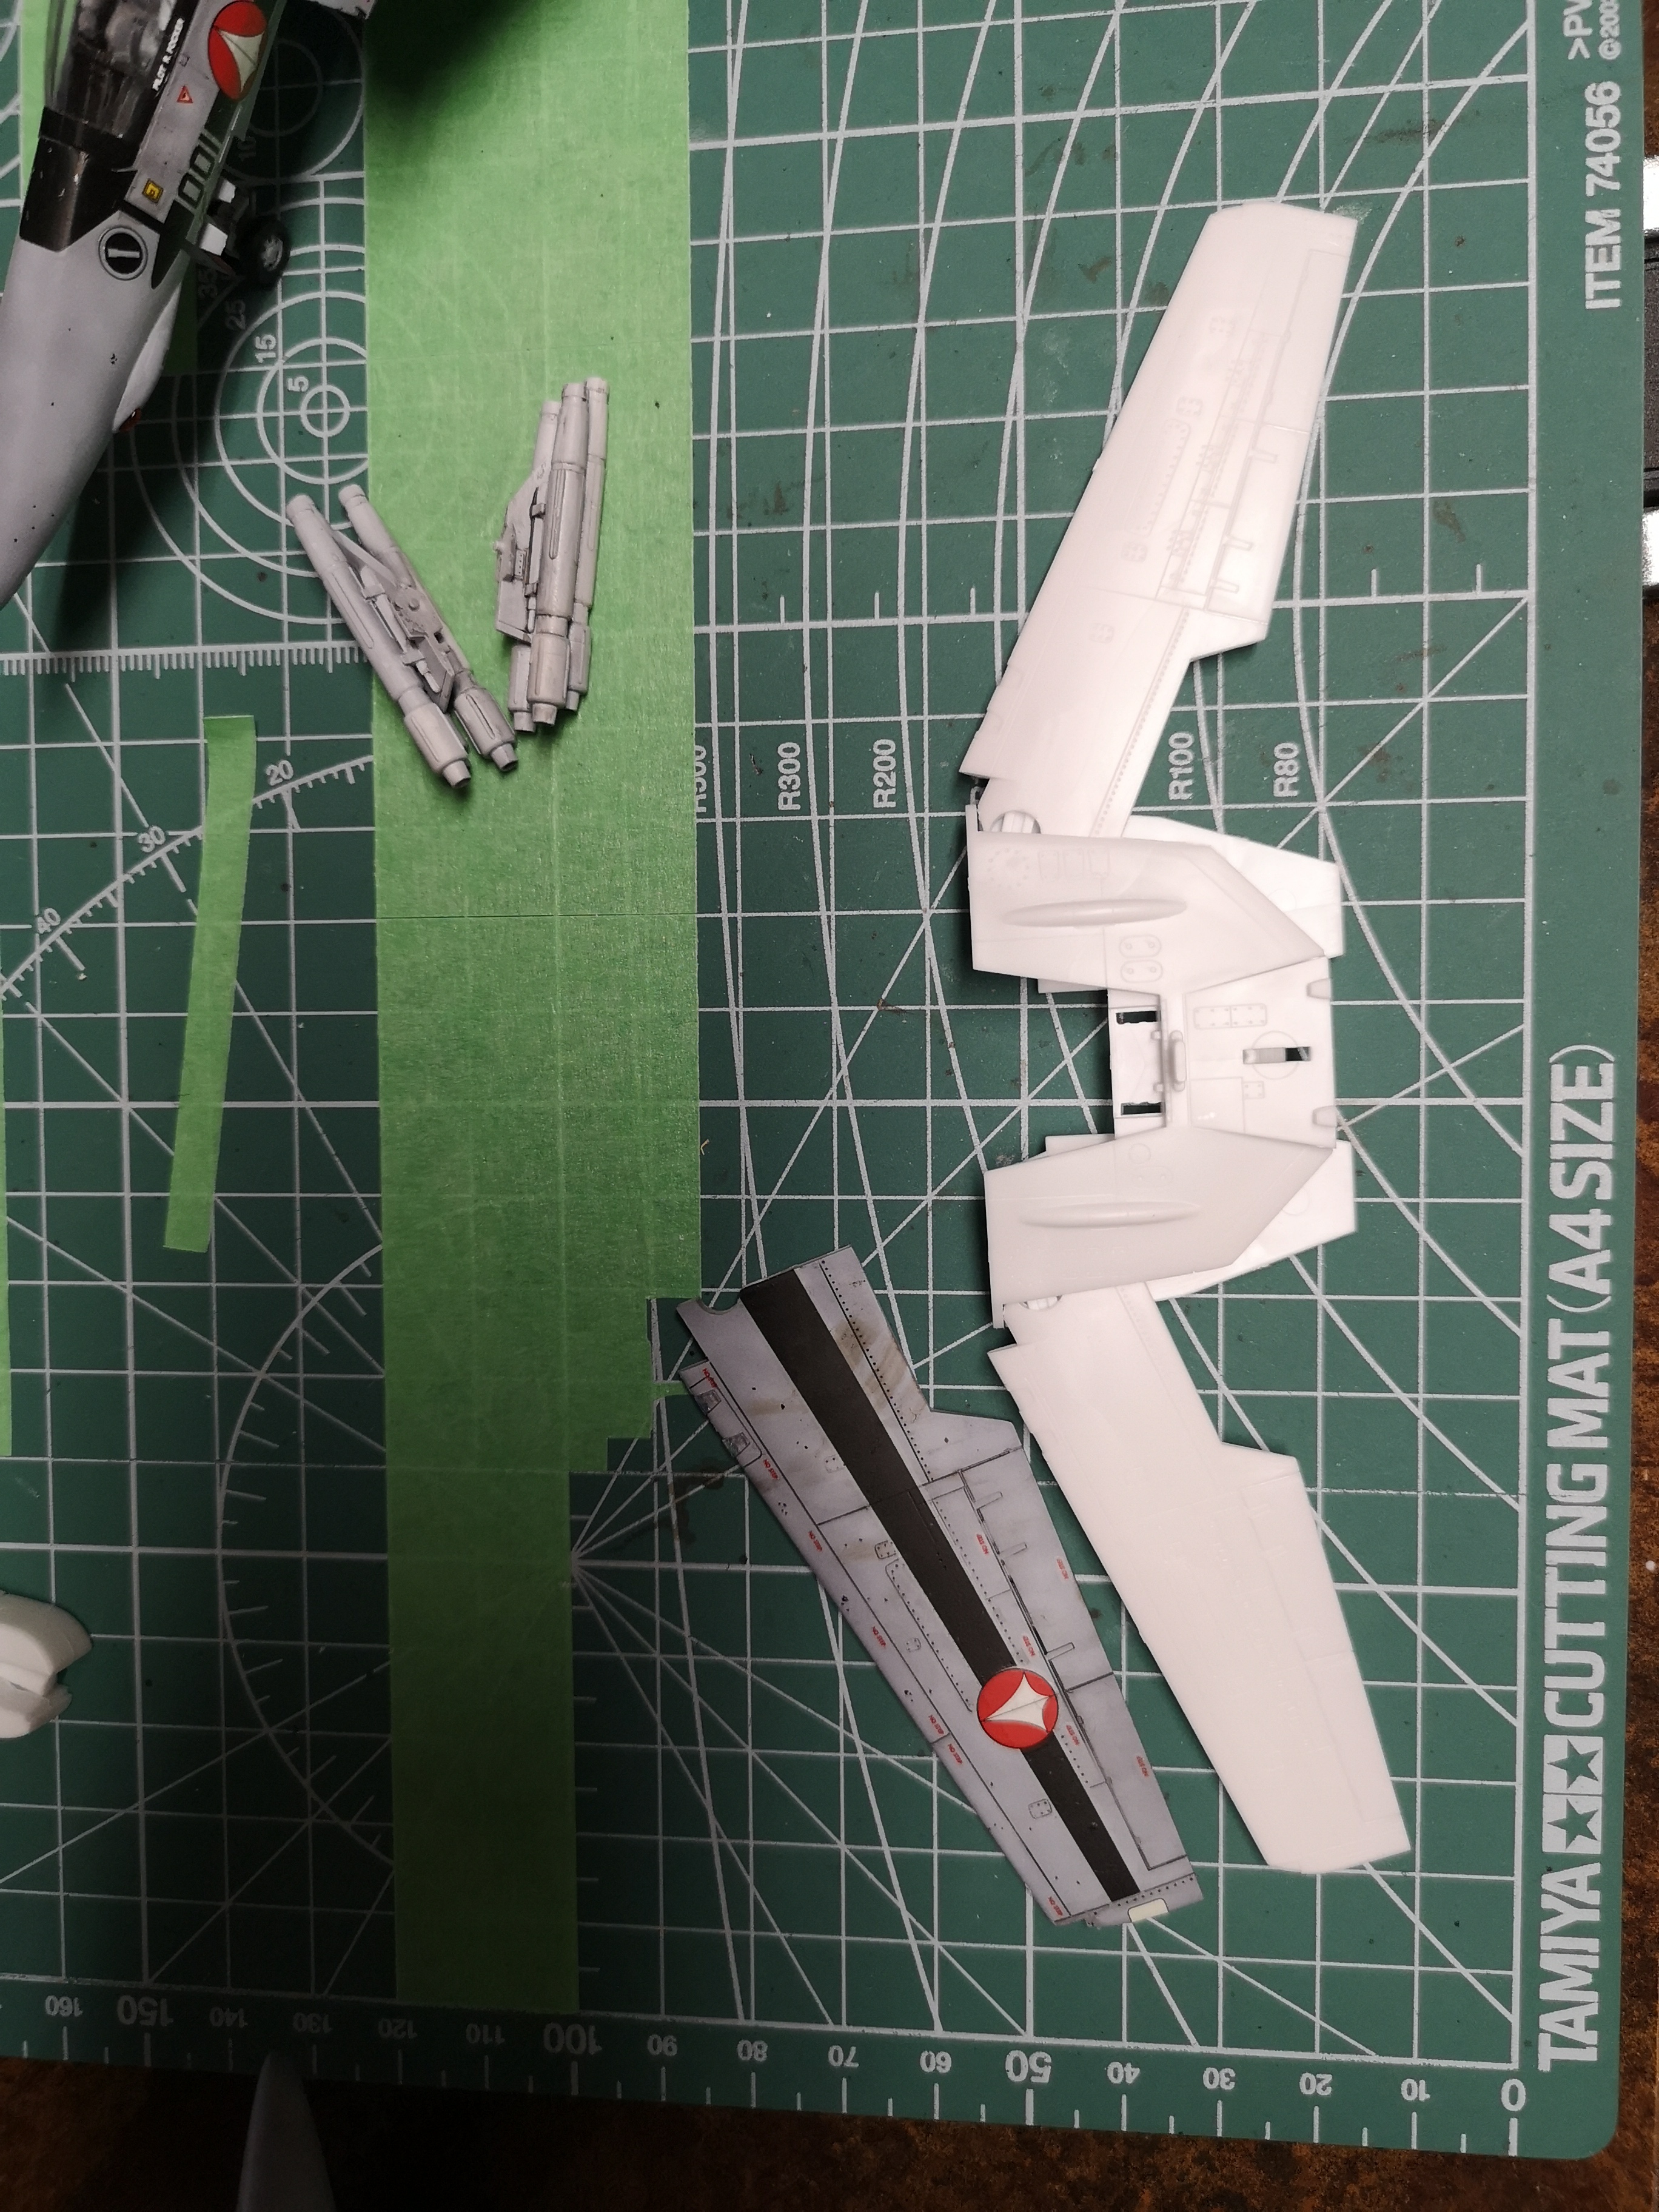
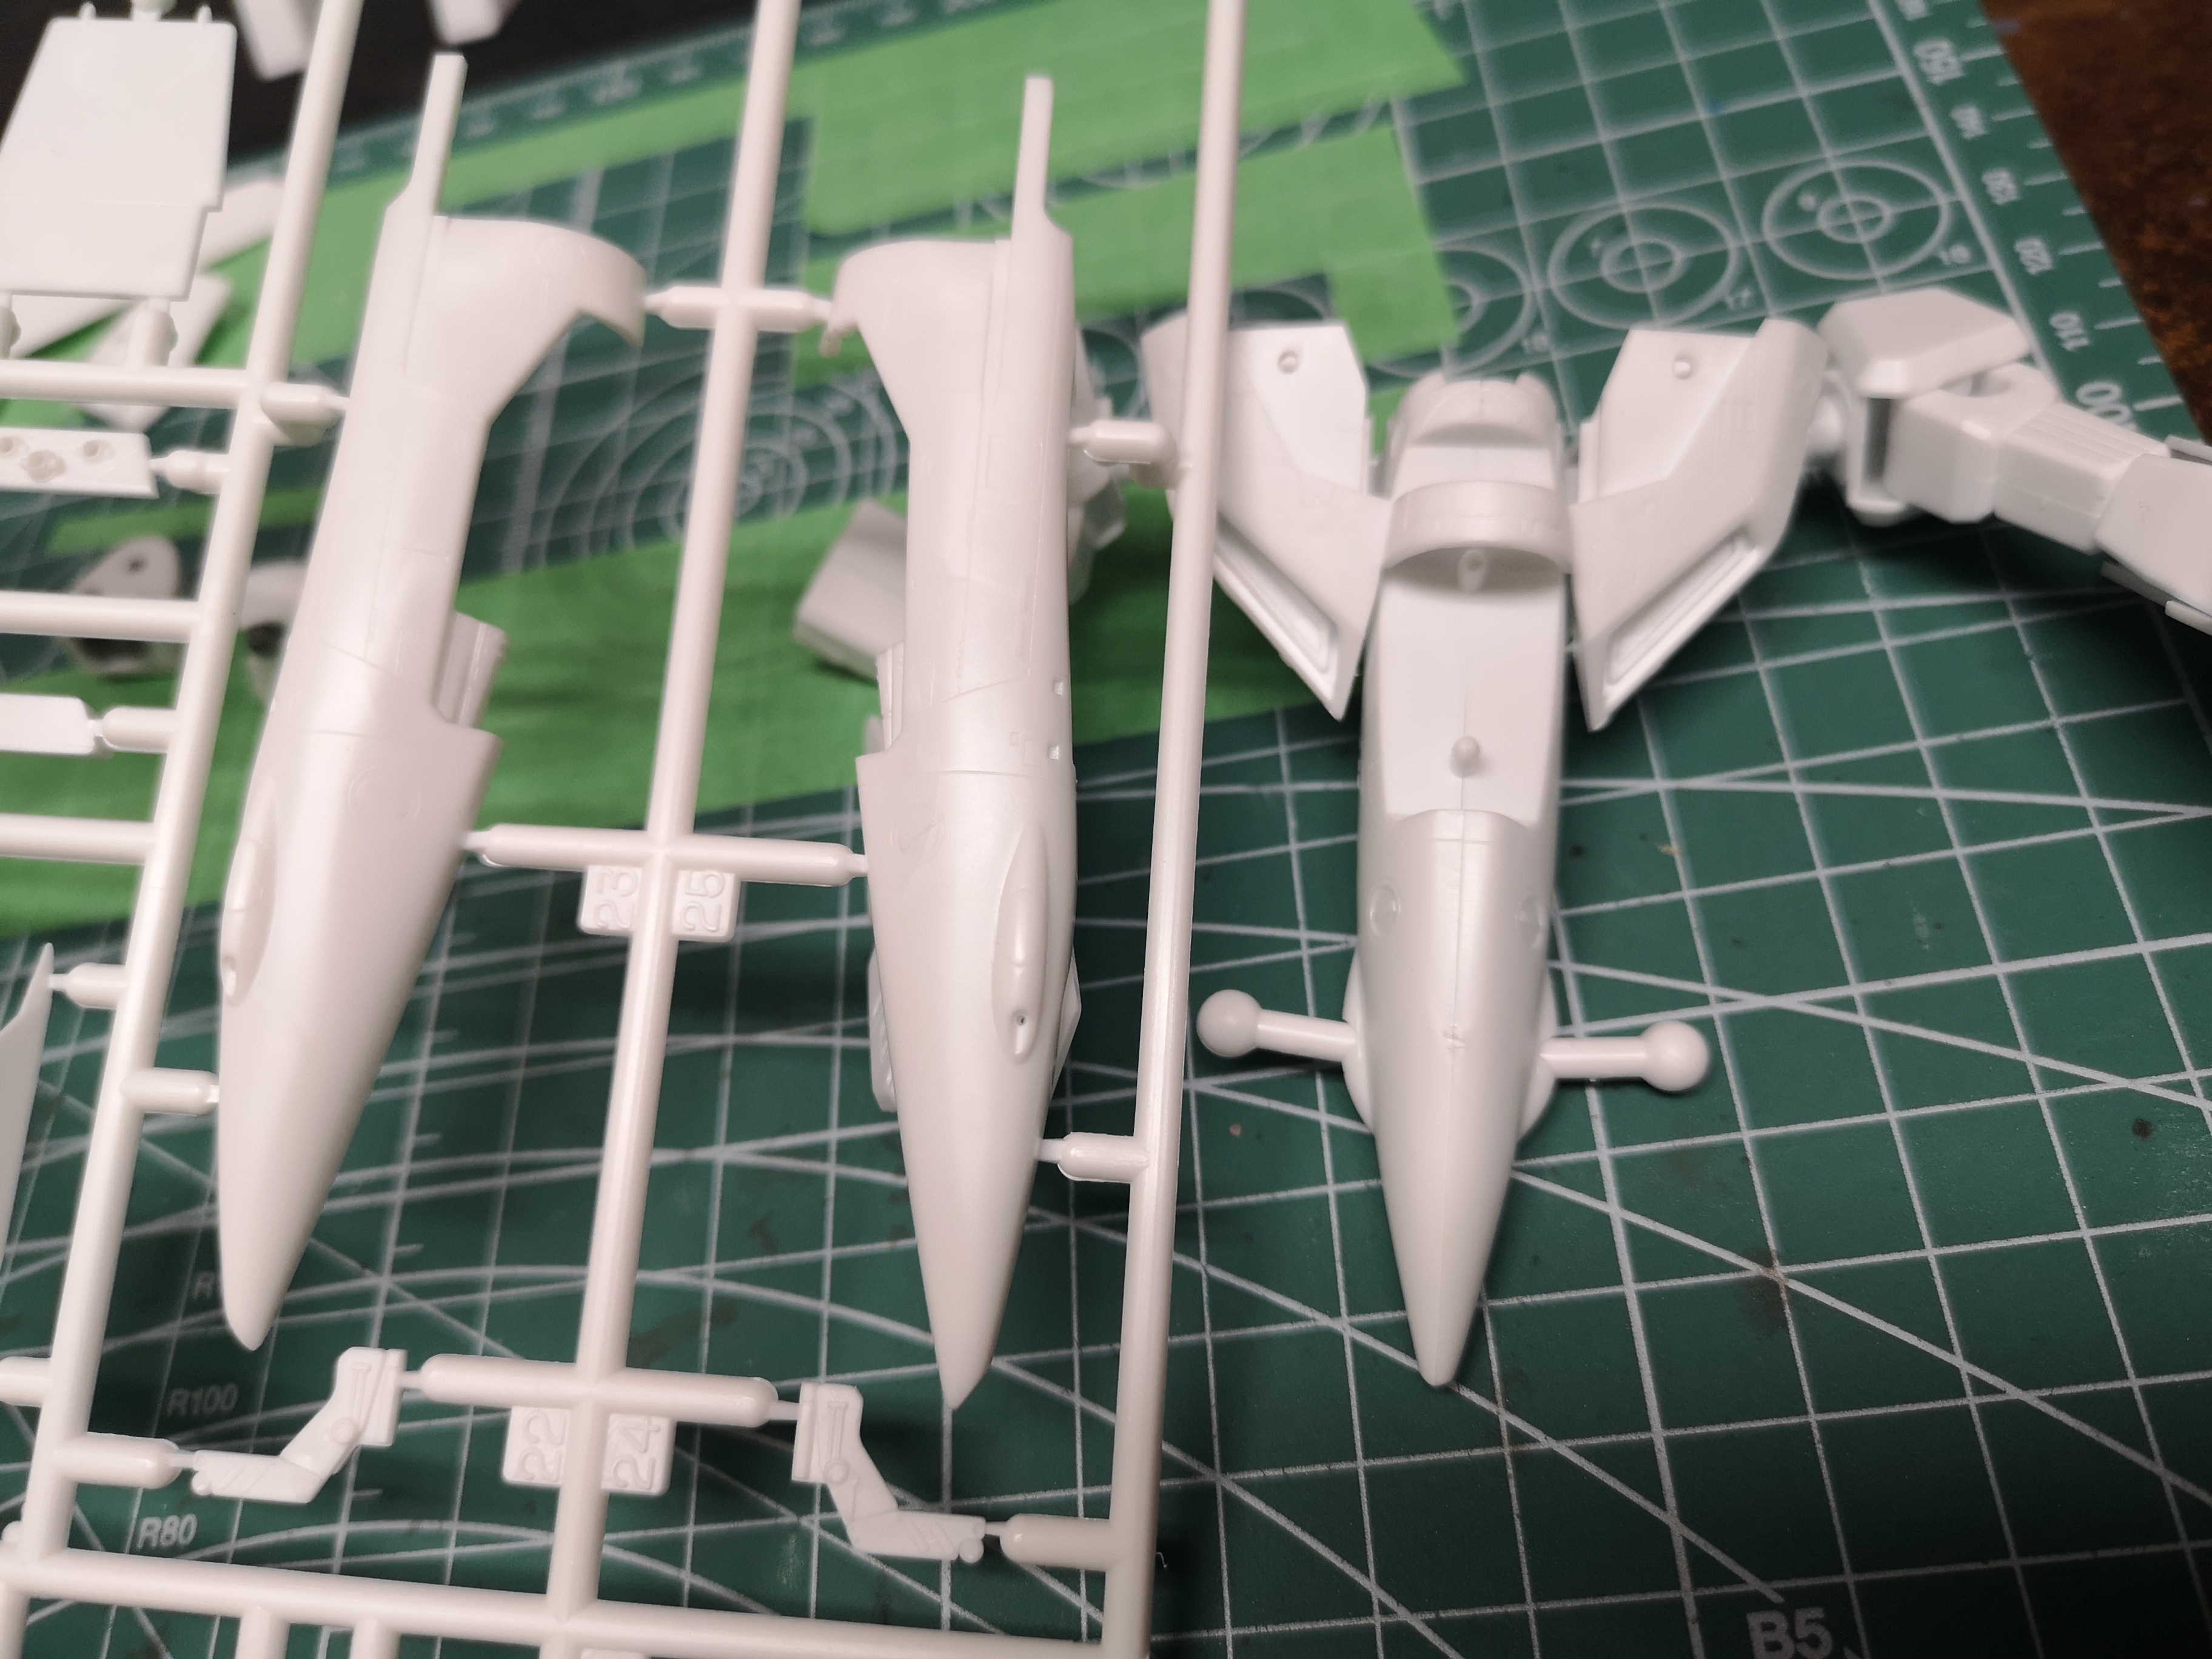
Comparison to the fighter wing.
The nose assembly fit together easily, unlike the fighter version, where there is an ill-fitting cockpit/landing gear bay section that keeps the halves from going together.

A lot bigger nubs for the Battroid version. The fighter version is a bit of a PITA.

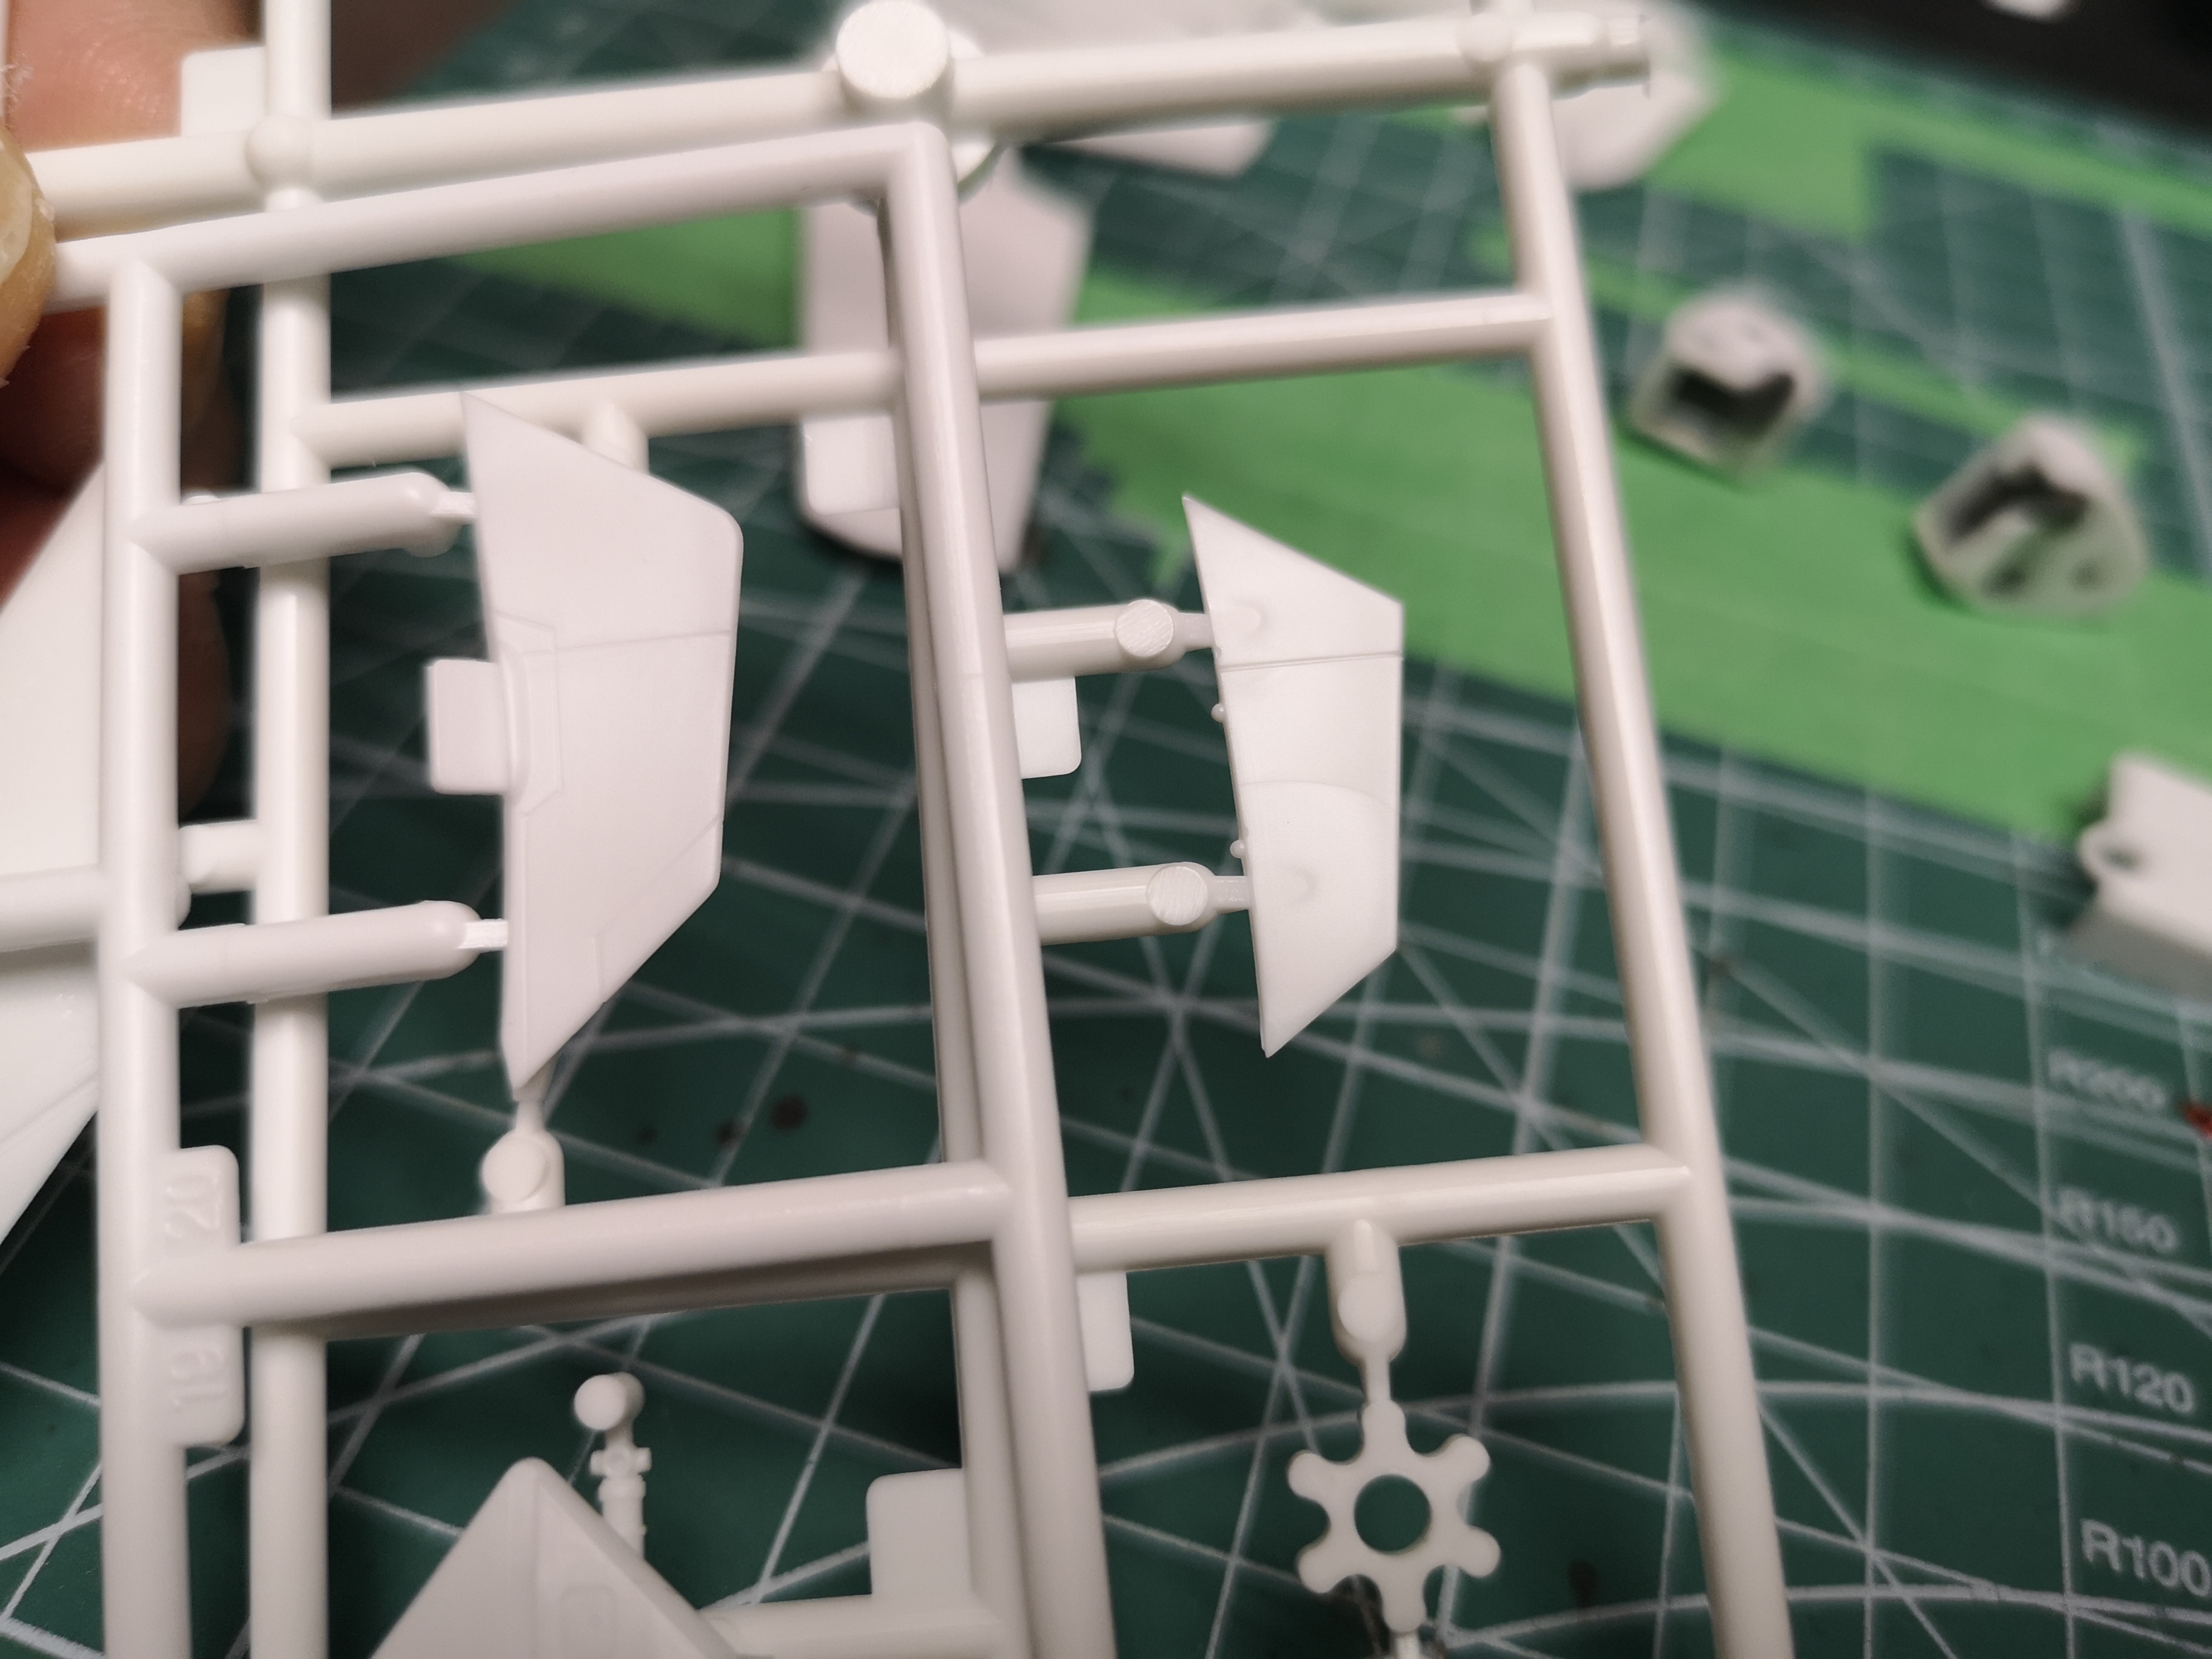
Larger tab for the fins on the Battroid.... Two useless pins on the fighter version which breaks quite easily.

Not sure why Hasegawa made the front of the foot two pieces for the fighter when it could easily have been accomplished as a one piece like in the Battroid.
It was fairly easy to get this far.
This was one part I found overly complicated, and a weak point of the kit. With the large intakes, the movement of the hips is extremely restricted anyway, so I'm not sure why Hasegawa when to this mu h trouble for the hip joint.

-
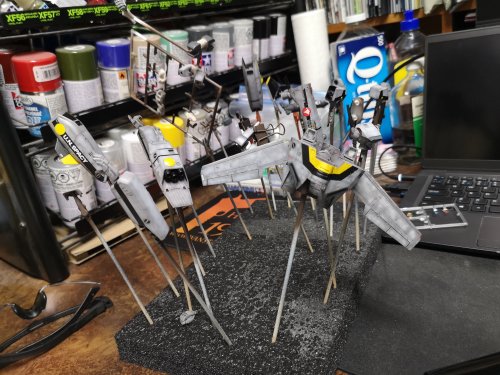
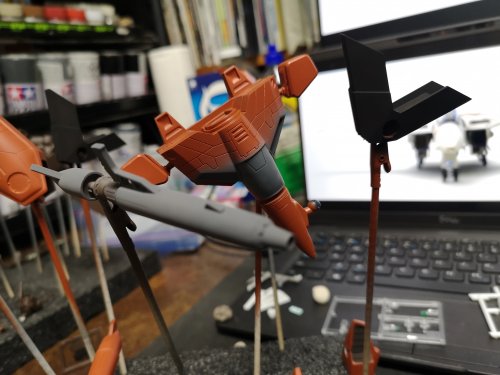
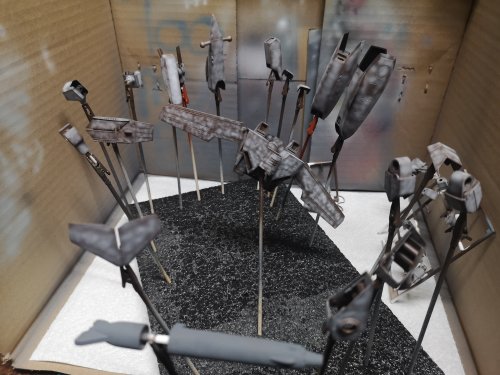
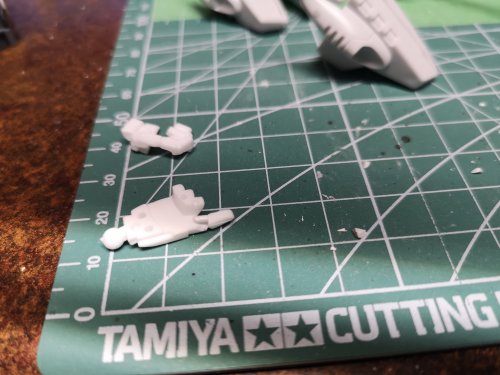
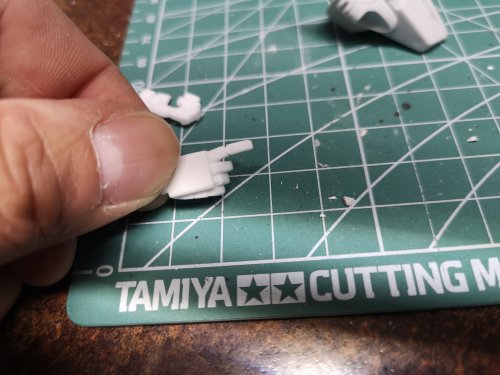
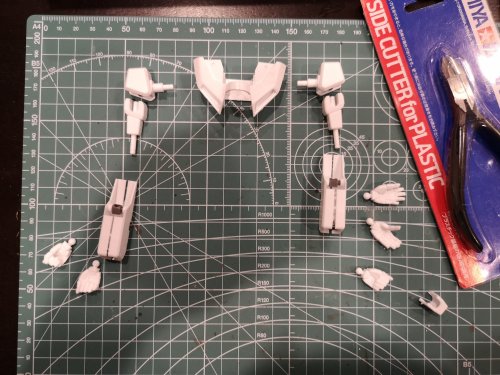
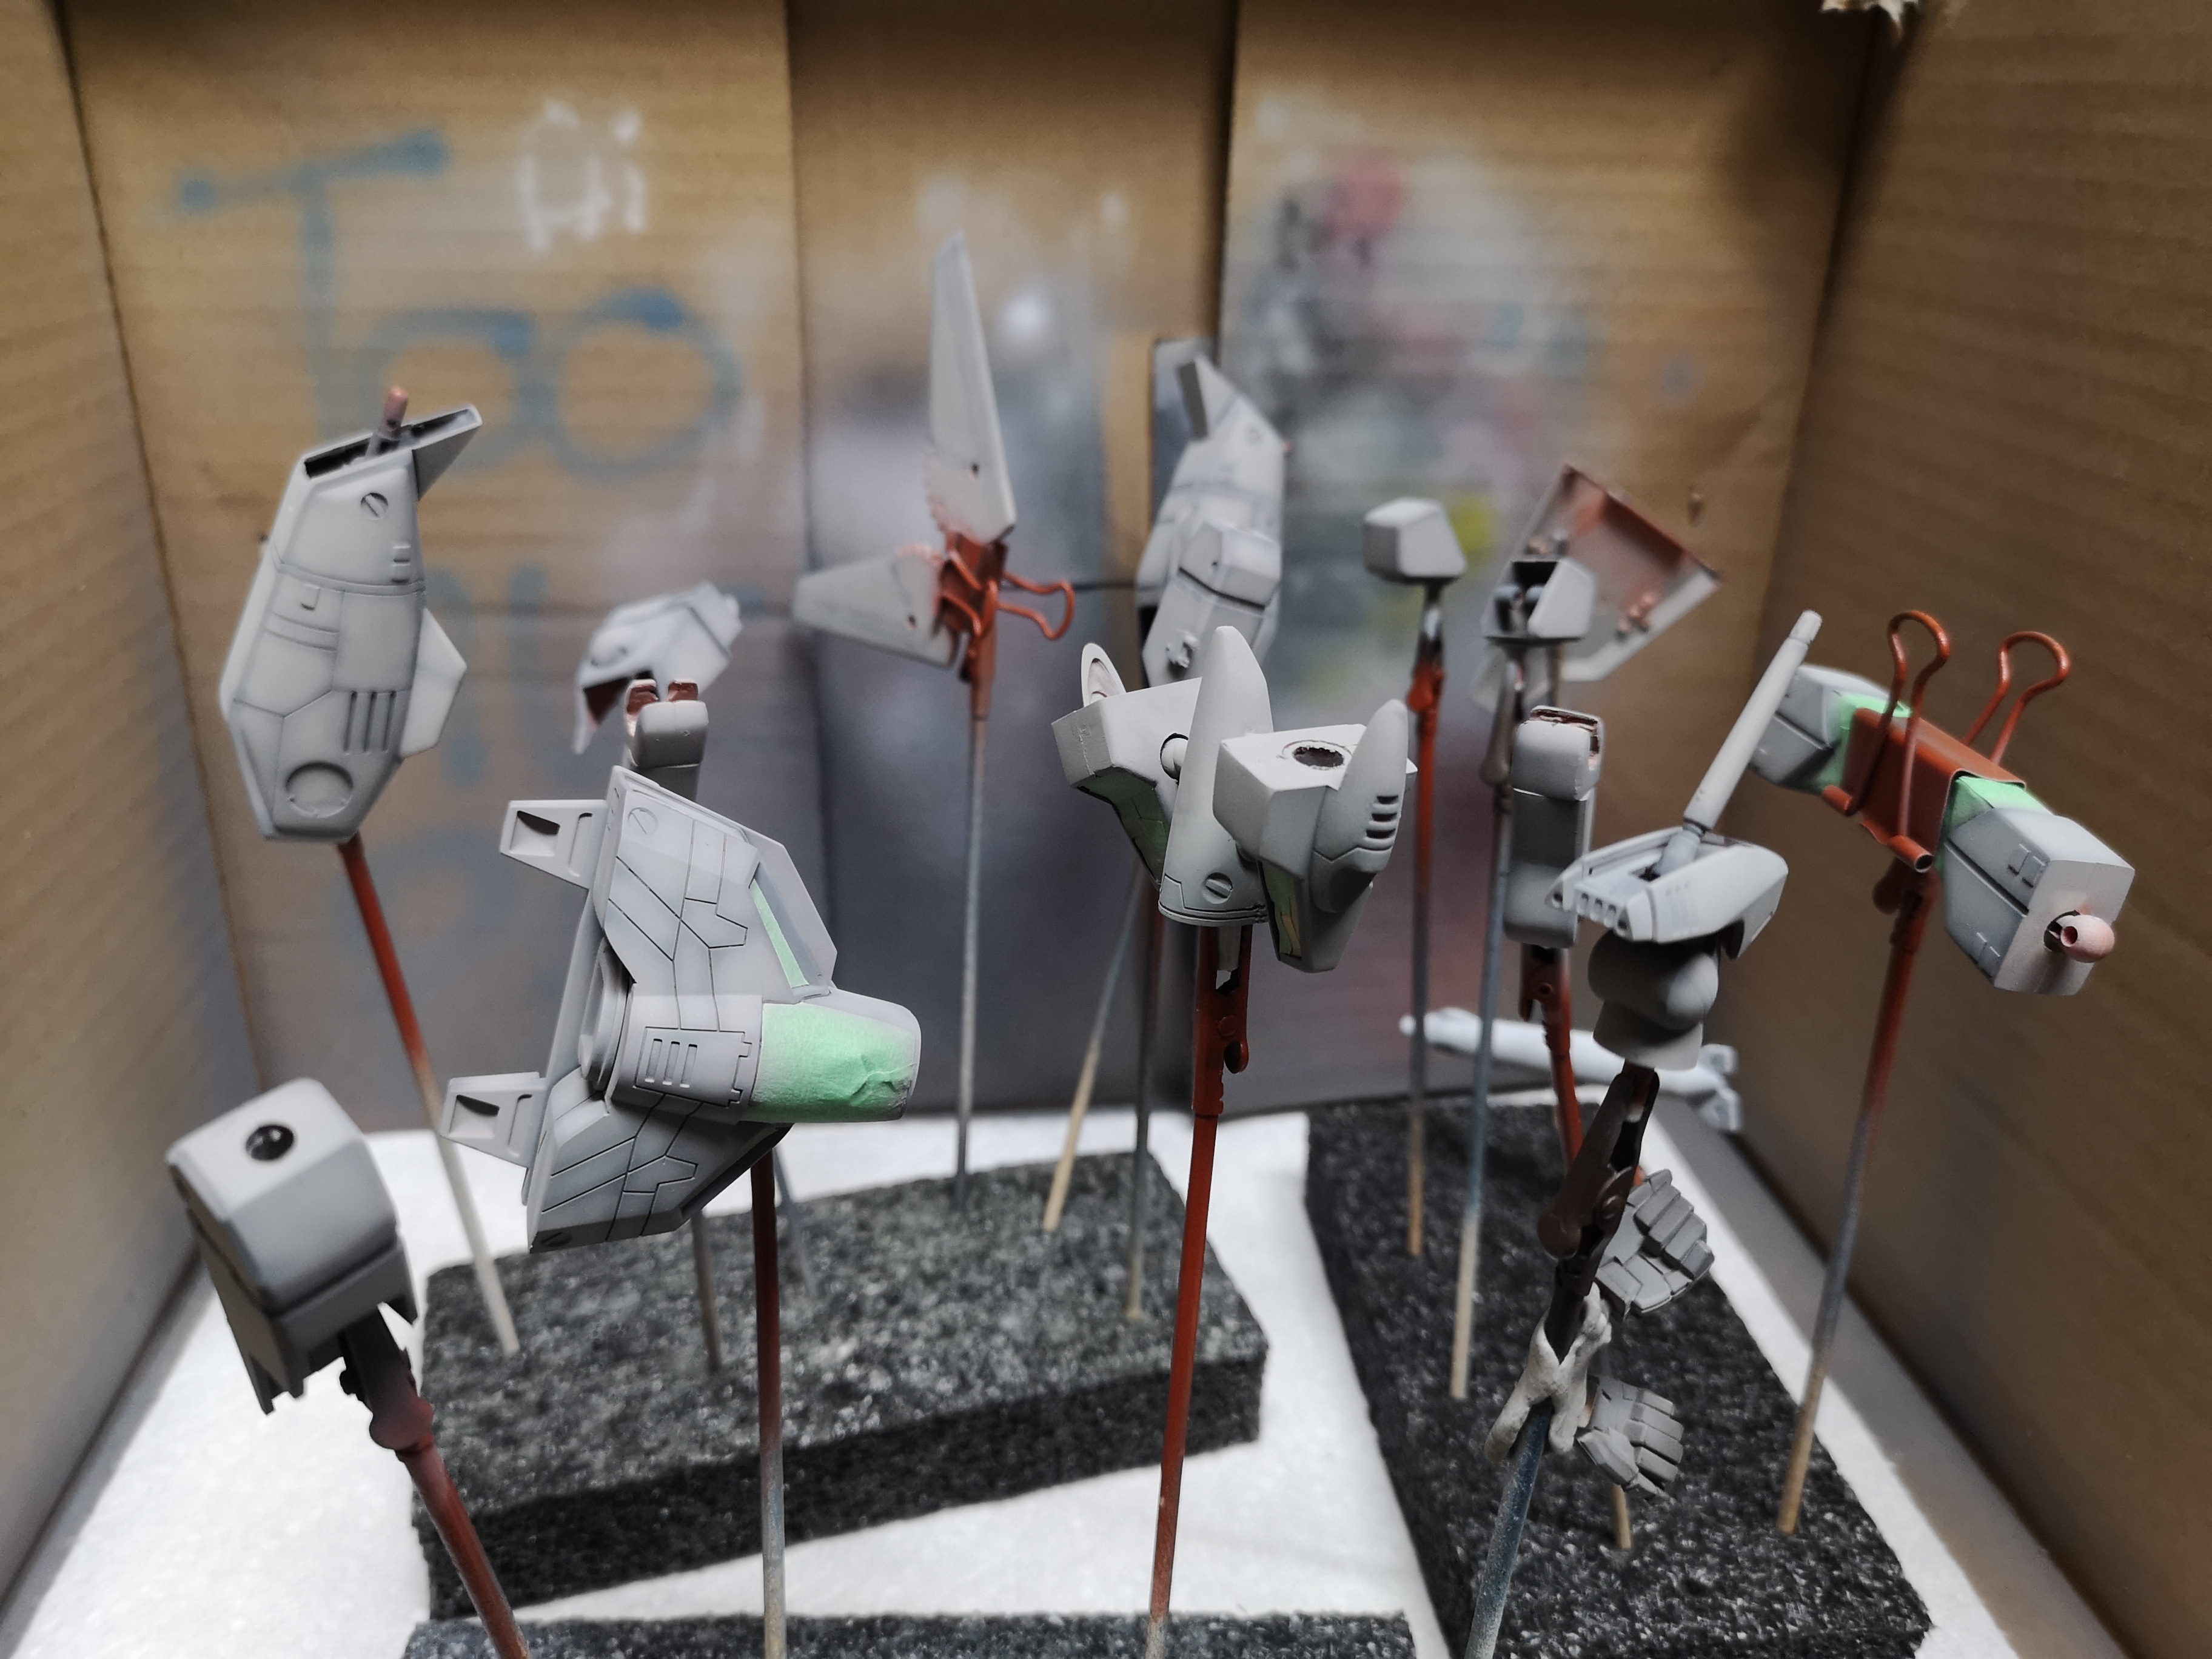
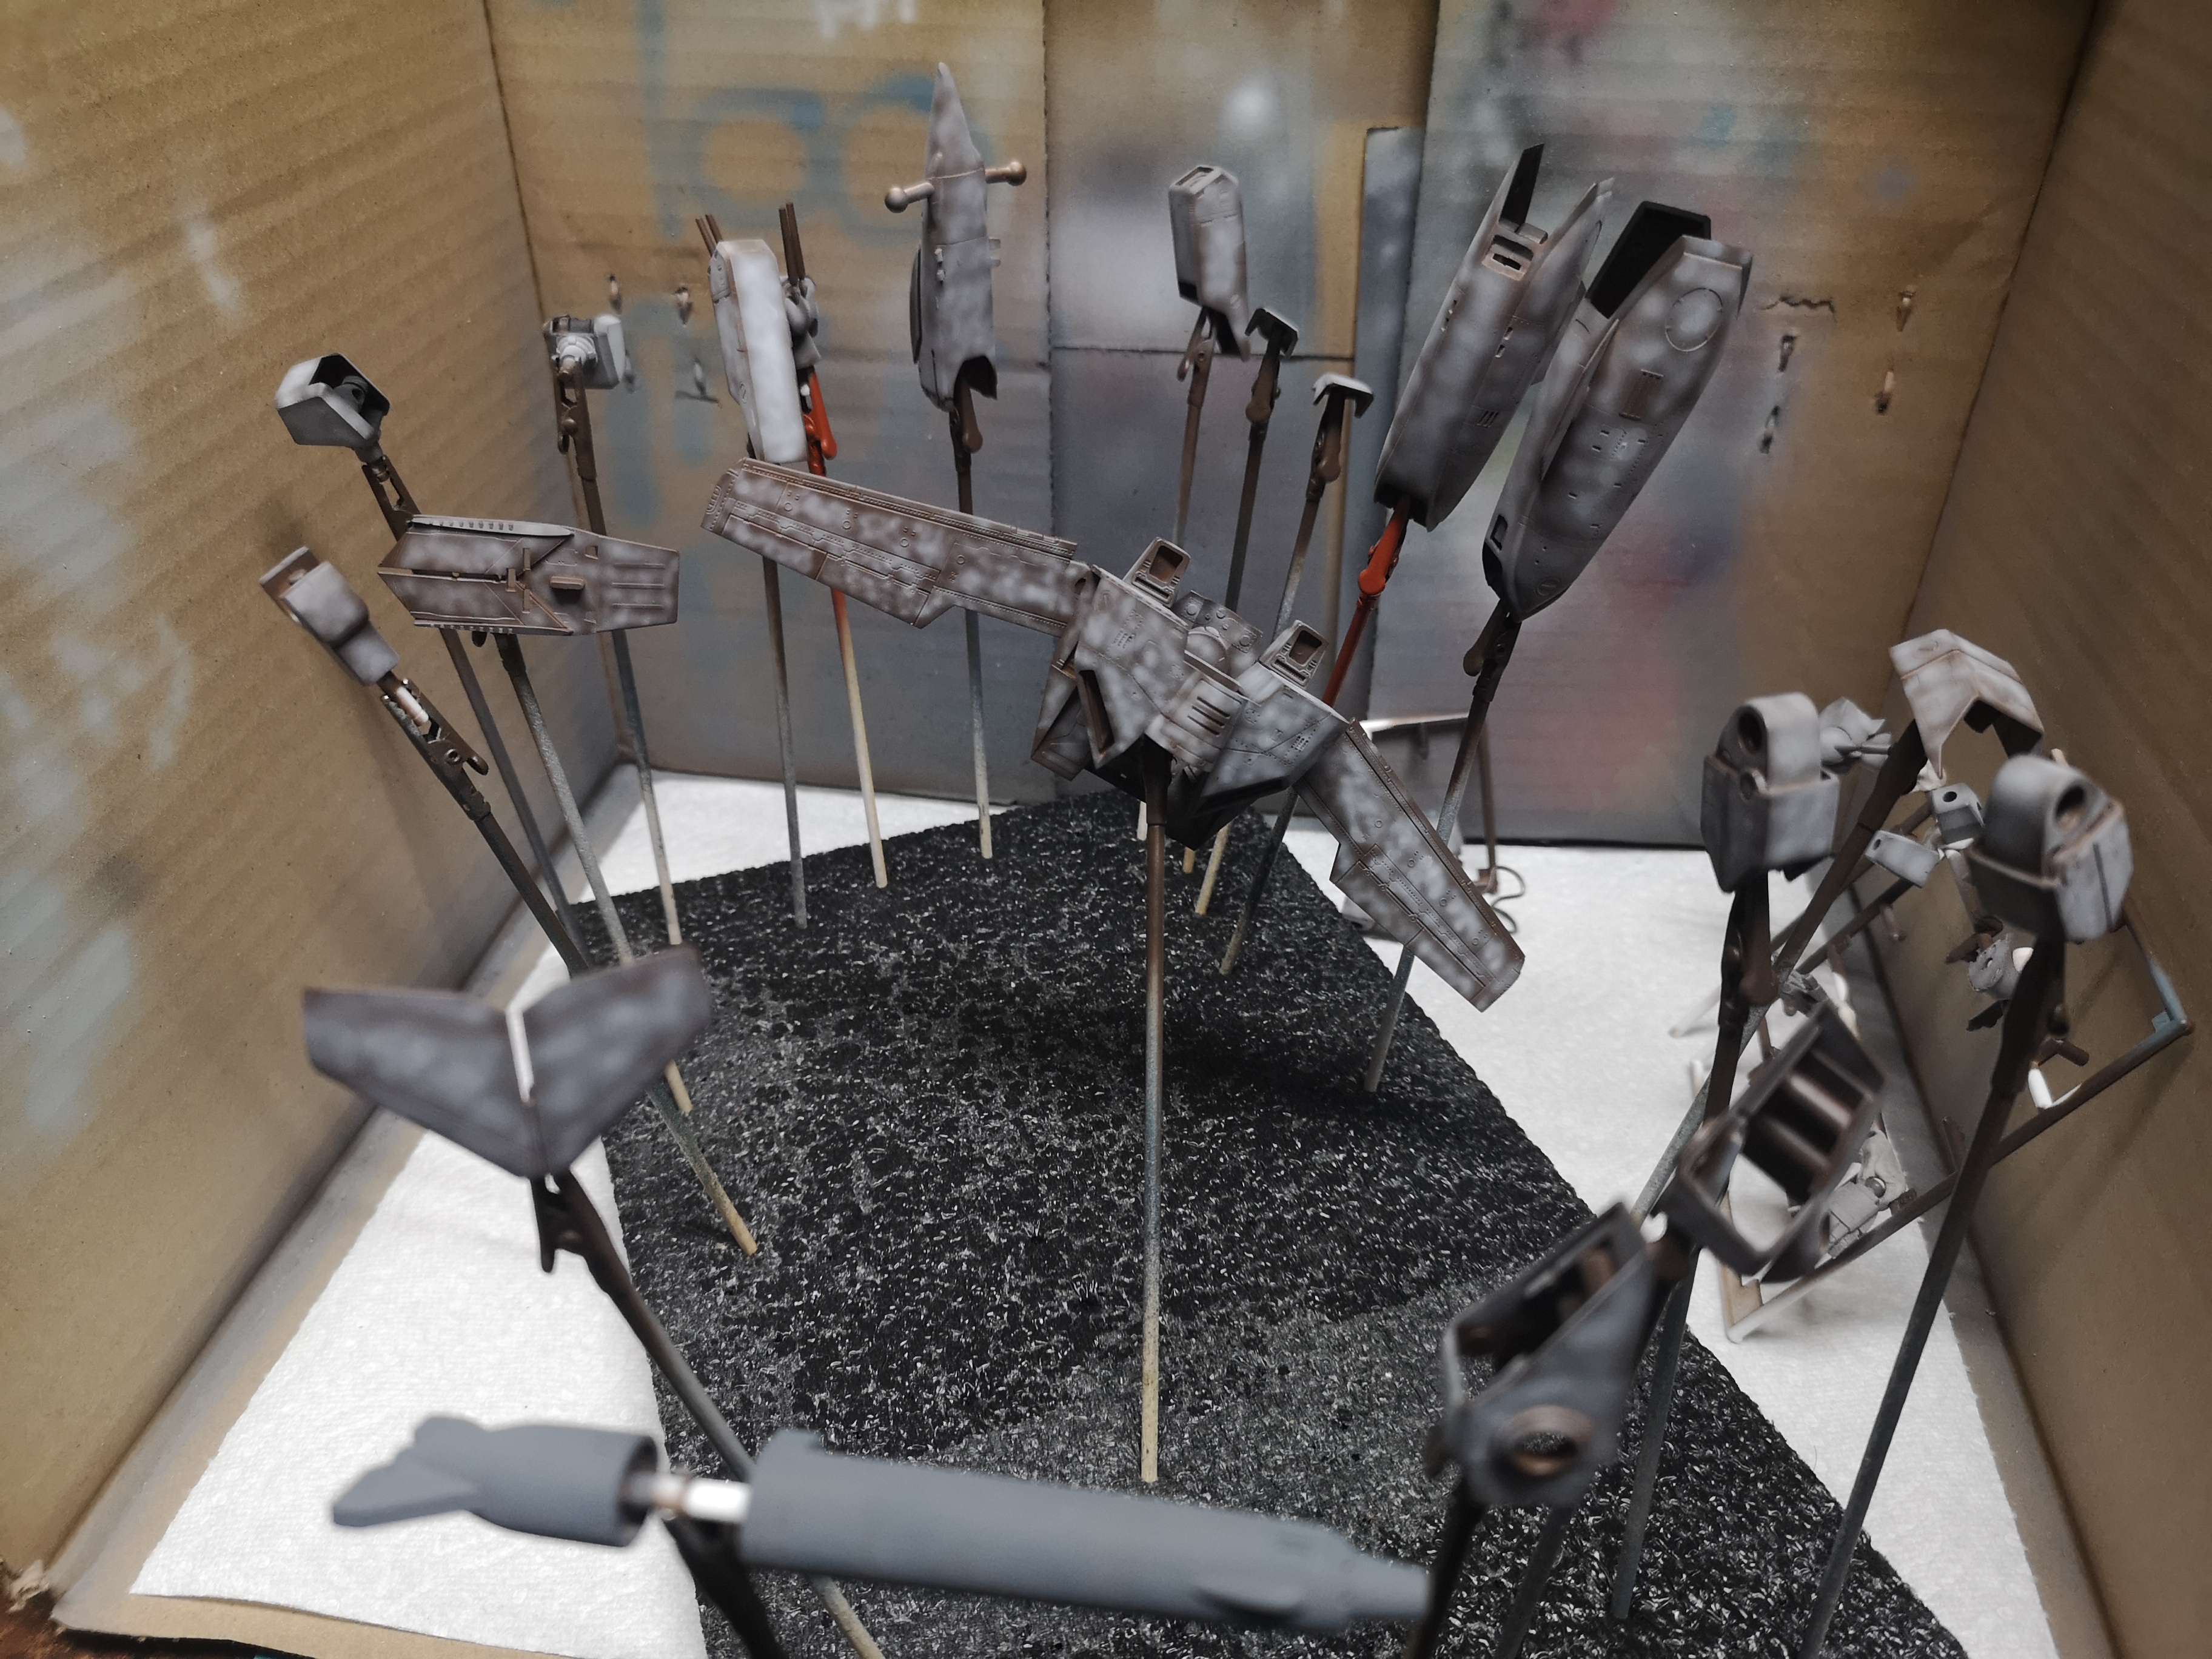
Photo dump..... Posted most of the build in the workbench thread, but in case anyone is interested, posted here for quick reference.
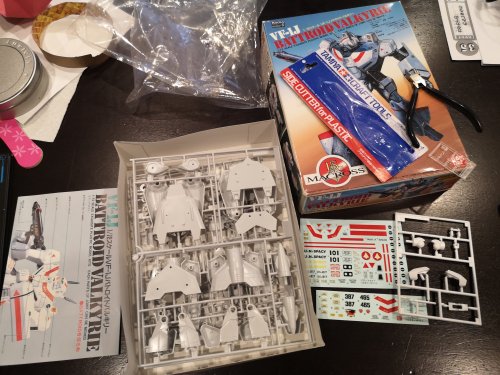
The base kit.

Base kit decal sheet....ended up omitting a lot of these and used spares from my Hasegawa sheets.

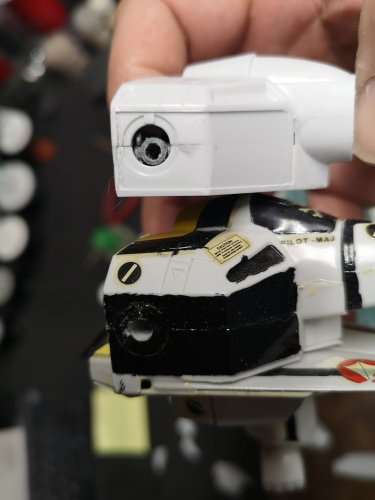
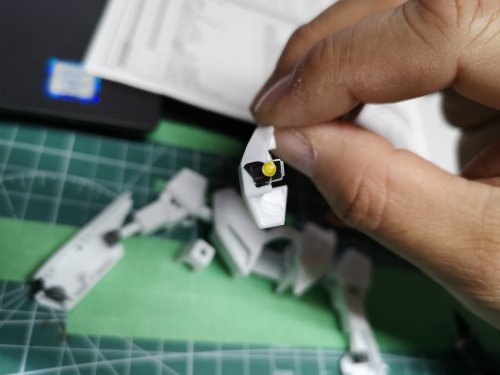
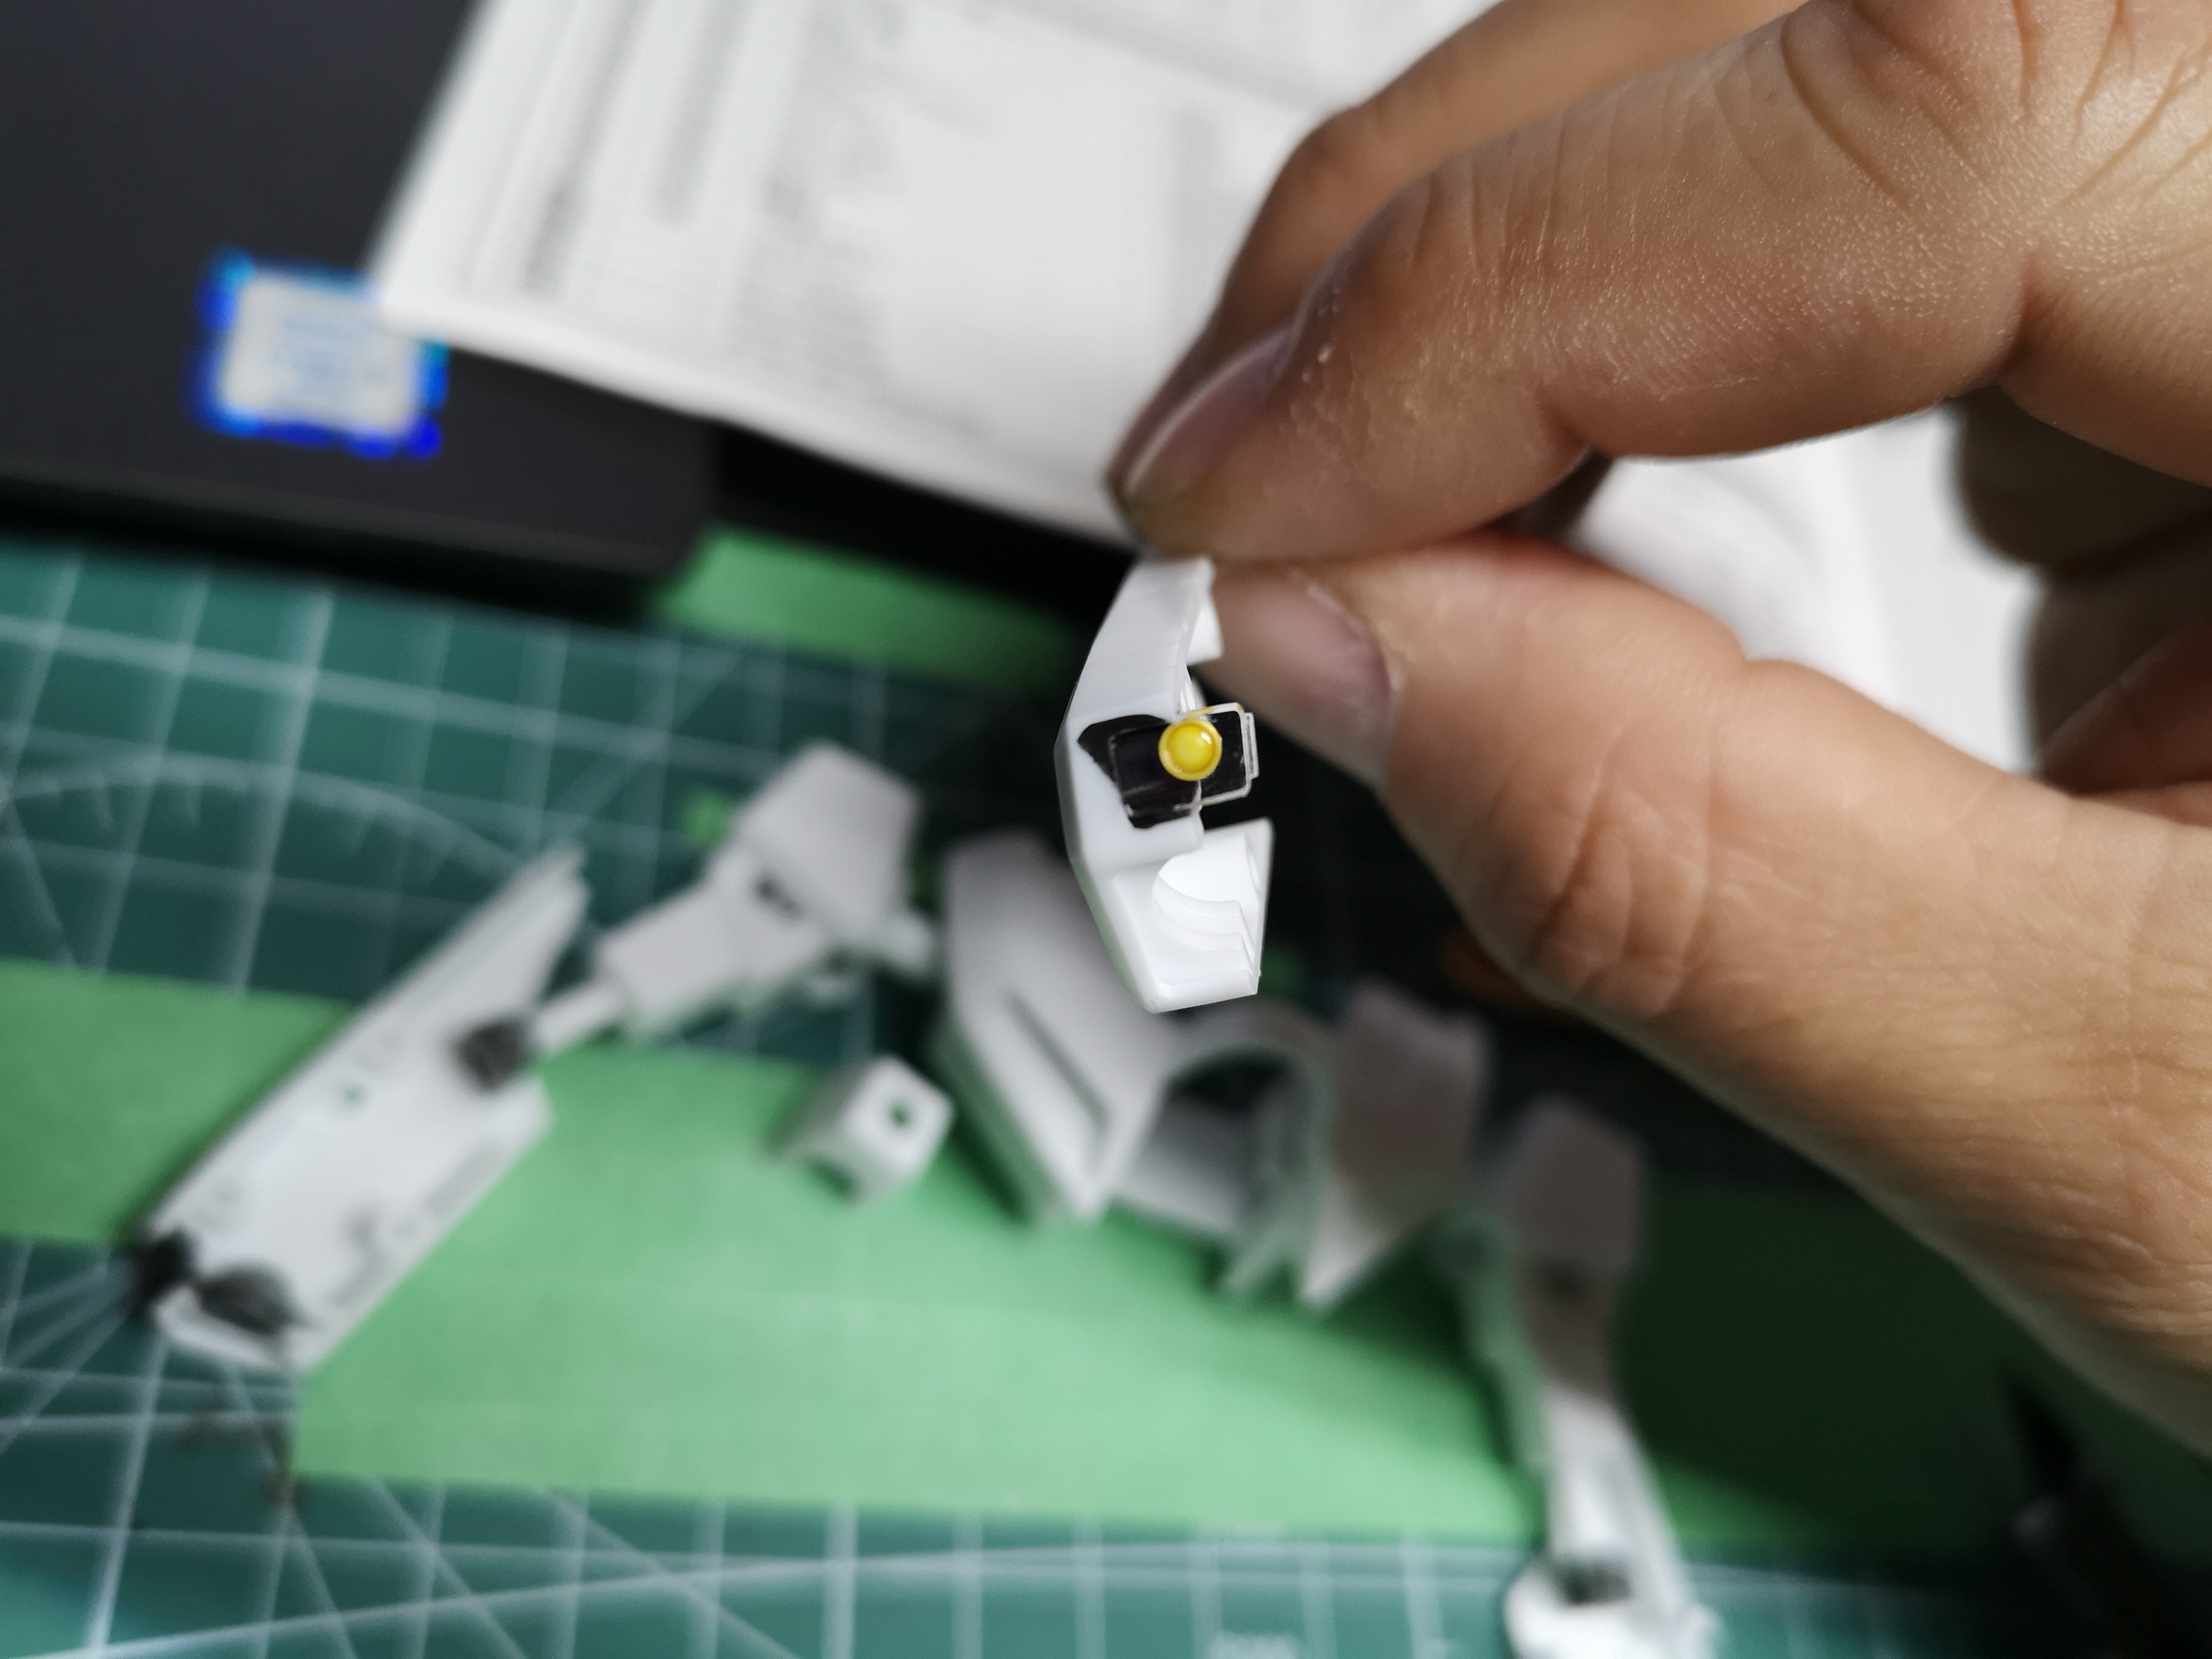
Early on I decided I was going to use a spare Hasegawa 1A Battroid head for this build.

Parts fitment is outstanding for these old Bandai kits.

Round parts into an oval holes.
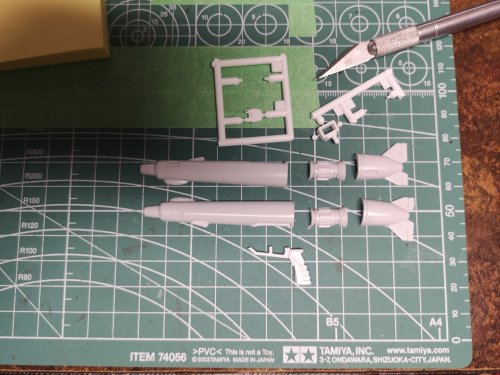
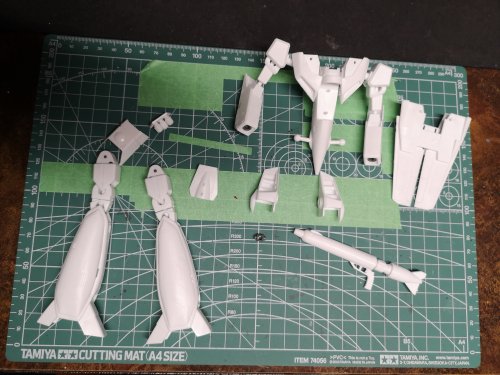
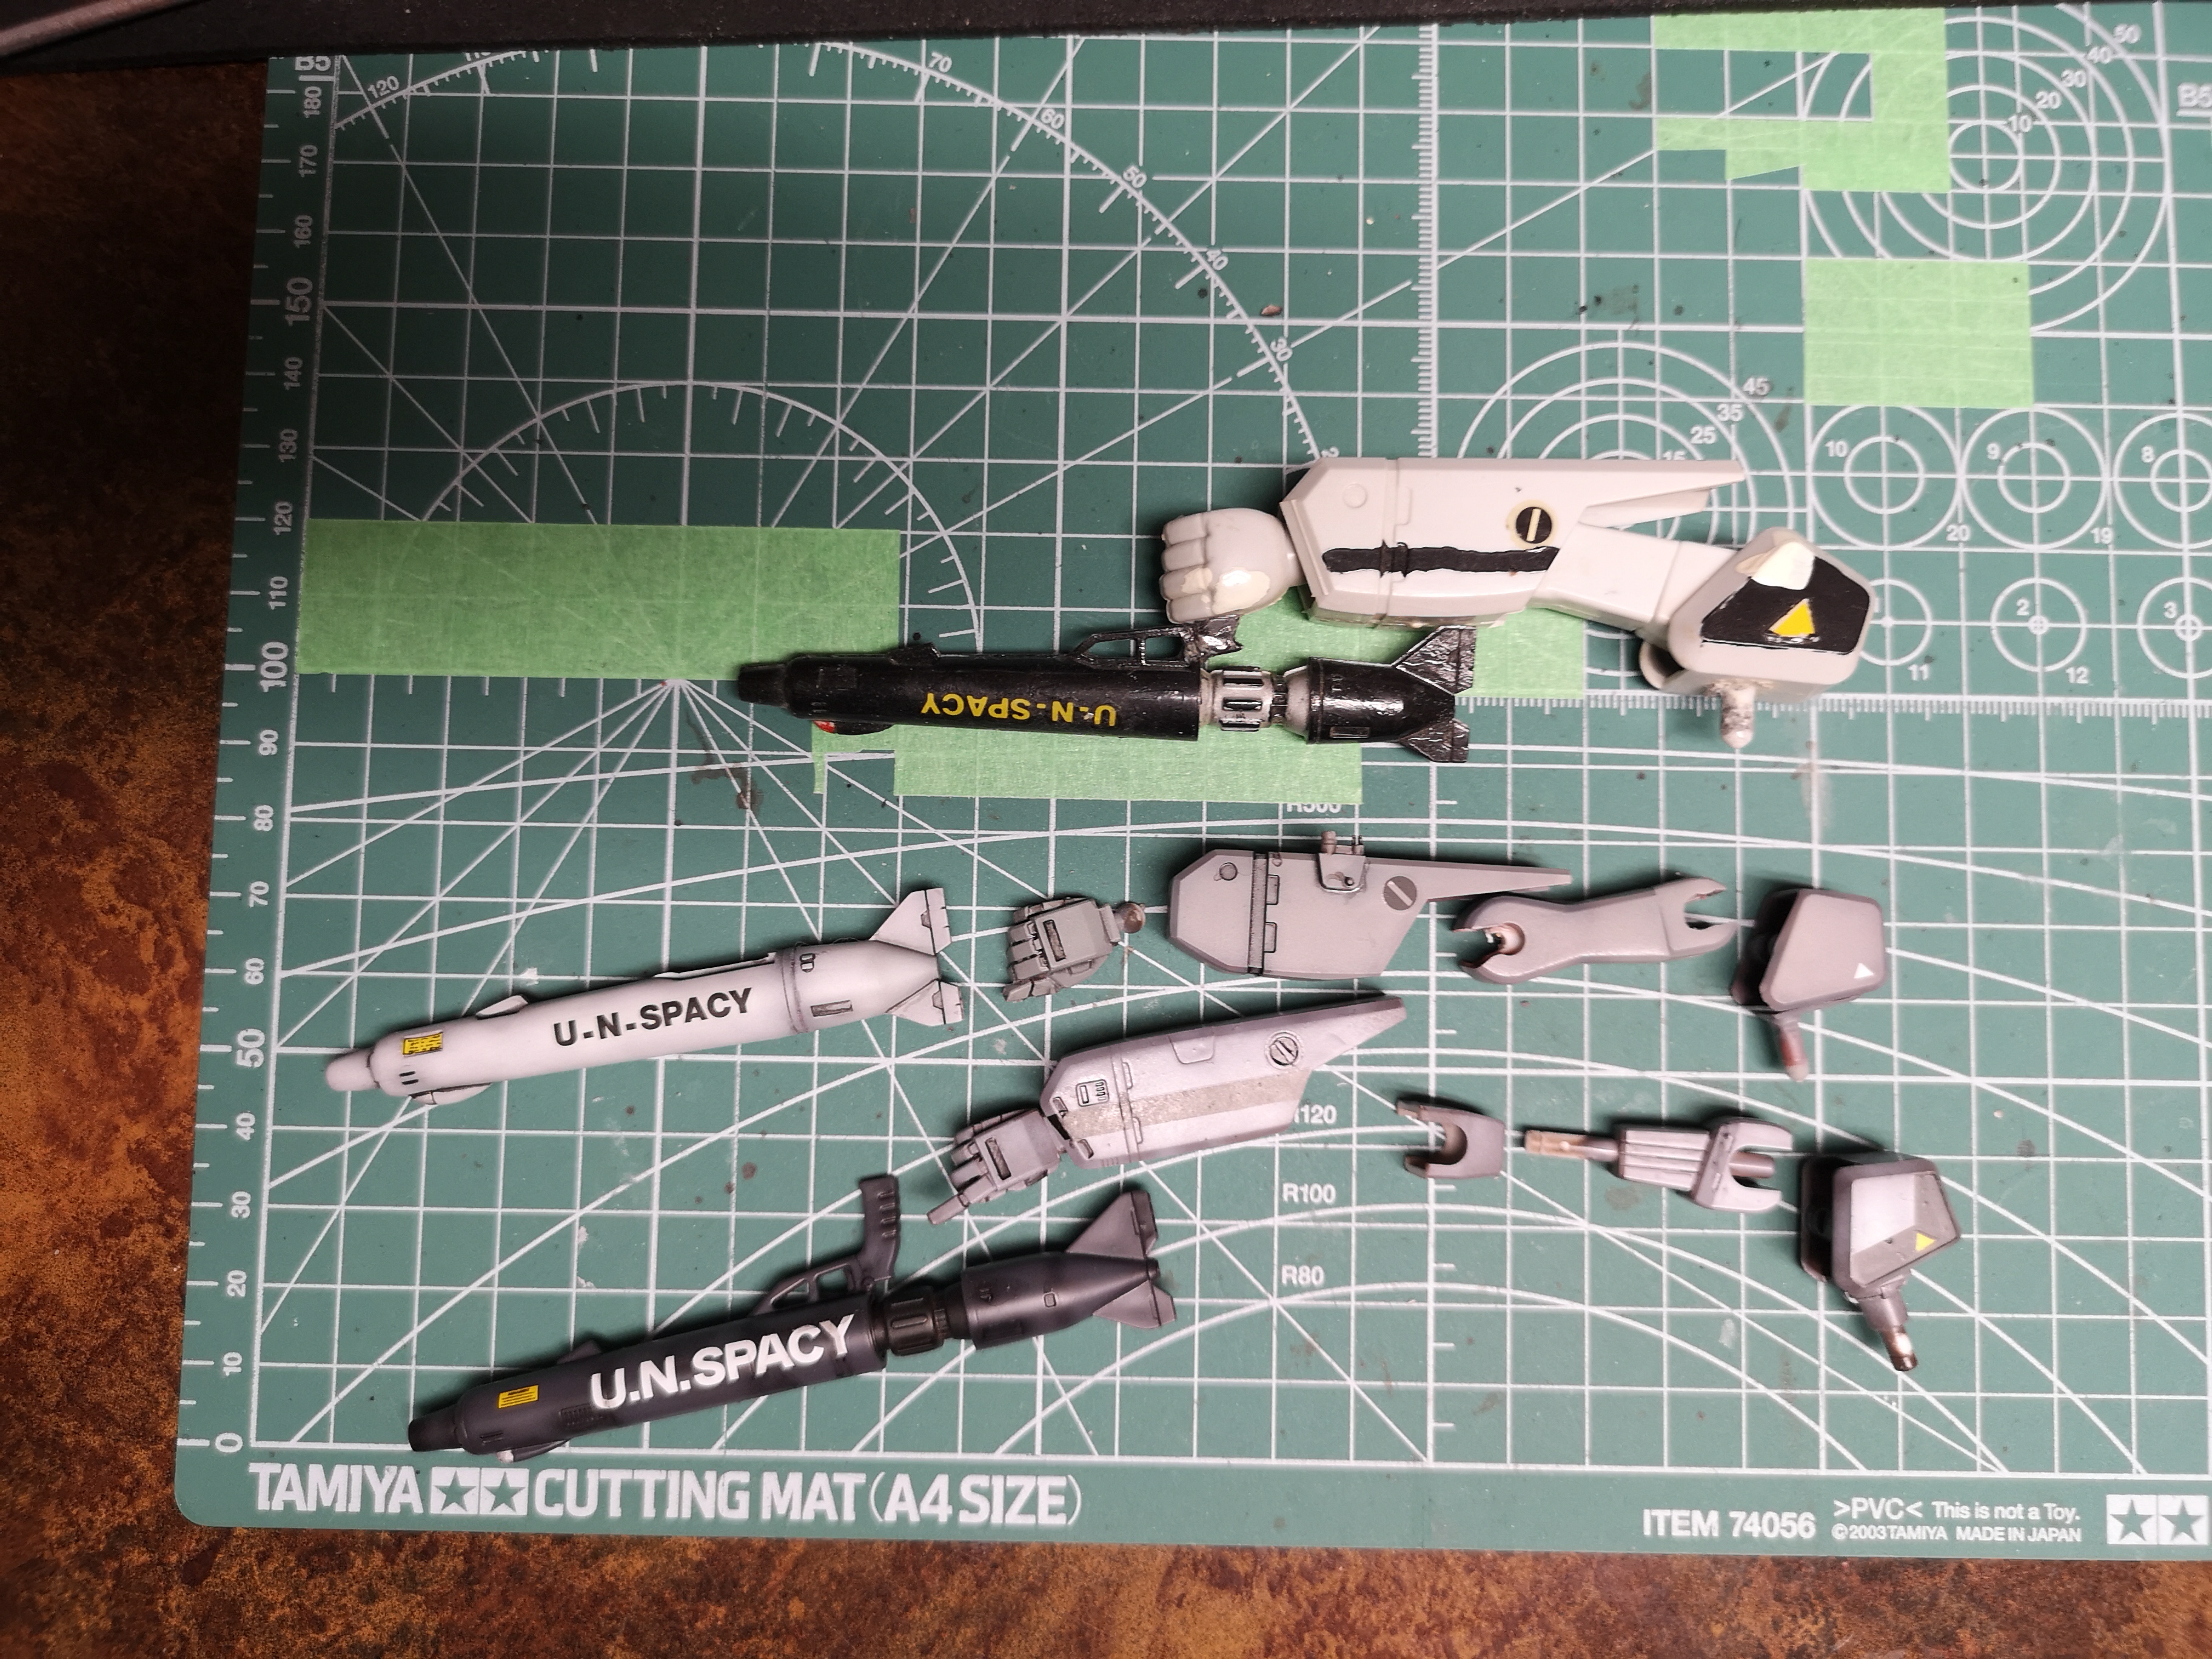
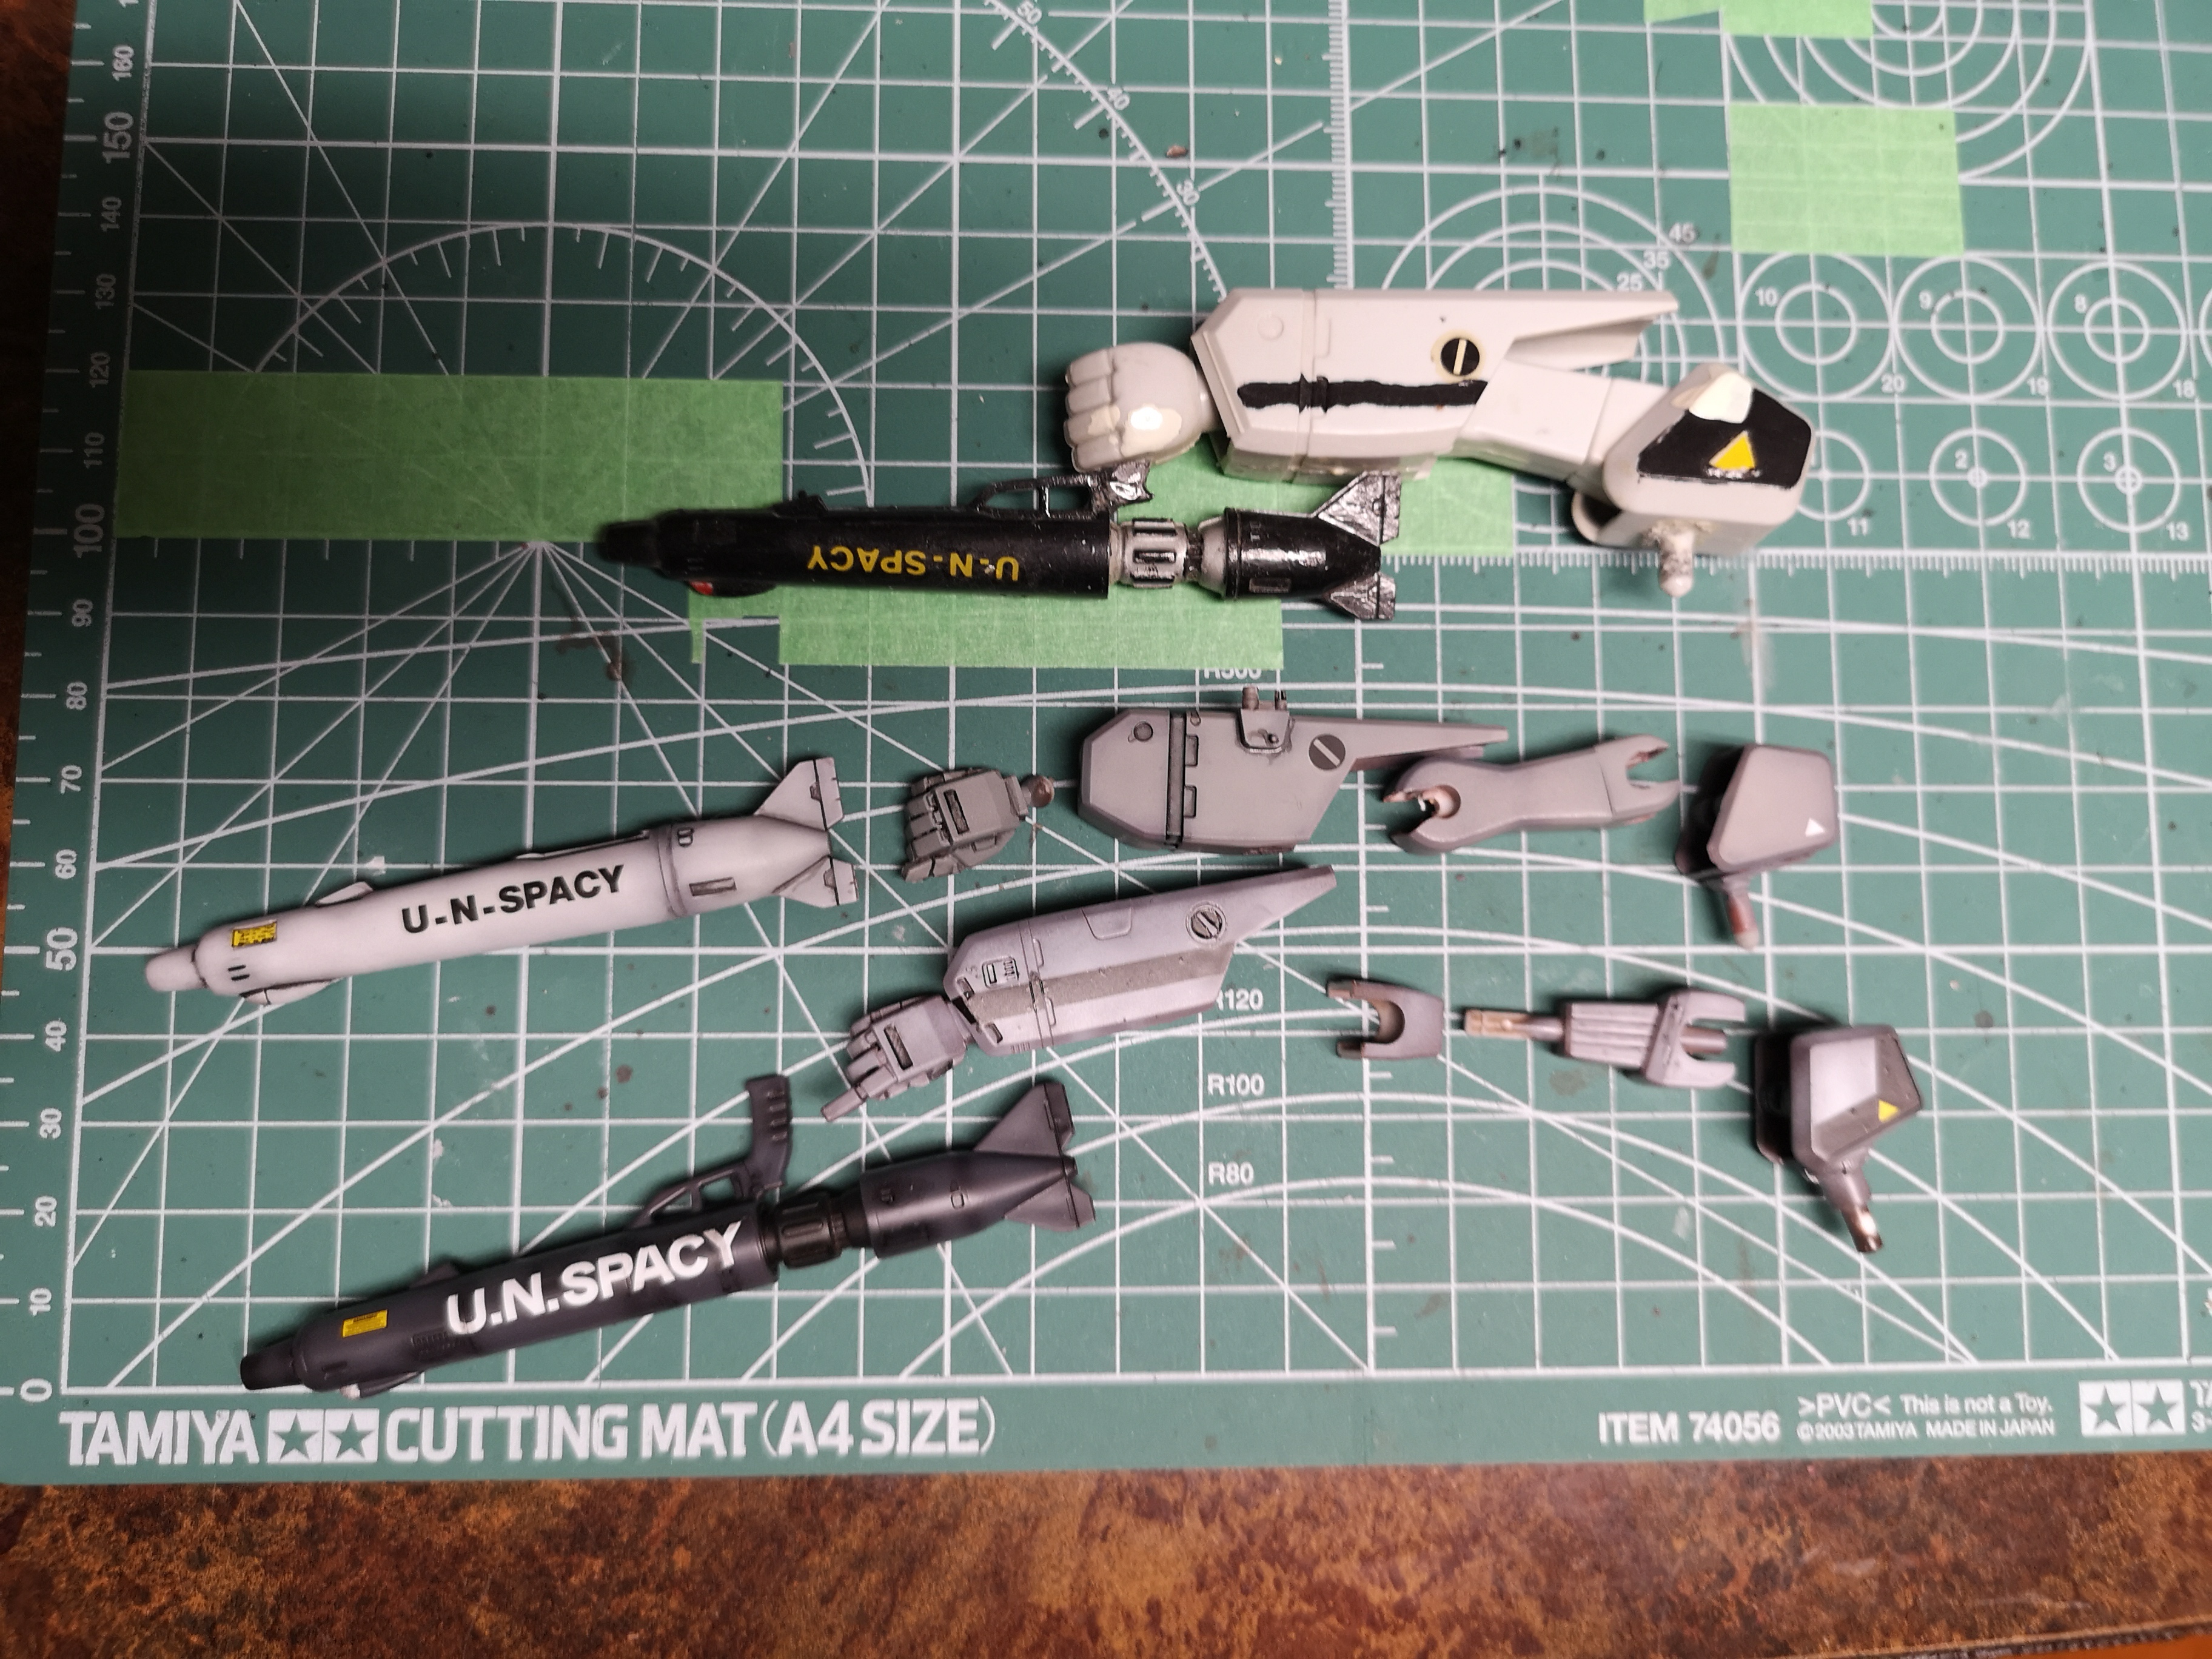
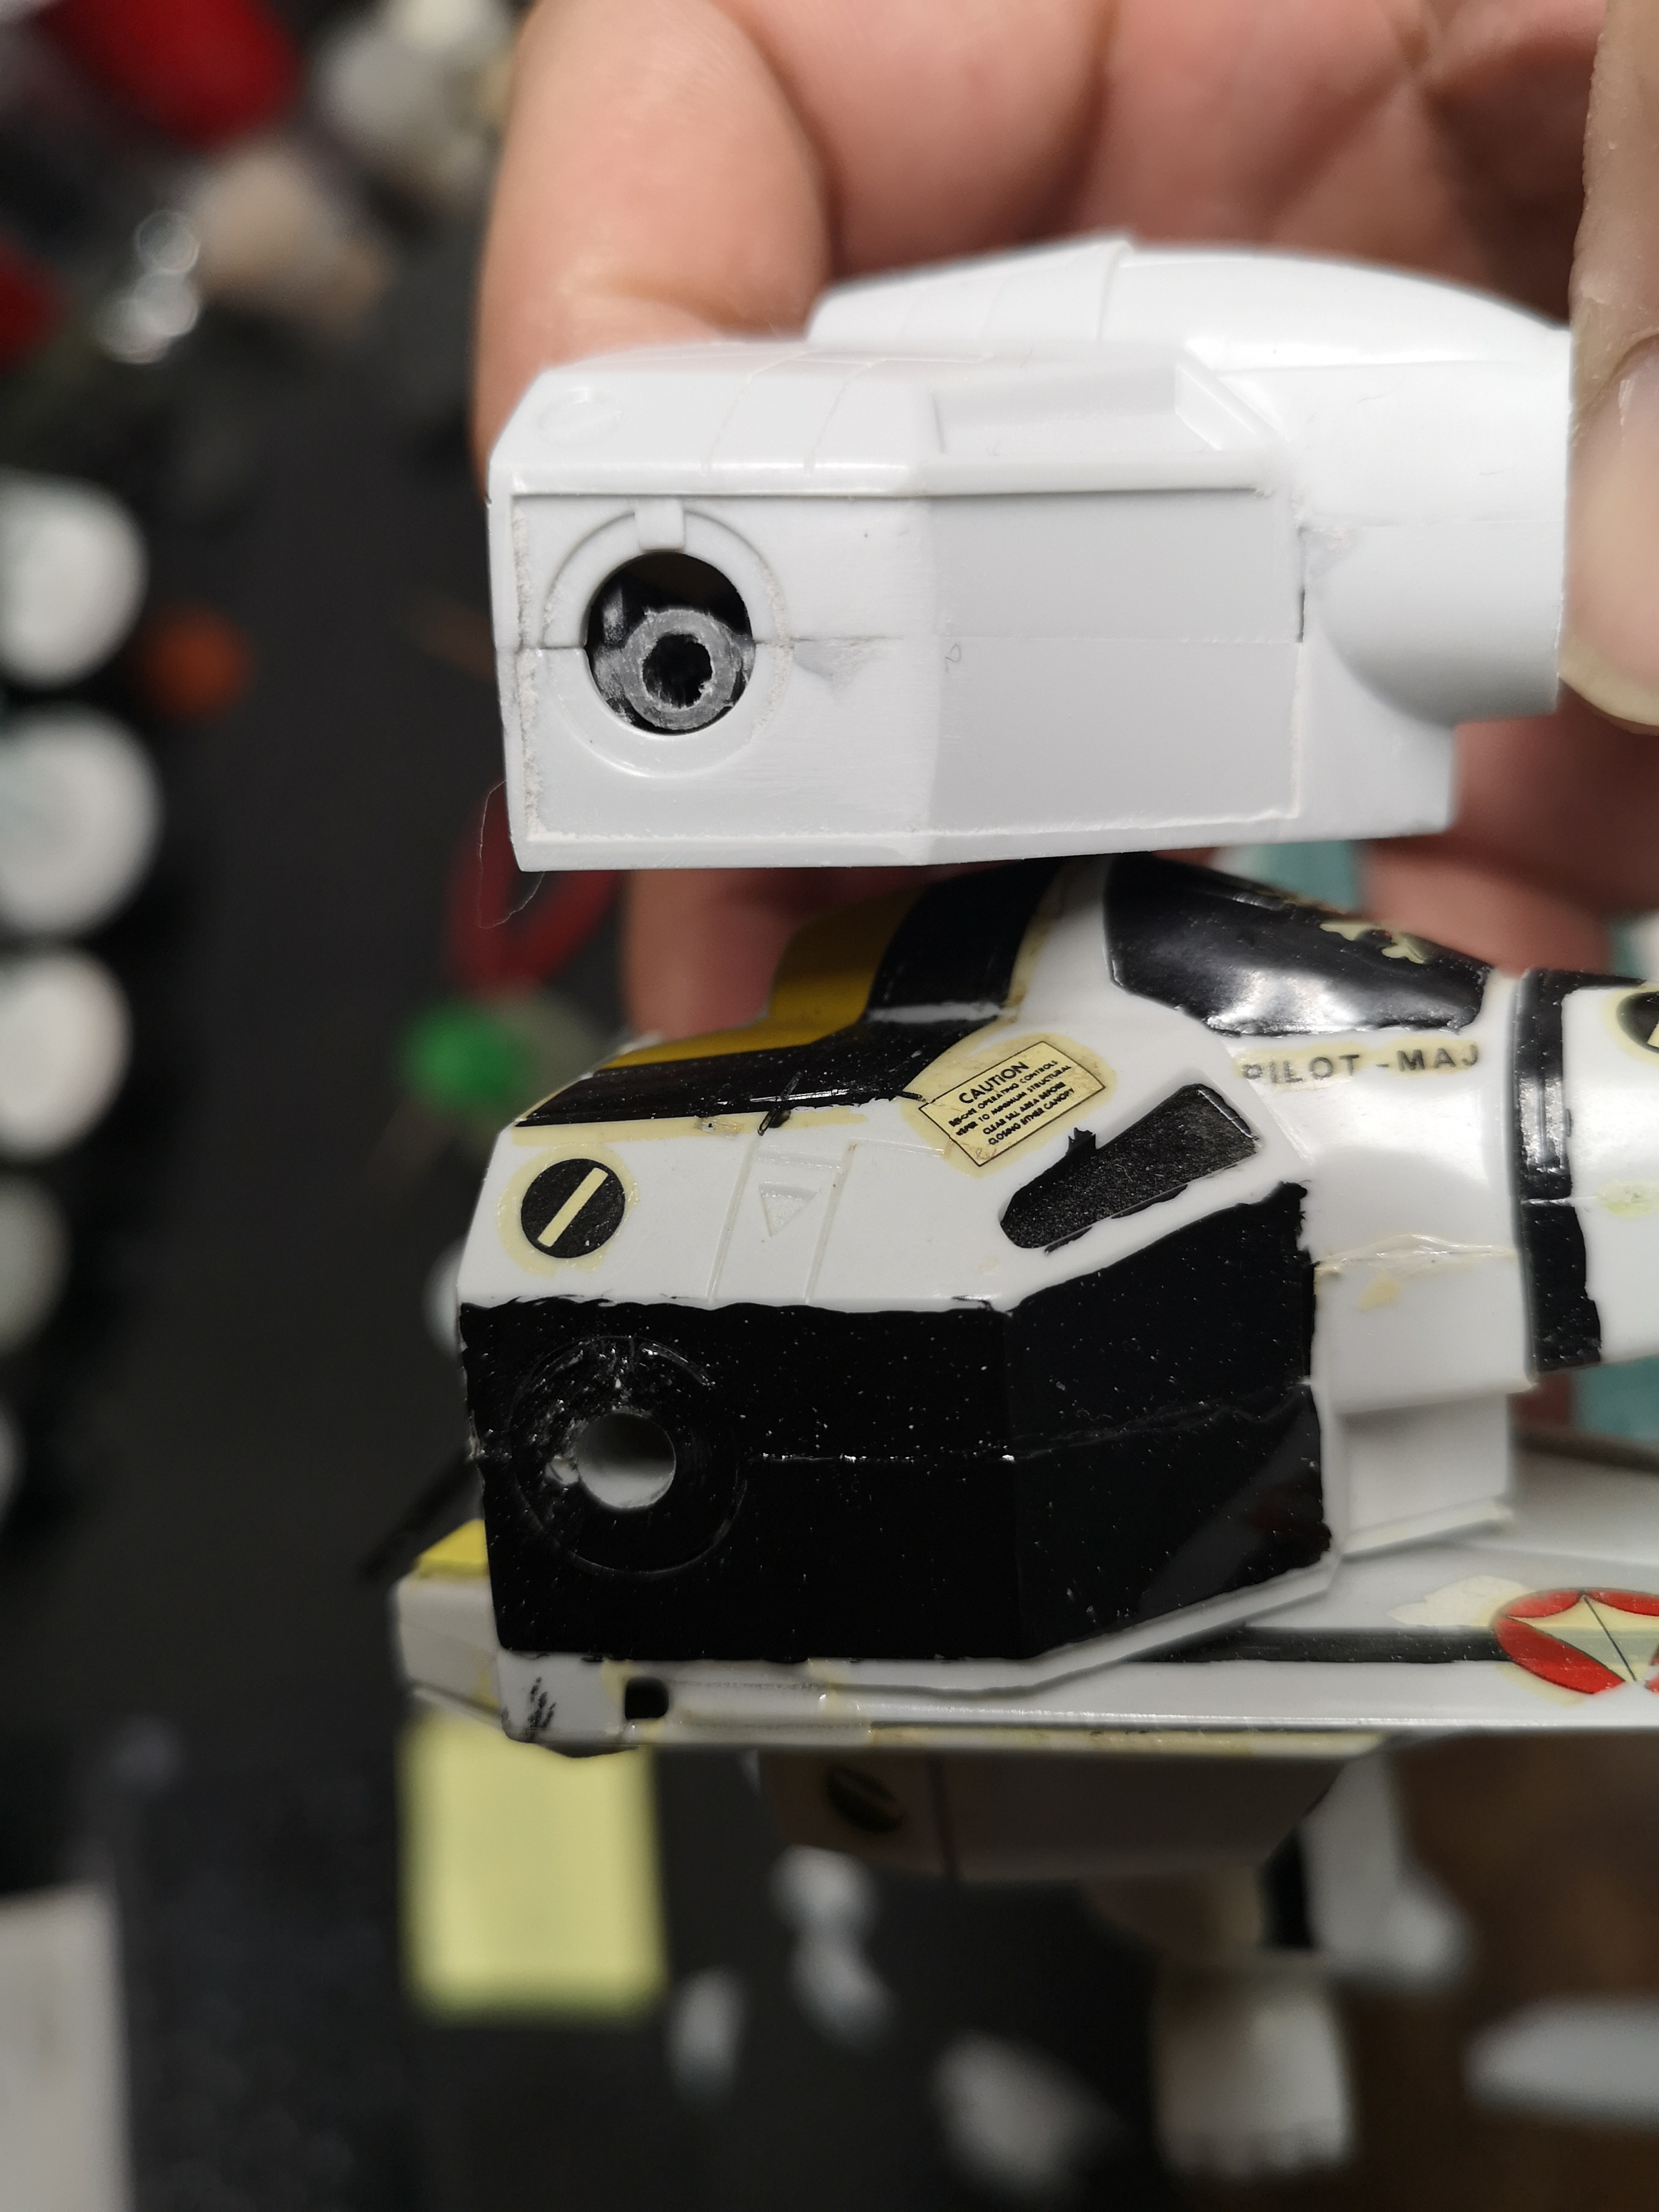
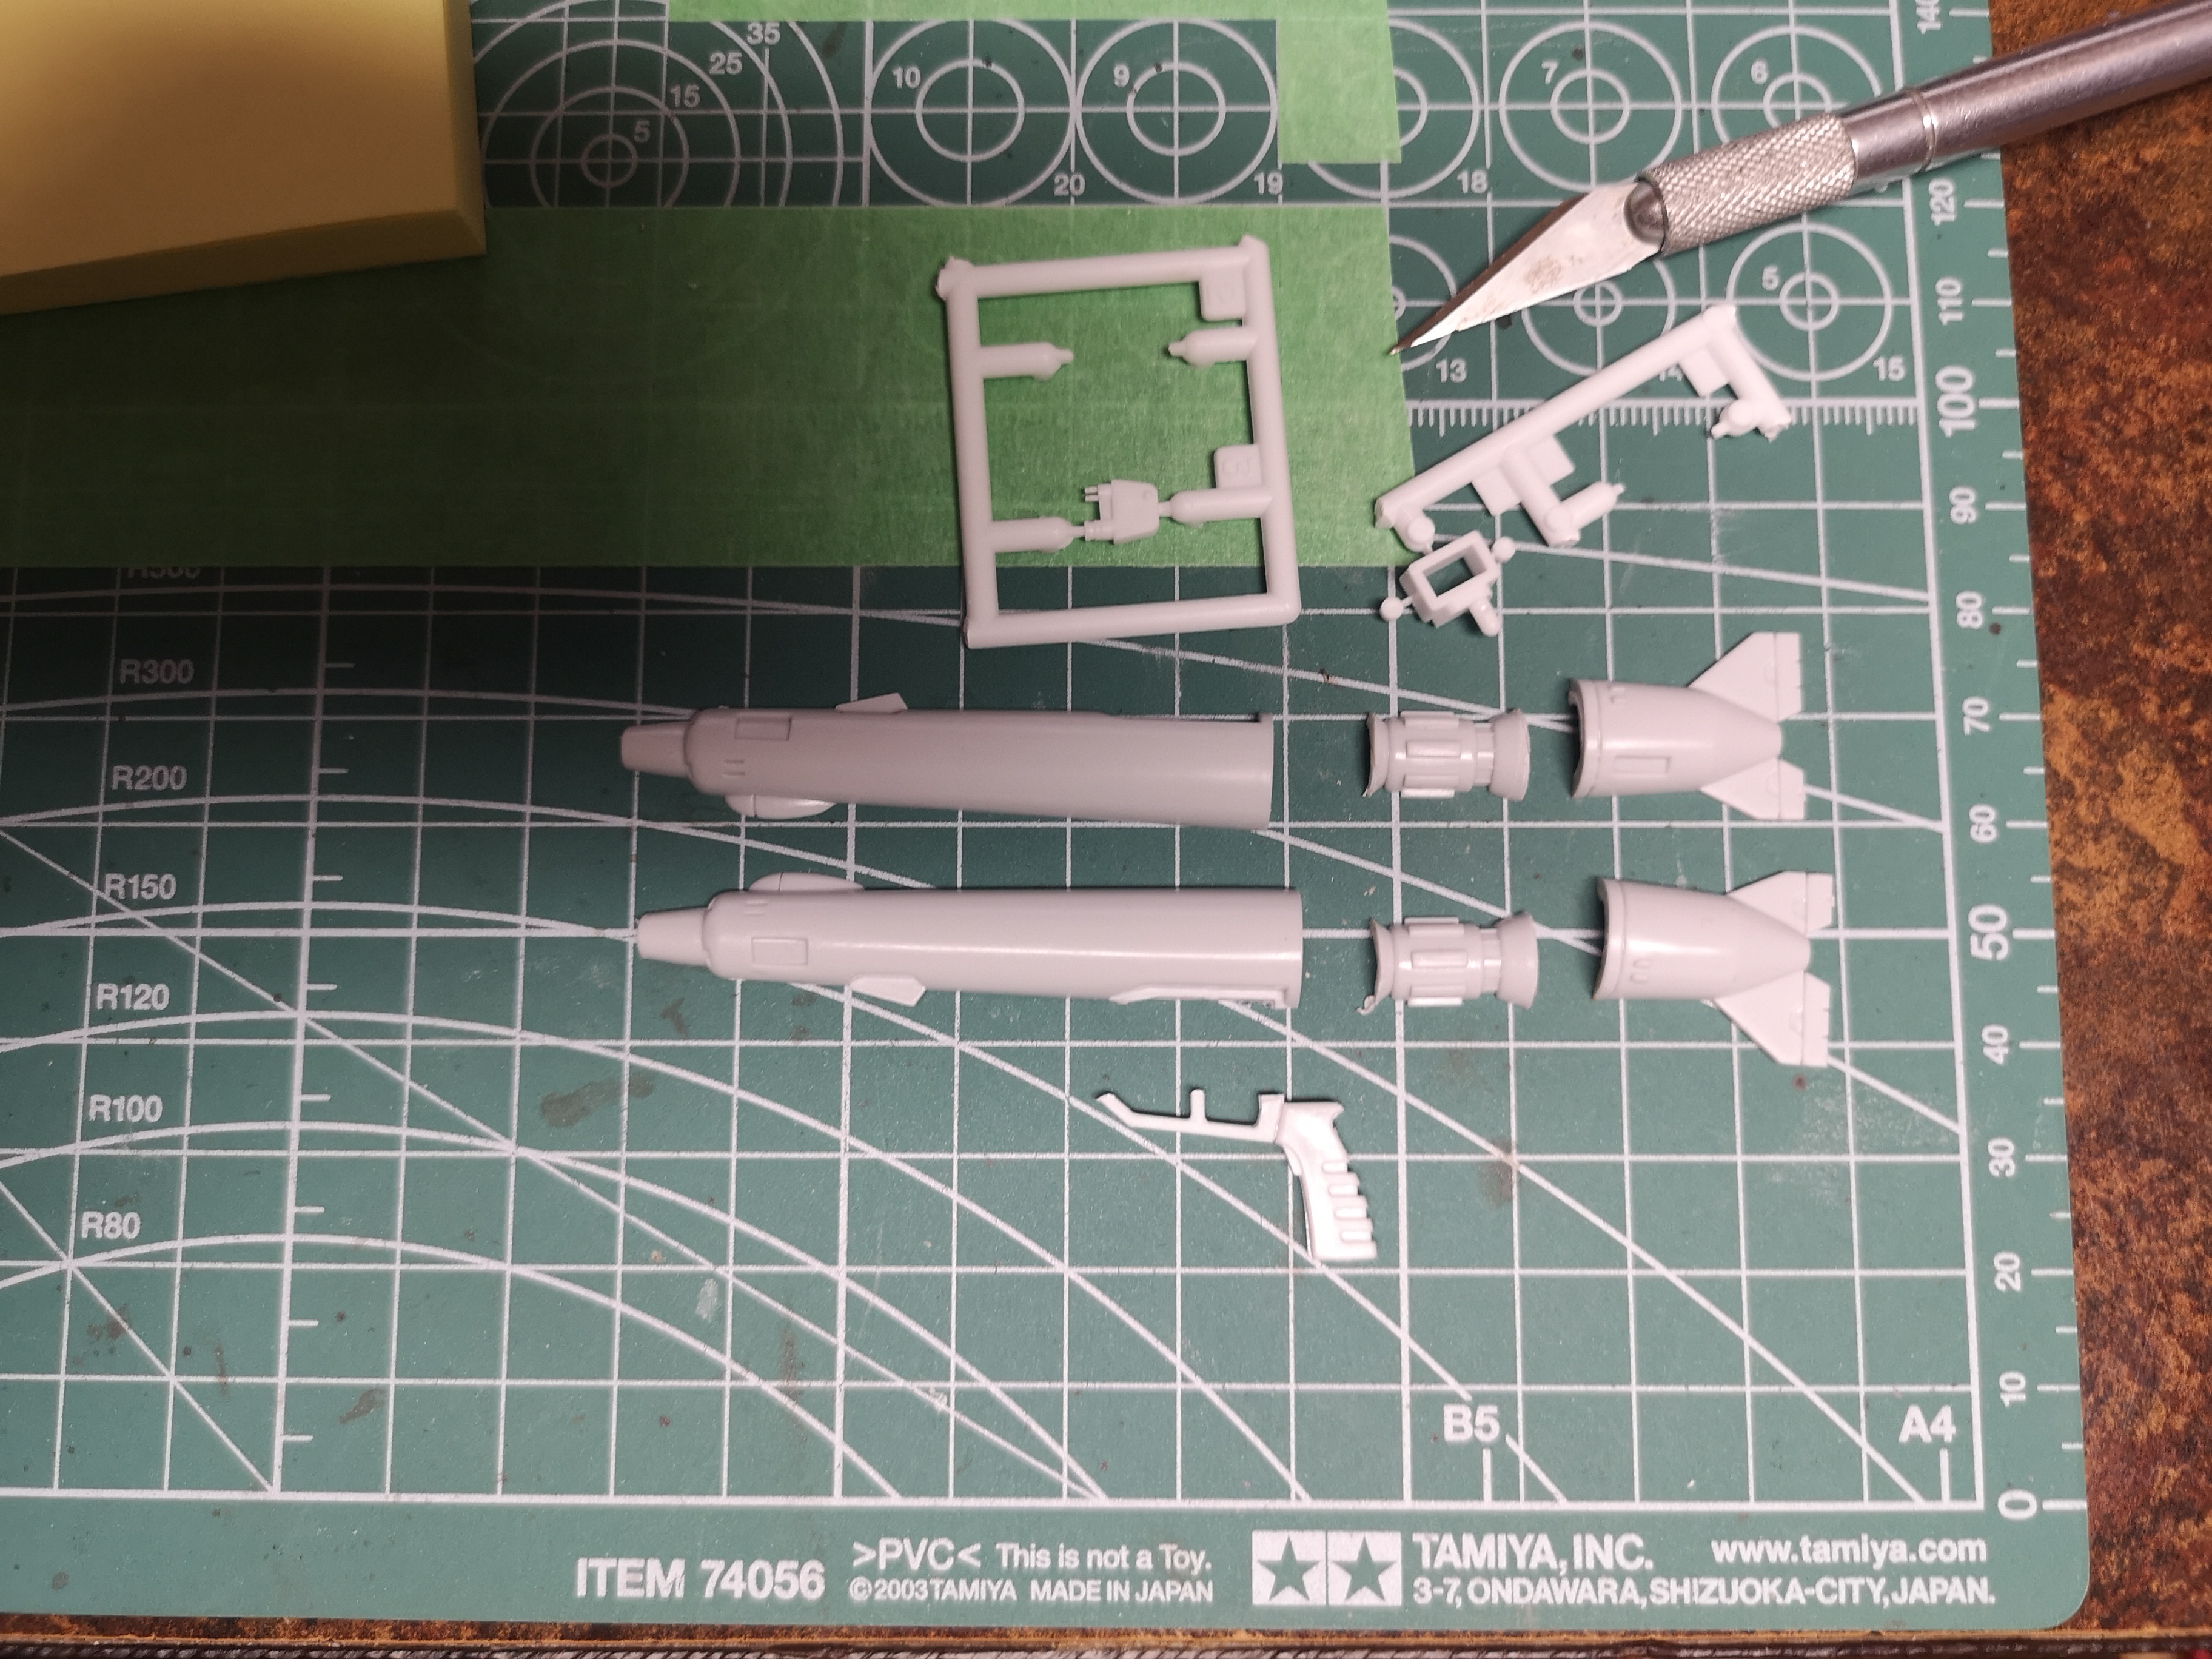
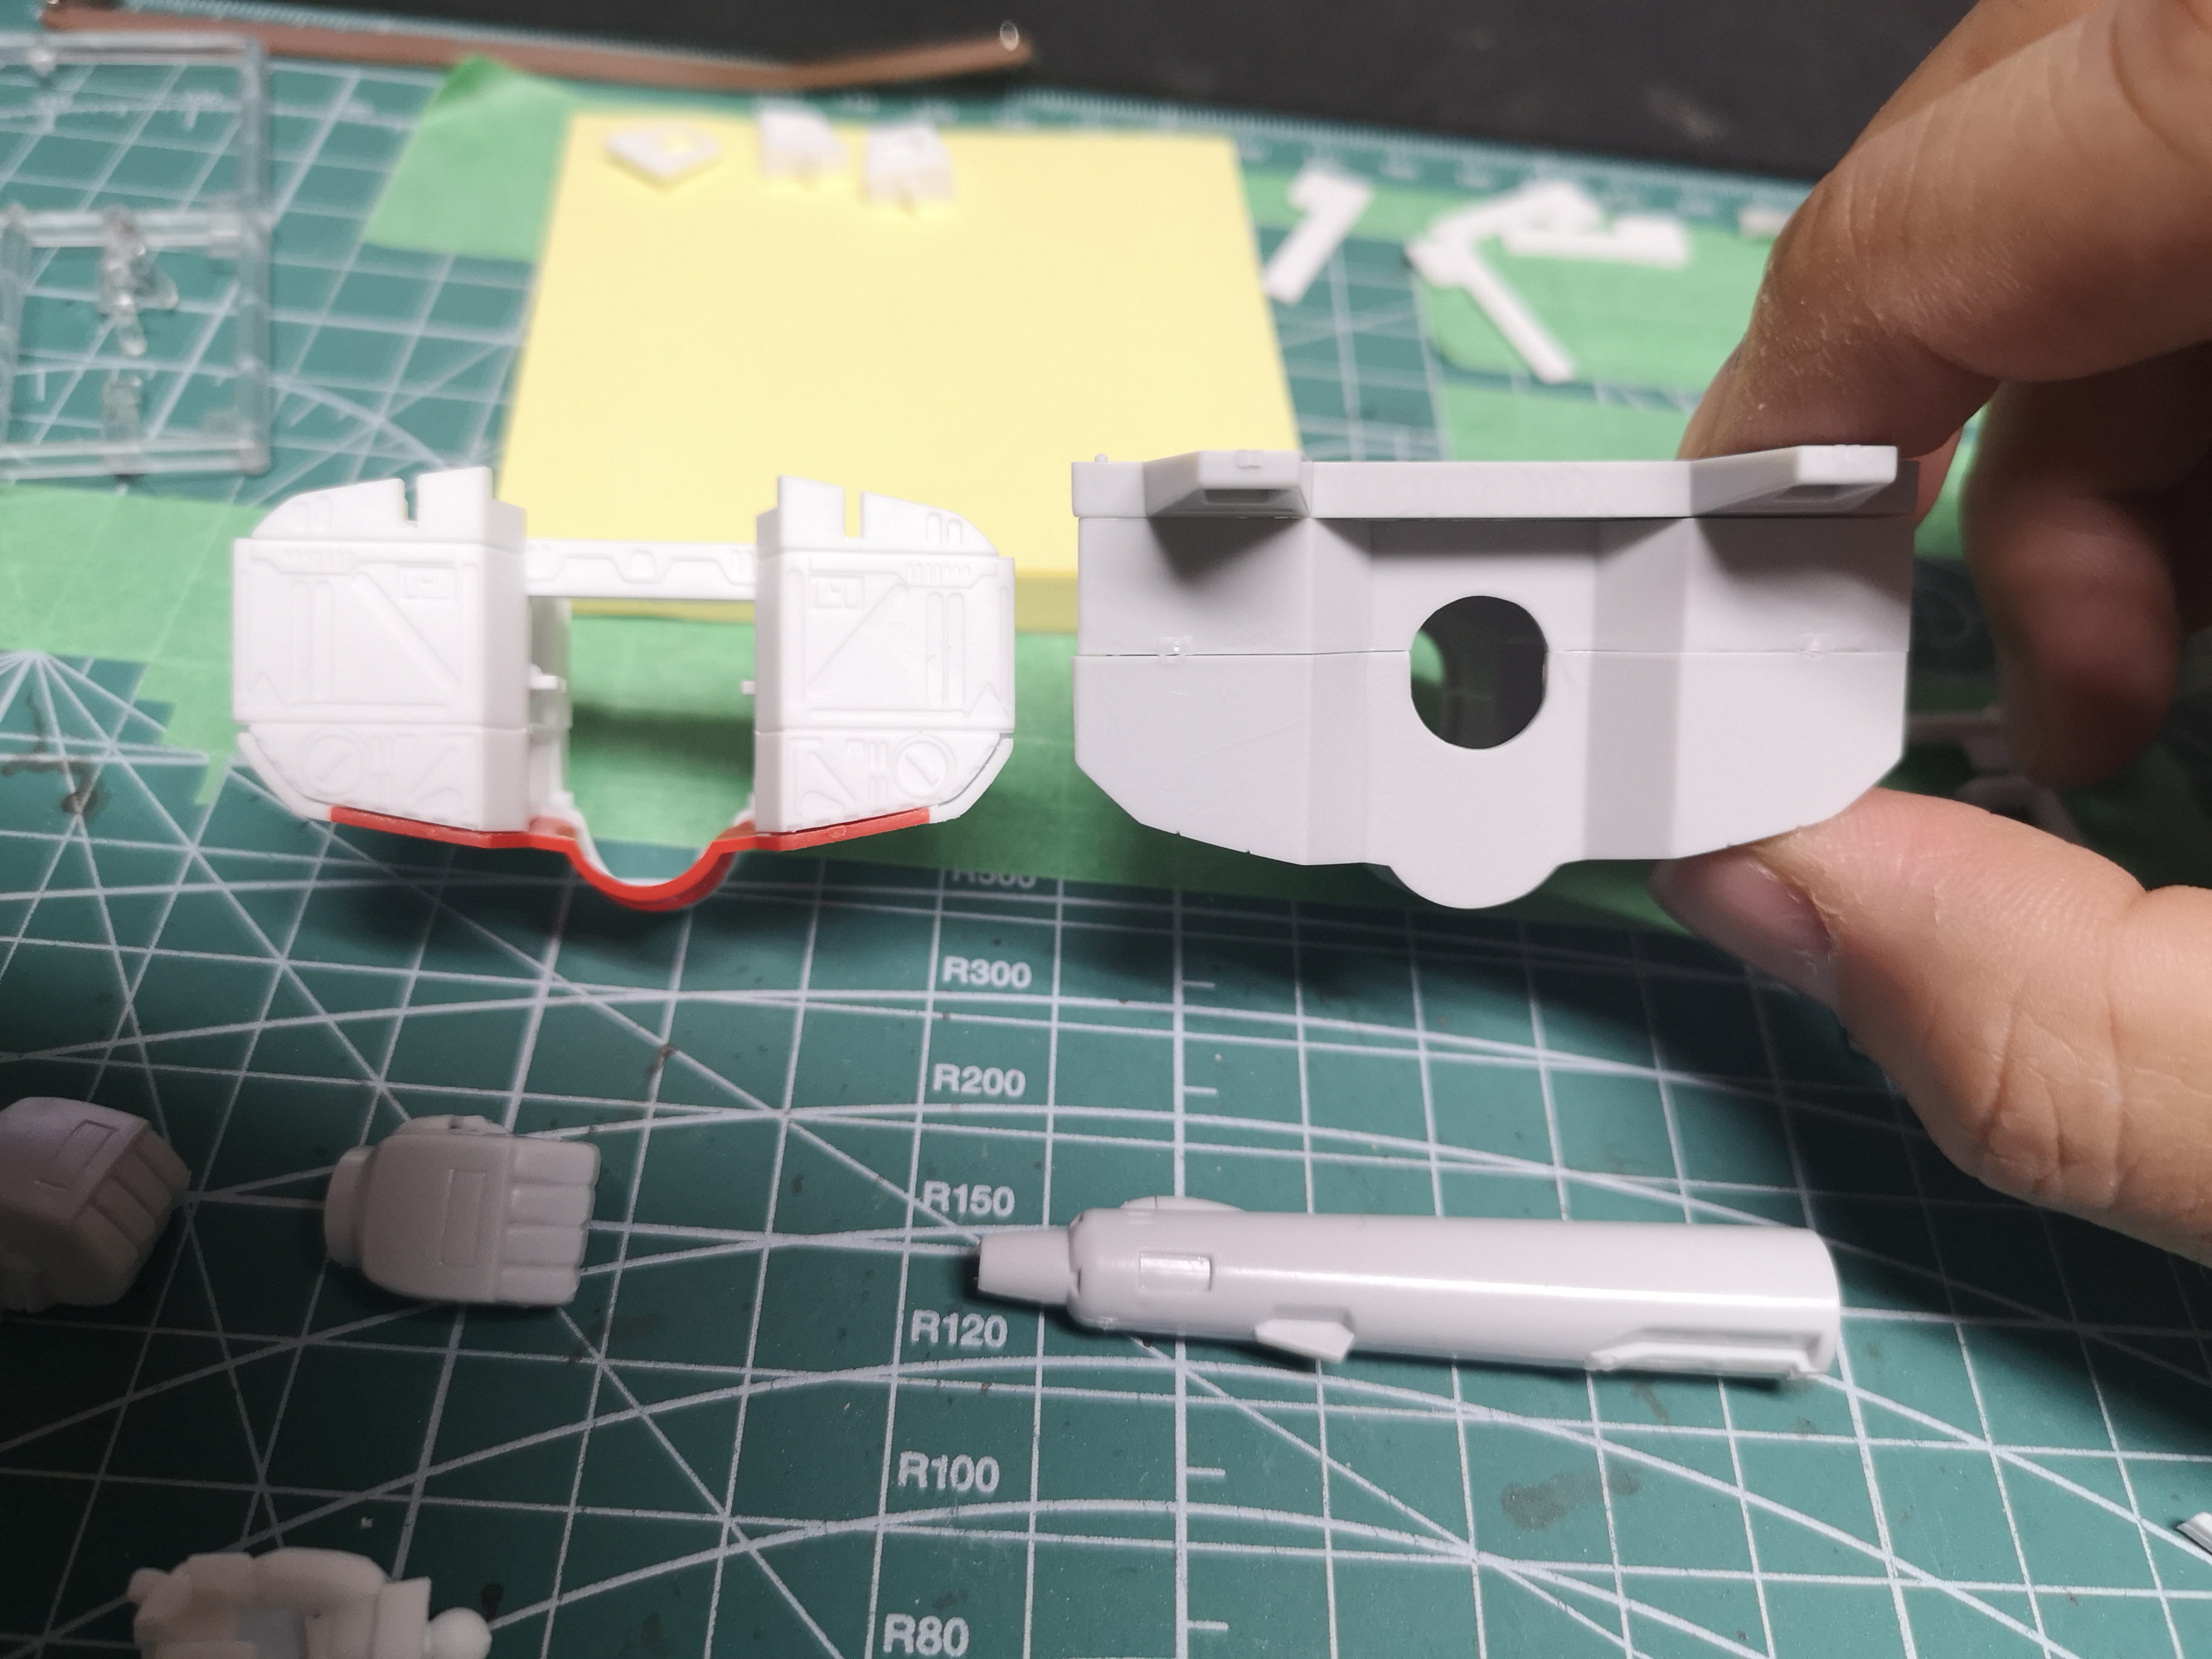
Comparison between the Hasegawa GU-11 on top and the Bandai below.
The Bandai unit was originally only two halves (body, internals, stock, handle and trigger assembly all attached) but I cut it apart because I wanted it collapsed and attached to the arm.
I didn't like the fact that the original hands (which I was thinking about using) hand big sausage fingers and would grip the rifle funny.

Hasegawa chest piece on the left, Bandai on the right.

Hasegawa feet on the left, Bandai bigfoot feet on the right.
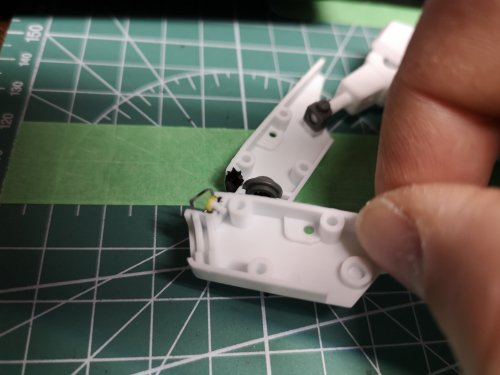
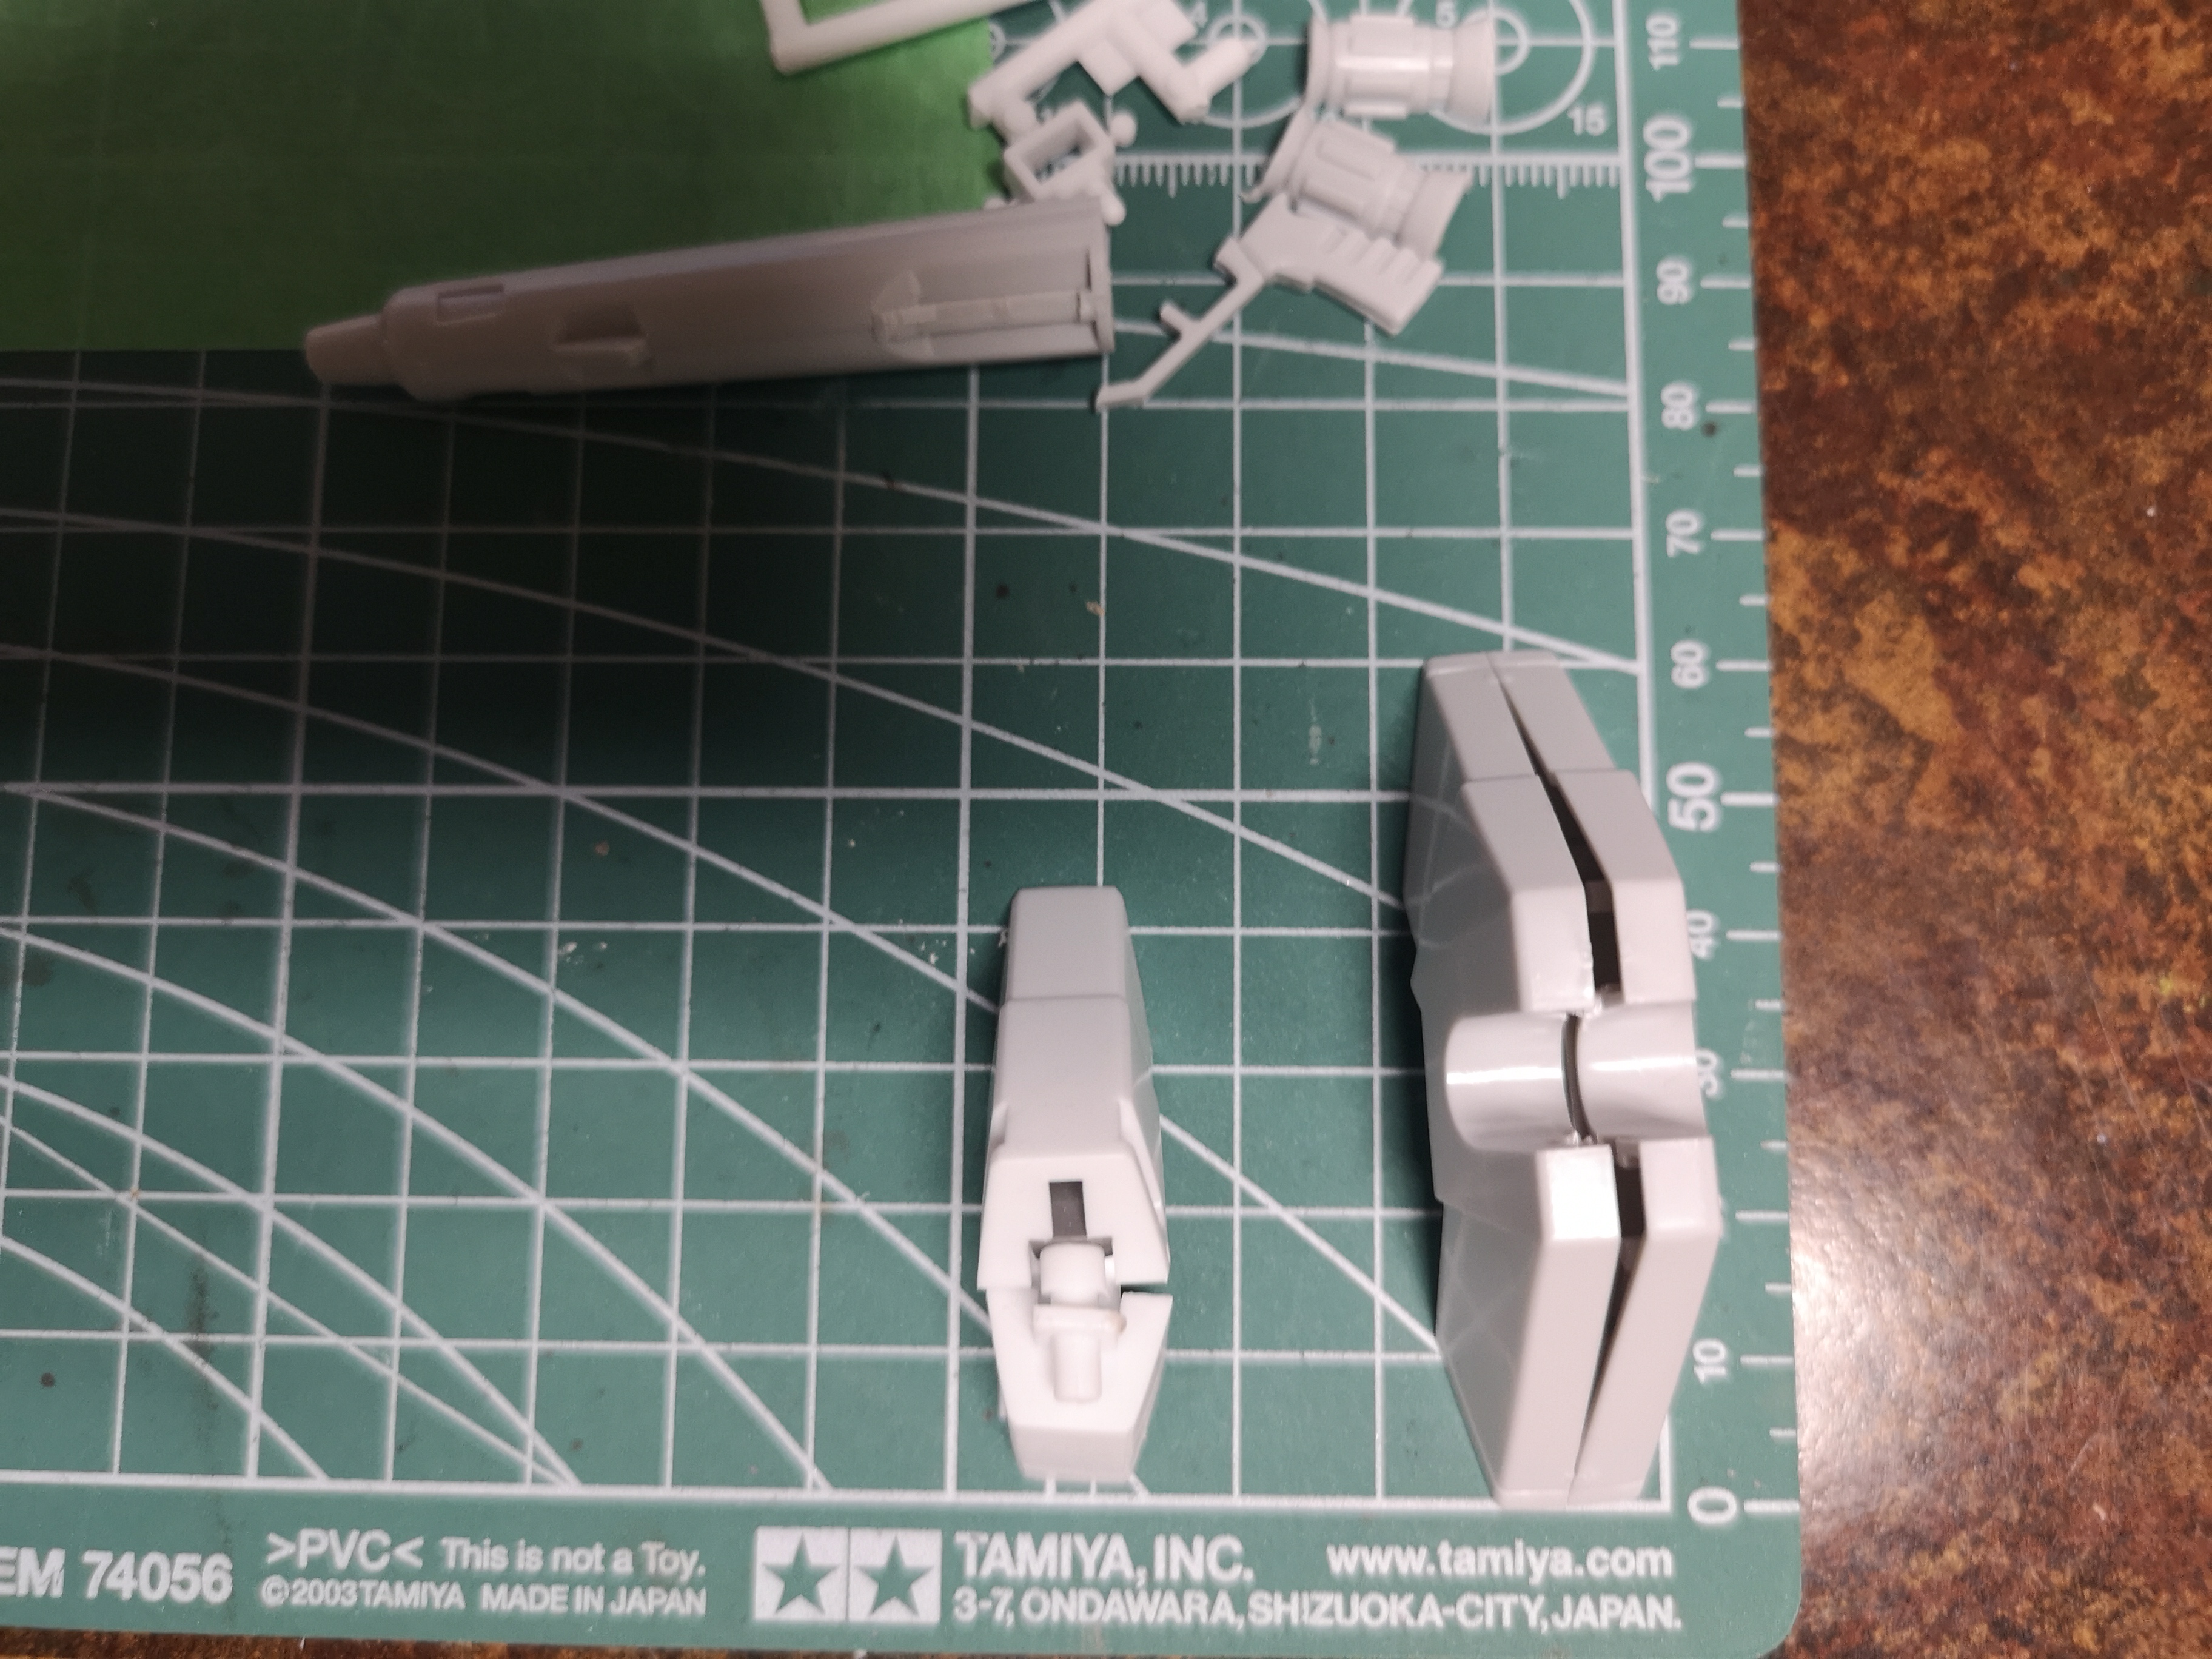
Not a good range of forearm movement..... Bandai Gerwalk arms in front, Hasegawa Battroid in the middle, and Bandai Battroid furthest.

The original Bandai comes with horrible plastic-on-plastic joints, no poly caps or ball joints, which led to a floppy mess when I was a kid because I played with this model a lot.
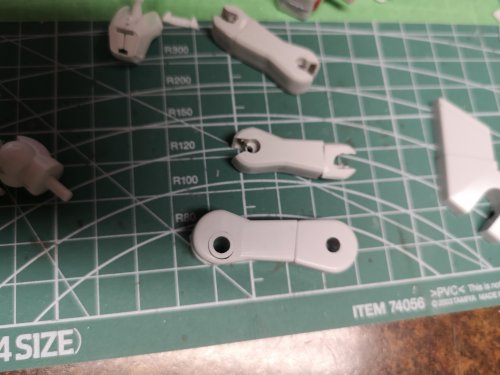
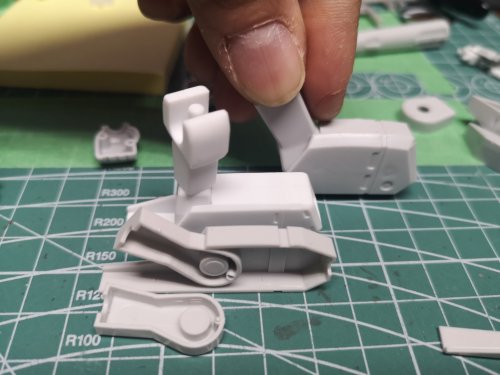
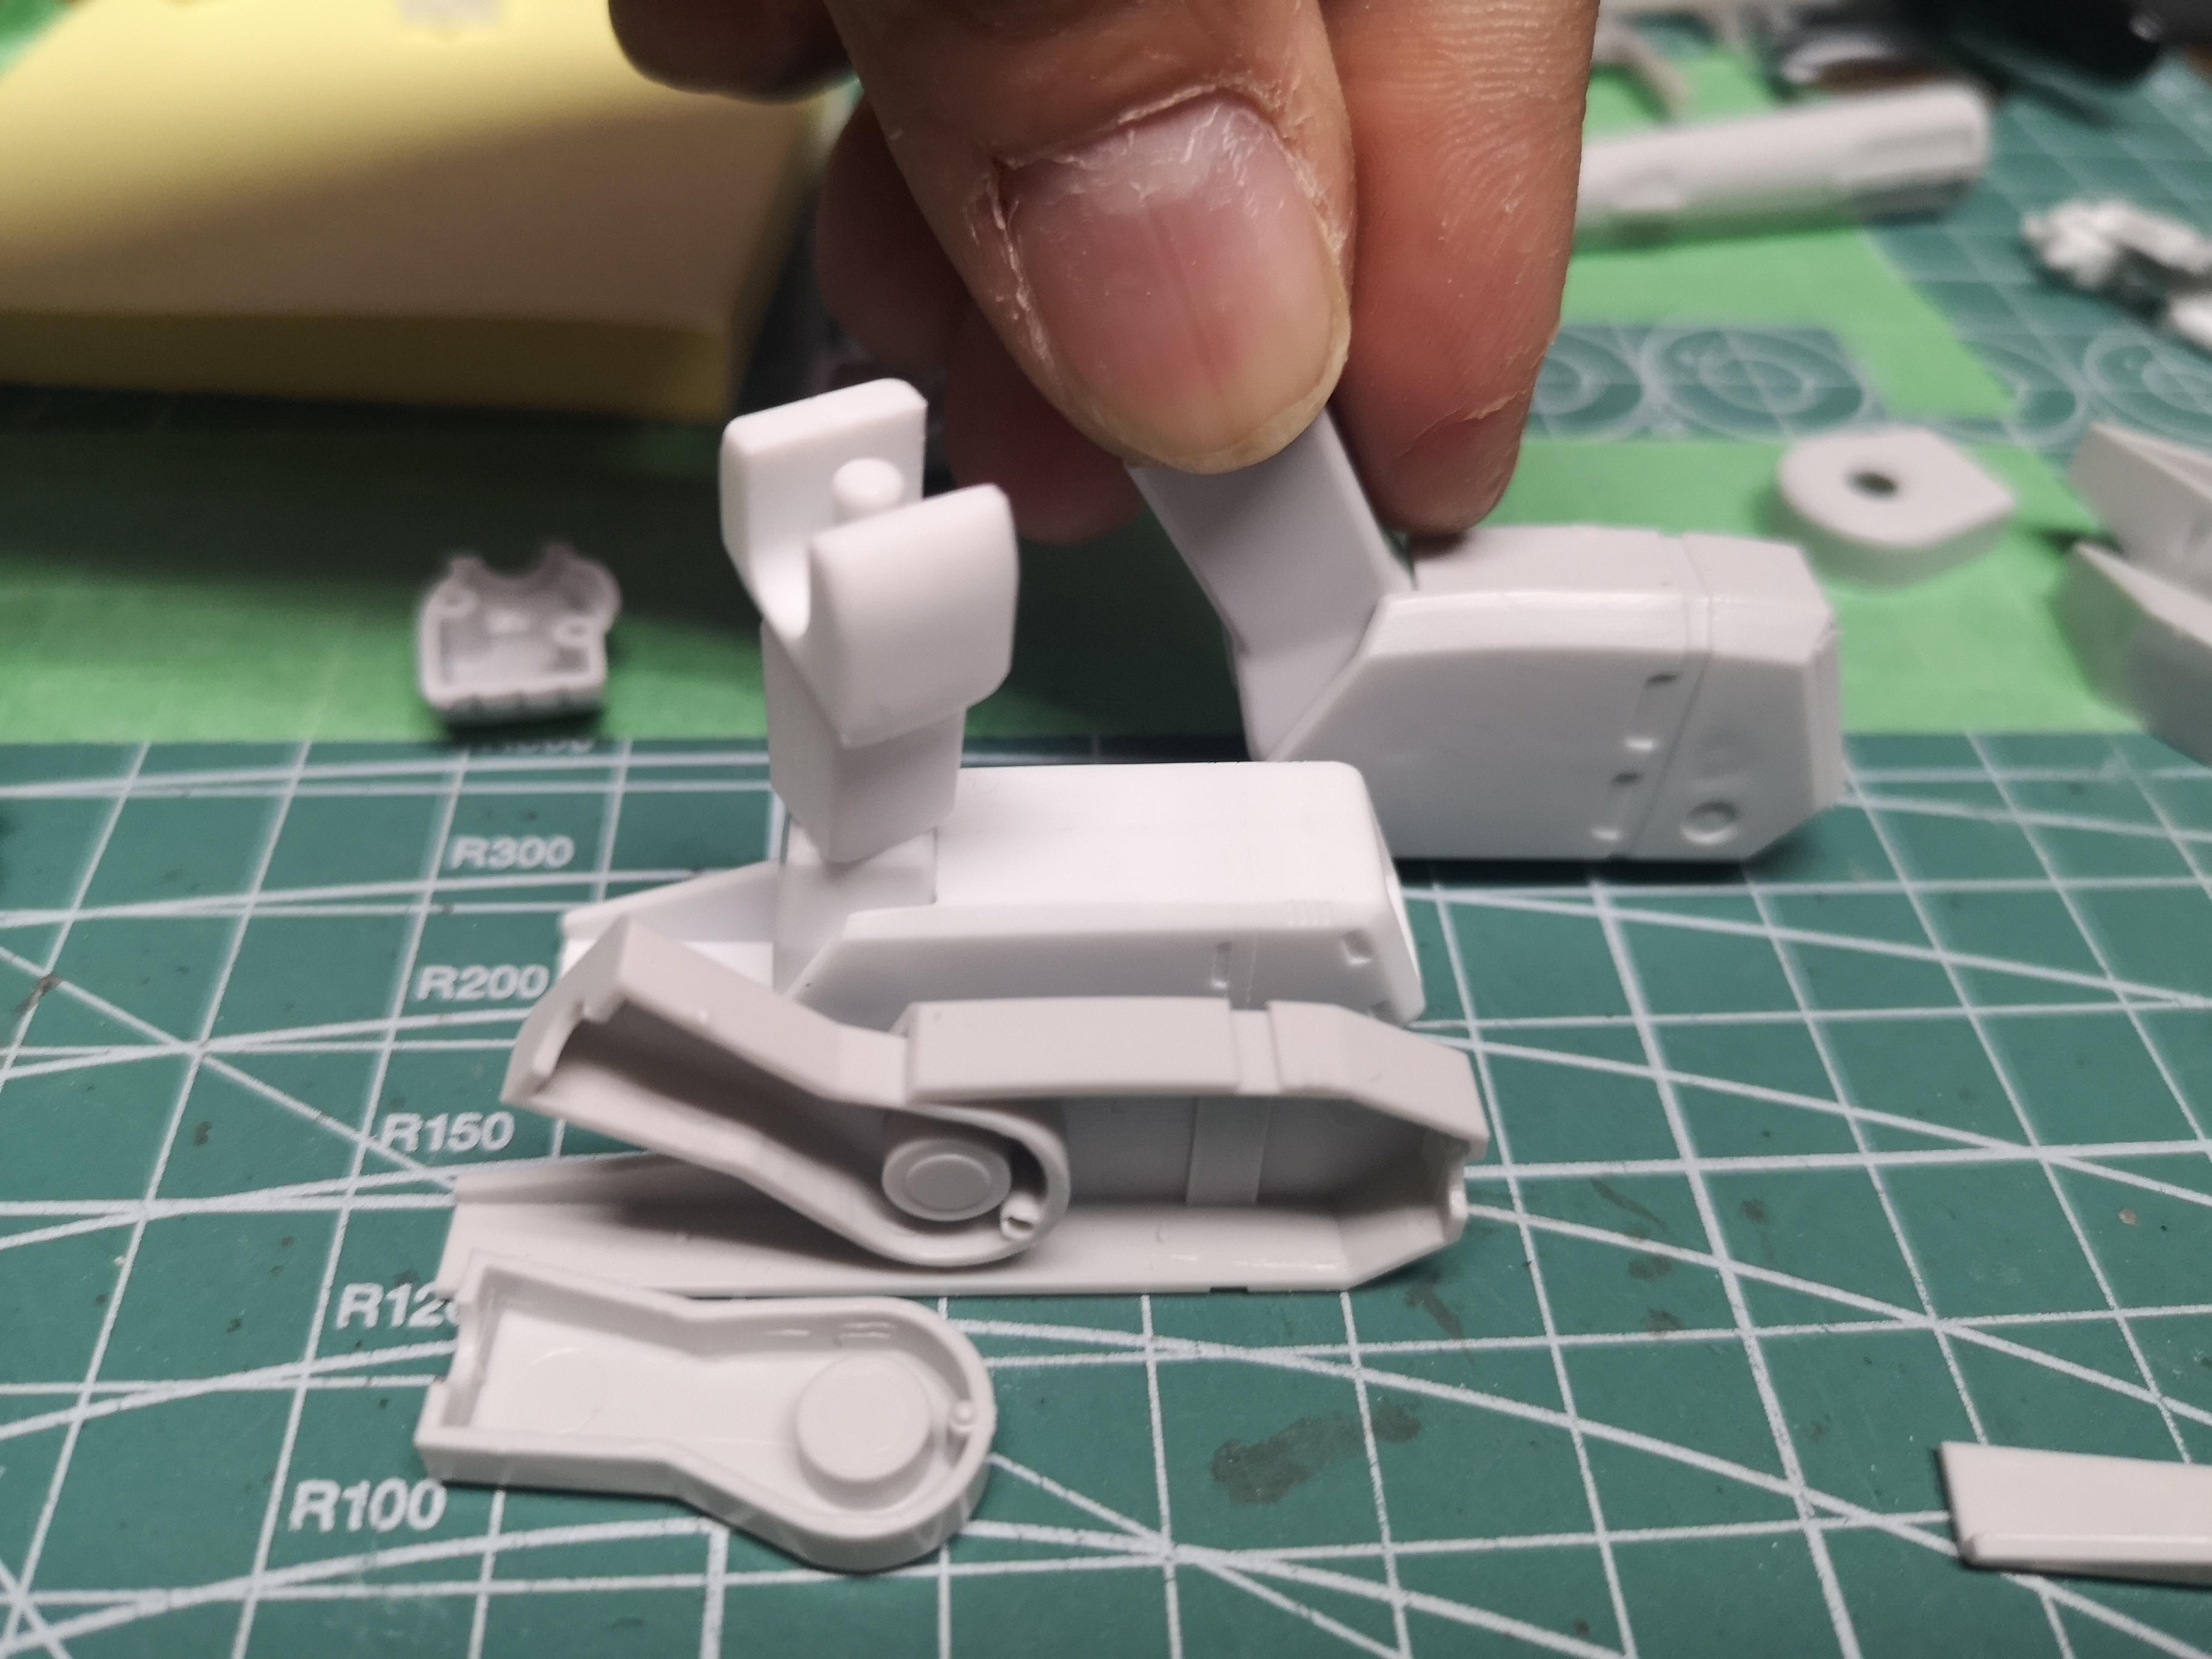
I decided to try custom joints on this build, but I'd never done this before. How do I get Gundam joints to fit into a Valkyrie?

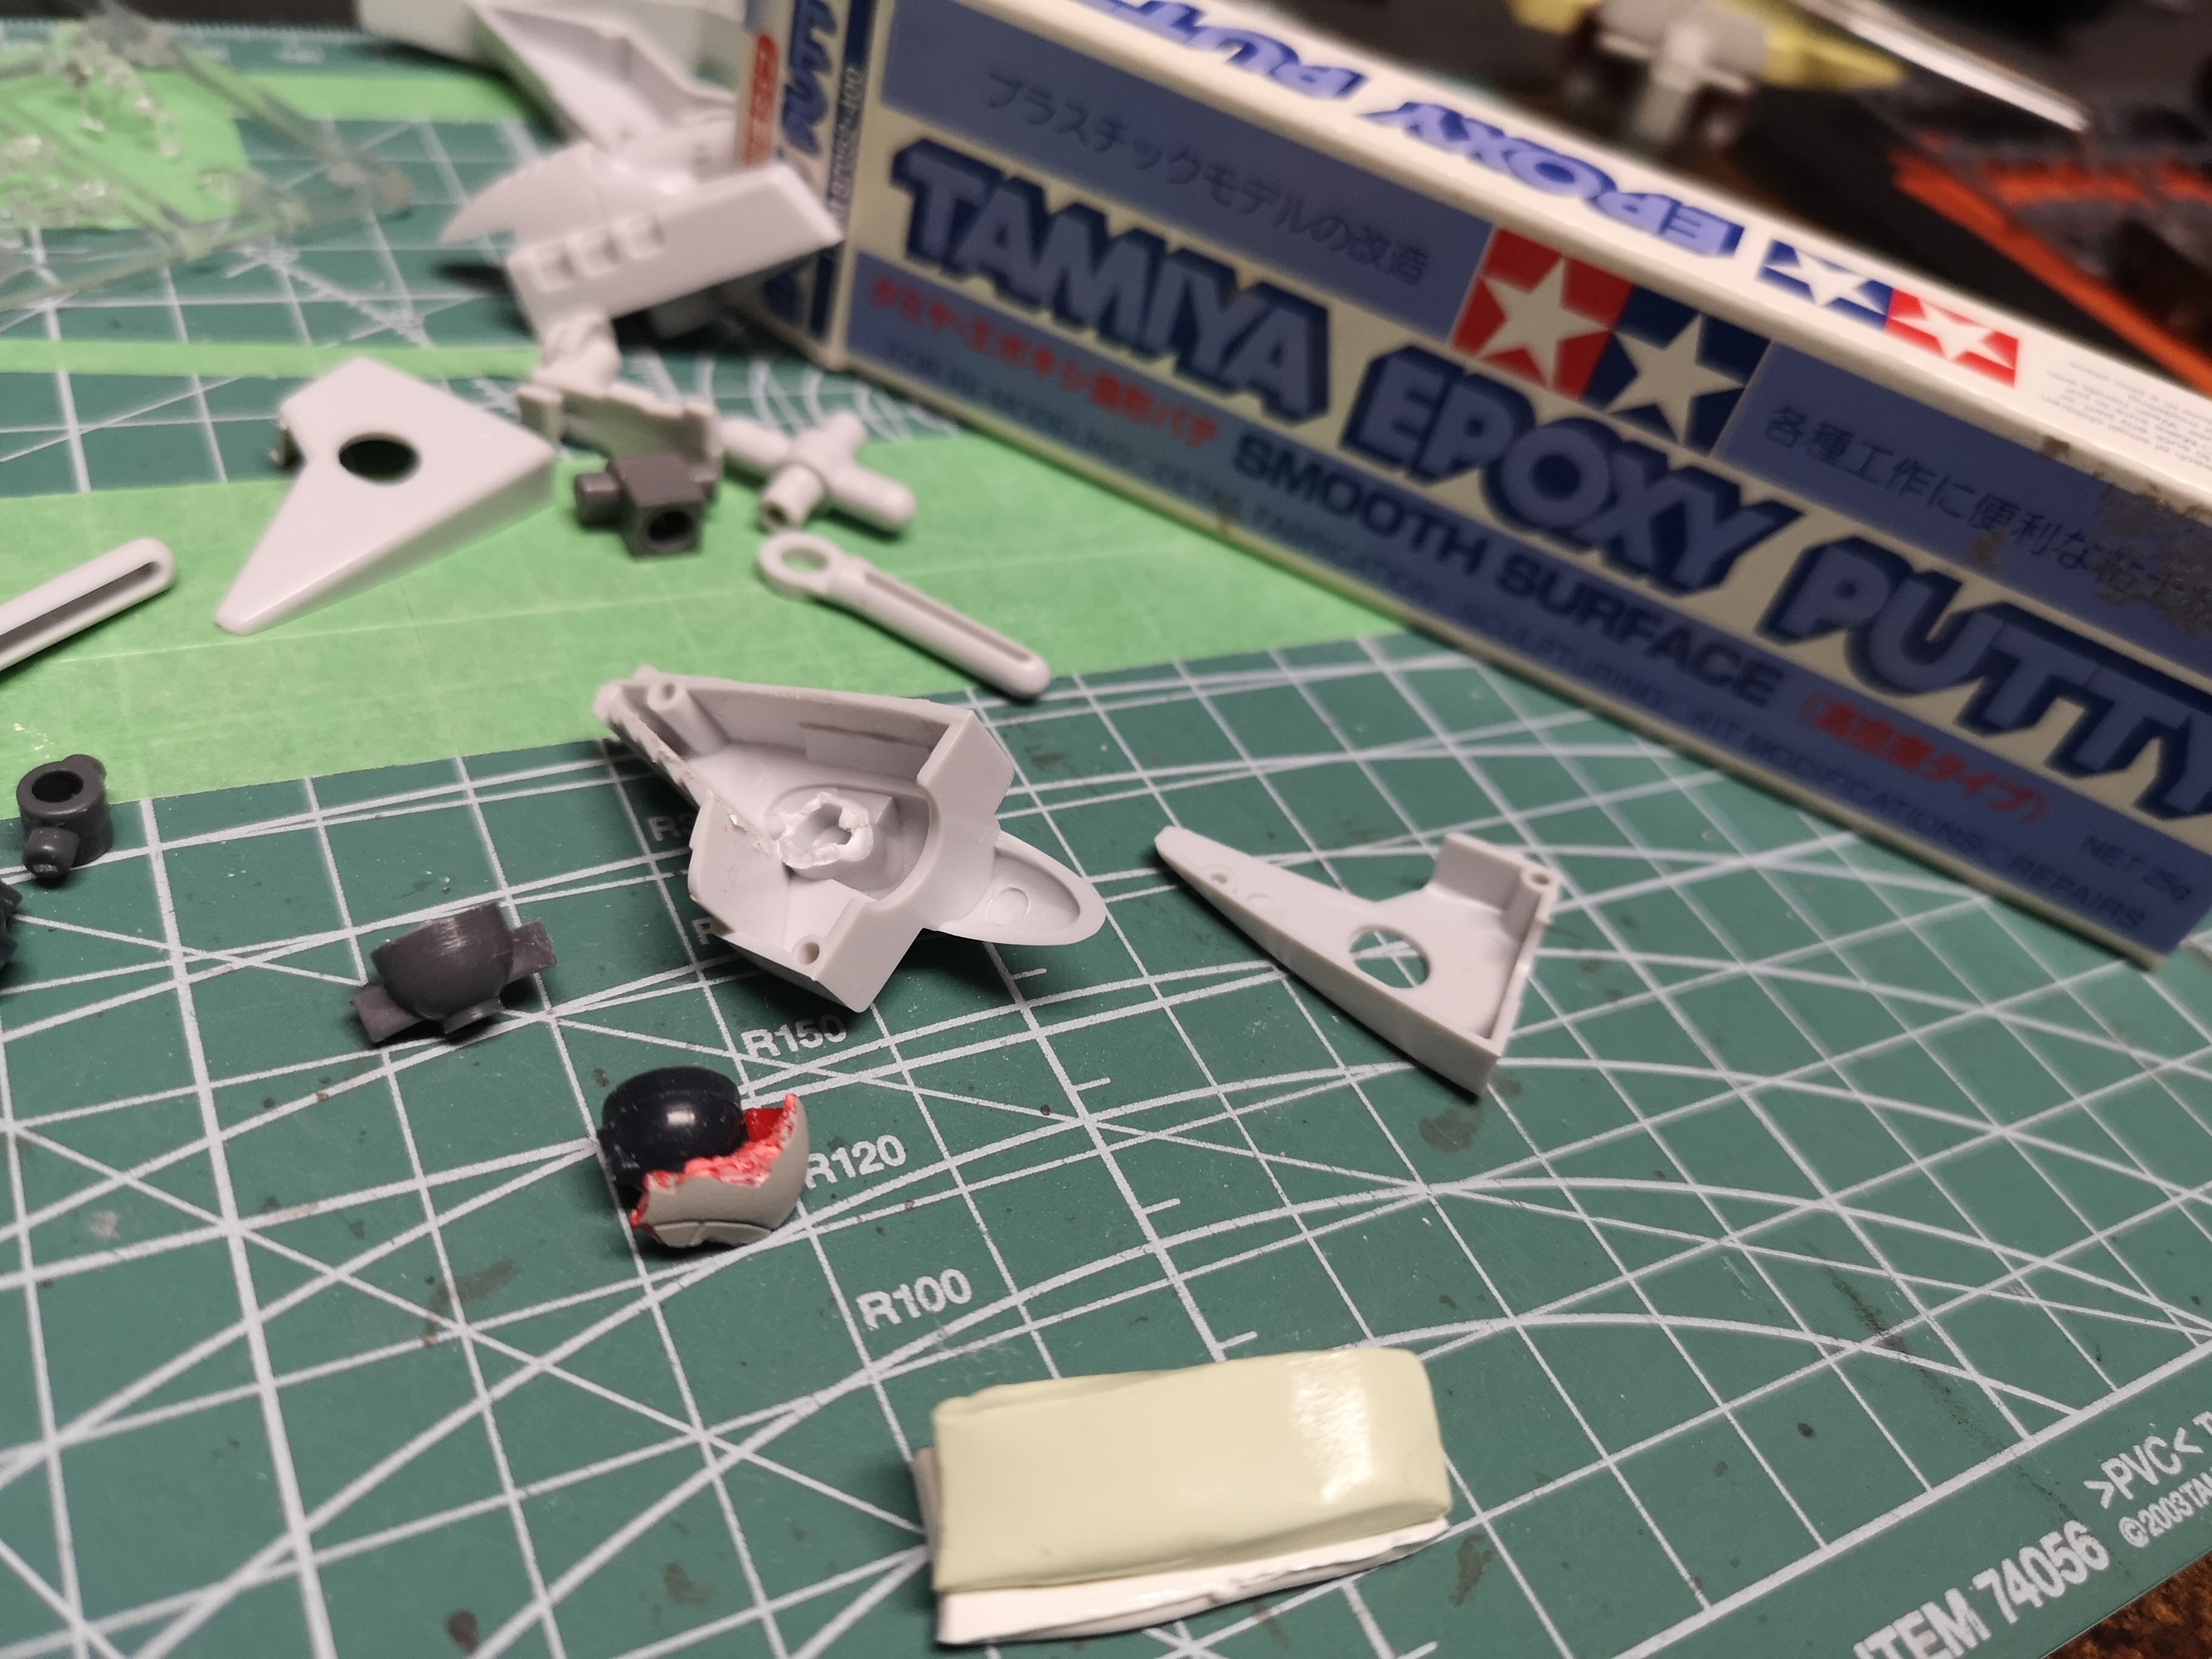
I remembered I had this epoxy putty I bought 20+ years ago, would be a waste if I didn't try and use it..... Never worked with epoxy putty before.
What a mess.

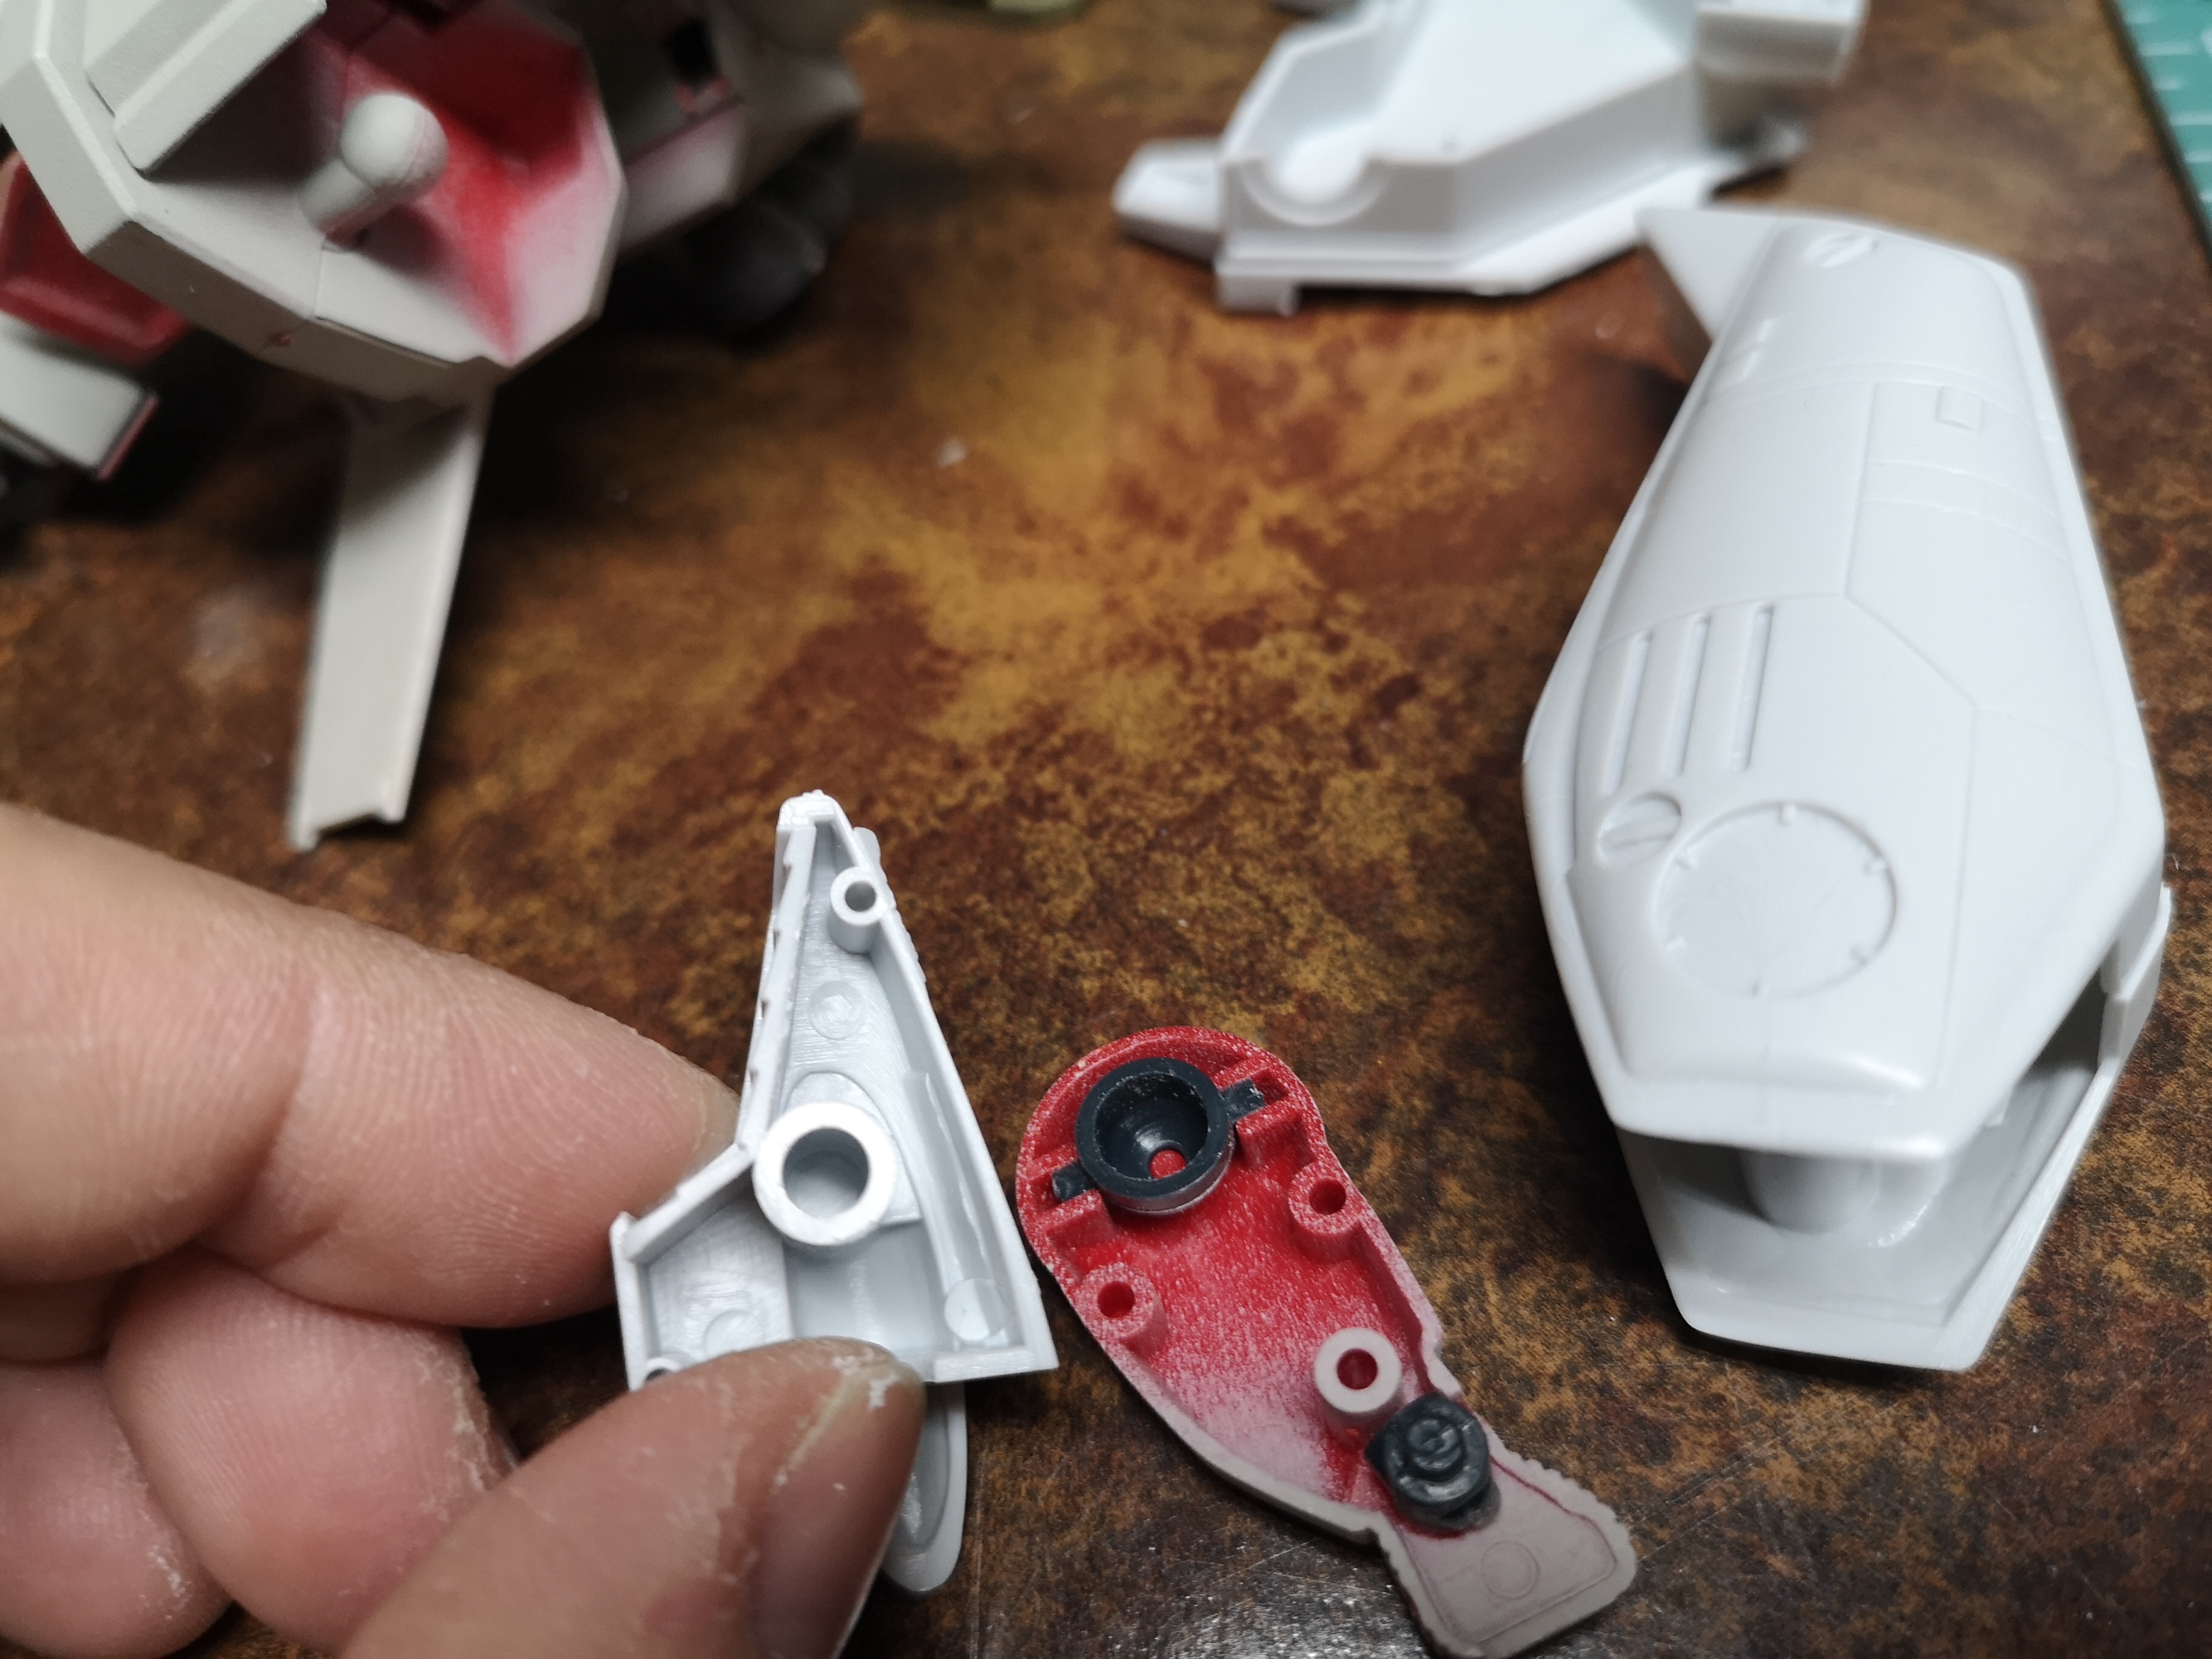
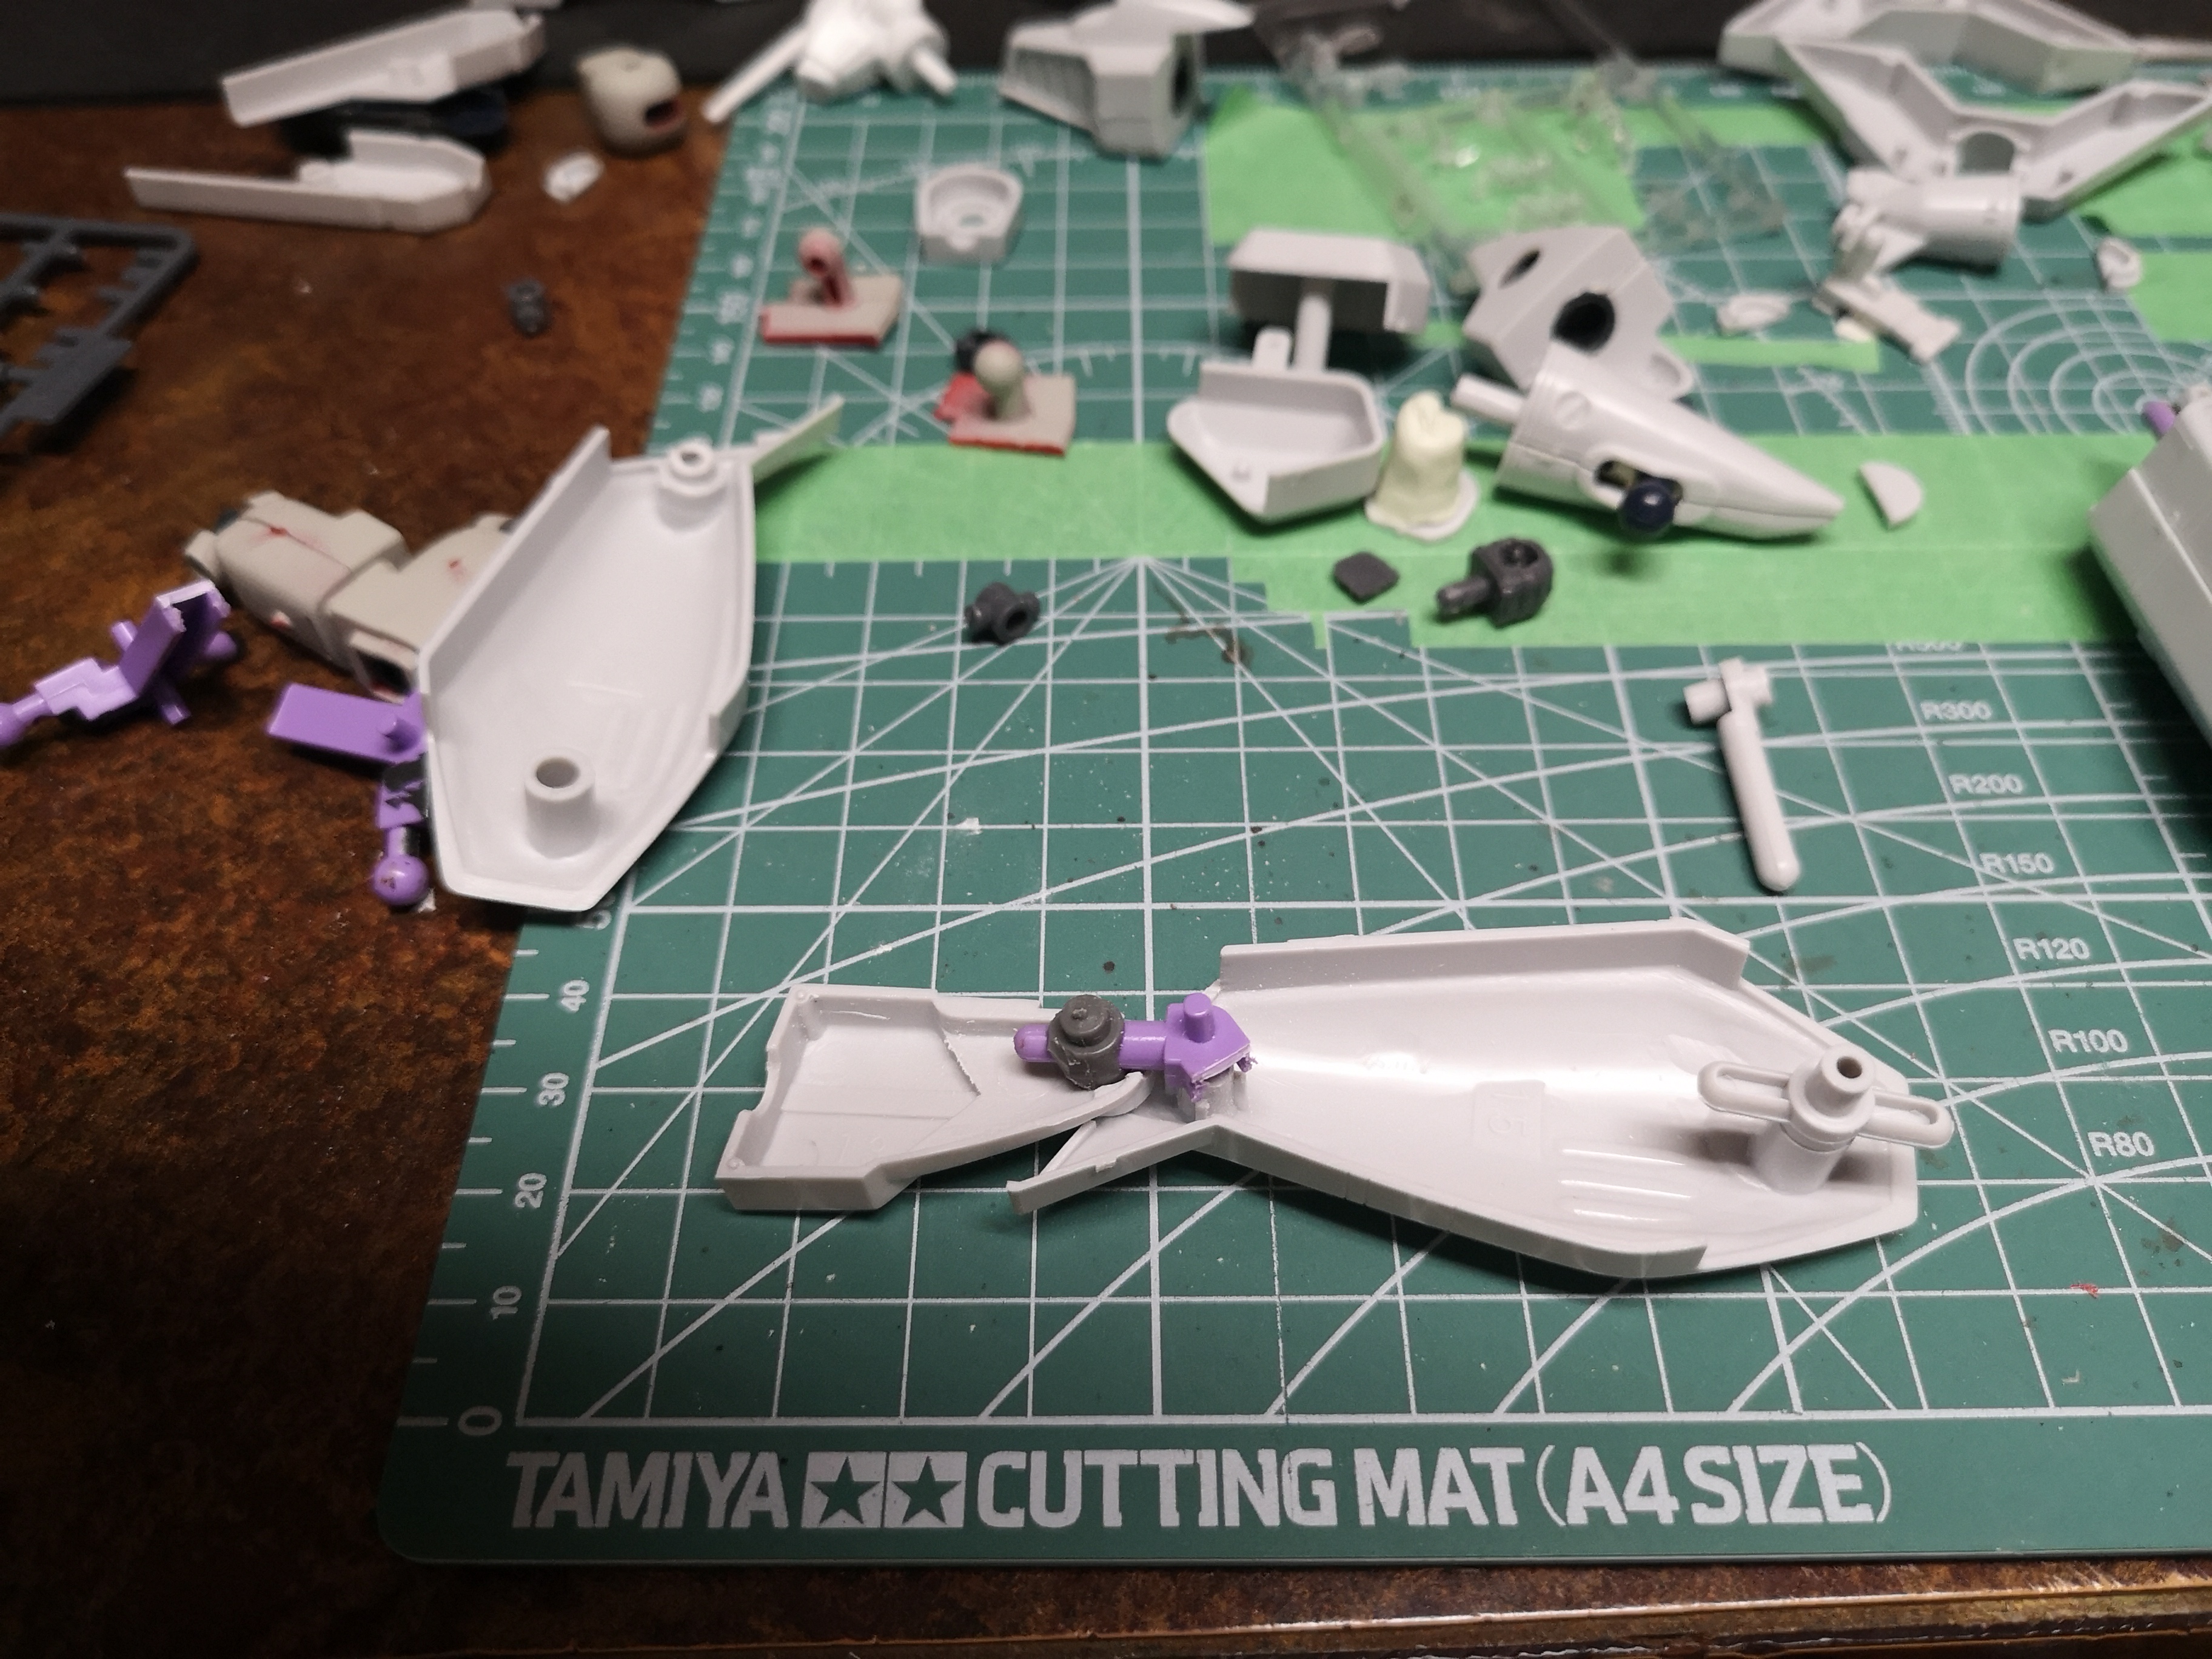
So I butchered an old Gundam to do this. Chopped it's crotch for the balls, and cut the sockets out of its hips.... Brutal.

Was also mucking around with the hip section with the upper leg section.

The shoulders on the Bandai SUCKED..... They would dislocate and flop right out if you played with it too much. The Gundam shoulder sockets made way more sense, but how do I fit al of that into the chest of a Valkyrie?
Chop-shop. I'm sure there are better, more professional ways to do this. I'll have to do more research on this.

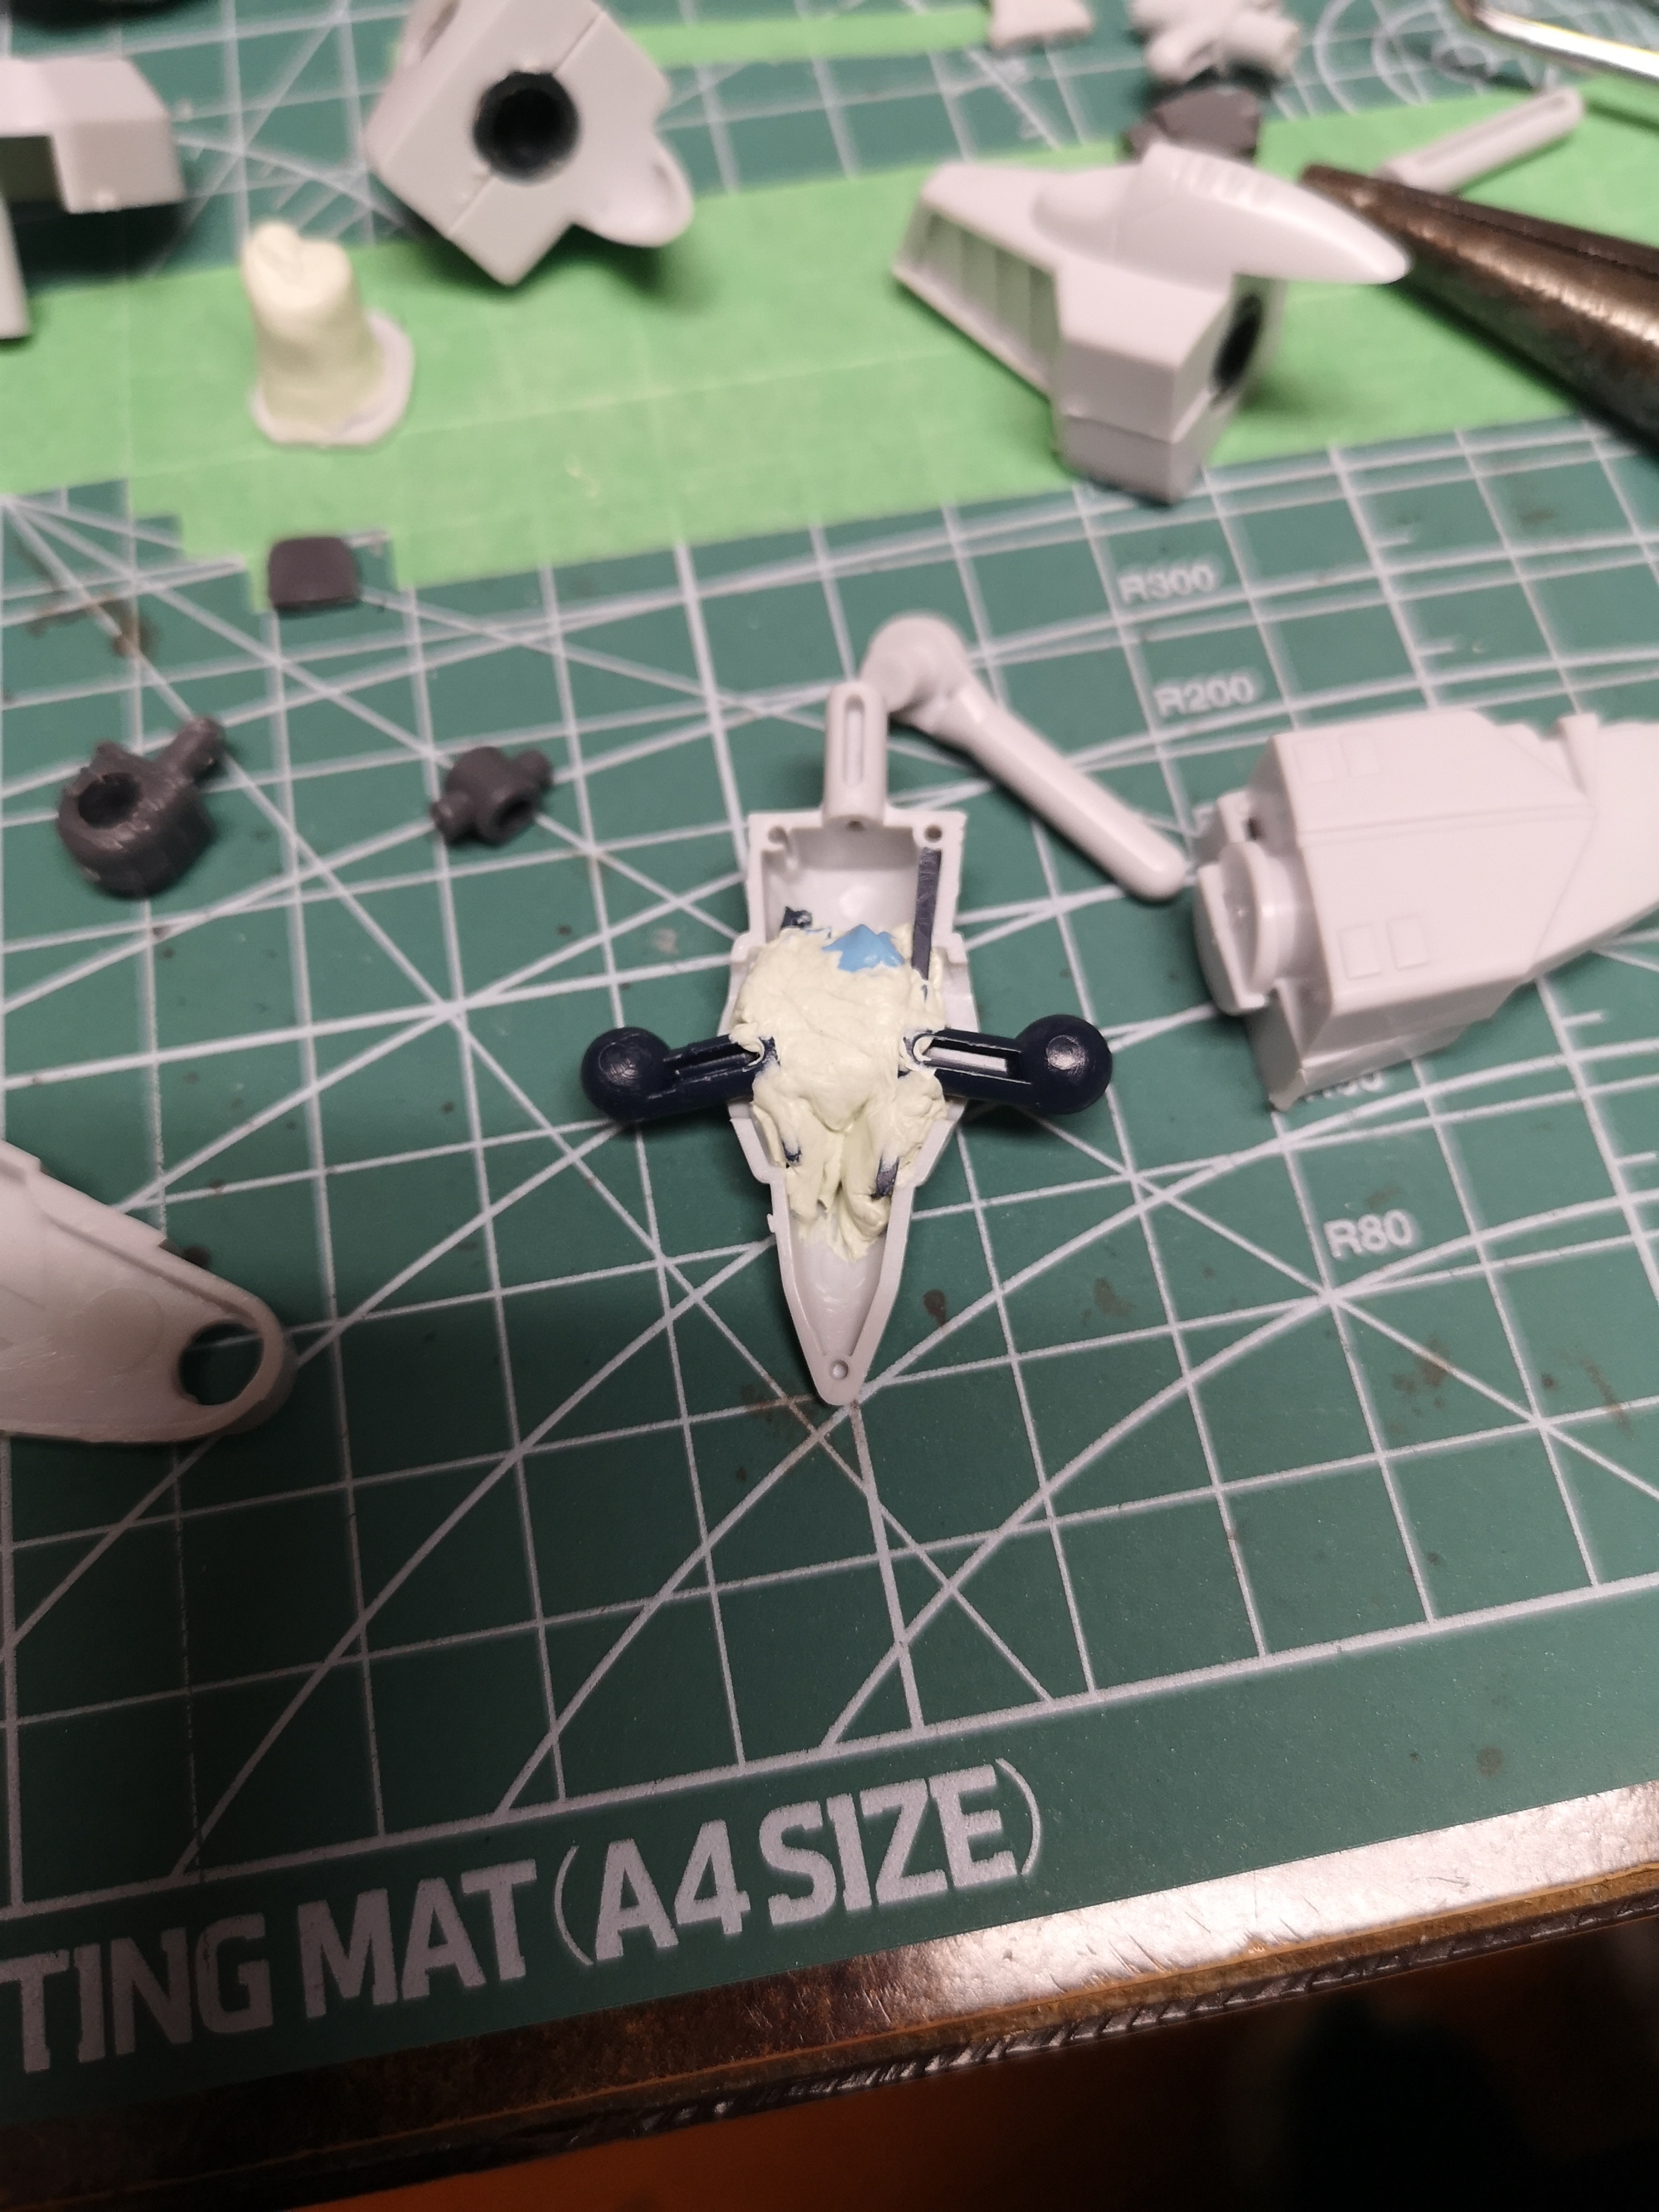
I wanted to do custom joints for the knees as well, but in retrospect, this was badly thought out. First, it added some unwanted height to the Valkyrie, and second, it's not tight so it was sort of a floppy mess.
Part of the reason I wanted to add custom joints was more for ease of painting. If I didn't, the process to build an old Bandai would be a PITA. Every part is captured in another so it would be glue, sand, fill, paint, mask, then capture it in the next part and do it all again. I don't build Gundam, but in this respect, Gundam kits make much more sense.

I got lazy here and used the arm of a Gundam inside the leg of the Valkyrie, with poly caps stuck in the feet (from the Bandai Gerwalk parts).

-
Last pic. Just need a Gerwalk for Roy.
-
All this talk about my low vis and the first Hasegawa Battroid kit I built feels forgotten.

Still a bit peeved about not considering there would be a height difference. I'll just call the Low-Vis the VF-1 Heavy Duty version. Actually, I was thinking the DX has those knee extensions which can actually add some height to the VF.

Giving boss a high-five

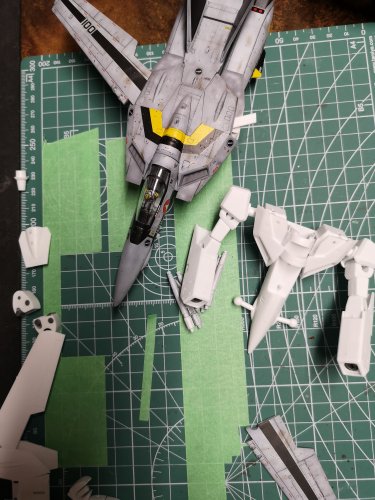
I love the detail on these Hasegawa Battroids. It was SOOO much easier to build than the fighter, I might build a few more that I have buried in my pile somewhere.
A bit hard to pose though, I still feel a bit nervous around it because it's Hasegawa and because their fighters fall apart if you breathe the wrong way.

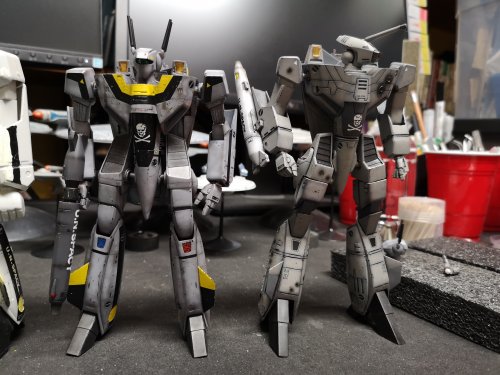
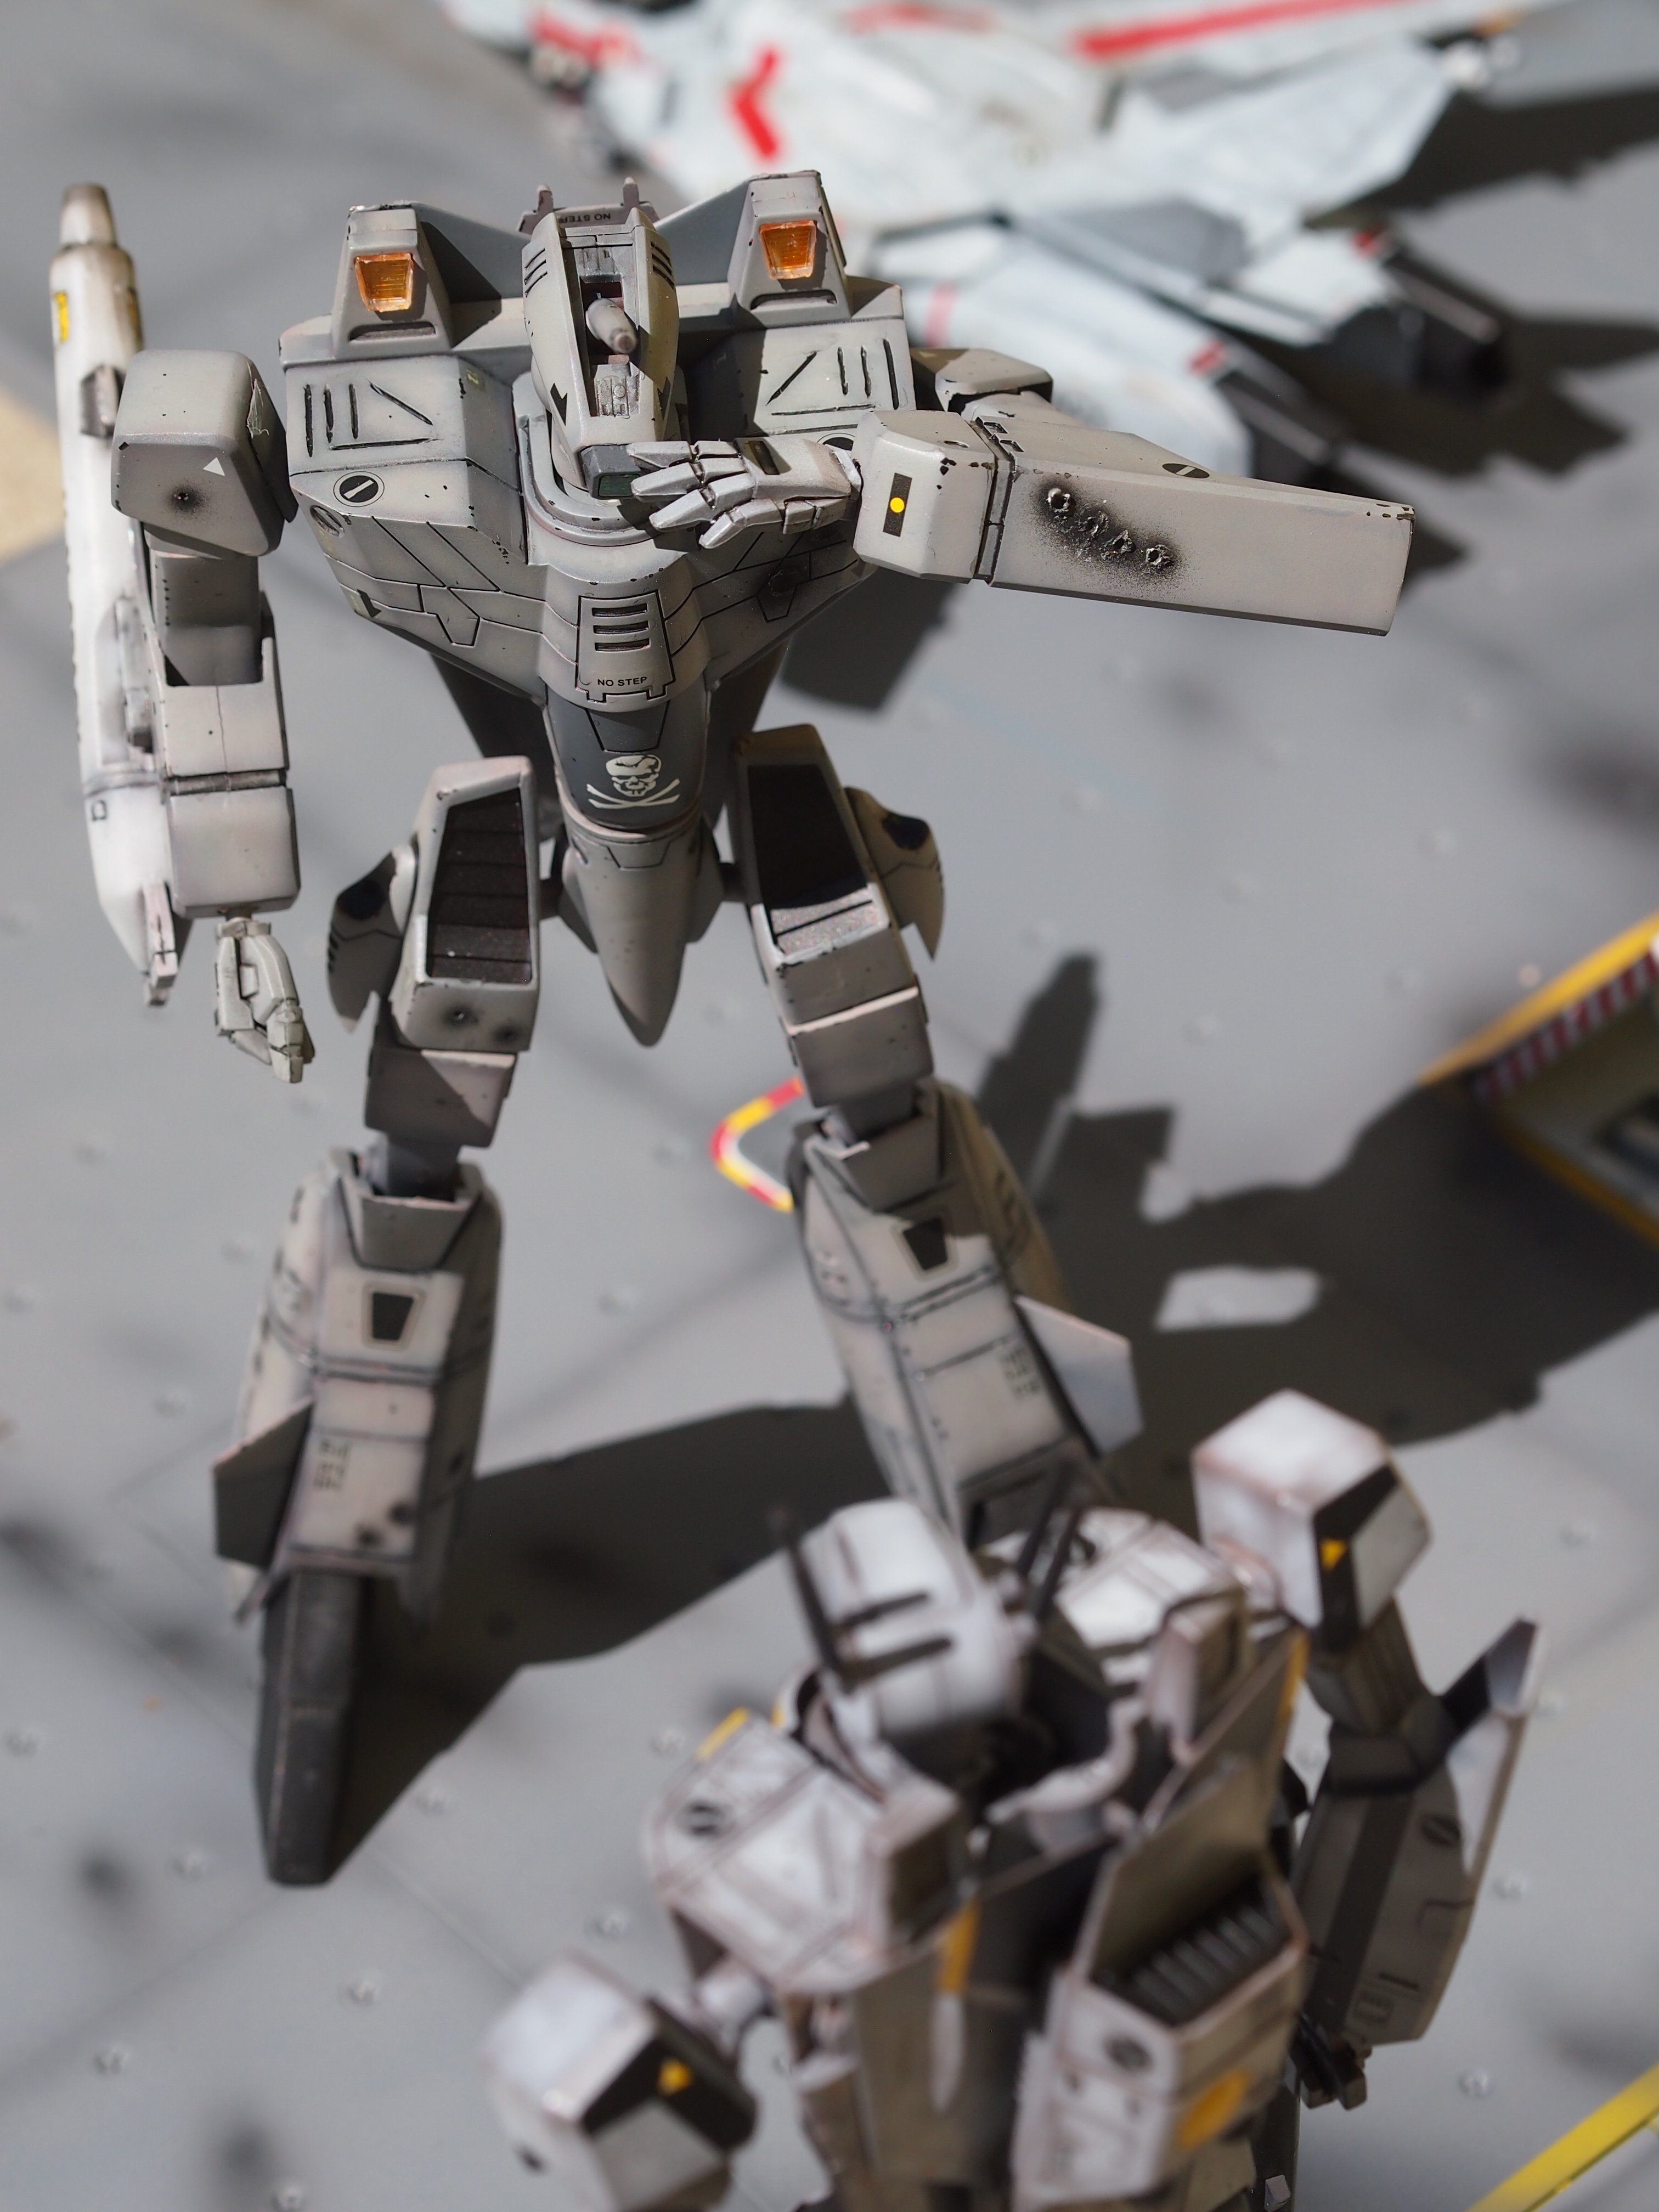
Watching Hikki on his first VF-1J sortie

If I had one complaint about the Hasegawa sculpt is the engine intakes/hips seem a touch to big? I think the smaller Fighter version would have been ok. The larger intakes also make that complex hip joint pretty useless as they really hinder poseability.
-
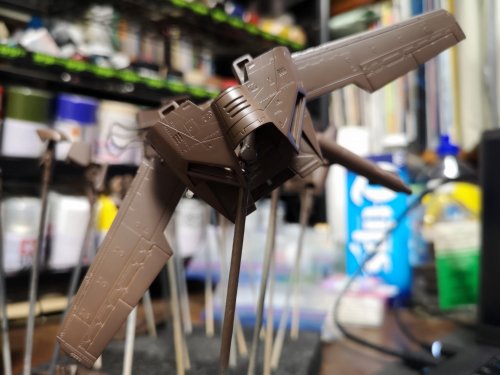
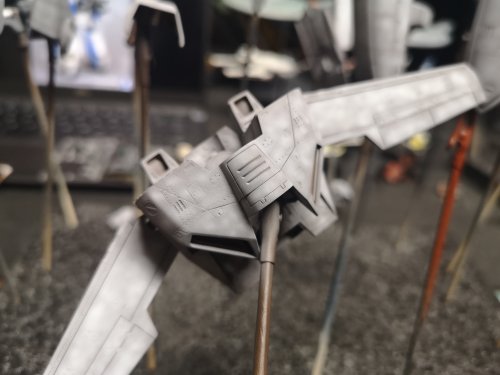
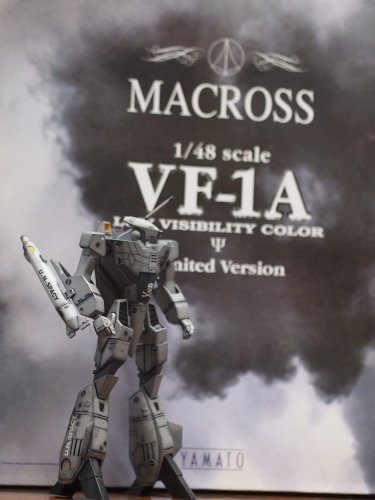
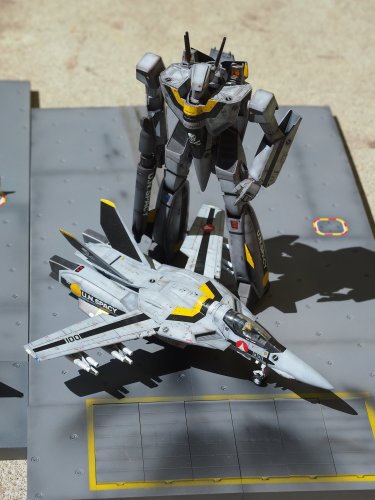
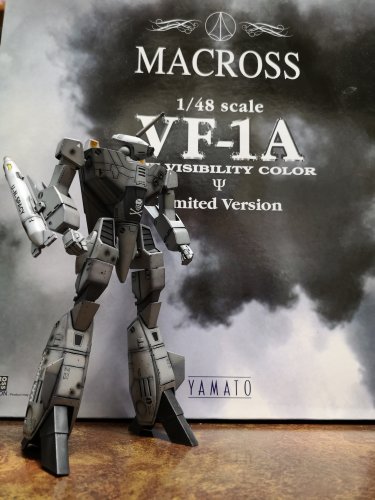
Some beauty shots of the 1A...lens on the camera picks up all the damn flaws, lol!
.thumb.JPG.b8830fba10a46598126ee9ecf5c0ac75.JPG)


-
Inspiration for the color scheme for the Bandai. Not an exact match, but good enough for me.


I swear the chicken hands that came with the Yamato 1/48 are actually 1/72 scale, lol! I'll have to find a way to use the spare hands from my Bandai DX on the old Yammies.
-
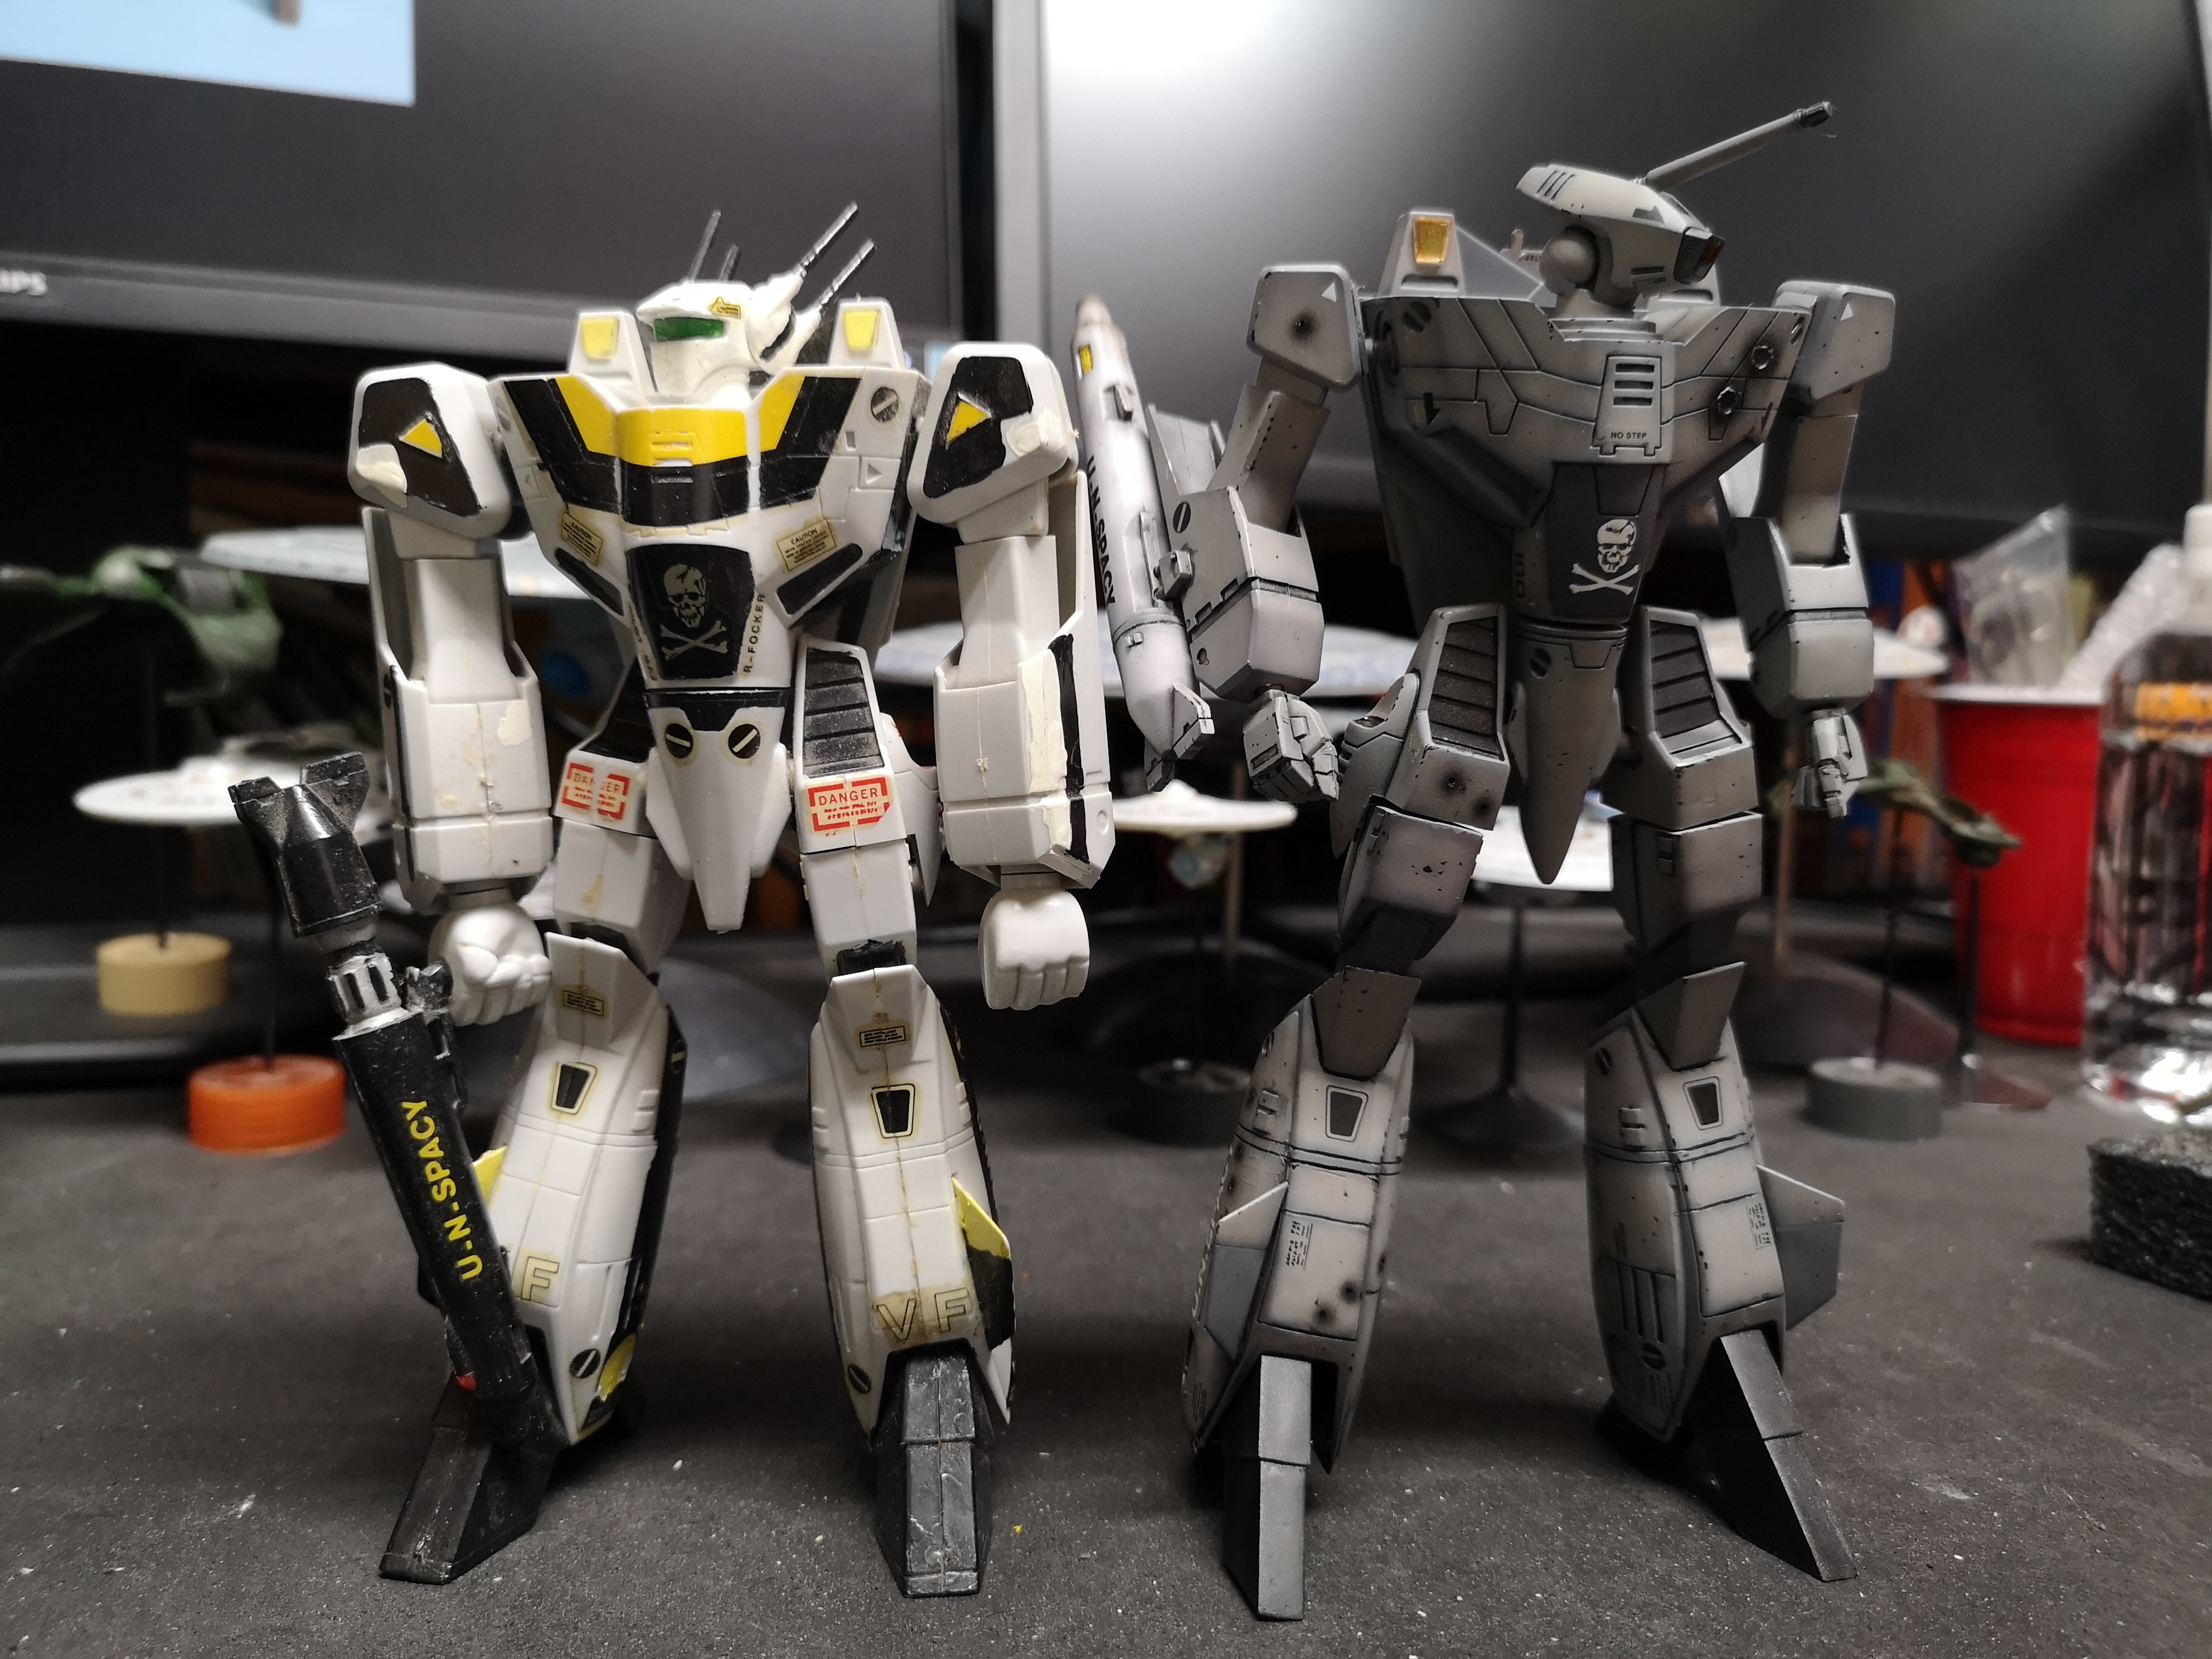
It came out a bit taller than I was expecting......oops. The feet from the Bandai Gerwalk are a bit taller (but narrower) than the Battroid feet. Also, I really Mickey Moused the new knee joint so there's added height there.

The original Bandai 1/72 VF-1S Battroid I build as a kid on the left, and the Low Vis on the right. I really like the arms from the Gerwalk, they are definitely less chunky/cartoonish than the original Battroid arms and hands.
The height difference between the Hasegawa and the custom Bandai.

Out of the box Bandai 1/72 and Hasegawa 1/72

The Bandai built out of the box becomes a floppy mess if you pose it too much because it's just plastic on plastic at the joints (or maybe I just played with it too much as a kid. I was able to improve on it a bit, but did a really crap job on the knees. I'll probably try to read up a bit more on custom ball joints.
-
Bandai 1/72 Low Vis Battroid done.
-
23 hours ago, pengbuzz said:
Hmm... Roy must've had one too many just before he took Skull-1 out...
Lol! Actually, I may have been hitting the sauce when I applied that decal.
@Thom Thanks
It turned out better than I was hoping for so I'm pretty satisfied.
-
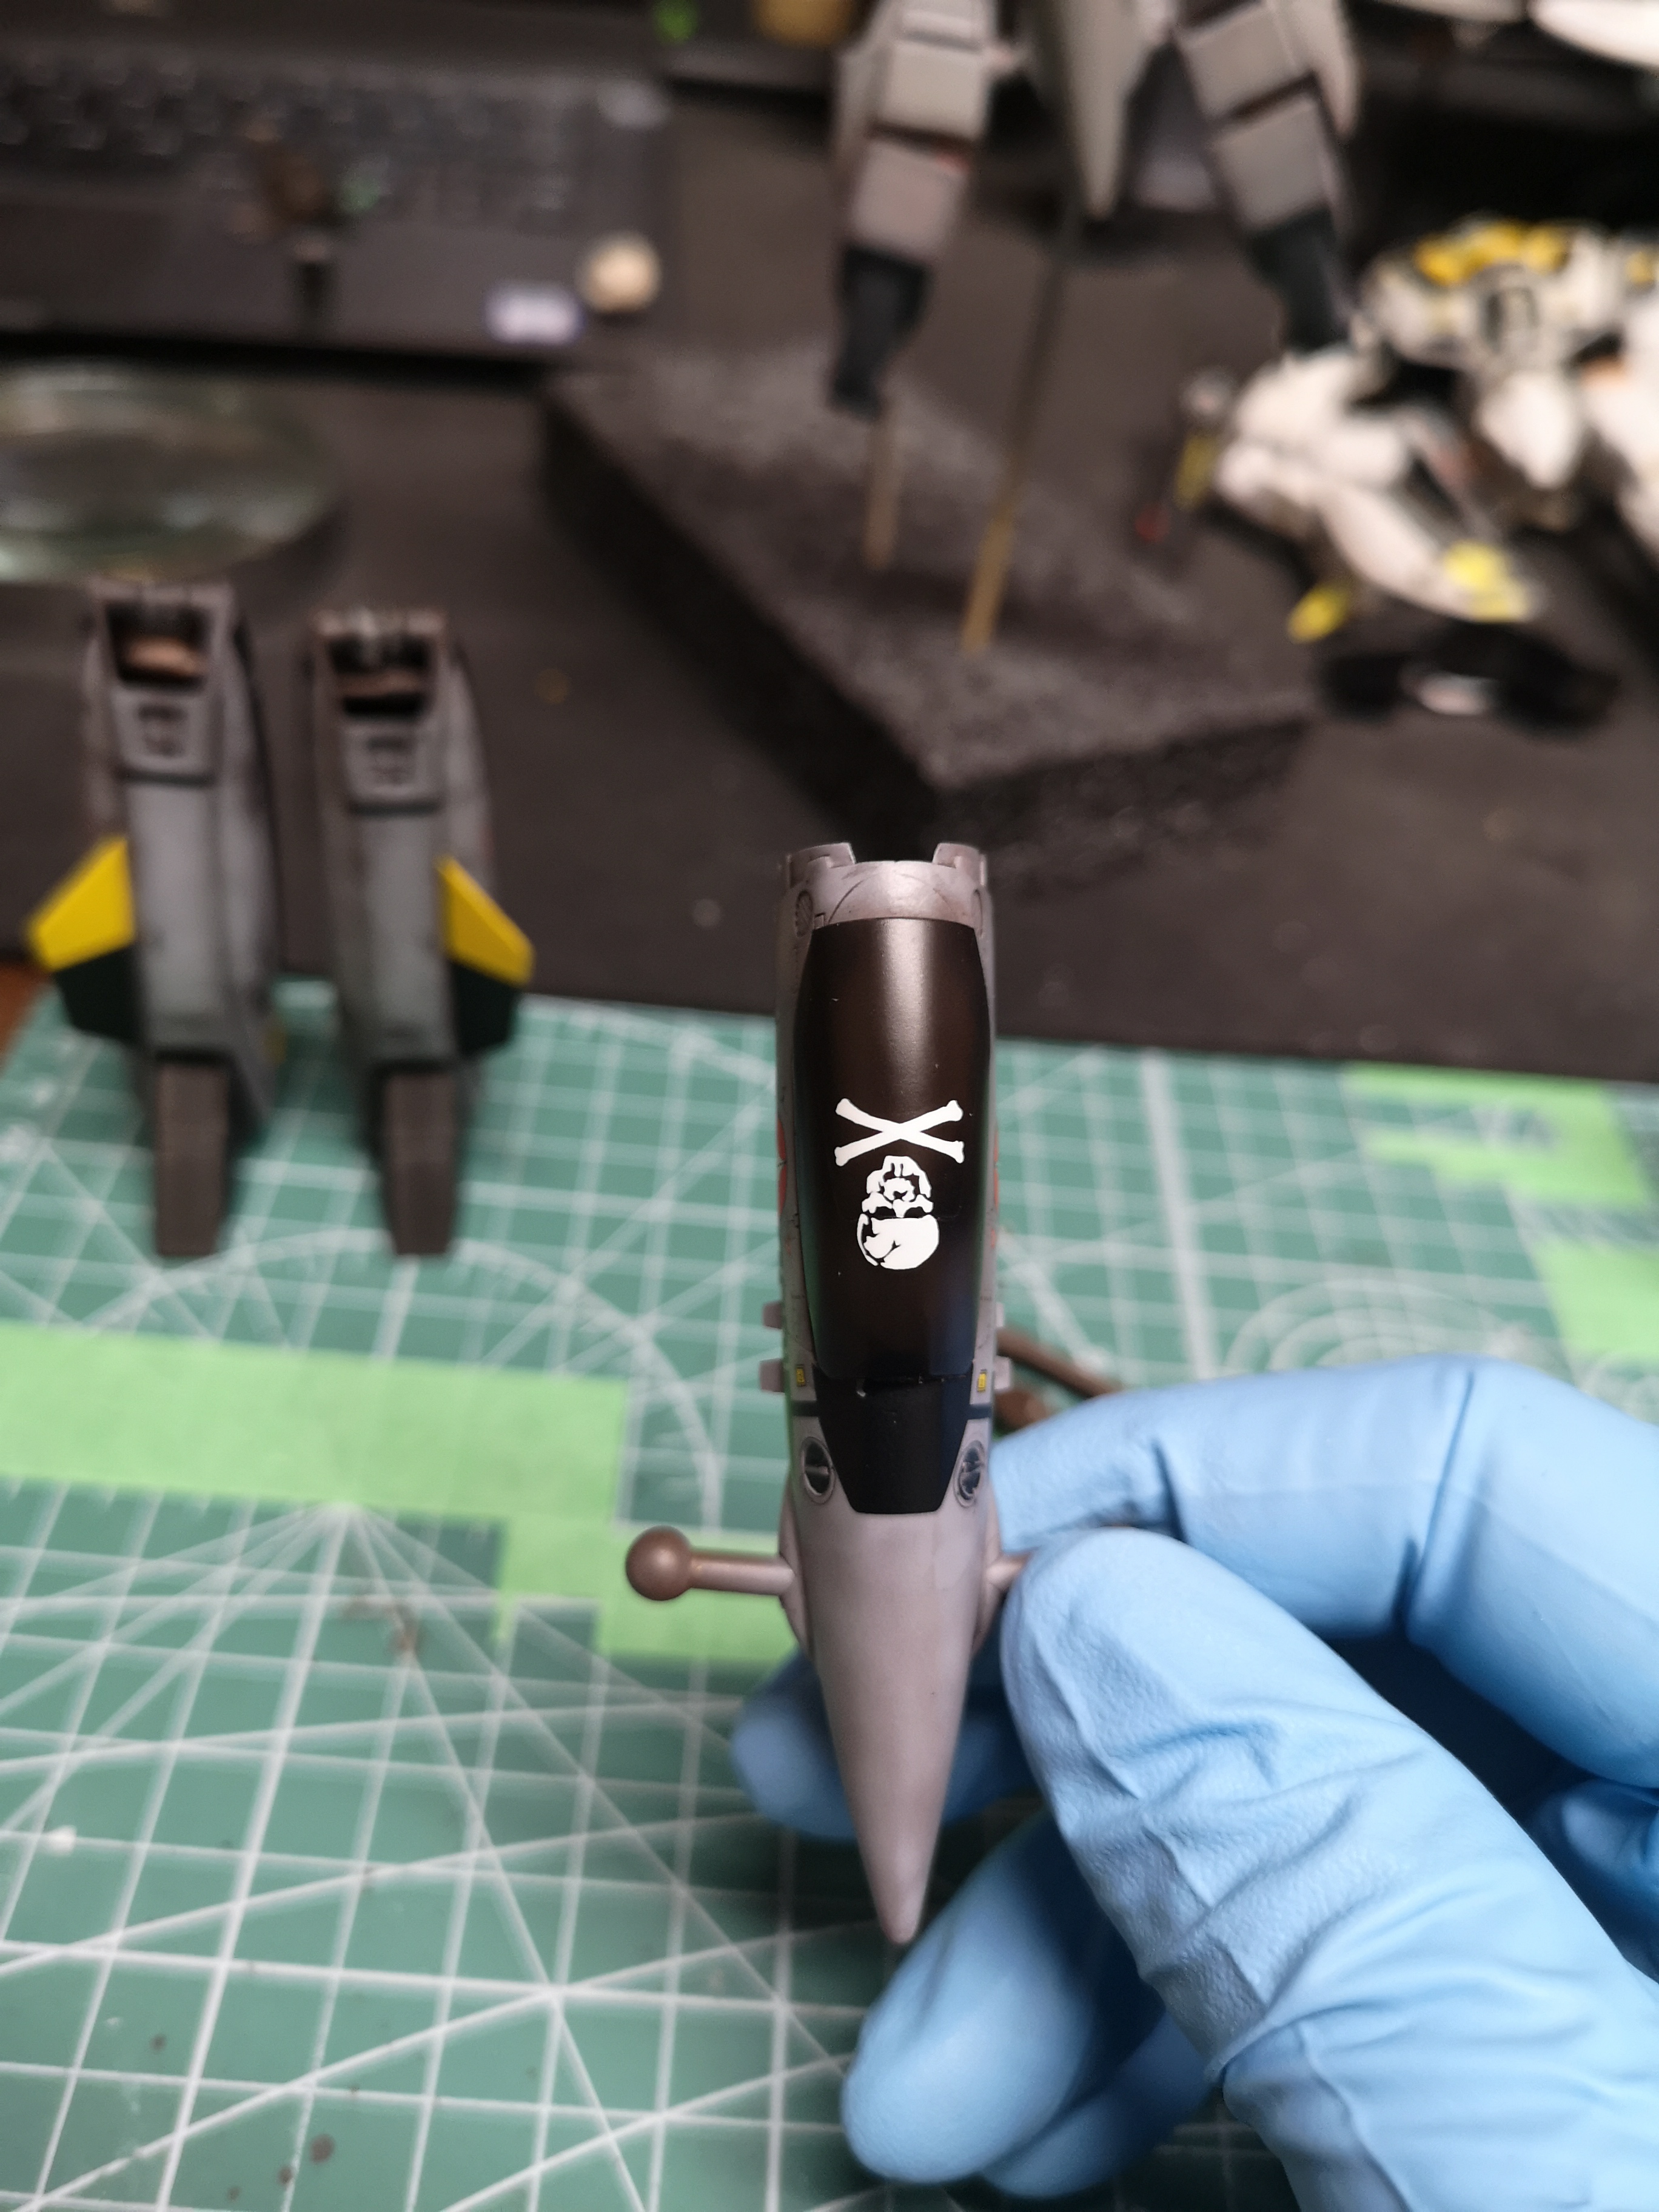
Btw, how's this for genius.
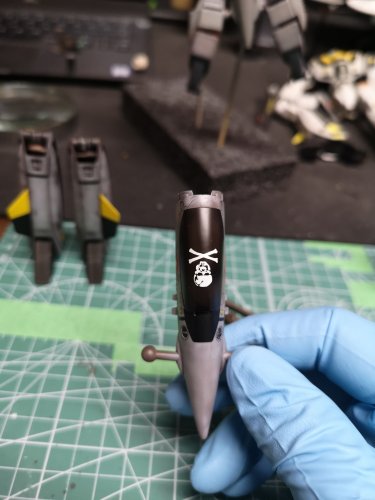
Good thing I have tons of spare skull decals.
-
5 hours ago, arbit said:
Looks sweet. Nice color scheme, paint finish, and panel lines. Did you scribe those yourself?
Haha, no, I can't scribe lines to save my life. I tried adding panel lines to the top of the chest piece but it came out looking like a 2 yr old drew on it.
The one on the left is how it comes from Bandai, no detail at all. The messy collection of jagged crooked lines on the gray one is what I added.
-
Flat clear on the Bandai Battroid.
Will have to decide how much more wear and tear to add to it.

-
6 hours ago, pengbuzz said:
UPDATE 1: earlier this weekend, the F-18 I was working on had a wing end pop off. In typical fashion, I repaired it, but miscalculated on the glue...
...I just found that it melted a huge hole down the entire inside of the left wing and fuselage.
So, the Top Gun: Maverick project is cancelled. Parts have been reallocated to the scrap heap. At least I still have the Tomcat though.
But the fun doesn't end there....
UPDATE 2:
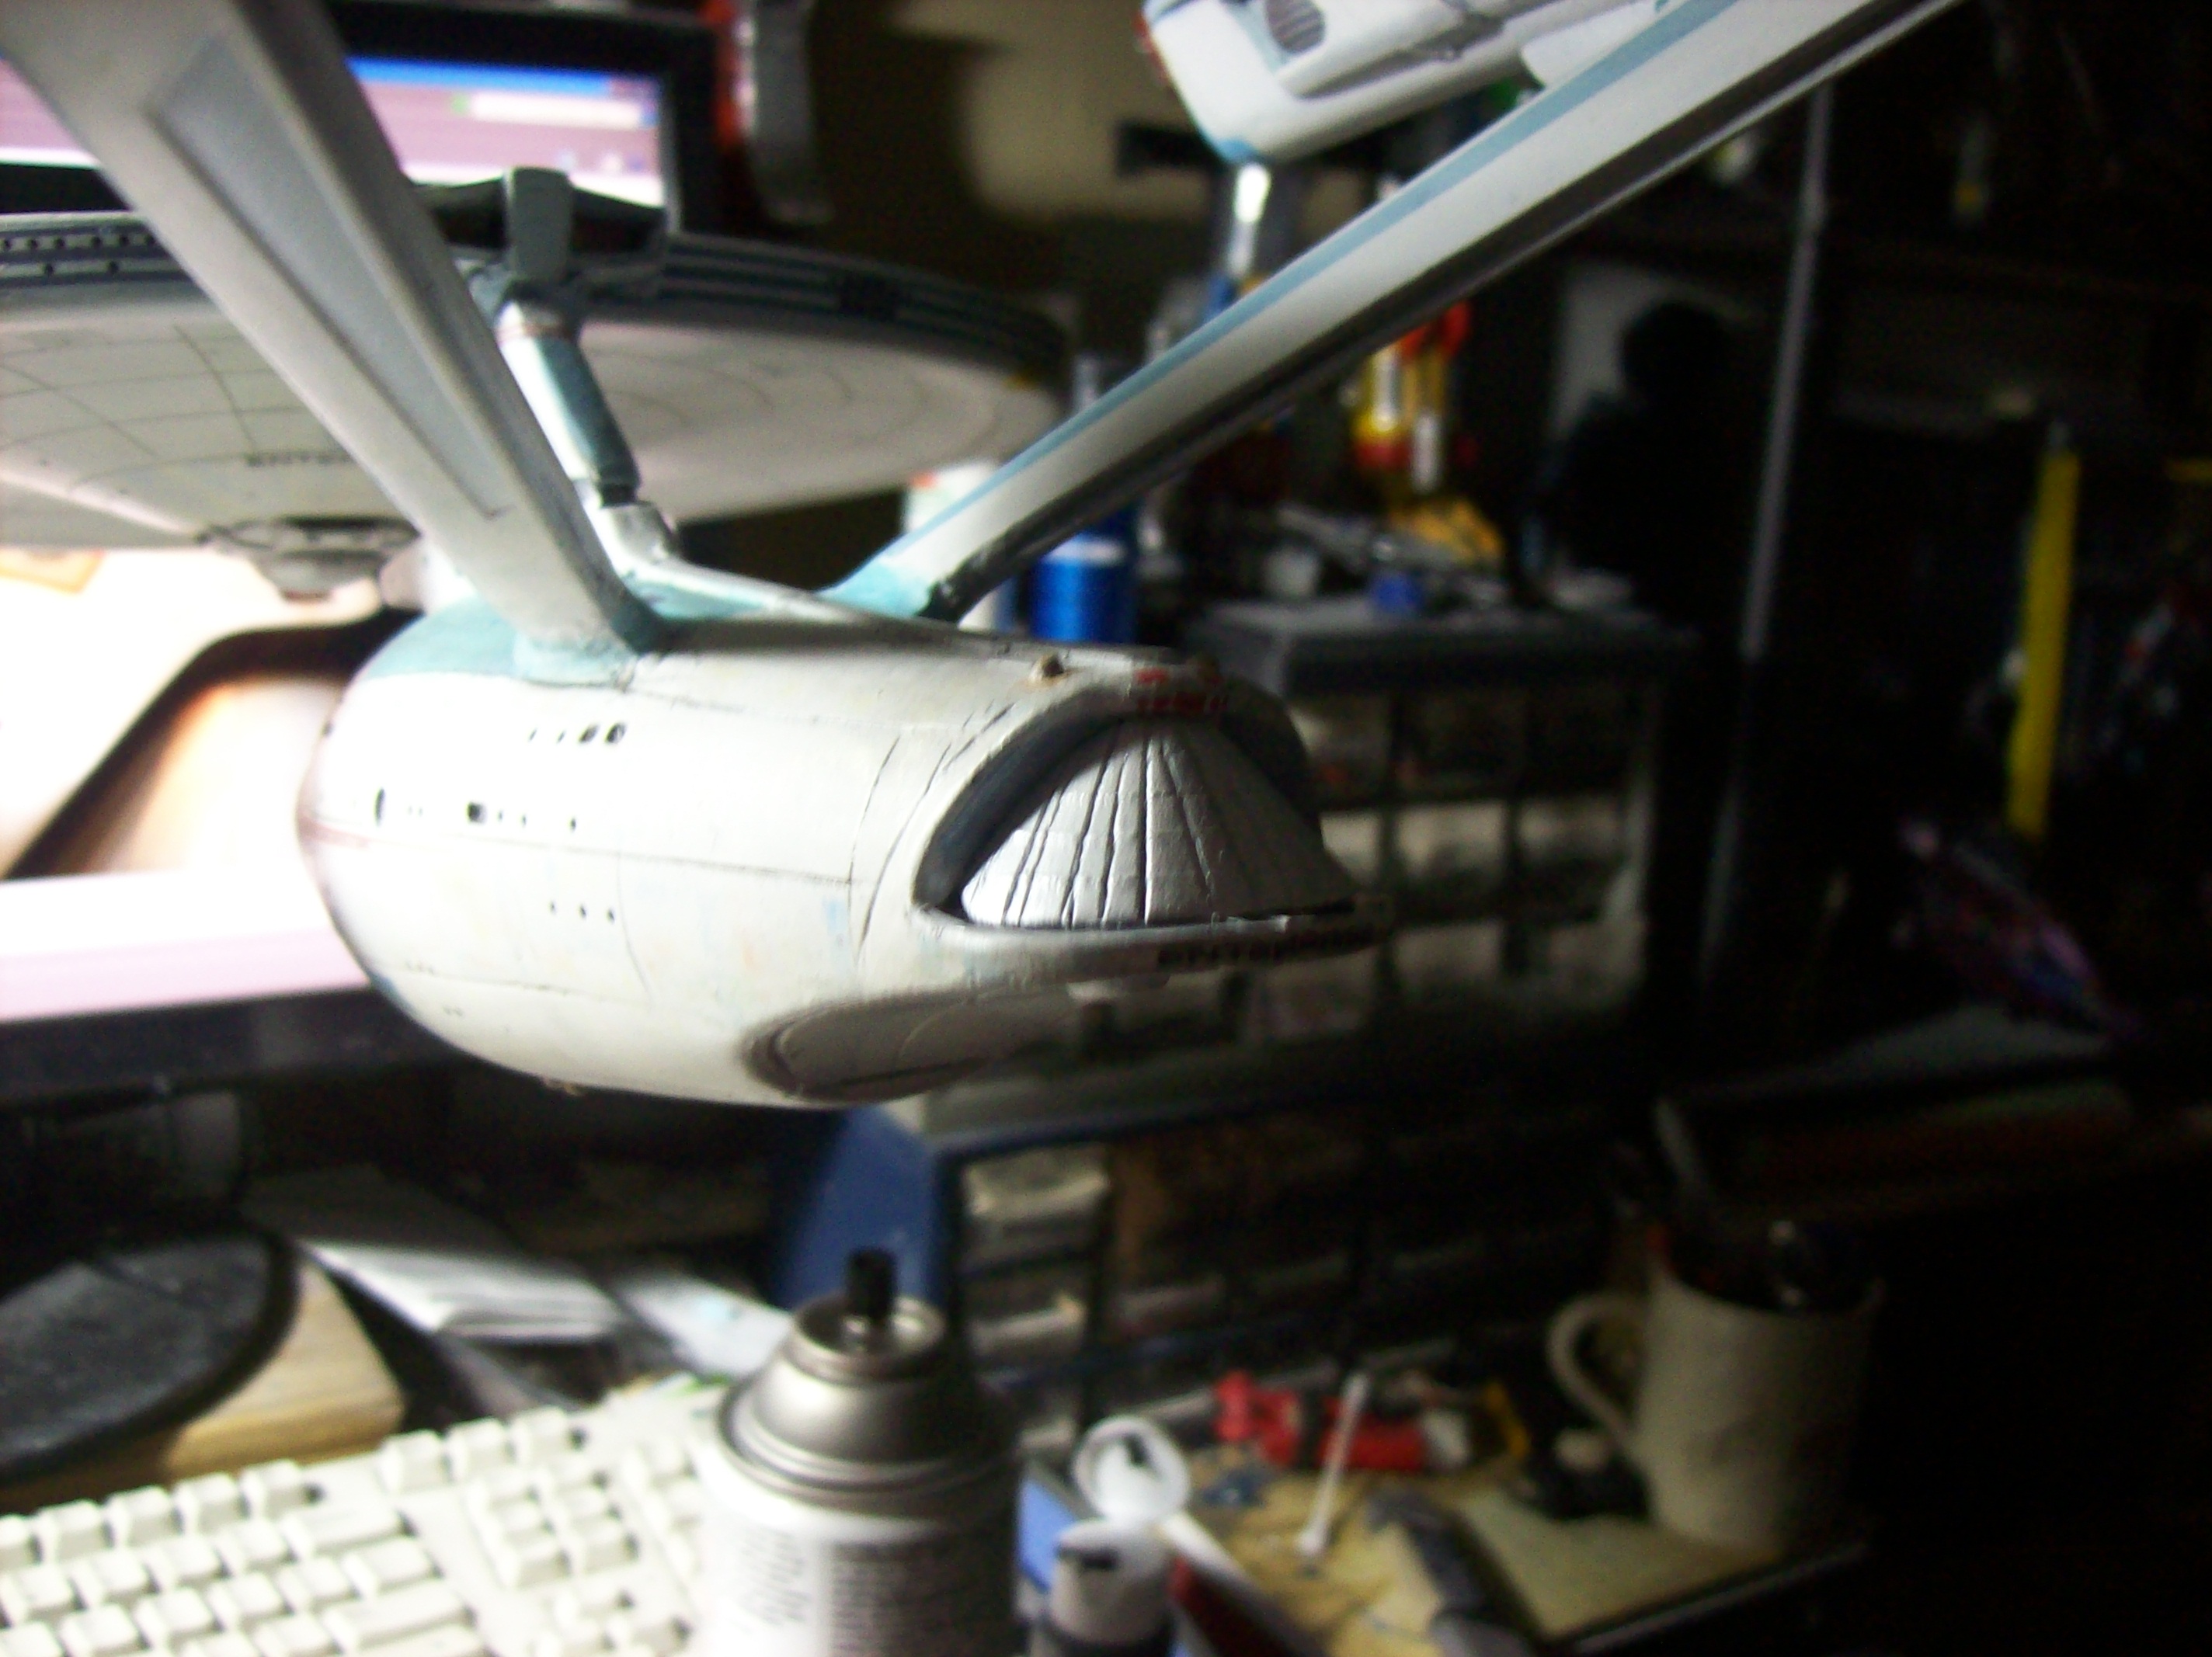
Nearly finished with the Enterprise...
*Now, you folks are probably wondering: "How the heck does all this keep happening to pengbuzz all the time?!" The answer is that I was cursed by a cranky gypsy a few decades ago for stealing her fresh-baked apple pie, and well... you know how it goes.*
Seriously though: when I picked the ship up, my thumb ended up going through the shuttle bay doors on the ship. Being that this was a smoothie kit from the 70's, my only surprise is that another part hasn't collapsed from age!
The damage:
This, on top of the Hornet, was a bit much for me to take. But rather than try to bed a new hangar door for the ship out of styrene, I decided to make a more permanent solution to this issue:
I layered 5 sheets of plastic together into a cube, and then machined it down into a new hangar bay door:

Ship fitting:
Primer and final:

On that note: after this project, I am taking a break from doing projects due to fatigue and just too many of them going sour. Part of it is my frame of mind (current events, stress at home and other issues) and part of it is dealing with older projects. The final element is that I may be getting distracted and careless due to stress and stuff, so I need to regroup and rest.
Stay tuned for this season's finale.
That new hangar bay door looks amazing. When I broke one, I just added more battle damage to hide the fact that I broke it.


.jpg.6acf03428532ee2b5c733c00d481673e.jpg)


.JPG.24f83d995264d65a341e7db03cb252e7.JPG)


Whats Lying on your Workbench MK IV
in The Workshop!
Posted
@arbit
LOL, I used weathering and battle damage to hide some flaws.
@Thom
Uh, yeah, my recommendation is to not get too comfortable posing these things...
BTW, I want to do something WWII now.... Really want that 1/32 B17, ut that's a quick way to get on the wife's $hitlist.
@derex3592
That would be amazing, a glass base! I just find a chunk of wood and spray it charcoal. I should put more effort into the displays.
@MechTech
I also used a real camera as opposed to my cell phone, hahahaha!
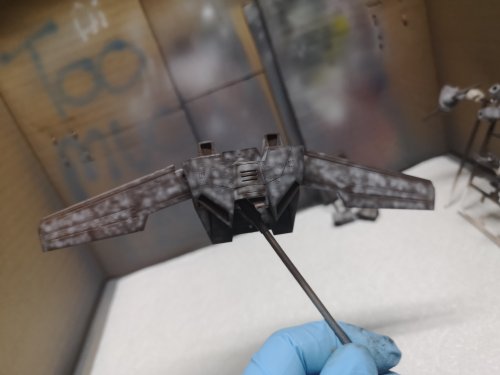
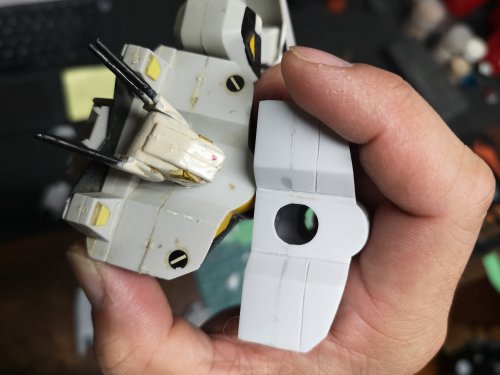
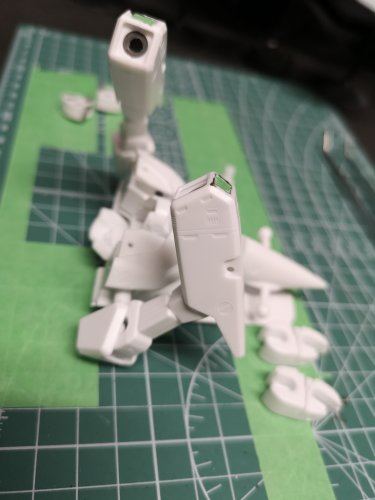
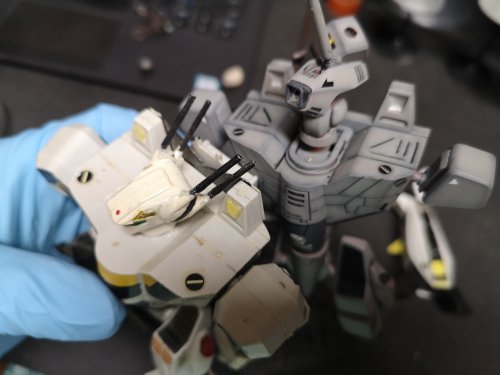
So about posing the Hasegawa Battroid.... I've come to realize it's best to pick a pose and leave it.
After the photo session:
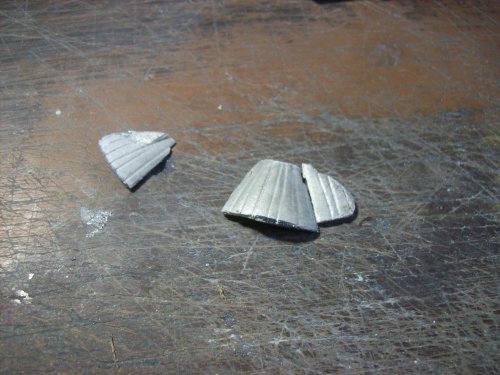
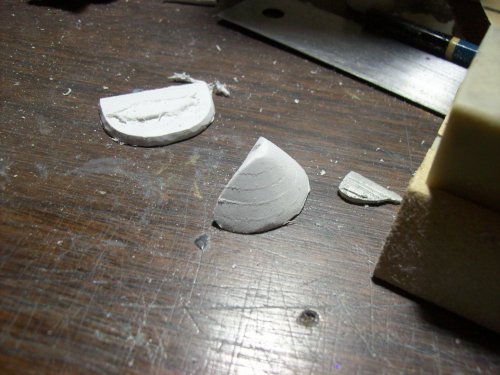
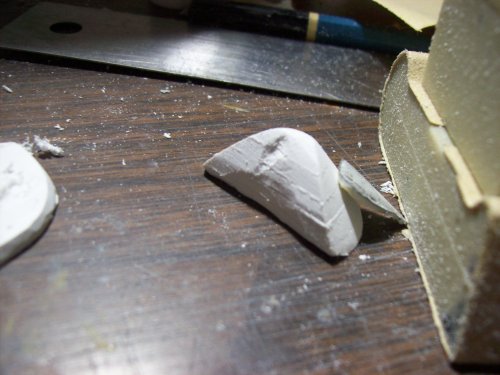
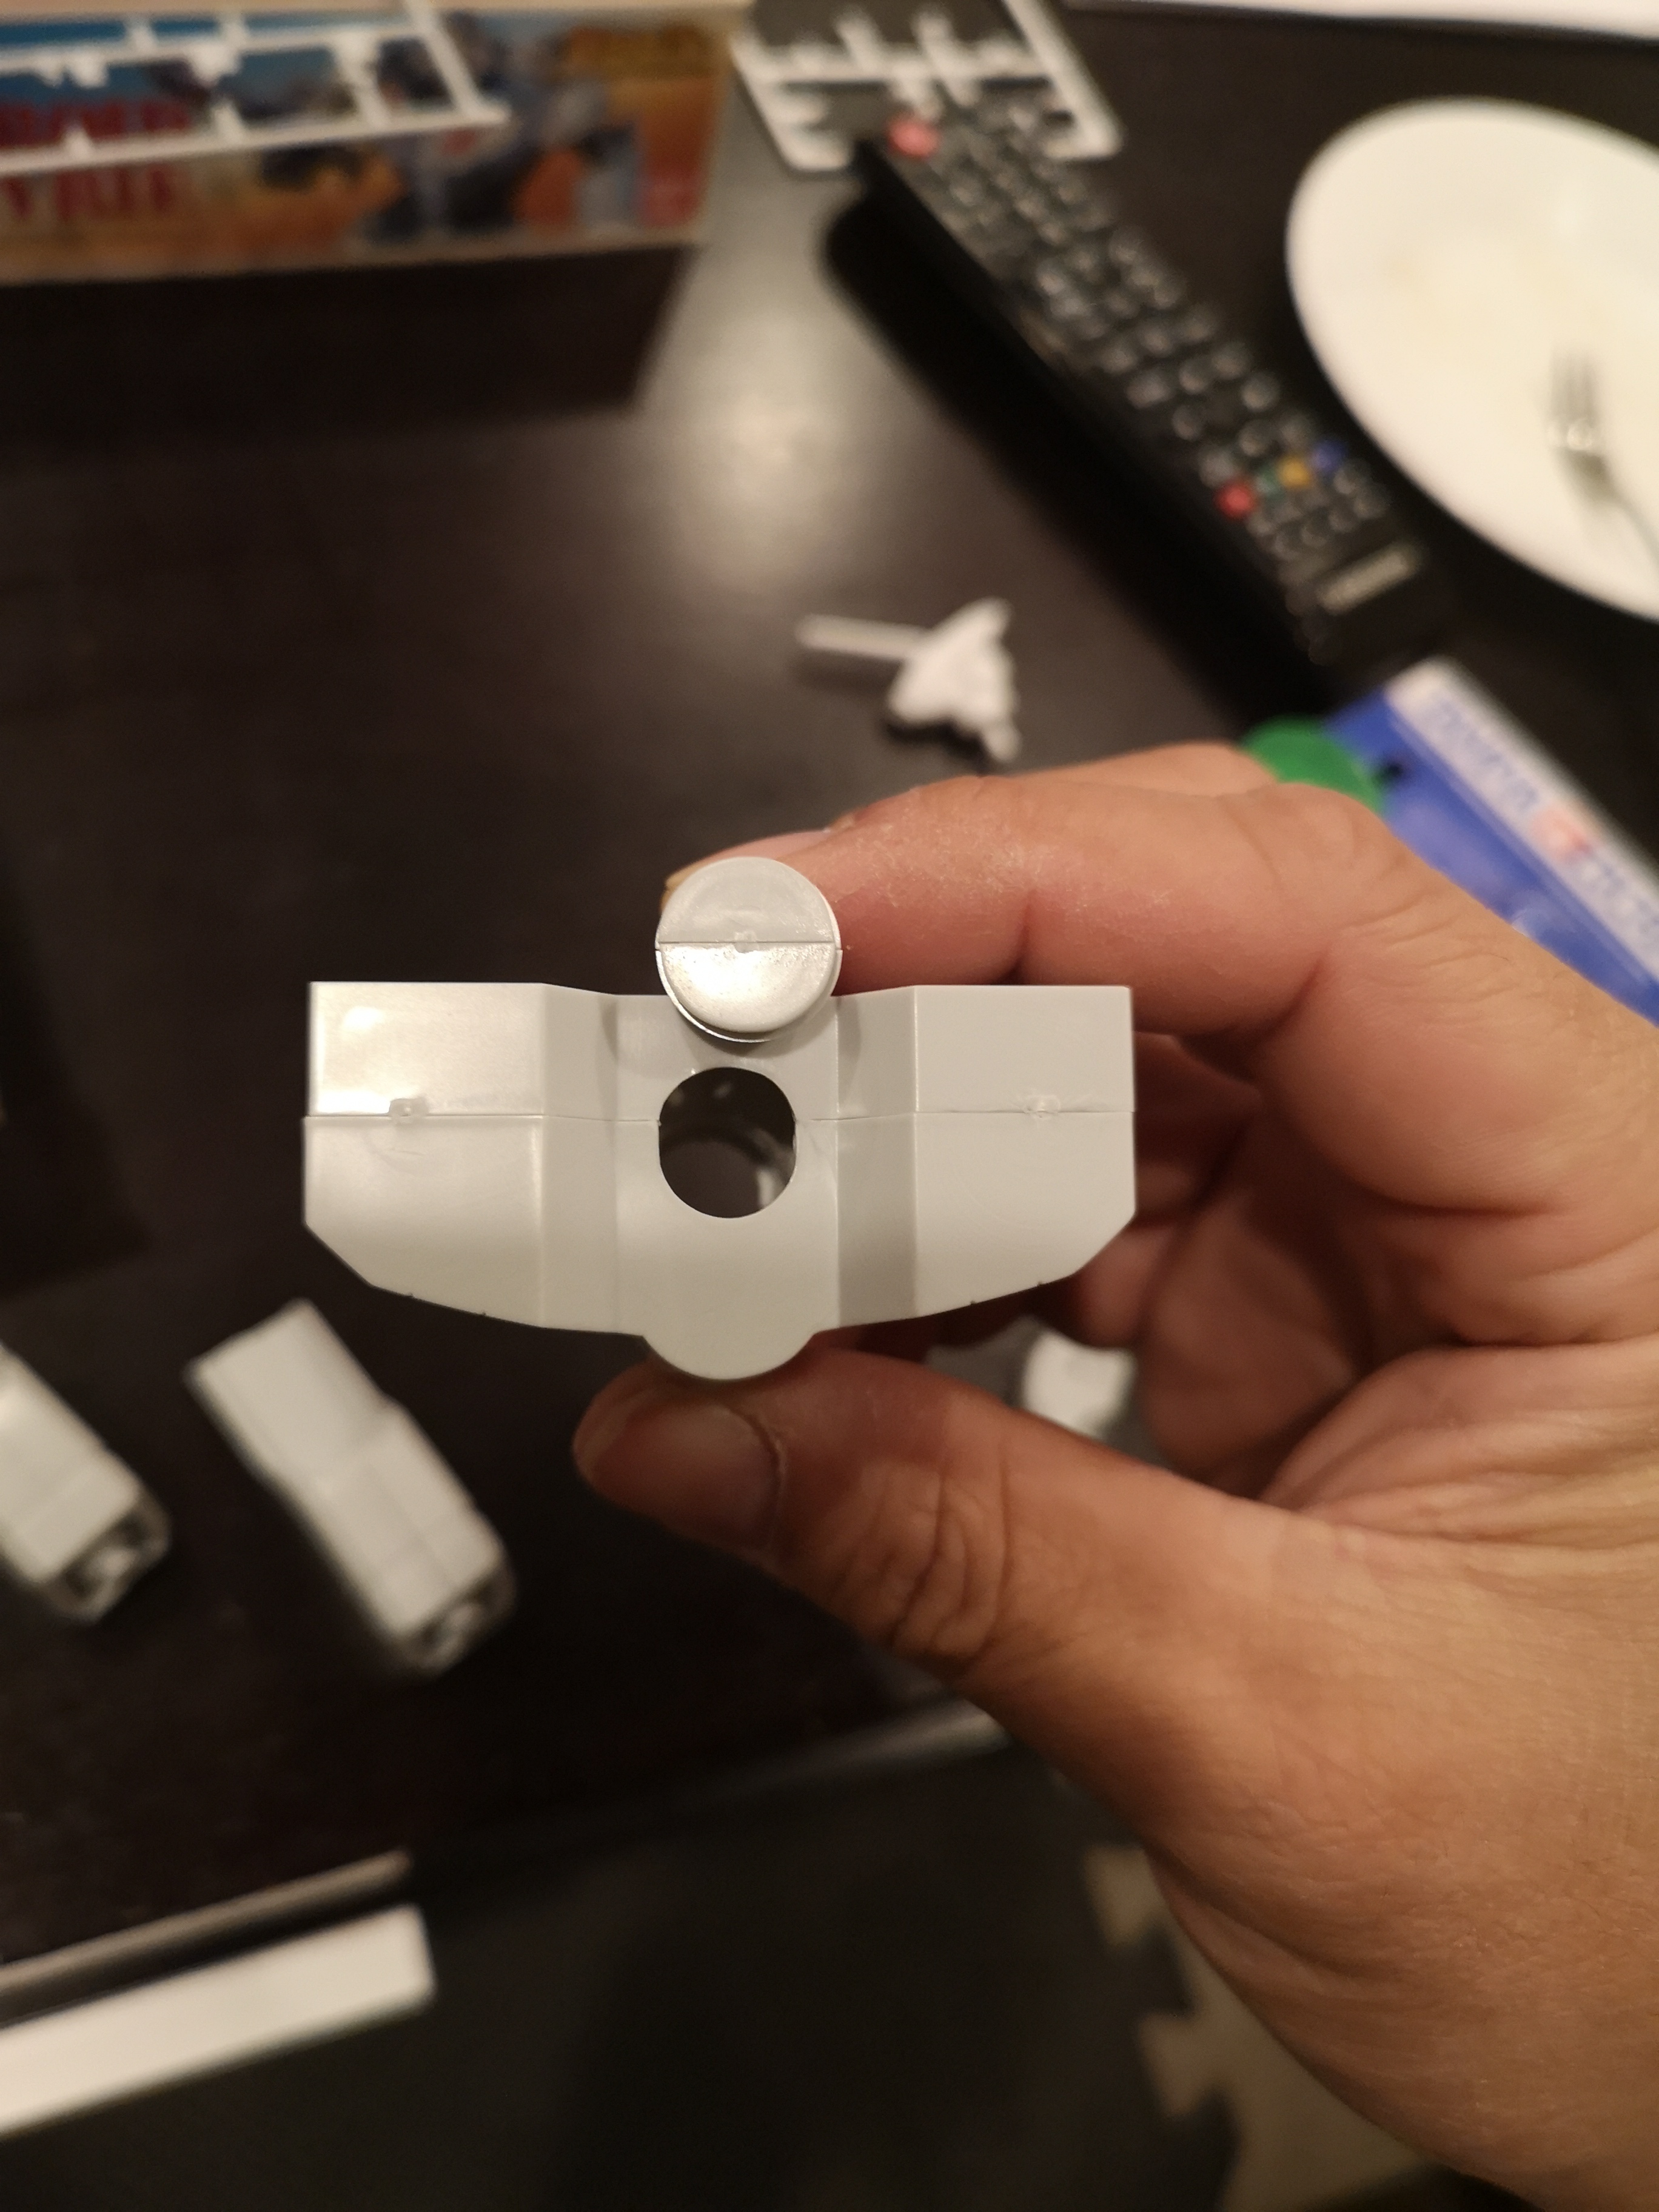
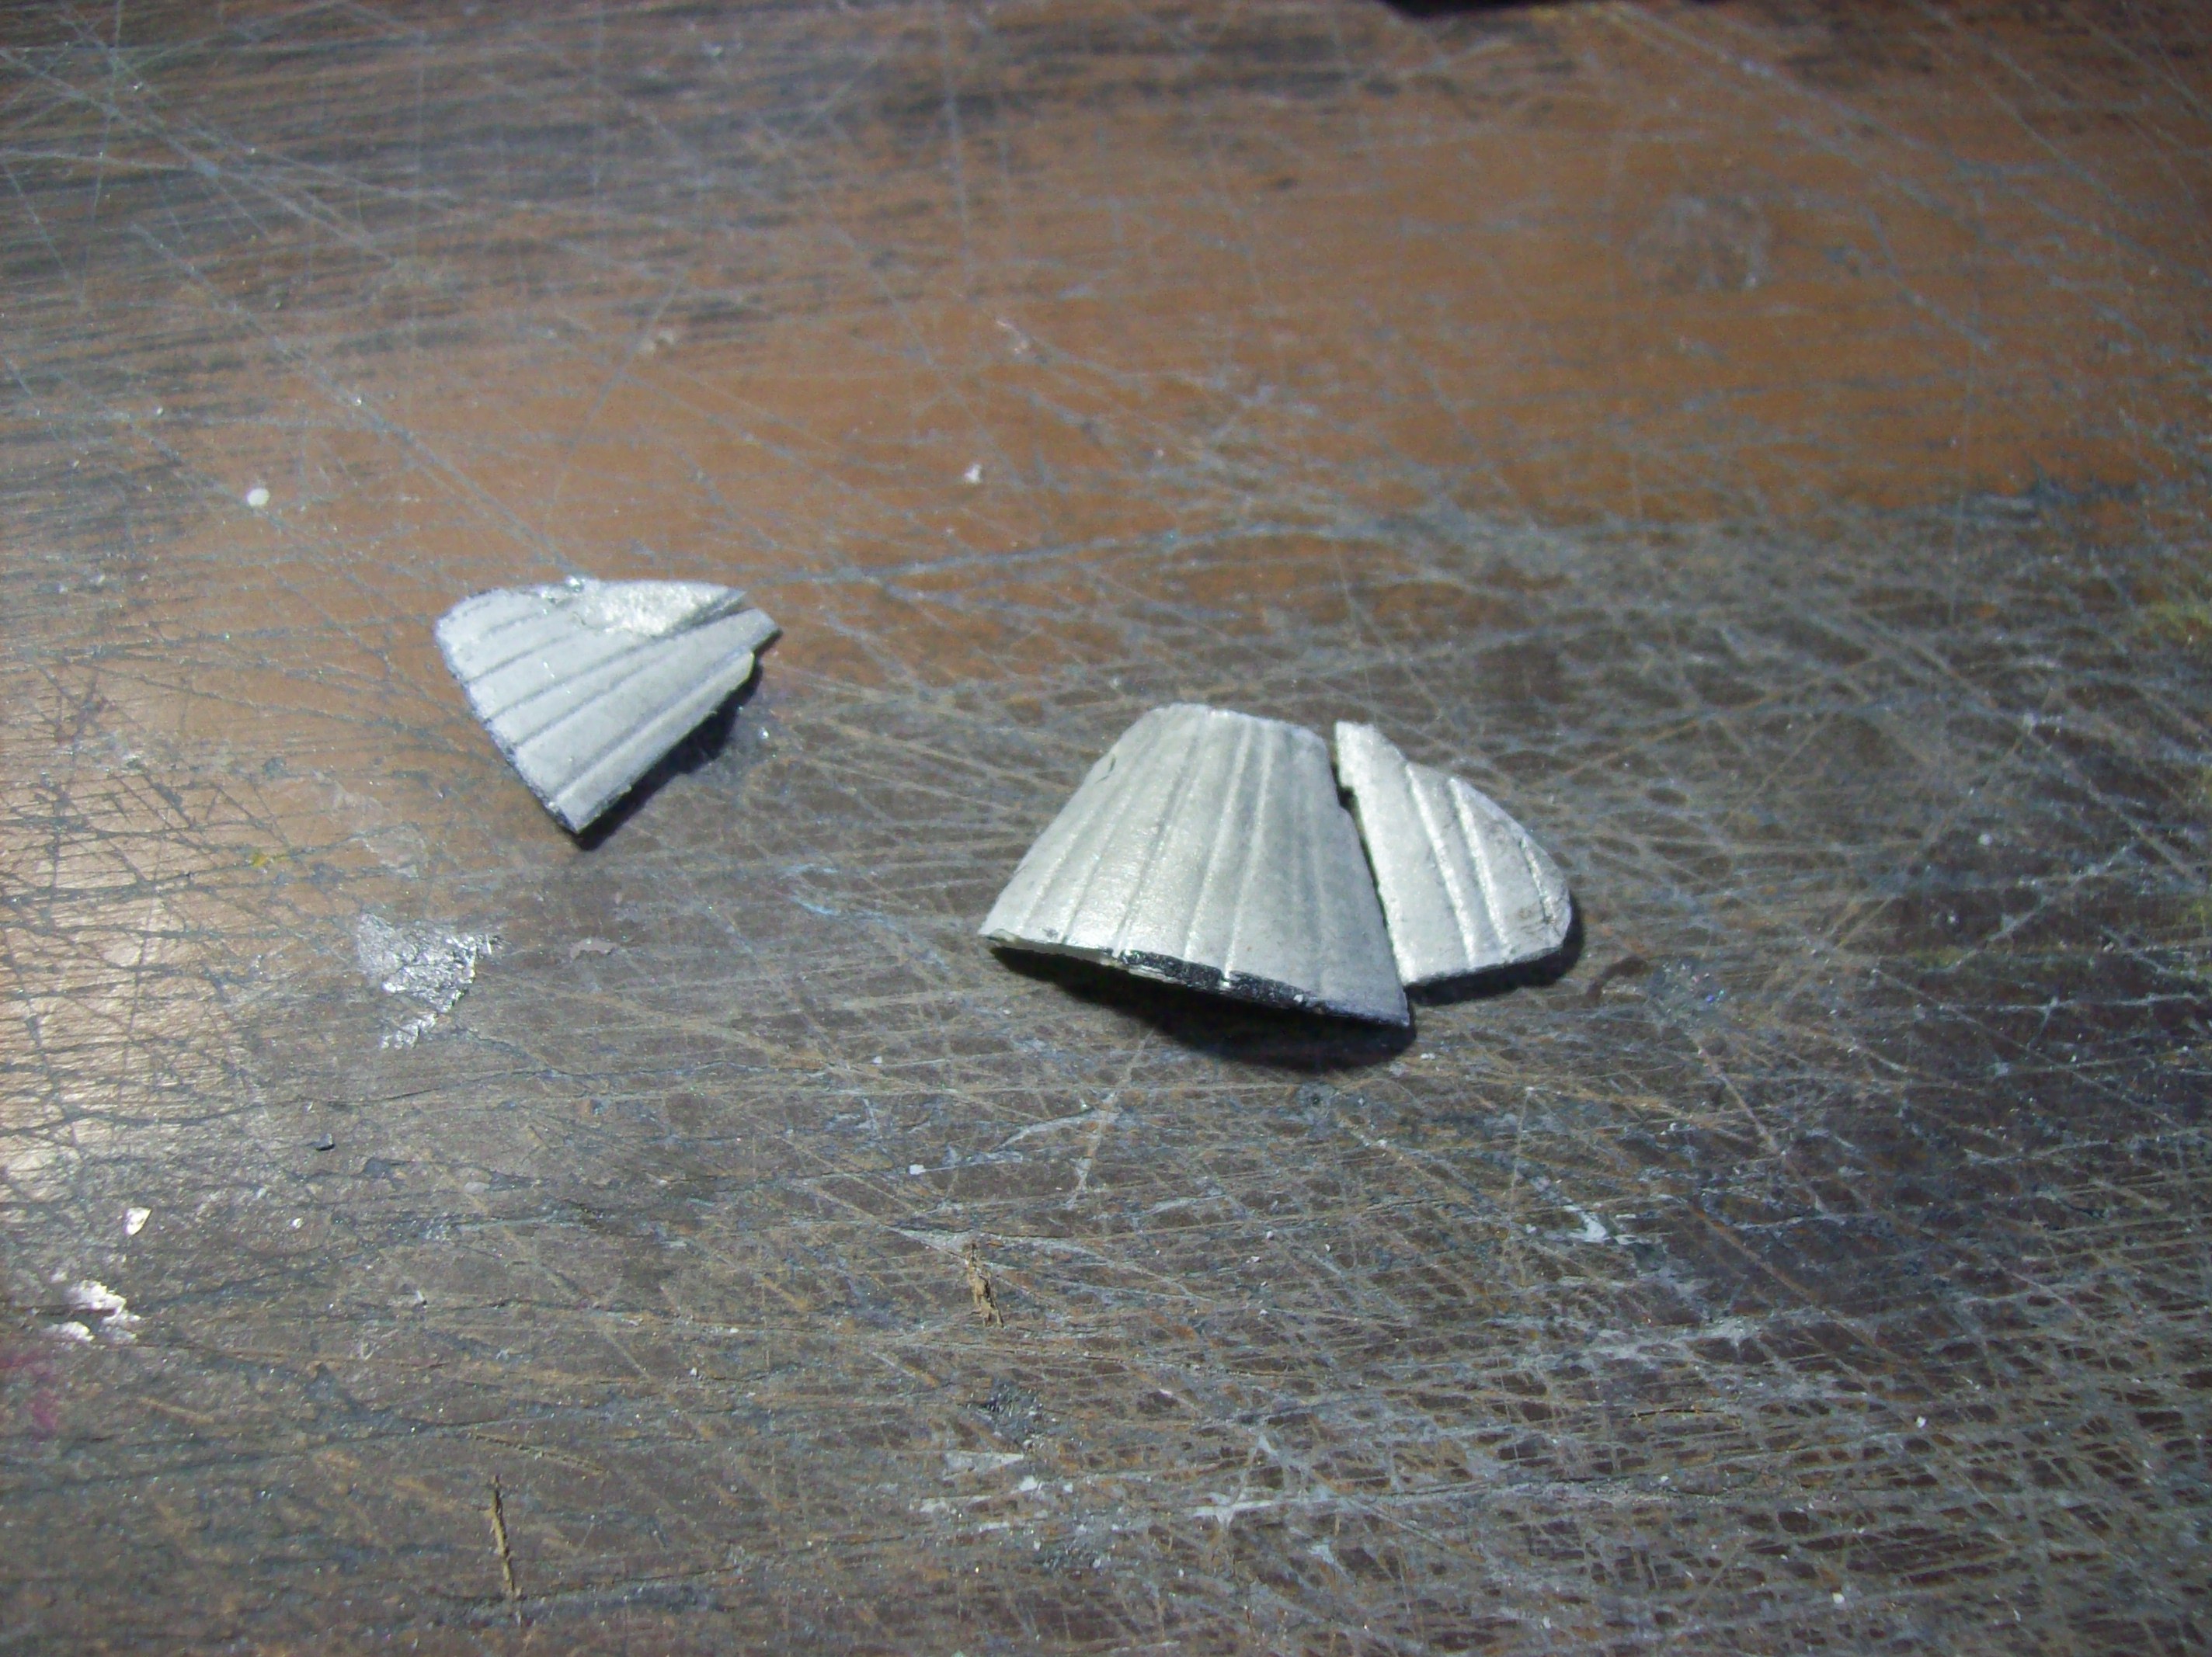
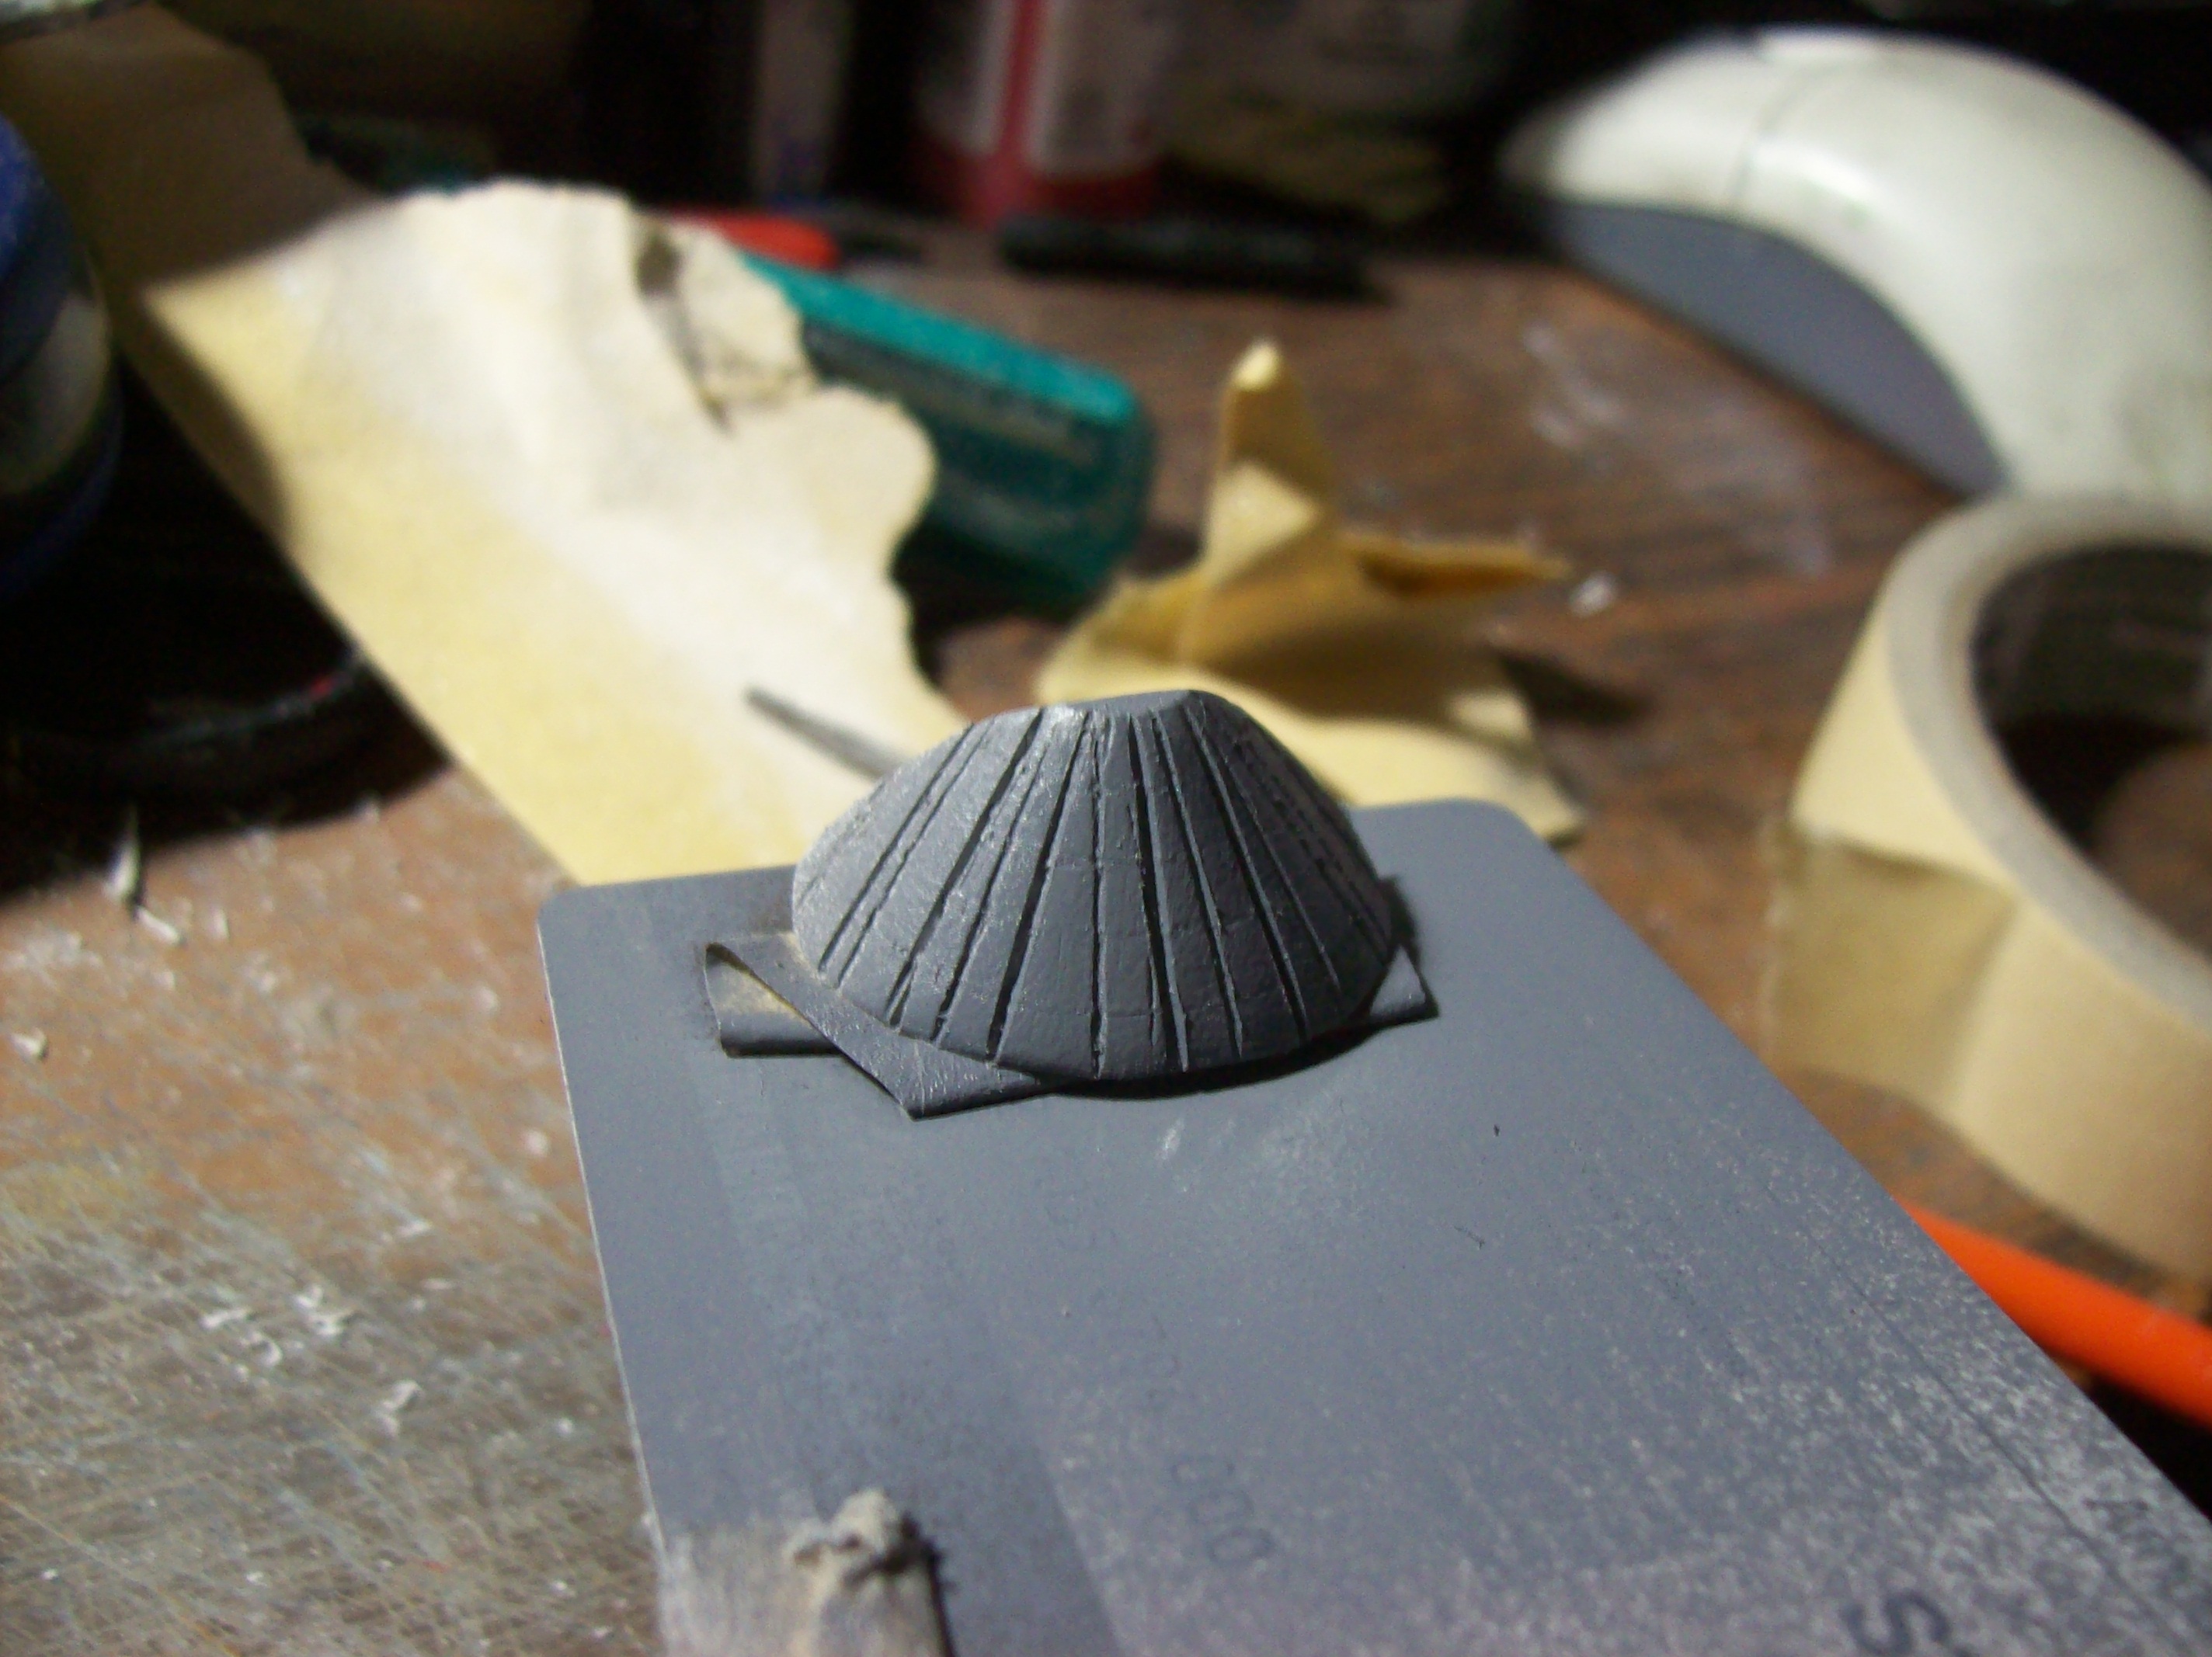
I knew this hip assembly was a weak point.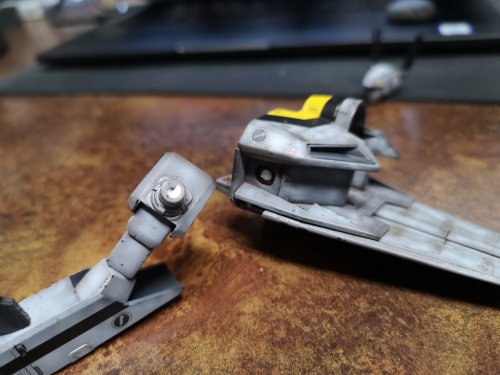
First one shoulder peg broke.
Then the other.
8 year old me would not be impressed, lol!
Anyway, I don't usually play with my models after I build them anyway, but the plastic on the Hasegawa is Ike butter. Pose able, but not really.
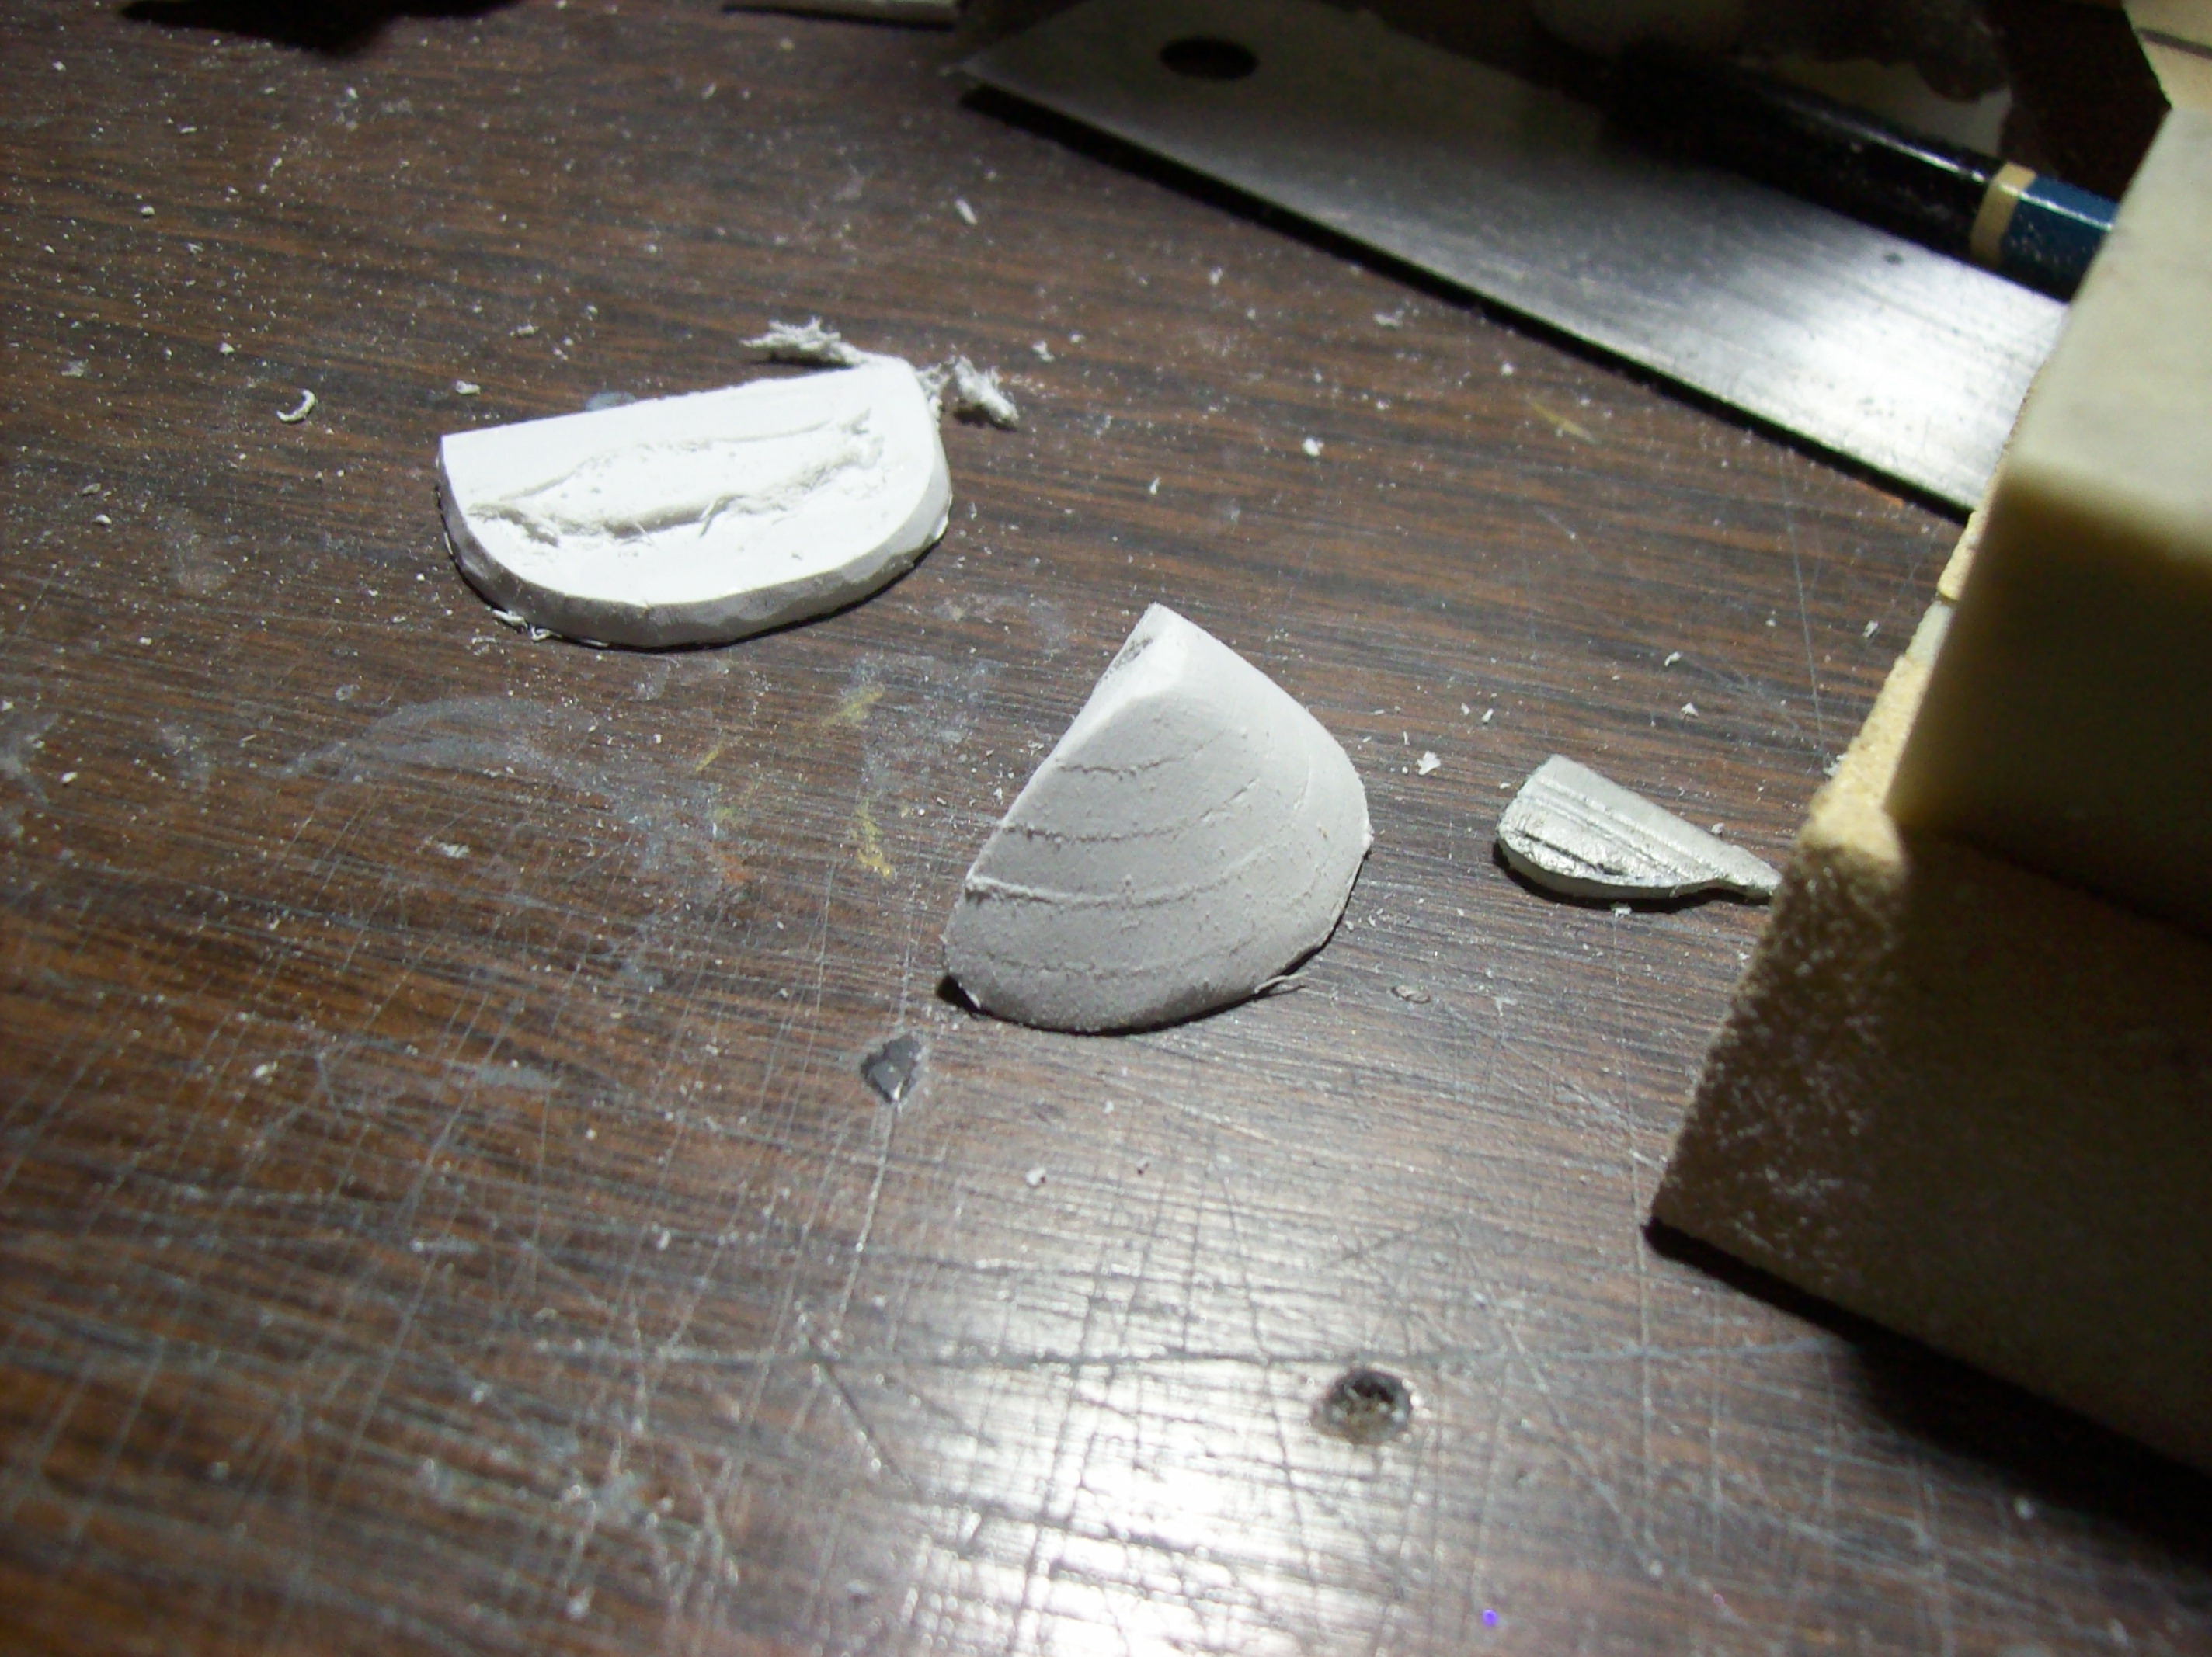
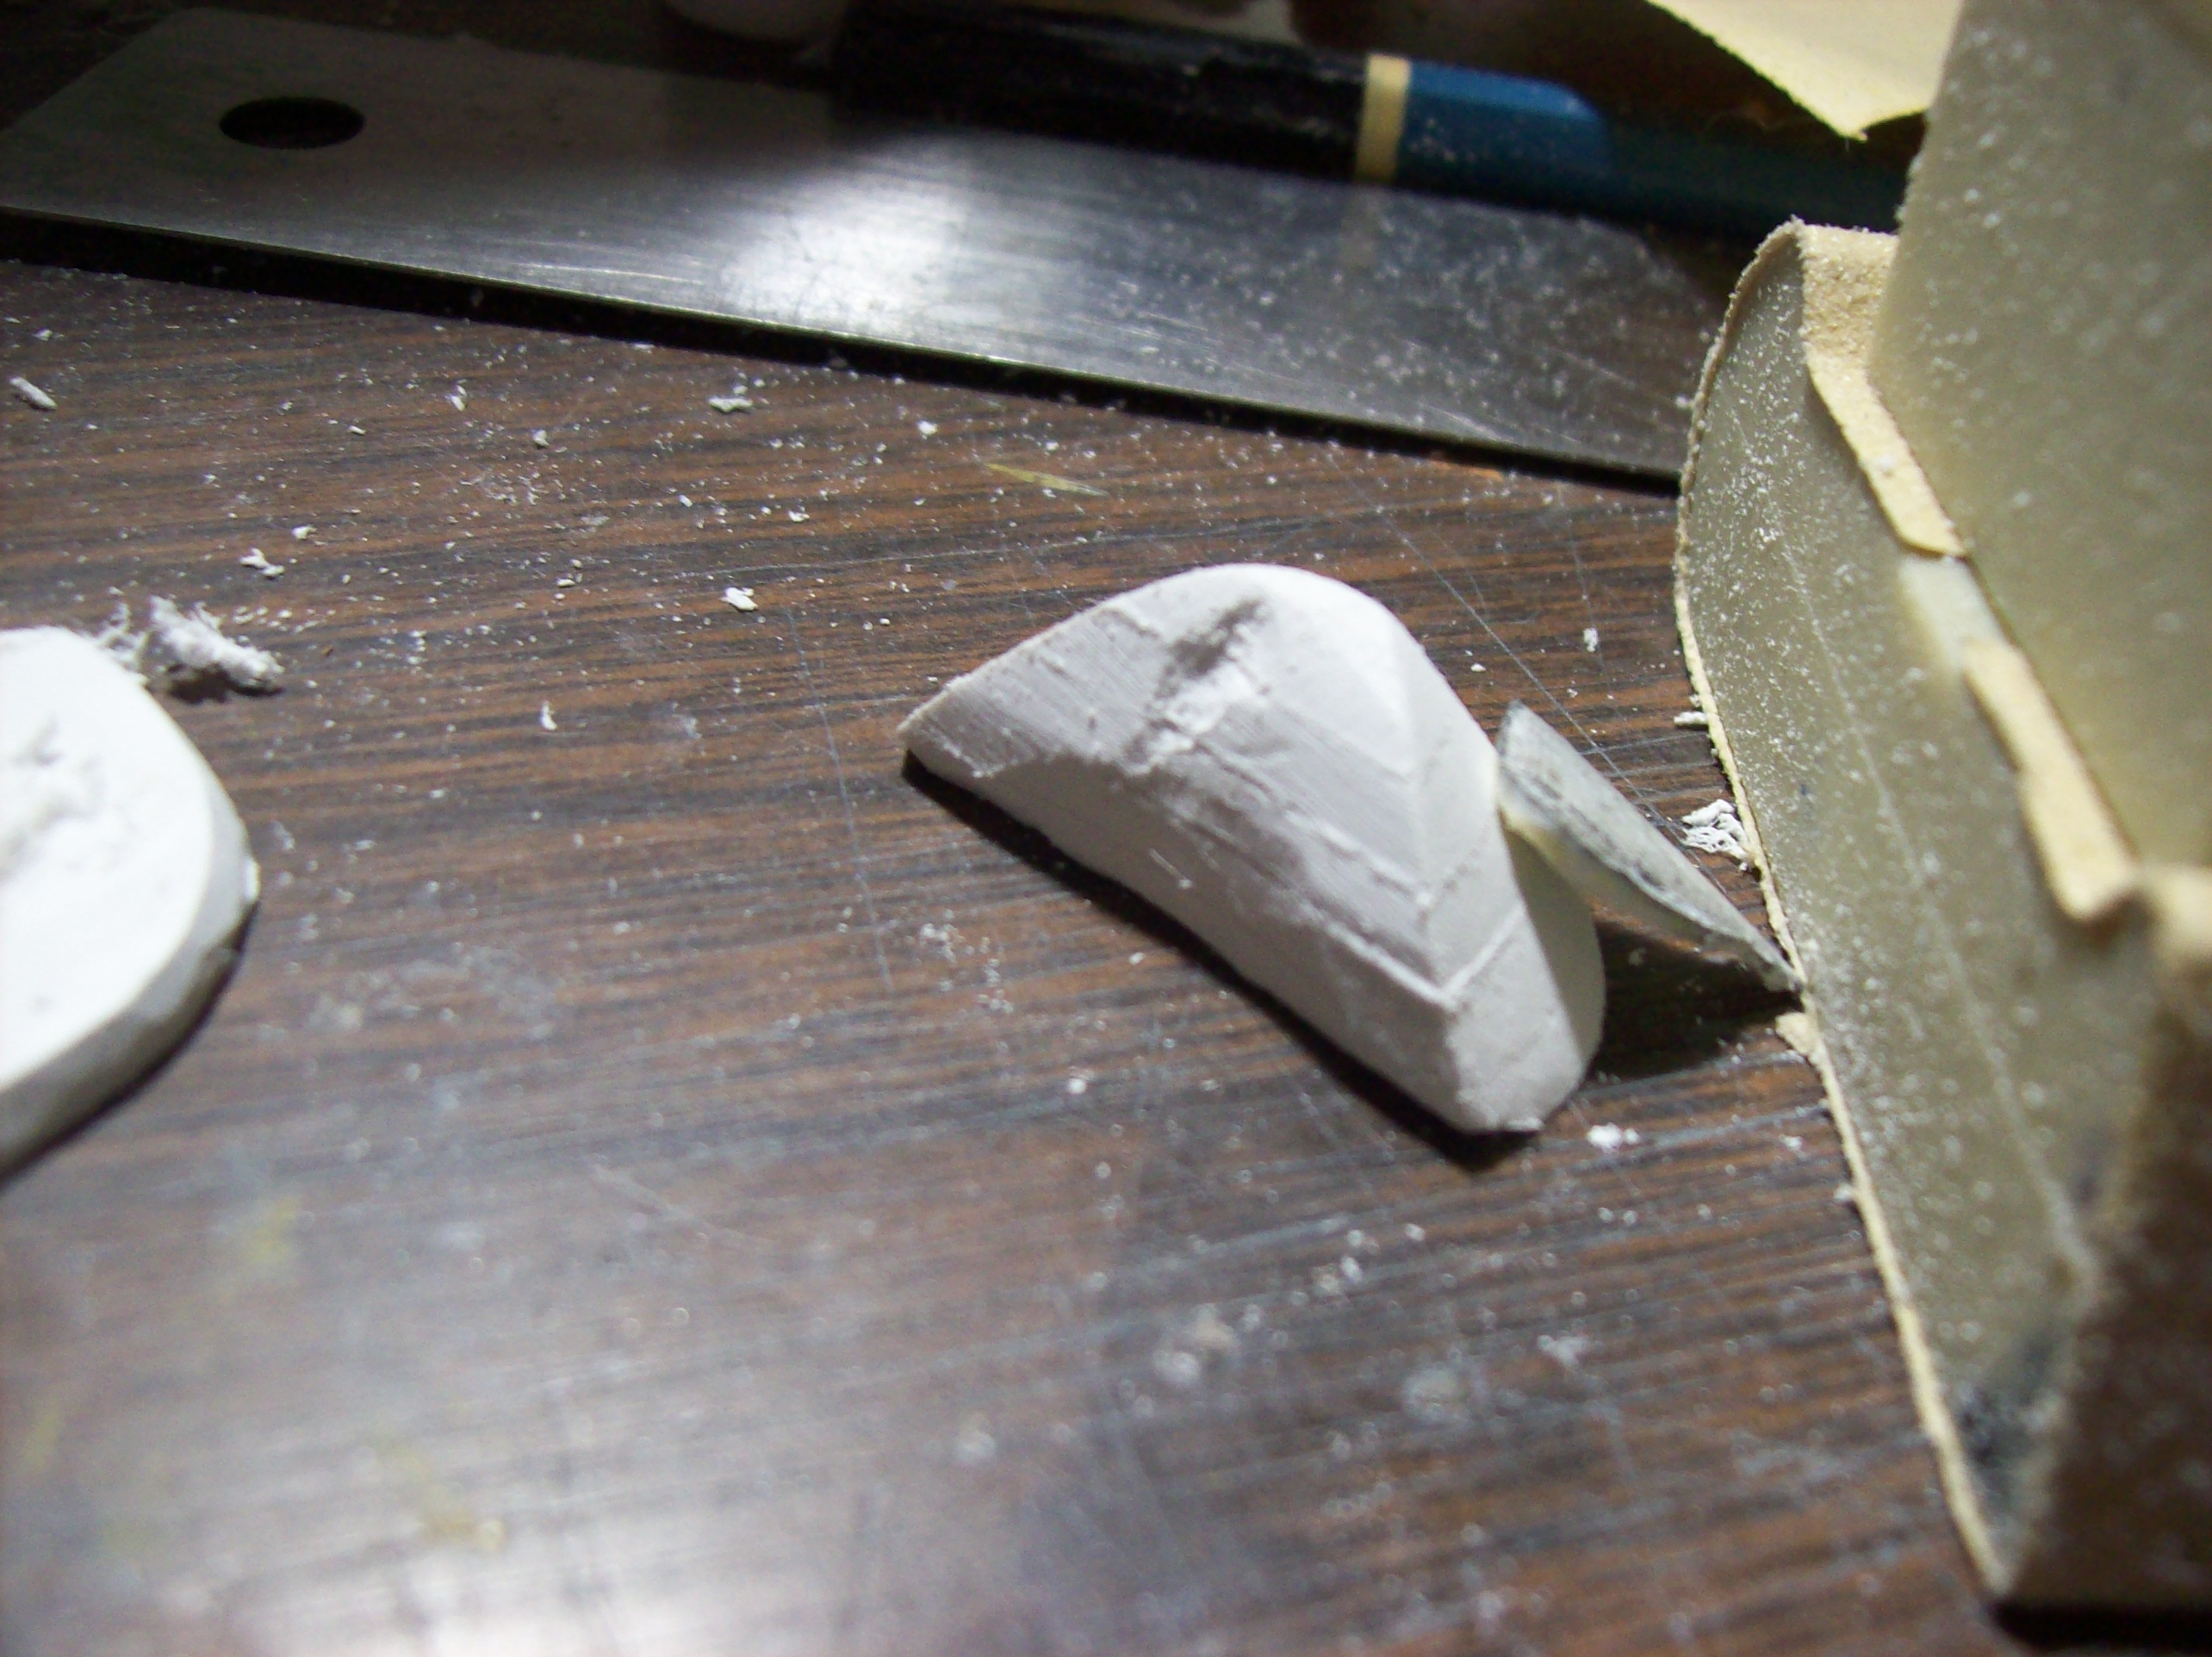
Hahahaha!
I superglued the pegs back in place, and they are holding, but I don't think I will mess with it anymore. On to the shelf and leave it alone.