captain america
-
Posts
3530 -
Joined
-
Last visited
Content Type
Profiles
Forums
Events
Gallery
Everything posted by captain america
-

1/72 F203 Dragon II Kit Proposal --Moscato Hobby
captain america replied to captain america's topic in Model kits
Tick-tock. I'll leave the pre-order window open until the end of the day on September 12th. Hopefully I'll get the needed tally of 12 kits by then, and if not, I'll go to another project. -
1/48 SOUTHERN CROSS BIOROID PART II
captain america replied to captain america's topic in Anime or Science Fiction
I think I've given-up on Anime accuracy with anything to do with the Bioroids. It's all just biomechanical gummy bears, jellybeans and jello as far as I'm concerned. The style-guide artists bear the guilt, and the animators commit yet greater atrocities, still! Nonetheless, I look forward to seeing the build progress. Judging from the Biopsycher knee pics, you're further along on that one than the Bug Face unit. -
1/48 SOUTHERN CROSS BIOROID PART II
captain america replied to captain america's topic in Anime or Science Fiction
Hey, Ted. I so enjoy seeing your building progress, especially that these Lloyds are some of my best work and very challenging models to build. I would have liked to offer visor pieces molded in traslucent resin, but the workload was already very high, and the lenses are just pure black in all the shots I remember, so I determined the extra complexity was unwarranted. That being said, I'm curious to see what greeblies you plan to stuff behind the vac-formed parts. Also, in case anyone is wondering...
-
Top Gun: Maverick (Top Gun 2 is comin)
captain america replied to Ladic's topic in Anime or Science Fiction
-
1/72 F203 Dragon II Kit Proposal --Moscato Hobby
captain america replied to captain america's topic in Model kits
Extremely mean and dangerous! Sometimes the best projects are the throw-away designs the original art team didn't mangle. So this is me throwing my hat into the ring with an offer for a second run, this time with decals and commensurate price bump. Please forgive the rickety build, it's barely holding together with hot glue.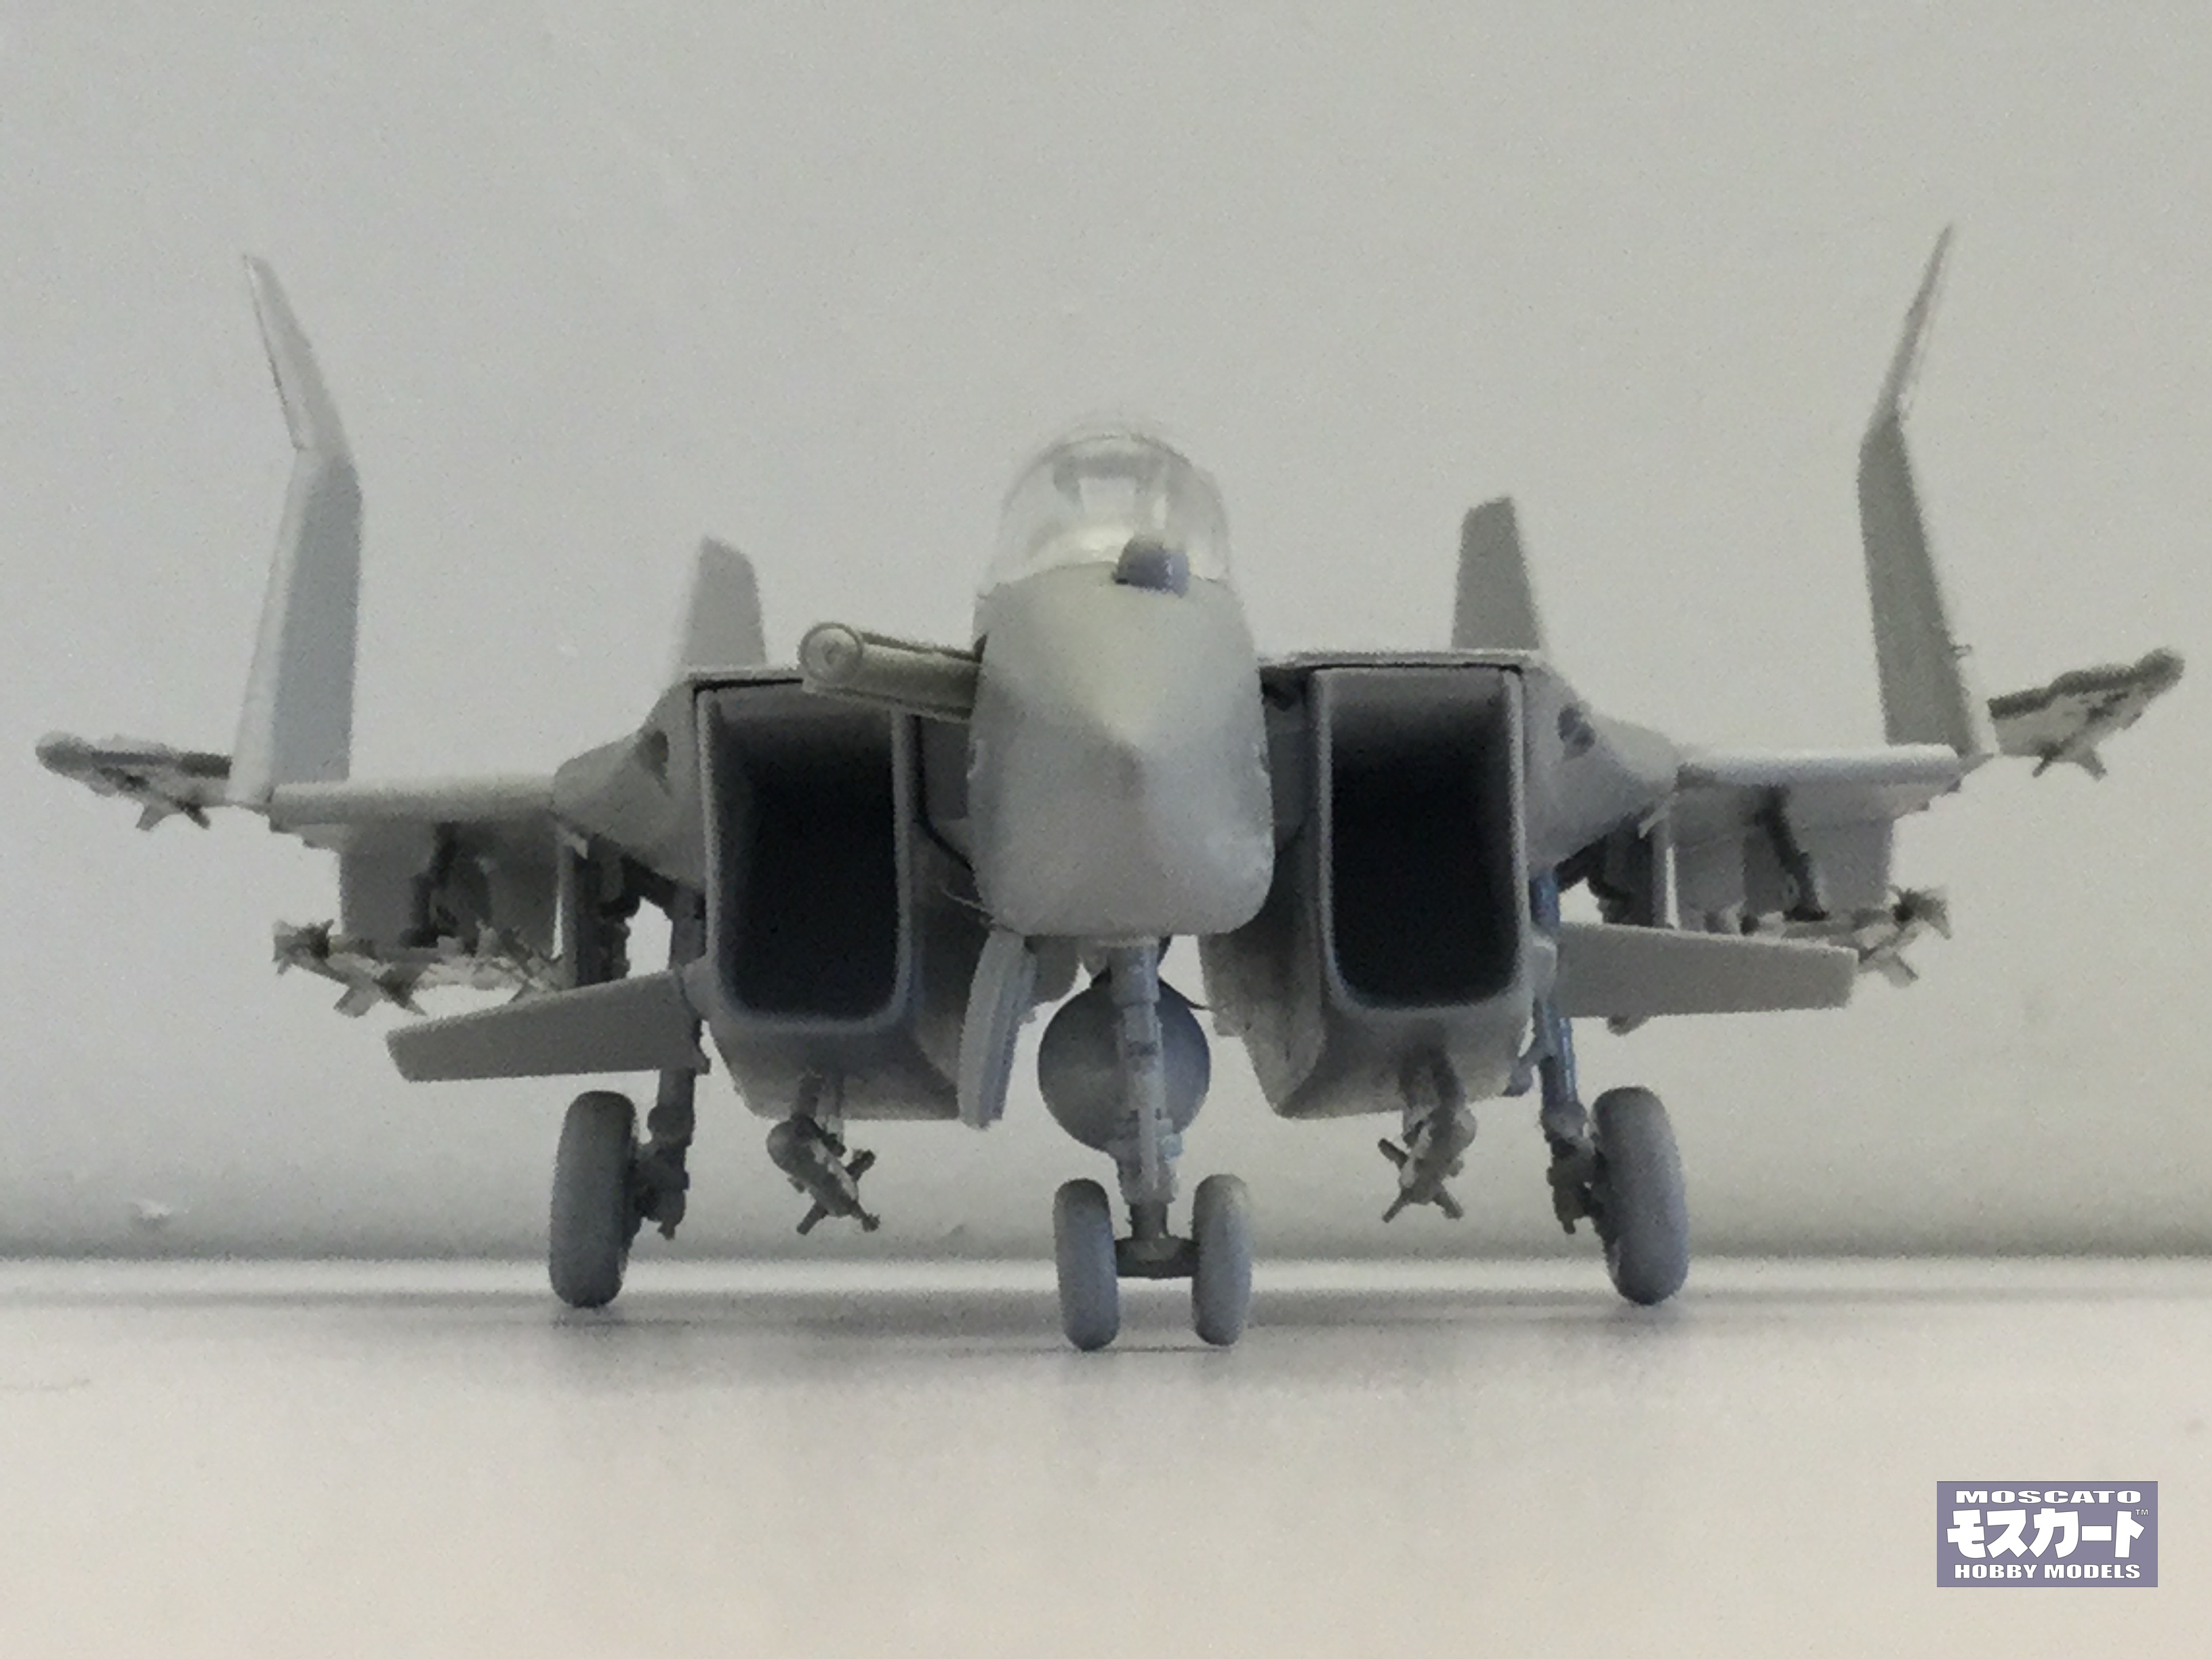

-
1/72 F203 Dragon II Kit Proposal --Moscato Hobby
captain america replied to captain america's topic in Model kits

-
1/72 F203 Dragon II Kit Proposal --Moscato Hobby
captain america replied to captain america's topic in Model kits


-
1/72 F203 Dragon II Kit Proposal --Moscato Hobby
captain america replied to captain america's topic in Model kits
Instructions are done!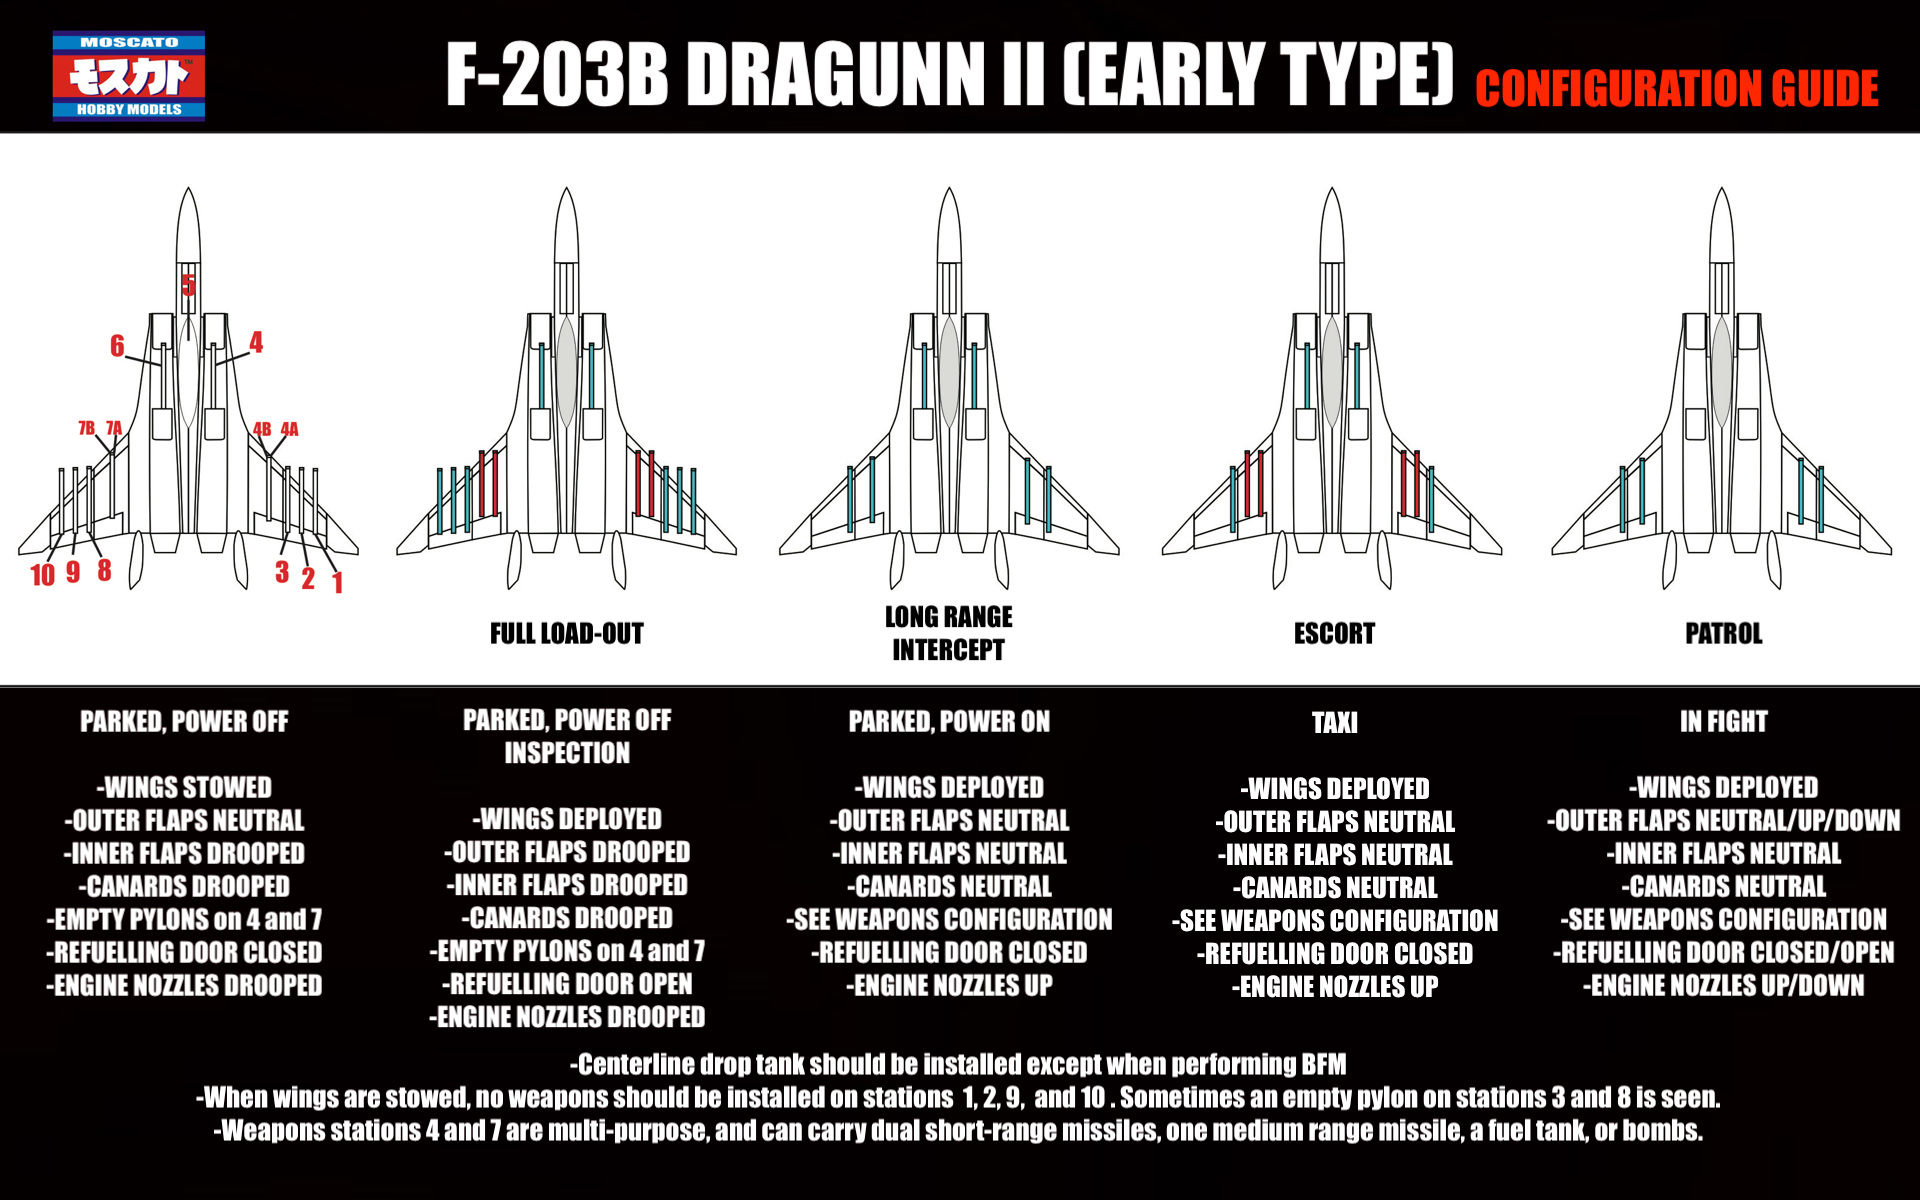


-
I did.
-
1/72 F203 Dragon II Kit Proposal --Moscato Hobby
captain america replied to captain america's topic in Model kits
All the kits went out in two batches: one on Friday, the other earlier today. Once it's in the hands of UPS, there's a myriad of factors that influence transit time. -
1/72 F203 Dragon II Kit Proposal --Moscato Hobby
captain america replied to captain america's topic in Model kits
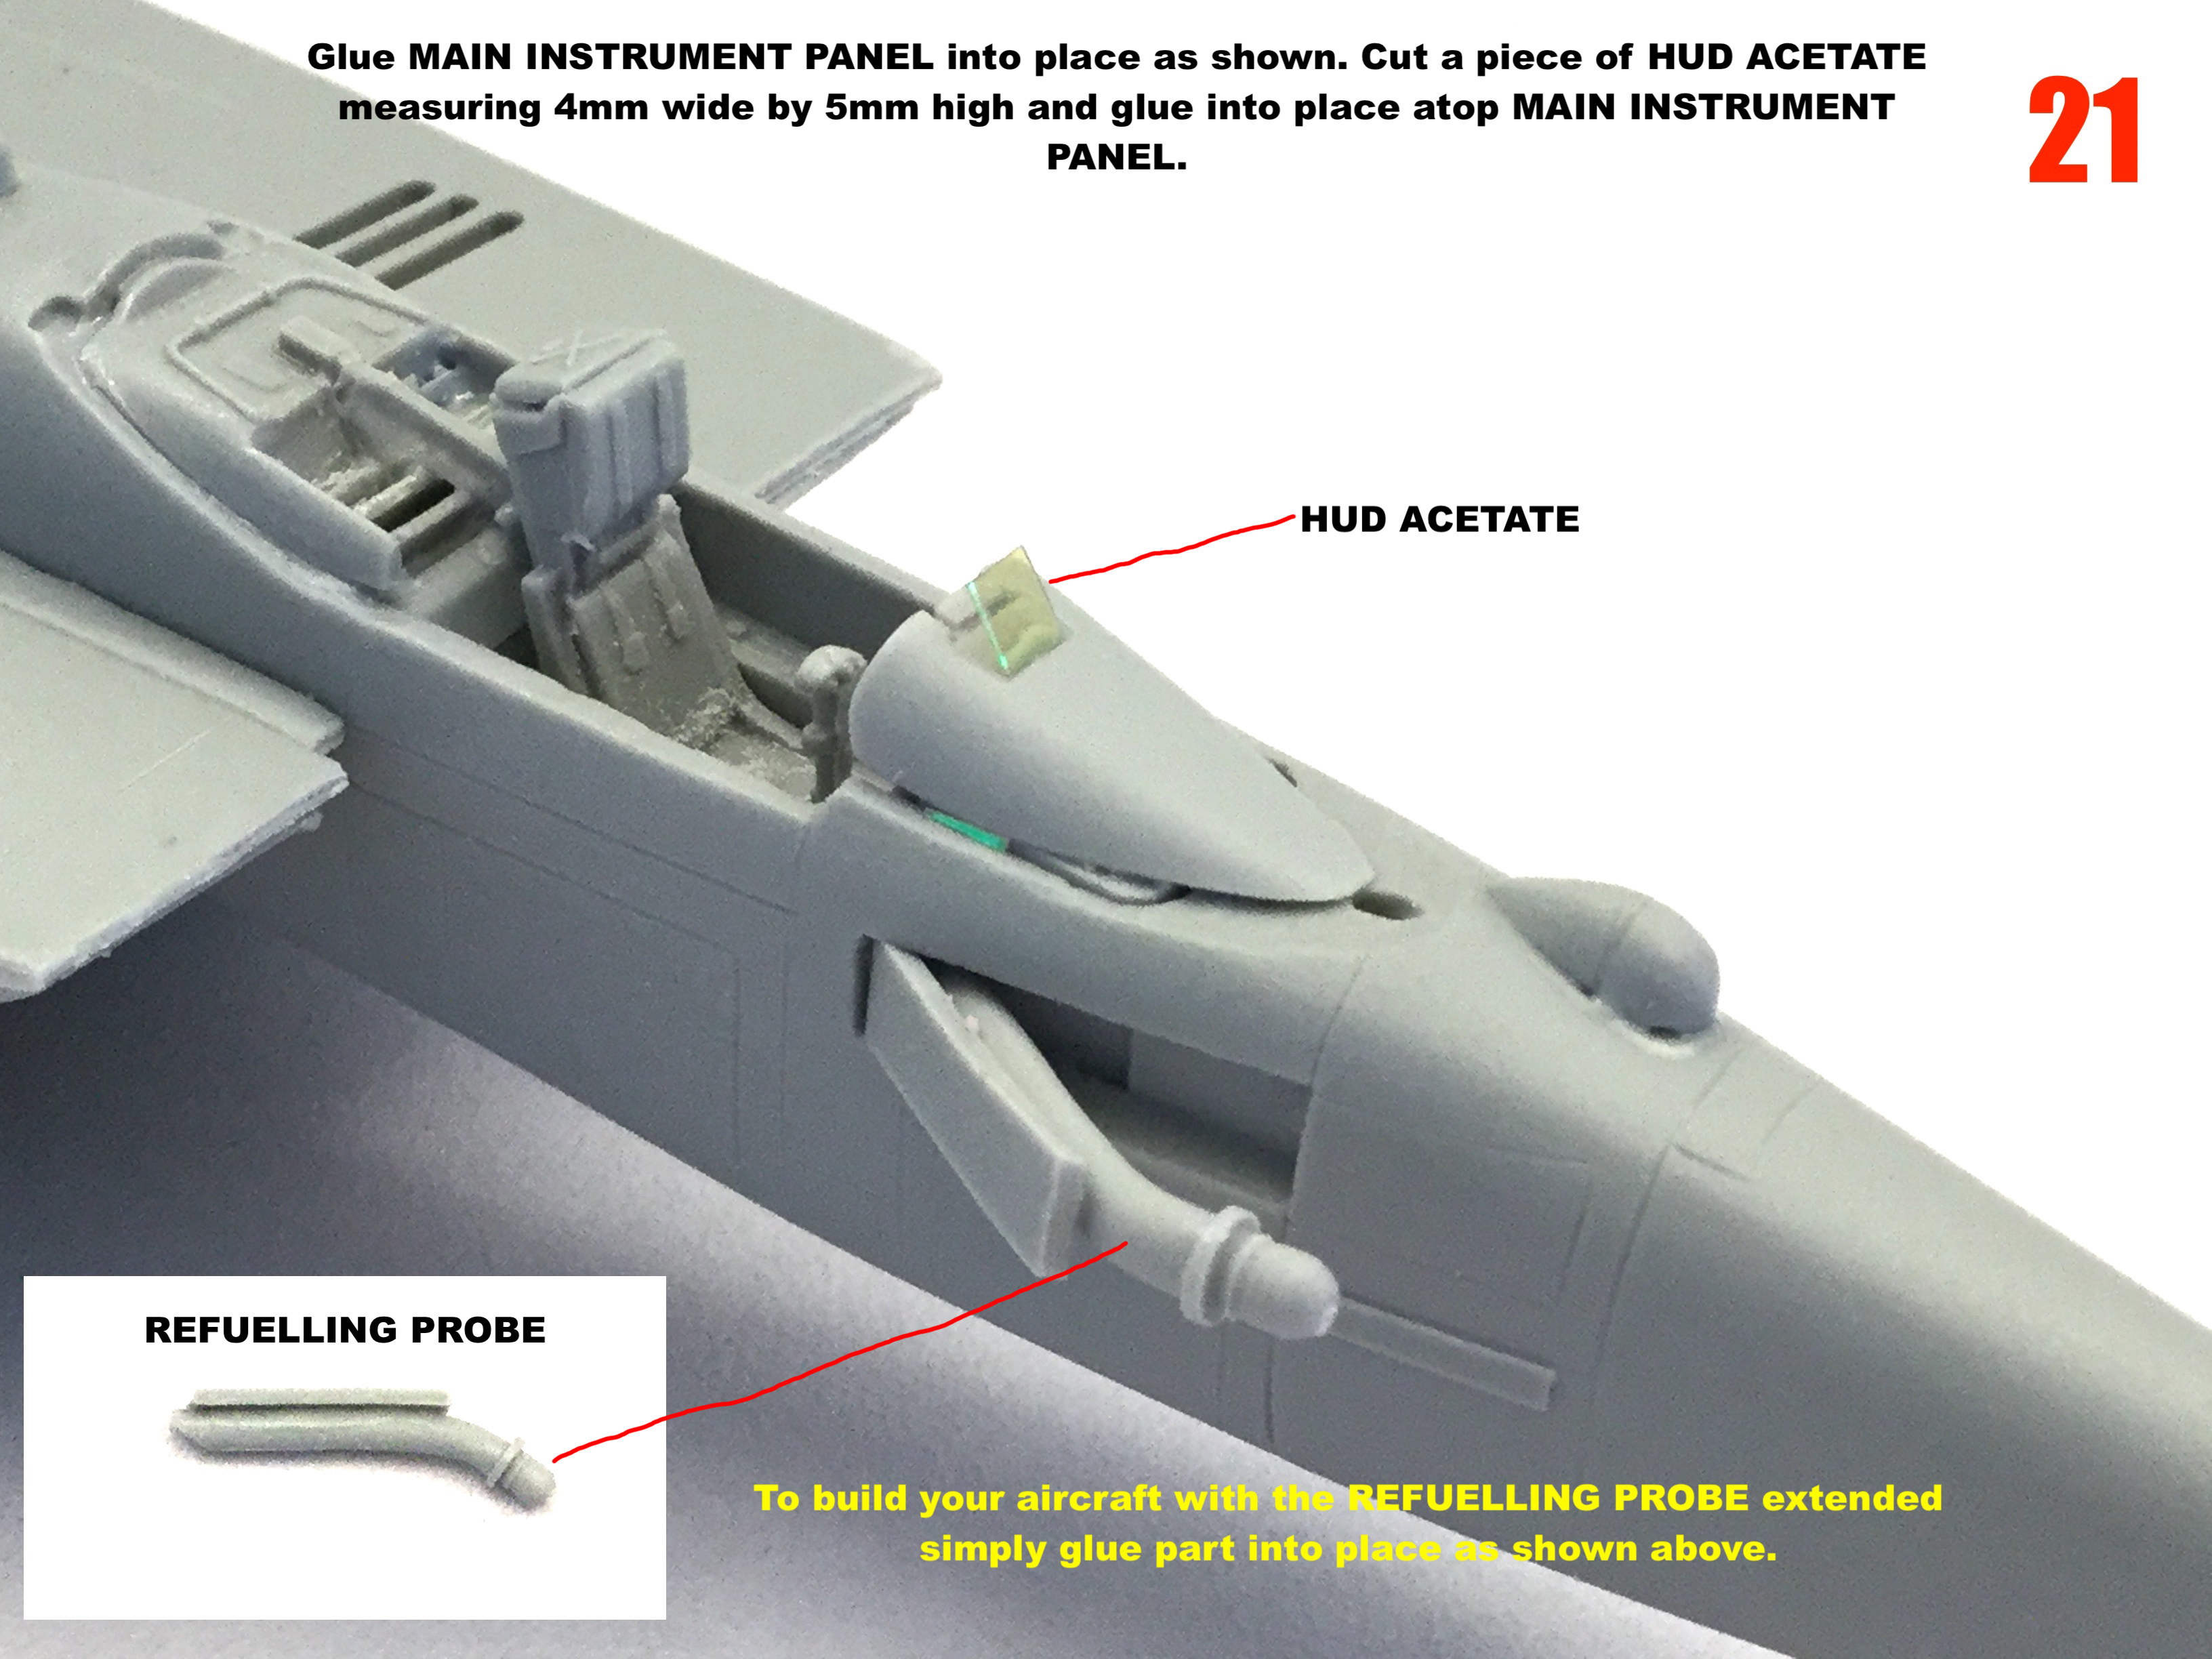
This is what's in the box. It's not shown, but I'm also including a small piece of metalized acetate to make the HUD from.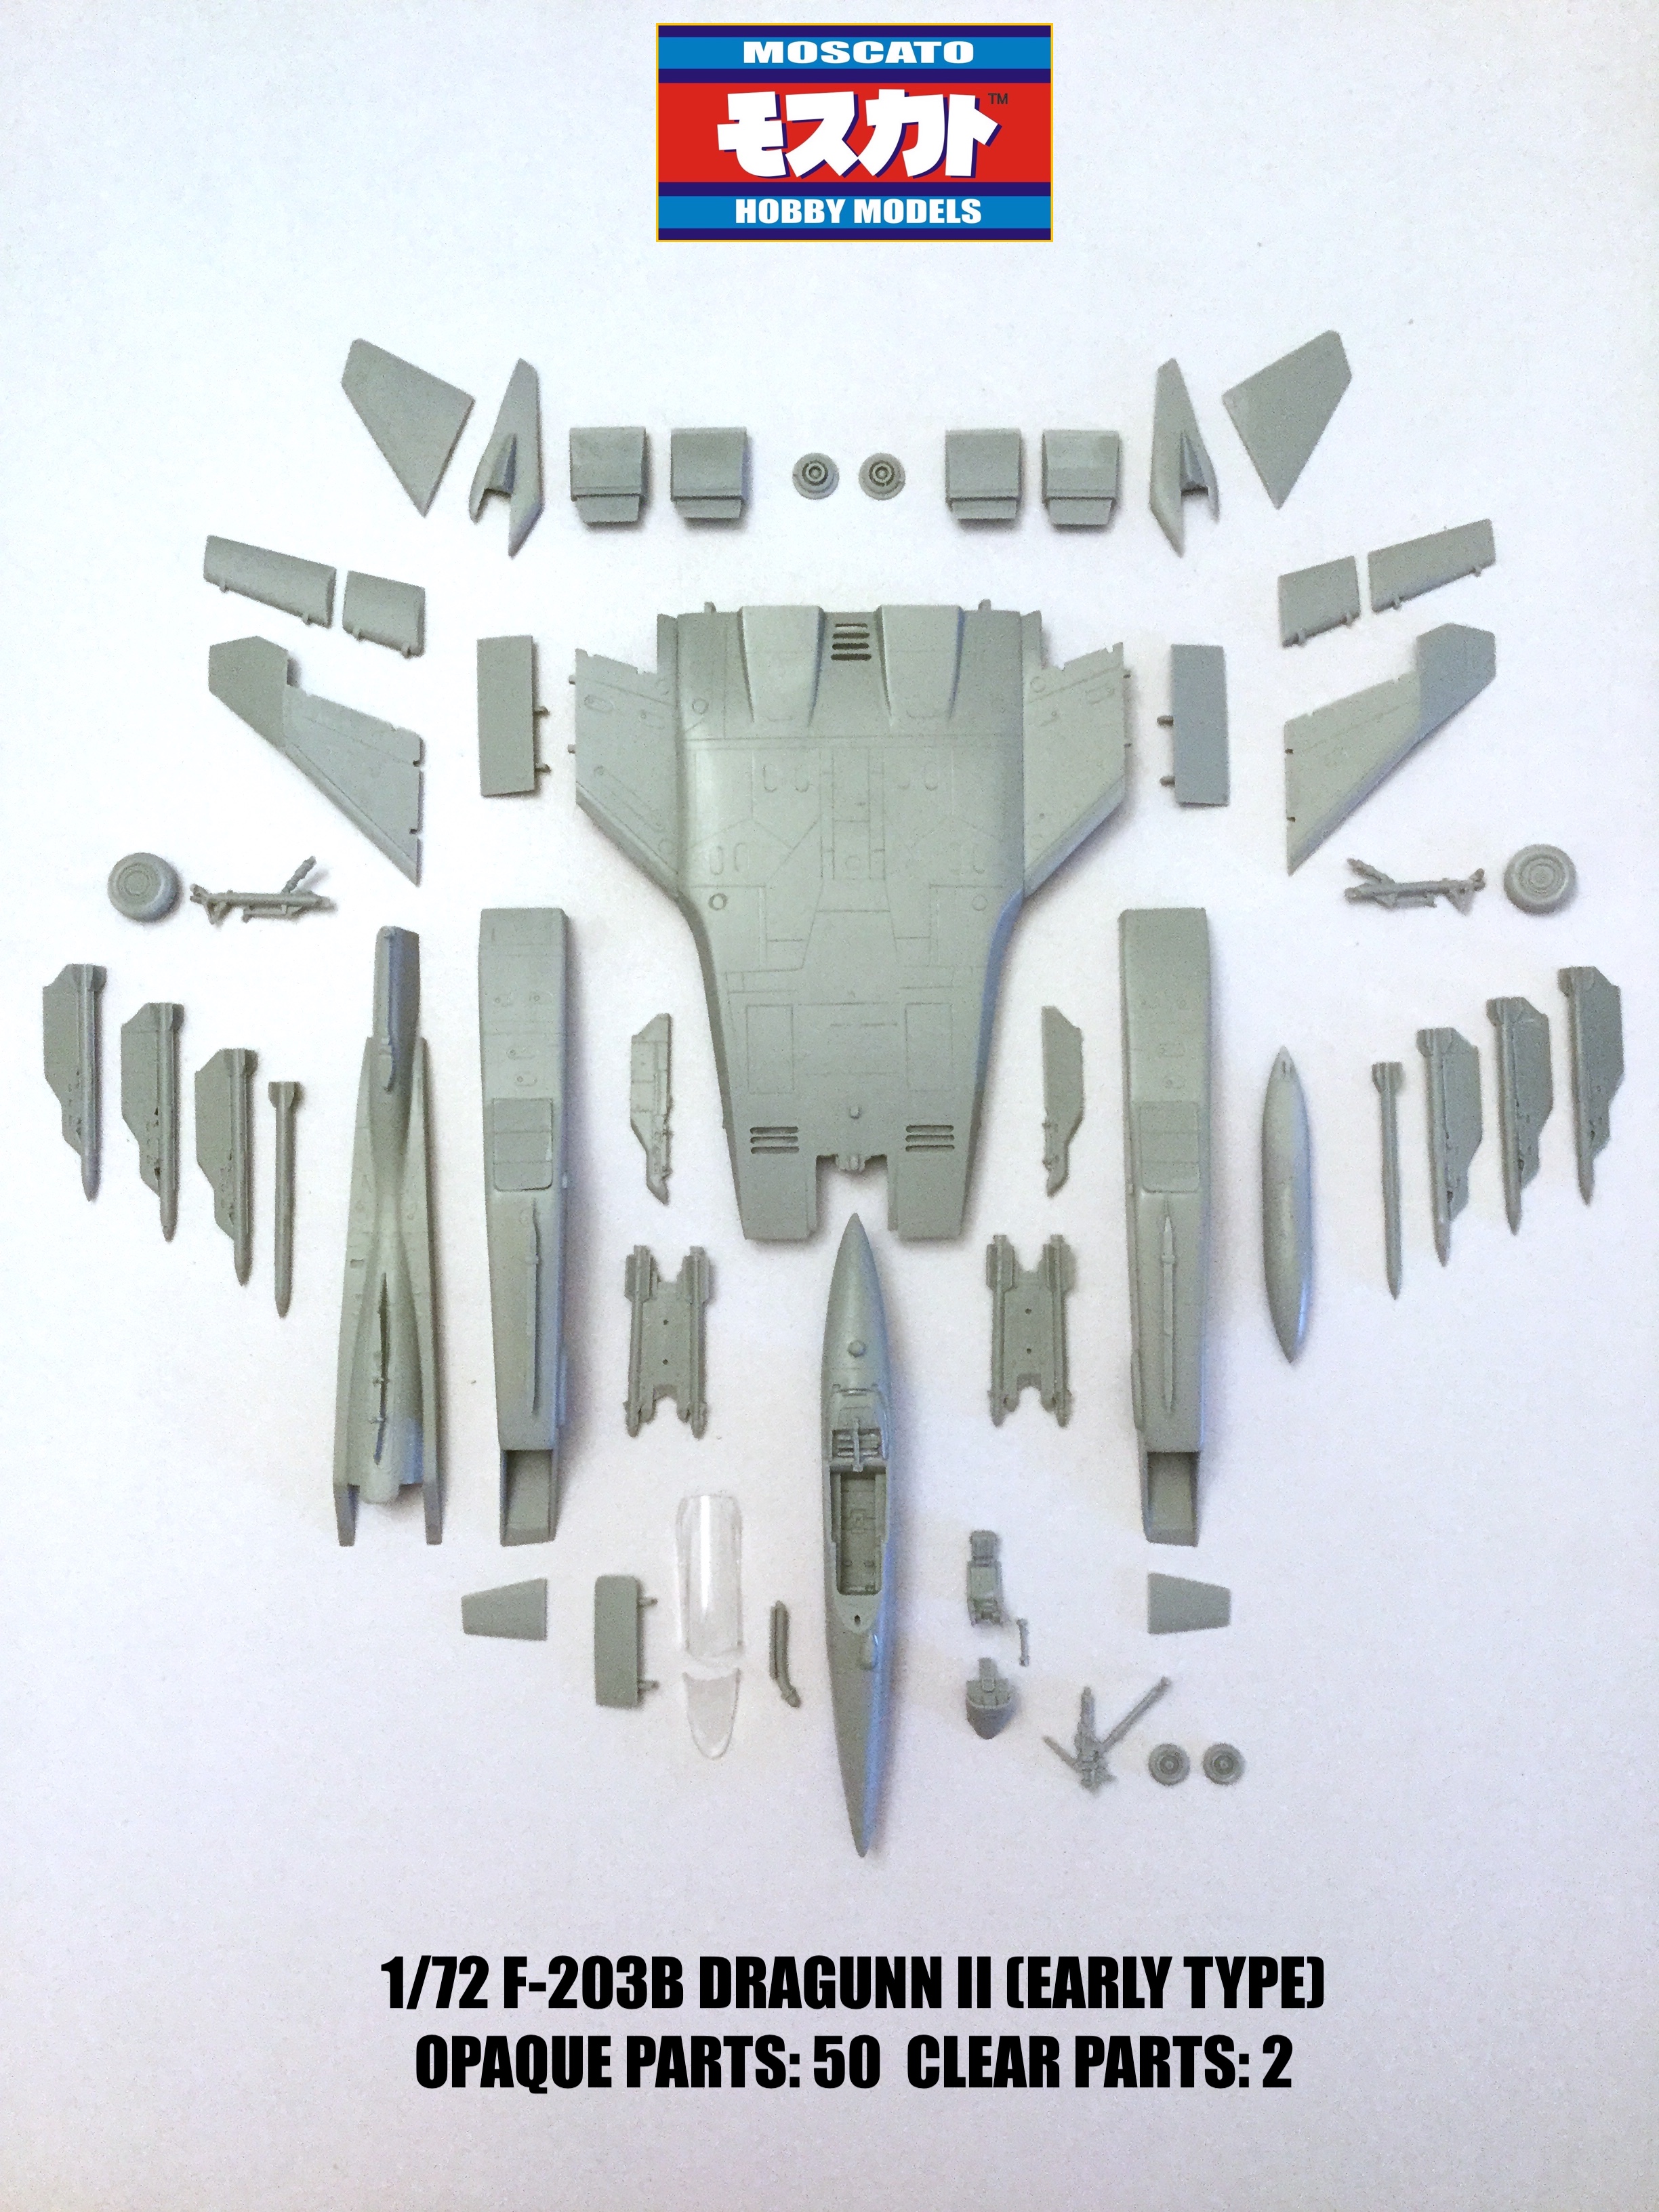
-
1/72 F203 Dragon II Kit Proposal --Moscato Hobby
captain america replied to captain america's topic in Model kits
Kits are being packed-up and should start shipping on Monday. Jose Jauregui: please PM me!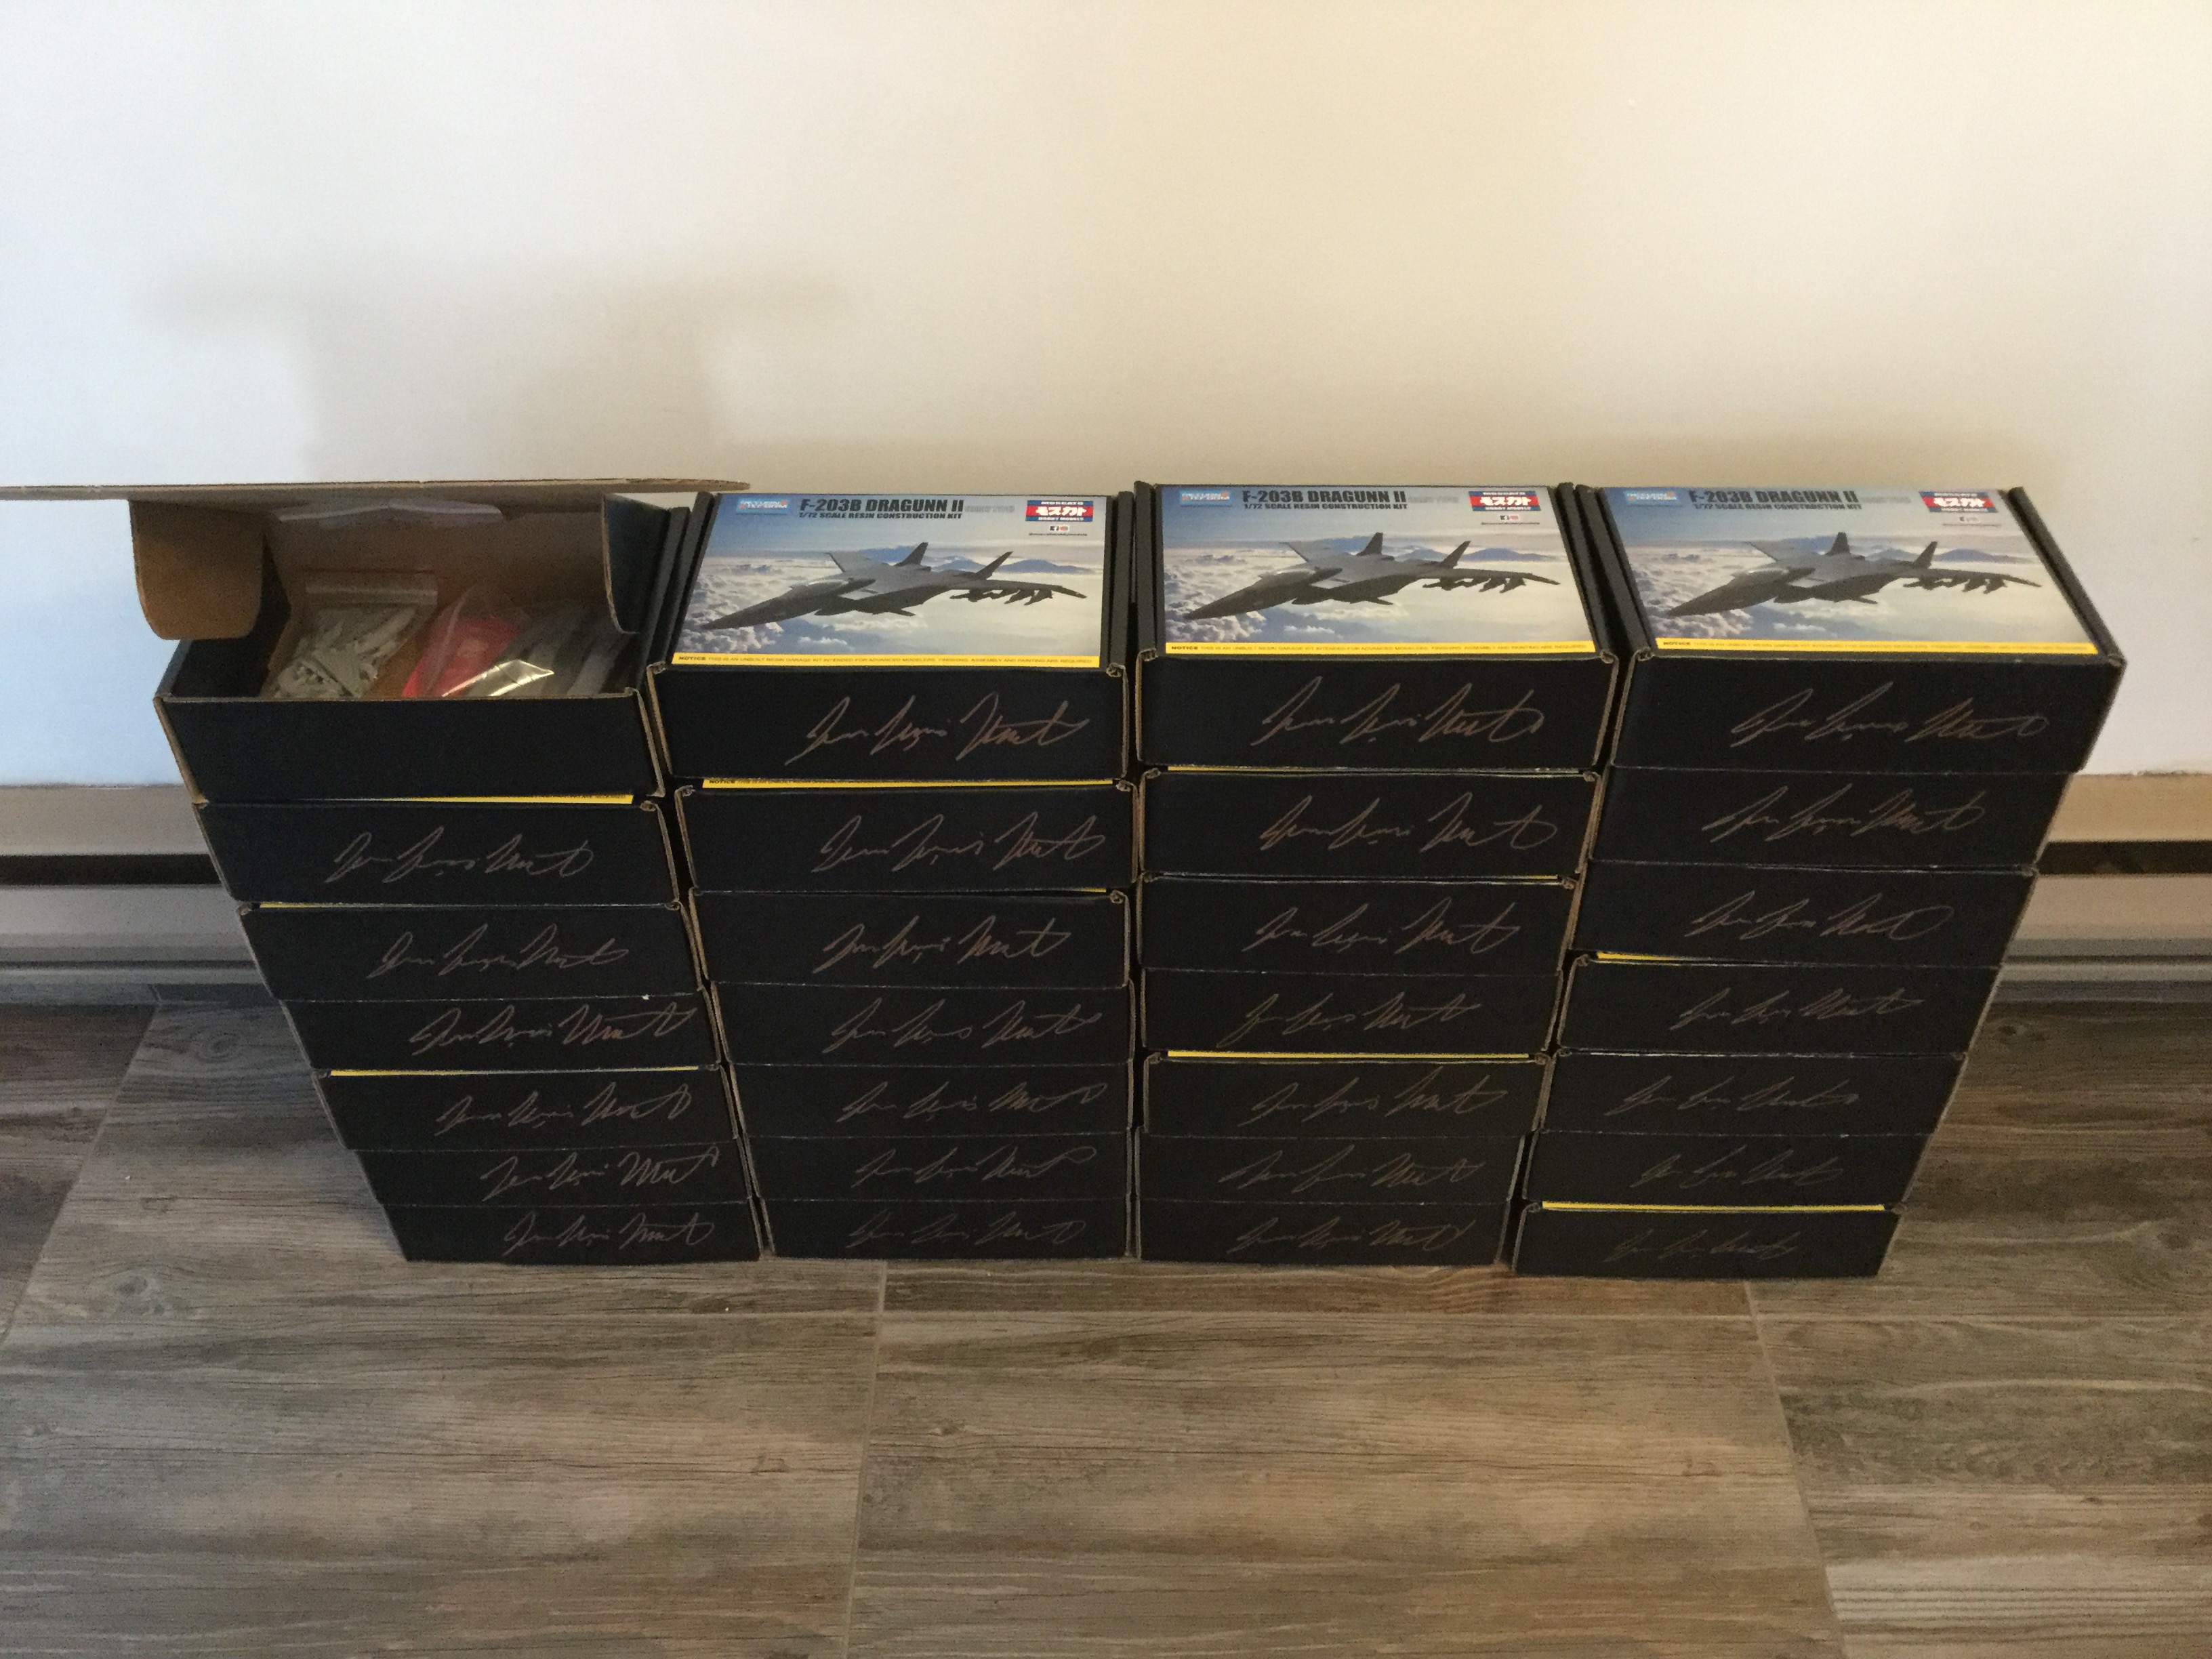
-
1/72 F203 Dragon II Kit Proposal --Moscato Hobby
captain america replied to captain america's topic in Model kits
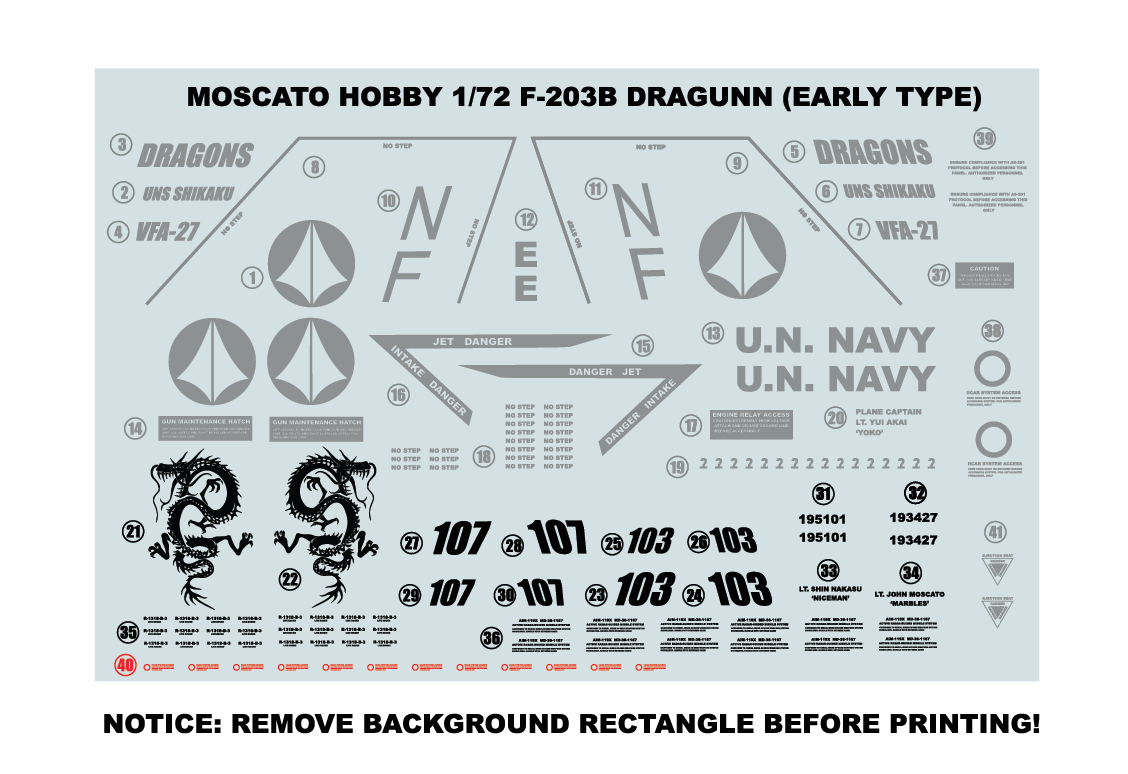
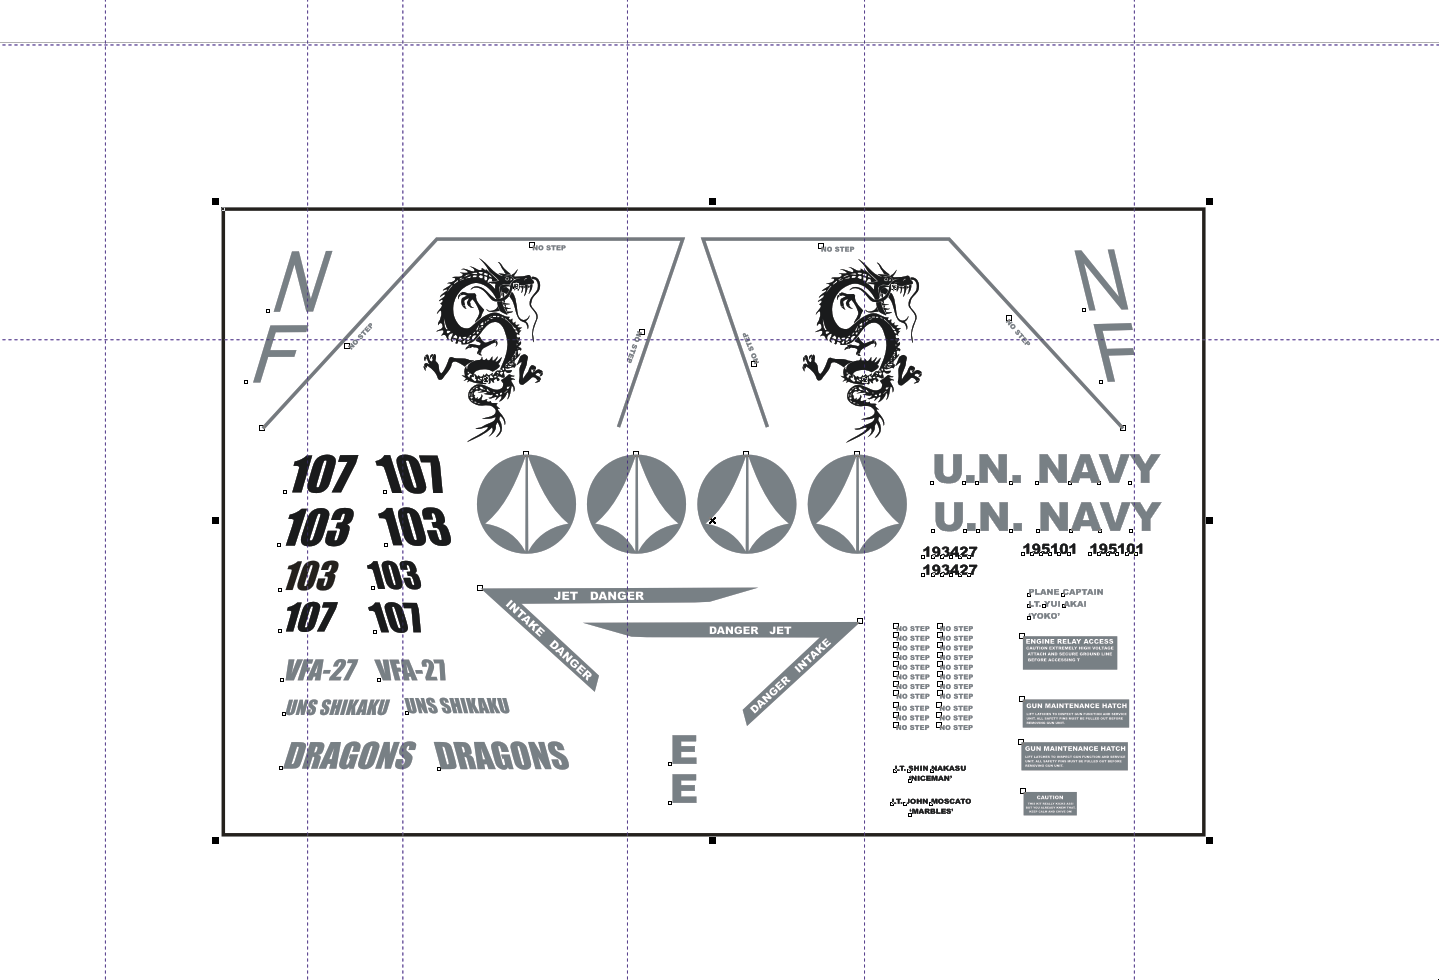
Decal placement guide and decal layout finalized. f203 dragunn decals artwork.ai f203 dragunn decals artwork.cdr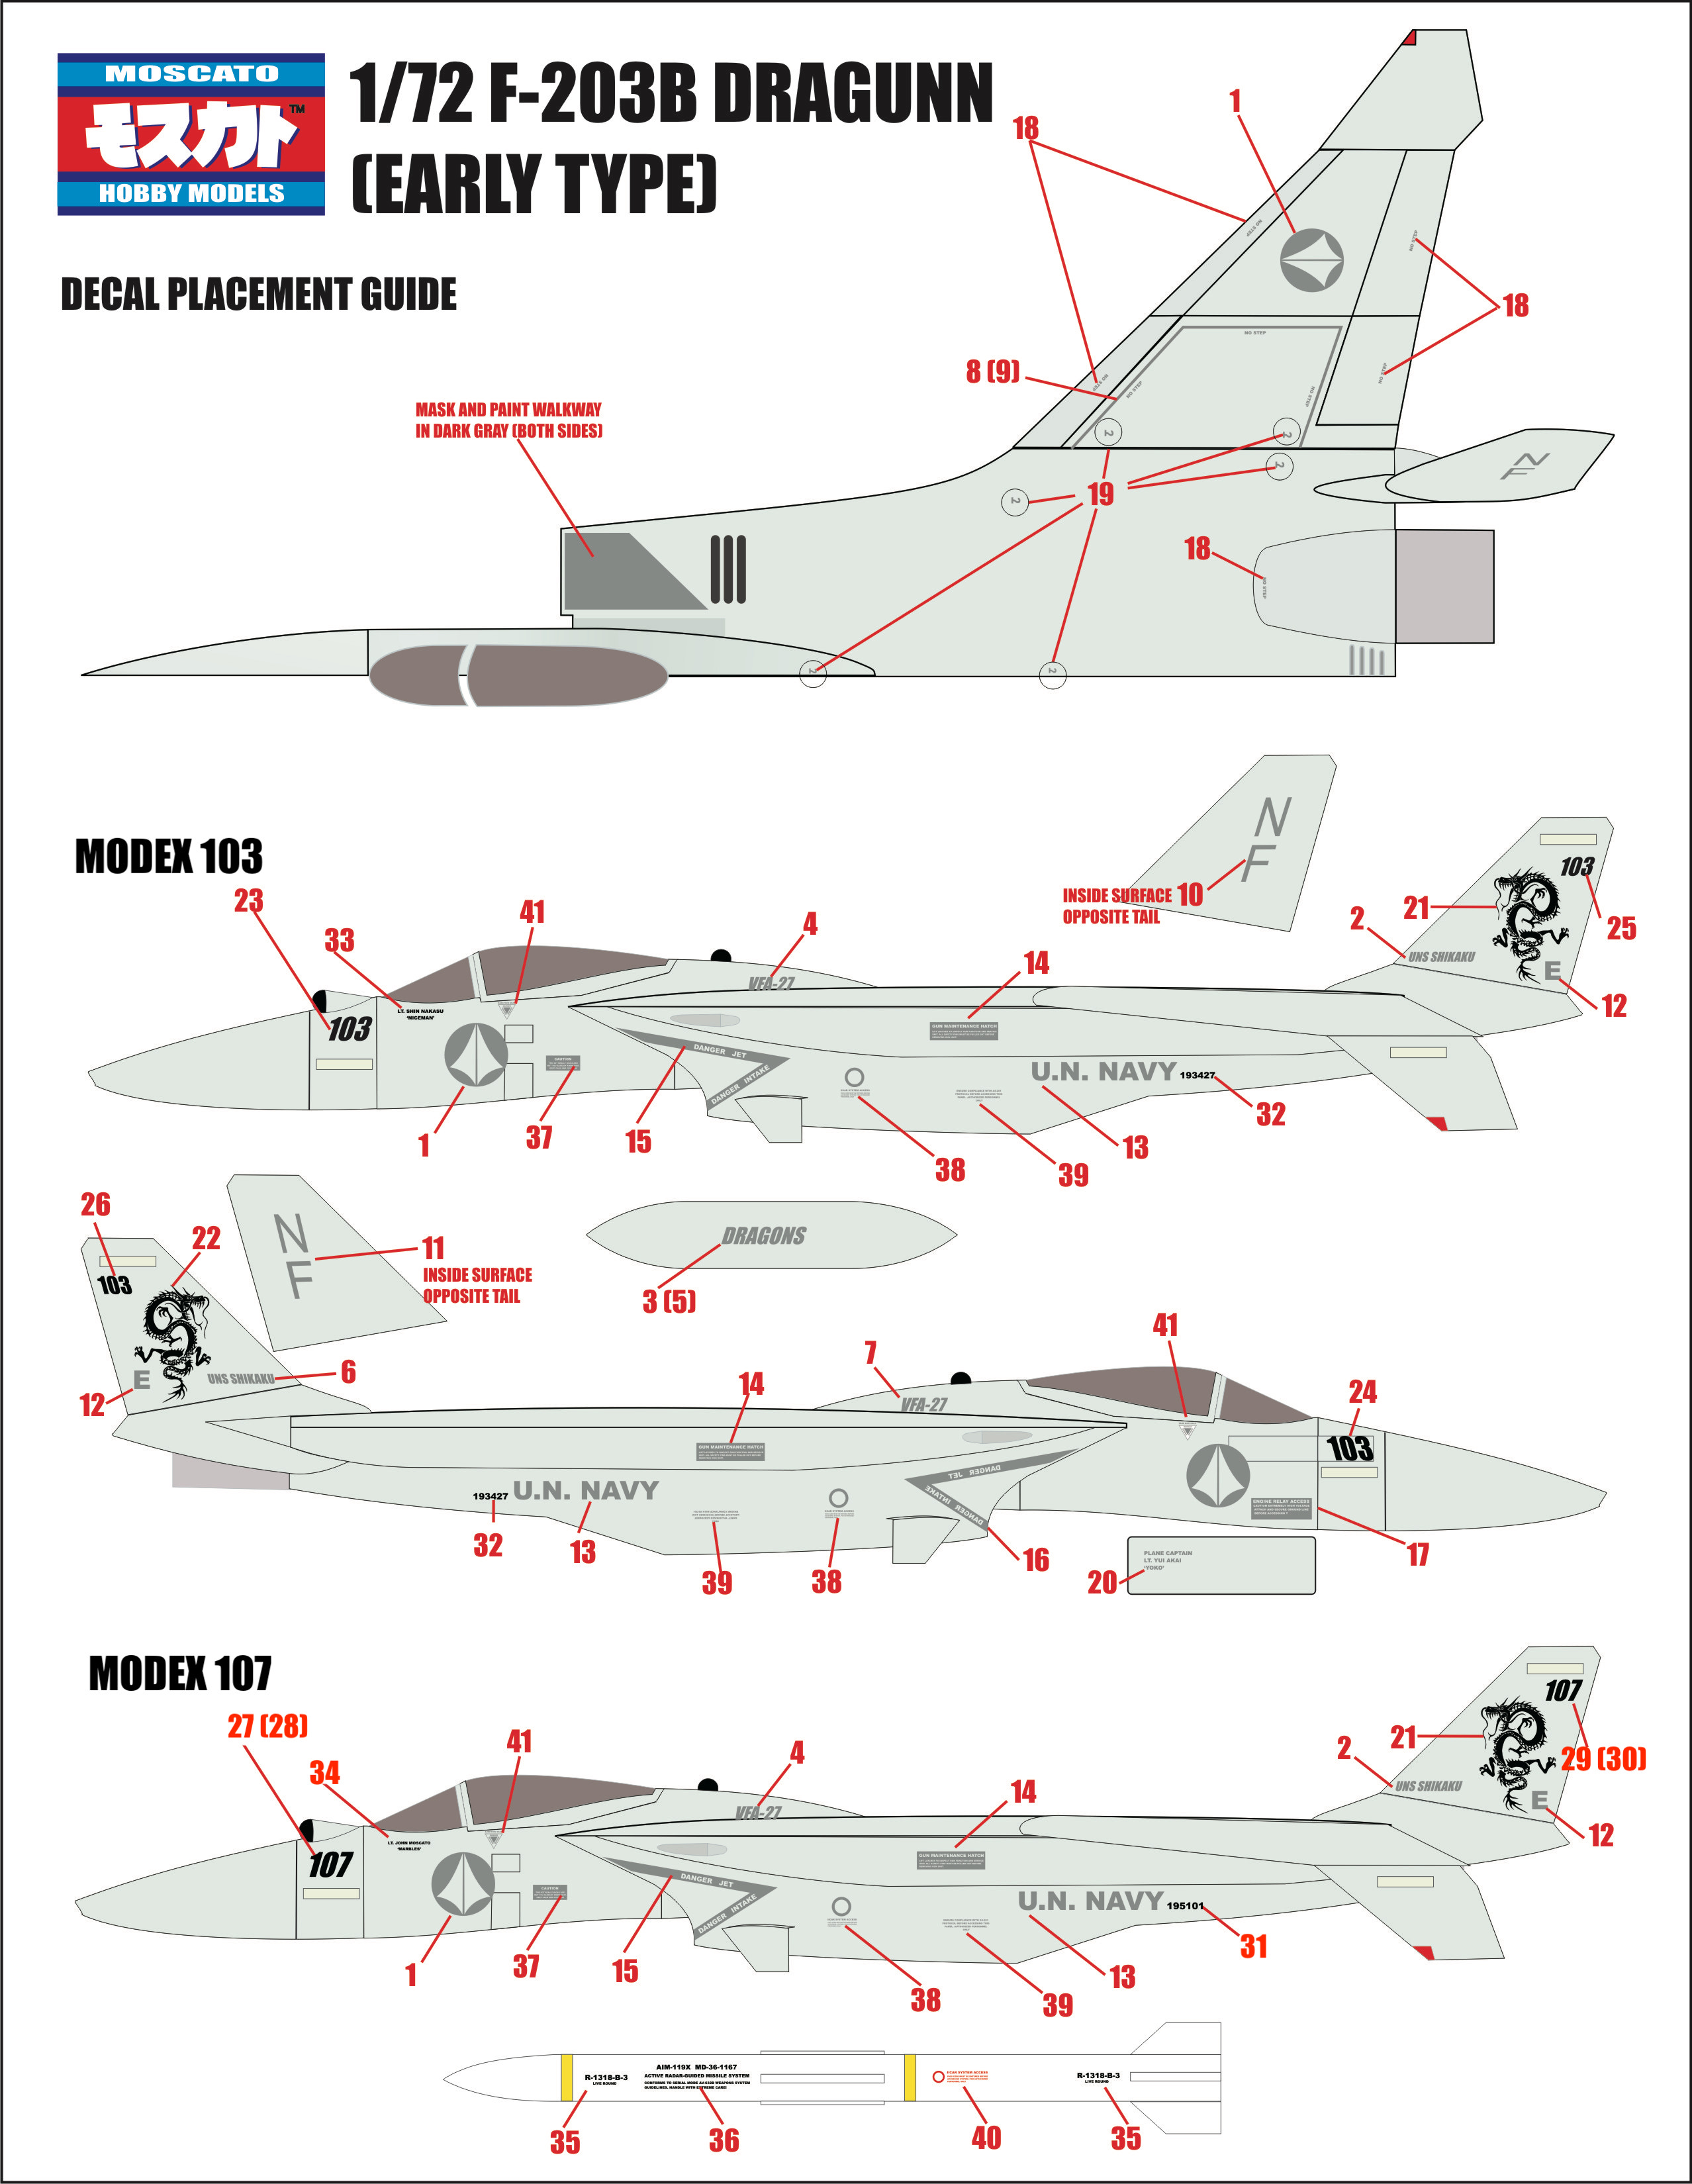
-
Now that's a beautiful Norbert-Gerard!
-
1/72 F203 Dragon II Kit Proposal --Moscato Hobby
captain america replied to captain america's topic in Model kits
Hi guys. Just wanted to check-in and say that my silence of late has not been in vain. I'm currently at mid-point in the production run and things are going beautifully! I should be done with the bulk of the casting by the end of next week, and will dedicate myself to the decal artwork and then the kits will ship. If someone could suggest a way to host the decal files for people to download, I'd really appreciate it. They're really simple, 2 colors only (grey + black) for the low-viz scheme.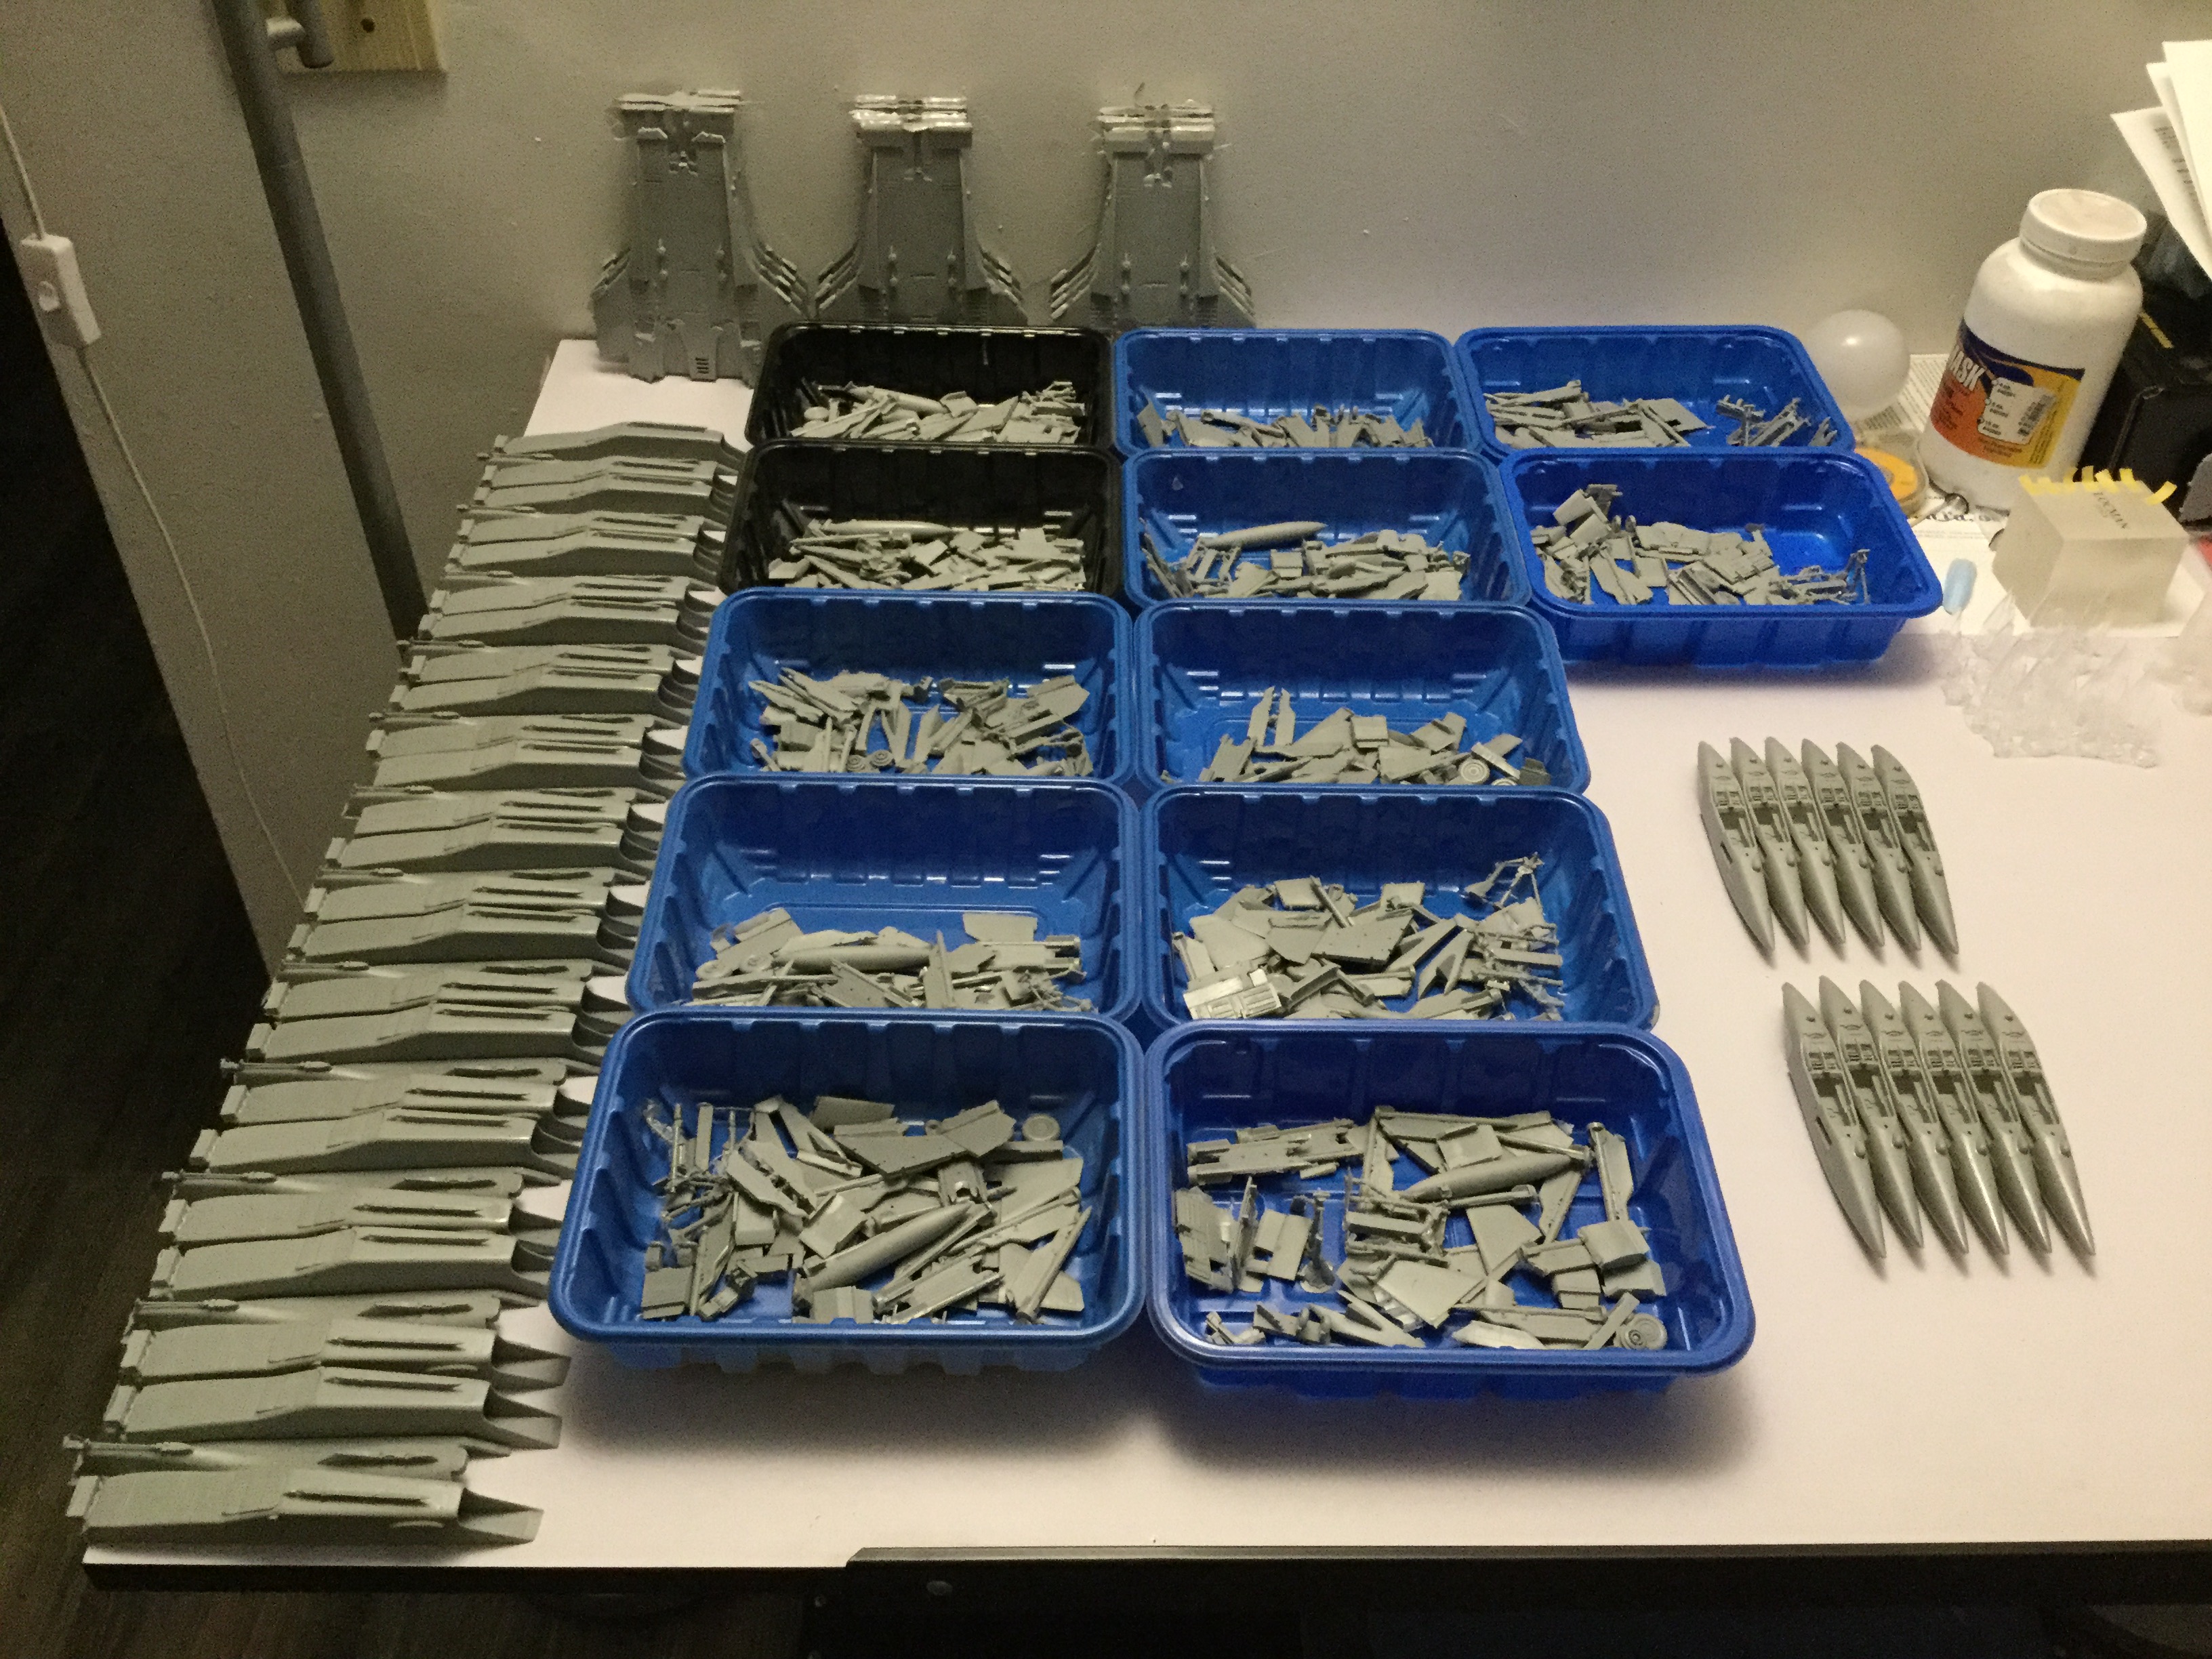
-
1/72 F203 Dragon II Kit Proposal --Moscato Hobby
captain america replied to captain america's topic in Model kits
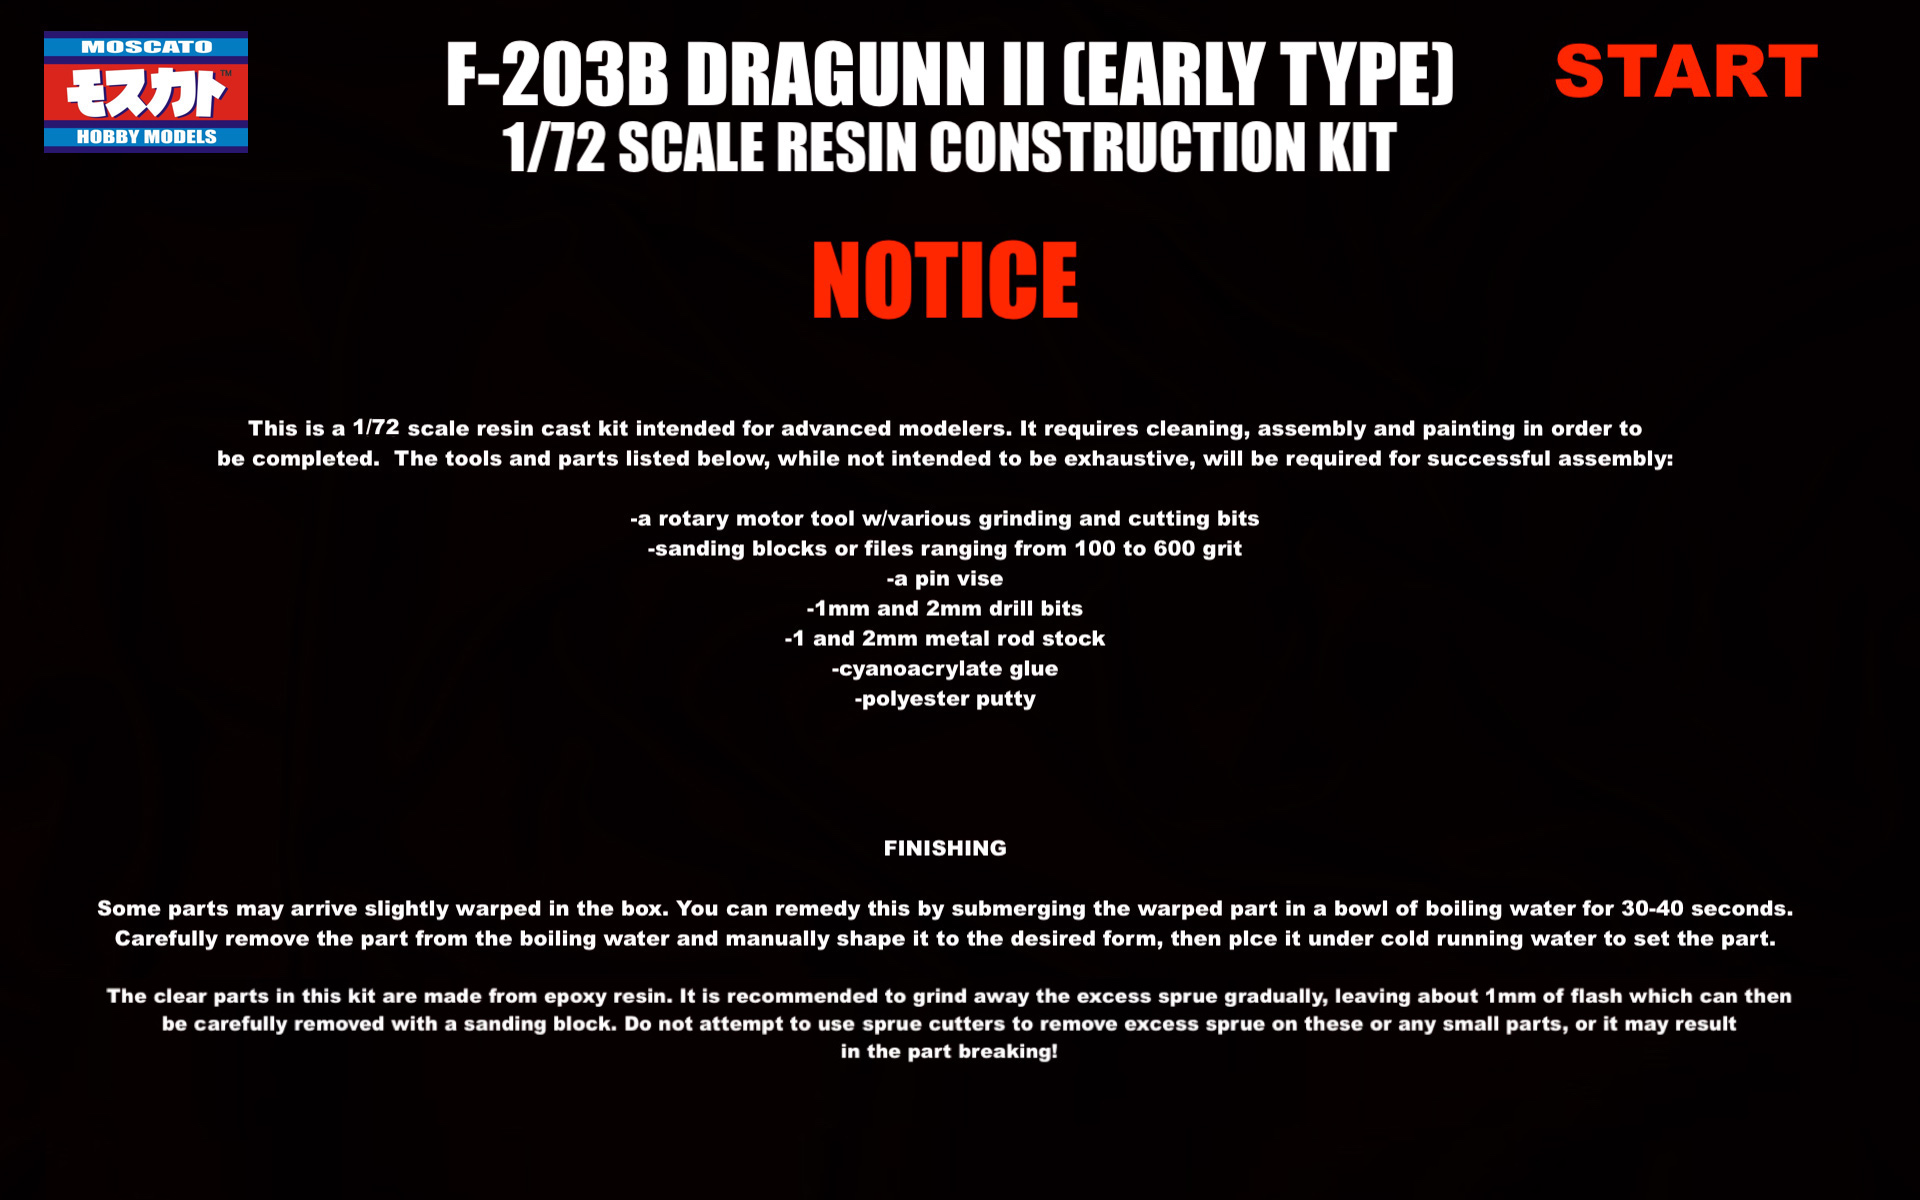
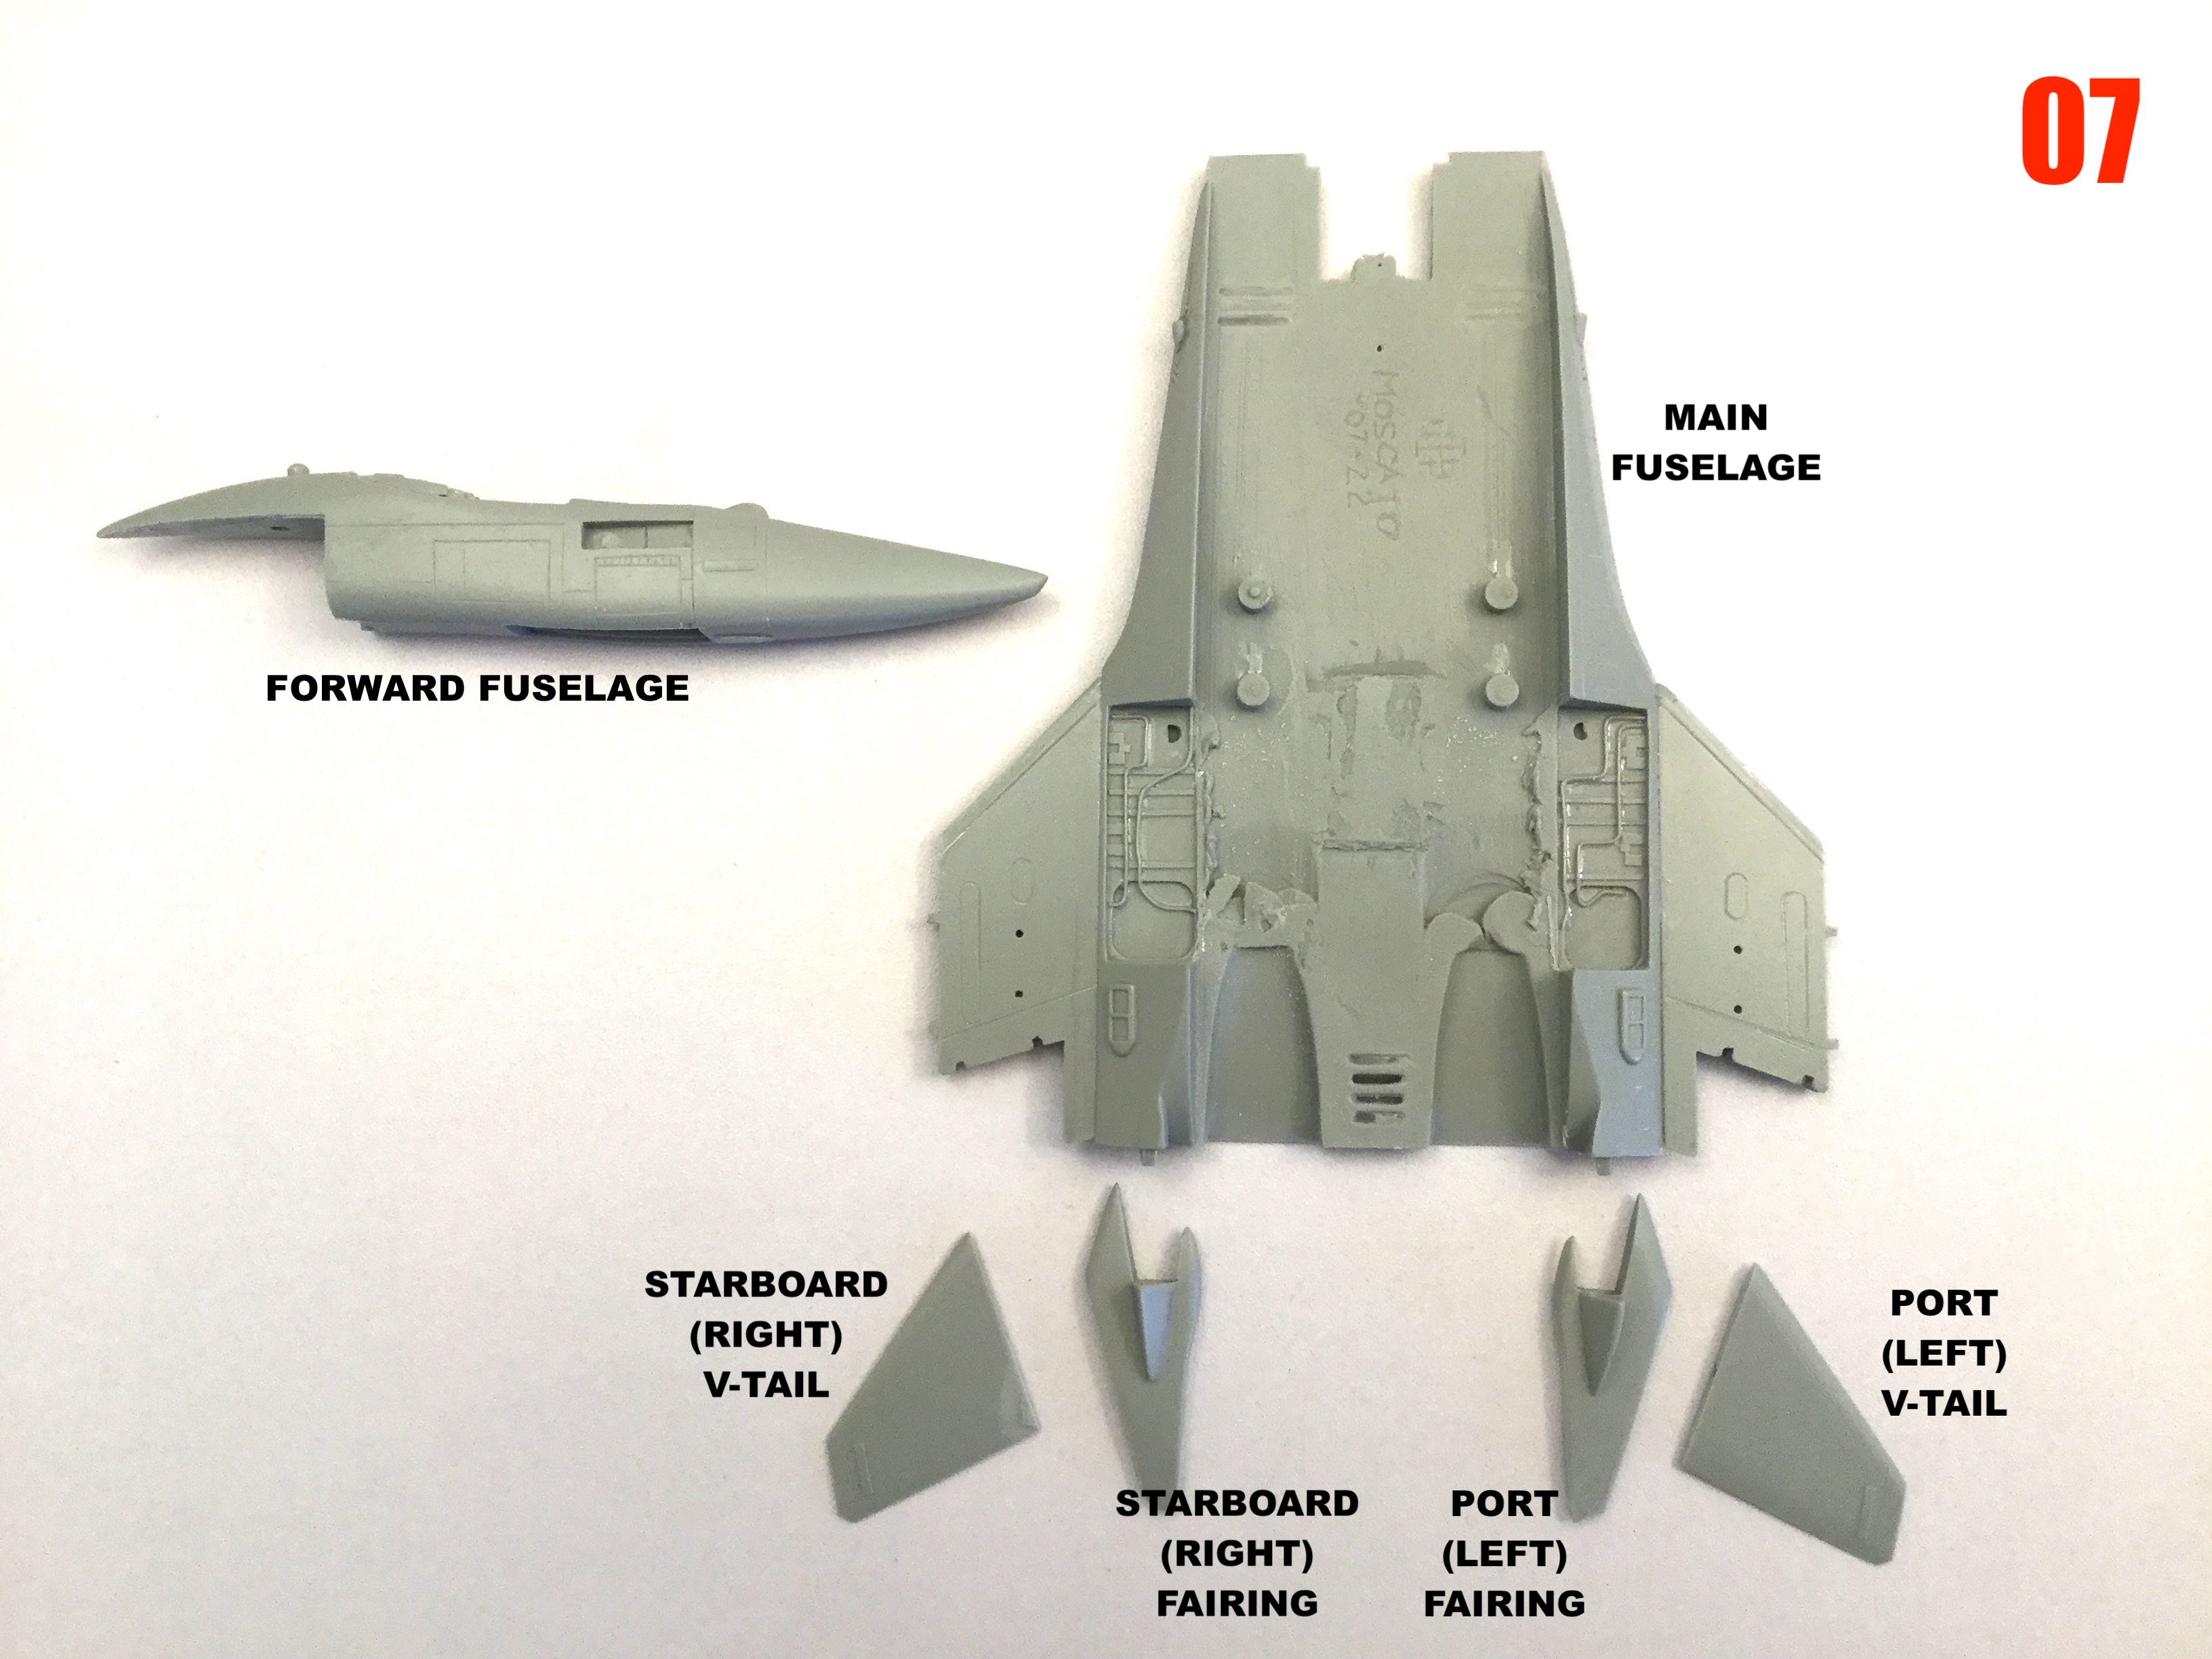
Captain's Log: Tuedsay, July 26th. 1/72 F-203B Dragunn resin kit scratchbuild update. Supply shortages are a frustrating matter! I just received my mold material yestarday, so I'll be able to complete the remaining molds... Now waiting on my resin shipment. Thankfully, I should be able to get through most of the production run with the resin I have on hand. All the tiny parts which were a concern for me have been casting very well. The clear canopies are underway as well, and looking extremely good right out of the mold. I'm also working on the markings for the fighter, which I may simply offer as free artwork that you can download & print yourself. It will also include a color & markings placement guide.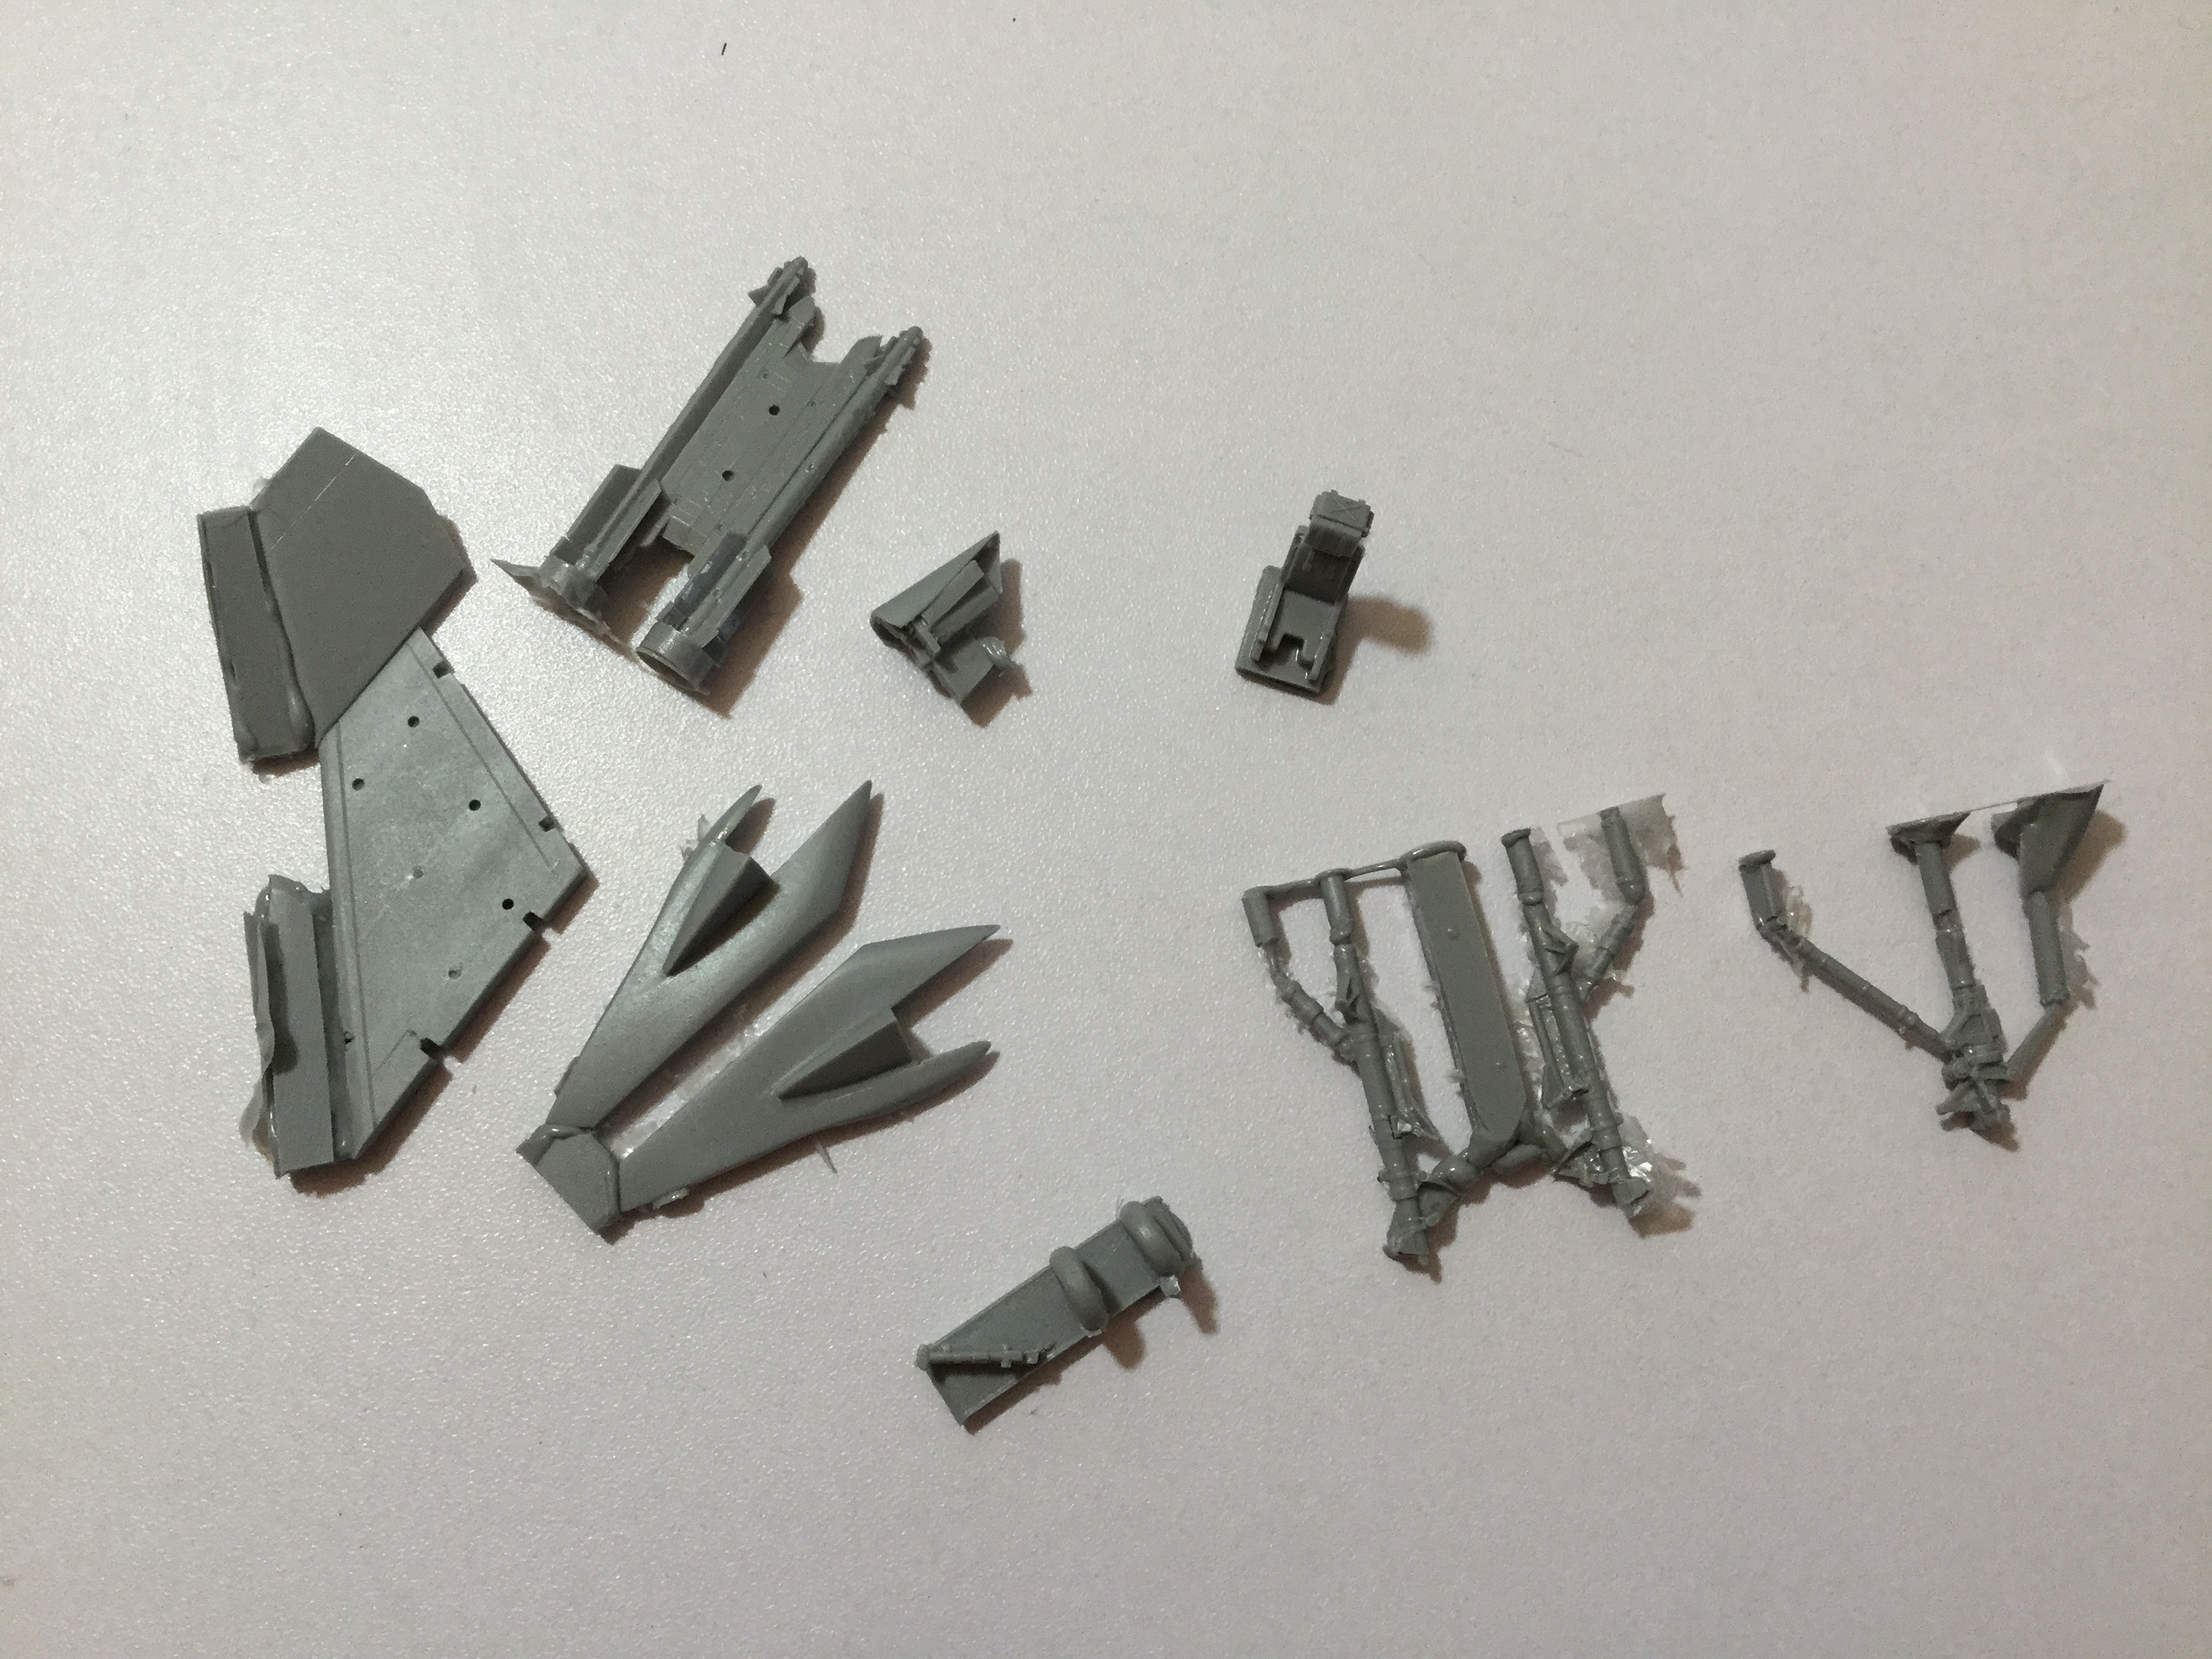
-
1/72 F203 Dragon II Kit Proposal --Moscato Hobby
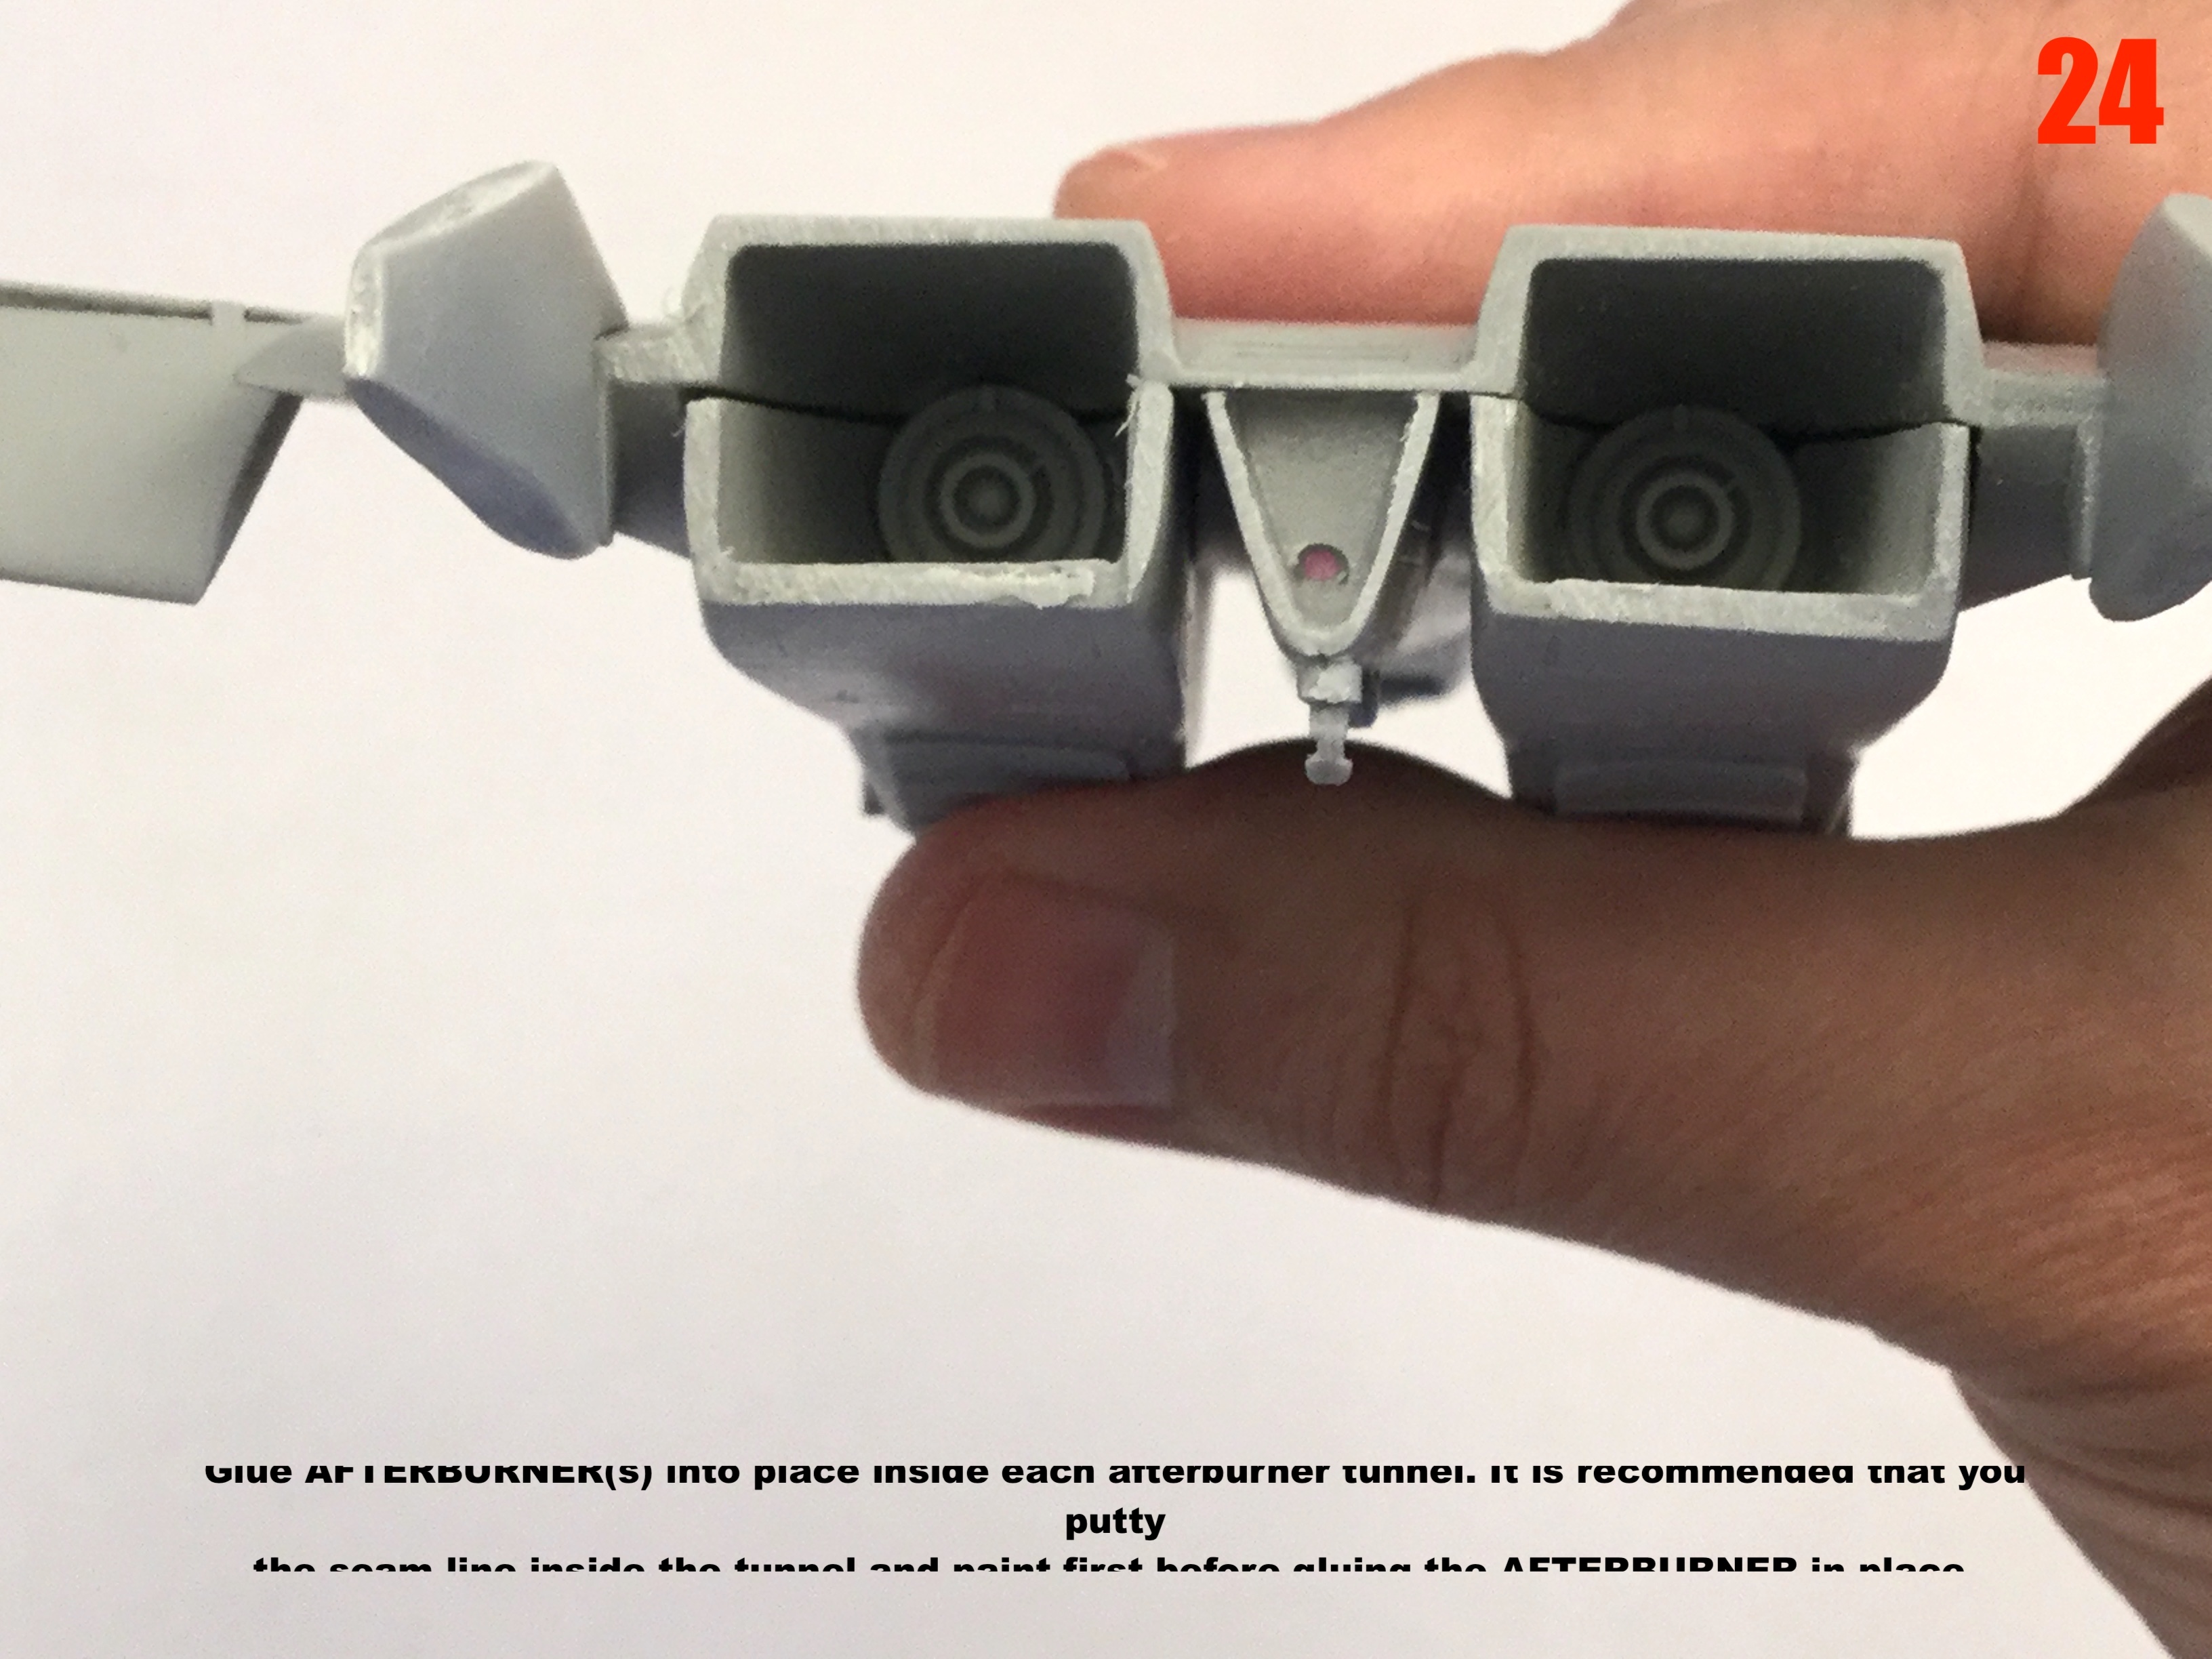
captain america replied to captain america's topic in Model kits
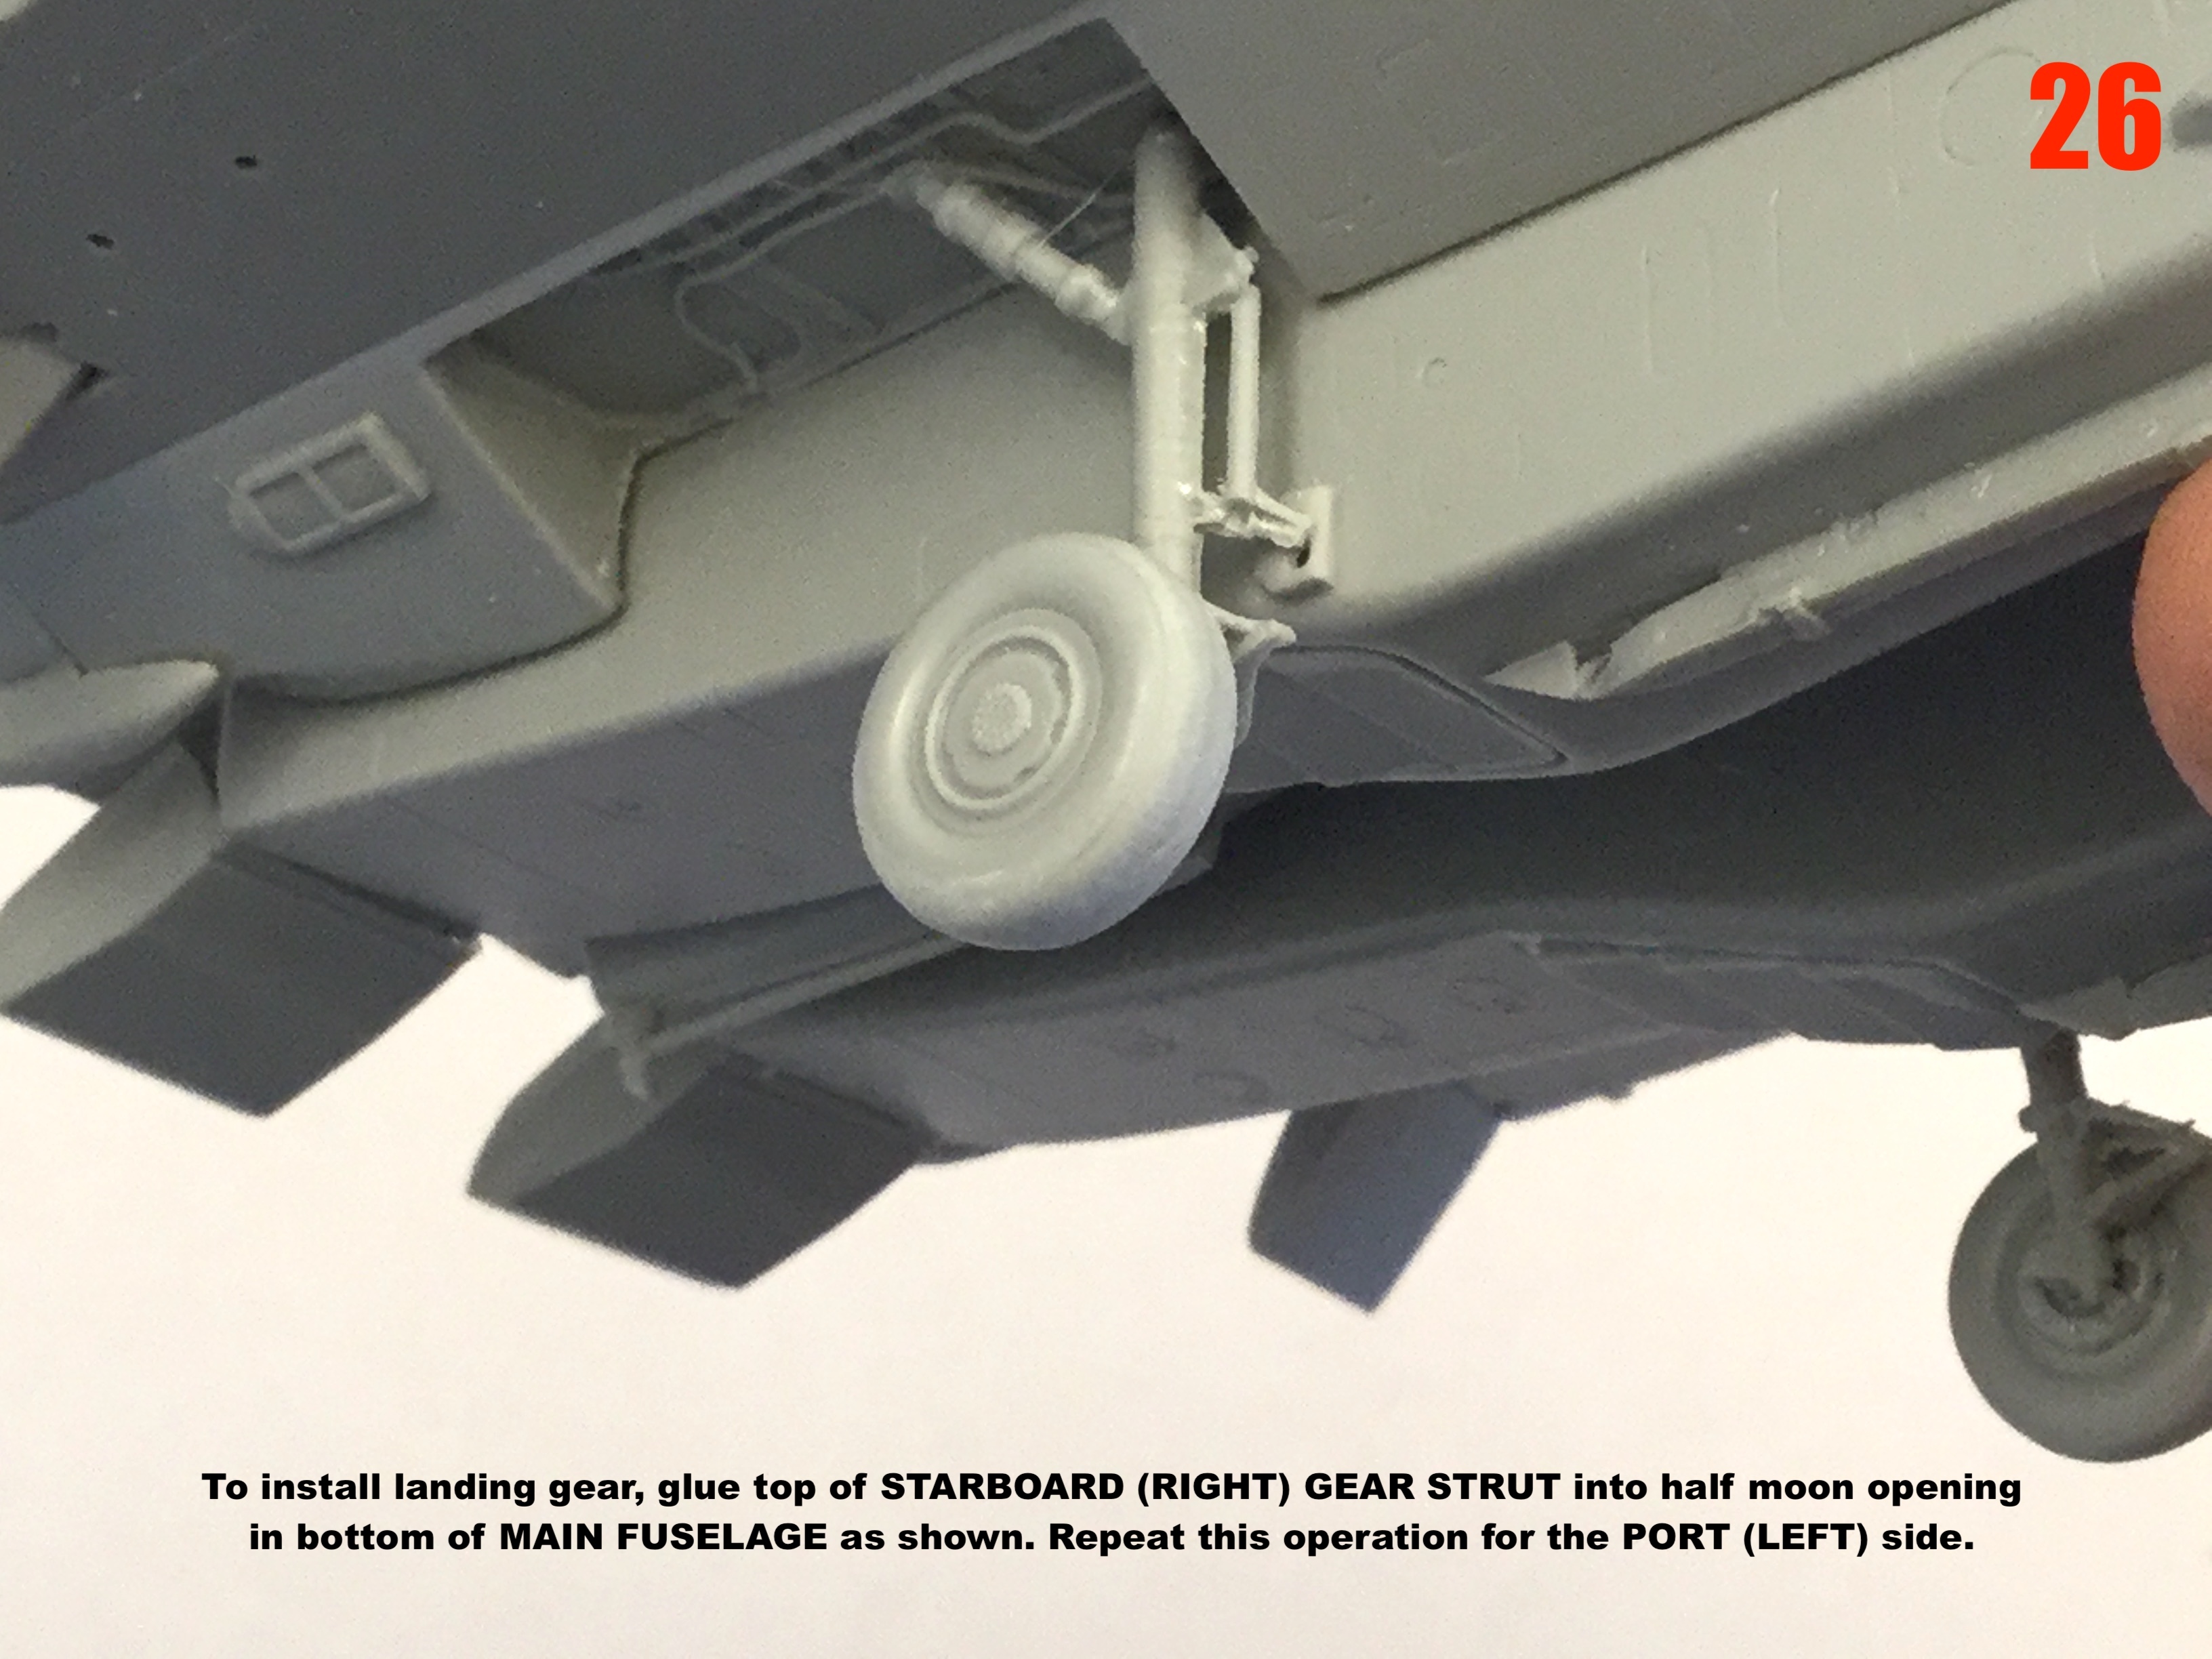
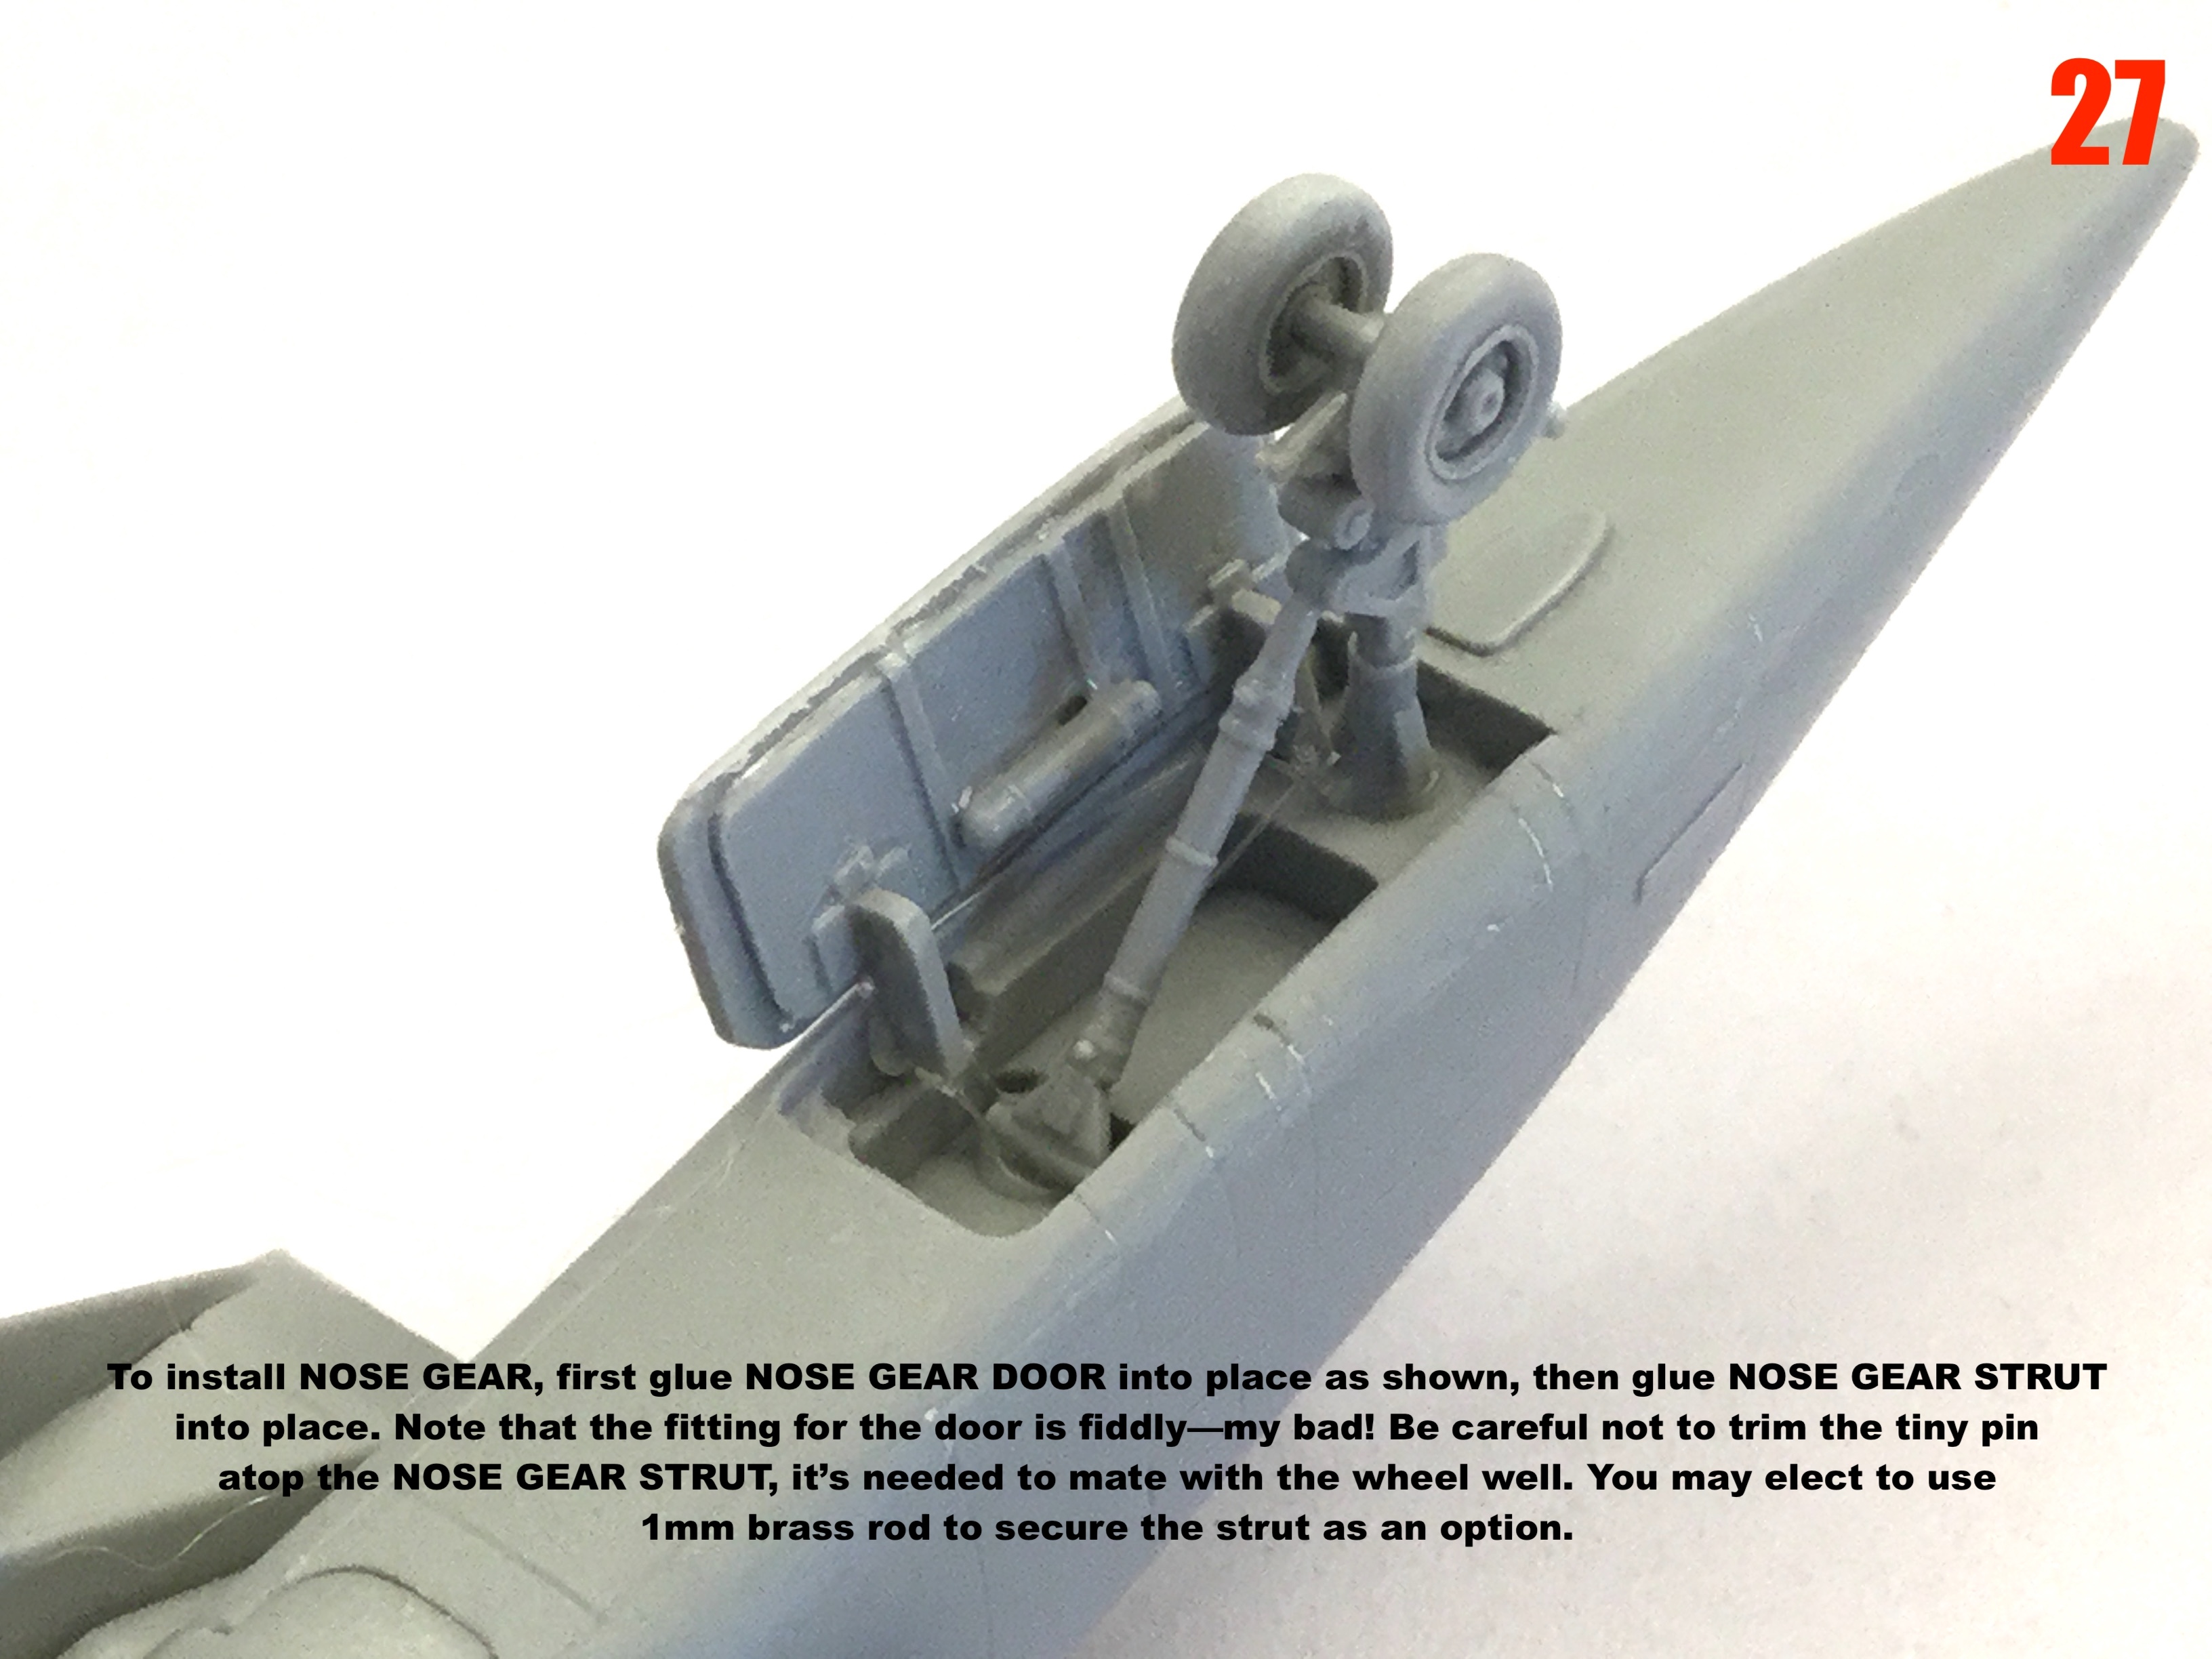
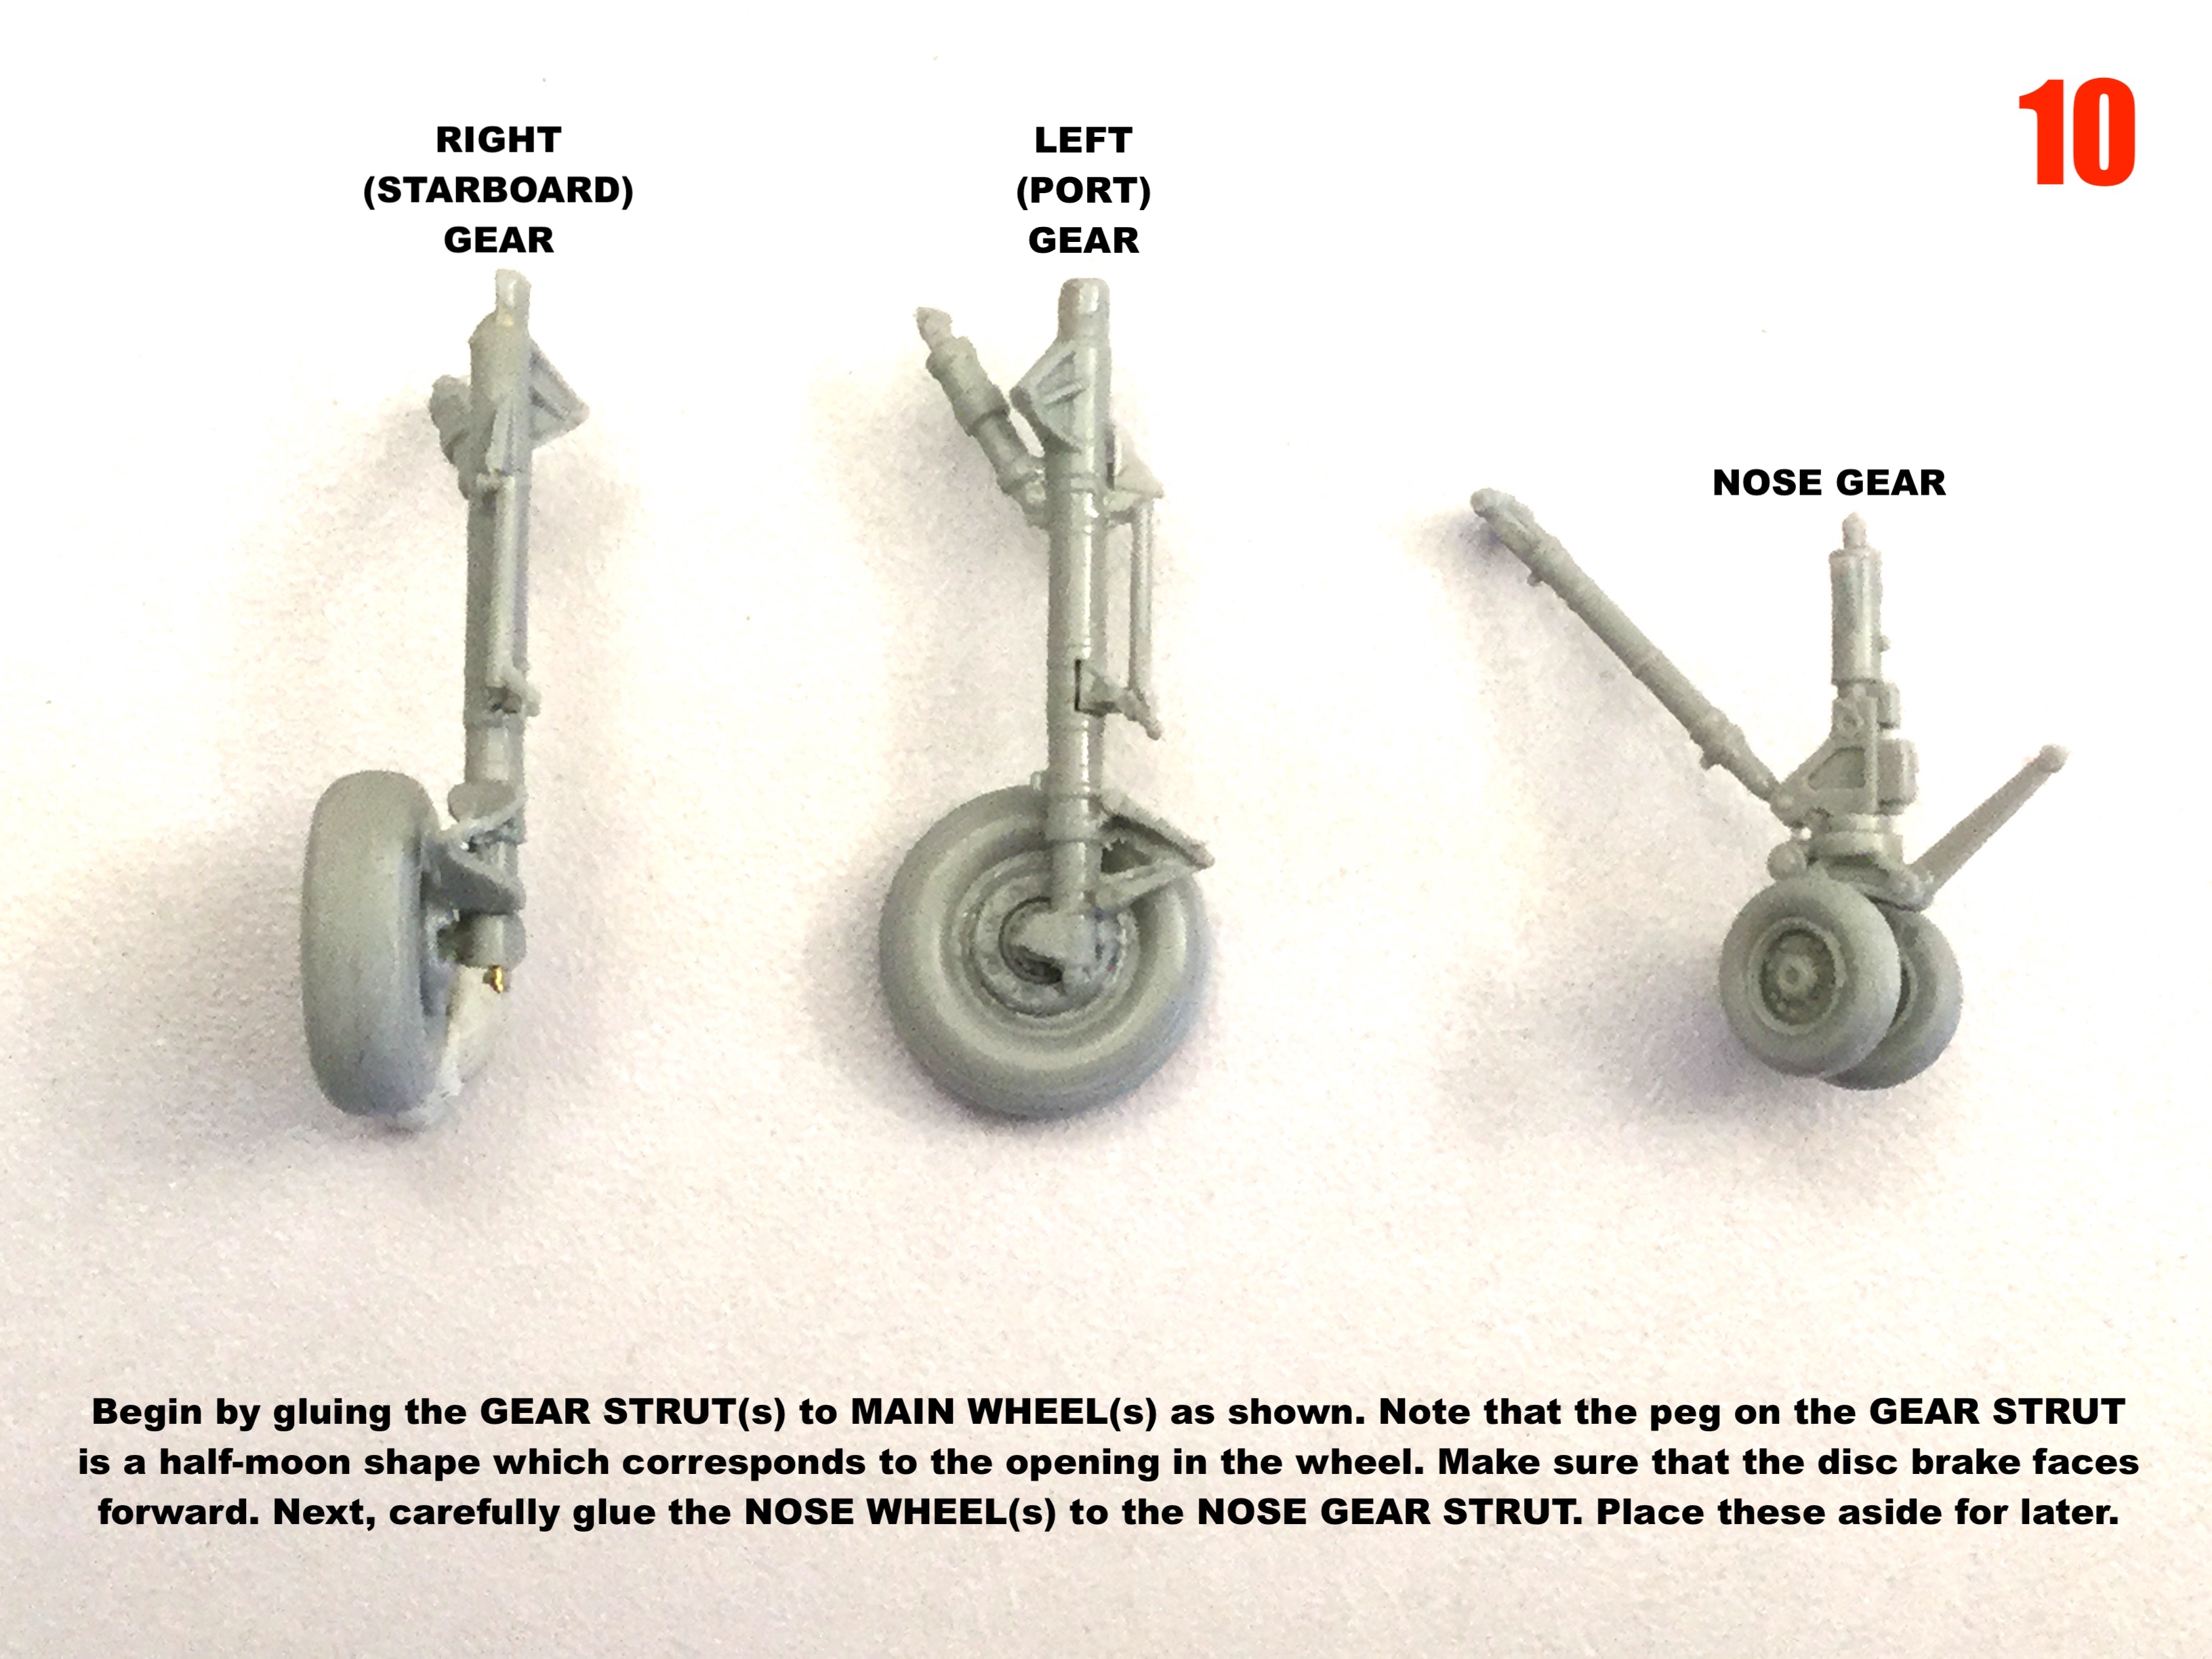
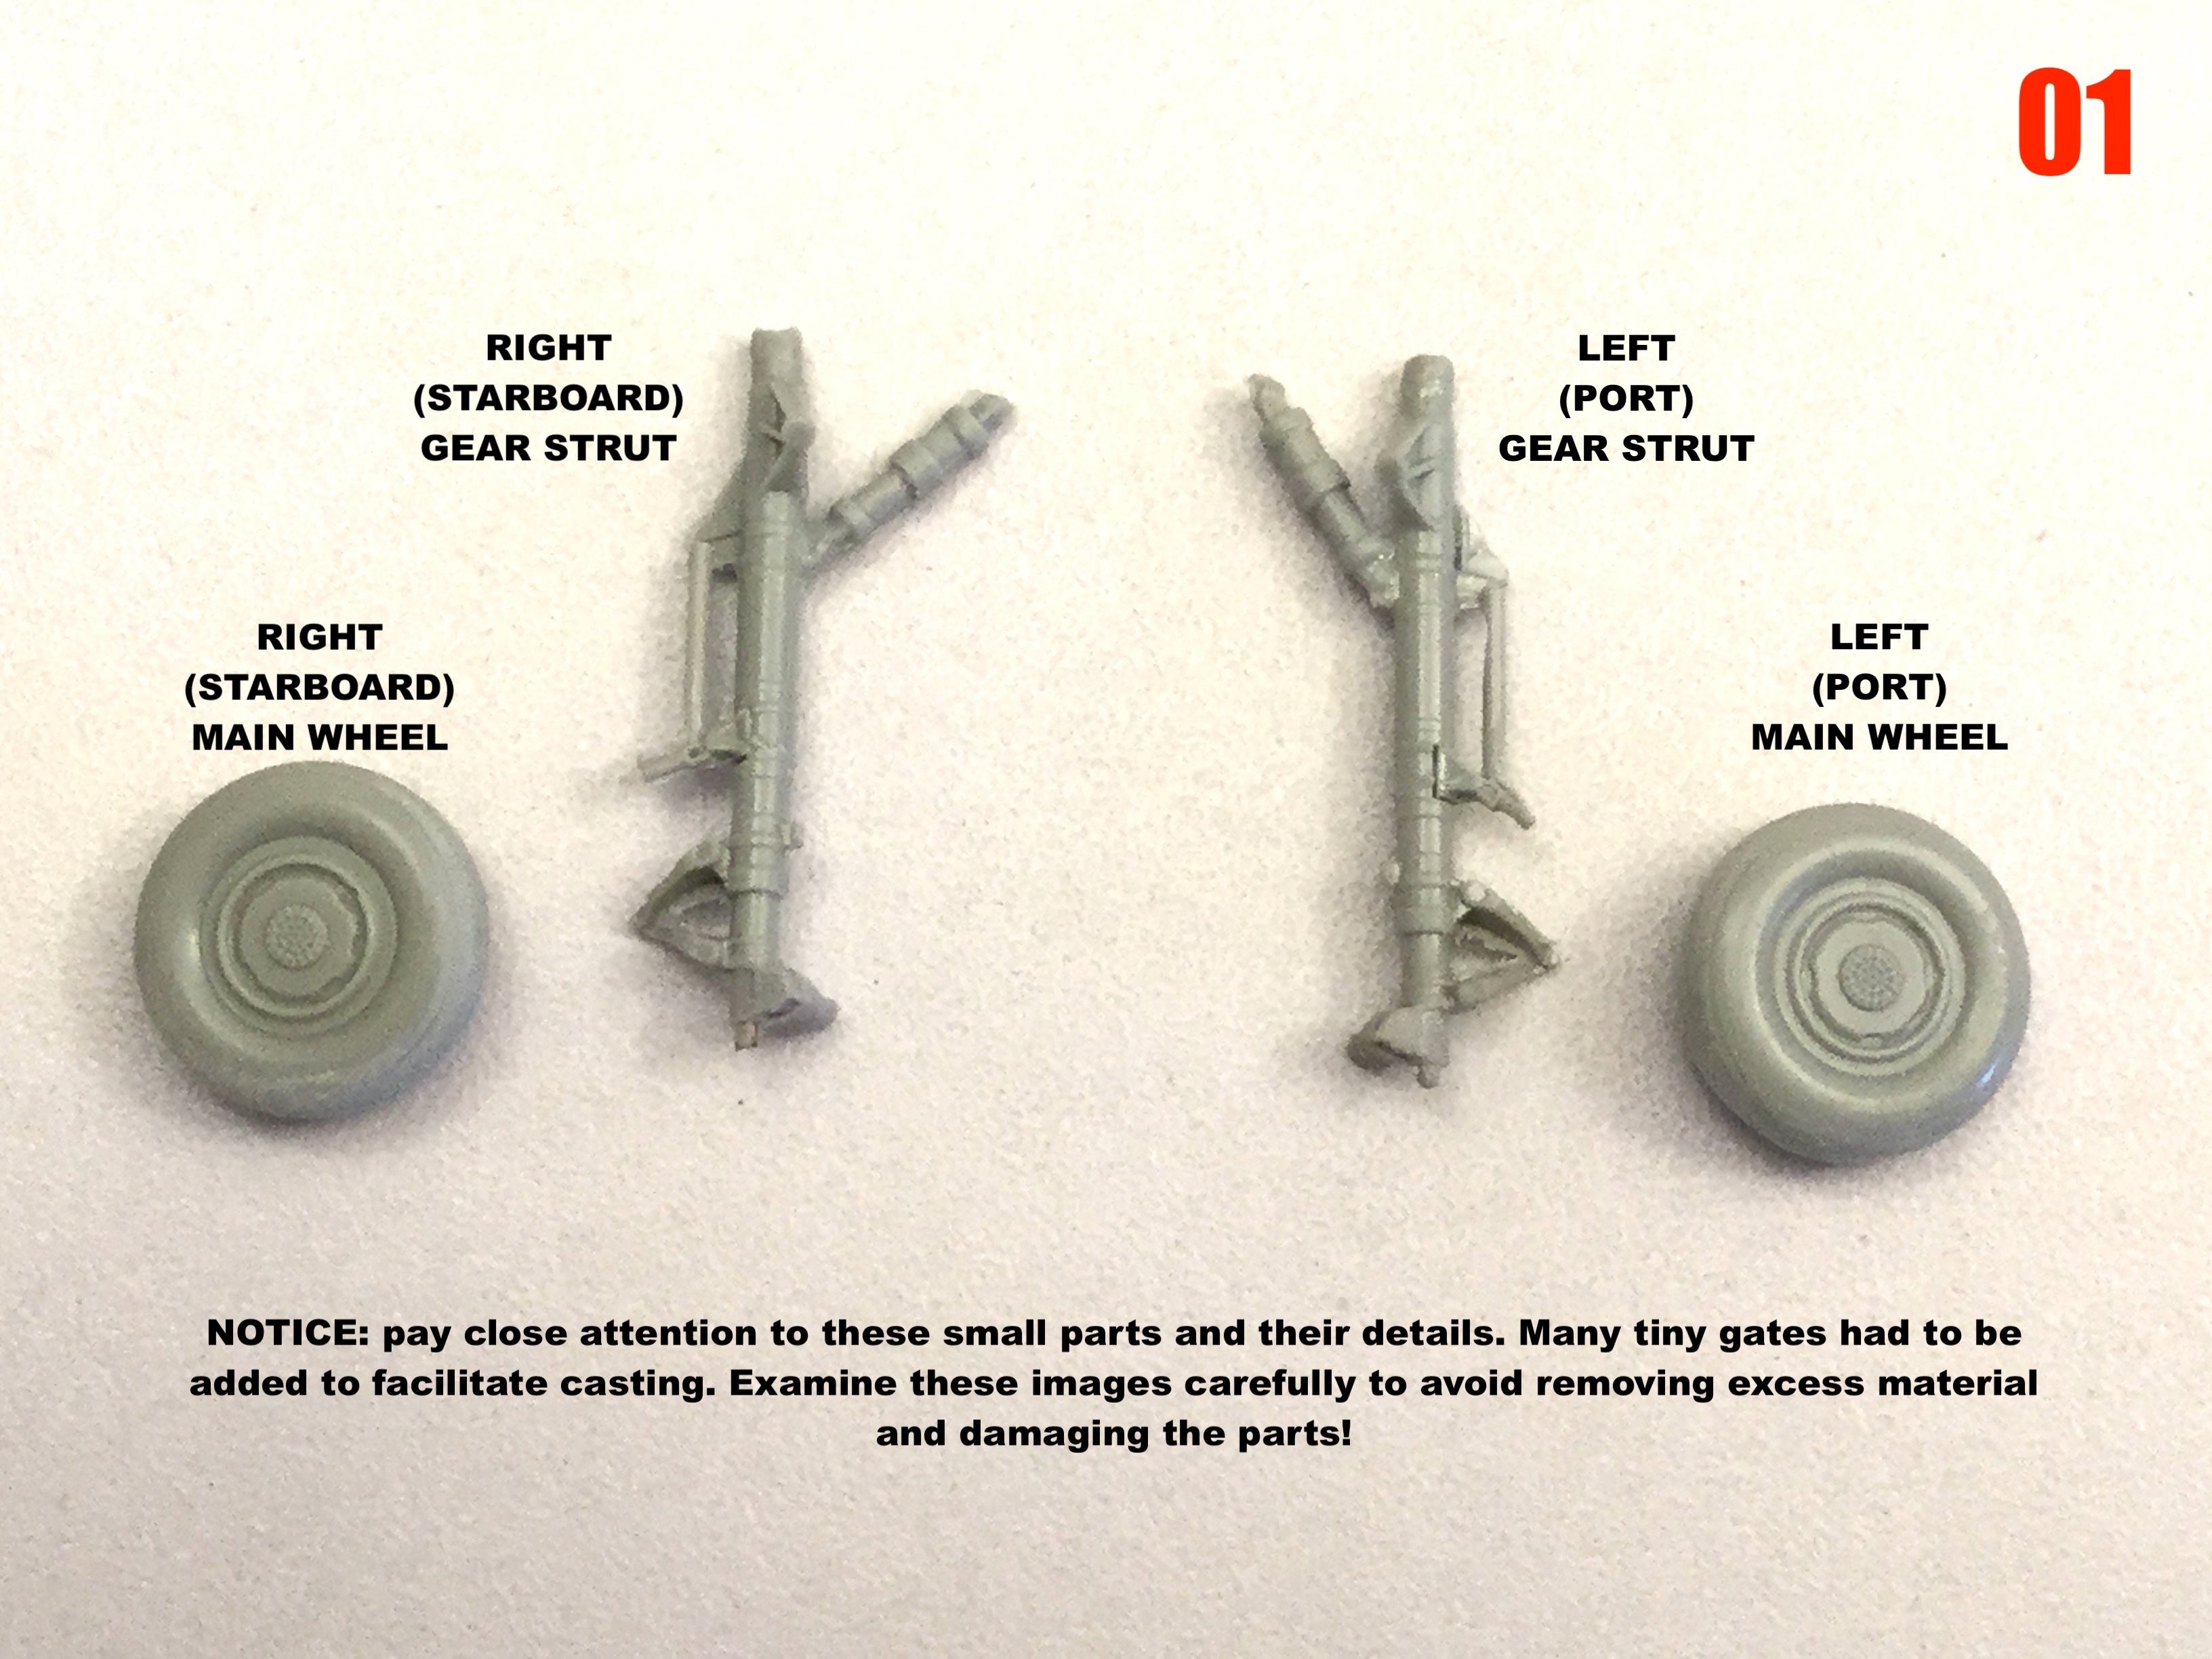
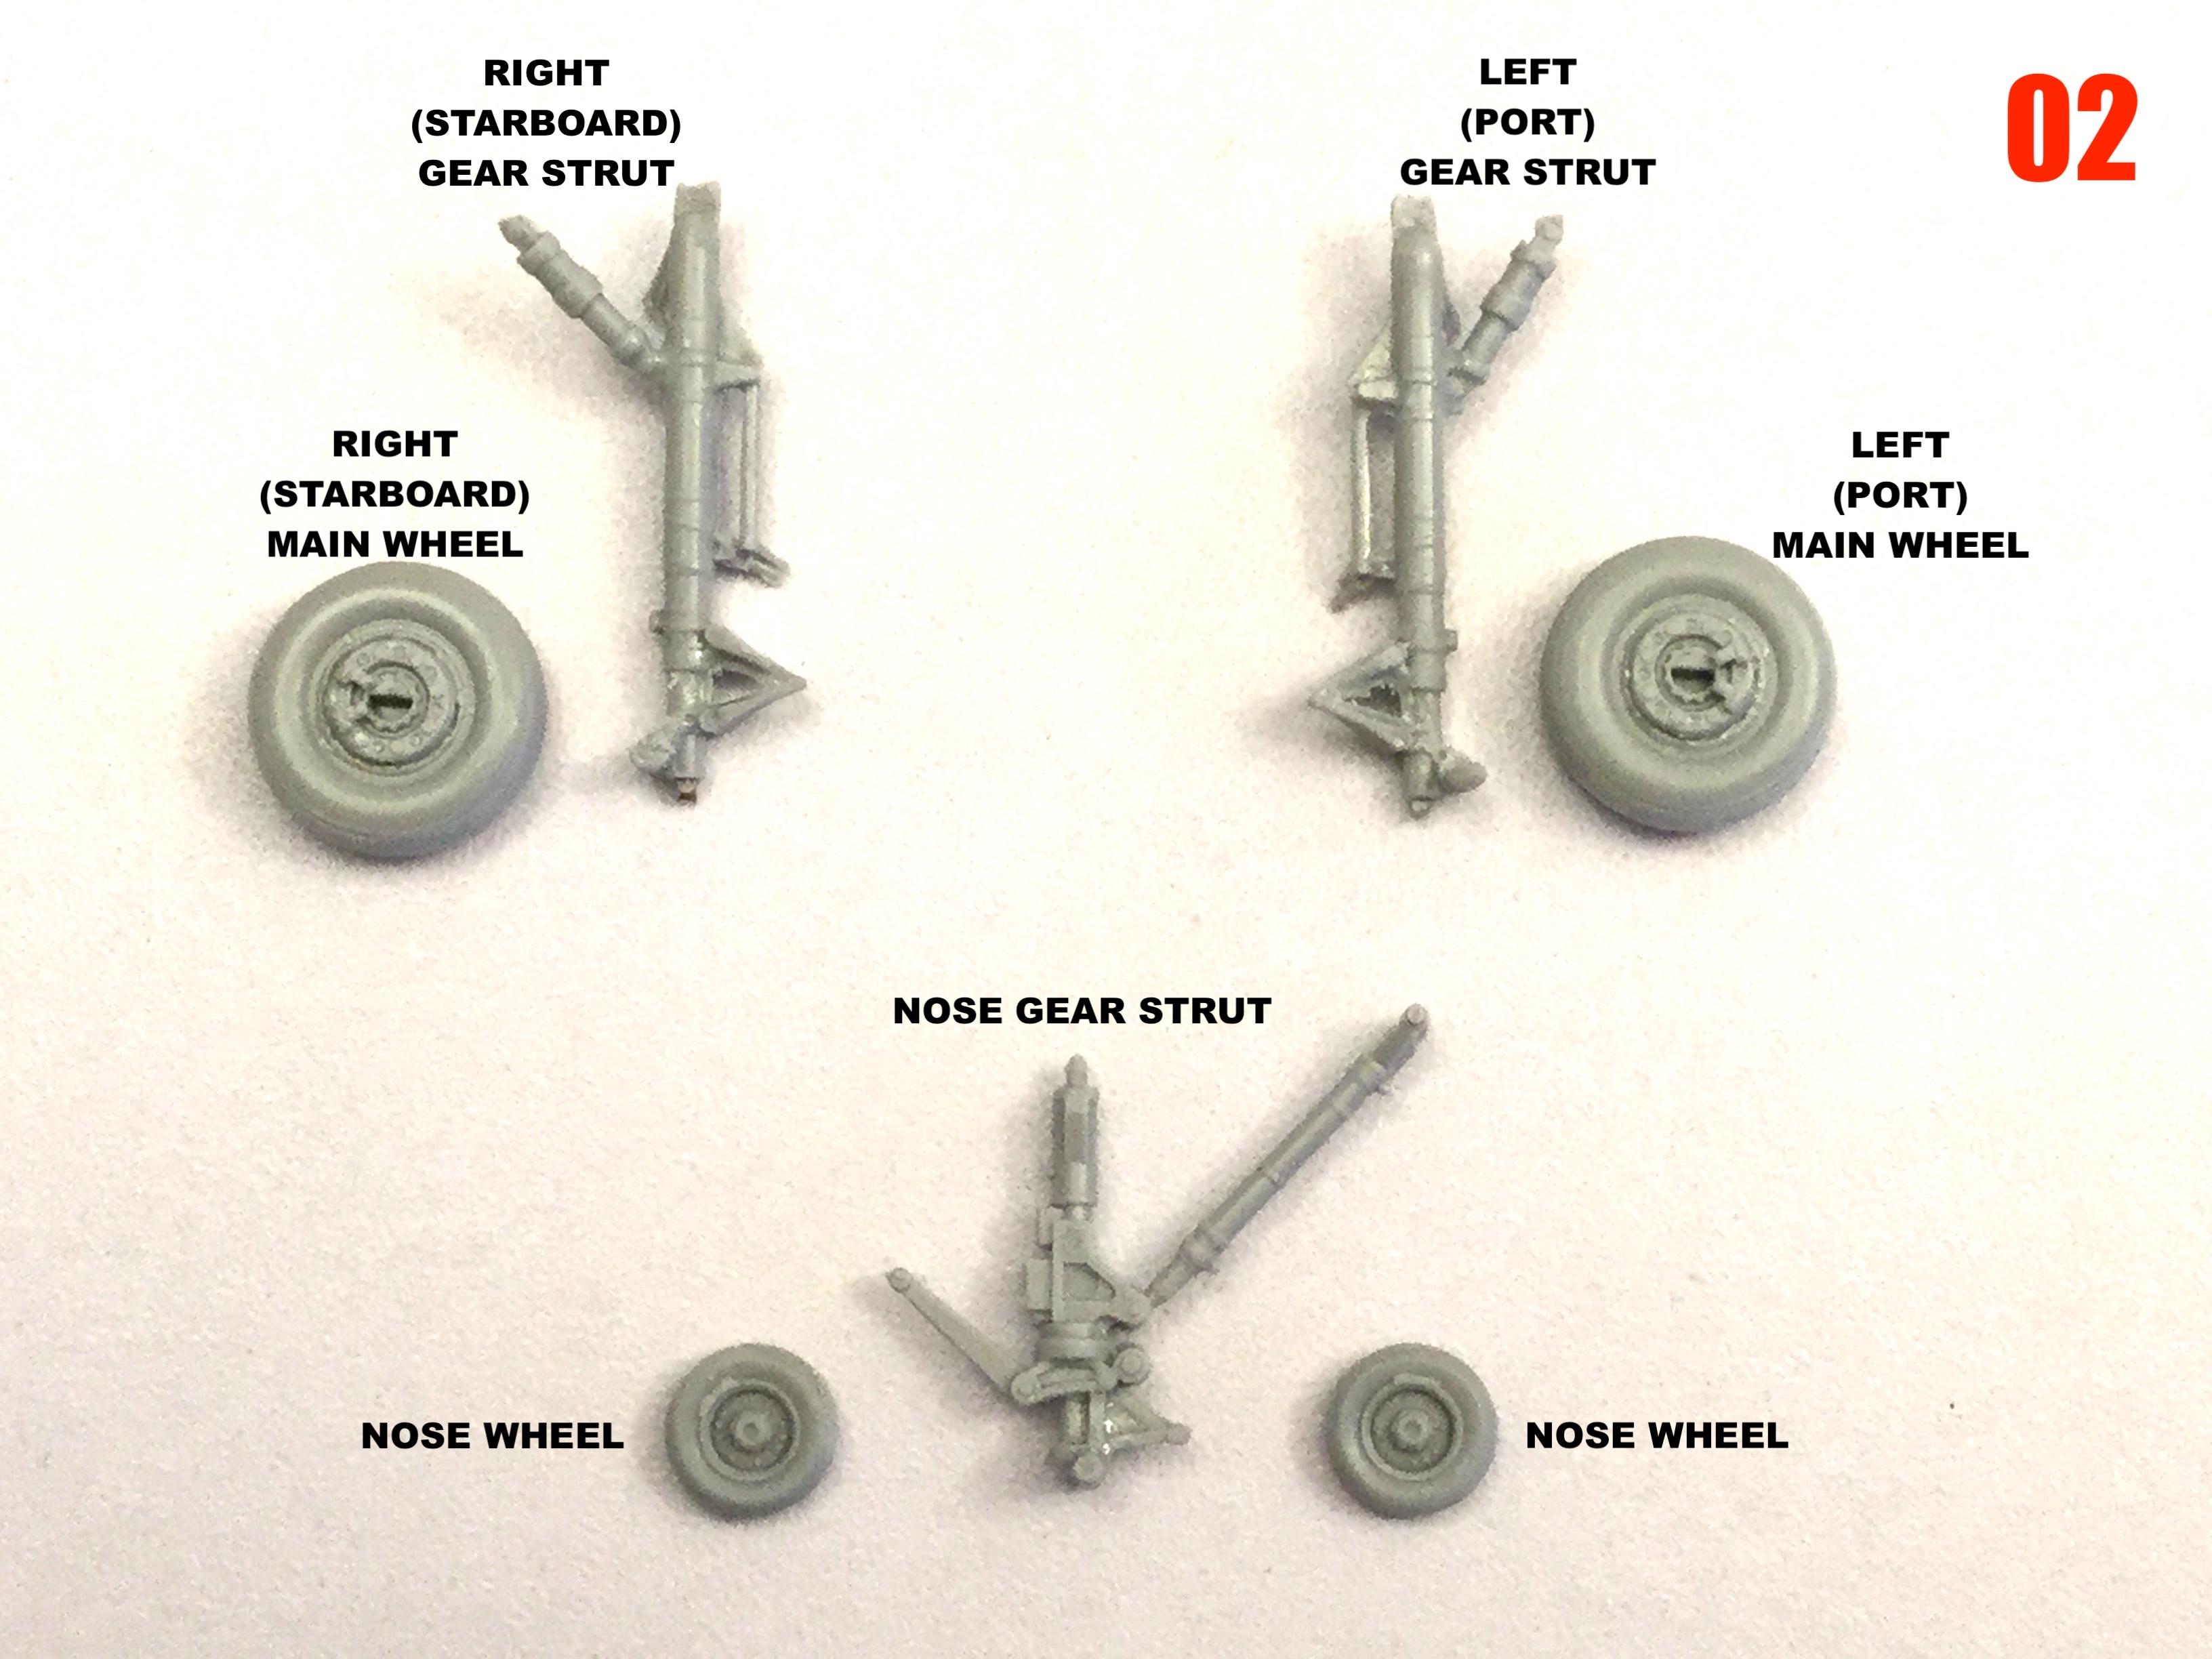
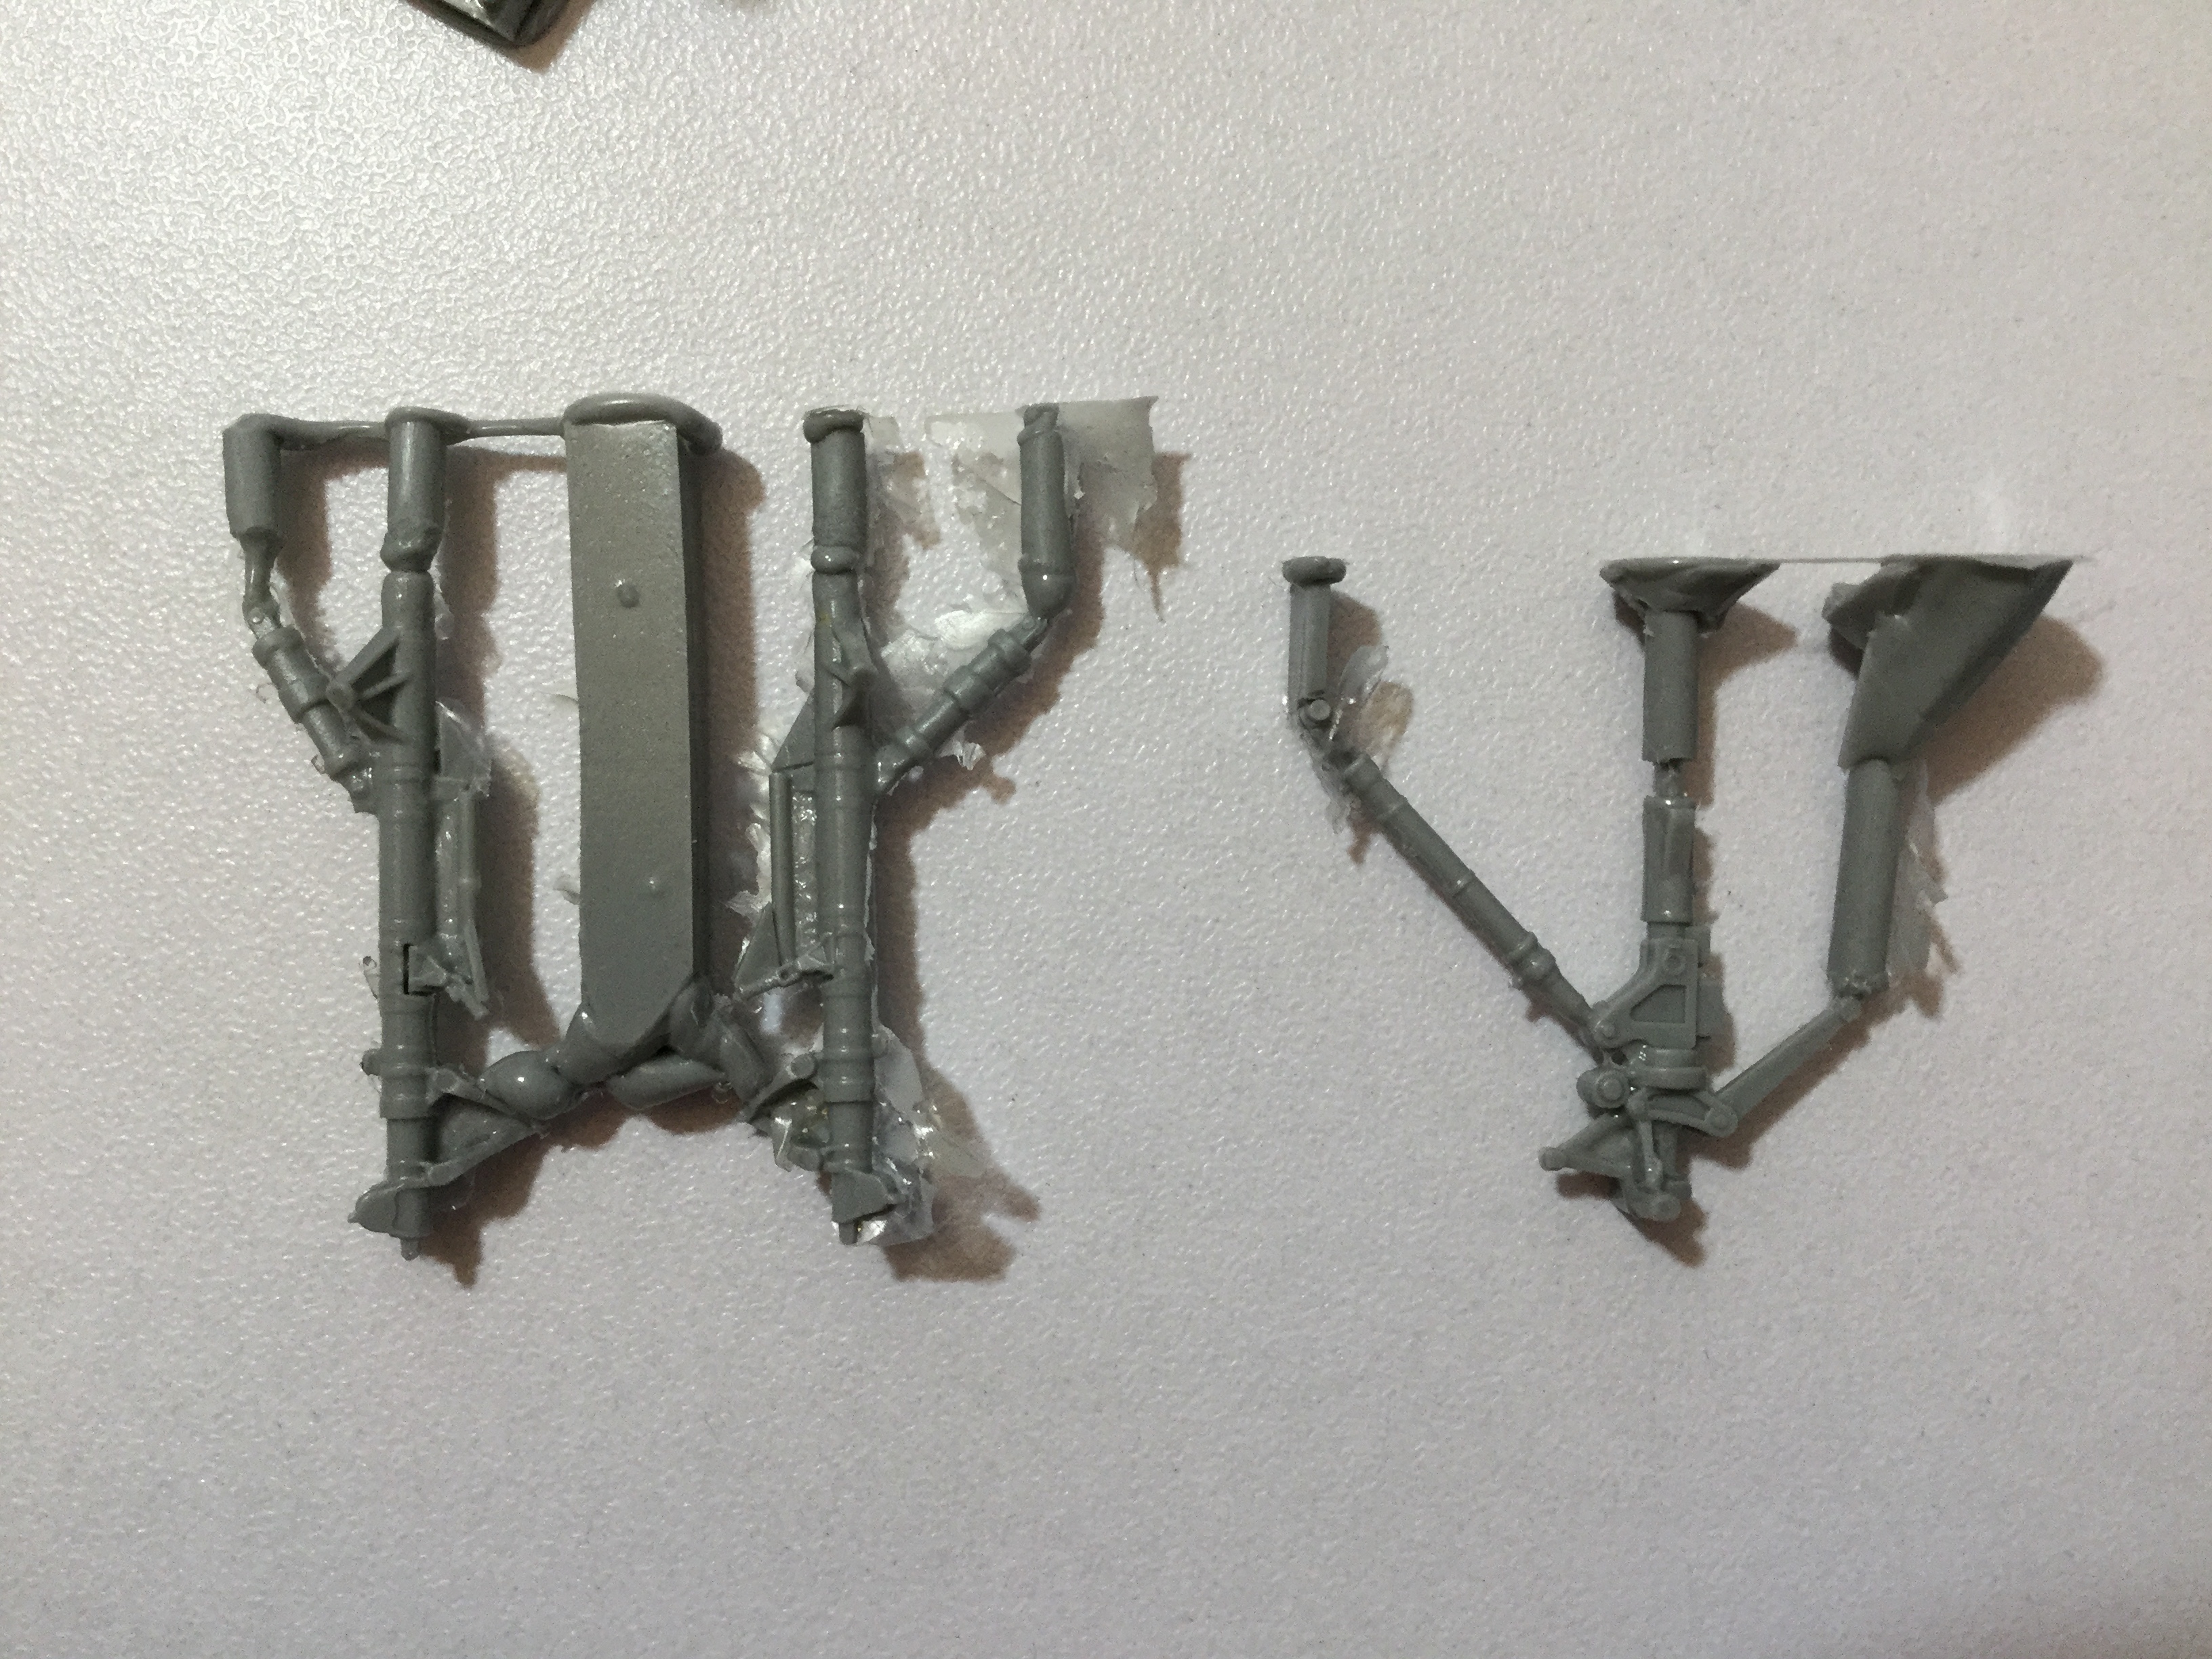
I went with smooth, simply because if I add detail to the burner can, it will only make it harder to fill that seam afterward. The way I designed it, you can putty & sand the burner, and then drop the flame ring in at the end so that it doesn't get damaged. Because of the zozzle design, the cans are quite well shrouded from most viewing angles. The ejector pin mark on the nose wheels is my bad: I should've filled them, but I forgot. More good news is that the landing gear struts all came out beautiful The main gears probably didn't need a metal insert, but I added one anyway just to be safe. At some point, we may need a 2-seat attack variant of this thing. -
1/72 F203 Dragon II Kit Proposal --Moscato Hobby
captain america replied to captain america's topic in Model kits
Captain's Log: Monday, July 18th, 2022. Molding is going well! The bulk of the masters have now been molded, but because everything is either slow or delayed these days, I'm waiting on the materials I need to finish the remainder of the molds, so the frustration continues. As such, I'll use this time to try to mold as many of the very delicate parts as I can and get those out of the way.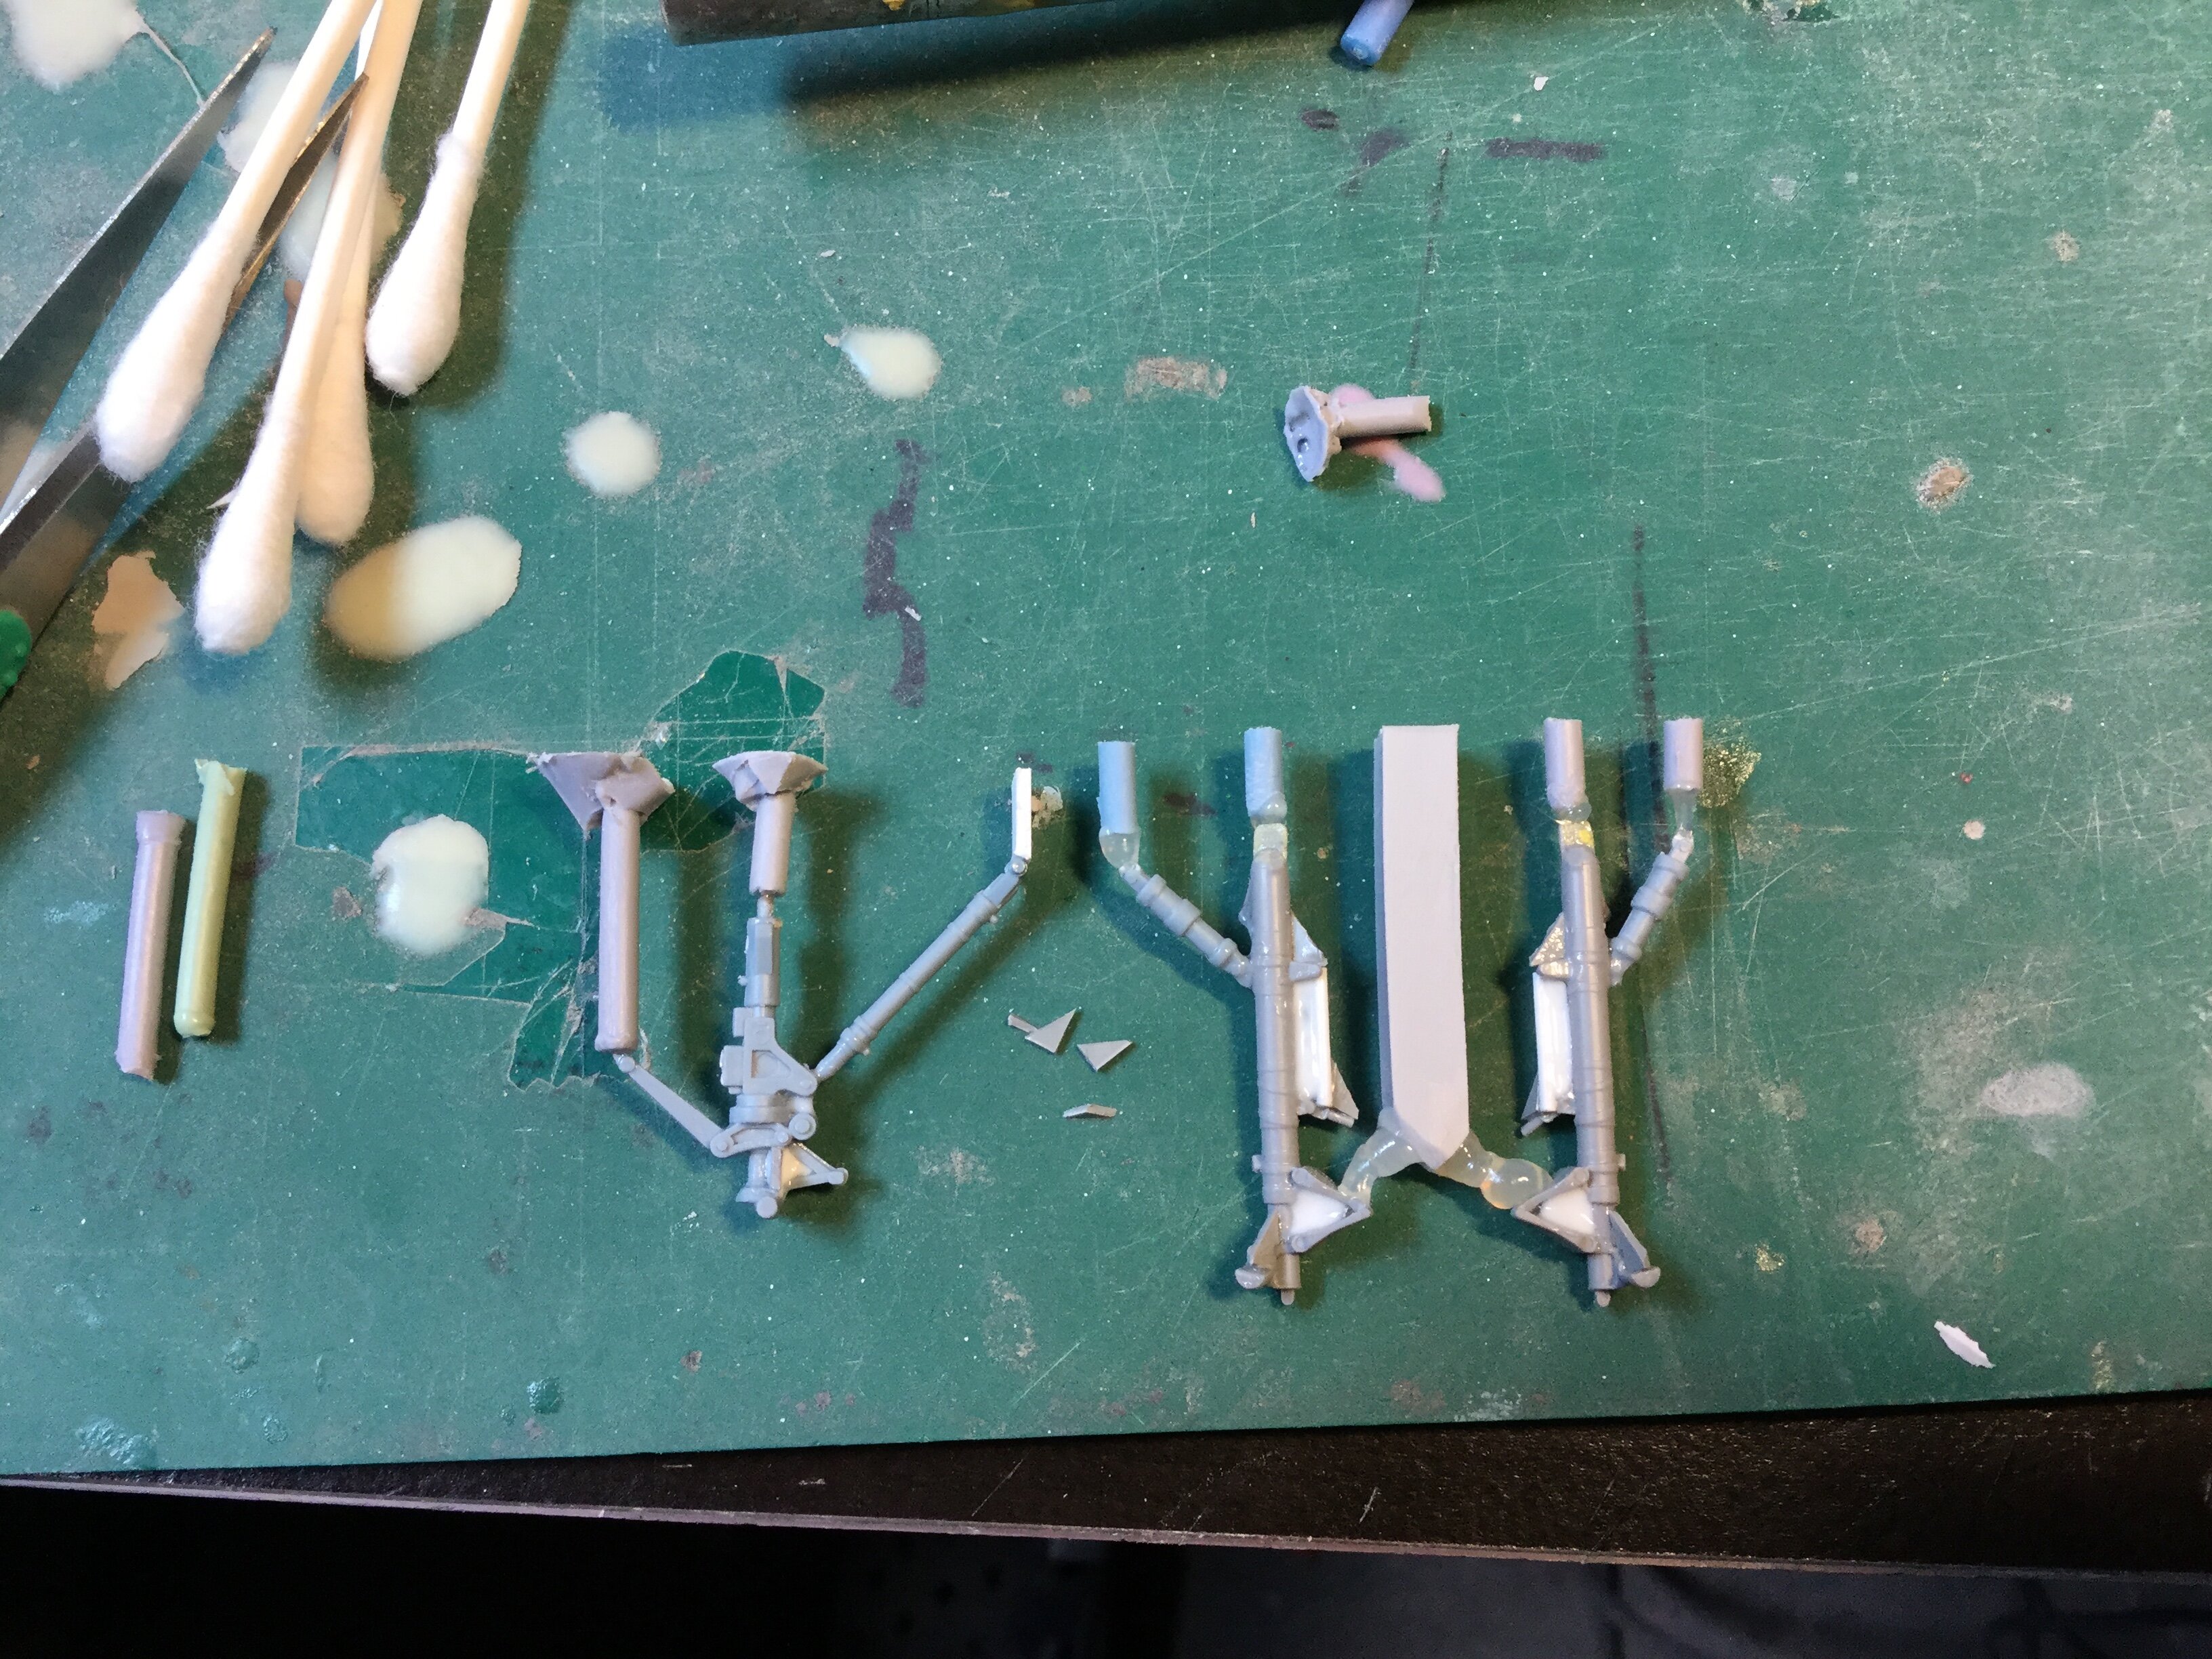
-
1/72 F203 Dragon II Kit Proposal --Moscato Hobby
captain america replied to captain america's topic in Model kits
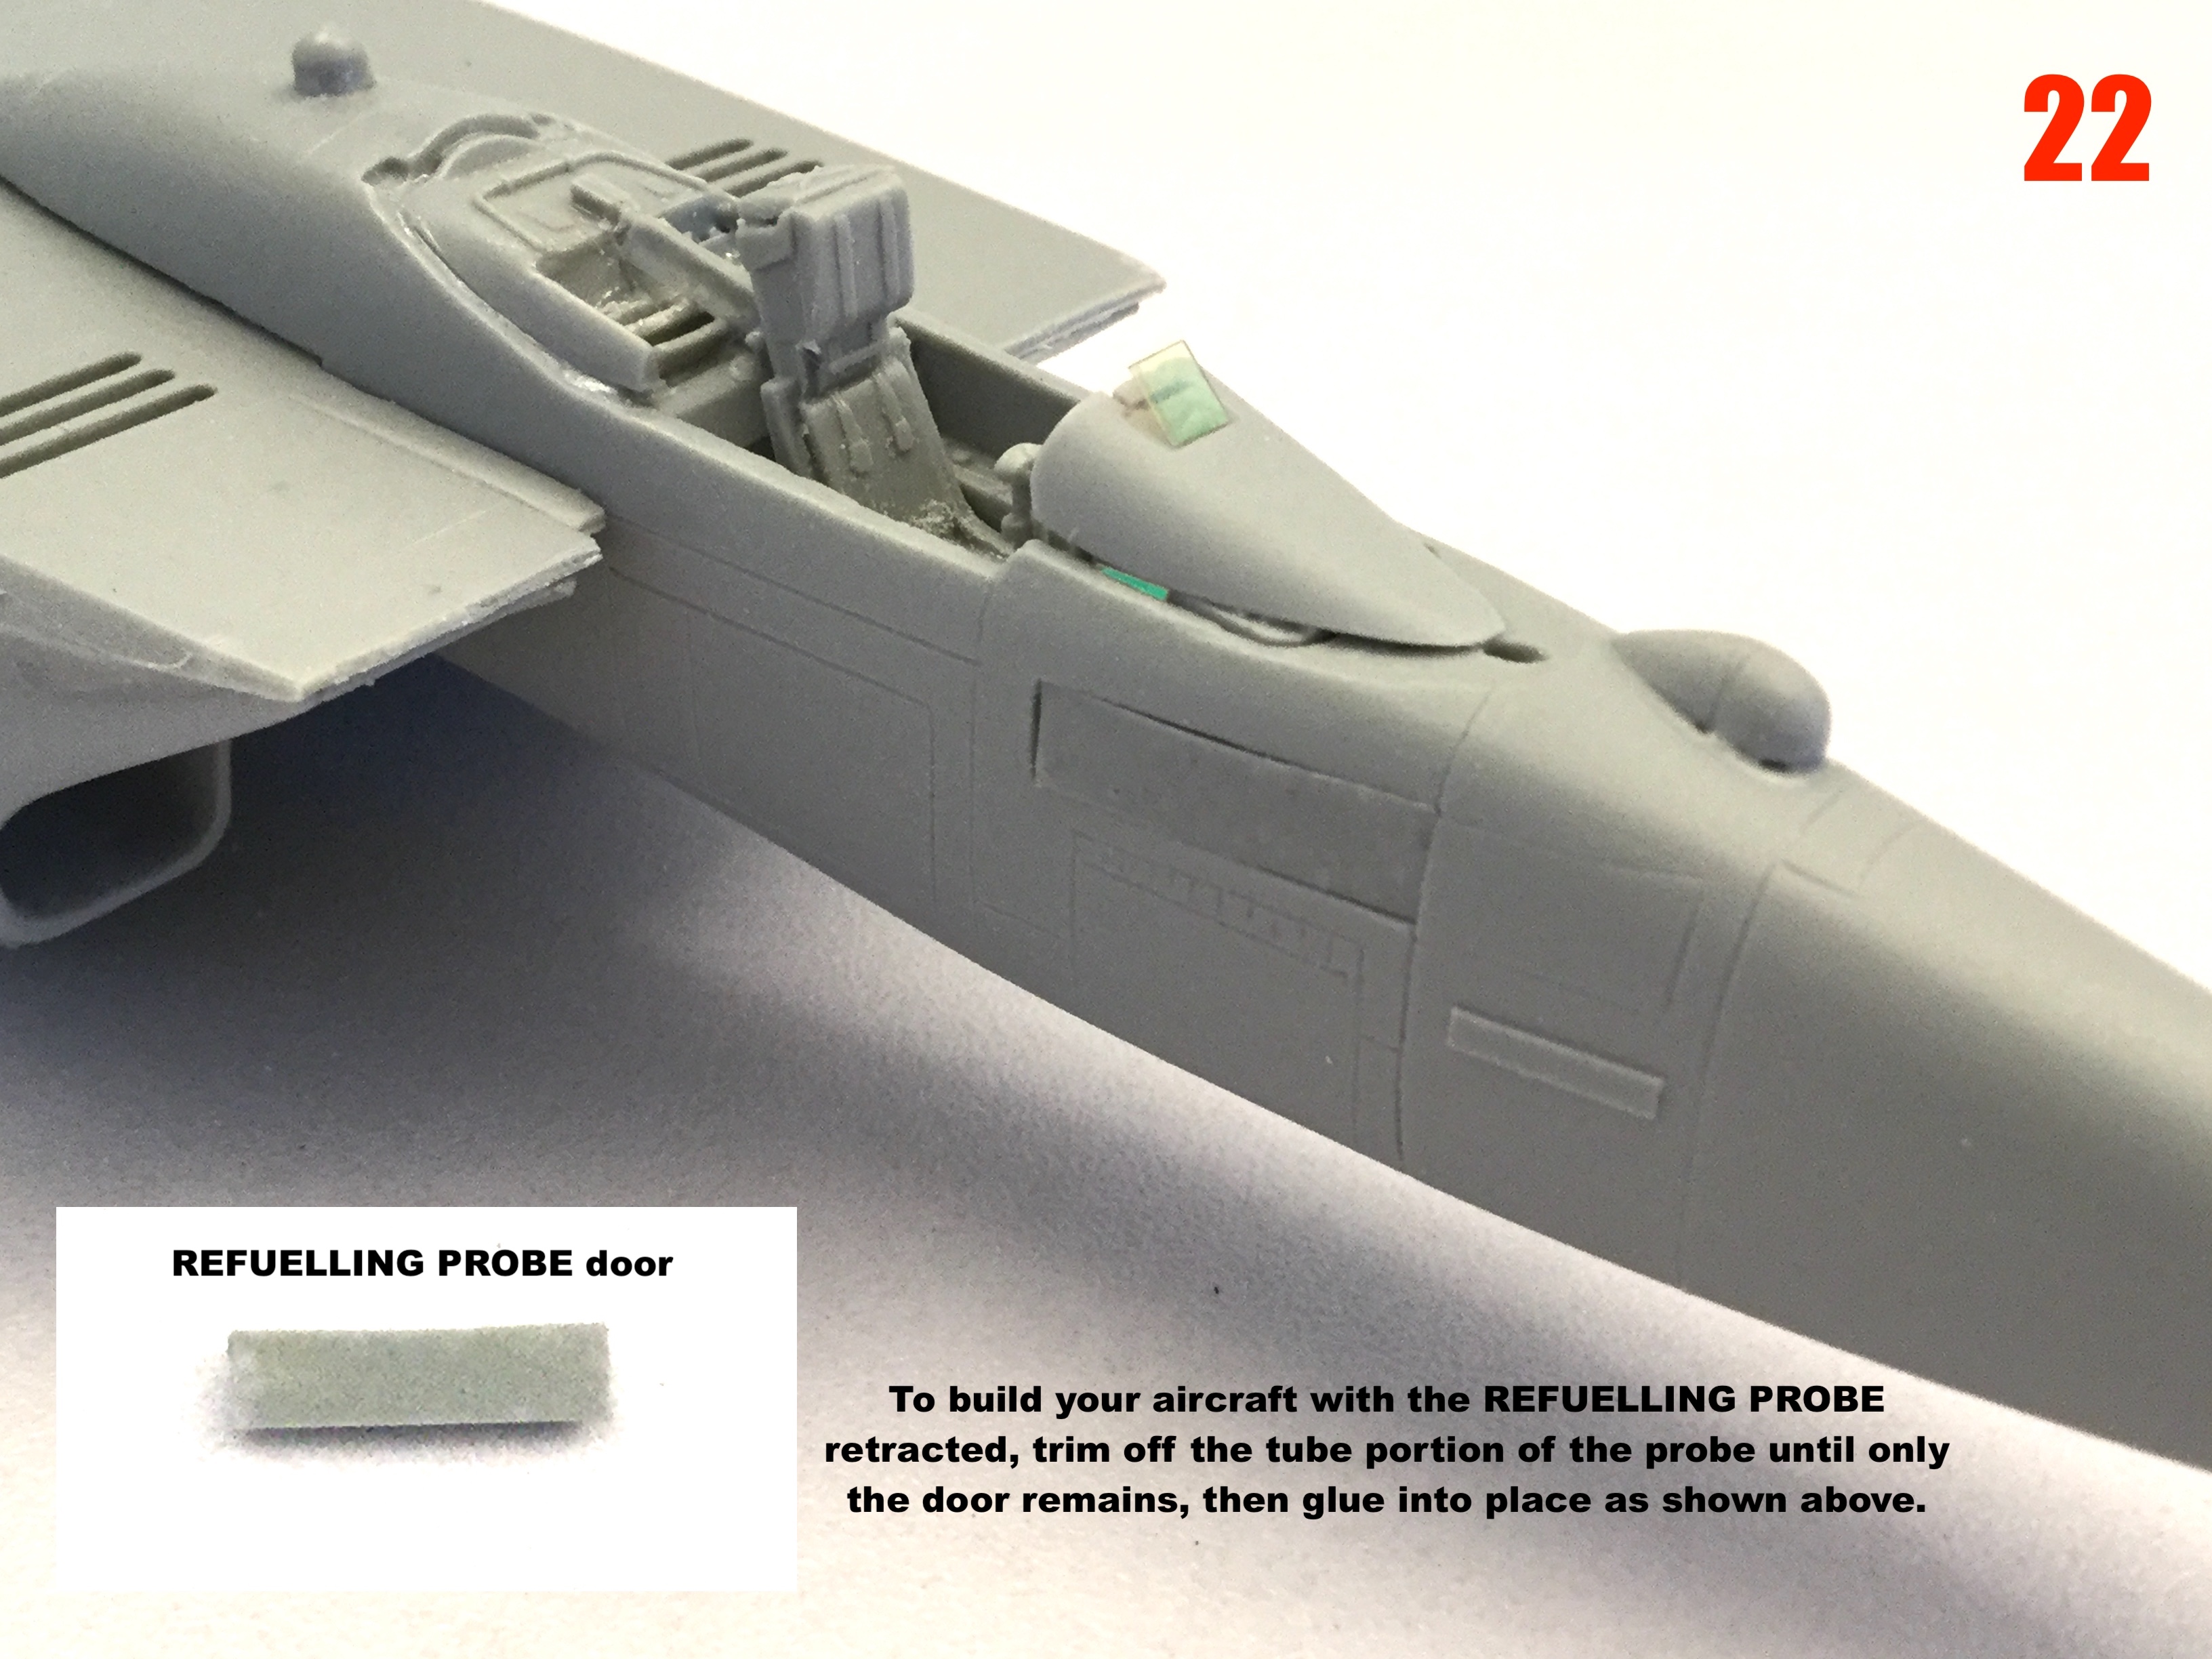
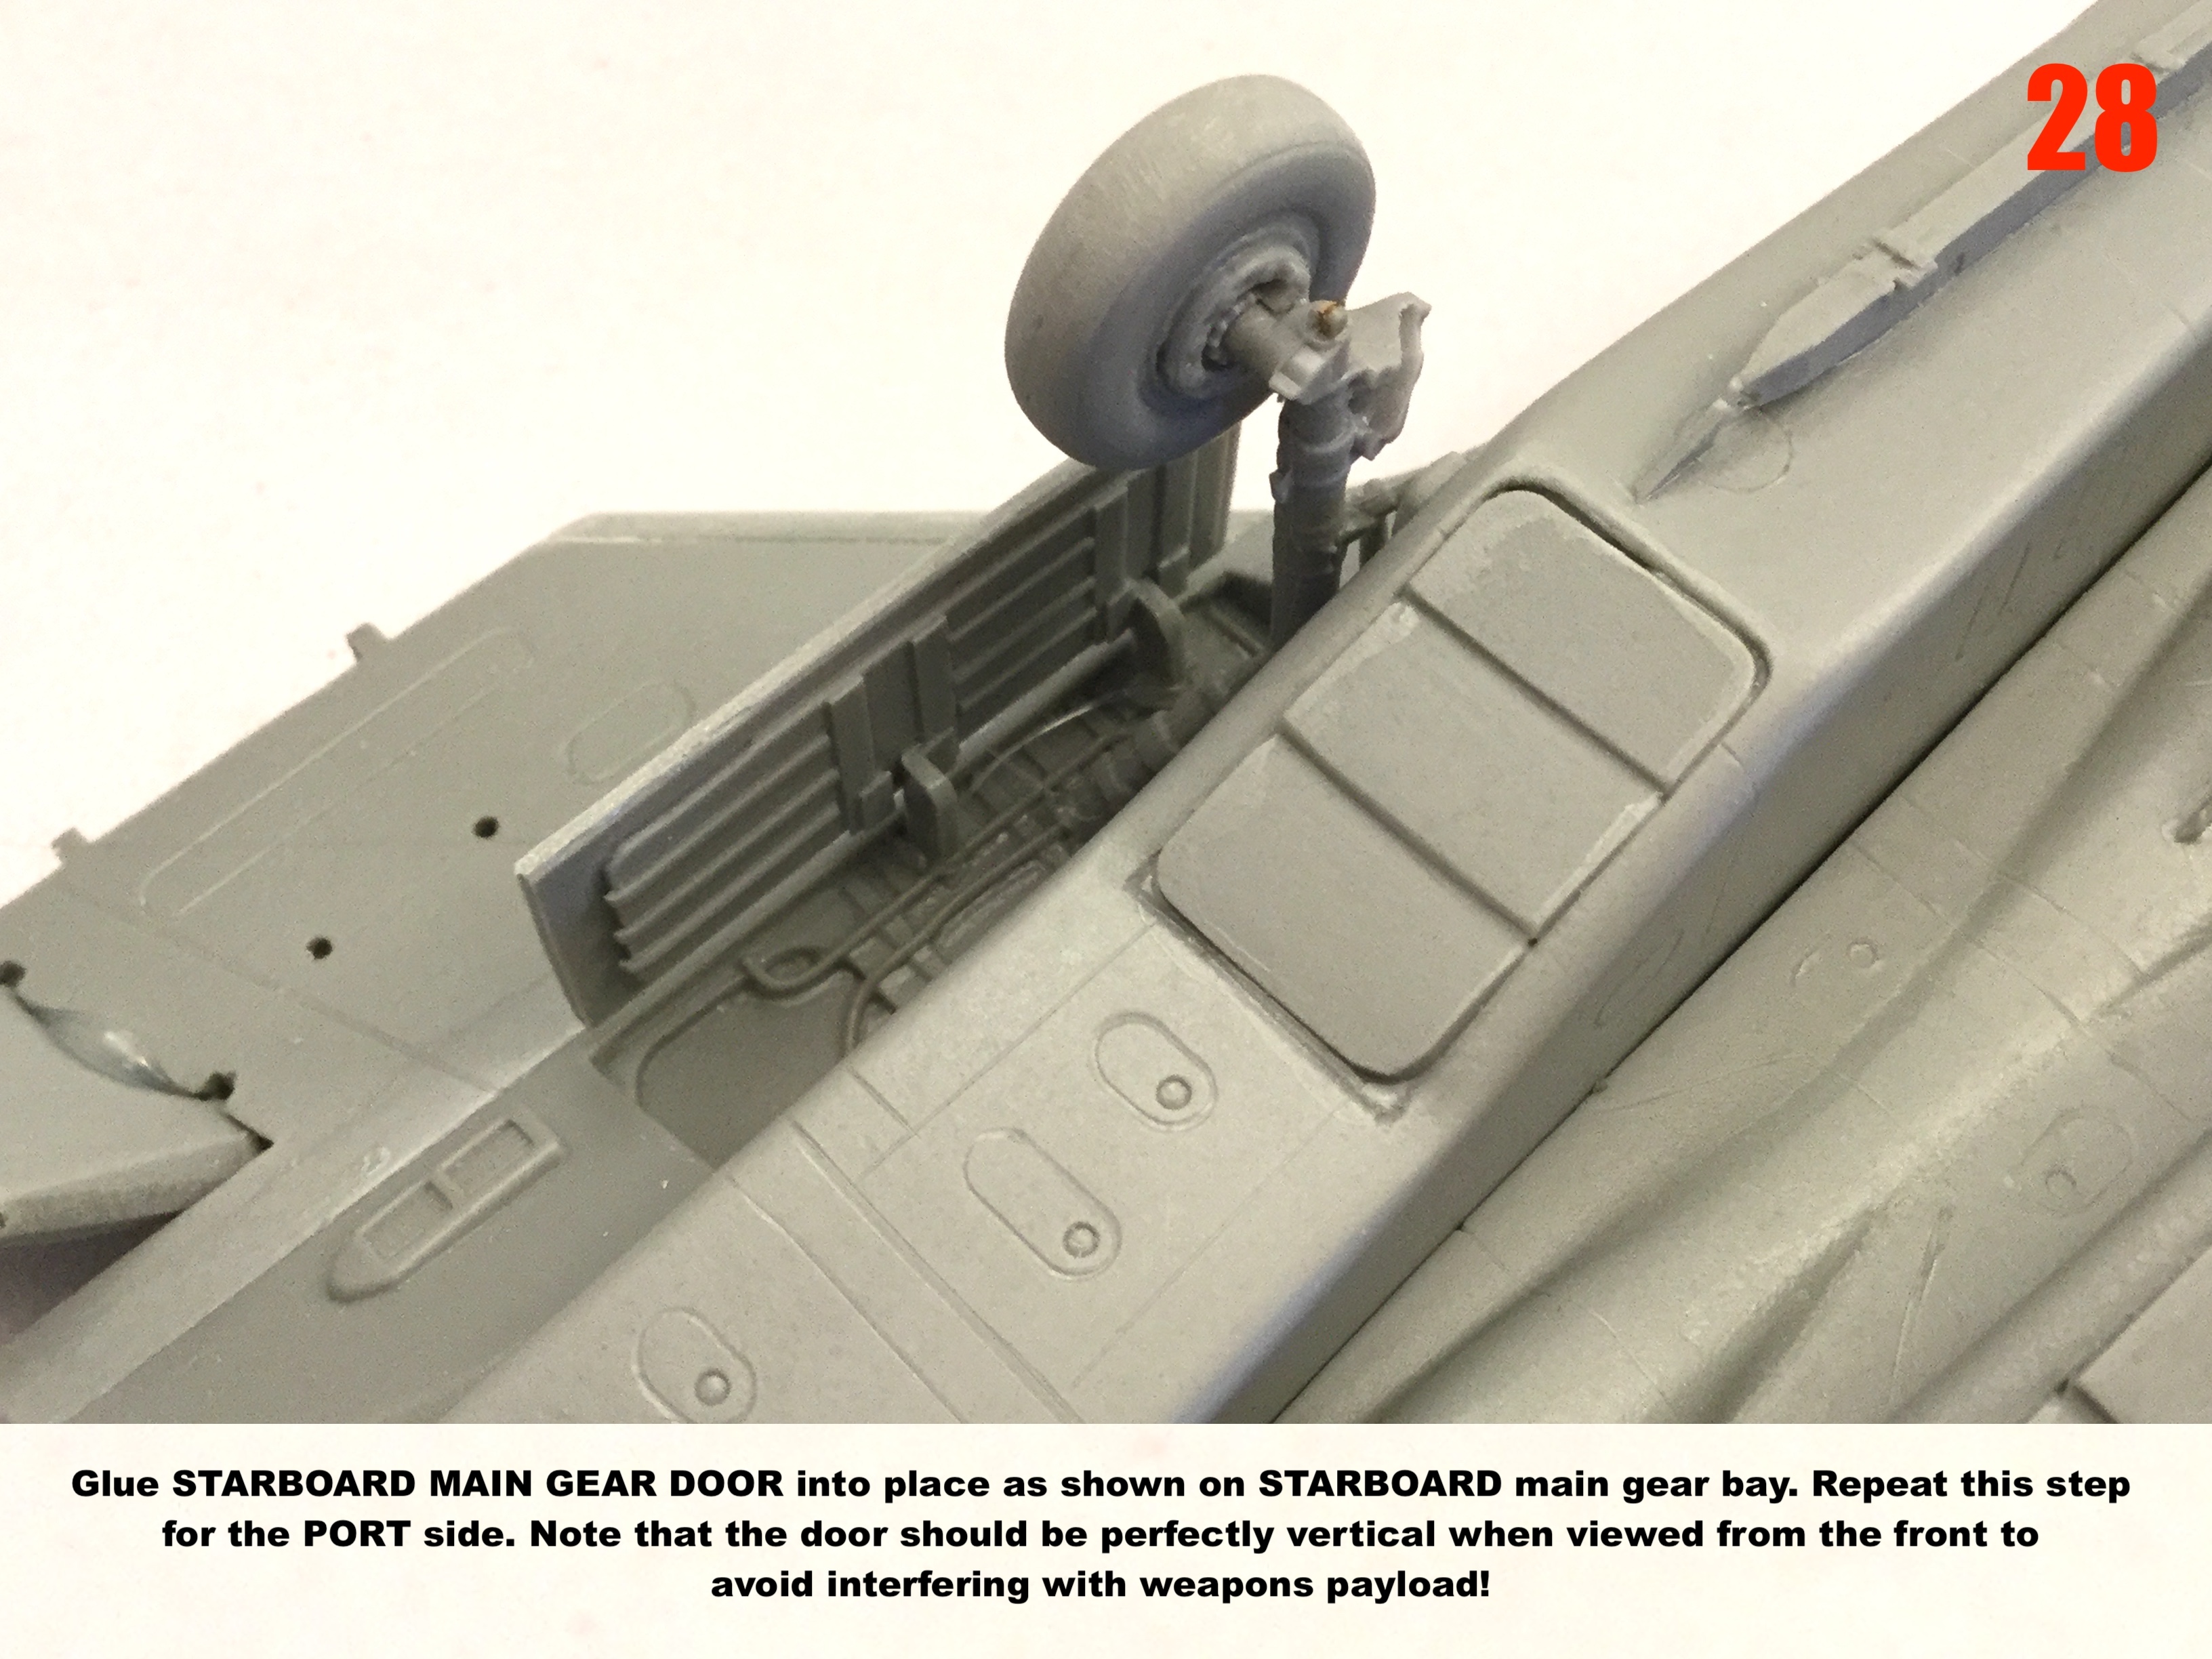
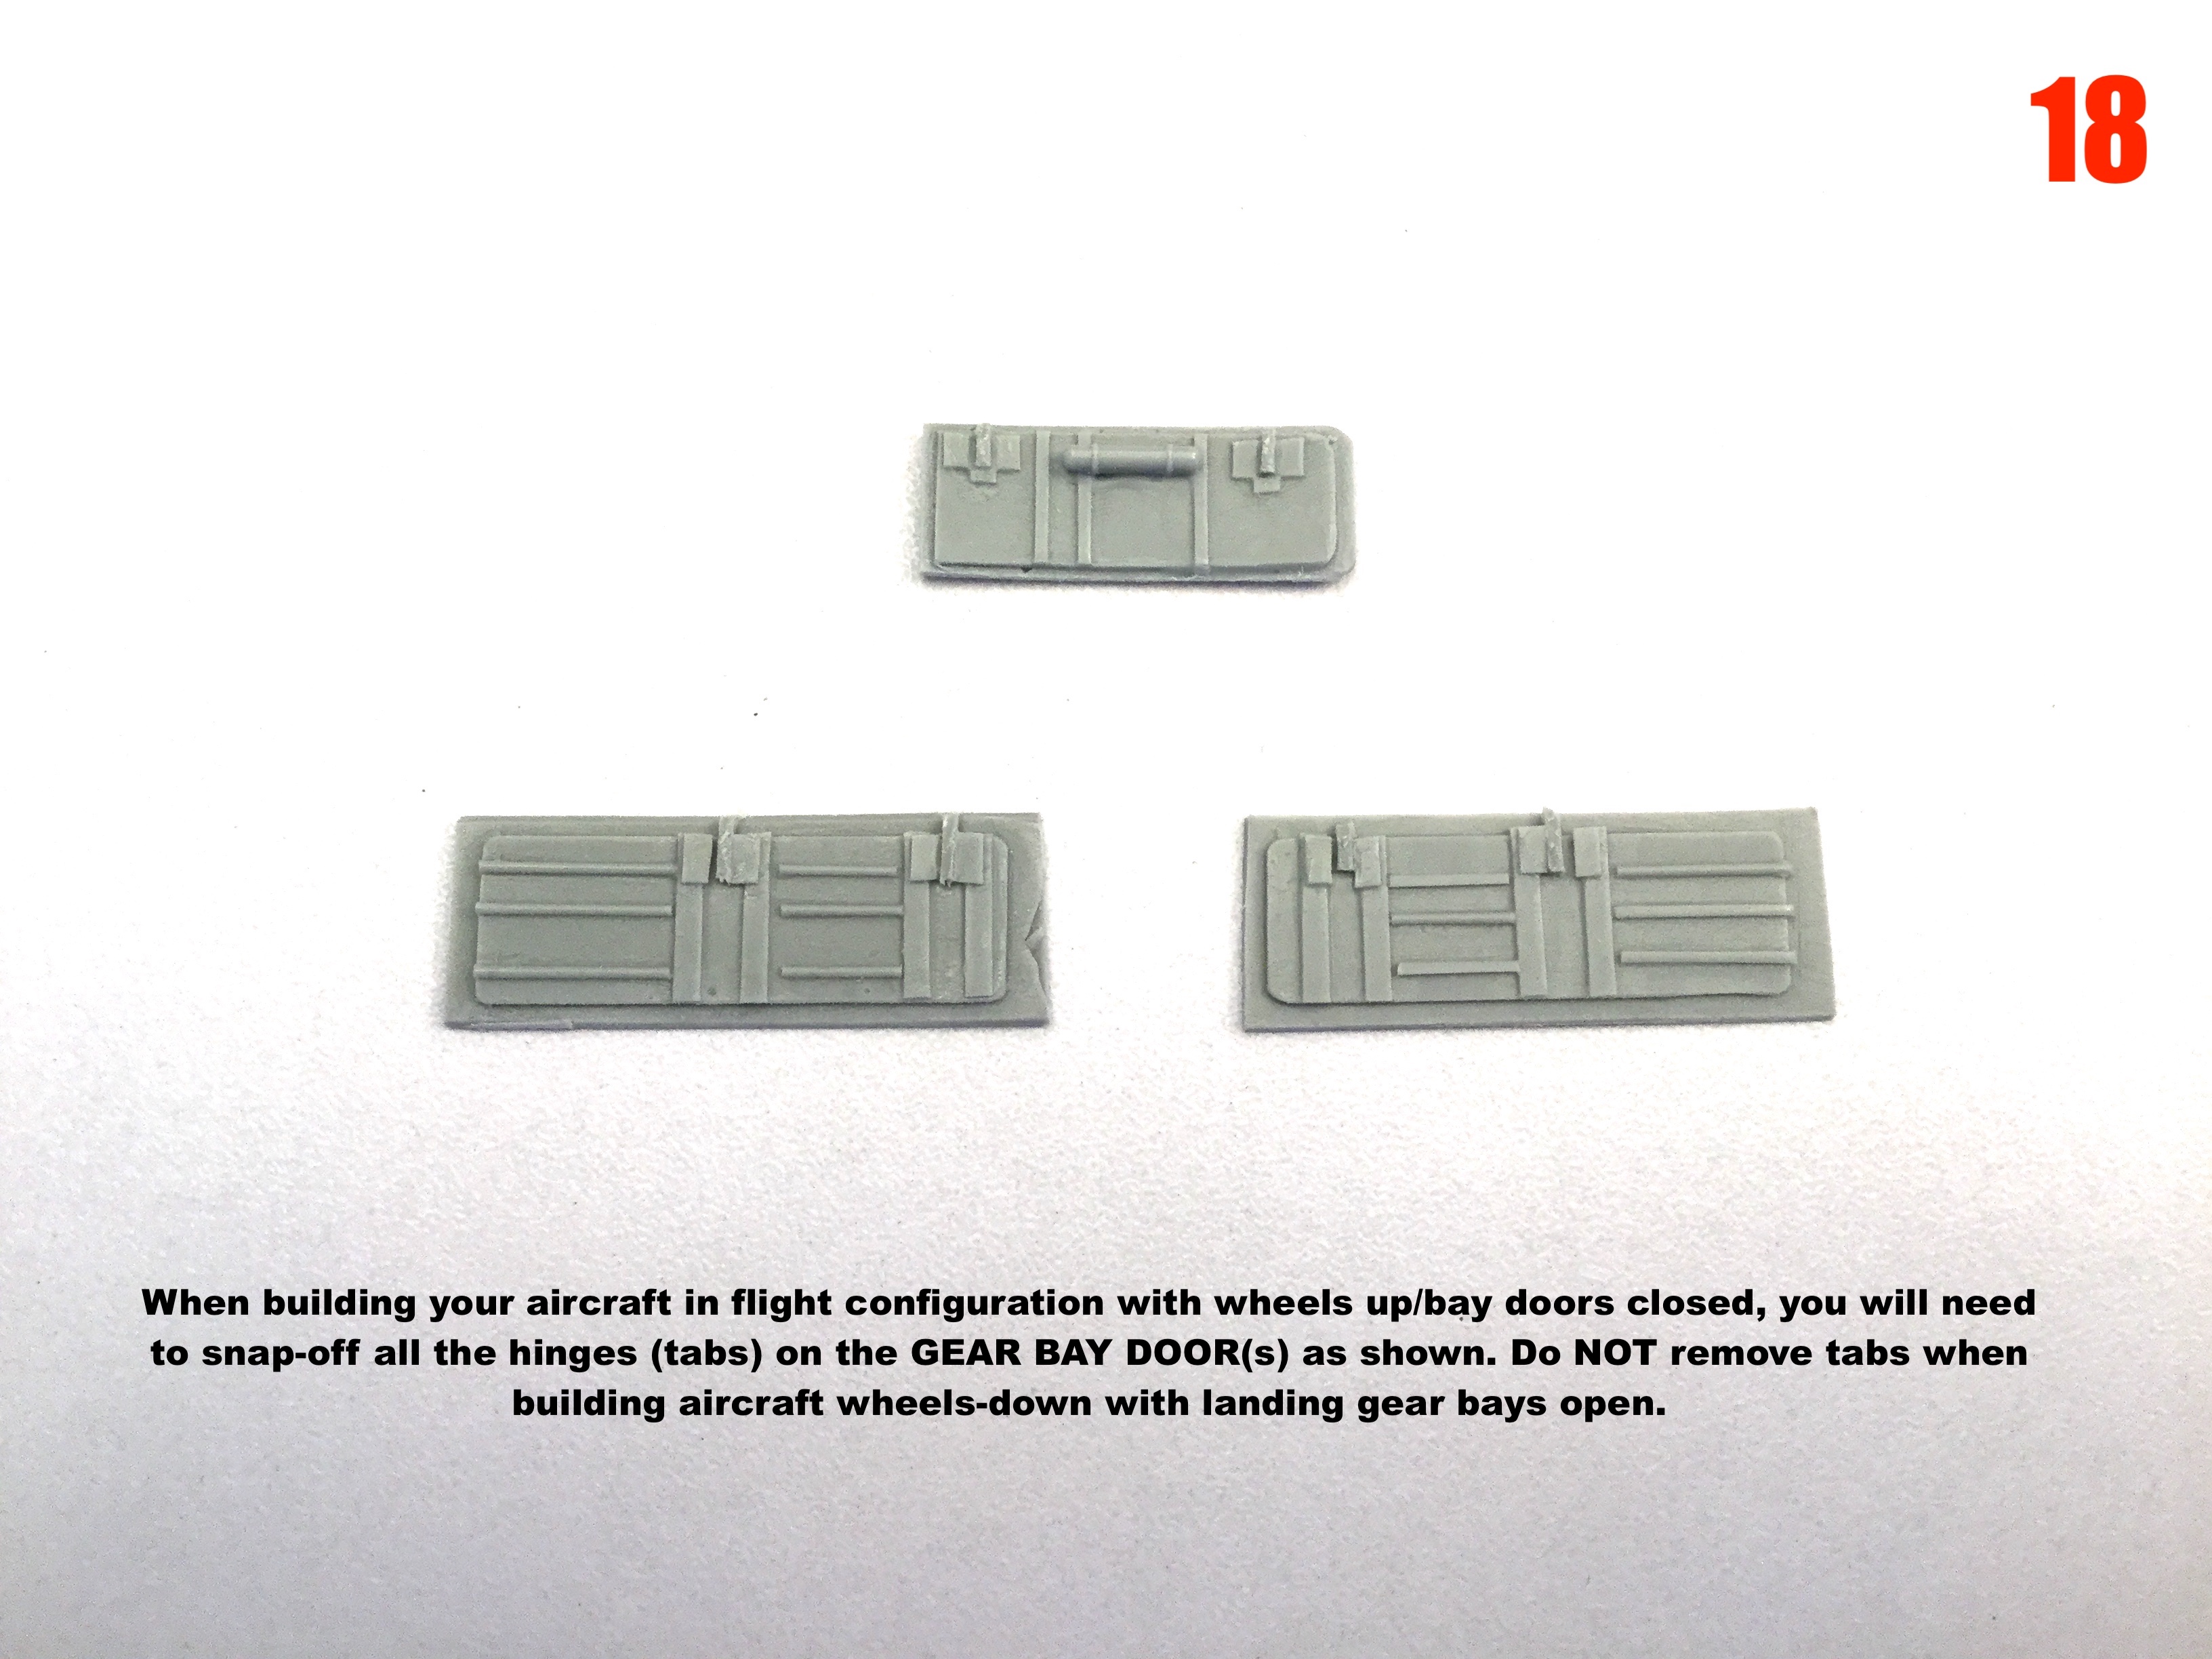
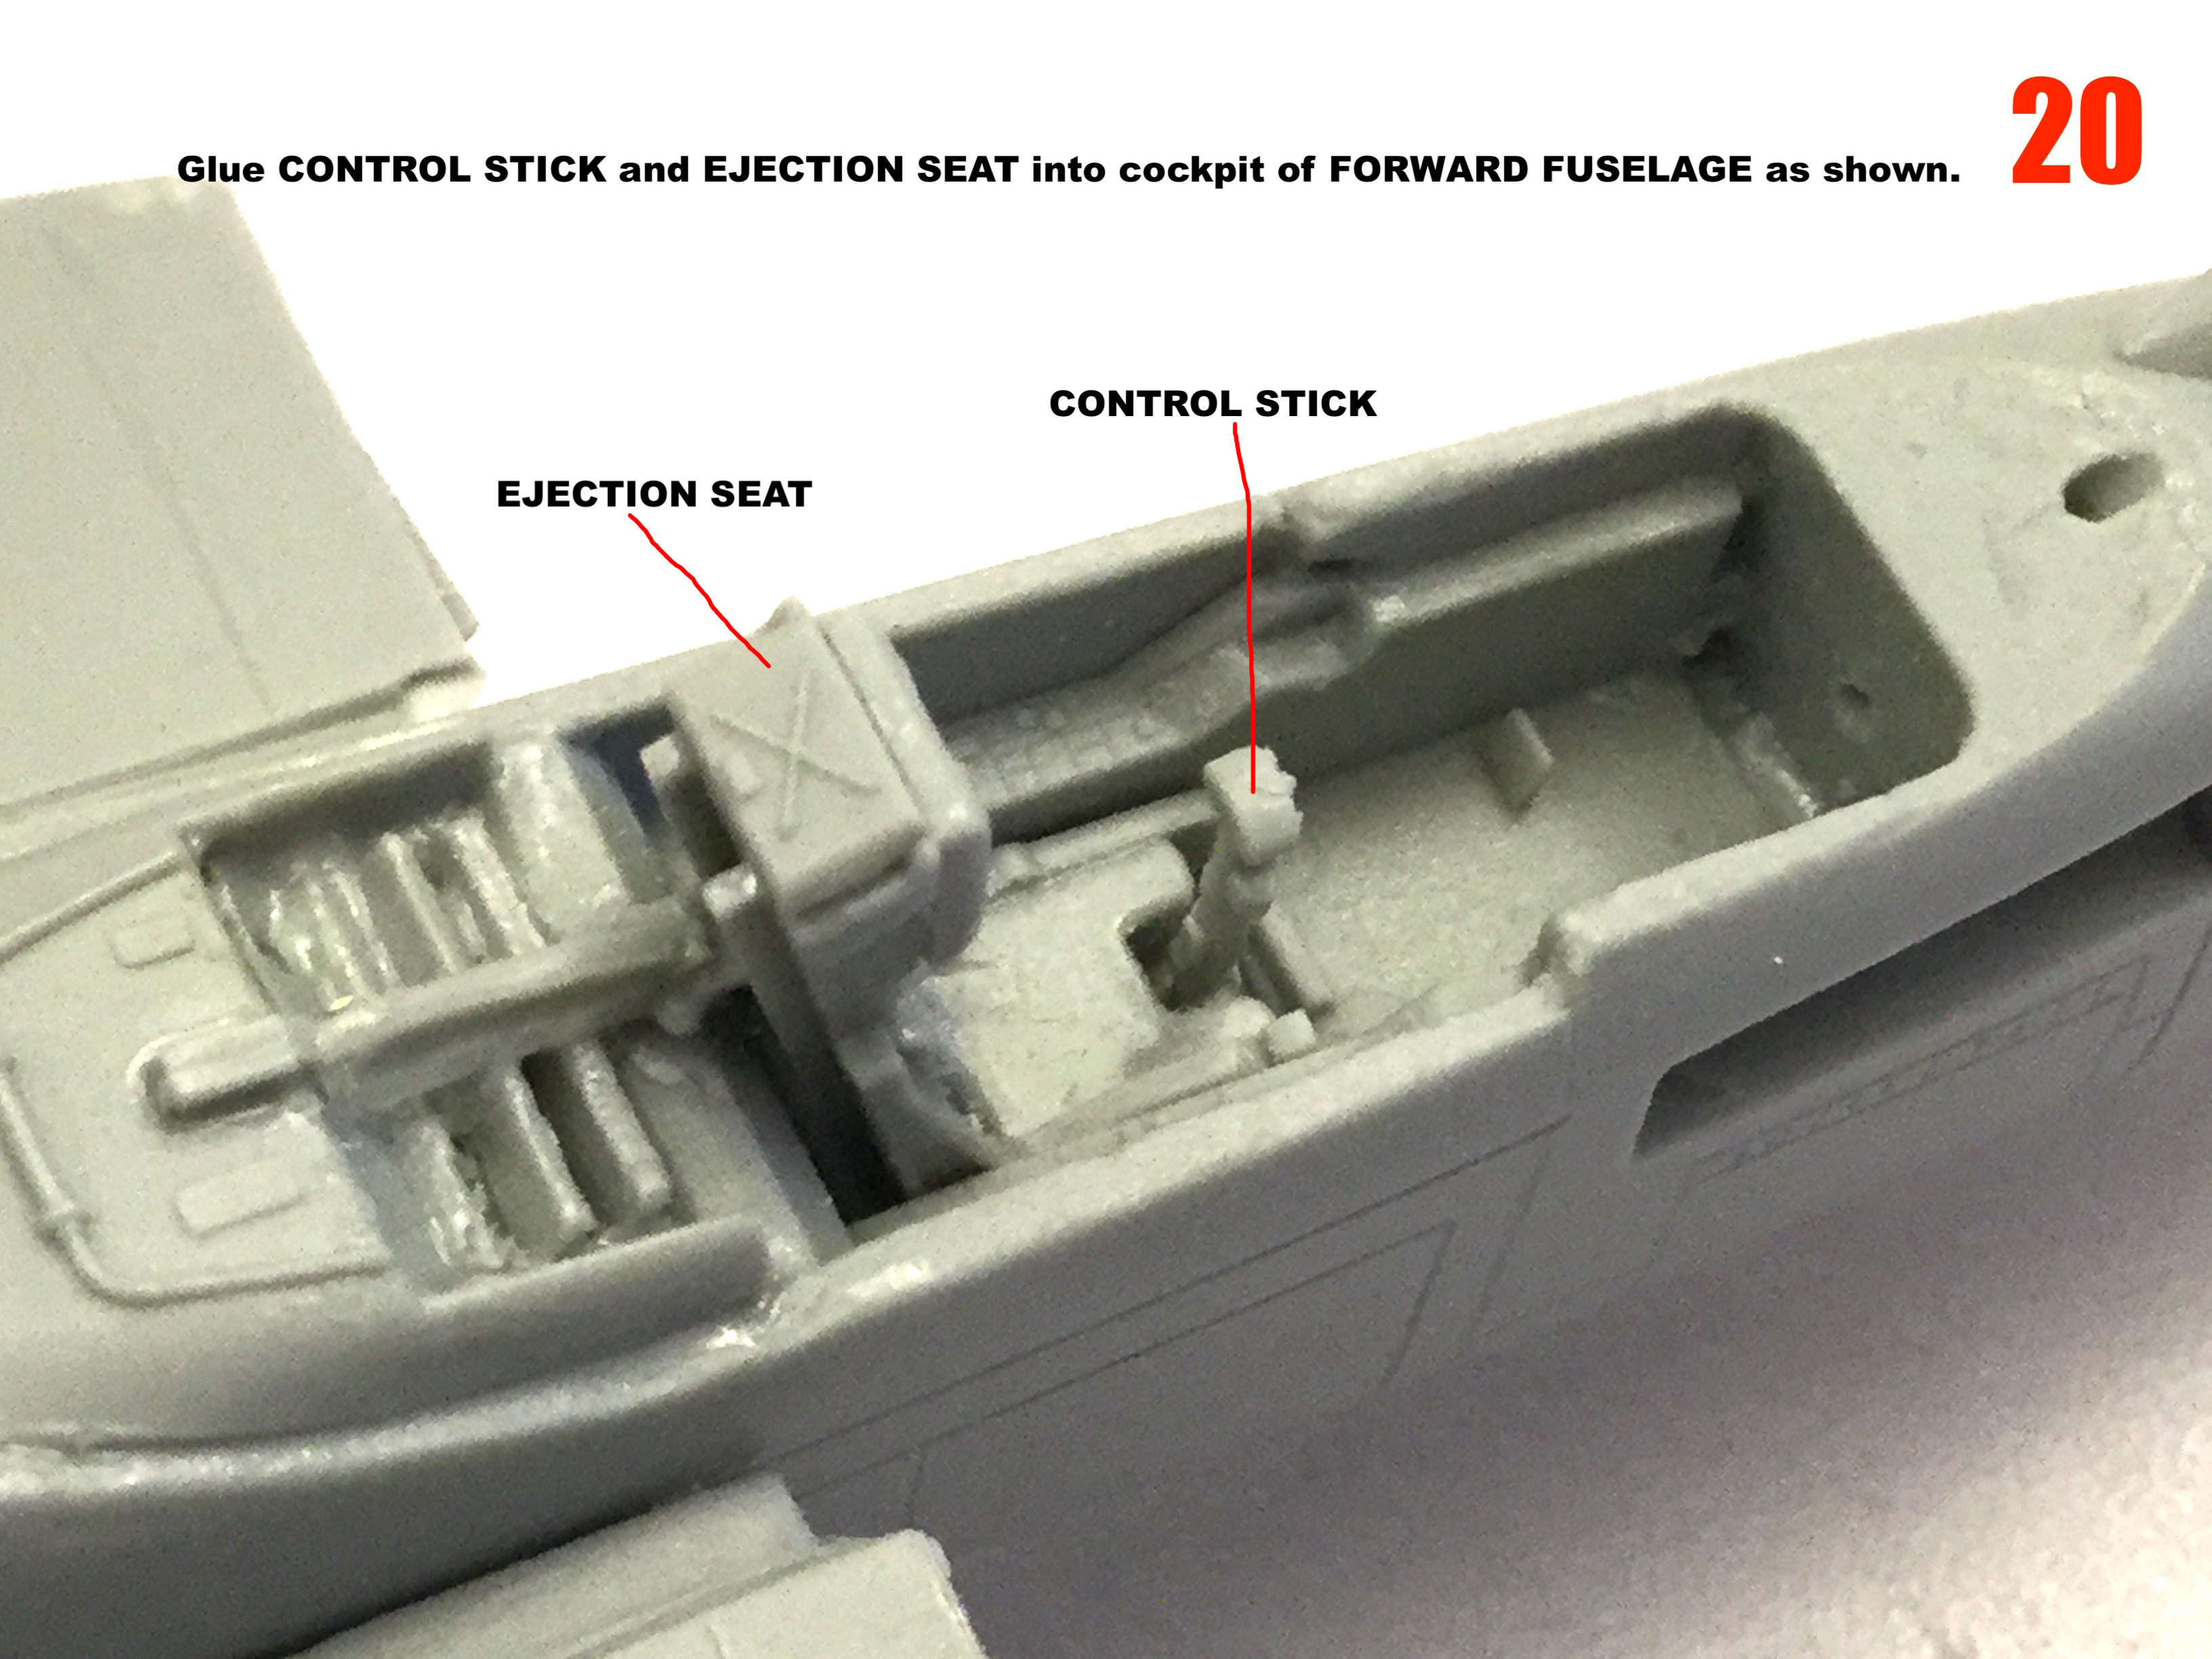
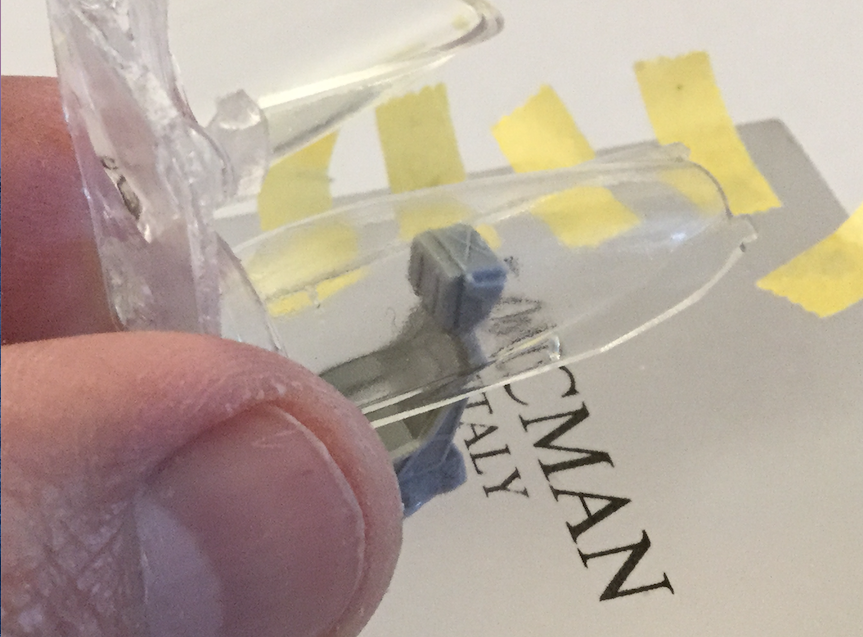
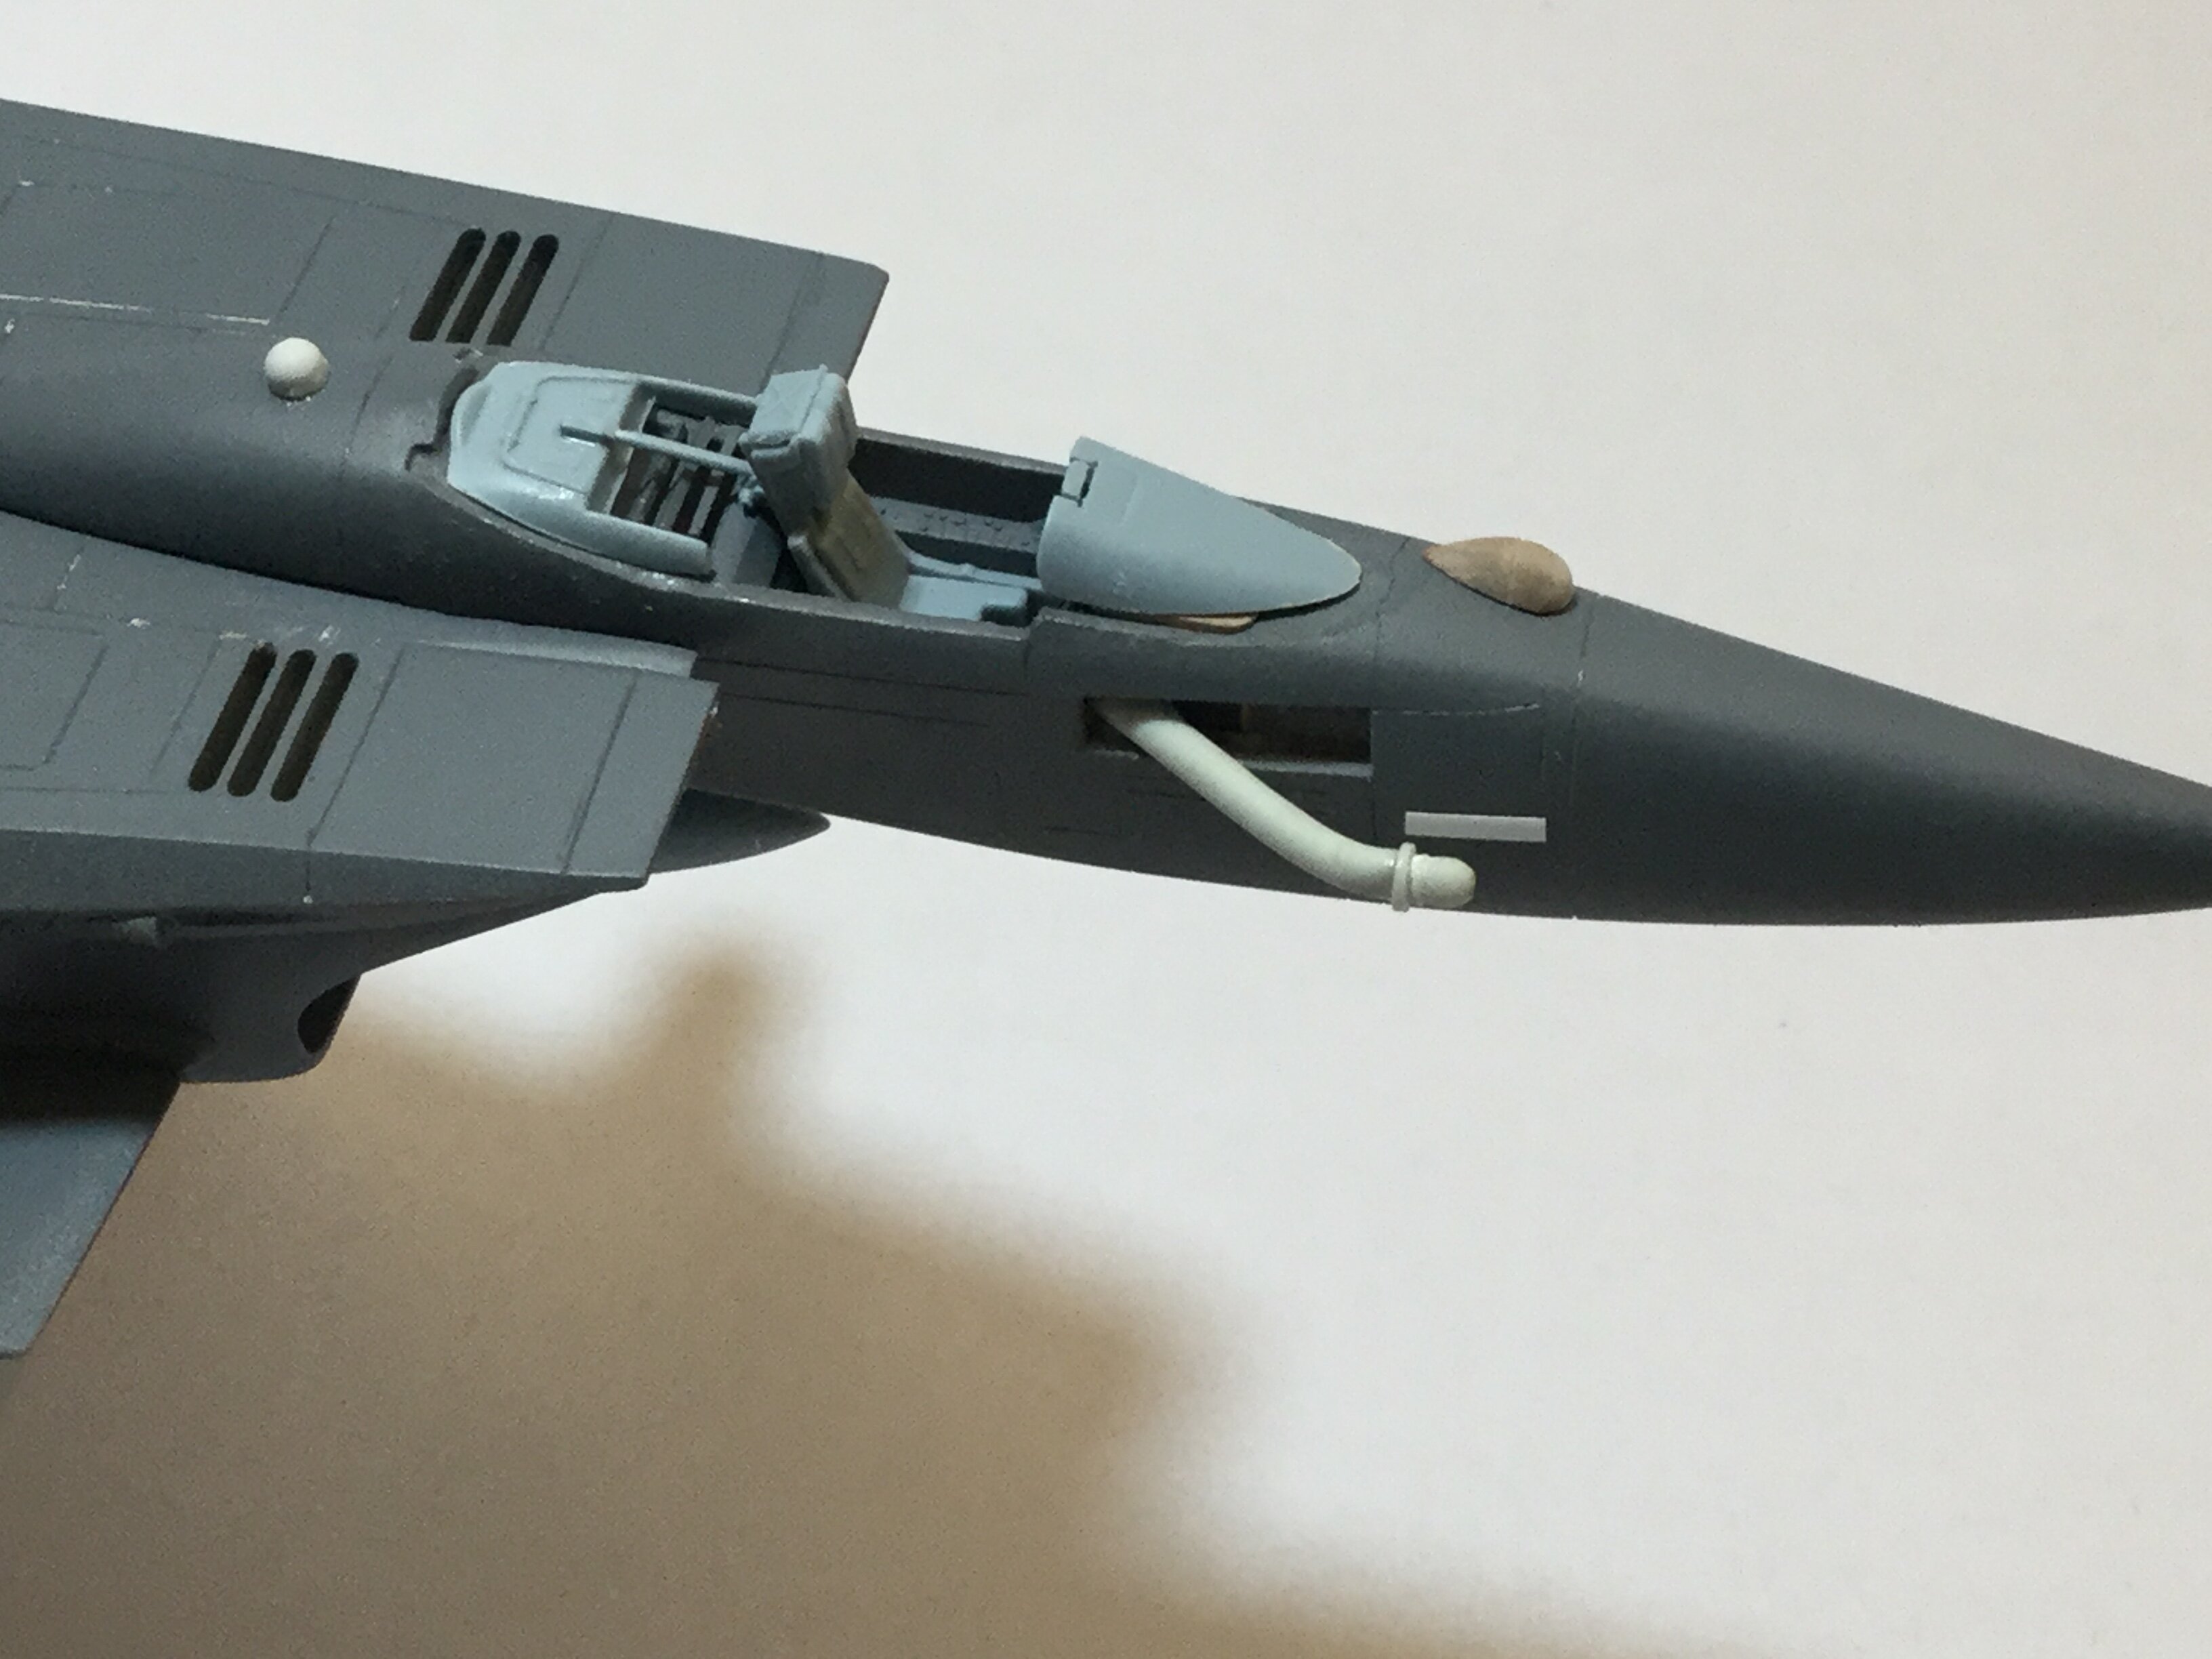
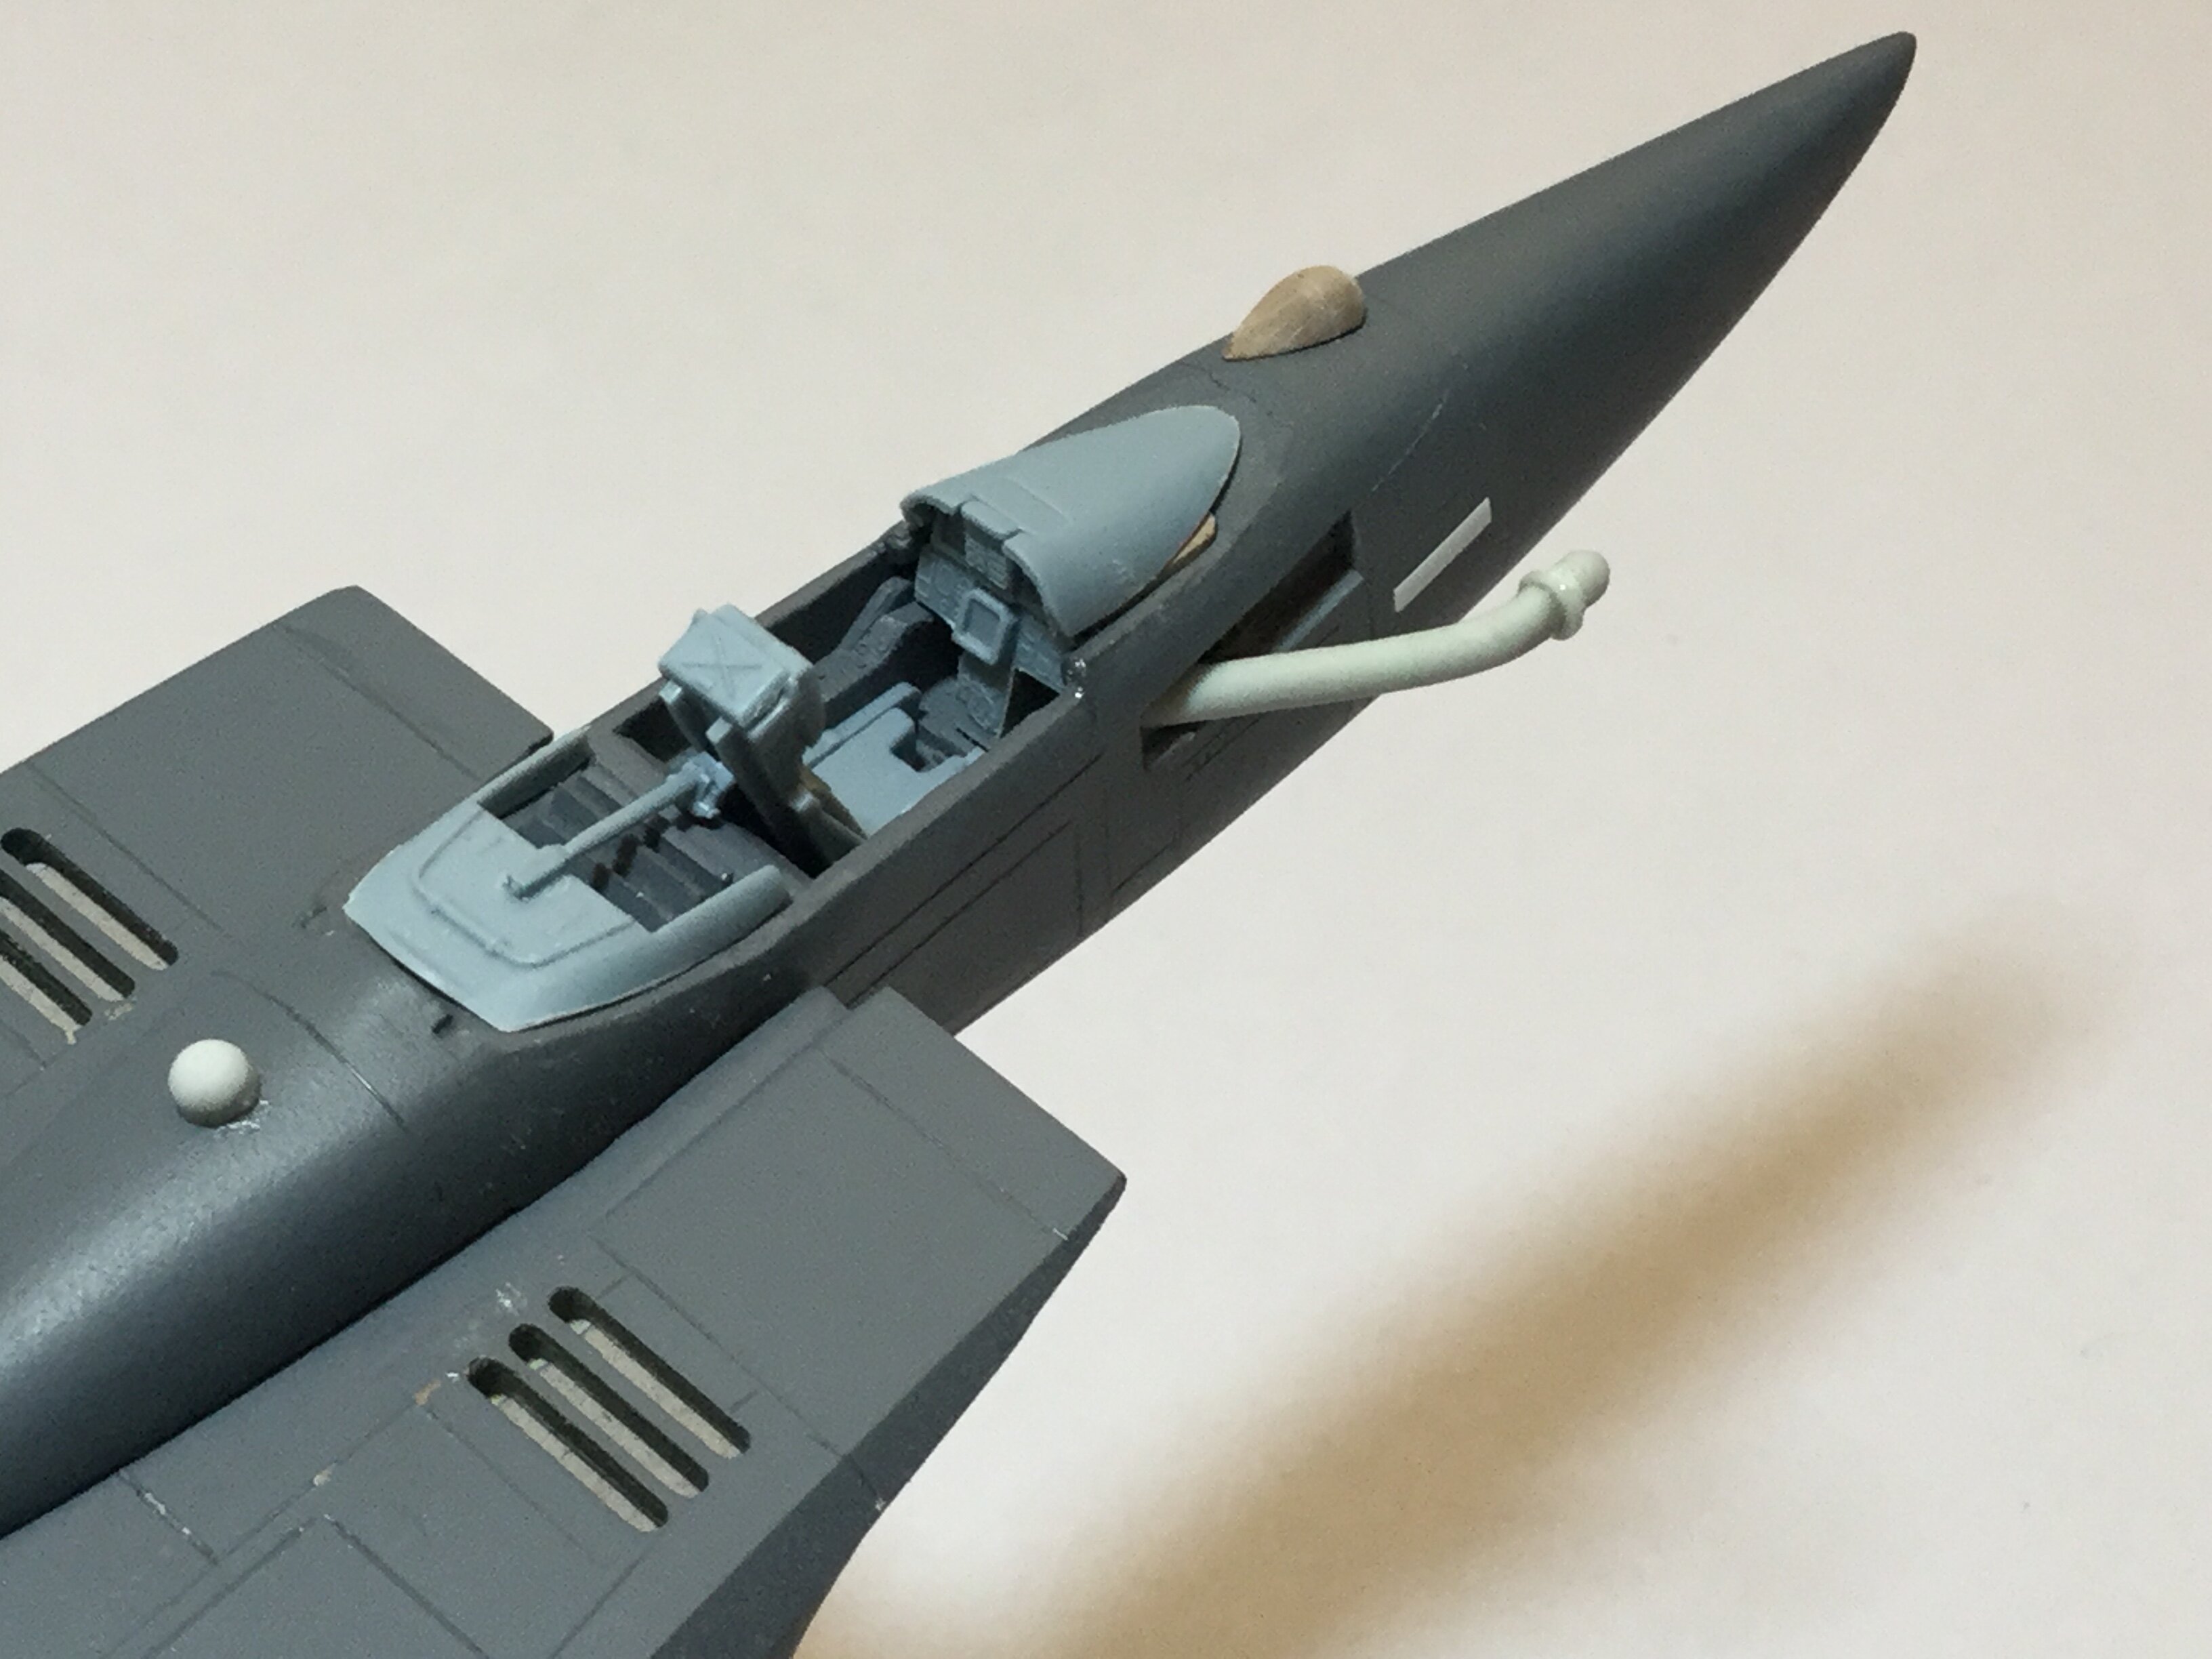
Thank you, you're most welcome. Truly I have been humbled over the years by the faith people have had to fund my projects, sight unseen, believing that they would meet expectations. I can't express how much I appreciate everyone who has helped to make projects like these a reality, because the truth is, I couldn't have done it without your help. Here are some final pics before I commit the masters to mold-prep. Please excuse the floppy gear bay doors, which are held with Tamiya tape: once I add the hinges, the only way to build the doors closed will be to trim those hinges off, just like your average Hasegawa kit. Some very fine detail parts are going to be extremely challenging to mold, so please pray that everything goes smoothly! One pleasant surprise is that the Dragunn doesn't do a wheelie on its tailpipes, even with all the weight shifted aft. The main struts will have brass inserts for added strength, and a few small details were omitted from the pics to avoid losing or damaging them, like the teeny-tiny control stick and the door for the refuelling probe. The canopy will be clear, of course, and the casting for those is already underway.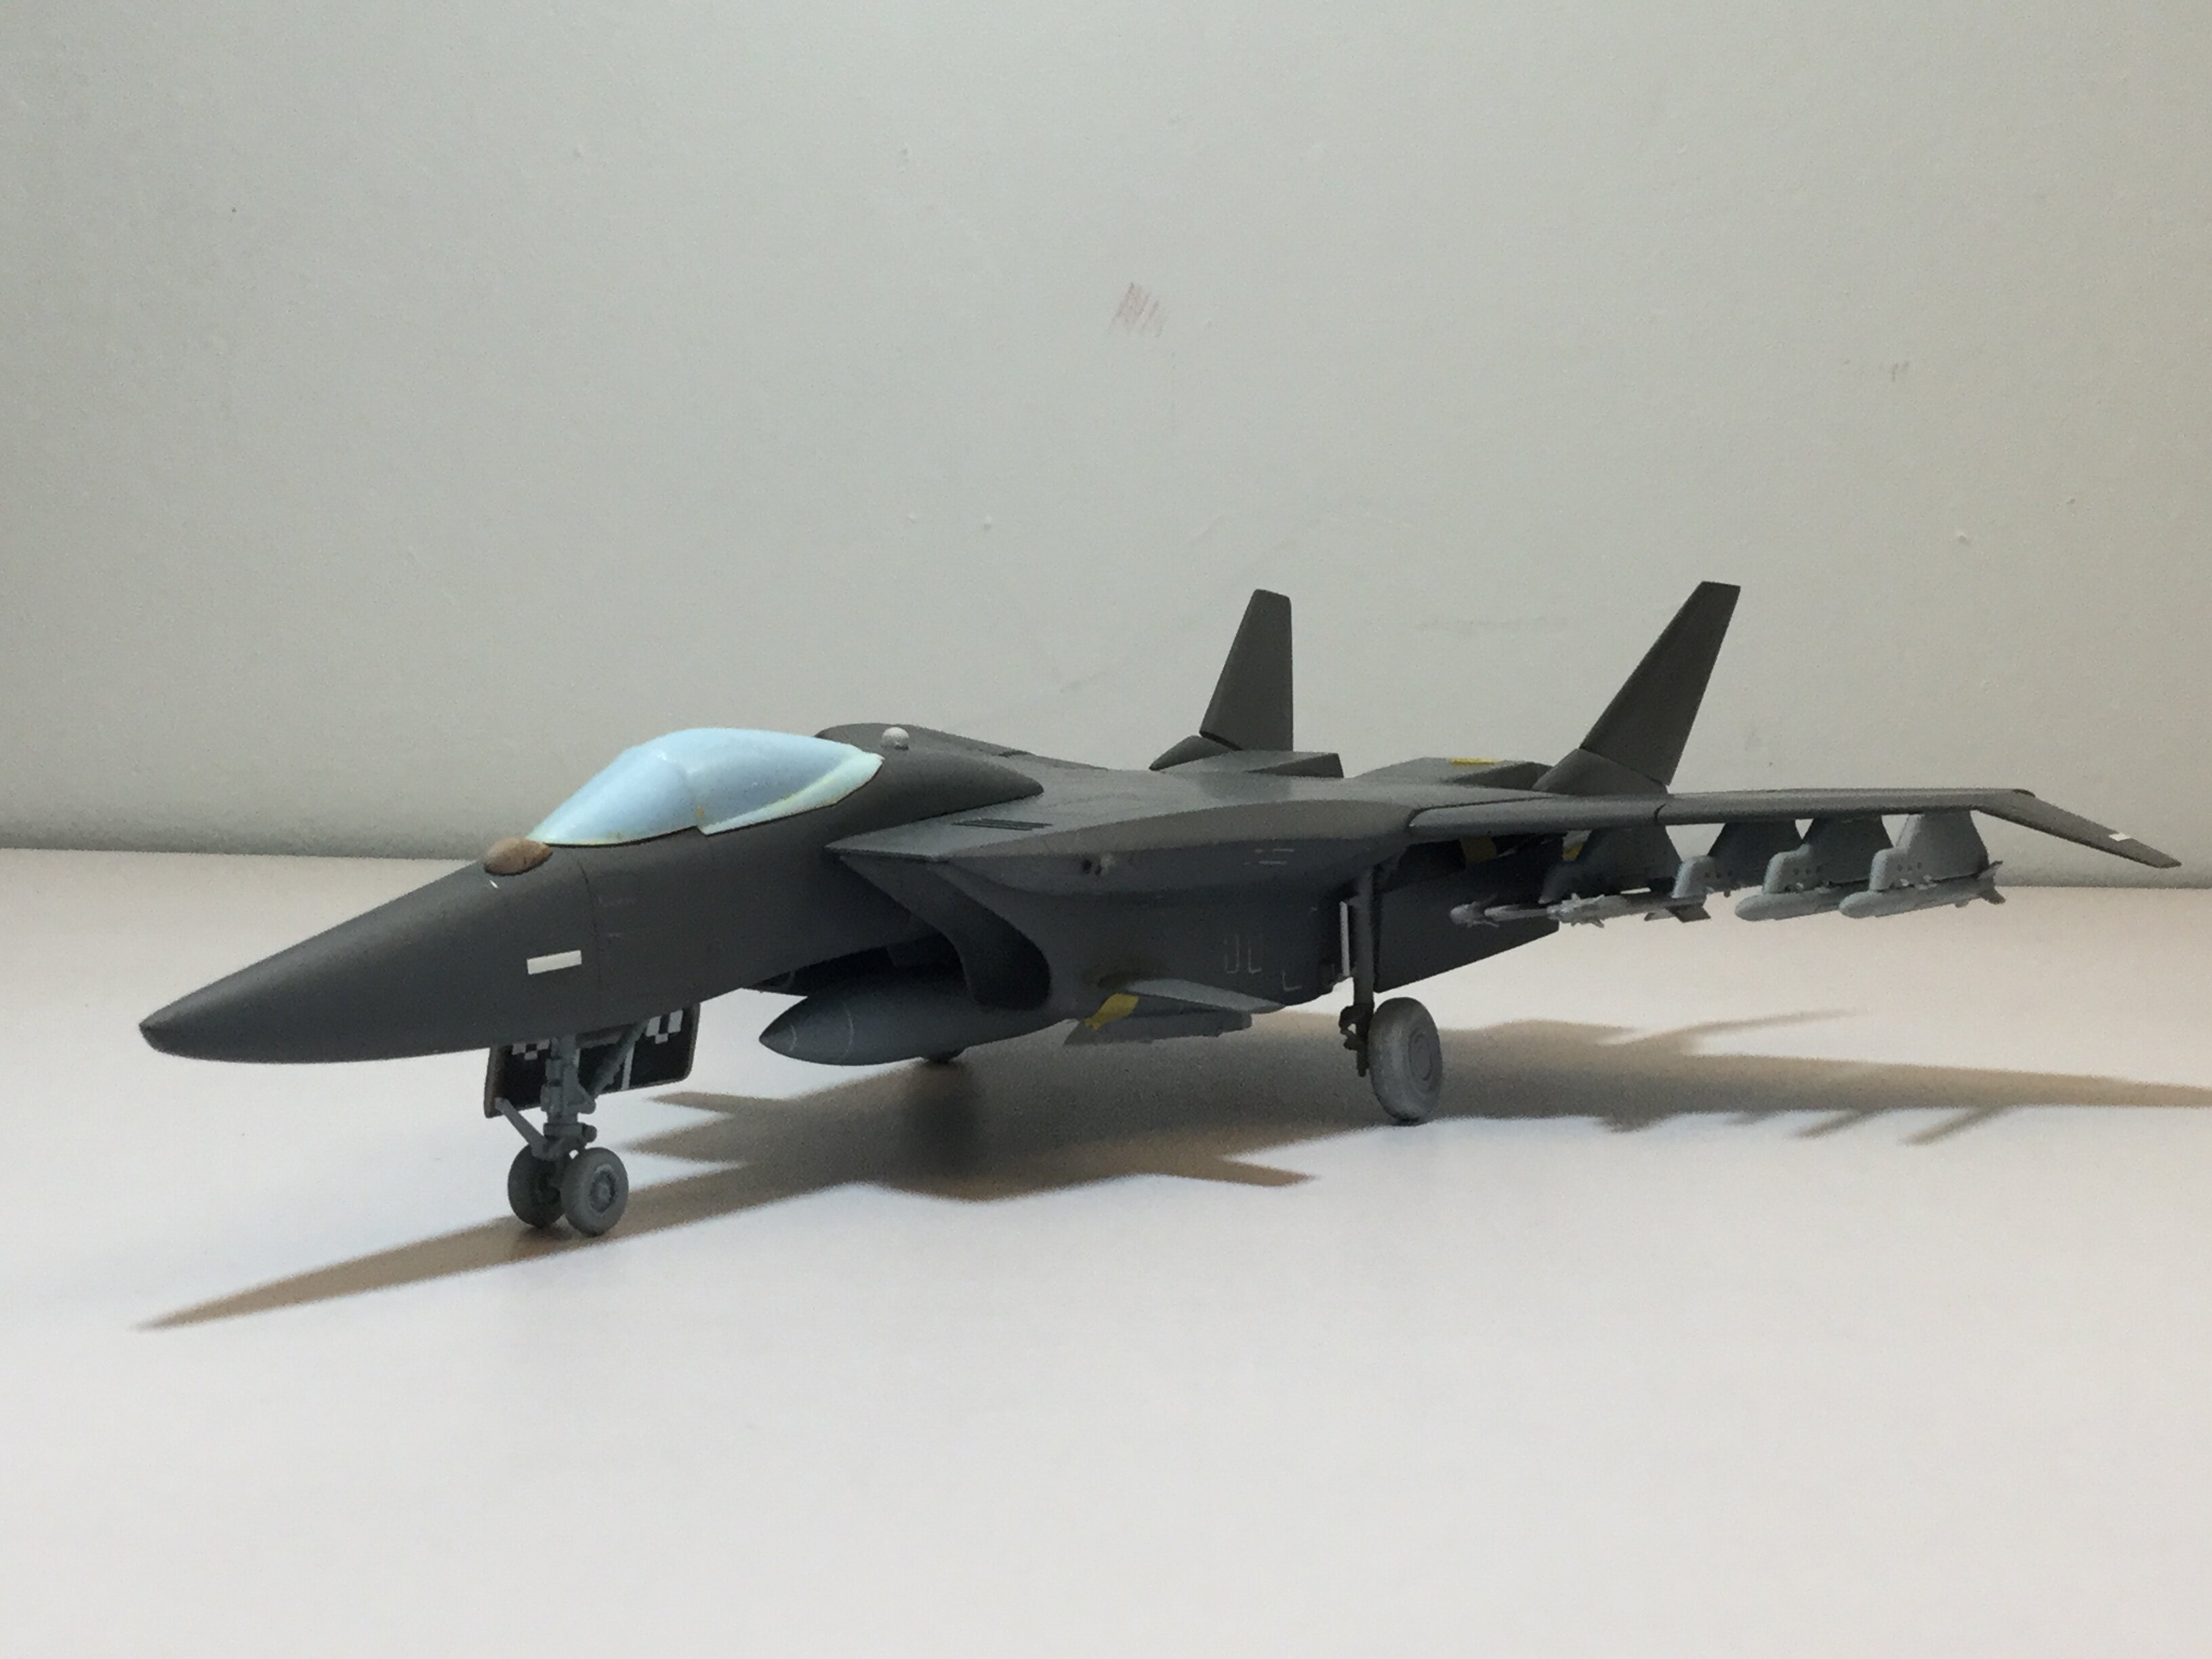
-
1/72 F203 Dragon II Kit Proposal --Moscato Hobby
captain america replied to captain america's topic in Model kits
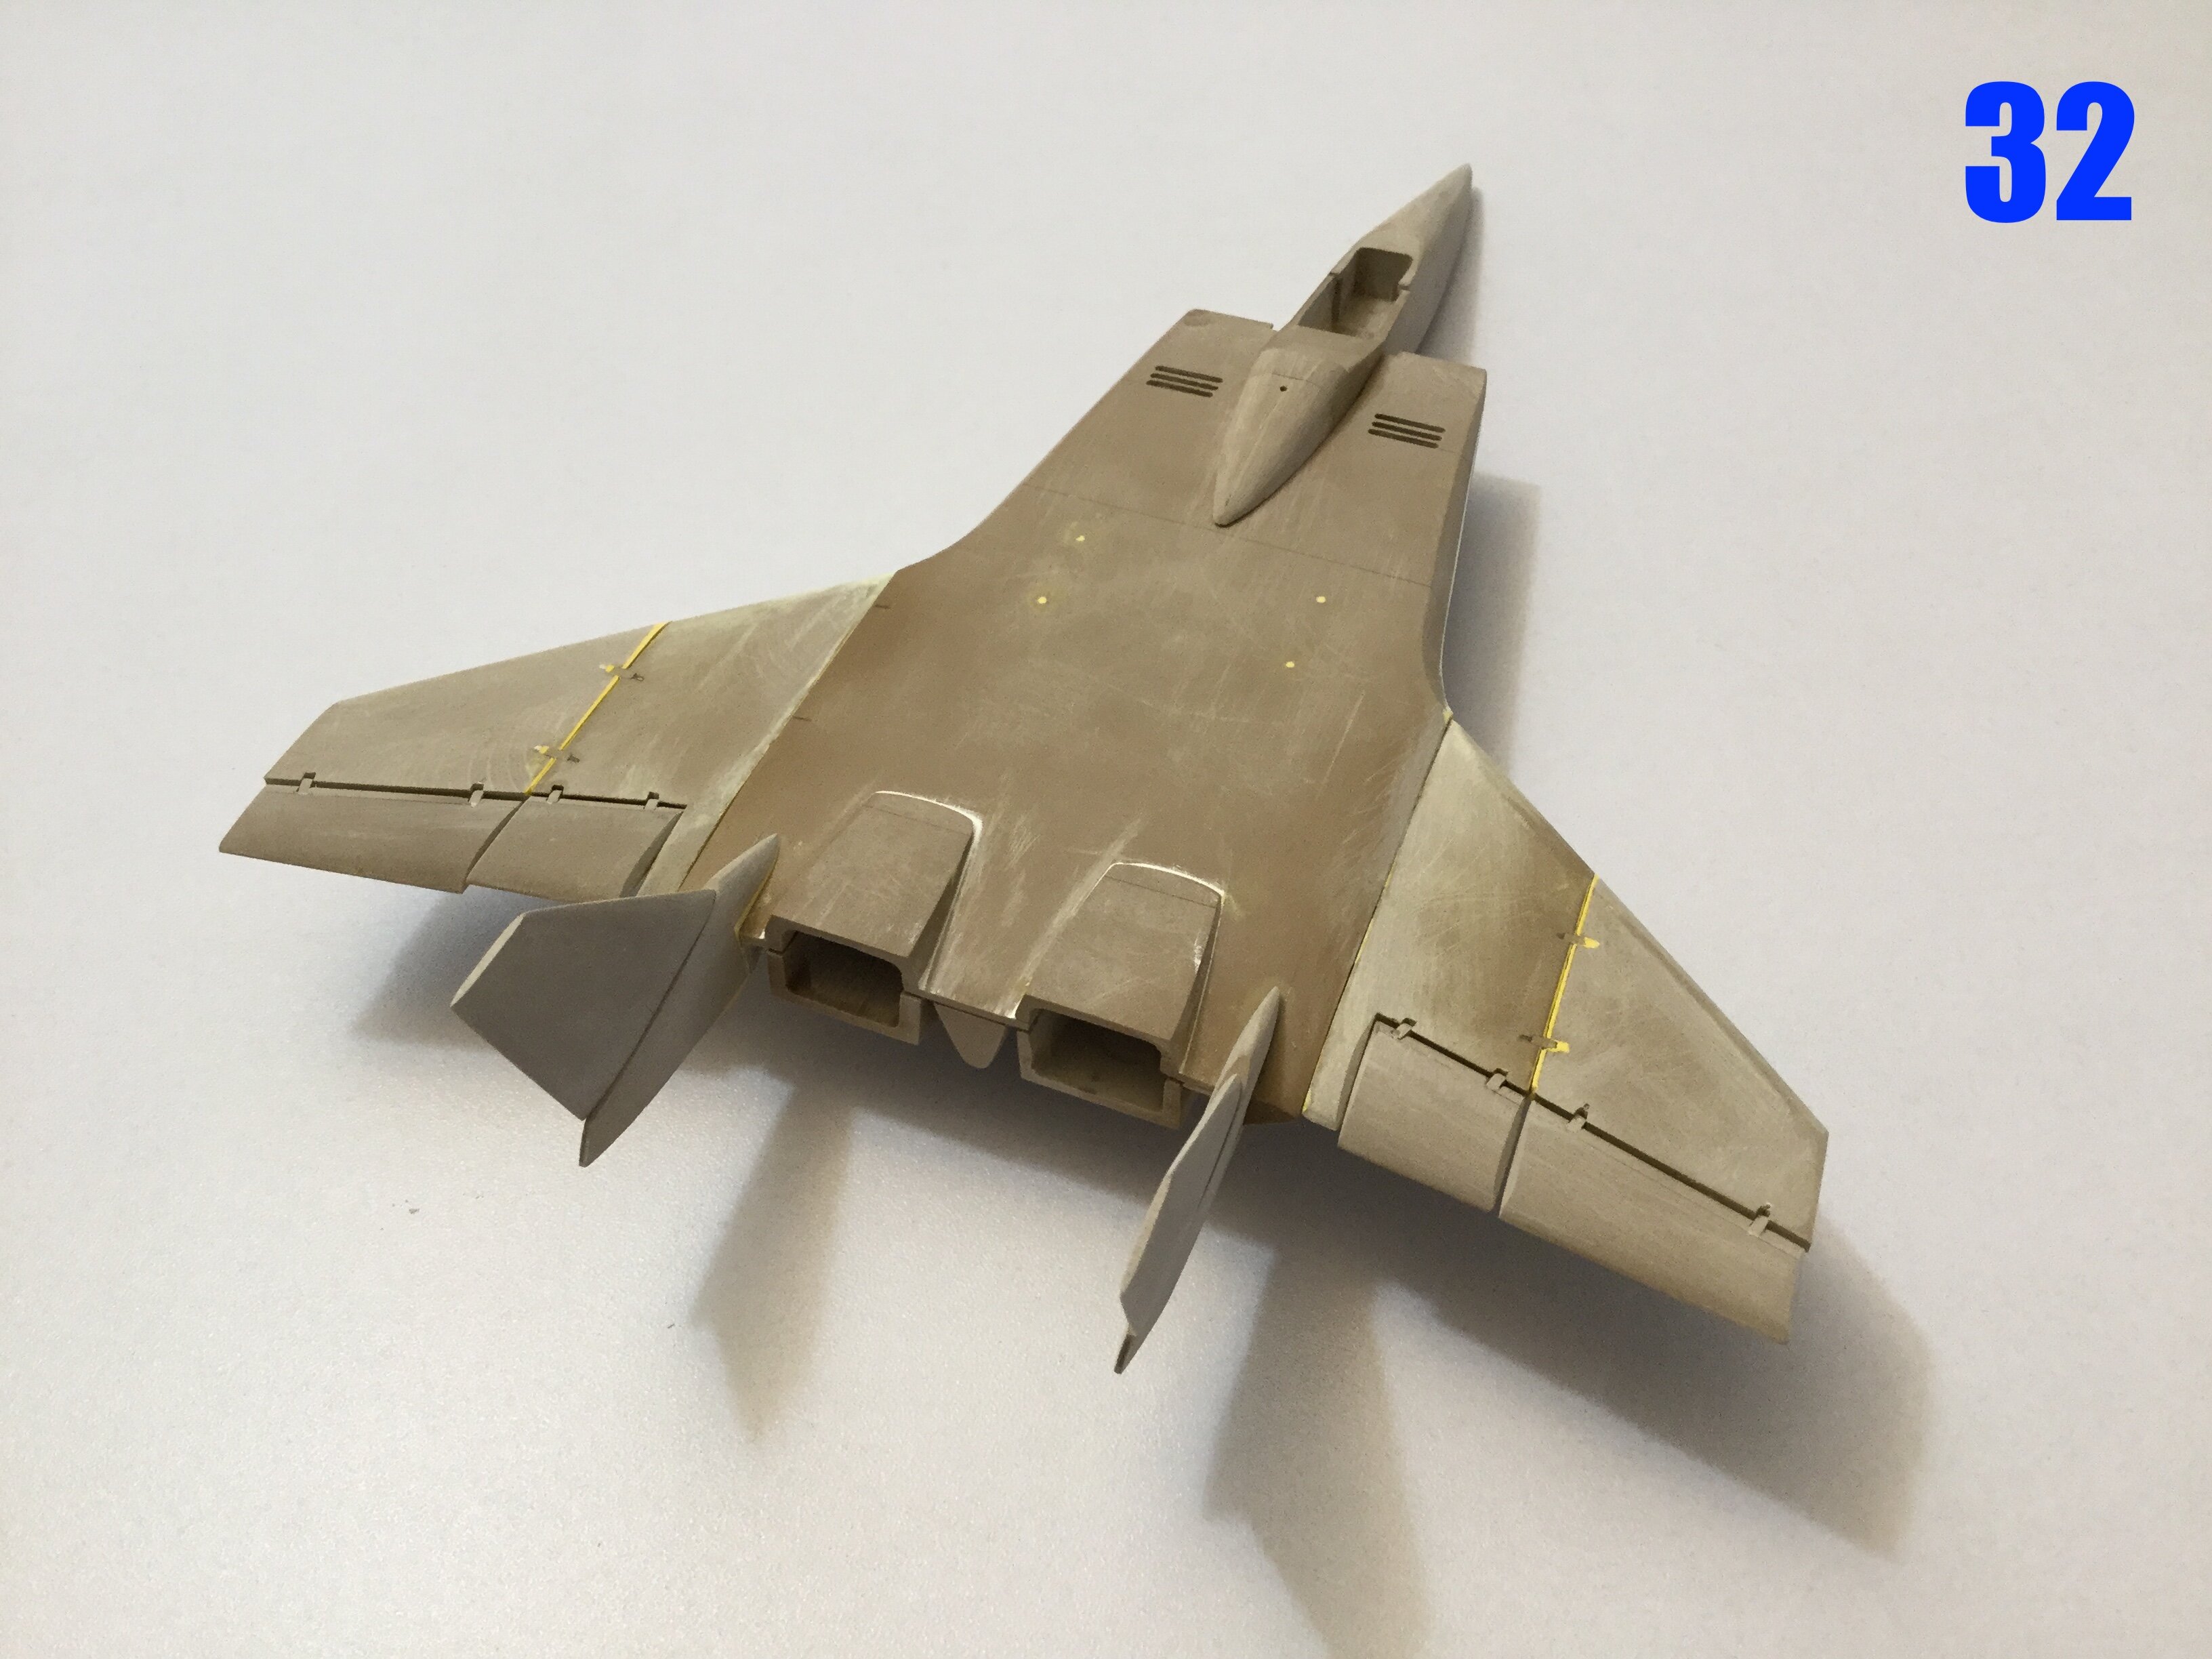
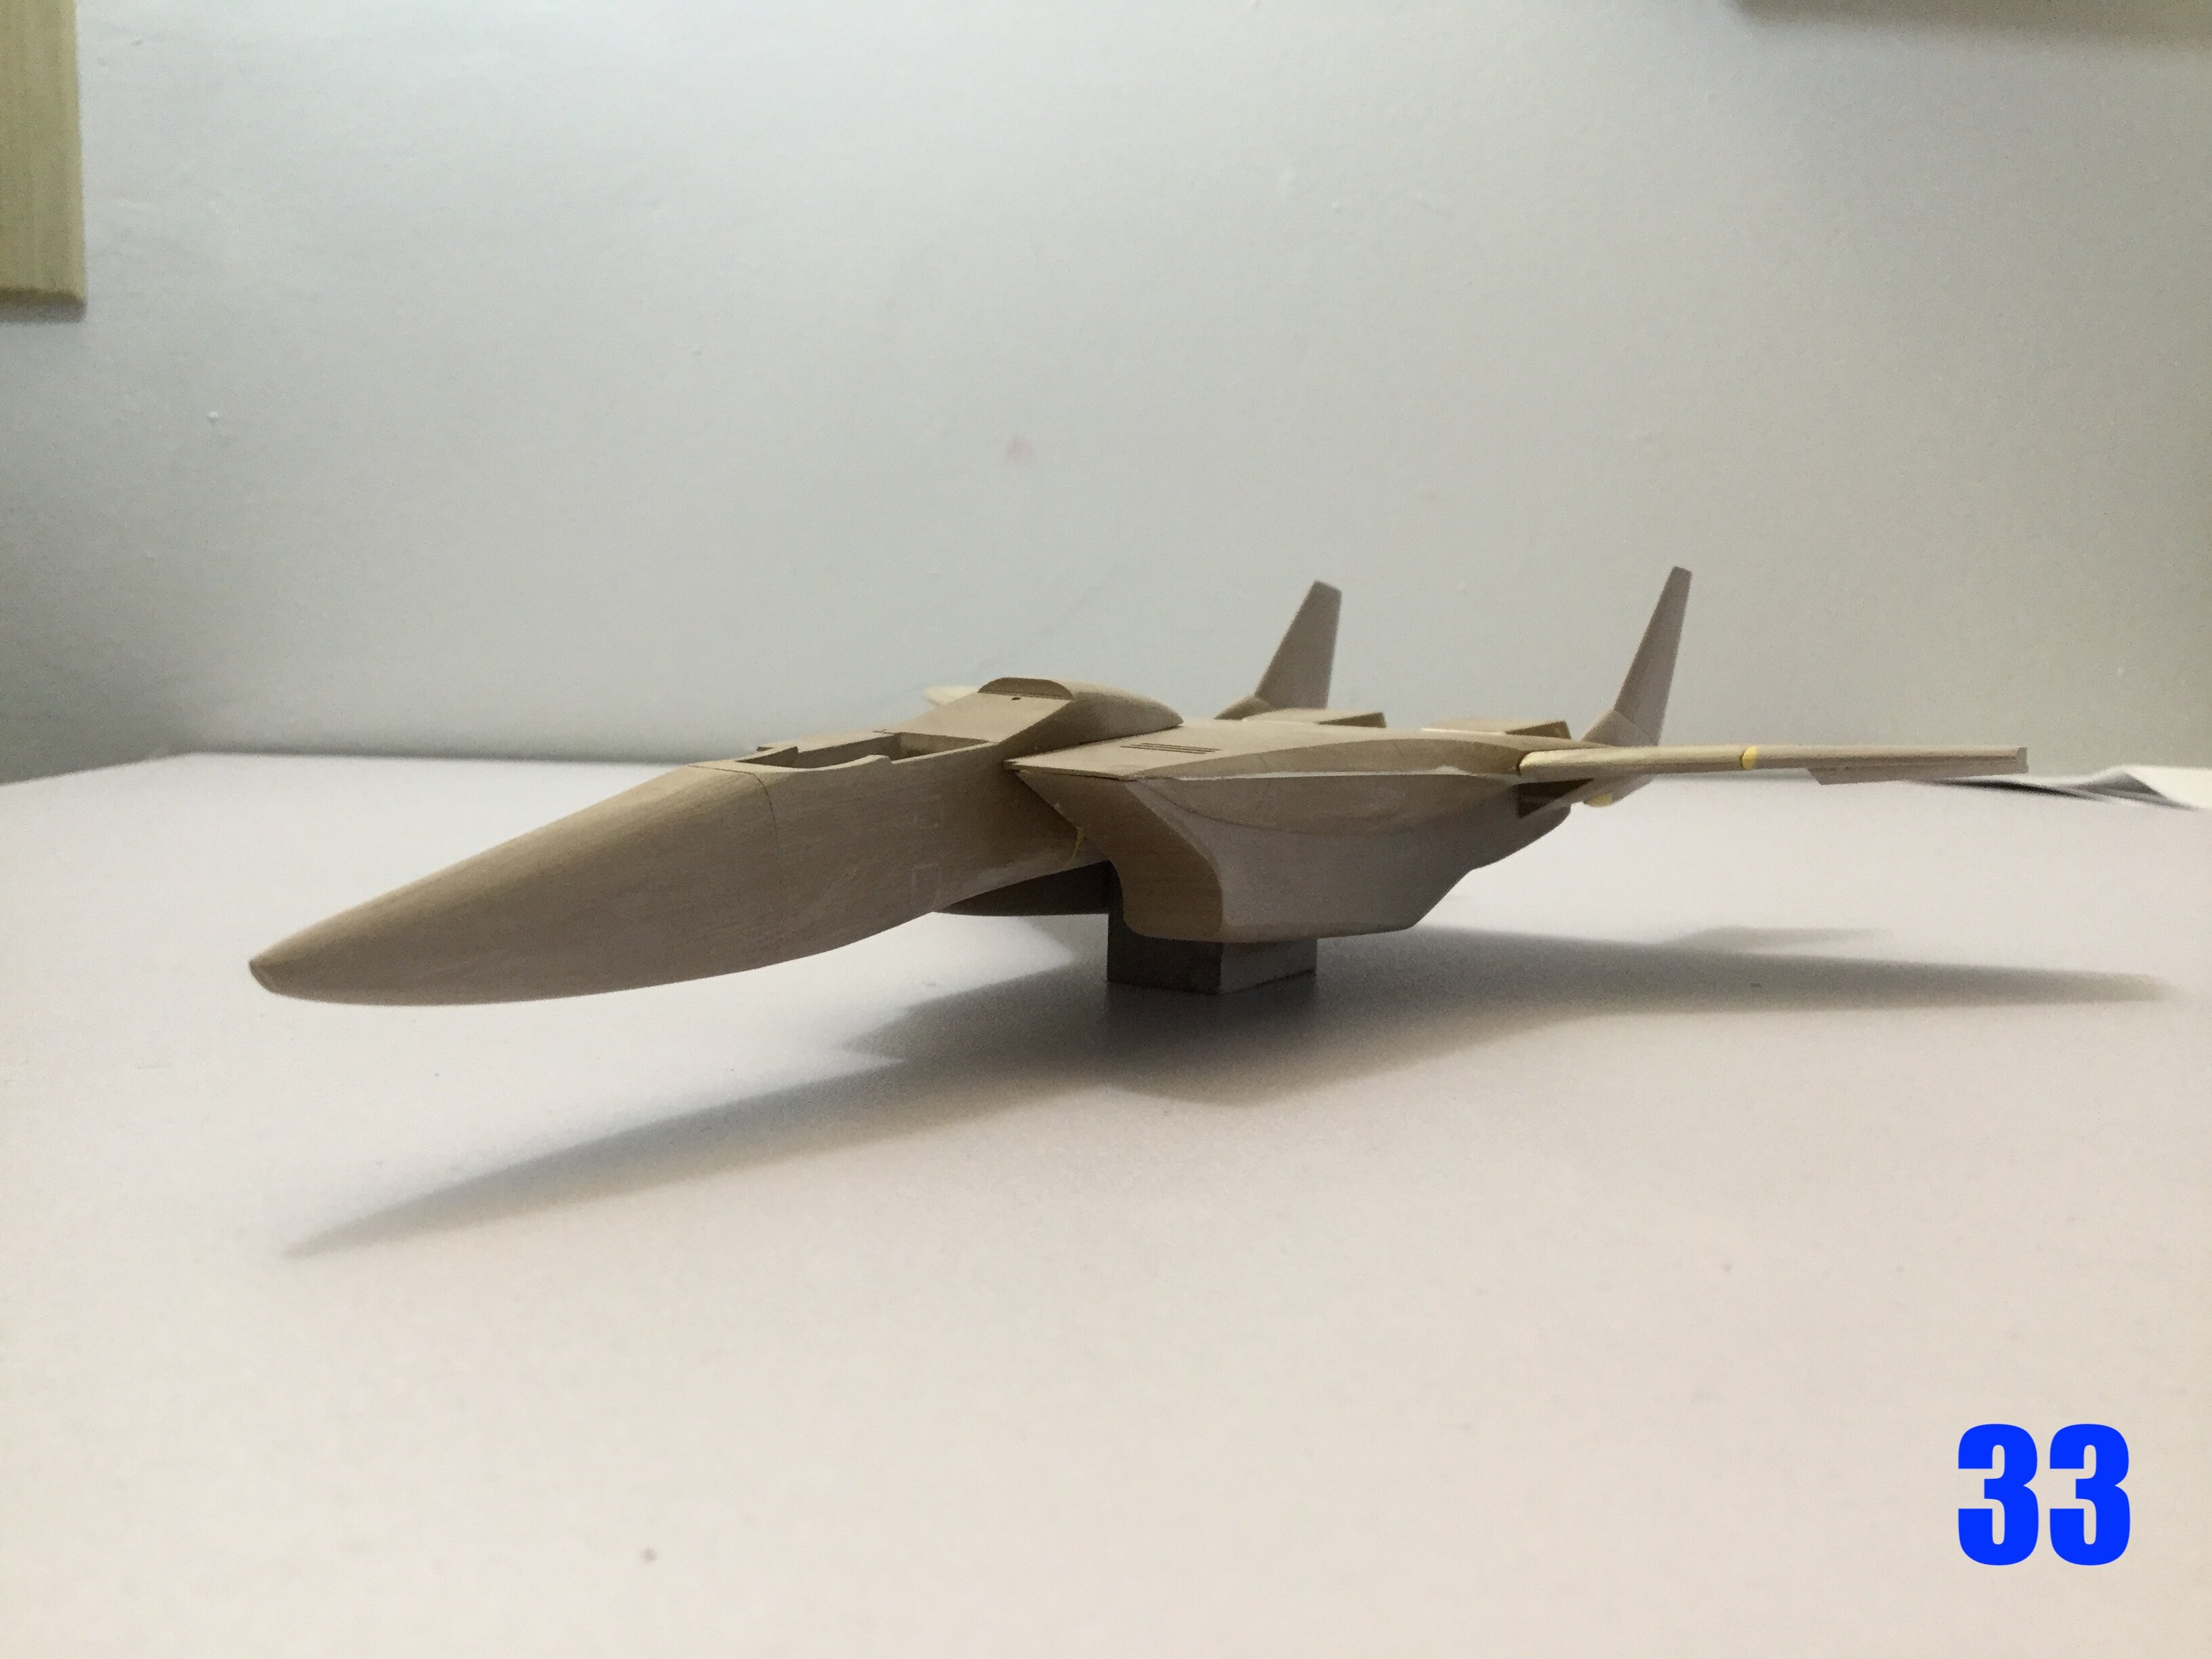
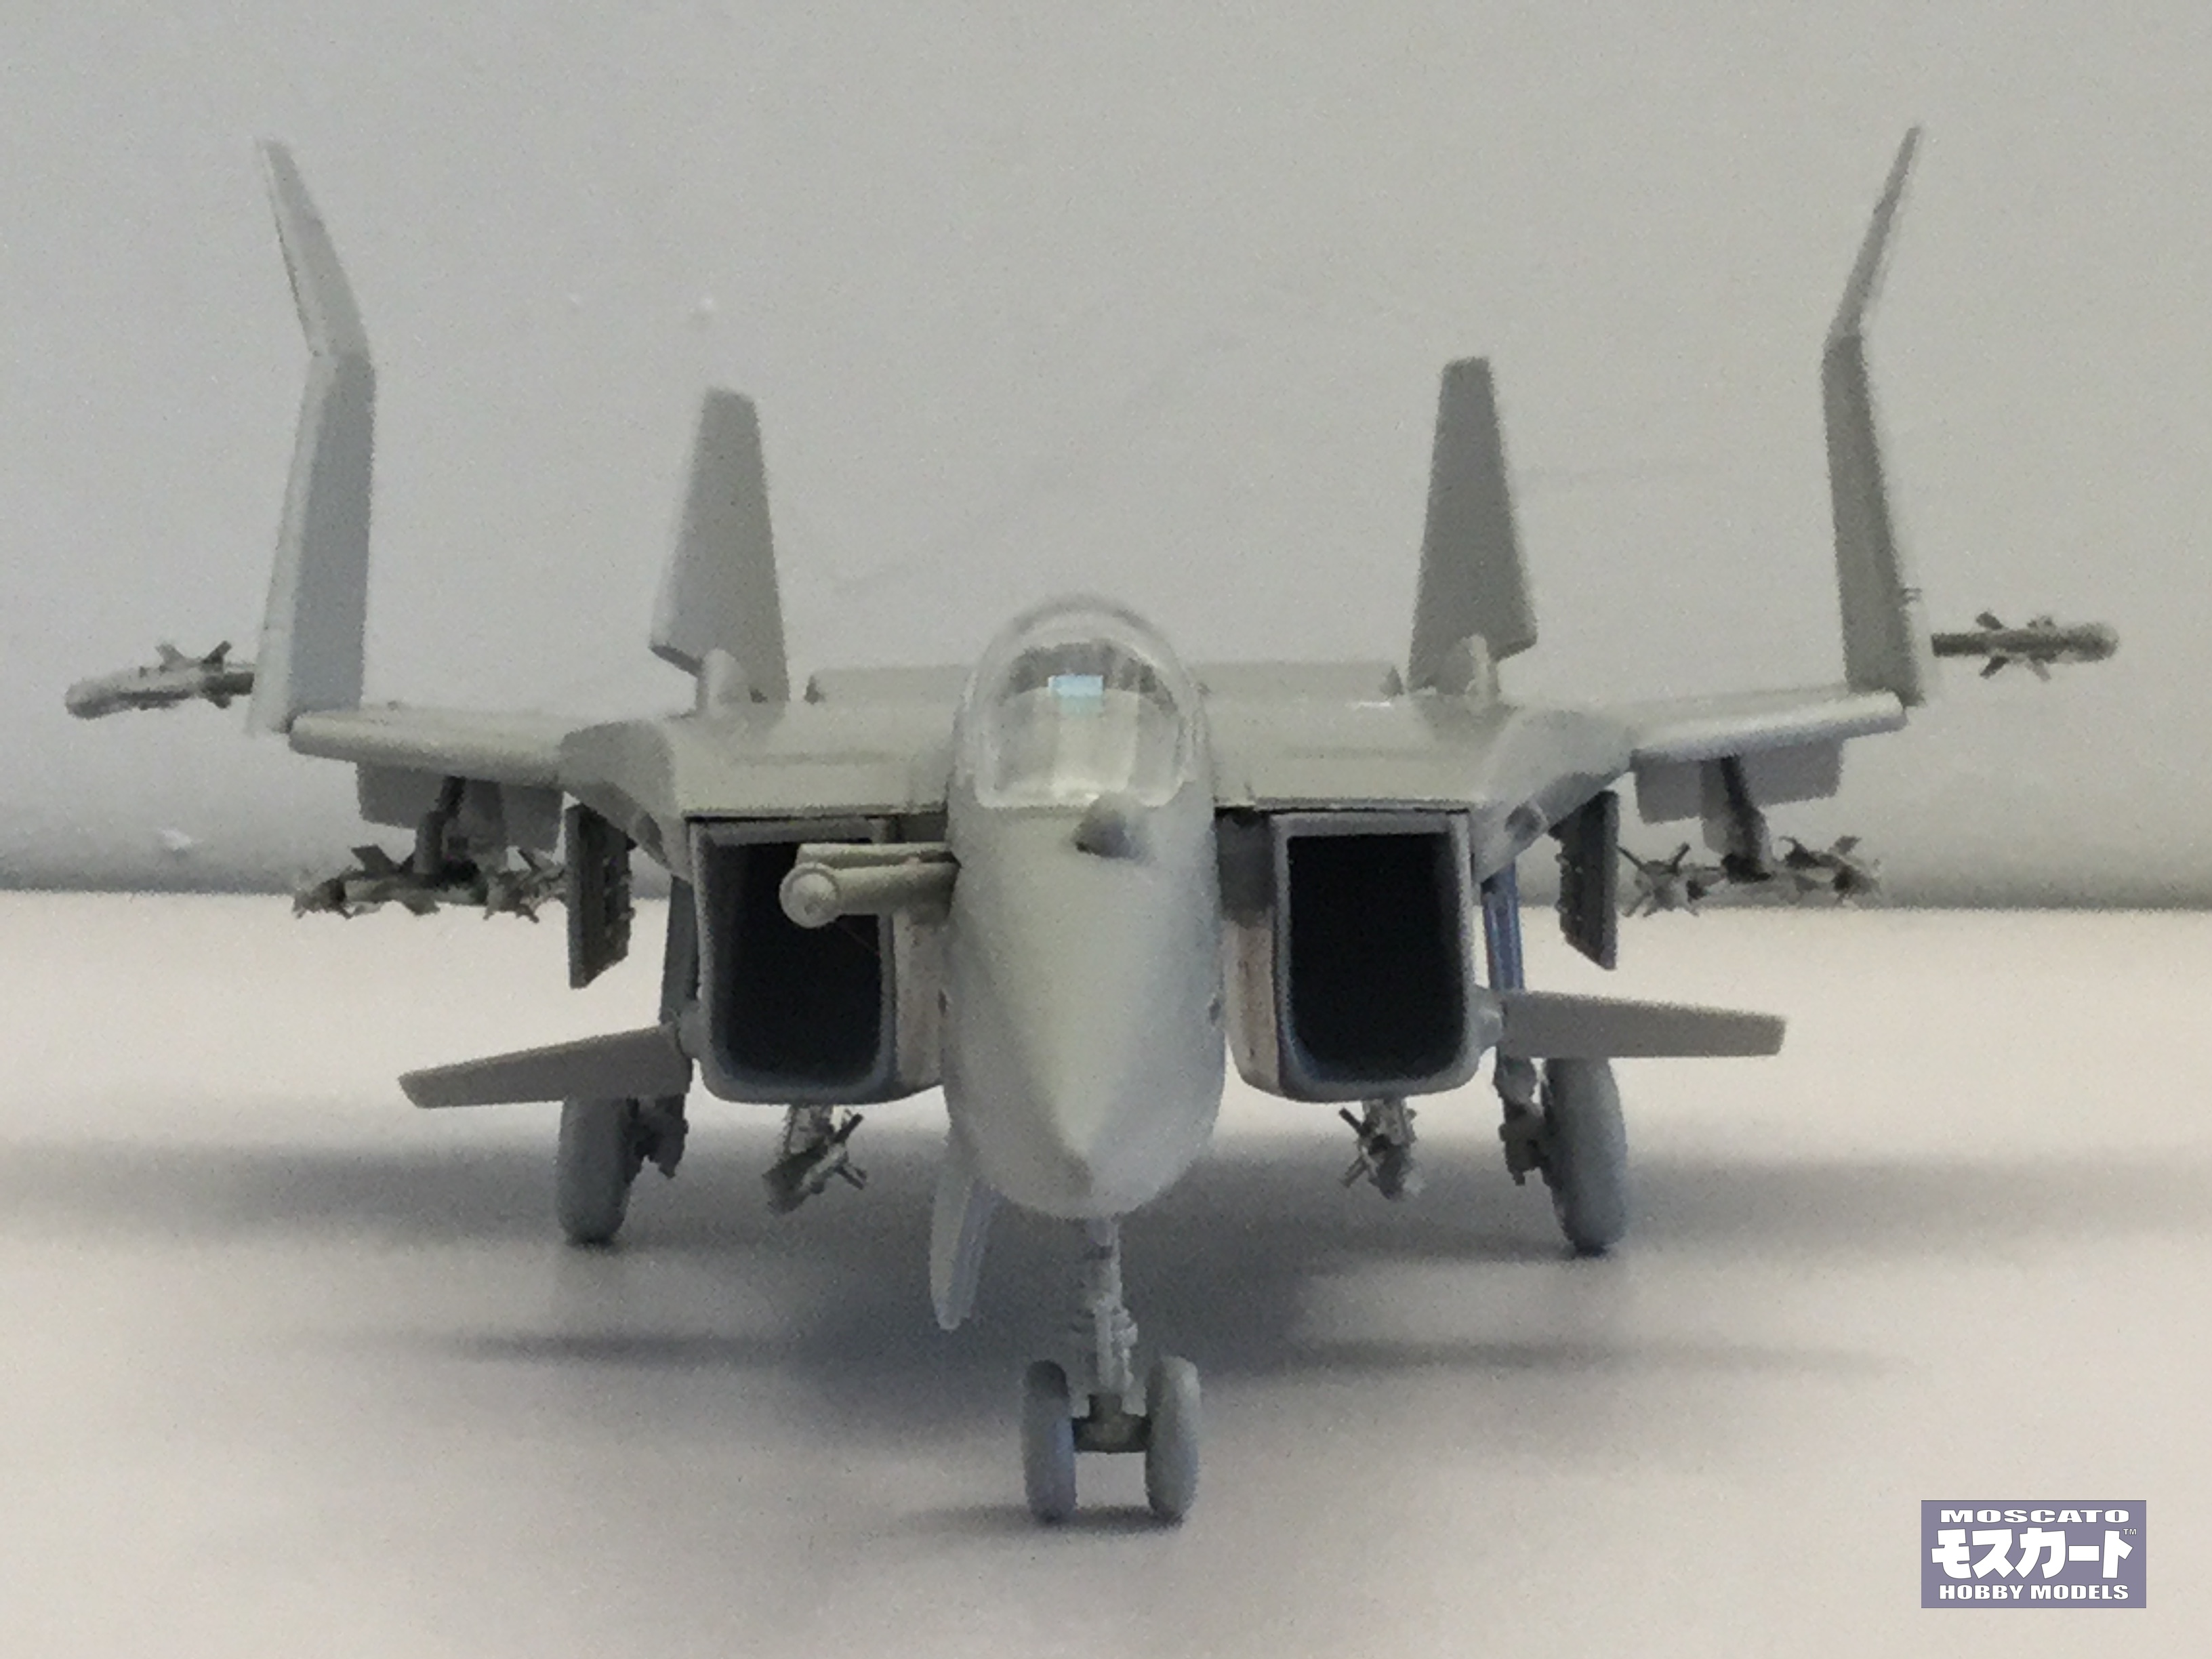
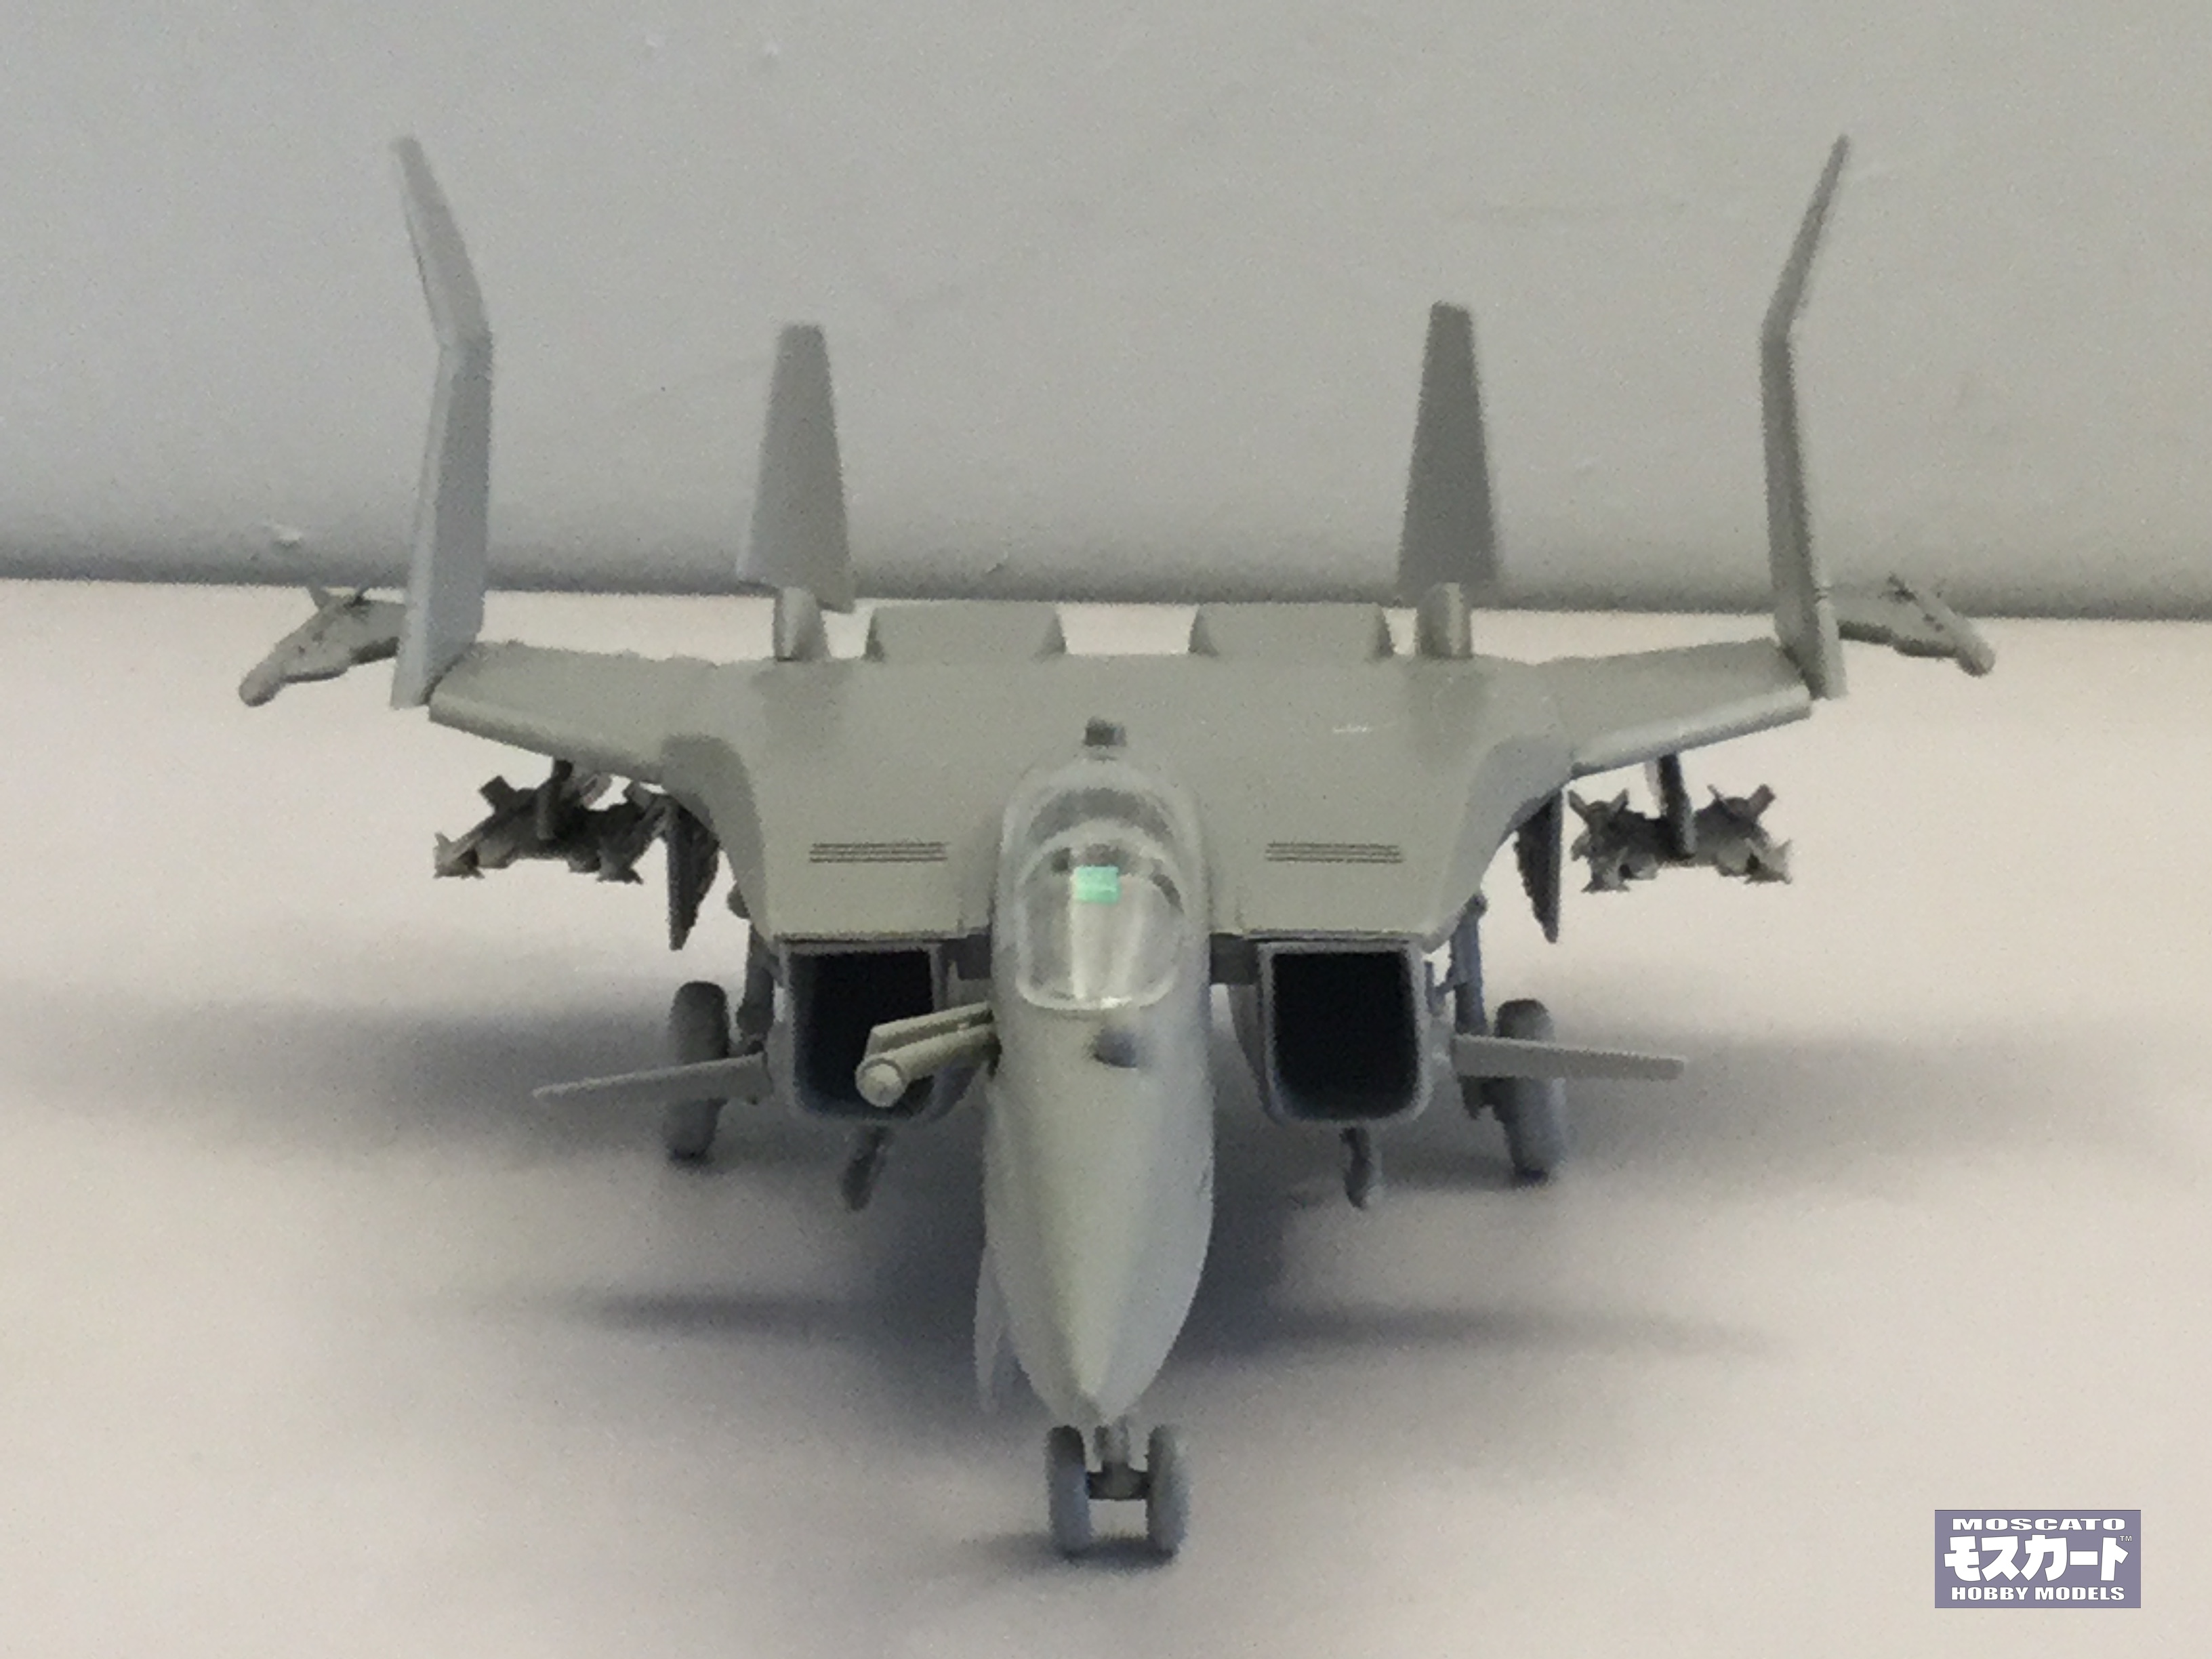
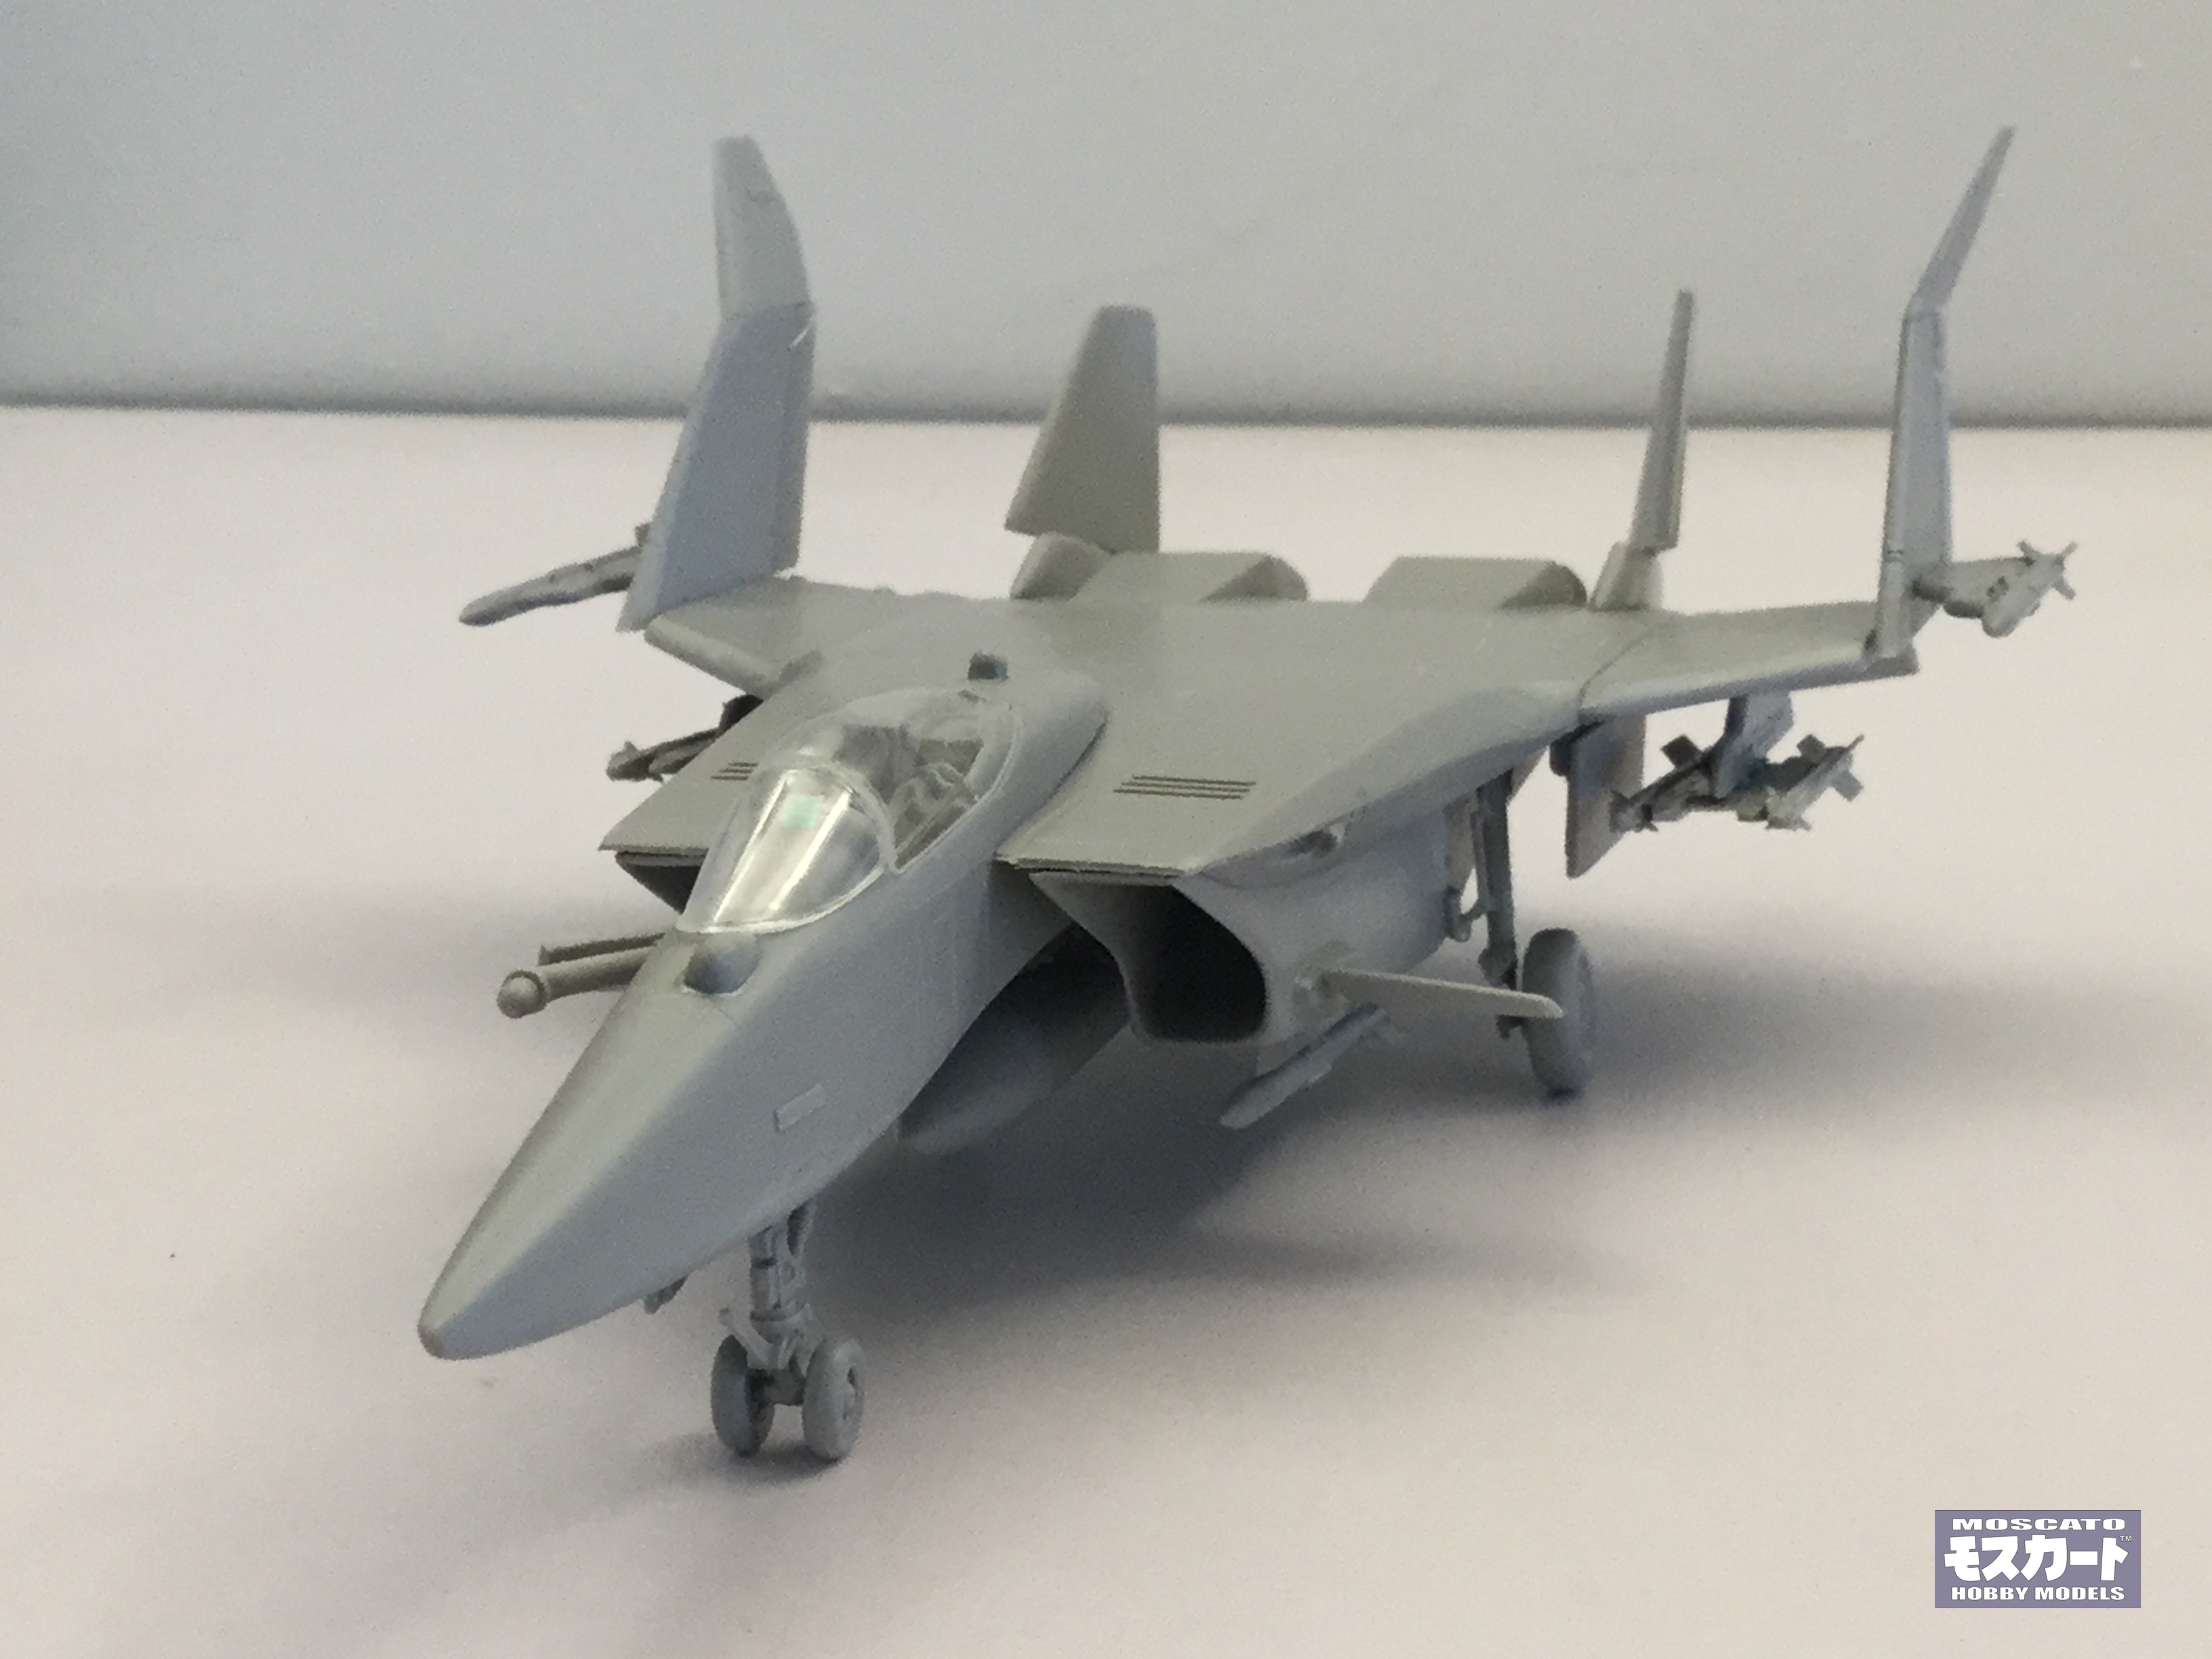
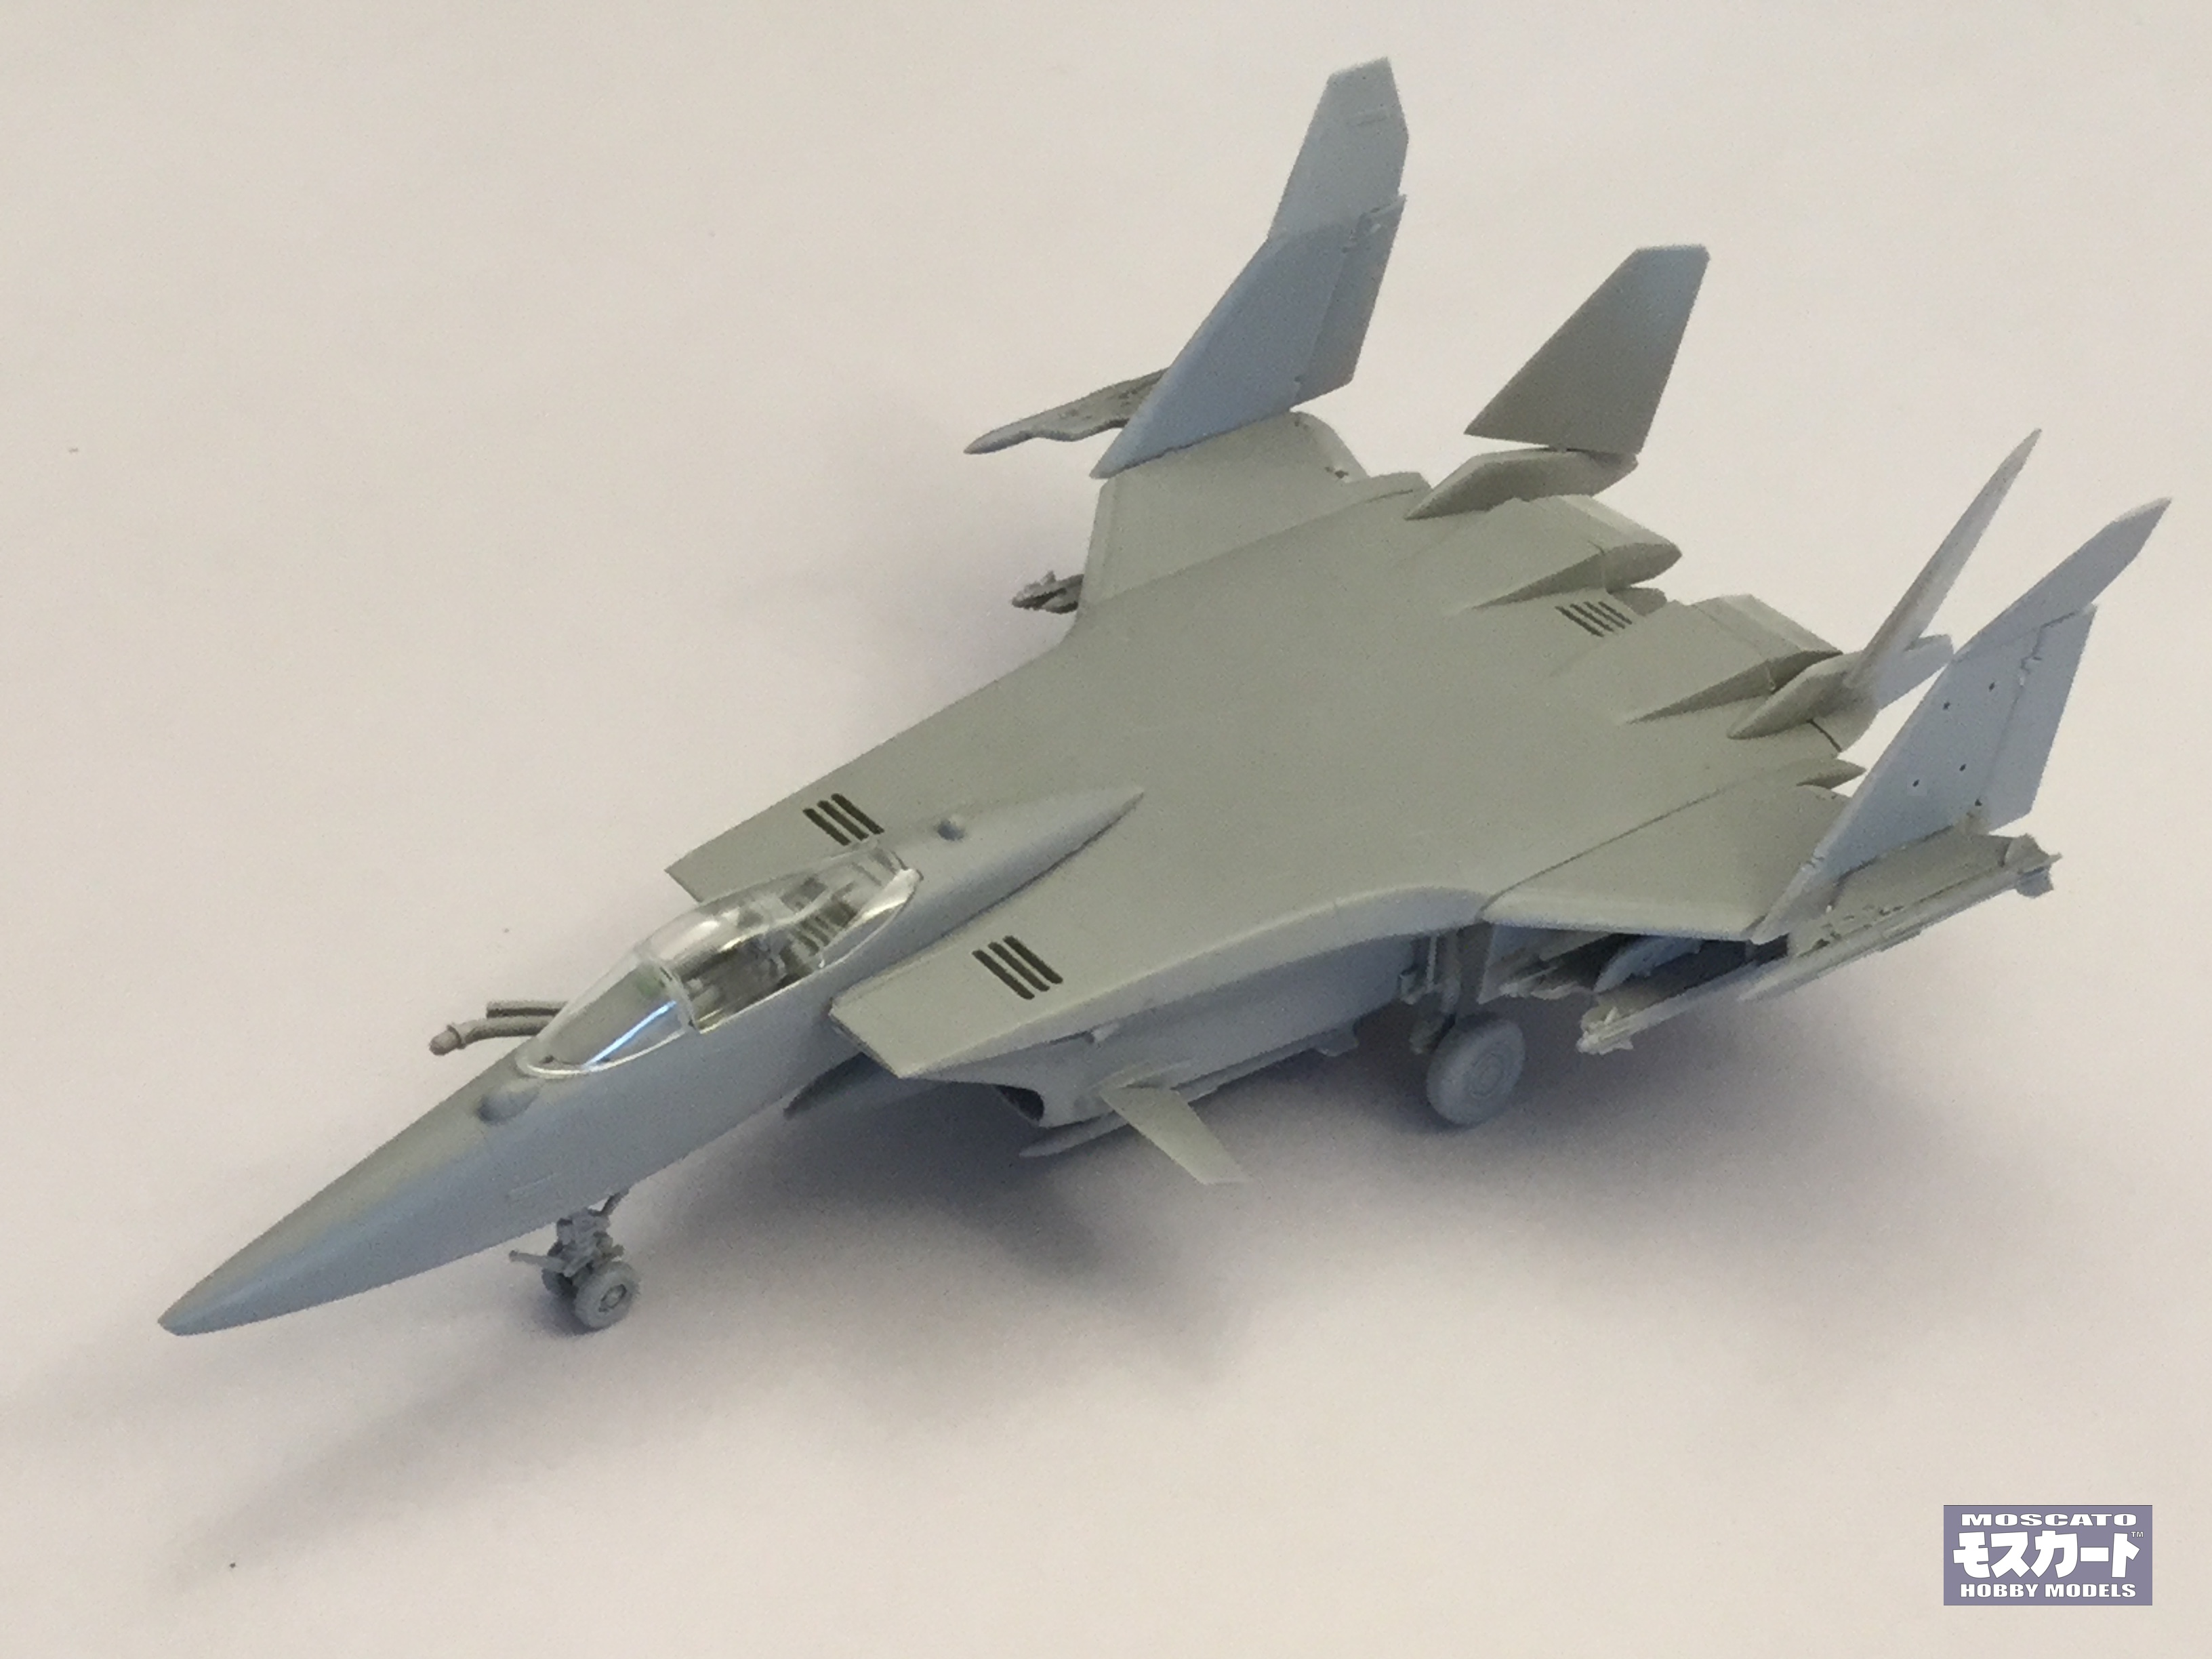
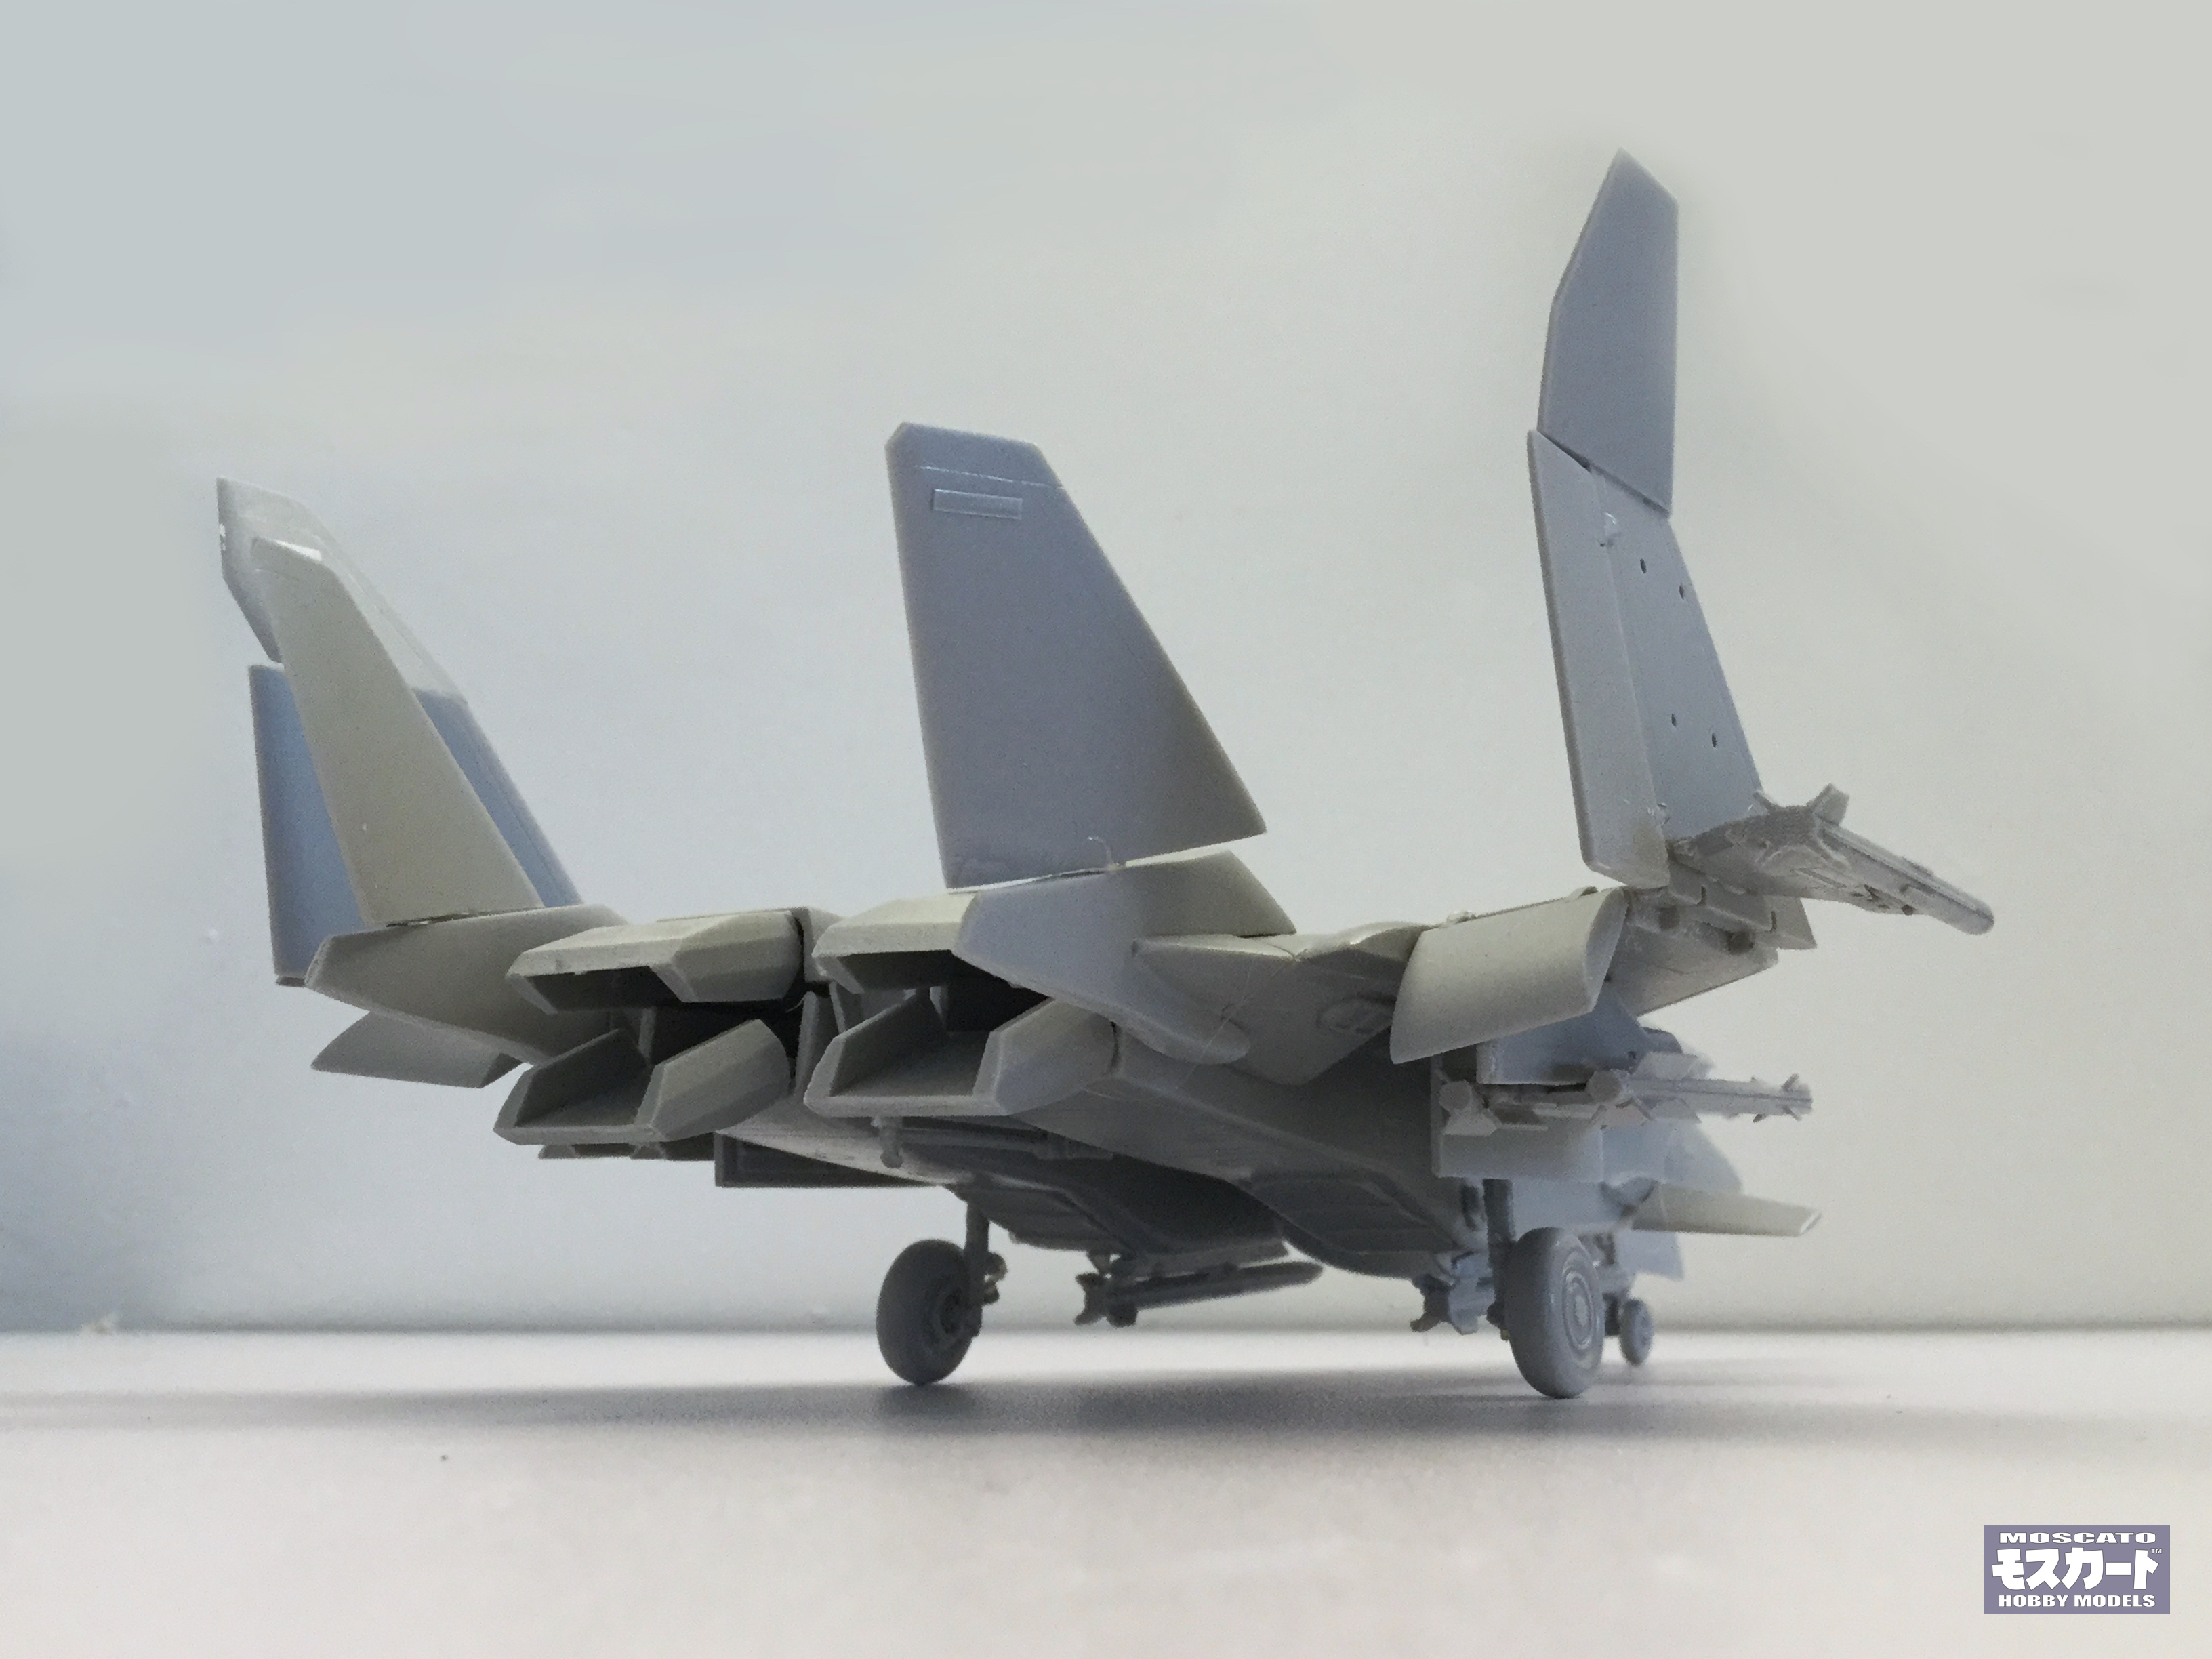
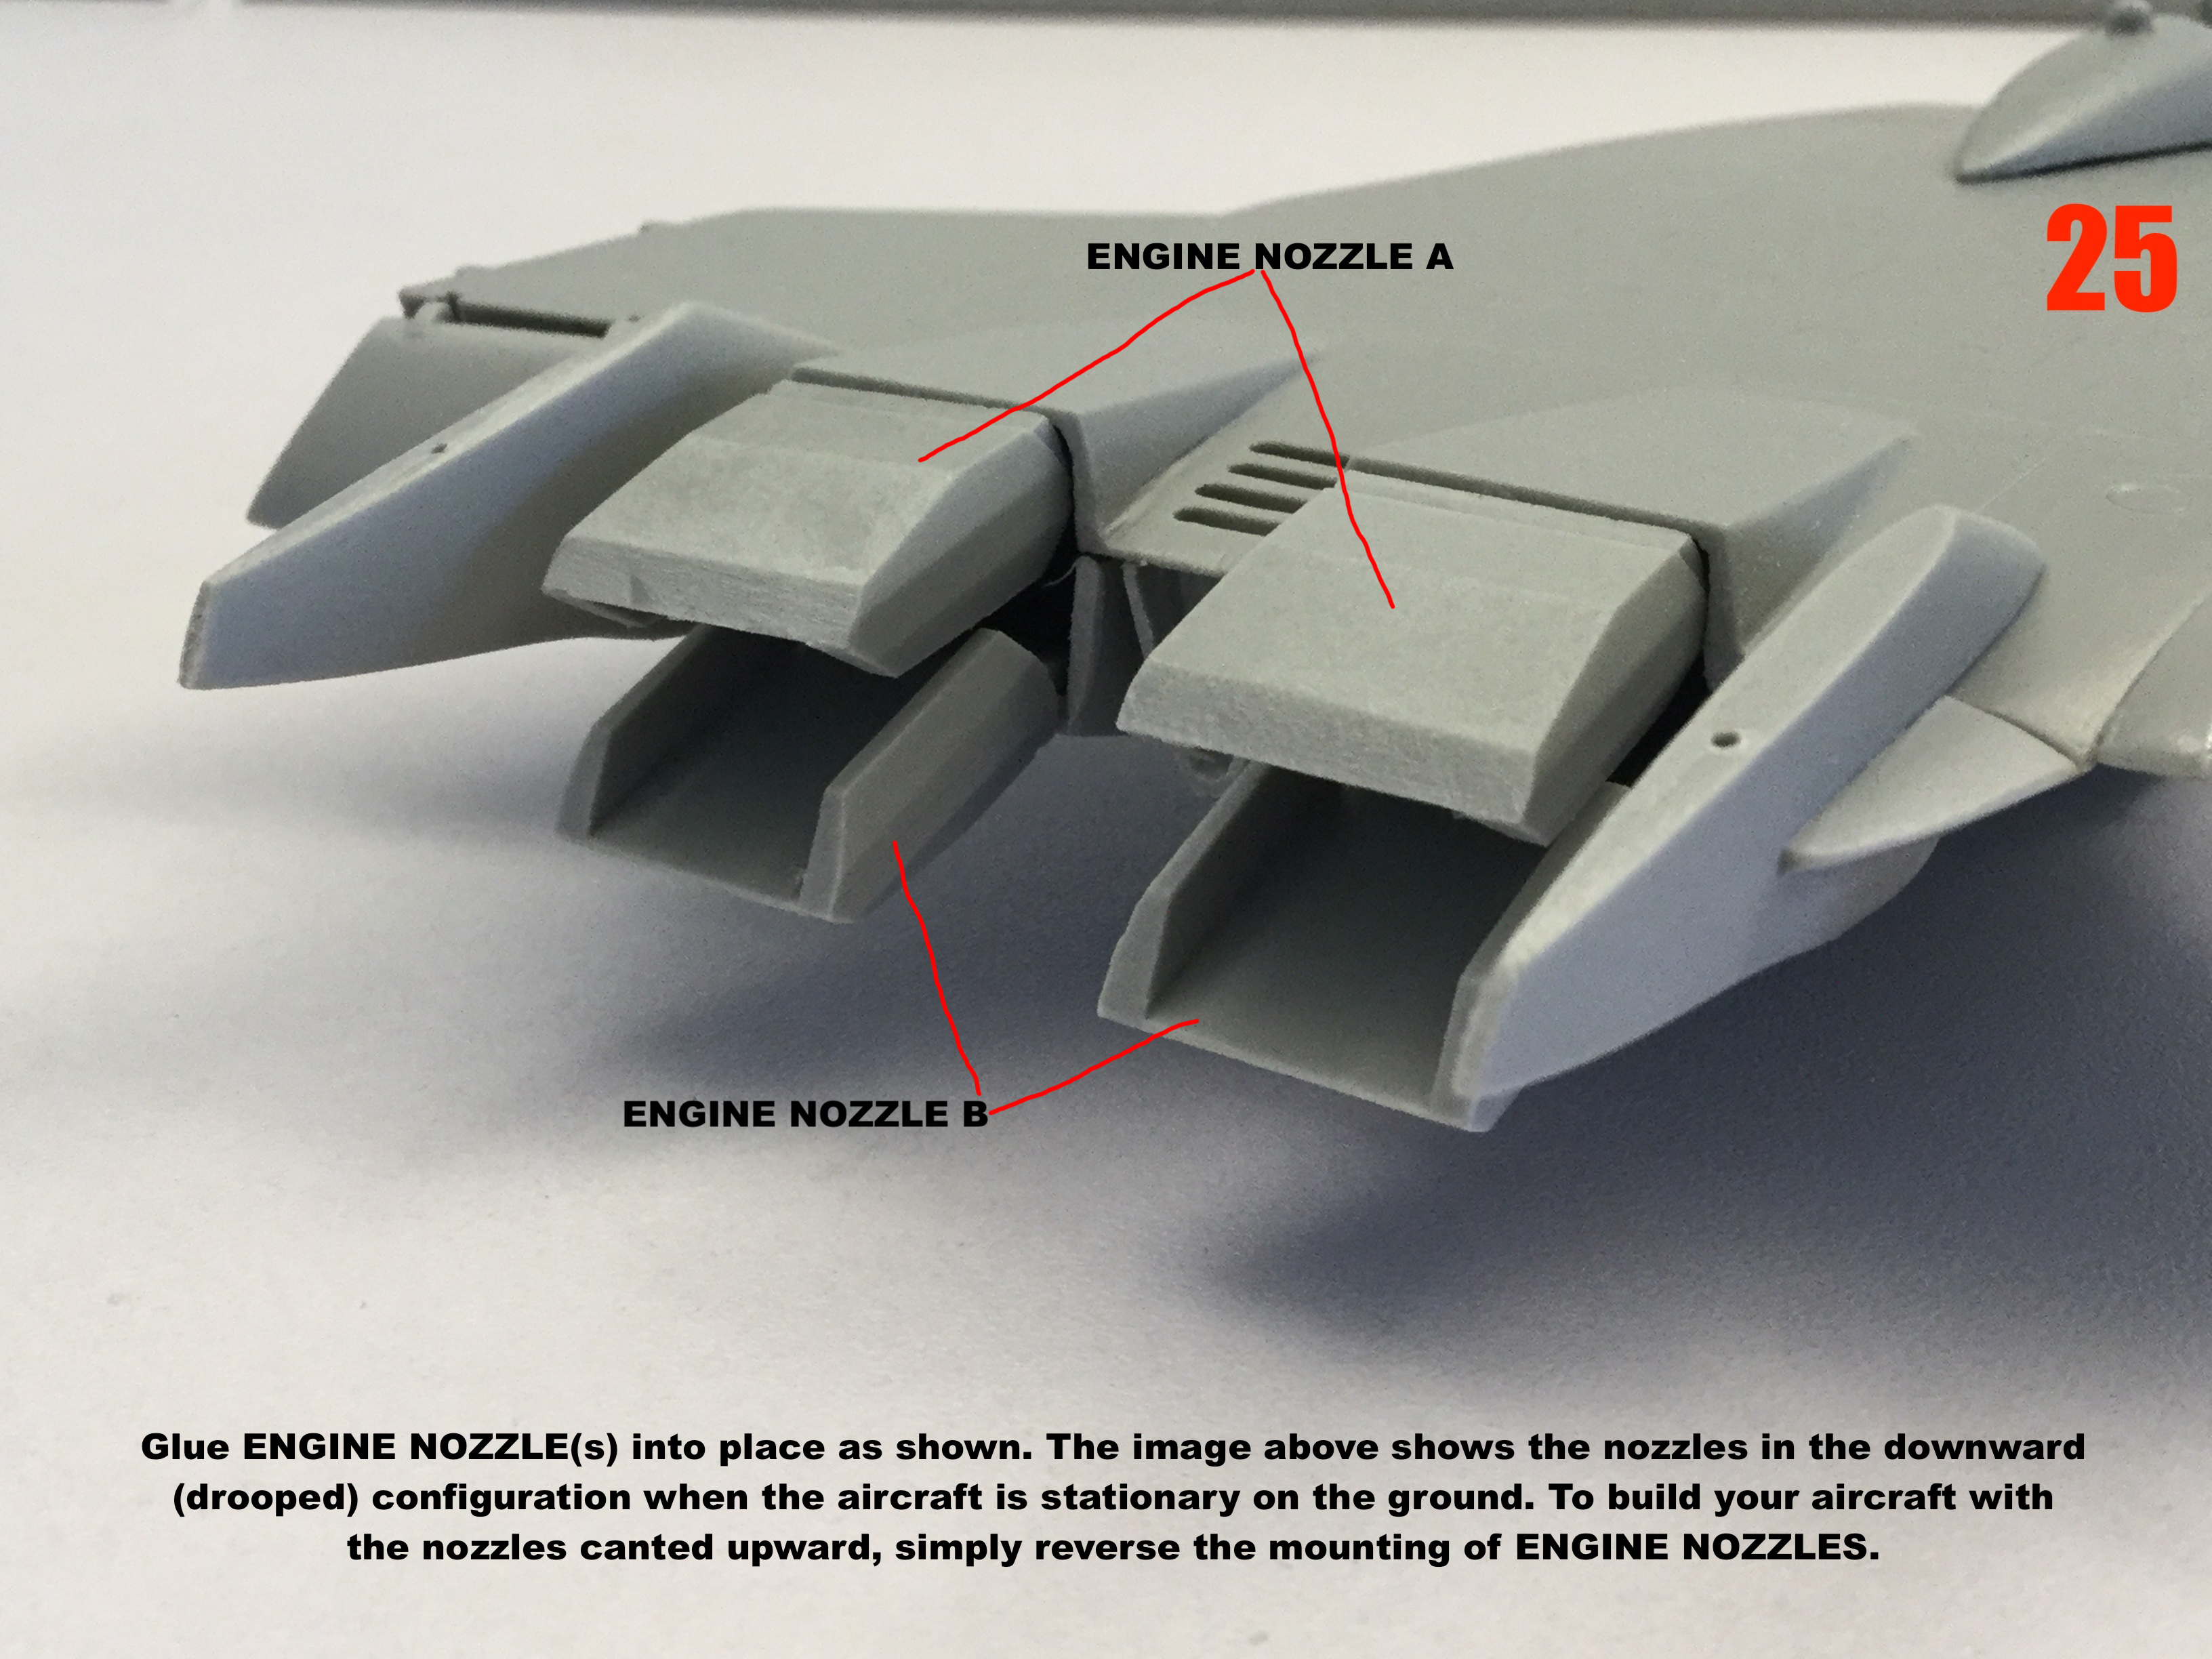
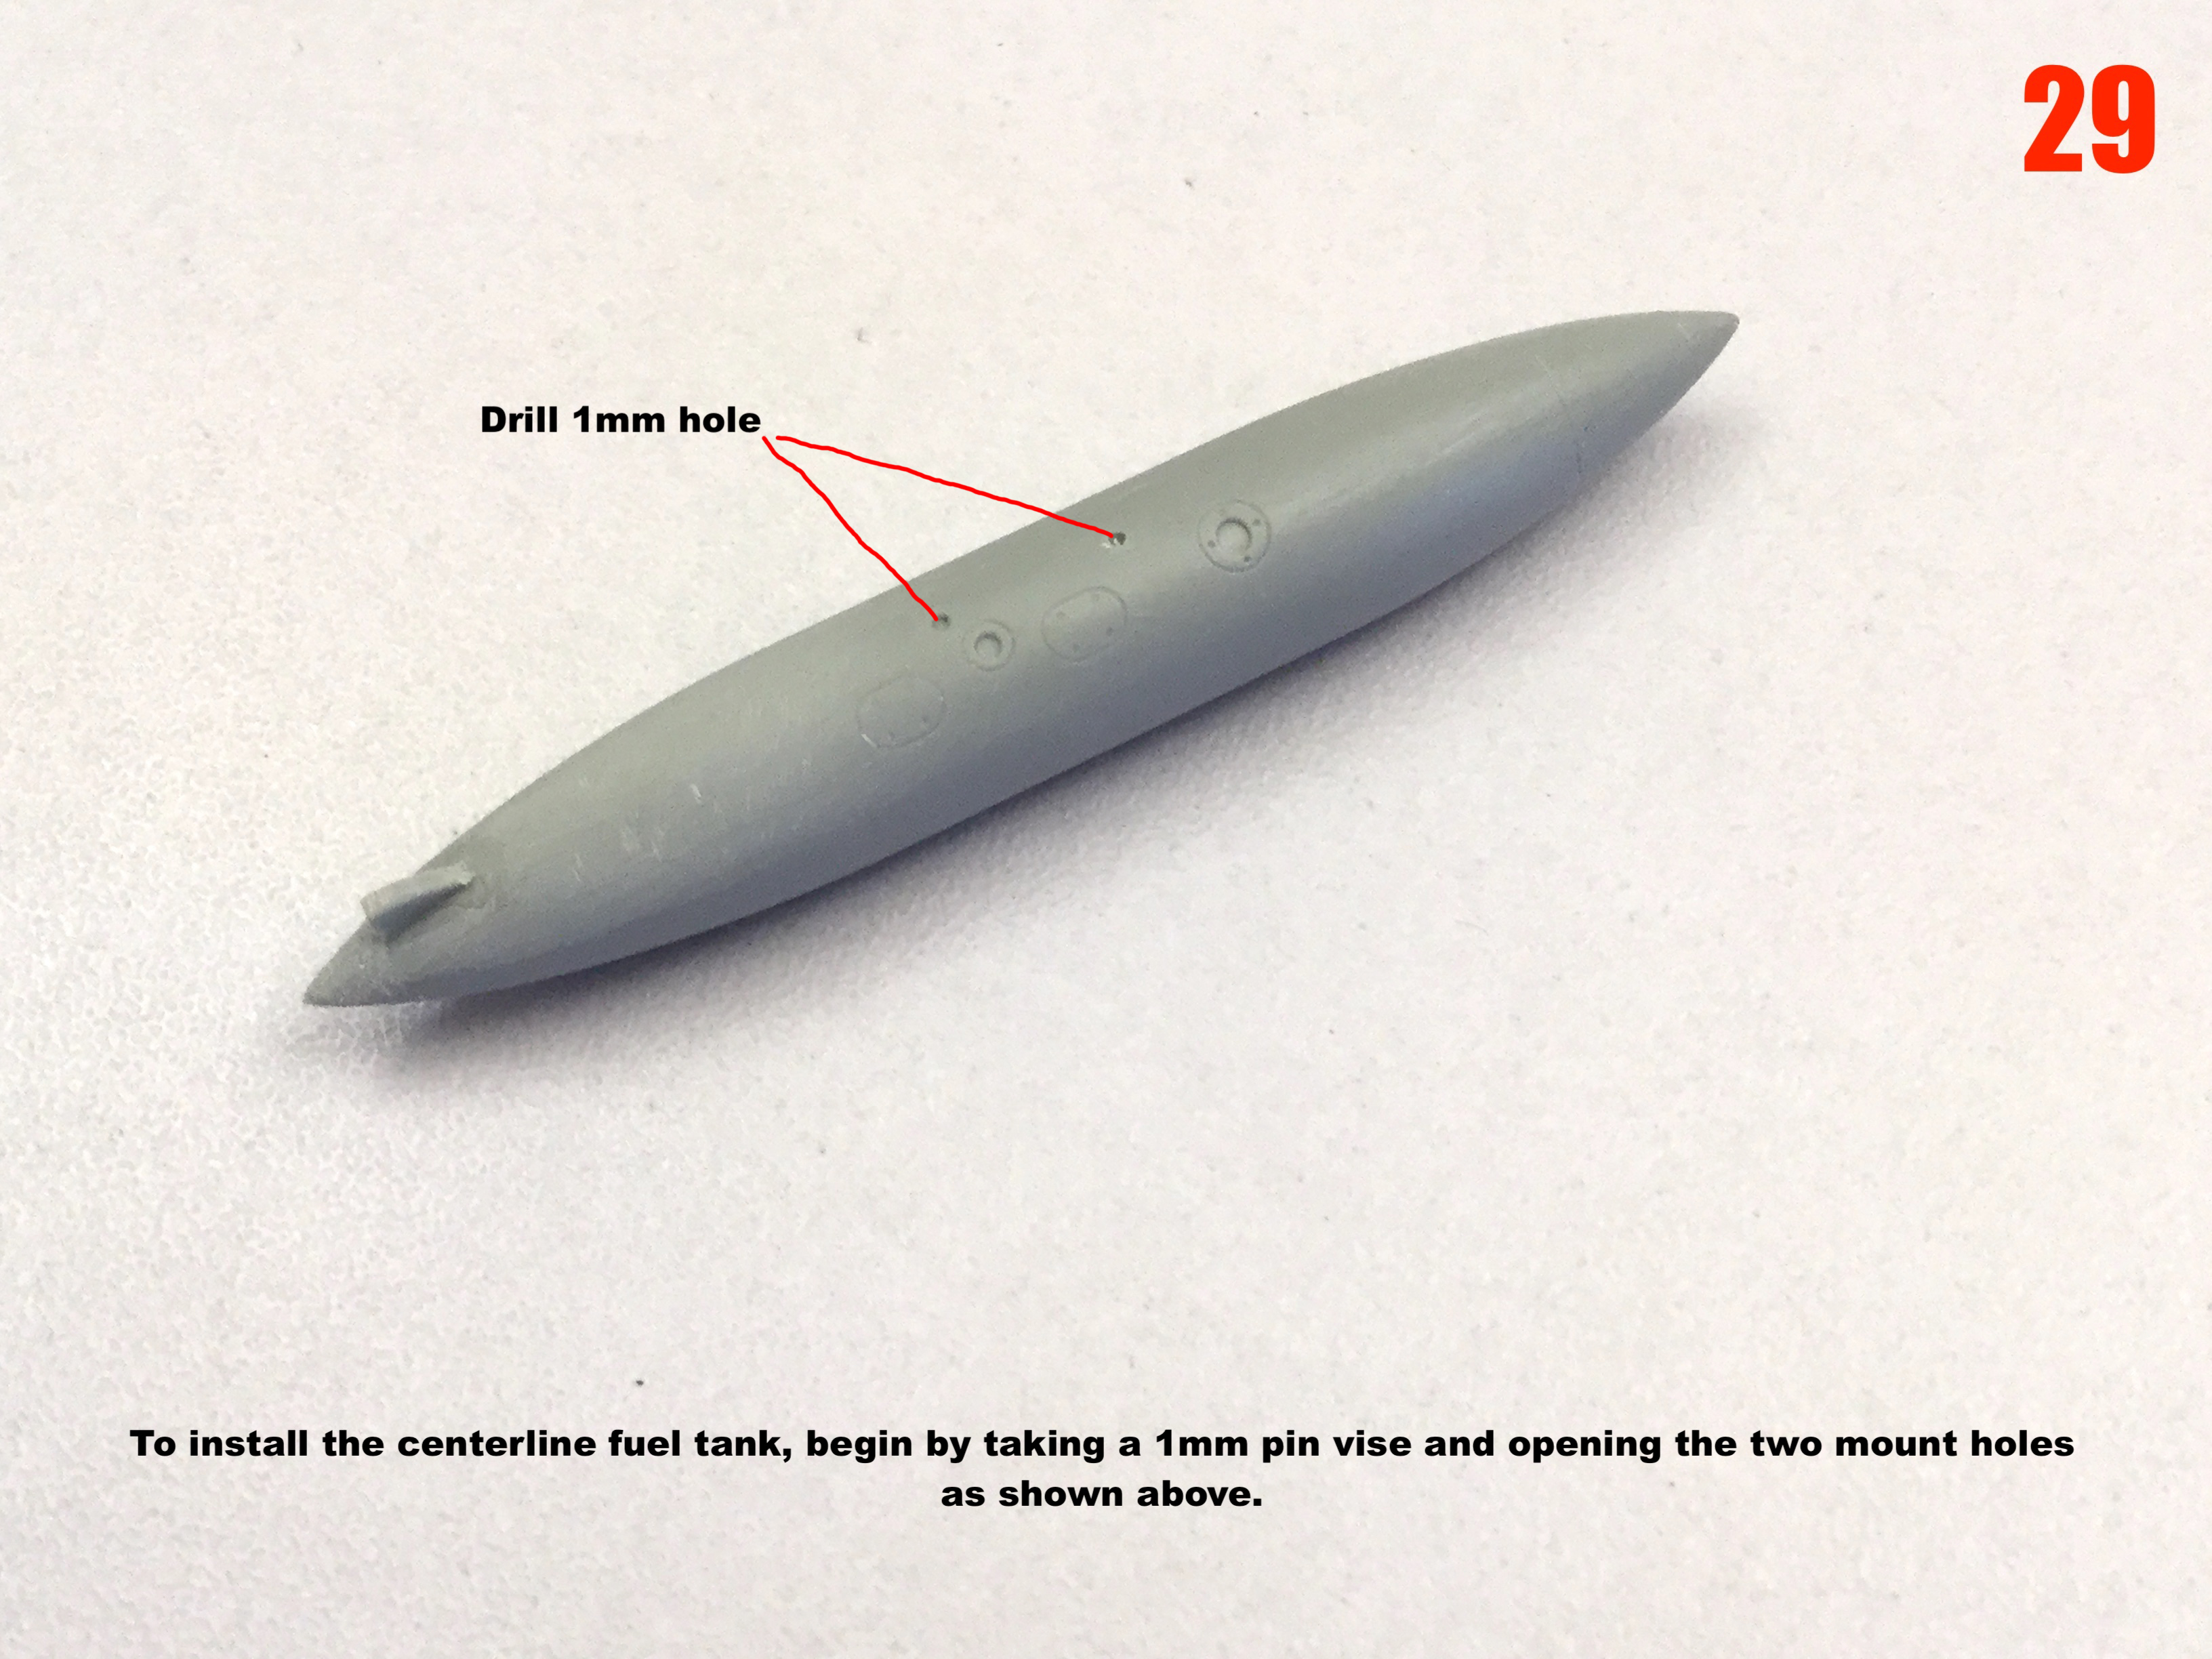
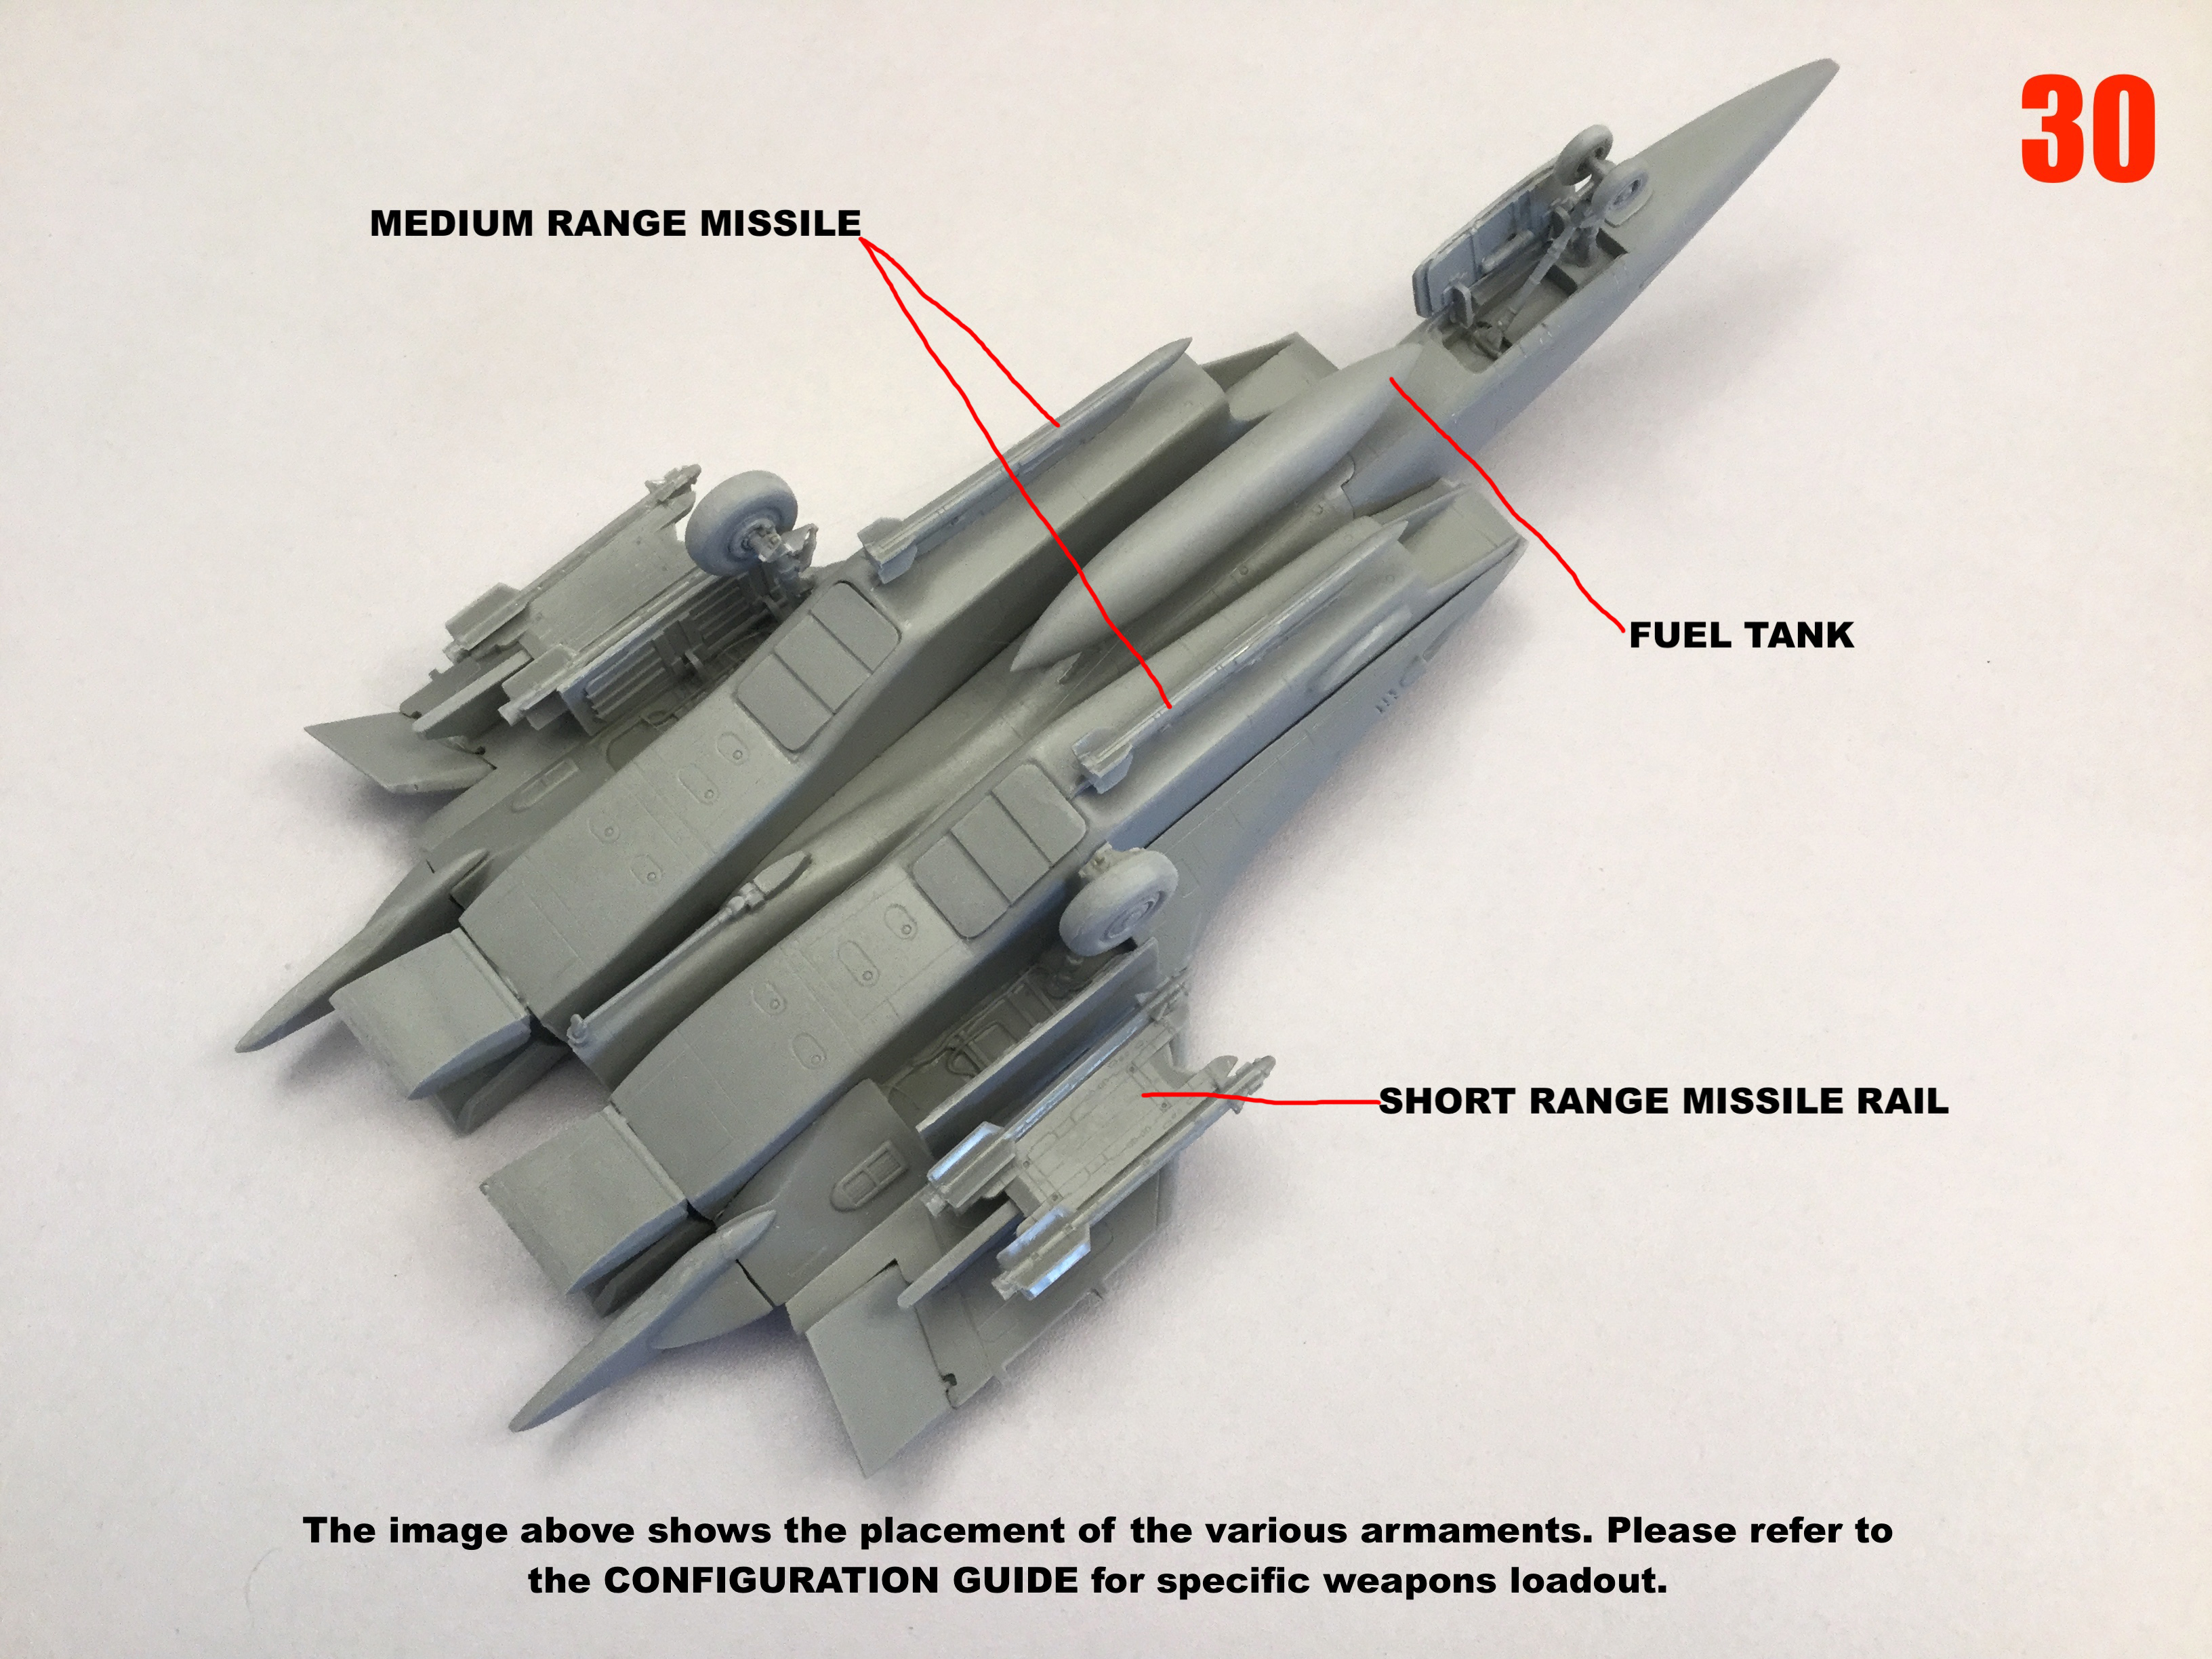
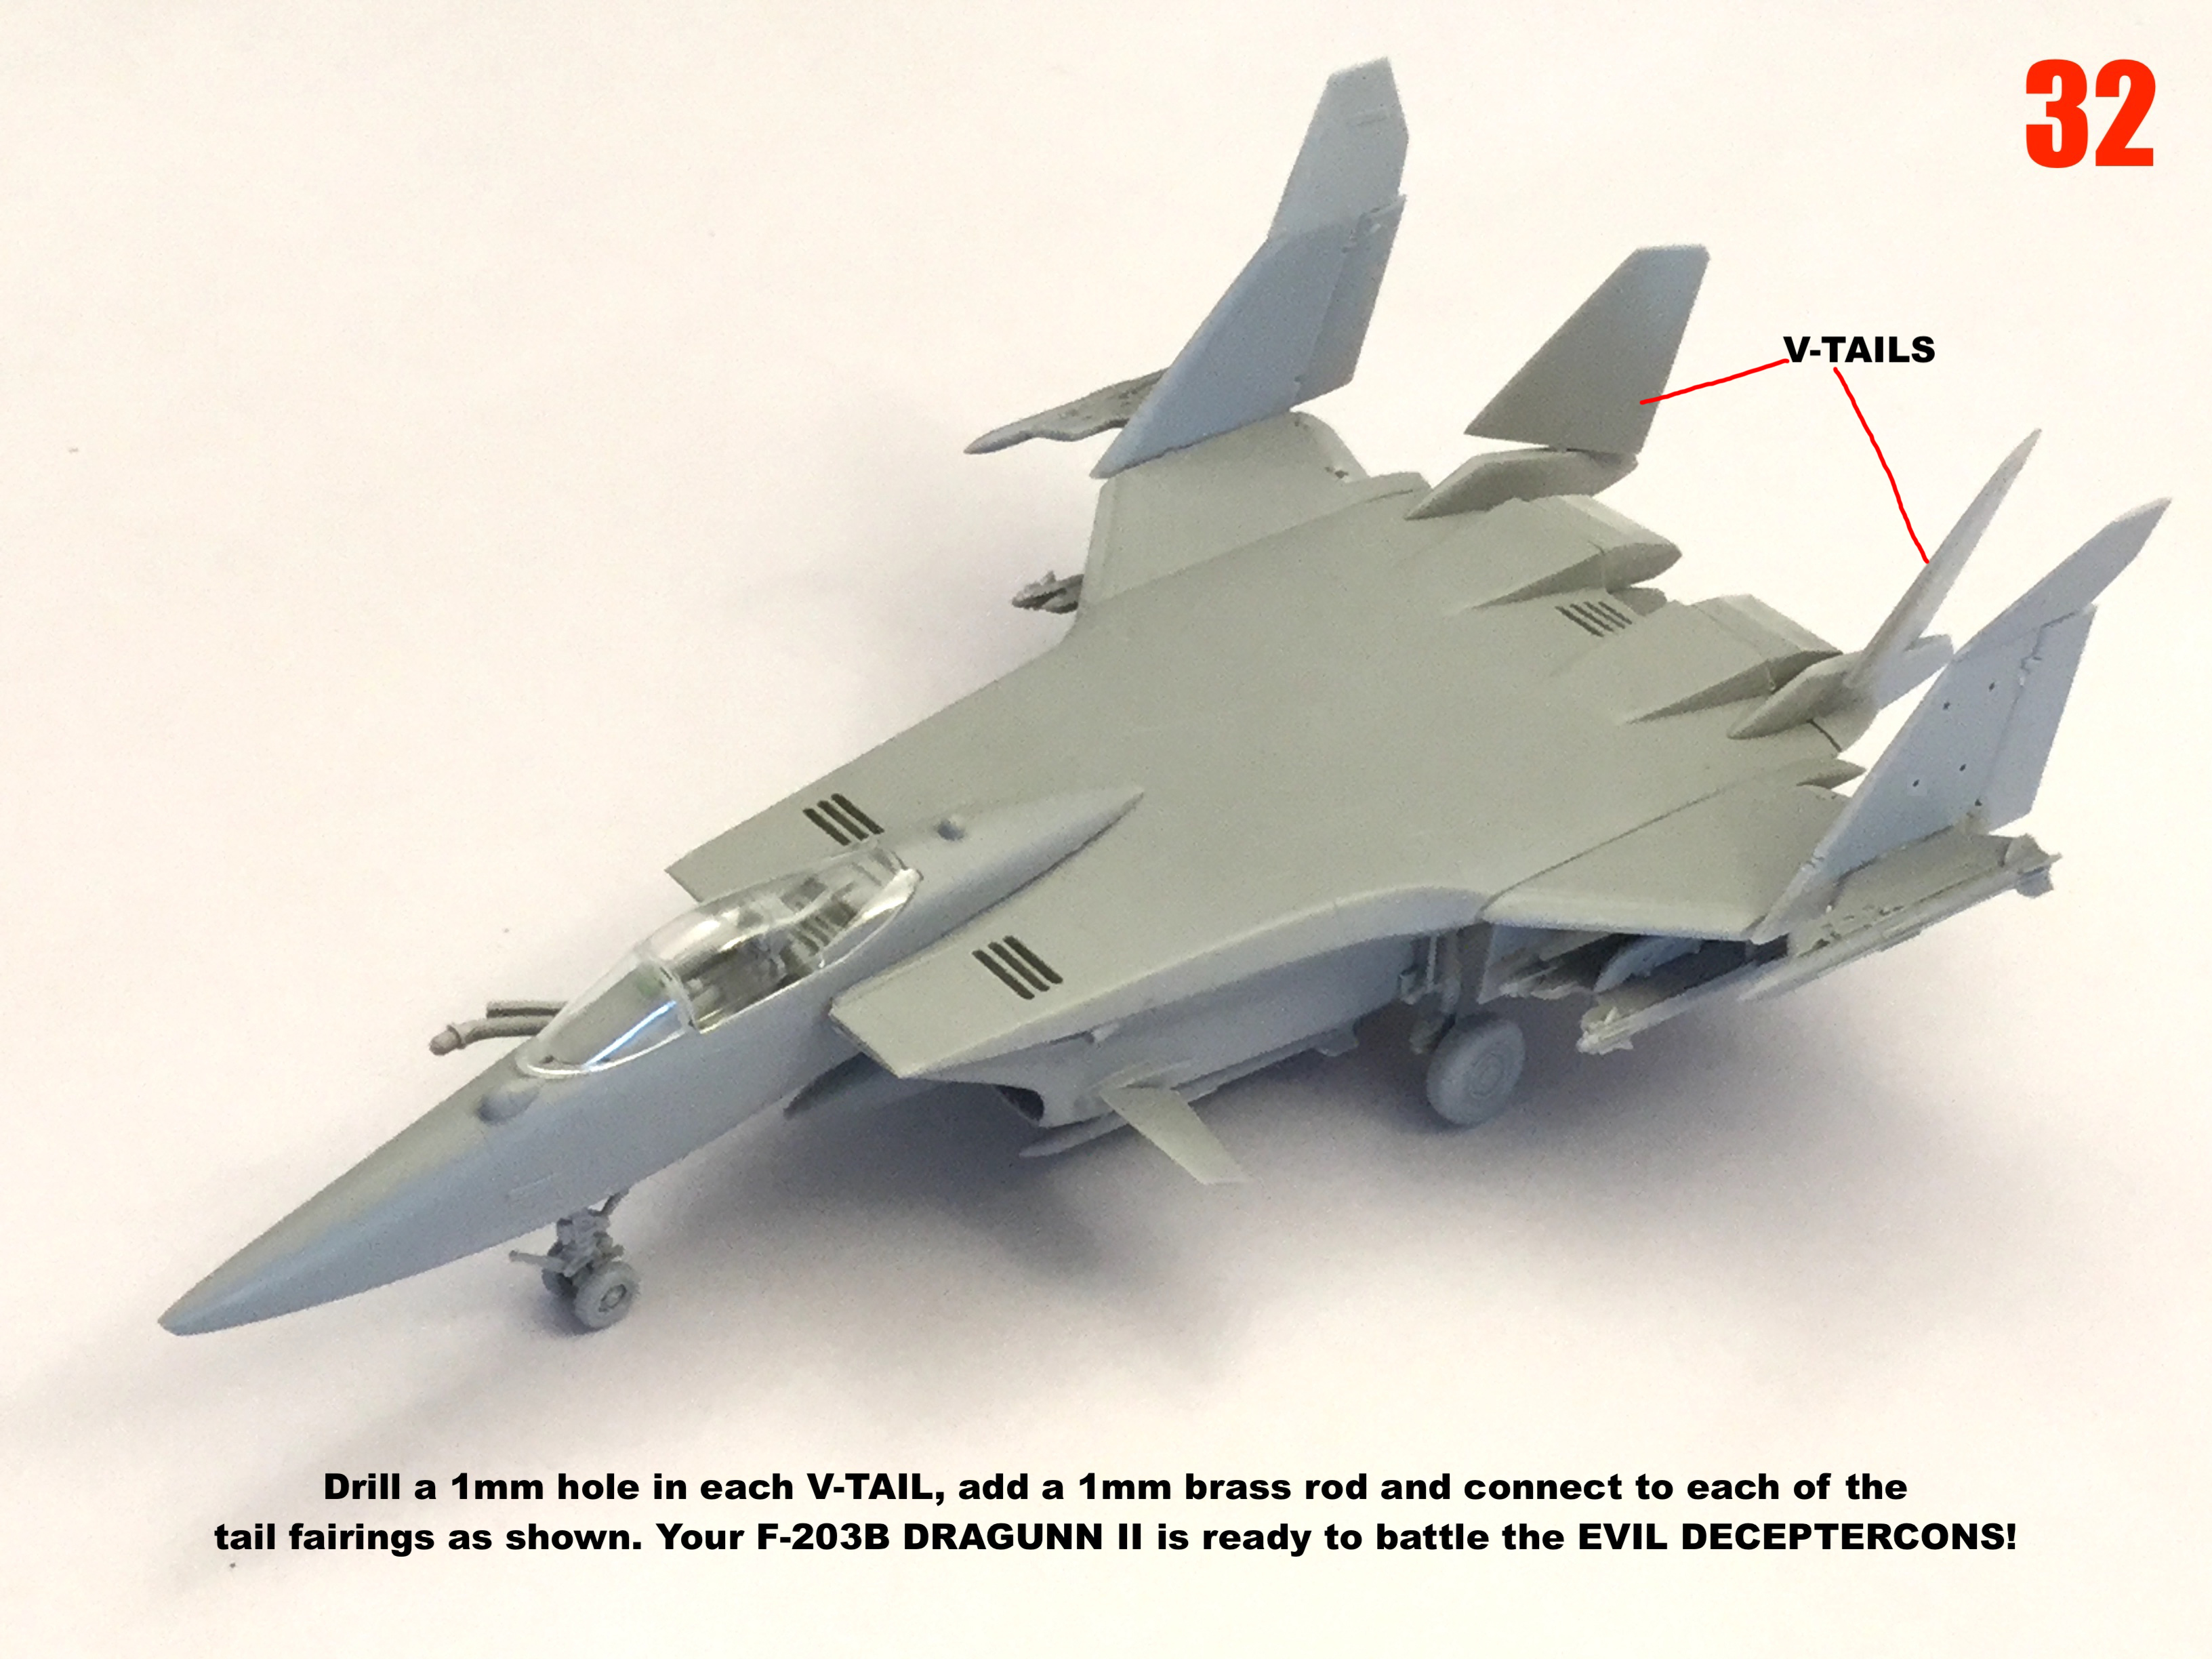
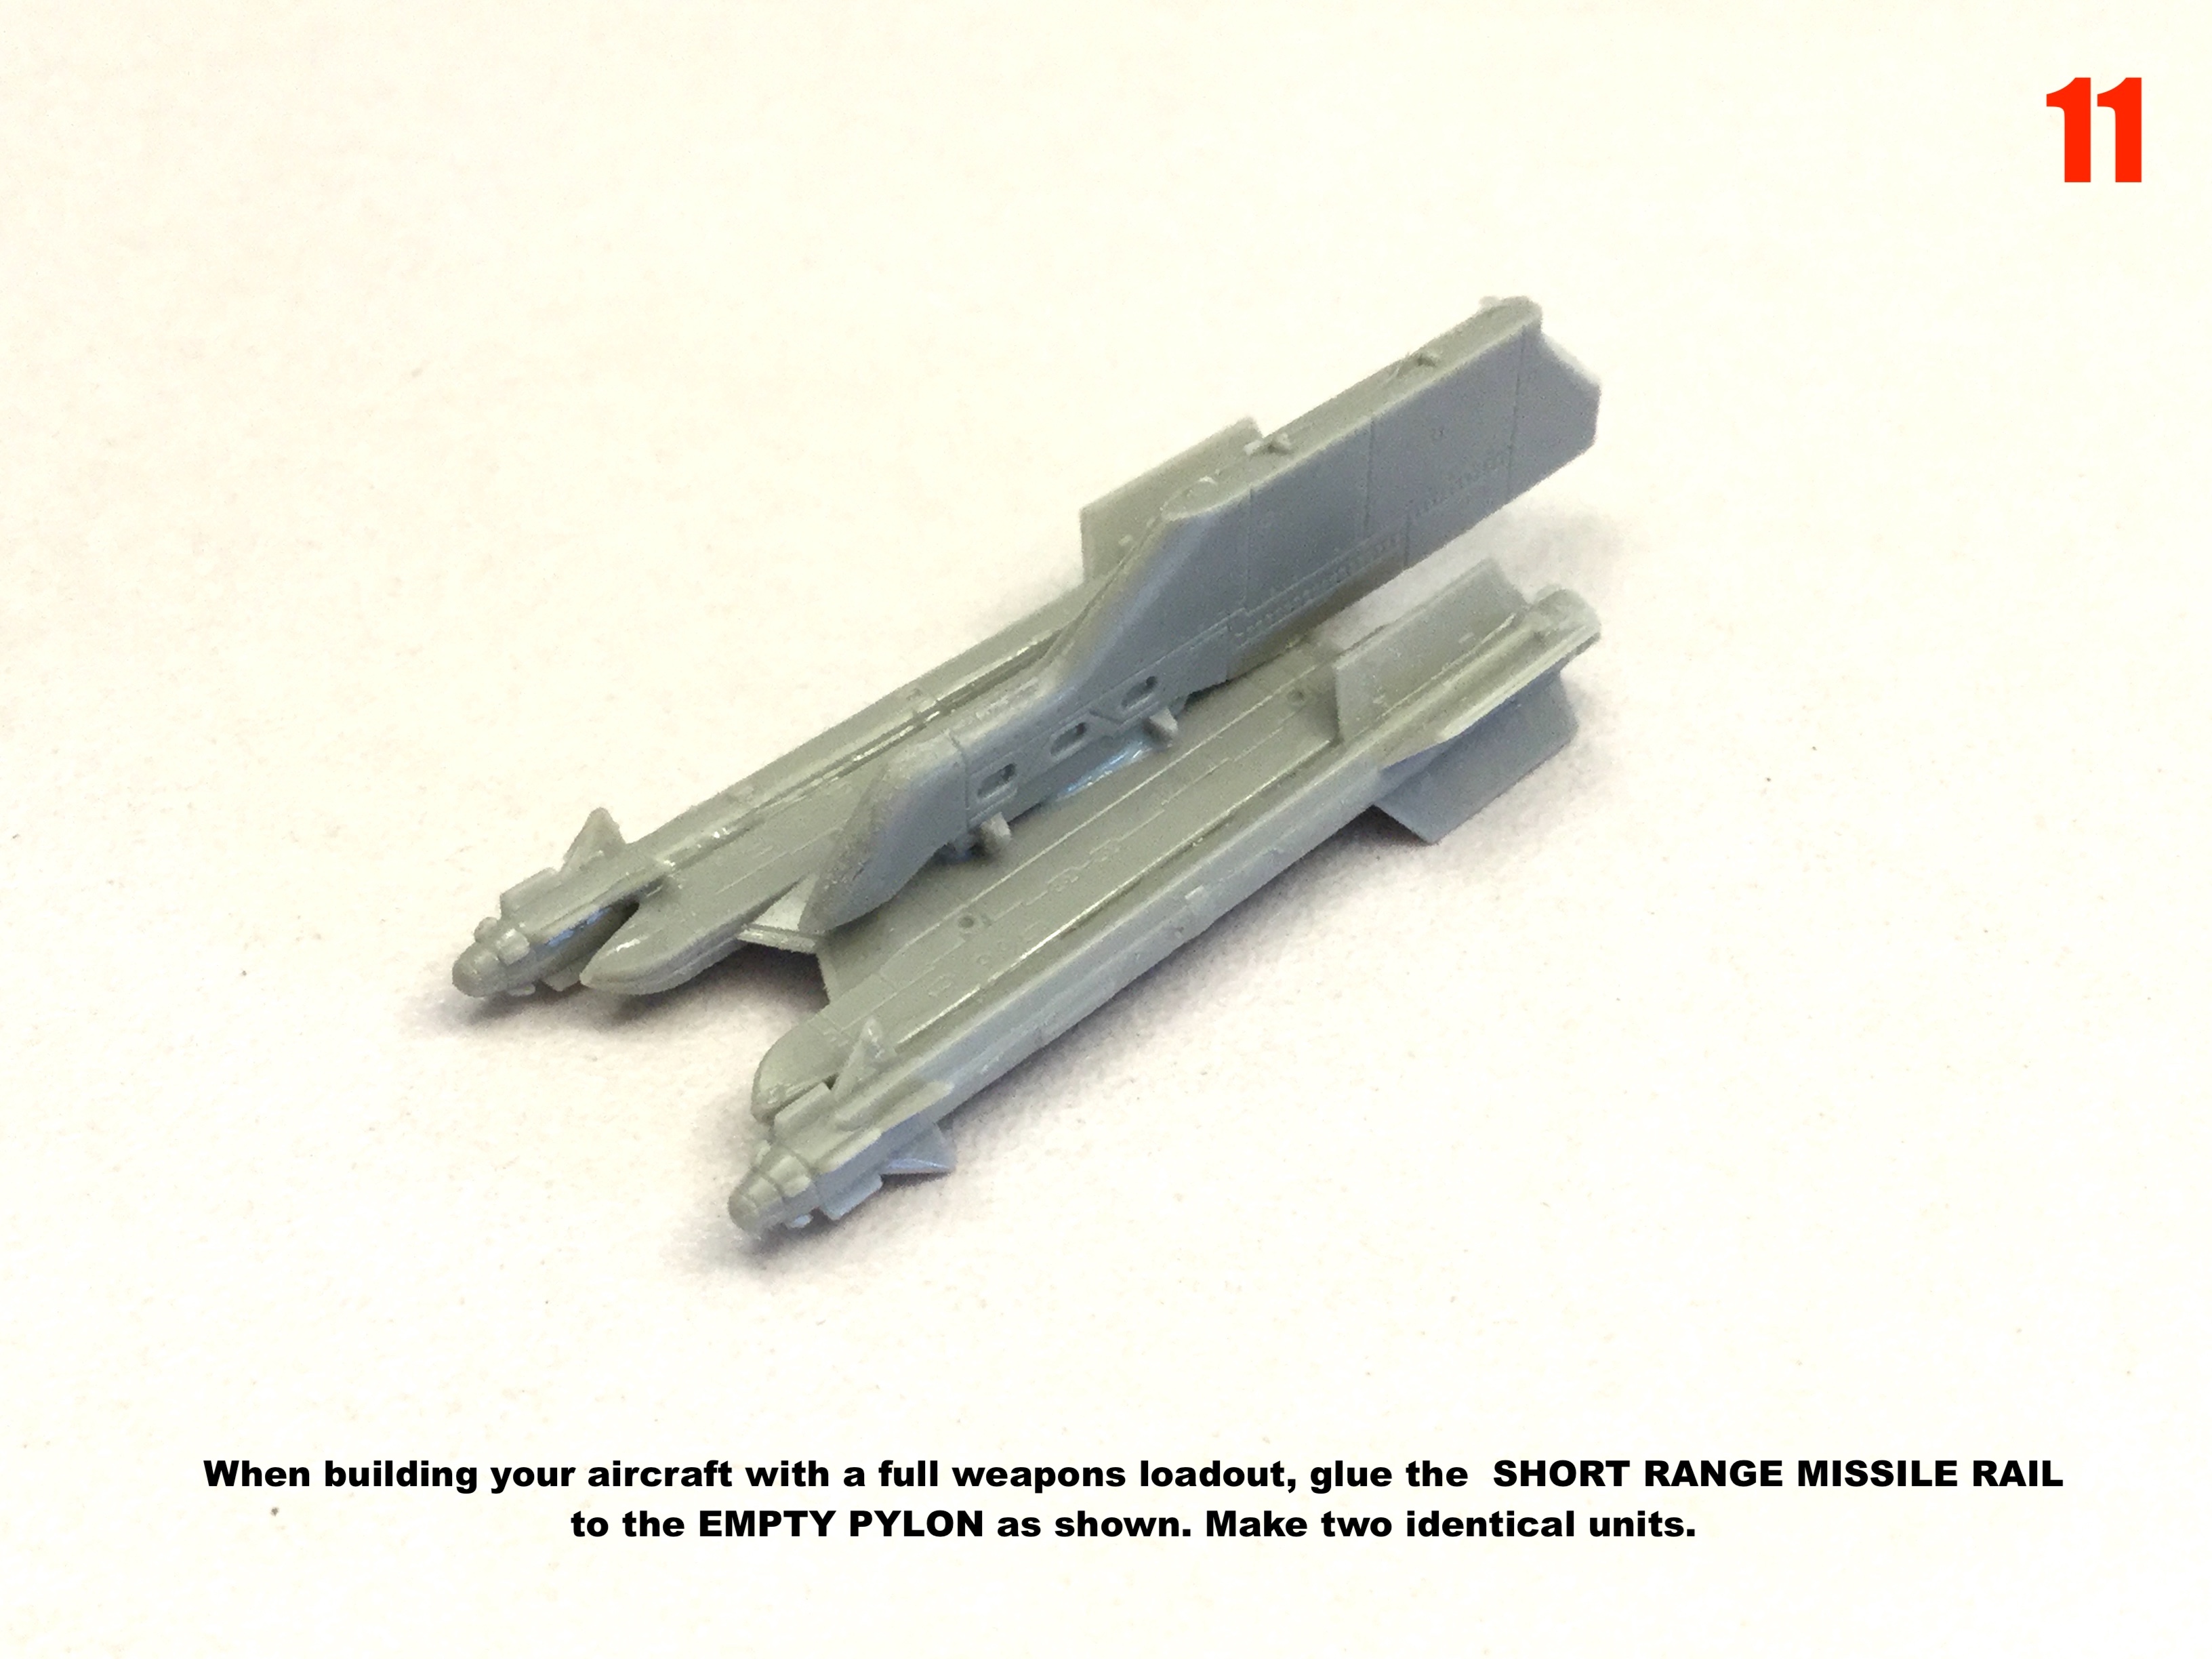
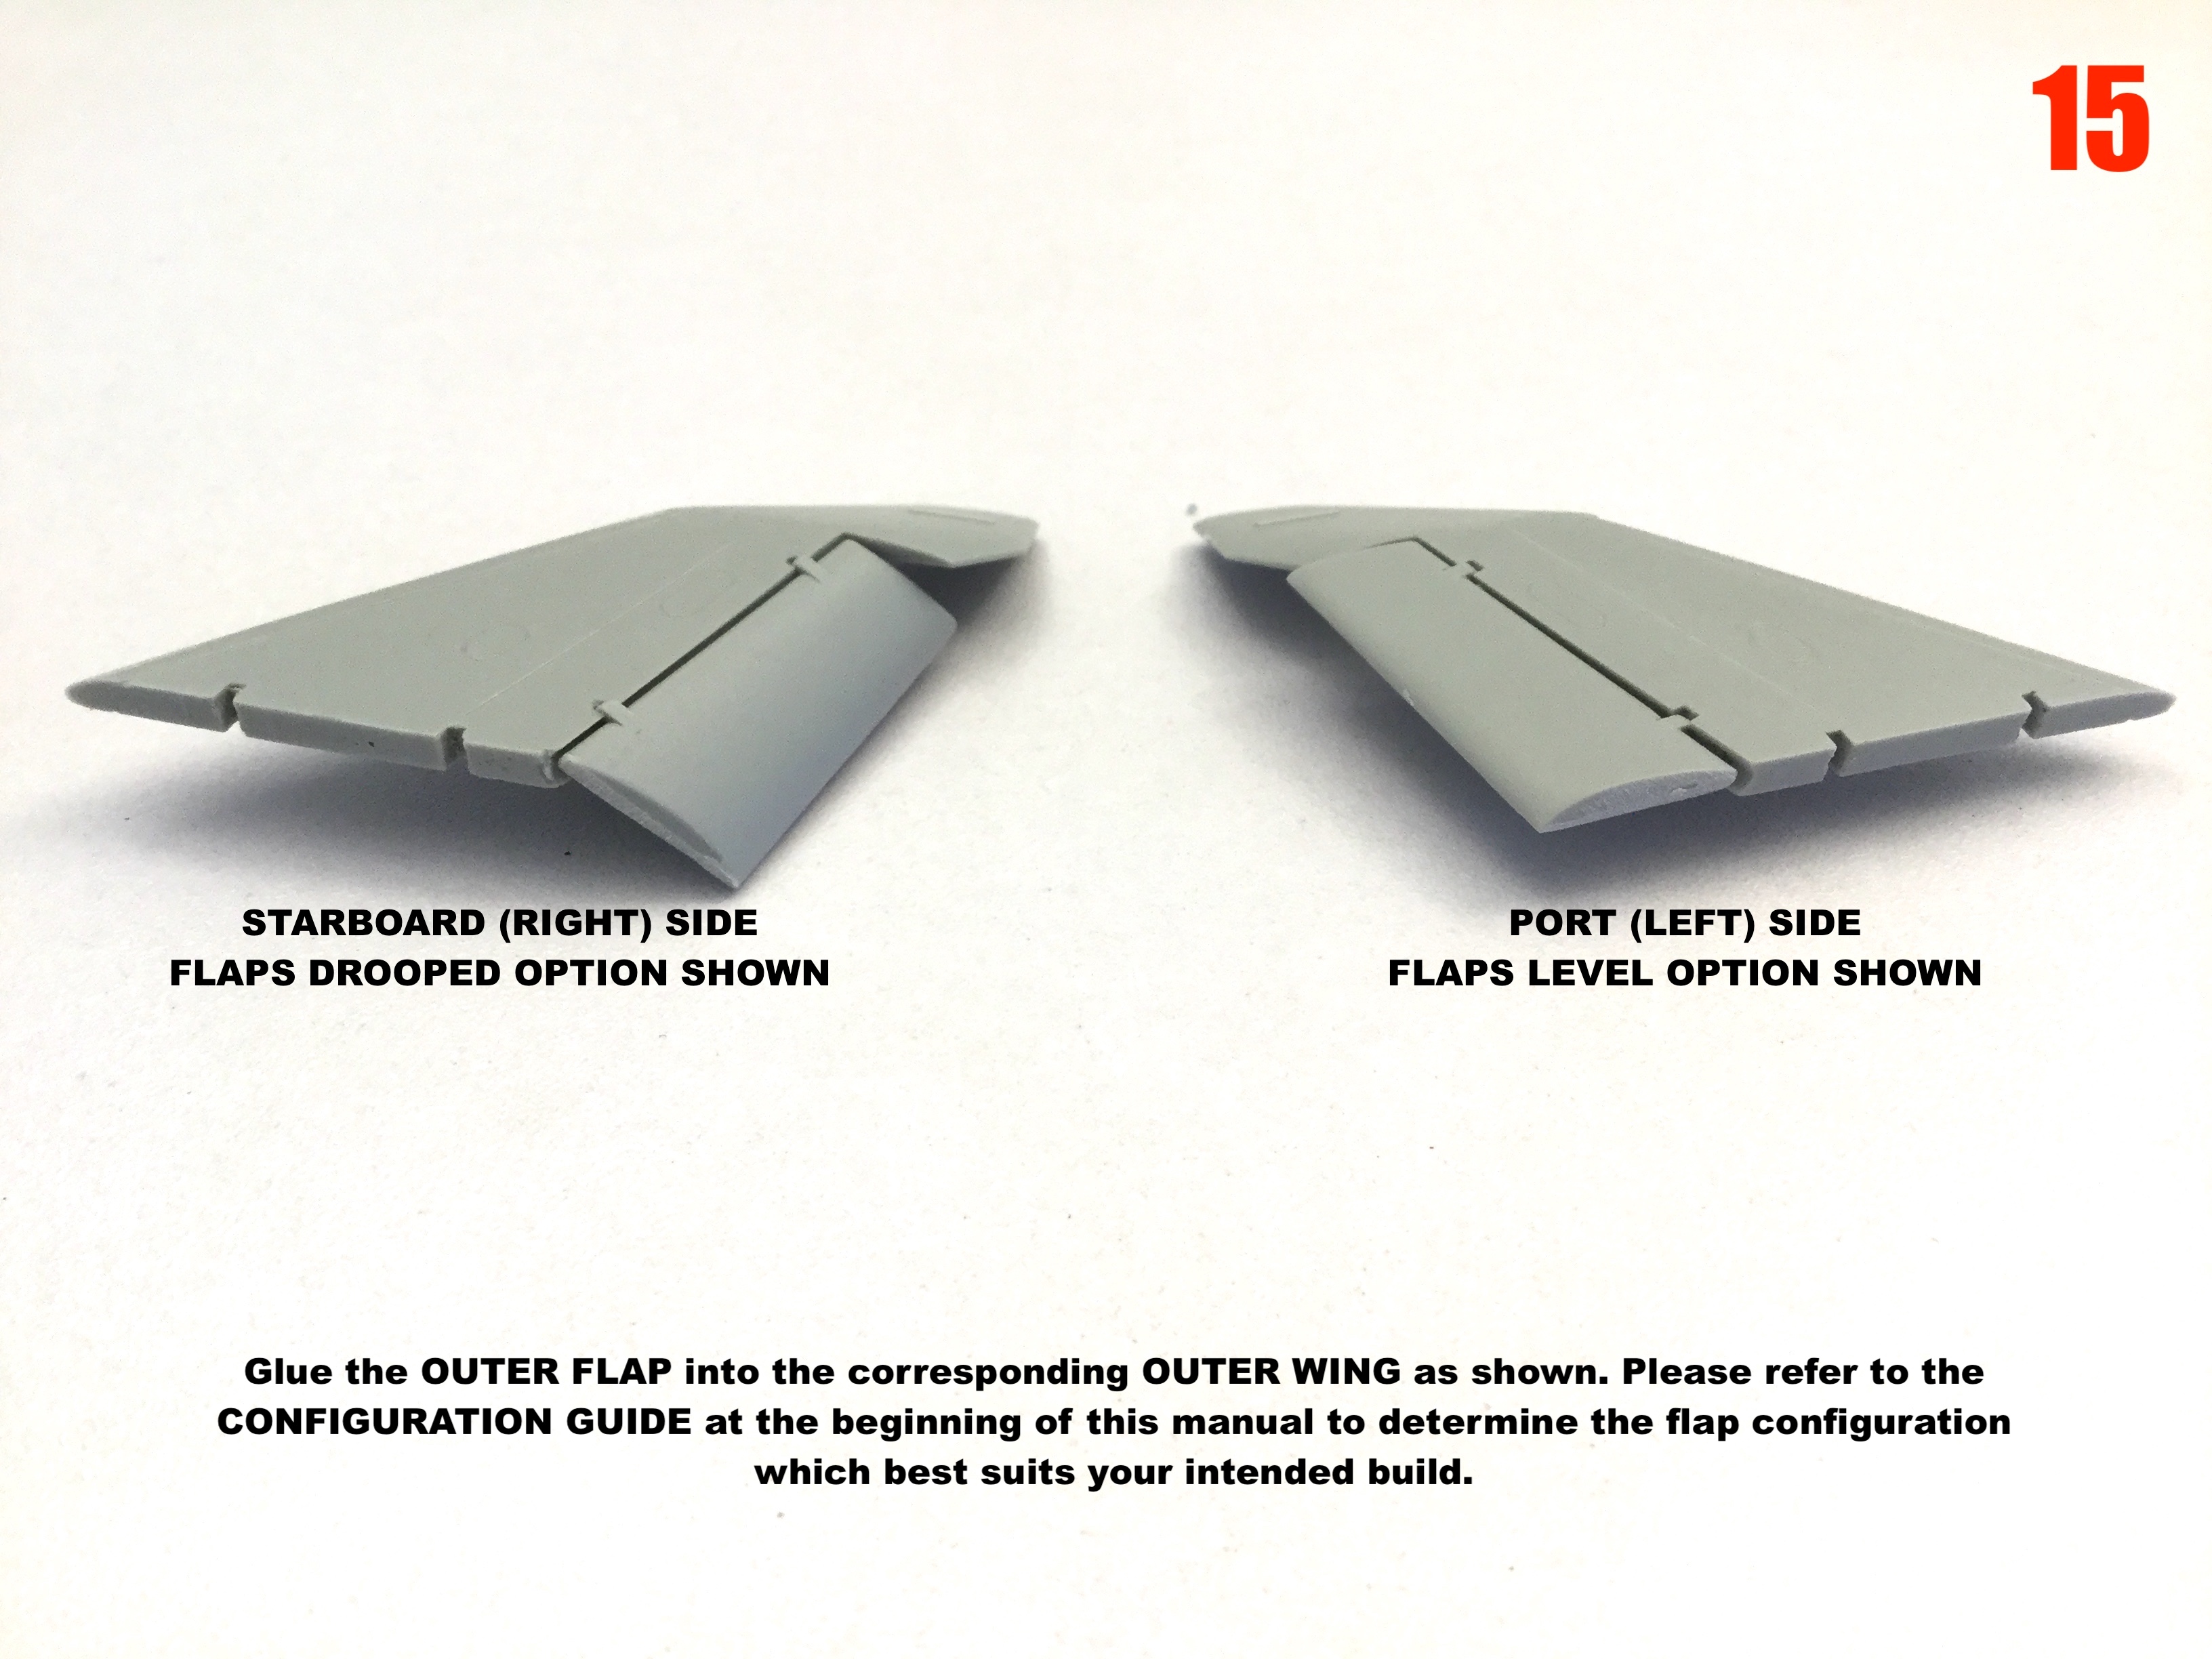
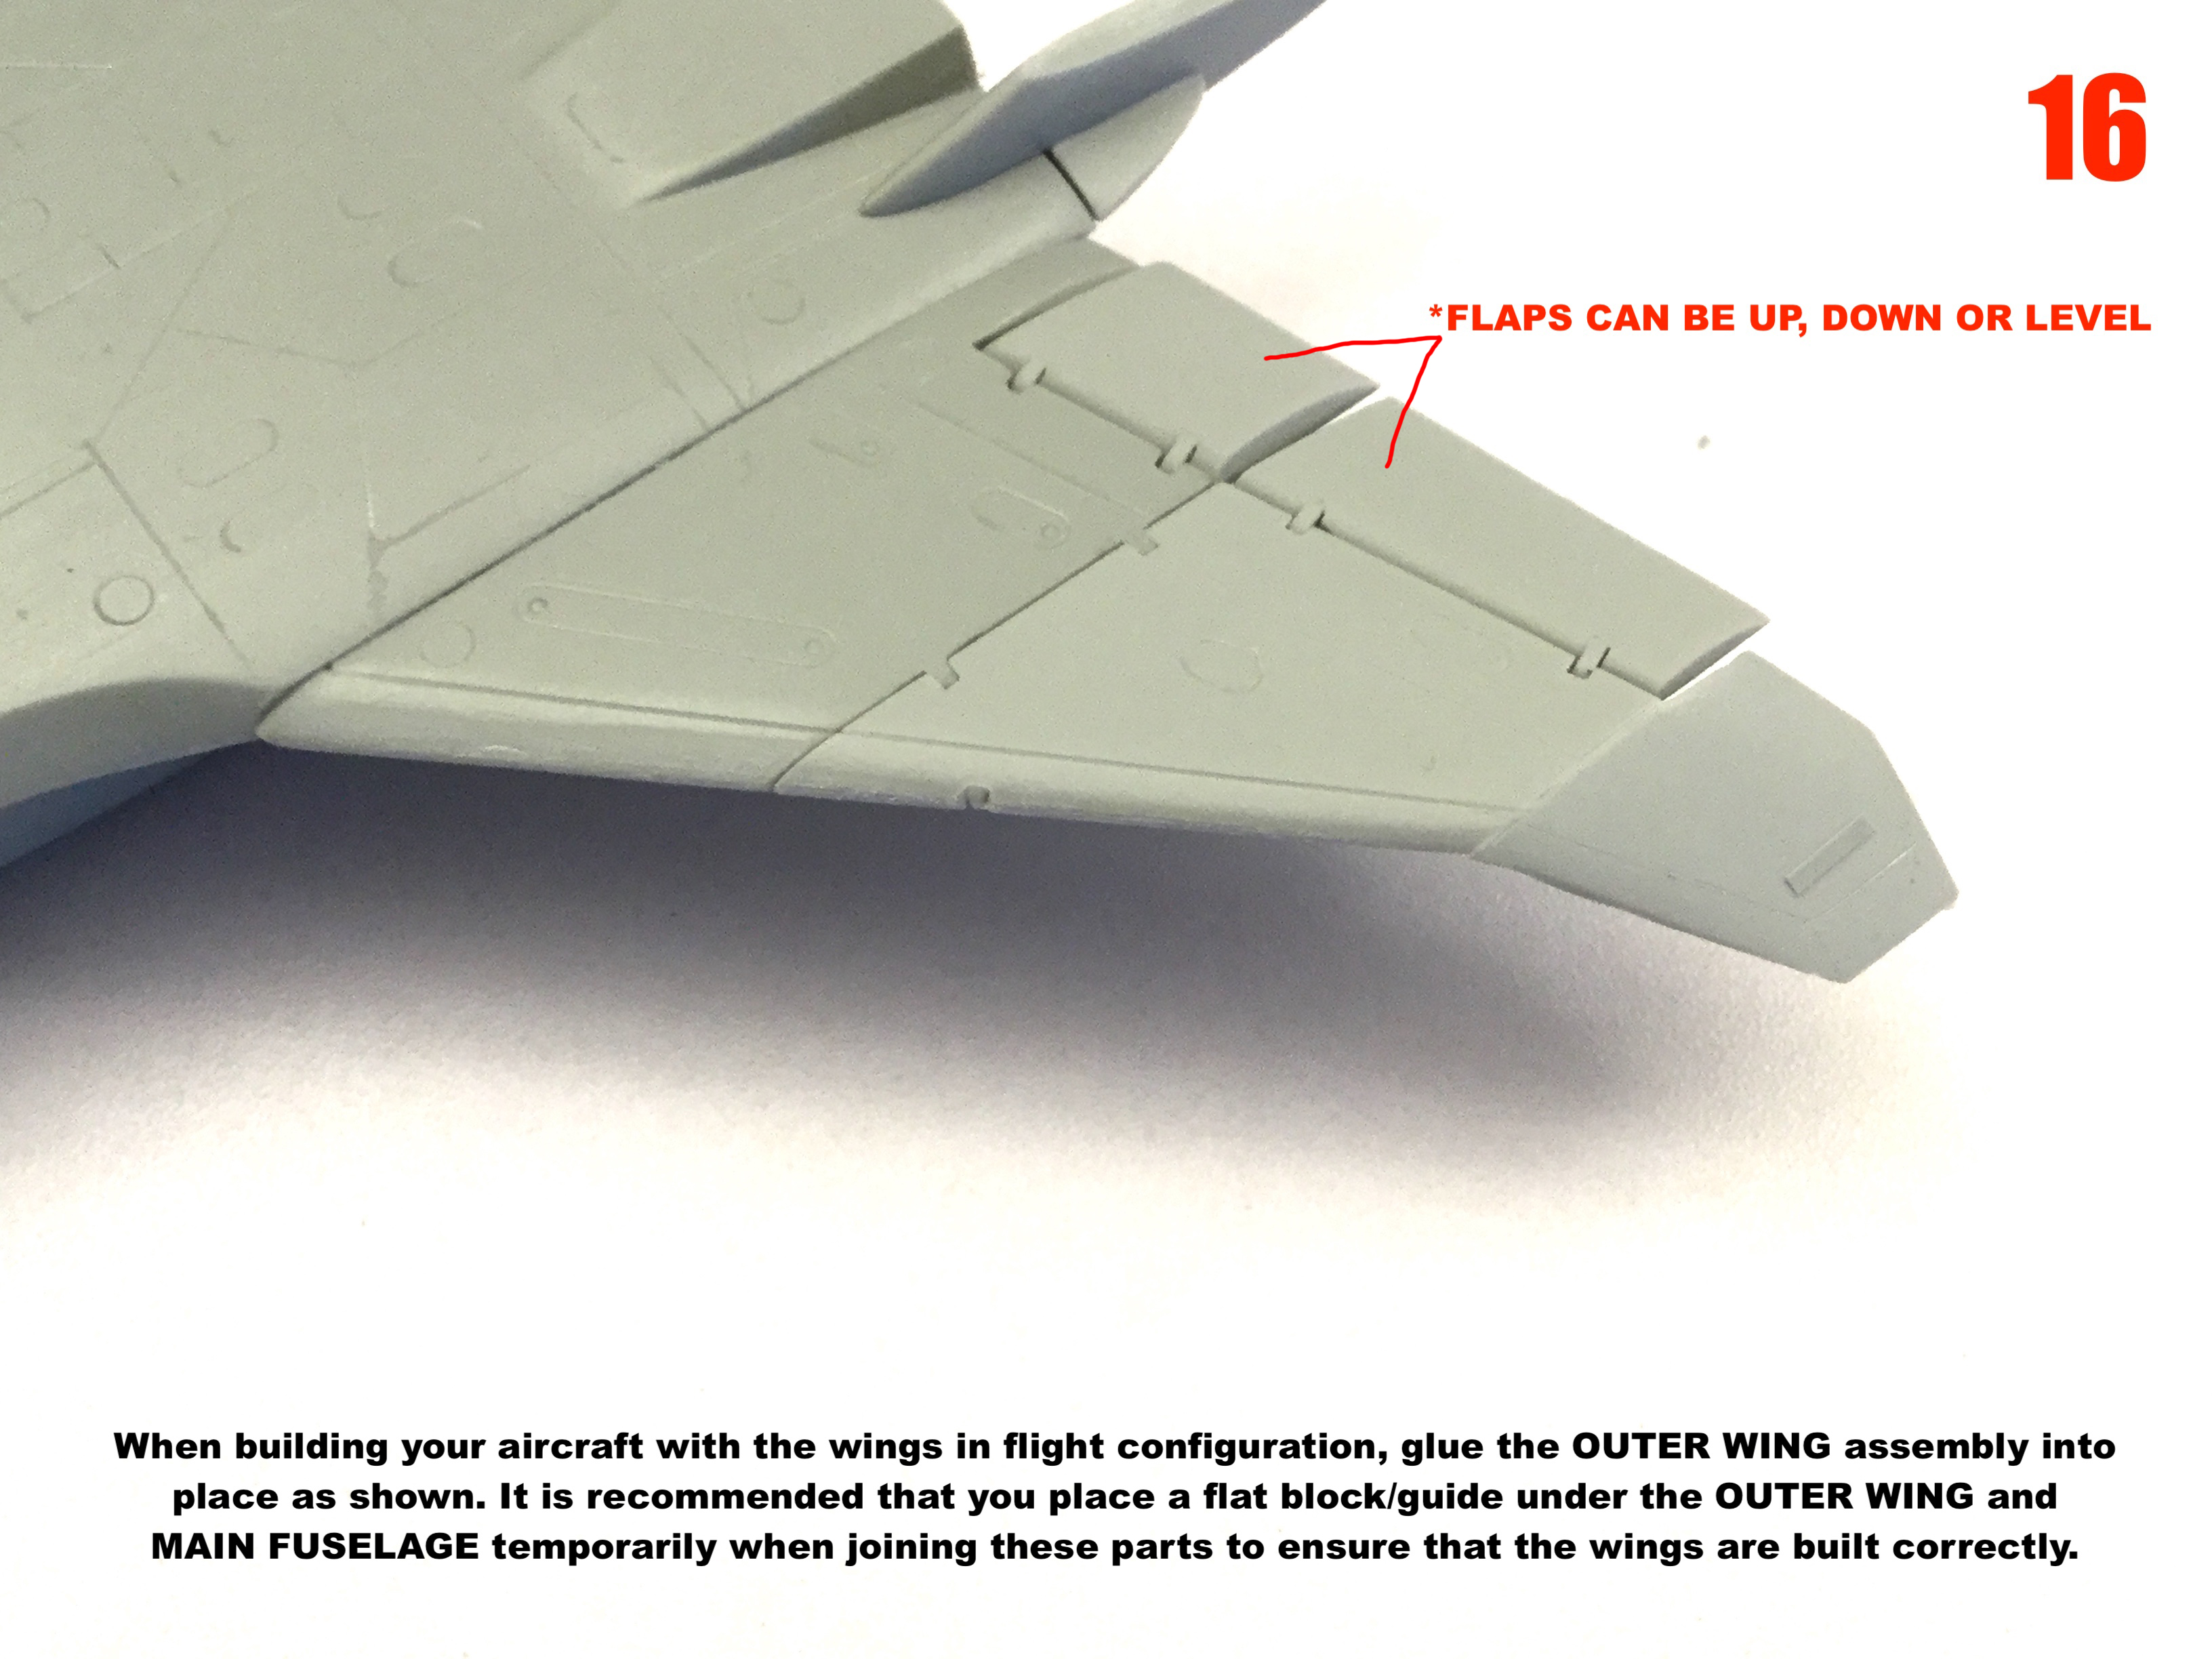
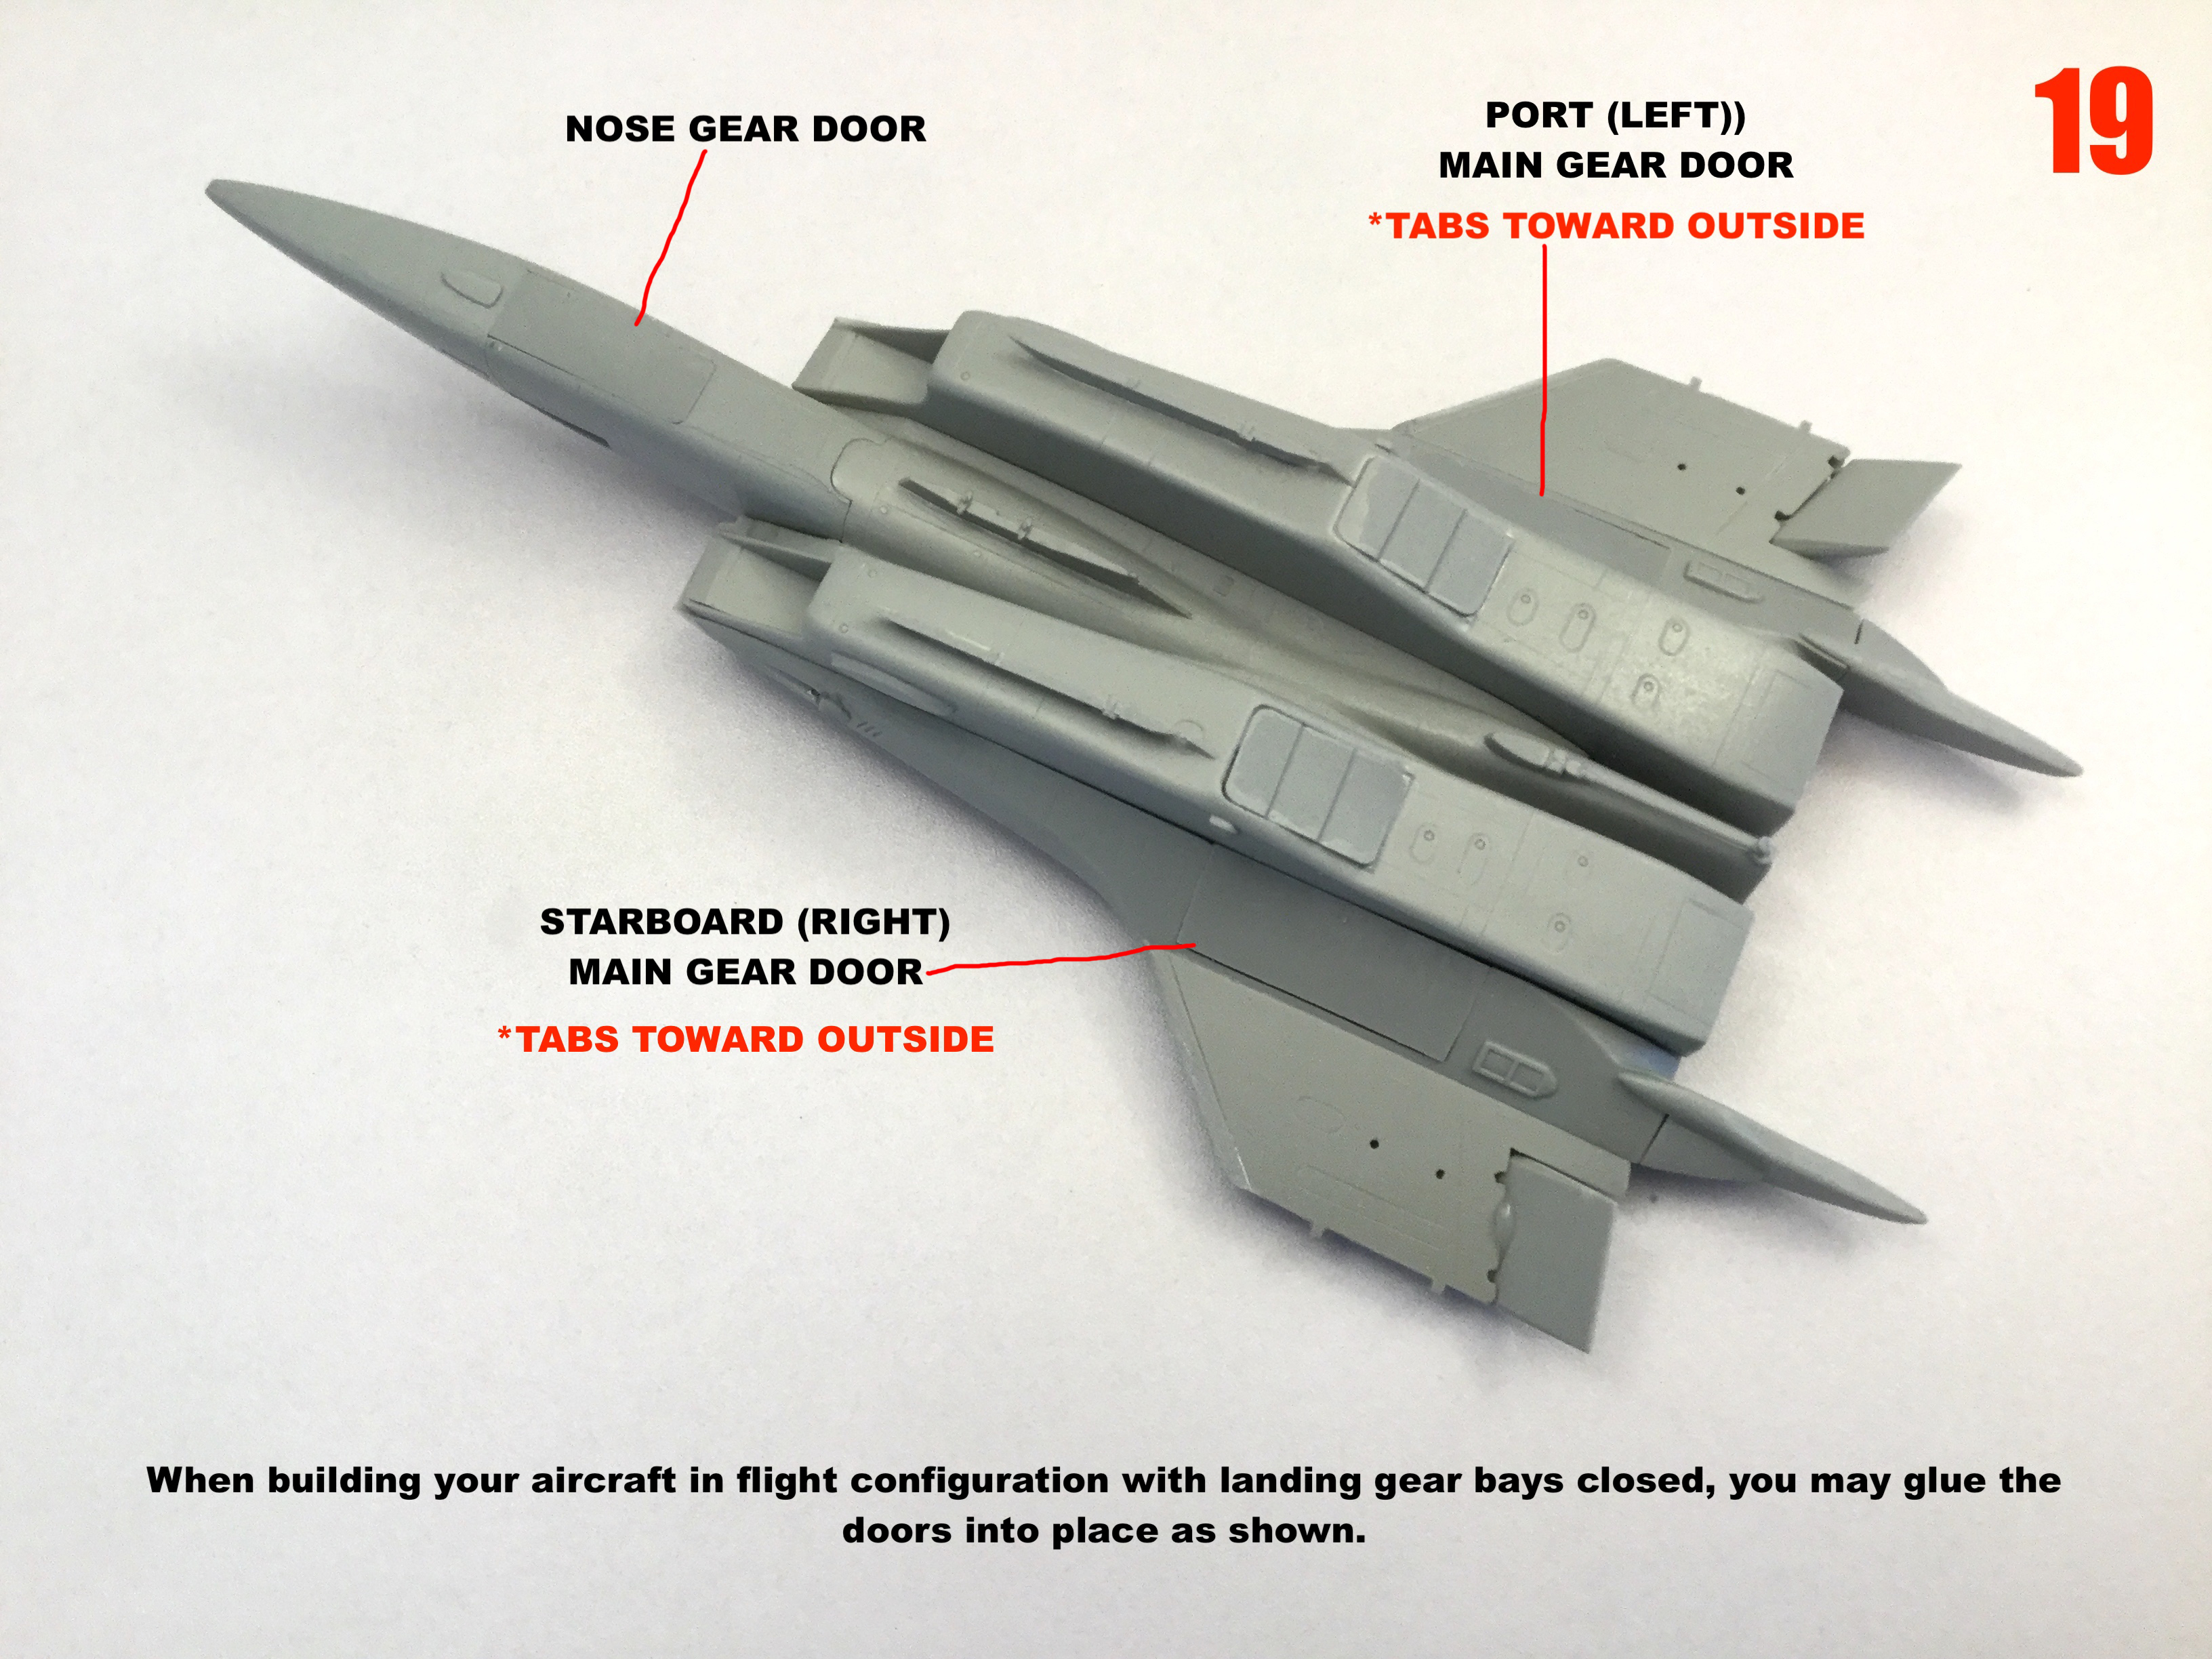
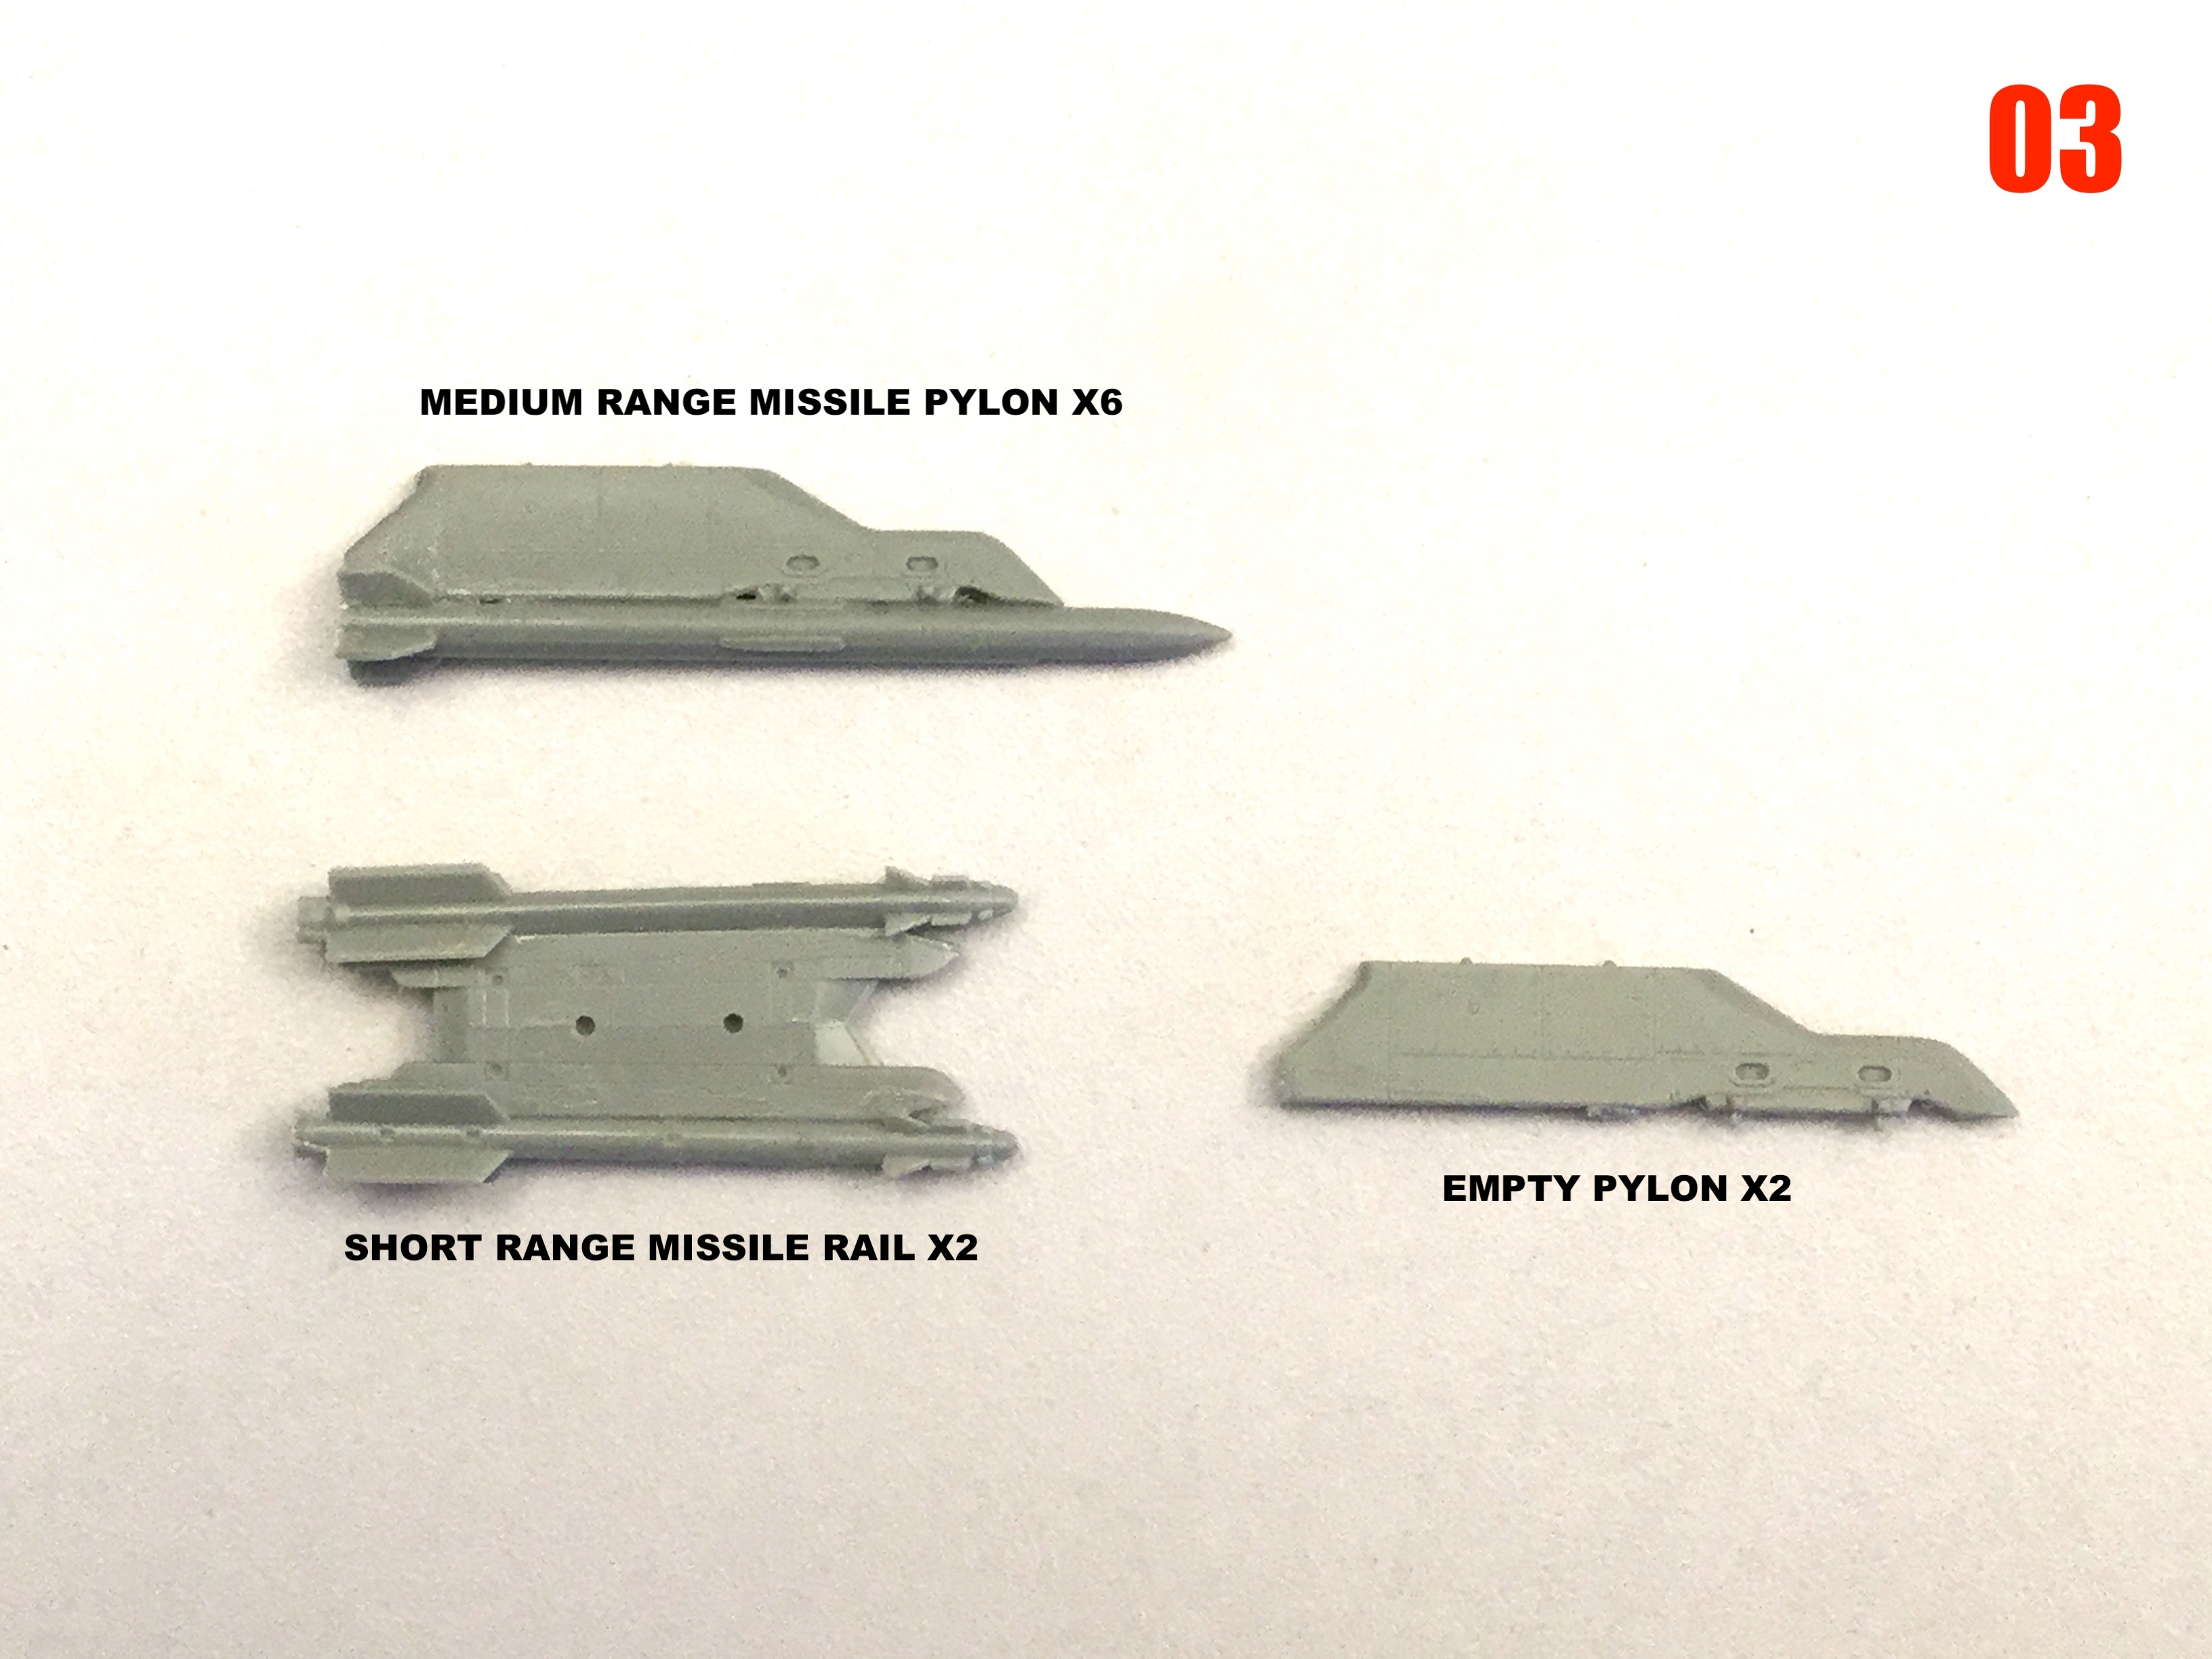
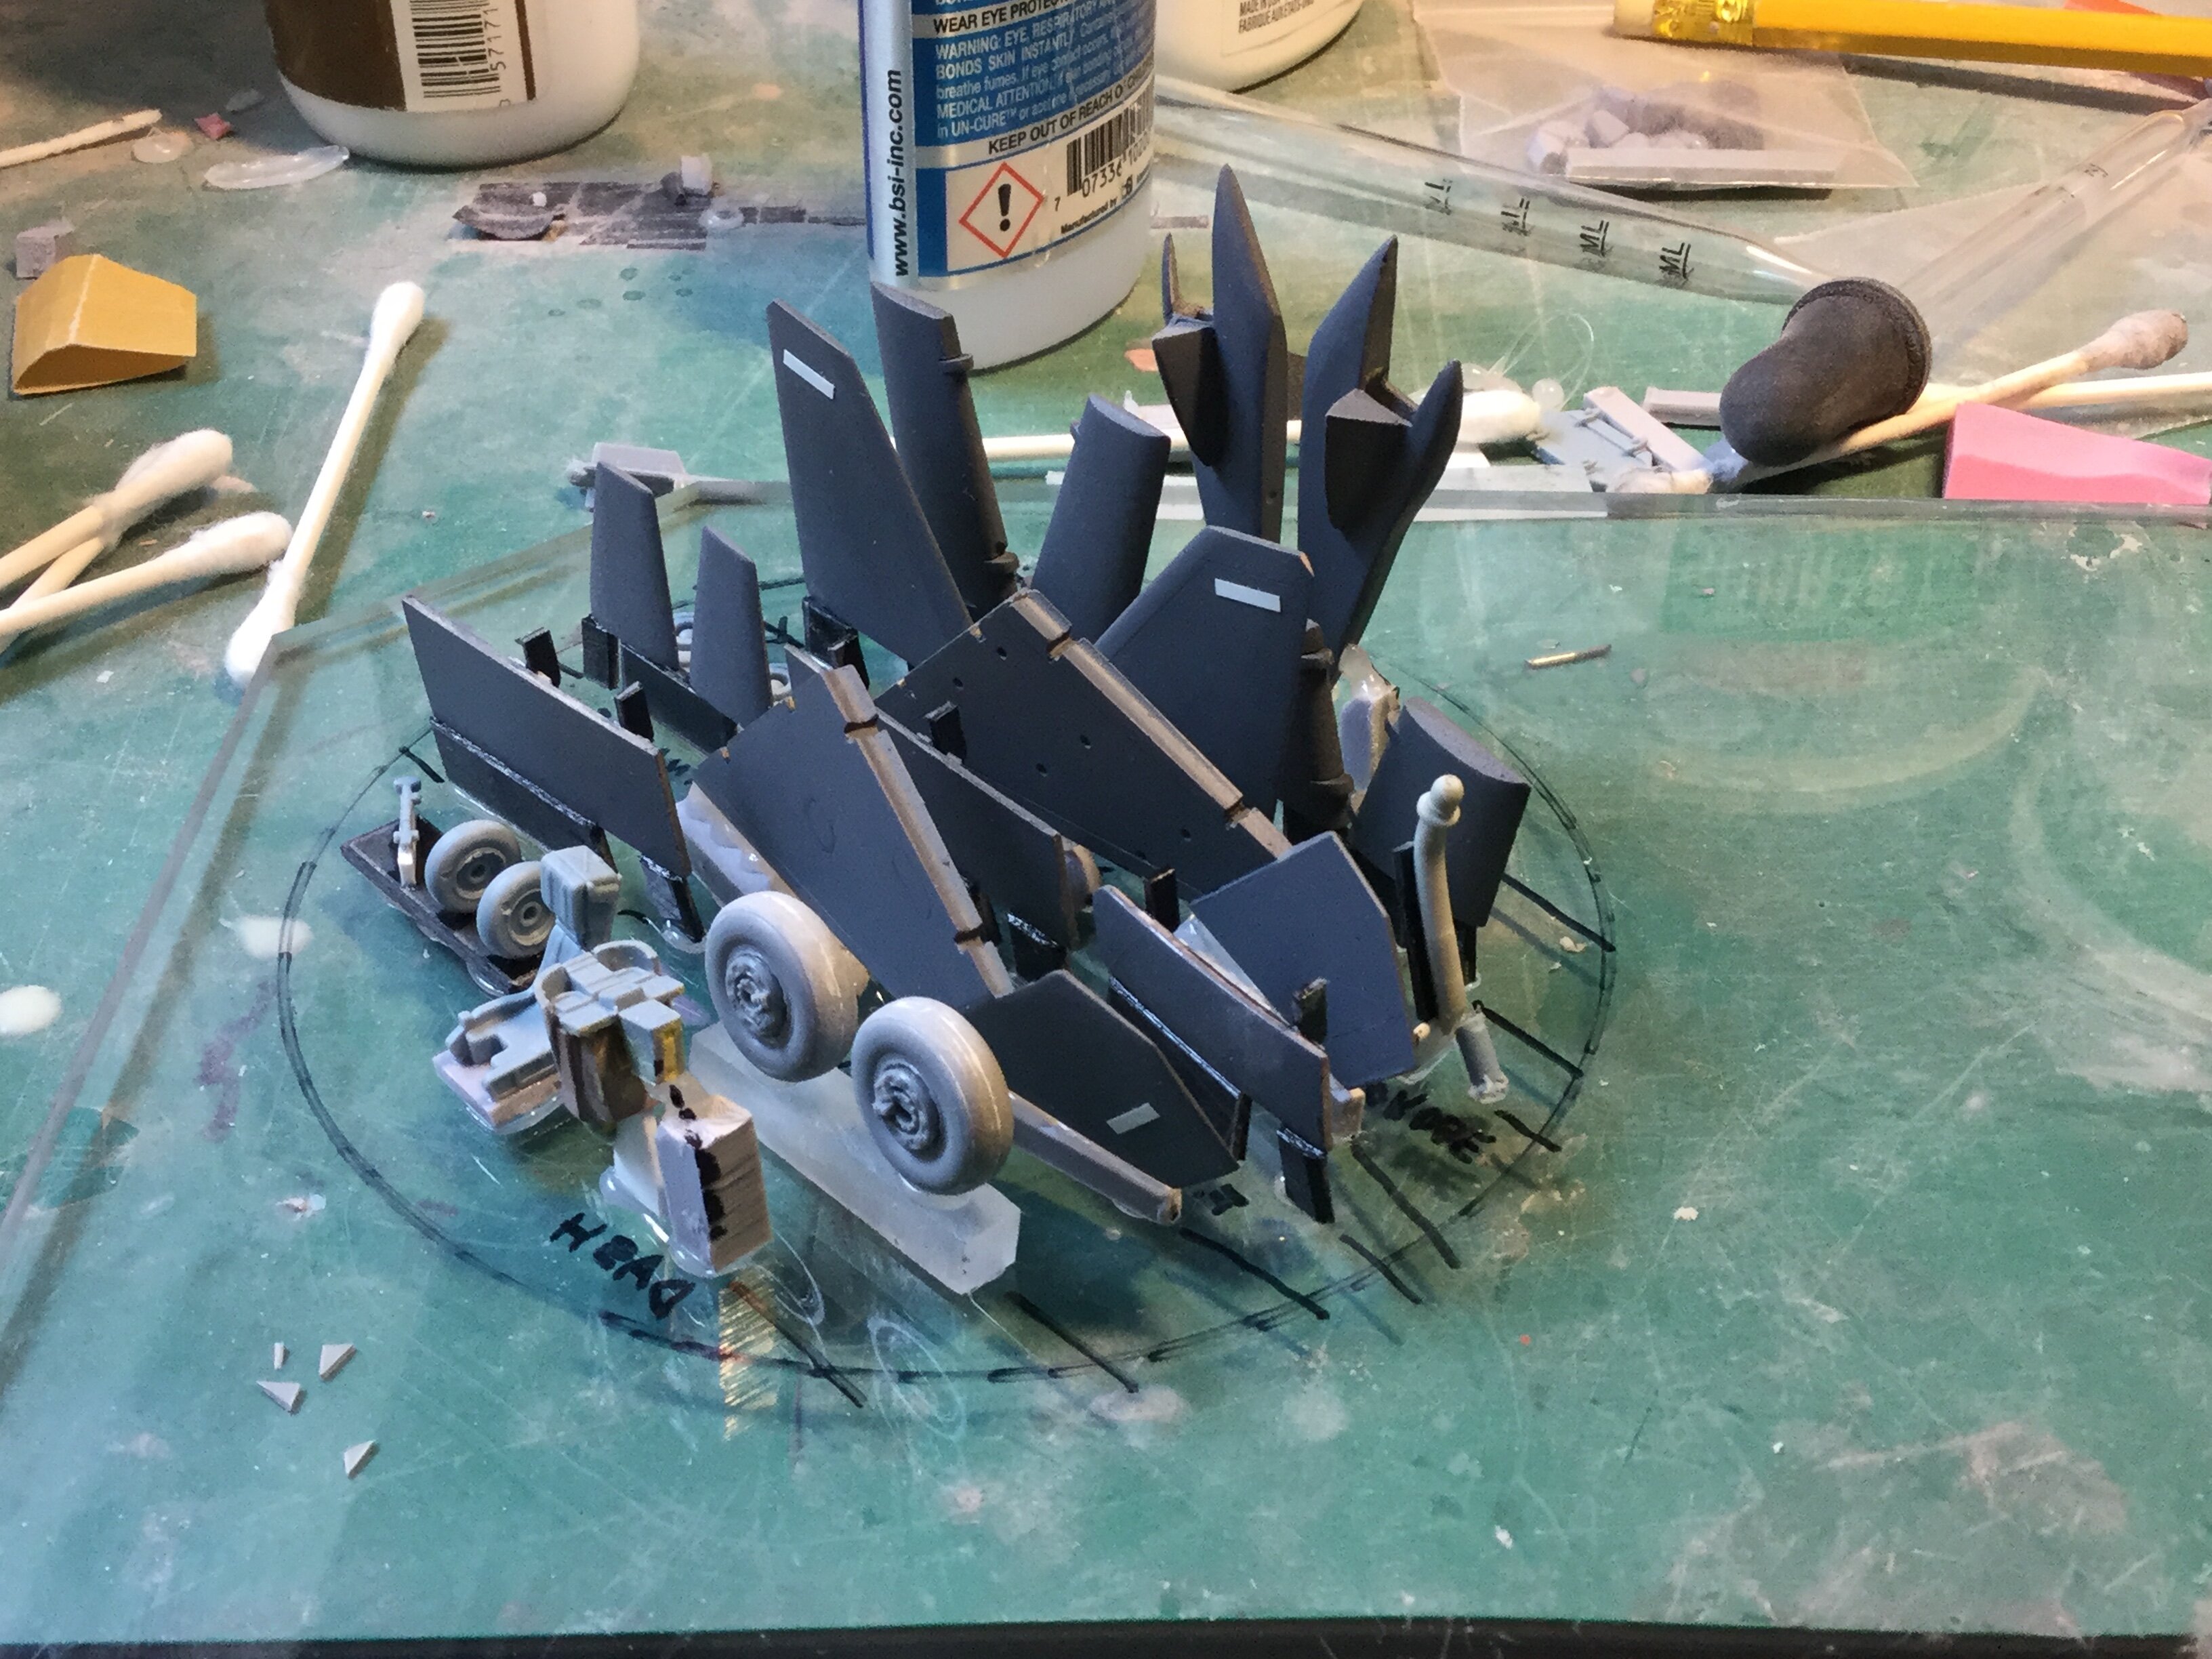
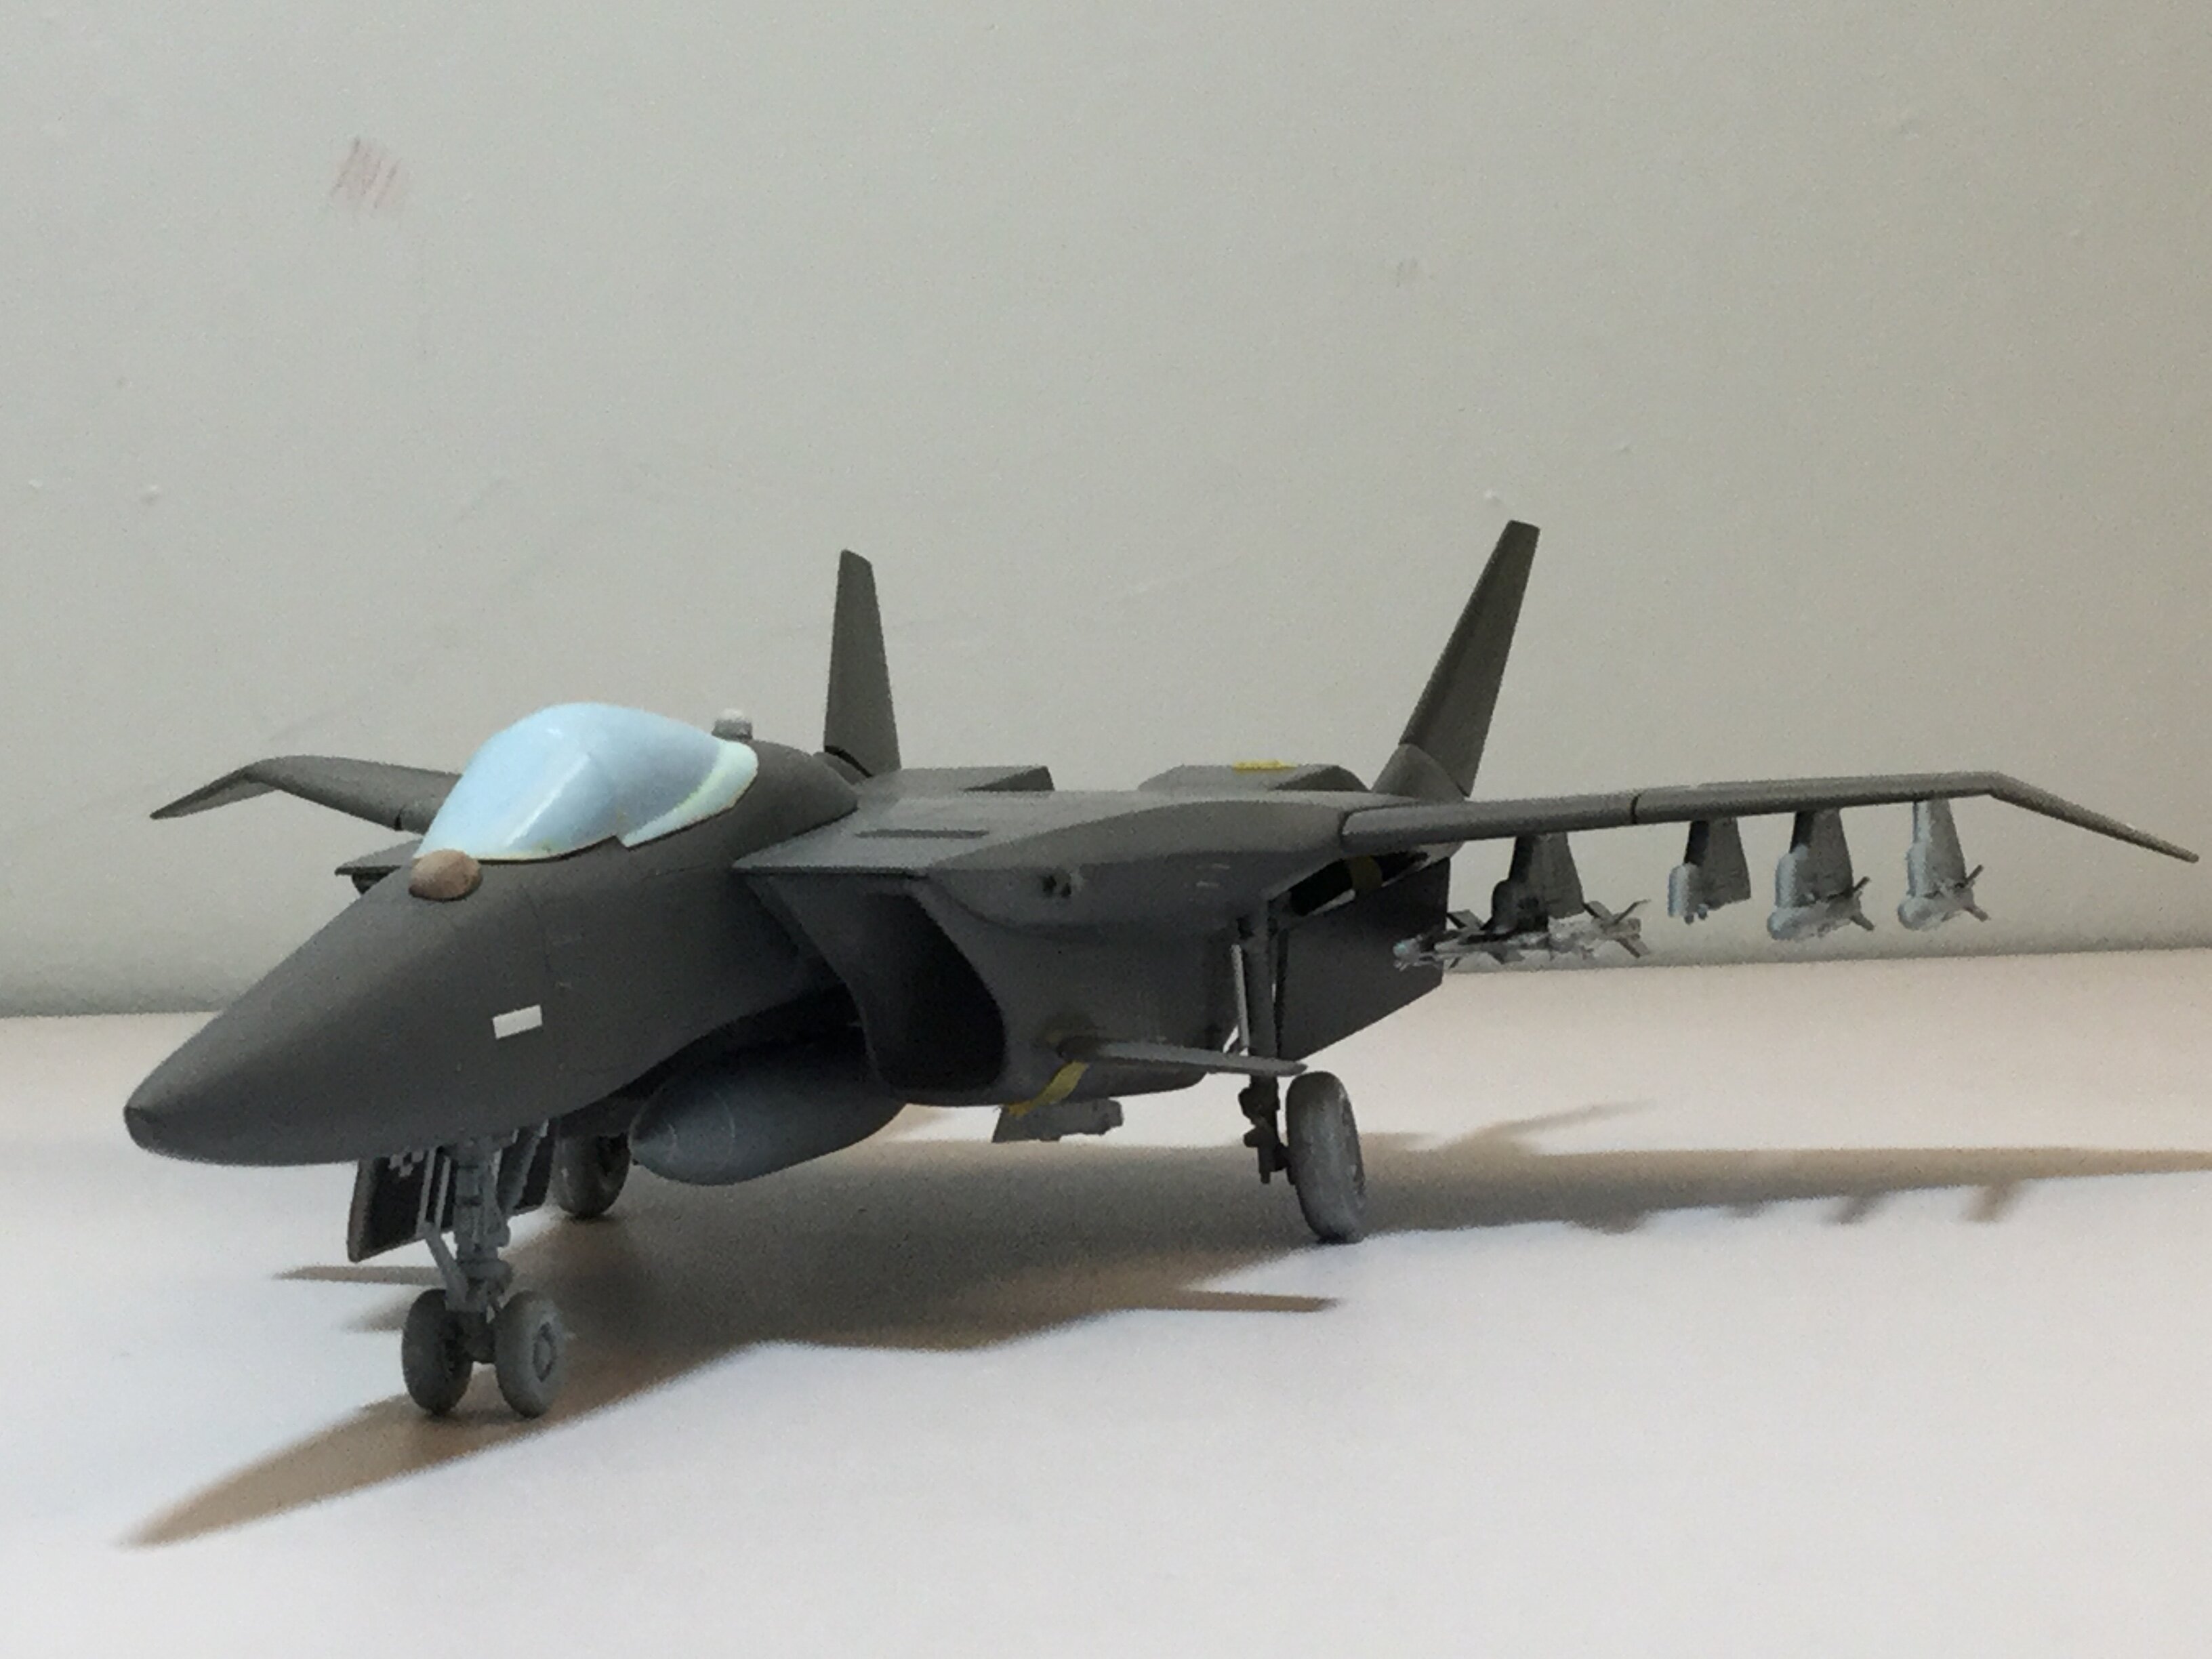
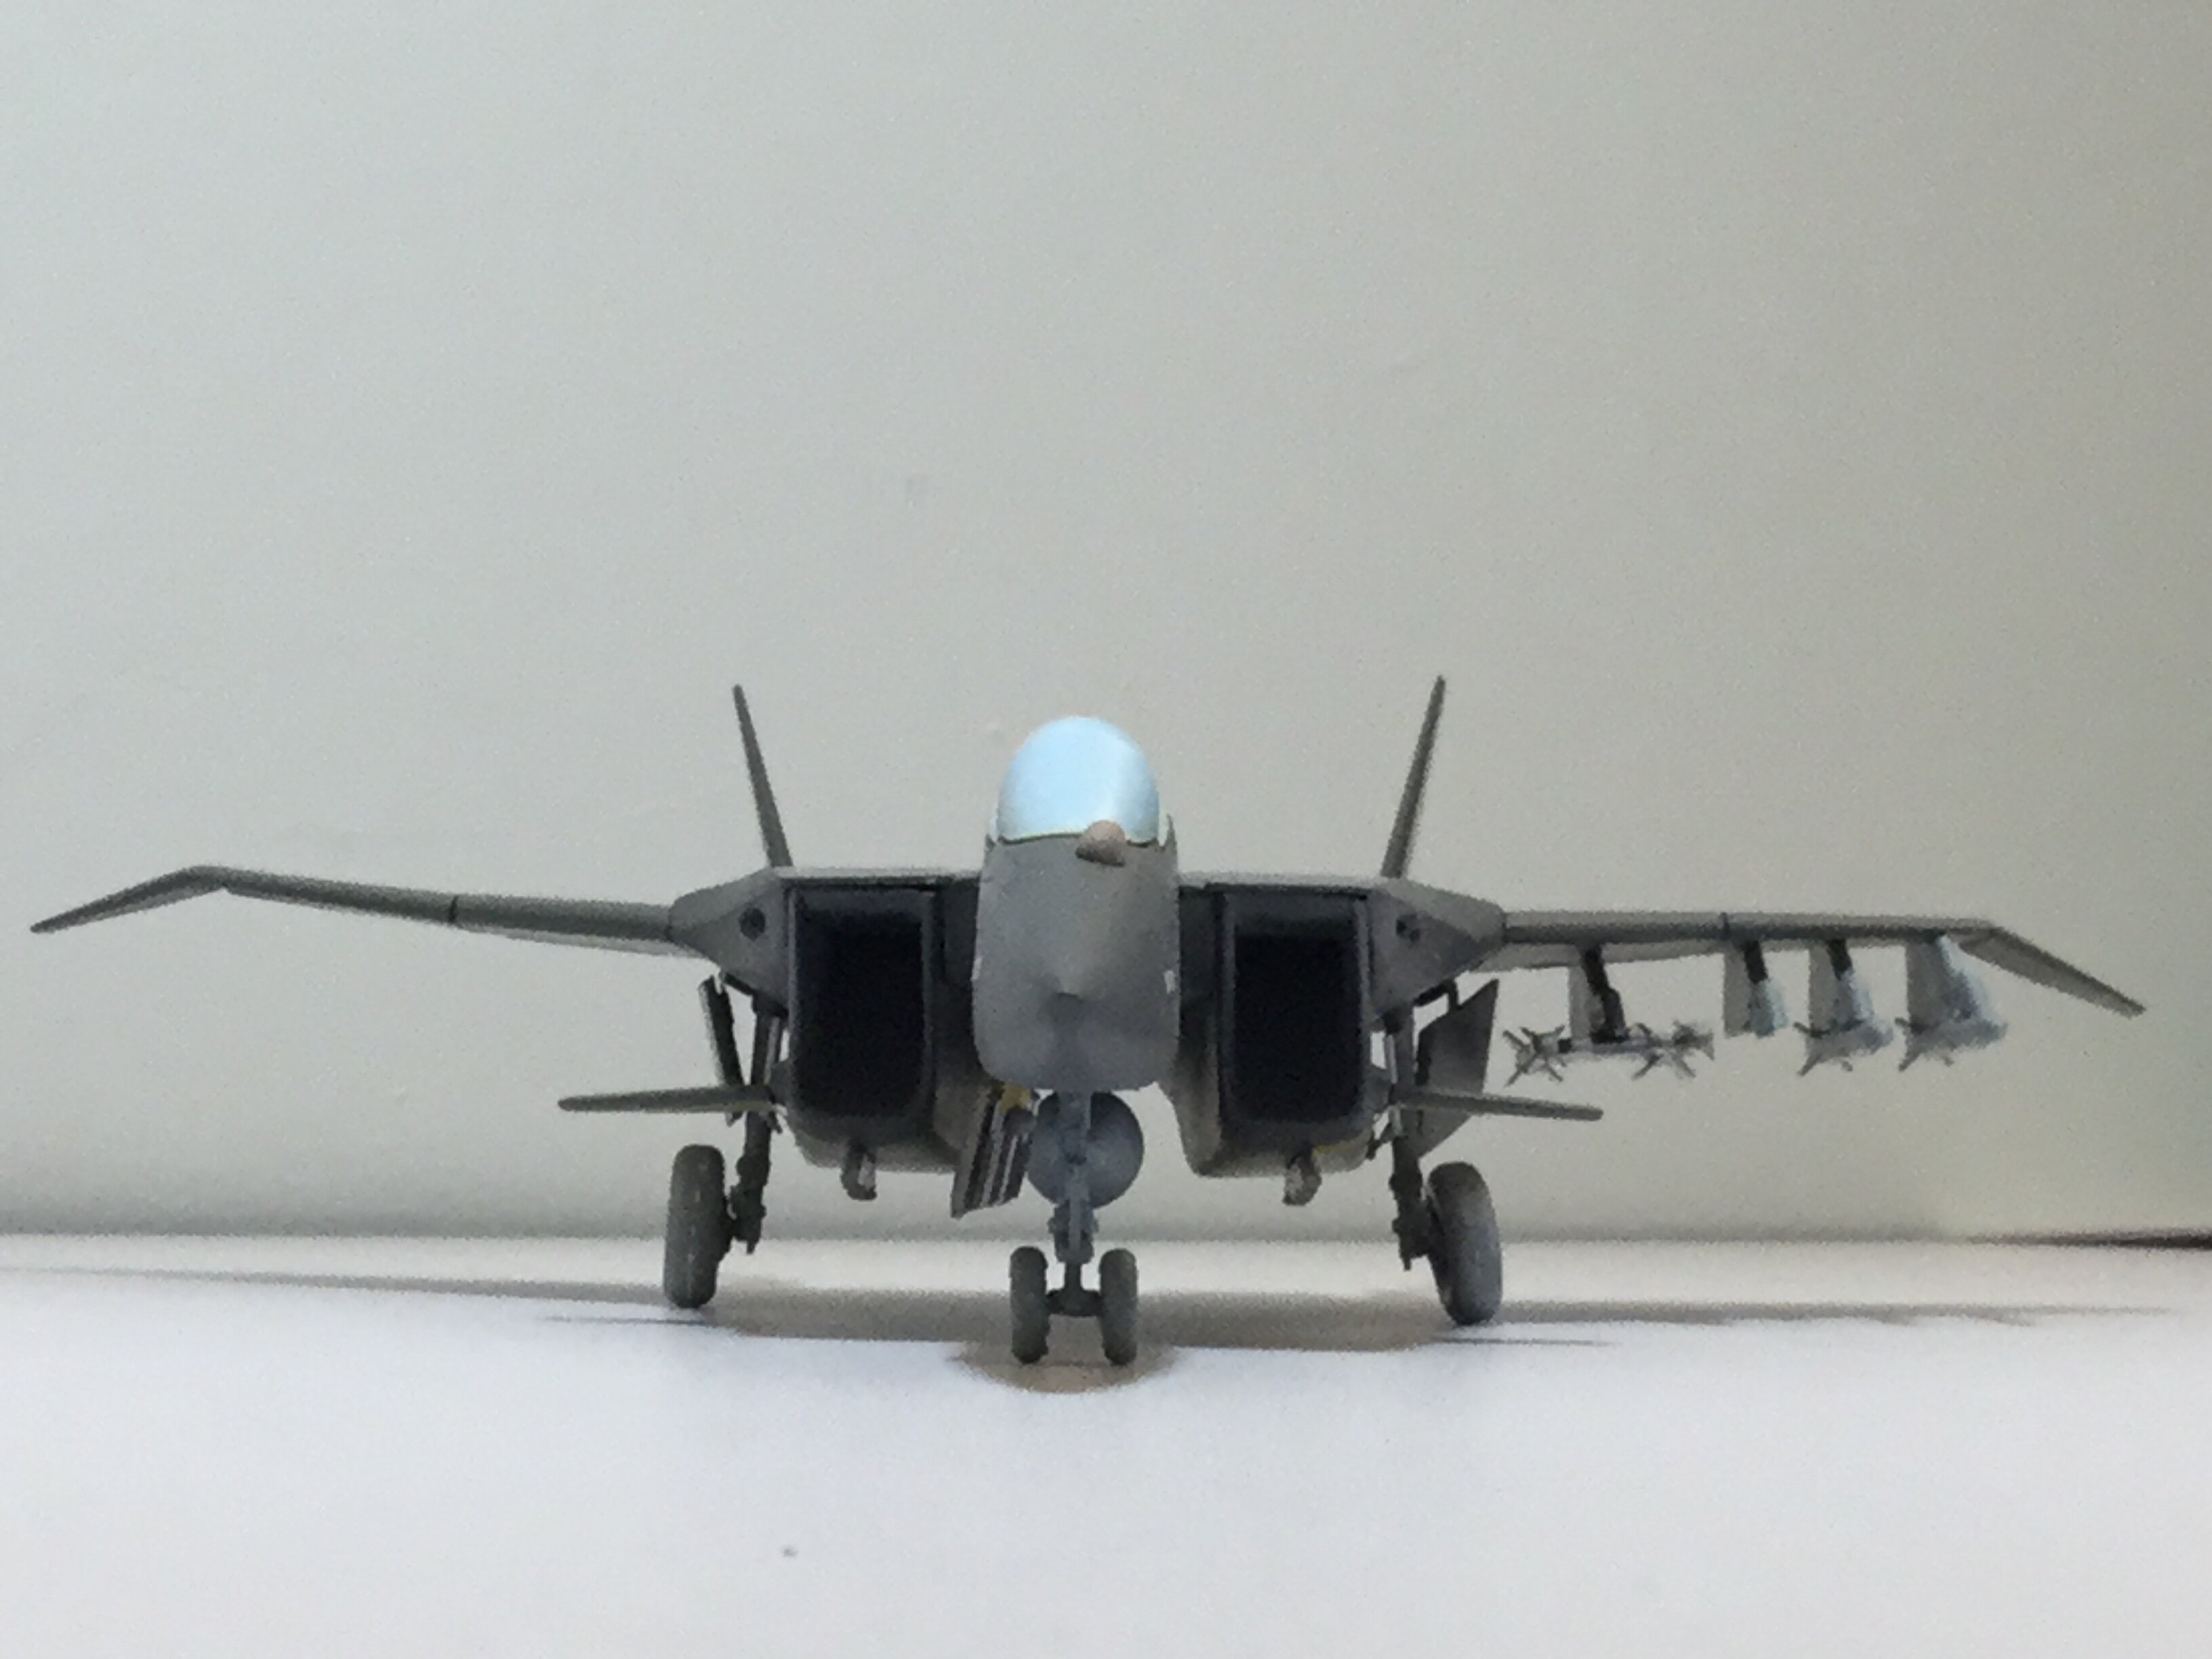
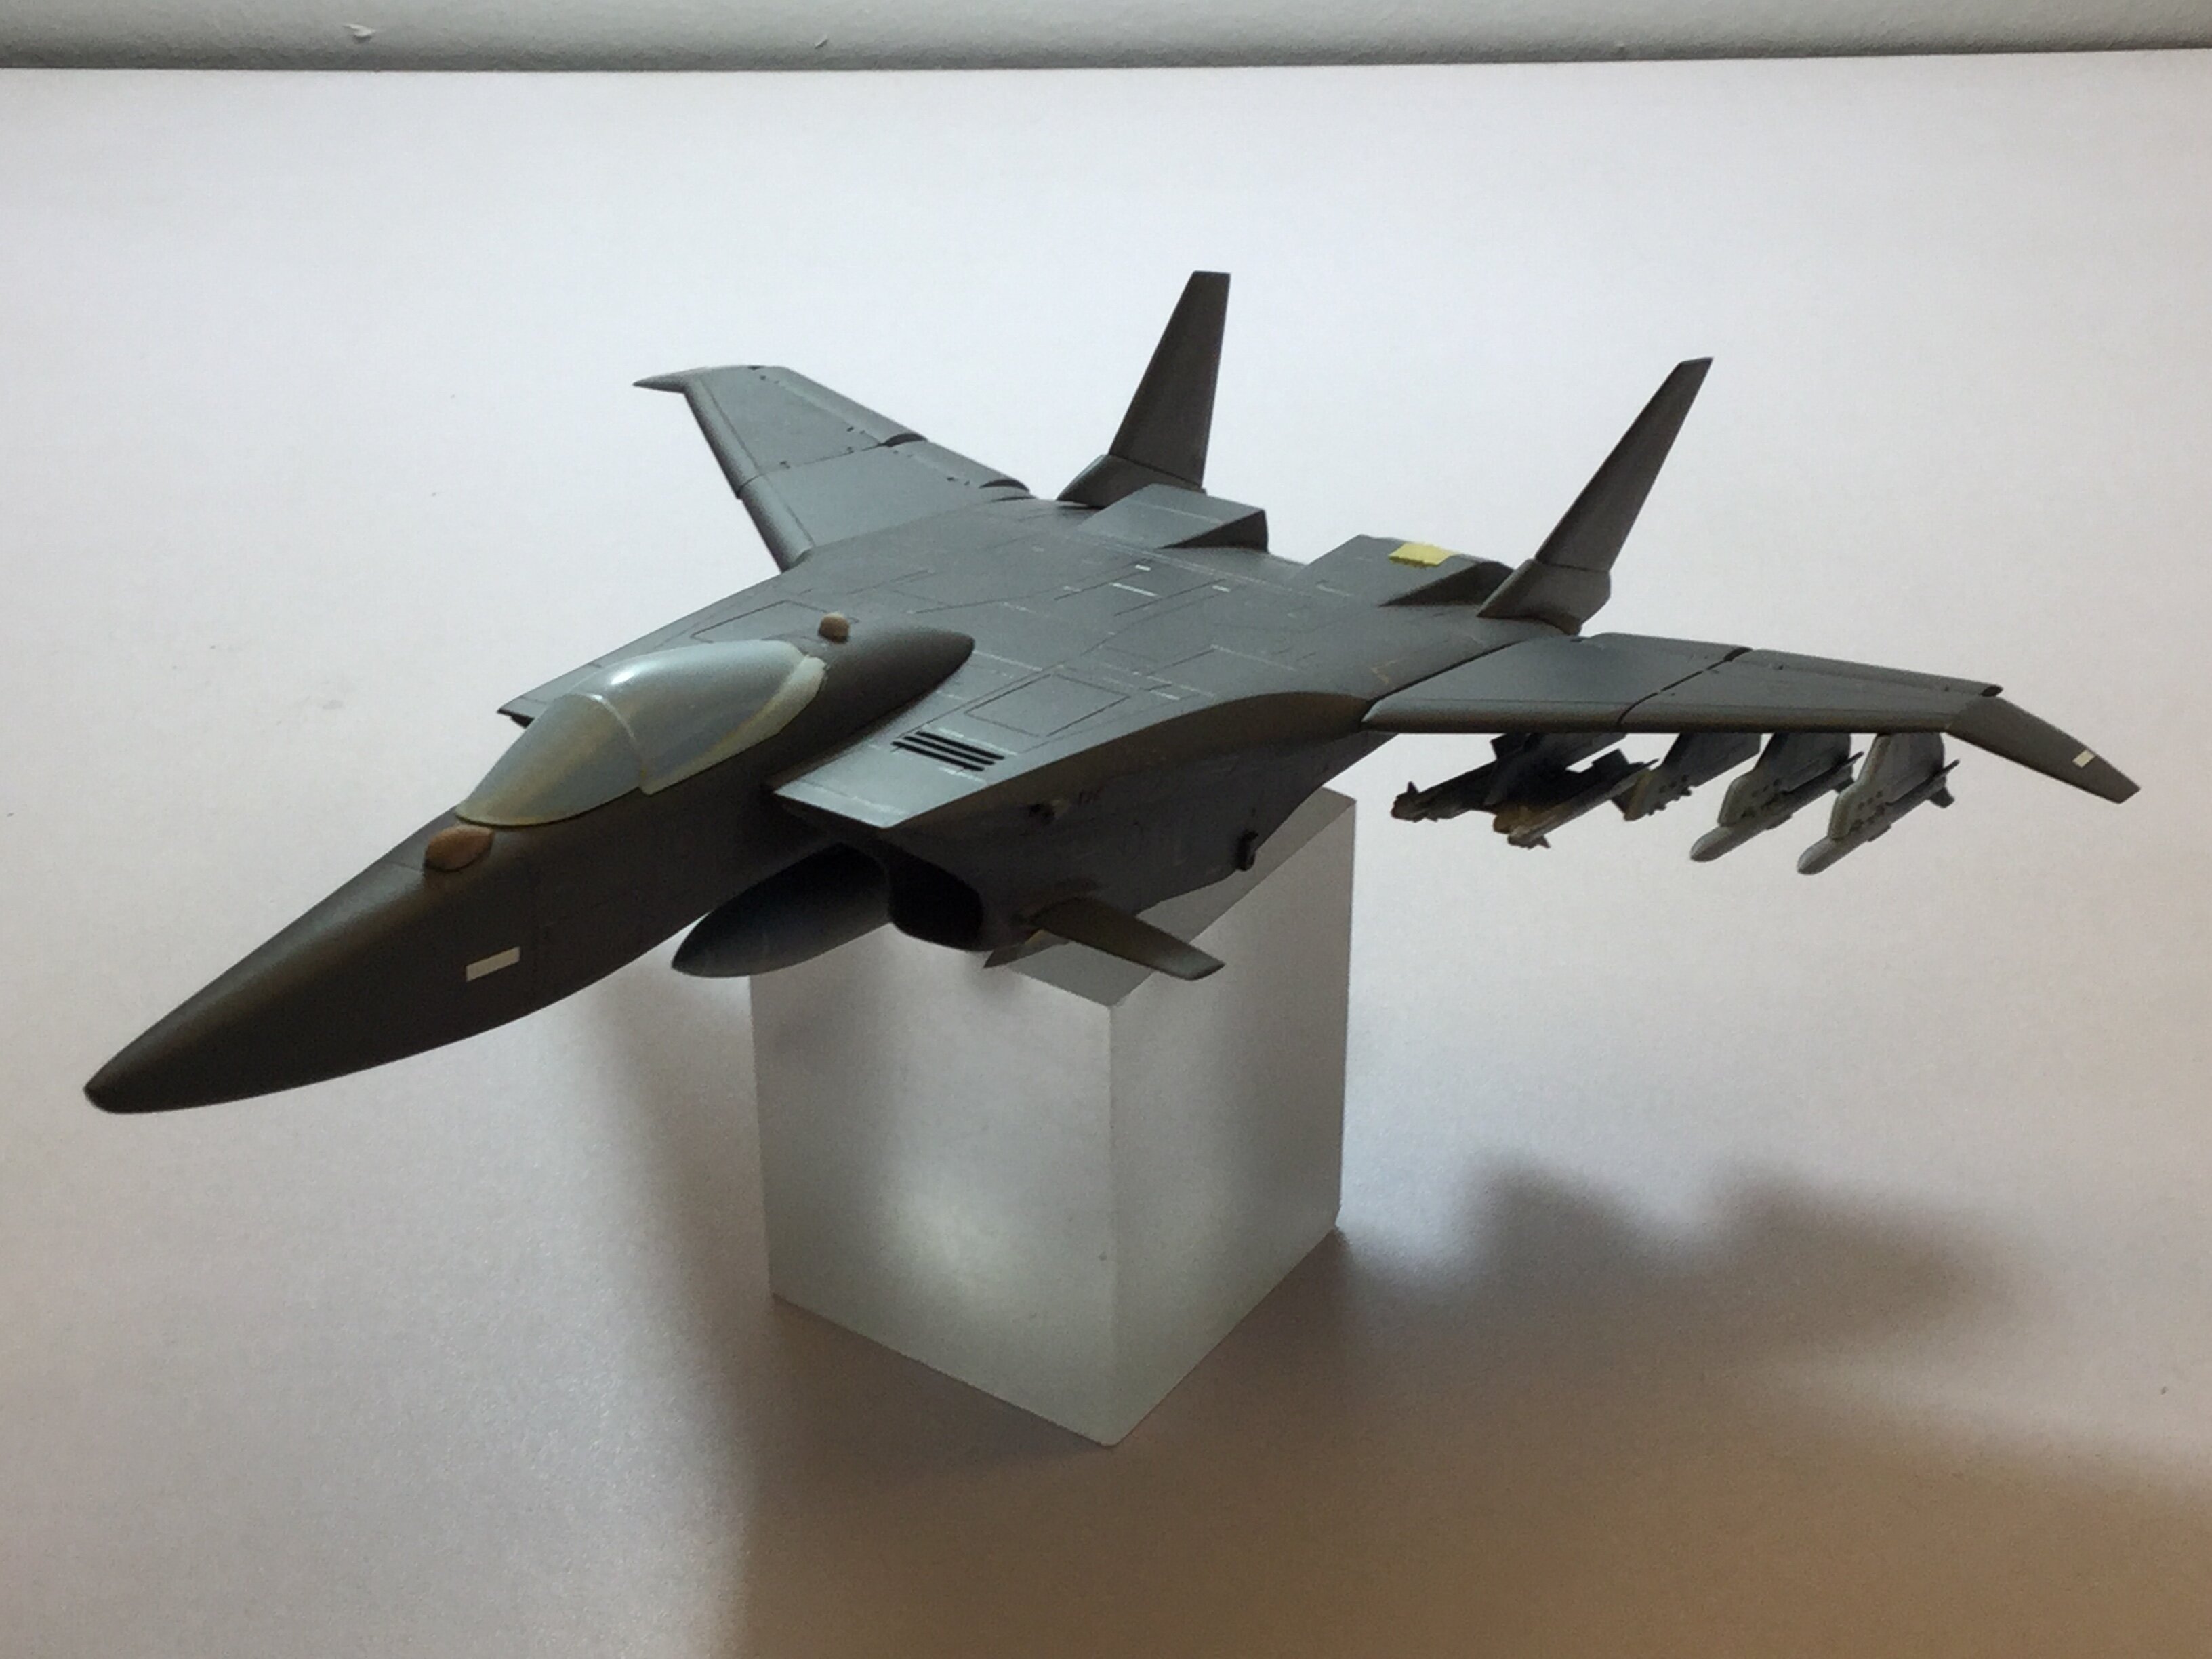
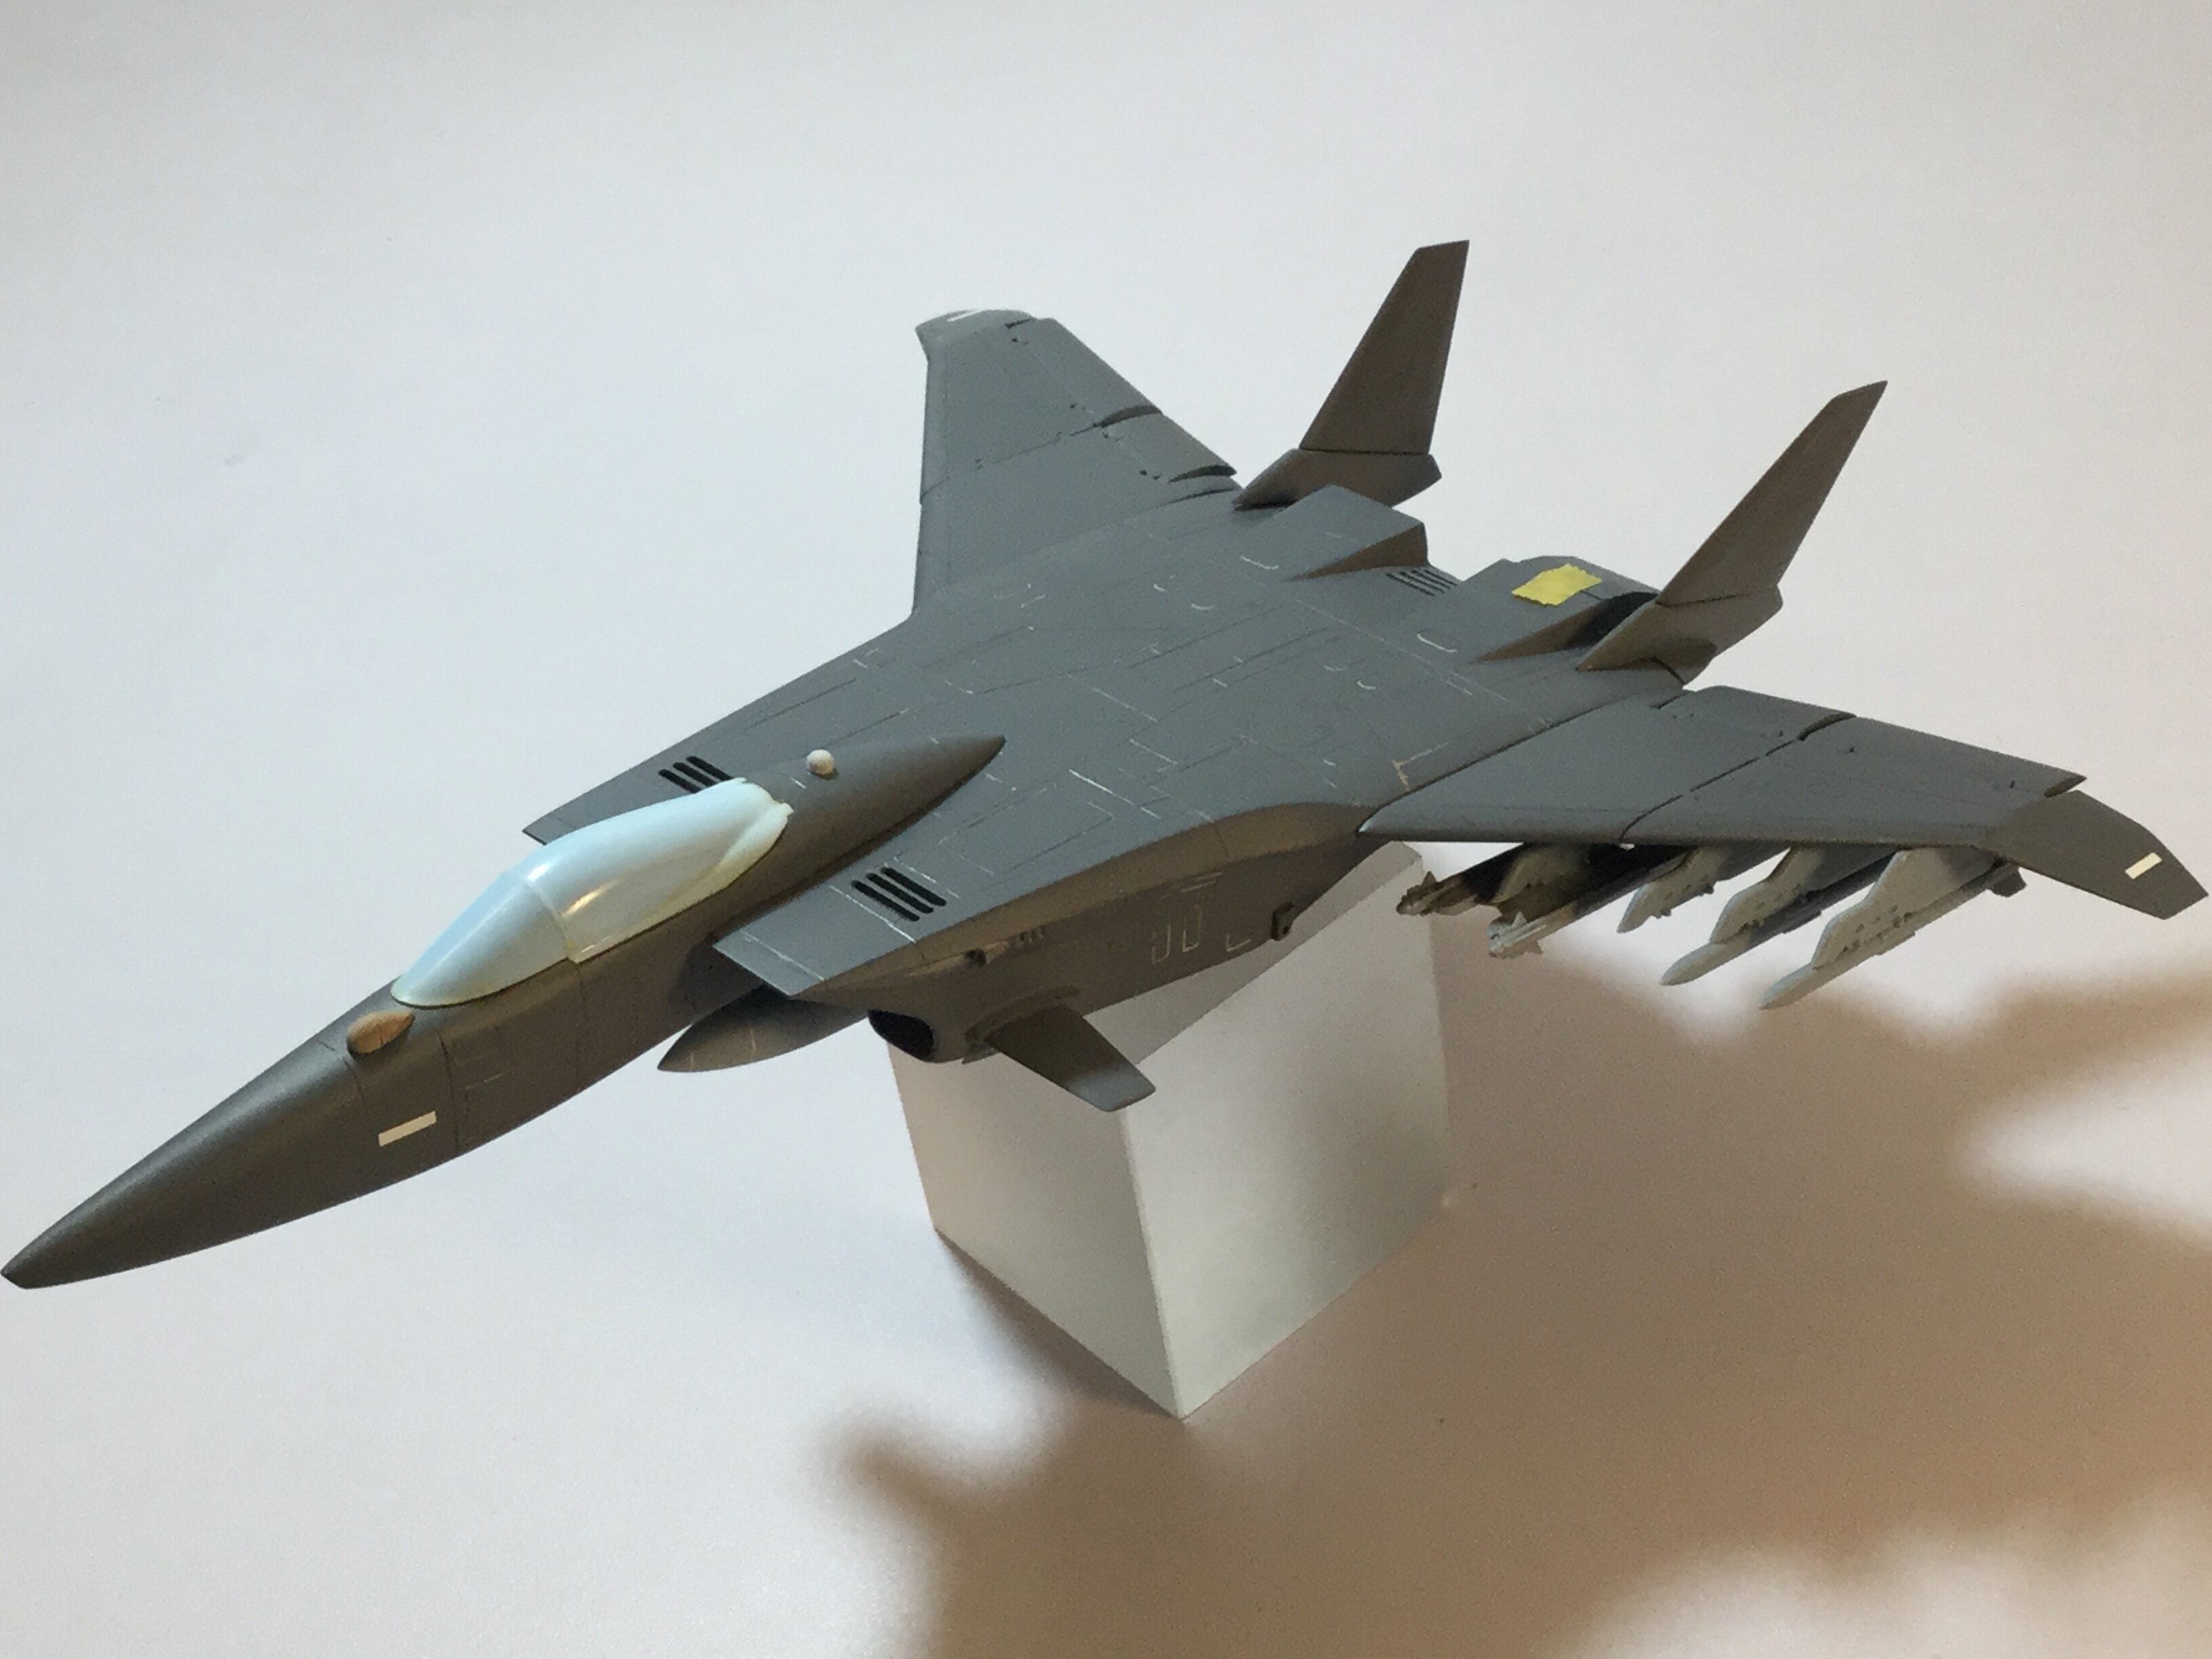
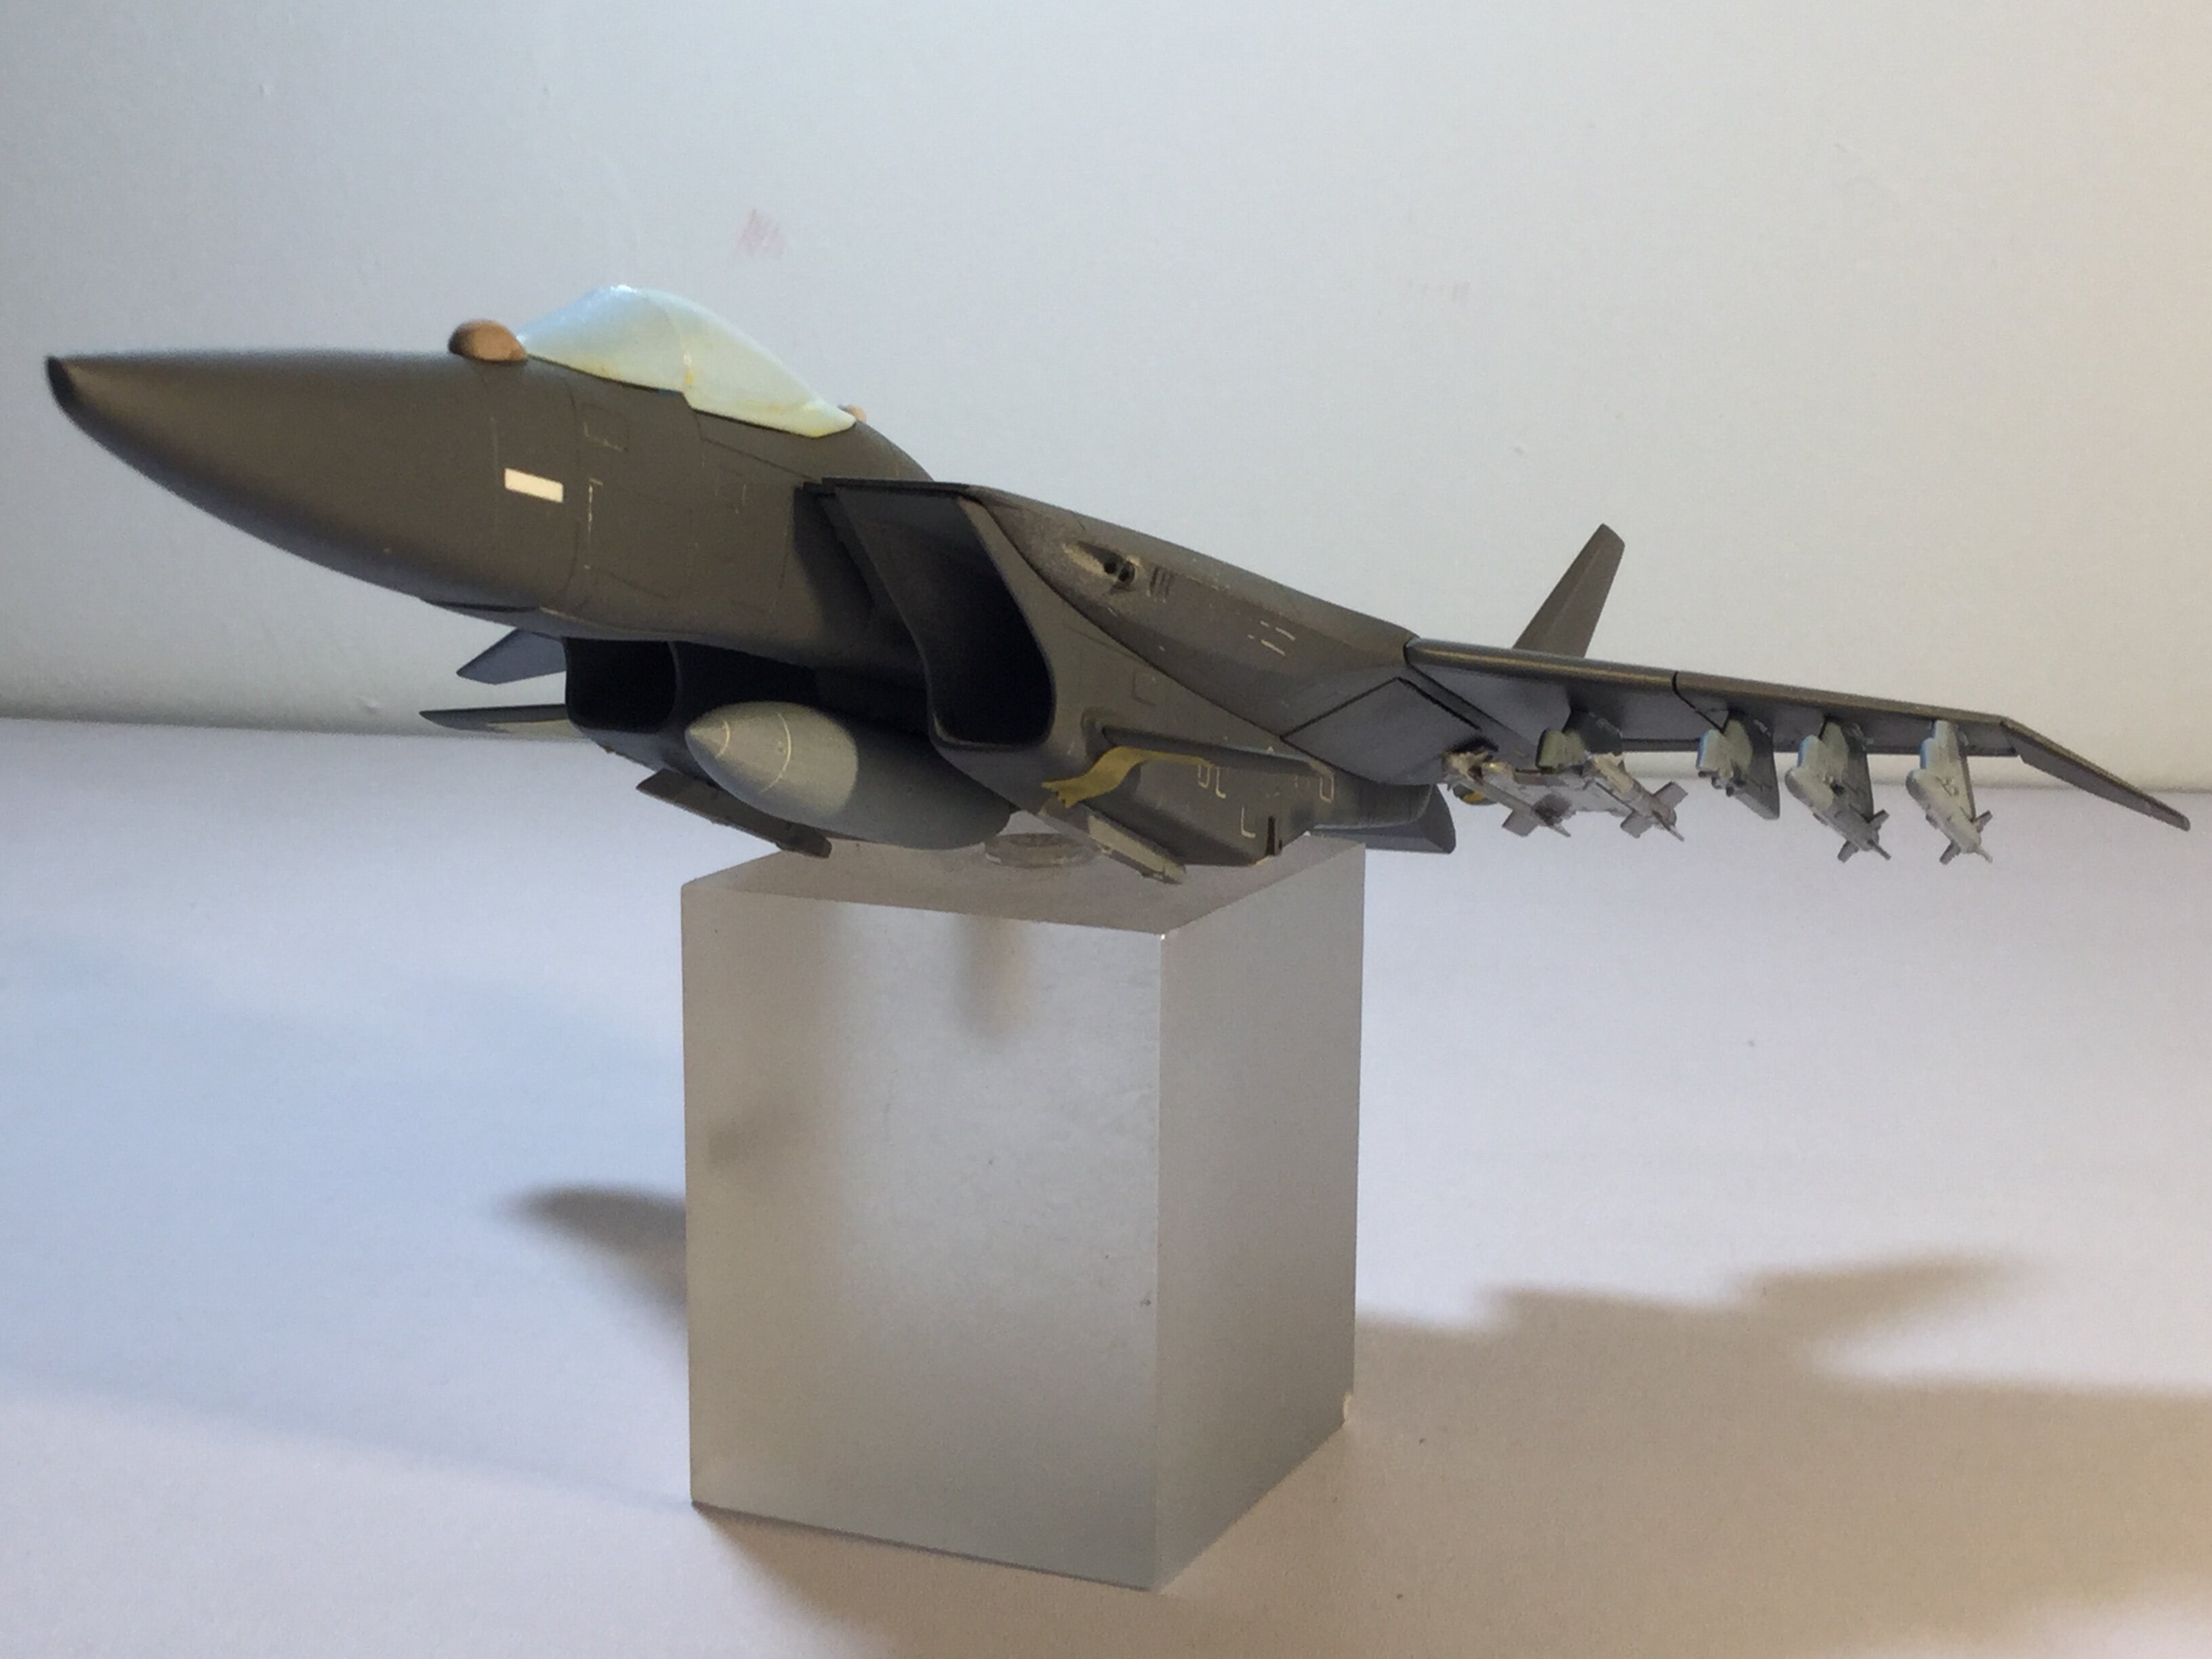
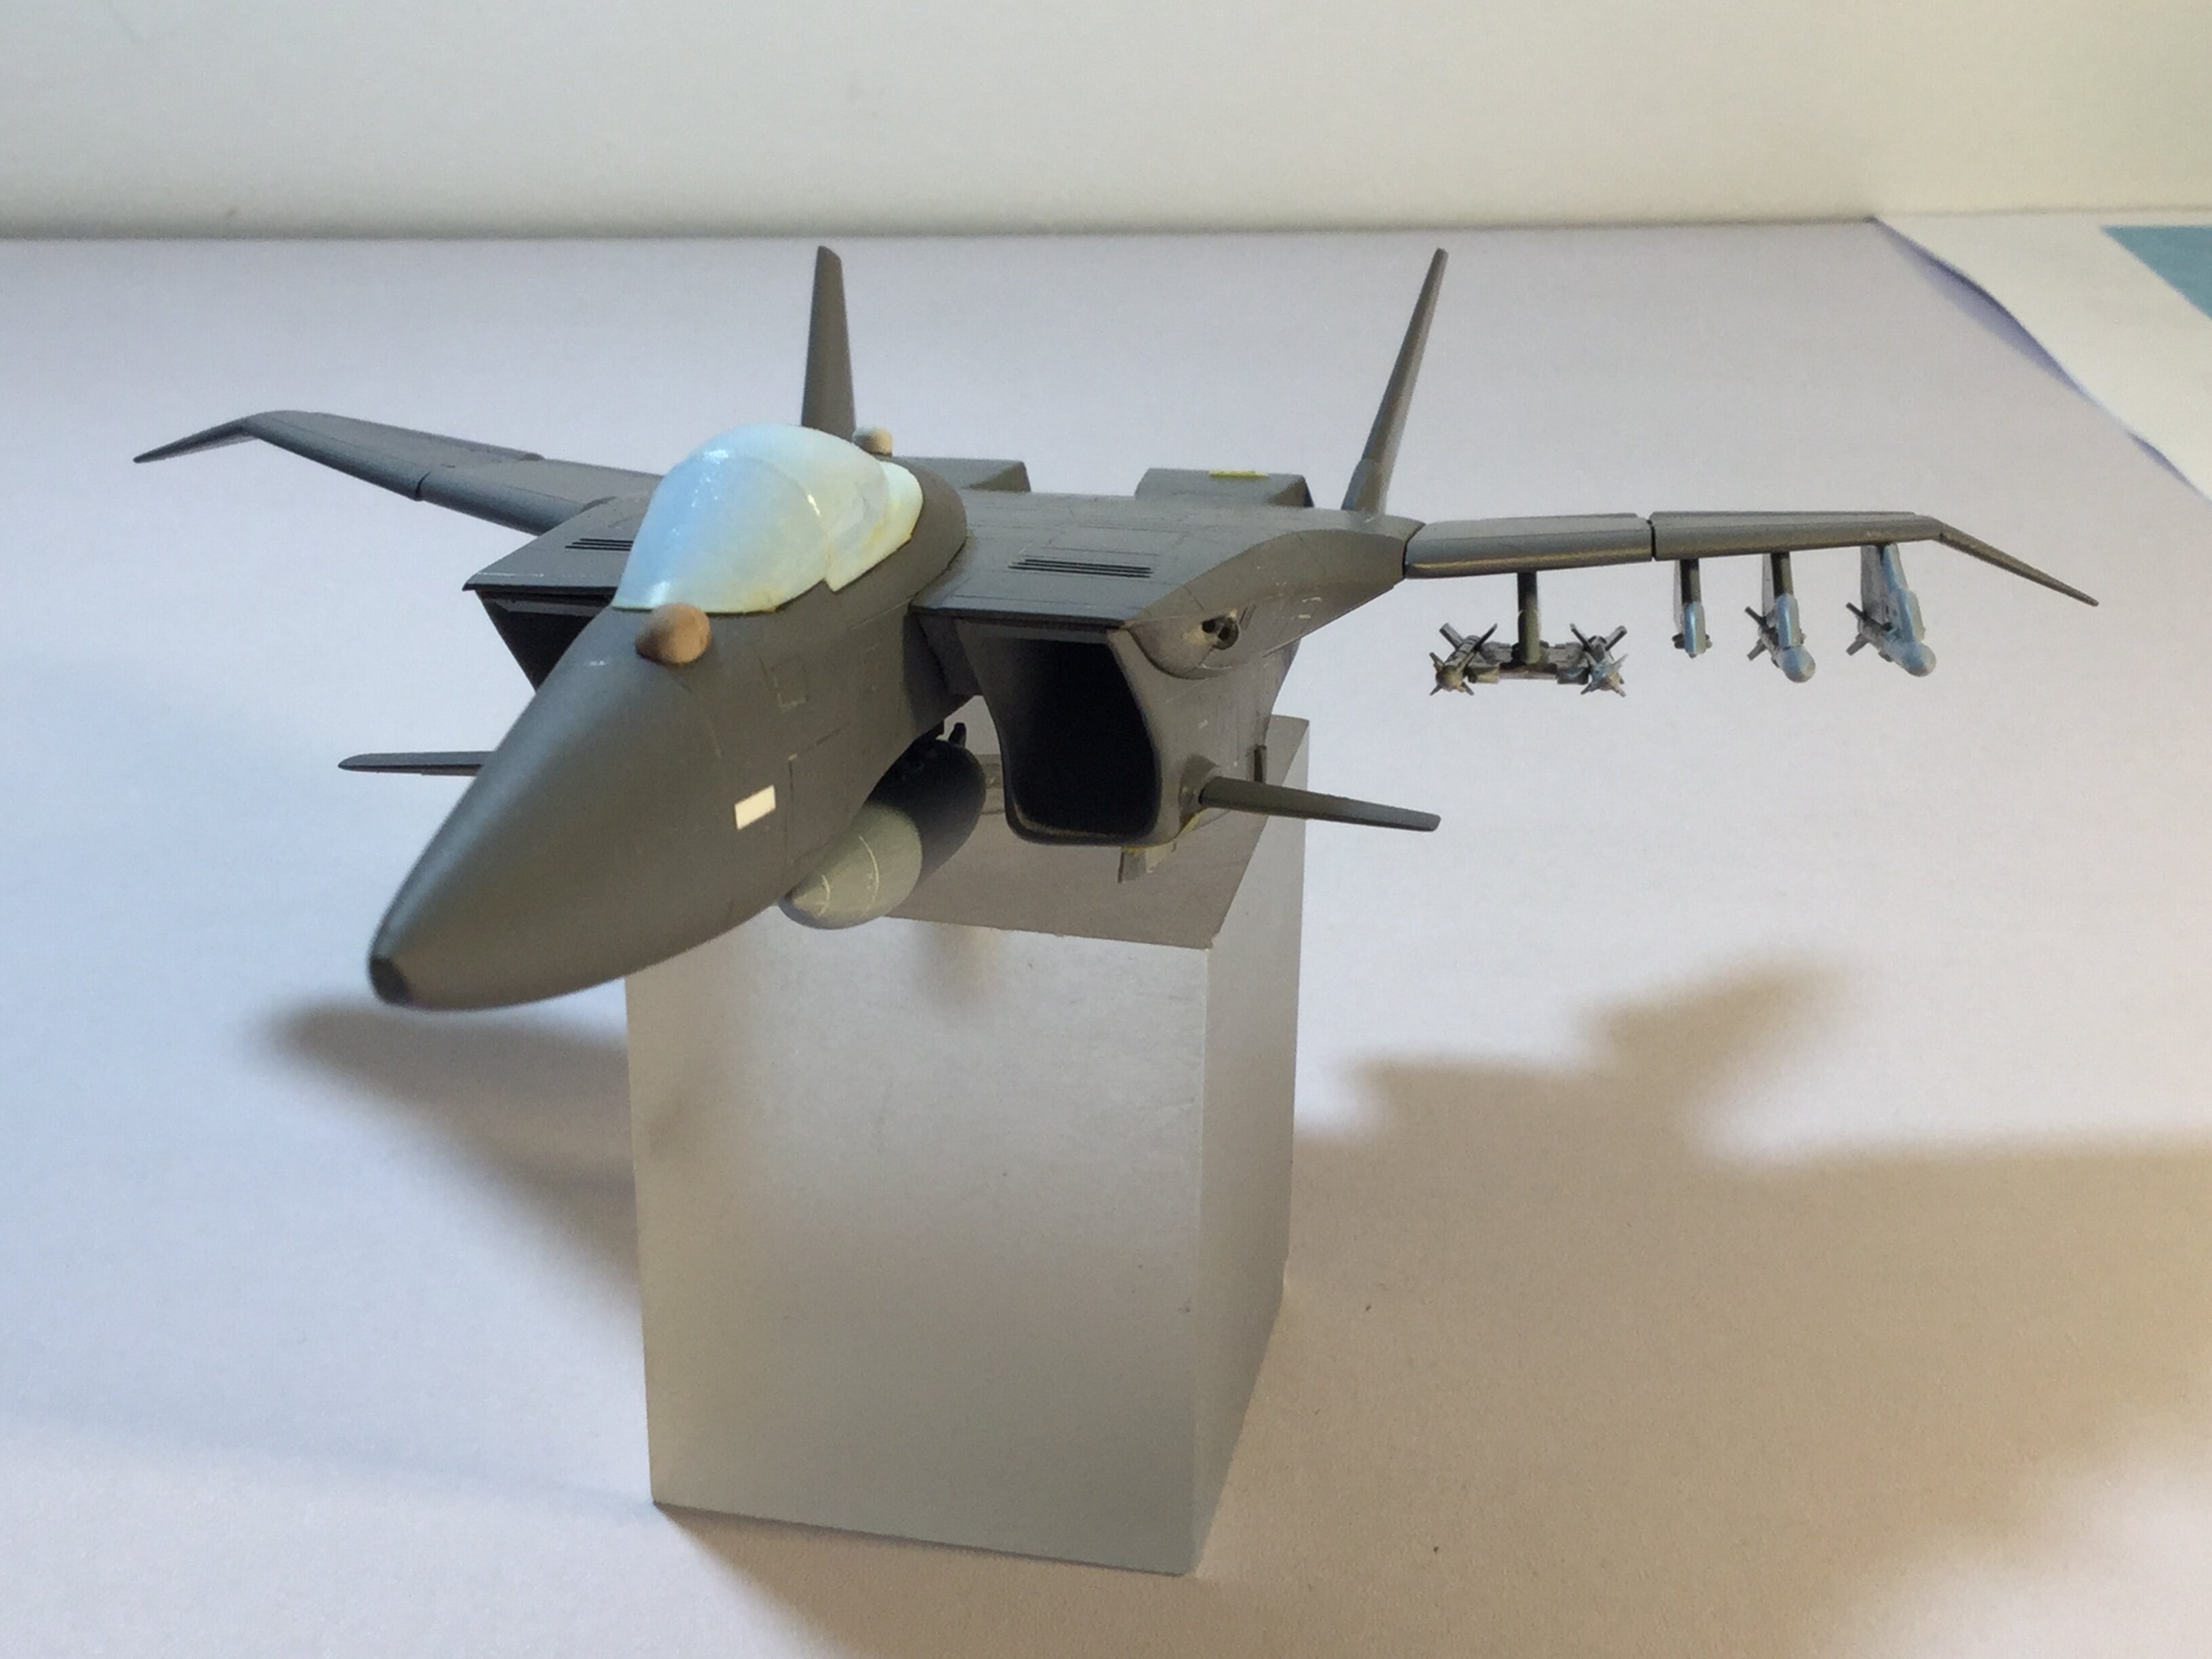
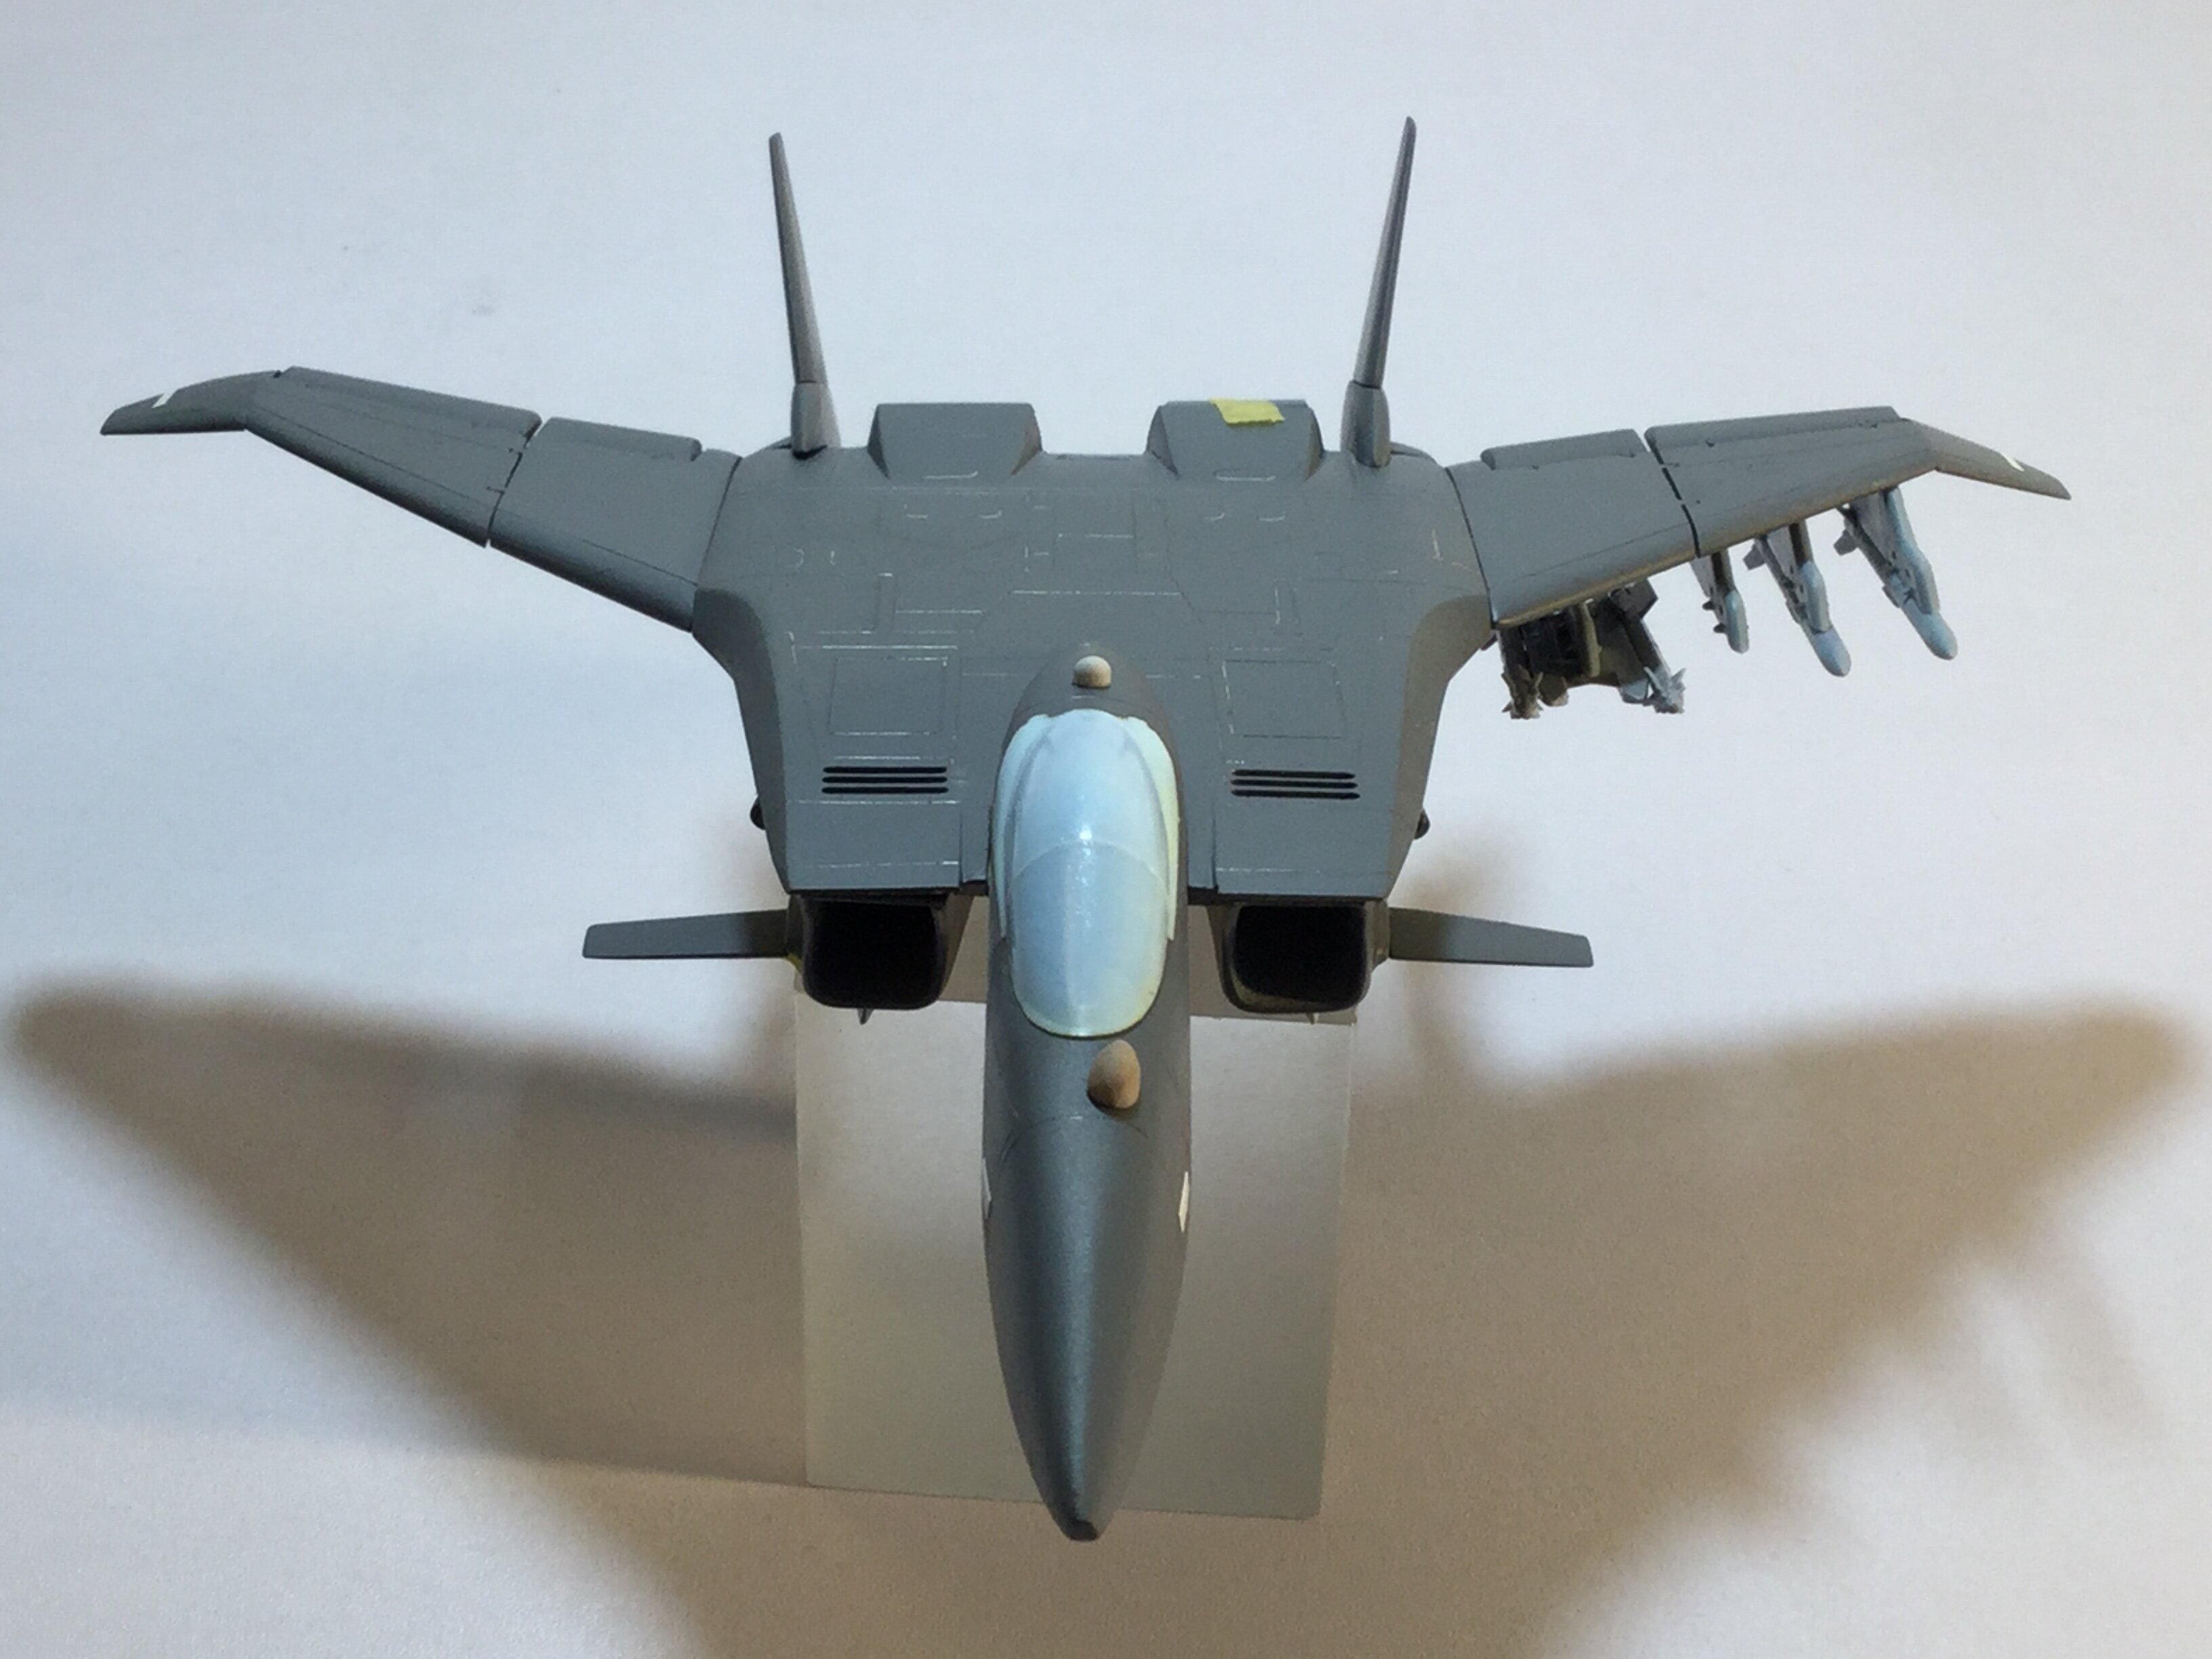
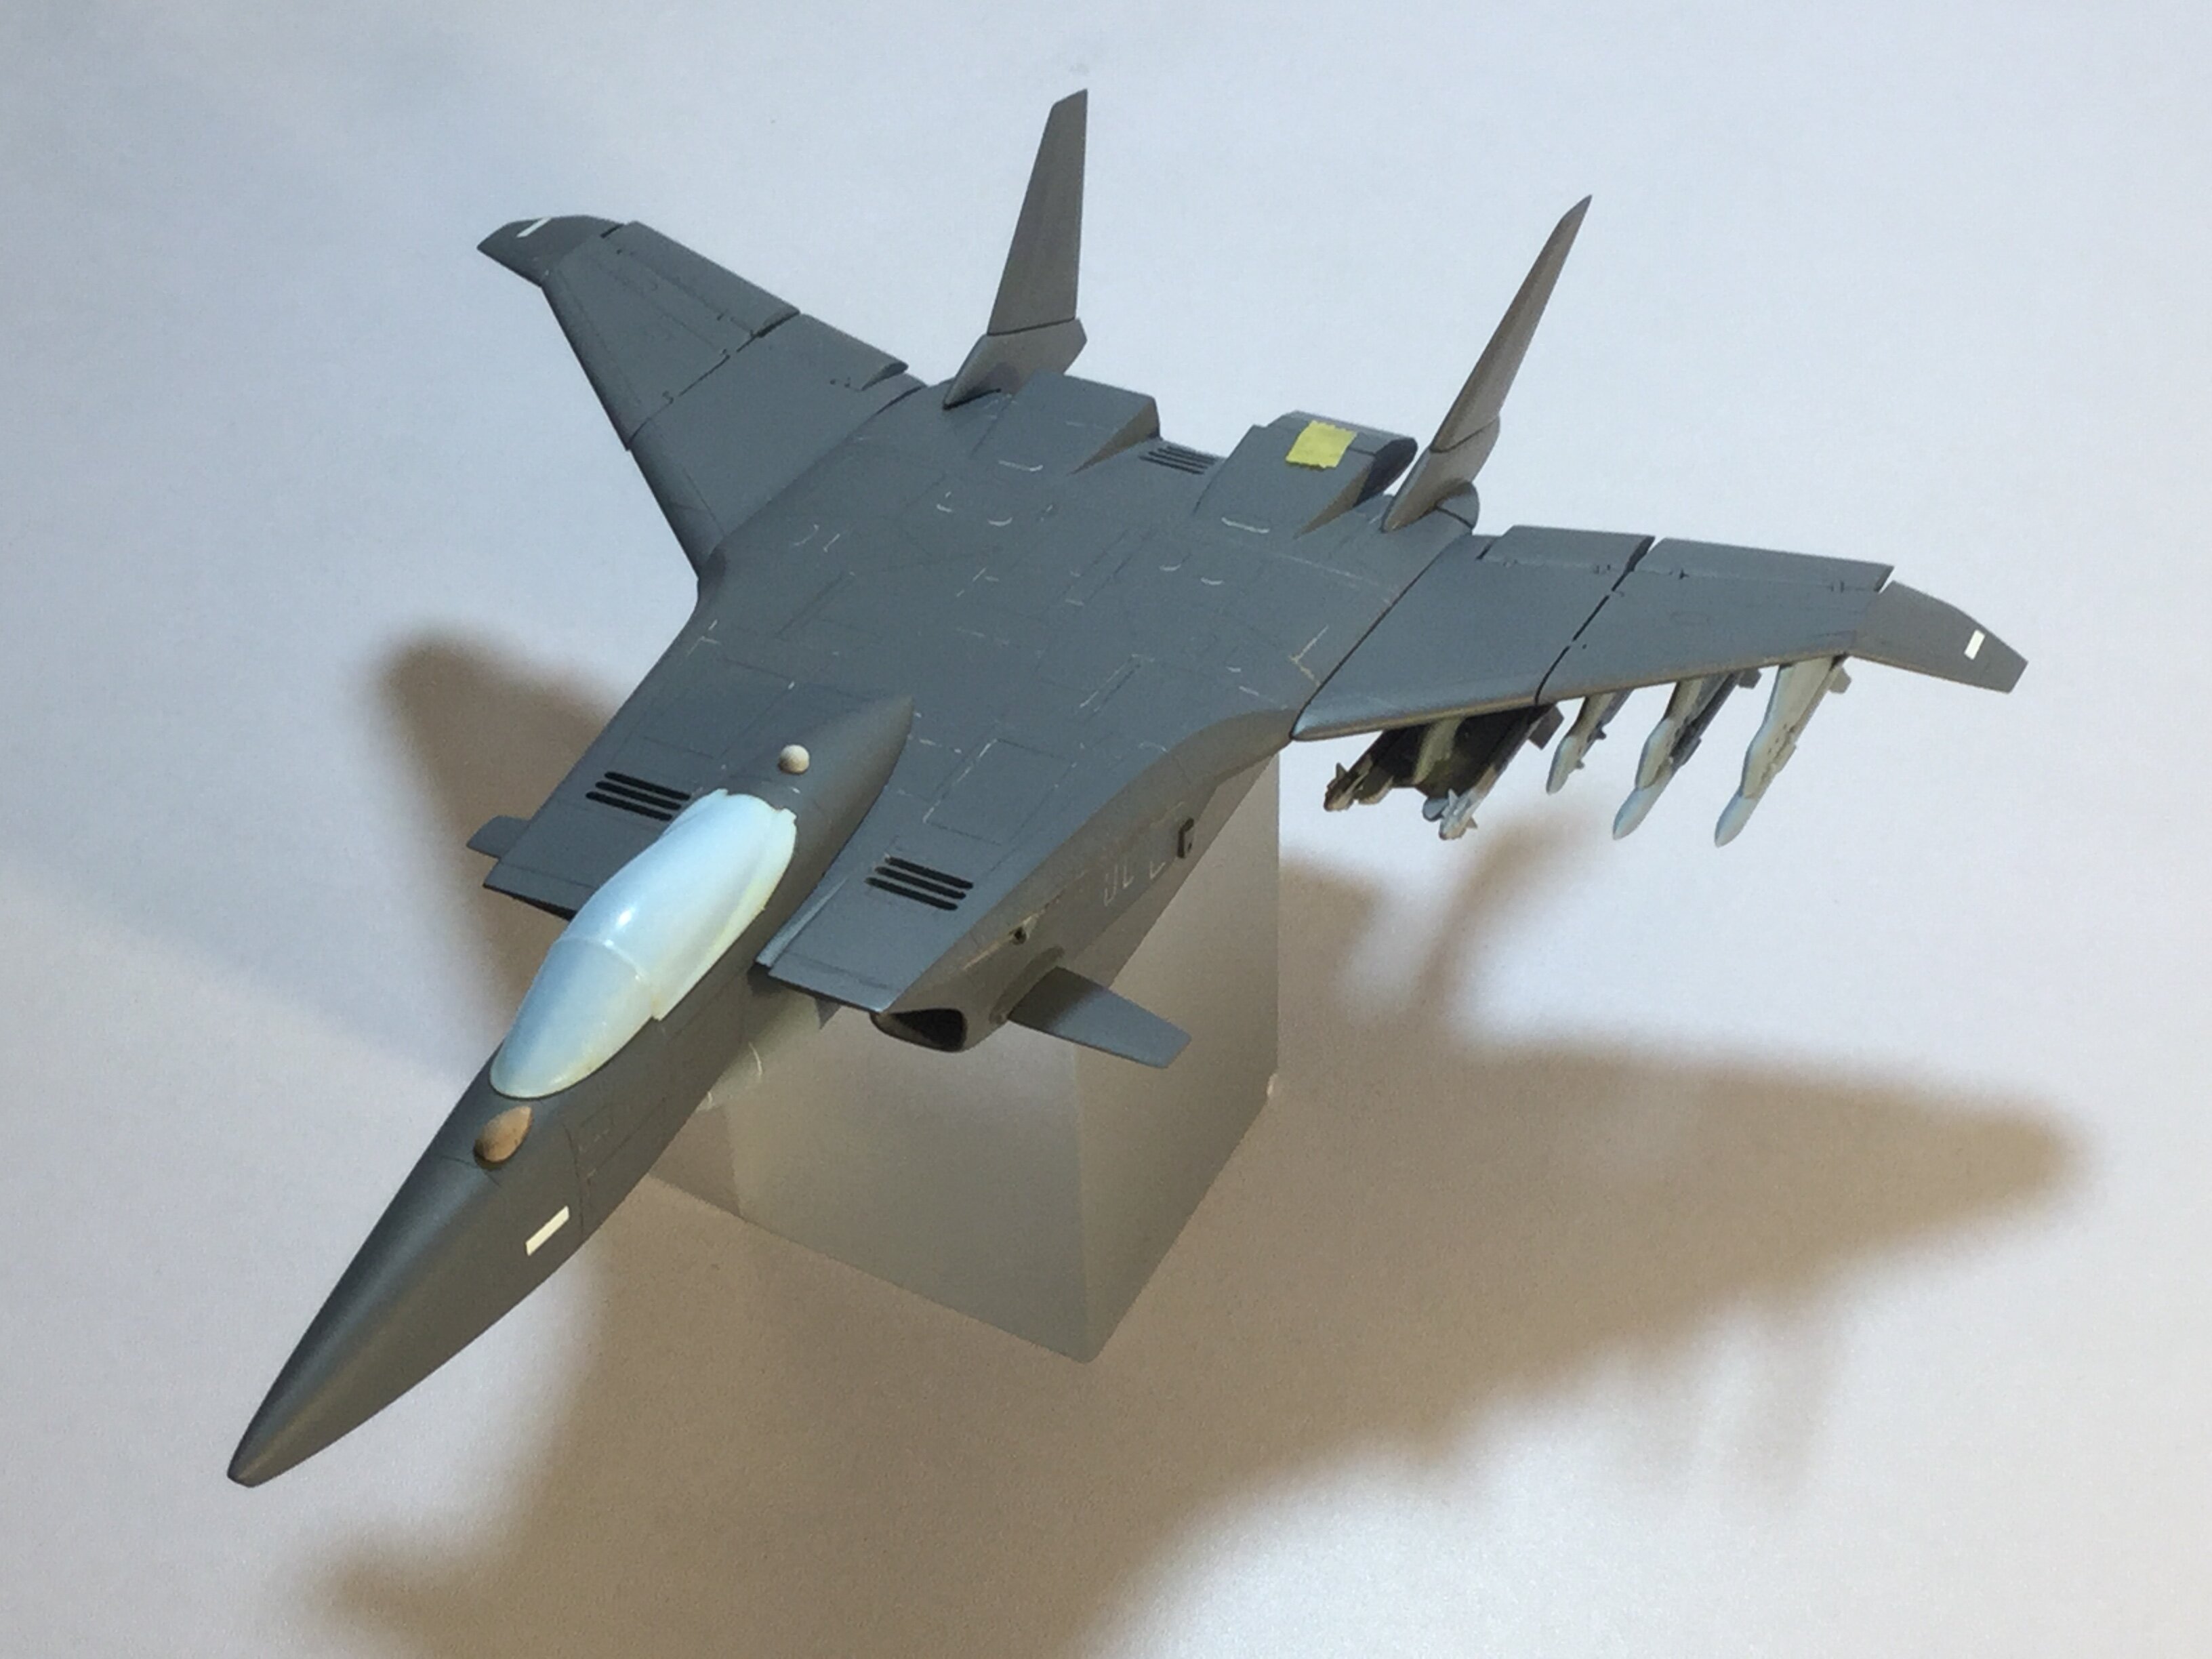
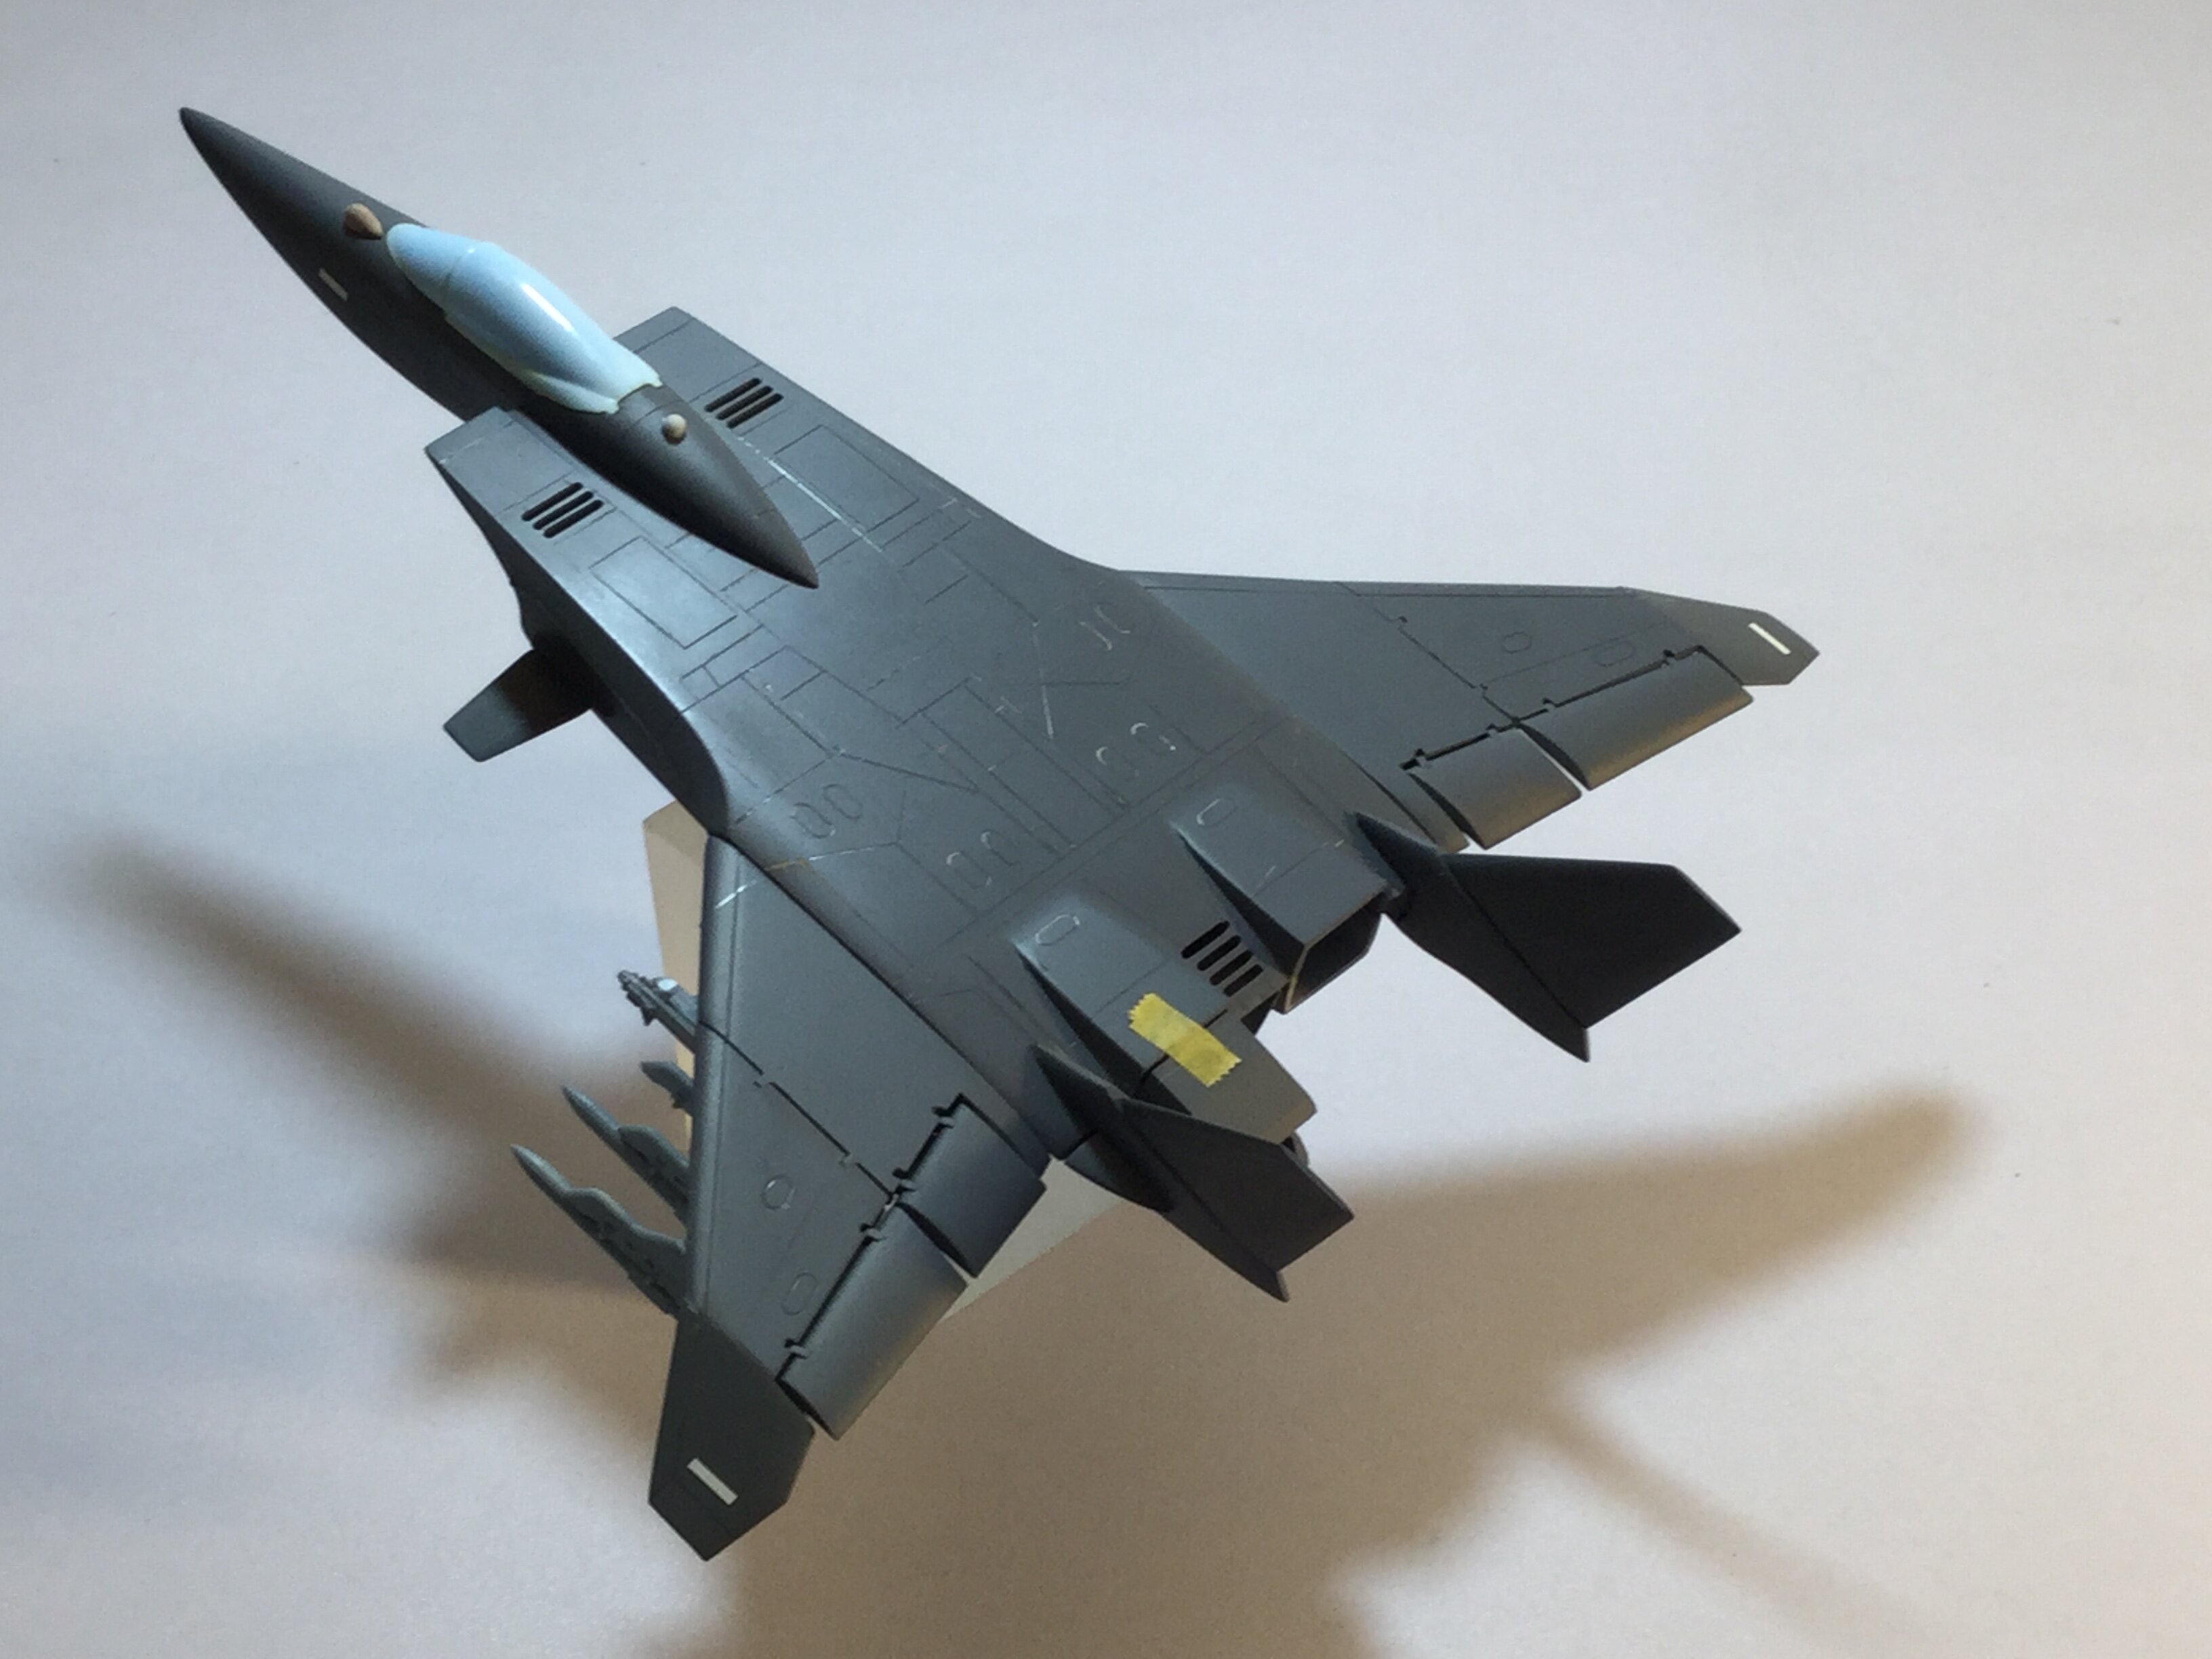
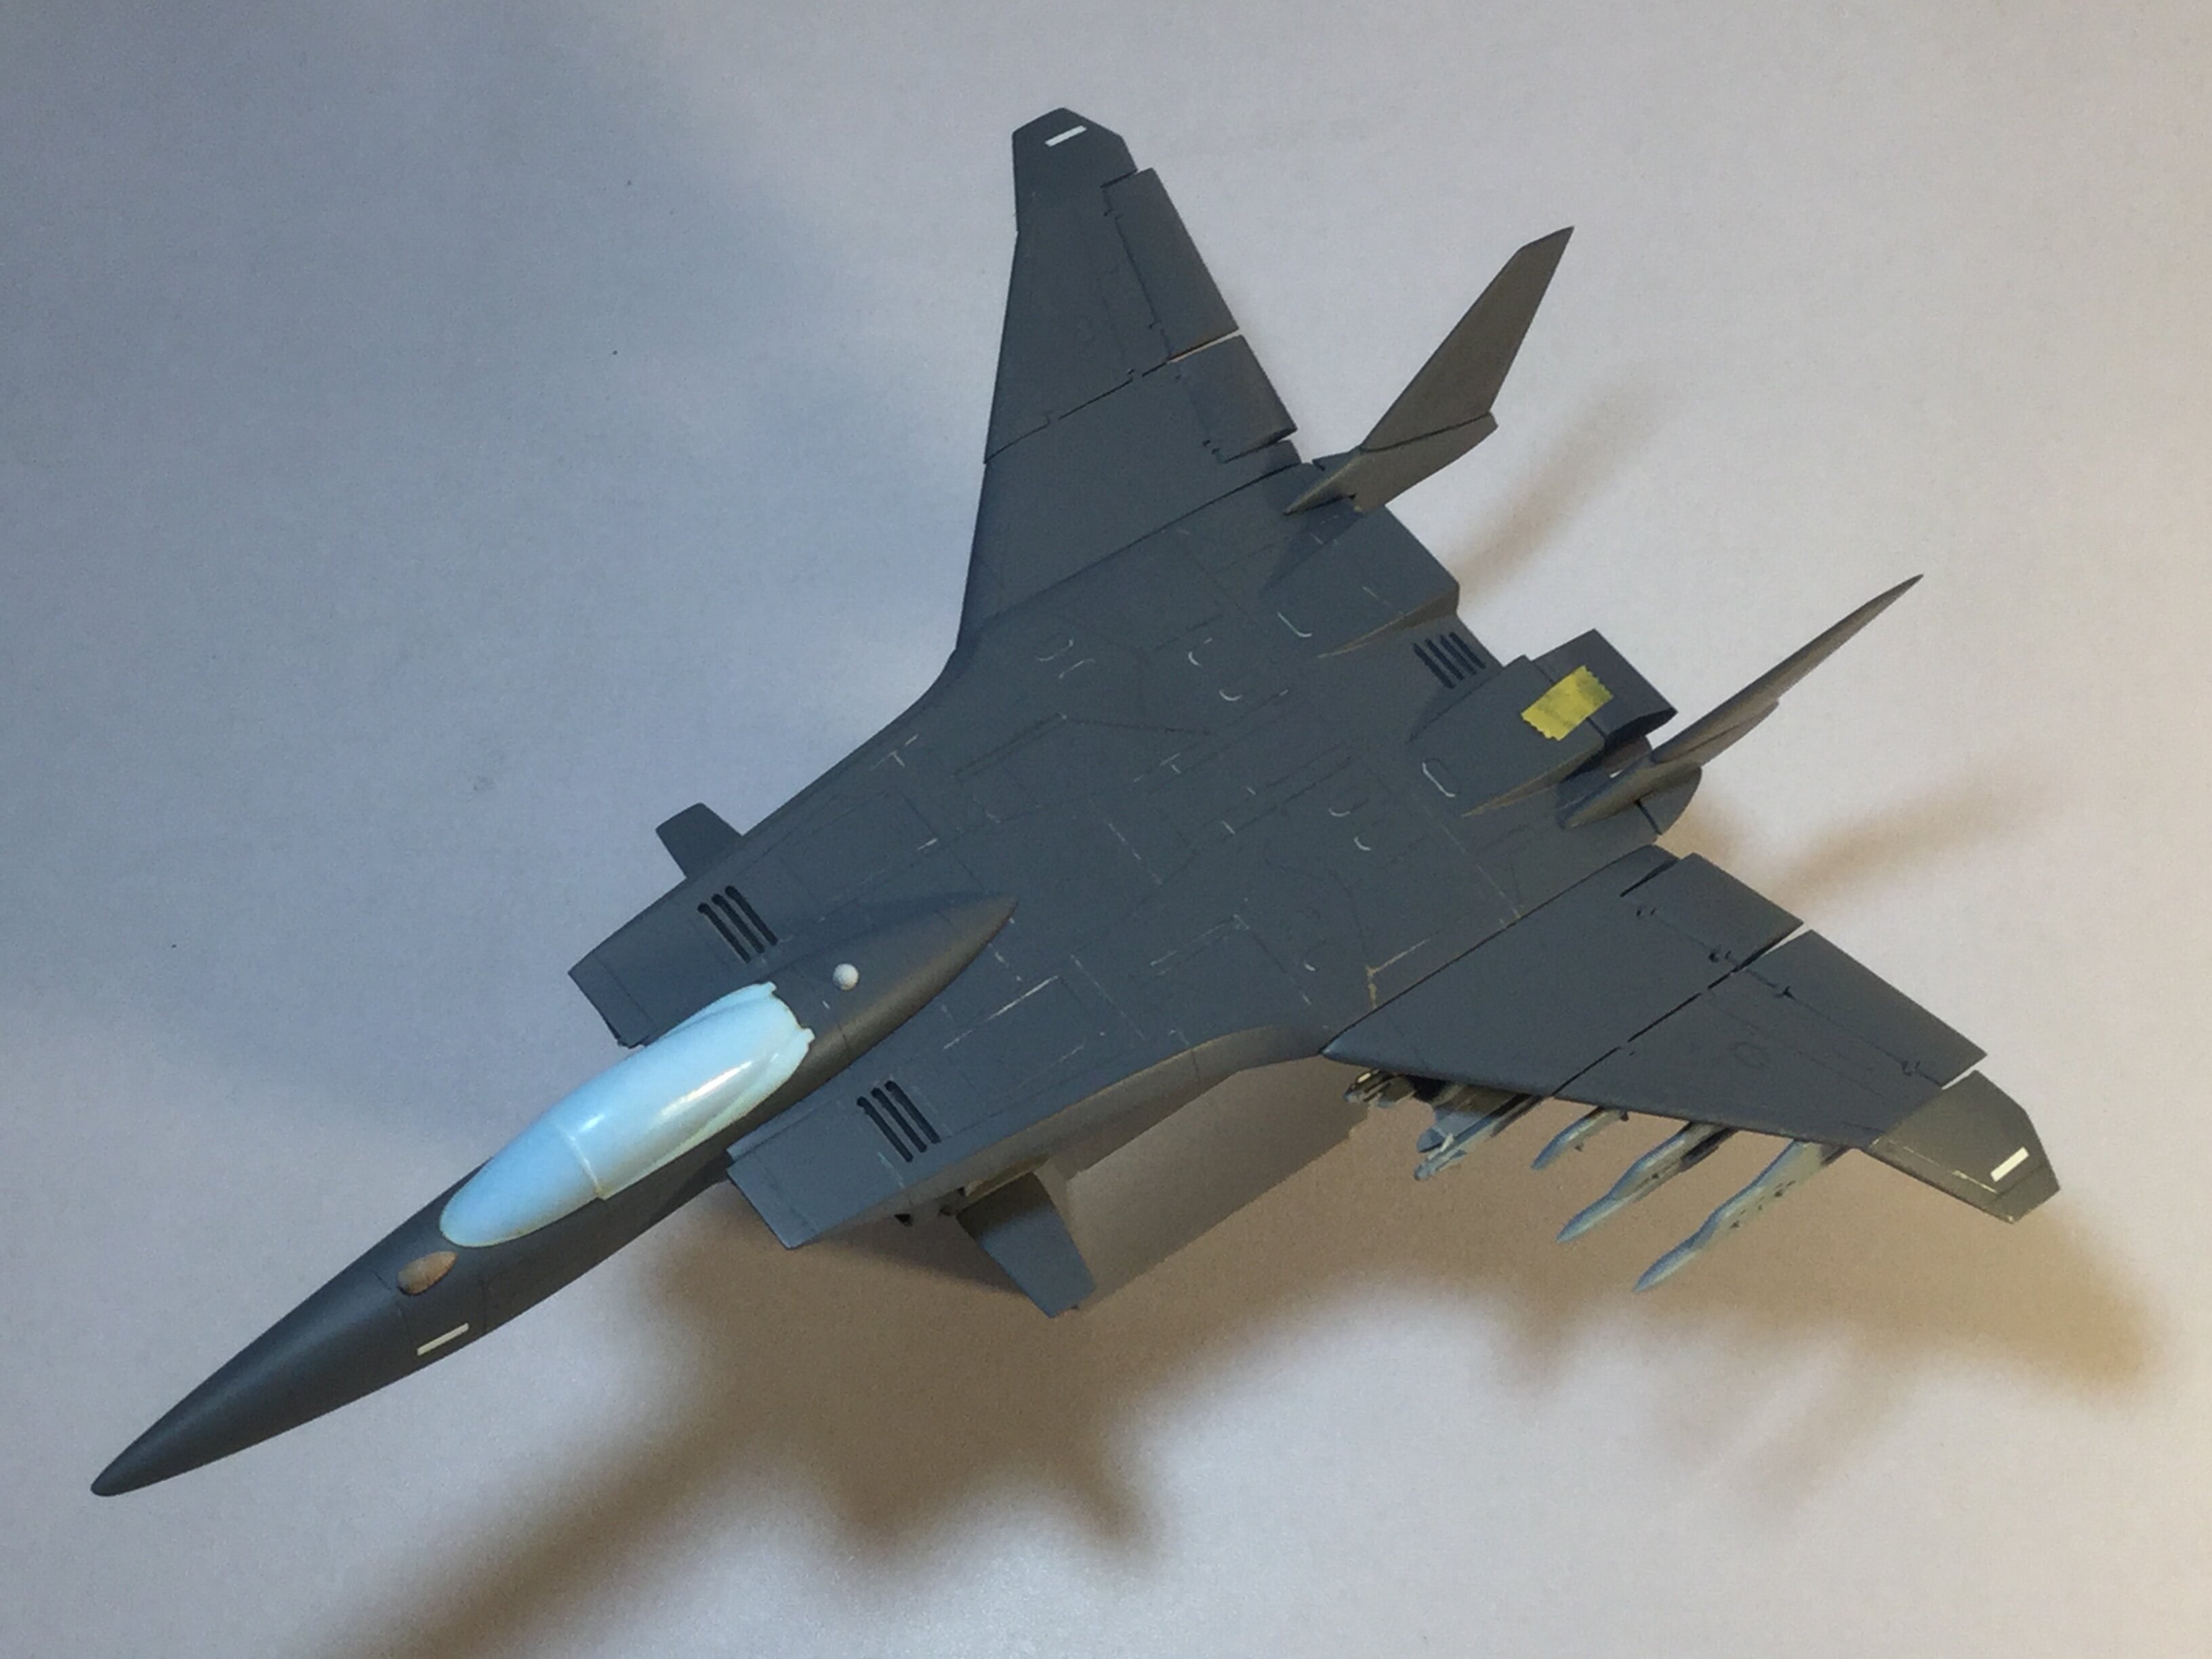
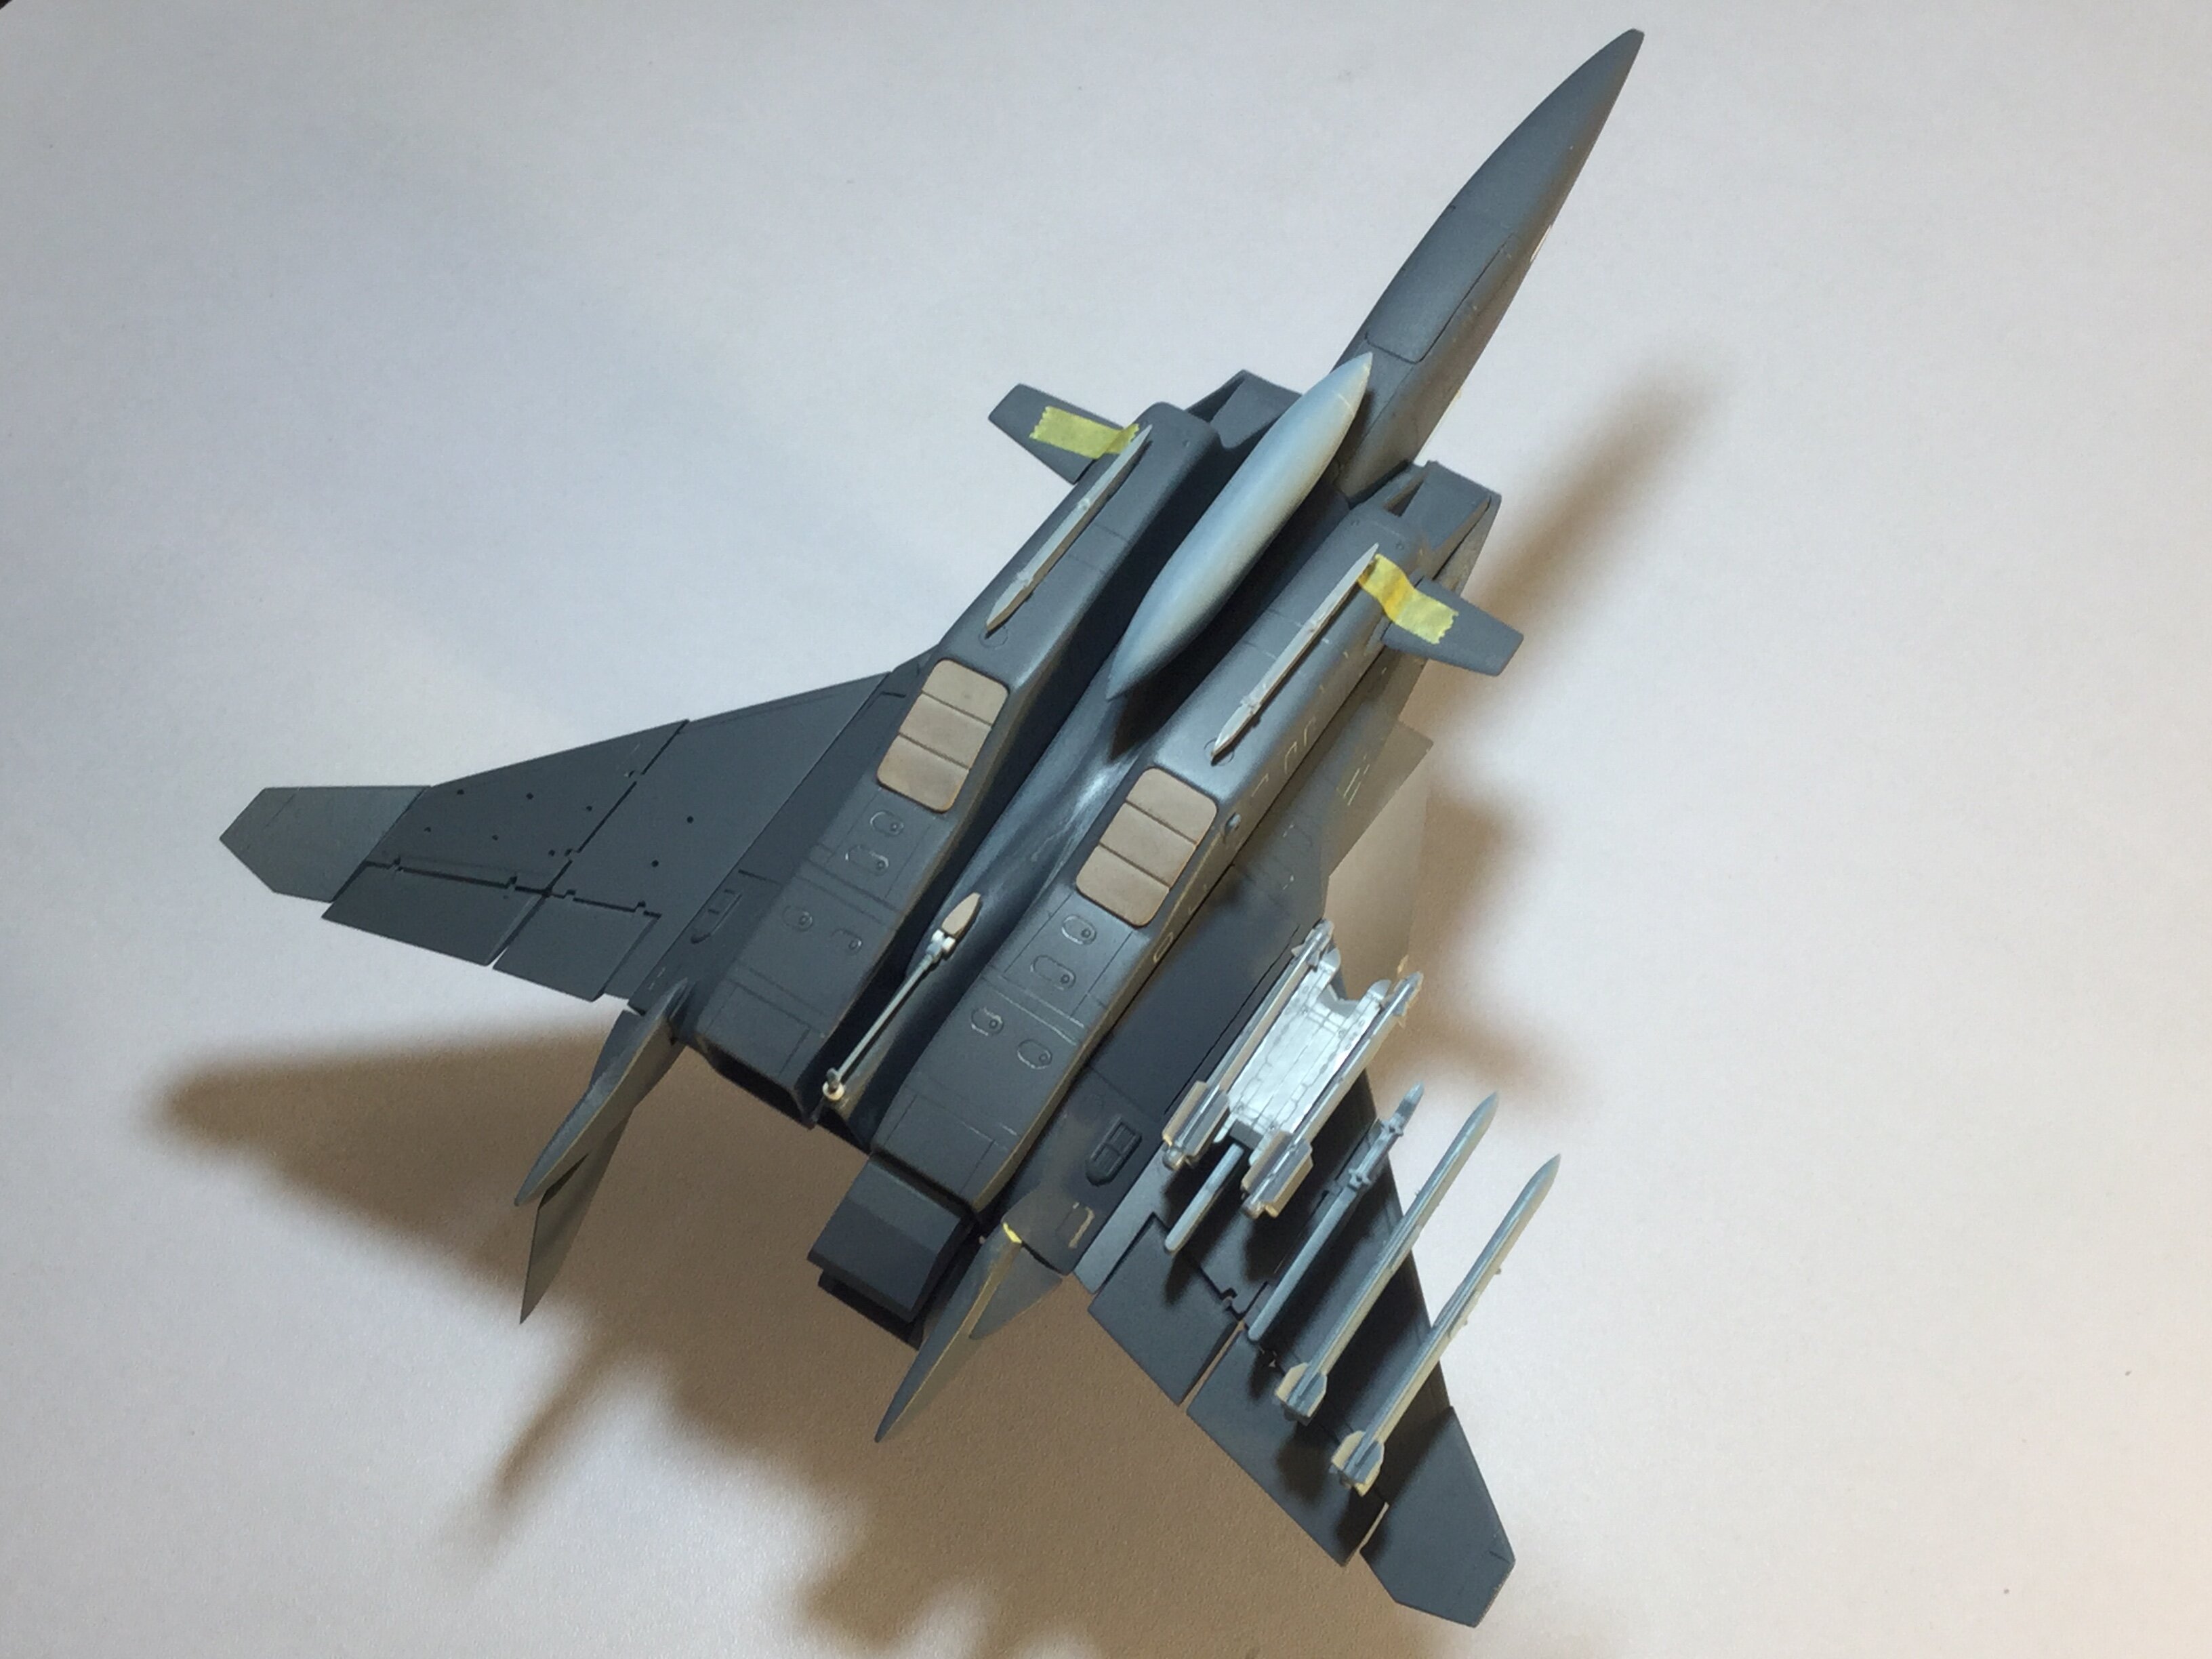
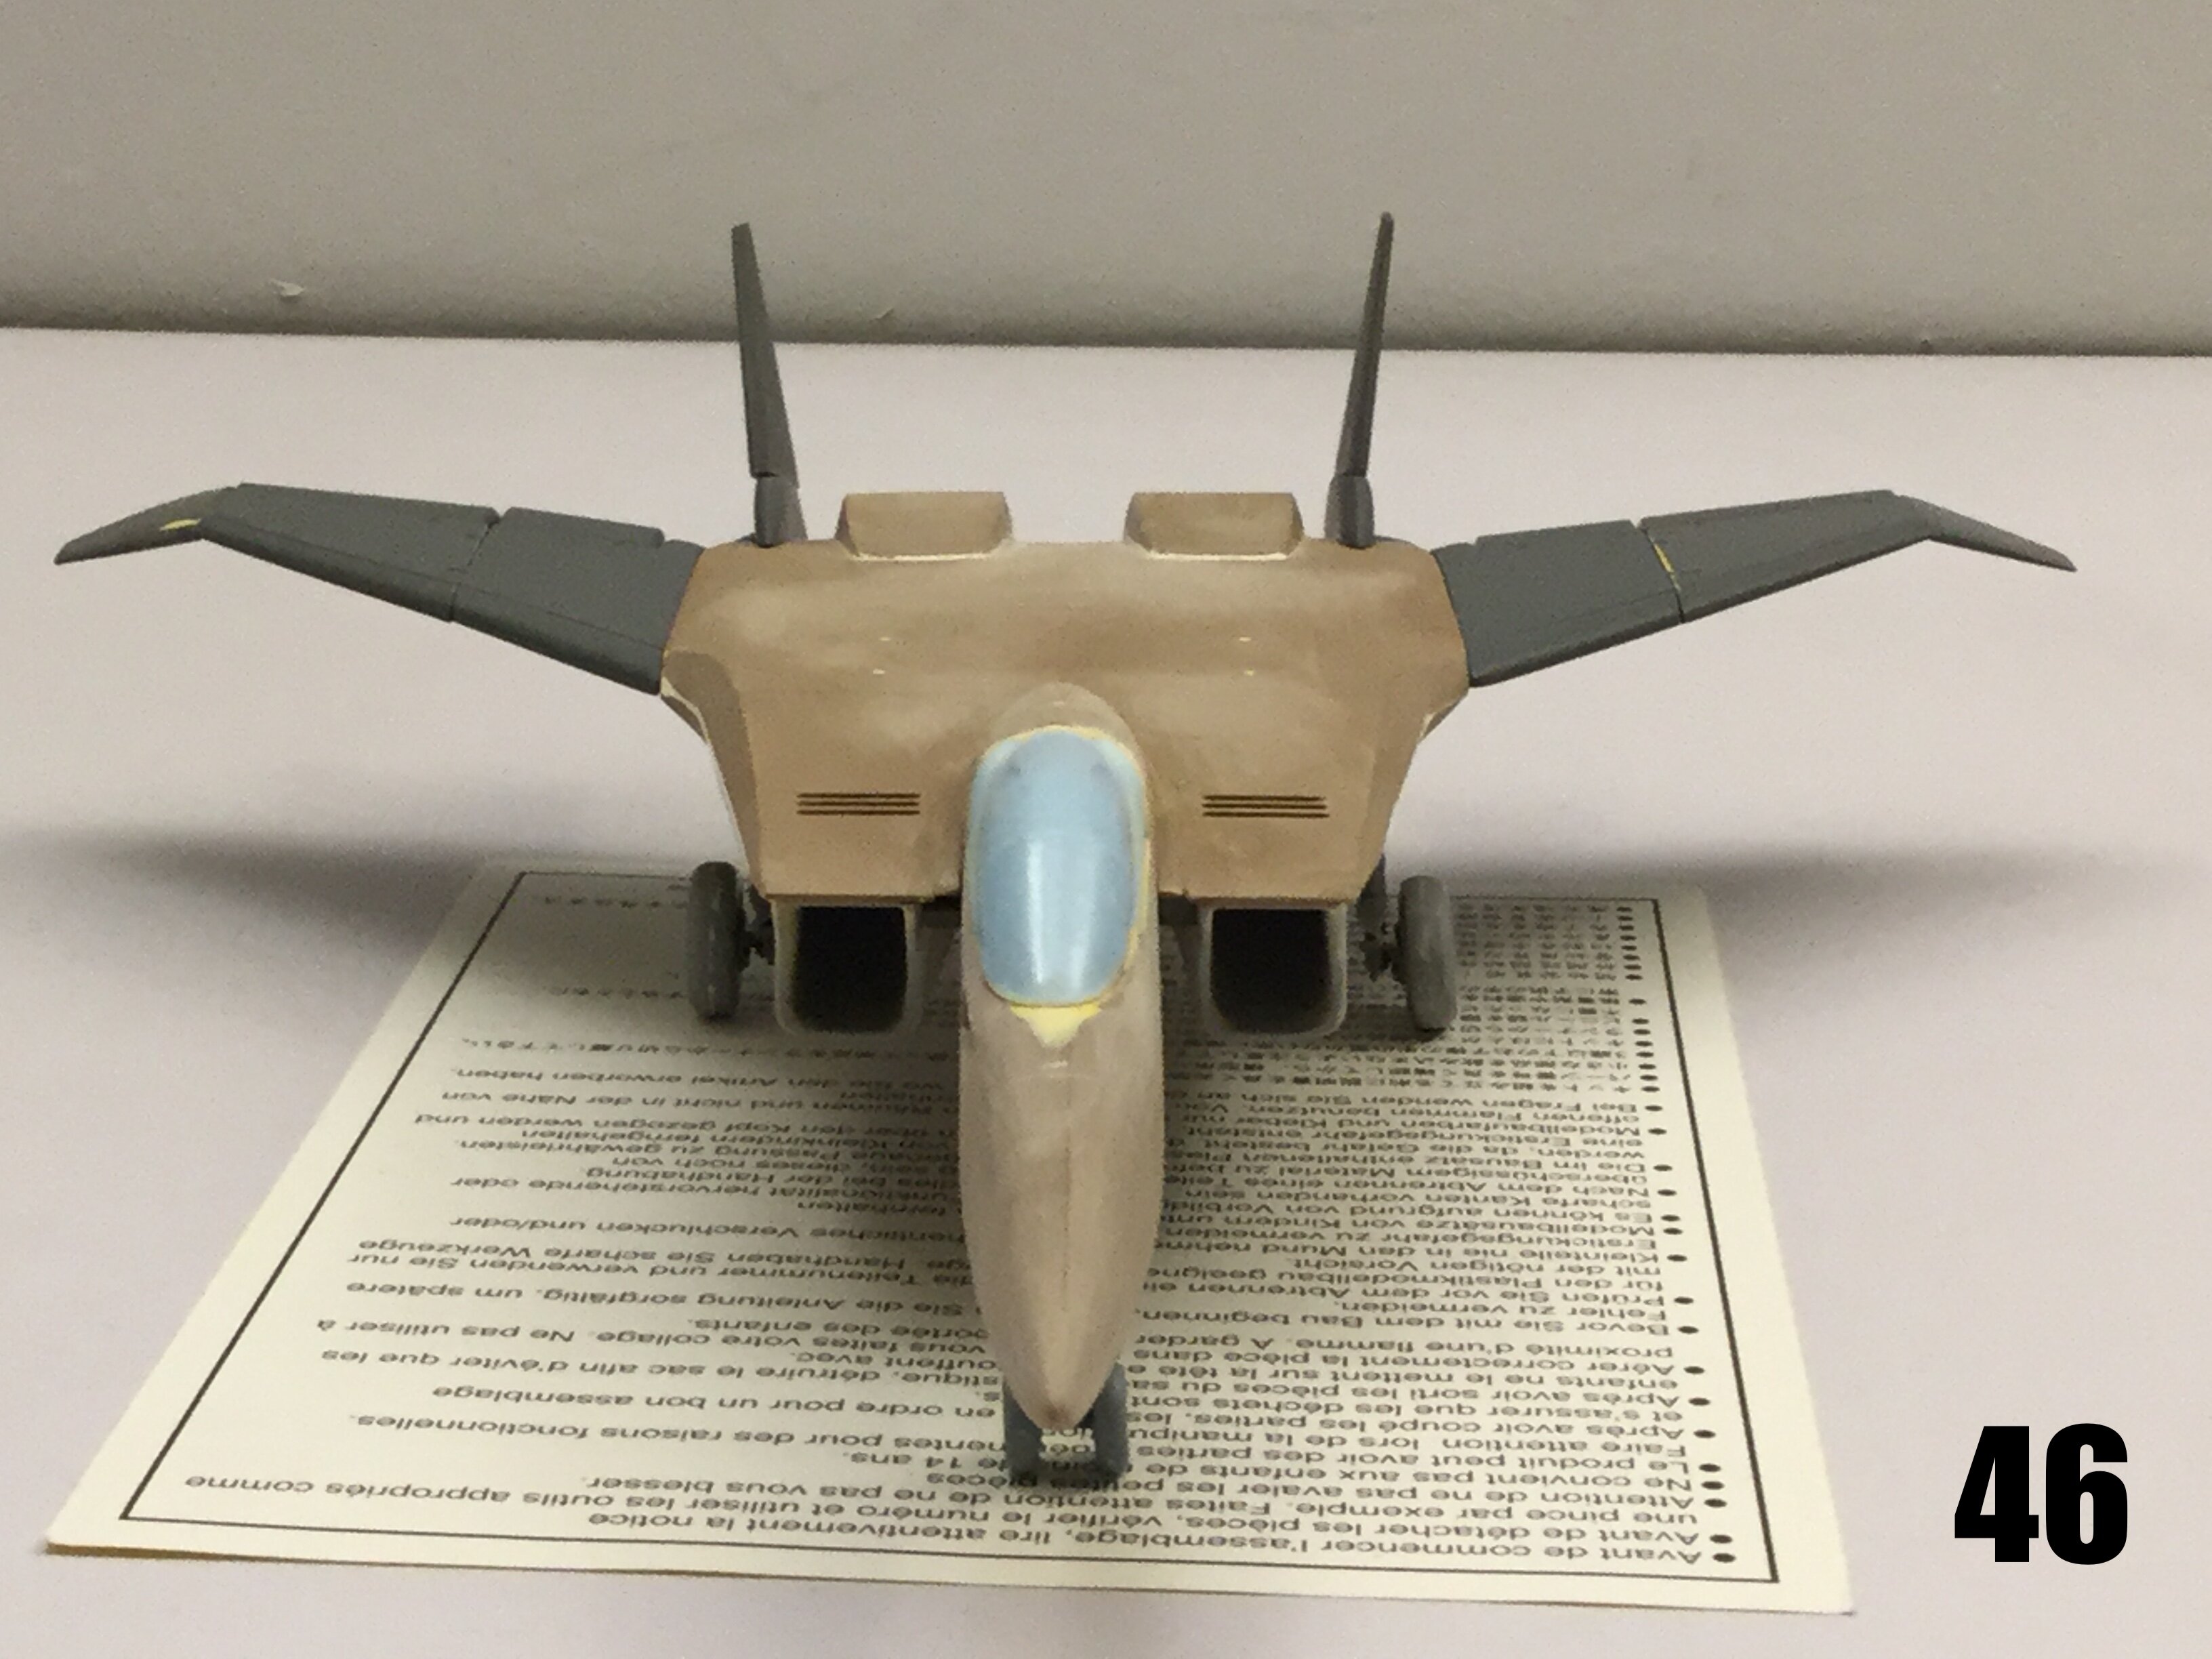
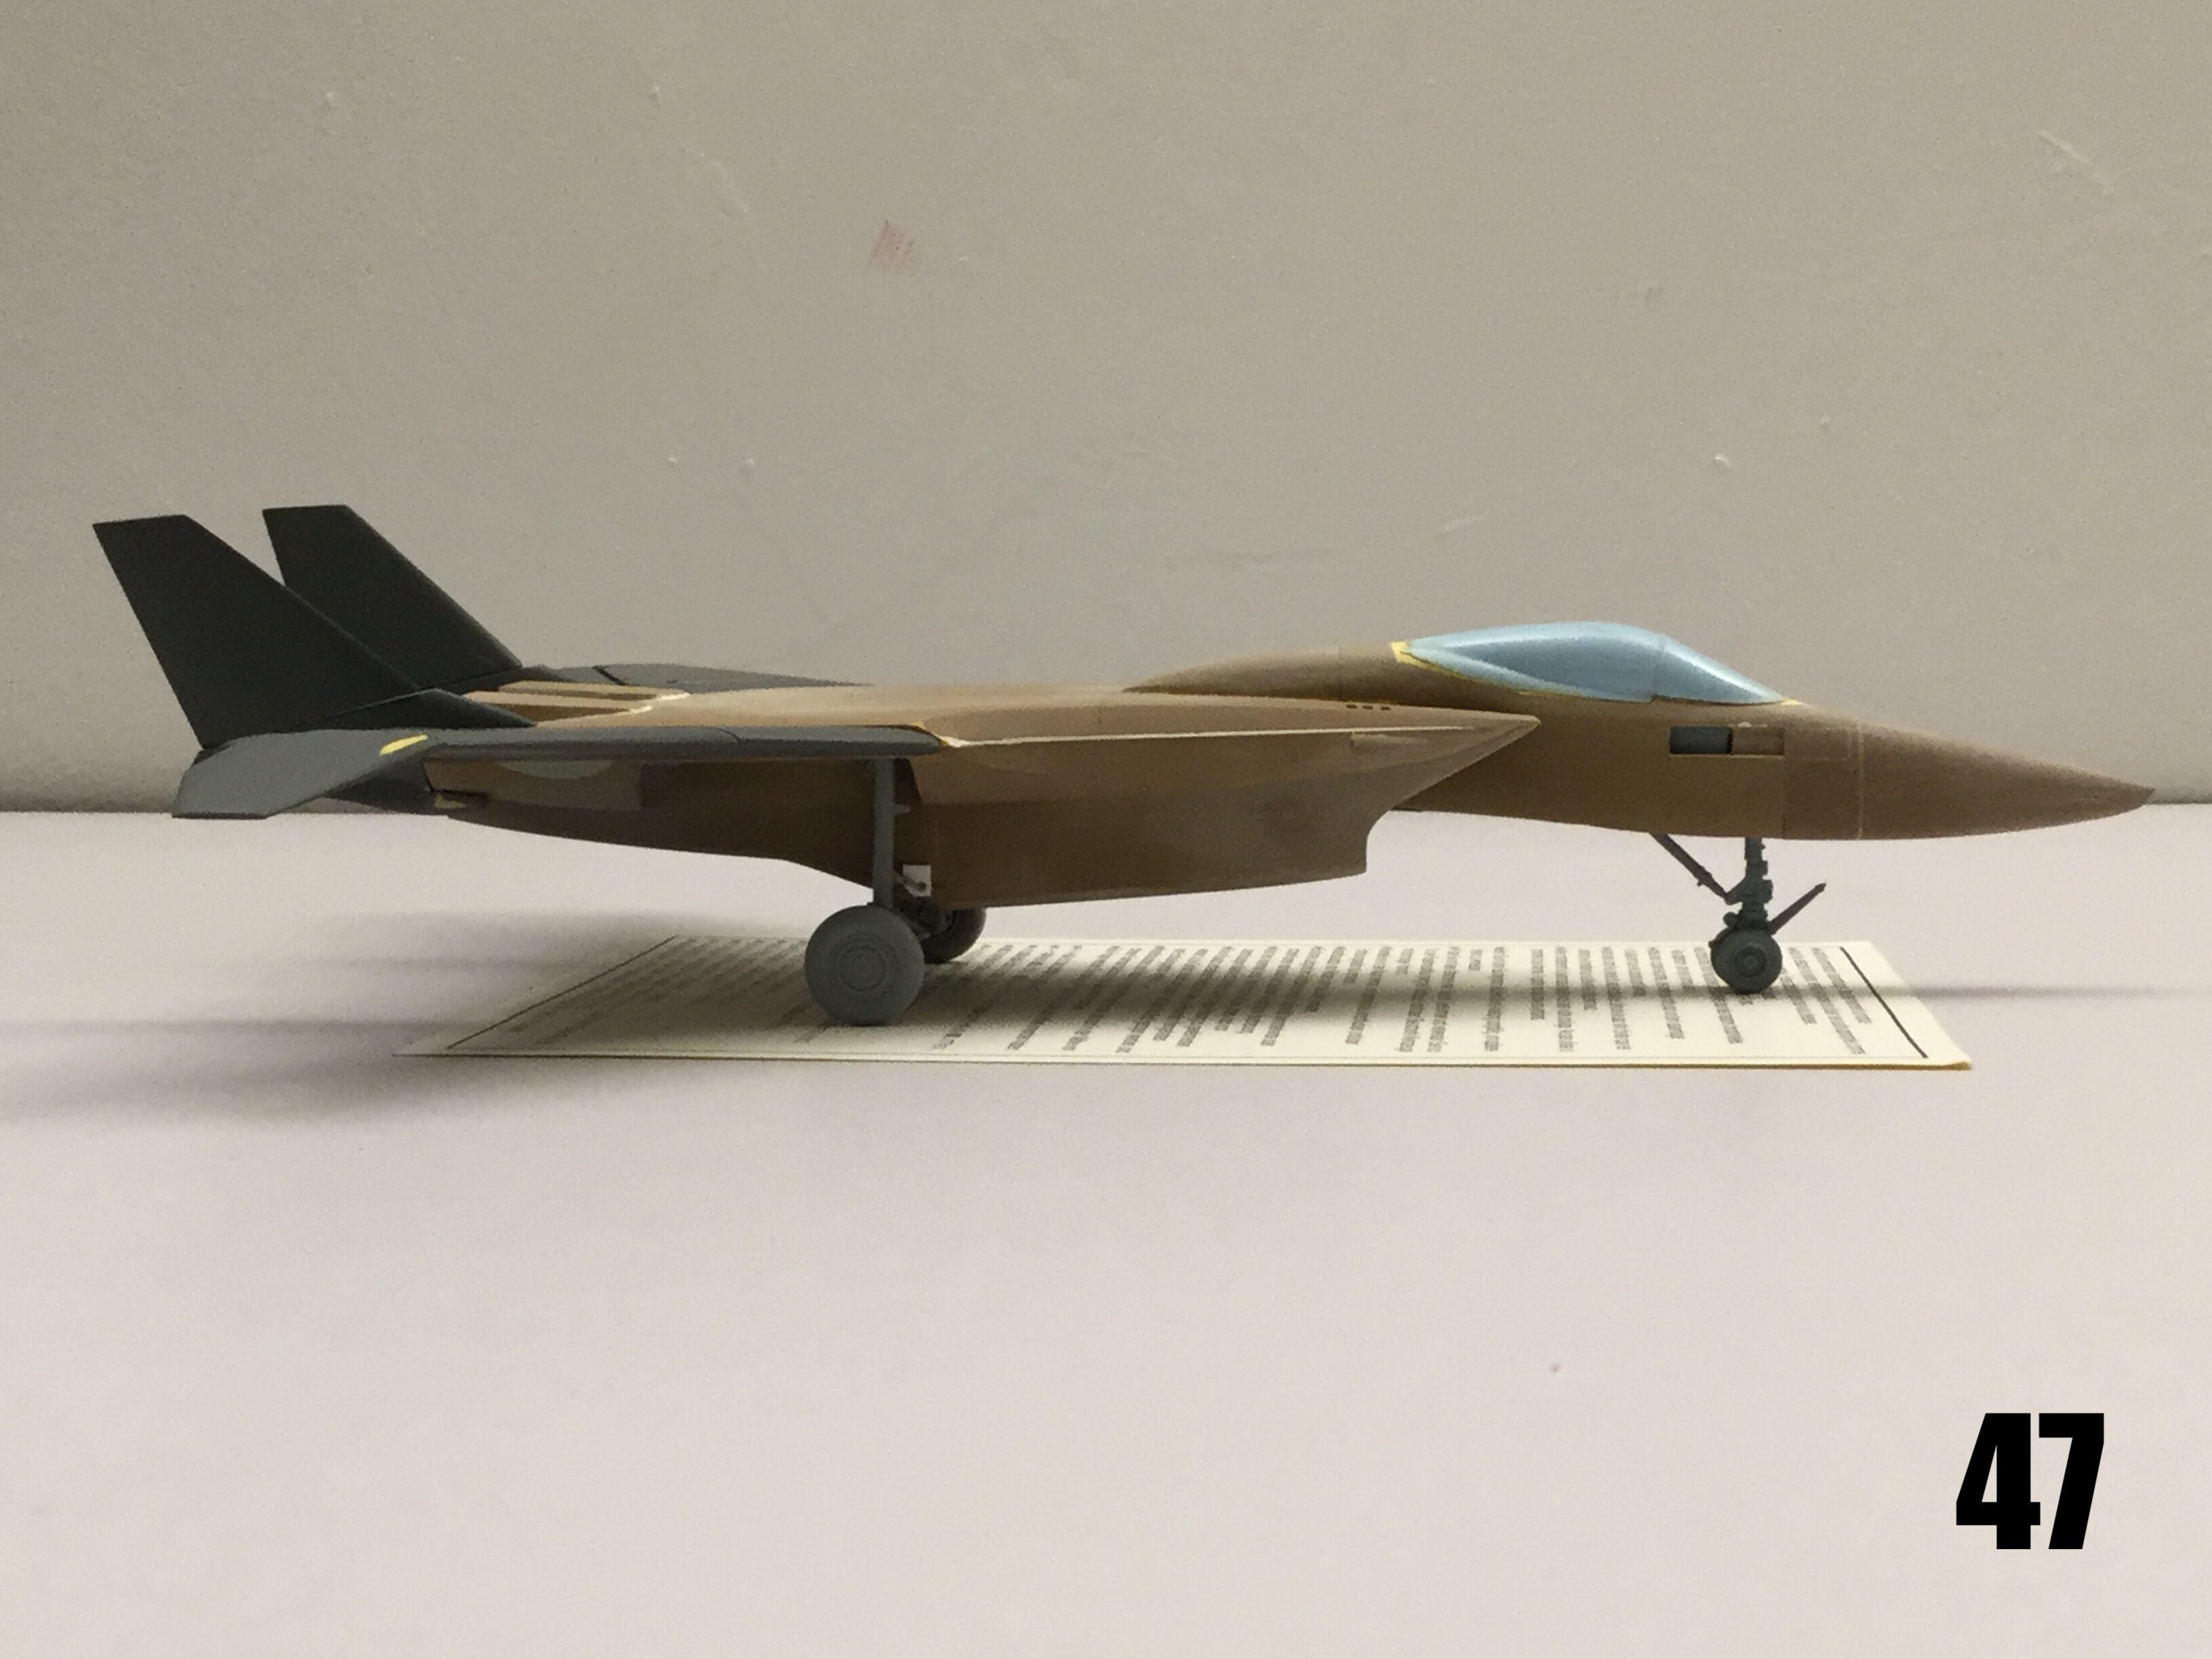
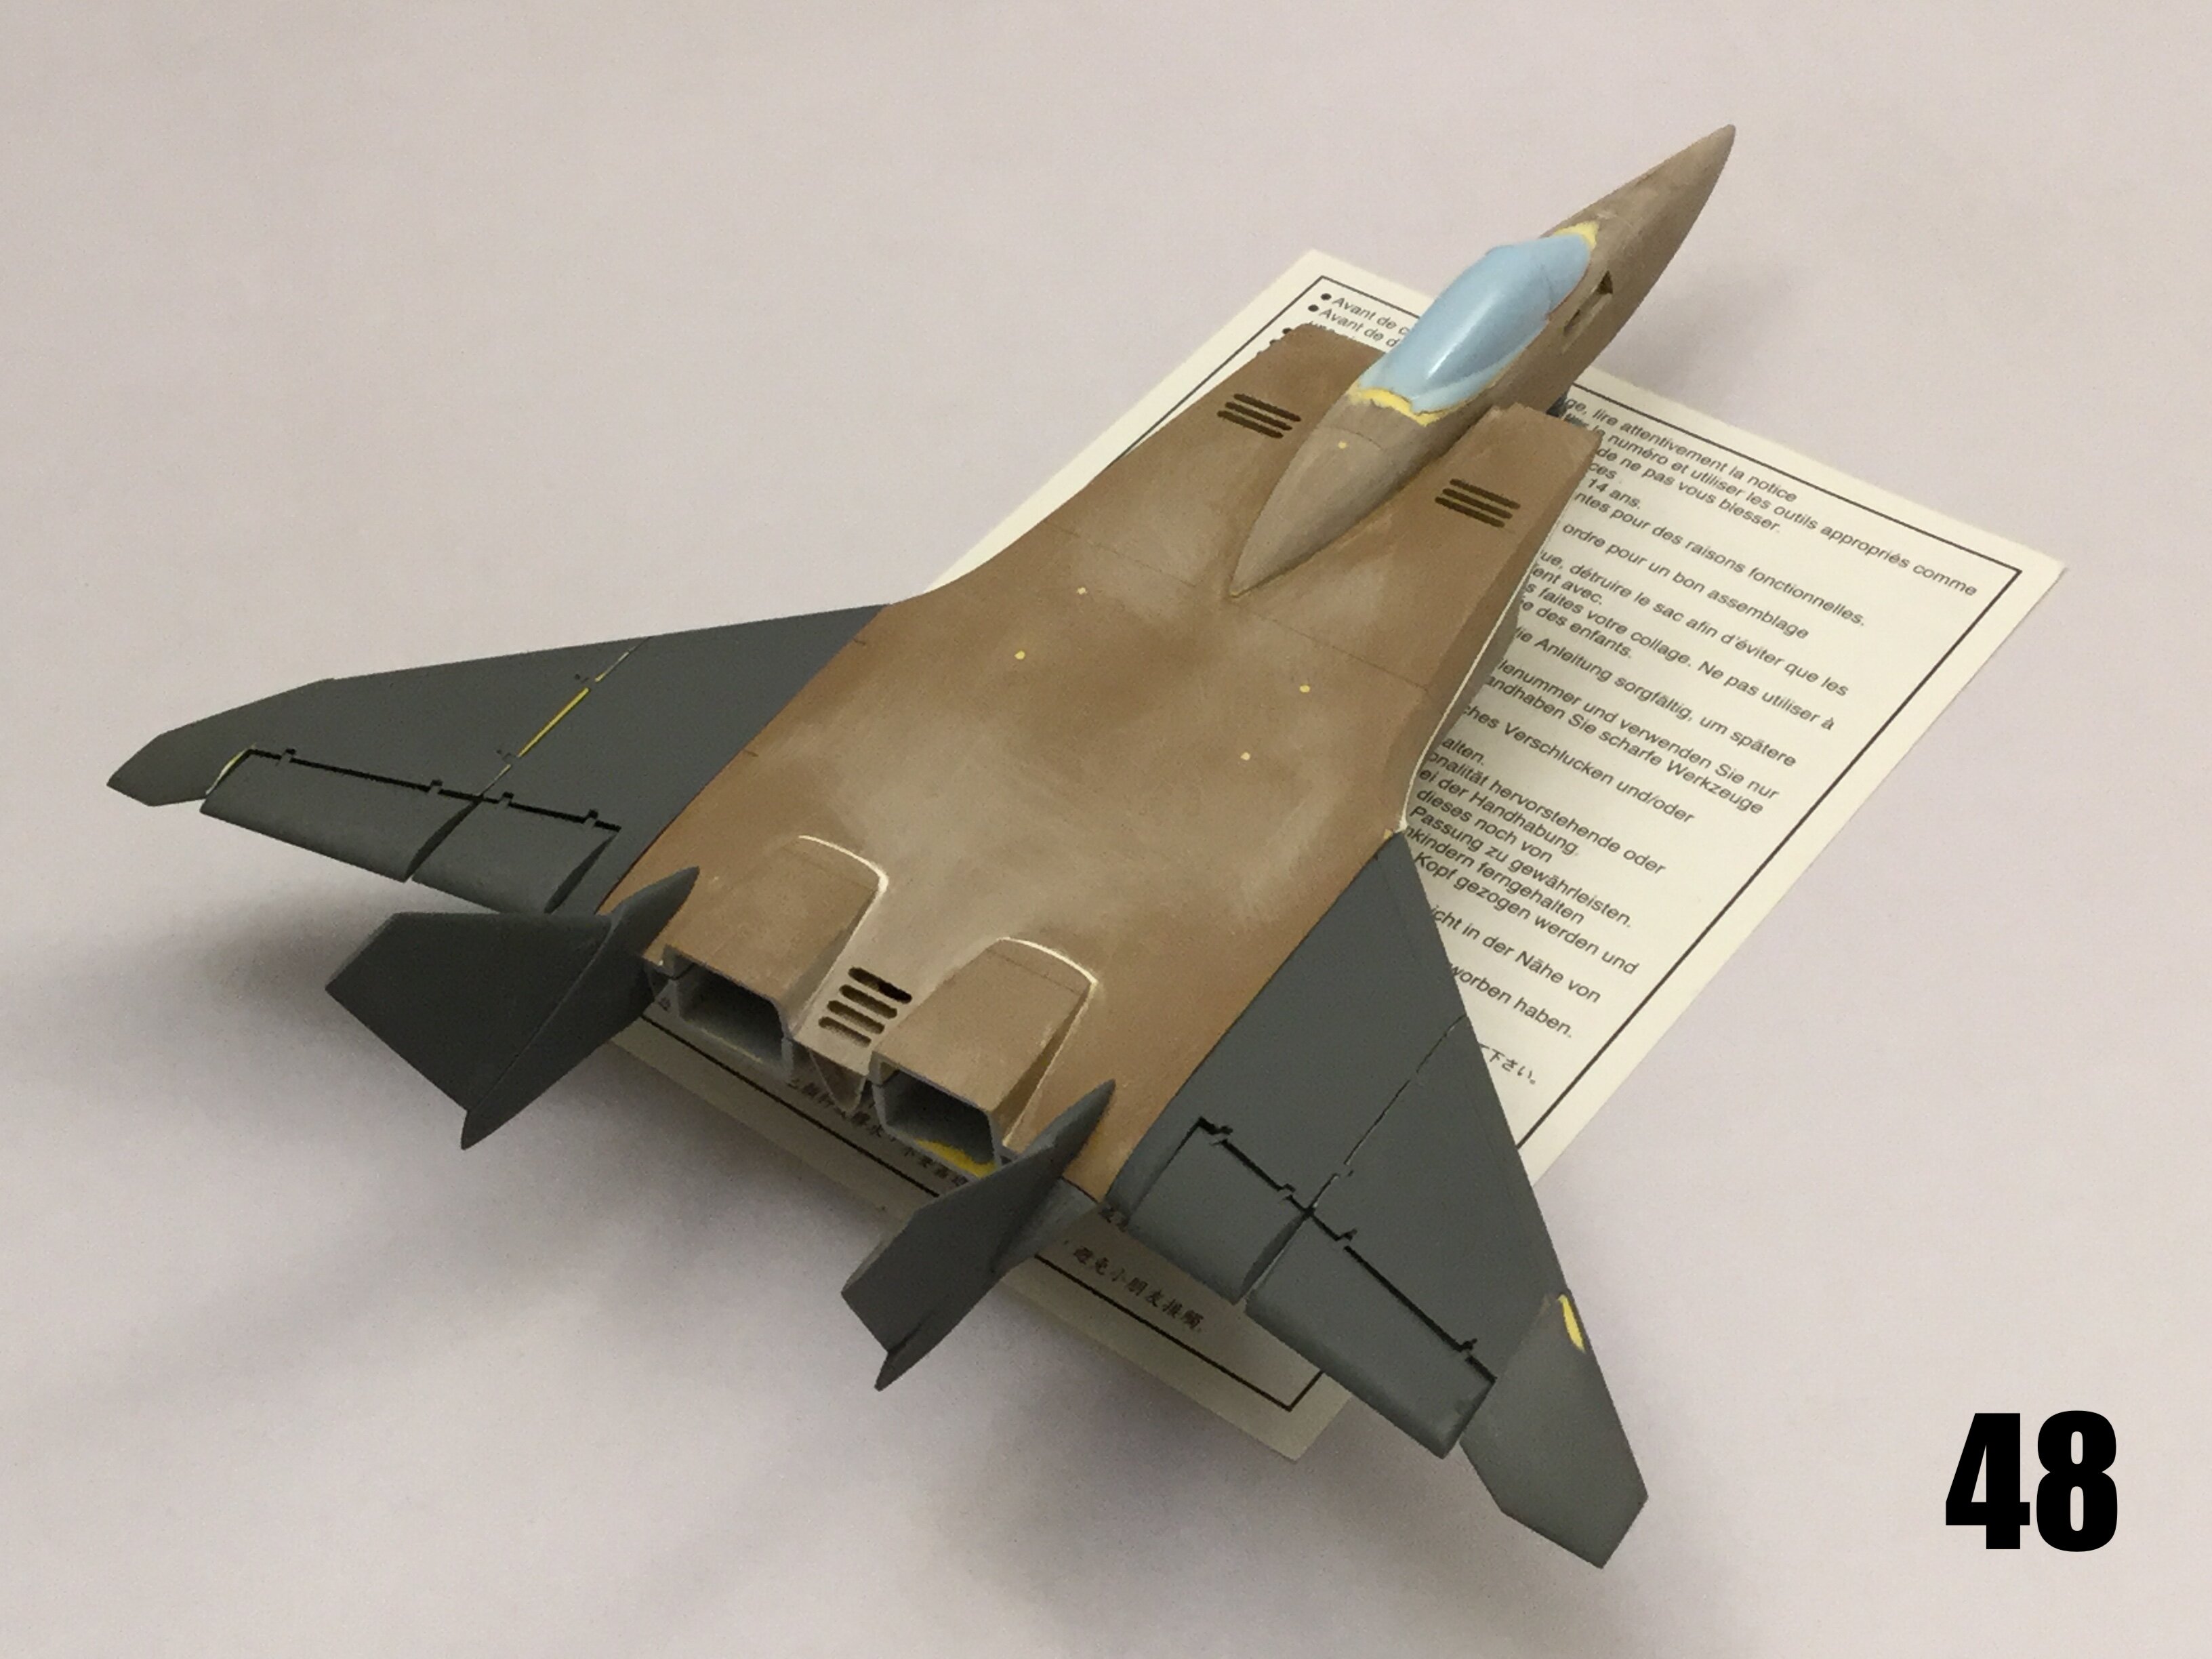
It. Is. Finished! Or at least mostly finished. Behold: the F-203B DRAGUNN II Air Combat Fighter in all its glory! Perhaps it's just me who has low standards, but this thing turned out better than I could have hoped for! Please not that these pics depict flight configuration with gear up. Early next week I will have pix of the parked bird with gear, cockpit and refuelling probe. This thing is just glorious to behold, and reminds me of an F-15E. As you can see, the kit will include a centerline fuel tank and 8 medium-range and 4 short range missiles. The slight compromise here is that the missiles will need to be cast on their pylons because they're just too spindly to cast properly otherwise, and believe me, I tried! You will also have the option to build the exhaust nozzles drooping, or canted slightly upward. I've added a data link dome behind the cockpit, as well as an IRST ball on the nose. Several other small doohickies will be integrated when I disassemble and begin mold-prep. If the wings look gappy, it's just because the parts fit very tight, and I didn't want to risk damaging the masters, which I kinda already did because the tolerances are tight AF! However nice the old Tanmen kit may have seemed, I encourage you to compare it side-by-side with this modernized version and draw your own conclusions. Mold-prep begins next week, after I do final wheels-down photography. Stay tuned!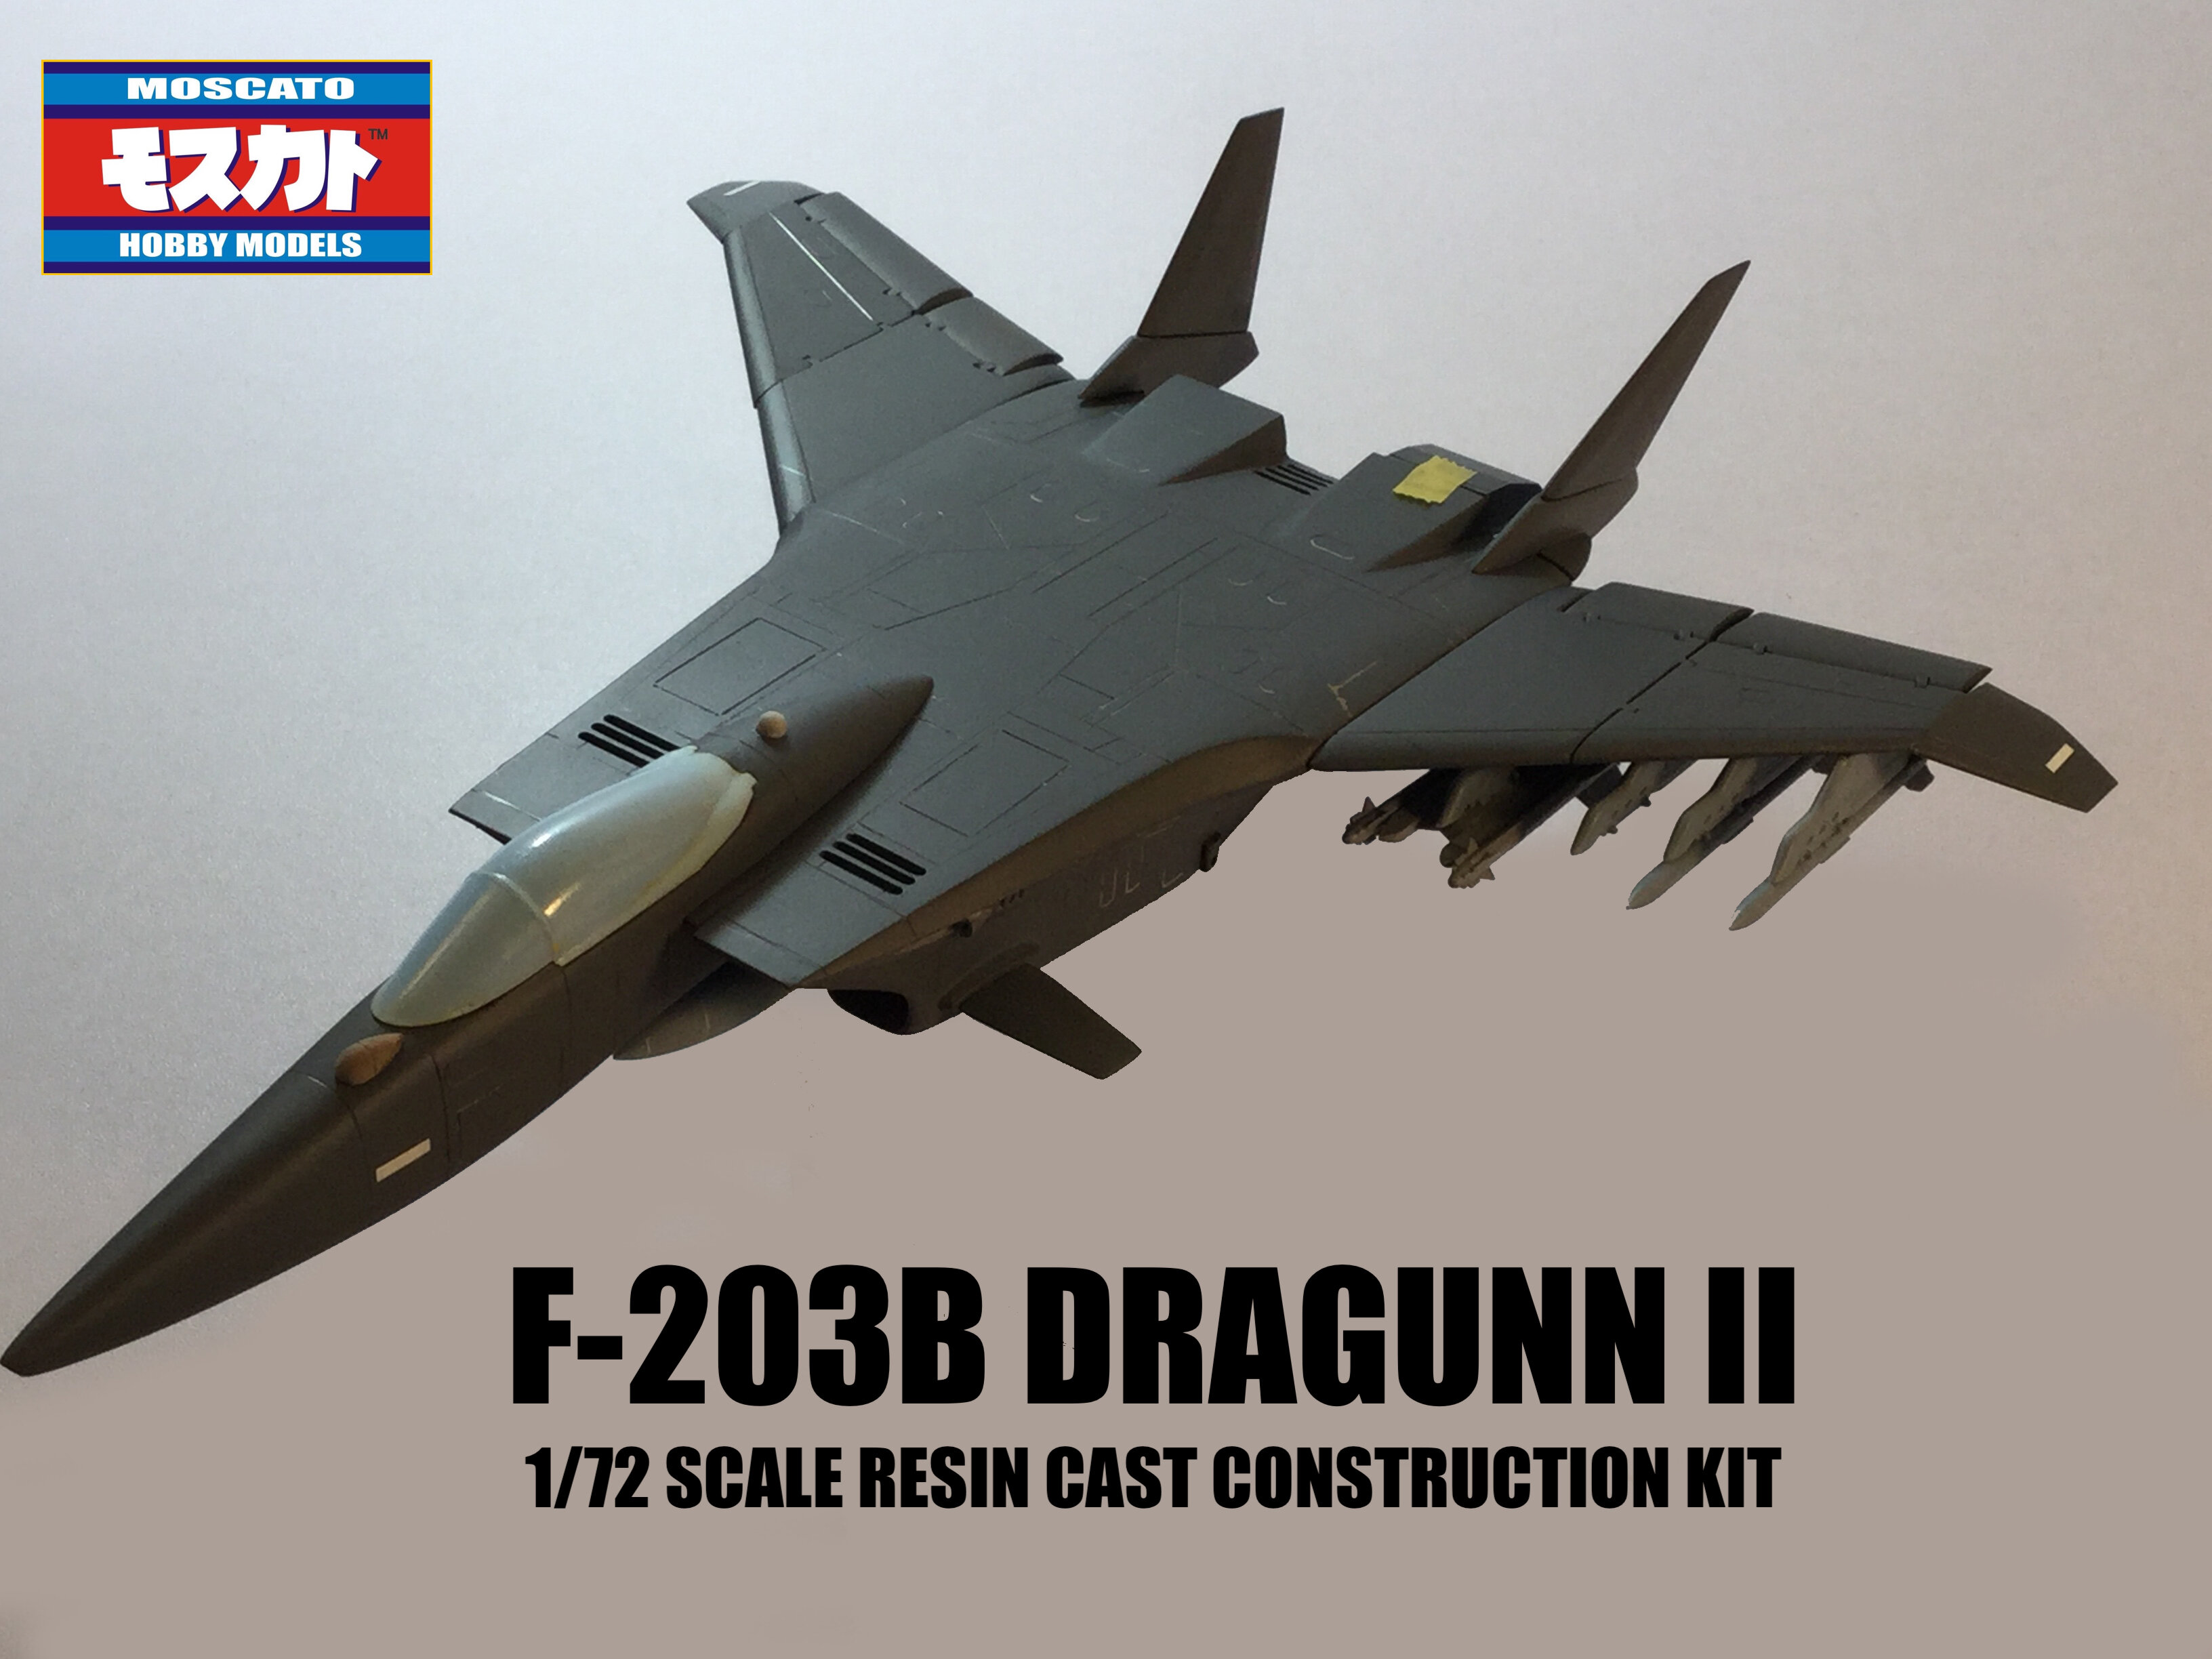
-
1/72 F203 Dragon II Kit Proposal --Moscato Hobby
captain america replied to captain america's topic in Model kits
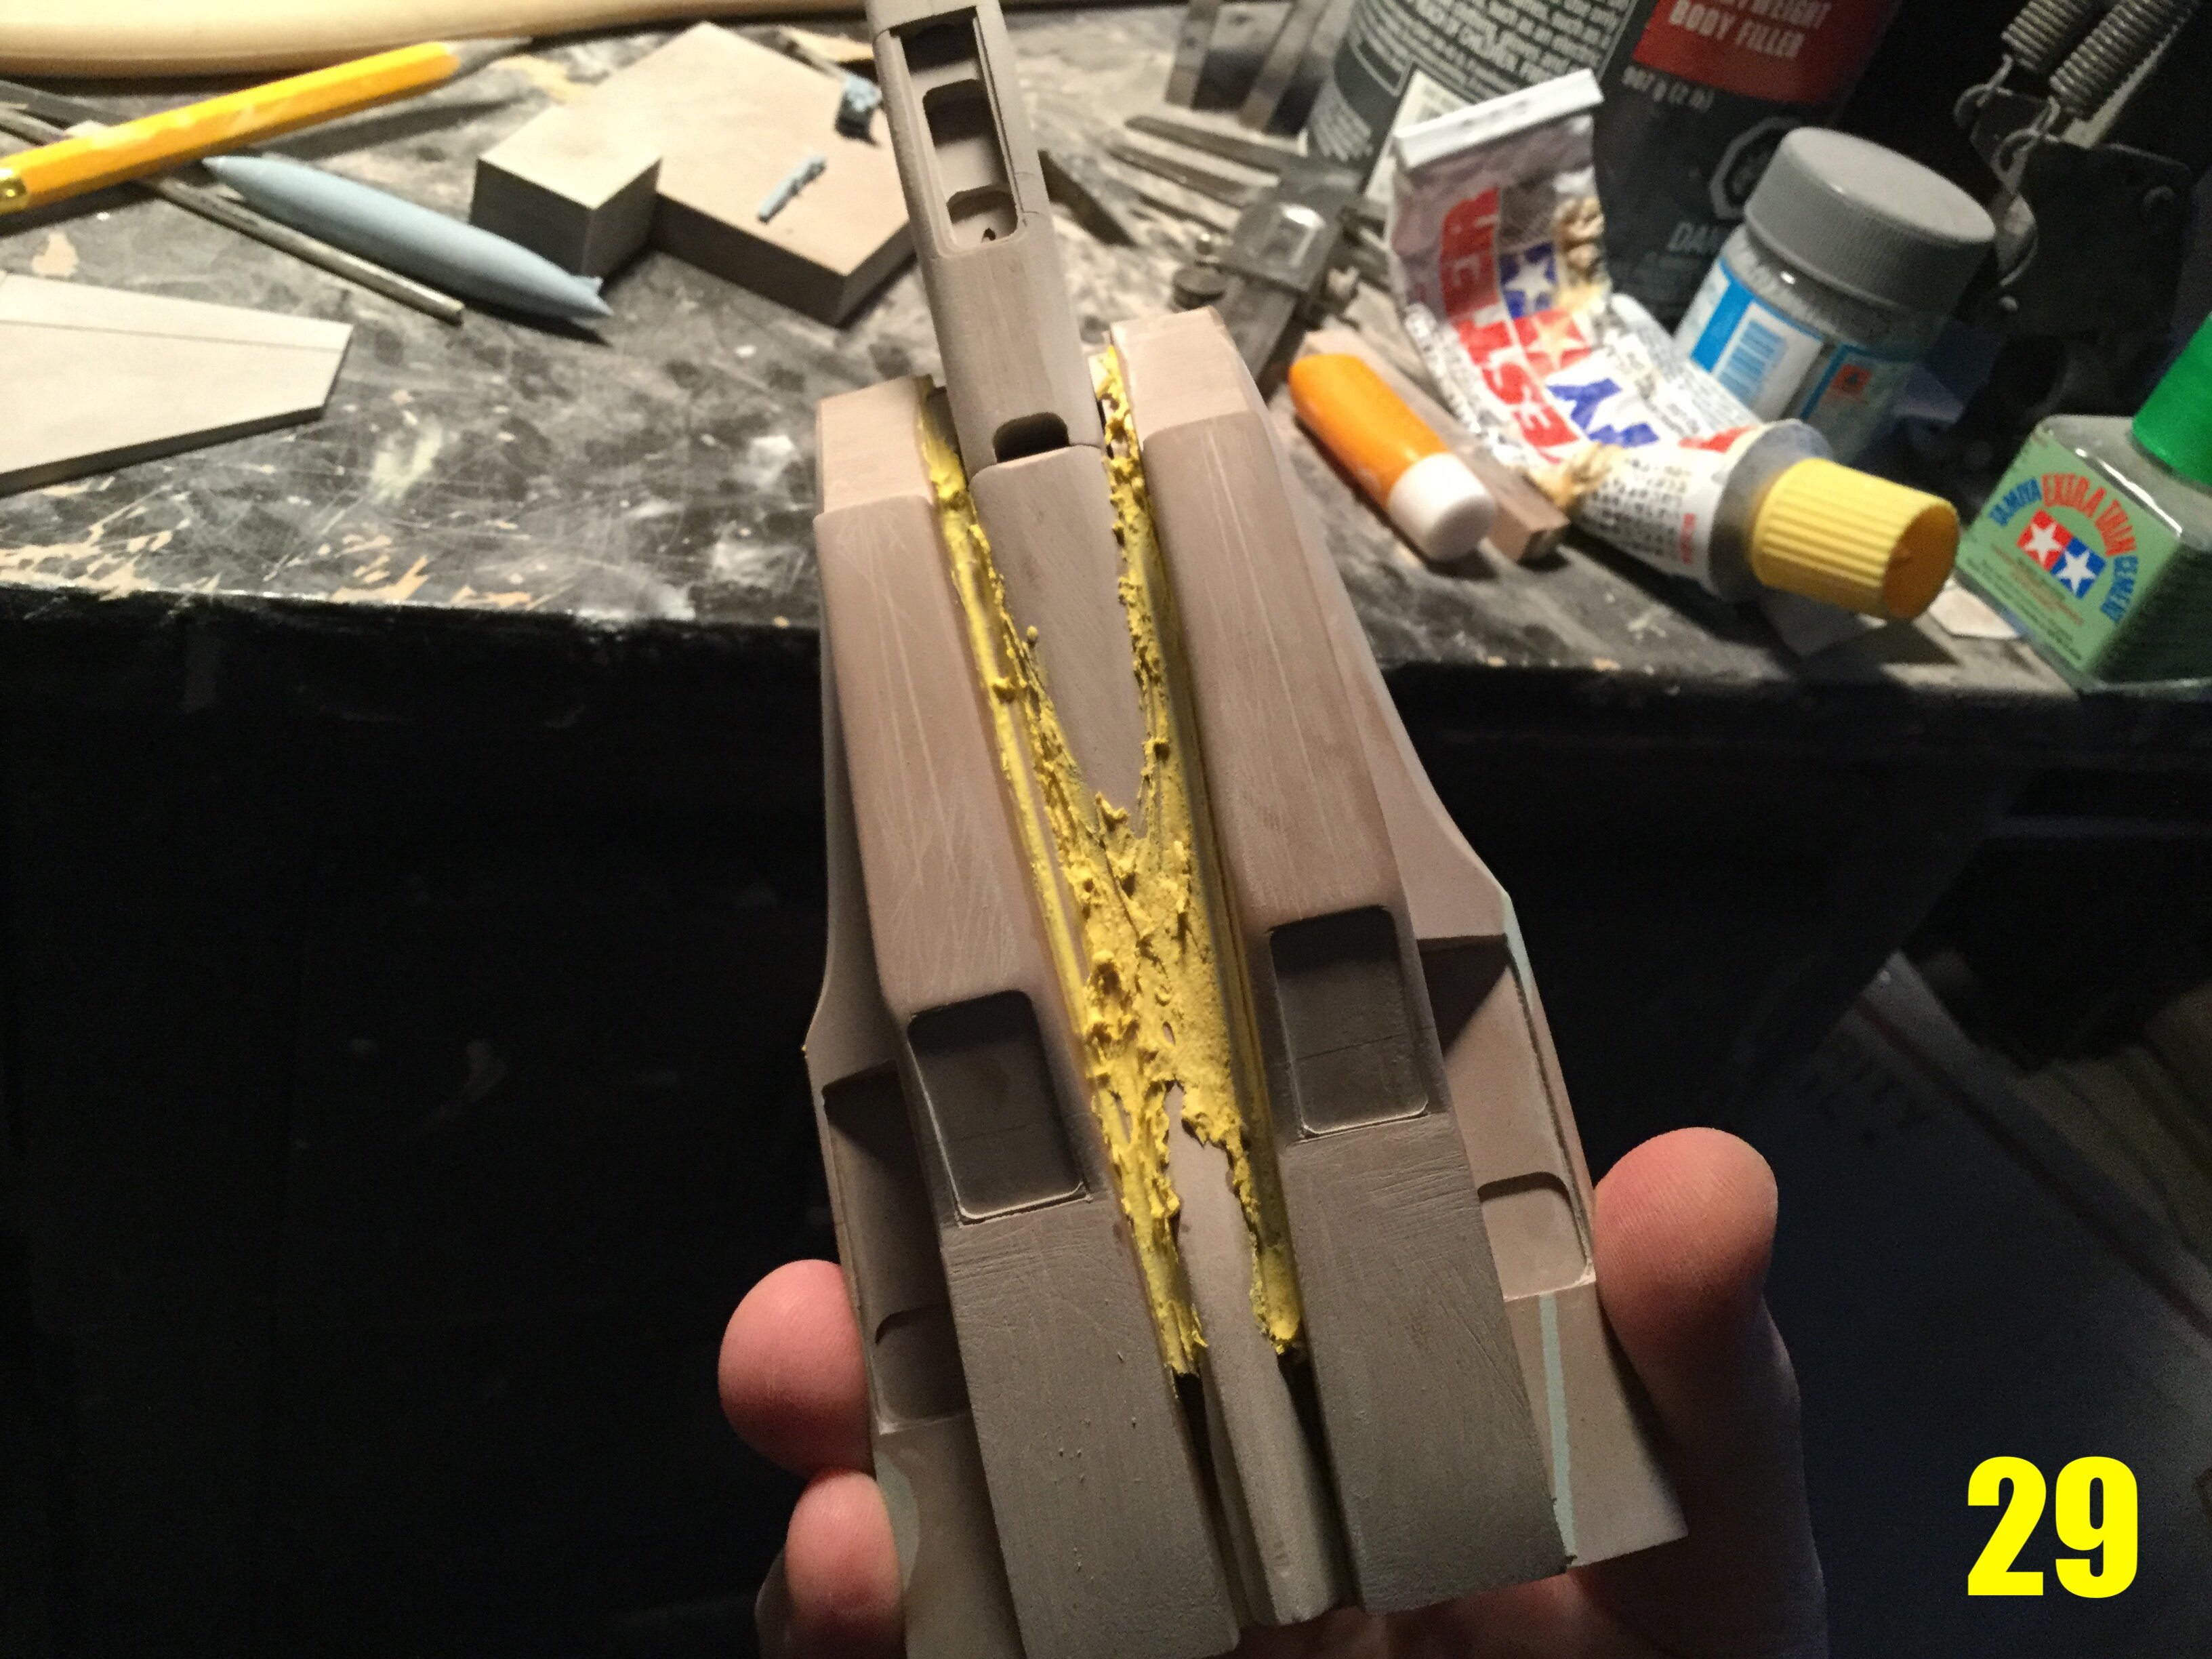
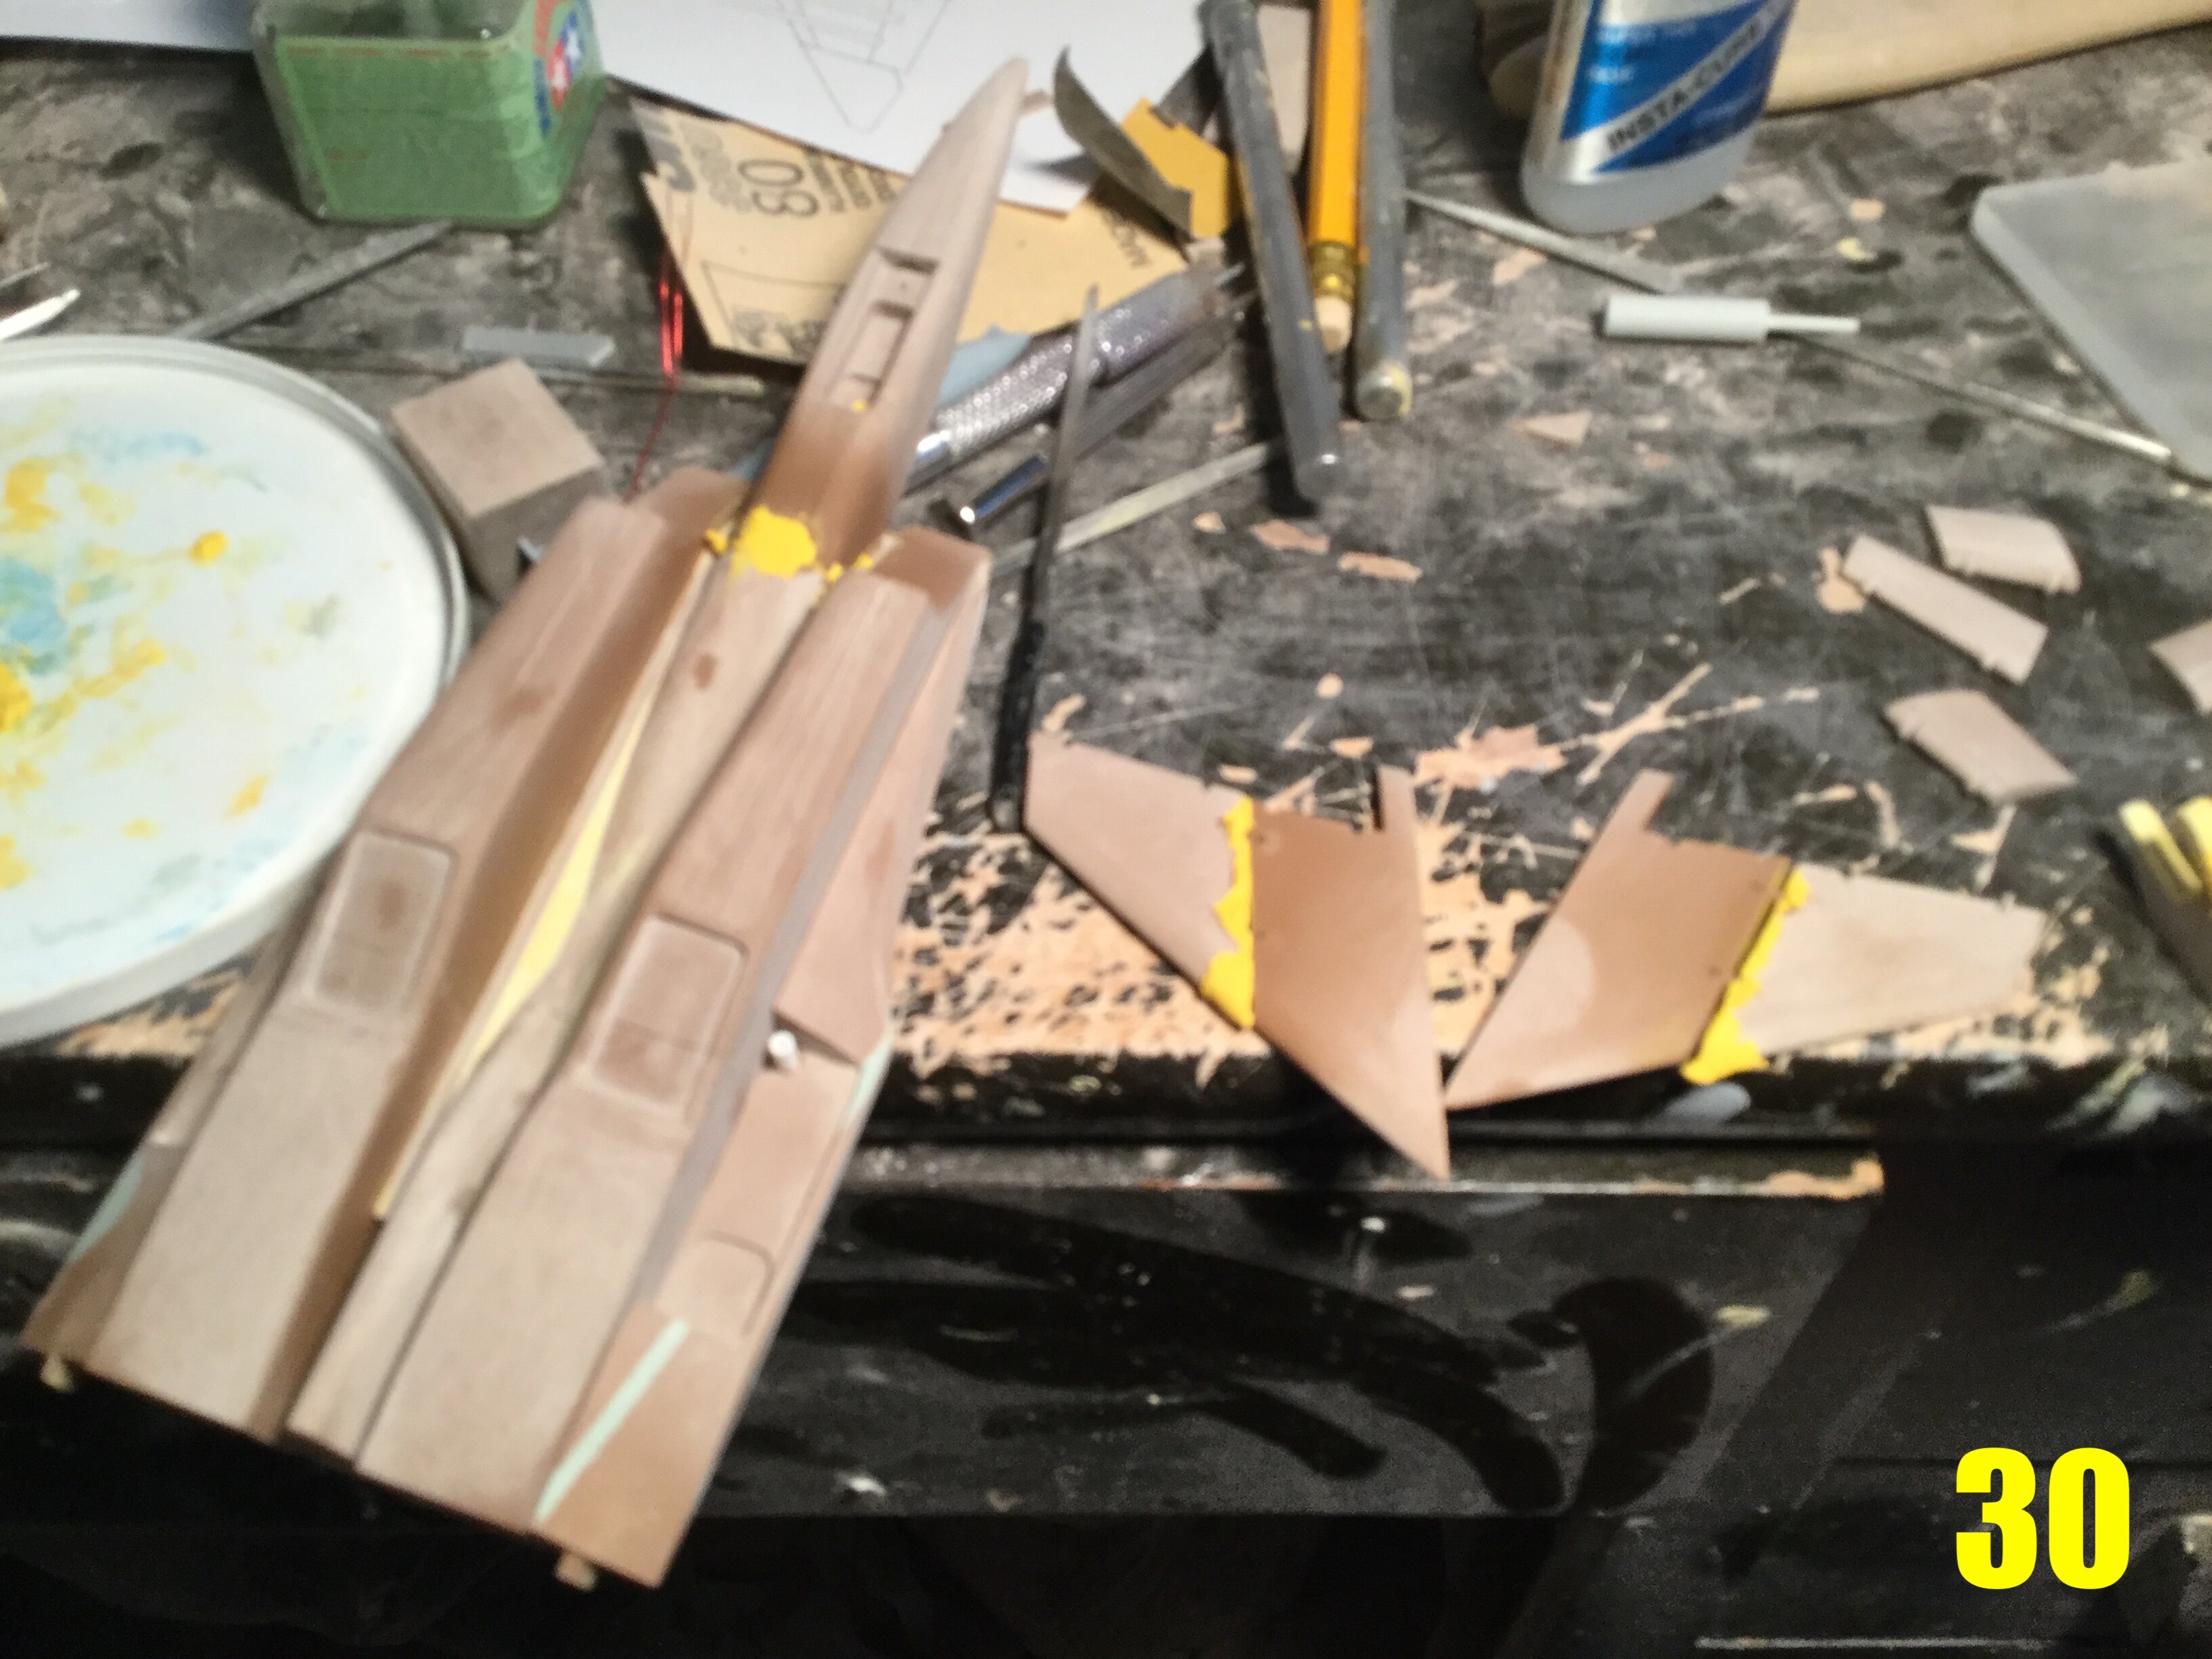
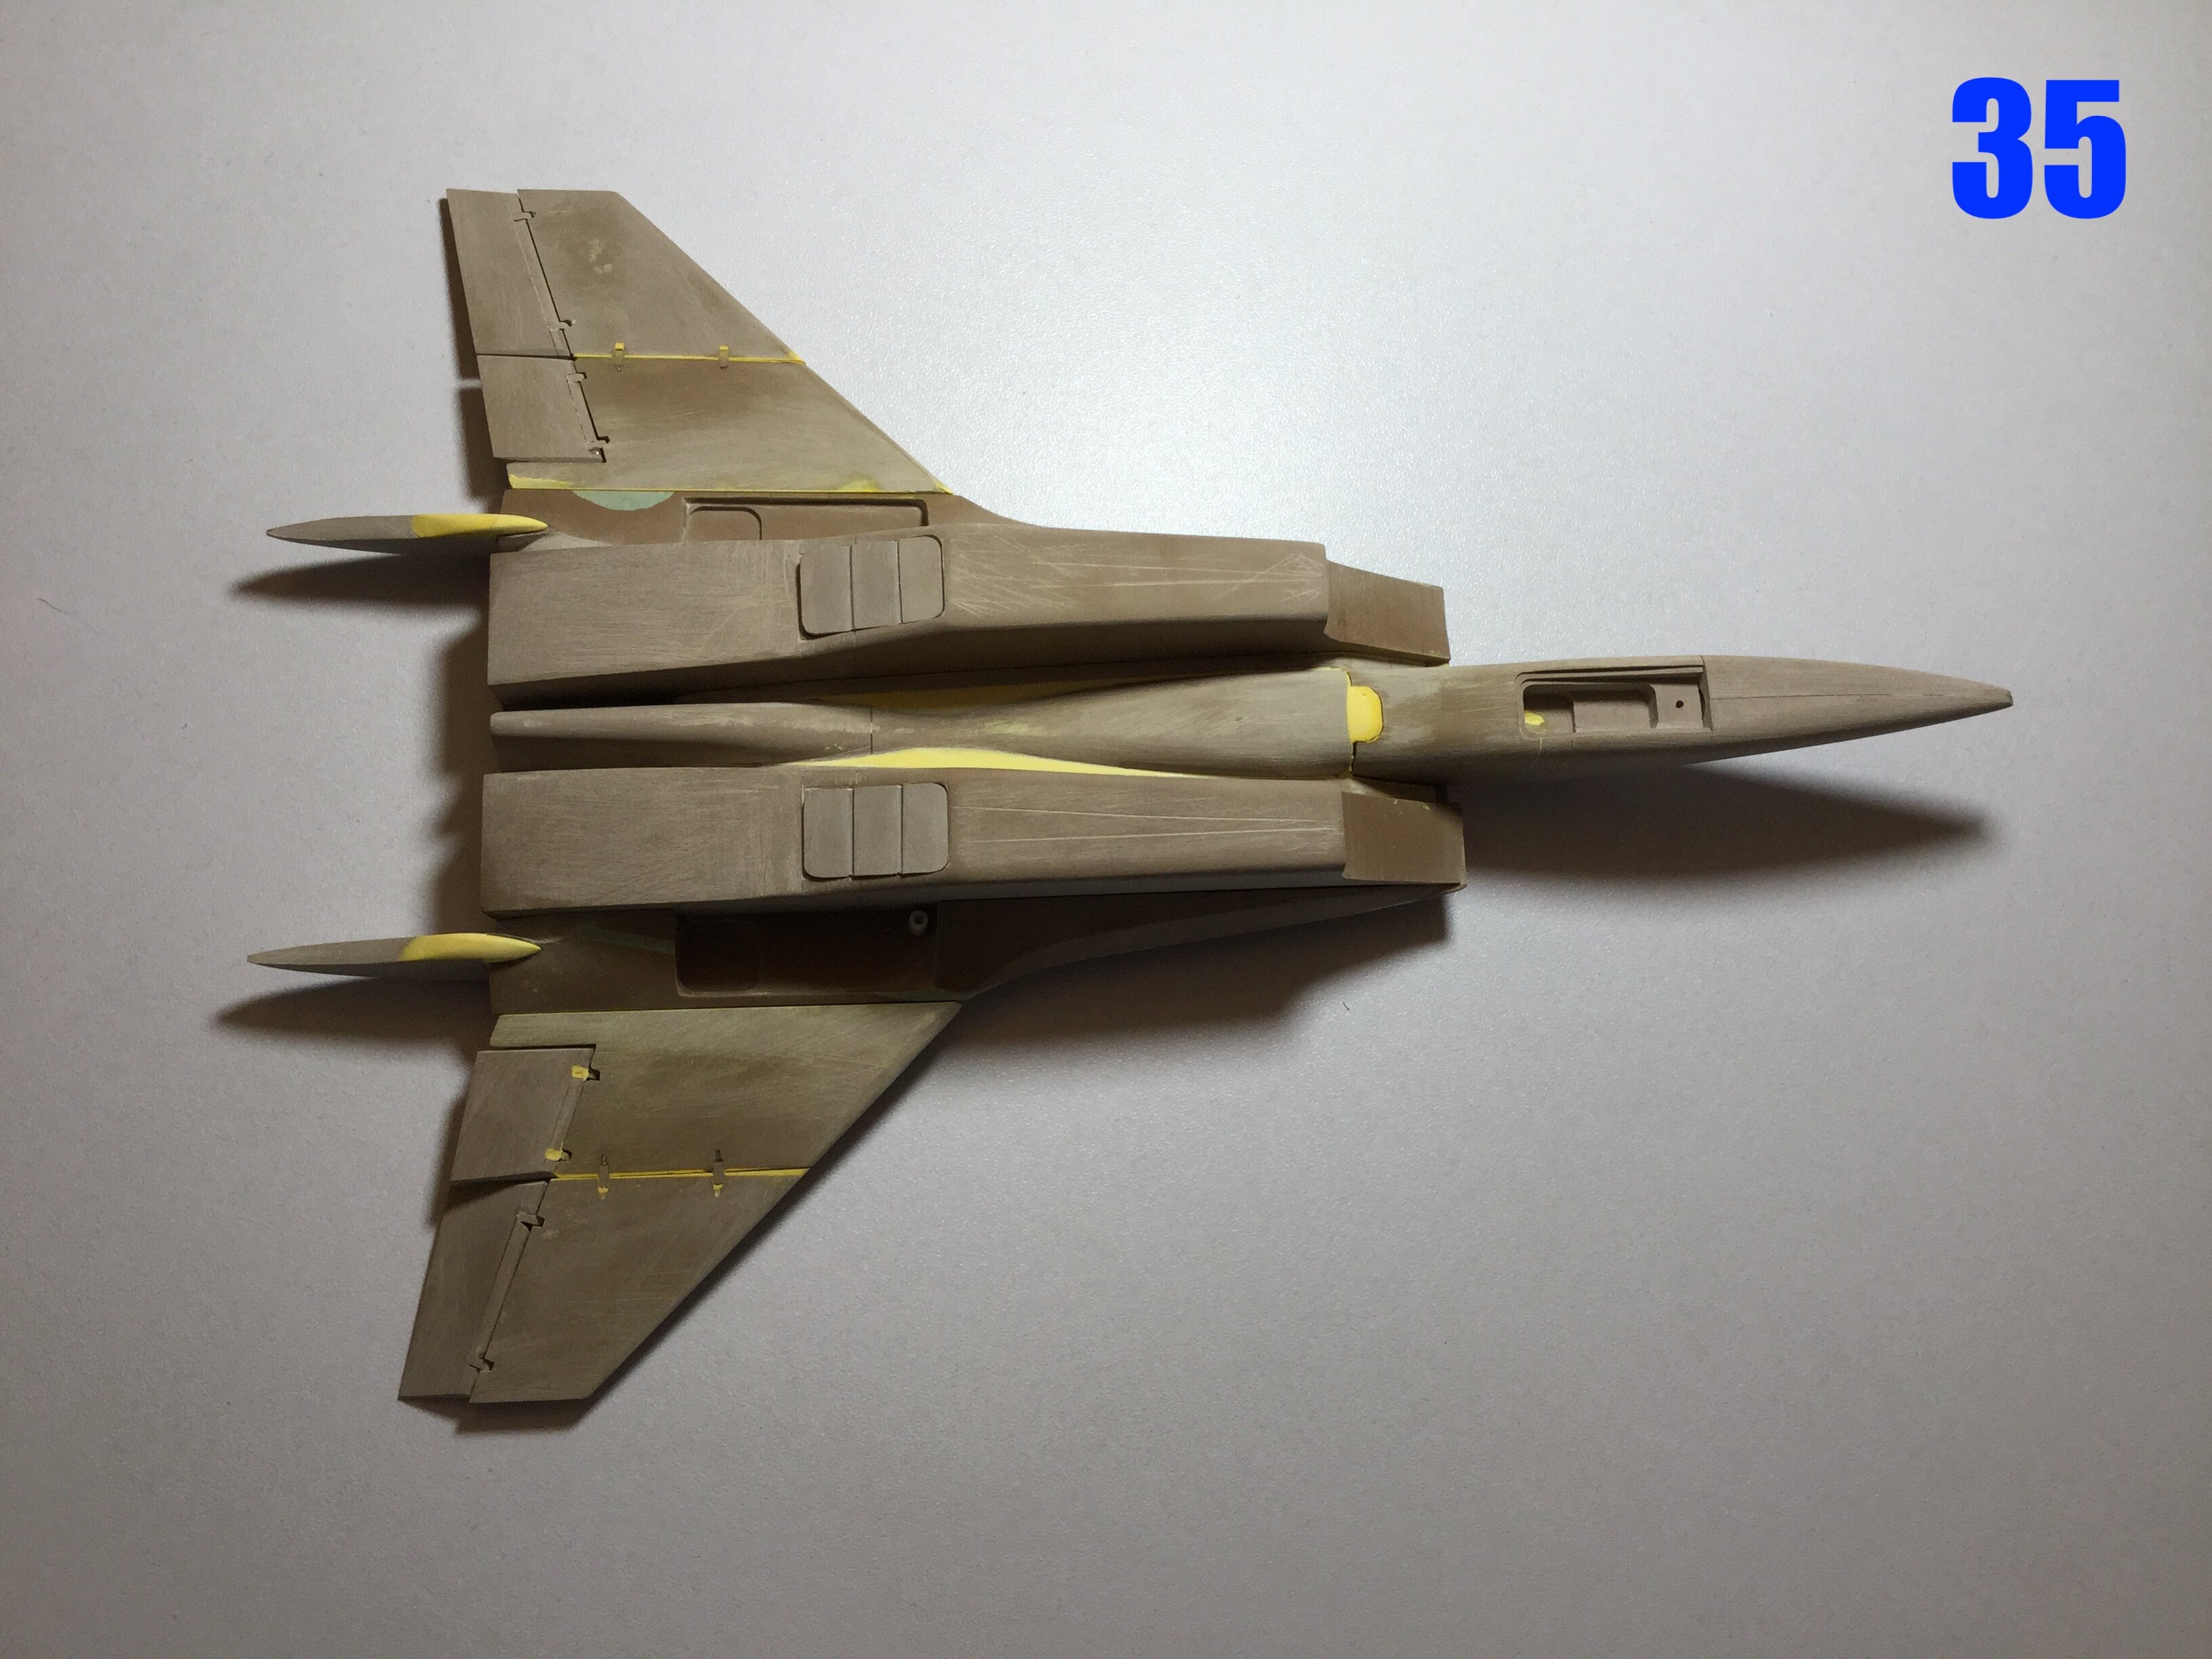
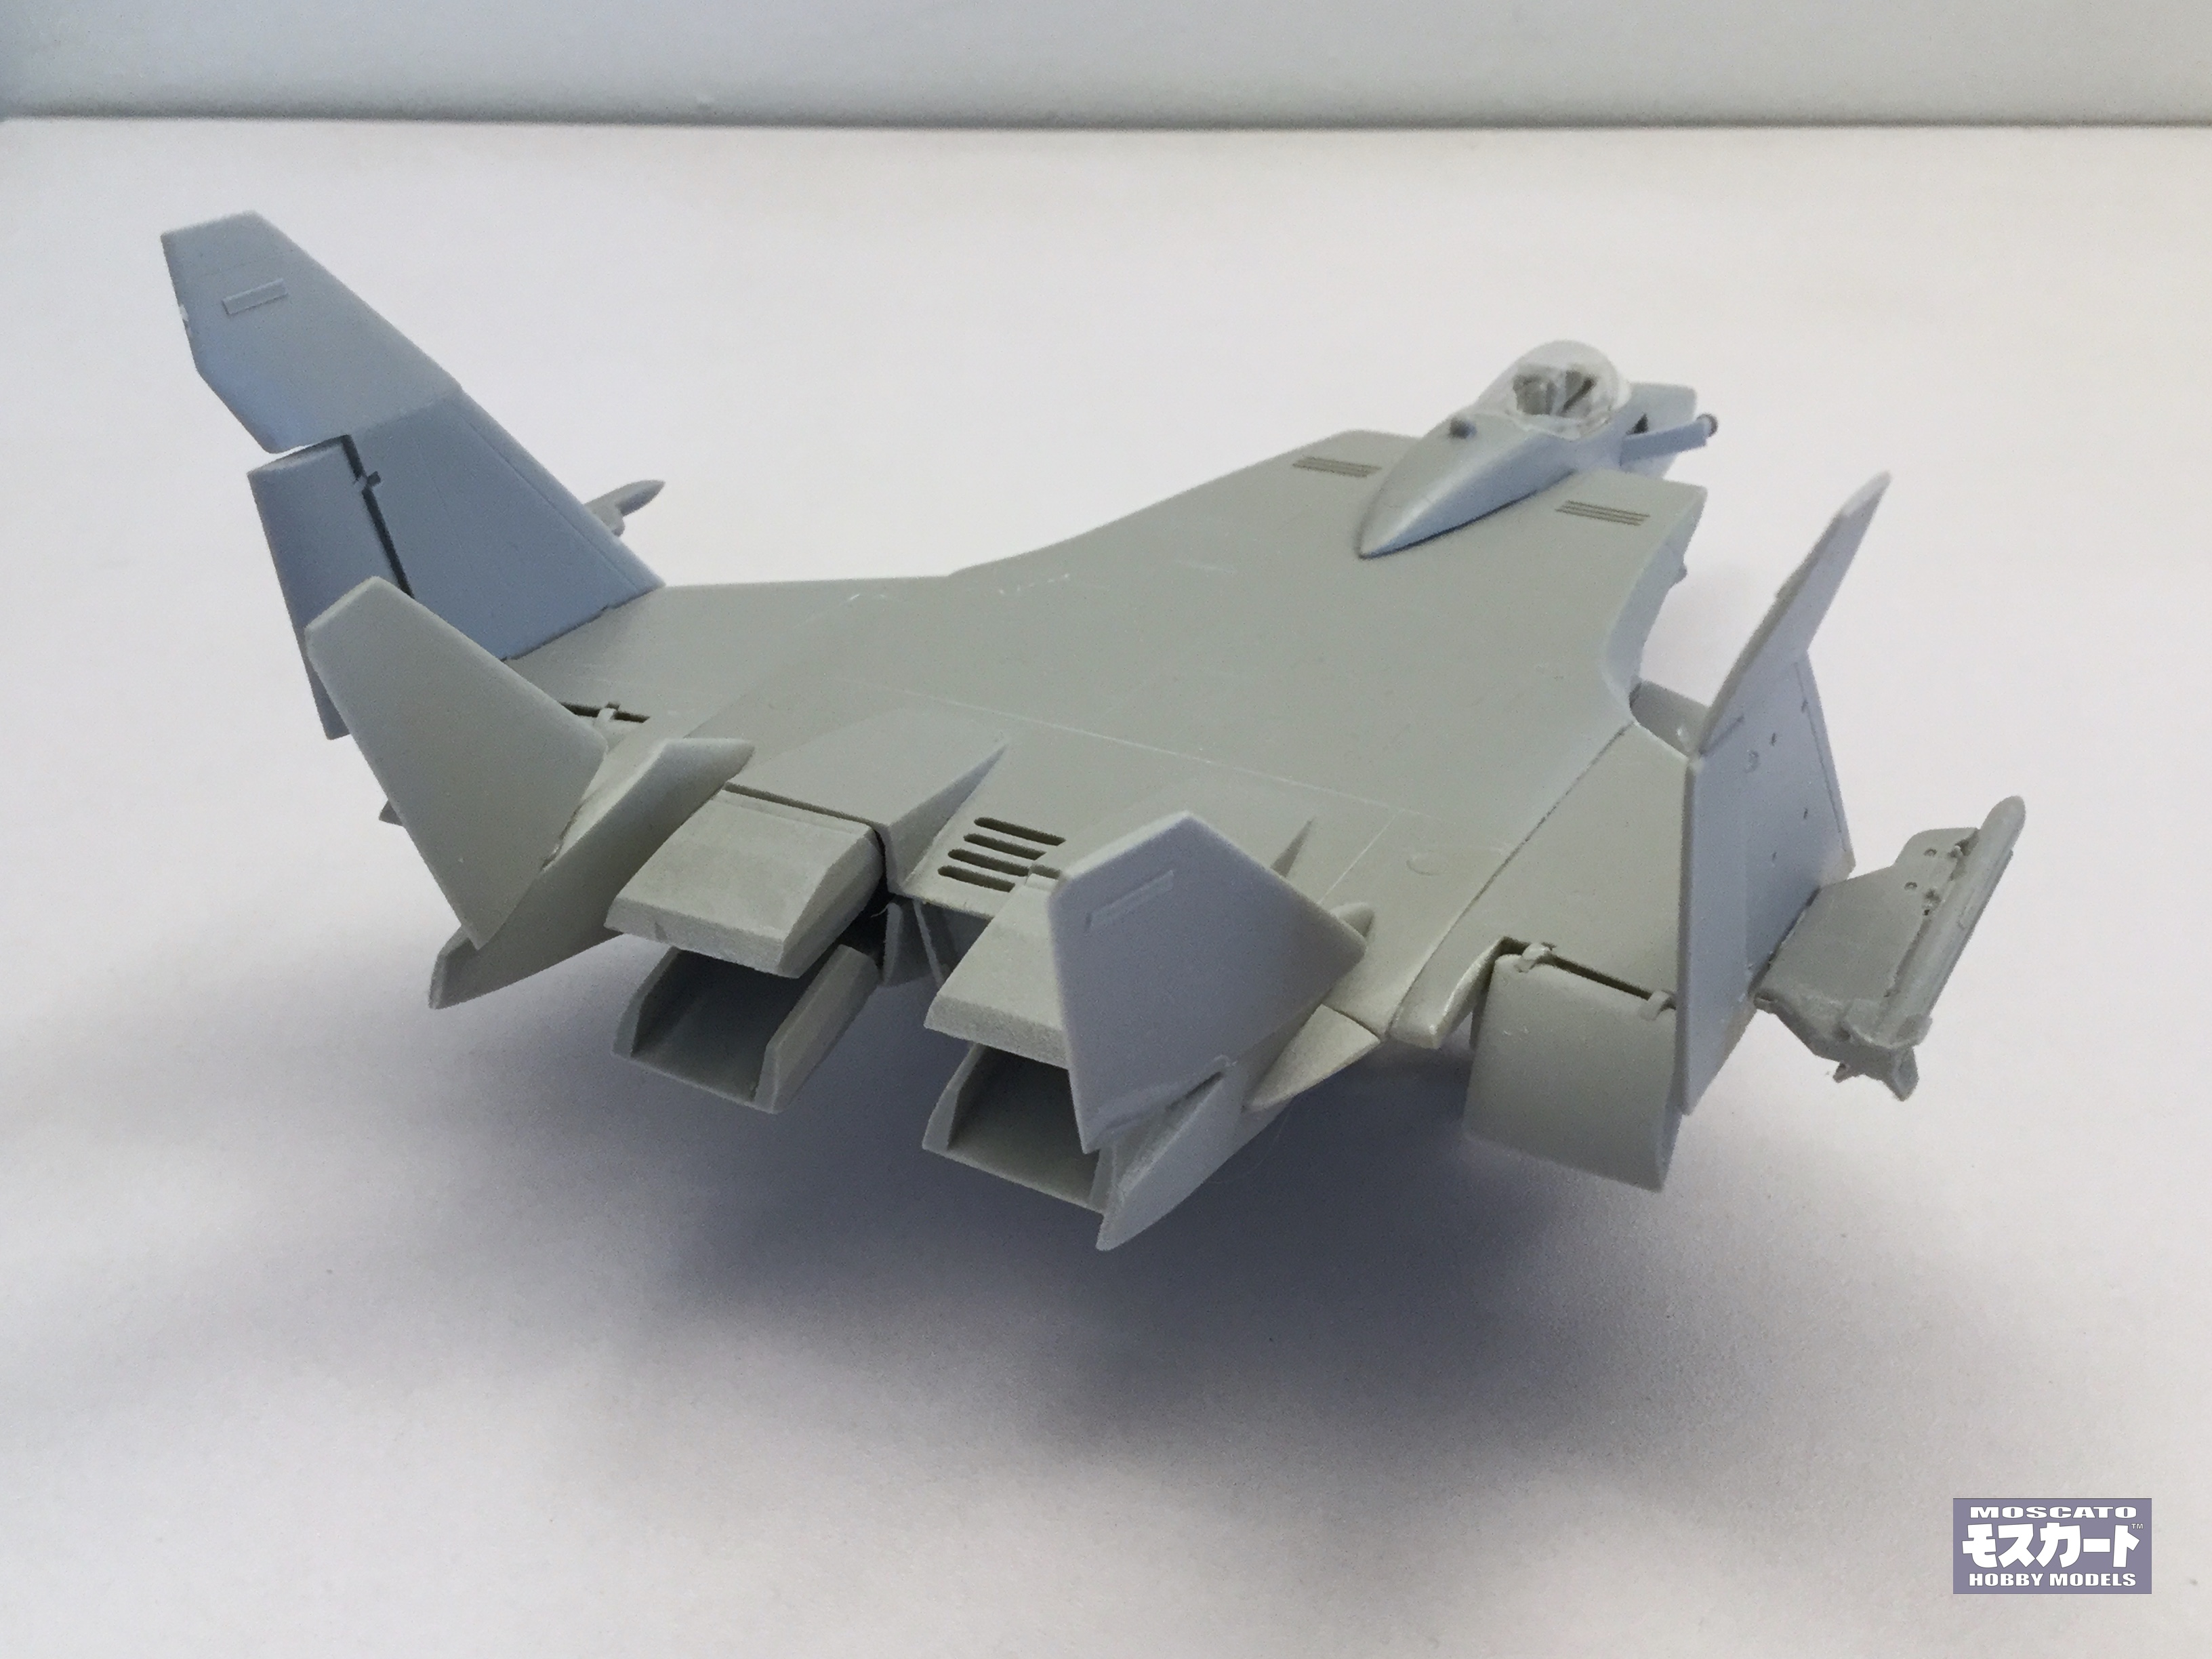
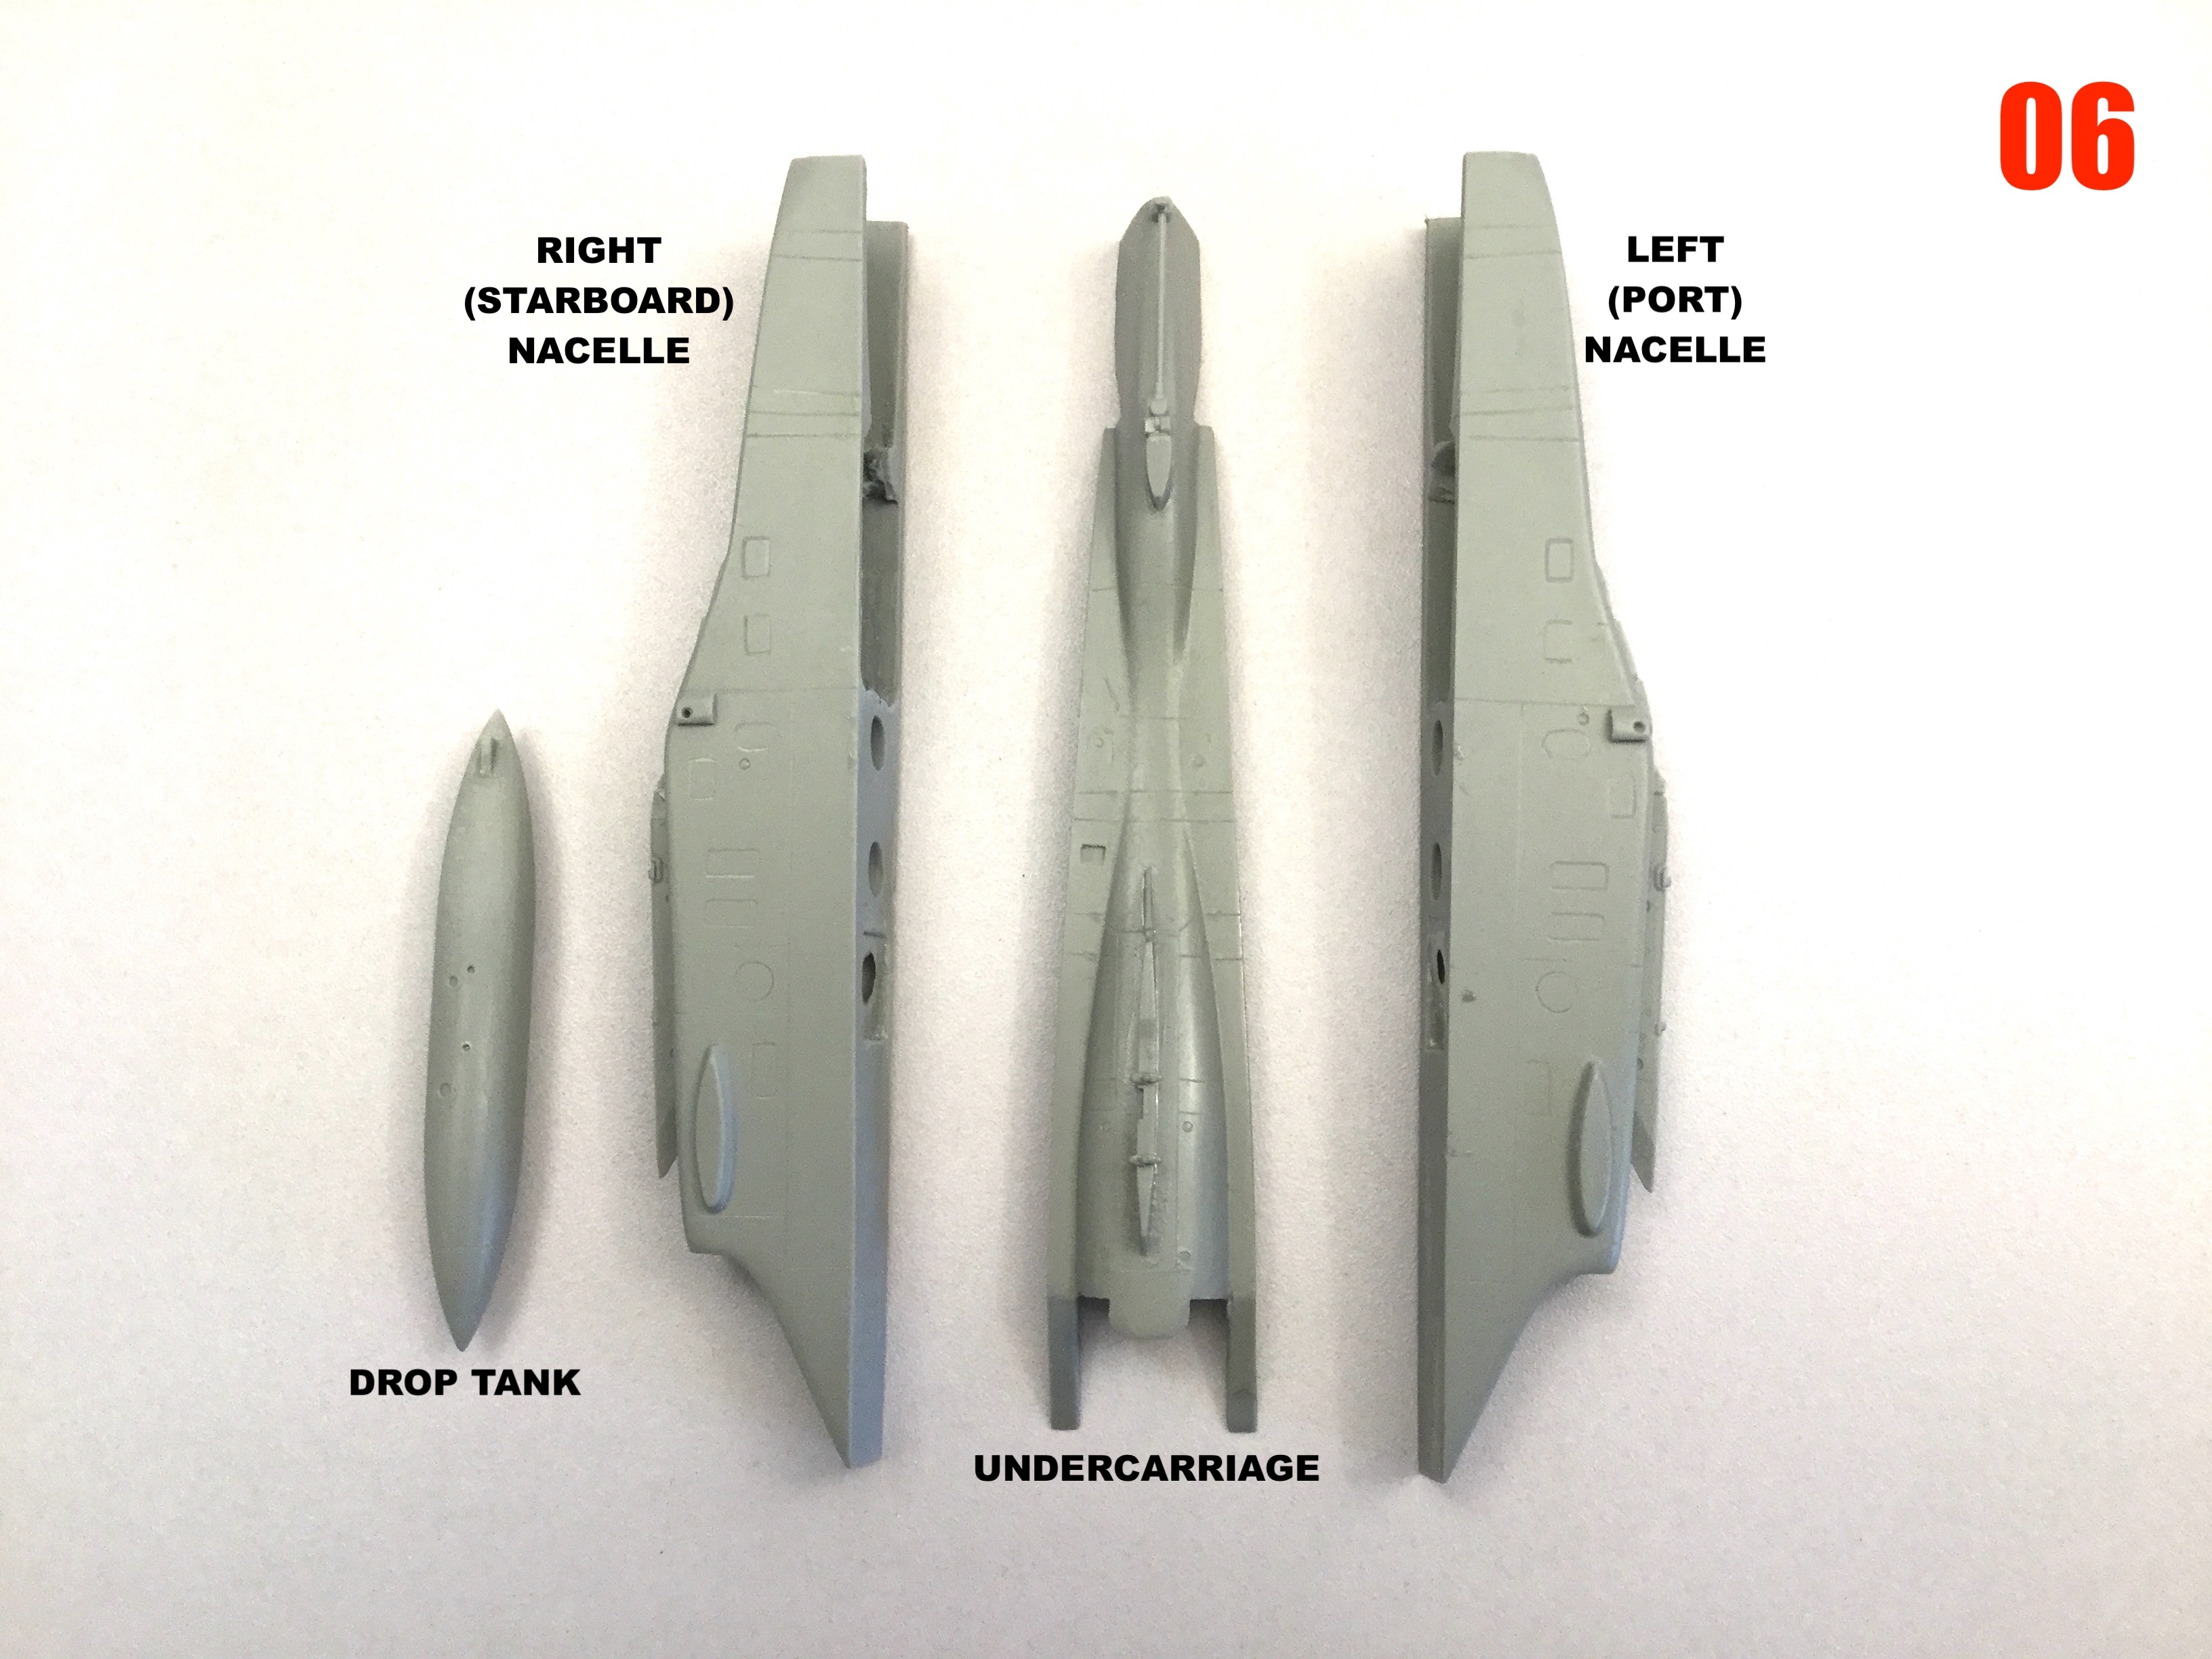
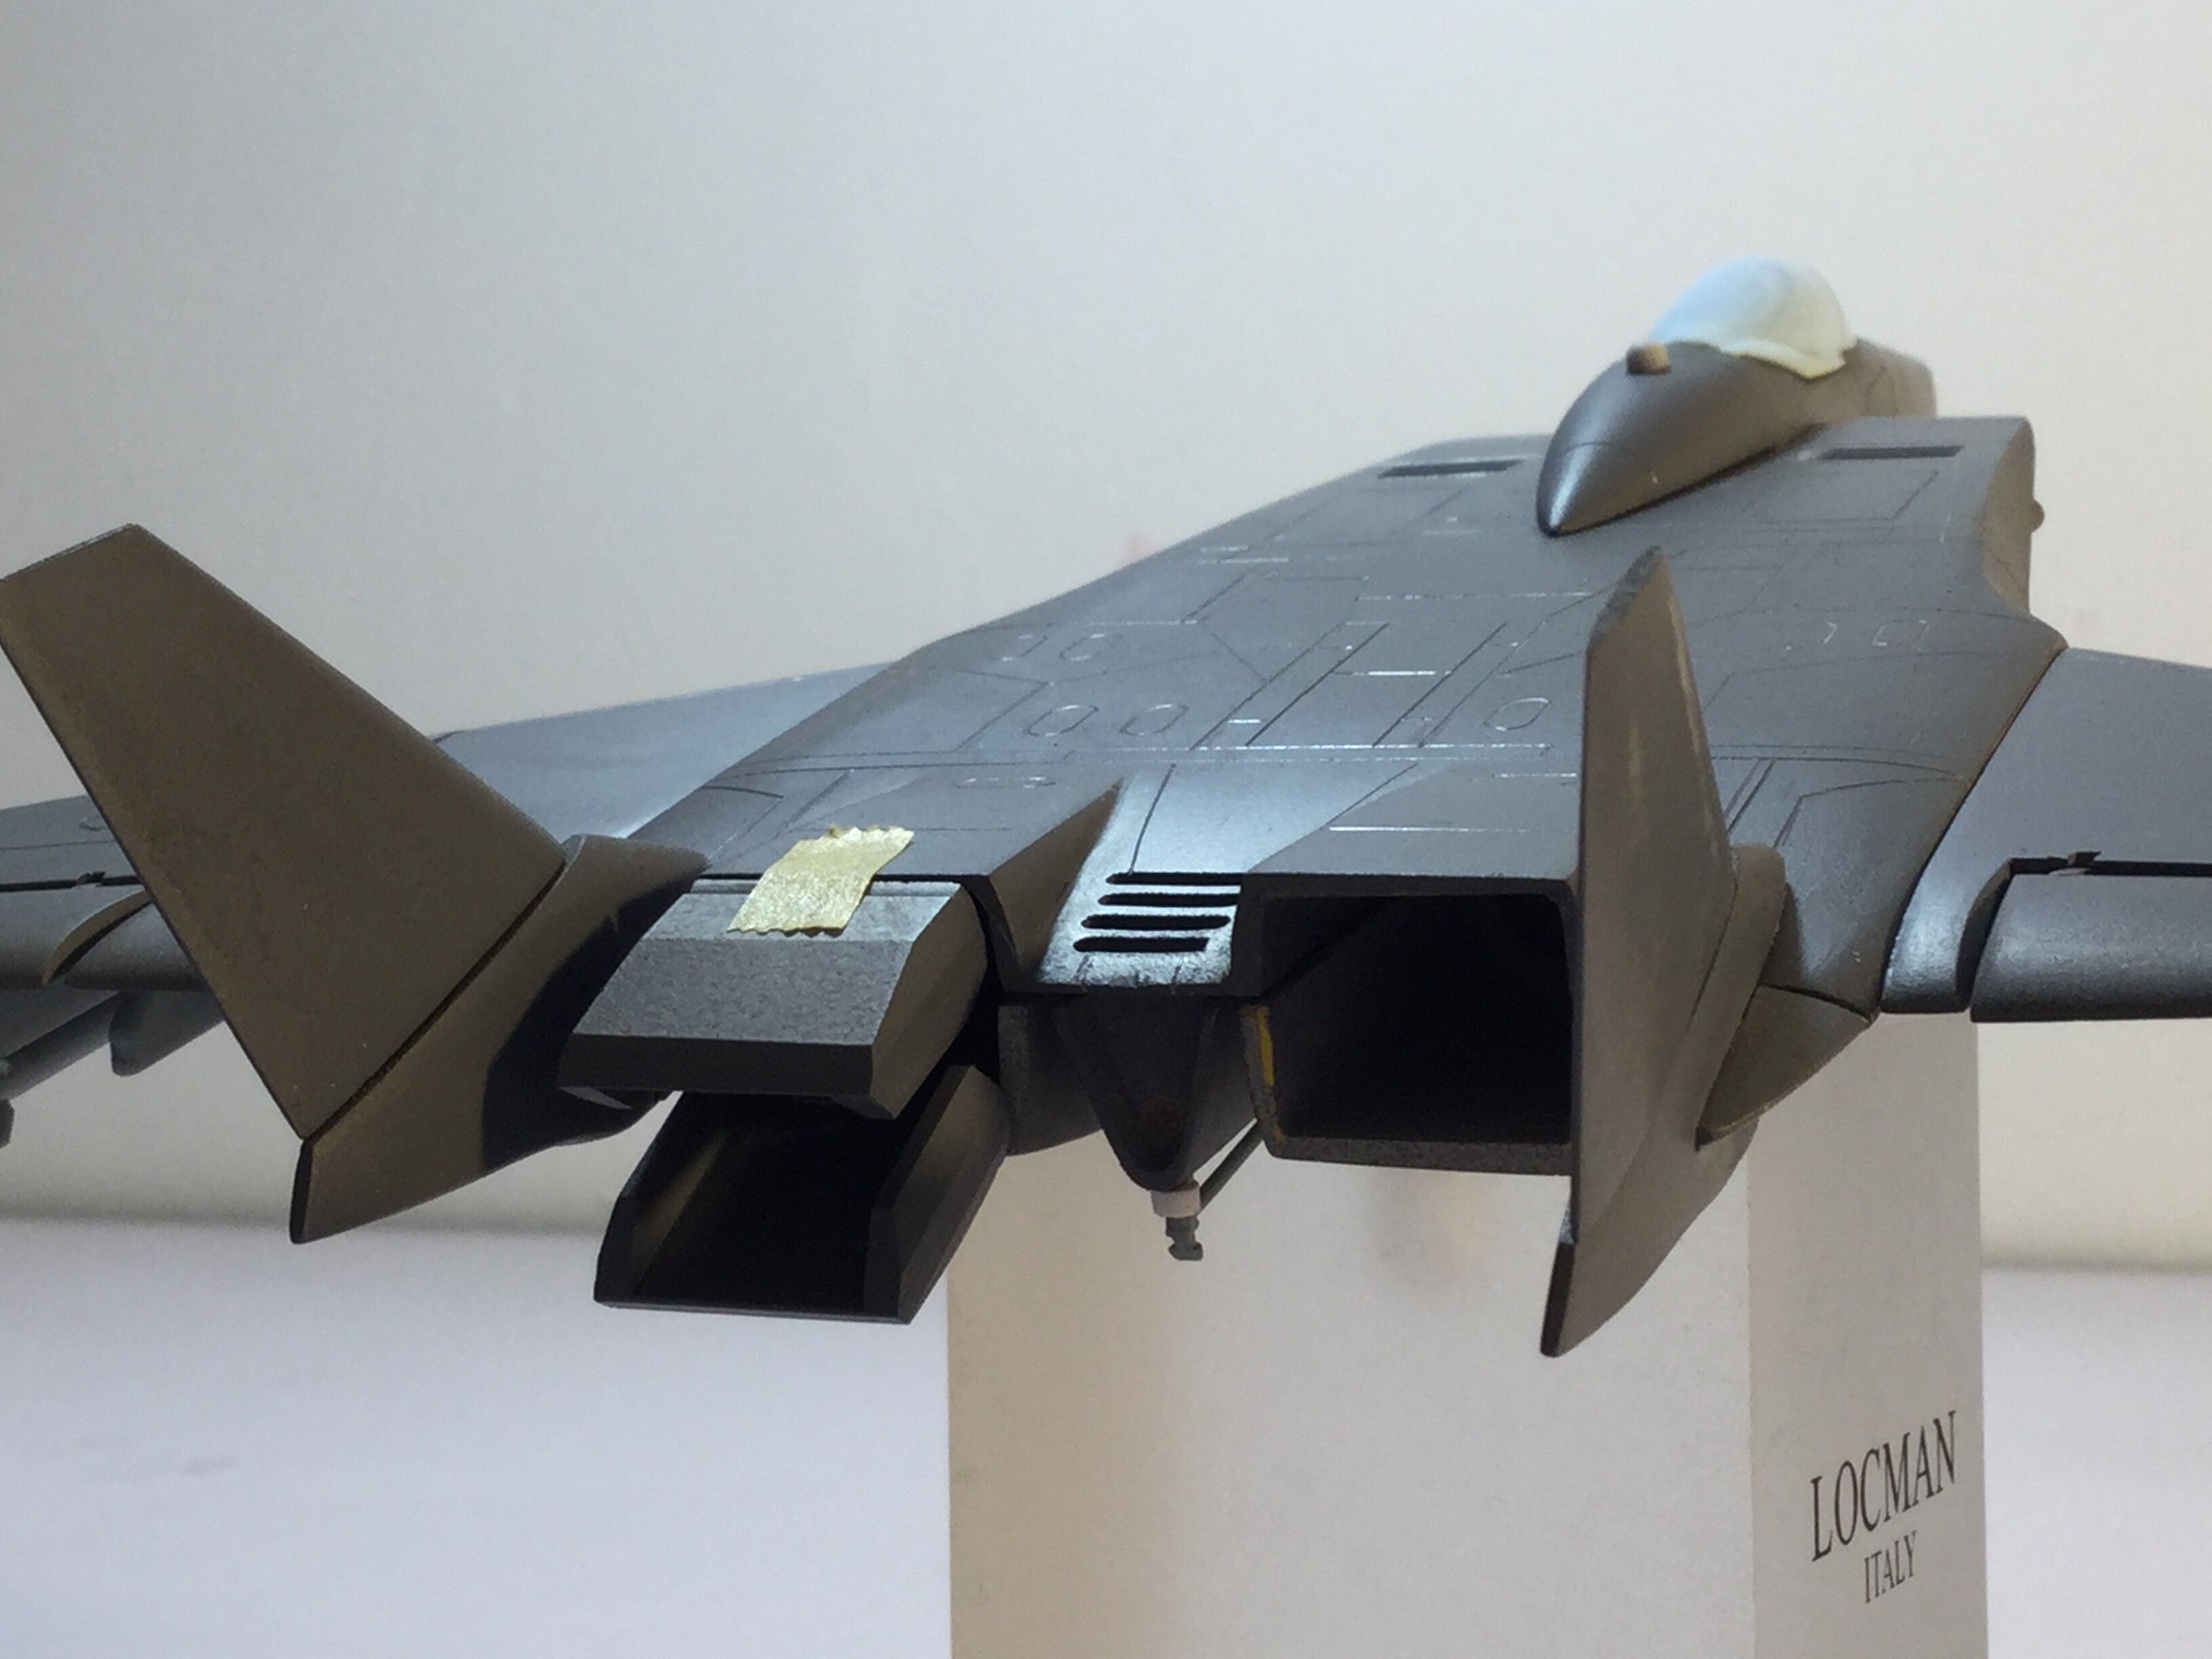
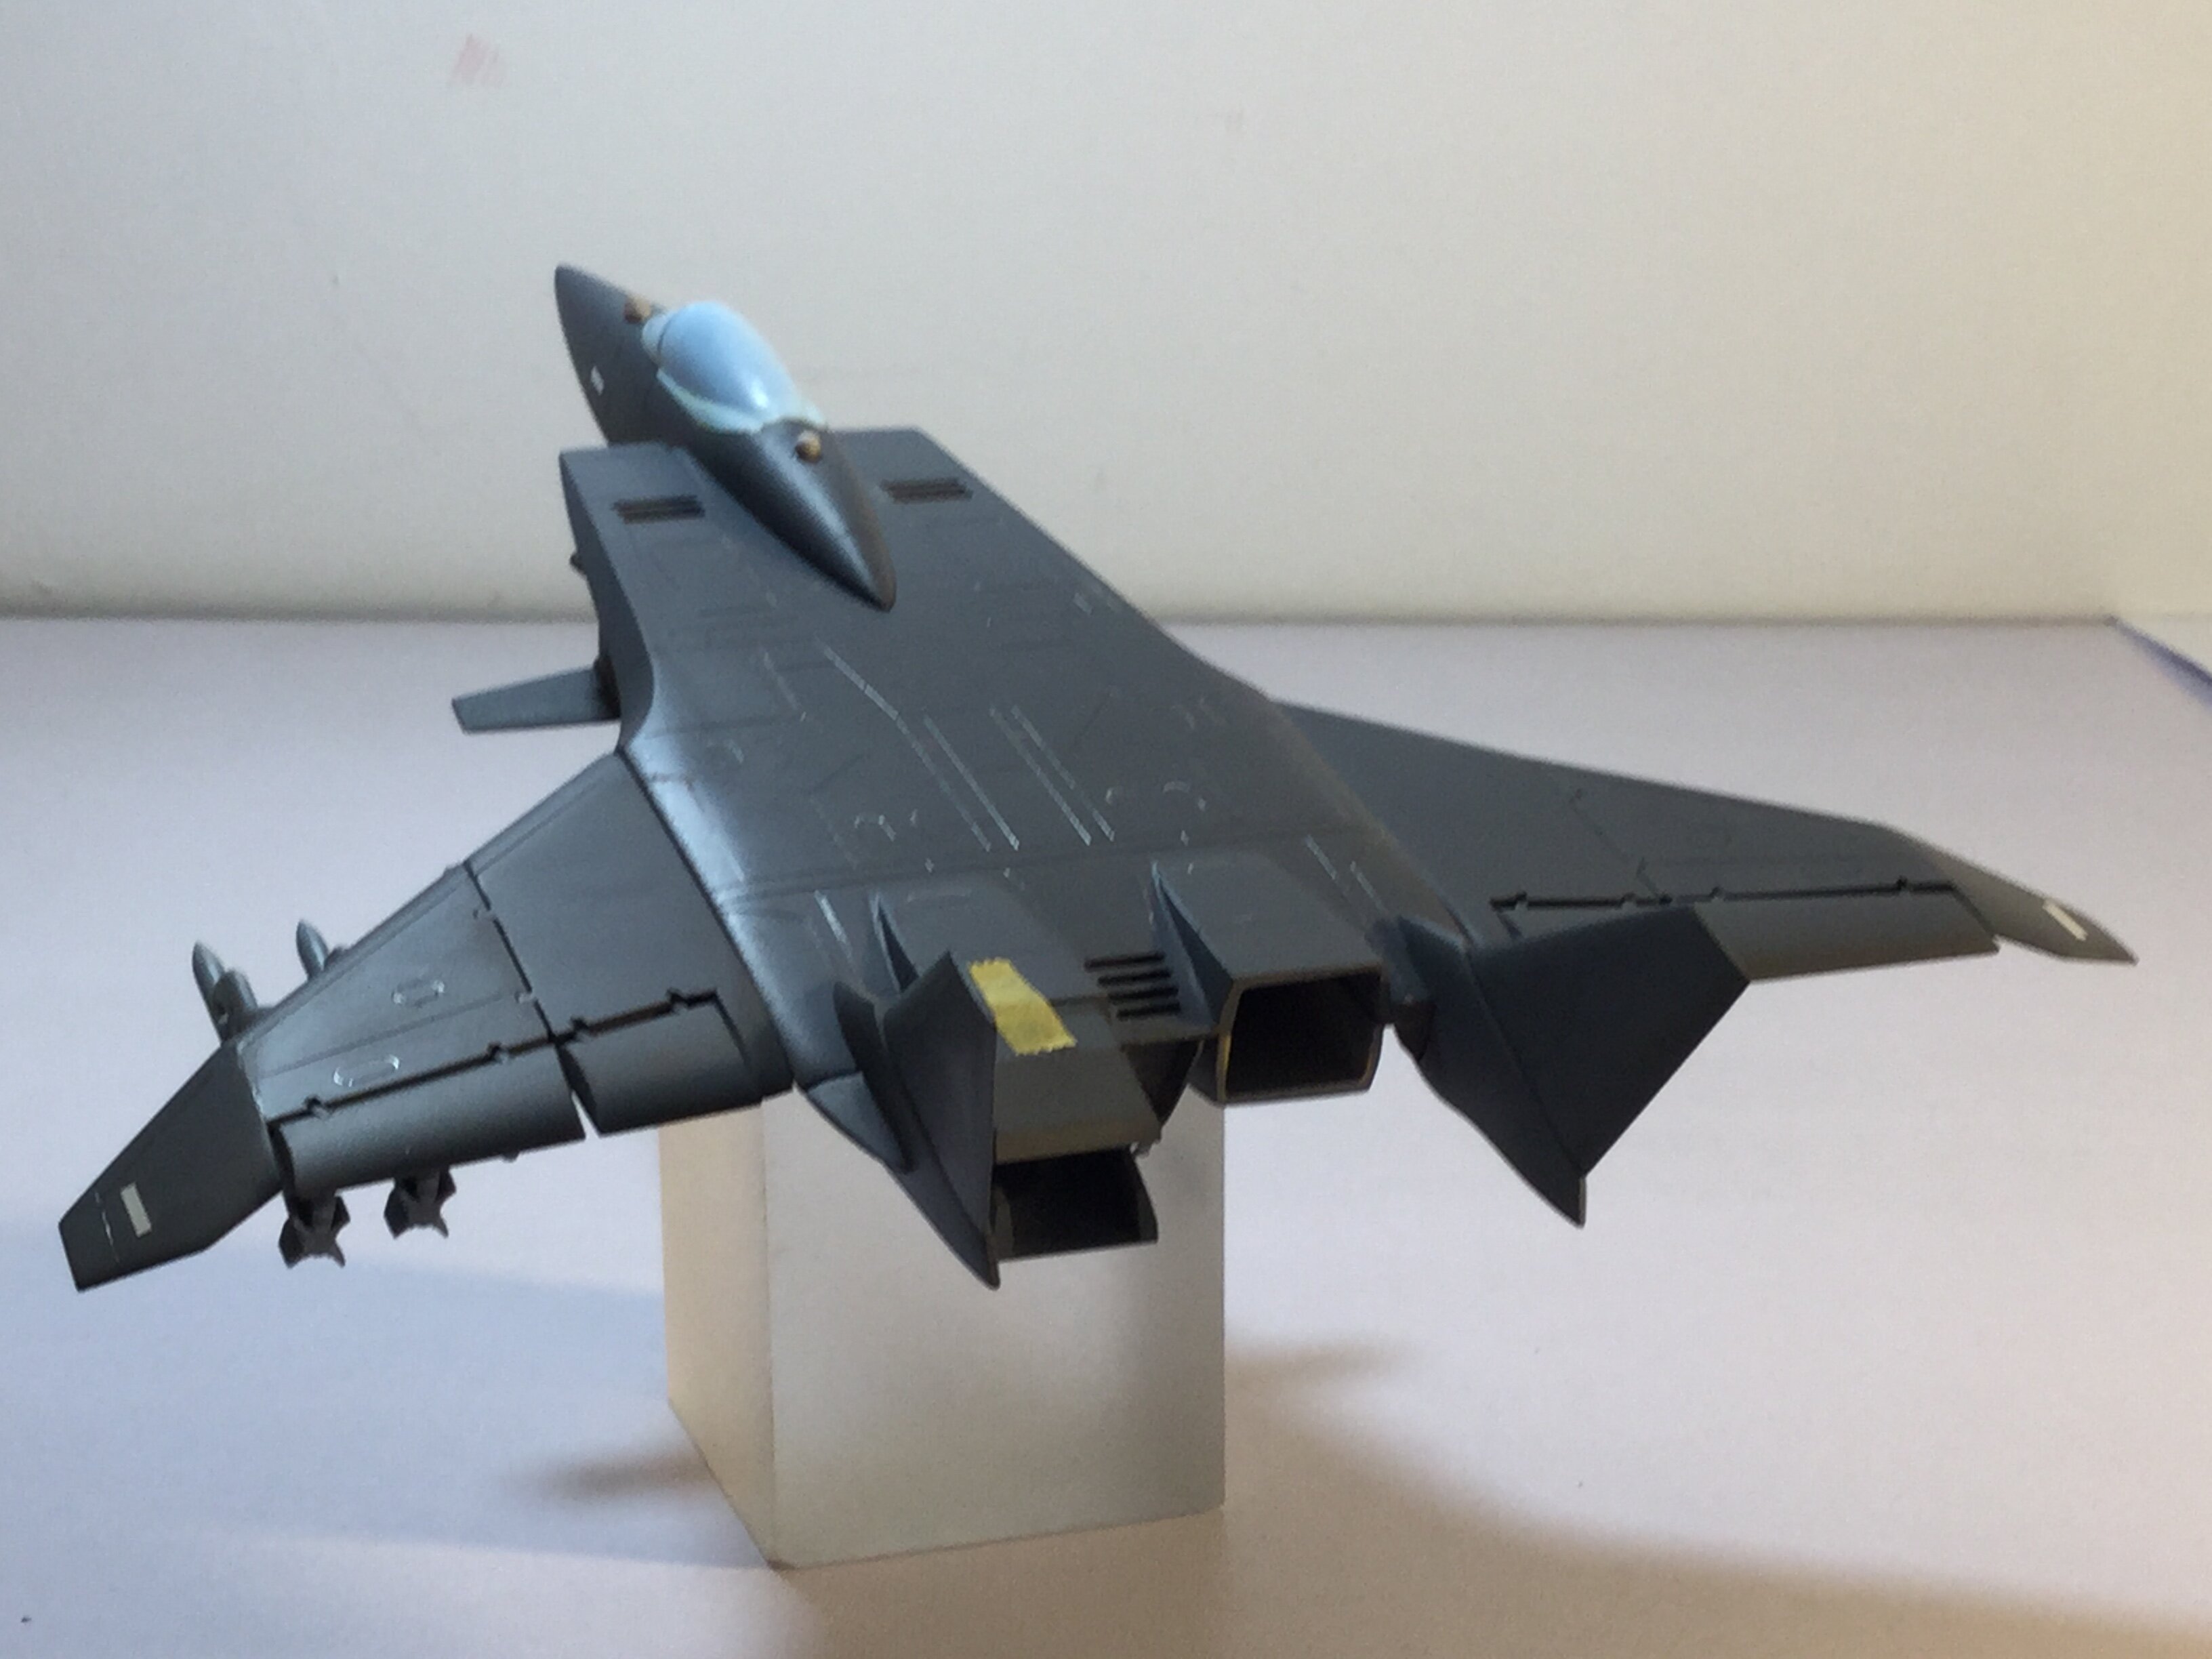
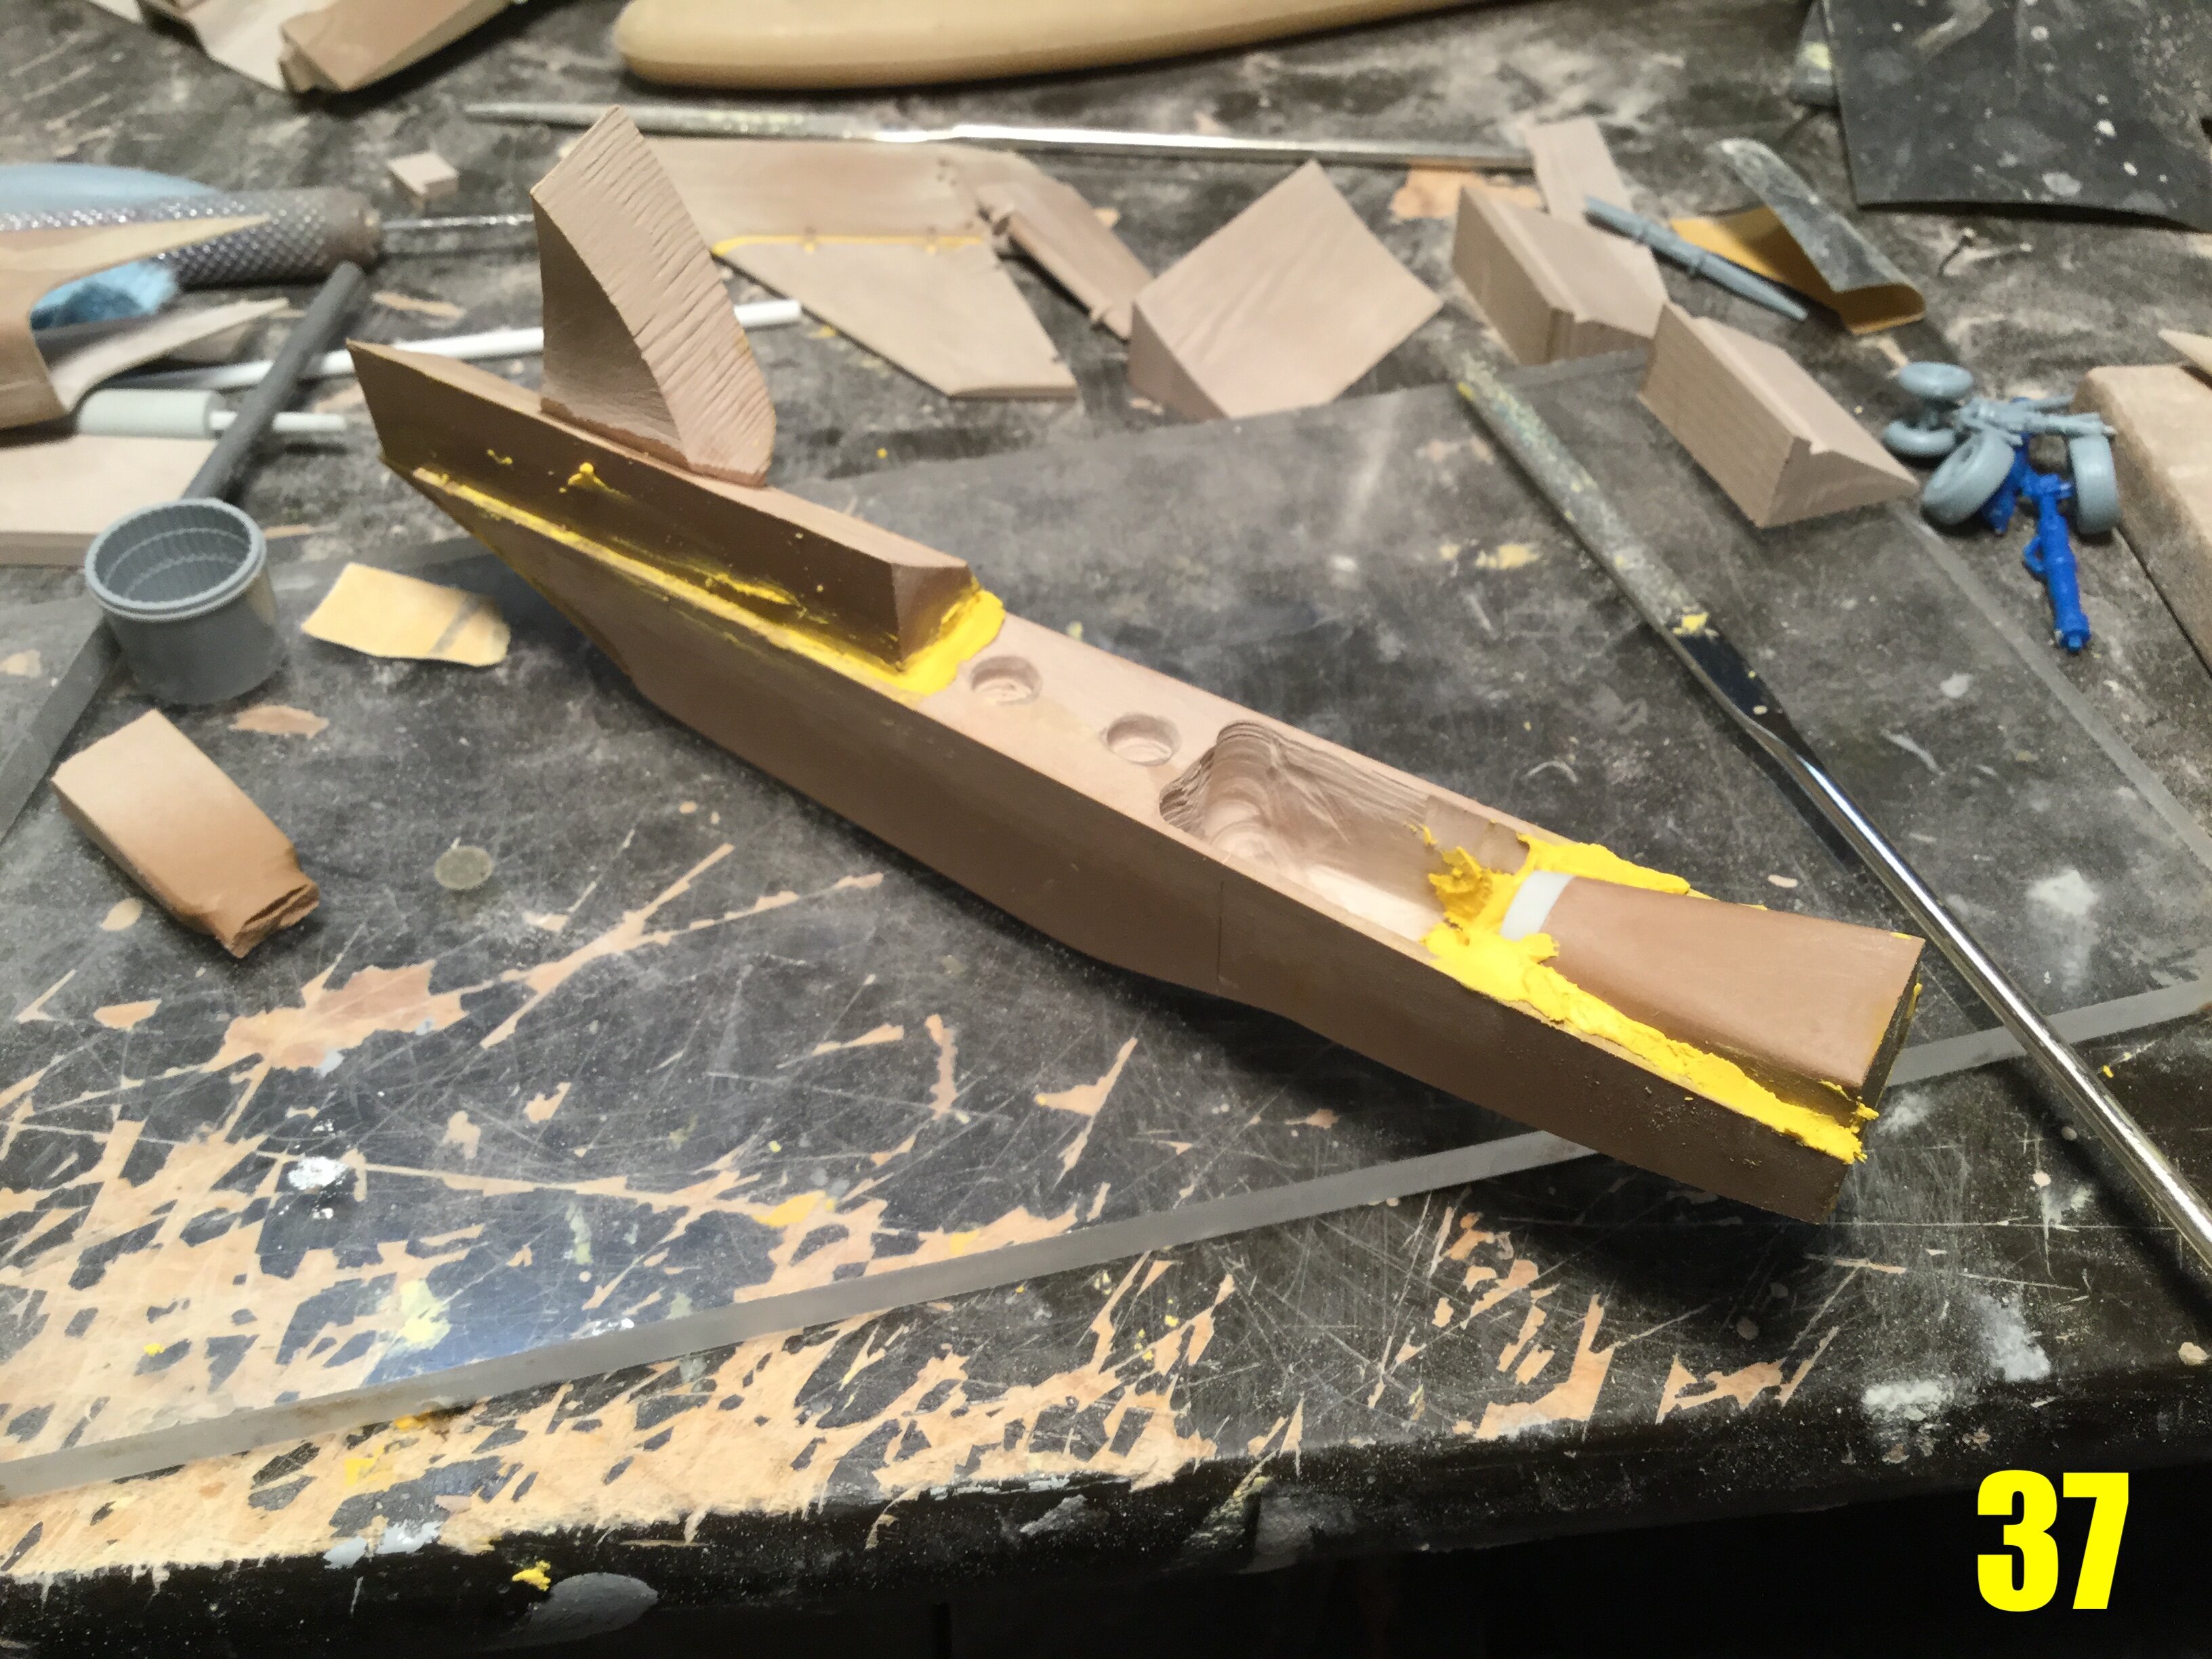
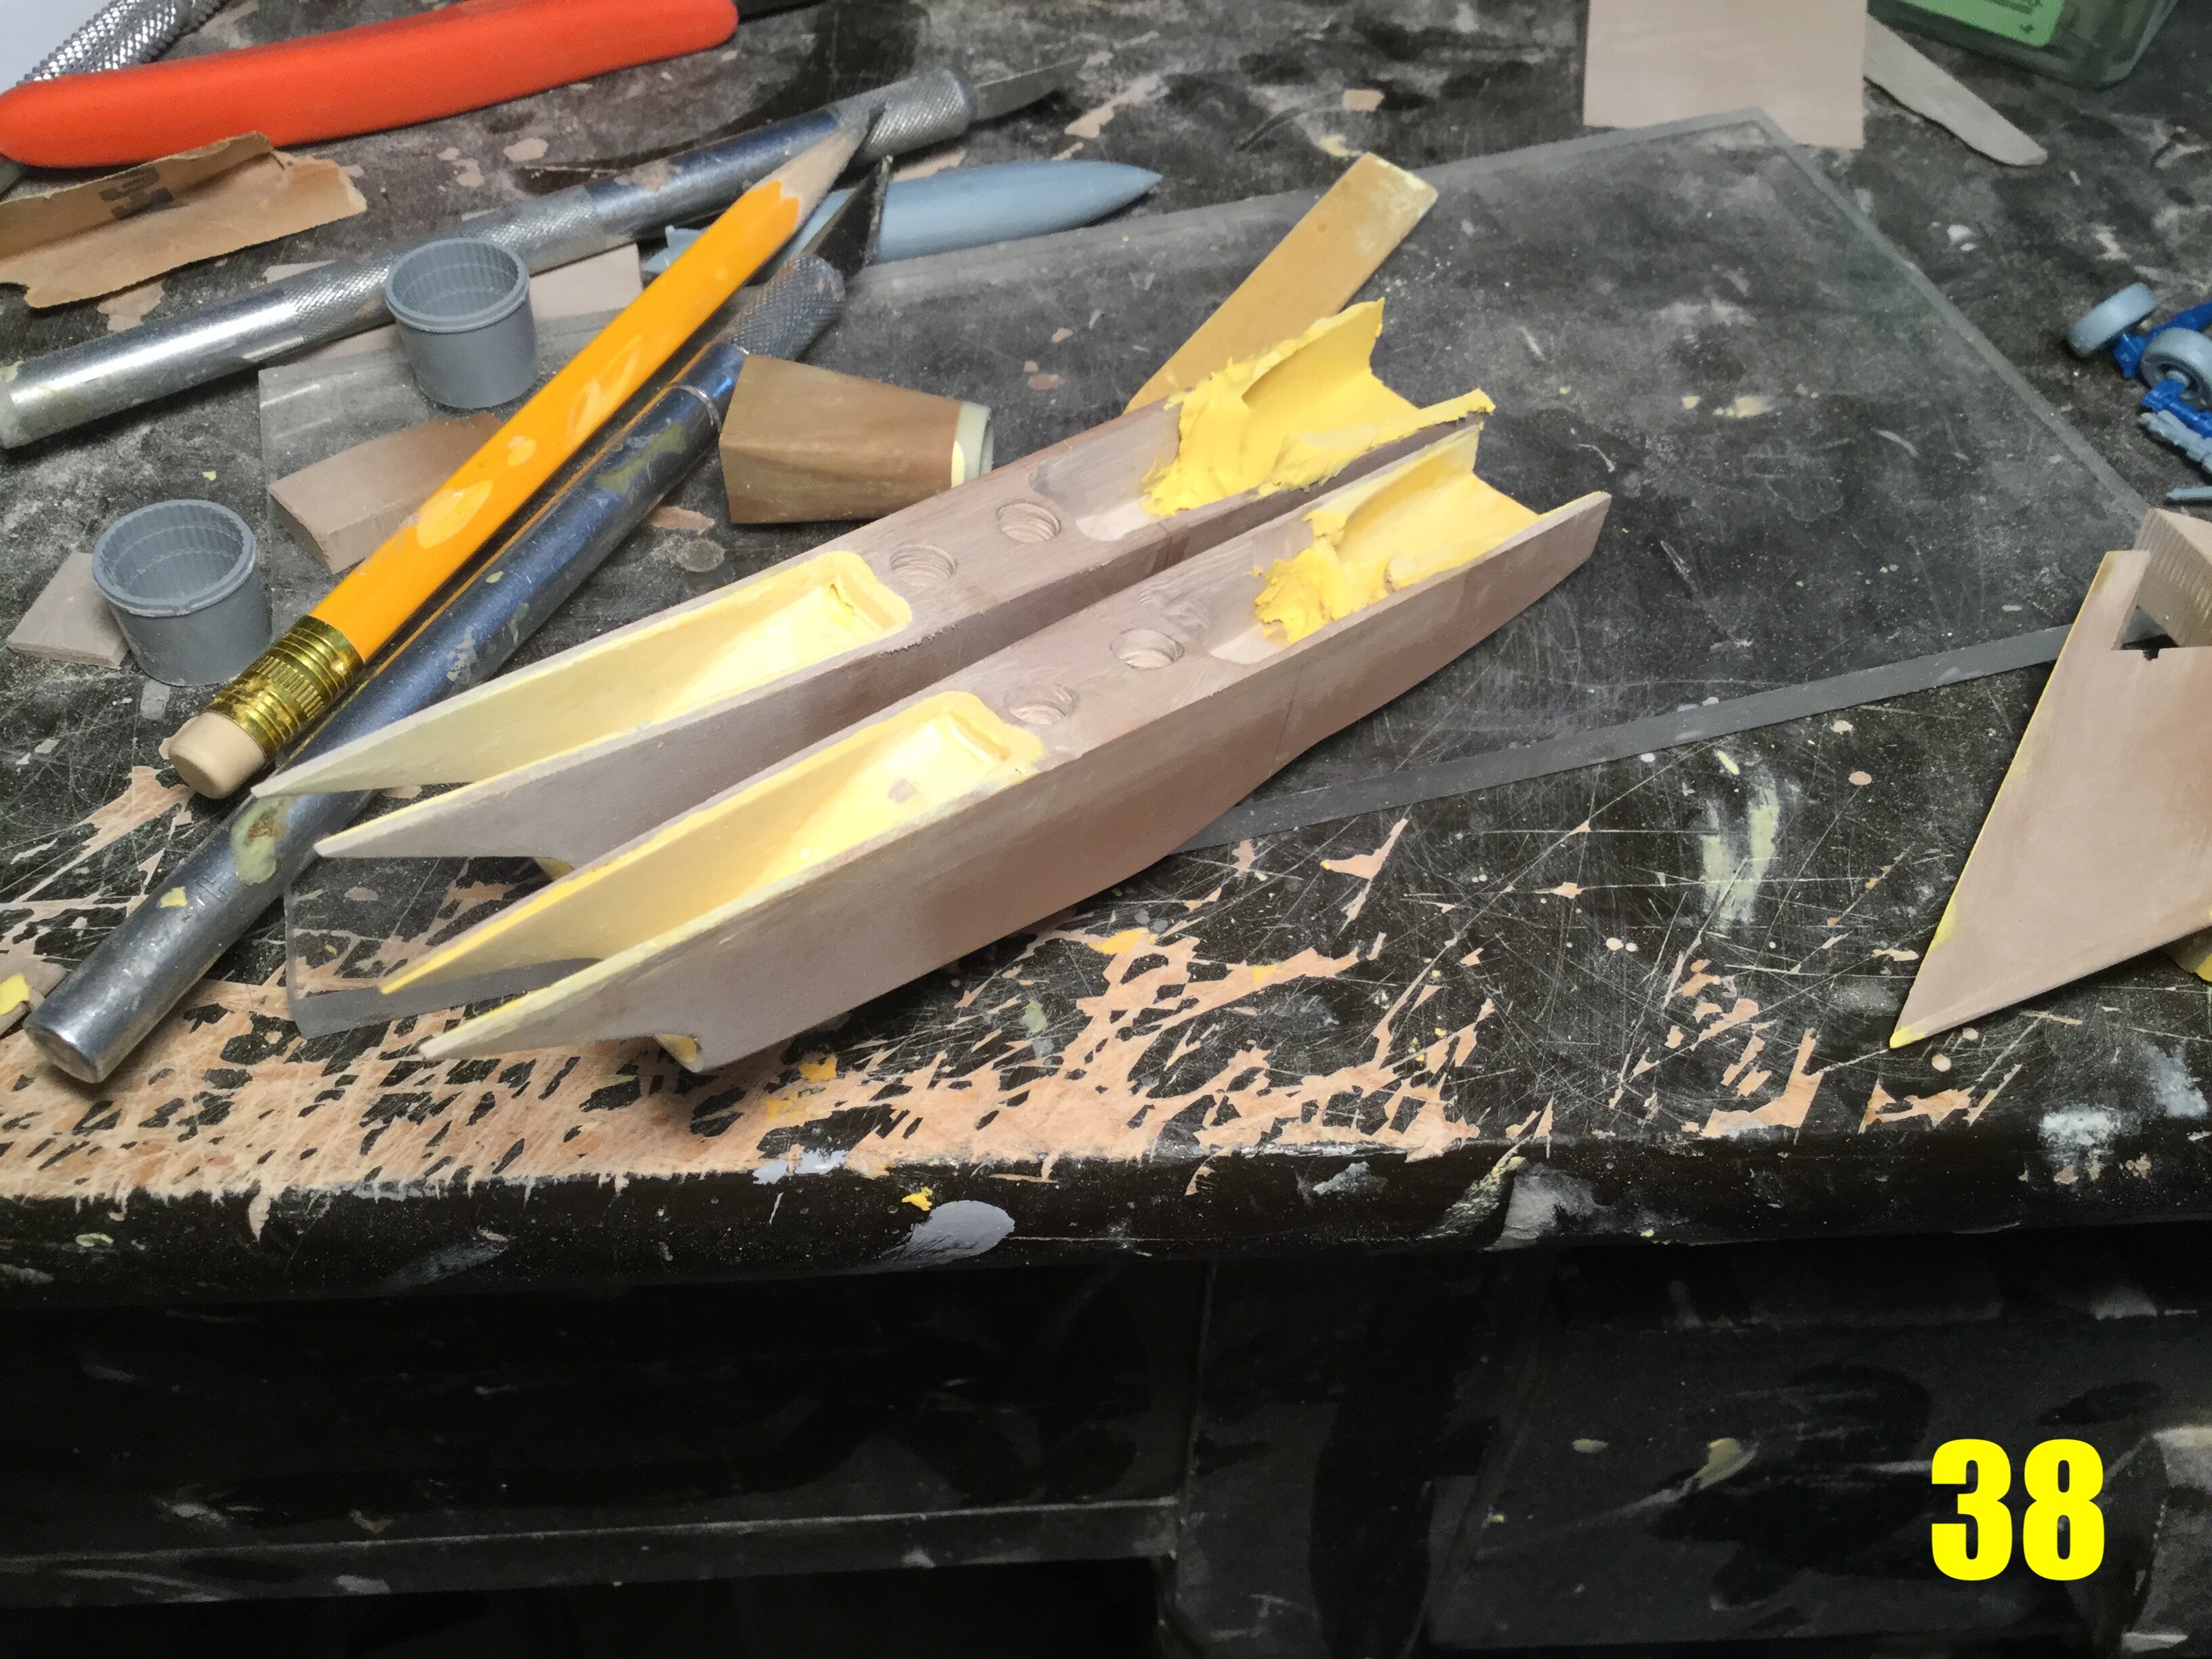
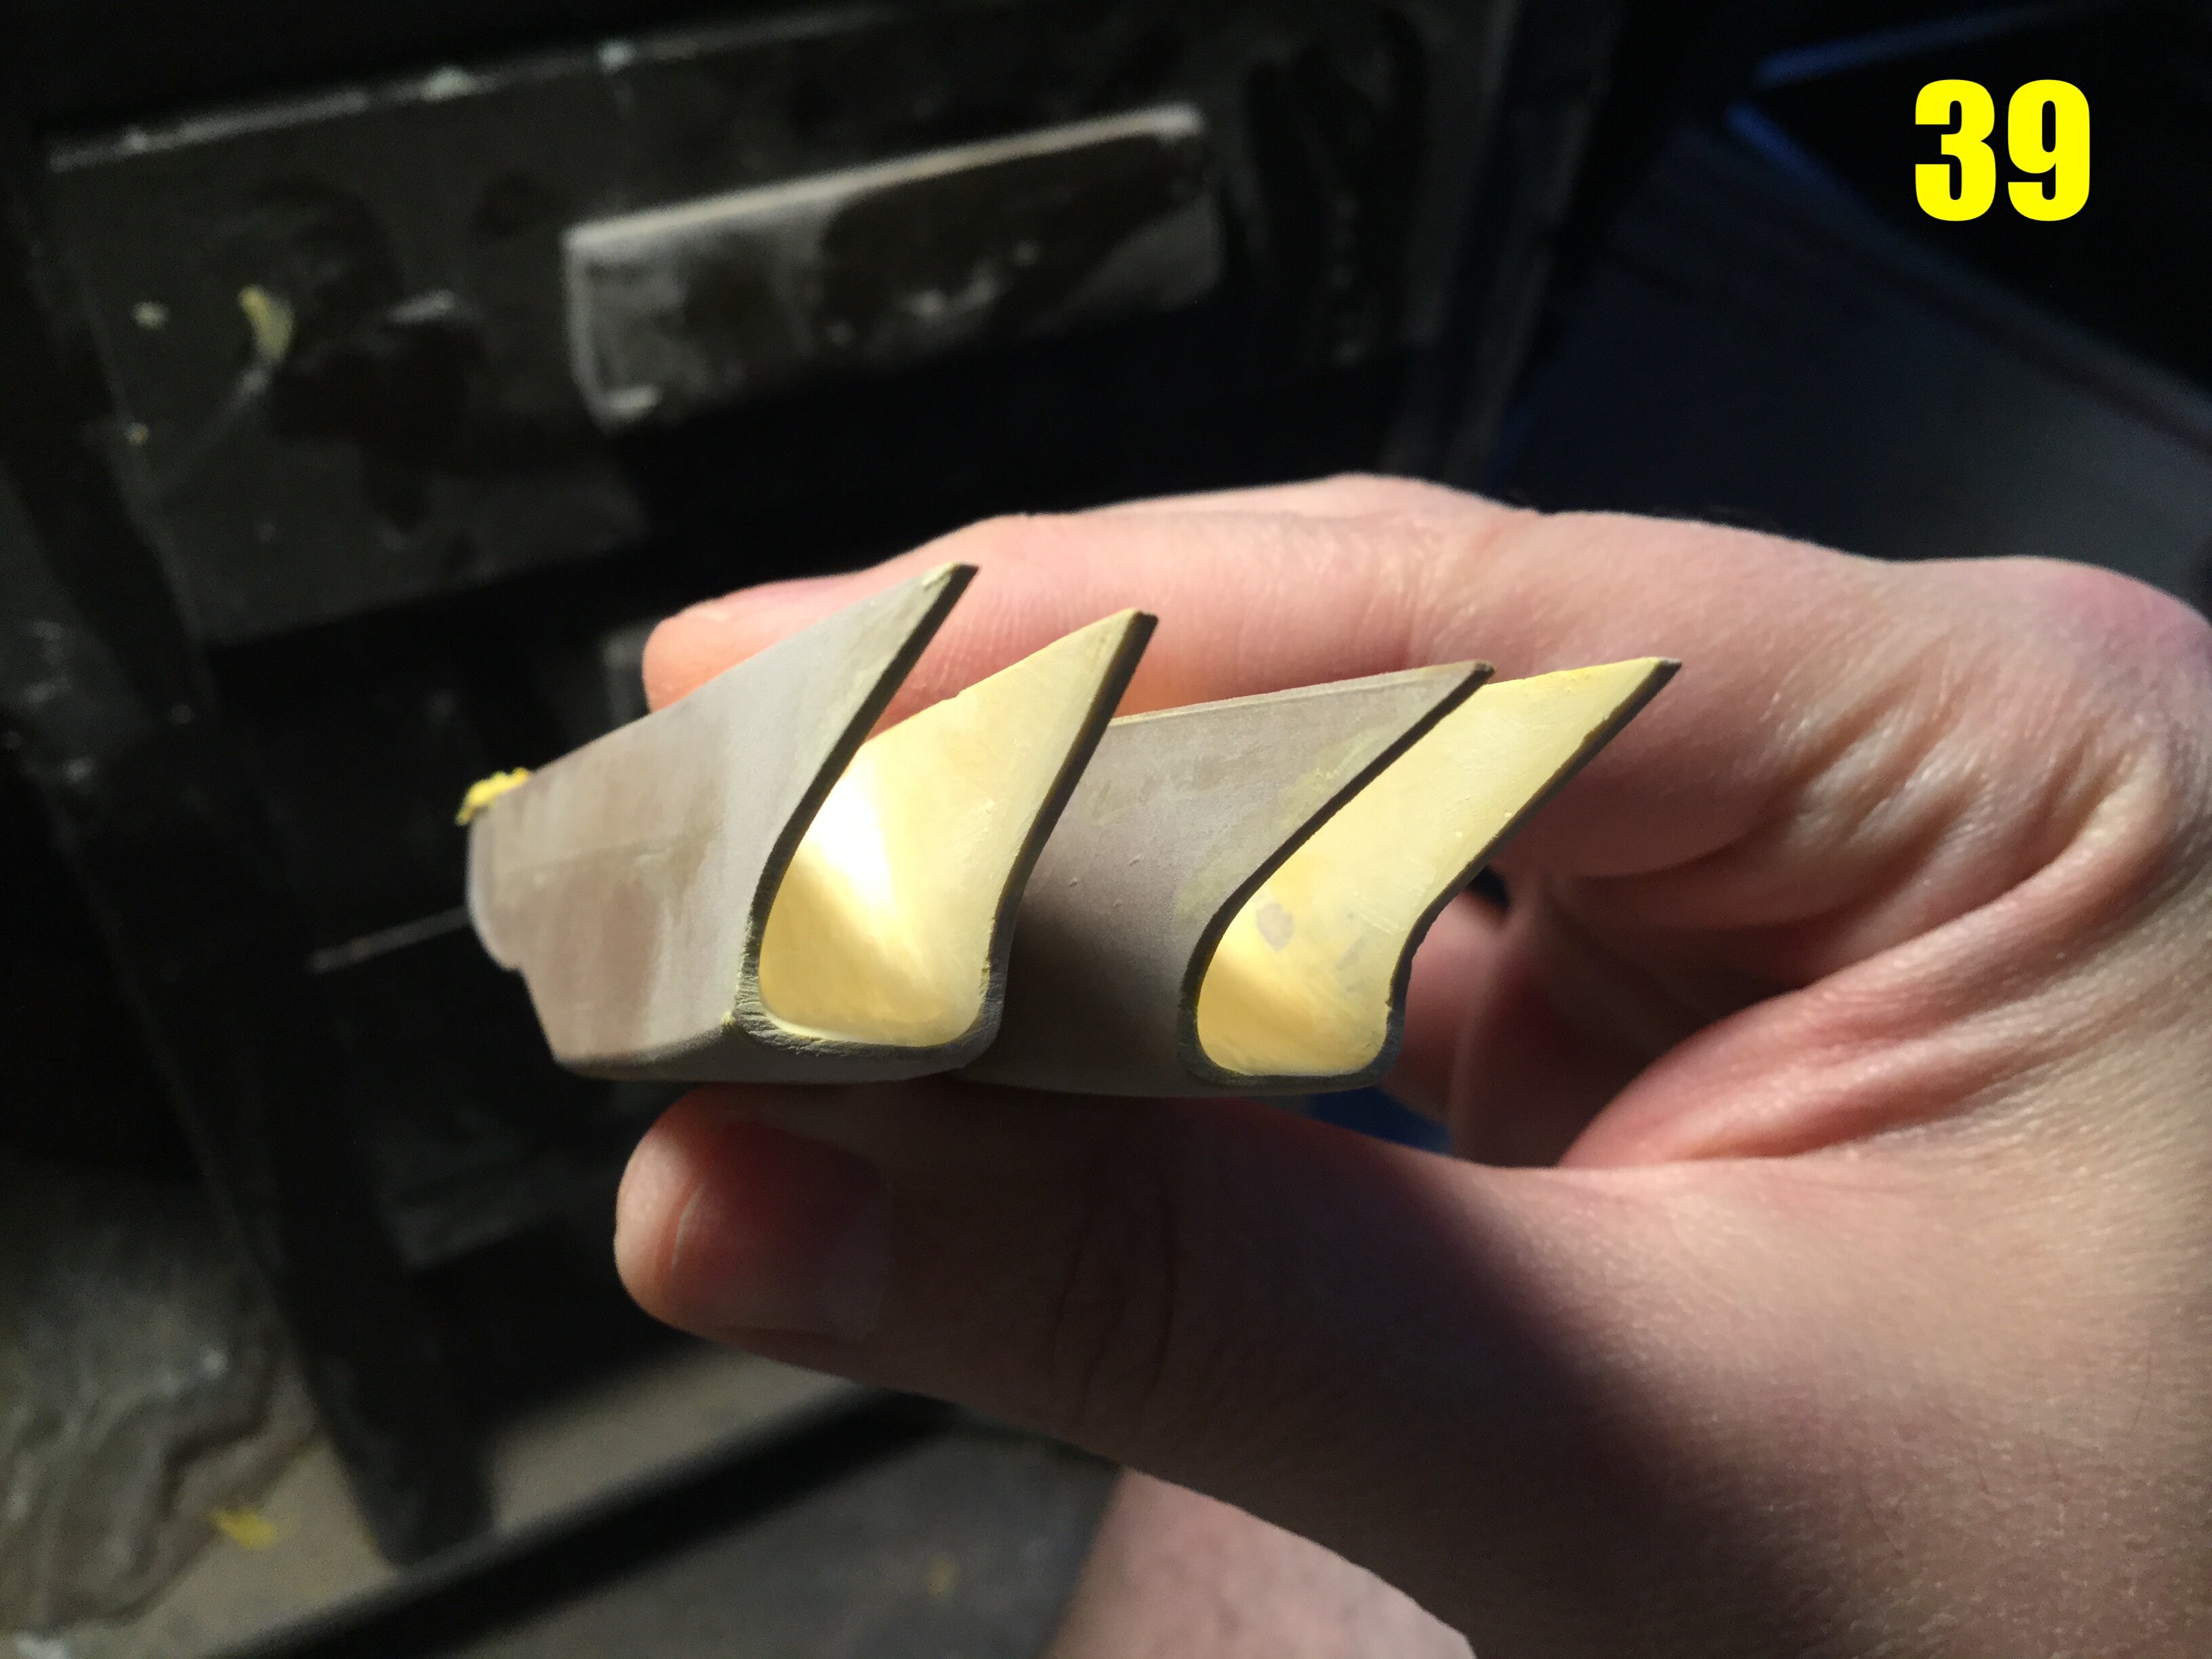
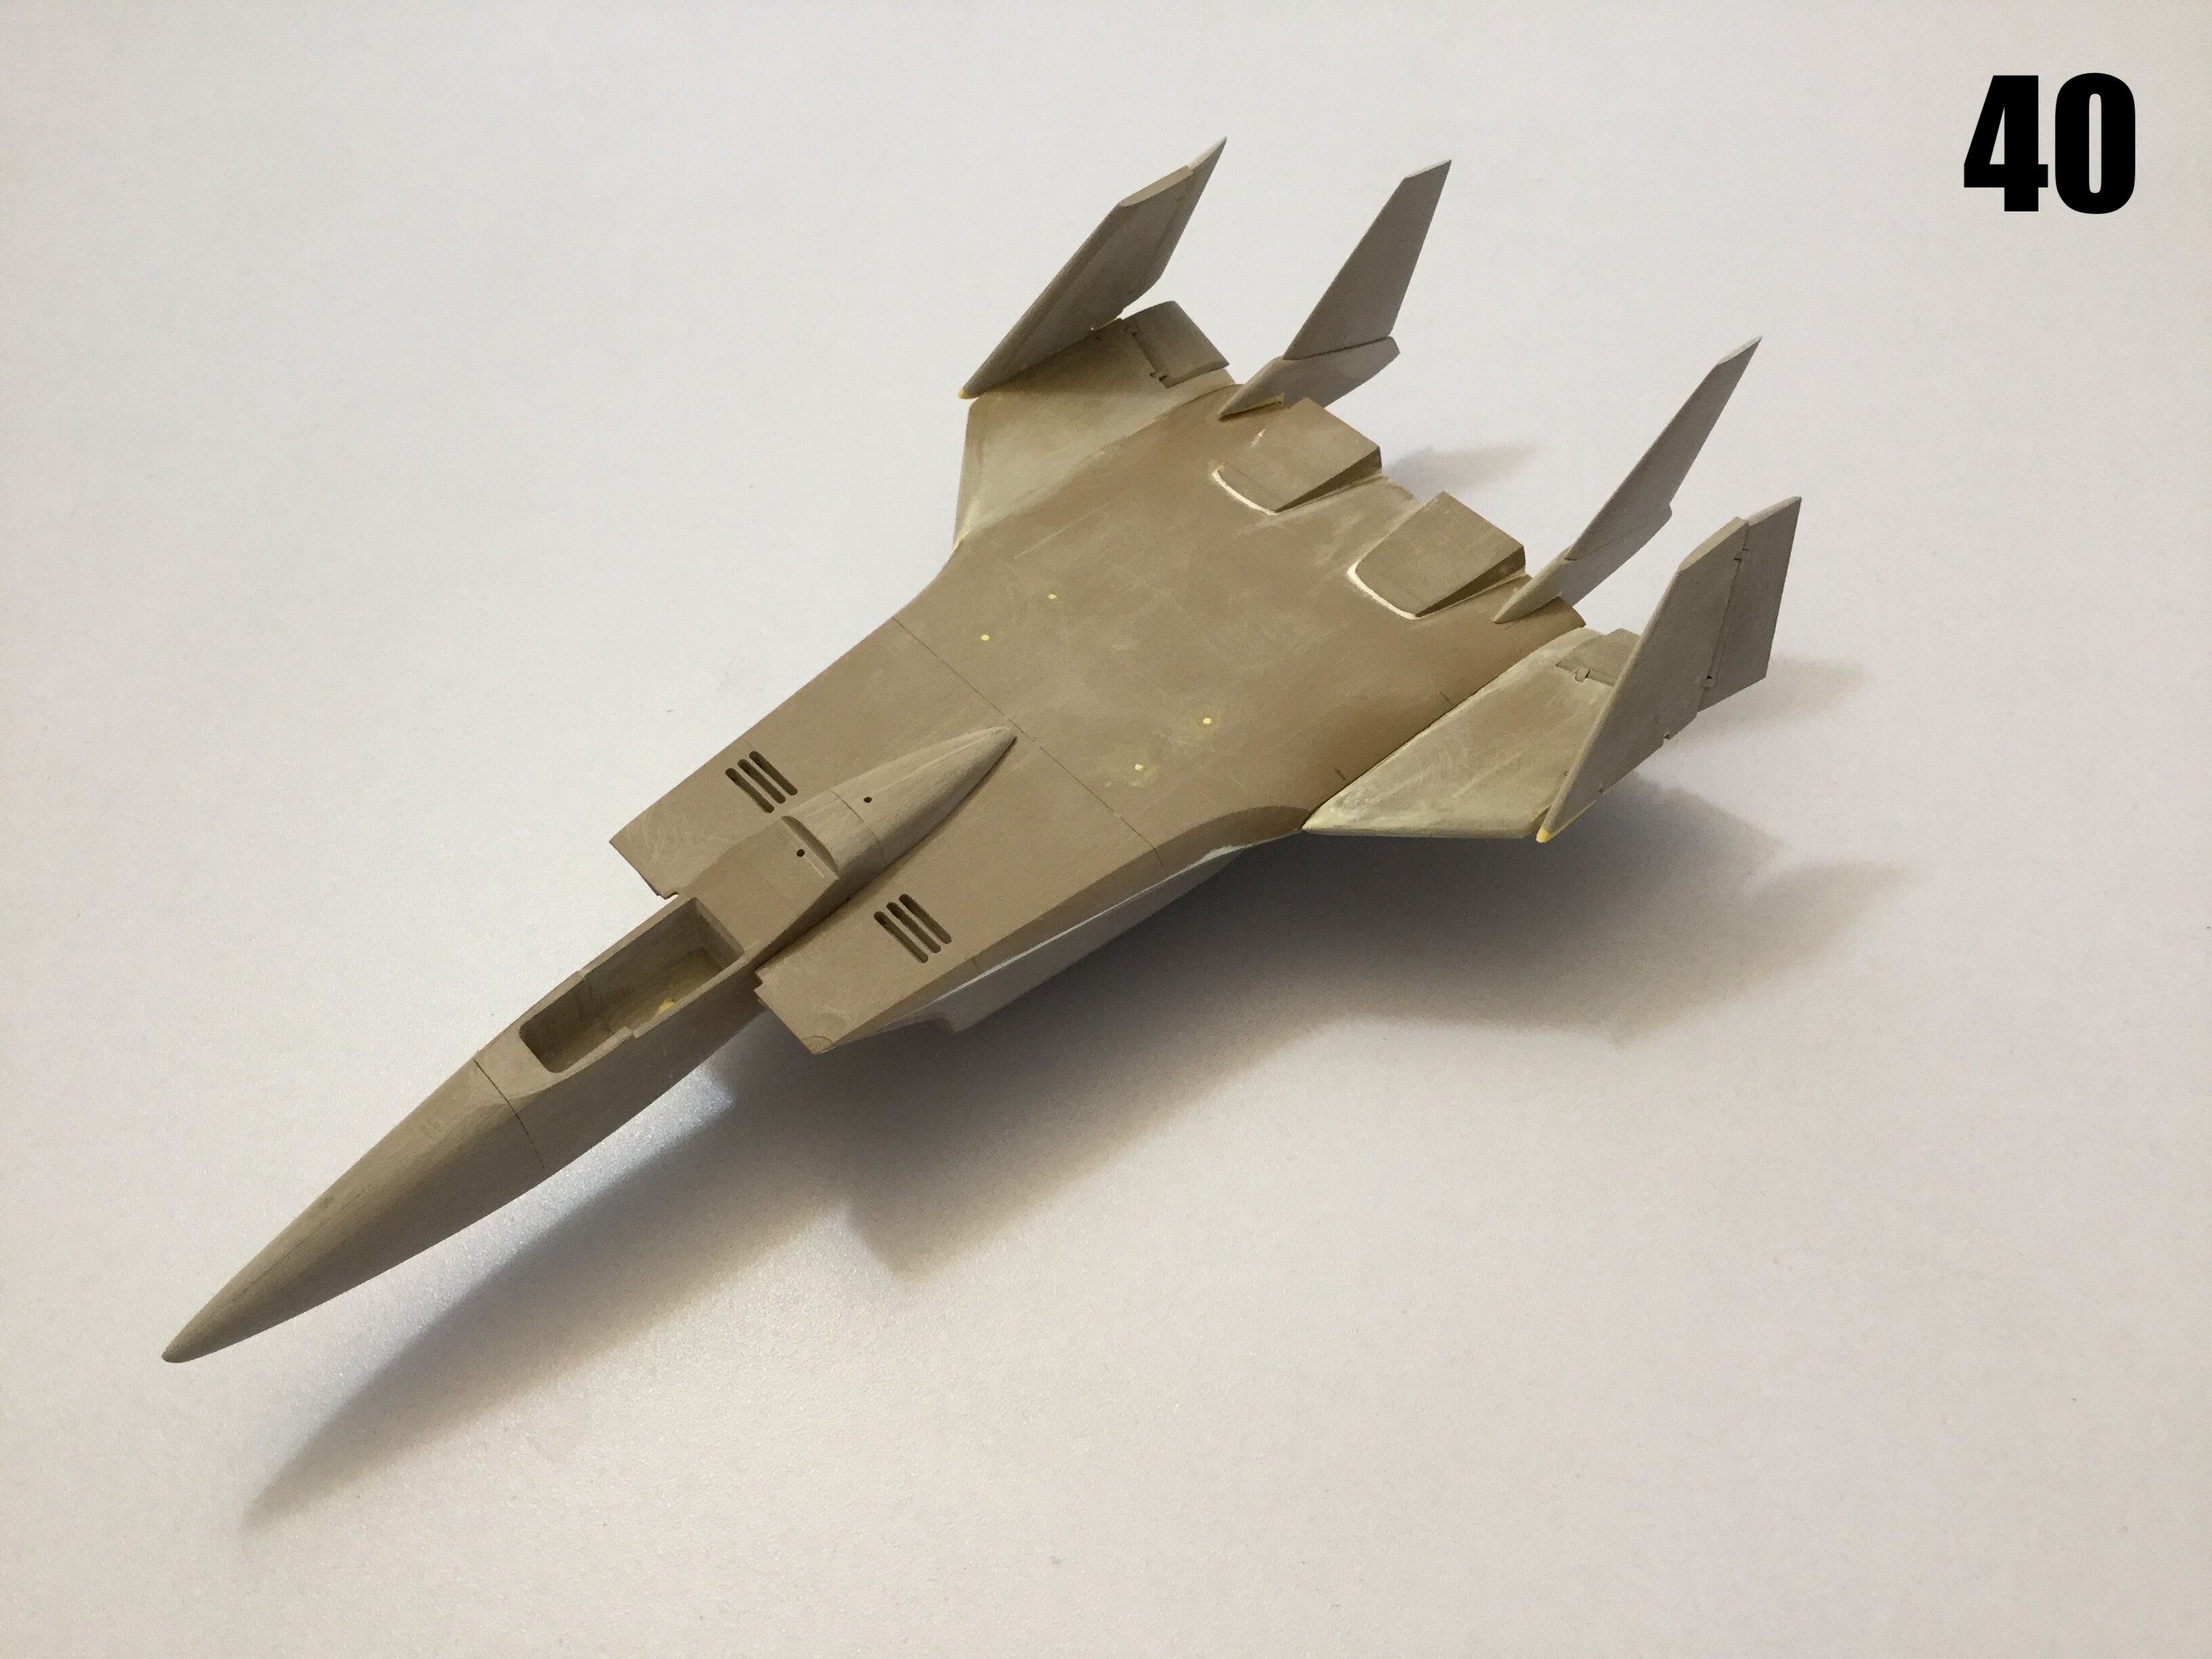
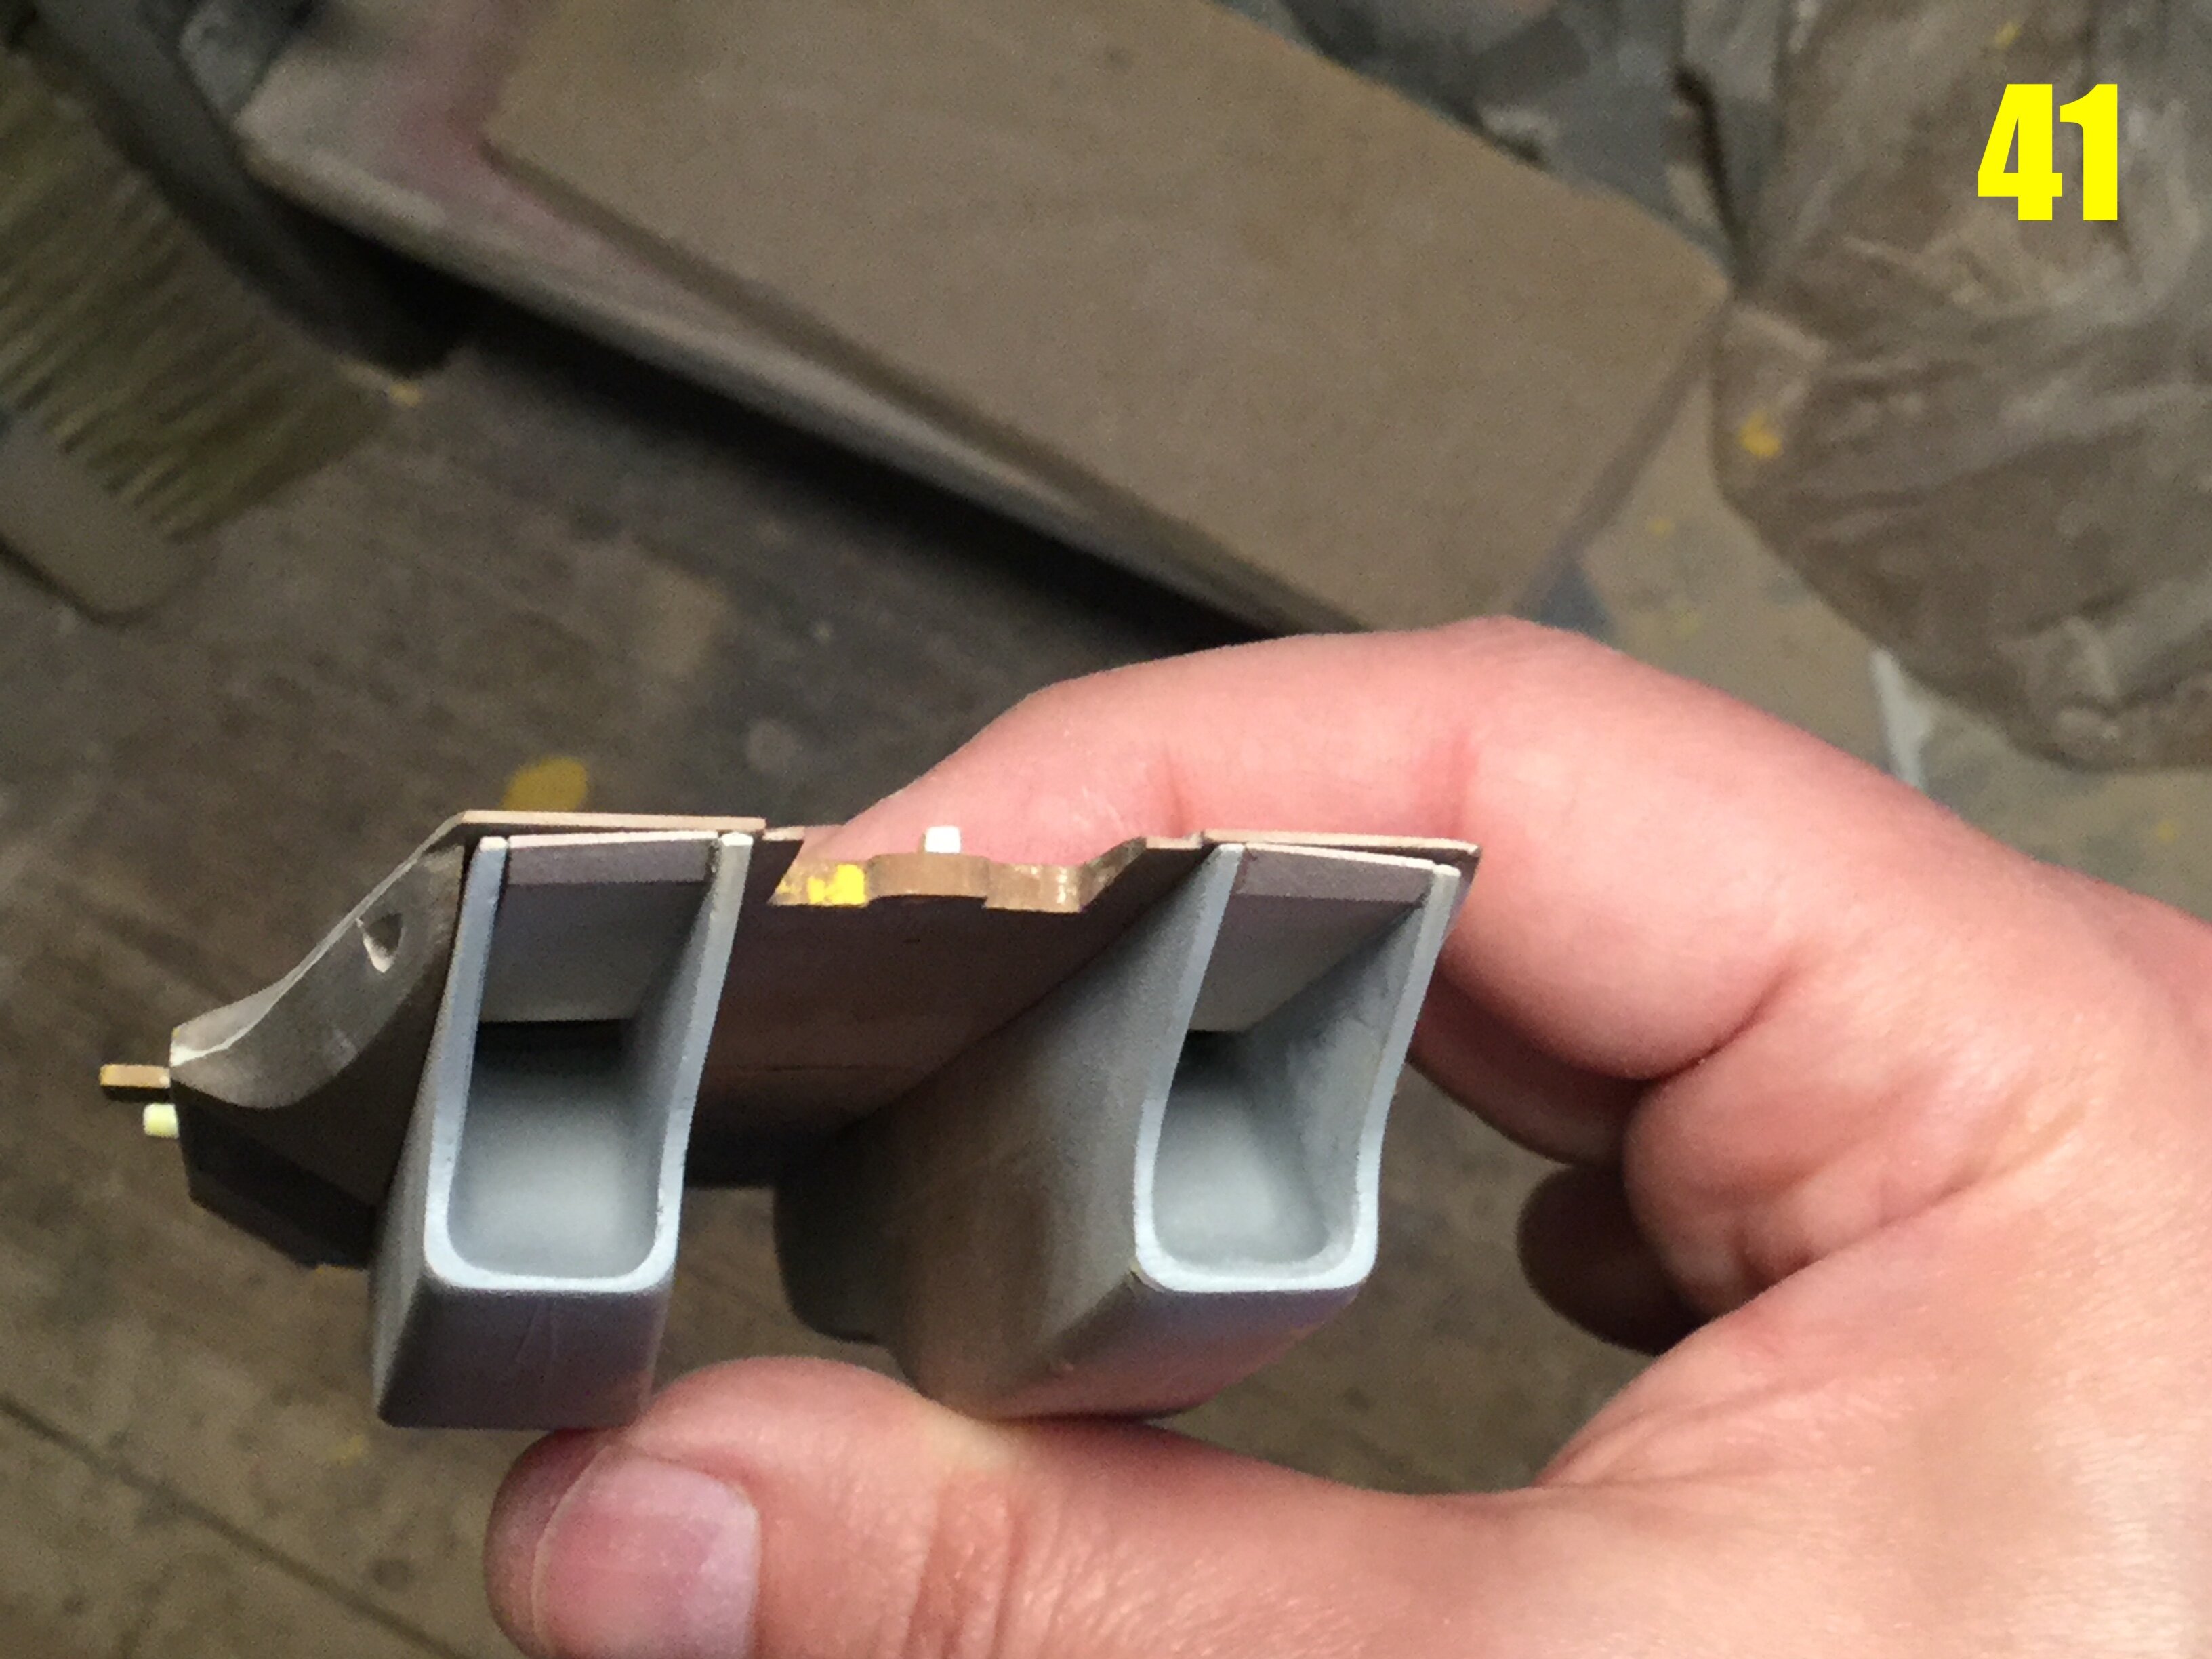
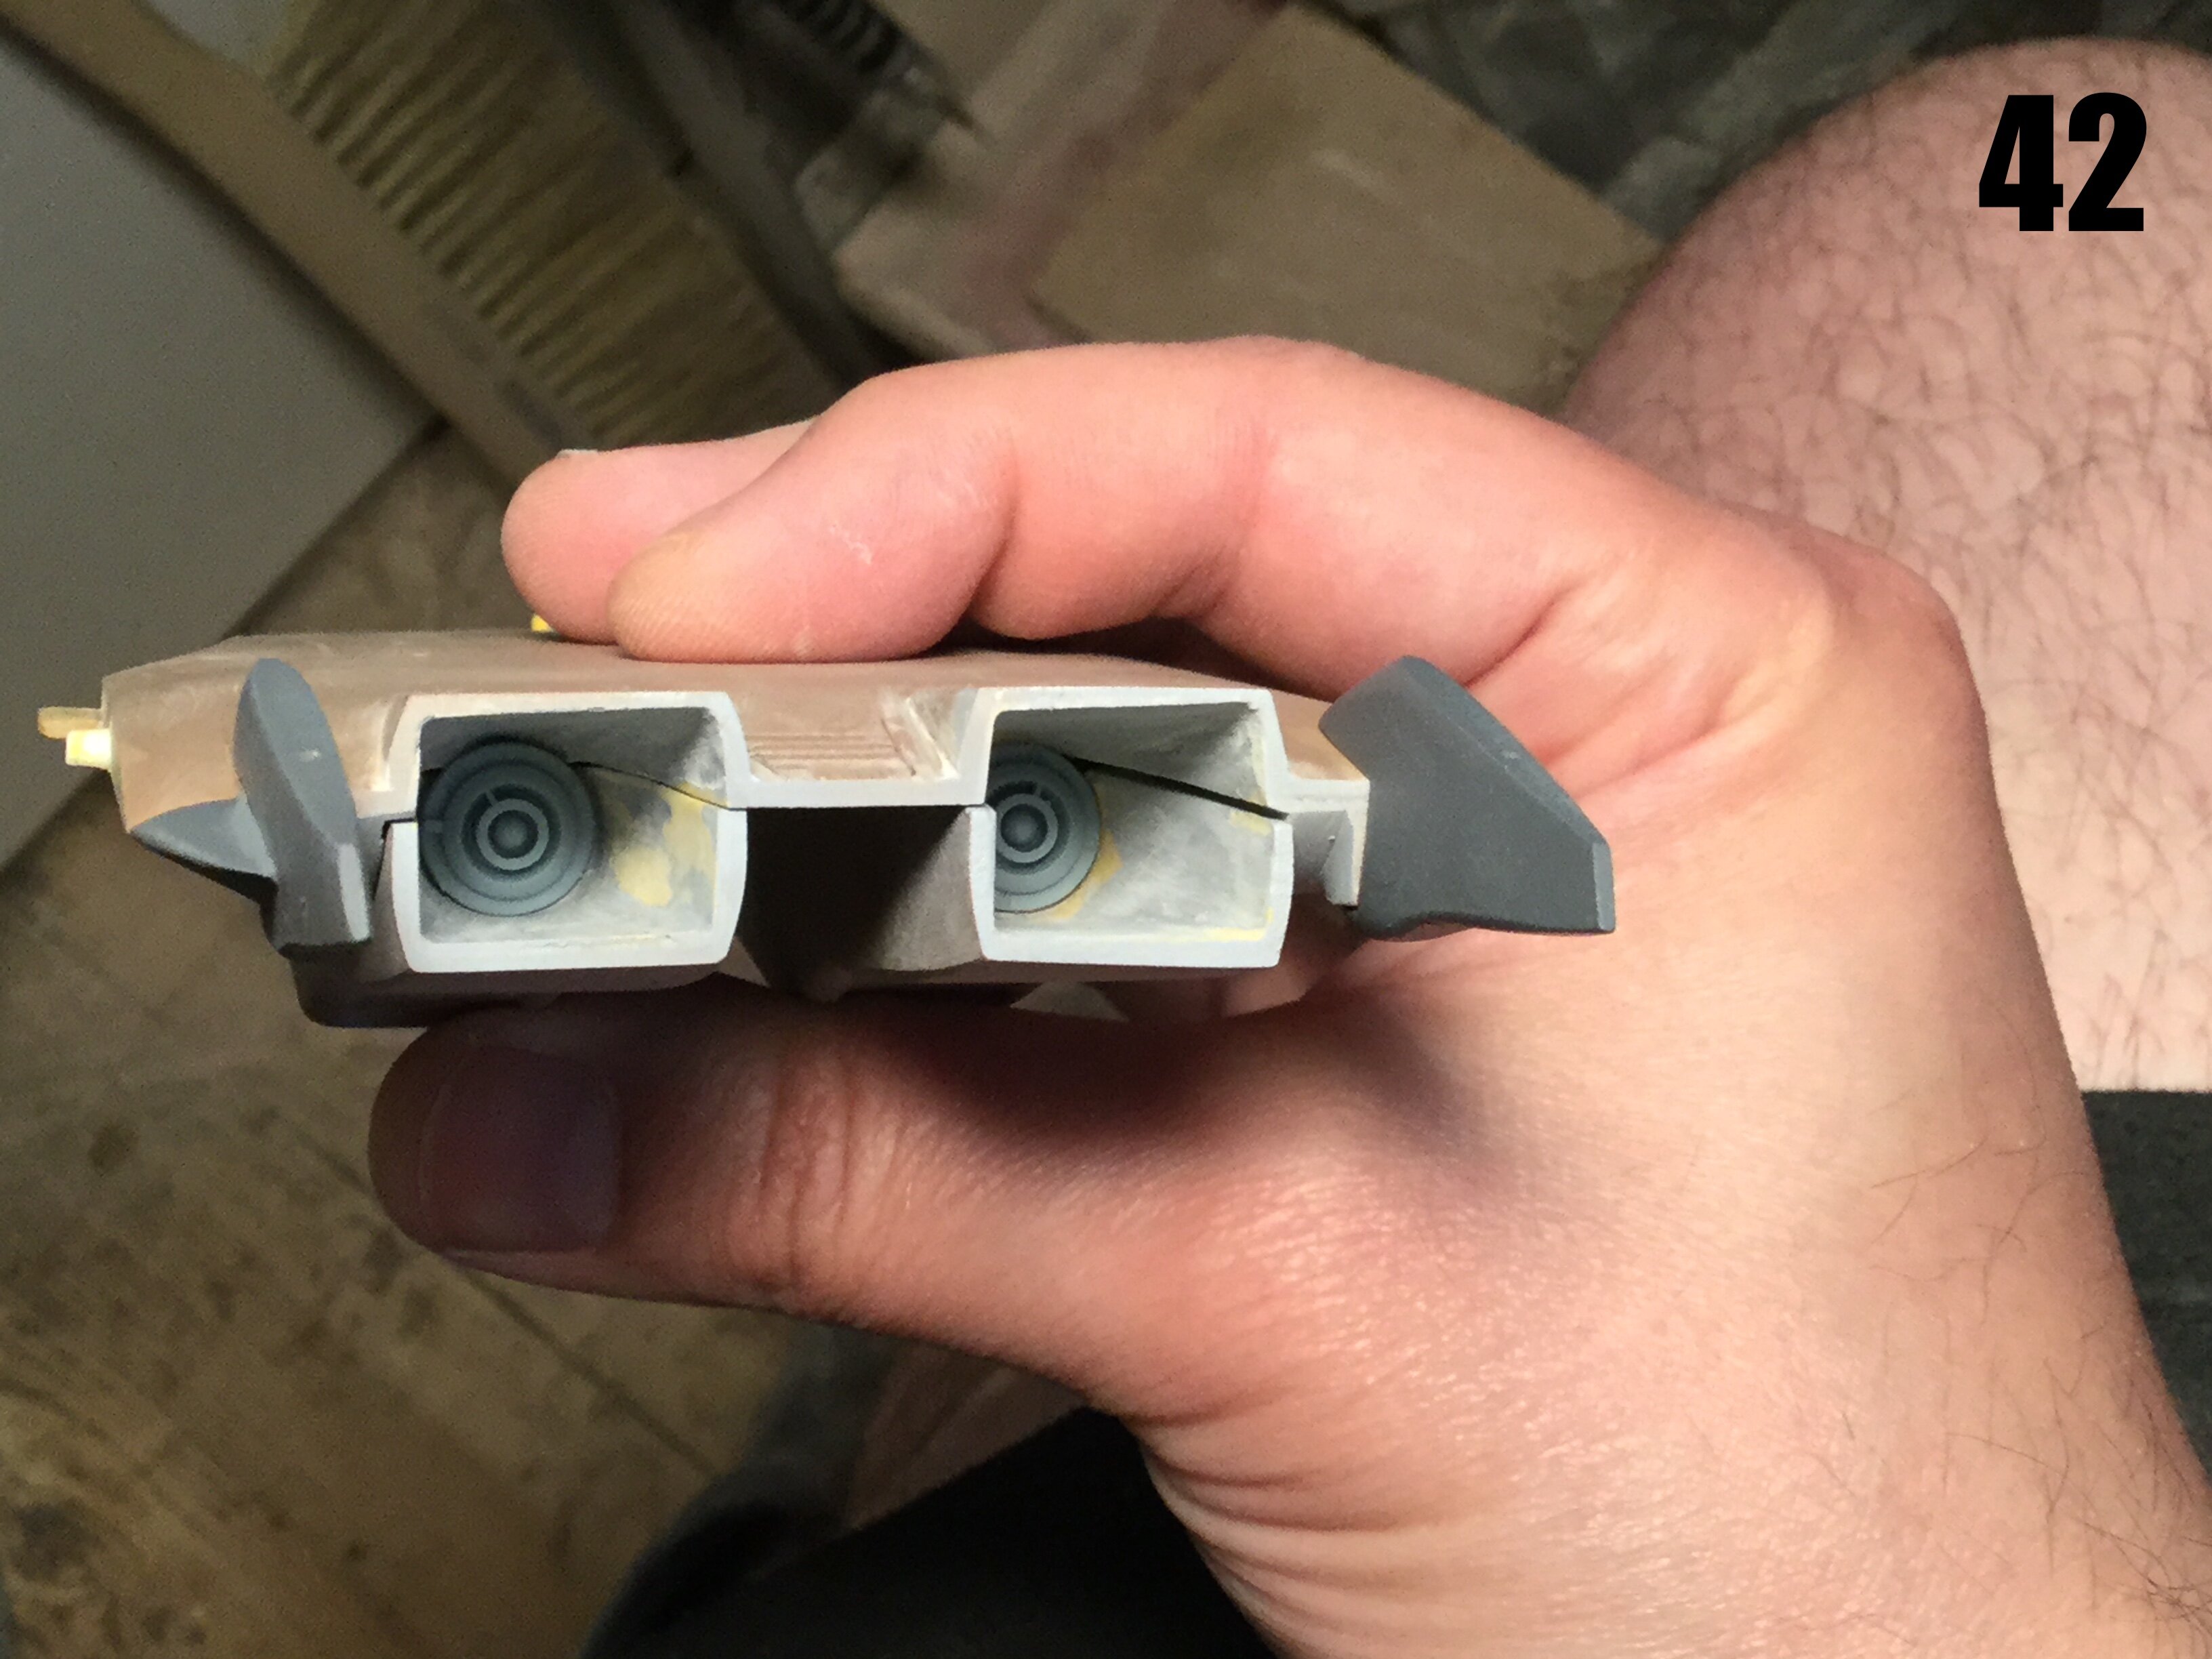
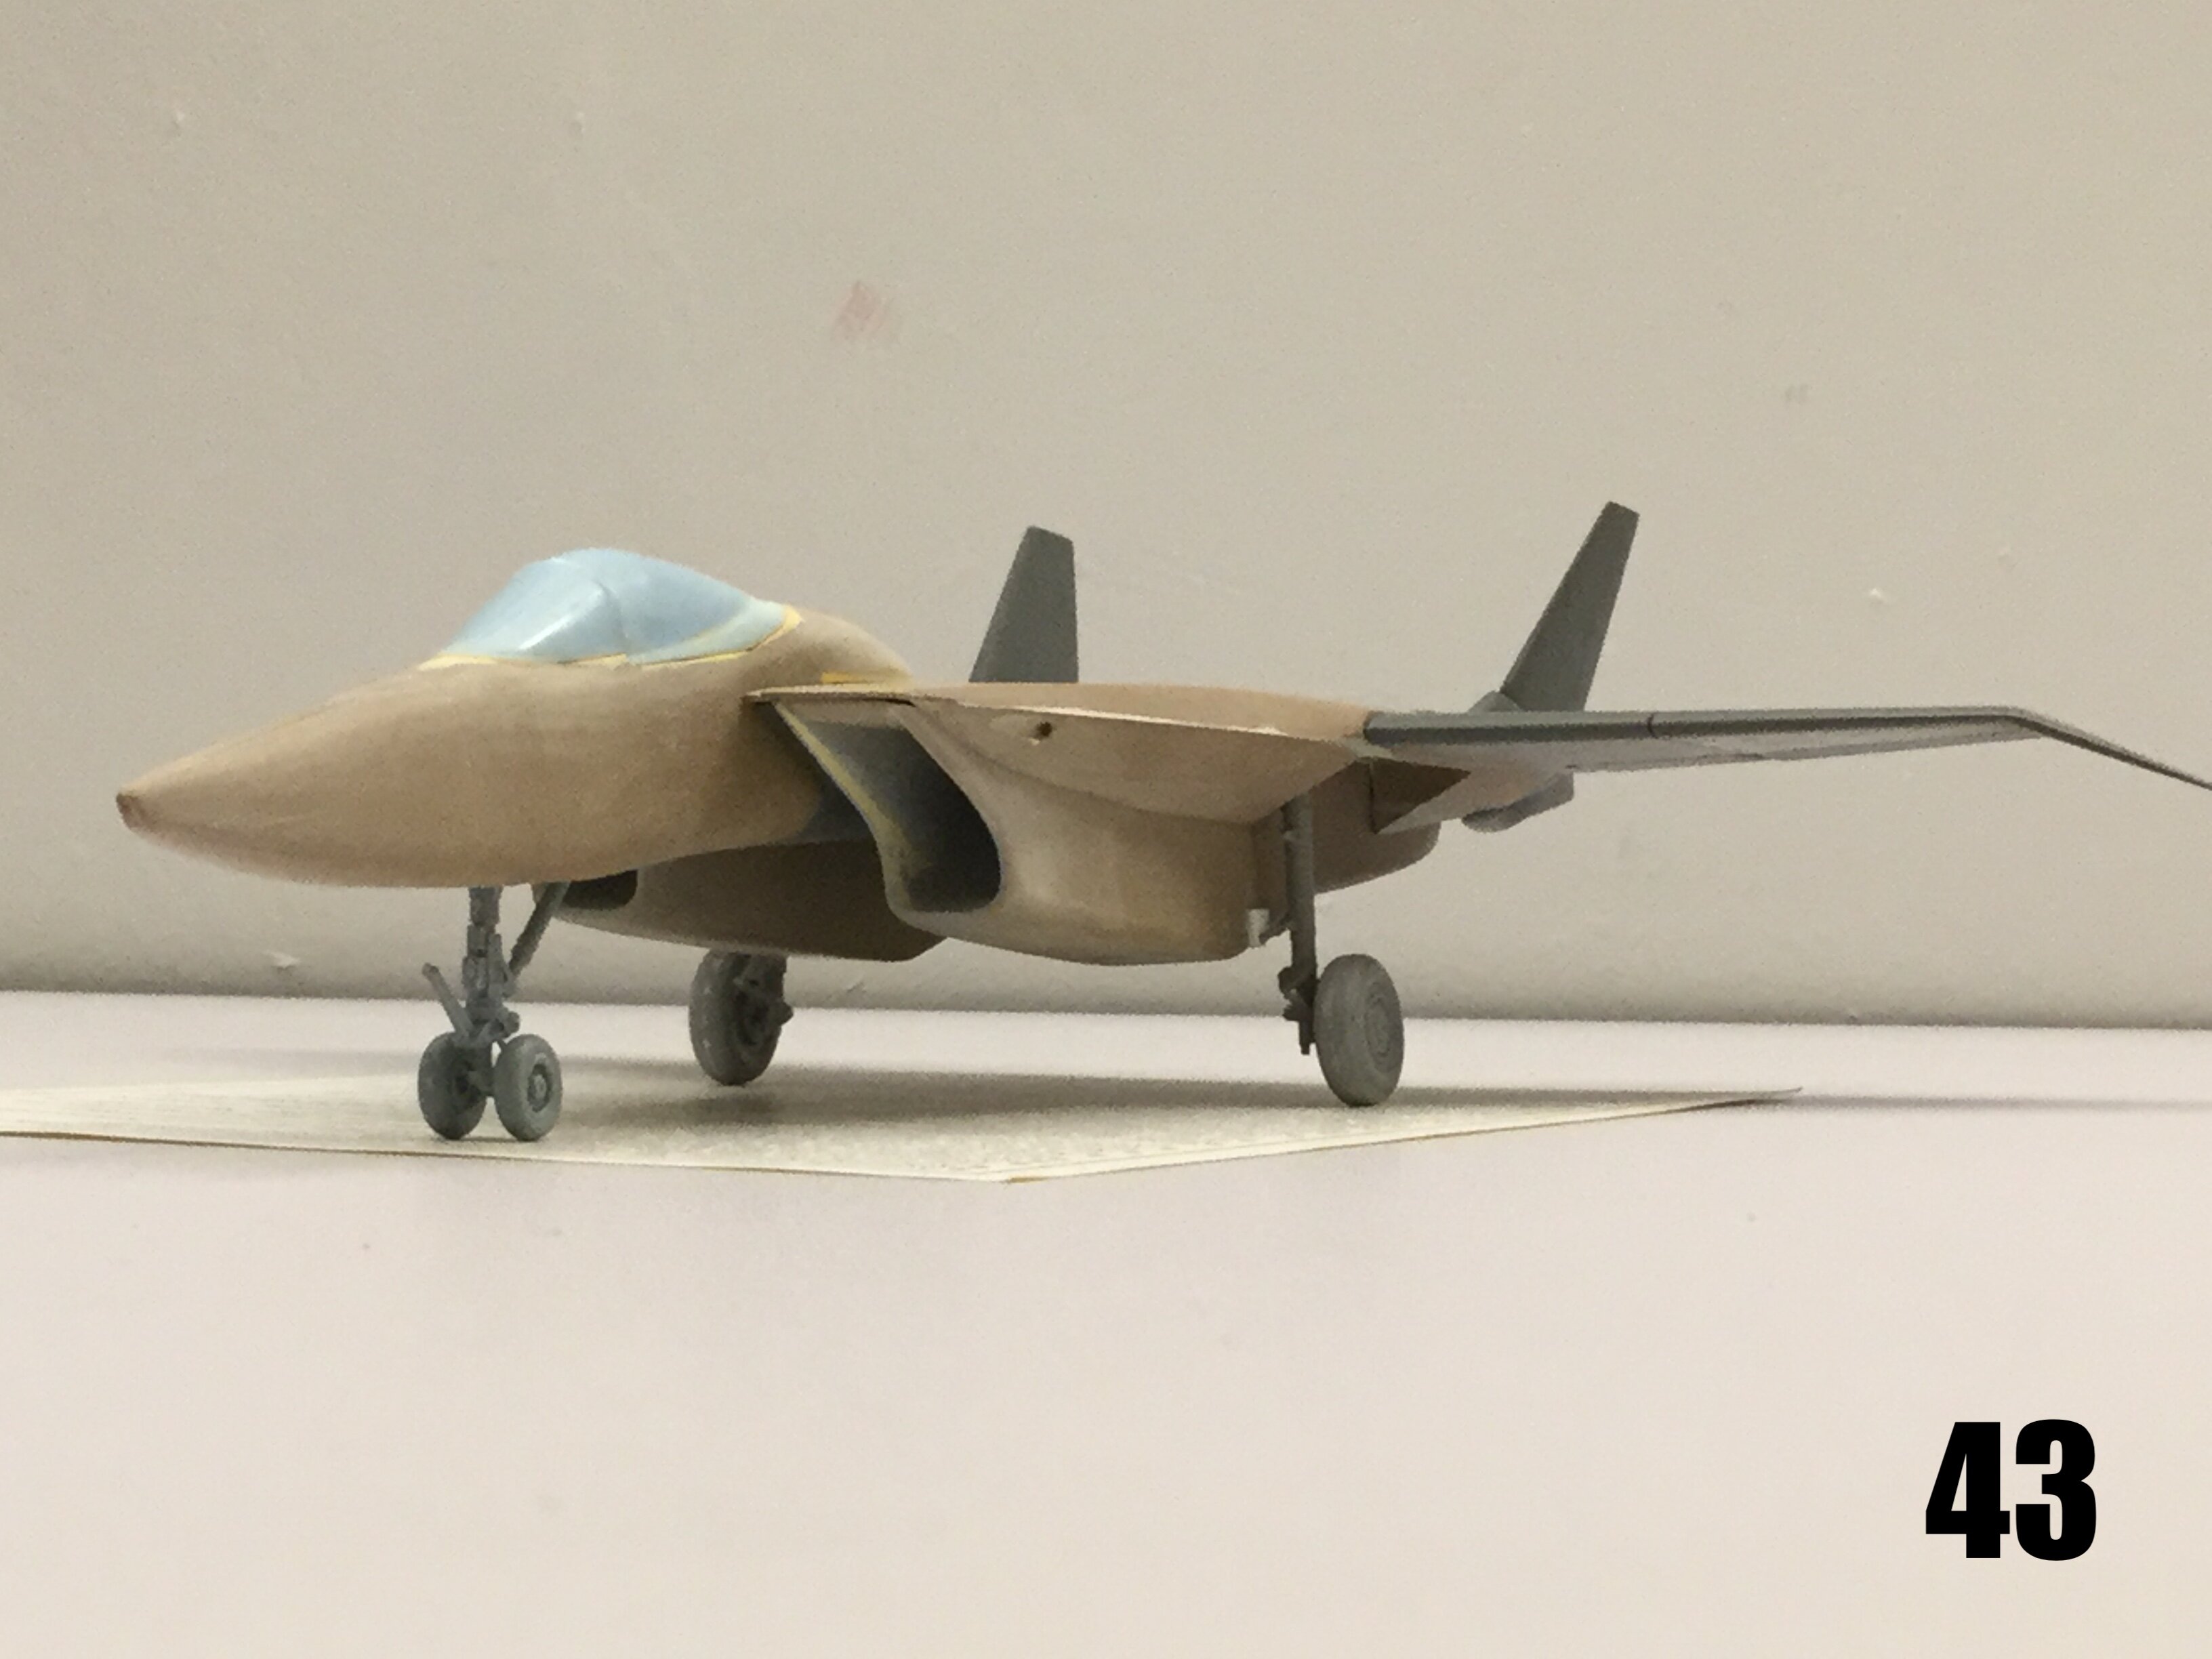
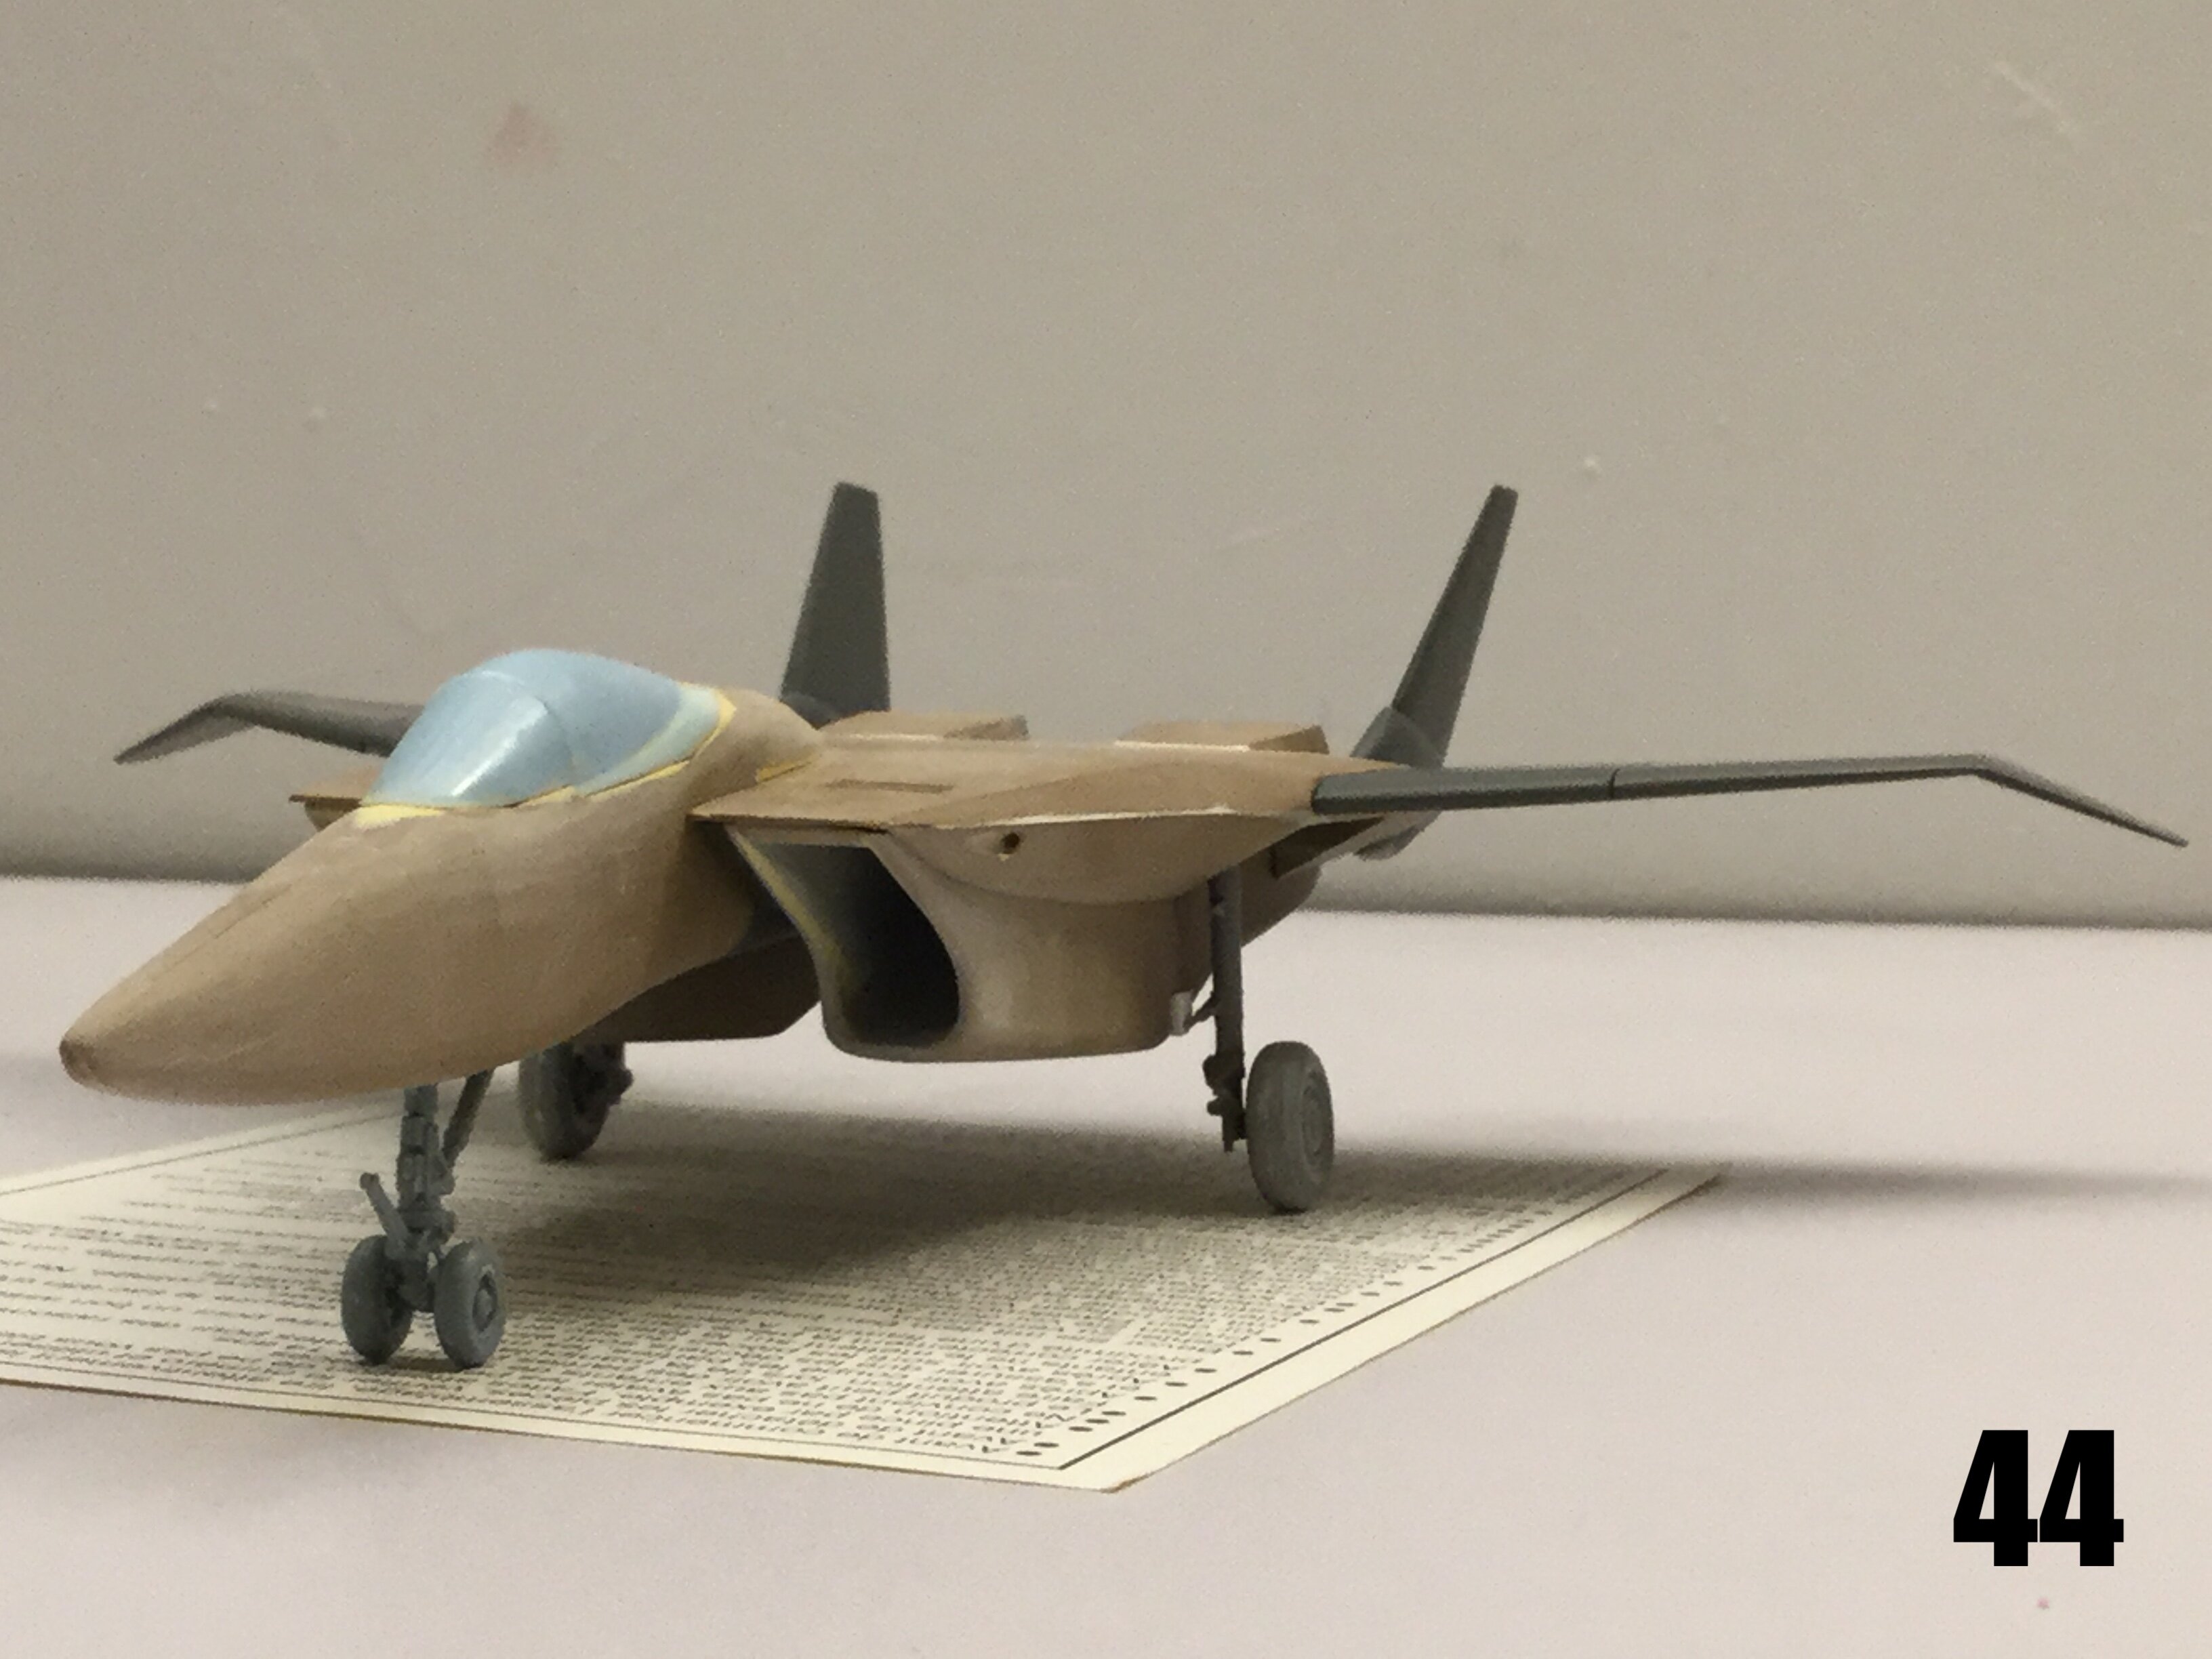
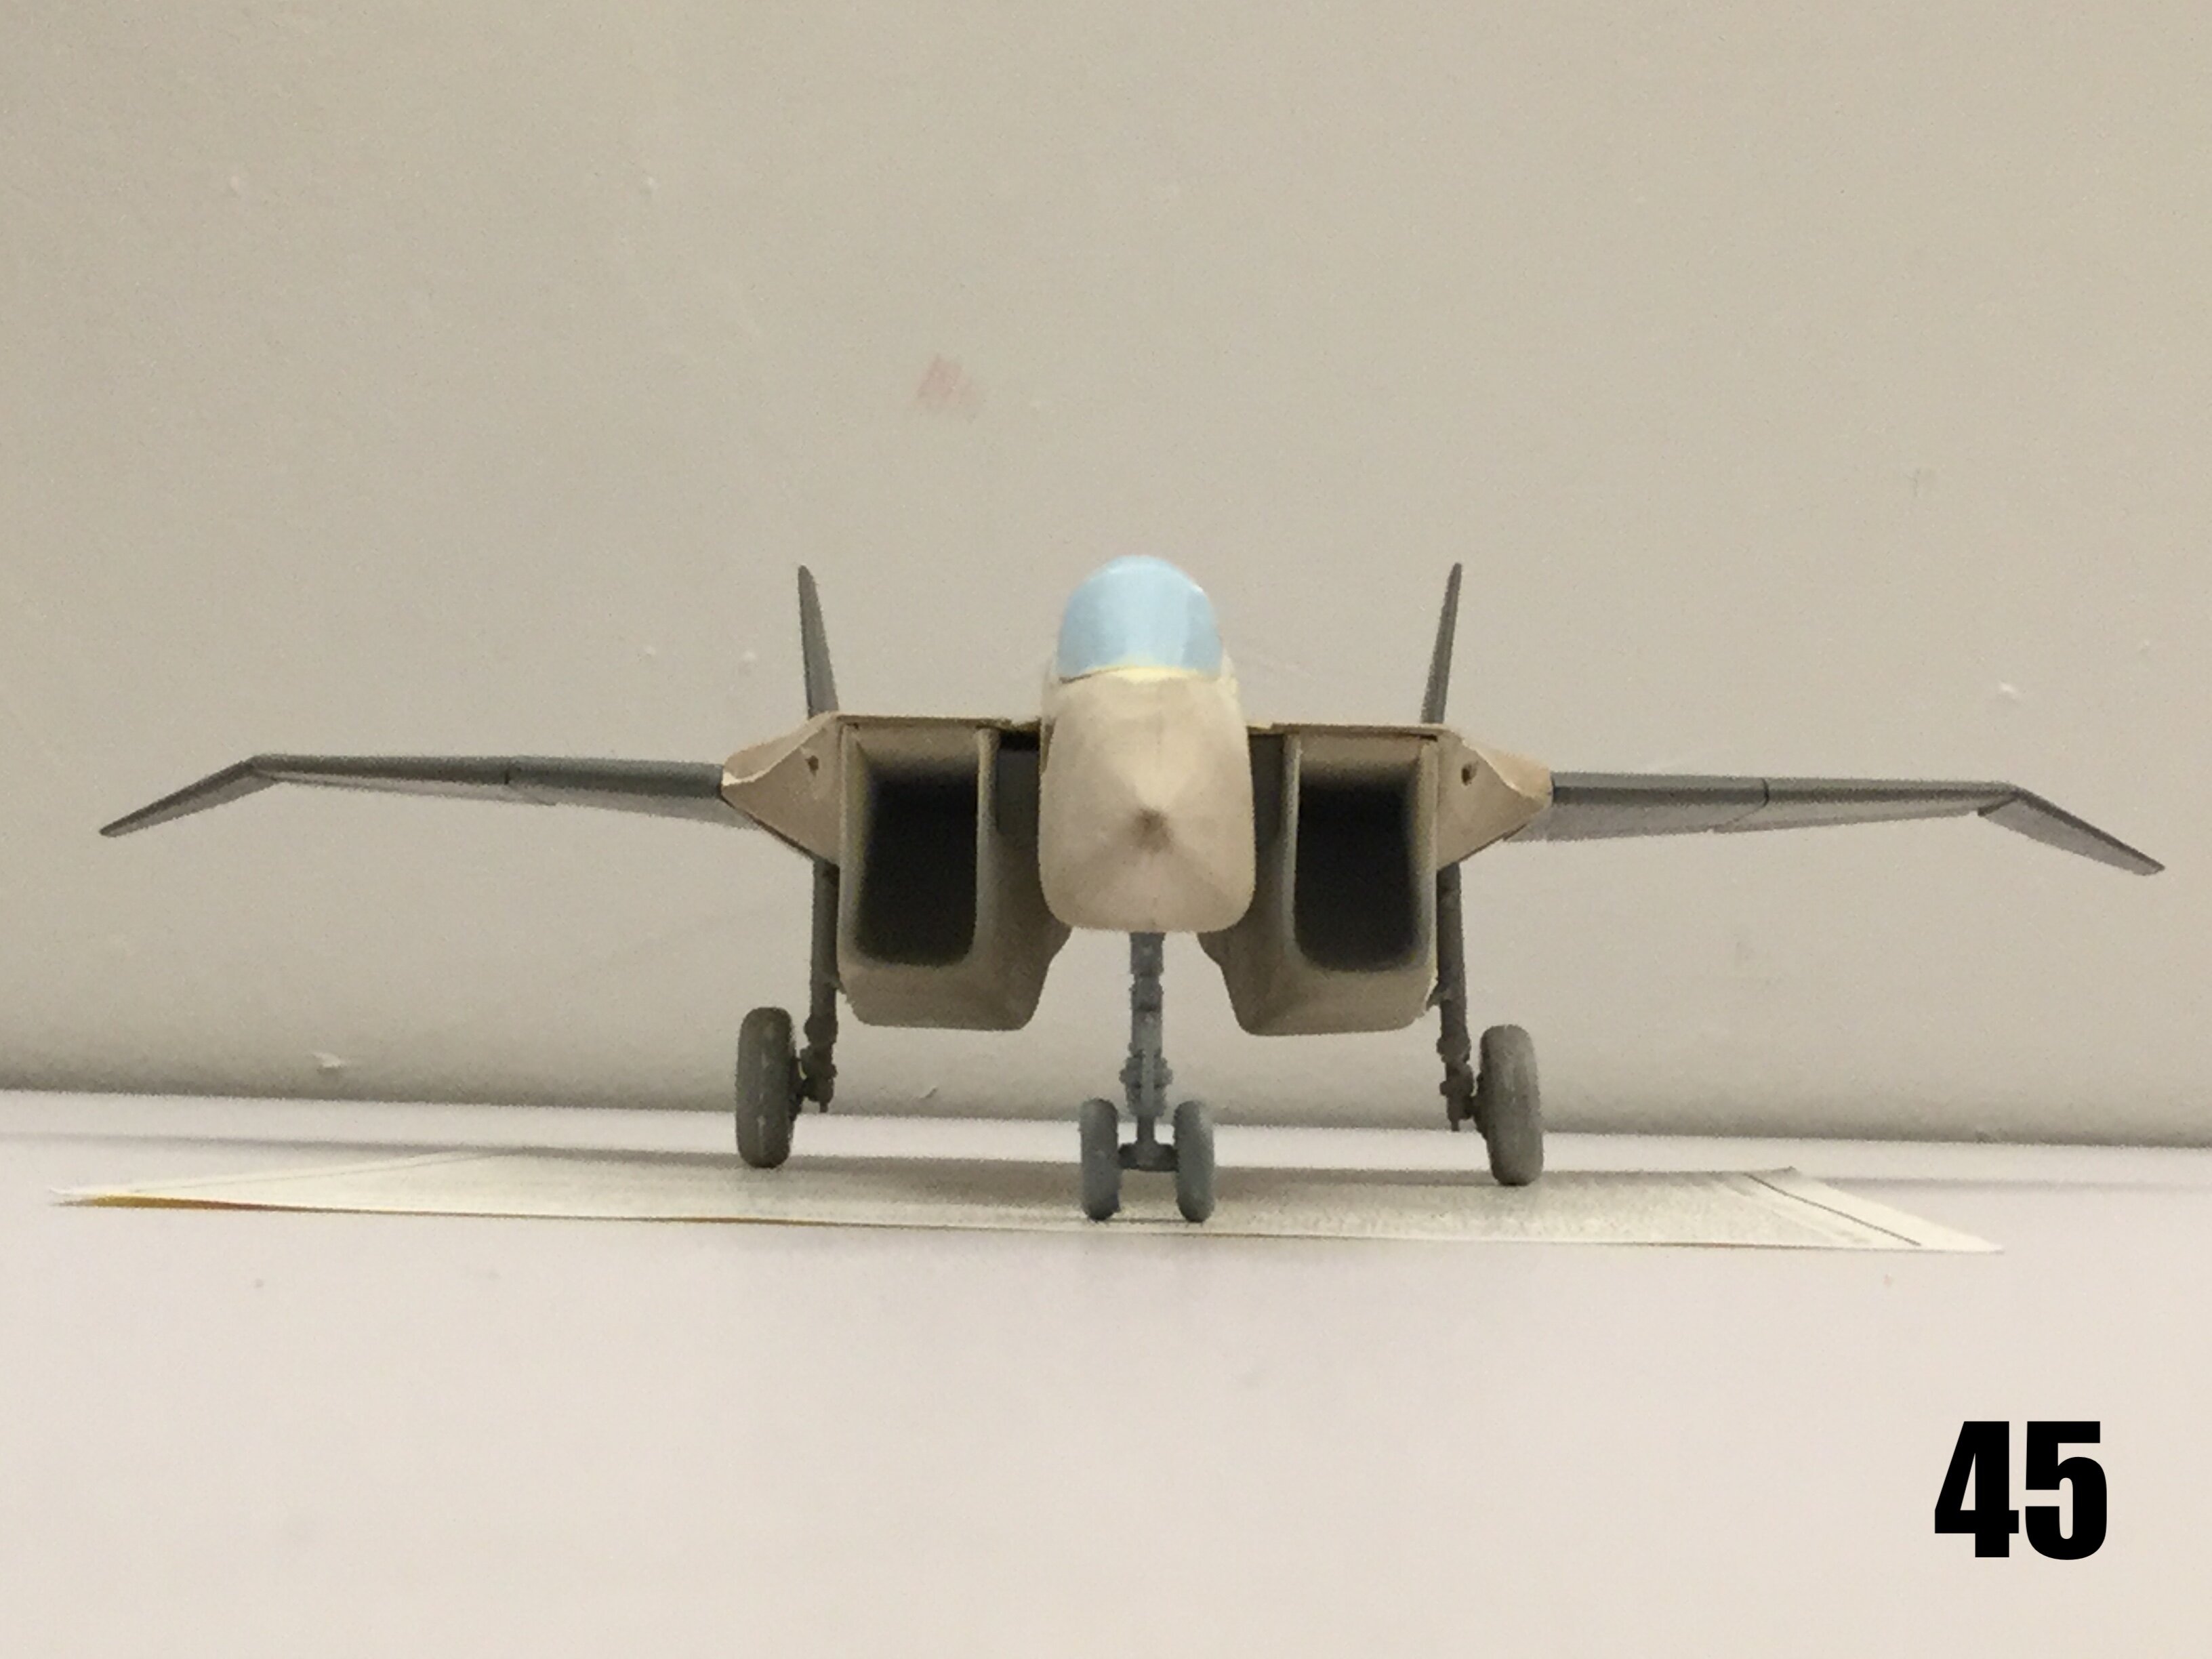
Captain’s log: Thursday, June 29th, 2022. I decided to leave the hollowing of the intake trunks until late into the build, simply because I needed to do a lot of exterior refining first. Once the intake tunnels are made, the structure becomes very delicate and prone to damage so I’d have to be very careful in my handling of the parts. Pic 36 shows exactly what I’m refering to. Here you can see the intake body having been emptied both fore and aft, as well as the two master plugs which will be used to recreate the intake tunnel (left) and the burber can (center). The latter component is a complex geometry that goes from a circular shape to a rectangular one, which is needed to mate to the squared vectoring nozzles. Pic 37: putty is mixed and spread onto the forms, and these are then smooshed into place within the intake bodies. This is a more stressful operation than it might seem at first glance, because the surface being created is large and the overall structure thin and fragile. If the mold release is improperly applied, the only way to separate the buck from the part would then be to destroy the entire intake assembly! Pic 38: thankfully, I mostly know what I’m doing, and the procedure was a success! Here you can see that I already began removing some excess putty around the intake area. Pic 39: the complex RCS-minimizing intake tunnels are looking quite good. The outer wall is still quite thick, and this is by design: the final thinning will be done when the upper roof/intake ramp is added to reinforce the structure. Pic 40: I forgot to show the sto-wing feature, so here it is: notice that the wing tips have not yet been added. Pic 41: the intake tunnels are done! If the left one looks rough, it’s just because I sanded down some of the primer. The intake ramps are in the fully open position, though if the build permits, I will include an add-on the represent the lowered ramps. Pic 42: the burner cans are also done, though these stil feature a seam. I’m debating whether it’s best to leave these smooth and let the builder fill them, or try to mask the seam with ribbing of some sort. As much as I would have preferred a seamless unit, the complex shaping of the part made this impossible. Pics 43-48: what a beauty! I stole the main gear from an SU-27, and the nose gear from an F-18, and they look excellent. You can also see the refuelling probe housing on the starboard forward fuselage, which you will have the option to build open or closed. I also have missile pylons in the works, but I need to make mold duplicates. I have already begun priming and detailing, and should have it all mostly done by July 8th or 12th. I think you’ll be quite pleased when you see the end result. Stay tuned for the grand finale!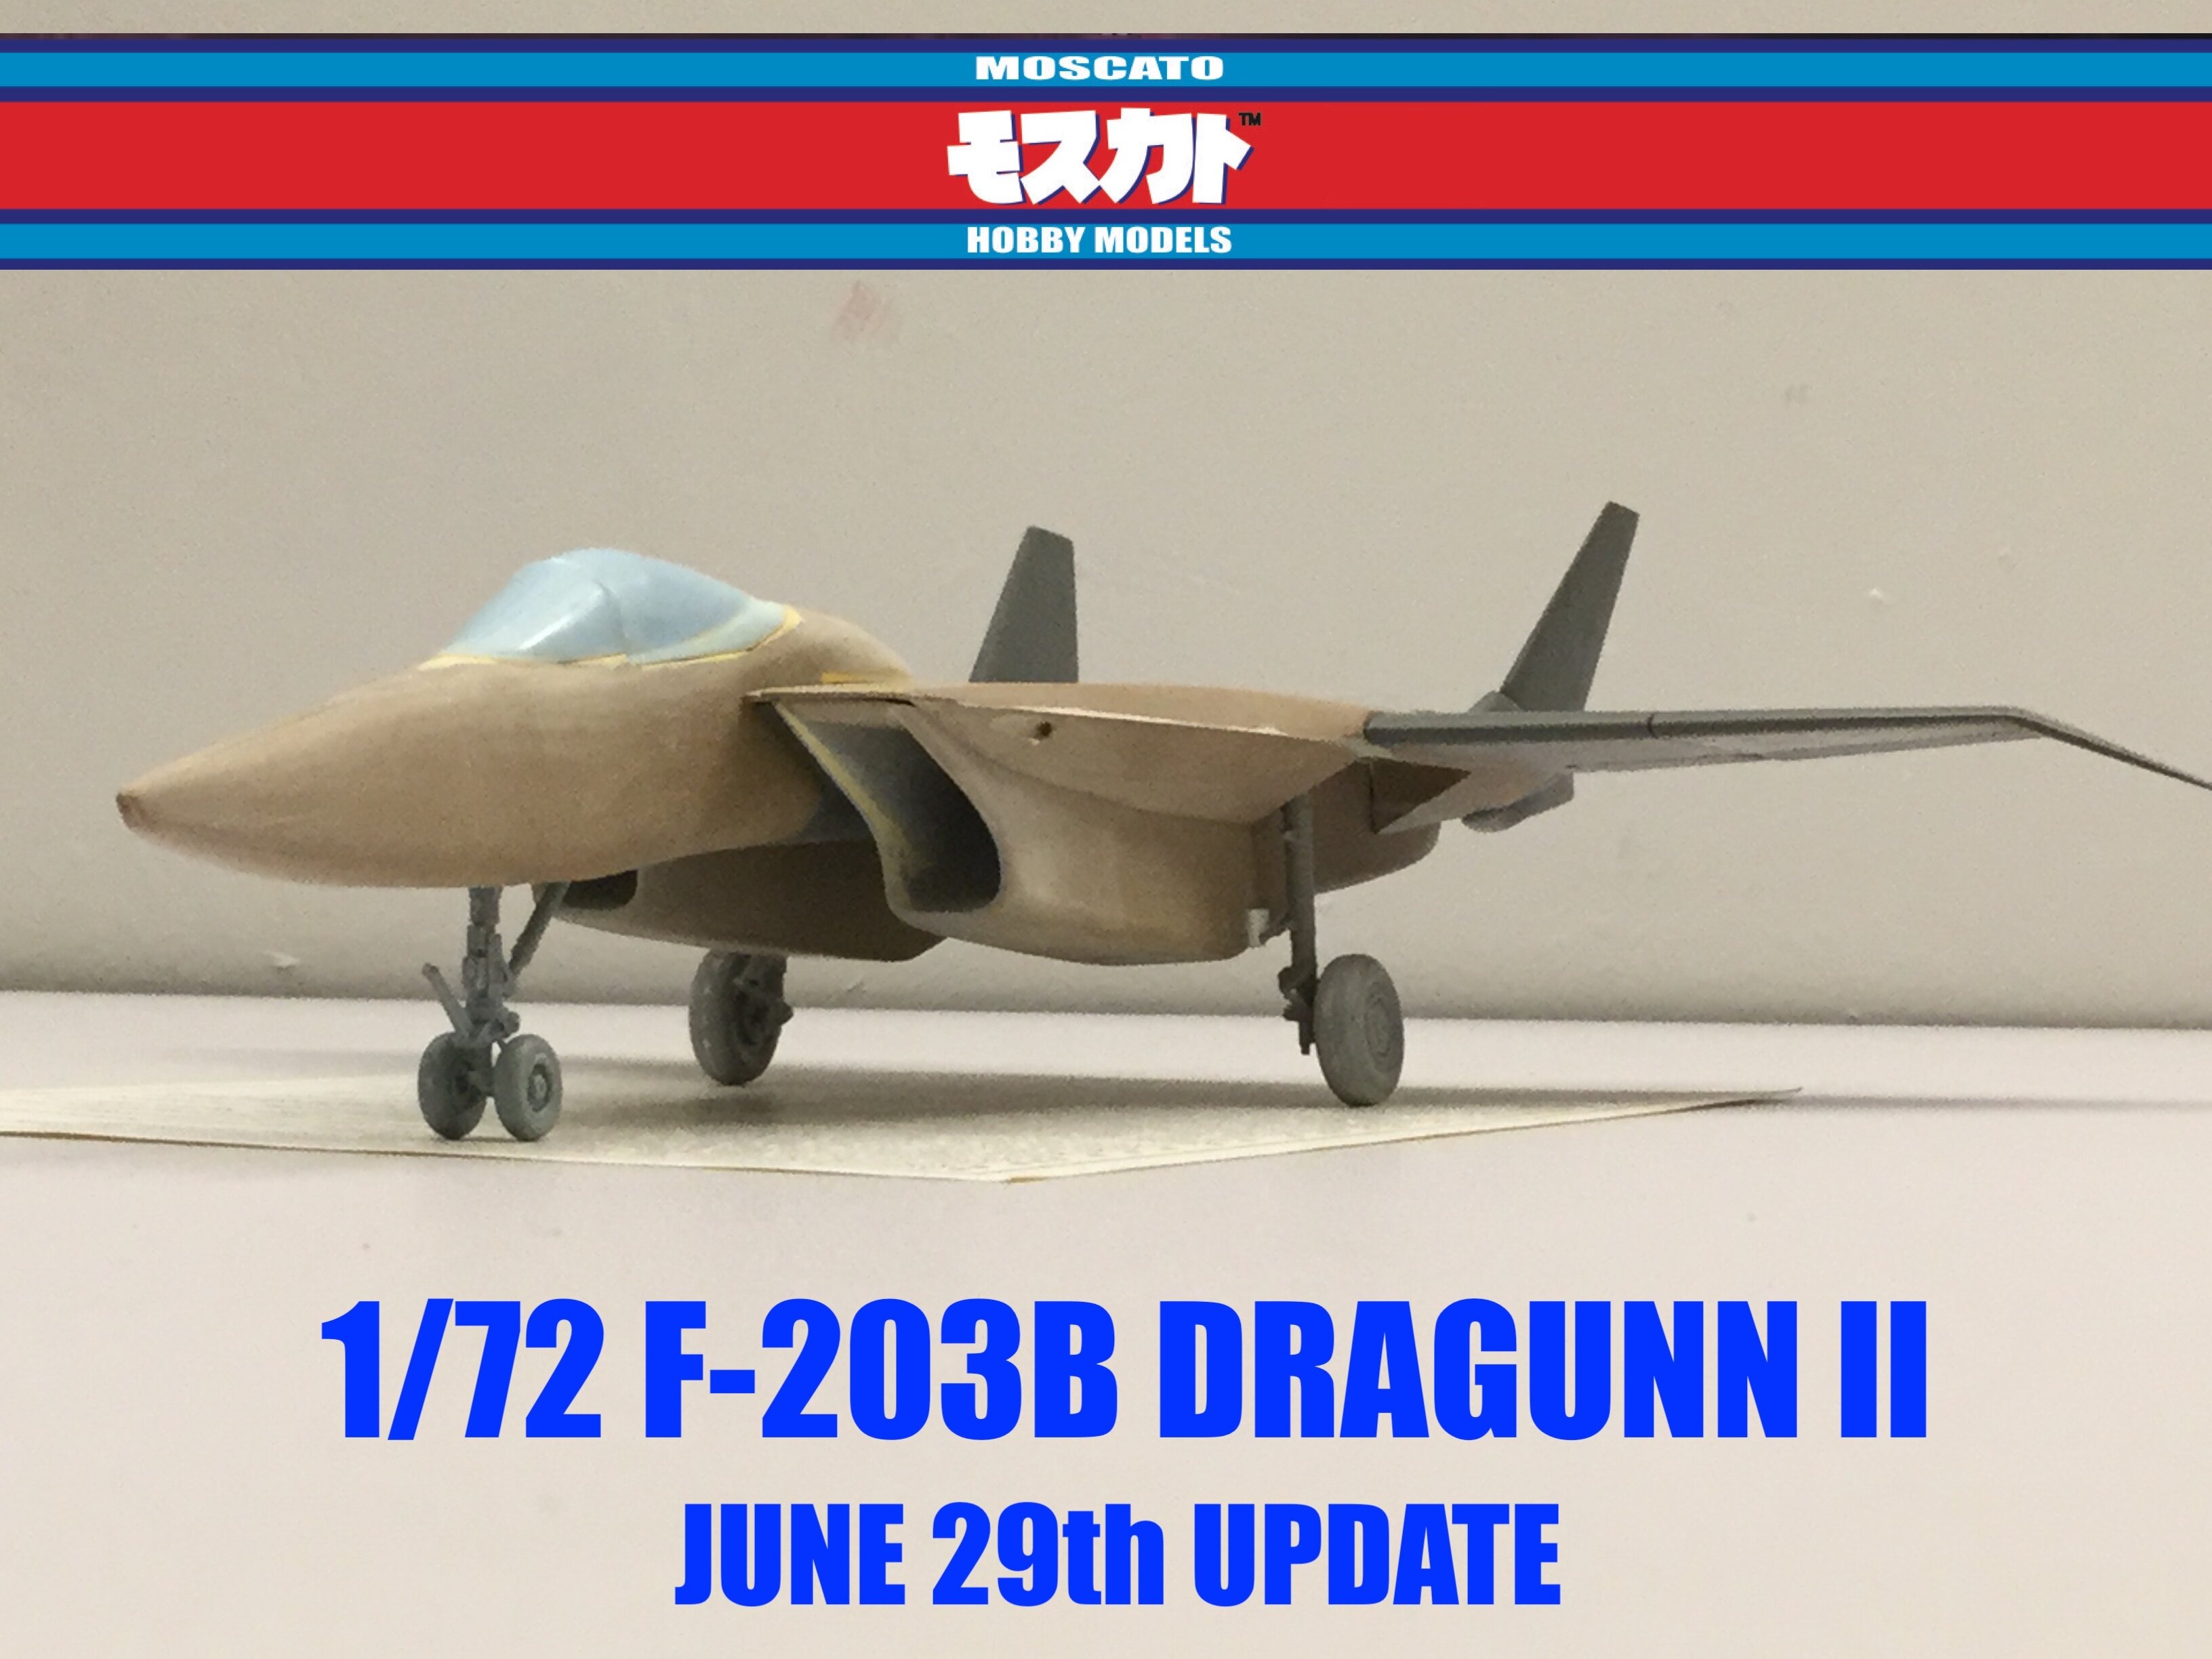

-
1/72 F203 Dragon II Kit Proposal --Moscato Hobby
captain america replied to captain america's topic in Model kits
That's what I'm currently working on. -
1/72 F203 Dragon II Kit Proposal --Moscato Hobby
captain america replied to captain america's topic in Model kits
Quick 1/72 Dragunn project update: Friday's progress report will be pushed to next week because sooo much puttying. -
1/72 F203 Dragon II Kit Proposal --Moscato Hobby
captain america replied to captain america's topic in Model kits
That bodes well, because I may end up using some SU-27 weapons pylons. -
1/72 F203 Dragon II Kit Proposal --Moscato Hobby
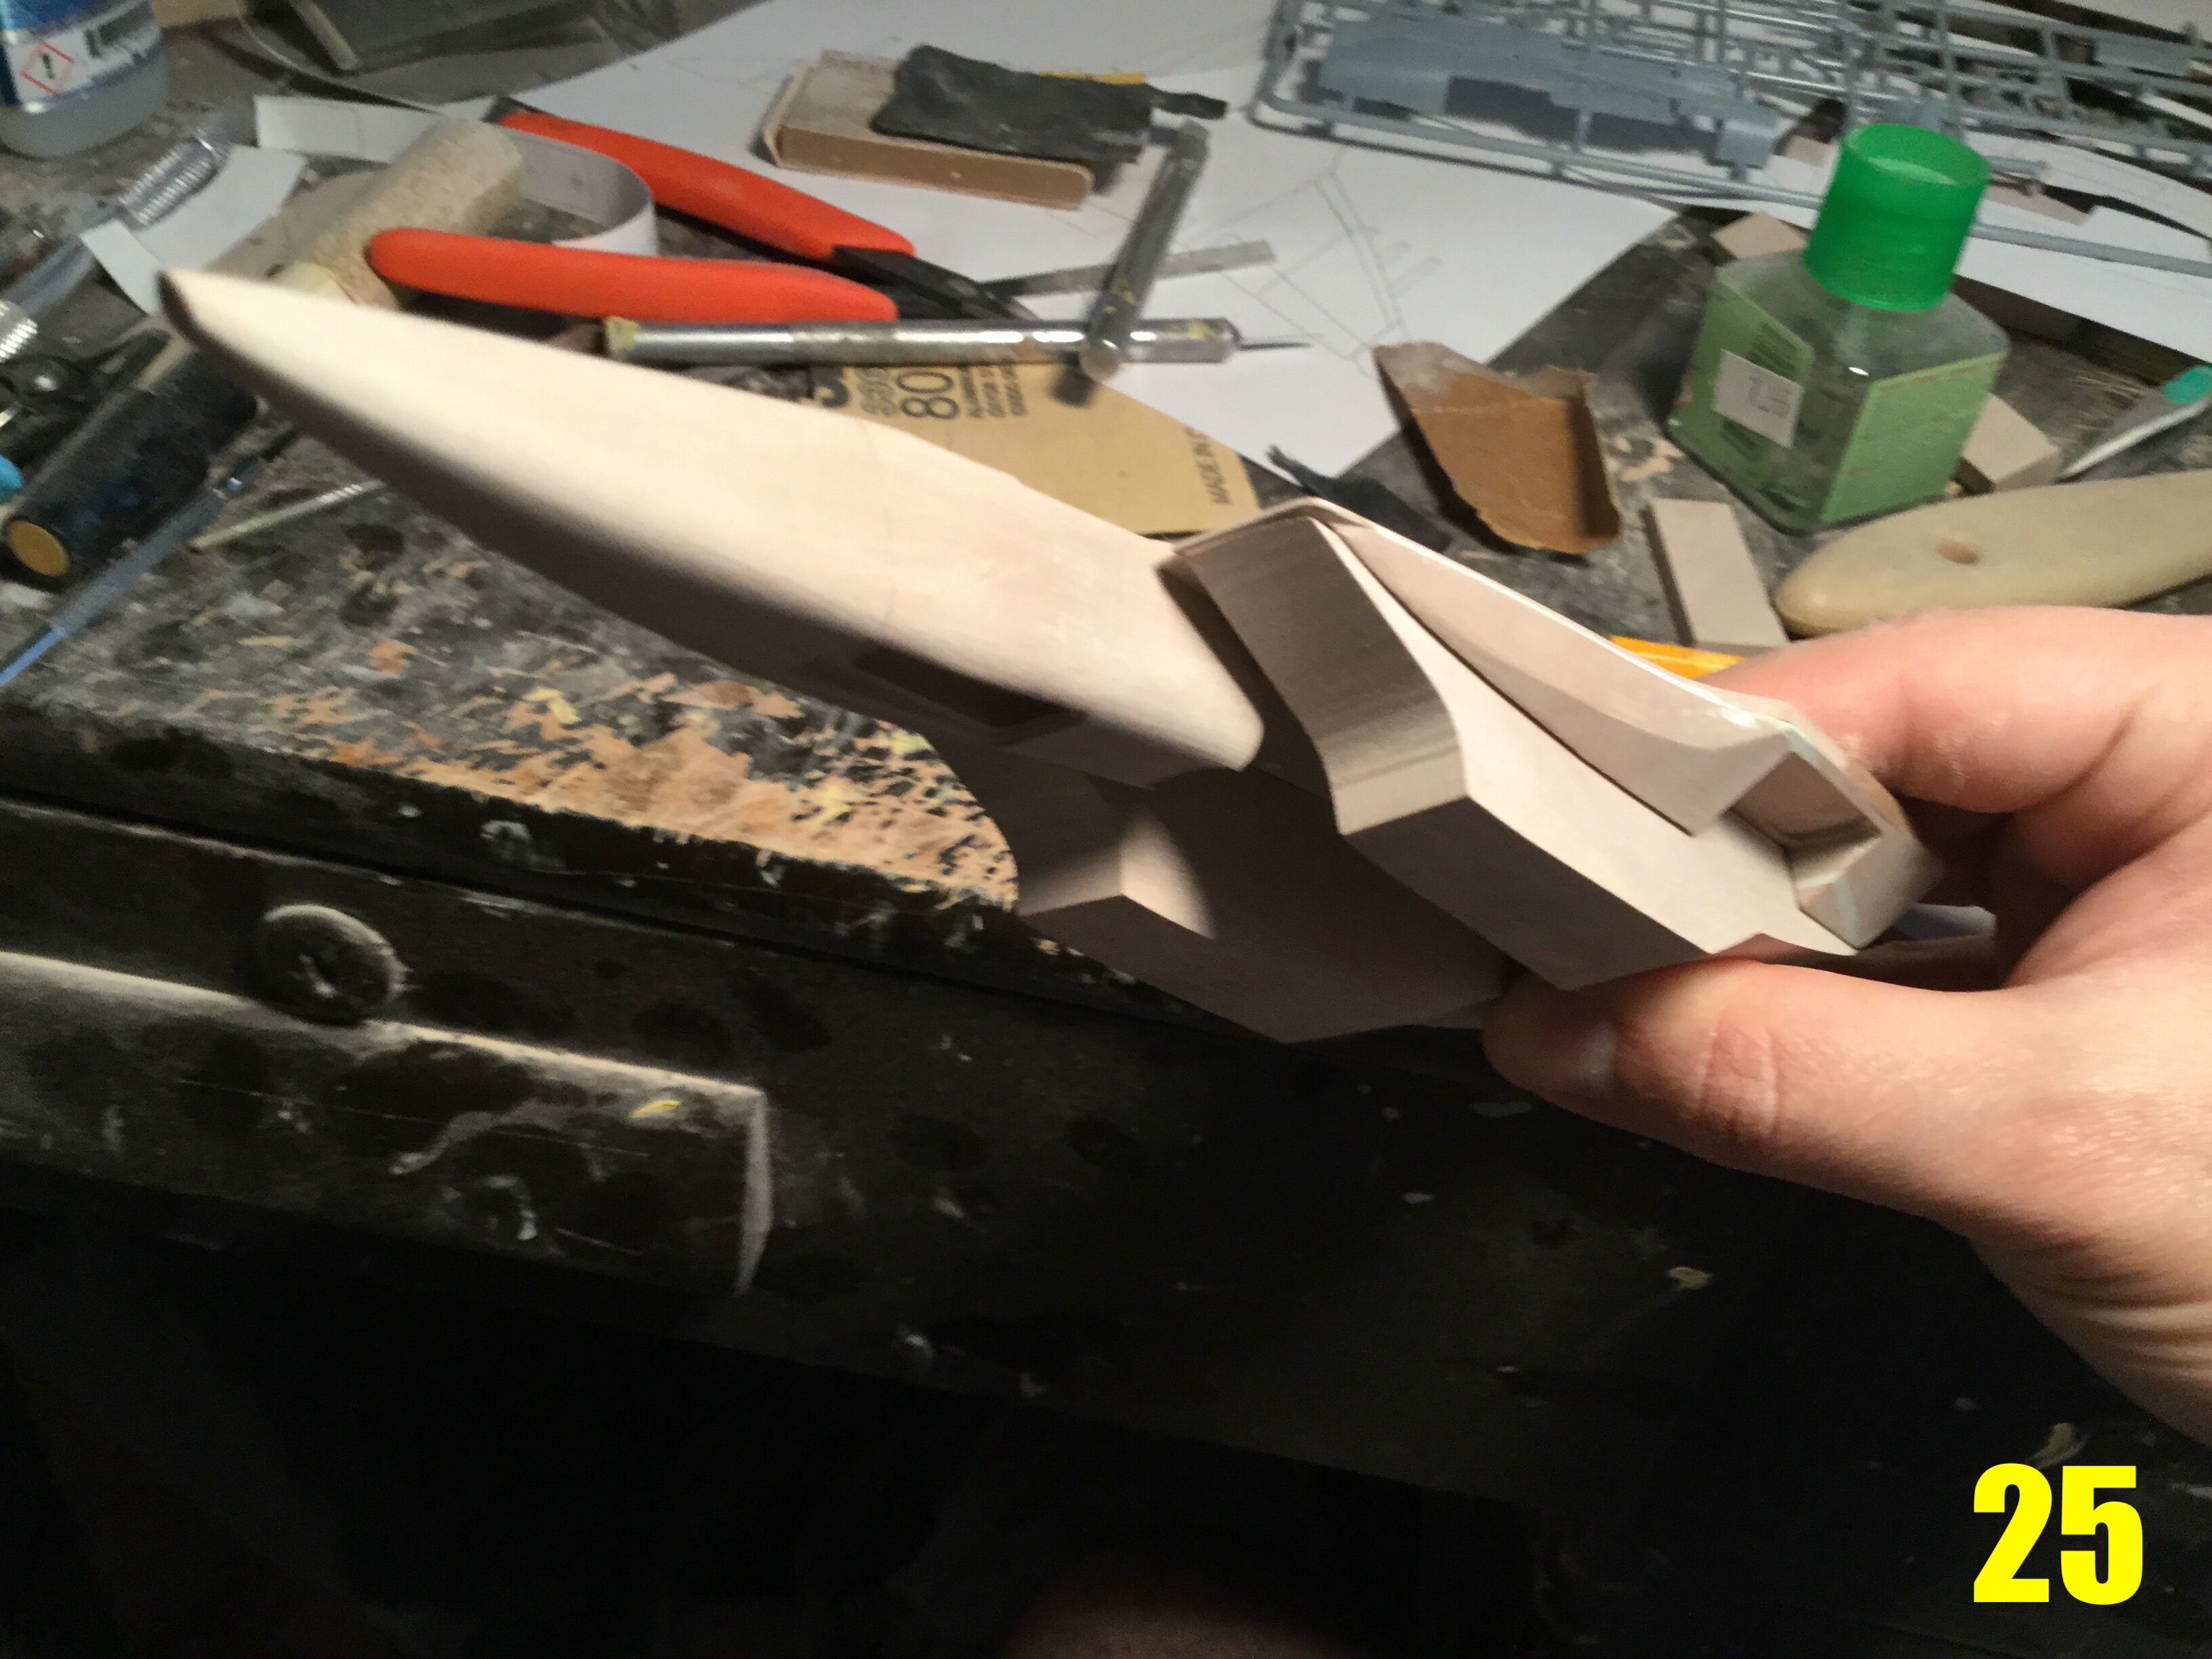
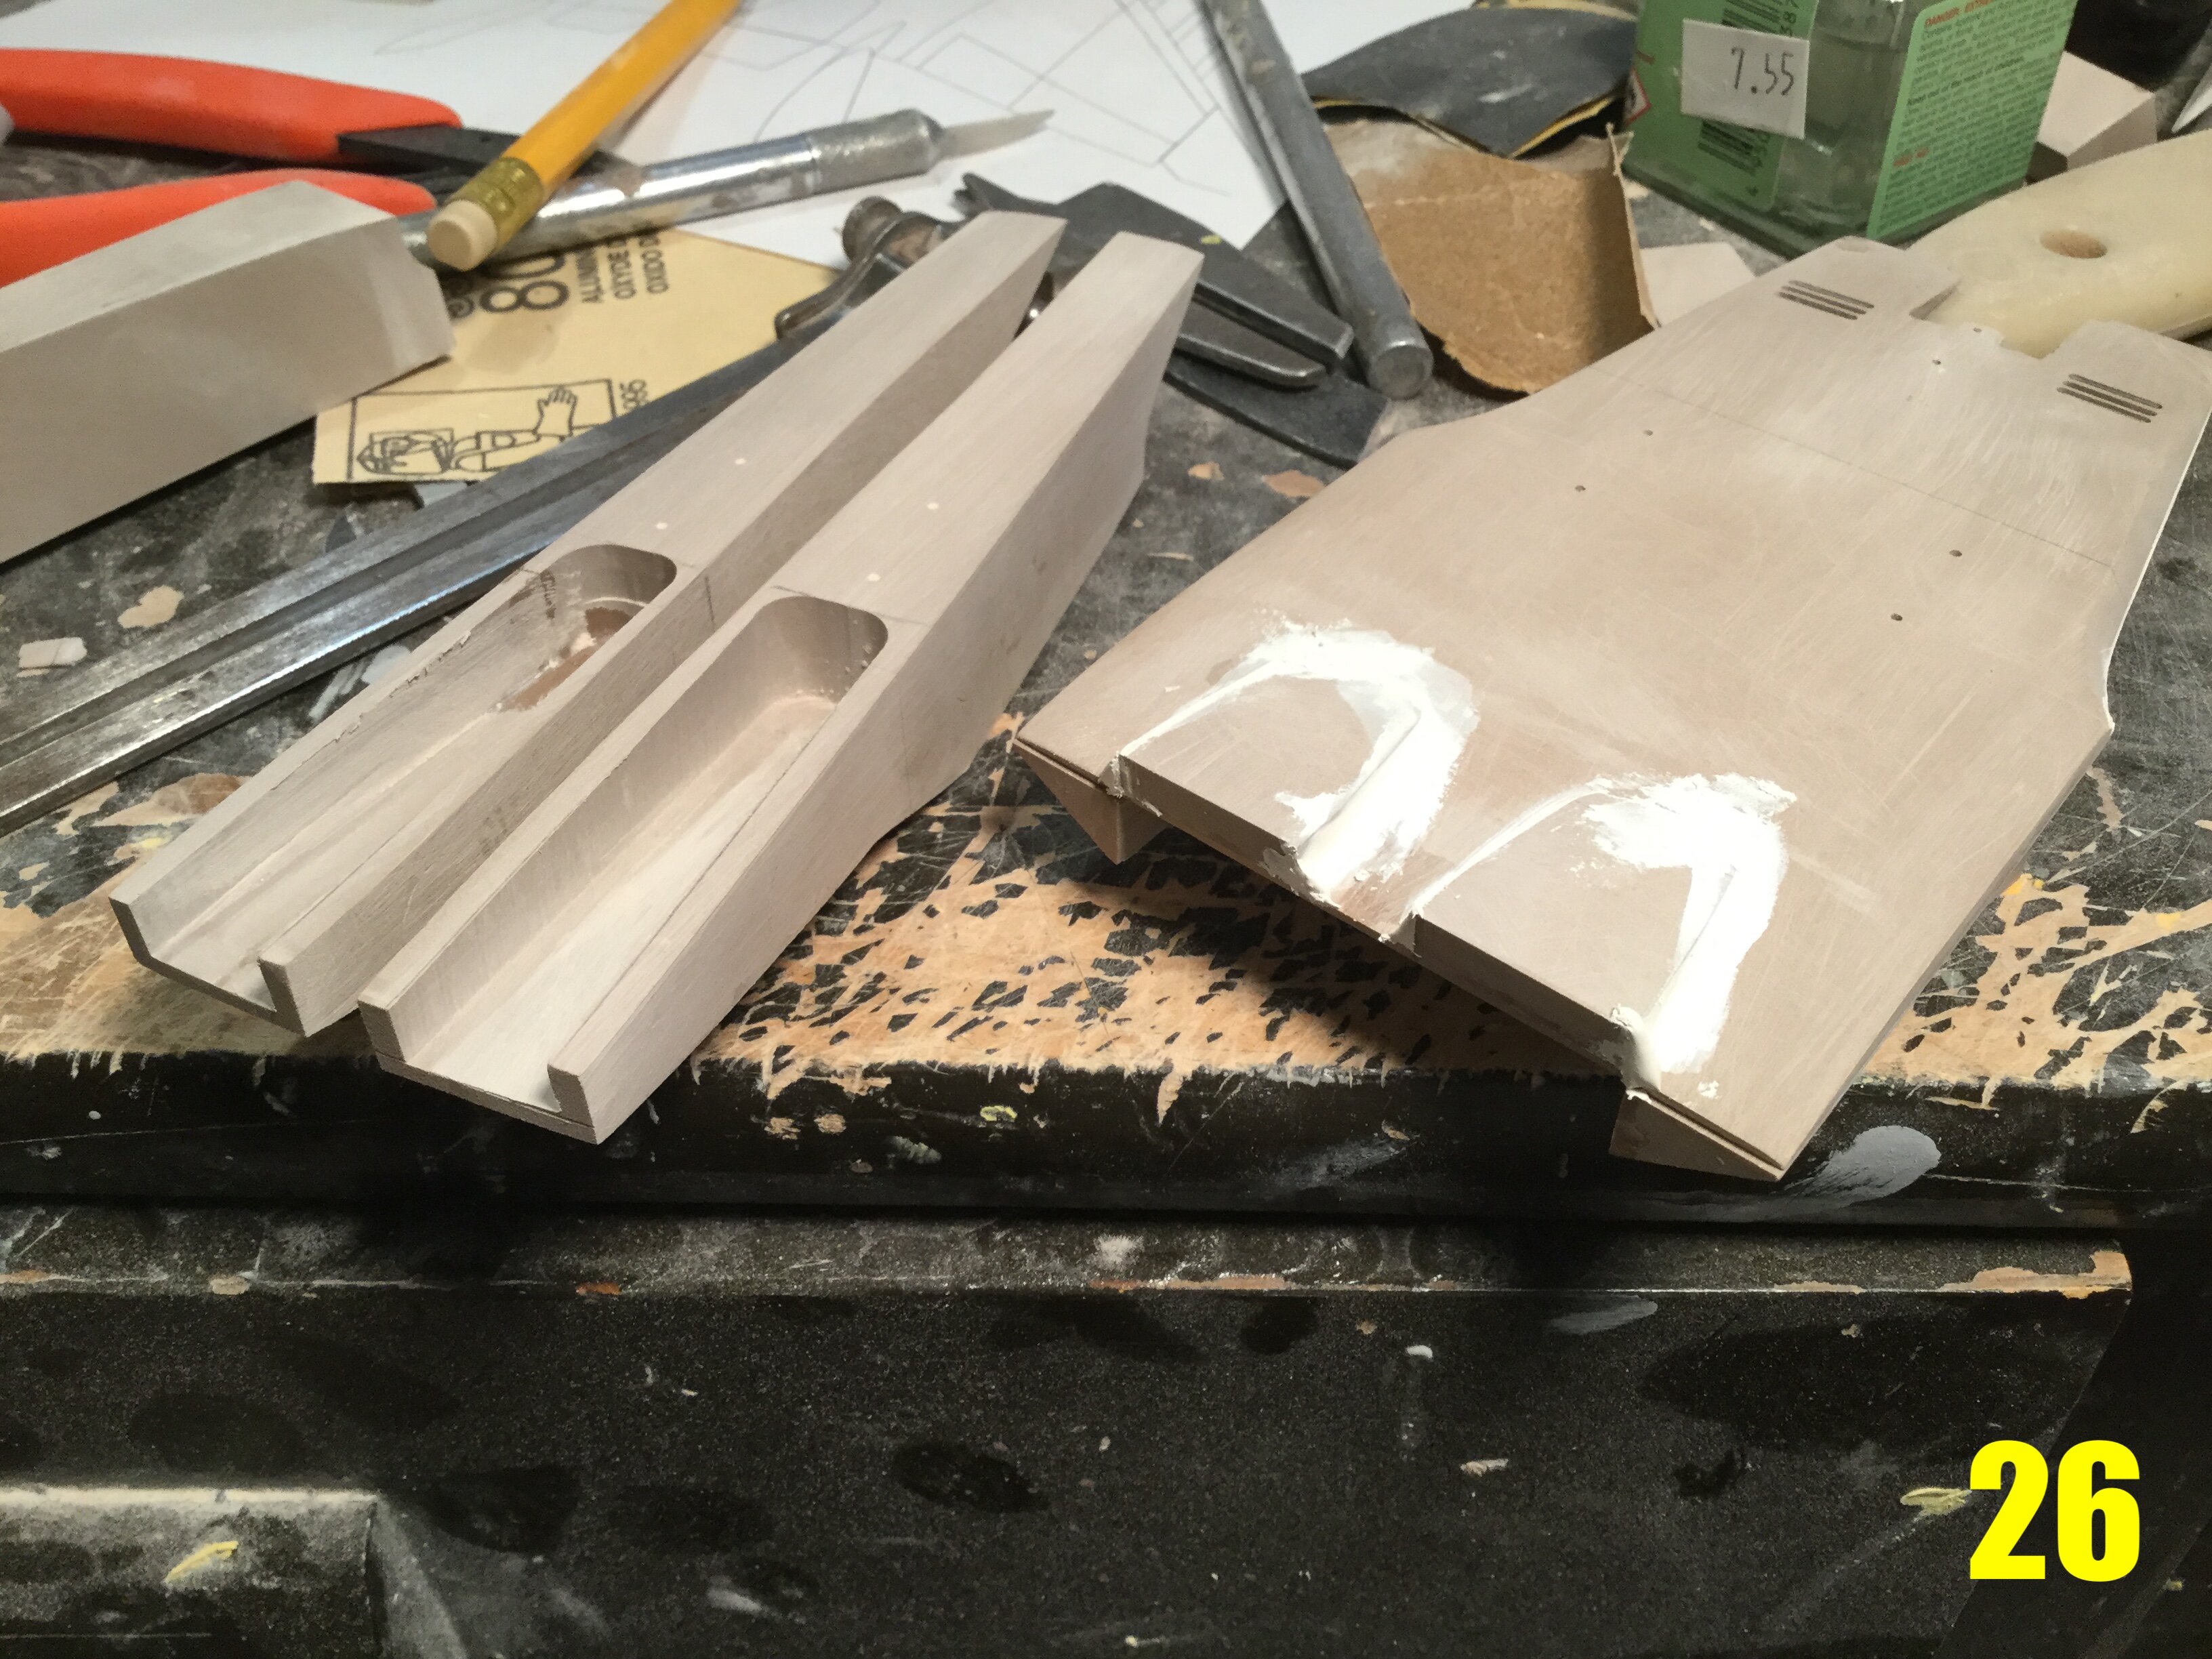
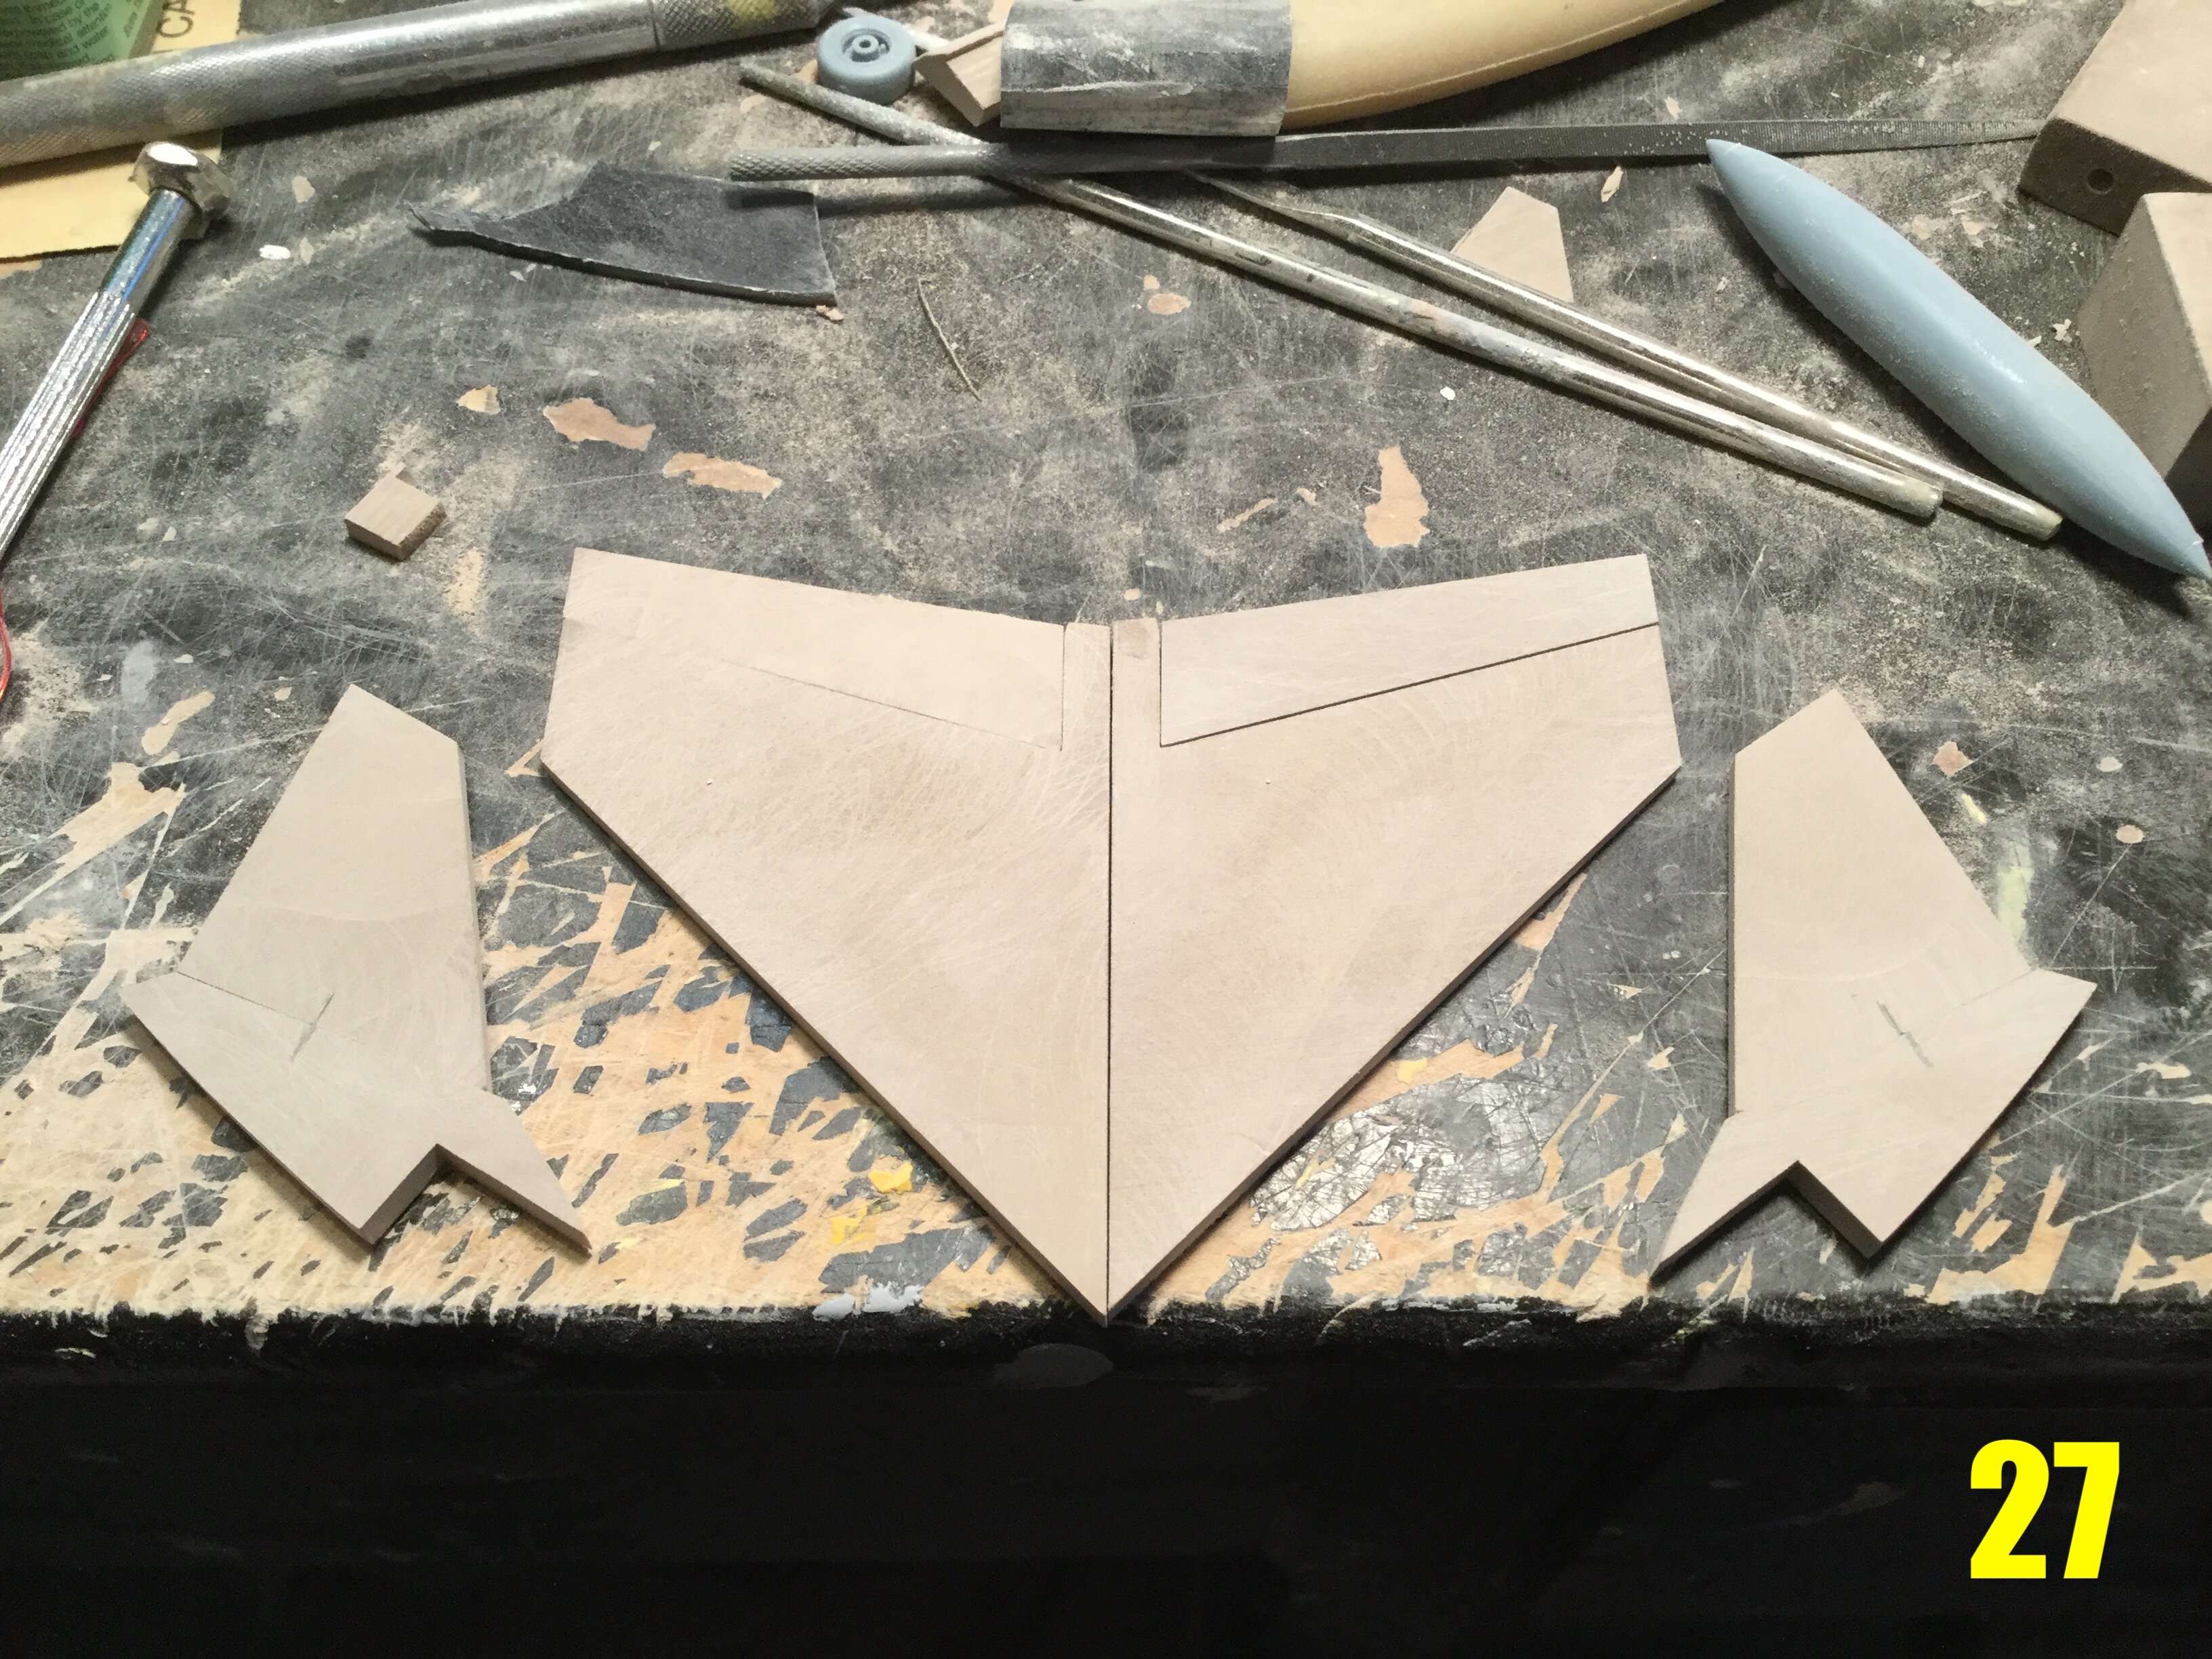
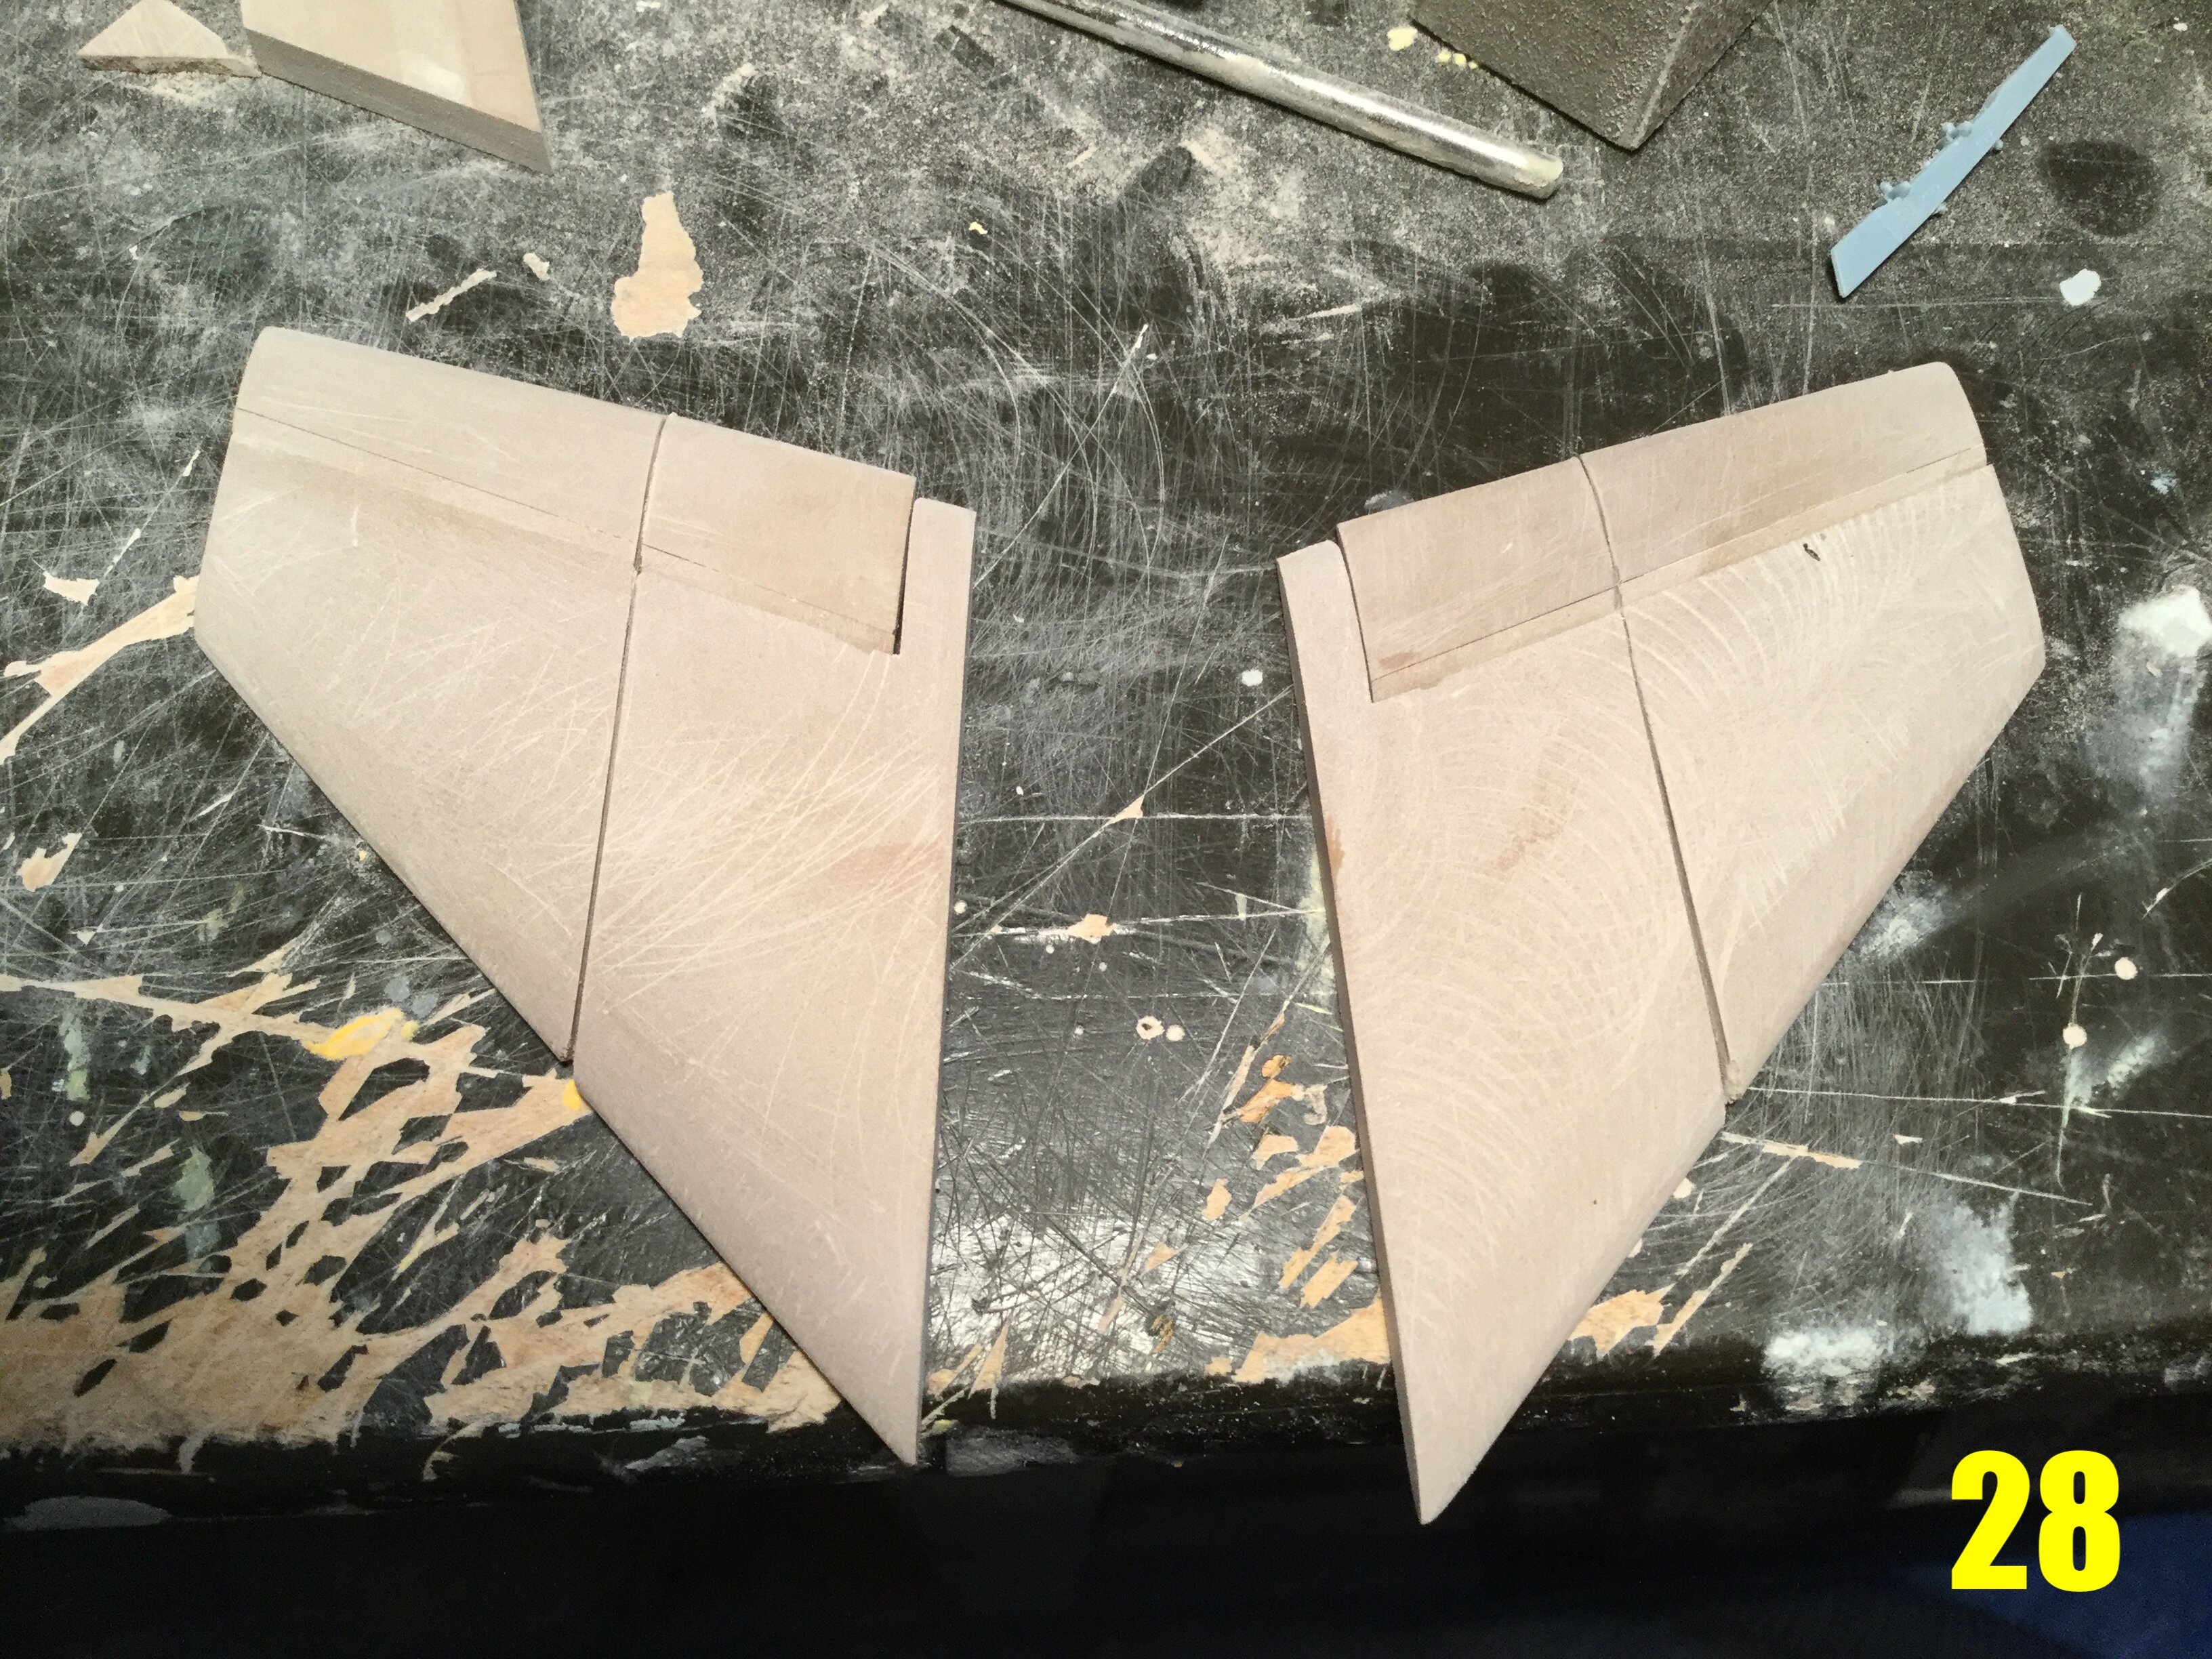
captain america replied to captain america's topic in Model kits
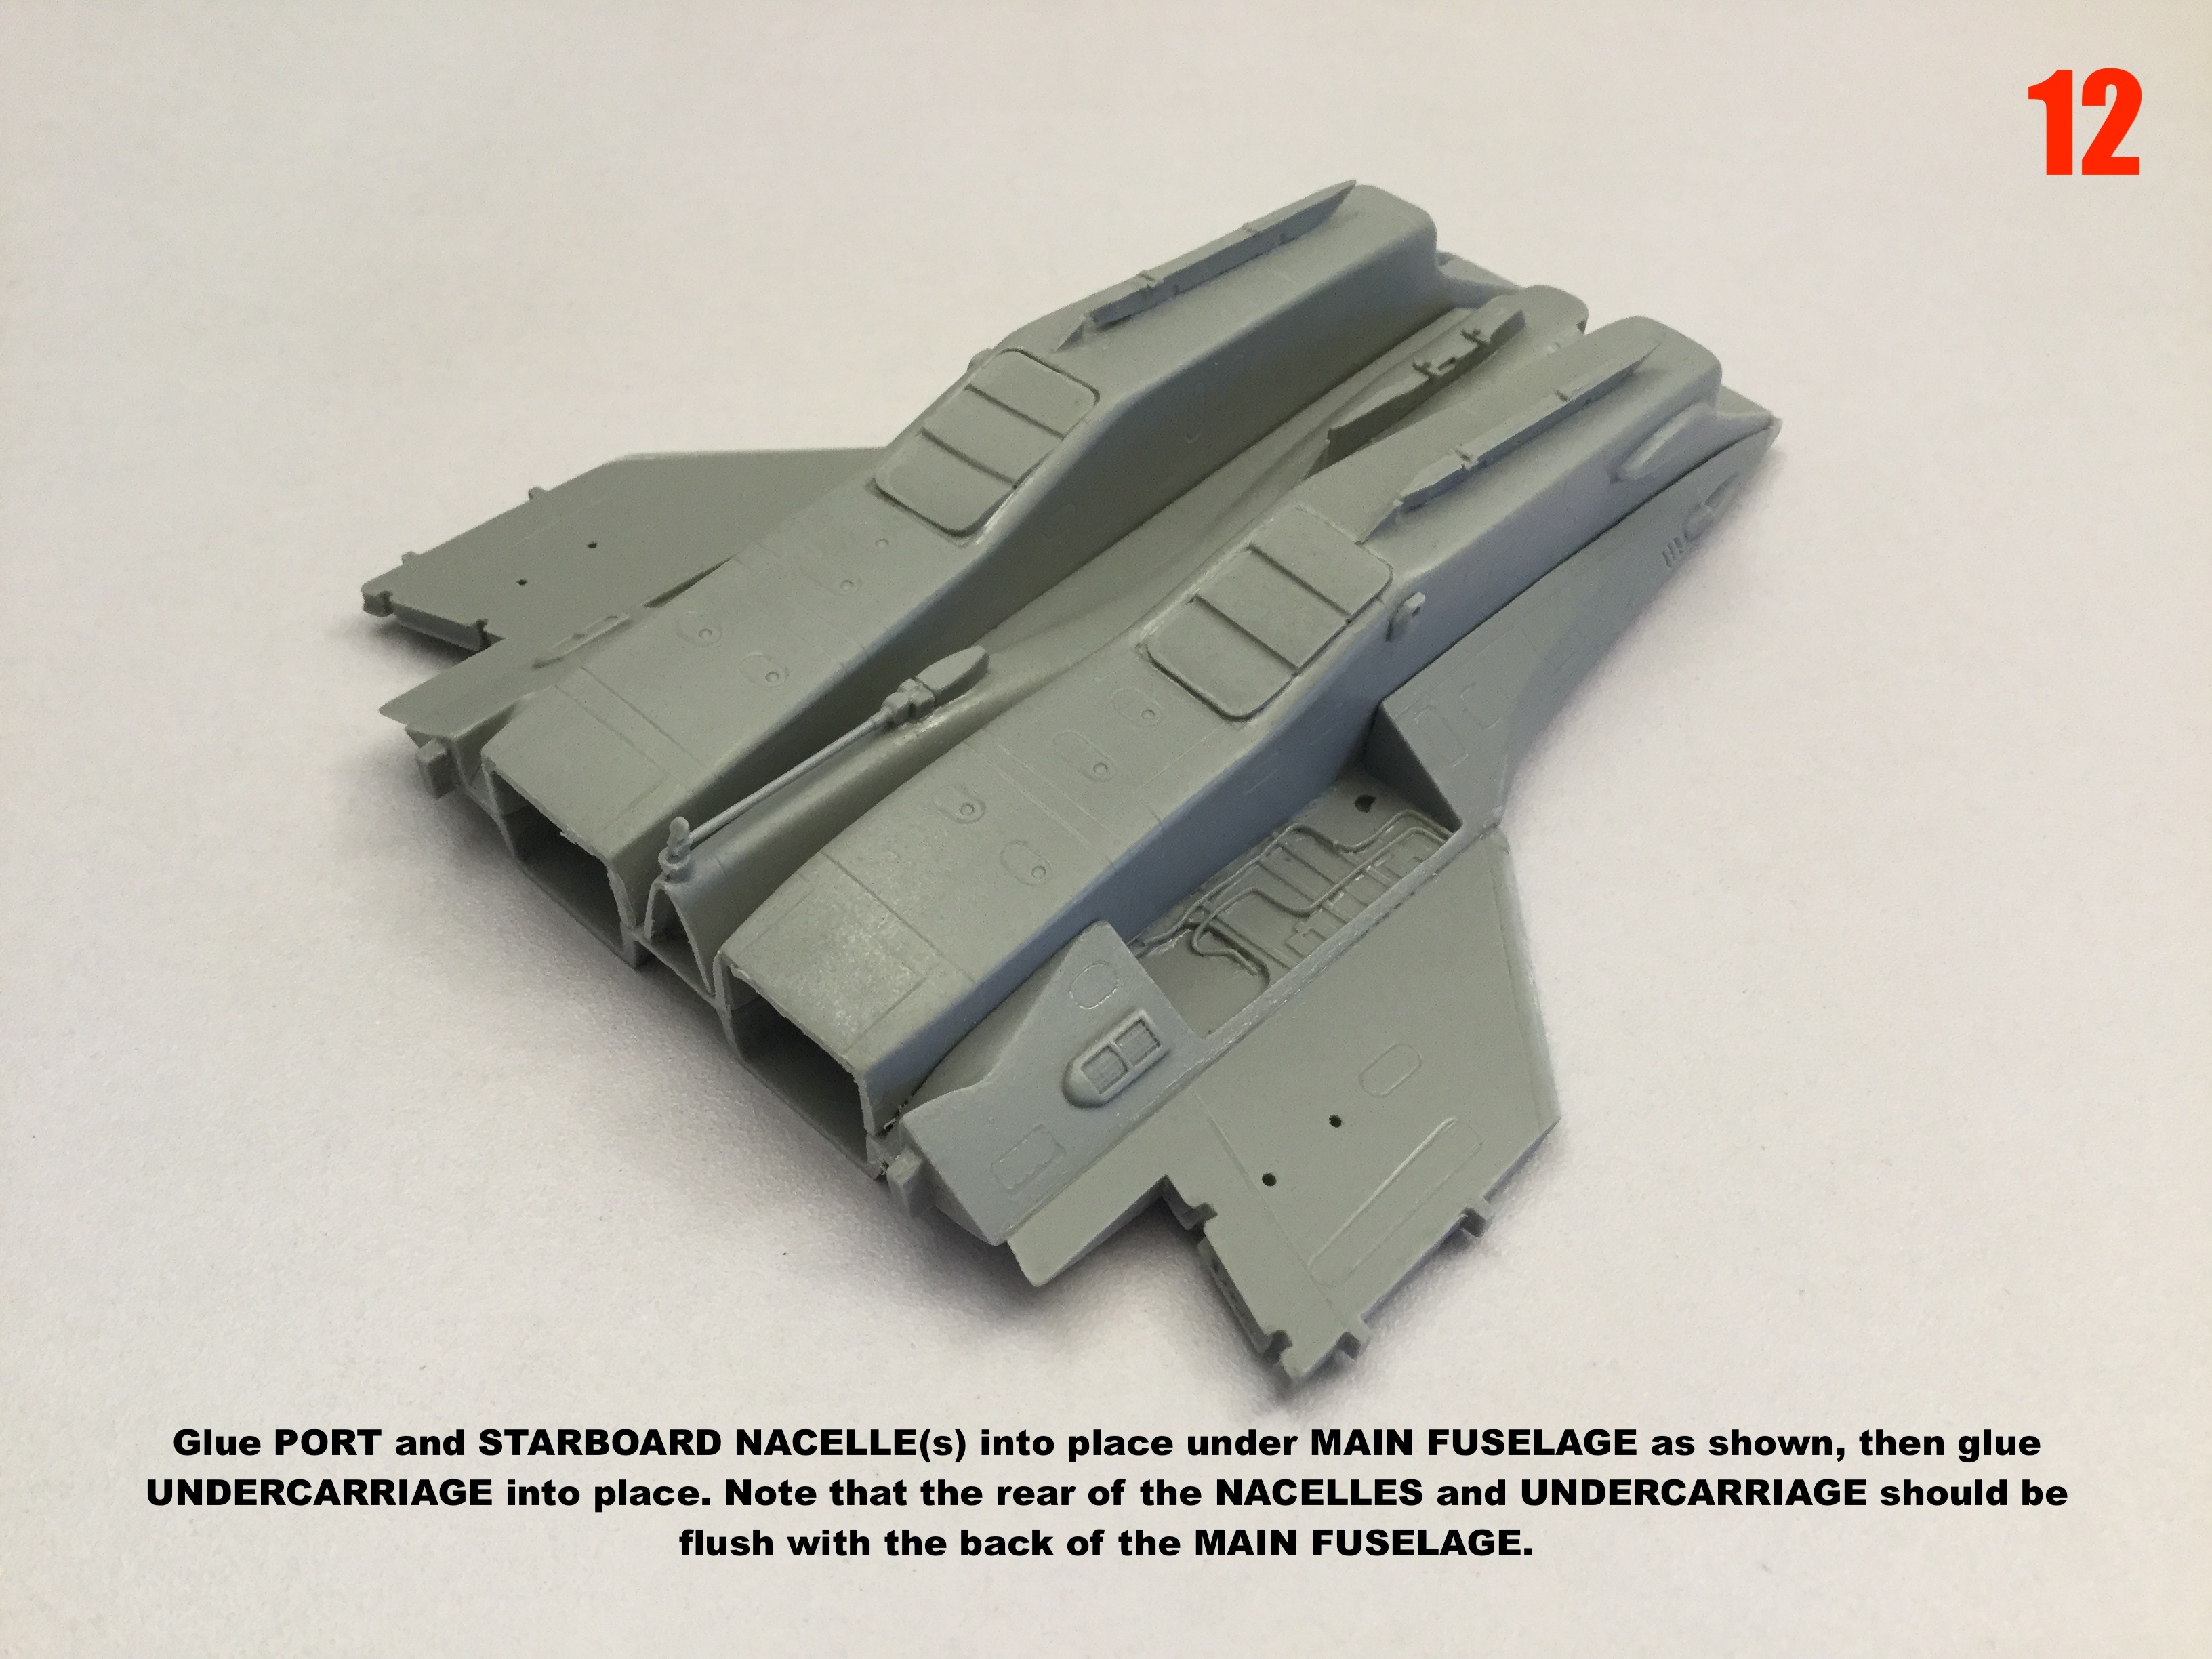
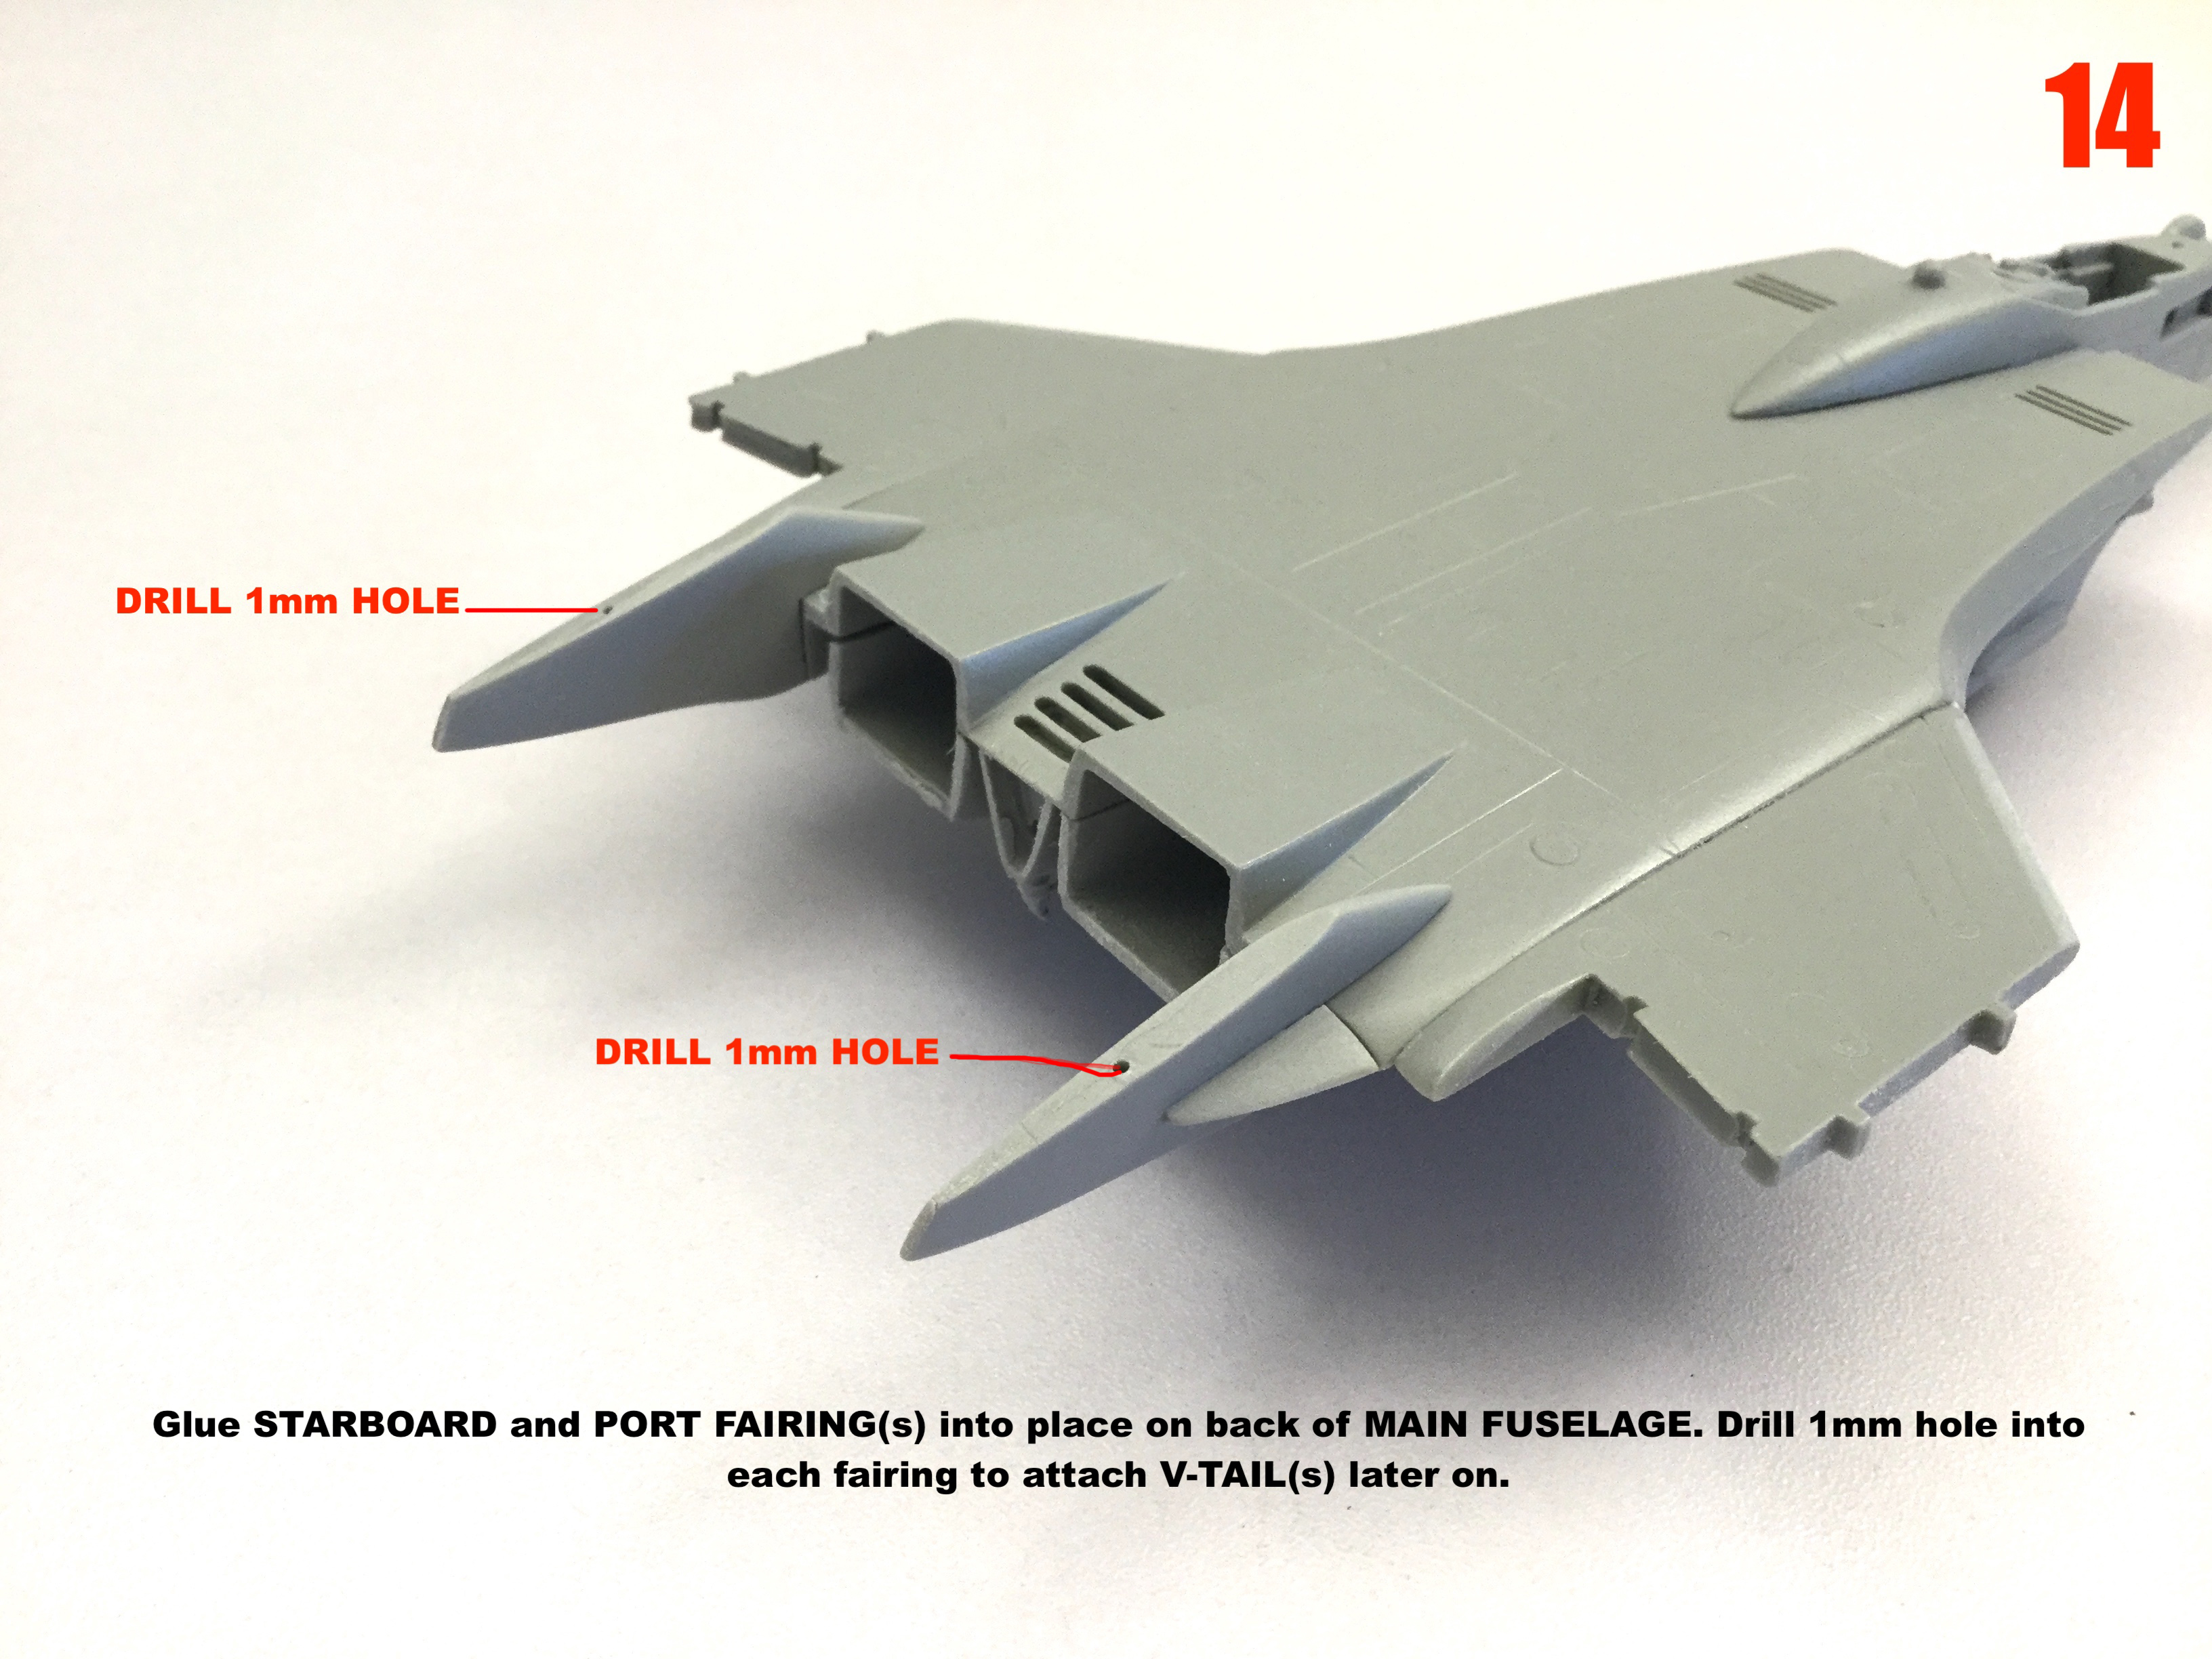
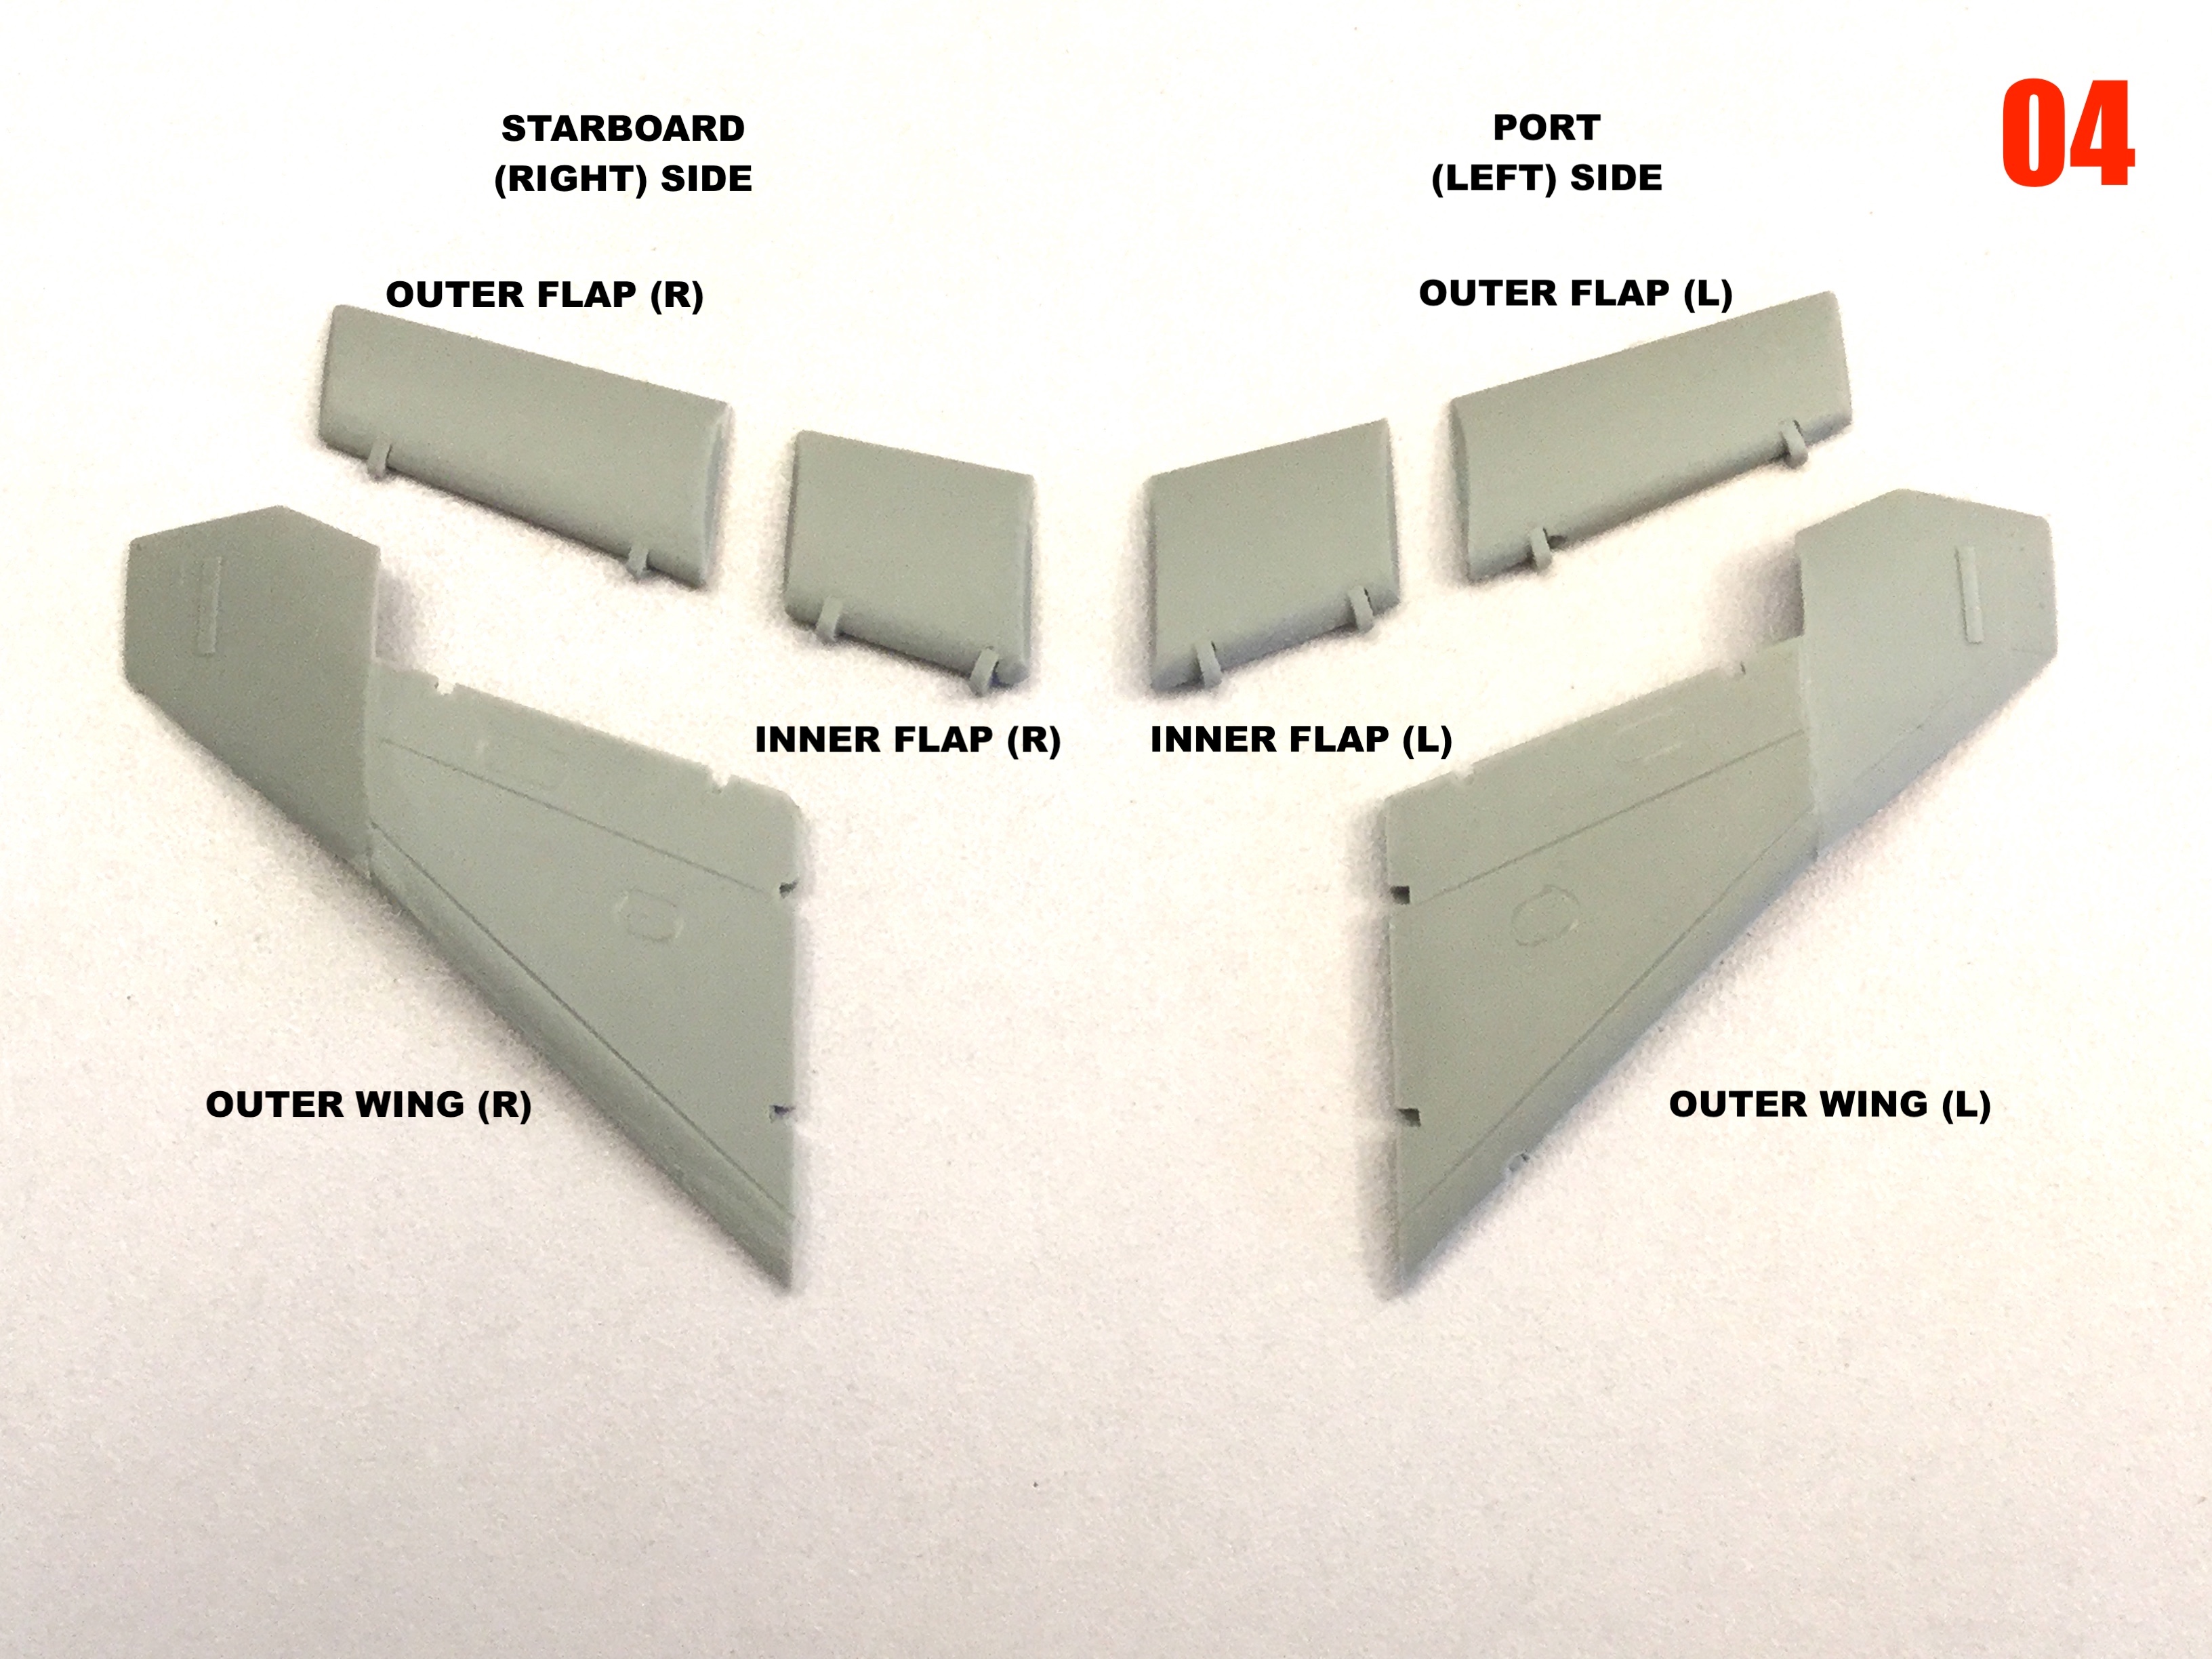
Captain’s log: Thursday, June 16th, 2022. Pic 25 shows off some very VF-1-inspired lines, which only makes sense as its predecessor. I can’t tell you how much fun I’m having with this thing! It’s such a nice change of pace to be able to play pretend aerodynamicist, even if it’s only for a little while. Pic 26: the engine nacelles being hollowed-out while the upper surface is modified with the appropriate shapes. Frankly, the aircraft has way too much of its weight distributed aft (engines, wings, stores) so I need to scrape as much weight out of this area as possible to keep her from being a wheelie-bird when she sits on her gear. Pics 27 and 28: wing surgery underway. The wings need to be split for the flaps, and then again for the sto-wing hinge. Because of the thrust-vectoring nozzles and secondary ventral thrusters, I didn’t think the plane would need fowler flaps, so conventional units are used. The rudders are all-flying control surfaces, and I modified the pivot to make sure that all the control surfaces don’t interfere with each other. They’re a little shorter than they appear in the line-art, but that’s because se sits tall on her gear and hangar clearance is a real thing. Pic 29: having fun with putty! There are lot of intersecting parts in this area that had to be mated and smoothed. Truth-be-told, the way that central ventral fin bulges down at the rear is absolutely horrendous for drag, and can also interfere with the aircraft’s take-off AoA, so I toned it down a bit. It’s still an interesting shape that can house lots of sensors/jammers/fuel dump pipe, and will also feature an arresting hook… because carrier landings! Pic 30: even more putty! Here you can start to see the shapening of the ventral area, as well as progress on the wings, which now have all the appropriate hinges. I’ll be adding hard points on the engine nacelles, but I’m also considering using that ventral tunnel to house more munitions, much like we see on the F-14. Pics 31-35: here’s the fuselage, now with partial wings. I’m leaving off the wingtips until I have the rest of the wings scribed & primed. She looks very MiG-25 at a glance, and I love it! Bear in mind that some parts are just tacked together, which is why it looks wonky. Next week I’ll be looking to molding the canopy and start adding details, so stay tuned!