

Lolicon
-
Posts
7346 -
Joined
-
Last visited
Content Type
Profiles
Forums
Events
Gallery
Posts posted by Lolicon
-
-
I'm currently reading a little known Jane Austen novel called Dense and Densibility.
-
This may come as a shock to some Robotech fans, but there are some people who don't live in the United States. They're not even US citizens! And they don't speak English! And they have their own TV shows! Those aren't in English either!
-
There's a saying that I've heard among people I know who like to watch bad movies which I think is relevant here:
Never remind the audience of a better movie.
So yeah, I'm sure Robotech fans hate seeing homages to things they've seen in "The Macross Saga" and knowing (or maybe not knowing?) that those moments really belong to Macross, and they'll never be able to get such homages in their precious Robotech; all they get is The SHATow Chronicles (not my name for it).
It reminds them of a time when Robotech could simply steal better material than anything HG could produce.
Oh, and I also watched Robotech: The Untold Story for the first time tonight. My god... how can anyone like that POS? And then say it's better than DYRL? It's utterly incomprehensible, the change in film stock between Southern Cross and Megazone is painfully obvious, I actually became physically ill about 30 minutes into it and wanted to vomit, and the hero defeats the main villain by... yelling really loud???

-
I can't tell from the photos, but will there be a pilot figure of Basara with guitar? If so, I'm sold.
-
So many excellent VF-25G builds. I'm going to assimilate all your techniques.

-
Those are stickers. Or "marking seals" as Bandai calls them.
-
I was about to ask where the heck all those little nozzles came from, but I remembered the super packs. Nice paint job, especially the gold section of the ankle armor. No wrinkles!

-
Indeed! I guess because it's a nudge for us to paint them instead. If memory serves, these are usually ones that need a metallic finish, right? That's hard to do with water slides.
I can't wait to get this kit! But I have to until after Christmas. Guess that gives me time to see what others are saying about gotchas and any problems. Loving the pictures so far though!
Anyone want to volunteer to translate the colours? I can probably work out the ones that are the same as the other kits and any mixed paints that match, as well. I'm guessing there will be a few new reds, purples and pinks in this one though.
It's usually pretty arbitrary as to what they decide to throw in a foil sticker for. Inexplicable stickers like Alto's visor (seeing a foil sticker for Alto's clear green visor makes me weep), the crotch, Ozma's head sensors, forward nose sensors, the green gunpod sensor, etc.
Took a quick gander at the color sheet (kinda sketchy surfing Hobby Search pages at the office), but here's a few colors (my Japanese is limited)-
Column 1 (first color scan, looks to be the main fuselage colors)
1. wine red 85%, clear blue 10%, clear red 5%, little bit of white
2. wine red 80%, purple (i assume that's what "sumire" is) 10%, clear blue 10%
3. purple 65%, wine red 20%, white 10%, clear red 5%
-
Why does Bandai make a huge sheet of decals but insist on including foil stickers for a few markings?

-
This is what HG did to "Rick" and "Lisa":
-
Be careful what you wish for...
People wanted to know what happened to Captain Kirk and we got... Generations.
People wanted to know how Anakin became Vader and we got... the prequels.
People wanted to know what happened to Neo and company, and we got... the Matrix sequels.
Now (some) people want to know what happened to "Rick Hunter" and the SDF-3... based on The Shadow Chronicles, does anyone believe it's going to be satisfying in any way?
Sometimes it's better not to know.
I'd love to see Hikaru and gang again, but only if it's interesting and brings something new to the table. Otherwise, better leave well enough alone.
-
Not knowing what happened to Kirk and crew didn't hurt Star Trek: The Next Generation. Heck, I thought that Generations was a completely unnecessary movie; The Undiscovered Country was the perfect sendoff for the original crew, with the Enterprise literally flying off into the sunset.
Cardinal rule of showbiz: Always leave on a high note and leave them wanting more.
-
I can get them to stay up, they're just not as snug or secure as I would like. They do sag slightly; I prefer them to sit higher up. I figure a little blue tack should fix that...

-
I have to admit that I gave the 1/72 an honest chance (twice). I have been building models for many years. but they were impossible!!! particularly the legs. I mean I look at some pics of others and I keep asking myself how the hell they got them tyo stay???
What part of the legs are giving you problems? I know it's very hard to get them to stay up in fighter mode, due to a lack of a locking mechanism (addressed by the Armored). I think some people installed magnets in the legs to hold them up.
-
Overall, I think it's a great thing that we have so many choices when it comes to Macross products, especially with Yamato's excellent toy lines and the success of Frontier. It's a great time to be a Macross fan.
 However...
1/72 models: Despite my bellyaching about one aspect or another of the model kits, they're great little pieces of engineering and look fantastic if you're willing to put some effort into them. I don't know where this "static non-transforming" nonsense comes from. They transform just fine; it's just those of us who have put time and effort into painting and decaling them don't want to see it scratched up by the rigors of transformation. I'd use the "it's not a toy" line but doesn't the DX also lose paint if you look at it the wrong way?
1/60 DX: One word sums up my opinion of these things: fugly. Fighter mode is passable, but battroid is absolutely fugly. They really do look like mordbidly obese old men with pants pulled up to their armpits. The jacked-up hips are the thing I notice most. The Armored DX looks like it was made by Fisher Price. The VF-27 looks promising though.
1/100 Partsformers: Was never interested in or impressed by this line. Fighter mode looked good and might've hooked me if there was a pilot figure. Battroid retains the same fugly proportions and hip placement as the DX. WHY?! One could make a case for the DX needing to compromise for the transformation, but it's inexcusable for a partsformer. Add to it the bloated price tag.
DX Quarter: Is it December yet?!

-
I recently showed Robotech: TSC to a friend of mine who isn't really into anime but liked the 1985 Robotech episodes back in the day. Here's what he had to say:
About the theme: "WTF? It's the Superman theme!"
About the women: "Seven of Nine is conservative by comparison." "Don't they have back problems?"
About the men: "It looks like they start every morning with a heaping bowl of anabolic protoculture."
About the story: "It's a bunch of stupid crap happening to a bunch of stupid people I've never seen before and don't give a crap about."
About the CG: "I would've said the CG was okay if you hadn't show me those CG clips [from Macross Frontier] earlier.
About the black hole escape: "WTF is this? Robotechnobabble? Sounds even worse than Treknobabble!"
About the Haydonites: "I thought you were f***ing kidding when you said they were just a floating head and shoulders with an empty cape." "They talk like a bunch of WIC Sith."
About Rick Hunter: "That's not Rick Hunter."
About the limited theatrical release: "They played this in theaters? People paid money to see this?"
About the DVD: "Don't you f***ing leave that thing in my house."
-
Megahouse keeping the high end figure buyers happy.
It's nice. But I think I'll stick with their 6,800 yen Excellent Model versions.
http://hk.myblog.yahoo.com/iam-cybergundam/article?mid=36461

!!!
Sigh more Japan only exclusives that I'll never be able to get my hands on.

-
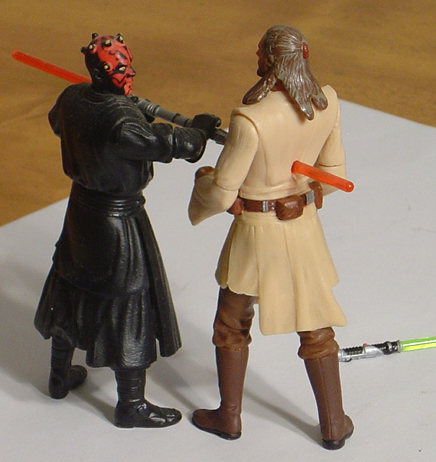
Made good use of some old Episode One figures.

-
Is he saying that the Robotech LAM will be so successful that it will bend time and space and retroactively eliminate the billion dollars Transformers has made for Paramount? If so, I'd be shaking in my boots too.
-
In the gerwalk mode shot, I just noticed that there are little tabs poking out from under the backplate. Are those possibly tabs for locking the legs in place in fighter mode? Please say it's so!

-
They can mold THIS canopy in color, but not the VF-25's??!!?
Apparently not. Clear purple seems to be impossible for some reason. There's no clear purple paint to be bought either.
But wait, isn't the DX canopy molded in clear purple???
-
The days of Macekreing anime ended in the 80s since fans usually hate it and it costs a lot more than just a straight translation.
-
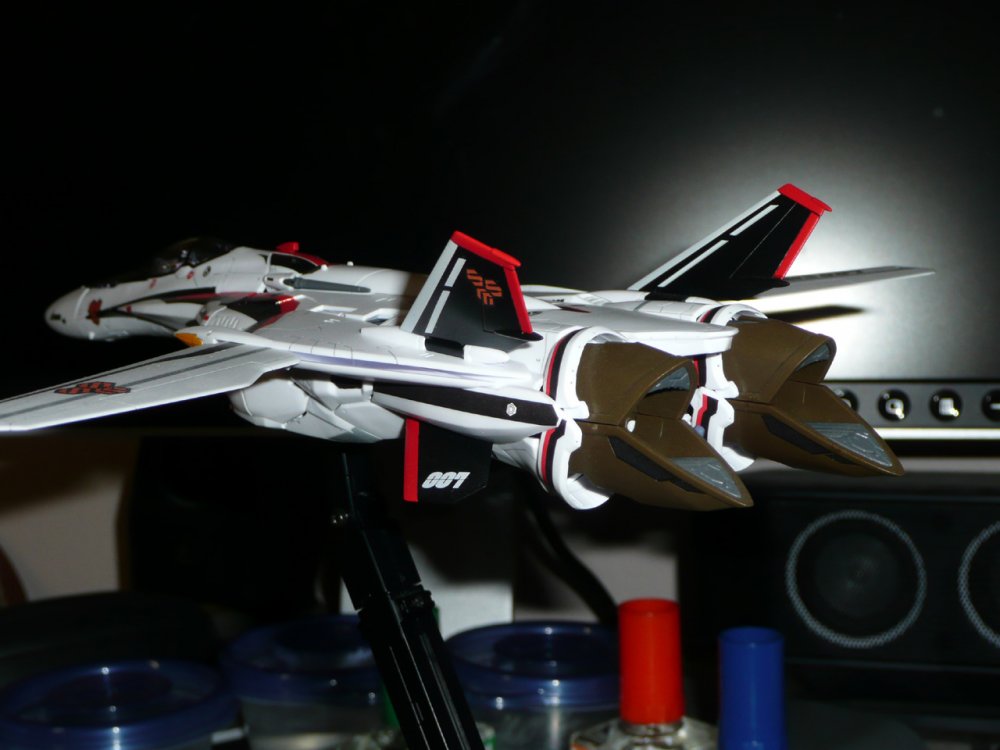
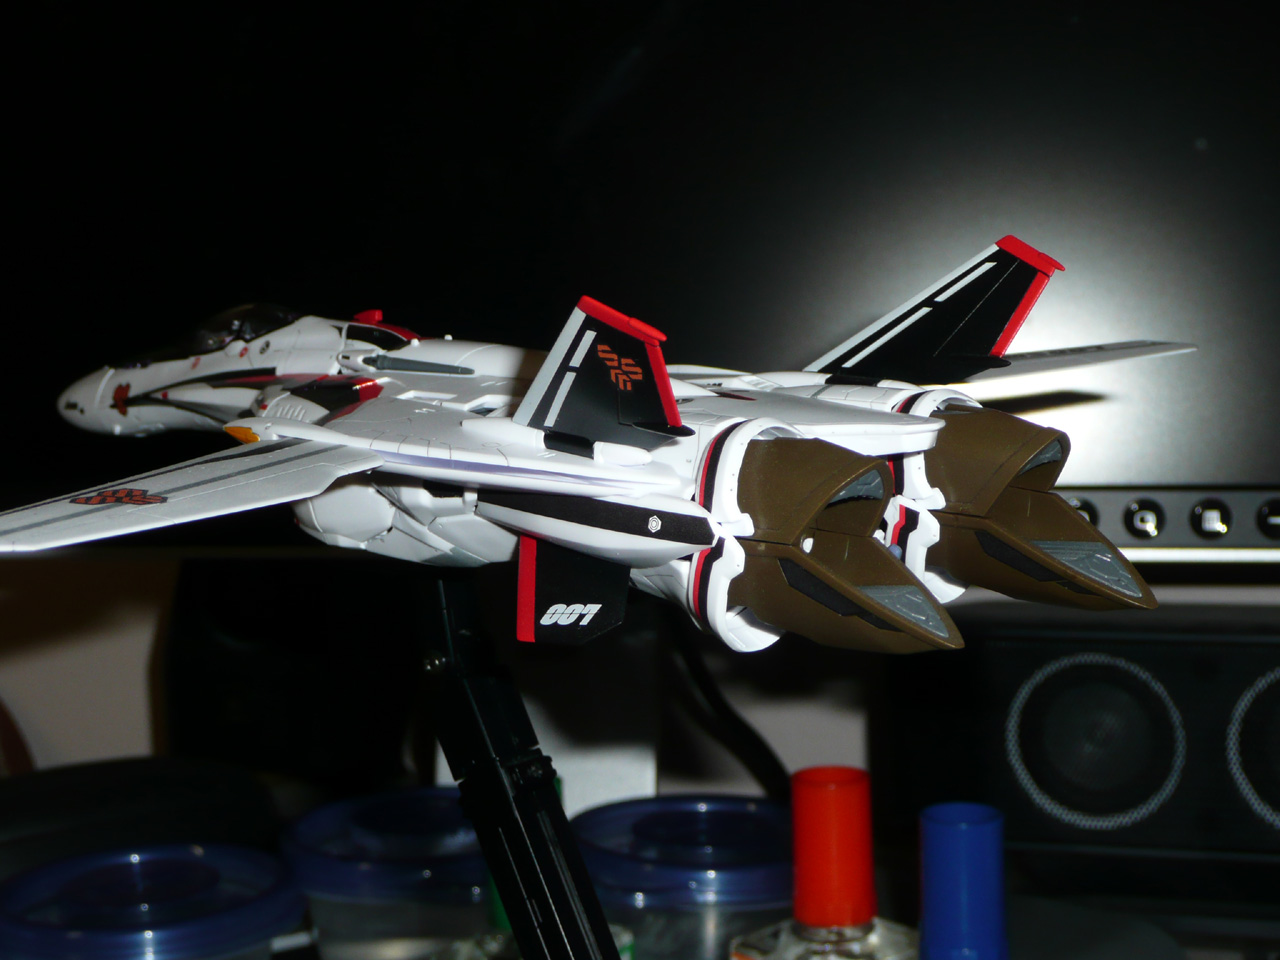
I think your build is looking good, despite any problems you've had with the decals. I'm sure once the whole thing's been assembled, you won't even notice the little slipups. Besides the SMS007 snafu.
I hear ya on the problematic decals. Since there's still a few weeks before the VF-27 comes out, I decided to finish sticking together my VF-25F battroid which I started nearly a year ago. This was when I wasn't really doing a whole lot of finishing work and had intended to only hastily assemble it as a proxy for the mordbidly obese DX, so it was already partially assembled; it'd look really jarring if I started painting the rest of it.

Anyway, the decals for the Armored were a breeze. There are almost no areas where you have to force a decal to sit in a groove or other awkward shape and the few that did involve irregular areas were fairly mild. The only exception were the chest covers; I ended up scraping most of the decals off and just painting that section.
And now back to the plain VF-25F... and a lot more decal difficulties! Much of the difficulty comes from the fact that these decals just aren't properly sized/shaped. But for some reason some of these decals just didn't want to cooperate. Like the "arrows" that sit on the neckline... they simply did not want to be moved into position, no matter how much water or setter I used; I ended up tearing on of them and having to paint part of it back in.
Or the black U-shaped decal in the very center of the chest? It's not even close to being the right size. You have to paint in the edges unless you want large, white edges.
Heck I'll just attach some pics and let you play "spot the decal screwup."
When you're dealing with a decal that has to be forced down into a pit or groove, it helps to trim off the excess film so there's less area for liquid to be trapped under and is more easily pushed out. It's very useful for small decals that fit entirely in a recess, like the circular "bolt" decals or the sensors on the sides of the cockpit.

-
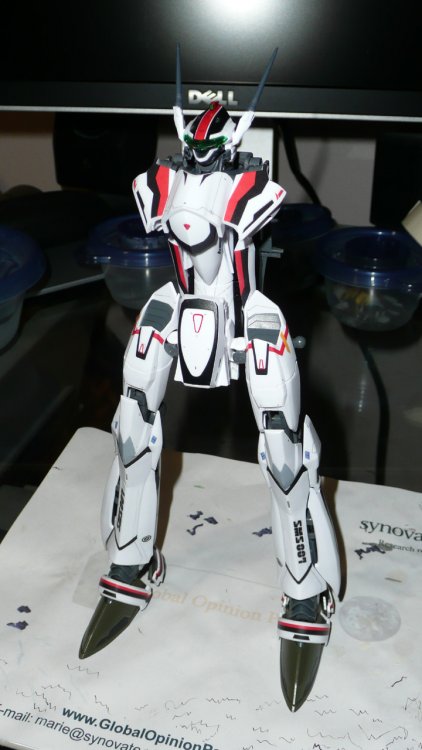
I'm beginning to think complaining about the hip placement is a knee jerk reaction to it being a DX and not any form of thought out criticism. the hips on the 27 DO NOT sit in the same place they do on the VF-25.
really, the only thing that looks off is that the crotch isn't angled out enough, and that's probably just because they didn't transform/display it properly.

Though I never once criticized the placement of the DX VF-27's legs simply because it looks so much better than the craptastic VF-25, I couldn't quite put my finger on it till you brought this up. So I fired up a bunch of Frontier episodes to check it out, and you're right, the VF-27's legs do appear to connect higher up than the VF-25.
The DX VF-27 actually looks fairly close to the anime and may be my first DX purchase! The DX VF-25s look like a bunch of morbidly obese old men with their pants pulled up to their armpits.
The air intakes look kinda elongated on both the DX and the model. Maybe it's just the viewing angle or the way it was transformed?
EDIT: I meant second DX purchase, after the Quarter.

The Macross Quarter. DX Chogokin
in Hall Of The Super Topics
Posted
Anyone wanna buy my Takatoku "SDF clone" for $200? Be warned, it's cute skiddle-colored red, white, and blue.