Dobber
-
Posts
6473 -
Joined
-
Last visited
Content Type
Profiles
Forums
Events
Gallery
Everything posted by Dobber
-
It looks like 2 of them. The lower one is Holding-on "bitting" the upper one. Still big though. Chris
-
"Not that there is anything wrong with that!" Chris
-
So she can give birth to Macro-sized babies after being Micronized!!! Chris
-
Did we have the same idea? Chris
-
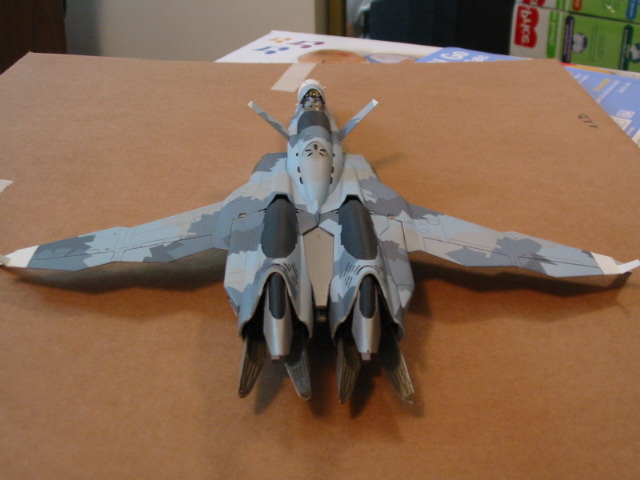
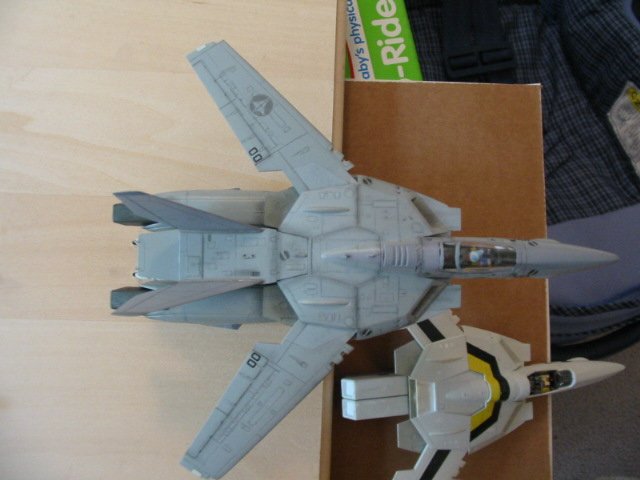
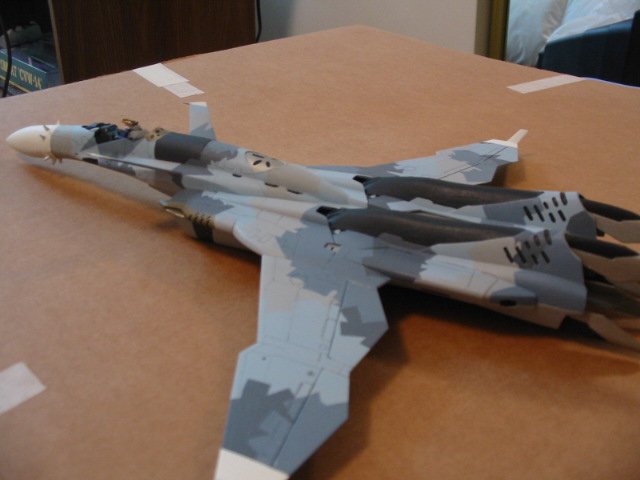
Thanks Again everyone!!!! Sorry I've been out of town the past week...I'm moving to West Virginia in a month and my wife and I needed to find a place to live in WV. Christopher, Yeah the instructions specified to do that with that section. Should I try to fix it? The Vf-1S Strike is actuallly painted Light Grey with a few lighter panels to give a slightly weathered look. The VF-1S "low vis" is just the standard VF-1S Repainted. I actually lost the remaining clear parts for that particular model....so other than the canopy there are no clear parts! as you can see in the picture. Anyone have any suggestion? As for the SV-51, I'm nearly done the vertical stabs and then I can decal and weather it! i can't wait!!! I'll post more pictures soon. Chris

-
Thats not the first time that Helmet is seen.....at the end of Predator 2 when the rest of the "crew/clan" de-cloaks, You can see a predator with that same mask step forward. I'll never forget it because I always thought it was Bad-A$$!!! I kept rewinding my tape so I could acurately draw it! Chris
-
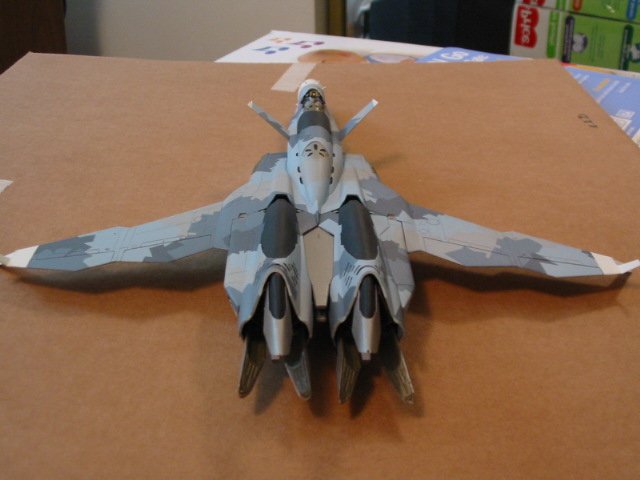
Yup, the whole thing including the panel shading! What I do is after the base coat is down, I'll go over panel lines with a thinned darker shade(in this case dark ghost gray over the base light ghost gray) then when it's time to weather the plane I'll go over the same areas with ground pastel chalk with a brush. The more often I go over an area the darker it'll be. I tend to make MAJOR seam areas a little darker since the seal is being broken more frequently in flight due to transformation, just my theory though I painted this particular valk as if it's in the twilight of it's career, hense the pilot in the Mac plus flight suit. Chris
-
Another shot. Chris
-
If you were talking about mine here you go! Chris
-
Thanks! yeah those antennas are a bit thick! Maybe someone will do a Photo-etched set some day. Good Luck though! Wicked Ace: SWEETNESS!! Chris
-
No, it was just another Bishop android. If you look carefully after "85" bashes him with the wrench, you'll see that half of his head - especially around the ear - is sorta hanging off. It was just another company trick to try to get Ripley to turn over the queen. Bingo.
-
I like those fan renderings! As for the villians.....the main baddie will be Raj Al Gul (spelling?) with scarecrow cameo at the begining I think. As for the other Bat-movies: I liked the first one when it came out...however I remember being a little disappointed still, at the time. I guess I forced myself to like most of them except Batman and robin, because I was a fan.....but now....cant stand any of them! Might as well watch Adam West!!! Not sure who said it but they were correct in there assesment of the previous films, with how the Batman was a secondary character in them..I hated that!!!! Plus why do they need 2 villians in them? I don't get it. Plus killing most of them off in the end. The final thing that was wrong that I hope that they get right this time was how he fought. Even though the suit LOOKED pretty good it wasn't body armor!!!! they had him walking up to people they shot him he falls down and then gets up and fights them. Batman was a martial artist of the highest order. I remember in one comic he described someone trying to shoot him as being "nearly impoissible to get a bead on me once I am moving." THAT aspect was a little better in Batman Forever. Just my 2 cents. Chris
-
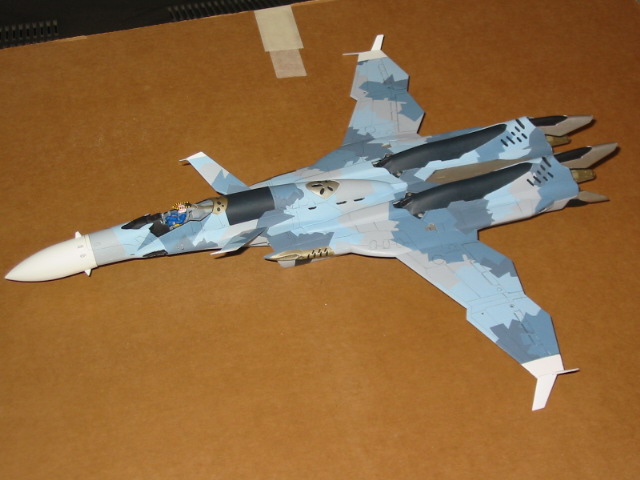
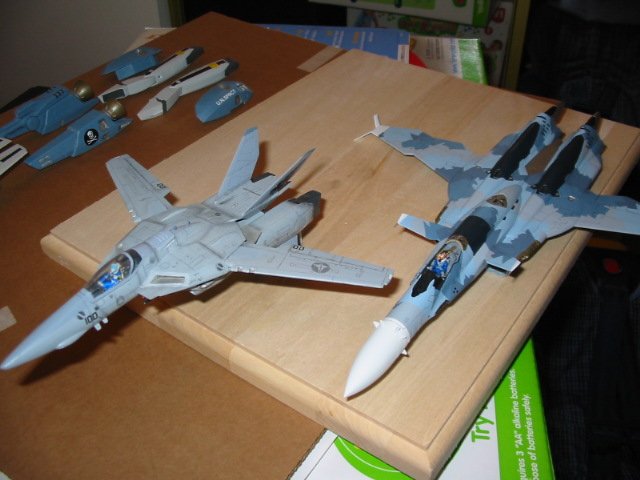
Again these entire models are hand painted with brushes. weathering is down with ground pastels and pencils. Hope you all like! this really is the last one!!! I'll post more of the SV-51 when I'm further along. Chris

-
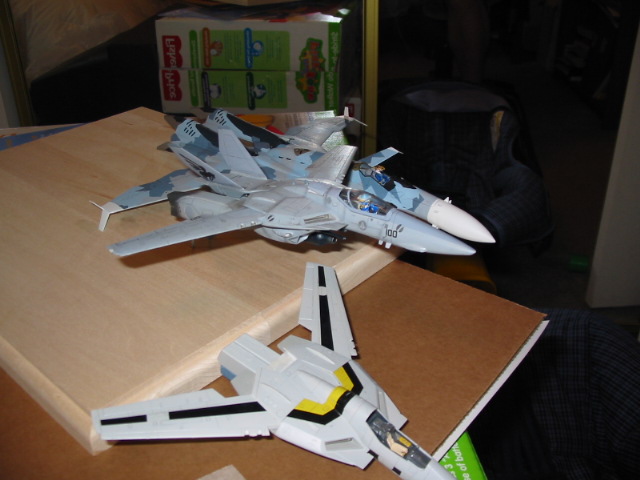
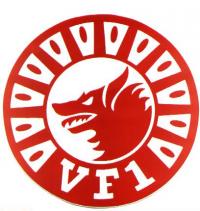
On the VF-1. I did't have or know about any custom decals at the time. ALL the markings except the number and the UN SPACY on the gun pod are hand drawn on or hand painted on, including the Pukn' Dog and the UN spacy emblem! You can also se a Roy Vf-1S strike I "was" working on I'll get around to it eventually Chris

-
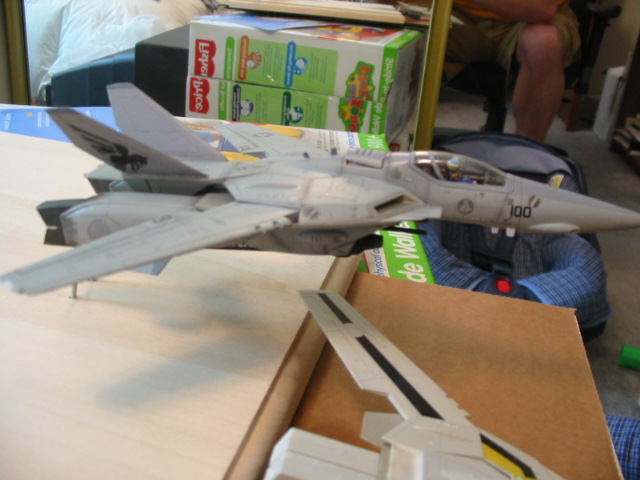
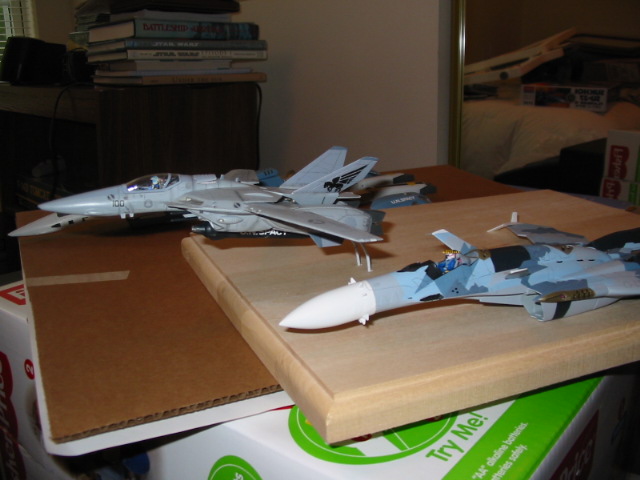
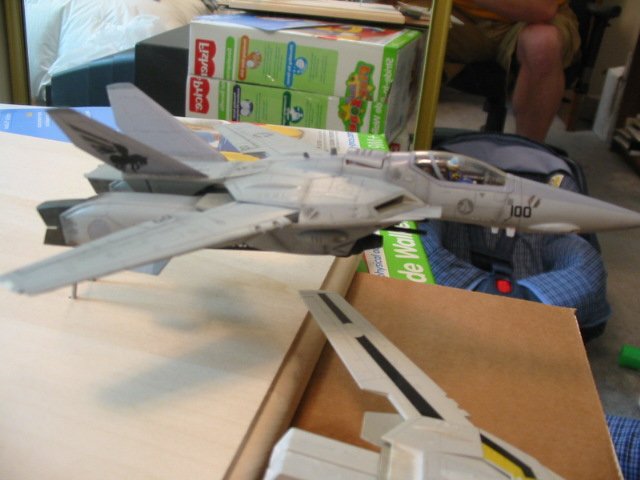
OK I lied!! Now that I know how to make my pictures small enough to post i'd thought I'd share a few more. Here is a size comparison next to my Custom Vf-1s. I have a display stand that I still need to varnish and then a few more valks to finish and put in formation. The VF-1s is a 1/72 hasegawa it just looks bigger because it's on a stand Chris
-
Last one. Chris

-
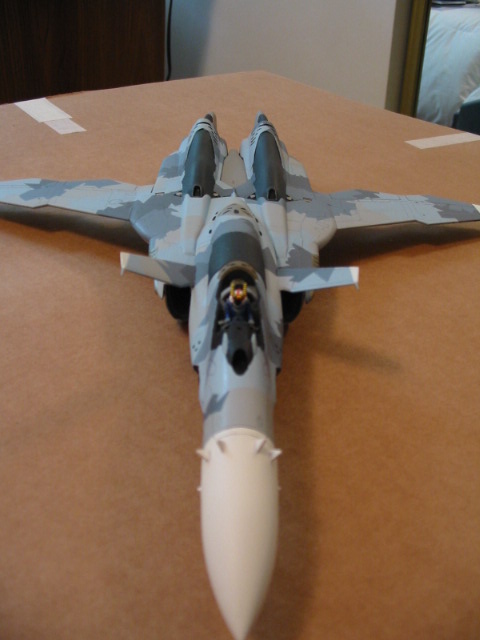
Another look. Chris
-
A few more pictures Chris

-
One more, Chris
-
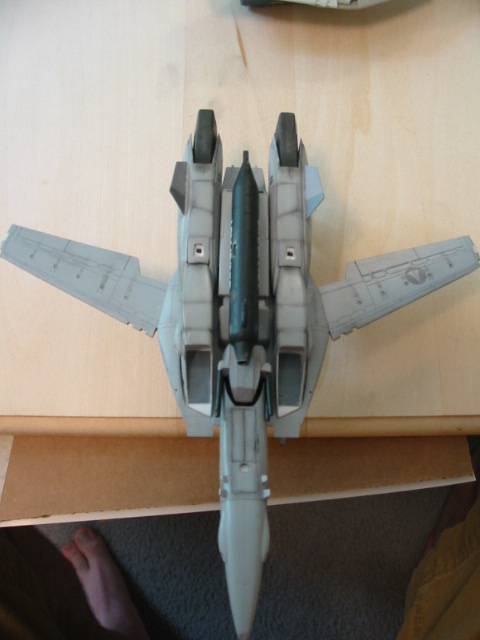
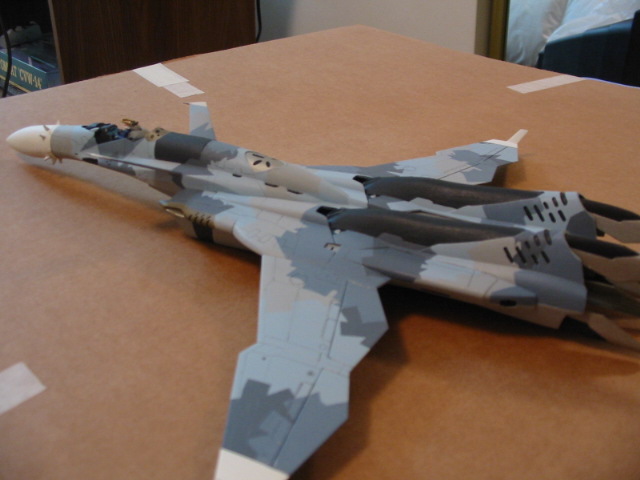
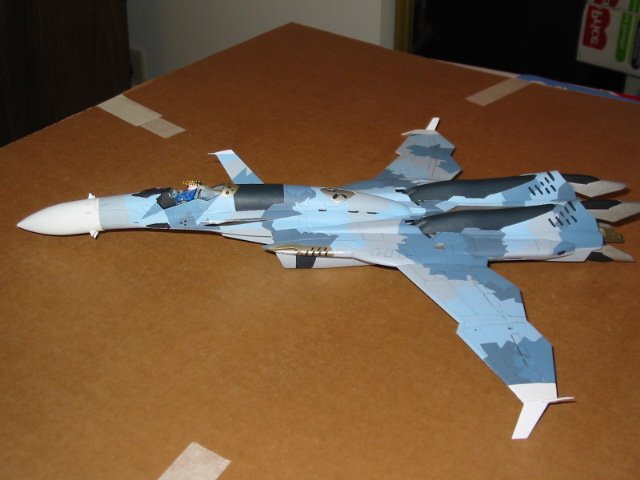
Me again, I figured out how to make the resolution smaller so here are a few more pics. I've been a little busy lately so the only differences are now the panel lines are done and the paint has been touched up, particularly around the anti-personel guns. I'm nearly finished with the vertical stabs and then I'll put the decals on, shade the panel lines and weather the whole thing. Chris

-
WM Cheng, I Use Testors My local hobby shop barely qualifies as one I prefer Acrylics and for the most part use only Model Master Acrylics. However, since all the colors aren't available in Acrylic I'll also use regular Model Master paints. I haven't tried to panel line wash on this model because I didn't want to ruin the complex paint scheme. I used a variation of masking and free hand....I have a pretty steady hand The last time I tried to wash, though, I'm pretty sure I followed those steps but from what I remember After the wash was applied I couldn't get the Excess off? Maybe it wasn't thinned enough...oh yeah I was using India ink. Also what should be used to remove the excess in your equation...more low odor varisol? Finally can anyone tell me how to size down my pictures? I can't figure it out!!! Do I need to do something with my camera or is it down on windows? Thanks Again everyone. Chris
-
Thanks Everyone! I'm a little further along now I've done most of the panel lines.but haven't really done much else I've been too busy. Overall I'm happy with it but it's the first camo job and model plane I've done in a while. Some fit problems, and paint lines are my main disappointments. I'd love to get another one and give it another try when this is done because I love the design and I now know the problem areas. This whole thing Is brush painted, I have no airbrush, had a cheap Testors "Double action?" but couldn't get the hang of it plus the clean up was a bitch!! I'm too impatient that way I guess. I'd love to post more pictures but I don't know how to scale down the pictures ala Grahams request. Any suggestions? Also I've followed WM Chengs instructions on how to do panel lines and tried different variations on it and it ALWAYS takes off the base coat (I must be doing something wrong!!!) so I just use my trusty artists pencil. Basically, I'm a brush painter that's reached the limit of my abilities that dosen't have the time or money to invest in an airbrush and practice. but I hope you all still like it!! Chris
-
If anyone is intersted, HLJ just pushed back the date for the Yellow Sub. 1/144 aircraft to Oct. I'd love to see more prototype pics. I REALLY WANT something of the FFR-31 Sylphide and as of now this Yellow Sub. is the only version of it. Chris
-
Just trying to see if I can figure out how to make a smaller picture....this is only a test Chris No luck ....picture removed
-
one more. I've just noticed those spots that I didn't paint DOH!!! Chris EDIT:new picture