Chas
-
Posts
953 -
Joined
-
Last visited
Content Type
Profiles
Forums
Events
Gallery
Everything posted by Chas
-
Agreed in GI- Joe the characters may have names but honestly how often are they used - almost never (what's 'Scarlet's real name?) . In Top Gun what was 'Ice man's' real name? heck for that matter what was 'Maverick's ? My point is that the "don't confuse your audience by giving your characters too many names " rule still applies in the examples you gave to disprove it - because those characters are almost always reffered to by their 'call-sign' - it 'is' their name. If you want to know what it's like trying to follow a story where the characters are constantly reffered to by any of two, or three, or four names try reading Crime and Punishment by Dostoyevsky, or for that matter any of the 'classic' 19th-20th Century Russian novelists. And I donn't know exactly but I suspect that the 'call-sign' is primarily an American phenomenon.
-
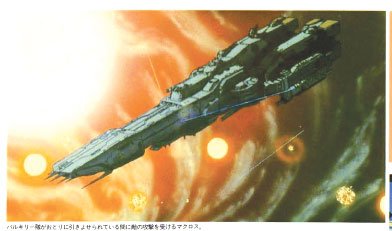
Well there have been lots of images posted in the past but here's one I don't think I've seen before, ( or at least in a long while) I think it should be fairly helpful, given you project . Good luck!

-
No. Brasso is a tarnish remover/ polish for brass and silver.
-
How do you paint a puttied, sanded, glued and primed model kit?
Chas replied to shiyao's topic in The Workshop!
Well as far as I know that only really applies to snap-fit kits (a-la Gundam). With your standard (glue) kit test fitting is not a problem as the parts do not 'snap' toghther and so cheking for poor fit issues is not difficult, all that's needed is a good eye and some tape every now and then. As for snap kits, I've read about the cutting of the male pins on a diagonal, but some folks also bore-out the hole in the female part as well. However, from what I remember, you can for the most part just pry the pieces apart. If your careful and patient and do it correctly (loosen one side, then the opposite side back- and - forth) without using too much force they come apart without any harm being done. -
Yeah I figured that the white stuff was a plastic polishing compound of some type, though I've never thought of using it that way before. I'll have to do a test and see how it works. (he used enamel for the panel lines right?) It's a good video, but they missed the best part of model building --FIXING YOUR COCK_UPS! -- everyone knows that's the most fun, and also the part where you learn the most! I agree that you don't need the weights if your building it OOB, but if anyone is going to do a gerwalk conversion weighting the nose and feet/legs is very important! Thanks for posting this Ryuji!
-
Wow! This is a real shame. Sorry to see it happen, but it's completely understandable, evryone moves on in life. Best to you and your new wife, and good luck on the Doctrate. I think the worst news is : - ALPS is discontinuing all support for their printers starting 04/01/07. This includes repairs and inks. Prices for inks are already going up, stock is going down, and the waiting list for printer repairs is getting longer. 'cus it means that no one will be able to pick-up where you leave off. Is Alps doing this for all their machines, or just the model that you have? Are they going out of business? If that's the case then it sucks for the whole cootage industry of decal making.
-
I'm sorry but I'm a little unclear as to what it is you are asking. Do you want to know what the difference between those Mr Color shades is? or what color is called for in the instructions for the VF-1D vs. the Super "O"?, or something else? can you be a little more specific?
-
Isn't the "real" Fx disc a boot anyway?
-
Painting, UGGG! You got me there! I'm sure whatever you'll come up with will be better than mine
-
Hurin, I'm not that sensativve! If in fact what I describe was a function of an older incarnation of the boards then perhaps that explains it. I can't actually remember which version was running the last time I used the search function. This whole idea of mine may be a moot point now, 'cus that was the problem that gave me such a headache, and because it was fairly obscure I thought it required a bit of spot light. Oh well sorry to waste your time guys.
-
You know, you are copletely justified in your reaction. I agree with you, it's mostly just folks being lazy - thing is that's never going to change! I just figure that, in our first encounter with new members we should give them the benefit of the doubt. - maybe they tried to use the Search Function and couldn't figure it out - if that's the case we can refer them to the sticky. No muss - No fuss. No further explanations required! And about the default search period feel free to chop it if it doesn't apply.
-
Well I'm using Firefox on a Mac Pwerbook G4 with OSX 10.3.9 and I've always had to change that field whenever I use Search. Maybe it's just my mac? Anyway It's no big deal If you all think it's not really needed that's fine, it was just a suggestion. I just noticed that we are always reffering newbies to the search function, and I remember when I first used it I never could get it to work right, and I didn't really want to post asking about it 'cus I figured someone would slam me for it. (The boards were a little more aggessive back then).
-
Submitted for approval How I use the "Search Function" First. Figure out what it is you want to find. It may not always be a good idea to search using a question. Try to think of words/phrases that posts, which contain what you are looking for, might have in them. Second. Which forum is this information most likely to be in? Keep in mind that until recently there has been a shortage of moderating staff so some topics may not be in the correct place (This is currently being rectified by our diligent and contentious moderators - Thanks Guys!). Due to this fact it is wise, if nothing of value comes up in the forum you think the information should be in, to try a "second best", or "second most likely" location for the information you are searching for. Third. Scroll down to the bottom of the index page of the forum you have decided to search. In the lower left corner, just bellow the last thread in the index, you will see a white search field with the words "Enter Keywords" this is where you type your carefully selected subject. Beside the search field is the "Search Forum" button do not click on it yet. There is one more step! Fourth. If you look further down, just above the very bottom of the page, where it lists the language the board is being displayed in, you will see the Legend, which tells you what all the pretty colours on the Kites actually mean. Beside that you will see a series of white text fields. Find the one marked "From: 30 Days" click on the arrow beside it and select a timeframe for your search (I usually choose "ALL"). Last. Click the "Search Forum" button. If you still have problems using this function go over the steps again to make sure you have not made an error, then try changing your search parameters, and/or the forum you are searching. If error messages still occur then please post a request for help in the FAQ & Feedback forum (Please refrain from posting requests for help in the other forums as this adds to clutter). Thank-you and good hunting. If I've missed anything let me know and I'll add it in. edit> all my quotation marks came out 'funny'
-
-
If you don't change the box that gives the time span of the posts being displayed from '30 days' to 'All' nothing shows up. At least that's been my experience. I just think it would be helpful is all. No need to insult anyone. It's not a matter of them being so 'lazy' that they can't figure it out. It's , in my opinion, about making this place welcomeing and a bit more user friendly.
-
I think it would be a good addition to the boards to have a sticky with instuctions on how to use the search funtion effectively. I know when I first tried it I had no clue why I never got any results and it was terribly frustrating! I think it would be a good Idea because folks around here are always reffering new members to the 'Search Function'and there are no instructions, to my knowledge, as to how to use it. For the new members that get told they sholud use it this must be a fairly frustrating situation. So what do you Mods and admins think?
-
Yeah I've used those guys, still got s few of'em left too. I don't know if it made a difference or not, but when I glued mine I took a file to the two mating surfaces and roughed them up a bit before glueing.
-
Looks good! In my experience if you want to put the pilot in afterwards it's best to also leave out the instrument pannel. Then, when you are ready, place the pilot in position and install the instrument pannel. This may require some finesse (and no, I don't mean 'use shampoo to get it in place' - for any of you wise guys out there!)
-
True enough Cobywan but what gets me is how "off" the cruiser mode proportions are compared to that pic. I mean it almost looks like a different ship! Personally with it looking that bad in cruiser mode I would only ever have it in storm attacker mode - which makes this a very expensive single mode display piece! Sorry, just doesn't cut it as a dual mode model, or toy.
-
Forget the Alphas! ( I've always liked the proportions of the LS 1/72 nd series much more - dedicated modes are the way to go with models in my opinion, leave transformation for toys) Now the Mospeada kits, there's something to pick up I just can't wait to get my hands on one or two of those babies! a little mod here and there to increase posability and Wham! georgous model. :>
-
Ahem! Initial battle scene anyone!
-
I'm sorry, I know it's O.T. and I'm aware that I may be considered an uninterested party, and I very rarely do this sort of thing, But I just feel the need to chime in here. Hurin, The guy was obviously a little pissed 'cus after 10 months or however long, the thread got moved (for no apparent reason-- if it's been somewhere for that long I think it's completely acceptable for him believe it was in the correct place) All that was needed was something along the lines of : "Oh, yeah, sorry about that - must have been a bit of a shock, hunh? Well we've finaly got a full deck of Mods again and we're doing some house cleaning/straightening up of the forums. This should have been here all along. You'll probably see more of this kind of stuff in the near future. Best . . . " I don't know whether your aware of it or not, but your comments often come off as sarcastic and condisending, and if someone is upset, that tone, in my experience never helps to make them any calmer or more receptive to explanations or Reason. You might want to reconsider your tactics. ---That is of course unless your aim was to explain why the thread was moved AND get in a few digs of your own to rile him up even more, if that's the case then congrats - job well done! Charles.
-
I'm Baaaack. Hey. So, some of you may remember that a few pages ago I was asking a lot of dumb questions about the PG Aile Striker, Skygrasper and all that. Well as you will recall I got that all straightened out, Thanks to you all, and then went Gundam shopping. I ended up getting my nephwes the PG kits, but I also picked up a couple of MG's for myself, namely: MSZ-006 Zeta Gundam v2.0, and RX-178 Gundam MkII v. 2.0. I am about ready to start building them and I have a few questions I'm hoping to get some help with. You see I truly despise the bright-bubblegum-cartoony colour scheme that is the Gundam mainstay and I want to paint the kits. My problem is I don't know how to go about that with a Snap-Fit kit. How do you test fit This kind of kit without 'Snapping' it together? Can it be 'Un-Snapped' easily? Is it advisable to paint the inner 'skeleton' or will this cause assembly fit, and movement problems? So this is what I'm thinking: cut the parts off of the trees; sand/clean-up sprue nubs; test-fit (if possible); prime- base coat (seal) -assemble sub-assemblies - decal (seal)-panel line - weather (seal) - final assembly. Does this sound about right? What steps do you guys (who paint your kits) use? Is there maybe a website or something where this kind of stuff is covered? Any help is greatly appreciated. Thanks in advance Charles.
-
Well as far as anything specific to this kit, I simply don't know, as I've yet to build mine. And as I don't know what kind of modelling experience you've got, I wouldn't know where to begin with general model building tips except don't forget Have Fun!
-
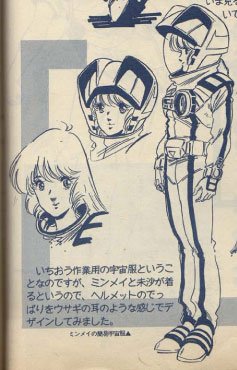
Well let's see 1. I look at the instruction book and notice color #318 is called Radome. What color is Radome? Radome is the tan-like colour you see on the fuselage (the parts that are not orange). 2. Is the color guide in the instruction book refers to Gunze-Sanyo Mr. Color enamel or the acrylic kind? It actually refers to both. The white squares in black boxes are Mr Colour (solvent based) and the black numbers in the white boxes preceeded by an 'H' are the Mr. Hobby (acrylics) line 3. I saw some pictures where the Super Ostrich is white and red. Is that accurate? Just stick to the Hasagawa instructions and you'll be fine. They're pretty much dead on as far as colour/markings. As for what you saw, could be a colour annomally due to photo-shoot lighting, of monitor calibration or web-colour non compatibility, or just some crazy custom. 4. Is there such Super Ostrich as one seater with missiles? -NO- the S.O. is basically the DYRL? version of the VF-1D two seat trainer from SDF Macross. 5. Can anyone help me with the line drawing of Lynn Minmay's helmet? You just had to ask for line art didn't you! Hope this all helps. and don't forget to post pics when your done! Charles.