MechTech
-
Posts
4698 -
Joined
-
Last visited
Content Type
Profiles
Forums
Events
Gallery
Everything posted by MechTech
-

Whats Lying on your Workbench MKIII
MechTech replied to HWR MKII's topic in Hall Of The Super Topics
Urashiman you should forget reality and "step" into some Macross kits The Mosquito is coming along nicely. One of the first "stealth" bombers! - MT -
The making of a 1/72 Tacticar Pod Graug--the musical!
MechTech replied to captain america's topic in Model kits
I throwing in an "Amen" for earlier comments! - MT -
It may be SPAM, but even SPAM goes well with Asian dishes! This is a great opportunity for people who missed out on Anasazi's stuff. - MT
-
I think the whole after market idea is awesome! It works great with cars! Something to think about dudes. Let's make some after market parts and sell them exclusively to MW members and tell the rest of the world "nanny nanny boo boo!" - MT
-
Thanks for sharing! The flying turd looks good except for the paint on the bow area. - MT
-
Pete, if you haven't seen Mospeda, you're missing out man! I didn't see it posted earlier, but in case anyone is interested, there's gonna be some Garfish goodness coming soon in a resin kit: http://www.macrossworld.com/mwf/index.php?...7453&st=805 Look near the bottom of the thread. The kit will be 1/350th and around $150. - MT
-
I just happened by this area and saw your post. I agree with the dissimilar shapes not looking good together. The first problem I saw was aerodynamics. Smooth corners and blended areas will fix that. If you want to go stealthy, just think F-22. It's angular and all the parts blend in smoothly. What you have is a good starting point! - MT
-
Your build is coming along nicely. I'm tempted to buy that kit! - MT
-
The customs look great and the diorama is coming along nicely. Looks like you'll have lot's of stuff to put in it! - MT
-
I've been having the same problem today. I've had to re-log on several times. This is a new one for me. Did we change some setting mods? - MT
-
That's cool! Thanks for sharing! I hate it when "Arimmage iminant" I was waiting for someone to do that. I even thought about it. In 1/200 scale it would only be about 5cm across! - MT
-
Fun with Italeri F-14 and leftover Macross kit stuff
MechTech replied to Urashiman's topic in The Workshop!
Nice work! I'm thinking about doing something similar someday. - MT -
Whats Lying on your Workbench MKIII
MechTech replied to HWR MKII's topic in Hall Of The Super Topics
Bartender, make mine a double silver on the rocks - or else! Looking awesome as always! - MT -
Photoetch upgrade parts for the VF-25 kits
MechTech replied to electric indigo's topic in Model kits
I guess he's officially selling them now. I think they look great. - MT -
The making of a 1/72 Tacticar Pod Graug--the musical!
MechTech replied to captain america's topic in Model kits
Let' face it, the official numbers looked cool on paper. Then you get suckas like us who actually try to build it and only then do we discover that the numbers can't work and that there is a lot of "anime magic" to the designs. As cool as many of the Macross mecha are, the designs and many of the stats just aren't realistic. Then again, we are talking about an animated series All the same, AWESOME work John. It sound like a few choice individuals will get a little something extra under the tree this Christmas - MT -
Whats Lying on your Workbench MKIII
MechTech replied to HWR MKII's topic in Hall Of The Super Topics
Everything is looking great guys. Nice looking 1/144th kits Rogue Trooper. I've found most of the Revell Germany kits are right on the money. I have an Imai 1/144 F-20 that's perfect. I wish I was building in 1/144 myself! You can even get 1/144 weapons and ground crew now! - MT -
She's really coming along great! Awesome work as always! I think your cannon are to the right length too. Are they tapered at the ends, or is it just the camera? Keep up the inspirational up! Peter is crazy, I'd have to buy a new house to put a 1/200 SDF-1 in - MT
-
Awesome work with the PE parts! The level of detail has been significantly raised! - MT
-
Welcome to Macross World! Great details! I would almost hate to paint over all that nice work. I love your wok on the leading edge, flaps and spoilers. - MT
-
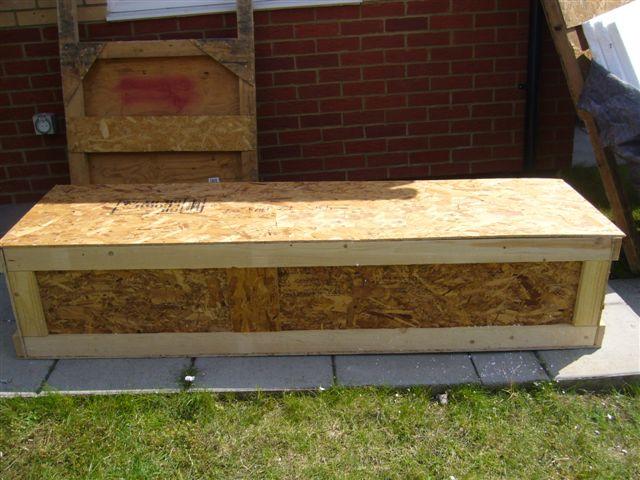
Thank you guys for the kind thoughts and prayers. I too am bummed I won't get to see you guys and have a mini-Macross con in Europe. Here's some photos of "my baby" being packed. The crate looked like a coffin sitting out in front of the house. I'm sure it got some curious onlookers. I was too busy taking my work bench and other gear apart to notice. I kept a couple of 1/20th Votoms kits to build in the mean time. Thanks again guys! - MT


-
I think the tape cost more than the paint Really nice scheme and excellent painting! - MT
-
The making of a 1/72 Tacticar Pod Graug--the musical!
MechTech replied to captain america's topic in Model kits
Absolutely positively awesome work Capn'!!!! I wish I were getting one! Where was the sound system supposed to fit again? No 12" subwoofers going into that baby - headphones only! Thanks for keeping us posted. - MT -
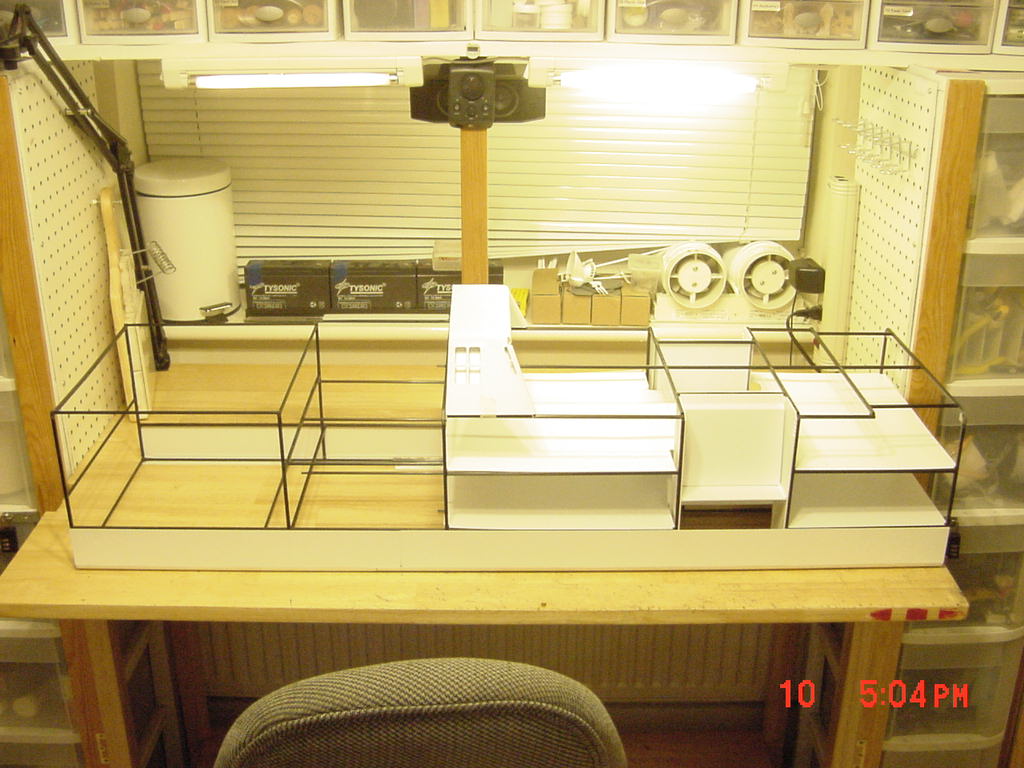
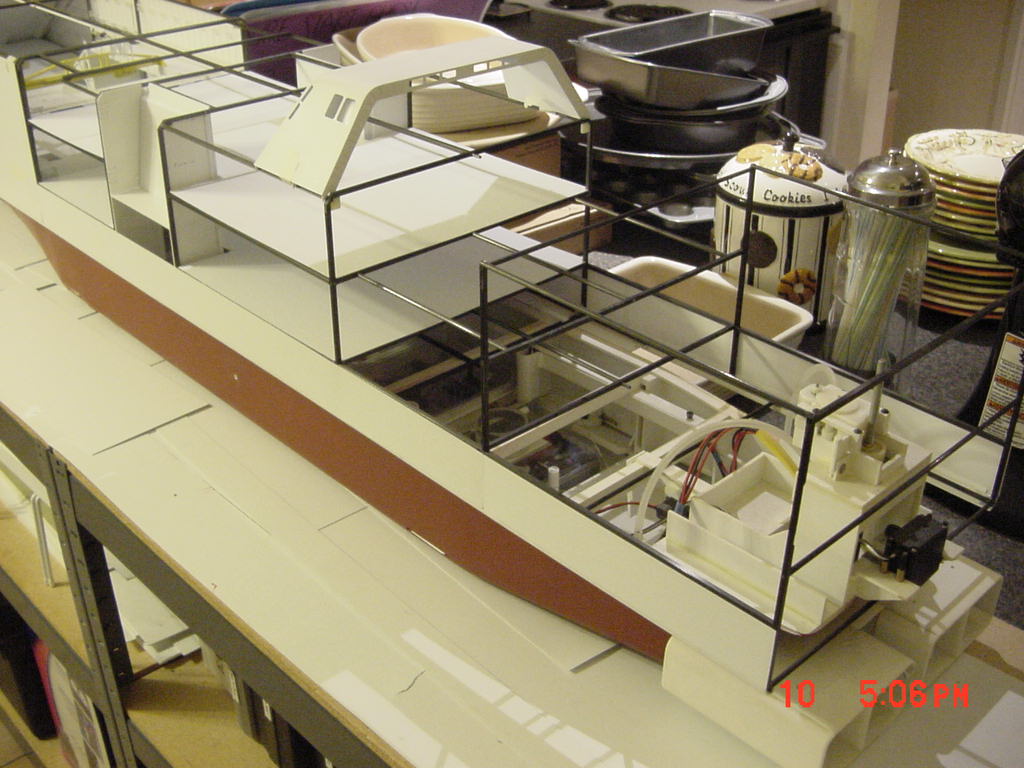
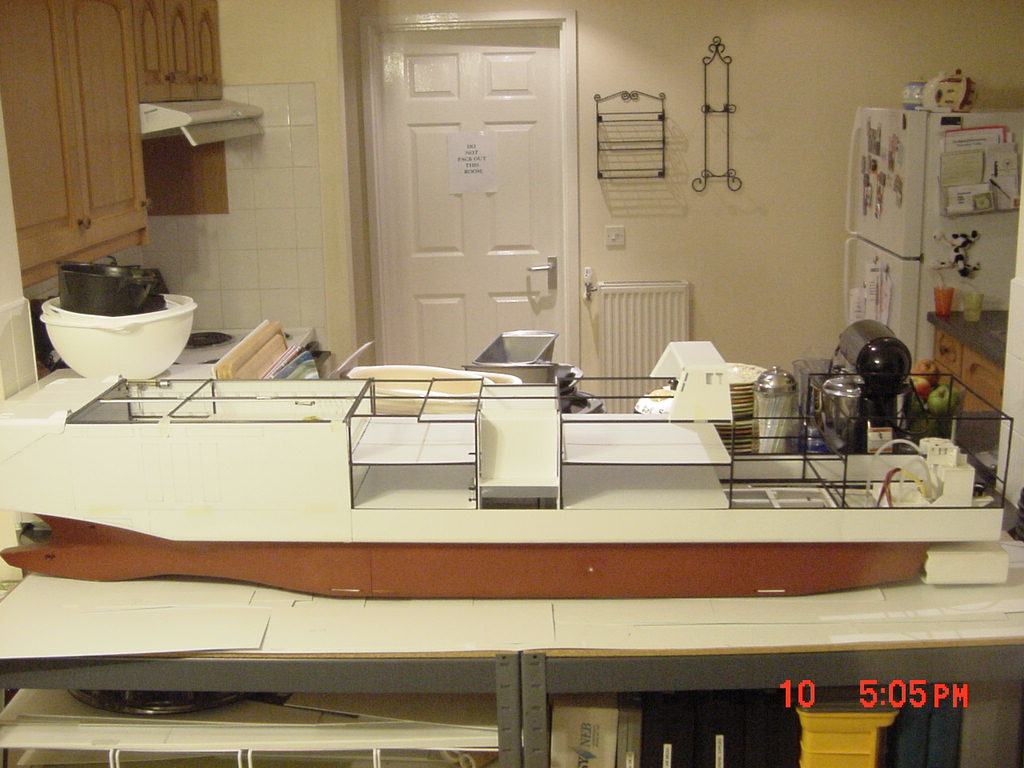
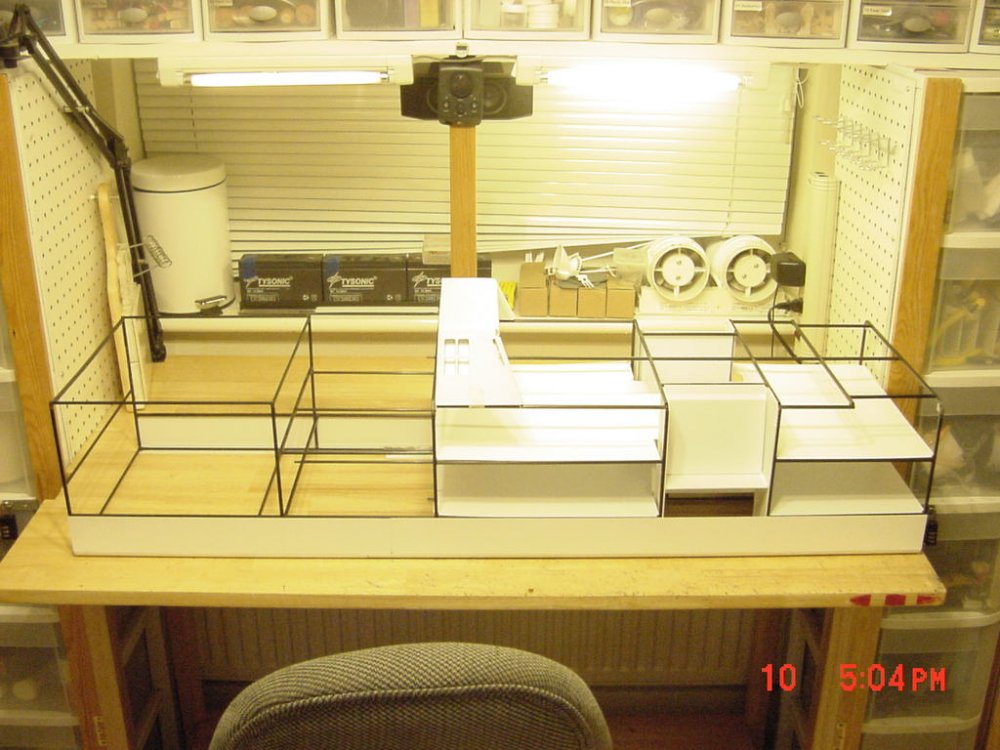
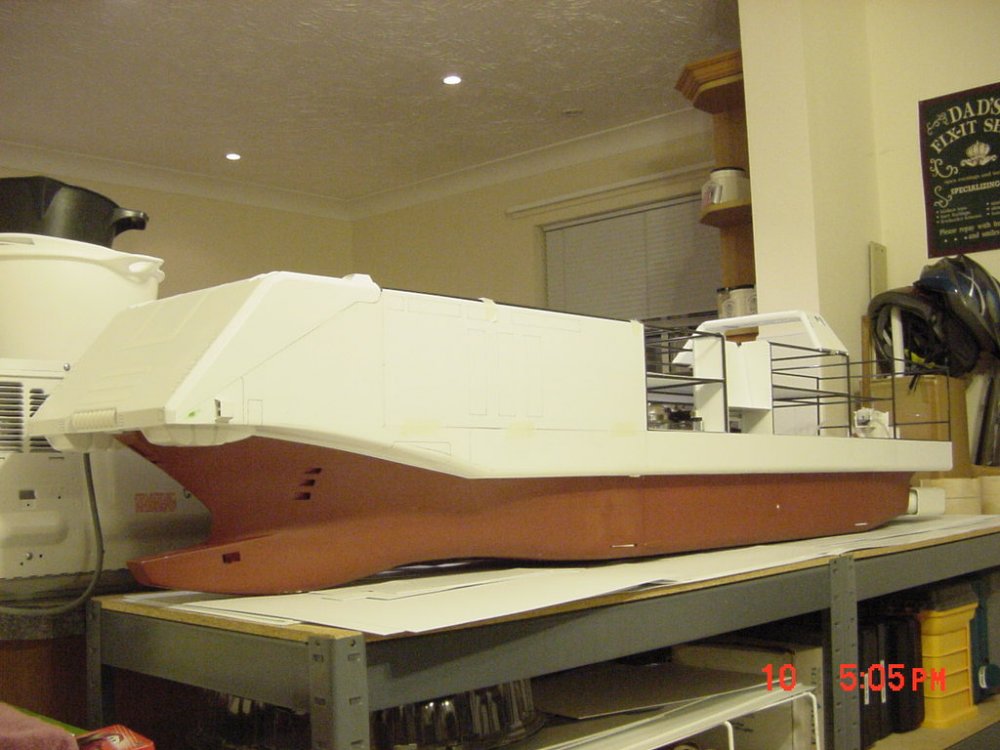
Claude - Thank you for your support! We could use the prayers; I know I'm praying a lot! Neptune - Thank you as well. I know exactly what you mean about the car carrier. I think it does too ! I don't know if it would ever be possible to bring this thing anywhere than in my car! It's just too big! Why the heck did I even start this thing! PROJECT ON HOLD These will be the last photos I post for about two months. Tomorrow we begin the process of packing up our stuff. I'm requesting a crate be built for "my baby." I'm out of time to build one myself and have lots to do! I've been saving up polyurethane and styrene foams to make cushions for the crate interior. My model has a few thousand miles to go stateside! In a nutshell, I added more braces to the very rear area. These strengthened it and added braces for the floors to go in. Then I skinned the lower area. I'll engrave and cut these area later when my mind is more focussed on building versus moving. How big is it? I stood up against the wall and held the camera so I could'nt see the viewer any more. I still didn't get it all in! There is about another four inches to add on to the rear too, so I kinda lied, it will be well over six feet when completed. That's it photo wise for the next two months or so. I'll still have PC access so I'll "be around" - virtually speaking. Enjoy and thank you guys again for your support. - MT


-
This reminds me of the thread where someone said all they had was a coffeemaker and something else (?) and they built this (insert photo of Deathe Stat) Looks great! - MT
-
FINALLY resurrecting this project? I wondered what happened to the older version. This would be WAY too big for my collection and available space, but I hope all goes well if yo go ahead! - MT