Xigfrid
-
Posts
2608 -
Joined
-
Last visited
Content Type
Profiles
Forums
Events
Gallery
Everything posted by Xigfrid
-
Display Base Project for Hi-metal & Hi-metal R (3D-Print)
Xigfrid replied to kyekye's topic in The Workshop!
Have you tried the Neodynum magnets N52? That’s almost incredible how strong they can be. For instance the small discs diam 5mm x height 3mm can hold 730g, that means that 4 magnets would hold easily a 2L bottle of coke! -
This VF-1S looks great in cavalier-lowvis version
-
They could probably do that if the valks were wearing out and thrown away every year (or even every 3-6 months for kids) I can’t imagine how much more Nike shoes are sold than bandai’s gundams, not even trying to compare to Arcadia’s valks
-
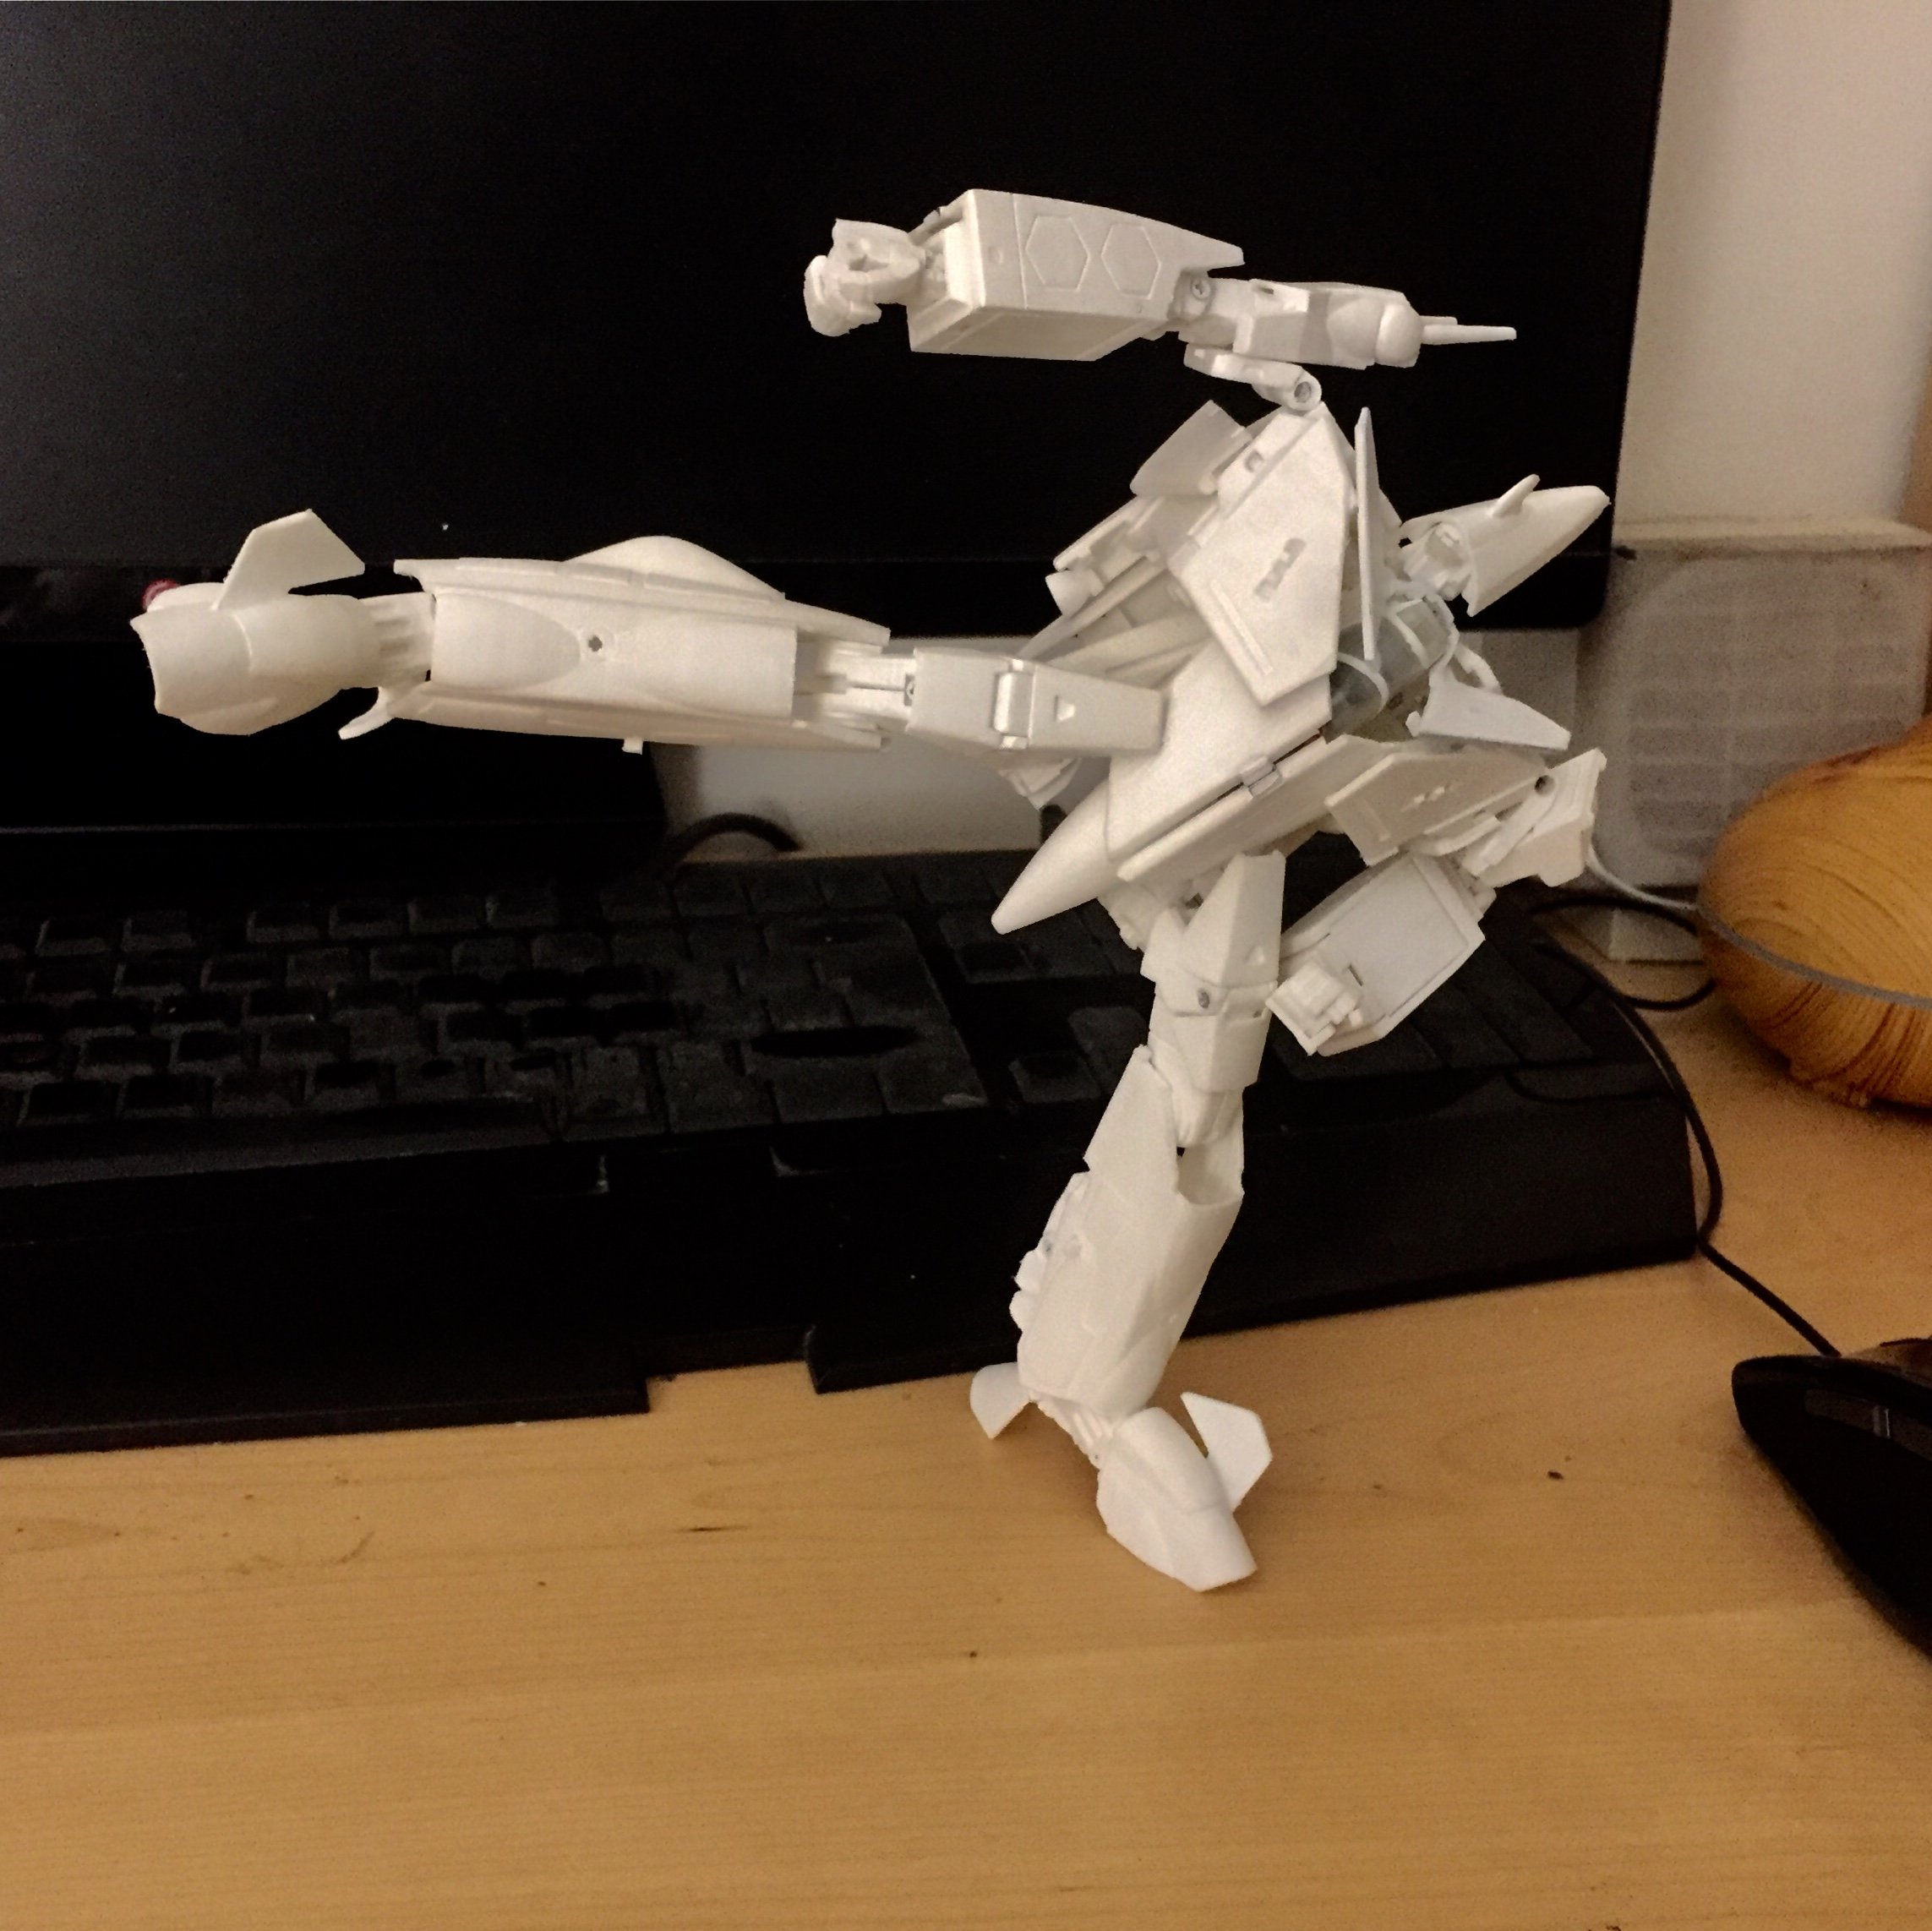
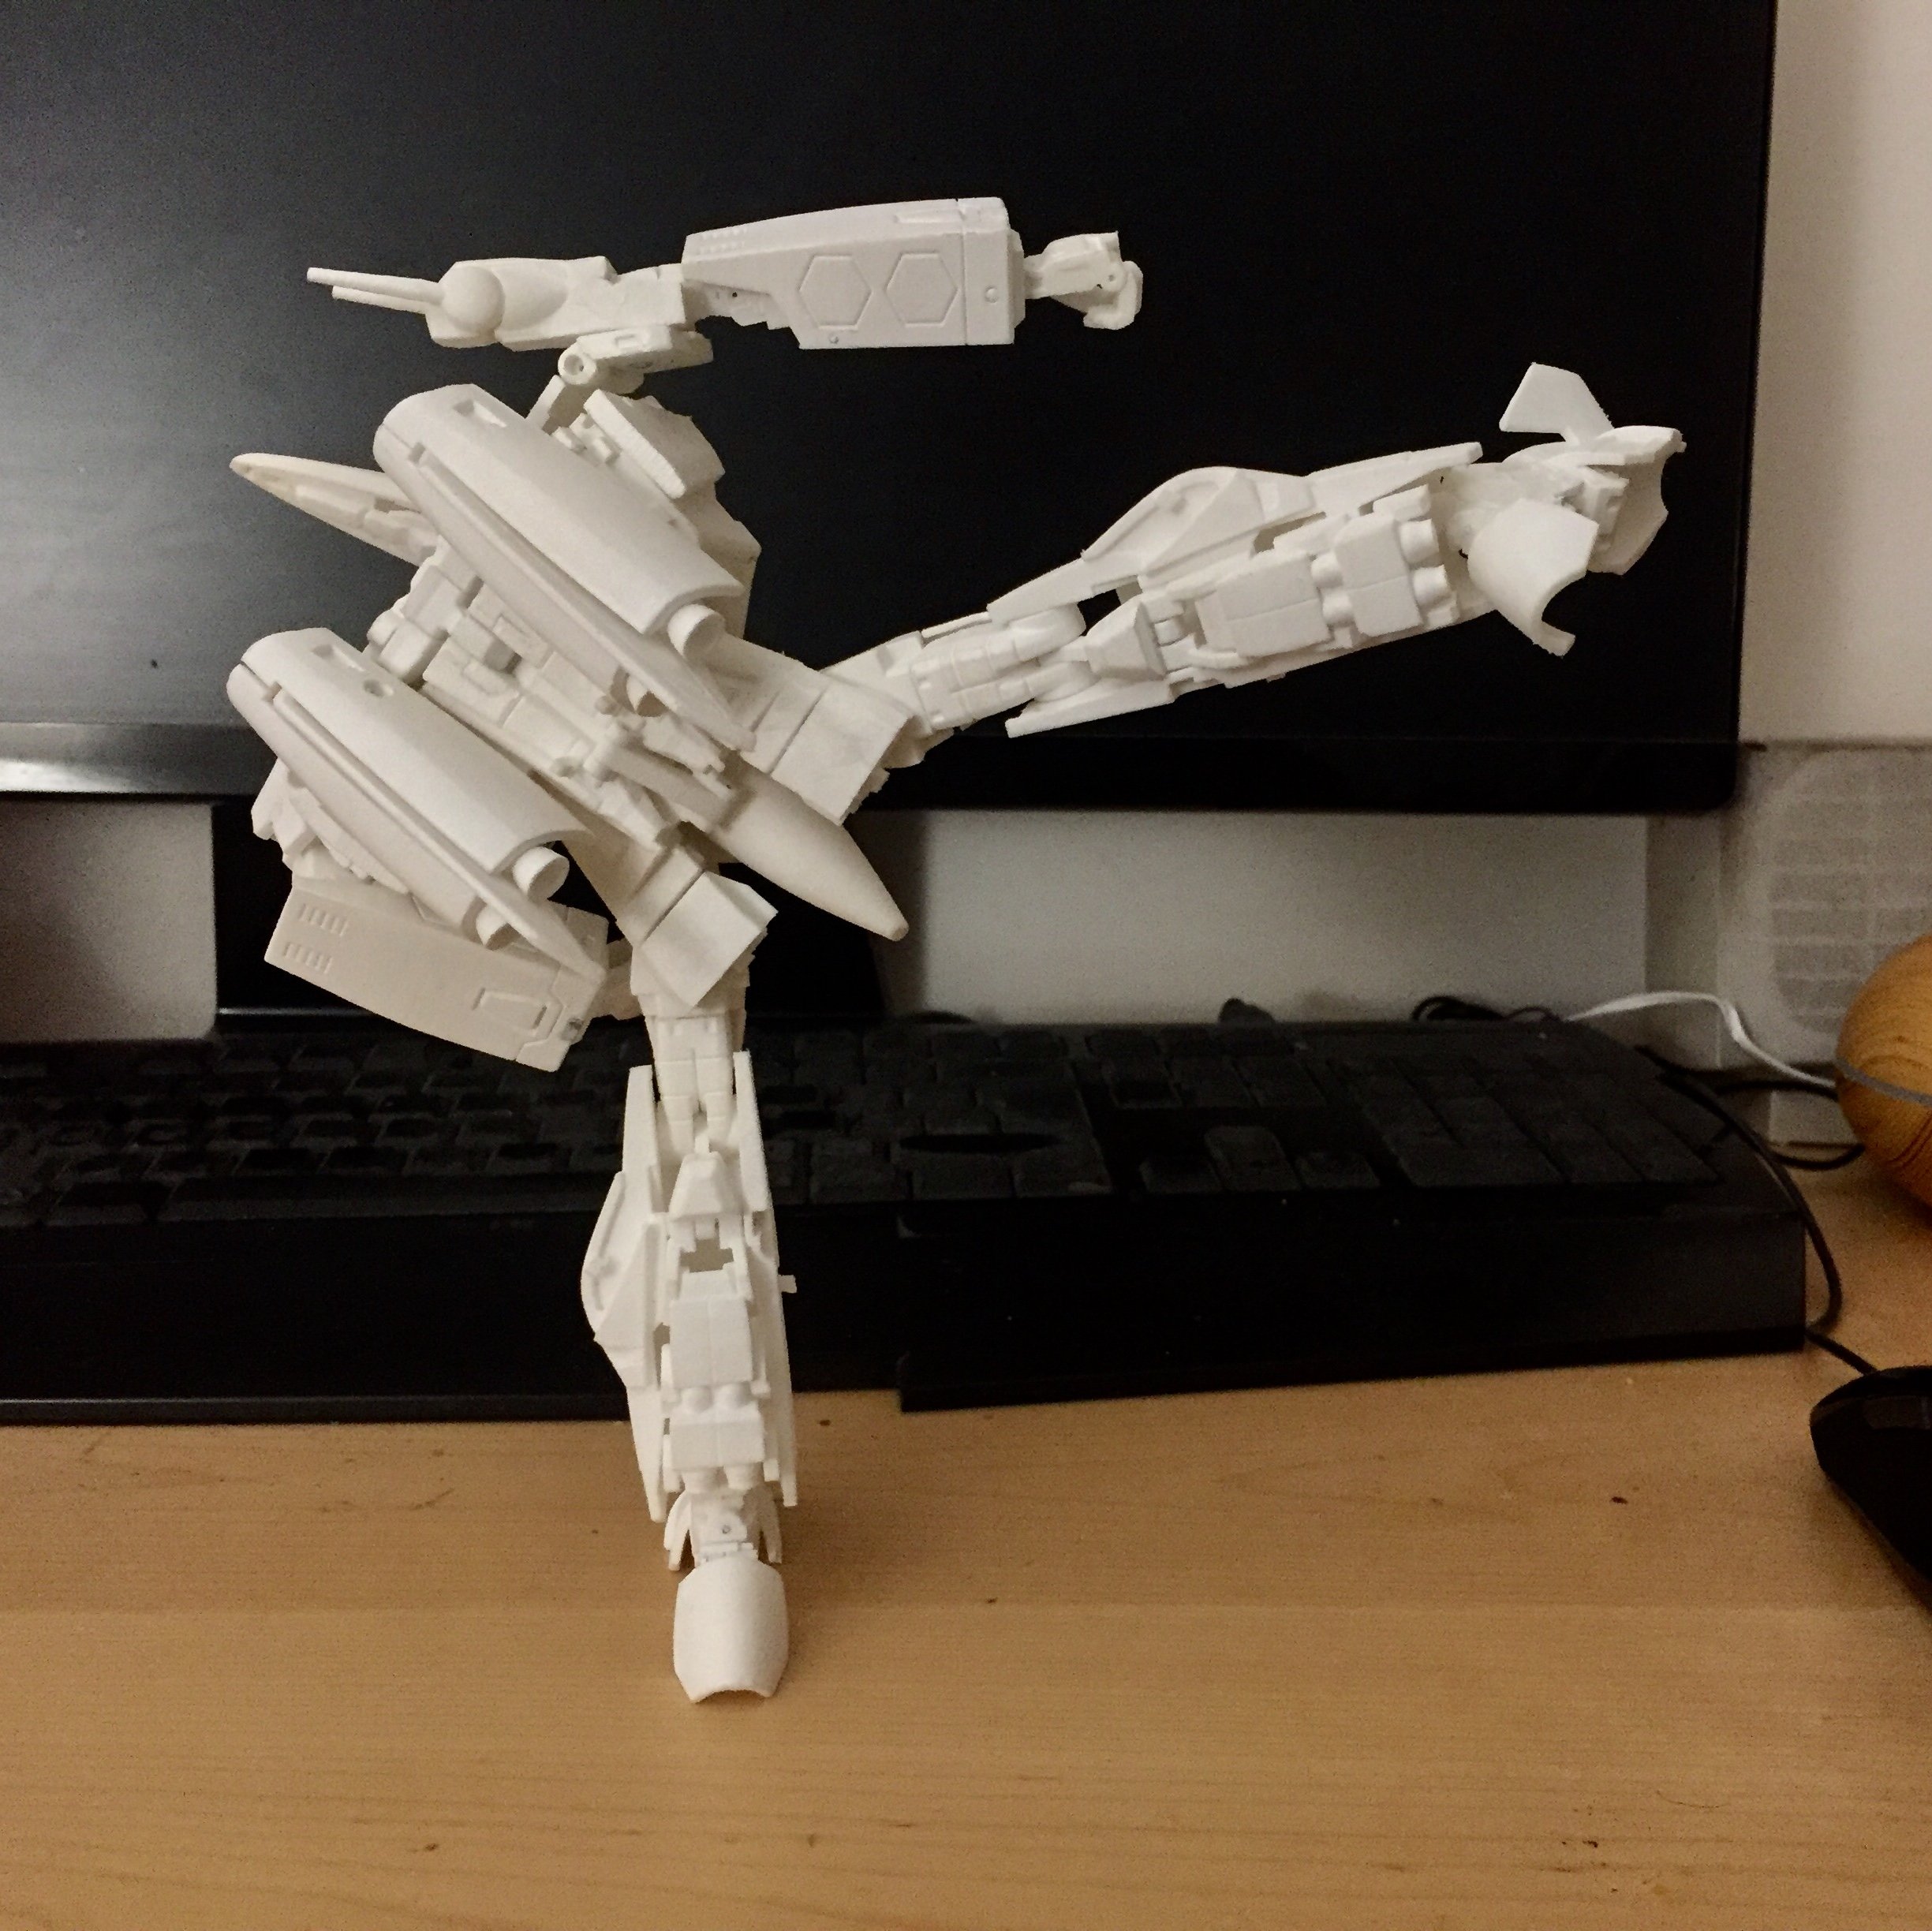
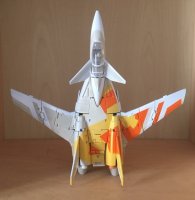
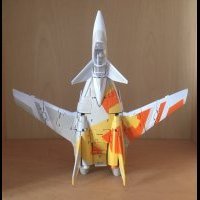
Hi Jasonc, it looks like it still needs an additional clear coat to obtain a great finish -or the focus on your camera was a bit off-. Otherwise it can also be a great base color for red painting. In the mean time, I have been lazy with my painting, pretending that I had to wait for the second V4 fins to install on my white VF-9 but managed to pose it kicking Kung Fu.
-
Depends if the stickers are applied or not: is it the premium equivalent or standard blank version ?
-
vf-31 siegfried WIP: Alternate Weapons Pods for VF-31
Xigfrid replied to Sanity is Optional's topic in The Workshop!
done click me! -
vf-31 siegfried WIP: Alternate Weapons Pods for VF-31
Xigfrid replied to Sanity is Optional's topic in The Workshop!
You got the eye, I have removed the AMM101 because I wasn’t really happy of the amount of work it represents to smooth them and it would give a bad taste for something meant to be fun. I can put back a 6-pack. I just noticed that I didn’t upload the AMM pylons compatible with Arcadia hard points. I can fix that too -
vf-31 siegfried WIP: Alternate Weapons Pods for VF-31
Xigfrid replied to Sanity is Optional's topic in The Workshop!
I did them a while ago, they are similar to the VF-9 wing attachments. They work but they need to be refined a bit. But I made the Yamato/Arcadia compatible hard points, which works very well, and you can also rotate the ordnance for variable swep wings. All my custom missiles can be mounted on both hard points. -
1/48+fp's, 1/60+fp's, 1/72, 1/2k, 1/3k,1/100 and now 1/144
Xigfrid replied to VF-18S Hornet's topic in Toys
I totally love this photo, the posture, the lighting, the 0S and its armor and the hangar. -
Display Base Project for Hi-metal & Hi-metal R (3D-Print)
Xigfrid replied to kyekye's topic in The Workshop!
Woah, looking nice ! Wasn't it overkill to separate the yellow and black parts ? I would prefer to mask the yellow and spray the black over than assembling that much individual parts in black (and having to sand more bent resin parts) You probably have figured something our already, but for the arm attachment I would have made "hanging adapters" (in a strong plastic 80% infill FDM or glass beads nylon SLS) for each model you want to hang, that would be quickly attached / released with a 1.5mm x 20mm pin to the center of the "finger palm". -
vf-31 siegfried WIP: Alternate Weapons Pods for VF-31
Xigfrid replied to Sanity is Optional's topic in The Workshop!
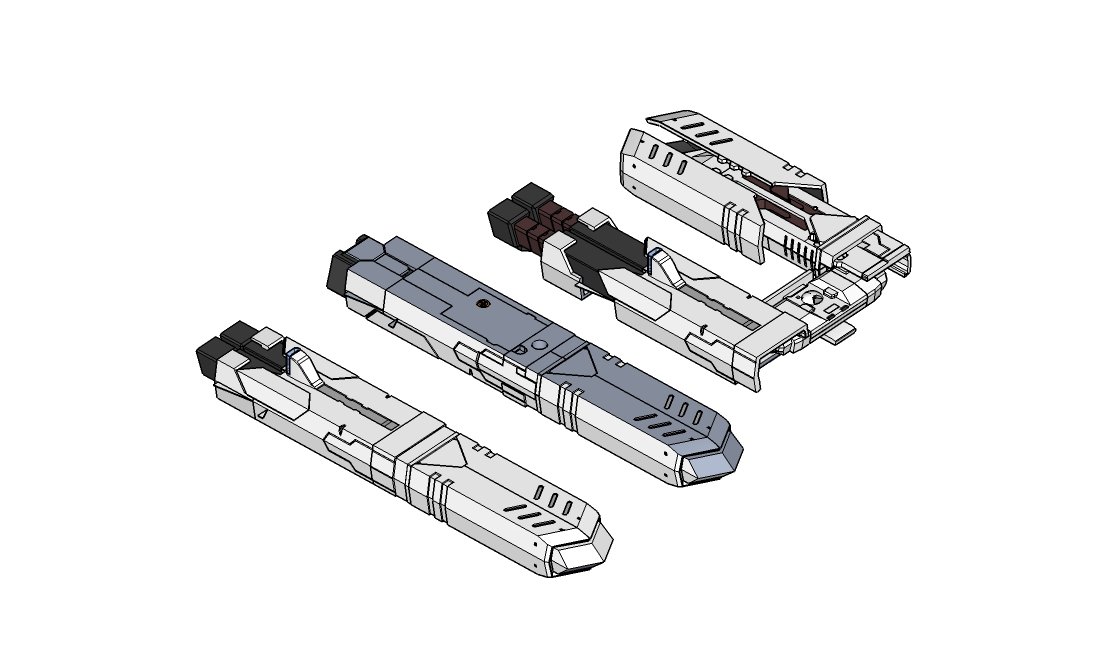
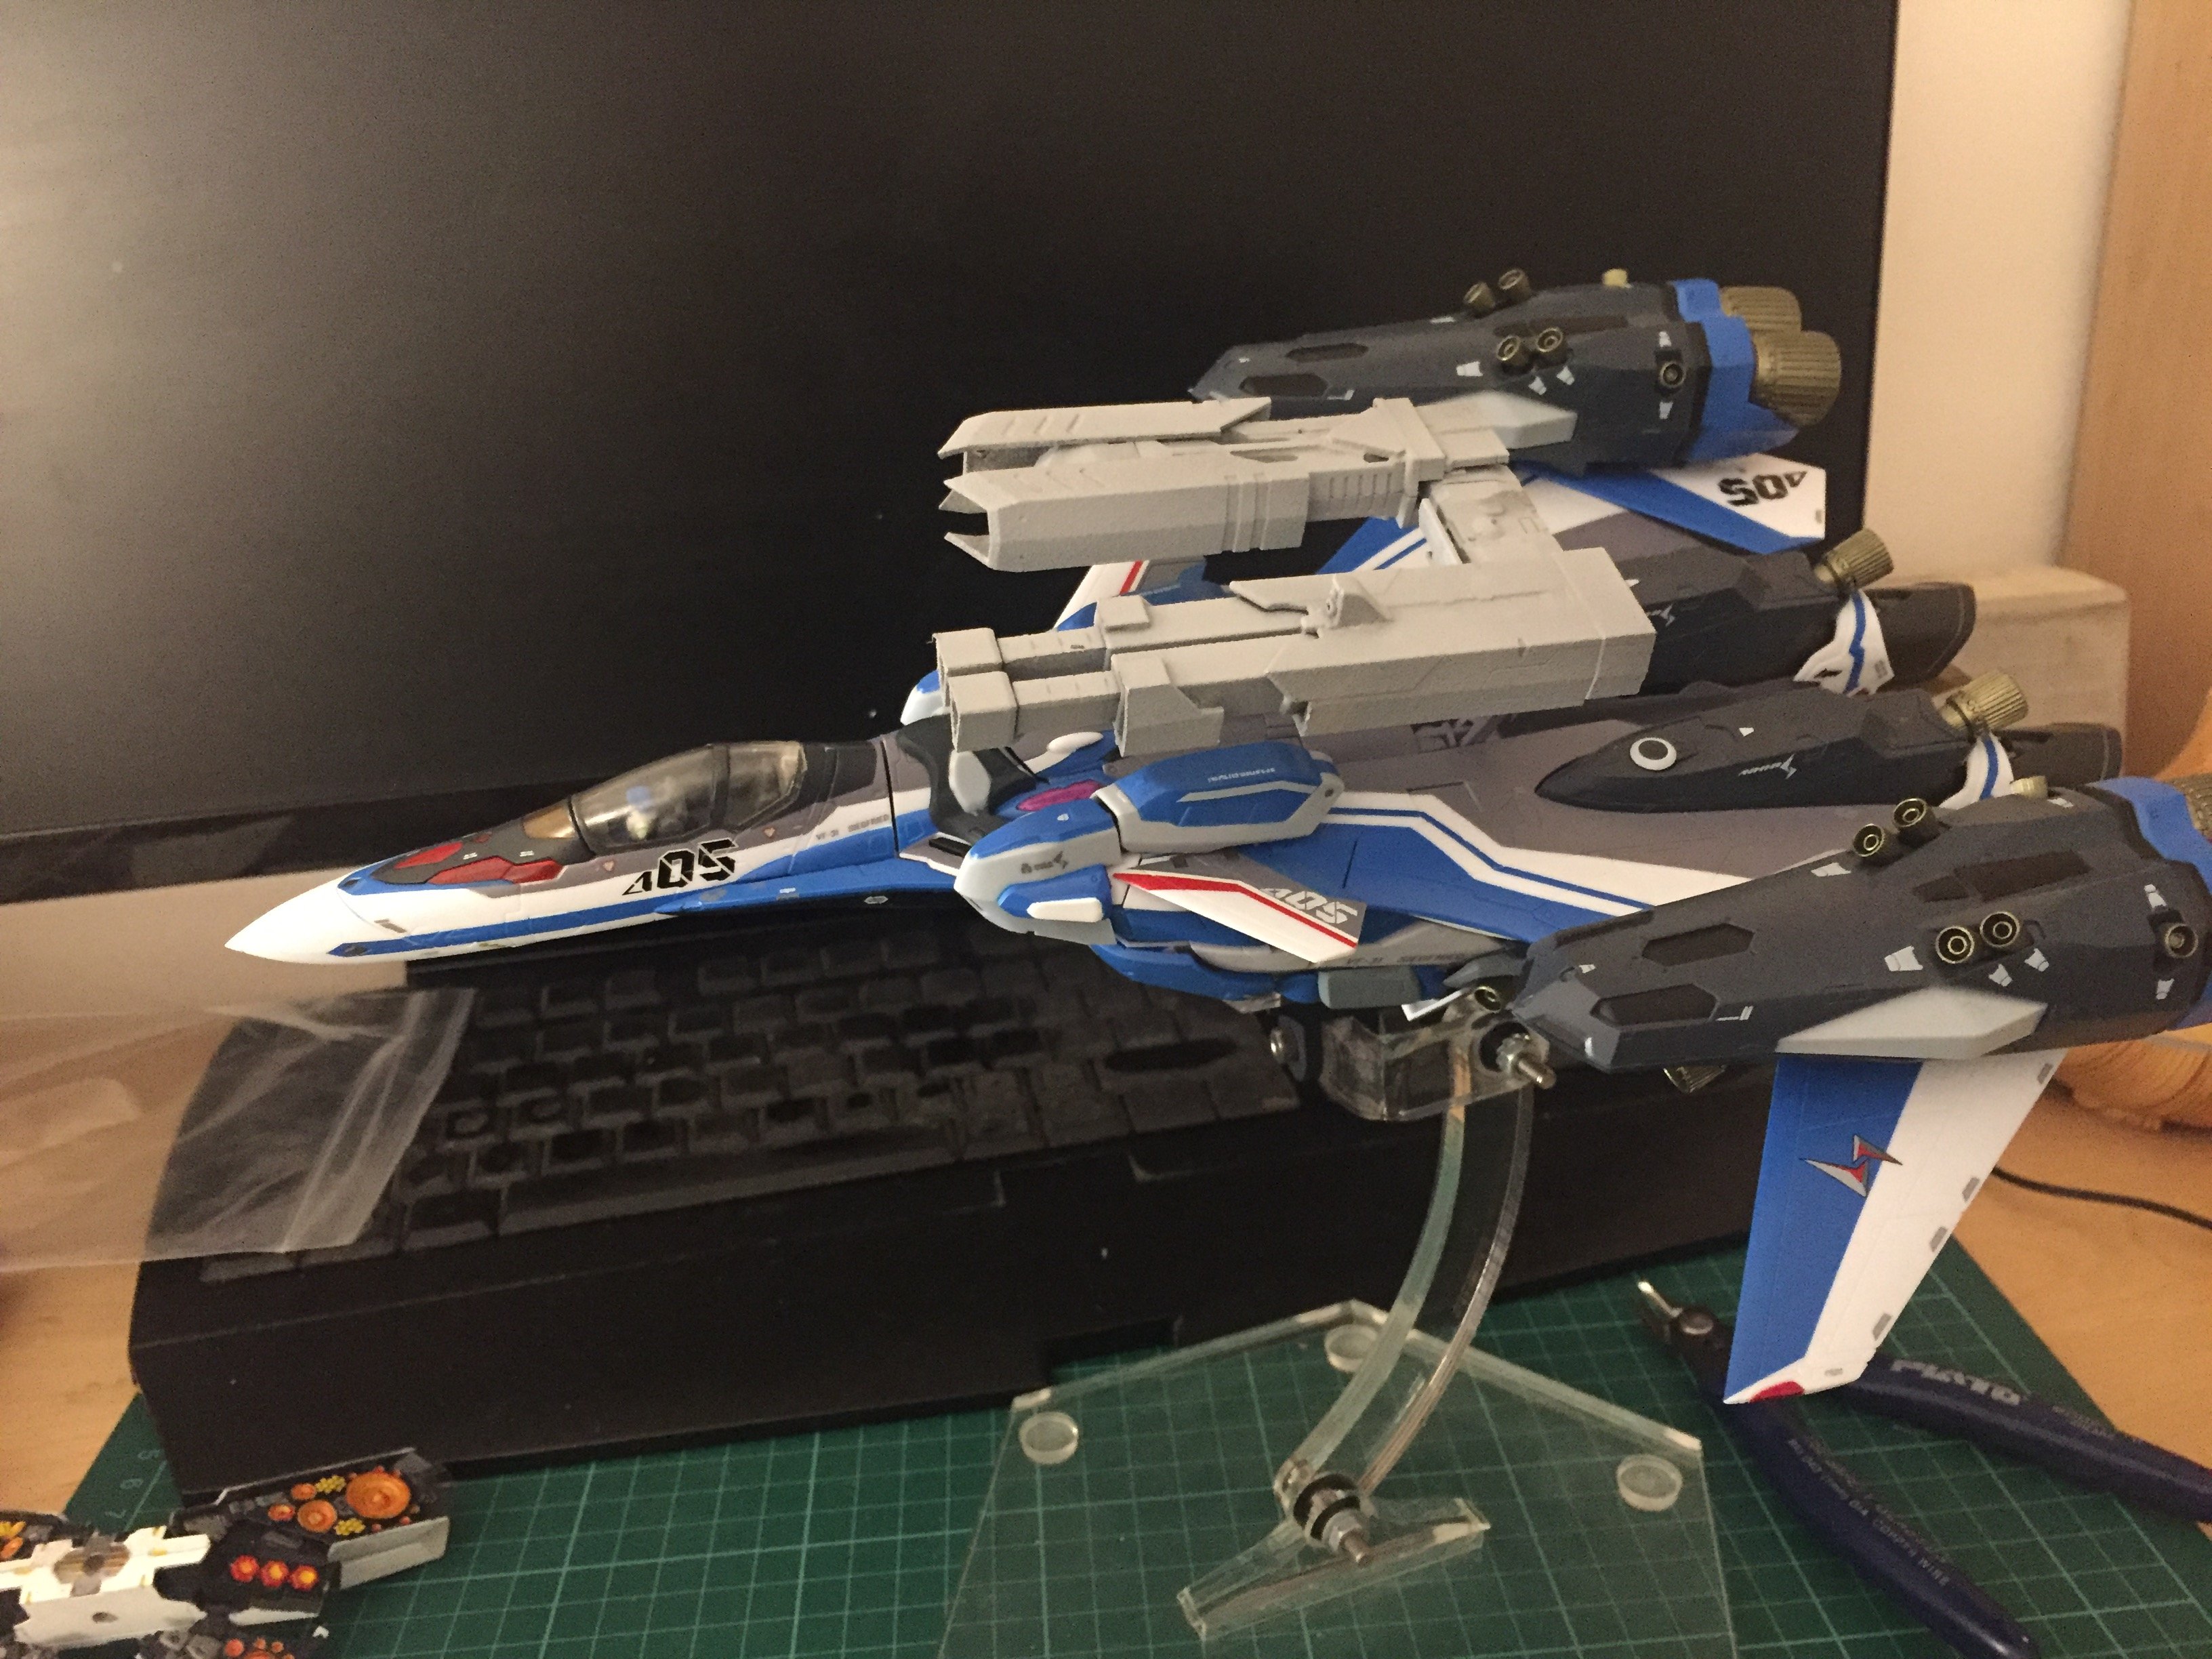
In addition to that, the sprues once cut leave a black dot on the grey part, and if you sand a bit the whole part, it will turn darker -almost black-. I have great news, I have found and tested a fix on my dual canon and I am confident that it be opened firmly now, I have also thought of a solution to keep the 30’ tilt and make everything tight with little changes on the original 3D file. I have to make all these changes on the file and print it to make sure. I hope you will like the new pictures.
-
vf-31 siegfried WIP: Alternate Weapons Pods for VF-31
Xigfrid replied to Sanity is Optional's topic in The Workshop!
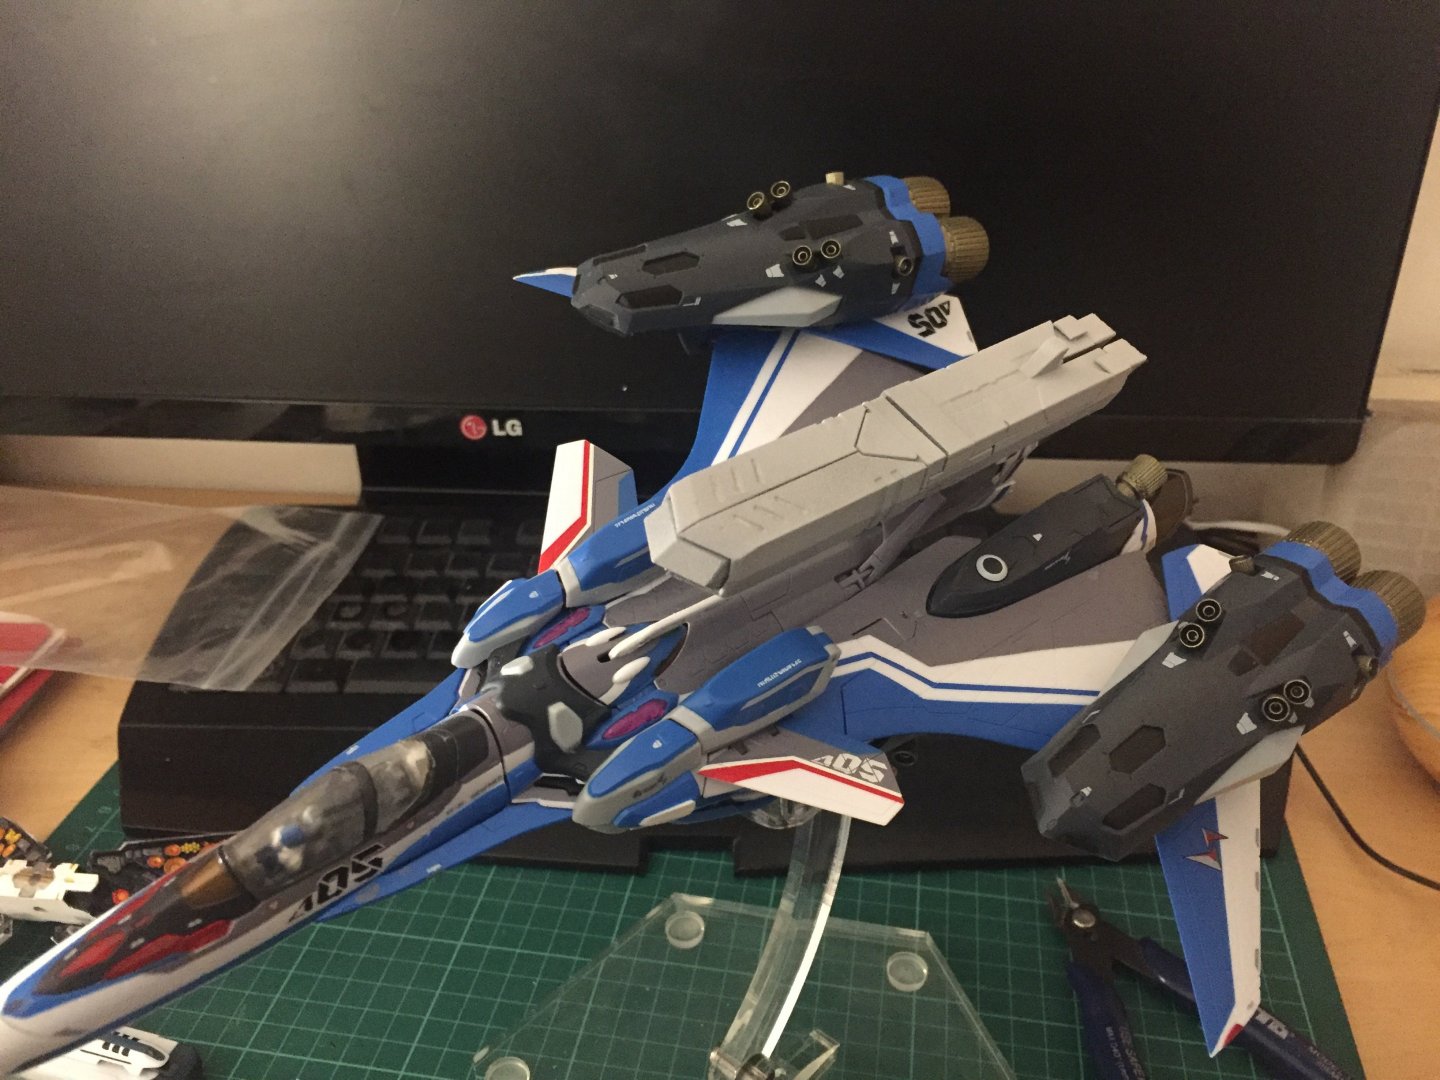
The original color is not very attractive in fact, that’s why I prefer to spray a grey primer before taking pictures.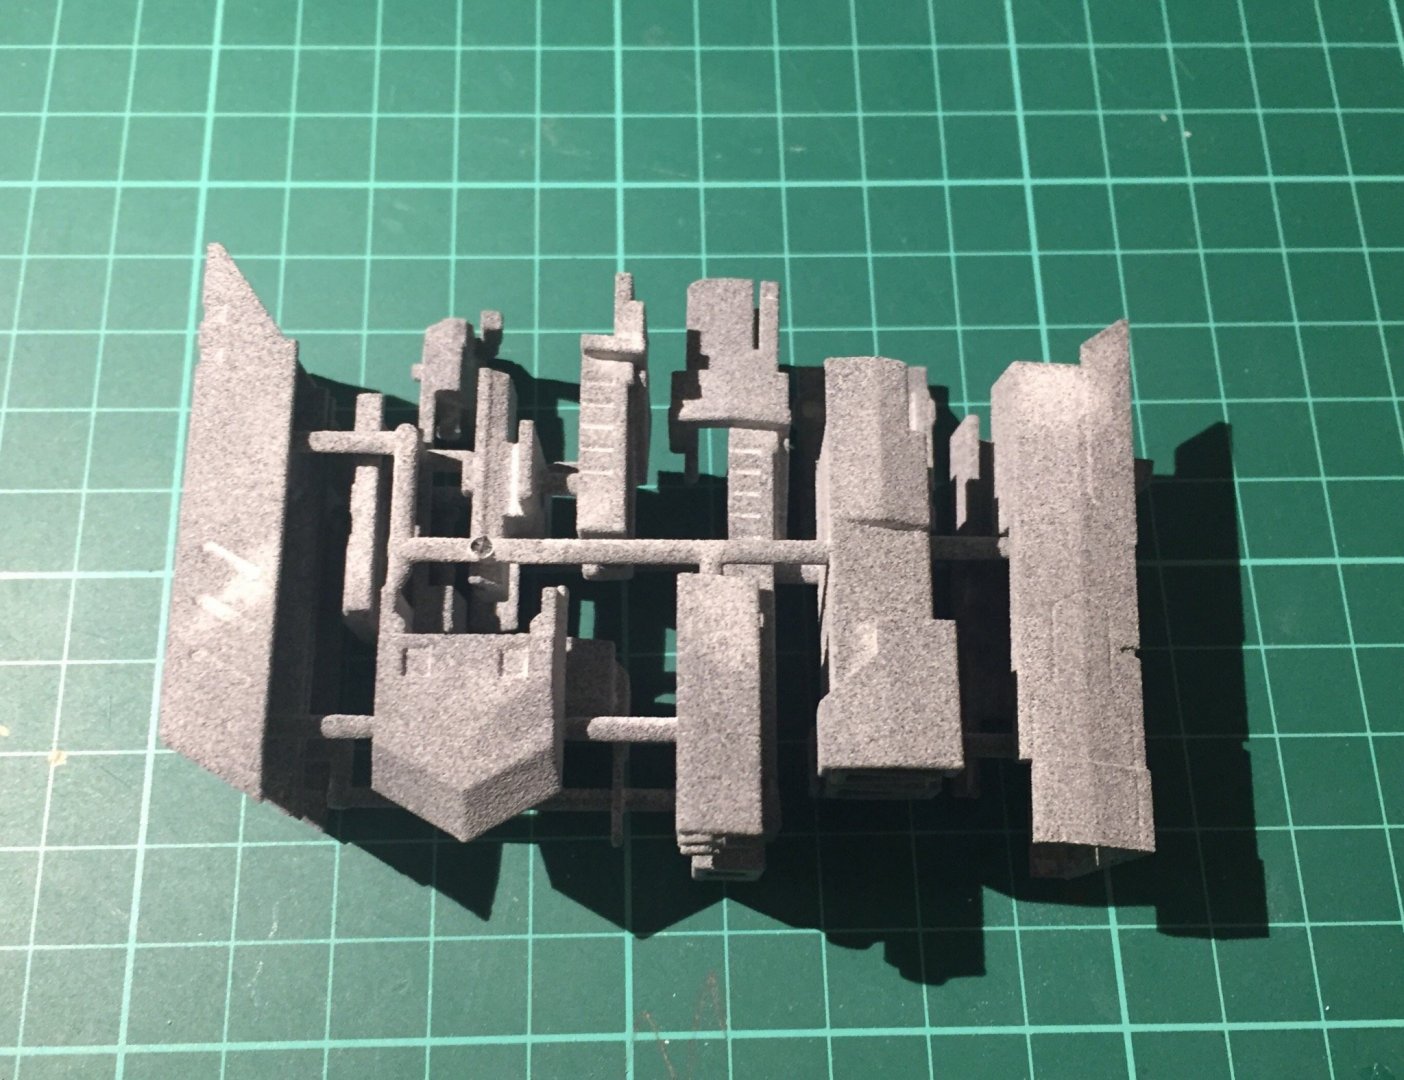
-
vf-31 siegfried WIP: Alternate Weapons Pods for VF-31
Xigfrid replied to Sanity is Optional's topic in The Workshop!
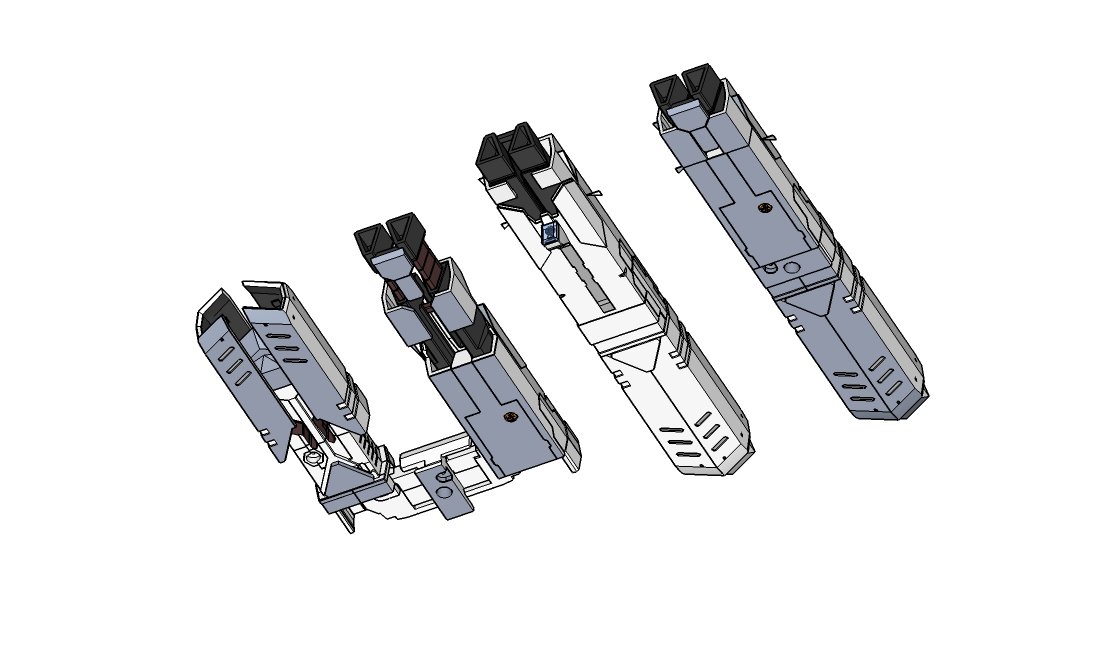
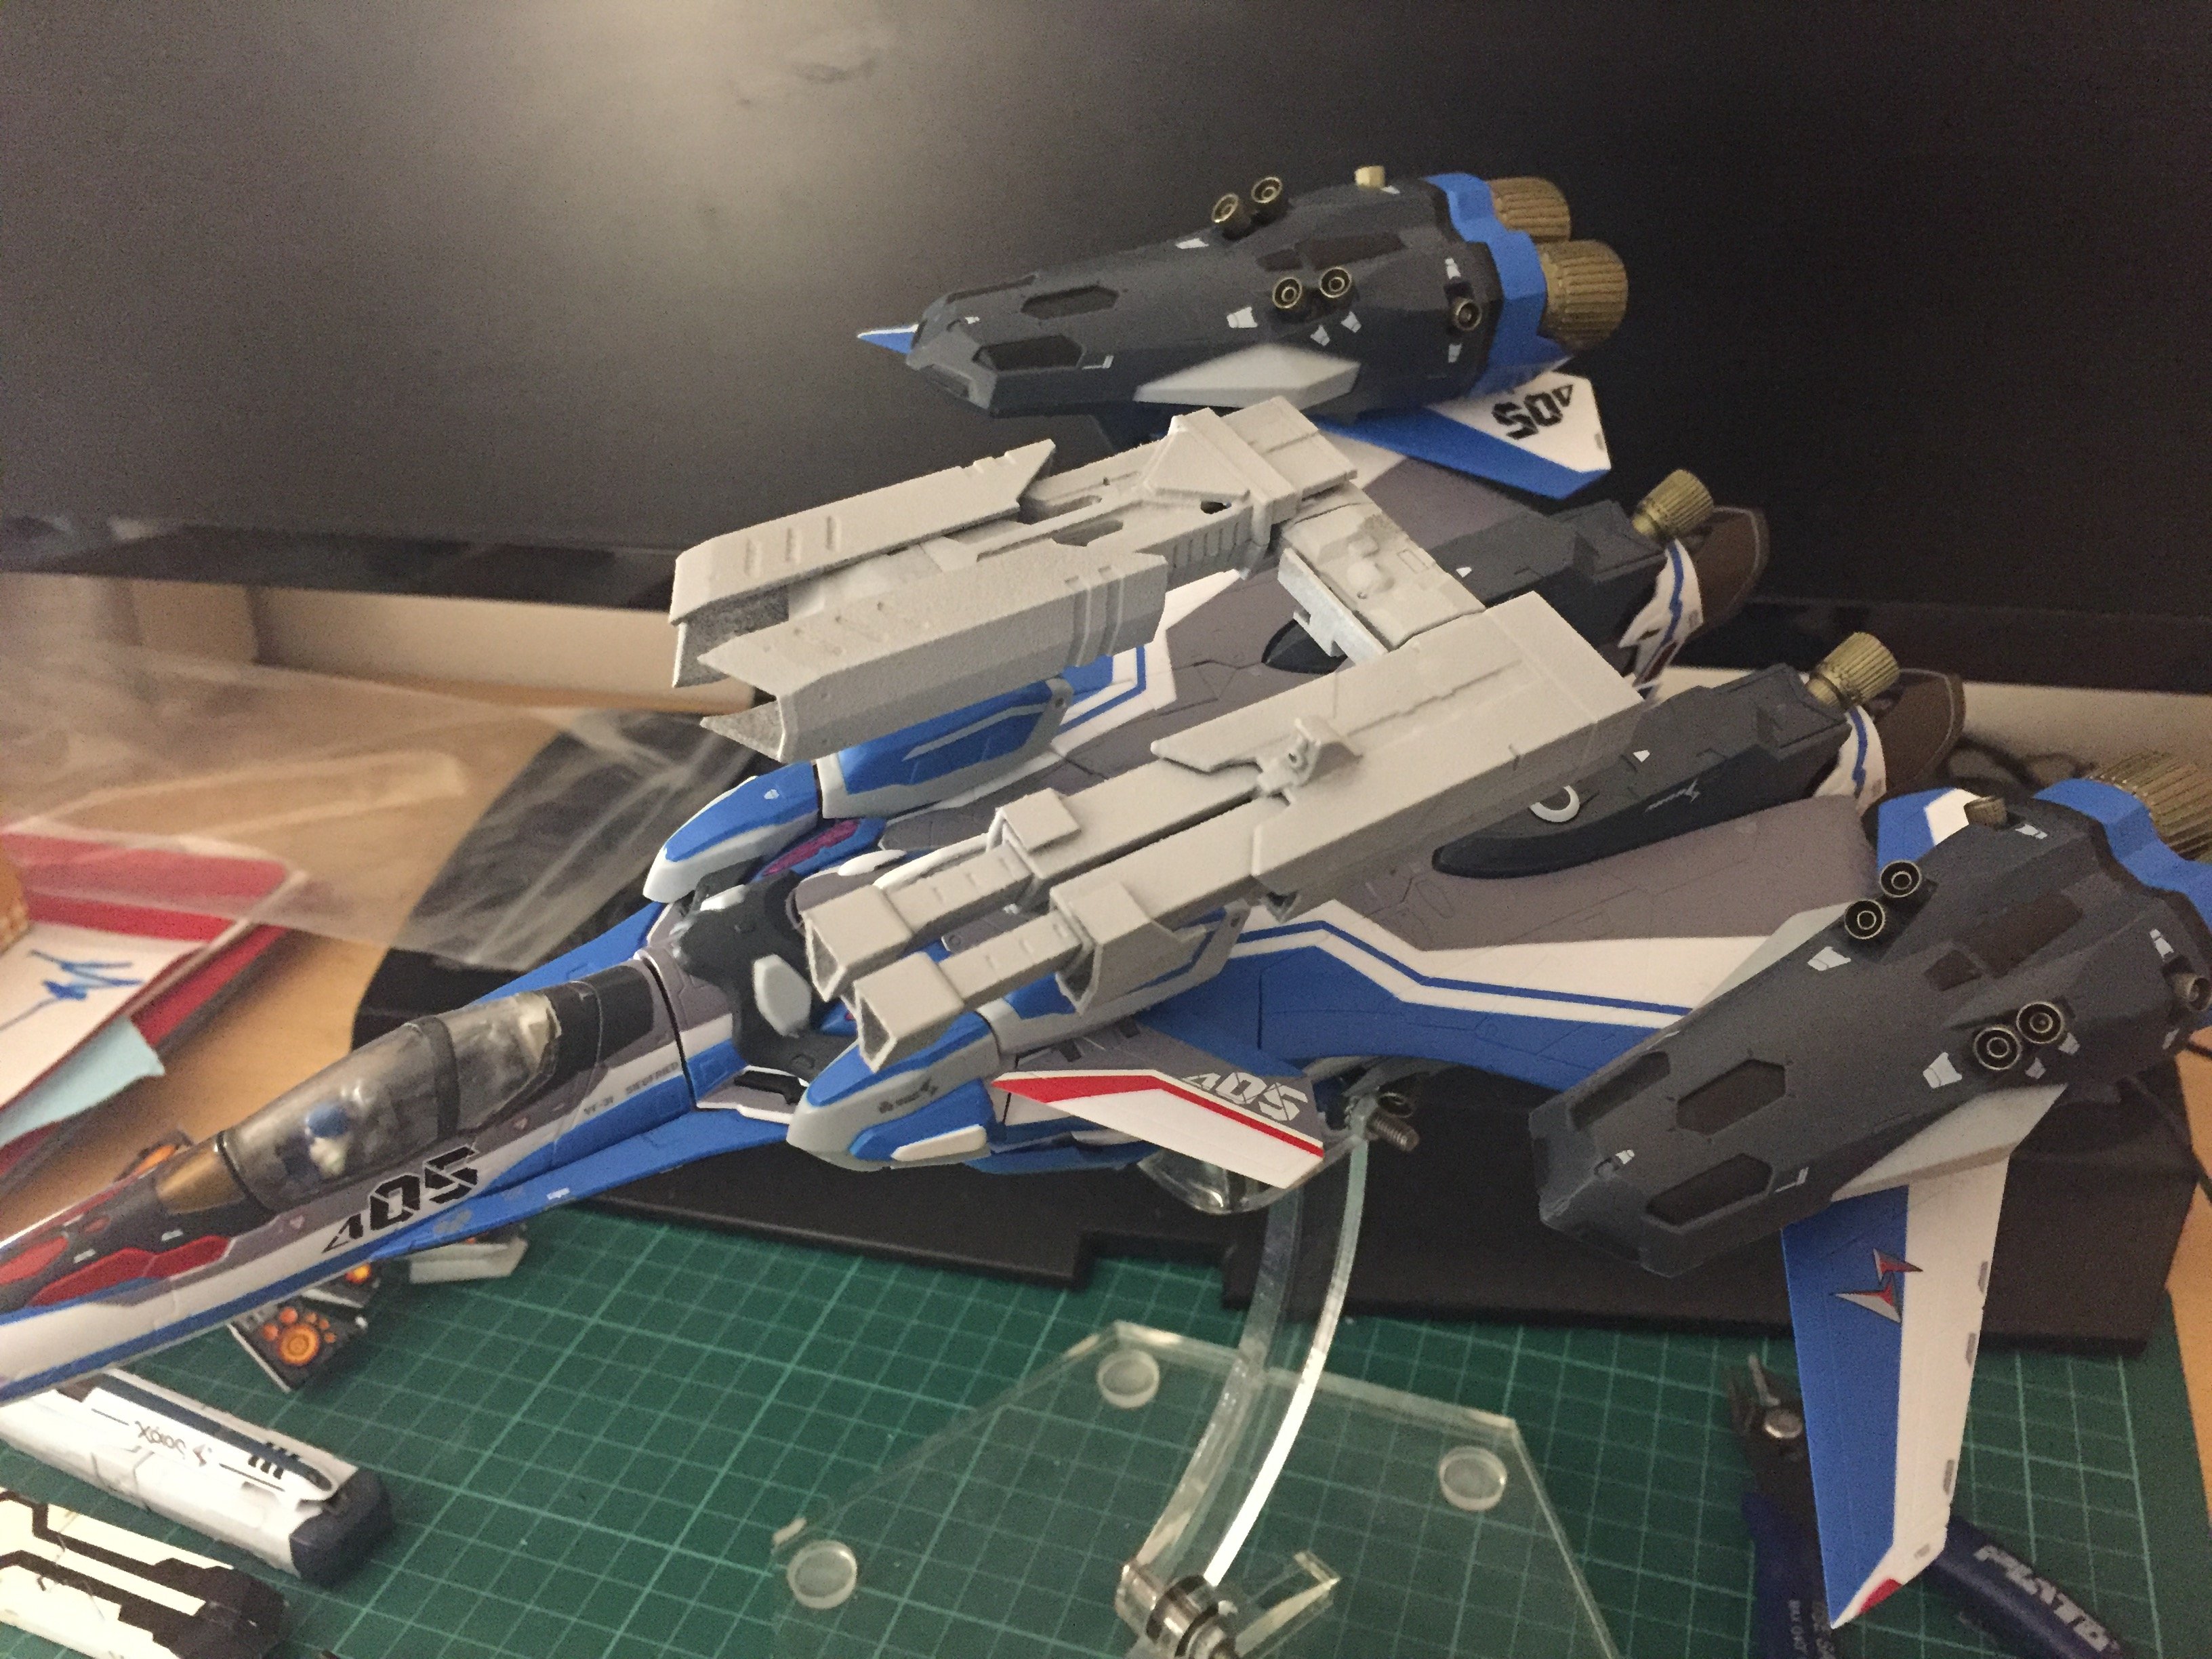
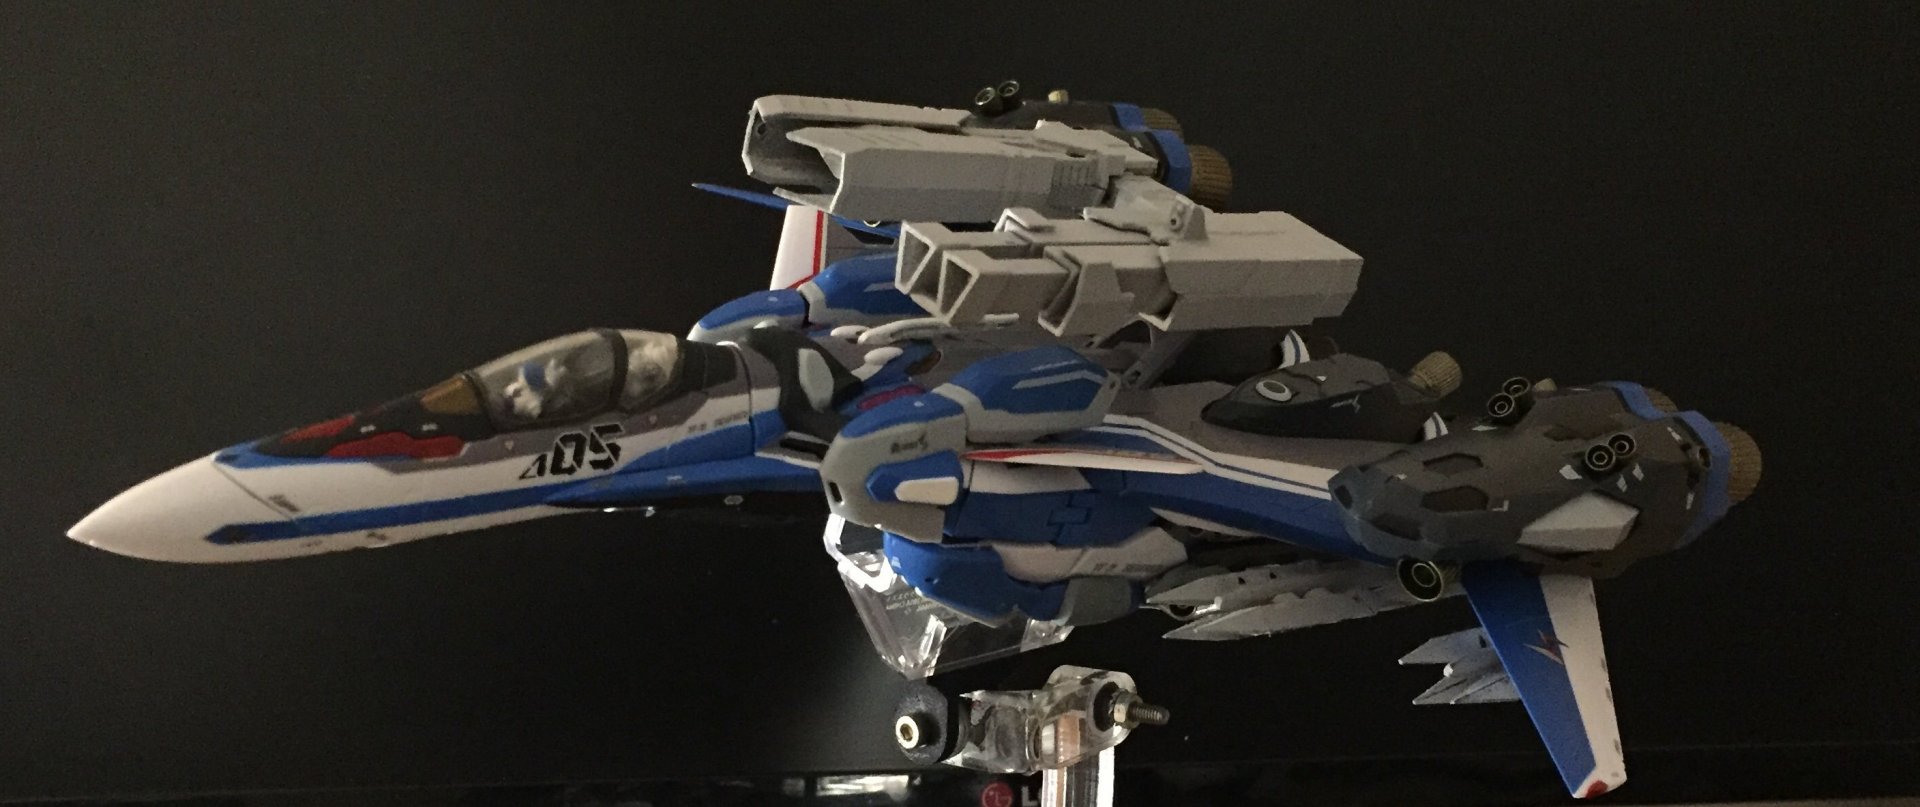
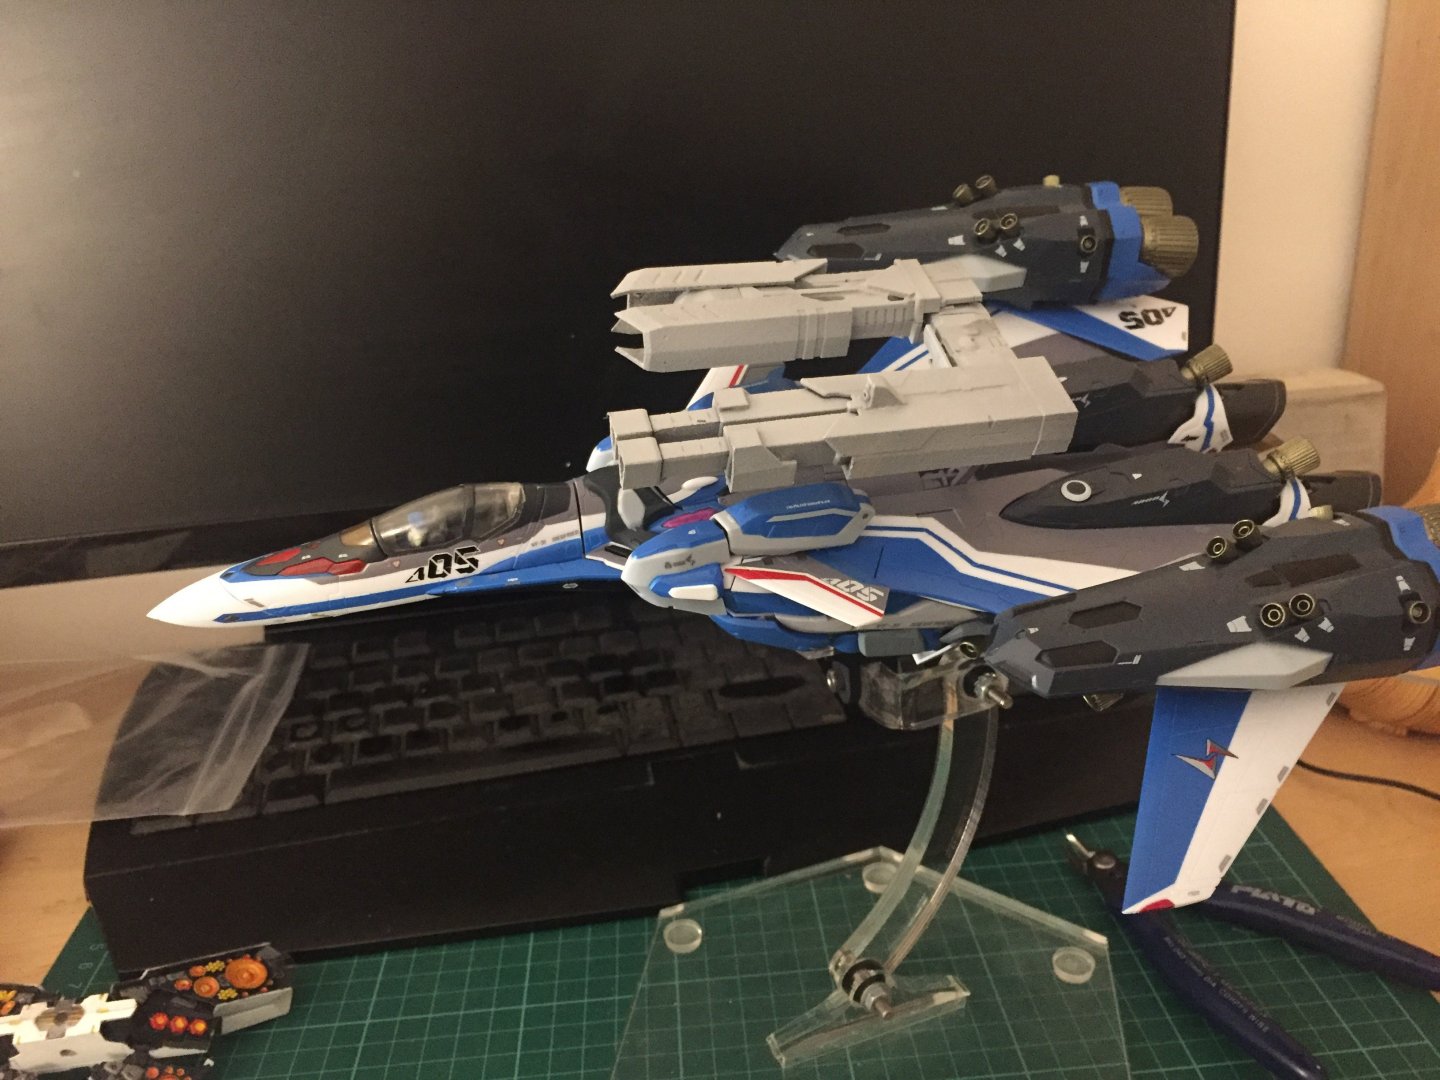
I will probably do that. I was in a rush to finish the design before Monday for the 15% promo at Shapeways, but it looks like I can't make it in time. This is a raw print by HP4210 jetfusion with 1 gray primer layer. Next time I will try a new extra smooth finish option at my European printer, they call it Shiny Black, promising! For now, I wanted to avoid PIN inserts, but I guess I will have no choice to add pins for the v2 if I want to keep things tight and functional. About manufactured Polycaps and Ball joints... I have been wondering if I should use these or not for some time now. I prefer to avoid using them just because I think this is difficult to source the exact same dimension in low quantity but if I come to a 3D print design using them brilliantly, I may change my mind! (Just like I copied the use of copper wires for my little Vajra articulations) I designed the canon pod to be able to tilt upward 30°. In fact you don't really need the tilt feature because you can tilt the arm that attaches the pod instead. BUT if you want to rotate left/right and have the canons tilted upwards on the side, you can't mimic that with the arm alone, that's where you need the tilt on the pod itself too. -
Ho yes, the real 1:50 is oversized for our 1:60 scale, I think the reference is siku 1722. But I meant the Siku 1311, which is much smaller and scales well with 1:60
-
vf-31 siegfried WIP: Alternate Weapons Pods for VF-31
Xigfrid replied to Sanity is Optional's topic in The Workshop!
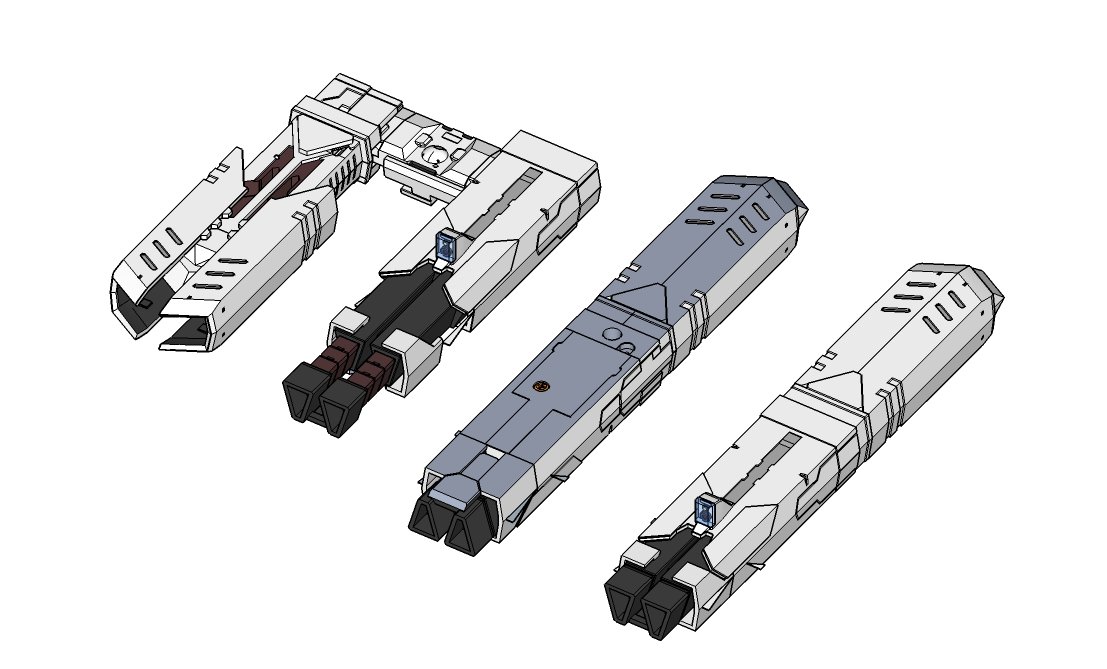
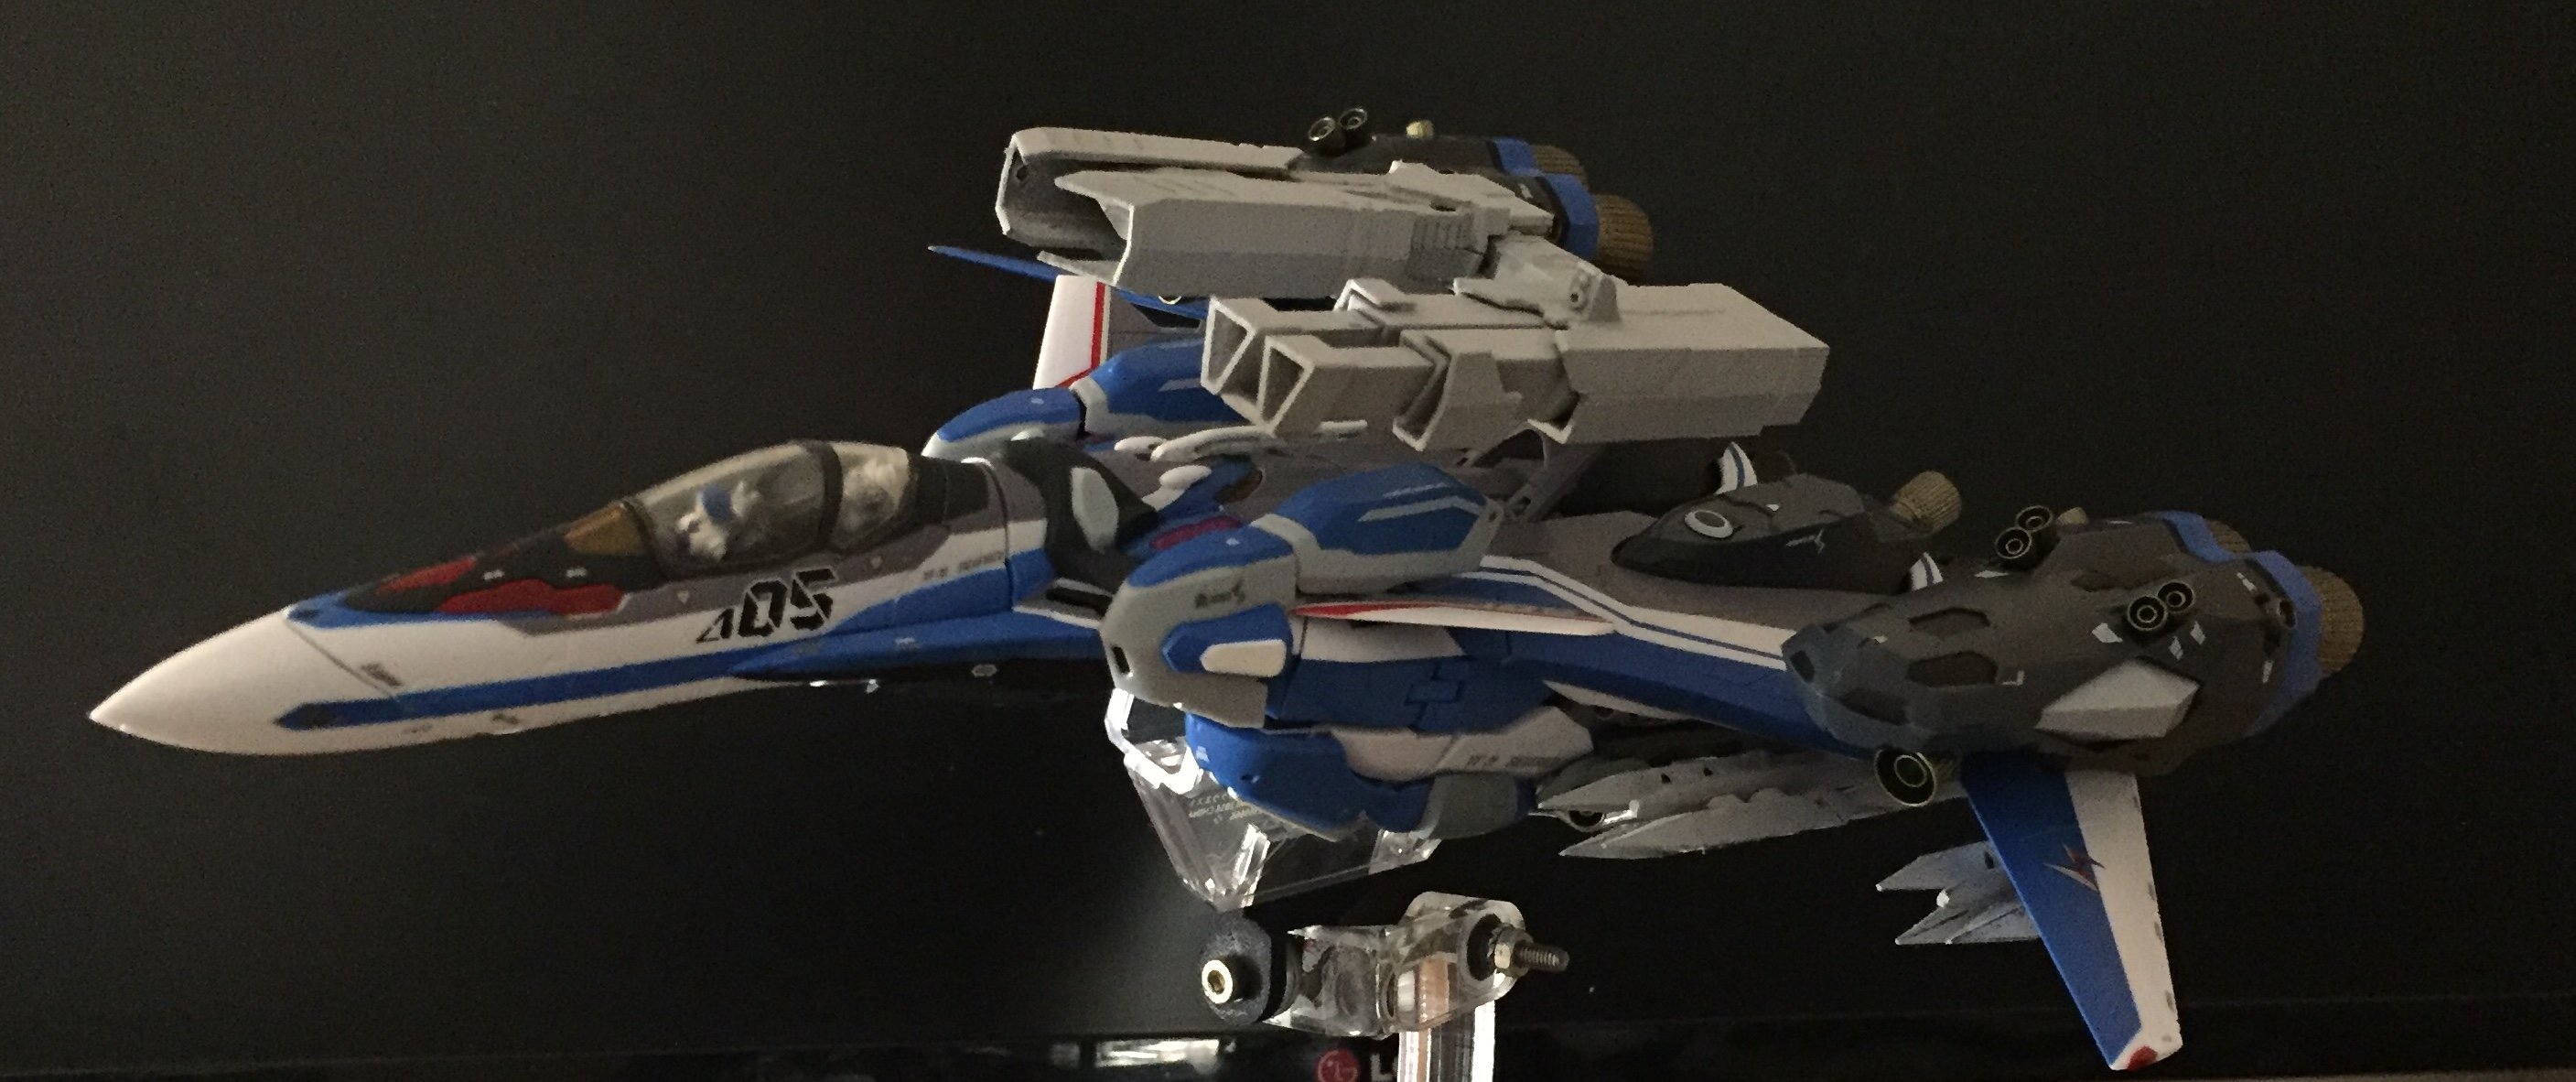
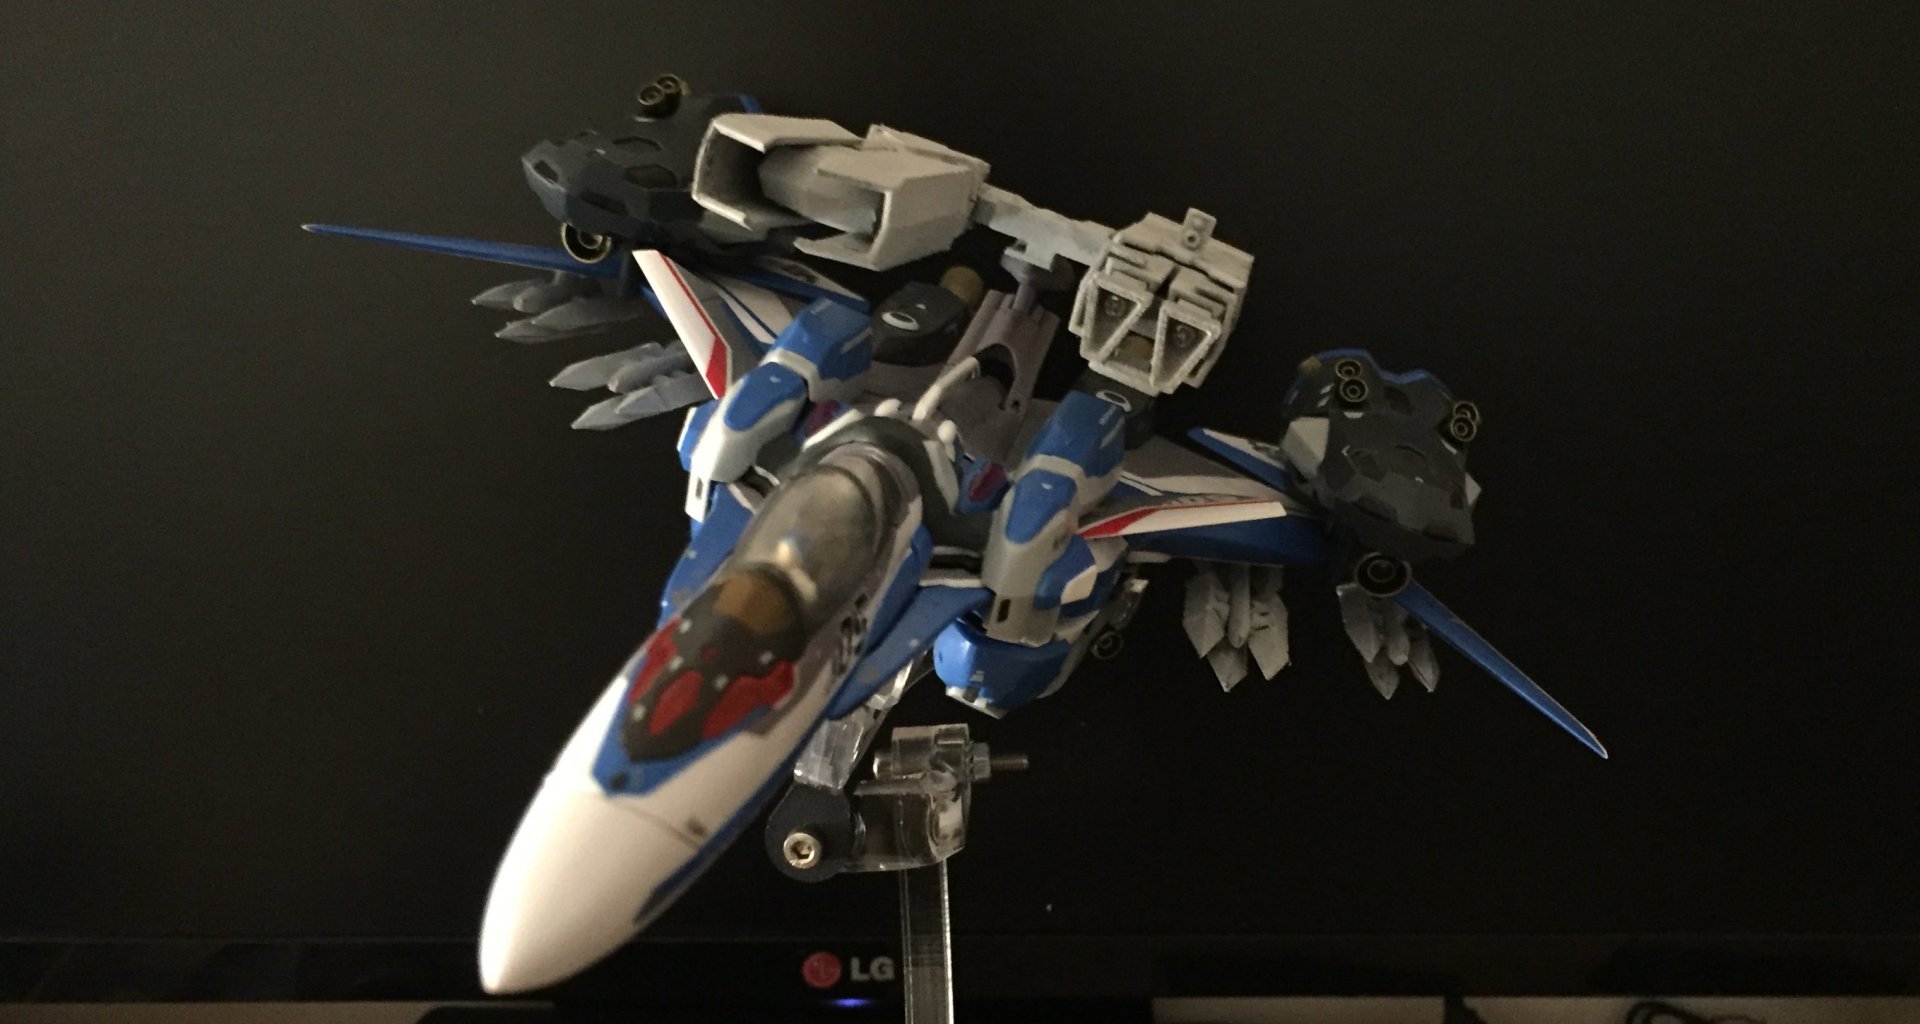
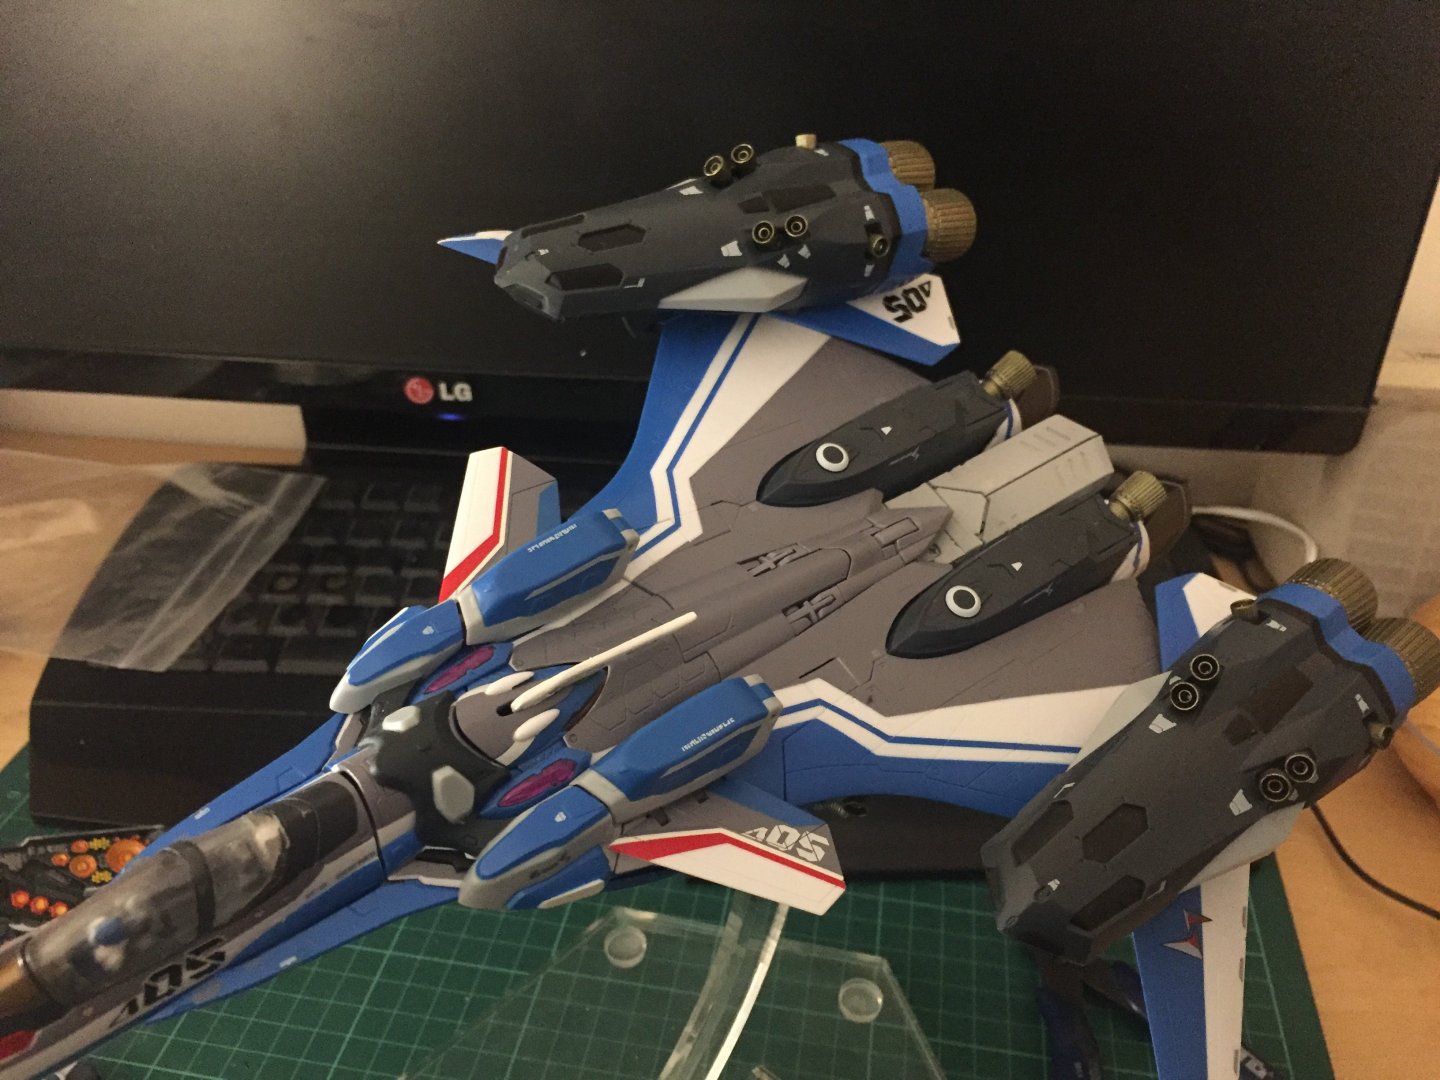
Super mono canon mode...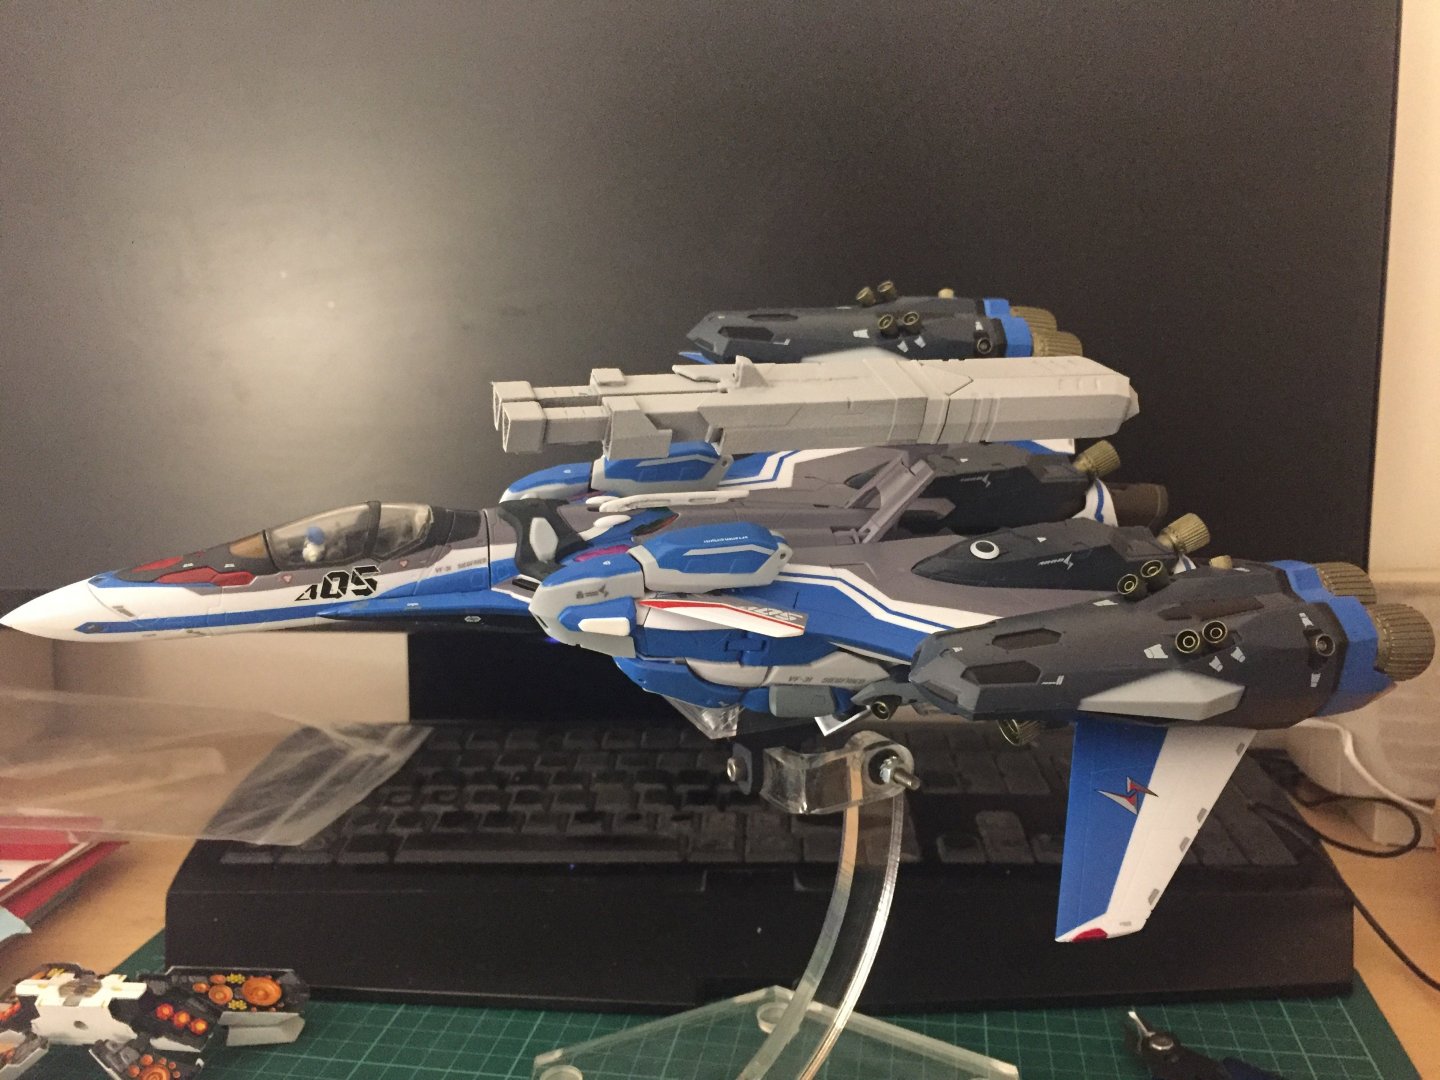
-
vf-31 siegfried WIP: Alternate Weapons Pods for VF-31
Xigfrid replied to Sanity is Optional's topic in The Workshop!
I got the pod tonight and quickly assemble it, with a few bad news. Indeed... 1) the model is not tight enough for me to validate it for sale. 2) I fixed all the main issues on my prototype and made something “rather acceptable” that can be transform forth and back in both canon and pod. 3) I had to gave up on the 30’ tilt Currently, my prototype relies too much on friction, and my screws don’t really help tighting the pod and its articulations. That really bothers me! So I will au around with my prototype and think about a potential V2. However, this model can be used as a 1:72, fixed position, if printed in Smooth High détail Plastic if any interest.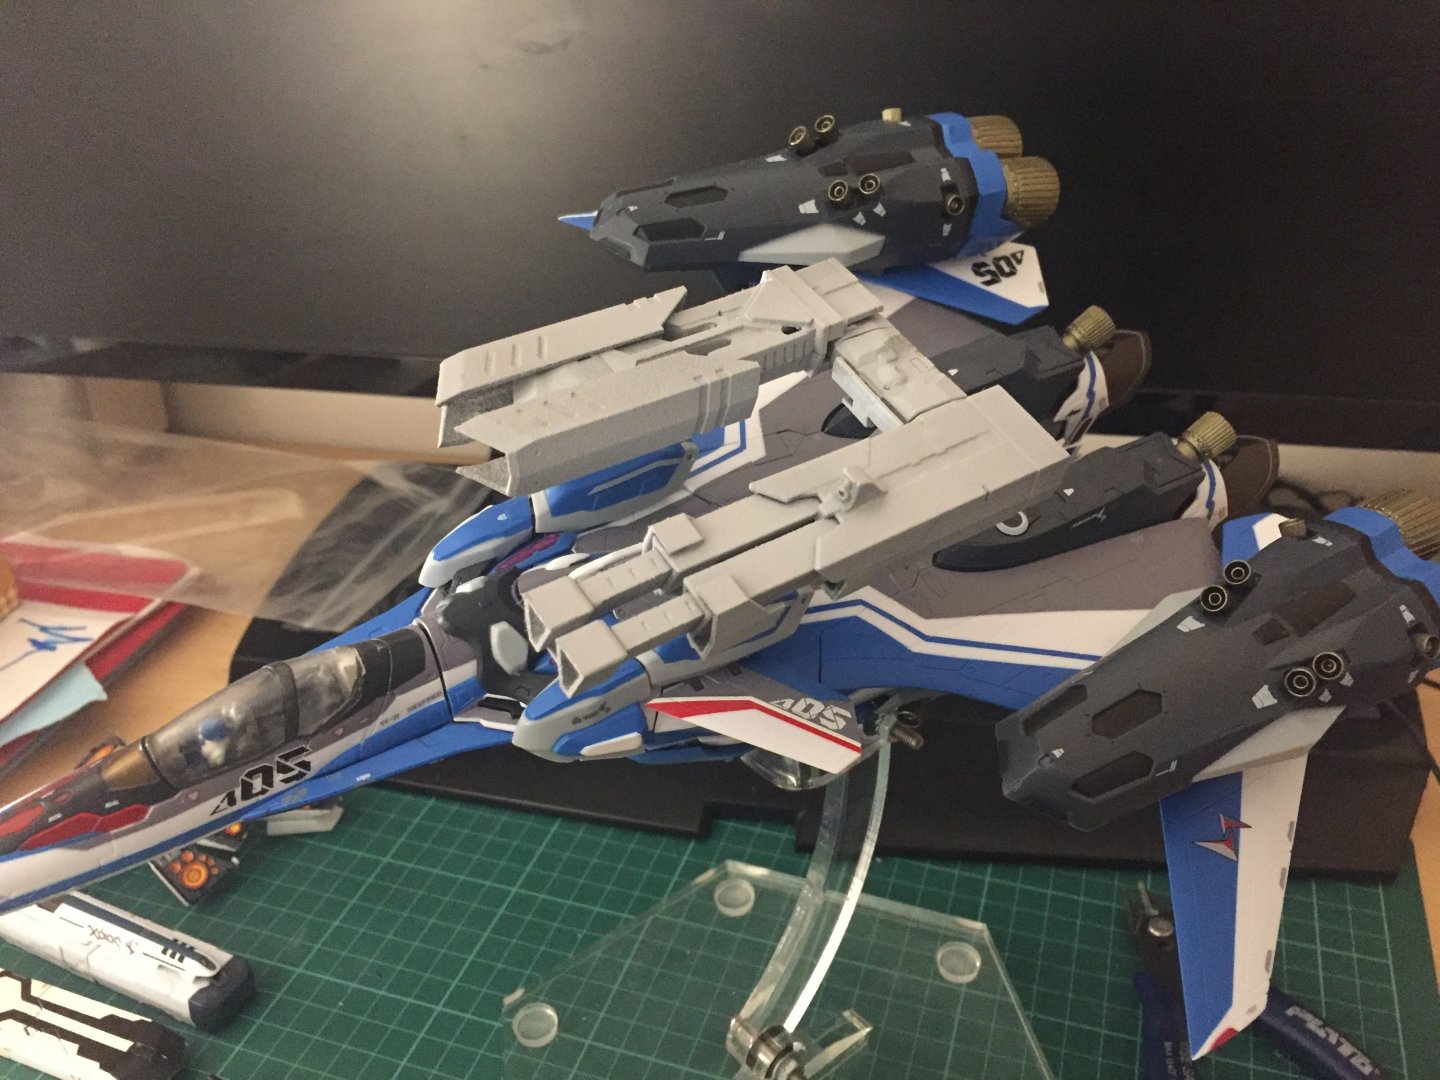


-
Grab a SIKU instead, they have full motion of their forks, in yellow or red.
-
Hi Jasonc, I am glad you like the gunpod too. Did you found the magnets in the end ? I will be looking closely to your results with this dying method, just when I was convinced that I should stick to HP plastic, if this dying method works great, that would completely change my mind. I am very bad at painting the large panels, and painting only the detailing would be an absolute plus to me. One thing though, how would you paint the white portions ? I was planning to prime my both copies in white then mask and paint in red (classic you would say)
-
Or he meant AUS dollars, I don't know how far the Australian dollar has plunged thought
-
vf-31 siegfried WIP: Alternate Weapons Pods for VF-31
Xigfrid replied to Sanity is Optional's topic in The Workshop!
Woah, this thread has been busy ! Shapeways materials: 1) Cheapest material is Standard plastic: description: SLS made, white, porous and requires (at least) 3x primer layers to be acceptable. Good dimension accuracy and stronger than classic plastic! 2) Expensive (1.5x Standard plastic) material: Resin curing, Smooth High Detail Plastic: foggy clear plastic (can be translucent if polished), high detail surface but brittle, it would break if dropped from 1meter height. Exceptional geometry and dimension accuracy. 3) Professional plastic is 2x times more expensive (arbitrary) than Standard Plastic: made by HP 4200 printer (JetFusion technology), parts are Grey or Black, require 2x primer layers. Greater dimension and geometry accuracy, but in general it prints 0.2mm thicker that need to be sanded or it would wear off with friction. This material is not porous, it will save a lot of primer, and the surface looks great out of the printer. One downside, the plastic not as strong as Standard Plastic, it is more like a classic ABS plastic strenght. I love sketchup, this is easy to begin modeling with, and once you get it you can make mechanical parts quiet easily. Only thing, is that you really can't sculpt with it (or I haven't tried hard enough to test it), you can also "curve-modeling" with the correct extension addons. And last thing! Shapeways Promotion will be 1 day only, on Cyber Monday the 26th November, that would be 15% off on the marketplace -
vf-31 siegfried WIP: Alternate Weapons Pods for VF-31
Xigfrid replied to Sanity is Optional's topic in The Workshop!
That's something I have considered 1-2 ears ago, a Form2 would have been 5K investment self-reimbursed if I were doing printing service on web platform like "3DHubs". I couldn't buy it because I can't have a resin factory at home, it really stinks and the vapors are toxic, so that was a categoric no considering my kids. Now this is even more difficult because 3DHubs works with "professionals" third parties only now. I have heard that there are resin printers that have sealed cartridges so that can be a solution. There are also desktop SLS printers now, and that's exiting if the printers are clean from nylon powder leaks. There is probably a solution for each individual, but don't take the shortcut to buy the cheapest one, you won't be satisfied by it for sure! -
vf-31 siegfried WIP: Alternate Weapons Pods for VF-31
Xigfrid replied to Sanity is Optional's topic in The Workshop!
I remember when professional plastic was available 2 years during the beta test it was 1$ more expensive than the standard plastic, with the promise that the HP plastic would be, later, half the price of WSF. Well, I guess this is the right time for competitors to enter the market developed by shapeways. -
vf-31 siegfried WIP: Alternate Weapons Pods for VF-31
Xigfrid replied to Sanity is Optional's topic in The Workshop!
Approx 80$ with shapeways, 33$ printed by European competitor. I can probably negotiate a lower rate if I got a larger order, and that would be great too if I can ship the large order directly to the USA from the manufacturer. -
vf-31 siegfried WIP: Alternate Weapons Pods for VF-31
Xigfrid replied to Sanity is Optional's topic in The Workshop!
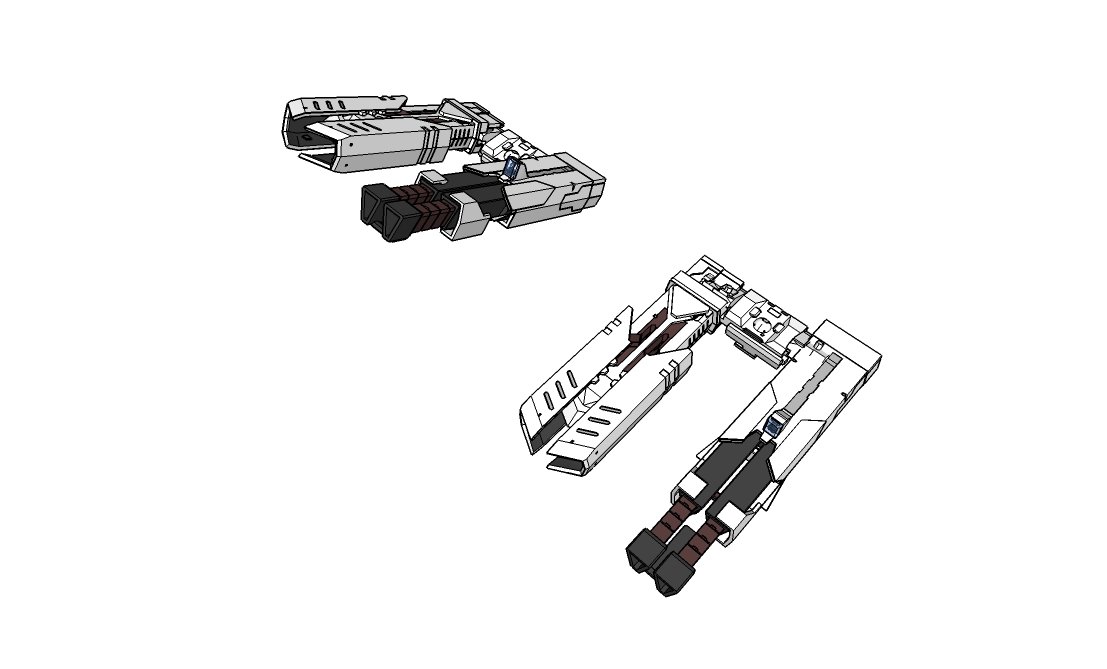
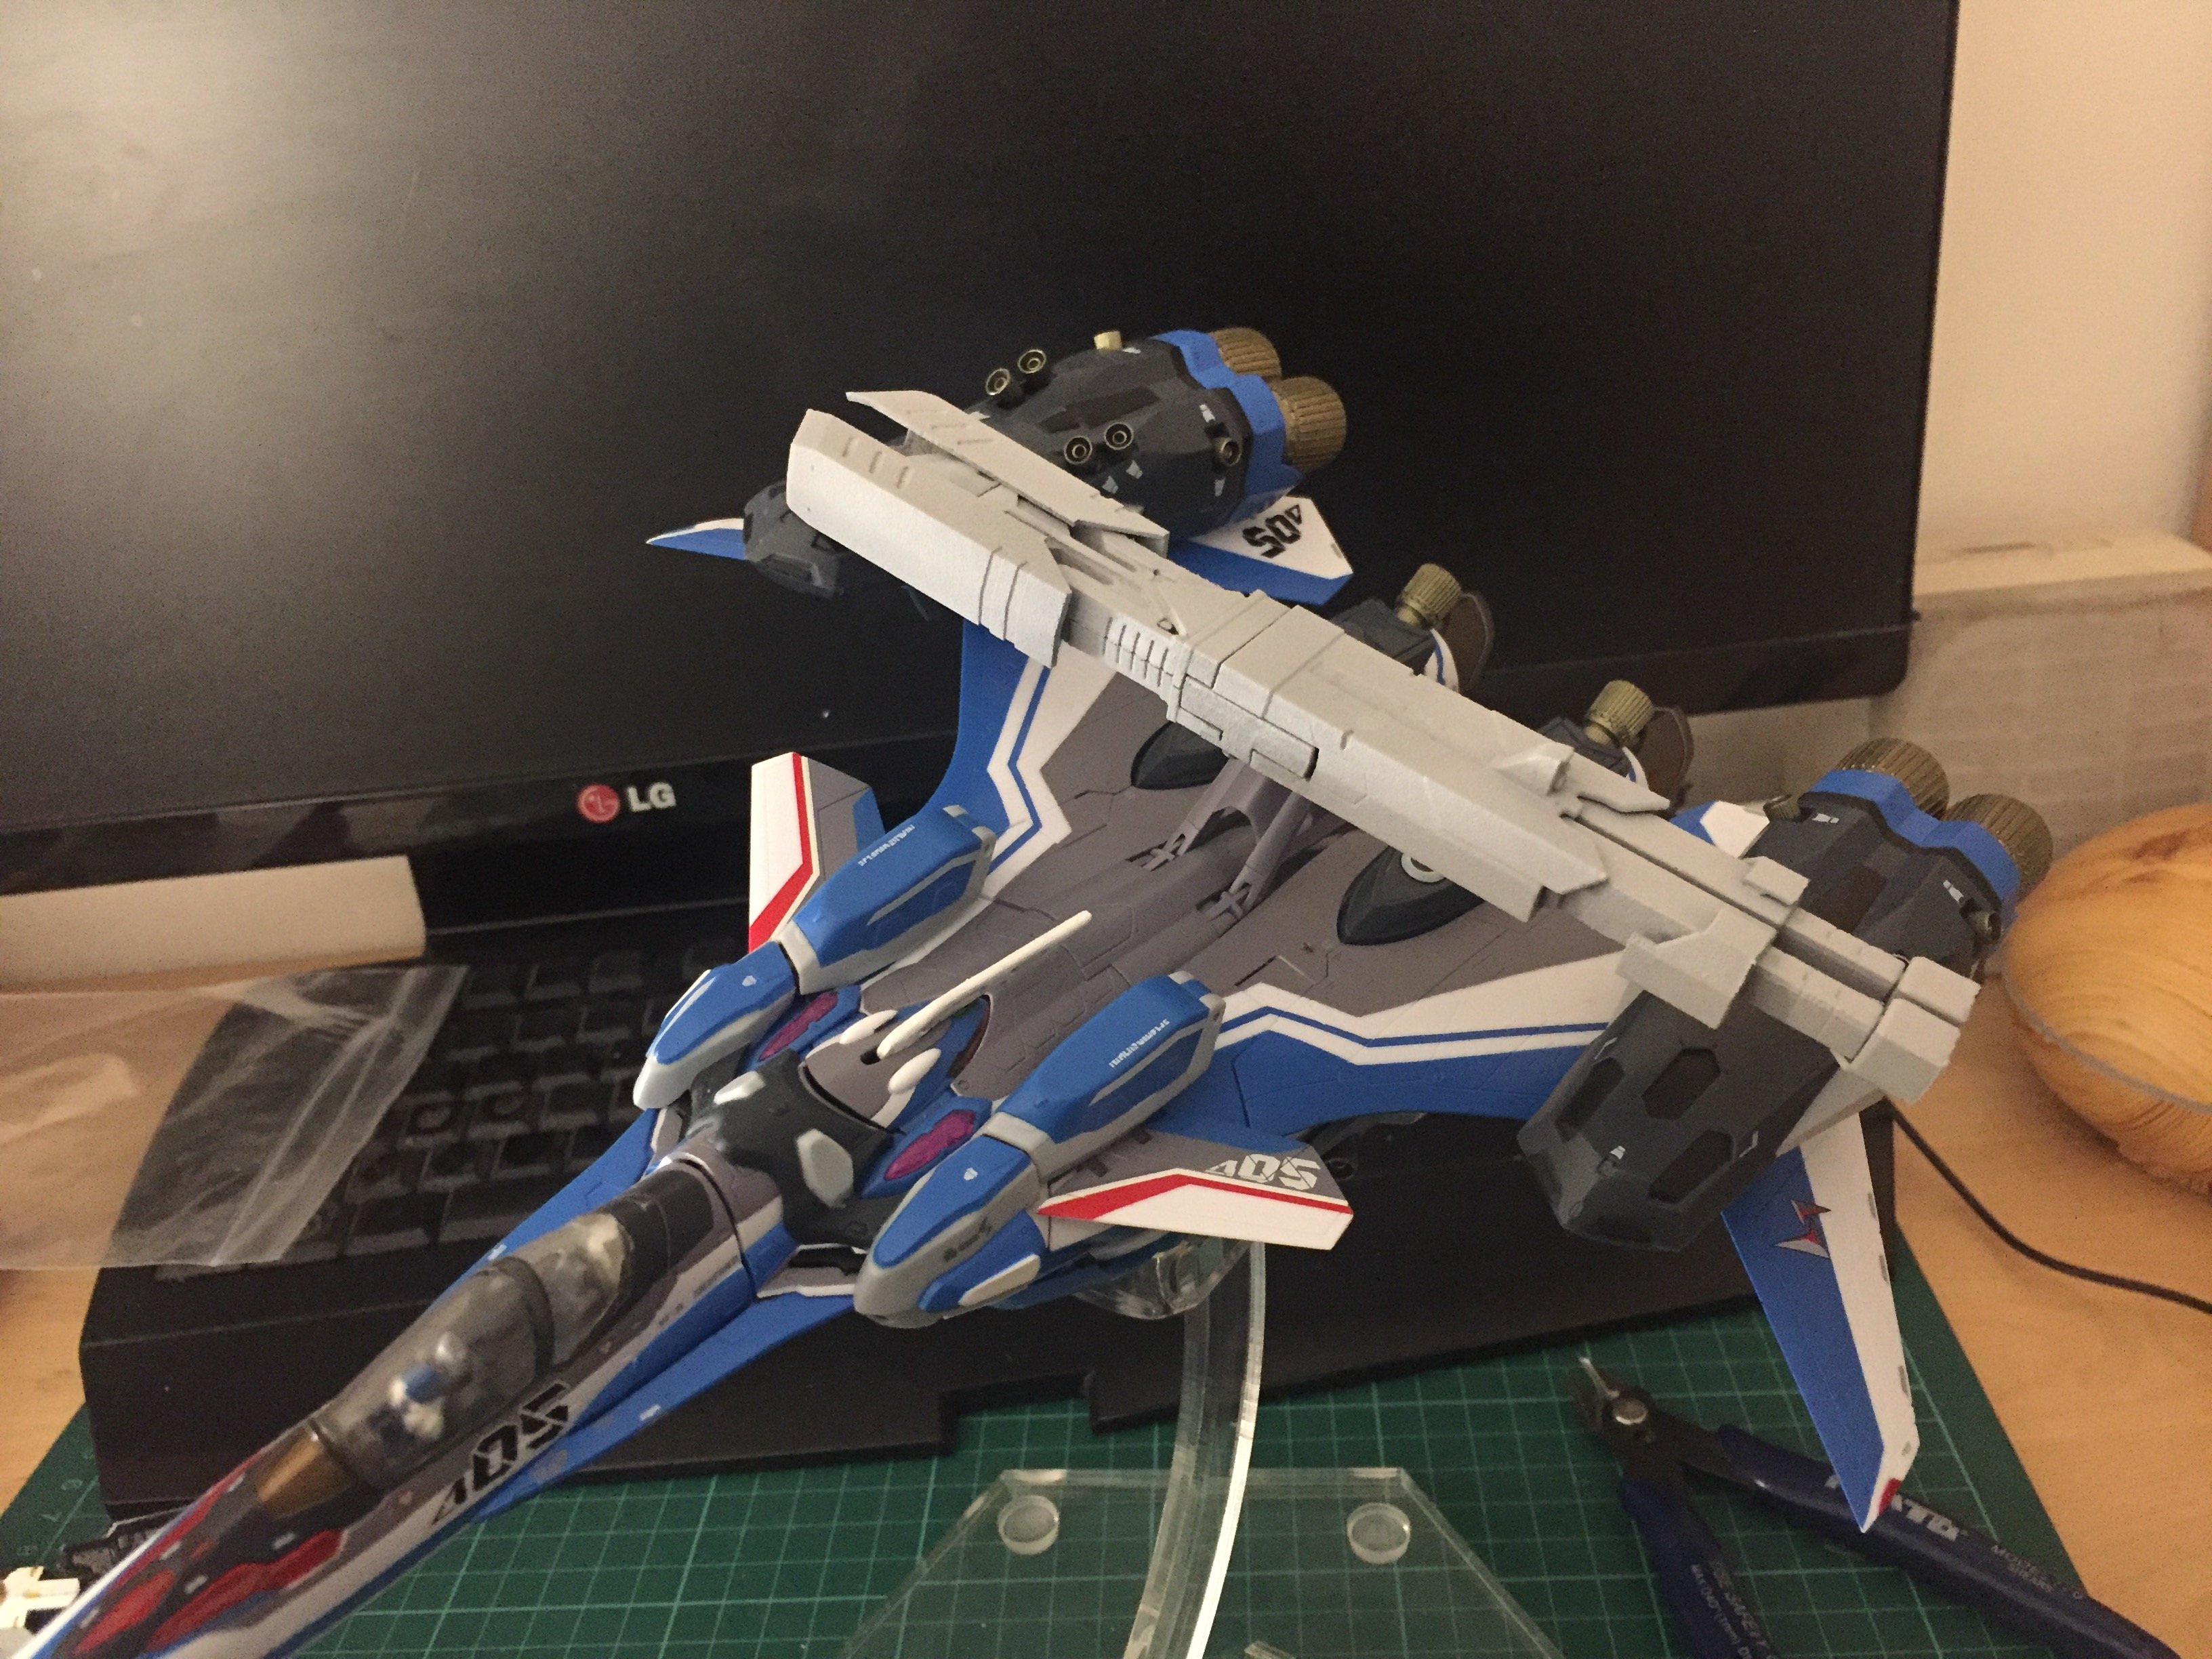
with 30° tilt