danbickell
-
Posts
242 -
Joined
-
Last visited
Content Type
Profiles
Forums
Events
Gallery
Everything posted by danbickell
-
A bunch of those features on the Shapeways site aren't working, but the "yippie!" emails have been going out again the last 2 weeks. If you got any sales in the last 2 weeks, you should have received emails for them, regardless of the website not showing any sales. I'm in the same boat. I just got my first "yippie!" email yesterday, so if I have any other sales, they would have to have been more than 2 weeks ago and I just don't know about them yet. Not holding my breath though...
-
The old Imai model kit is the only one I know of.
-
I FINALLY got my LE BR box today, from YesAsia.com. Ordered and paid in advance back in March, shipped 7/27, and eventually re-shipped 9/3 after the first never showed up, 30 days had passed. This time, I sprang the extra $12 for their "express" shipping on 8/28. That ended up being FedEx, which I eventually got today, off the truck at the service center, after they missed the "hold at the service center" order I put on it on Wednesday. They tried to deliver it anyway. The nice lady there at the service center acknowledged the mistake, promised to put it on hold for me after the truck returned, and then it would be available for pickup tomorrow. An hour later, I get the email notification that the package is no longer on hold and scheduled for re-delivery on Monday. Also, I get an email notification that the item is back at the Service Center. So, I go back and another nice young lady, who had no idea how I was possibly getting all this information sooner than she seemed to get it, eventually was able to locate and retrieve the shipment. She looked kinda creeped out when my phone got the email notification letting me know I had just signed for the package... I don't think she thought she was done changing the status in the system yet. Anyway... I'm just thankful YesAsia was able to replace the shipment. They stalled a few weeks with dates to wait for and hoops to jump through. I had to wait days for my PayPal payment for the express shipping to clear, writing back to confirm I had still not received the original shipment before they would re-ship. I had to wait 30 days (on a shipment that was originally quoted at a 7 day estimate) before they would consider replacement. I think maybe they had sold out of stock, and had to wait until somebody returned one for box damage, because despite the several layers of bubble wrap, a corner of the box has a good little crunch. After waiting this long, it's not like I'm going to reject it. But I finally got it, a month later! Some of the extras are really nice, and I watched through everything, and played once through all the regular games levels, and here's the filmstrip I got:
-
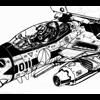
I will leave the specifics and details out of any public internet discussion, as wisdom dictates... However, fear not, Gundam fans. No violence was intentionally visited on this 1/60 Perfect Grade RX-78-2. It was a decade ago, and the mishap was a case of lit candles (not placed by me...) being placed a little too close to the tip of the gun. With amazing timing, the room lit up brightly with the inferno that ensued. It took mere seconds to topple the formerly proud model into the pile of slag that exists today. It is a testament to how awesome those models are that it held up to the fire as well as it did, and that the end result looks as realistic and purposeful as it does. The outer armor pieces burned away first in some places, exposing the thick skeletal structure underneath. In other places, the innards burned first, and oozed out between the joints in the outer armor. Mostly, it all just fused together, forever holding it's final pose, but in pieces. Sad as it was, it just looked so cool that I had to keep it all these years. Here's the only picture of it prior to the fire that I managed to find, circa the late 90s when this kit came out: RIP the only Gundam model I ever made. Your amazing posability was a daily source of fun for a few years at least, until your untimely death by candle flame. The End.
-
Of course! That will most likely be next on the list. If a few of the S heads sell, that should give me the funds to try the A head. I've mostly been working on sub-d versions of the nose and cockpit parts, and much of that is ready to print, but those parts are going to be a lot more expensive than the heads. I don't imagine that I could likely sell enough heads to fund a whole nose section. We'll see...
-
For those of you who requested it... The 1/24 VF-1S head is now available for purchase at my new Shapeways shop: http://www.shapeways.com/shops/bickellbuilt
-
I wouldn't try to get it published. I would just get them printed in small quantities and sell them privately.
-
Thanks guys! I really do appreciate the support. This is, however, merely a WIP thread. It's is still far from what it will hopefully become... someday. I've been suddenly swamped with a bunch of "real life" lately, so sorry that I don't have more to update. After showing the prints at the wonderful L.A. DYRL screening that >EXO< masterfully organized, I have been persuaded to make the S head model available to the public soon. The V2 is 99% up to my standards, so I plan to make it available with some minor tweaks (like an extra sprue of eye clamshells added). My vac-form table showed up last week, but I still haven't had a chance to test out the buck I had printed for the clear parts, but I will make that separately available too if it tests out well enough. I wouldn't ever hope to make a bunch of money out of it, but the way my finances have been going lately, it might be the only way I can fund any further 3D prints of the rest of the model. One of my plans all along for this project, once finished, is to put together a VF-1 fansite. Once I get over the hurdle of completeing the model and texturing it, expanding on it (FAST packs, GBP armor, TV version, 2-seaters, and plenty of paint schemes) should create gobs of content to put together a nice site of valkyrie-porn-o'plenty. I'd like to eventually make lower-poly game/animation versions available there for the public to have fun with too! That, and/or put together a book. For decades now, I've always wanted to make something like what the Master File books are, but they beat me to it. As cool as those books are, I always imagined something more, though. They came fairly close, but I think I can do better. Hopefully life will let me keep it all going. I certainly do enjoy the hell out of it, and sharing it with such fine like-minded individuals as yourselves makes it all that much better!
-
I look so happy! Thanks so much for putting this together! It was a great time, and it was awesome getting to meet everybody and put faces to screen-names. Good times! And for those who were hanging out later on when we were having story time (which we shall not repeat here):
-
Roger that!
-
Don't worry! We'll bring both, and the v2 print is still raw (only cleaned).
-
I think that is why the vents open and close, and angle away from the legs when open. Changing shape is one thing, but changing size/volume/density would be the "magic" part. Even something like the Terminator T-1000 "polymimetic alloy" can't make significant changes in size and can't become complicated/mechanical shapes. As far as the intakes and fans, I think a lot of us might be having a hard time coming to terms with these designs because of our familiarity with current real-world jet technology. We want to make sense of this stuff as if has all the same constraints as real tech, but it simply doesn't. They have overtechnology and nuclear reaction engines. The intakes and fans are secondary accessories to optimize their use in atmosphere, and the engines themselves would probably have little in common with any jet engines we know of. My $0.02, for what it's worth, I wouldn't worry about any of this stuff. I would make everything as accurate as possible to the fighter designs, with zero compromises for battroid or GERWALK. I wouldn't try to mimic the Yamato toys shortening of the fuselage (that was just them compromising the design to make a toy with better proportions in the other modes). I would, however, still try to make it fully transformable. I'd make the legs fit in the space that the fighter design provides for, and then just scale them up when posing it in battroid or GERWALK. That's certainly easy enough to do, can be easily and cleanly done in an animation, and is better any day than compromising the beautiful fighter design. I see a beautiful fighter model in the works, and I think it would be a shame to see it get compromised because of the anime magic needed for the other modes. It's not like you were planning to make a 3D print of this thing that transforms, right? So, don't even worry about it. That's what CG magic is for! If you did happen to want to make a physical model out of it, I would just make separate modified versions of the legs and fuselage, idealized for the other modes, parts-former style.
-
I don't know how soon I will end up getting back to the chest/back parts. I'd like to get the cockpit and nose gear updated before I move back to that stuff, but I just know I won't be able to help myself and end up getting sidetracked on 3D prints of the nose (as long as I can afford it, anyway... I think that's going to get fairly expensive). It is pretty impossible to hold the 1/24 S head print in your hands and not salivate at the idea of printing more of the model! I'd really like to do a J head, but that will probably wait until I make a lot more progress on the rest of the VF-1. I'm sure I will end up printing the A head before I get to the J as well. I like certain things about the Macross the First J head. The Tenjin painting from Macross Ace vol.7 looks better than some of the lineart designs for it. I actually really dig the revised D head more than the new J. I wouldn't do either unless I was specifically doing a Macross the First VF-1, though. I might end up borring some details from the new designs, just to flesh things out. The J head never got the detail treatment for DYRL (since it was only seen briefly), so it might need some embellishments, borrowing details from some of the model kits and the new design, and matching details (like behind the visor) from the DYRL S and A designs. I would keep the shape classic, though.
-
Hehe, thanks guys! Kurisama is absolutely right. There really isn't one superior 3D package. They all do 90% the same stuff, and the skills needed work universally between them all. In the end, it all just comes down to learning new interfaces and workflows. I was totally a grumpy old fart about it when I had to switch to Maya years back, but after a few months I was a Maya lover. I only switched back to Max because I was using it at work again, and liked a lot about the updated version (ie. stuff they made more like Maya). I'd like to get the latest version of Maya at home (I still have 8.5) and see what's new. Now that they're both Autodesk products, I wouldn't be surprised to see them eventually combined into the same product. From a professional standpoint, I'm really glad that I'm comfortable with both. I wonder how Lightwave is these days... That's the first big 3D package I started with. I still need to get some more experience with Zbrush too, so I can compete better with all the kids these days. Maybe when I get around to doing a VF-1 pilot!
-
The parts were laid out in the file exactly the same as the previous version, but this one had all the frosting on the opposite side as the previous one. I've come to the conclusion that my assumption about which of the build area dimensions was up was wrong, so both prints got oriented on the side (just one side or the other). The weird part is that the guns (in both prints) have the frosting where I intended, and appear to be printed with a 90 degree rotation from where they are in the file compared to the other parts. Likewise for the neck rings. So, either they are moving parts around in the file before printing, or we're seeing parts from separate printings at different orientations. Maybe the dimensions they give are conservative, and there is actually an extra centimeter or so, because the parts should only fit in the build space 1 way (or flipped 180 from that, but not 90).
-
Took my time cleaning up this print, with multiple baths in the ultrasonic cleaner with hot water, dish soap, and cleaning powder, followed by some rinsing passes in the ultrasonic cleaner with just clean water. There is now zero sign of any wax residue. The gun barrels are completely clean, and flow air and water smoothly. This process really brings out the "frosting" in the "frosted ultra detail". It is difficult to photograph, but here's a few pics under different lighting conditions. These have not been altered in any way, other than the clean-up process stated above. Harsh lighting with a dark background really shows everything. You can see the vertical line on the face between the frosted side and the unfrosted side (where the support wax was and wasn't). That was one of the main places we smoothed out on the first print. I tried to get a shot looking down the barrel, but it was pretty impossible to get my iPad to focus on it. It looks much cooler in person, but you can see how it goes all the way through, and the rifling detail is nice and crisp the whole way. Of course, the main head and eye detail are separate pieces, and the neck there is 4 separate pieces, but they fit snuggly enough that they hold together by themselves for the pictures. That shot of the main head piece is facing straight up, unsupported and resting on the 3 grooves on the back of the head. I still can't see any faceting this time around, but you can see some of the print lines in places. Some of it you can barely feel, and other parts you can't. Some of the lines that were visible before cleaning became invisible after it frosted post-cleaning (probably just internal). I think some light sanding should easily take care of it. I'm still waiting on the vac-form table I ordered. I'm really curious to see how good we can get the clear parts to come out!
-
Actually, the first one hardly had any sanding at all. All the pictures posted prior to spraying primer on it were without any sanding at all. After the cleaning, the "frosting" showed up (apparently where the wax support material had been, but was now stripped out and no longer helping to smooth out the surface). There was a visible vertical line on the face between the frosted and unfrosted side, so that line got a few passes of a fine grit emery board to smooth it out. The first one also had what I assume was a print error on the top of the head. There was a thin sliver of material jutting out of the line between the mohawk and the left side of the top, which got trimmed out and cleaned up with a few more passes with the emery board. The front facet of the mohawk had more apparent print lines (steeper angle), so that got a few passes. Other than that, the rest of the surface was left as is. We were paranoid as hell that any sanding would kill the little 0.1mm panel lines, so it barely got touched. I would estimate well under 10% of the surface was sanded at all, and even that was very minimal. After the primer, you could see all the details much better, and they look more robust than I thought they would. Of course, you could also see the flaws, and the faceting. Some of the print lines that were visible when it was clear went away (must have been internal), but others were still slightly visible (external stair-steps on steeper angles). We talked about doing more sanding at that point, but decided to leave it as is. There were a few spots that got a few clean-up swipes with the emery board, but not even going through the paint. You can still see the flaws on the painted model, in the right light. Some of it is visible in the pictures. Harsh lighting shows more of it. In retrospect, it could have used more prep, but it kinda looks cool in some ways. Fokker has an early model, that has been beat up and repainted, and isn't perfectly smooth. I'm thinking this second one will get more sanding all around (despite seeming cleaner, and error free so far), but I'm thinking really fine wet sanding. We don't have the anxiety so much this time to get it all done as soon as humanly possible.
-
Well, the V2 VF-1S head print is an all-around success! This one seems to have come out quite a bit cleaner, and without any apparent faceting. Will have to run it through the clean-up process and shoot some primer on it to really tell. The domes on the guns certainly seem much smoother, and the gun barrels seem rounder as well. I think they spent more time cleaning this order, although it seems to have a lot more of the greasy coconut oil coating than the first print did. The best part is that the gun barrels came with maybe 10% (at most) of the wax inside them. I was able to blow air straight through one of the barrels right out of the bag. The rifling detail looks much more defined, without the wax plugging it up. Interestingly, the 2 main neck pieces came assembled in the bag this time. They are not printed that way, but the cleaner at Shapeways obviously must have deduced that the 2 pieces fit together and tried it out. I have to wonder if they played with it a little! The vac-form buck for the visor and lenses is an interesting experiment with the frosted detail material (not the frosted ultra detail). The detail is still pretty crisp, but the surface feels rougher. It also didn't come all greasy like the FUD parts. I'm kinda curious to see what the head would look like printed in the FD instead of the FUD. The FD doesn't have as small of a minimum detail size, so I'm guessing the panel lines might not be as well defined, but that would only cost $73 vs $105. It might not look half bad, and just require some additional sanding. It could be a good option for a fighter mode head. No new pics yet. I might put the parts through the ultrasonic cleaner bath later tonight, and post pics of the cleaned parts.
-
I've never had much chance to mess with sub-d prior to this, as it isn't of much use for game work. I just dived in and experimented while I was prepping the VF-1S head for printing. The trick in Max is to use the options for using smoothing groups and material IDs for separataions. You can use these to create logical boundaries within which the smoothing is contained. It is similar to what other packages allow with "creased edges" (ie. boundary between smoothing groups in Max), but you can also use separate material IDs to create the boundaries as well, giving you some extra degree of freedom to work with. The rest is pretty much like any other 3d package that does sub-d, I would assume. You just use the topology to define where the curves are, which means that you will need edges in places that you might otherwise not bother with. Curves like to have edge loops that create their boundaries, as close to perpendicular to the starting and end points as possible, and it works best if there is also a mid-point edge that is perpendicular to the apex of the curve. The rest is tuning the number of edge loops along curves to control how much (or how little) the curve will get sub-divided. Most of my work converting the VF-1 model to sub-d is just re-topologizing the model, cutting new edges in where I need to control curvature, modifying smoothing groups and material ID boundaries to control the subdivision boundaries, and adjusting the spacing of the edge loops.
-
Thanks! No turbosmooth. I never use that, because it just doesn't have the sort of control I want. It can work nicely for soft organic shapes, but I find it pretty useless for detailed hard-surface work. This is all NURMS subdivision surface, which has a lot more options and controlability. News update: I managed to miss UPS yet again today! They came an hour before the stated delivery window, and I was in the shower. I scheduled a will-call pickup later this evening, so I will update later about how the V2 VF-1S head print from Shapeways turned out. Stay tuned...
-
I understand, and I'm in the same boat about wanting to get the rest of the valk done too. I'm dying to get around to texturing this all, and I've been resisting the urge all along to start texturing what I've already completed. That's when all of this will REALLY come alive, and the fun will begin. And once the base set of textures are complete, making all the different paint schemes and levels of weathering and such will be a breeze. Getting into the 3D printing certainly has slowed things down, but it is ultimately a very good thing for the project. It has forced me to re-examine my approach to it all, which is a good thing because I really have very little experience doing this sort of high resolution work. As a game developer, my skills have always been tailored to making low poly moldels look as good as possible when rendered, and the needs of 3D printing take all of my tricks of the trade out of the picture, forcing me to build (and re-build) this the way it should have been from the start. The more I have progressed, the more I have started building more and more high-poly, and the sub-d version of the VF-1S head that was needed for a better 3D print established a new standard for the rest of the model to come. There isn't much point in proceeding until the parts of the model made earlier are brought up to the same standard. Wouldn't it suck if the whole thing was complete, but the most important part of the whole thing was substantially lower quality than the rest? Here's another new shot of the sub-d model, showing some details close up: This part of the old model could never have held up this close. The fact that it should 3D print nicely is something of a bonus. When I saw the faceting that showed up on the S head print (despite already being substantially higher resolution), I had a sick feeling in my gut about what the old nose model would look like if printed. I know the renders don't really show it, but if you look back at the old wireframes I've posted, you can see how low poly it actually was. A 3D print of that would have surely disappointed us all. Like I said in the beginning, this will be a slow project. I'm happy to have more time to spend on it lately, but it is still slow progress, even though I find time to work on it just about every day. Hopefully, the end results will justify it all. I do hope this will be *the* definitive model for some time (and I seriously hope it motivates some young talent to produce something even better!), but I have to be patient about it and make sure it is done the right way, even if that means going back and re-doing the stuff I have already done. Patience is the ultimate attribute that makes this as good as it is. There's nothing special about any of the modeling. I don't have any magical skills that other modelers don't have. It all just comes down to having the patience to take it slow and get it right. Accept no compromises, and cut no corners. As anxious as I get to make more progress, I am still really enjoying the ability to not have the time-constraints that my professional work always has to have.
-
Me too! I'm expecting delivery of the V2 VF-1S head and the vac-form buck for the clear parts from Shapeways tomorrow. I also ordered a vac-form table appropriately sized for these parts and hopefully doing the actual canopy down the road. In the meantime, I've been quite busy with the VF-1 model still. I haven't progressed much with new parts, but I've been spending a lot of time converting the nose to a sub-d model to bring it up to speed with the S head, from what I've learned from the 3D printing process. I've ended up re-working it all quite a bit, refining the shape and details. Most of it might not even be that noticeable in a render, but the results on a 3D print would be night and day. Here's a render to illustrate the difference in the geometry topology, and what it looks like with a few subdivision iterations to crank up the poly count: As you can see, some parts get so dense with geometry that they render almost as if solid. I ended up doing yet another revision of the vernier thrusters, mostly because it became apparent that I was going to have clearance issues with the depth of the previous ones in places on the chest. These ones fit with room to spare, and are simpler and cleaner (and also sub-d, so they can get as perfectly round as needed): The latest area I've been addressing is the cockpit. Paying closer attention to scale now with the 3D printing efforts, I came to the conclusion that there were scale problems with the references I used when originally creating this stuff. Some of the ergonomics of the cockpit were problematic. I ended up scaling up the seat and controls a bit, and repositioning to get a nicer fit for a range of pilot sizes. Smaller pilots like Hikaru and Max would fit fine, and a taller guy like Fokker would fit snug like he should. This really helps the scale feel like it should for a fighter that is supposed to be as relatively small as it is. Here's a WIP shot of how I currently have parts scaled: I will be sure to show you guys the new parts as soon as I receive them.
-
Unknown carrier. It qualified for free shipping, so I just went with that. I guess that's the standard service, which they say is 6-14 days to the US. I'm in the middle of that window now, but I would have guessed it would make it to Los Angeles closer to 6 days.
-
Did anybody else pre-order from Yesasia.com? I pre-ordered the LE back in March, and it shipped on July 27, but I still haven't received it yet. Feeling pretty dumb right now for over-paying for it, paying for it in full up front, yet everybody and their brother seems to have got theirs before me! No tracking on the shipment either...
-