VF-19
-
Posts
1399 -
Joined
-
Last visited
Content Type
Profiles
Forums
Events
Gallery
Everything posted by VF-19
-
Already started: http://www.macrossworld.com/mwf/index.php?showtopic=41407 I'm probably going to do a bit tonight.
-
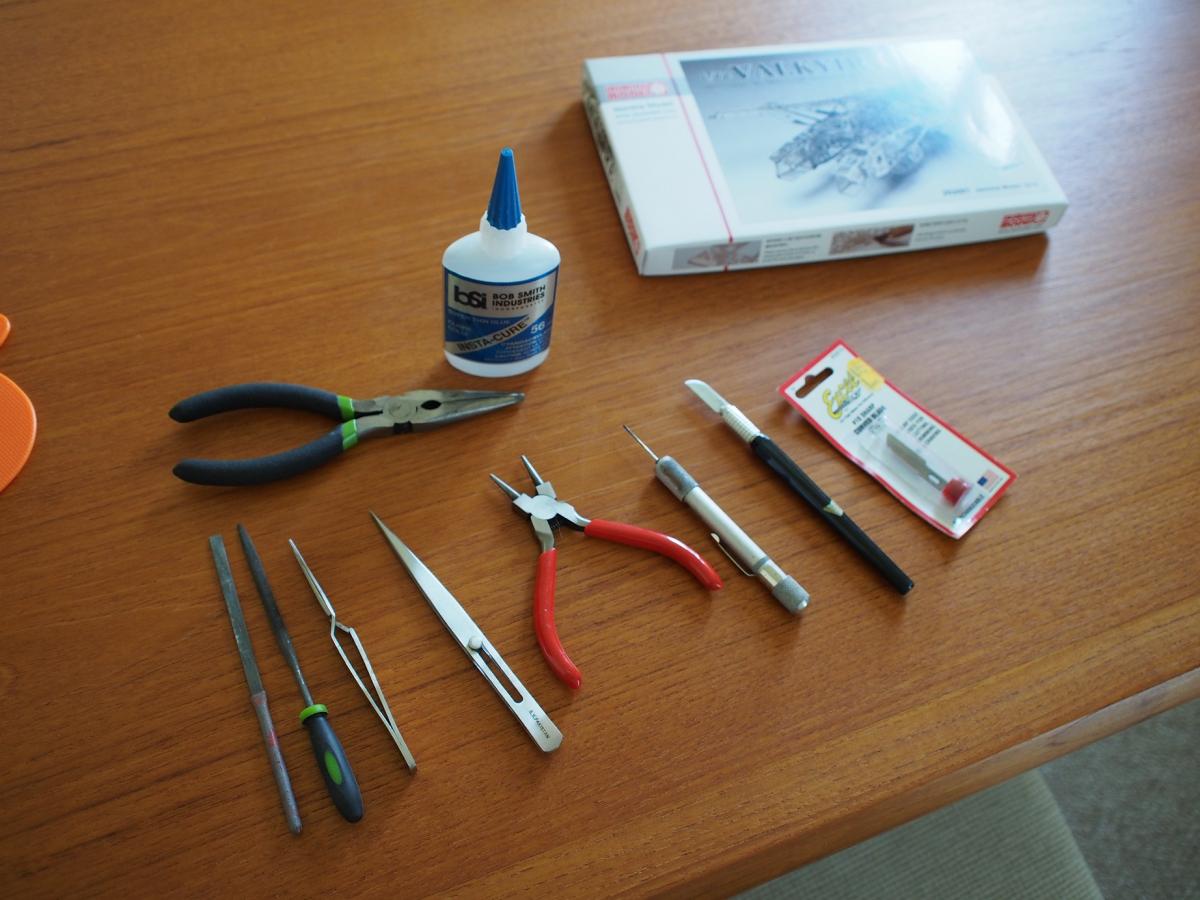
From Left to right: Files, tweezers (clamping and slide locking), some sort of weird type of needle nose pliers (you can use the rounded tips to put curves into parts), a home made super- precise superglue applicator, knife and extra blades. The superglue applicator is something that was passed on to me from the local hobby shop. Basically, you take a needle, and chuck it into your pin vise. Using a wire snip or a piece of sand paper, you cut the top off of the needle eye. This gives you two prongs to draw up a tiny amount of superglue to put where you need it. To clean the tip, just stick it into an open flame to burn off the superglue. I probably won't be using the larger needle nose pliers that is pictured above the row of tools, but you never know...

-
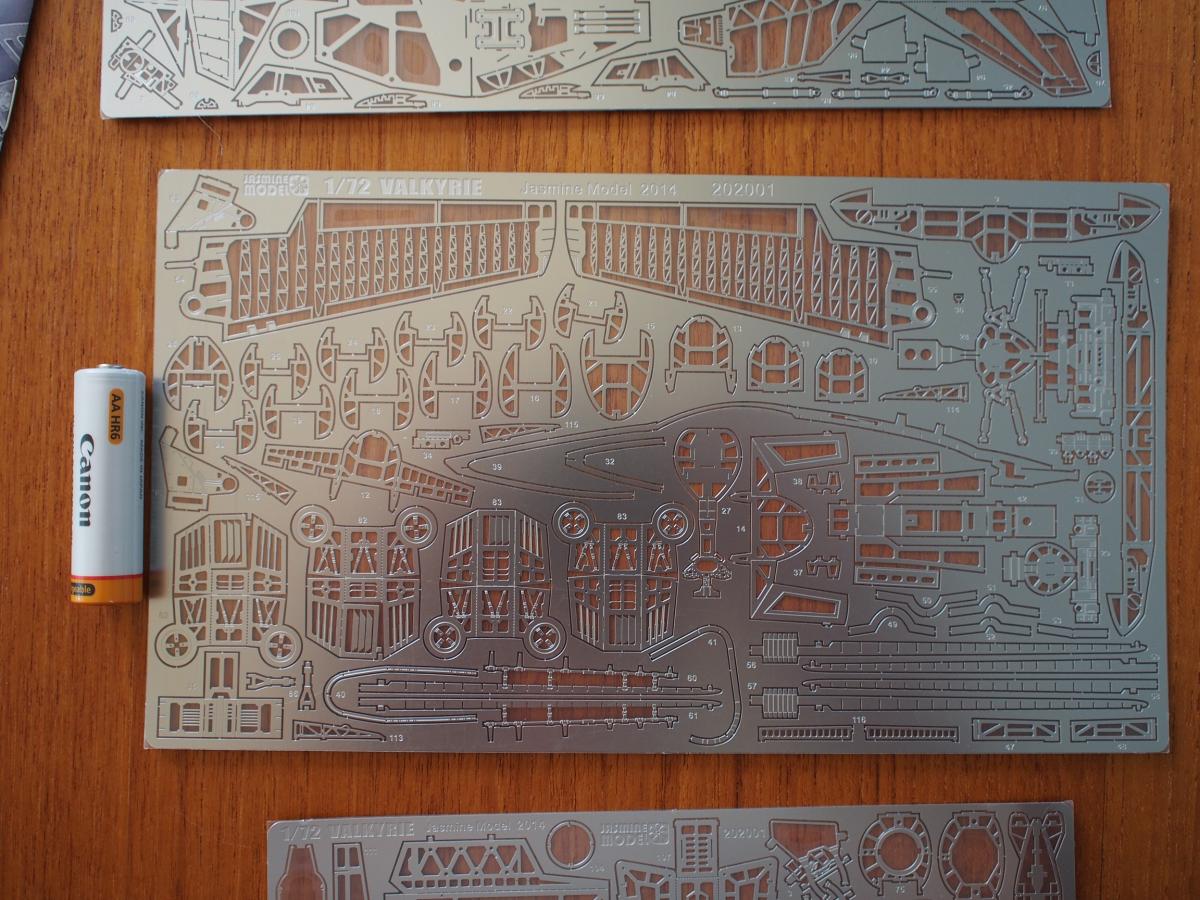
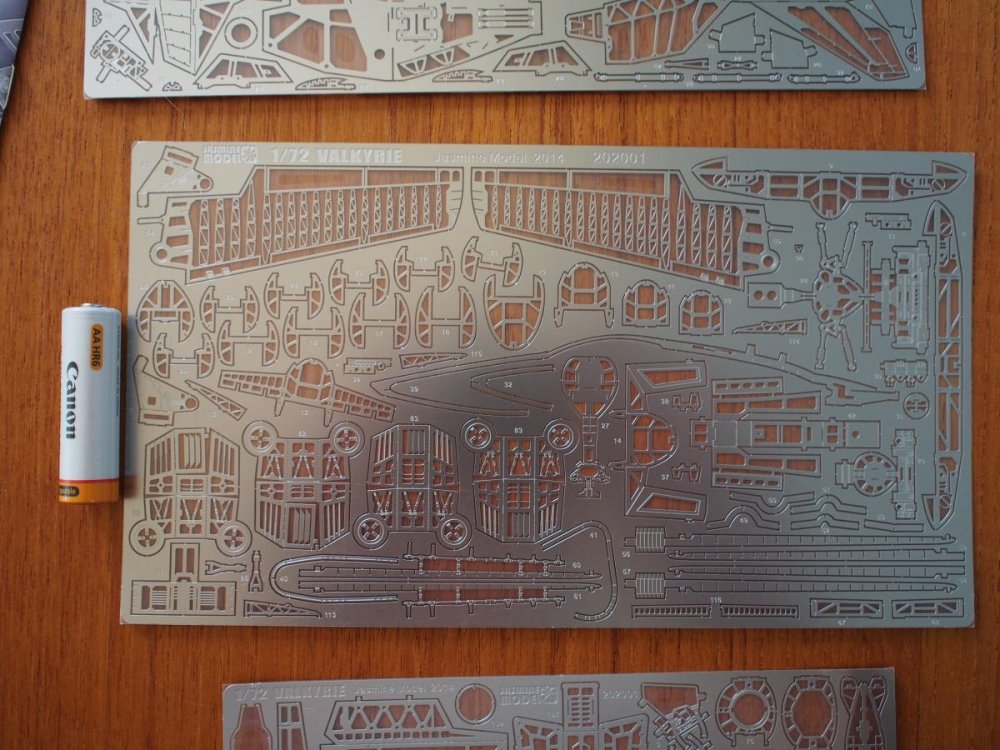
I don't think I'll need a fold and hold for this kit. The frets came sandwitched in some sort of packing plastic. I think I'll leave one layer on to hold the parts in place while I cut them out. Otherwise I'll use the sticky tape method, which I've done before both with plastic kit parts and the bits of photo etch (or is it laser etch?) parts.
-
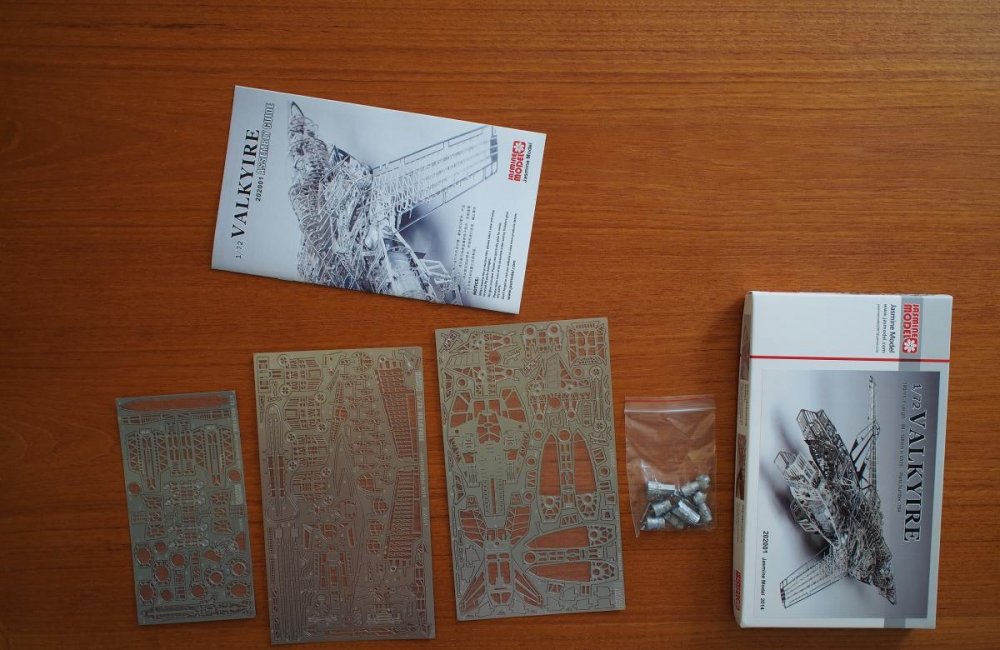
As promised, I'm going to attempt my first ever build up of Jasmine's photoetch VF-1. The box arrived slightly less than two weeks after it was shipped, and luckily, Canada Customs saw fit to not charge me the applicable fees! The kit has 3 sheets of thin photoetch, a great construction manual, and a bag of resin parts. The photoetch is sandwitched in between two thin plastic layers, and I plan on leaving one layer on to prevent parts from flying off as I cut them out of the tree. Keeping in mind that I haven't completed any serious amounts of photoetch, one must wonder WHY I decided to jump in with both feet. The simple answer is because this looks cool. That and I may be slightly insane. But mostly, because this looks damn cool. This is everything that's in the box. AA battery for scale of parts. Be warned, I'm a slowish builder and I won't be starting this kit for a few days, but I'll keep you guys posted!
-
It's here, and upon first impressions... WOW. And man, the metal is THIN. It's thinner than the kits from Metal Earth. A fair bit of patience will be needed.
-
They're better than Metal Earth's instructions. Seriously, pictures of how it's supposed to look after you're done that particular step is extremely helpful. Also, coming home to an empty mailbox made me sad, and a little happy. No model in the mail, but no bills either! Hurry up CanadaPost! I don't have infinite paitence!
-
I would, but I need the model first! Hurry up CanadaPost!
-
Might just do that. The kit should arrive sometime in the next week at the earliest. I've always been impressed at how fast stuff gets to my door from overseas... And surprised at how slow it is to get something from the west coast (particularly California, for some reason).
-
I've been practicing using models from Metal Earth. Small, and along the same lines of complexity. I only use a knife, tweezers, and some pliers to build them. Looking at Jasmine's VF-1, it shouldn't be too hard, as there aren't many complex bends in the kit. These are some great instructions and will go a long way towards making this a easy build!
-
Thanks!
-
Any chance you could post up a copy of the instructions for me to review (and to go nuts over) while I wait for the kit to arrive?
-
I ordered one just now. Looking forward to when it gets here!
-

Edge of Tomorrow, on DVD/Blu-ray Oct. 7, 2014
VF-19 replied to areaseven's topic in Anime or Science Fiction
It was a fun movie. -
Greatly annoy it!
-
Interstellar - In cinemas and IMAX November 7, 2014
VF-19 replied to taksraven's topic in Anime or Science Fiction
Seeing this trailer drove my curiosity to 11. I can't wait till November! -
The computer and electronics super geek thread
VF-19 replied to azrael's topic in Anime or Science Fiction
Well, no time like the present to start saving for it! -
The computer and electronics super geek thread
VF-19 replied to azrael's topic in Anime or Science Fiction
Not sure. It never was the boot drive for the previous system. It was (as is now) being used as a warehouse for everything. In any case, all it really was, was a head scratcher. Nothing was broken, and it was just a really time consuming fix. This incident kinda motivates me to get a bigger, faster NAS. Transfering files at 16ish MB/s is rather... dull. That and all I have on the NAS is 4TB, spread across 2 drives. I might get a 4 bay NAS and 3-4TB drives to fill it. -
The computer and electronics super geek thread
VF-19 replied to azrael's topic in Anime or Science Fiction
Well, fixed my drive problem. Turns out it had nothing to do with the SATA controller. It had everything to do with how the drive was formatted. Apparently the way it was formatted before (for my Socket AM3 motherboard) is incompatable with my current motherboard. A reformat fixed everything. I was trying to avoid it as it is a bit tricky to find room on the home server to house all the stuff... Oh well, at least now I have a spare SATA controller if I decide to build a HTPC out of my spare computer parts. -
The computer and electronics super geek thread
VF-19 replied to azrael's topic in Anime or Science Fiction
Well, got the SATA card, and it didn't make a difference. Still hung on the same part during boot. Oh well, now to try what I've been trying to avoid. A total re-format of the drive... After pulling everything off of it. -
I also suggest using some painters tape on the underside as you cut, so that the itty bitty parts don't achieve orbital velocity when you free them from the fret.
-
The computer and electronics super geek thread
VF-19 replied to azrael's topic in Anime or Science Fiction
Tried switching to legacy boot, and no dice. Hopefully, sometime next week I'll have the SATA controller in hand and we'll see if it fixes everything. -
The computer and electronics super geek thread
VF-19 replied to azrael's topic in Anime or Science Fiction
No dice. The system just gets hung up one step further. Some more investigation setting my SATA ports to hot swap revealed that windows sees the drive as 1.34TB, but Disk management sees it as the full 3TB, as does Intel Rapid Storage Technology. I'm rather tempted to pull all the data off of the drive, delete the partition and reinitialize the drive to see what happens. -
The computer and electronics super geek thread
VF-19 replied to azrael's topic in Anime or Science Fiction
Tried that too. No dice. I would sub another multi-terabyte drive, except I only have one available. All the others are either in my NAS, or broken. I got the 3TB because my 1TB decided to slowly die (but let me get my data off). I've even tried doing a BIOS reset, assuming I mucked up somewhere, and that didn't work either. Heck, I even tried different combinations of cables, and power rails just to run down the possiblilities, and everything is being super stubborn. I did put in an order for a SATA controller at my local computer store, so I'll know next week if it solves my problem. -
The computer and electronics super geek thread
VF-19 replied to azrael's topic in Anime or Science Fiction
Right now, mikeszekely, that is exactly how I have the computer setup. One SSD for boot, and the 3TB for storage/games/whatever. I will definately try out a SATA controller, but the behaviour of the computer is still very puzzling. Upon initial assembly, I had no problems booting with all the drives attached. Two or three boots later, the BIOS (same one, I patched it after the problems started to appear), the 3TB refuses to be recognized on boot. If I make the SATA port hot swappable, then I can plug the drive in after boot, and see the full size, and everything that's in it. The thing is, this is an Intel Z87 chipset motherboard, and as far as google can tell me, nobody has had a problem like I had. I'm almost tempted to replace the board to see what will happen. Oh, and I did find my laptop power brick... After I ordered one on eBay. Luckily, it was only $15. -
The computer and electronics super geek thread
VF-19 replied to azrael's topic in Anime or Science Fiction
Built me a (mostly) new PC. Motherboard: Asus Maximus VI Hero CPU: Intel Core I7-4770K However I have one puzzling problem. My motherboard refuses to now recognize my 3TB Seagate. When I first built it this morning, the computer booted up fine, and saw all the drives. Now, it stops on boot, giving me the code A2 (but not progressing beyond it), telling me that it's hung on drive detection. I've already updated my BIOS, and reset my BIOS (just in case it was my own fault) and troubleshooting has shown that the drive can be read in windows (either by plugging it in via a USB enclosure, or setting my SATA ports to hot swap in BIOS). Moving the drive around on a combination of SATA ports and power lines has resulted in no change. However, if I grab one of my older SATA hard drives (a 320GB Seagate in this case), and plug it into the same port, then it will boot properly. Any ideas why the BIOS would suddenly decide not to boot with that particular drive attached? Google was... less than helpful.