

MacrossJunkie
-
Posts
3249 -
Joined
-
Last visited
Content Type
Profiles
Forums
Events
Gallery
Everything posted by MacrossJunkie
-

1/48+fp's, 1/60+fp's, 1/72, 1/2k, 1/3k,1/100 and now 1/144
MacrossJunkie replied to VF-18S Hornet's topic in Toys
Of course it is (one way or another)! You need only disassemble 30% of the toy to get at the screw underneath the bridge. Alternatively, you can just break it off the peg it's screwed into, take the pic and stick it back on. No one would be the wiser and we won't tell For the assembly kit version, I left the screw out since it squeezed into the hole pretty tight already so it wasn't going anywhere even without the screw. -
Just as a side note, I think the Advance was meant to be a two seater too, but Bandai just didn't make the toy that way. The reason I say this is because they have a 2nd "Danger Ejection Seat" triangle under the area where a second seat would go if the cover were removed.
-
I'd say as long as you keep an eye out for the next few days after the release, you should be able to score one. The VF-19 Adv is way more popular but it was available from a bunch of stores multiple times after release. Worst case scenario if you miss all those and really want one, you could buy from N-Y after release and pay their severely marked up prices.
-
They once showed a prototype for the 1/100 hi-metal line.
-
These please!
-
I have it here as a pdf, including the manual errata inserts. If you already got the pics from Chavakaiser, then just ignore this. SDF-1 Assembly Manual
-
100% agree. The closet I've dedicated to storage just doesn't have enough space. I flattened all my Yamato/Arcadia boxes like that too and stacked the plastic trays. That's why I hate the styrofoam that Bandai uses. People love it for the "nostalgia" or whatever, but for me, it just takes up a ton of space and I can't do anything about it if I want to hold onto the boxes. I'm going to have to take some time to toss out some stuff eventually. Think I'll start with the v1 DX 25 boxes and go from there.
-
If you're having problems with the edge poking out and the tab not going all the way in, the hip joint is probably not squeezed in all the way. If you look on the under side, you can probably see a difference in distance. I resolved that by putting my thumb and index finger on the outer sides of the primary intakes and squeezing them together.
-
It's just the lighting. The color of the parts are identical to the previous releases.
-
I should have gotten that refund! Oh well, got a second 19 from CDJ. Had $20 in discounts with them so that helped soothe the pain a bit
-
M+ Drone Fighter 3D Printing Project Request
MacrossJunkie replied to charger69's topic in The Workshop!
I'd be down for one at 1/60 scale. -
Looks pretty good! What camera did you get? The surface is an interesting pattern, although I think I'm more partial to the black surface myself. I still plan on getting a black acrylic sheet to replace that godawful black velvet dropcloth (a.k.a. lint magnet) I've been using in past photos once I get back into working through my backlog of stuff to weather.
-
It is probably one of the most QC riddled Macross toys to exist. The problems aren't constrained to just the exploding shoulders. Various parts are known to have broken or are missing right out of the box. Needless to say, it is a risky purchase. The EX variants seem to be much safer to get.
-
That's interesting. The leg armor piece goes up higher and covers more of the leg in the pre-production pic. I wonder why they changed that. It would have filled in the atrocious gap a lot better and it doesn't look like it would have been in the way of anything.
-
NY shipped mine too. Will probably arrive by Mon or Tues next week.
-
Thanks for the offer! I appreciate it a whole lot. For now I'm going to give the styrene a try first. I already ordered some sheets of styrene and a pin vise from Amazon and hopefully I'll be able to do something with it. Hopefully it's not too hard to work with. I've never tried something like this before. I'm guessing I'll need to use some modeling putty as well to fill in the gaps between layers and smooth it out.
-
Thanks, guys, for the input! I think I may try going with the styrene idea and take the discount. The styrene may be the easiest route for me. I've got no knowledge or skill with how to make stuff for Shapeways. I toyed with the idea of epoxy putty, but that stuff is really hard for me to shape or use. I just don't think I could make it look right.
-
Yeah, they specifically said I could choose to get a "...full refund--meaning the cost of the item, the cost of shipping it from us to you, and your cost to return it to us."
-
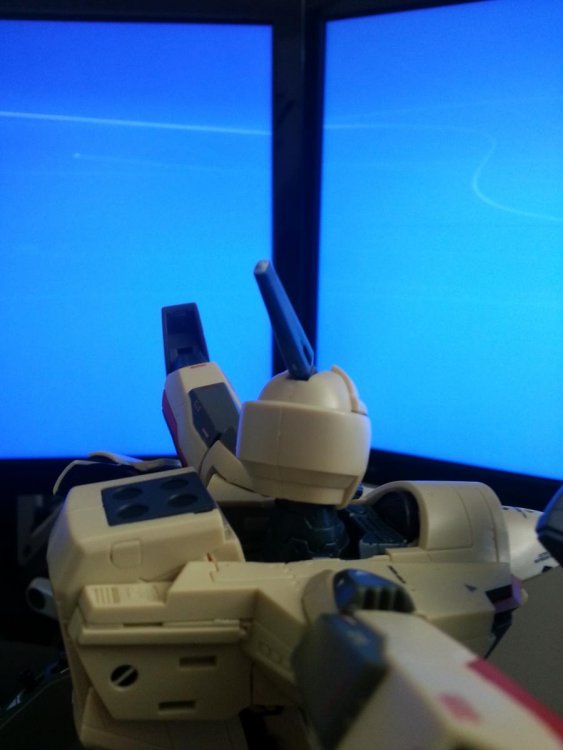
Yep. A few pages back. Here's an additional pic that I sent to HLJ. I would have been happier if it had just snapped off in the box or something. That way, I'd have the piece and just glue it back on and be done with it. But the break is so clean, it's almost like someone just cut it off the sprue at the wrong point. I checked the inside of the box, inside the styrofoam tray and in the plastic trays to no avail.
-
So I have a dilemma. I can either return mine for a full refund including shipping costs or I can keep the one I have and take roughly $40 in discounts for my next purchase. Ideally, I'd prefer to send it back if I could find another one at a reasonable price somewhere else, but it seems like the prospects of that are extremely slim unless I opt to pay for the marked up price at NY (roughly $80-90 more than I paid for at HLJ after considering shipping). I really do like it and want to have a copy, but the one I have now leaves me dissatisfied with the broken head laser...
-
I'm upset because I wrote to parts@hlj.com about my defective head laser and they replied that couldn't get replacement parts and they had none to do an exchange with. Then here they sell some more a couple hours later... wtf?
-
I was under the impression or read somewhere that they worked with Kawamori (or was it Tenjin?) to determine the markings to use. In any case, my only real complaint about the markings is that some of them just look out of scale, like way too big. The ones on the nose cone for example look like they were meant for something at a larger scale.
-
Good catch. That is pretty odd since it now doesn't match the shoulders which are still red on top and black on the bottom. On an unrelated note, I'm going to have to find a match for the tan color they used so I can paint that grey block right above the knee. It just bothers me looking at it because it's so out of place. Arcadia's version also has it, but they managed to mold it in the same color as the rest of the surrounding area.
-
Just been busy. I'll try to pick back up soon!
-
I'm late, but wow, that looks great! The mottling from the salt weathering adds a whole lot to the overall realism. I can only hope to make mine look anywhere near that good. I haven't done anything since last year so I'm probably a little rusty. Saburo uploads and hosts his pics on Flickr. If you do that and add the image hyperlink to your forum post rather than uploading attachments, you can set whatever resolution you want and the pic will be as sharp as the original photo since it doesn't go through extra compression algorithms like pics uploaded to the forums do which causes the loss in detail and sharpness and additional artifacting. The forum hosting is nice and convenient, but if you want to retain the quality of your photos, you should try Flickr, especially since it's free to do so. I mirrored my albums in Flickr also since it lets me categorize my stuff much better. If you want to do that and have any questions, feel free to send me a PM.
