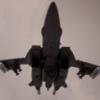
Berttt Posted March 15, 2007 Share Posted March 15, 2007 (edited) I had always wanted a 1/72 scale Gerwalk had have been disapointed that Hasegawa haven't got around to making one. I'd thought of making one from an old Hase VF-1S fighter that didn't turn out very well and a Hase VF-1 Battrod where the clear coat had gone sour, but I didn't like the look to well. Also I wanted more than one which was going to be costly to bash 2 Hase kits for every Gerwalk. In the meantime I had picked up an Imai 1/72 VF-1J Gerwalk and was disapointed by the overall look (the downward pointing noe the most), but after I saw some images from another thread here at MW I thought that something good may come from these old kits with a bit of attention. This was the kit that finally inspired me to action: (Found here: http://nosutaru.fc2web.com/MACROSS/imai/S-GW/1-72-S-GW.html: [attachmentid=41178] I have picked up a lot of stuff off the web and won't claim that any of these ideas are my own. Thanks go to WM Cheng and the author of this site: http://nosutaru.fc2web.com/MACROSS/MACEOSS.html My ultimate goal for this project is to have model that looks like this lineart (taken from the macross Mecha Manual site) only as a super since I don't like the strike variant so much: [attachmentid=41173] Firstly the kit needed a new nose, so I sawed off the old one and added a leftover nose cone from a Hase VF-1 (from the VE-1 kit). The Imai is about 3mm wider than the Hase so I added strip styrene and putty then sanded to shape. [attachmentid=41174][attachmentid=41175] I have also started work on the forearms which needed some shape correction. All I did was slice off an angled portion. The unmodified arm is shown as a comparison: [attachmentid=41176] And added some scribing to spice up the legs: [attachmentid=41177] Edited July 3, 2007 by Berttt Quote Link to comment Share on other sites More sharing options...
Chas Posted March 15, 2007 Share Posted March 15, 2007 Did you scribe the rivet marks on the leg piece? If so, what did you use? Quote Link to comment Share on other sites More sharing options...
007-vf1 Posted March 15, 2007 Share Posted March 15, 2007 Modifing and riveting an Imai kit? looks nice.. you are a brave man. Likewise Chas I wanna know details... Quote Link to comment Share on other sites More sharing options...
mslz22 Posted March 15, 2007 Share Posted March 15, 2007 Great work, and that is a great site, goes to show you how good some of those old kits can look.... Quote Link to comment Share on other sites More sharing options...
Berttt Posted March 15, 2007 Author Share Posted March 15, 2007 (edited) Modifing and riveting an Imai kit? looks nice.. you are a brave man. Likewise Chas I wanna know details... Well I am going to be away a lot with work this year so I'll have a bit a spare time without much to do. Luckily adding scribed details only requires a few tools and lots of time Chas all my scribing work is done with a sewing needle in a pin vice, I haven't done a lot of scribing so far so this should offer a good chance to practice. Edited March 16, 2007 by Berttt Quote Link to comment Share on other sites More sharing options...
big F Posted March 15, 2007 Share Posted March 15, 2007 Great work so far. Thanks for the link that site has plenty to look at. Quote Link to comment Share on other sites More sharing options...
cowie165 Posted March 18, 2007 Share Posted March 18, 2007 (edited) Well I am going to be away a lot with work this year so I'll have a bit a spare time without much to do. Luckily adding scribed details only requires a few tools and lots of time Chas all my scribing work is done with a sewing needle in a pin vice, I haven't done a lot of scribing so far so this should offer a good chance to practice. Berttt where did you buy your pin vise? I grabbed one through eBay from the UK but I got what I paid for: the bits wont centre correctly as the pawls are not cut accurately. Was it a Bunnings job or did you need a specialist tool place? PS The Bandai hands are at work, going in the post on Monday. Sorry about the hold-up. Edited March 18, 2007 by cowie165 Quote Link to comment Share on other sites More sharing options...
cowie165 Posted March 18, 2007 Share Posted March 18, 2007 And reference your goal pic: when I made the Bandai variable into a fixed gerwalk (and aiming for a similar pose), the hardest parts were the knee and ankle joints, particularly the ankles. It is a bugger to set the angles right. Looking forward to seeing what you can do bloke. Oh yeah, make sure you throw plenty of lead into the legs. It will make life a lot easier down the track! Quote Link to comment Share on other sites More sharing options...
big F Posted March 18, 2007 Share Posted March 18, 2007 Berttt where did you buy your pin vise? I grabbed one through eBay from the UK but I got what I paid for: the bits wont centre correctly as the pawls are not cut accurately. Was it a Bunnings job or did you need a specialist tool place? I got one made by Eclipse, Draper also make one IIRC. they wernt that expensive I found mine in a normal hardware store. Other than that I use a pin chuck which is meant to go into a drill to allow you to use really small drill bits. Mines arround 35 years old and is as good as the day my Dad gave it to me. Quote Link to comment Share on other sites More sharing options...
cowie165 Posted March 19, 2007 Share Posted March 19, 2007 Brett the valk hands are in the mail to your work address. Please let me know when they arrive! Quote Link to comment Share on other sites More sharing options...
Berttt Posted March 27, 2007 Author Share Posted March 27, 2007 Picked them up from work today after I got back from Avalon. Cheers man. PS: My pinvice is a Citadel one, but you can get better ones around that have pawls that will accept smaler bits and hold the bits i the handle, mine has a little plastic container that threatens to get lost at any time. Quote Link to comment Share on other sites More sharing options...
Berttt Posted April 8, 2007 Author Share Posted April 8, 2007 (edited) Minor update: I have been working on a replacement knee section that will be far more acceptable. It isn't 100% finished yet as there are a few flaws to fix, but I squited some grey on for these pics since I won't be able to work on it for a few weeks . I had to redo some sections a few times to get it right, but in the end I think it turned out ok. Here is the new section with the regular leg: [attachmentid=41791][attachmentid=41792][attachmentid=41795] And with the as yet unmodified FAST pack leg: [attachmentid=41794][attachmentid=41793] and mocked up with part blu-tacked together: [attachmentid=41796] I have one more part to make up and then I can send the lot off to the casters. Any feedback would be appreciated. Cheers, Berttt Edited April 8, 2007 by Berttt Quote Link to comment Share on other sites More sharing options...
Chas Posted April 8, 2007 Share Posted April 8, 2007 Wow! it's hard to believe I'm looking at an Imai kit in those pics. Nice Job! A word to the wise though, the pose in that line art pic is unatainable, or it has been for me anyway. I have managed to achieve a close approximation though. What I ended up having to do was adding weight (in the form of the little lead balls that make up the contents of buck-shot shells) into the nose, feet, and front portion of the super packs. So before you start to glue the sub-assemblies together you may want think about where you want to add weight. I was working with two Hase. kits, I don't know if the Imai will have the same issue but measure twice cut once! as they say. Once again it looks GREAT! Quote Link to comment Share on other sites More sharing options...
mslz22 Posted April 8, 2007 Share Posted April 8, 2007 Great work, i just picked up a couple of those bandai fastpack fighters to kitbash for either a battroid or Gerwalk custom as well. It's cool to see some of these old kits getting some life...... Quote Link to comment Share on other sites More sharing options...
cowie165 Posted April 9, 2007 Share Posted April 9, 2007 Berttt that is looking very very nice. Hats off for the time and effort you're putting into an older kit! PS That website is great! Time for a brew and a browse Quote Link to comment Share on other sites More sharing options...
kensei Posted April 9, 2007 Share Posted April 9, 2007 Bertt, that looks sleek man. Very nice. Cna't wait for the finish. Quote Link to comment Share on other sites More sharing options...
cowie165 Posted April 9, 2007 Share Posted April 9, 2007 http://nosutaru.fc2web.com/MACROSS/imai/max-GW/DSCN3757.JPG Anyone else think the whole nose/canopy profile looks weird? The nose seems kinda long and the canopy too shallow/flat. Bertt is that the standard NATO Imai front end they've used? Quote Link to comment Share on other sites More sharing options...
Berttt Posted April 14, 2007 Author Share Posted April 14, 2007 Hey Cowie, no that isn't the Imai nose on that one. This picture shows the builder using some sort of resin replacement: [attachmentid=41992] Quote Link to comment Share on other sites More sharing options...
Recommended Posts
Join the conversation
You can post now and register later. If you have an account, sign in now to post with your account.