SuperSenpai Posted February 13, 2013 Share Posted February 13, 2013 I wasn't sure whether this should go under the modeling or toy forums -- but has anyone completed or attempted to build one of the Yamato V2 1/60 unpainted assembly kits? How does it compare to the assembled toy? Difficulty level? I'm assuming that these kits are basically the same things they hand to the factory workers to put together to make the actual toys. I haven't built any models since I was a kid, and those were very rough, but I'm feeling the itch to put one of these together. Quote Link to comment Share on other sites More sharing options...
eggy99 Posted February 13, 2013 Share Posted February 13, 2013 check out this blog for a review on the unassembled kit http://www.mech9.com/blog/2012/08/yamato-160-vf-1a-no-paint-kit-with-bonus-option-parts/ I've got an unassembled kit that I need to find time to put together. From what I've read, the kit is not for inexperienced model kit builders. Runners are all unmarked, so you have to identify the parts by inspection. Also the 30th anniversary kits don't come with stickers. Only water slide decals (well mine did anyway). I wouldn't call myself experienced, so i reckon this is going to be a long build - maybe even a train wreck if I'm not careful. Quote Link to comment Share on other sites More sharing options...
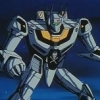
GGemini Posted February 13, 2013 Share Posted February 13, 2013 I built the VF-1J, then painted it to look as it appears in The First manga (or as close as I could). Later I sold it to jvmacross. As eggy99 mentions, not all runners are marked, and it's definitely better to remove the pieces from the runners as you build. The kit includes lots of pins and they're not easy to identify as the size difference is minimal. Oh, and other thing... once a part is assembled, there's no turning back. Having a VF-1 toy as reference definitely helps to see which parts go where, and it was very useful to me especially to plan the painting. In the same blog that eggy99 mentions, I found an assembly guide that someone kindly translated to English: http://www.mech9.com/blog/2012/07/yamato-160-vf-1-no-paint-kit-w-bonus-parts-construction-manual/ It took me around 3 weeks to finish. Quote Link to comment Share on other sites More sharing options...
SuperSenpai Posted February 14, 2013 Author Share Posted February 14, 2013 Thanks for the replies. That review doesn't seem to have too much other that pictures, unfortunately. It looks like the author hasn't gotten around to writing up the actual build process yet. I noticed that it seems to come with decals that match the painted details -- so technically it would be possible to build the whole thing without painting right (obviously it wouldn't look as nice). One thing I don't get -- it seems most of it is held together by screws. If that's the case, then why is there no turning back once the part is assembled? How does your assembled kit compare to the factory made toy? Quote Link to comment Share on other sites More sharing options...
Loop Posted February 14, 2013 Share Posted February 14, 2013 (edited) I would think that it would turn out like the 1/60 v2 "No Painting" version that was released maybe a few years back. I have that one and the kit version, so I never even bothered to build the kit.... http://www.hlj.com/product/ymt00181 Edited February 14, 2013 by Loop Quote Link to comment Share on other sites More sharing options...
Hikuro Posted February 14, 2013 Share Posted February 14, 2013 They are a bitch to build, you really need to own one and look everything over. Then you'll need a Pin pusher, plyers, sand paper etc etc. You gotta keep everything including those hinge pins organized. It's easy to screw something up. Quote Link to comment Share on other sites More sharing options...
Jasonc Posted February 14, 2013 Share Posted February 14, 2013 I've put one together, and they are very time consuming, but I wouldn't say difficult. Then again, I have built quite a few different things, so maybe it's only easier because of that? In any case, you really need to make sure you do it right the first time. It's a pain if you have to dismantle any parts you put together. They aren't great for ful paint jobs, but if you're going to do one, make sure the white is the primary color and use any paint as just trim on less or non-moving parts. Quote Link to comment Share on other sites More sharing options...
GGemini Posted February 14, 2013 Share Posted February 14, 2013 Thanks for the replies. That review doesn't seem to have too much other that pictures, unfortunately. It looks like the author hasn't gotten around to writing up the actual build process yet. I noticed that it seems to come with decals that match the painted details -- so technically it would be possible to build the whole thing without painting right (obviously it wouldn't look as nice). One thing I don't get -- it seems most of it is held together by screws. If that's the case, then why is there no turning back once the part is assembled? How does your assembled kit compare to the factory made toy? Actually the manual included with the kit is not bad at all, and if you download the one that is translated from that website, it's clearer. Not everything is assembled with screws, and the parts have a tight fit. There are also that need to be glued and, as Hikuro mentions, you need to be very careful with all the pieces that involve pins. The assembled kit ended up being almost the same as the toy. Some joints ended up tighter. And you can do some changes too. For example, knurled pins are included for the shoulders but there are other 2 that are the same size but "unknurled" so I swapped them. It does come with decals (water-slide) if you decide not to paint it. But if you want to build a color scheme that is already available, I suggest you buy the toy. This kit is best for customs. In spite of everything, it is fun to build IMO. Quote Link to comment Share on other sites More sharing options...
Recommended Posts
Join the conversation
You can post now and register later. If you have an account, sign in now to post with your account.