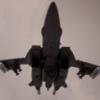
Berttt Posted April 4, 2005 Share Posted April 4, 2005 (edited) Well as a lead up to assembling the Atmosheric Booster I thought I would tackle this little guy. As you can see I am in the initial stages of filling all those little bubbles and casting imperfections. There is quite a lot do do as there is no part without something to be filled. My weapon of choice for this task is Mr Surfacer 500 and 1000. Will up date when I have finished filling and sanding. Edited April 4, 2005 by Berttt Quote Link to comment Share on other sites More sharing options...
zeo-mare Posted April 4, 2005 Share Posted April 4, 2005 hi good luck on the kit, i understand fully resin kits can be a real bitch to build i am building the 1/72 Geara Doga on this site. i cannot wait to see your buildup of this. by the way your picture is only half loading for me chris Quote Link to comment Share on other sites More sharing options...
Myersjessee Posted April 4, 2005 Share Posted April 4, 2005 Can't wait to see more. Quote Link to comment Share on other sites More sharing options...
Berttt Posted April 5, 2005 Author Share Posted April 5, 2005 Well I have almost finished filling and sanding. No pics yet, but I wil have after I finish priming. After having a think about colours I decided do do it in the standard white, but with a variation; the large lower arm will be in yellow and black hazard lines, an the light bar on the top will be done in orange. I have collected my markings for the little bugger: Kite will be supplied by left over Hasegawa item Numbers and letters will be painted on via stencil Placards from various left over decals from other aircraft kits. Also what is the policy regarding non macross kits in this section, I know we have had various Gundam kits here, as well as Yukikazi but what is the official line? Cheers, Berttt Quote Link to comment Share on other sites More sharing options...
zeo-mare Posted April 5, 2005 Share Posted April 5, 2005 there does not seem tyo be a official line, i guess if it is a cool kit that the mods are interested in it they will allow you to build it many of the things and techniqes that you use to build a gundam or space ship kit can probably also be used to build a macross kit, so many times people learn new things from the people posting which allows them to build better macross kits in the long run. by the way how big is this kit any how, do you have any sort of other toy or kit you can pose the main body along side? thanks chris Quote Link to comment Share on other sites More sharing options...
Berttt Posted April 17, 2005 Author Share Posted April 17, 2005 (edited) Quick update. The base coat is on. I recently lost the red out of my monitor so if the pics look too bright or the colour is off that's why. Edited April 17, 2005 by Berttt Quote Link to comment Share on other sites More sharing options...
Berttt Posted April 17, 2005 Author Share Posted April 17, 2005 (edited) The yellow is the base coat for the two tone black/yellow hazard stripes. Edited April 17, 2005 by Berttt Quote Link to comment Share on other sites More sharing options...
HWR MKII Posted April 17, 2005 Share Posted April 17, 2005 (edited) Id use thin chart tape and wrap it around the arms to mask it and then airbrush the black on them. Remove the tape and there you go , perfectly spaced warning lines. This model screams for a good wash and drybrush session along with some pastels. Please more results. I was thinking about the cockpit on these the other day too. Why not make it gold like a space suit helmet. Since its not molded clear it would give it a SciFi feel. Edited April 17, 2005 by HWR MKII Quote Link to comment Share on other sites More sharing options...
Berttt Posted April 17, 2005 Author Share Posted April 17, 2005 The kite is a hasegawa item and the numbers are left over kit decals. I was too lazy to piant them on as I intended. The "P" is a 6 as found in a Hase VF-1 kit, with part of the tail cut off. Quote Link to comment Share on other sites More sharing options...
Berttt Posted April 17, 2005 Author Share Posted April 17, 2005 (edited) Id use thin chart tape and wrap it around the arms to mask it and then airbrush the black on them. Remove the tape and there you go , perfectly spaced warning lines. This model screams for a good wash and drybrush session along with some pastels. Please more results. I was thinking about the cockpit on these the other day too. Why not make it gold like a space suit helmet. Since its not molded clear it would give it a SciFi feel. Hey HWR, can you give me a bit more detail on the chart tape you mentioned? I like the idea of the gold, I have some humbrol metalcote that comes up really shiny, if I use that with a clear yellow over the top I should ge the right effect. The Bug has a lot more decals and weathering to go. I may be able to finish it in a week or so. Enjoy. Berttt Edited April 17, 2005 by Berttt Quote Link to comment Share on other sites More sharing options...
HWR MKII Posted April 17, 2005 Share Posted April 17, 2005 You should be able to get the tape from most office supply stores. It comes in many different widths and isnt too tacky. just pick the width that will fit the size of the model and stripe you want and wrap it around the arm tubes to mask the areas you want to stay yellow. Its easier than cutting masking tape and trying to keep the width the same all the way. Your idea sounds good for the gold on the bubble just make sure the gold is reflective enough to show through the clear yellow. Quote Link to comment Share on other sites More sharing options...
honneamise Posted April 20, 2005 Share Posted April 20, 2005 This is really a great piece of work Berttt! Seems you got rid of all the little imperfections that come with resin kits, the (nearly) finished model looks just plain perfect to me. Can´t wait to see more photos. What did you use to get the white finish? Is it a primer or just paint? I´ve been using Citadel White Primer (acrylic) for years but they seem to have changed the recipe for that paint as it does not stick to my resin parts as it did before. By the way, the kit of the Bug is just awesome. Now that you posted these photos I am REALLY SORRY I joined MW too late to get one! Should Gundamhead/Myersjessee consider a new production run I´d be definitely IN! Can you hear me??Please!!! Quote Link to comment Share on other sites More sharing options...
Robert S Posted April 21, 2005 Share Posted April 21, 2005 i thought these were still in production now with you choise of canapy and light bae clear resin colors. of course i cound just be nuts Quote Link to comment Share on other sites More sharing options...
honneamise Posted April 21, 2005 Share Posted April 21, 2005 Well Robert S now that you posted it I remember something about clear parts for the Spiderbug too, although I did a search for this and there was no result. Anyone here who knows about a Spiderbug with clear parts still in production? Or was it just a proposal? I´d really love one with or without those gimmicks as I´m not into lighted models anyways and in this scale just painting the lights will do the job for me. Quote Link to comment Share on other sites More sharing options...
Gundamhead Posted April 21, 2005 Share Posted April 21, 2005 This is my pay off. Thanks Berttt! I wanna build my own now! I like your color scheme. The 'official scheme' is pretty bland. Looks like it's on it's way to build some ARMD carrier in dry dock. Did you just drill out the raised circle bar verniers and add a strip of styrene? It's looking great, i can't wait to see your booster. Quote Link to comment Share on other sites More sharing options...
Berttt Posted April 24, 2005 Author Share Posted April 24, 2005 (edited) Another quick update. More more warning and maintenance decals as well as the yellow/black hazard markings. Edited April 24, 2005 by Berttt Quote Link to comment Share on other sites More sharing options...
Berttt Posted April 24, 2005 Author Share Posted April 24, 2005 I really should get some practice in with this new digital camera, fuzzy pictures don't tell much of a story. Quote Link to comment Share on other sites More sharing options...
Berttt Posted April 24, 2005 Author Share Posted April 24, 2005 honneamise - The white is Mr Base white sprayed on with an airbrush, followed by Tamiya flat white. Don't be fooled by these fuzzy pictures, there is plenty of faults in it's finish. Gundamhead - I removed the raised verniers and countersunk in some Wave items. HWRII - Thanks for the tip on chart tape, as you can see it worked a treat! Thanks for the comliments guys, I appreciate it. Cheers, Berttt Quote Link to comment Share on other sites More sharing options...
HWR MKII Posted April 24, 2005 Share Posted April 24, 2005 I think paint flaws in a subject like this make it all the more real looking. Ever seen a piece of construction equipment with perfect paint? I havnt either. I like the "nose" art you selected for it. Where did you get that? Quote Link to comment Share on other sites More sharing options...
honneamise Posted April 24, 2005 Share Posted April 24, 2005 Looks even better now, Berttt. I´d say you did a really good paint job. Considering the pics are bigger than the actual model, I cannot say I see anything that could be called a "flaw". Thanks for sharing this great build up!! Quote Link to comment Share on other sites More sharing options...
Berttt Posted May 27, 2005 Author Share Posted May 27, 2005 (edited) Well the Bug has been on hold for a while because I have been busy. I know what you mean HWR, I will be trying for that "beat up" look, but will avoid the "badly painted model" look that can sometimes occur whe trying this. The nose art is from Starship Modellers cheesecake, I thought it would make a nice touch. GH: I cut off the raised verniers and countersuck some Wave items. I am surprised n one has built one of these yet. Thanks for all the props guys, will try and get it finished soon. On a side note, my unit has deployed for a few weeks and I find that I am playing cartaker for the hangar, so I have started the Massive Madness Macross Manufacturing project. 7 Hasegawa kits lay on the bench at work as I mass produce parts for assembly. Hope I can gat most of it done before the blokes get back! Berttt Edited May 27, 2005 by Berttt Quote Link to comment Share on other sites More sharing options...
jardann Posted May 27, 2005 Share Posted May 27, 2005 On a side note, my unit has deployed for a few weeks and I find that I am playing cartaker for the hangar, so I have started the Massive Madness Macross Manufacturing project. 7 Hasegawa kits lay on the bench at work as I mass produce parts for assembly. Hope I can gat most of it done before the blokes get back! Wow! It must be nice to have a free workbench to mass produce some valks! And a perfect atmosphere too, a hangar. And to be on the clock while your building...priceless! I'd love to see a pic of the assembly line. Quote Link to comment Share on other sites More sharing options...
Grayson72 Posted May 28, 2005 Share Posted May 28, 2005 Nice build, how did you do the black stripes? they make it look very believable. Quote Link to comment Share on other sites More sharing options...
Berttt Posted October 10, 2005 Author Share Posted October 10, 2005 I thought I'd add some progress pics of the Bug. She's almost finished. Grayson: I painted the sections yellow then wrapped thin chart tape aroungnd the arms at the right angle. Masked off areas to remain yellow and presto, black stripes. Quote Link to comment Share on other sites More sharing options...
Myersjessee Posted October 10, 2005 Share Posted October 10, 2005 I thought I'd add some progress pics of the Bug.She's almost finished. Grayson: I painted the sections yellow then wrapped thin chart tape aroungnd the arms at the right angle. Masked off areas to remain yellow and presto, black stripes. 335390[/snapback] Looks GREAT! Where are all the others?!?! Come on now boys and girls! Quote Link to comment Share on other sites More sharing options...
Grayson72 Posted October 10, 2005 Share Posted October 10, 2005 I thought I'd add some progress pics of the Bug.She's almost finished. Grayson: I painted the sections yellow then wrapped thin chart tape aroungnd the arms at the right angle. Masked off areas to remain yellow and presto, black stripes. 335390[/snapback] Looks GREAT! Where are all the others?!?! Come on now boys and girls! 335536[/snapback] Uhmmm and yours is.....where? Quote Link to comment Share on other sites More sharing options...
Berttt Posted September 23, 2006 Author Share Posted September 23, 2006 (edited) Well the Spiderbu ig finally finished. Overall I think it turned out OK, but I am not thrilled with. I am hower thrilled that one less kit is on my build pile. Man taking photos of white kits is a pain, a lot of the subtle weathering didn't show up, oh well better get better at taking pics then Cheers, Berttt Edited September 23, 2006 by Berttt Quote Link to comment Share on other sites More sharing options...
Grayson72 Posted September 23, 2006 Share Posted September 23, 2006 Well the Spiderbu ig finally finished. Overall I think it turned out OK, but I am not thrilled with. I am hower thrilled that one less kit is on my build pile. Man taking photos of white kits is a pain, a lot of the subtle weathering didn't show up, oh well better get better at taking pics then Cheers, Berttt That looks really great Bertt, thanks for sharing. When I do mine I probably won't weather it quite so much. The base you made kicks ass man! Quote Link to comment Share on other sites More sharing options...
HWR MKII Posted September 23, 2006 Share Posted September 23, 2006 Bravo! Excellent work. I wanted to get one but something about it never really caught with me. You brought it to life though. Quote Link to comment Share on other sites More sharing options...
Berttt Posted September 24, 2006 Author Share Posted September 24, 2006 (edited) That looks really great Bertt, thanks for sharing. When I do mine I probably won't weather it quite so much. The base you made kicks ass man! Thanks Chad, I realise that the weathering may be a bit much for some, but I always saw this as a kind of "Space Forklift". As such I figured it would be pretty busy, and always getting knocked about retriving debris from outside the ship, or carrying out repairs after a battle, with little time for touching up paint etc. Edited September 24, 2006 by Berttt Quote Link to comment Share on other sites More sharing options...
jardann Posted September 24, 2006 Share Posted September 24, 2006 Really nice work Berrrt. It looks like that bug gets a lot of work. The cheesecake art is a nice touch and the base puts the little guy into perspective I think. I like the gold cockpit glass too. Seems like you've been pretty busy lately! Quote Link to comment Share on other sites More sharing options...
Recommended Posts
Join the conversation
You can post now and register later. If you have an account, sign in now to post with your account.