Search the Community
Showing results for tags '1/72'.
-
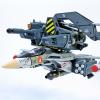
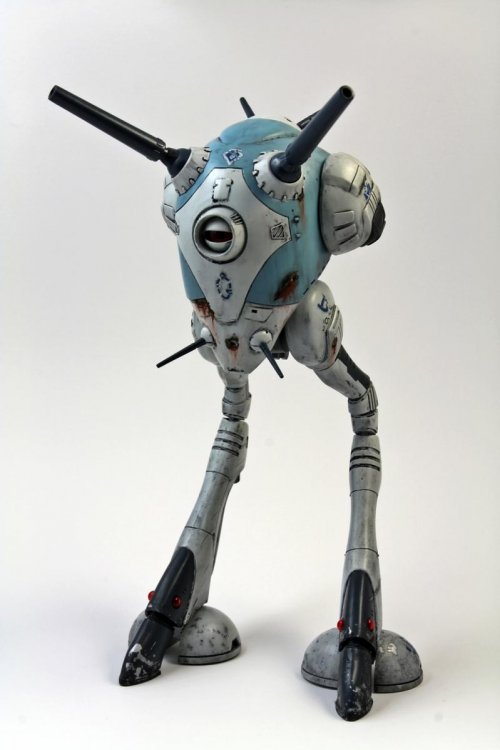
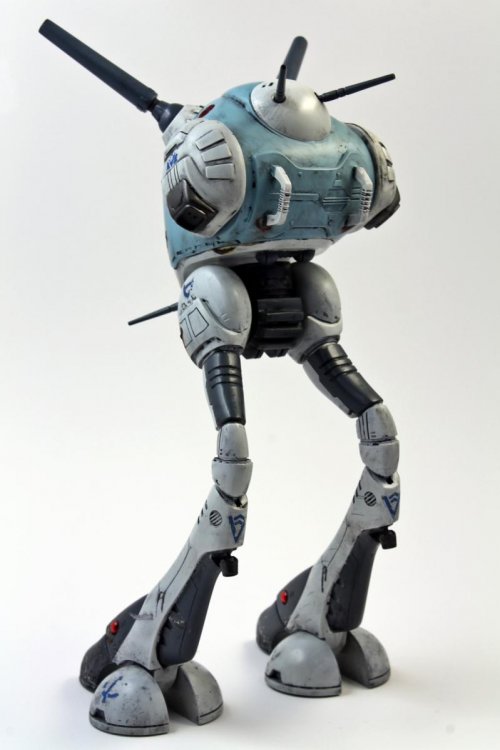
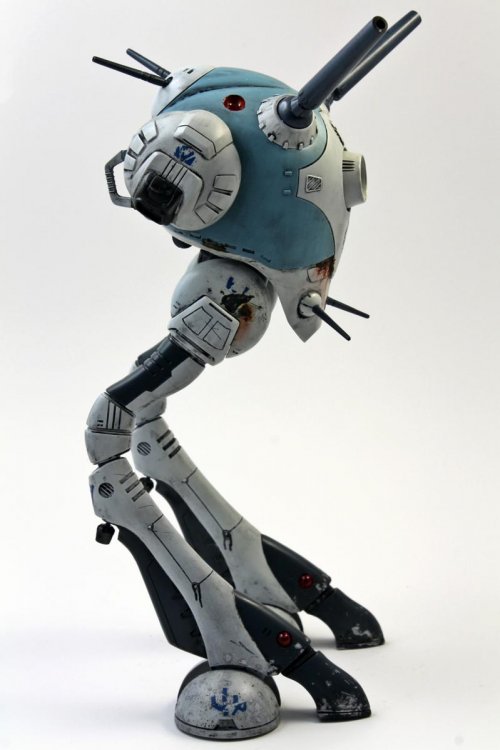
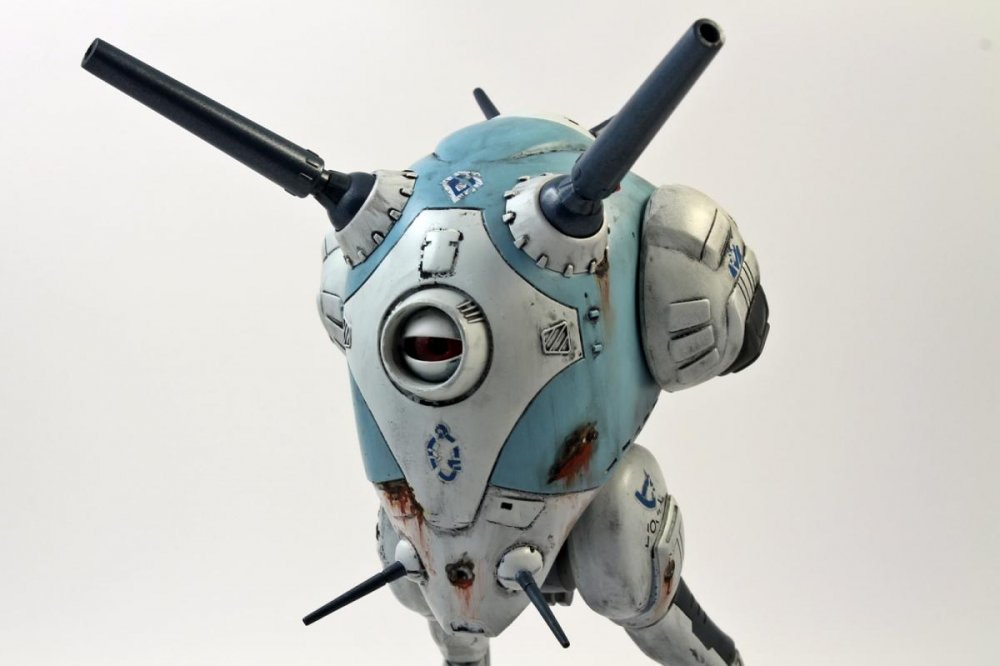
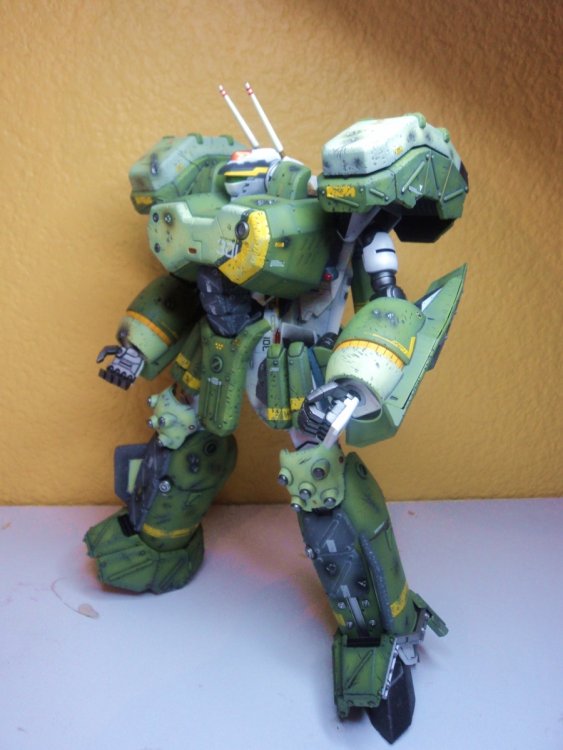
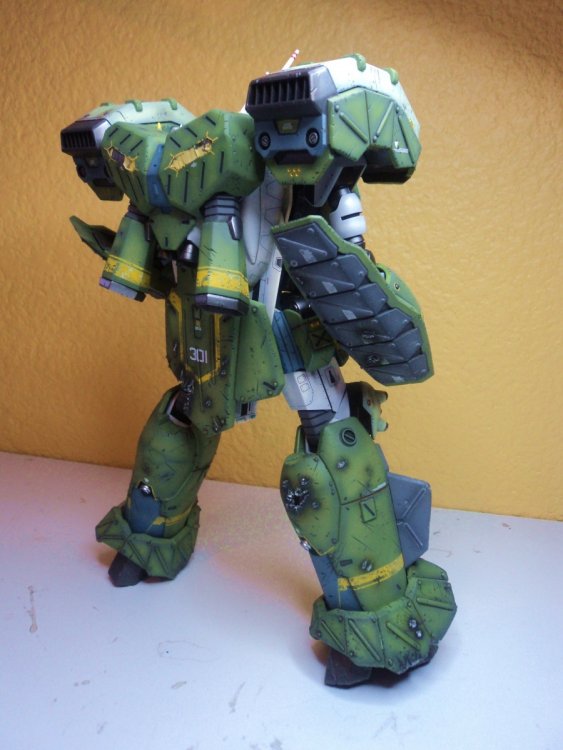
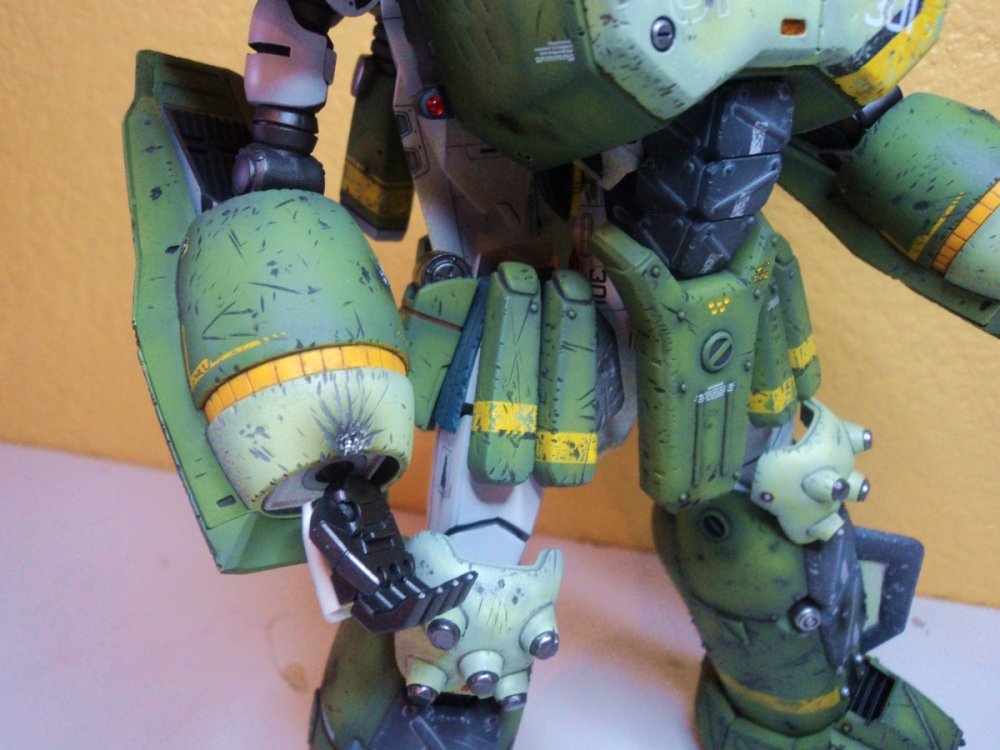
Old school kit, with new school tooling. This is the Bandai rerelease of Imai's old 1/72 Regult kit. Even though it has new tooling, it's still an old school kit. Be ready for a lot of puttying and sanding!! Since the Zentradi didn't know anything about maintenance, I wanted to make this look like it's been in action a few hundred more cycles than it should have been. More to be seen at the regular place.
-
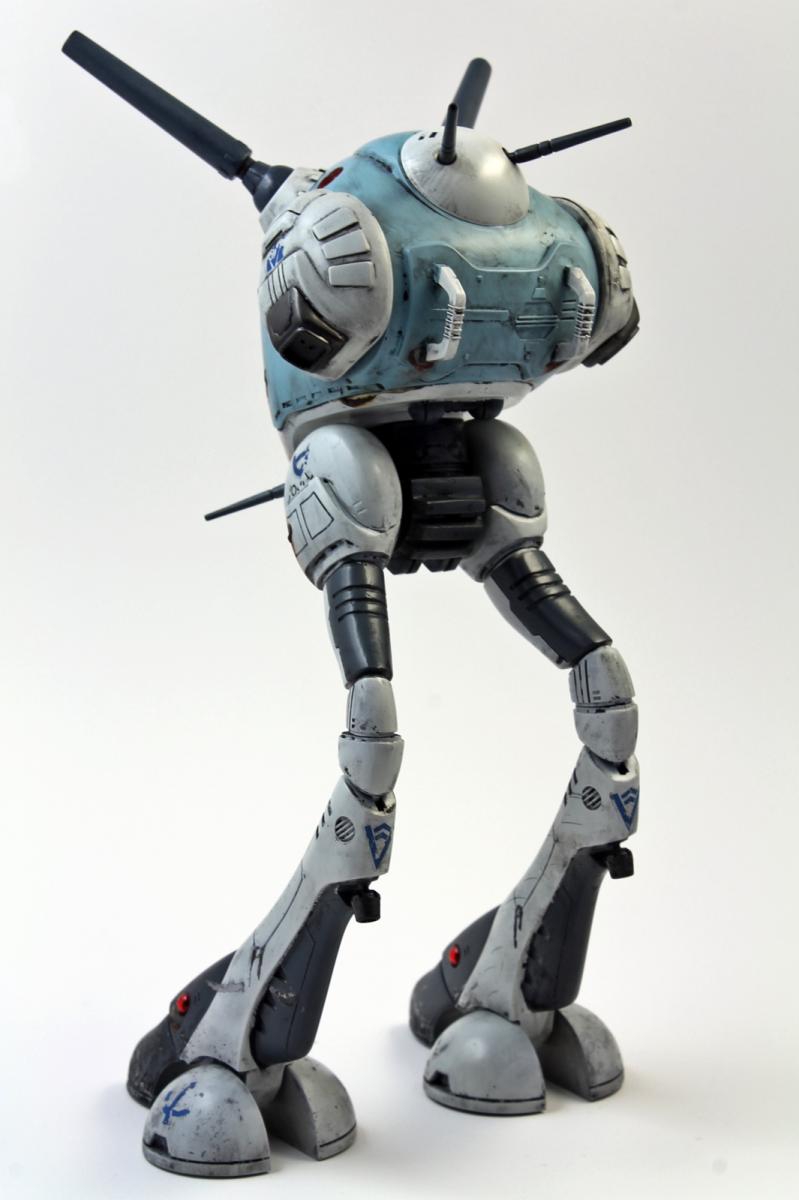
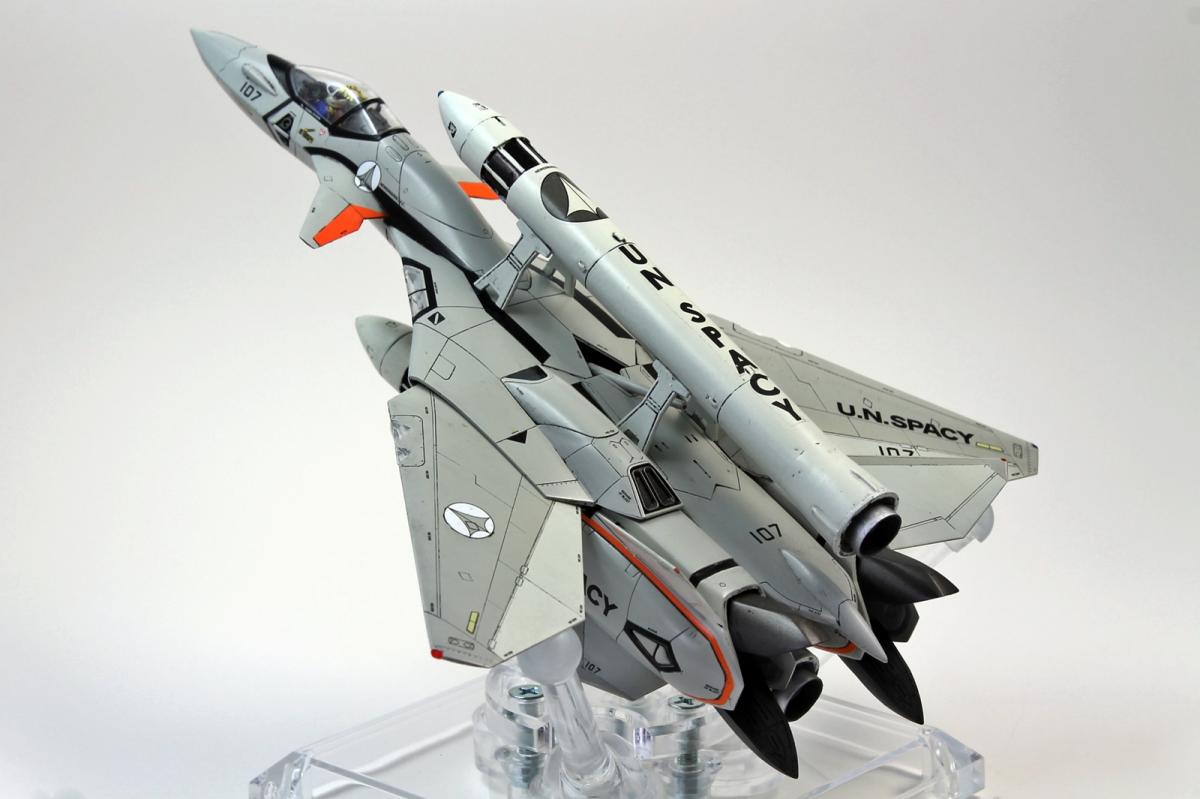
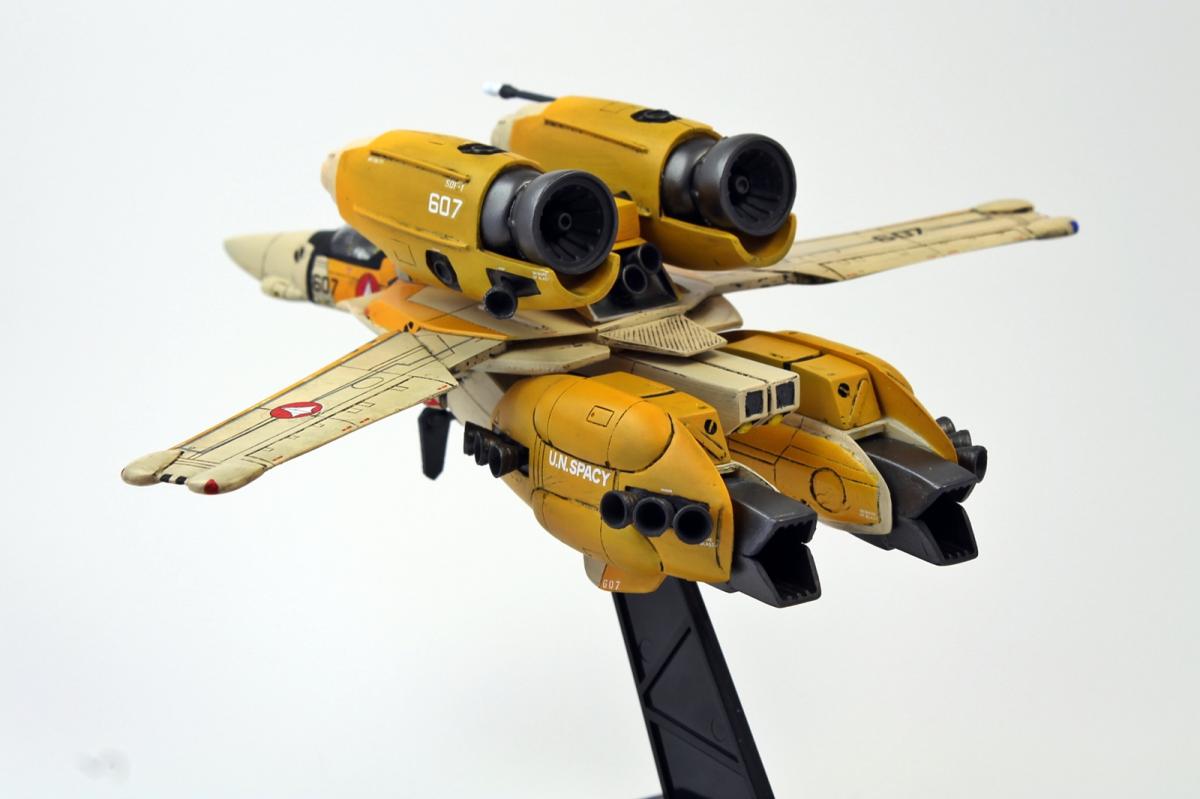
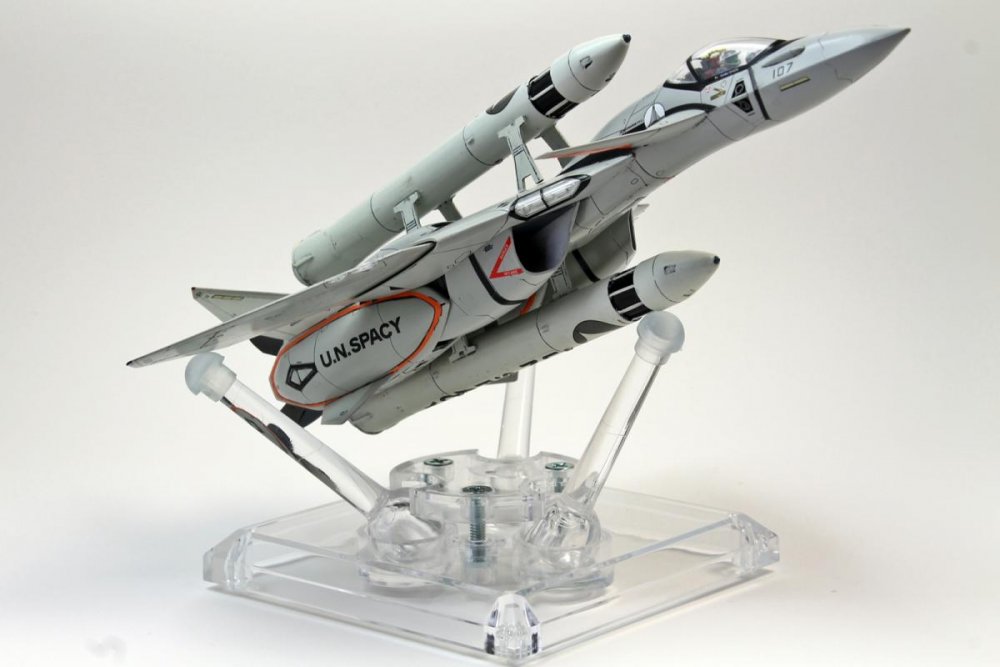
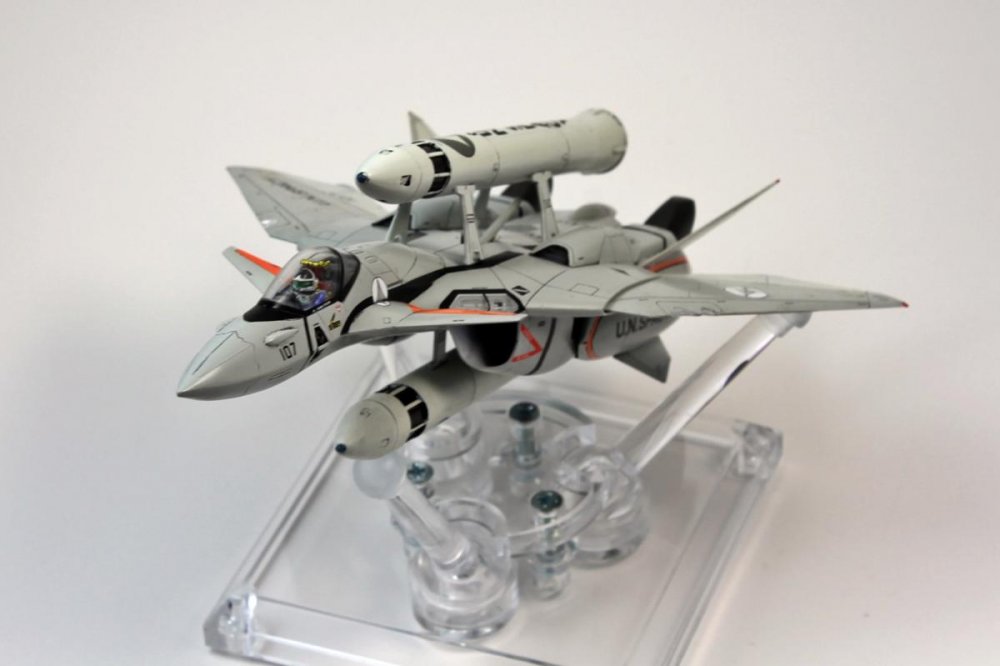
Latest addition to my completed collection. A 1/72 scale VF-11B Thunderbolt, from Hasegawa, plus a 1/72 resin booster set from the Club M release of same. The Club M release also came with the Super Packs, so that's why I used the boosters on this one. As usual, more to be seen here.

-
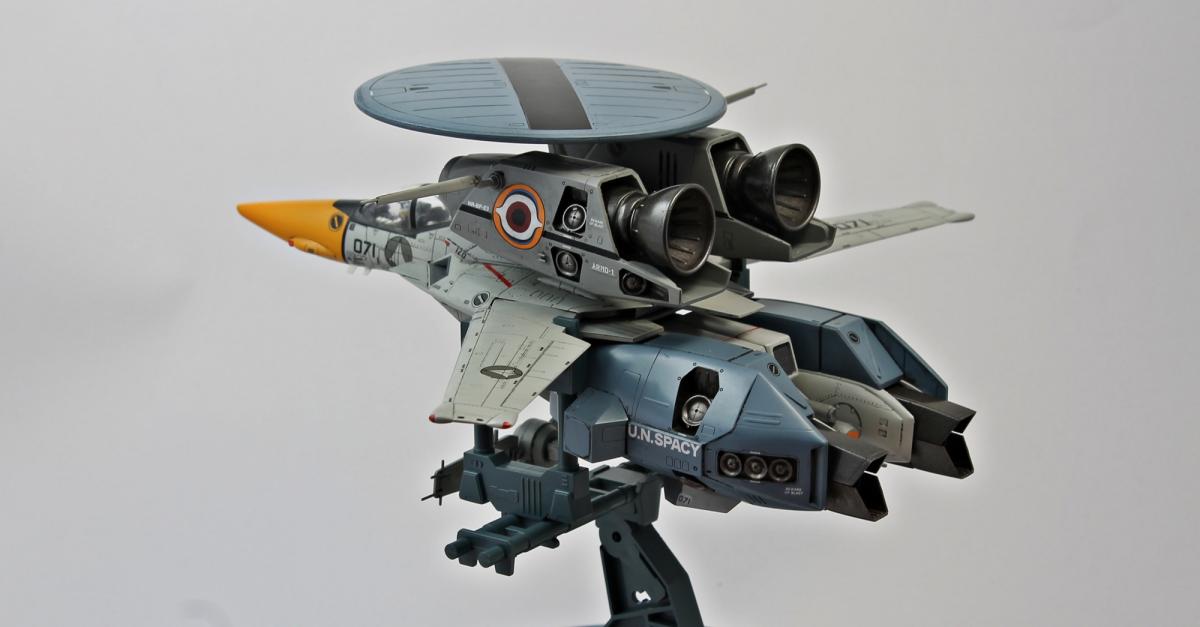
Actually, I finished this last week, but my computer died, and couldn't get around to uploading the pics until now. Heard horror stories about the decals on this one, but I never had any problems. Just kept Mr's Mark Softer and Setter close at hand. I had originally planned on having a standing Nora next to the plane, but unfortunately instead of carefully bending her, I broke her. Guess I should have use actual boiling water, and not just very hot water. As usual, more can be seen here.

-
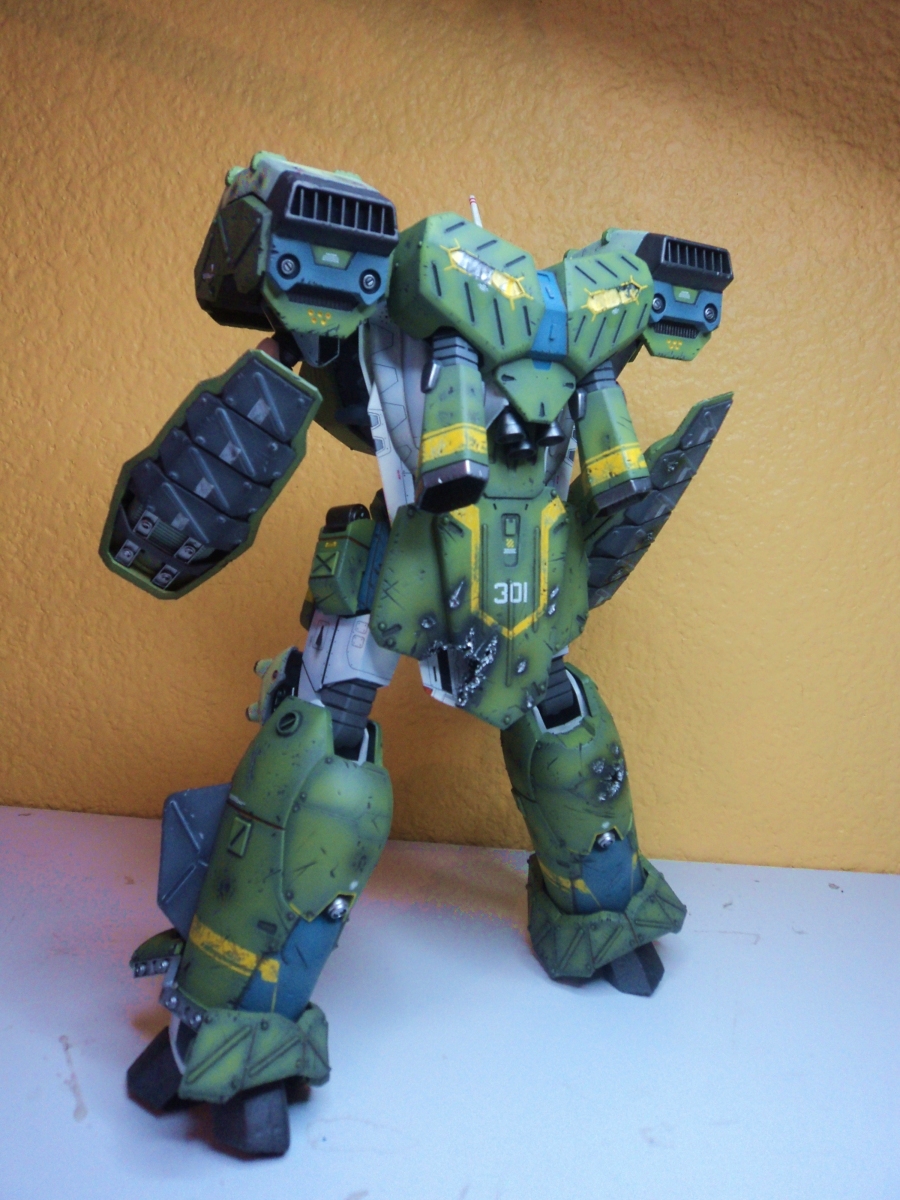
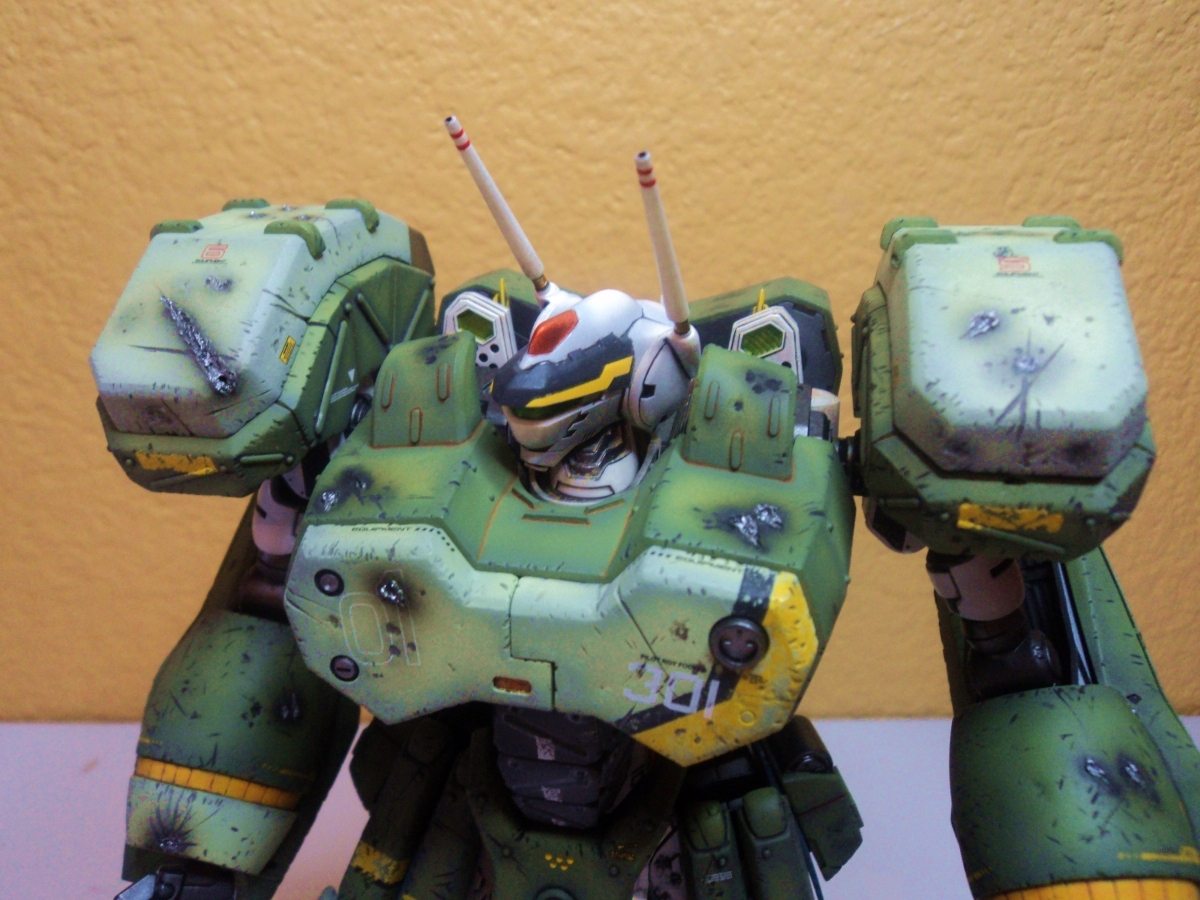
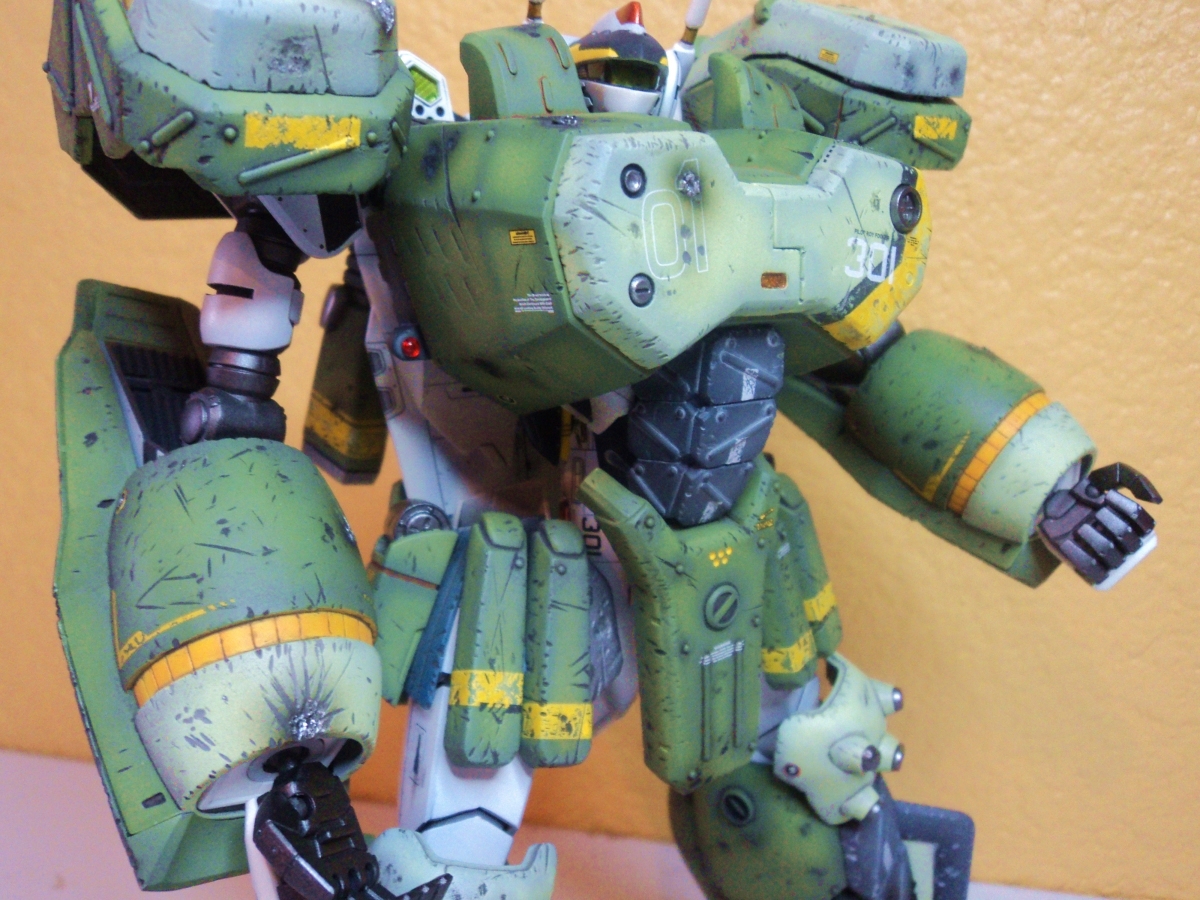
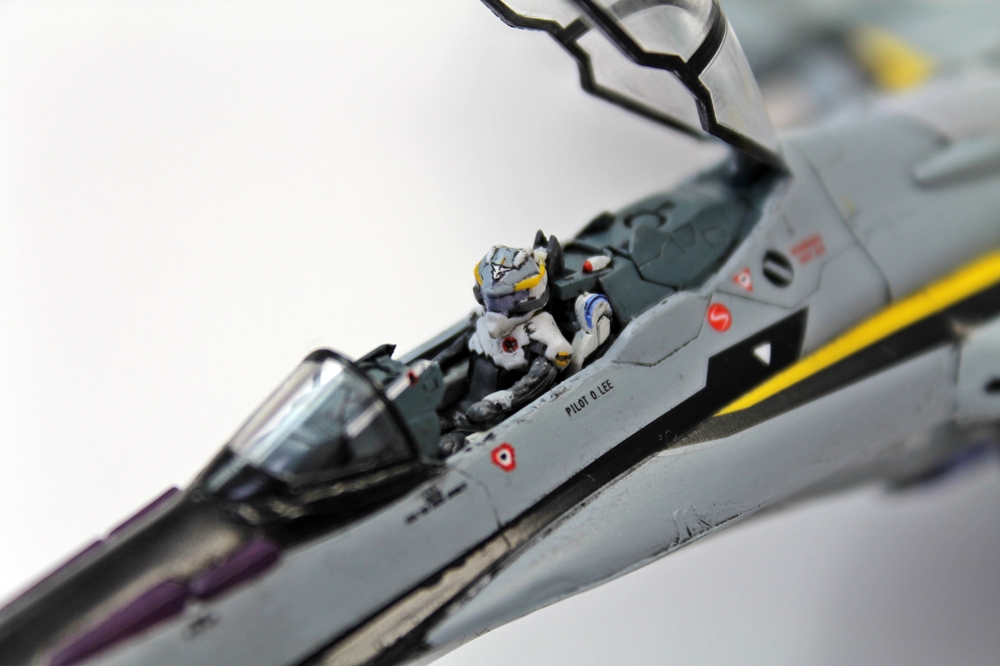
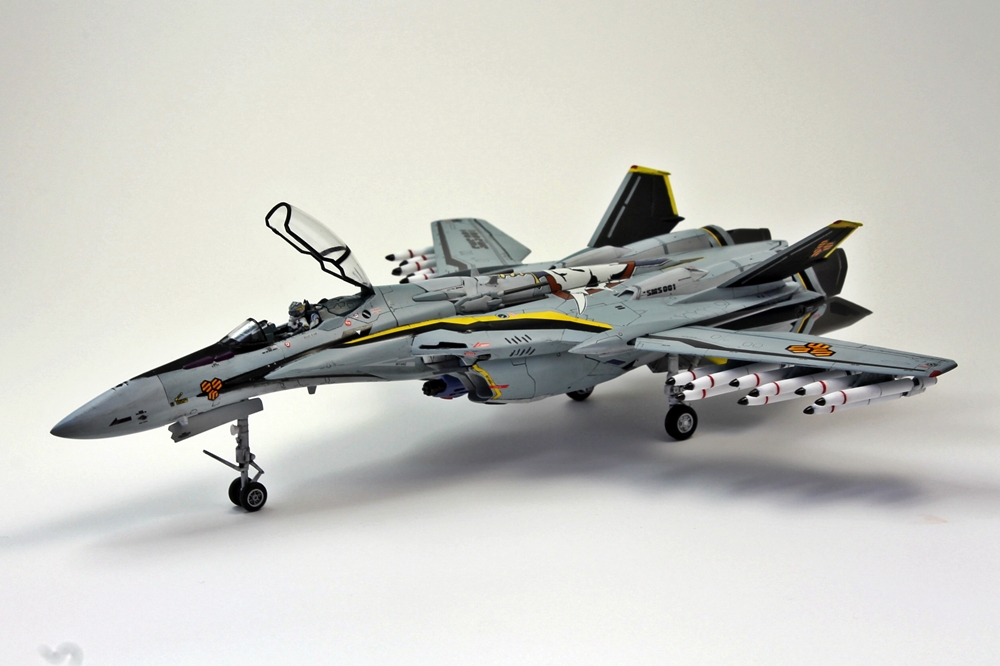
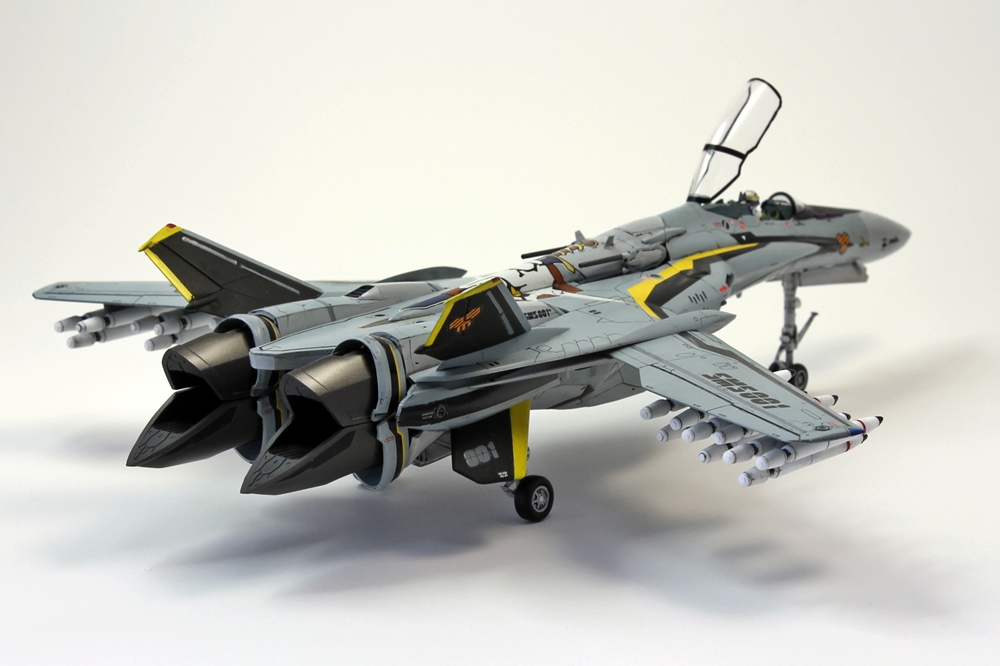
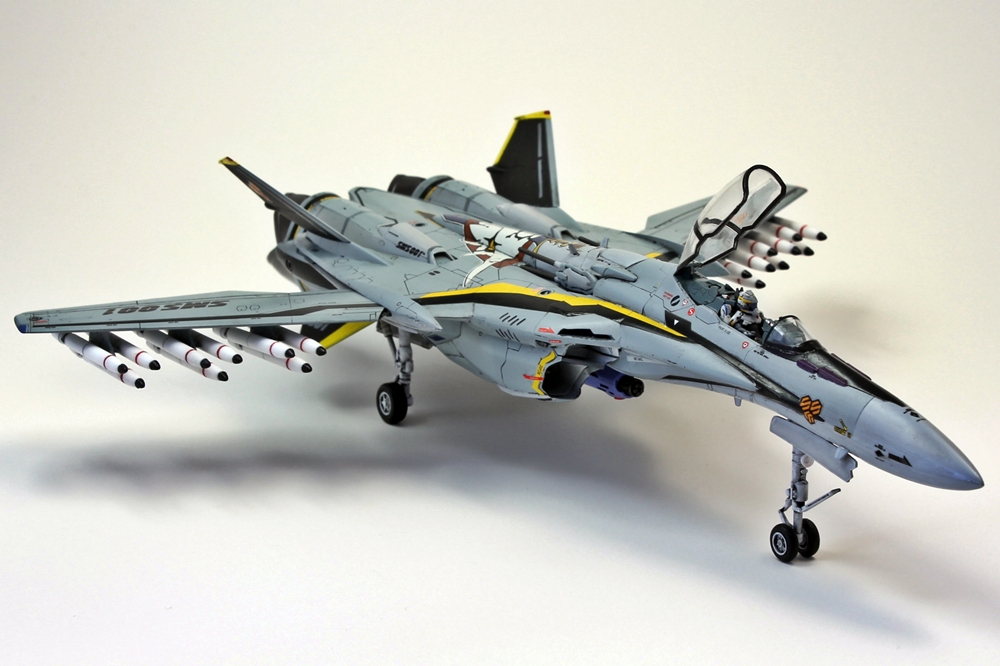
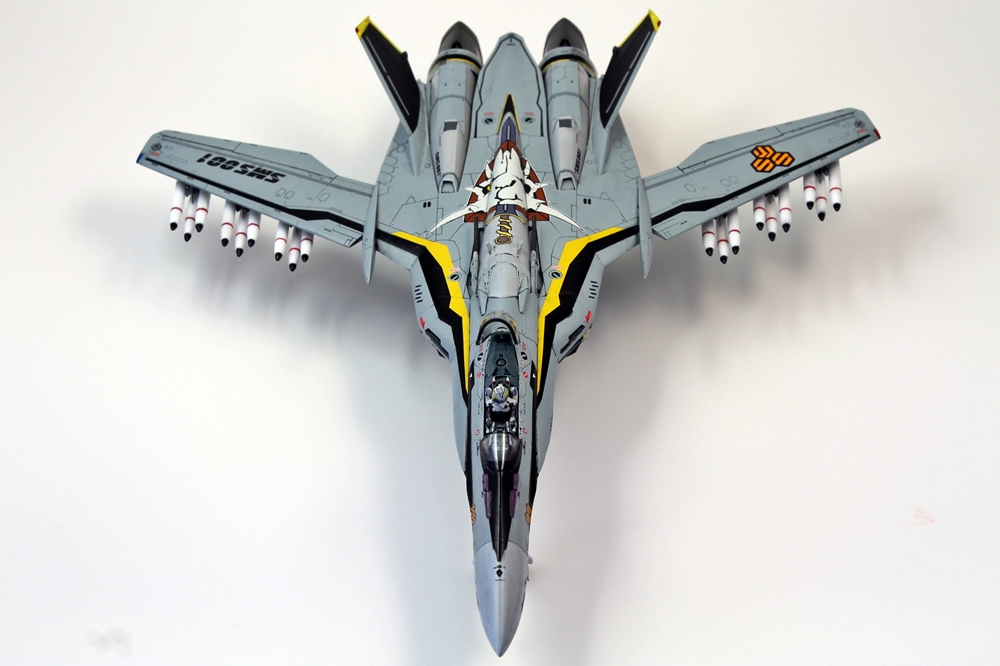
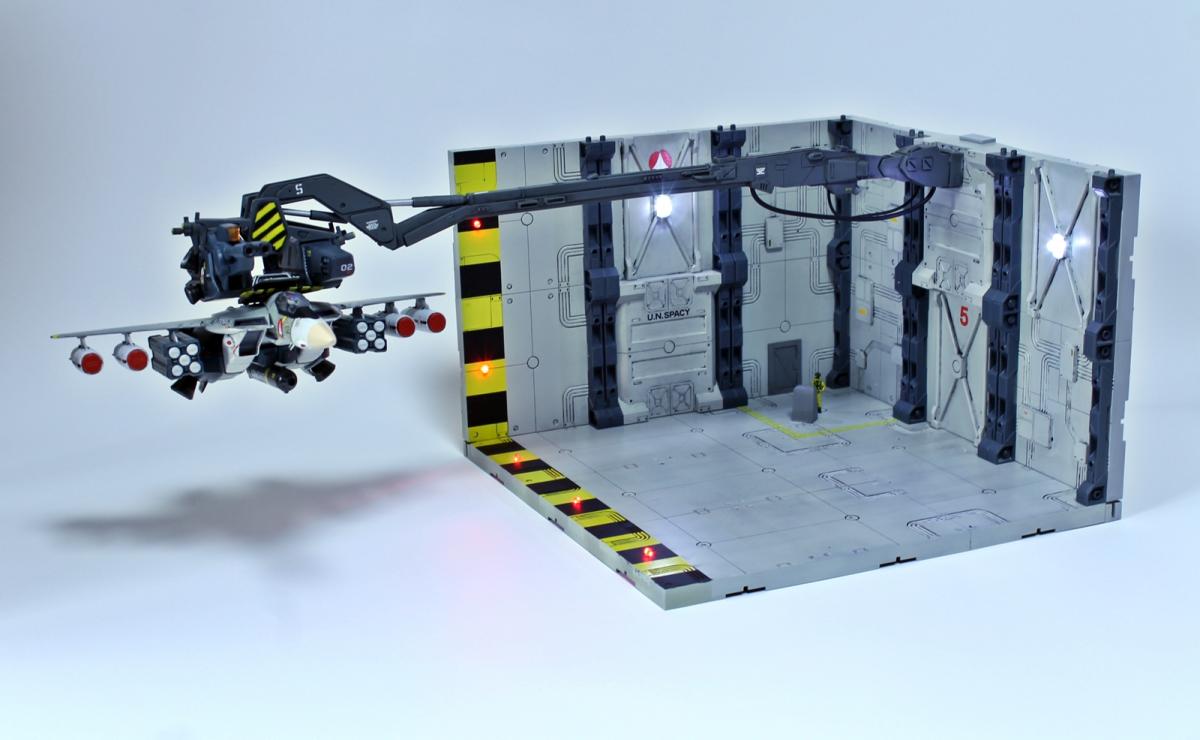
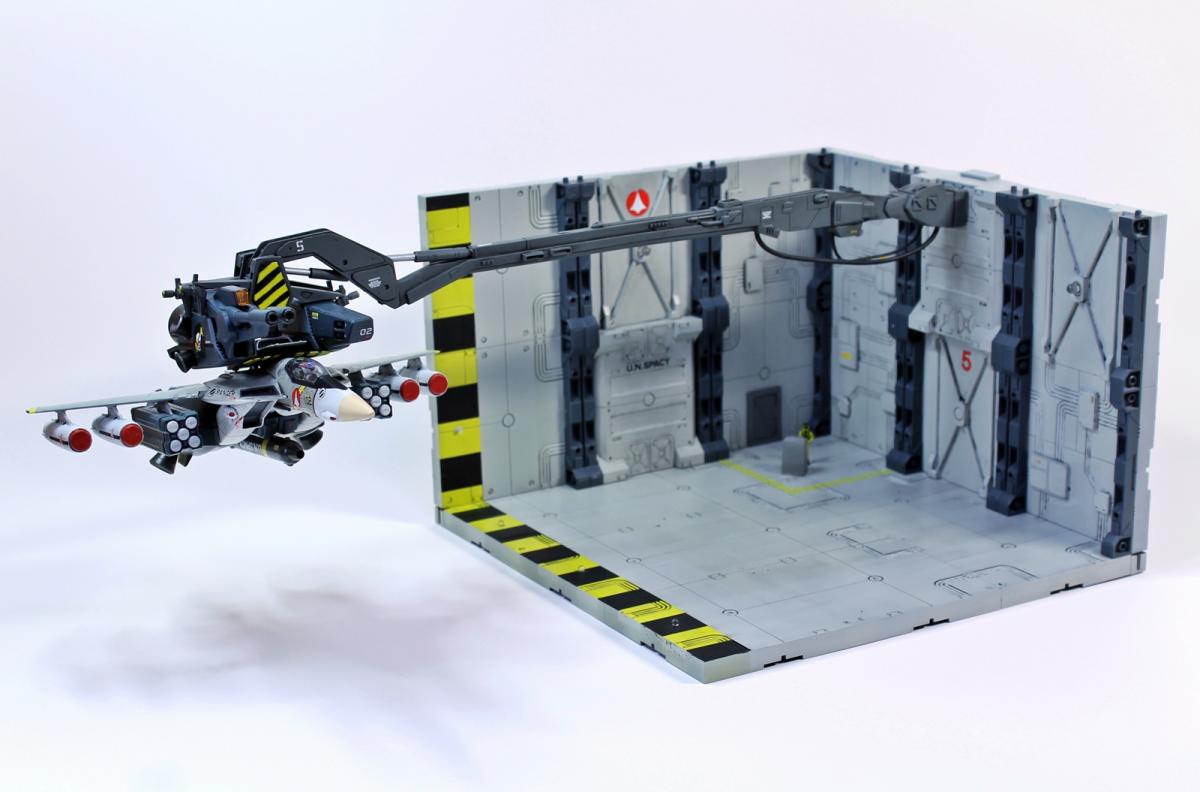
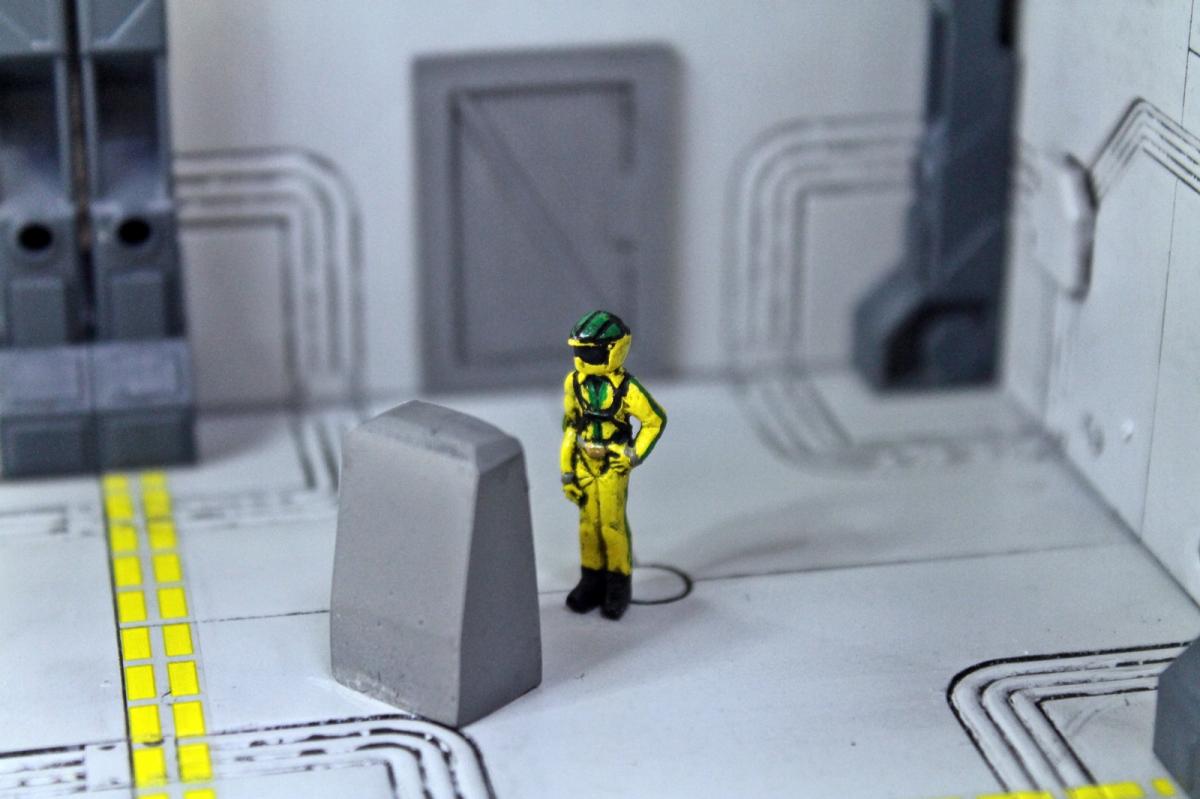
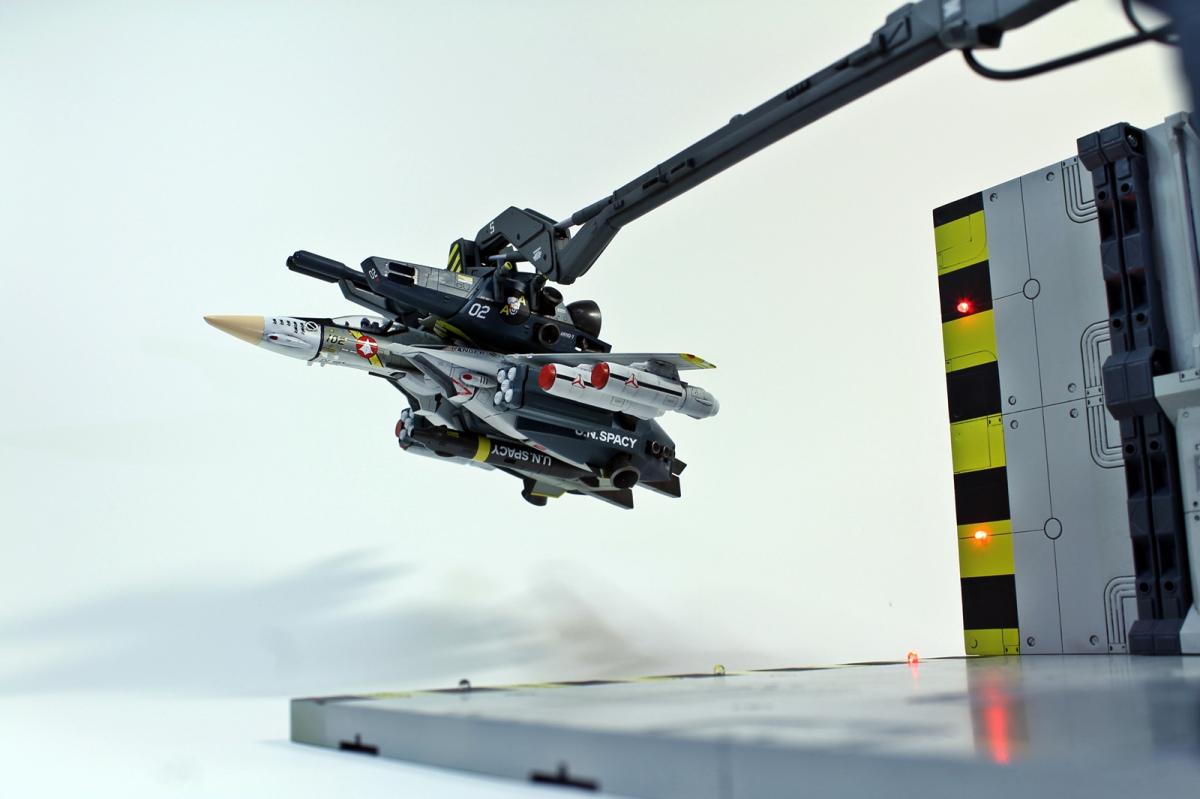
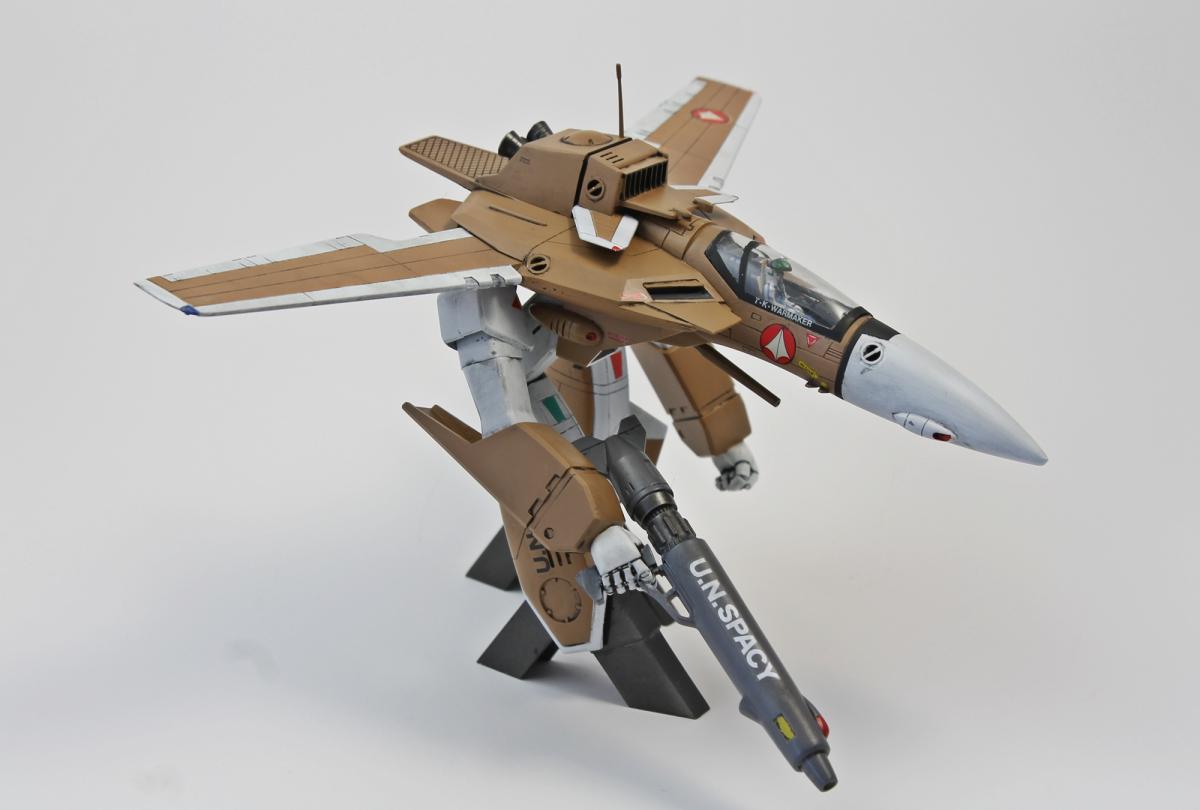
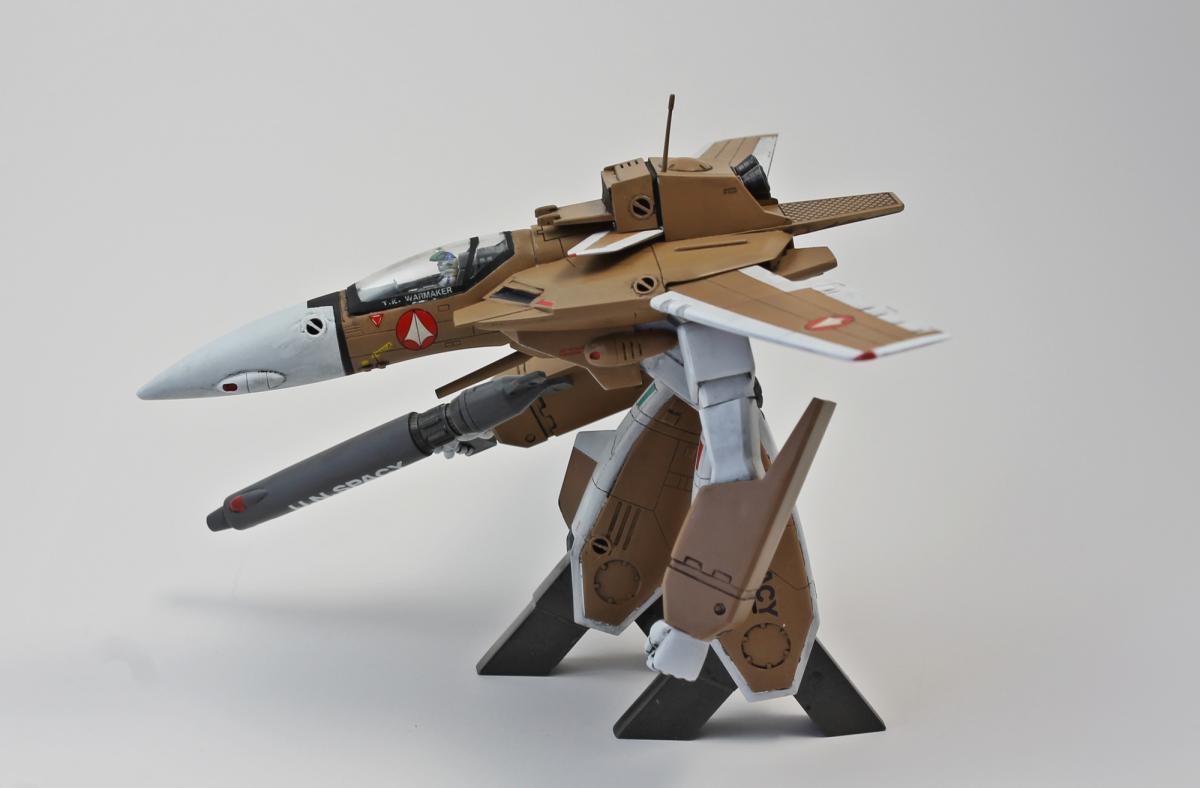
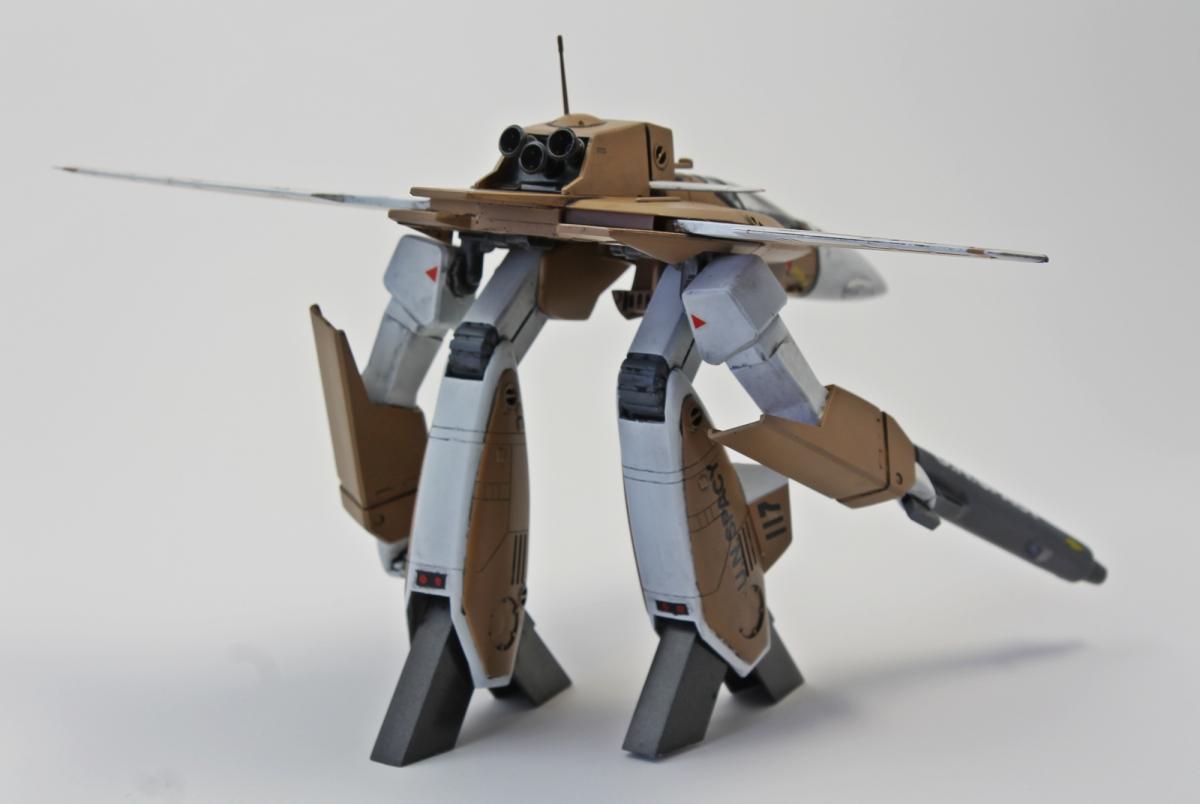
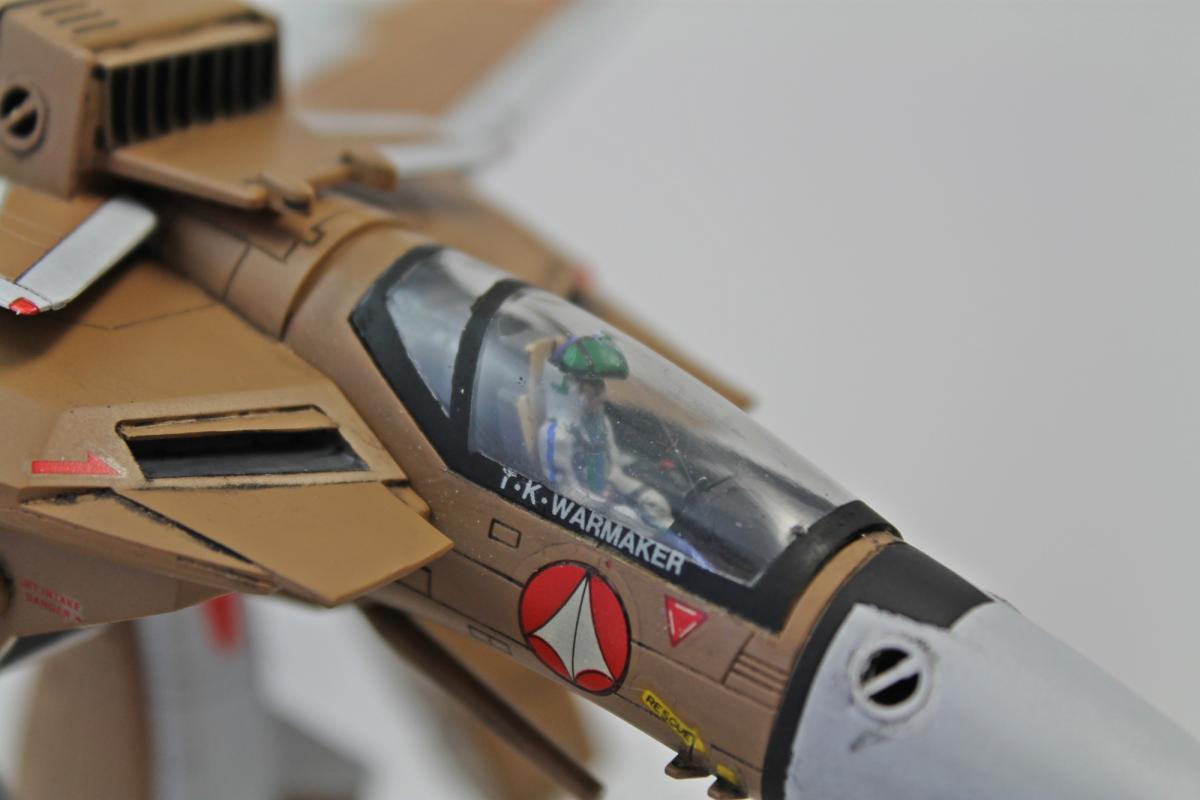
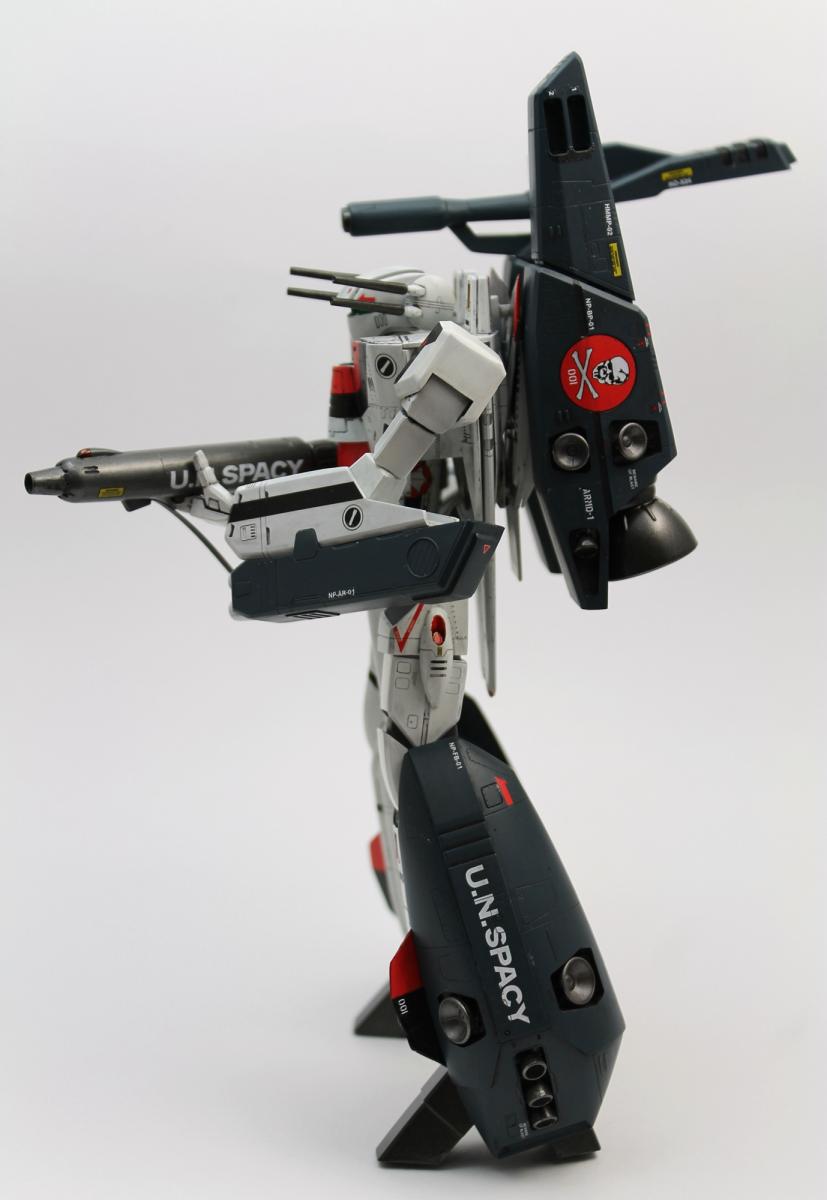
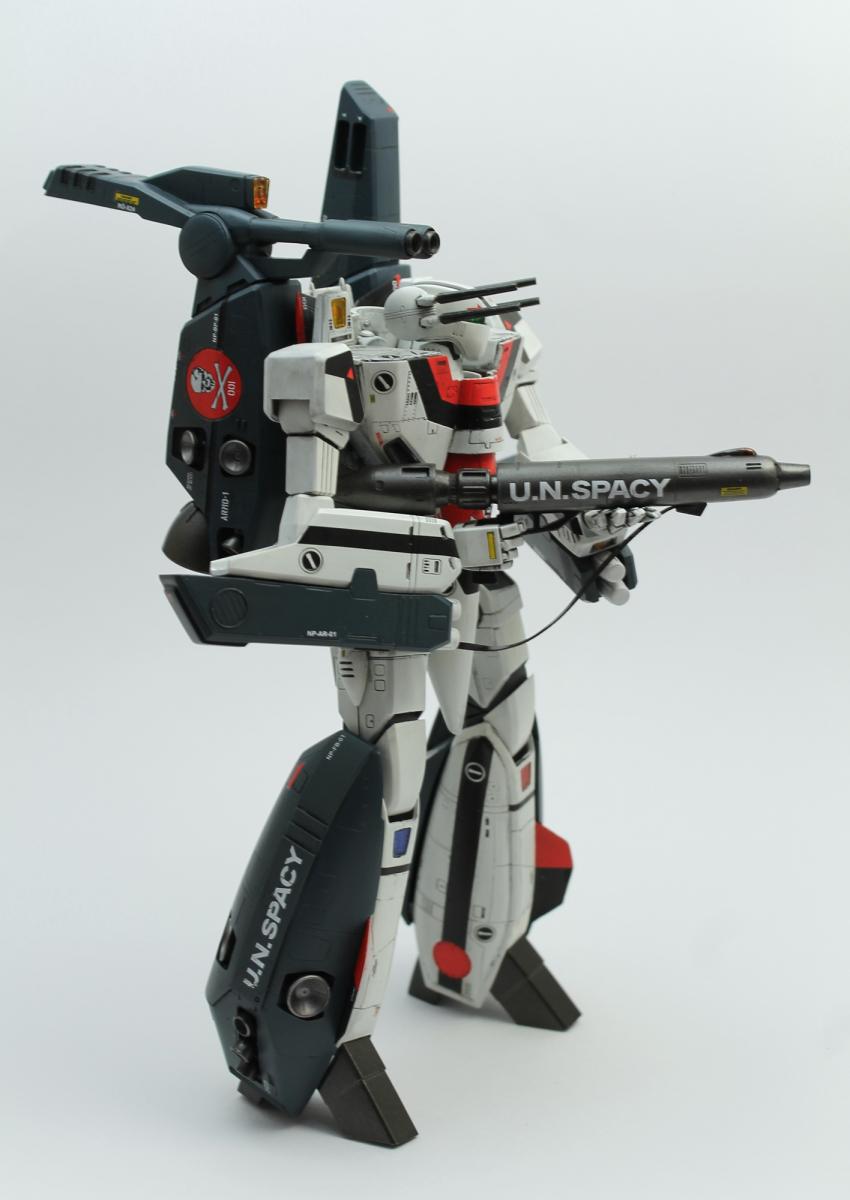
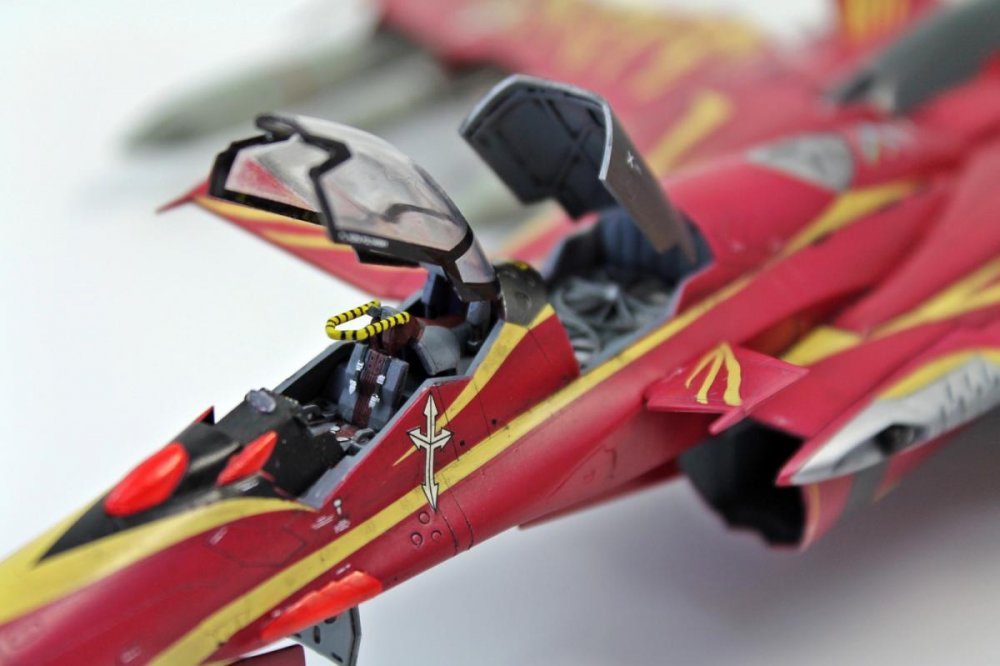
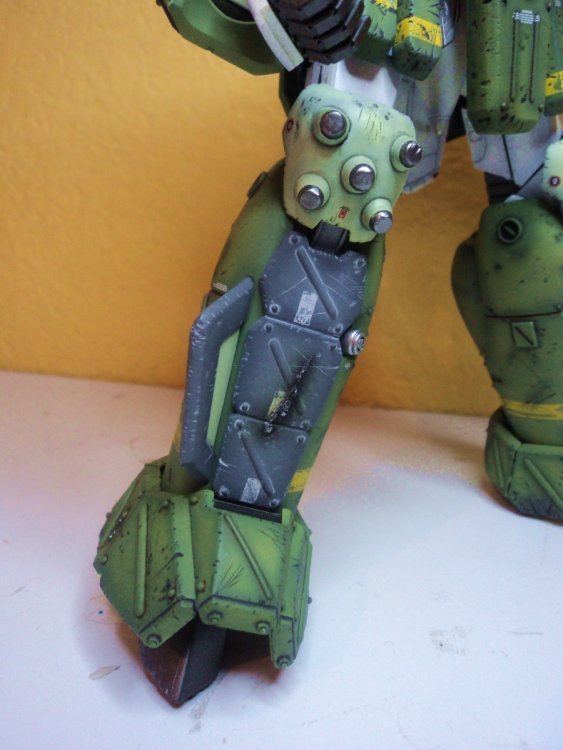
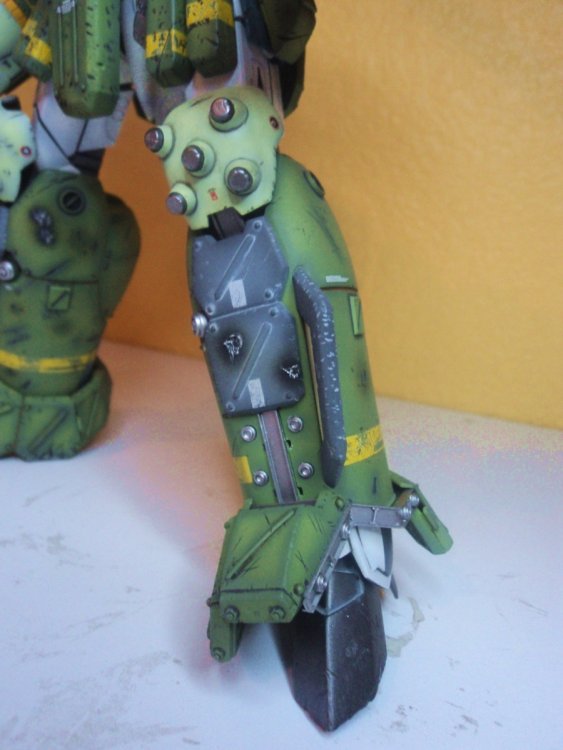
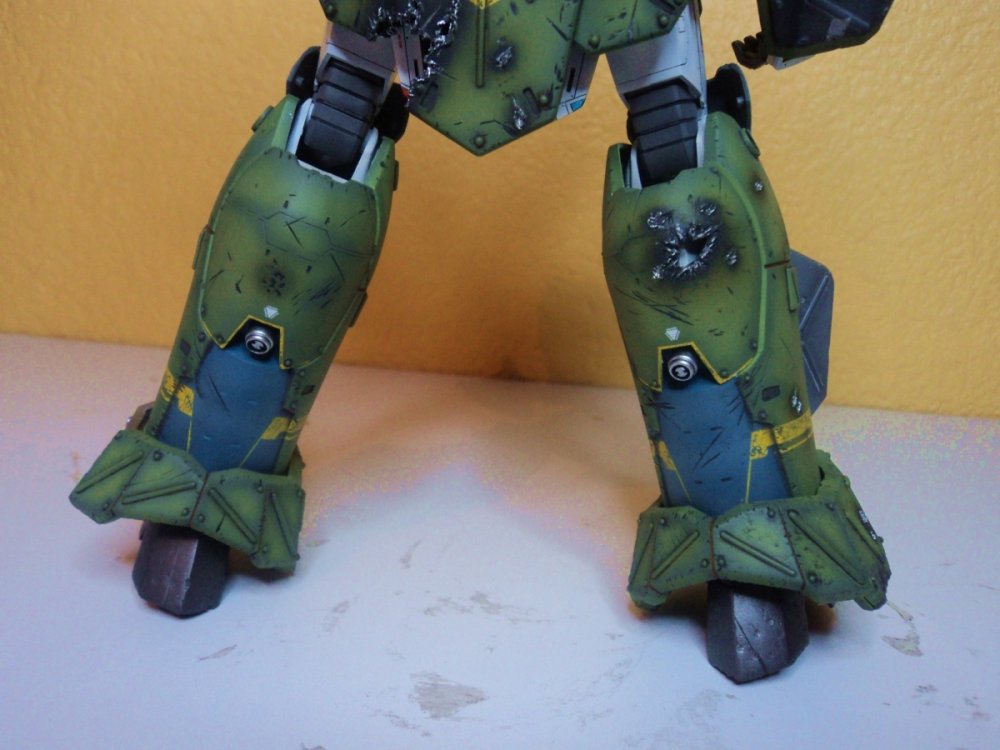
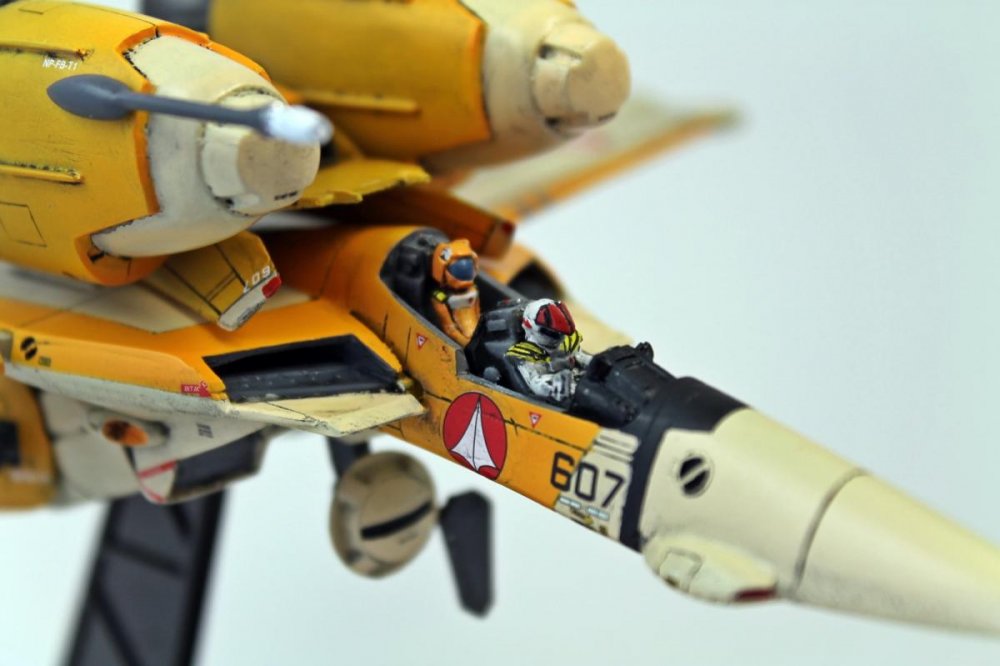
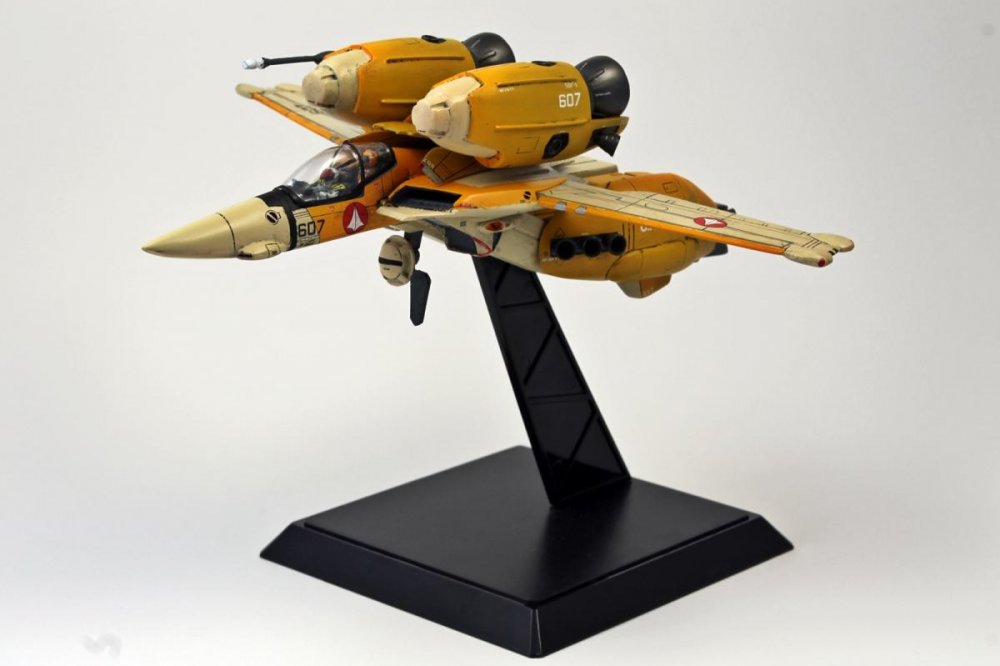
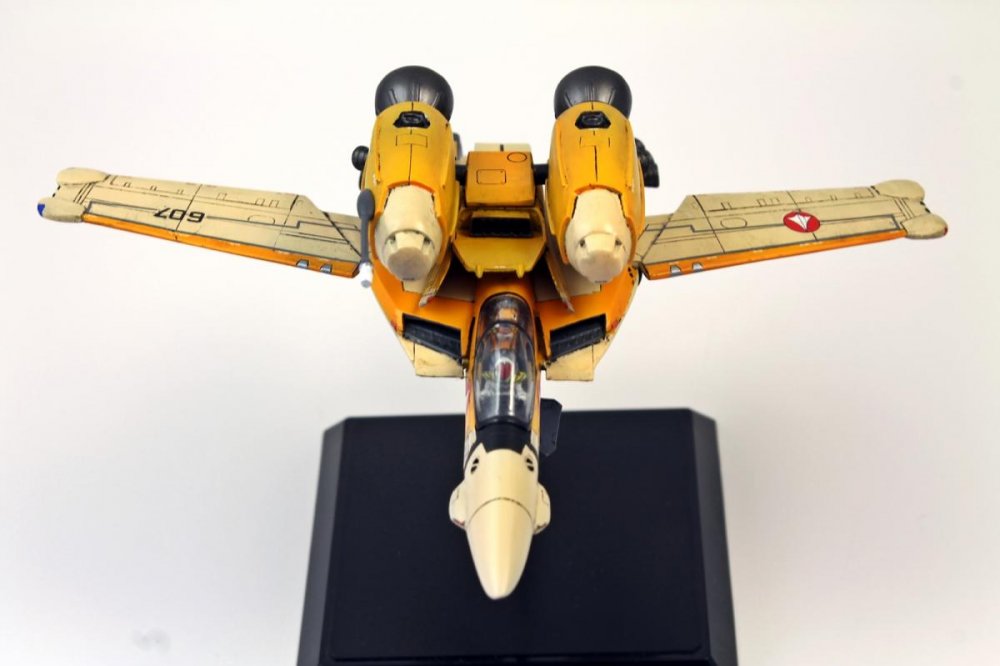
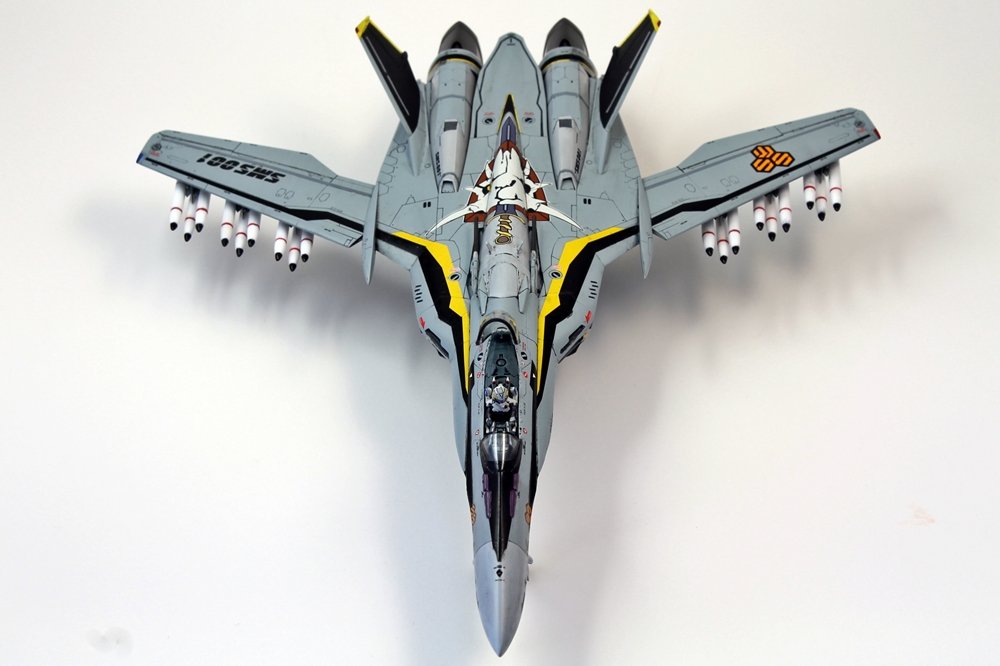
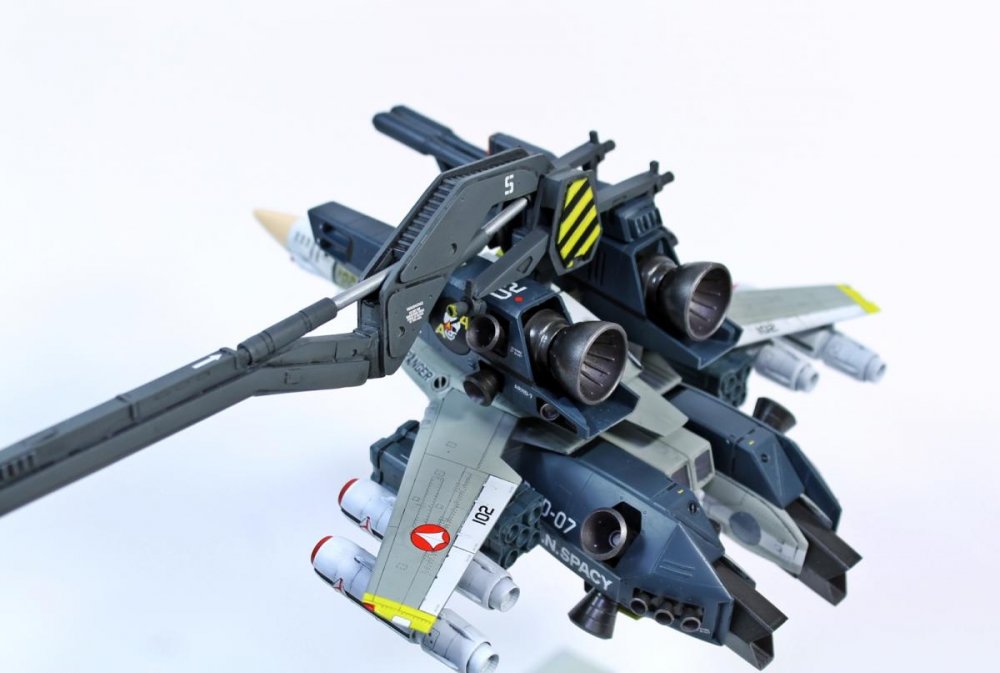
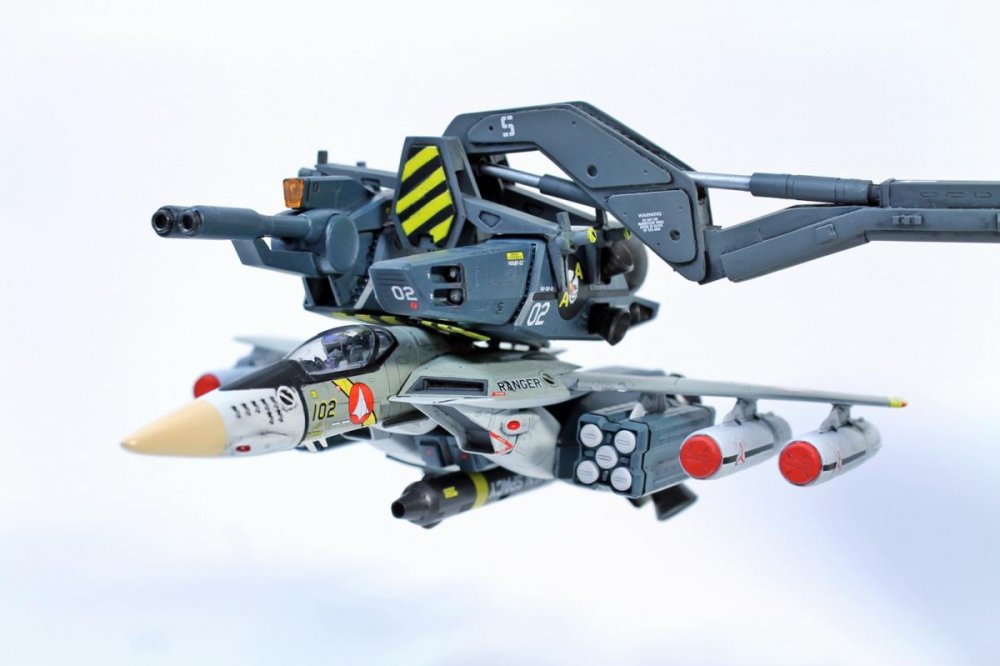
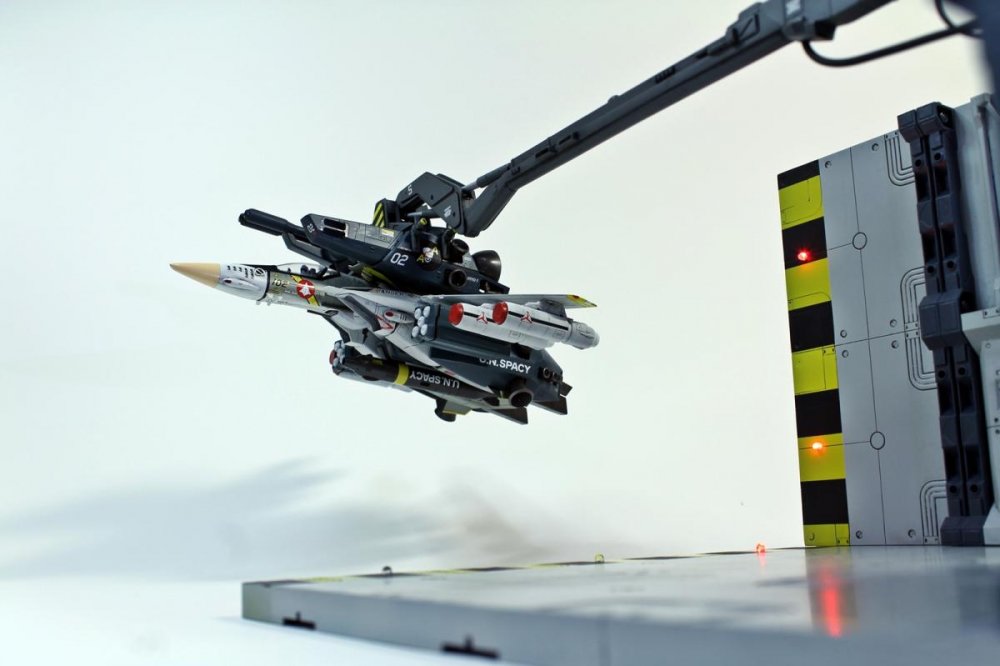
Warning, heavy post, constantly uploading images... Hi my friends, long time no posting, this time I will share with you 6 months of my life, originally intended for a contest, but didn`t finished it on time. Inspired by a Japanese magazine, I decided to make my own version, it cost me money and above all, so much time and effort, but it worthed, the only bad thig was my poor skills in photograph (cell phone) and the absence of a light box...I added many details, almost 300 round bolts and many styrene rods, and of course I damaged the styrene with many items. The next top secret pictures were taken when one of the last reactive armours were set to a VF-0 valkyrie to go to battle against the anti U.N. forces, whom haven`t stopped their attacks on the last days, giving no time for repairs, we`ve been forced to use it as it came back from it`s last mission...barely a couple of hours ago, we hope to hang on until reinforcements arrive...from...only God knows where...


-
From the album: Personal Macross Kits
Parts of the Imai 1/72 VF-1A variable kit, getting their clearcoat. -
Hello, here is the Comanchero from Neptune Models, cast by John F. Moscato, that I have just received from Starship Modeler : http://starshipmodeler.biz/shop/index.cfm/product/2860/172-comanchero-attack-helicopter-macrossrobotech.cfm The box art : One of the seats : The front and rear cockpits : The blades : The weapon bay (I will probably close the doors), where 2 missiles can be stored : Tha area below the main rotor disk : The decal sheet : Regards,
-
Wow, two completed builds on the same page! Guess a heavily cut work schedule was good for something! Here's the latest addition to my collection. A 1/72 scale VT-1 Super Ostrich resin kit from Yellow Submarine & Club M. Yes, it's a bit dated compared to the Hasegawa's, but it's still fun to give these old kits a little love. Besides, I can always use more practice with resin. The Minmei figure did not come with the kit, it's one from Studio Starforge. As usual, more can be seen here.

-
Yay! A Messiah kit that doesn't suck!! More can be seen here. OK, this kit did give me some trouble. The decals are not up to Hasegawa's usual standards. Had a lot of them not stick very well. BUT, it still blows the Bandai monstrosity out of the water. On a side note, funny how the first day after my job ends, I finally finish a kit....


-
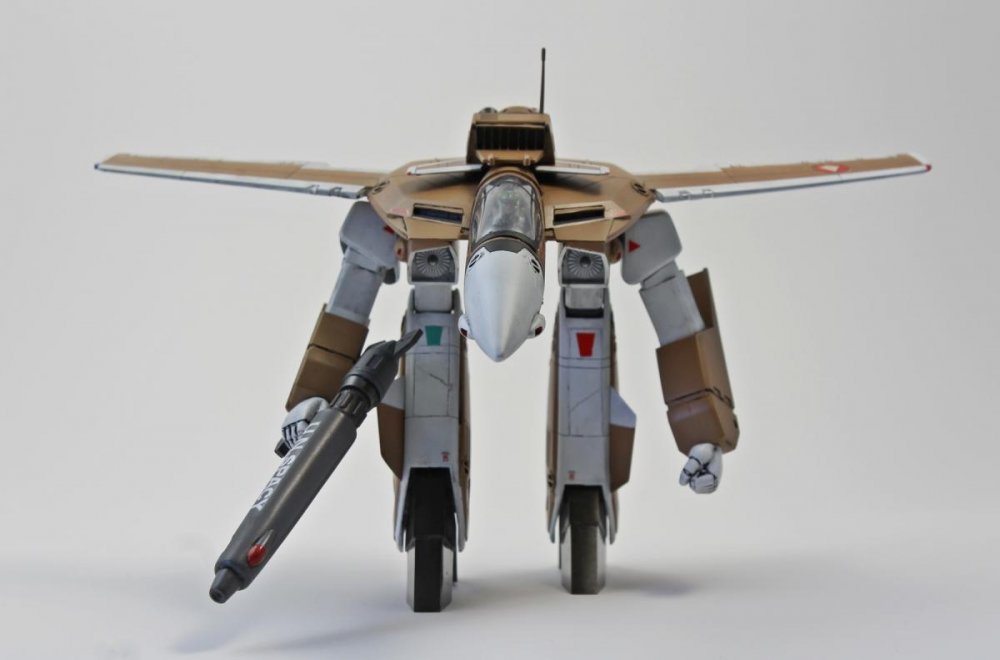
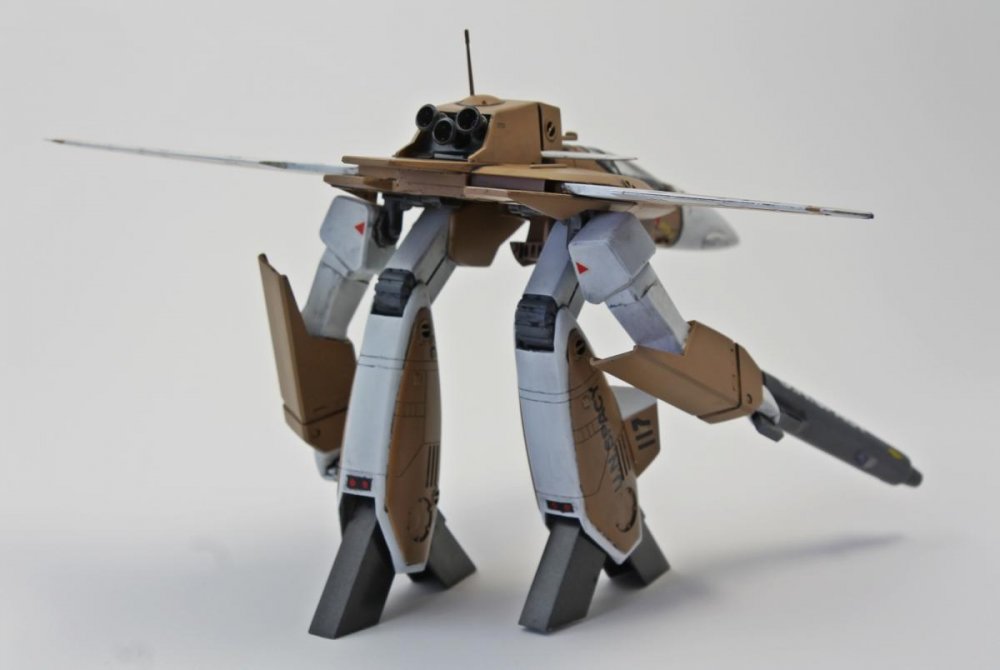
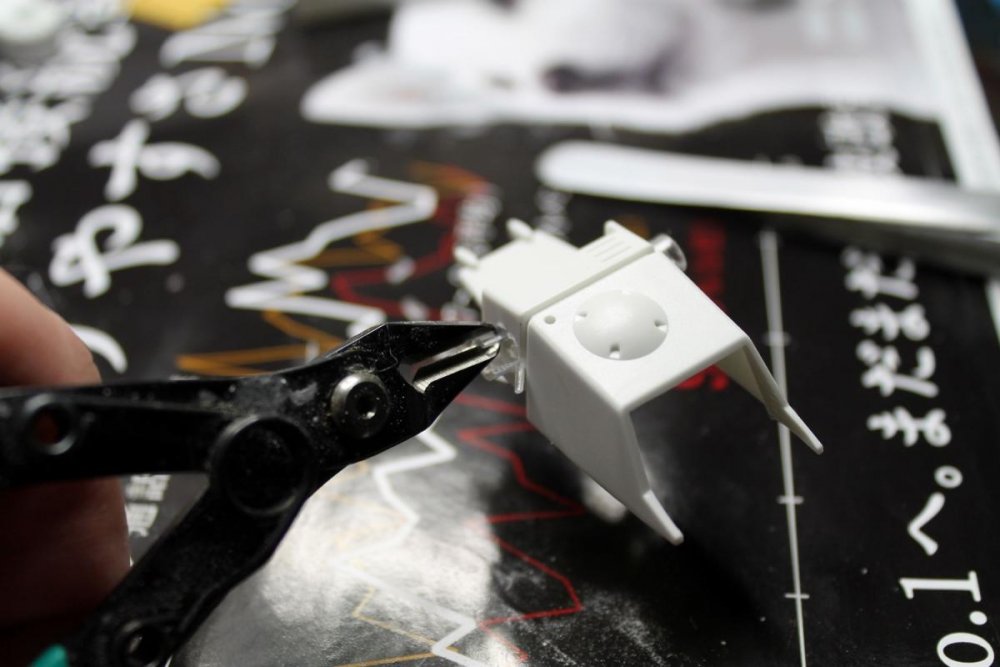
Greetings everyone! First time poster here at MW. Been lookin at this site for a while & thought I'd jump in with all you fine folks! So, like many of you guys, I got the new 1/72 BANDAI Variable Valk kit & was, well, a bit dissapointed. But I have to say, coming from a long time modeler's point of view who does it mainly for the love of it, its not that bad of a kit. Sure it has its problems but we as modelers can just do what we do best...improvise, adapt & overcome right? So saying, I'm planning a little something "special" for my kit but first I need to address some of the problems it has...parts fit, looseness, lack of detail in some spots etc etc..all stuff I'm sure you guys have already come across! The First thing I tackled was the wonky fit of the legs in fighter mode & how they don't fit quite perpendicularly to the fuselage. The main problem is, like I'm sure most of you have figured by now, the grey retention tabs that lock the arms in place in fighter mode. The top edges of these are rubbing the sides of the legs & keeping them from sitting in where they should. Instead of cutting these off entirely tho, I thought if I could shave down one side sufficiently on a diagonal angle it might allow the leg to seat better & have a more perpendicular angle to the fuselage when viewed end-on. Here's what I shaved off: Secondly I thought, again, like most of you I'm sure, that the arms are too spindly & need fixed. I plan on beefing up the upper arms, shoulders & forearms. The first thing I started with was the degree of bend to the elbows. With a little tweaking of the lower part of the upper arm where it joins with the elbow joint, I was able to give it a lot more bend, so much so that now the Battroid mode will have the ability for the Gunpod to actually touch the shoulder armor: Next ( because I'm a hopeless scratchbuilder & can't leave anything alone straight out of the box ) I'm gonna lite this guy up with micro LEDs. The first thing I worked on was the optics section on the head. Since this particular build is gonna be a "one-off" style, i wanted something different. He's gonna be a predominantly really dark low-vis Valk & I thought he'd look kick-@ss with a blue Optic sensor: A veeeeeery long time ago, when the Hasegawa VF-1 kits came out, the only way you could get a pilot figure was to get the add-on weapons set. So, I got one & and while the figure wasn't bad, it could be remade better. Now, don't get me wrong, the pilot figure the new kit comes with aint bad but I'm anal when it comes to miniatures & detail & I looooooves me some detail work... at that point I remembered my old VF-1 Hase pilot. I dug the little guy outta storage & I think with a little tweaking I can make him fit in the new kit: So, thats where I'm at right now. Any ideas or comments are heartily welcomed & appreciated! Thanks for lookin guys n Cheers!! ~BK
-
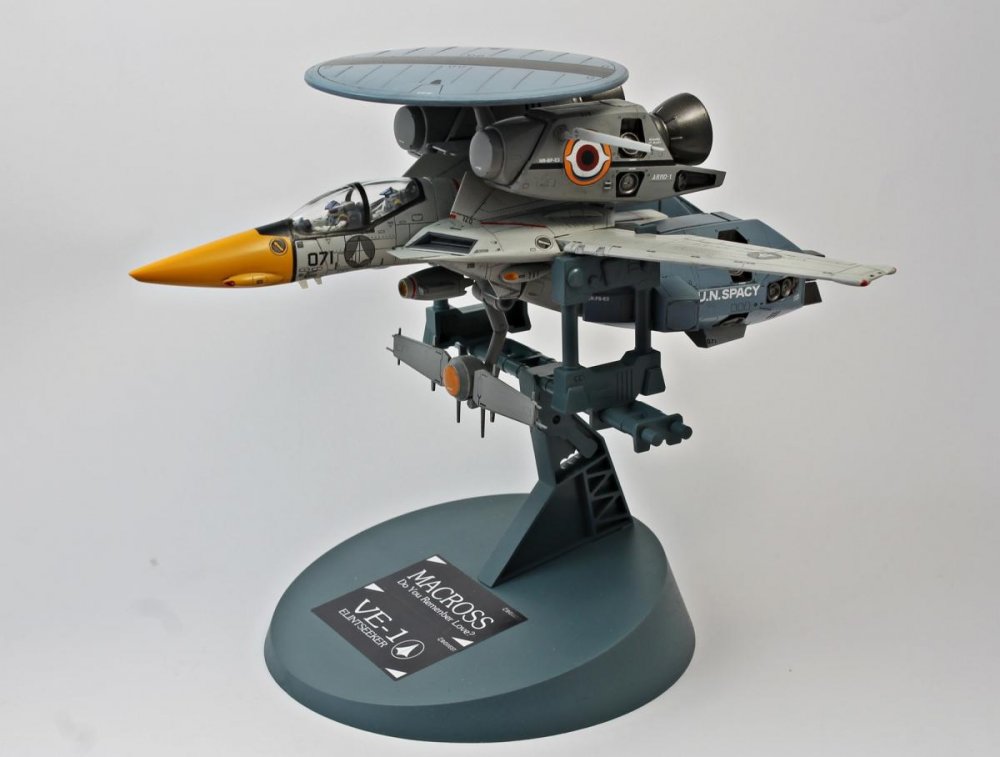
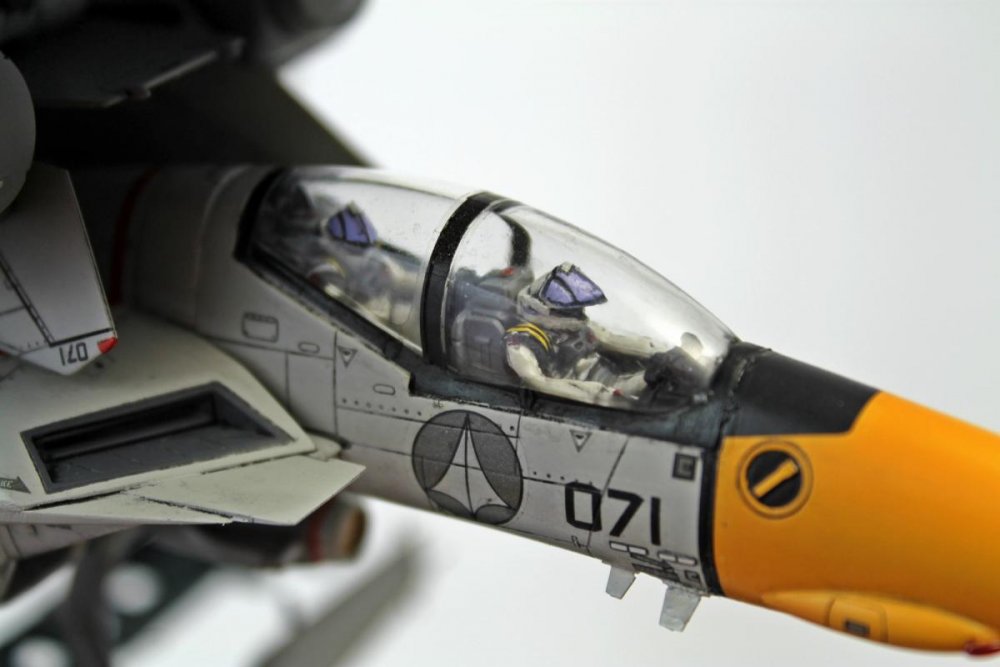
2013 wasn't my most prolific year, but I neves stops to build kits. This is my last model, the Hasegawa's Elintseeker. Not much to say, always is a great pleasure to build a Hase kit. About the weathering, I prefer not to make it in fighters, I like to see them in pristine condition. In the last picture, I tried to get the same angle that the Tenjin drawing. Thank you for watching!
-
It's been over fifteen years since I've done a commission (they helped put me through university back in the day) so it was with some trepidation I undertook a very special request from a member on this board - a pair of VF-4s! One was to be Skull Squadron battlewagon we're all familiar with, and the other a souped-up Max version with custom decals, weapons and other accessories. Presented here are the two results - built from the resin kit that has been offered here a couple of times. I do like the kit - it's a relatively easy build, but it may be beginning to show it's age as there aren't many straight lines and symmetry is a challenge. Never the less I'm pretty happy with the overall result and the client is as well - he's graciously allowed me to post these pics up for you enjoyment. As of now these birds are very securely packed away to be sent off. I will be sad to see them go. I couldn't resist putting Max and Miriya together in one bonus shot. Thanks for looking!
-
Hi everyone !! Last night, while taking another look at Tenjin Hidetaka's Macross art works, specially to the VMFAT-203 Hawks VF-0C flying over a Daedalus picture, I started to entertain the thoughts of kitbashing a VF-0C and/or VF-0B from the Hasegawa VF-0D and VF-0S kits available. As you may know, VF-0C & VF-0B productions were discontinued long time ago due to being both limited editions, and to find a kit at an affordable price nowadays is nearly impossible. Have anyone of you guys (specially our modelling masters or the ones that have the VF-0S or D under the belt) thought about this idea before ?. How complicated could be ?. Any additional or special work besides frankenstaining two kits ? Any references or previous topics about this subject ?. Any comment will be highly appreciated. Cheers !
-
Hello, few pics of my new building, a VF-1A Valkyrie. The box art : Building will be quite simple, only few updates thanks to parts taken from this : No main issues for the building till now : More work to come on the desk : Wings will be set in open mode : Let's have a quick look : It seems that it looks like a Valkyrie uuuh ? the paint will be probably a us navy inspired, with a heavy weathered grey camo. Thanks for reading me.
-
Hello guys. This is not my best year, and in part is because of this kit. I'm having great problems with the adherence of Laquer Paints on resin kits, mainly those that were made in Japan in the 80's and 90's. With Moscato Kits instead, I never had adherence problems, and obviously neither in plastic models, like Hasegawa. I lost entire weeks because during the masking, the tape toke off all the paint. It was a dissaster. Fortunately, you can't see any of these problems in the pictures. So please enjoy it, I didn't! Uploaded with ImageShack.com Uploaded with ImageShack.com Uploaded with ImageShack.com Uploaded with ImageShack.com Uploaded with ImageShack.com Uploaded with ImageShack.com Uploaded with ImageShack.com
-
The wait is finally over! (for those of you who were waiting)


-
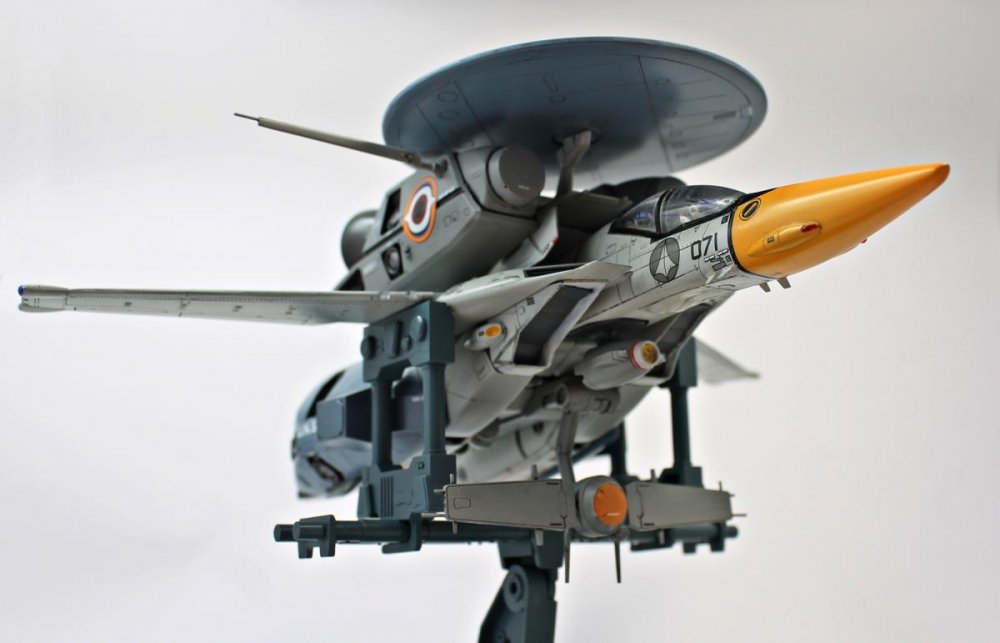
Hello MW! Hopefully nobody minds if I just start up this thread to capture my progress as I delve into the scifi genre a little more and give my newly acquired Macross models some love. I started the Hasegawa Spacewolf model in 1/72 back on the 'What lying on your workbench...' thread and figured I would give it a home of it's own. The Hasegawa kit, for those interested, practically falls together. It was a headache free, simple build that would see little weathering or preshading as I intended to display it in a cross over scheme as a Macross realm prototype. Purists may hate it, and Harlock fans may shake their fists... but I just had to do it. I mean, come on! - the decal sheet sports skull squadron markings! Here's some pics of my build so far. I meant to keep this build light and easy, but I still needed to resolve how to arm it with a large calibre gatling gun as promised in the other thread. I resorted to casting the barrel end of the riptide kit from Games Workshop/Citadel and it fit really nicely on the sawed off intake trunk. I chose the red/black scheme as a bastardization (I've come this far right?) of the orange test schemes we see in history. I figured the white decals will really make for a striking contrast once they're applied. I shaved all the elongated aerodynamic bits off the wing tips and rudders. That aspect of the kit was cool and all, but didn't appeal to me. The burner can and gatling gun received a light gun metal finish and eventually the whole model will have a panel line wash with promodeler product. The cockpit area will remain black, with no fanfare or extra detailing via paints. At this scale it's a bonus to have knobby things included but once that canopy is installed you can forget seeing it from inside my display case. I chose this tamiya yellow green for my interior coatings, like the WW2 chromate used in that period. I felt it was fitting as so much of this aircraft feels inspired by the planes of the age. I did the landing gear in the same color and then washed the items and bays with citadel's badab black wash thinned with plain old water. It settles nicely and is a worry free detail aid. Under wing hard points are intended for big, clumsy looking drop tanks. I intend to attach some Macross goodies once they arrive in the mail and I've had a chance to duplicate them. Enjoy... C+C welcome. modelglue
-
Newest build completed! A 1/72 scale VF-1A Valkyrie, in Gerwalk configuration. This is an old Imai kit, so I did a few modifications, alterations, and additions. As always, you can see more here.


-
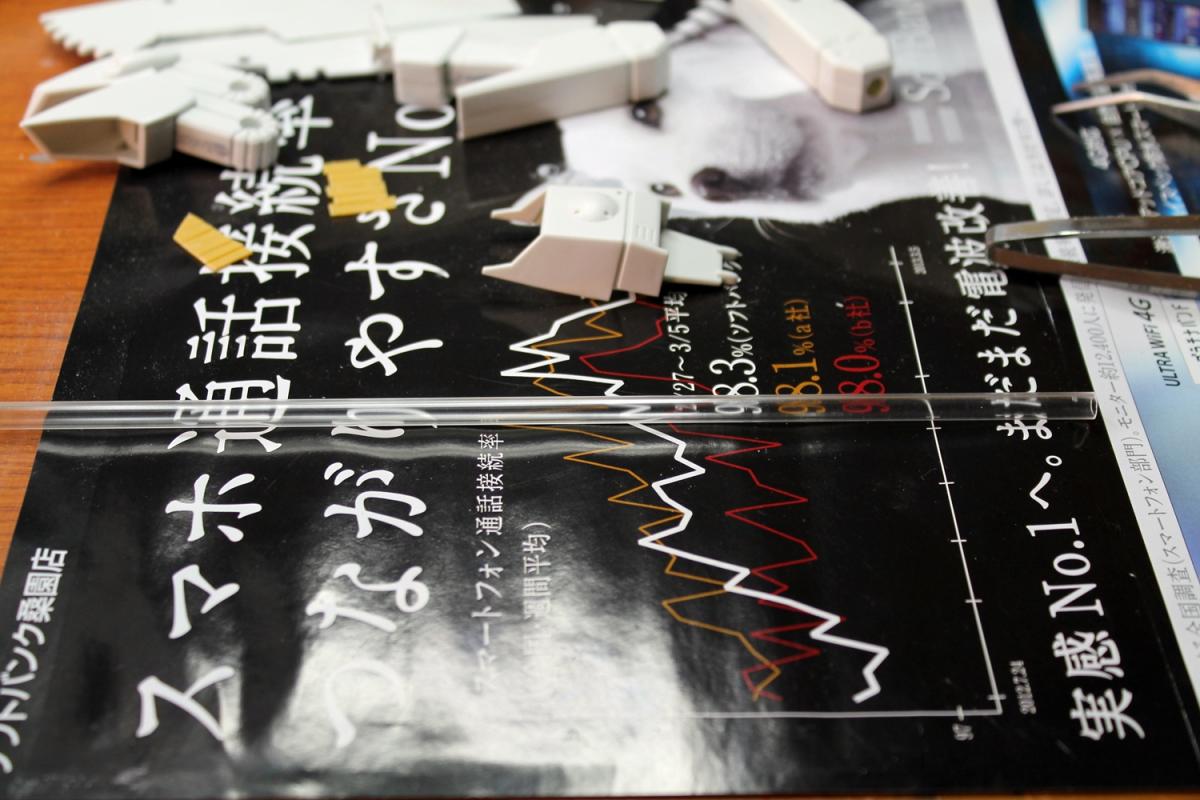
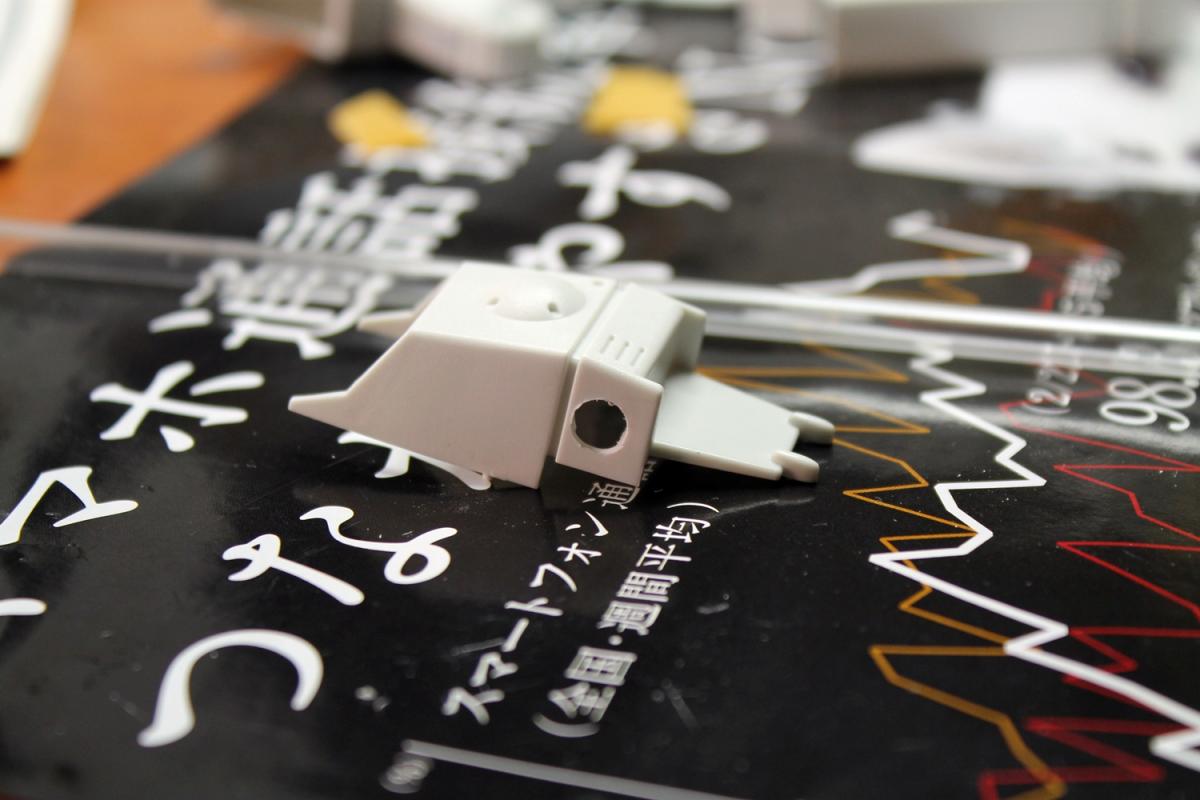
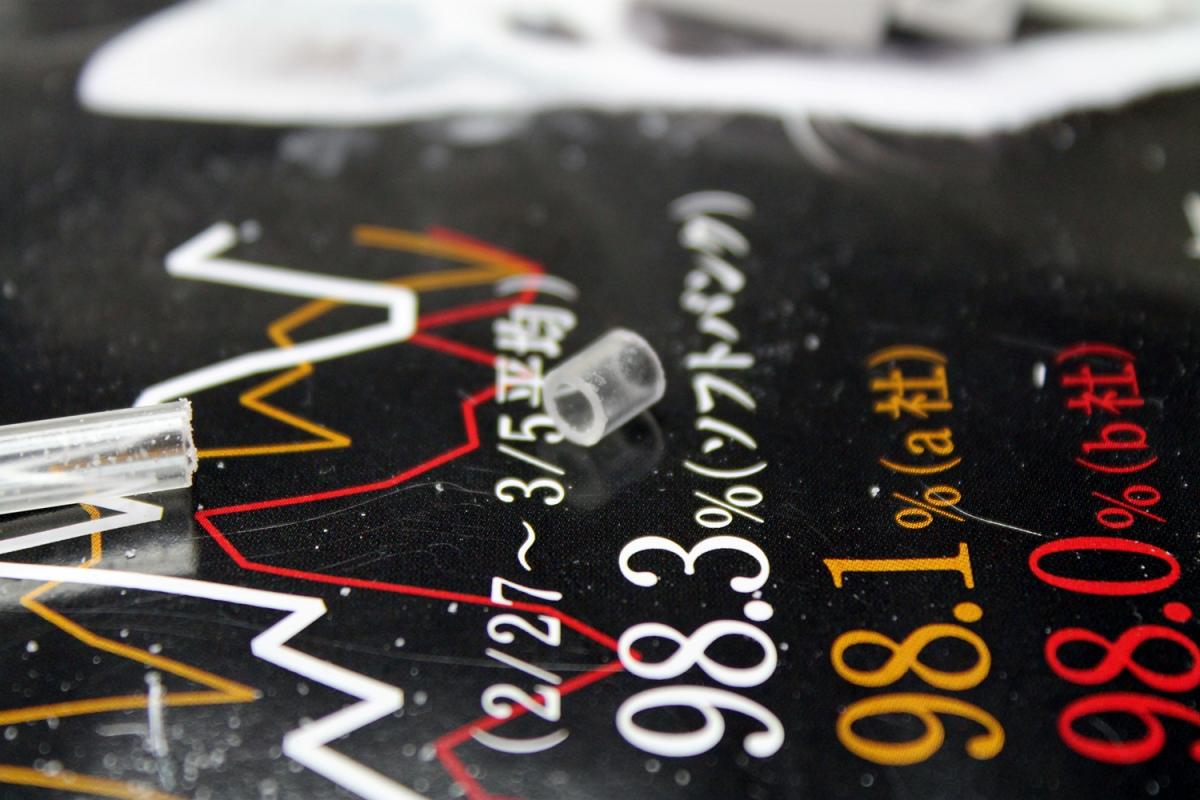
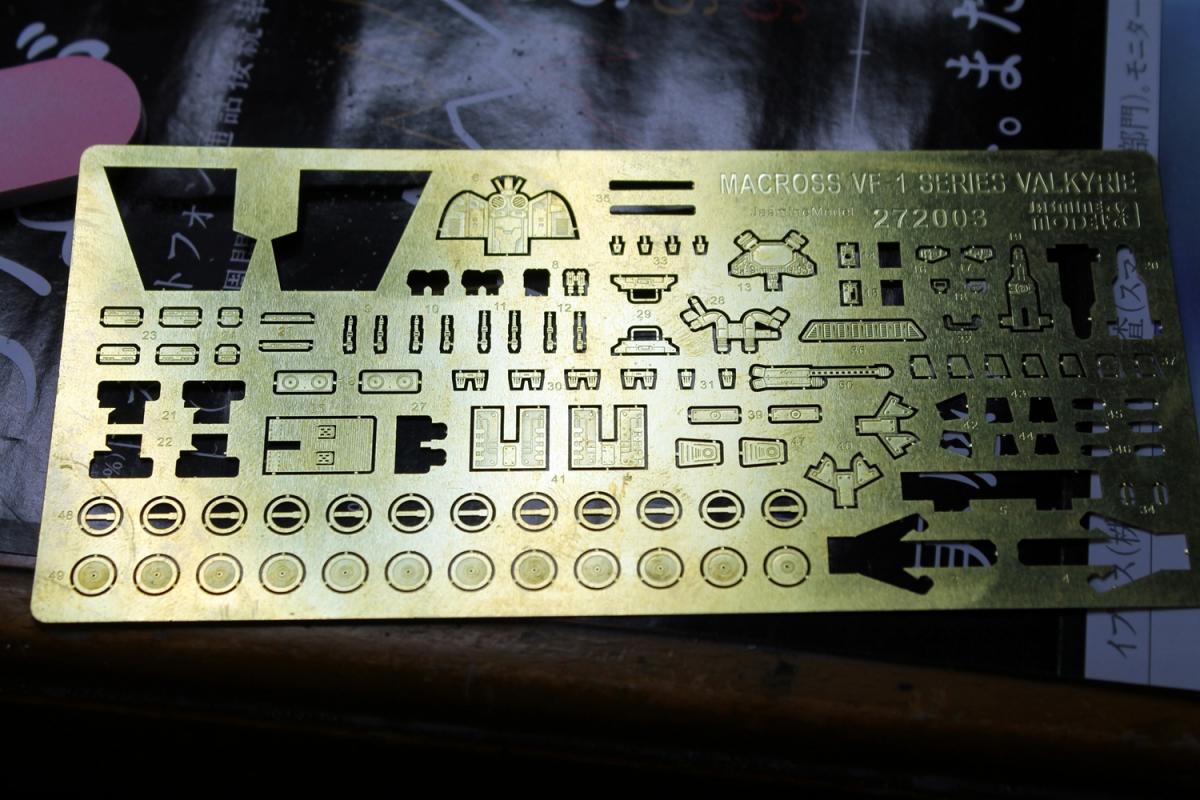
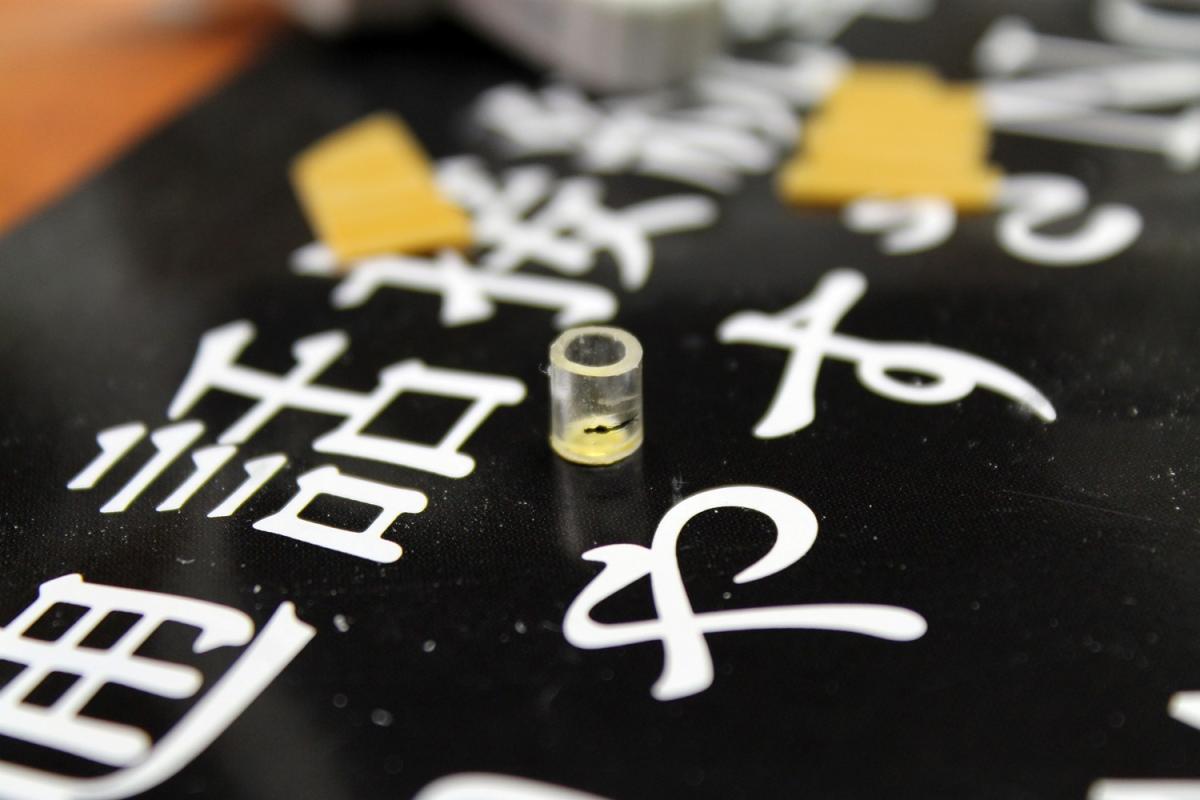
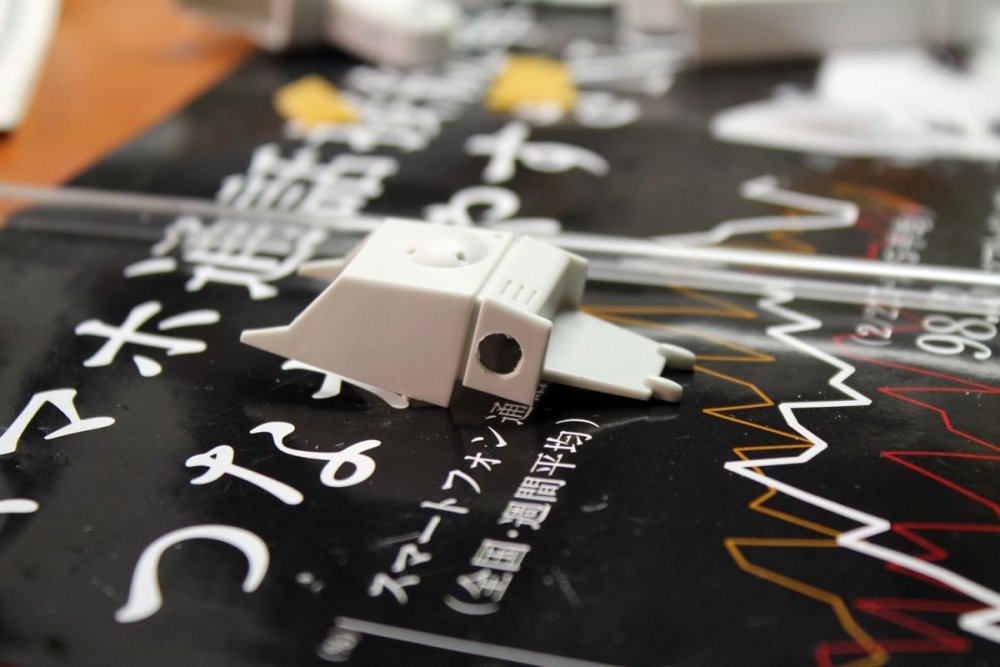
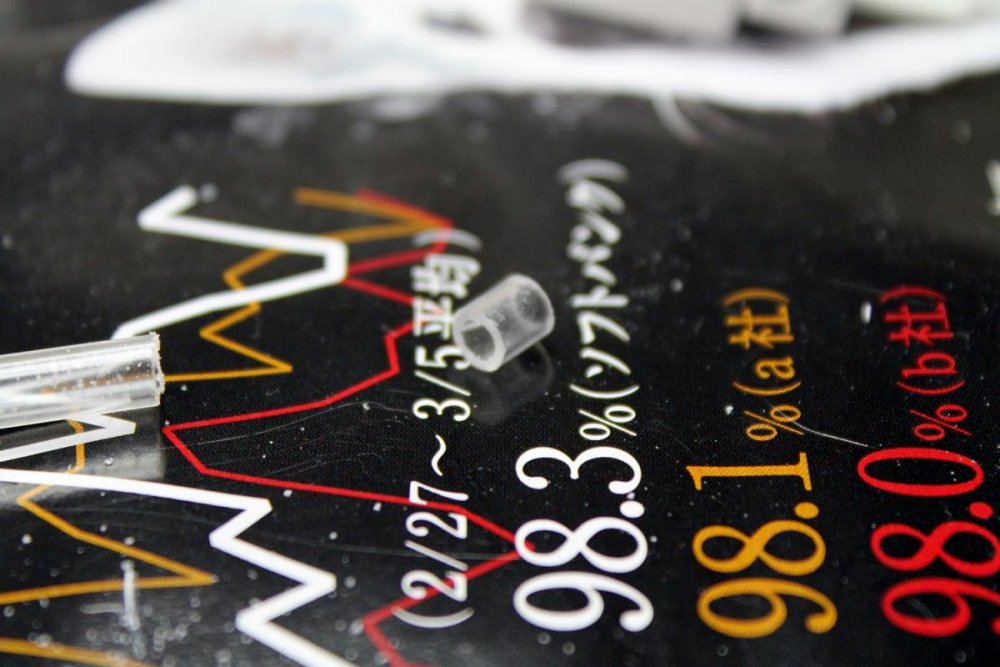
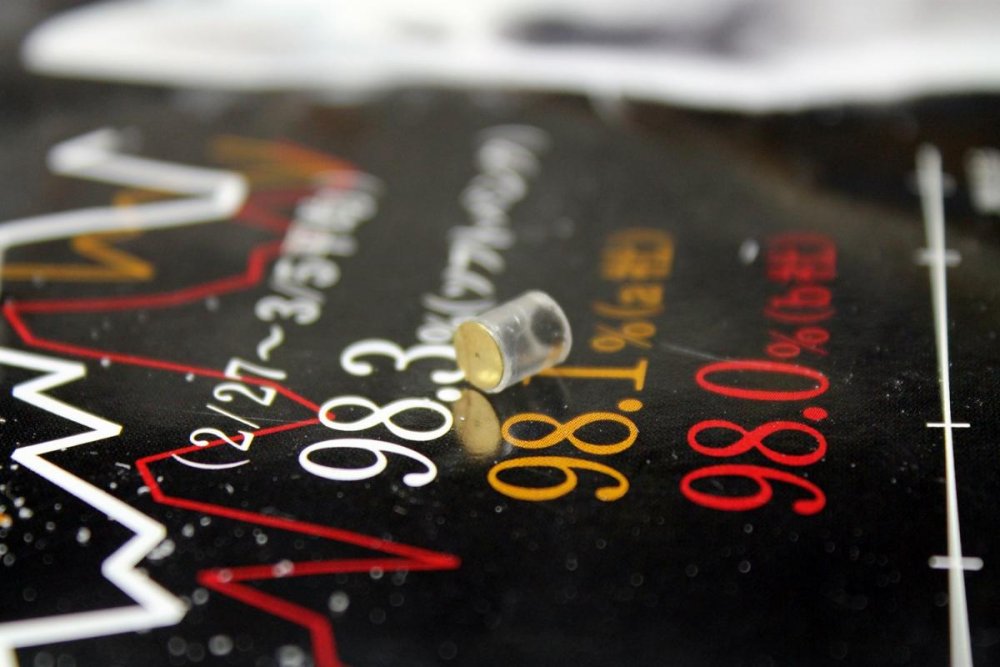
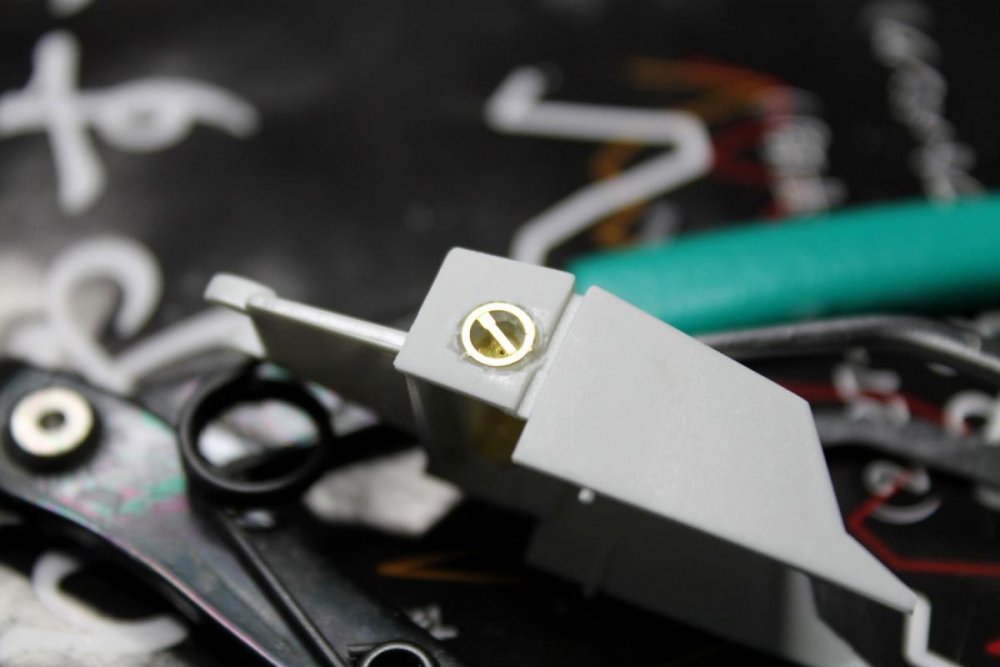
Some of you (hopefully) noticed that I recently got the book VF Modeling Manual. In there, they give a description on how to do a recessed vernier for your 1/72 kit. As I am building an old Imai Gerwalk now, and trying to pep it up a bit, here's what I did to make the vernier. Start by getting yourself some 5 mm plastic pipe. I'm using Tamiya. No special reason for it being clear, that's just what the hobby shop happened to have in stock. Next, take the part you want, and drill a 5 mm hole (obviously, on the Hasegawa kits, just remove the original casted vernier area. Cut a small piece of the rod. I did around 4 mm long. Then, smooth out the rough edge. Now, here is where I'm deviating from the Modeling Manual plans, since I've got some extra parts from Jasmine Models lovely VF-1 PE set. I'm using the round pieces in the lower left. Glue the round piece onto one end of the short tube. Draw a mark on the tube for how far you want to insert it into your kit. You only want to go 2 mm or so. Put it, and glue it. Once the glue has set, trim off the excess, and sand it flat. Put on the top piece, and you're finished! (actually, wait to do this until you've primed and painted. much easier to get the inside black with no cover) Now, if you don't have the PE set, use a small disk of plaplate (5 mm, natch), and a small strip over the top of it. You'll also want to get a circle scribing template (probably around 6 mm) to go around the outside of the hole.


-
Does anyone have any suggestions on some general basic reading, guides, or links on how to get started with Bandai 1/72 snap together models? (And how to not jack them up royally) Even little tips would be appriciated. IE: tab cutting the different varieties of plastic, surfacing, minor detailing, decals, preservation, ect?
-
Looky at what I just pre-ordered!
-
What I was hoping to be the last kit completed in 2012 actually turned in into the first kit for 2013. Oh well! Pretty much a straight forward build. Used pilots from the weapons set, and a Jasmine Models PE set. And as an added bonus, 98% of the Macross kits I've completed so far.

-
What all is included in this kit? Of course it comes with the VF-11, but are the Super Packs, and booster included as well? They're on the instruction sheet in the Legacy Models sections, but the sheet scan doesn't have the parts inventory page. Anyone have one of these, and can tell me for sure what all is in the box? Thanks!
-
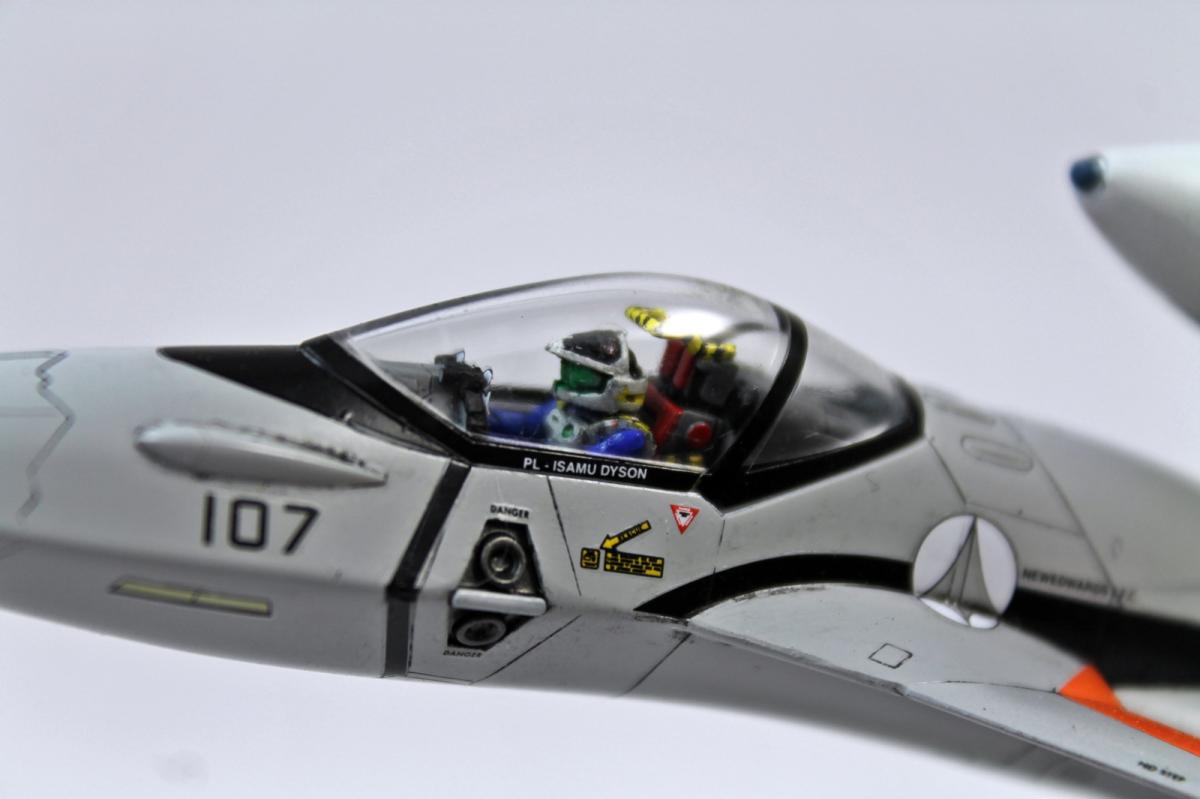
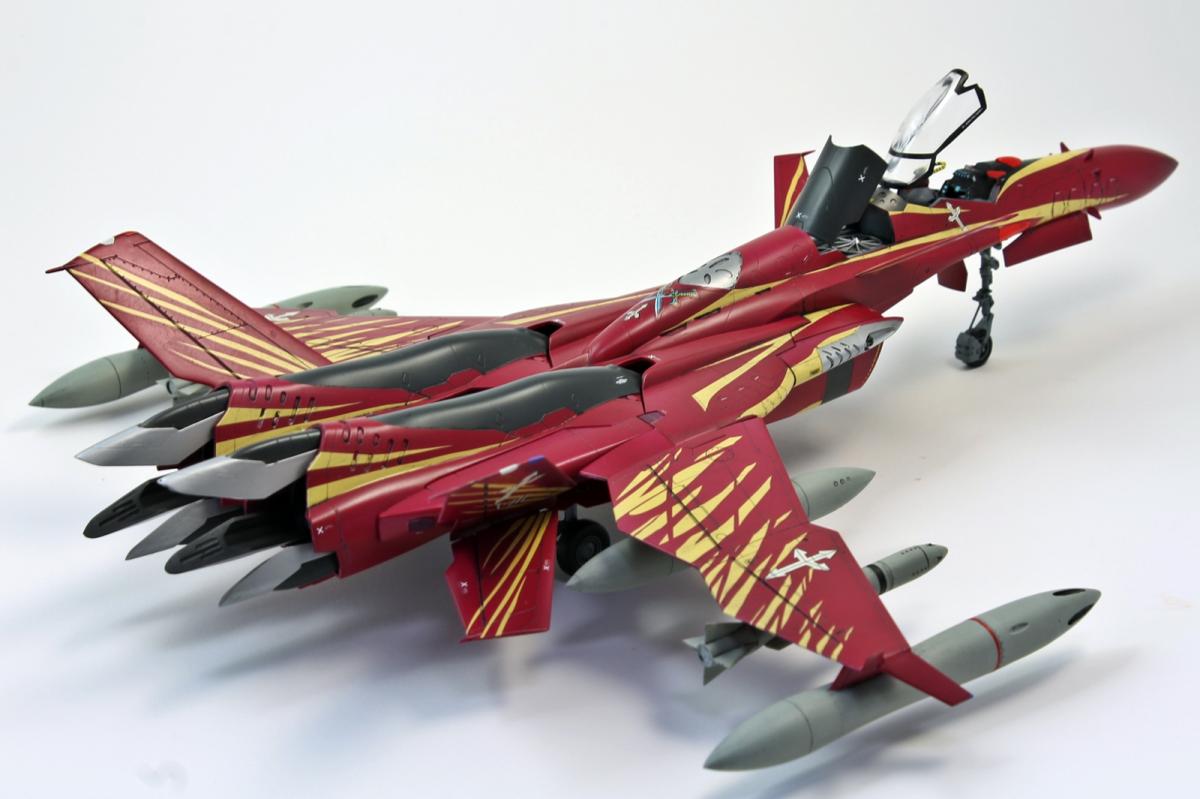
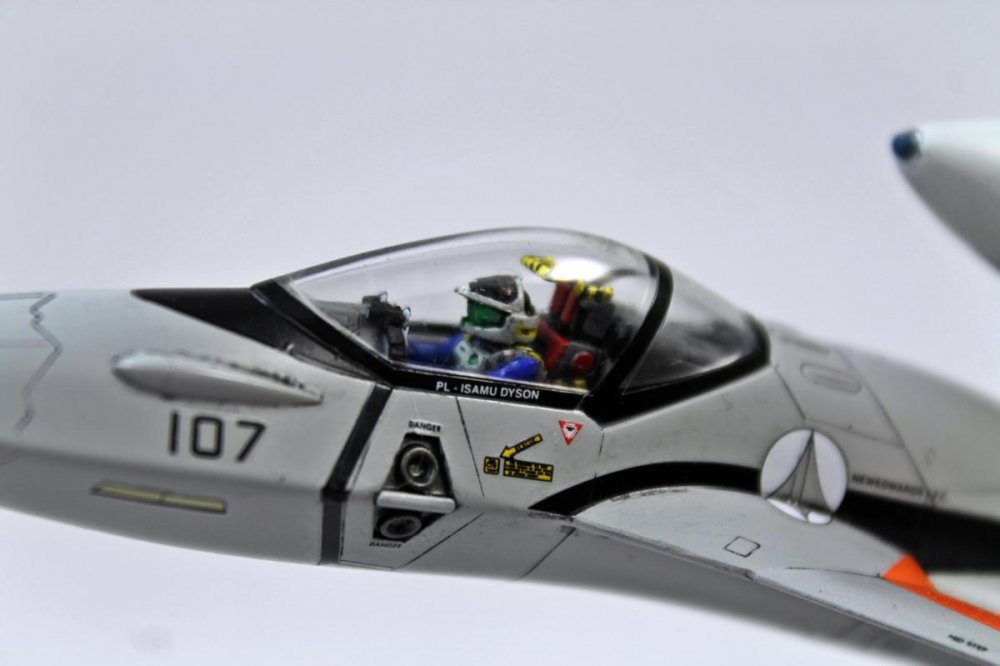
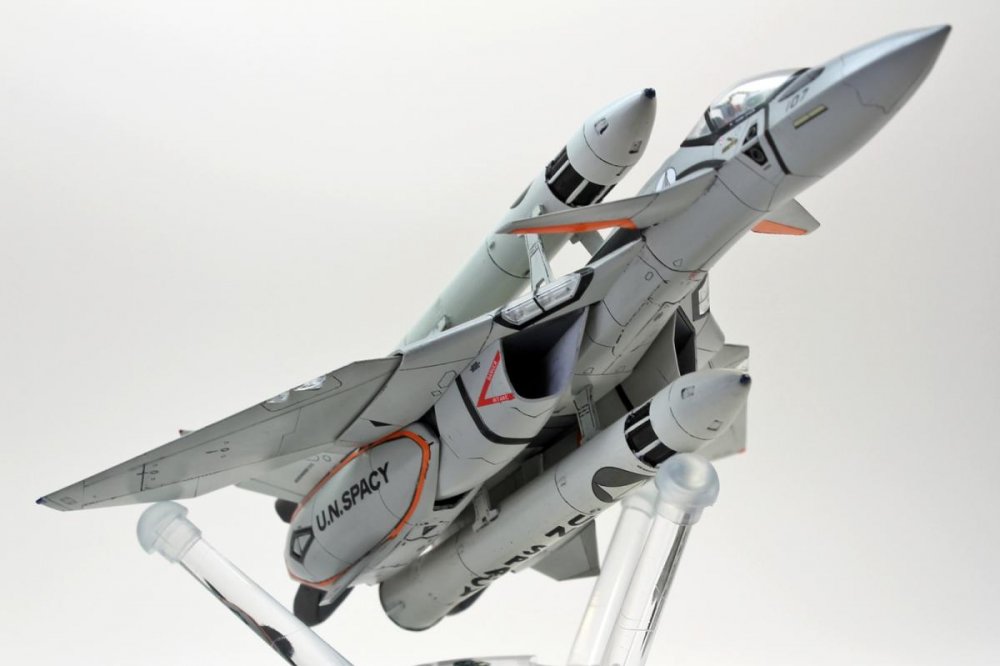
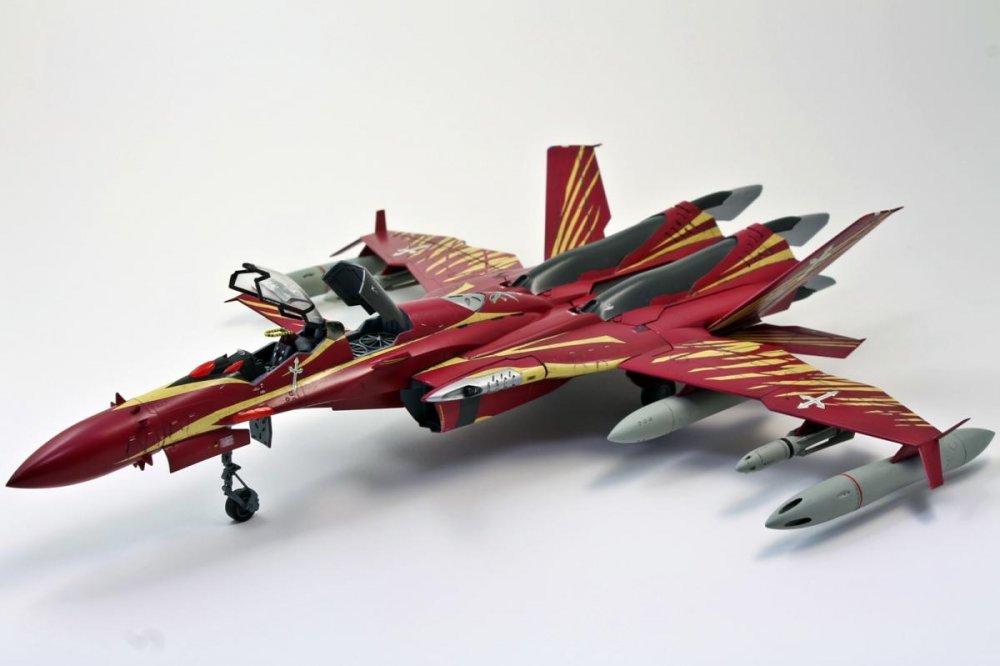
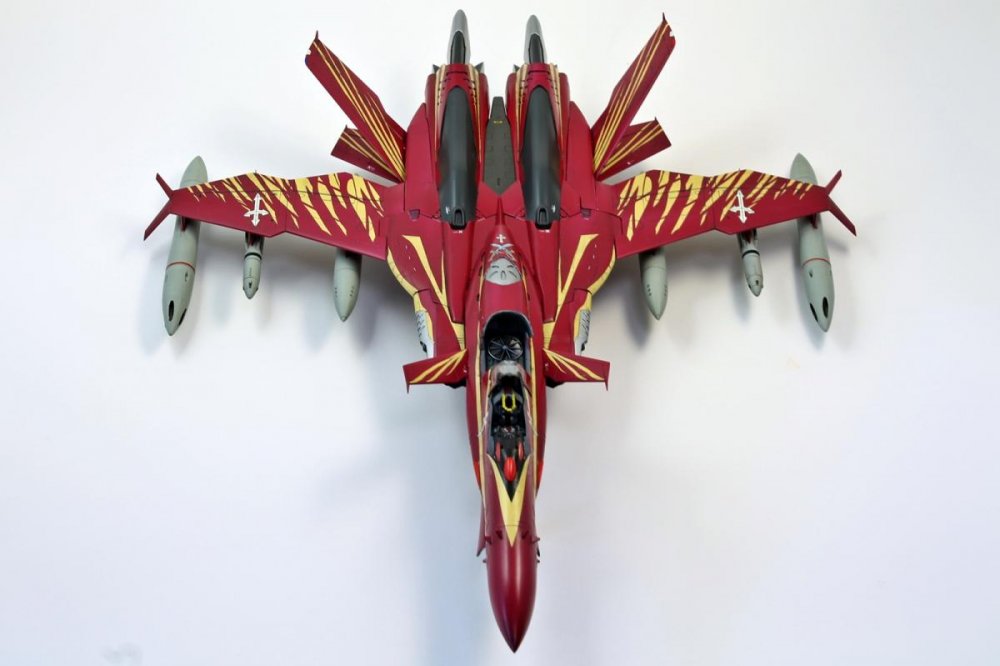
How could I let 2012 go without doing another VF-4? Here is Milia's VF-4 Racing Custom. I had really hoped that the 'Macross: The Ride' racing series would encourage people to do some more racing customs. I love military aircraft, but I also love racers, with their crazy colour schemes and sponsor logos plastered all over the place. I thought about Milia - a pilot hotshot, no longer in active duty. What would she do? Why not race with a hotted-up retro VF-4! However, this V4-F has some pretty substantial... modifications. From the souped up engines, reformed cowlings, control surfaces and even wings... a lot has been replaced in subtle and not-so-subtle ways. Custom decals were produced, one with a fun little spin on Milia's origins. Some were cribbed from a Macross decals option sheet. While I love weathering, somehow, it didn't seem appropriate for a racer like this. It was all about chrome and gloss finishes, and black, red and white. Enjoy the pics. Thanks for looking! Regards, Petar
-
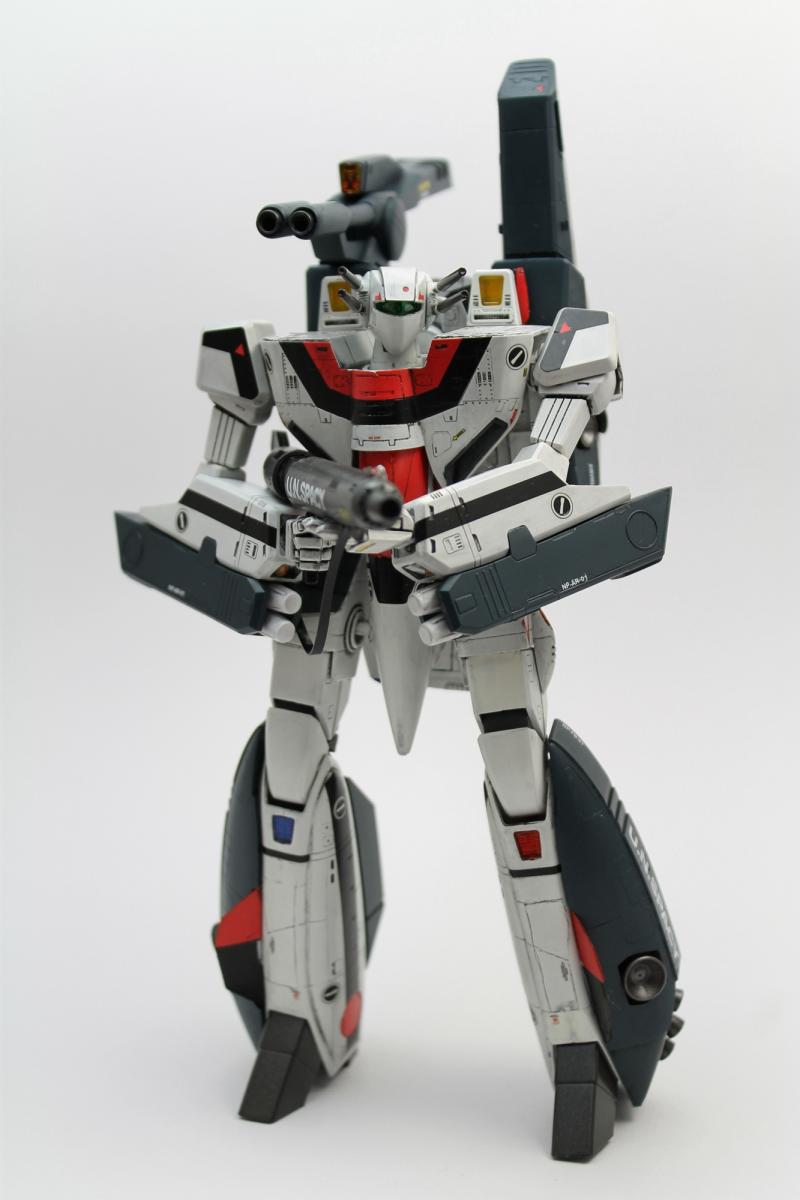
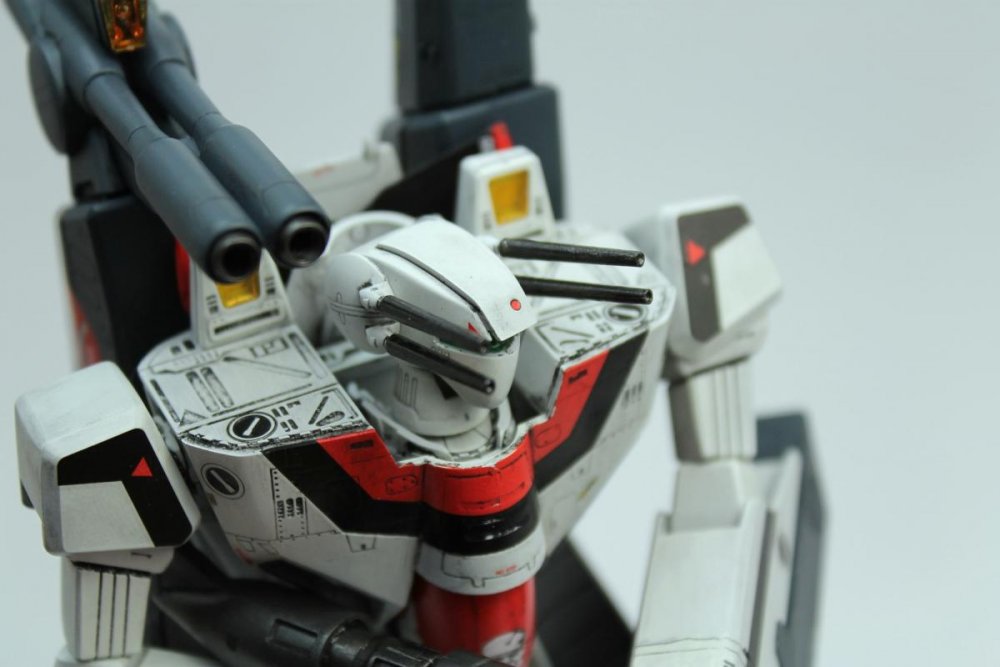
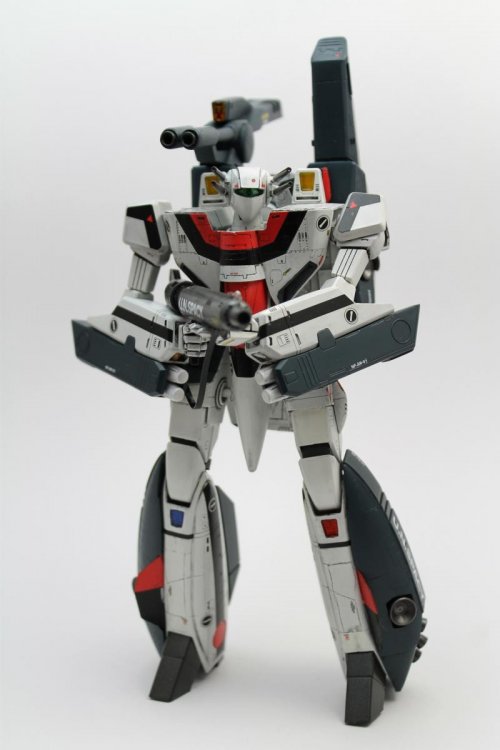
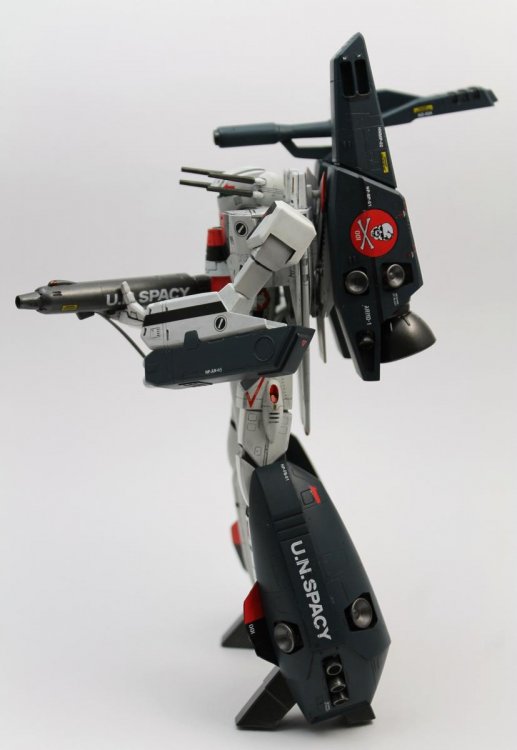
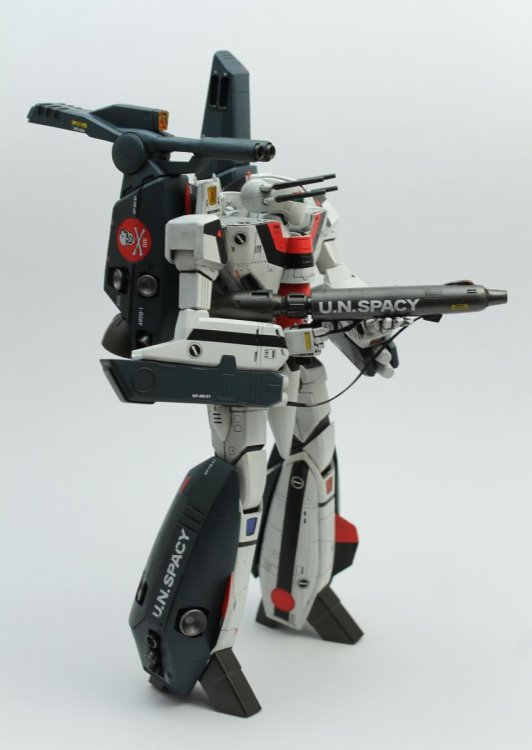
Finally finished another one! 1/72 scale Strike Battroid from Hasegawa. Pretty much a straight OOBB. Went with the Hikaru version, since my regular VF-1S Battroid is Roy's. Few more shots can been seen at the regular place.
-
Hello, Here is new topic about the QF-3000E Ghost Fighter, a resin kit from Neptune Models. Starting by the intakes, that look quite bad : Cutting everything, and doing it again with plastic card : And soon it seems to look like to... uuuh an UAV : Next step : painting ! Thanks for reading me.