Boobytrap
-
Posts
528 -
Joined
-
Last visited
Content Type
Profiles
Forums
Events
Gallery
Everything posted by Boobytrap
-

1/6 MOSPEADA Rider Project Proposal
Boobytrap replied to captain america's topic in Anime or Science Fiction
Thanks! Yeah I figured a ride/space armor should have more of a leather/rubber rather than fabric suit. This one I am pretty sure is vinyl with fabric backing. It fits perfectly on the base body (if I didn't know better I would think it was made for it) and I am pleasantly surprised by how thin and flexible it is. I thought it would hinder articulation and was willing to make the sacrifice for the appearance but no sacrifice needed. I have no idea what the longevity of the material will be but I doubt replacements will be hard to come by. Link: https://www.ebay.com/itm/294917757024 -
1/6 MOSPEADA Rider Project Proposal
Boobytrap replied to captain america's topic in Anime or Science Fiction
Finally got the body suit in. I'm still waiting on some upgrade parts so I'm in a bit of a holding pattern. Hopefully I won't have to wait too long as I have been having a lot of fun on this project.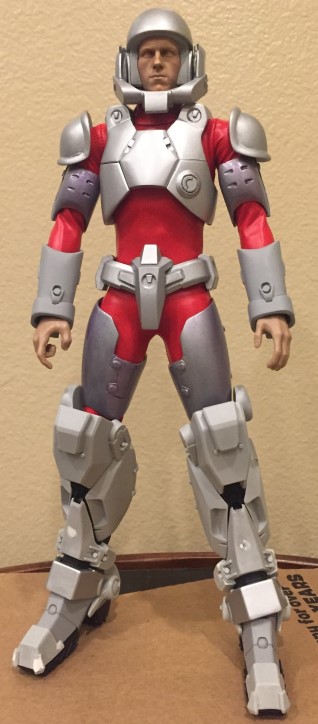
-
1/6 MOSPEADA Rider Project Proposal
Boobytrap replied to captain america's topic in Anime or Science Fiction
I have decided to go with a heavily weathered and worn scheme with this figure. End of a long road sort of vibe. To that end I have started on the base metal that will be seen through all of the paint chipping. I've been binging the RoboCop TV series on Amazon so was inspired to try my hand at a simplified version of his armor scheme (only purple and blue; no green and pink). I didn't want to go all out since it will barely be seen in the end. The bicep and thigh armor are done, As a comparison, the chest is the bare metal color before the filter colors were added. I'm not super happy with the brand I used for the purple paint. The color is fine but it was pretty much impossible to get it to blend smoothly. If I wasn't going to be covering it all up I would have redone it with my normal brand.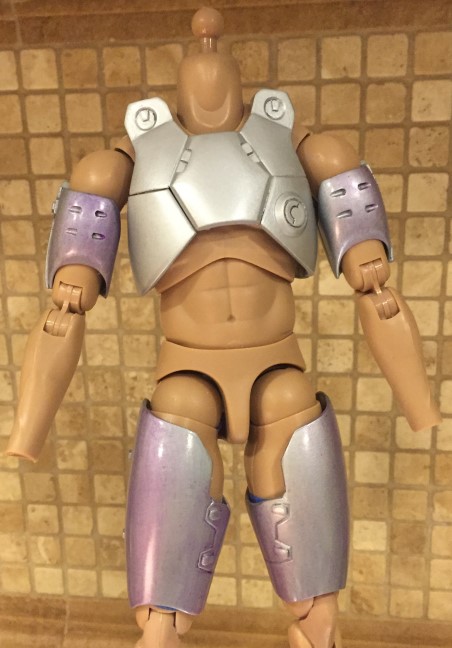
-
1/6 MOSPEADA Rider Project Proposal
Boobytrap replied to captain america's topic in Anime or Science Fiction
Wasteland companion perk unlocked! Still waiting on those road leathers.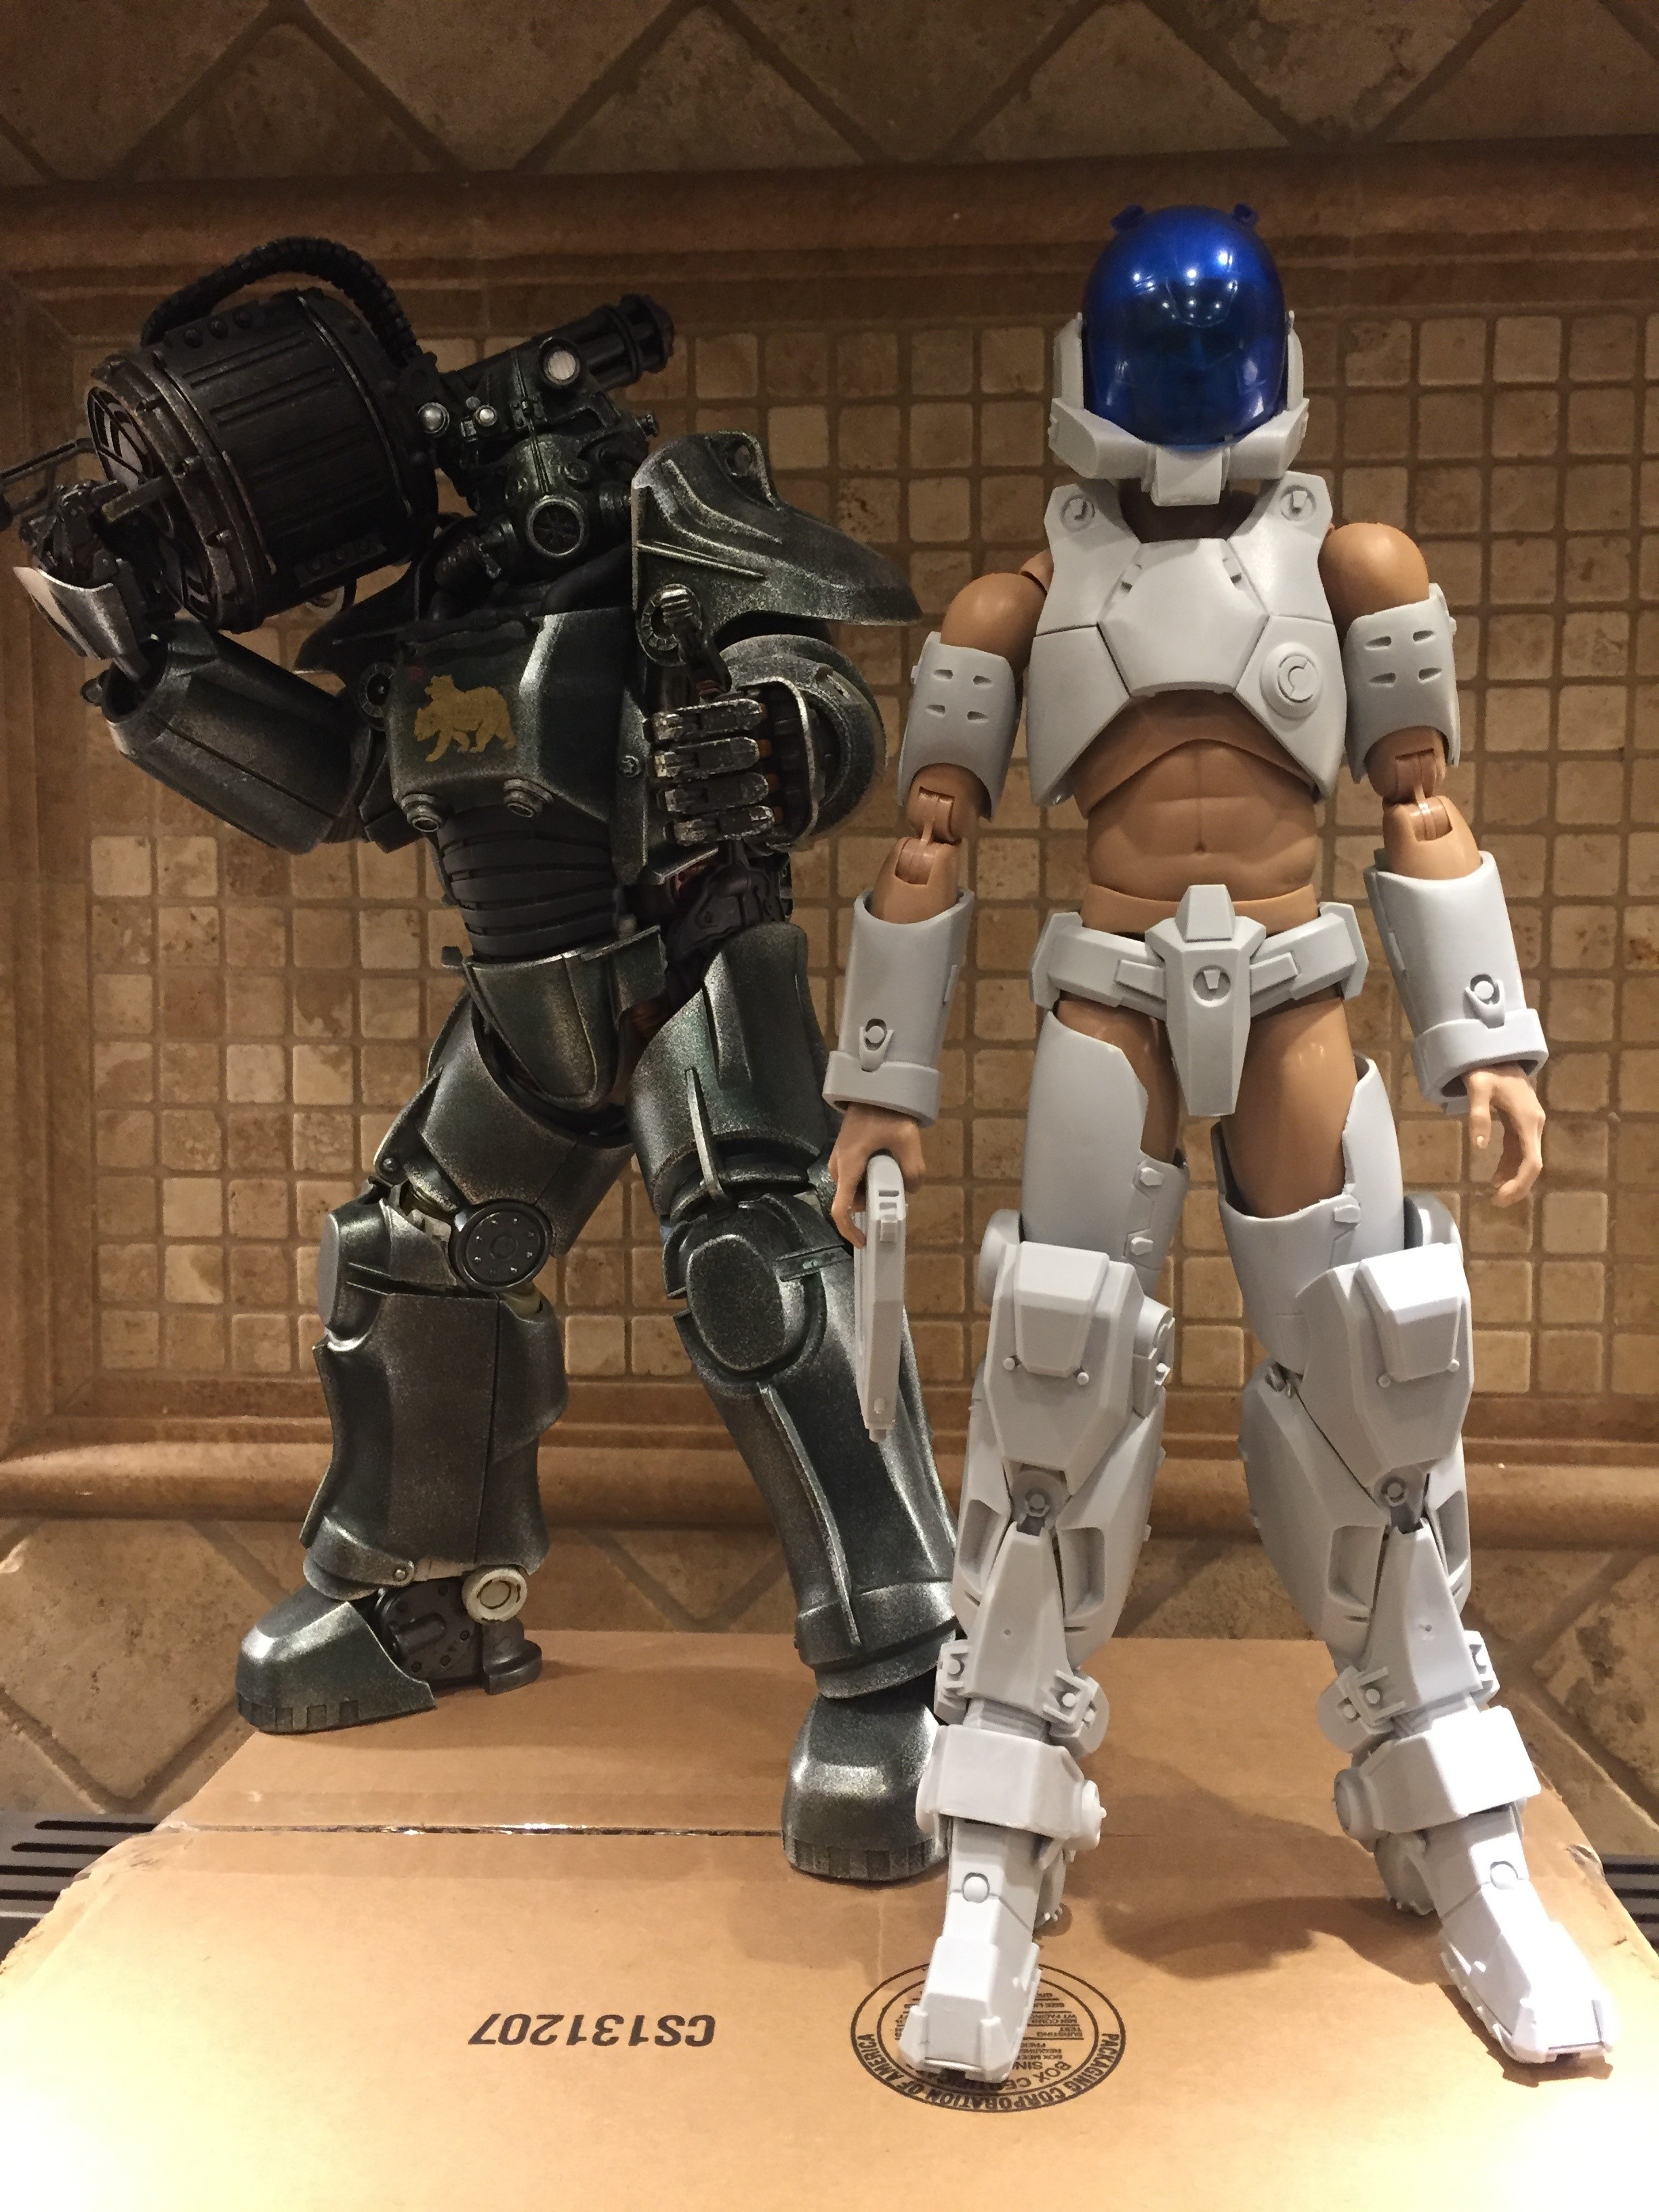
-
1/6 MOSPEADA Rider Project Proposal
Boobytrap replied to captain america's topic in Anime or Science Fiction
I totally understand. I figured the bike, even if it was solid, would be a long shot anyway. Having this in hand now it's just too good not to have something to accompany it. I'll keep my hopes up that a female rider may come to light some day. In the meantime maybe I'll try to scratch build some of the cycle cargo containers , supplies, and weapons. I've got your 1/12 set that I can use for inspiration :). -
1/6 MOSPEADA Rider Project Proposal
Boobytrap replied to captain america's topic in Anime or Science Fiction
Aww man that sucks. So I assume the odds of a companion piece like a bike or female rider are also zero? -
1/6 MOSPEADA Rider Project Proposal
Boobytrap replied to captain america's topic in Anime or Science Fiction
I knew I recognized it! It was bugging me trying to figure it out. I thought it looked like that guy from Uncharted. Guess I was wrong though 😉 -
1/6 MOSPEADA Rider Project Proposal
Boobytrap replied to captain america's topic in Anime or Science Fiction
Did some basic skin texturing. I really wasn't expecting this detailed of a sculpt. It was a very nice surprise. @captain americais this a recast or did you sculpt it? If you sculpted it my list of wish items from you is going to grow quite a bit.
-
1/6 MOSPEADA Rider Project Proposal
Boobytrap replied to captain america's topic in Anime or Science Fiction
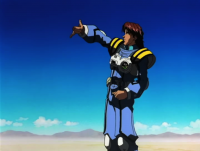
It's here! It's here! Happy valentine's day to me. I've been on a 1/6 kick lately so this came at the perfect time. Still waiting on the body suit delivery but at least I already have the MX-02 base body. Off to go do a happy dance before I get to work on this bad boy.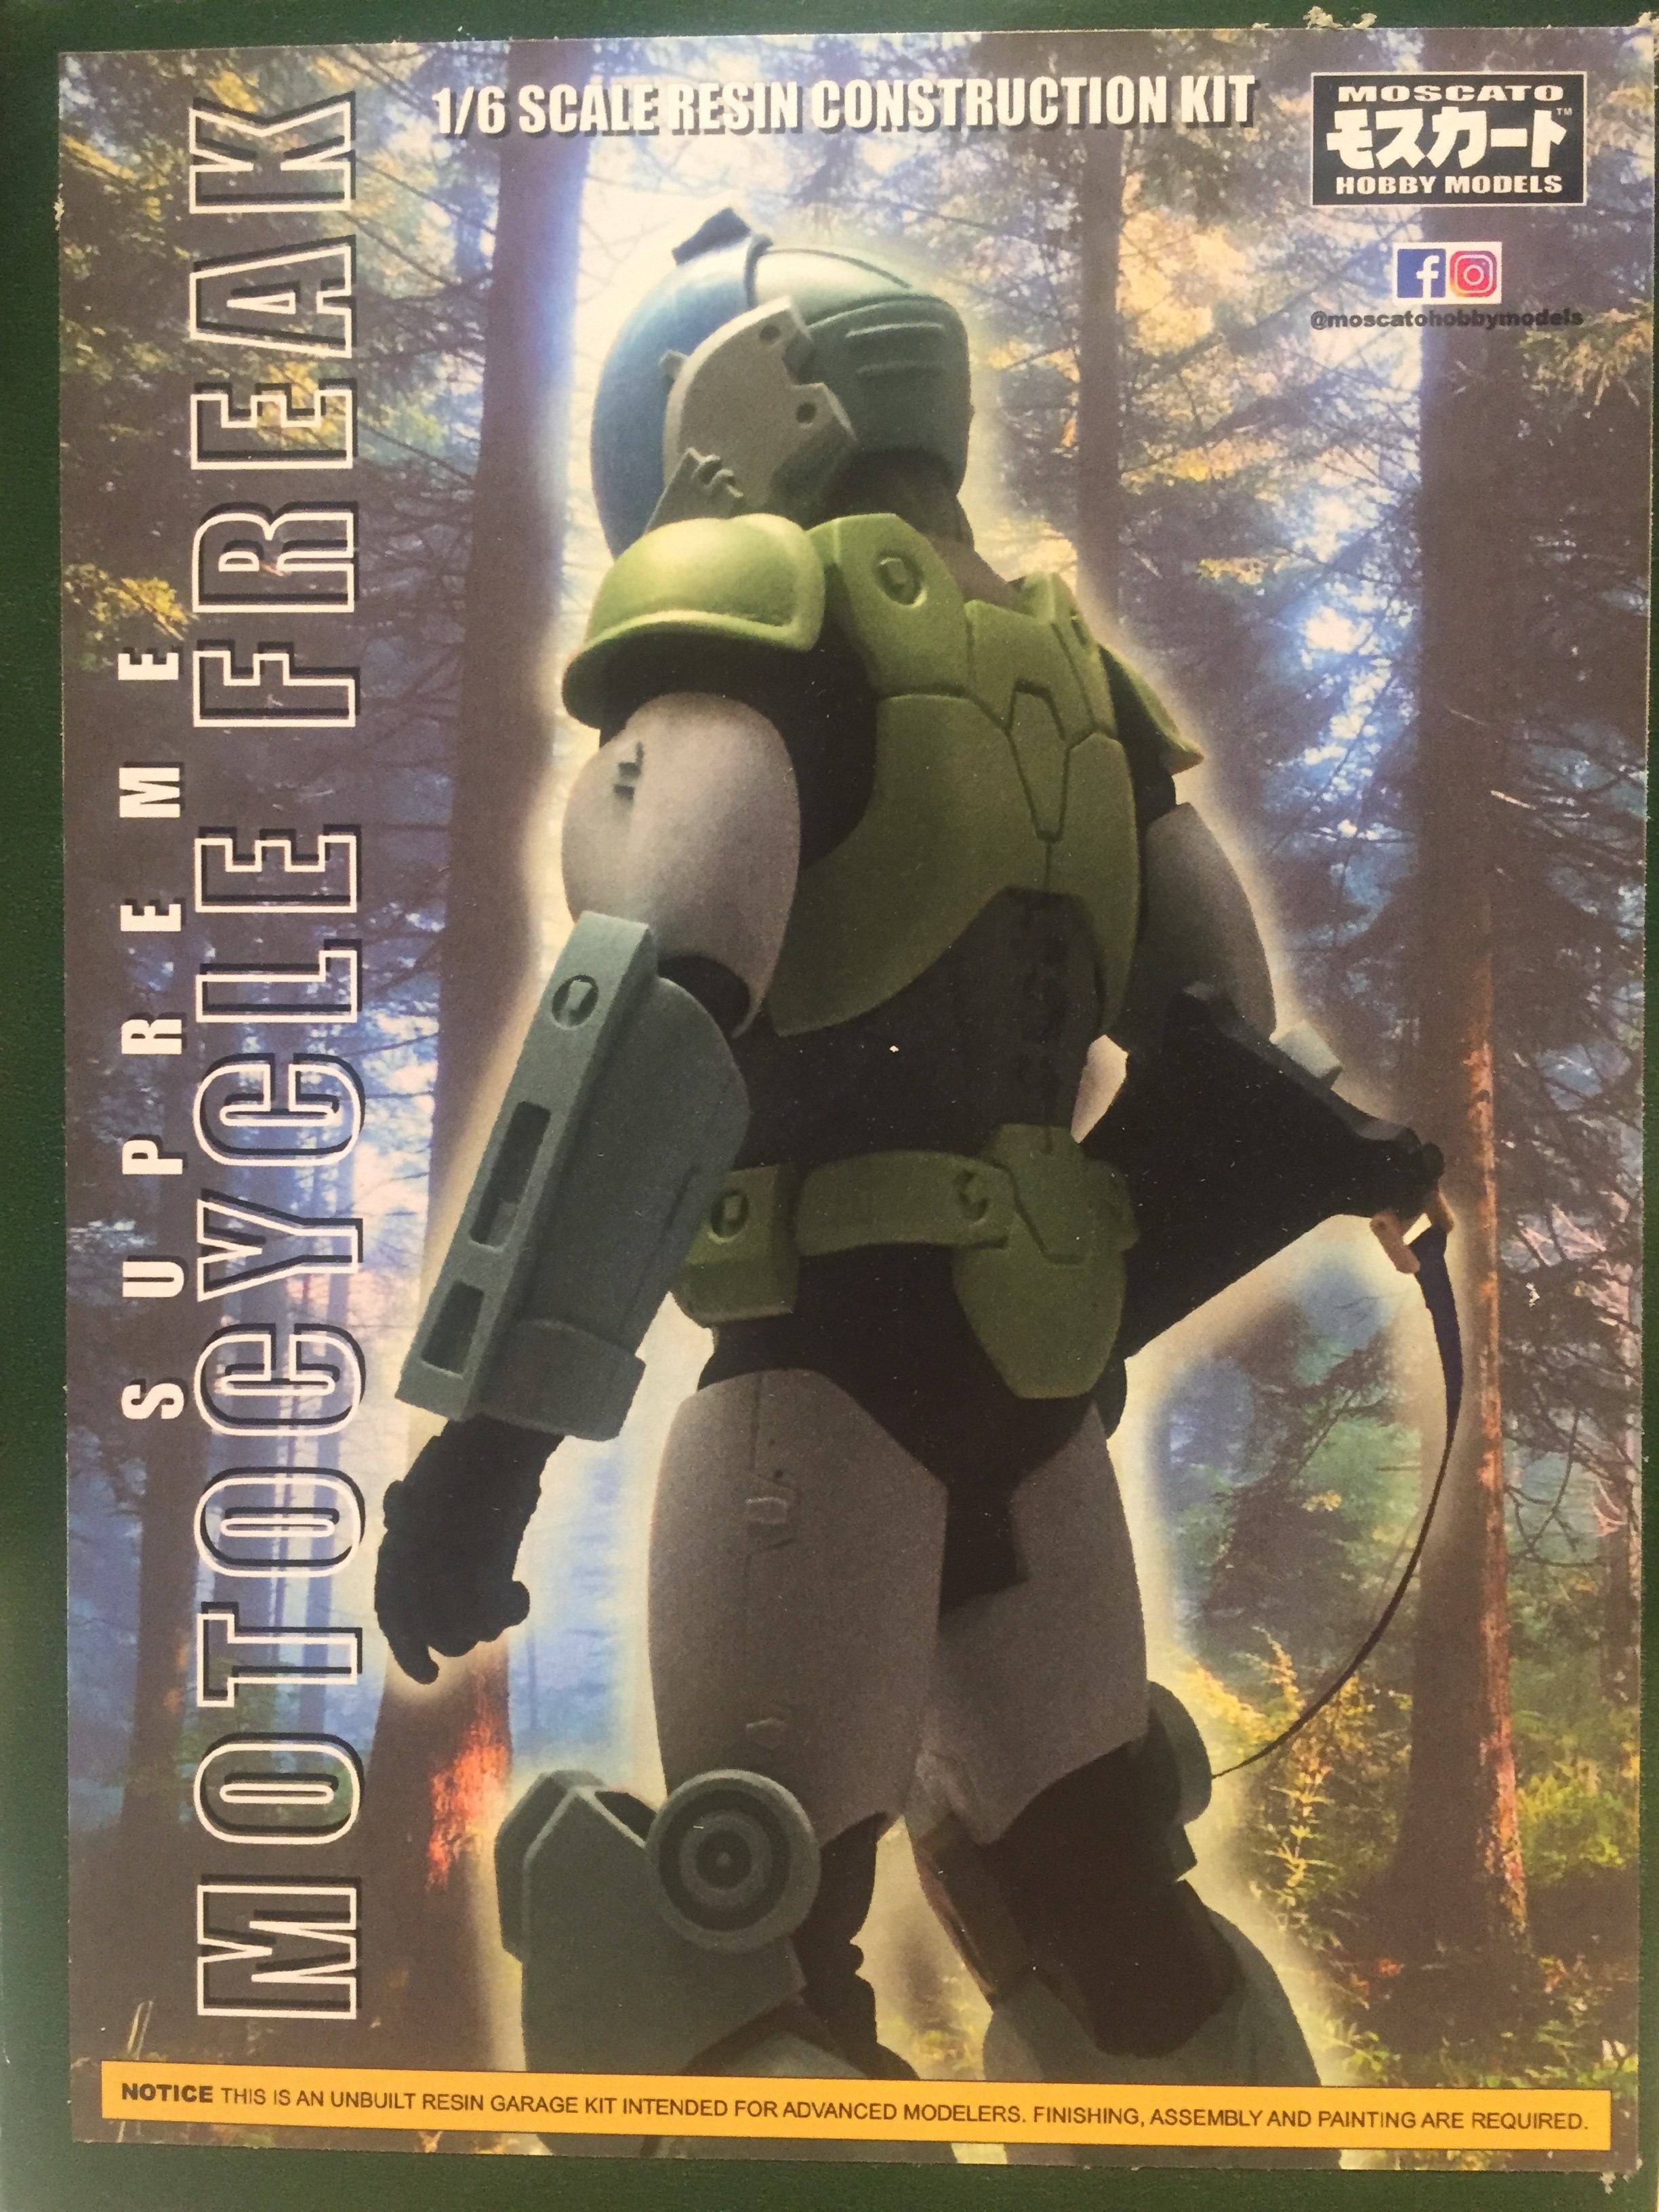
-
1/6 MOSPEADA Rider Project Proposal
Boobytrap replied to captain america's topic in Anime or Science Fiction
WANT! -
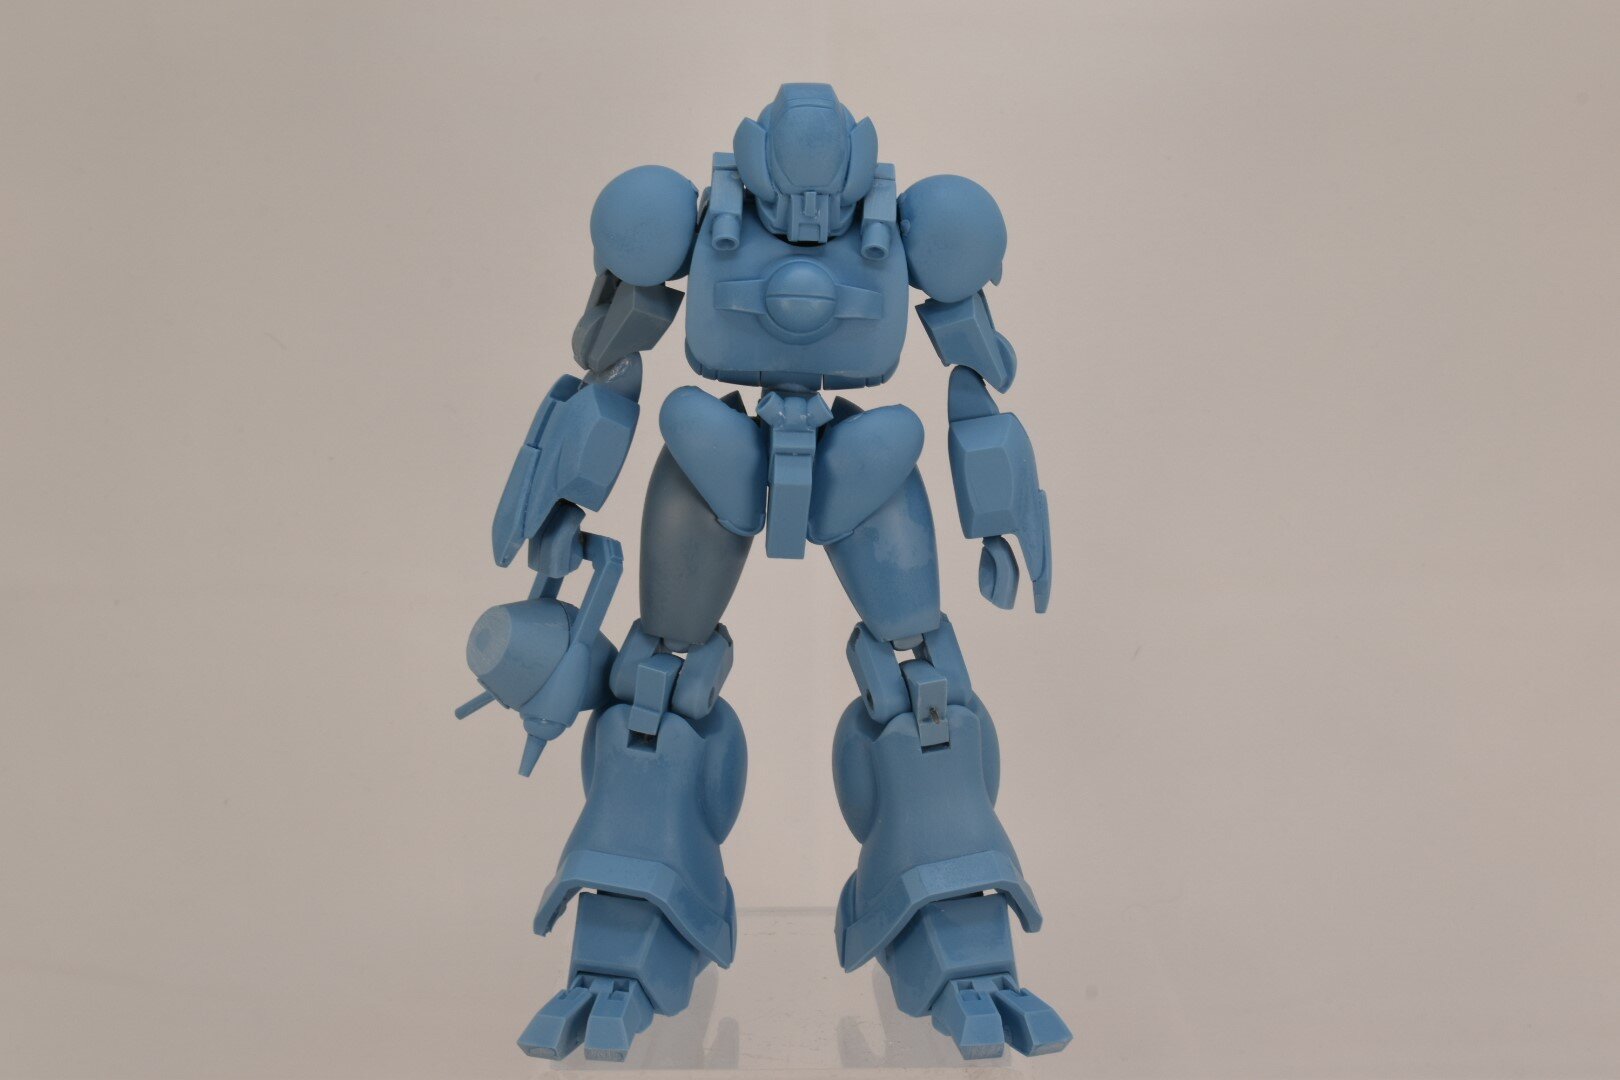
1/48 SOUTHERN CROSS BIOROID PART II
Boobytrap replied to captain america's topic in Anime or Science Fiction
And so it has begun... I've replaced all of the joints except in the waist and knees. It will also be able to be displayed with the chest open or closed. I will just have to pop in the cockpit when I want it open and take it out when I want it closed.
- 150 replies
-
- 1
-

-
- southern cross
- robotech
- (and 4 more)
-
All members should CHANGE their passwords - Help thread
Boobytrap replied to Shawn's topic in MW Site News & Member Feedback
👍 No issues here with the update. Thanks for looking out for us and the site. -
1/48 SOUTHERN CROSS BIOROID PART II
Boobytrap replied to captain america's topic in Anime or Science Fiction
There's muh boy blue! Looking awesome as expected. It will definitely be the version I am going to build. -
1/48 SOUTHERN CROSS BIOROID PART II
Boobytrap replied to captain america's topic in Anime or Science Fiction
I like all this back and forth. I'm sure I'll like whatever the final product ends up as. For my .02, looking at the pictures Ted provided, I think the edges on the lenses on the bug face should should be recessed and only slightly bulge out in the middle. Additionally, each edge of the lenses appear to have fairly hard angles with little to no rounding. For the chest piece I would agree with Ted that the side brackets shouldn't be so wide to allow the hoses to lay directly on the chest. It looks odd and doesn't seem to match the line art sitting on top of the medallion brackets. As always, fantastic work and I really appreciate that you listen to our feedback. -
1/48 SOUTHERN CROSS BIOROID PART II
Boobytrap replied to captain america's topic in Anime or Science Fiction
I'm in for one without the sled. -
1/48 SOUTHERN CROSS BIOROID
Boobytrap replied to captain america's topic in Anime or Science Fiction
I didn't have the funds during the first run where all three were offered. The red was the only one offered on the second run. -
The Official Moscato Hobby Models Thread
Boobytrap replied to captain america's topic in Anime or Science Fiction
Oh yeah, I completely blanked on the biopsycher. Sorry about that. I am a patient man. Until next time... -
The Official Moscato Hobby Models Thread
Boobytrap replied to captain america's topic in Anime or Science Fiction
So @captain america now that the Horizont and contest has been completed what is next on the work bench? I'd like to re-nominate the Gigamesh. 😉
-
1/48 SOUTHERN CROSS BIOROID
Boobytrap replied to captain america's topic in Anime or Science Fiction
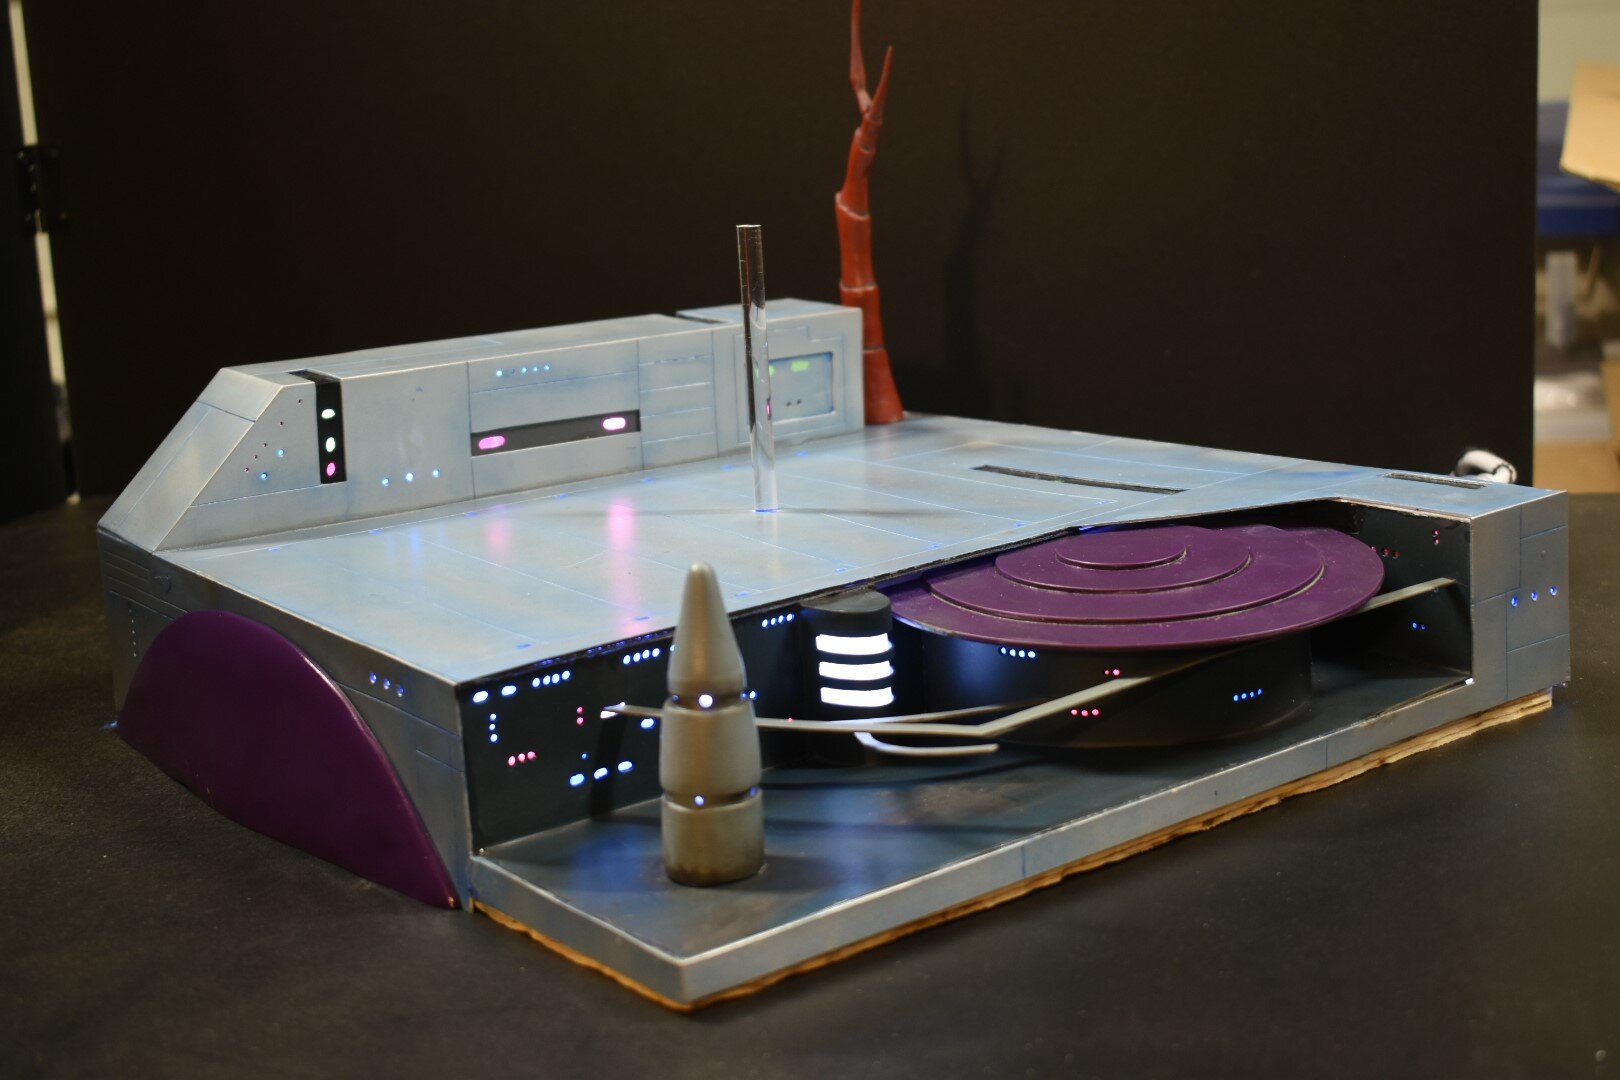
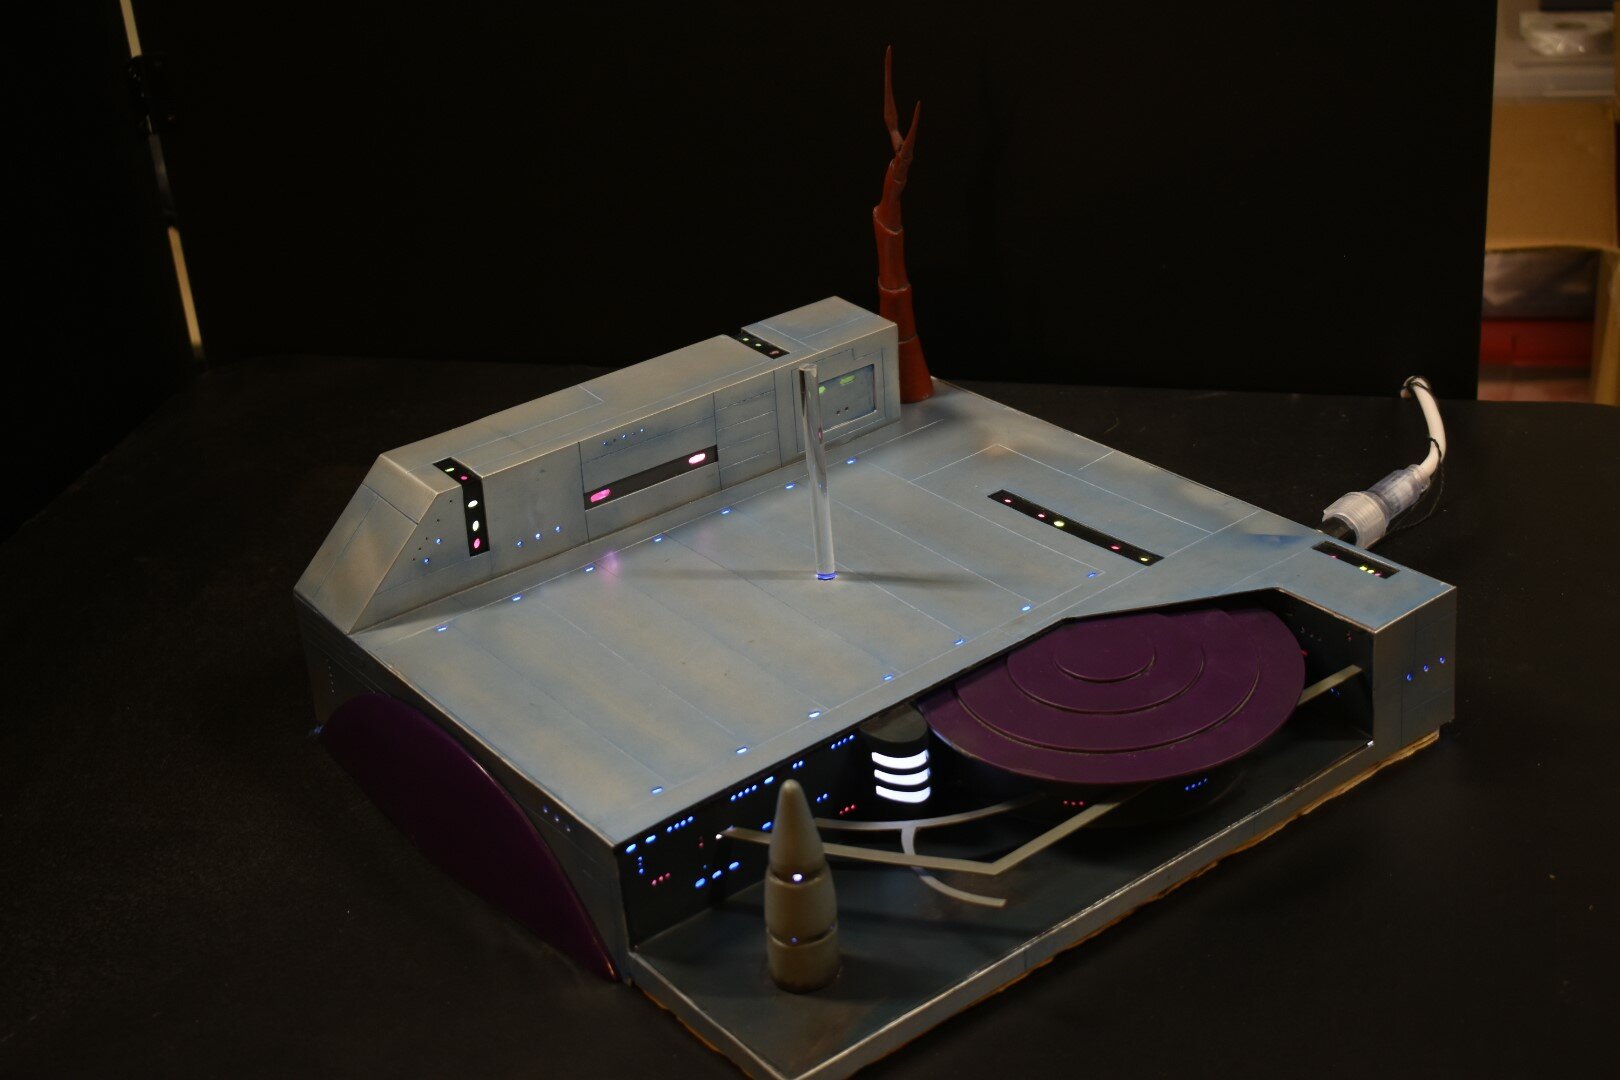
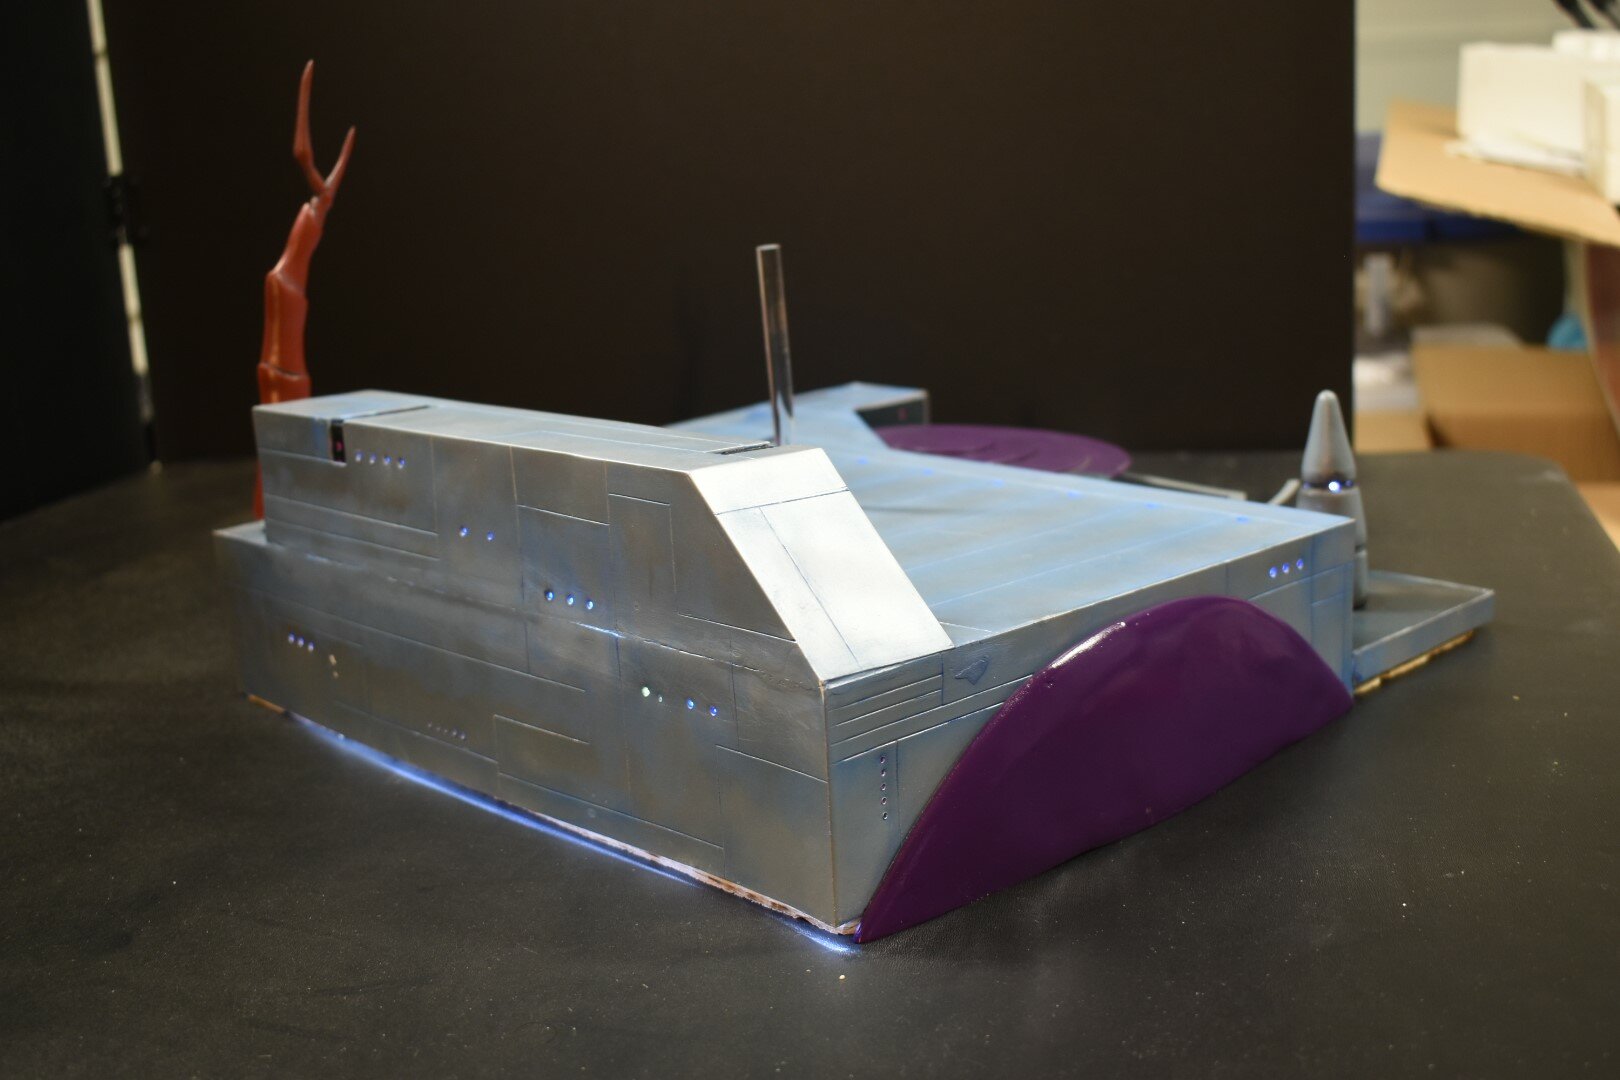
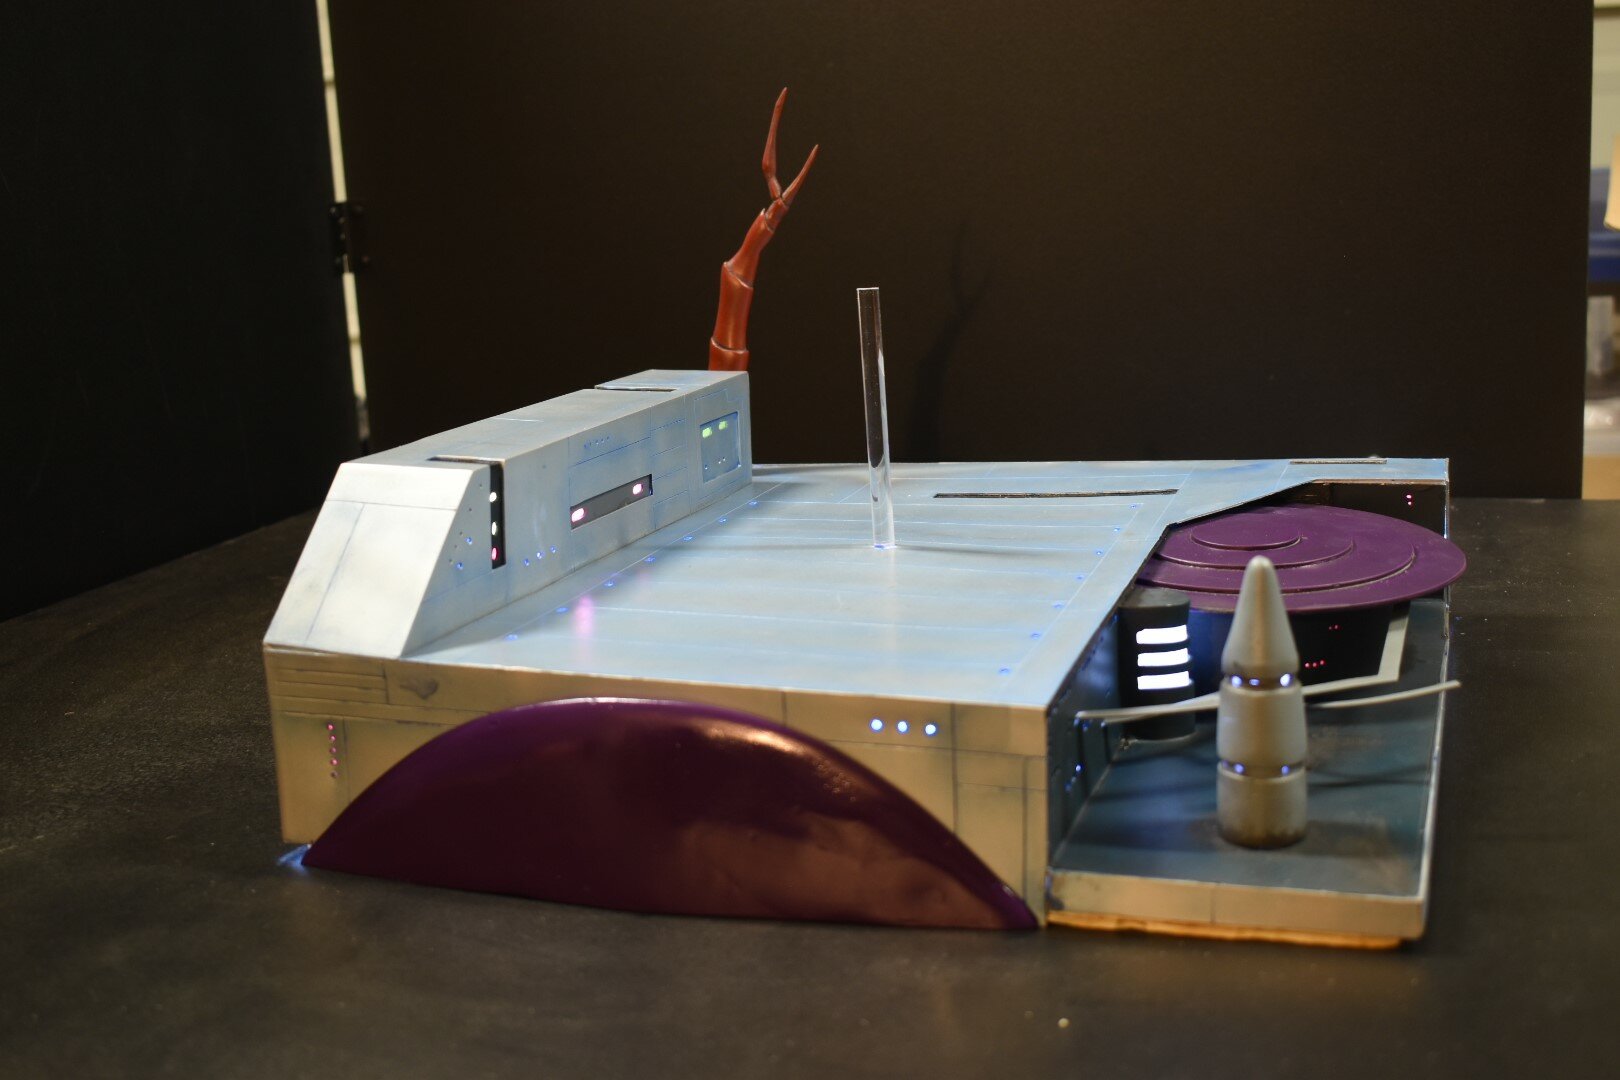
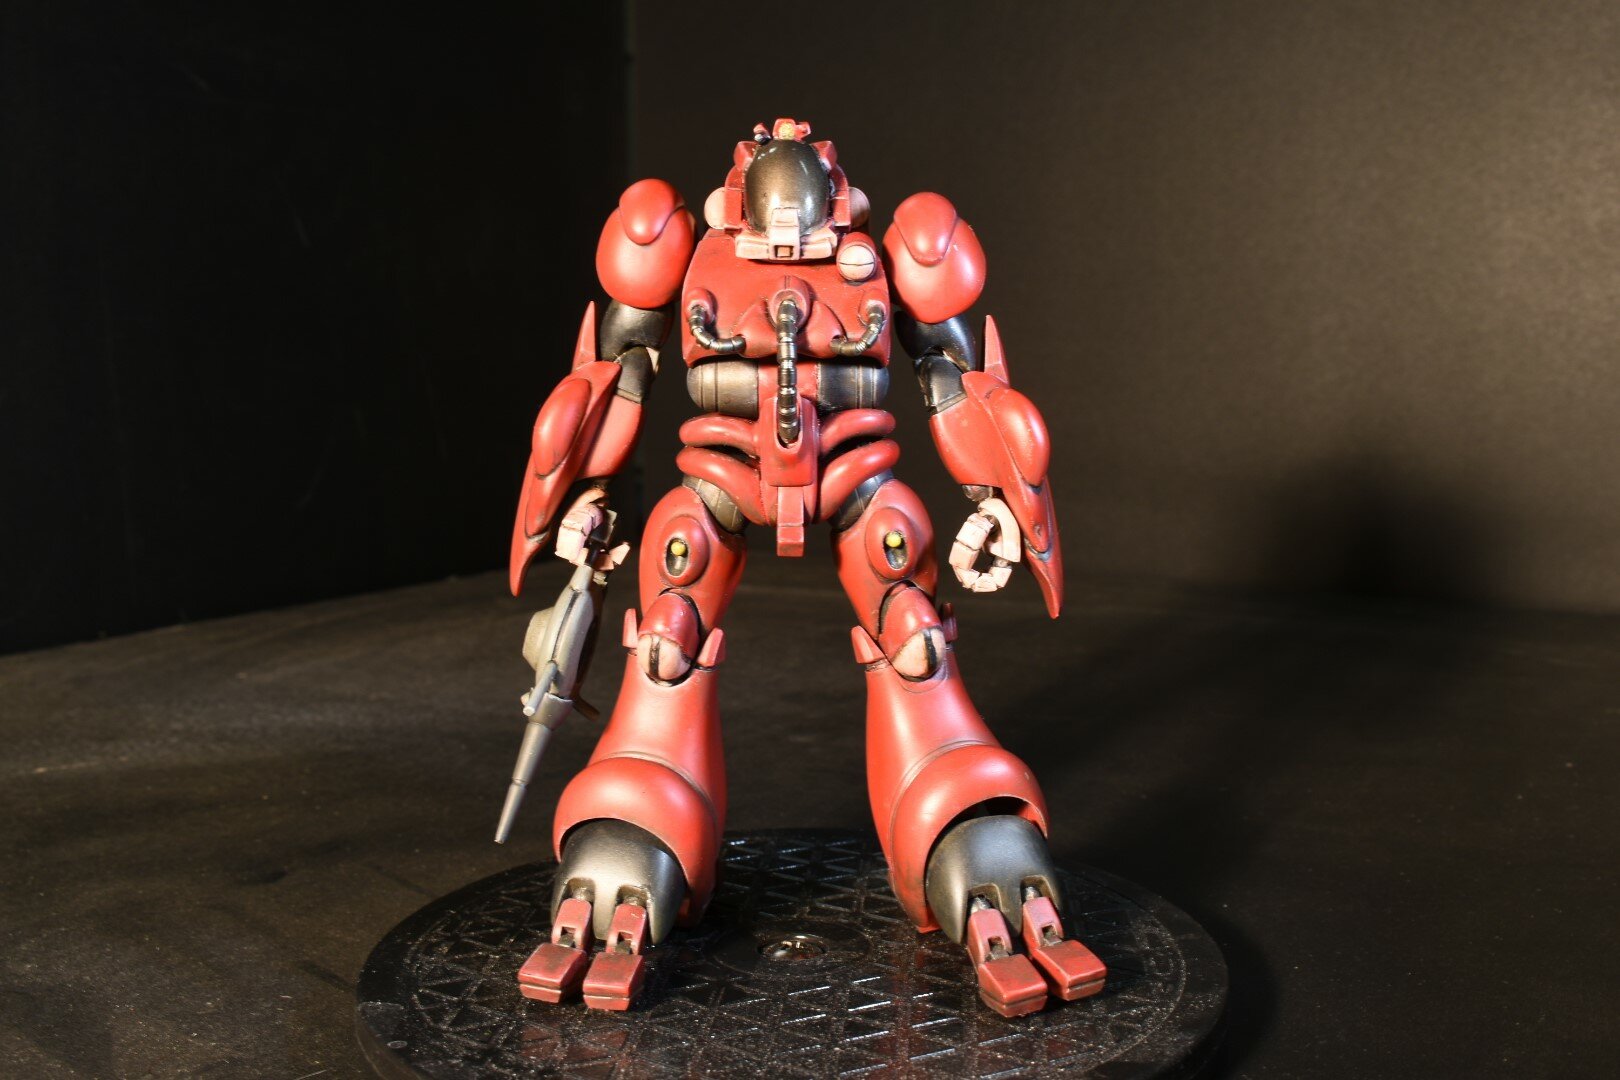
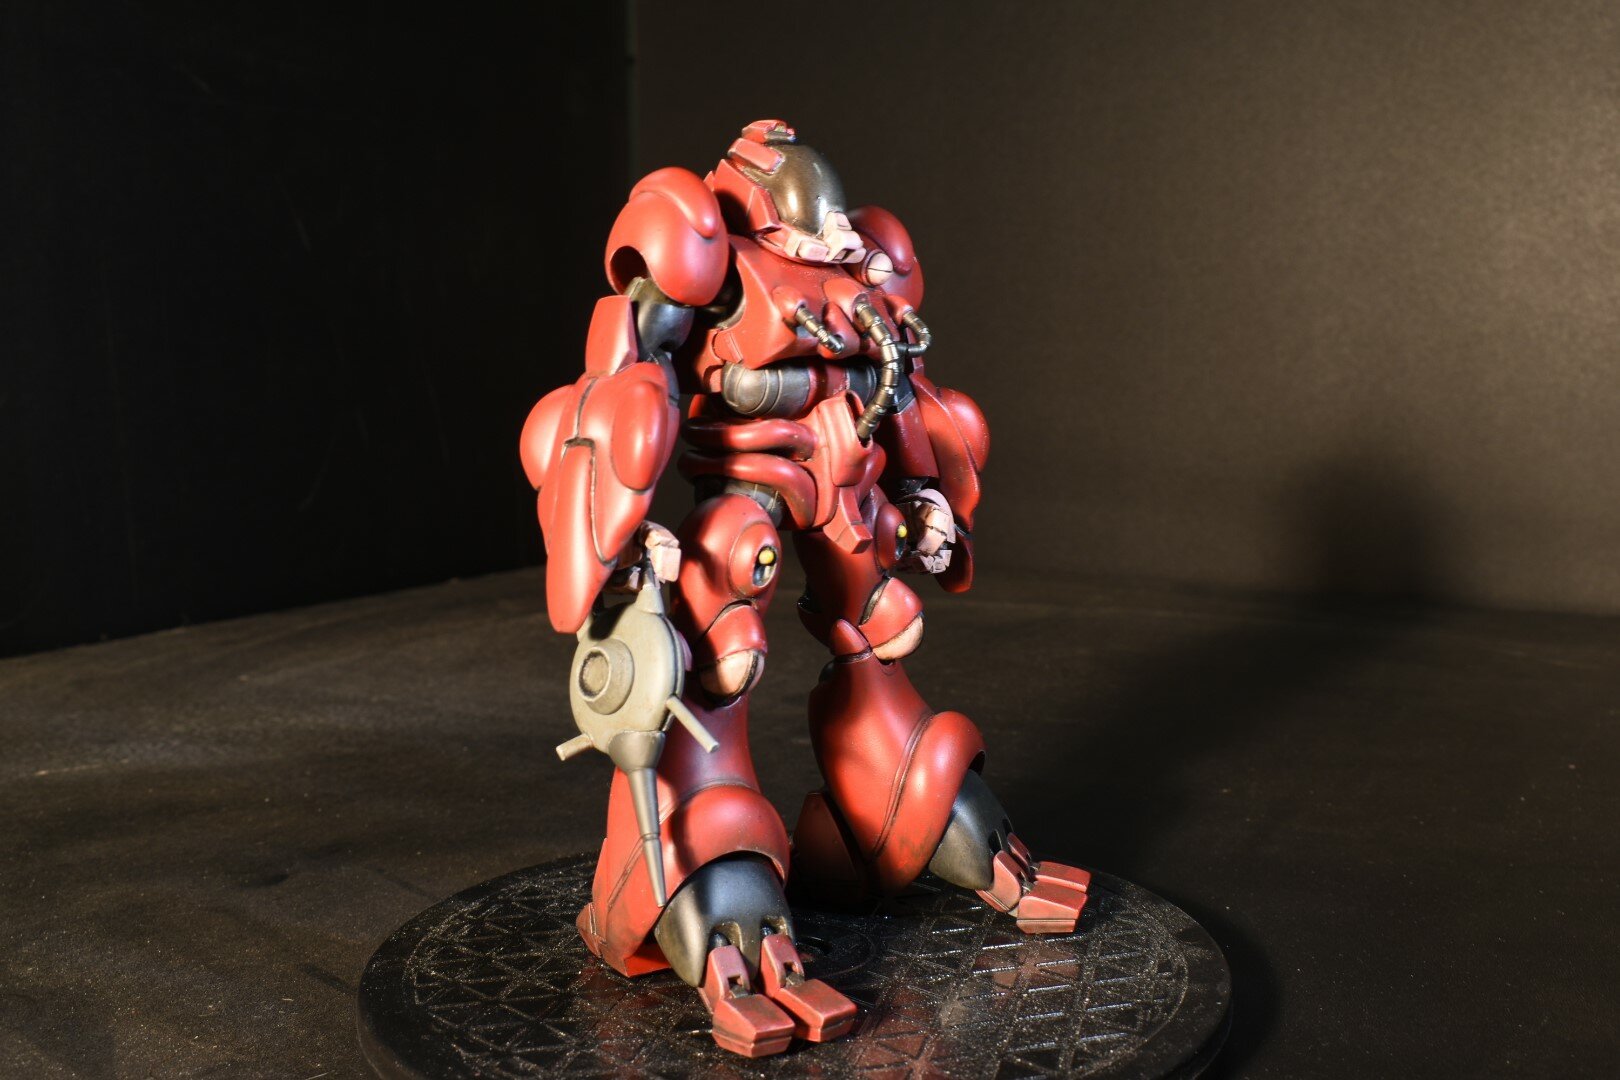
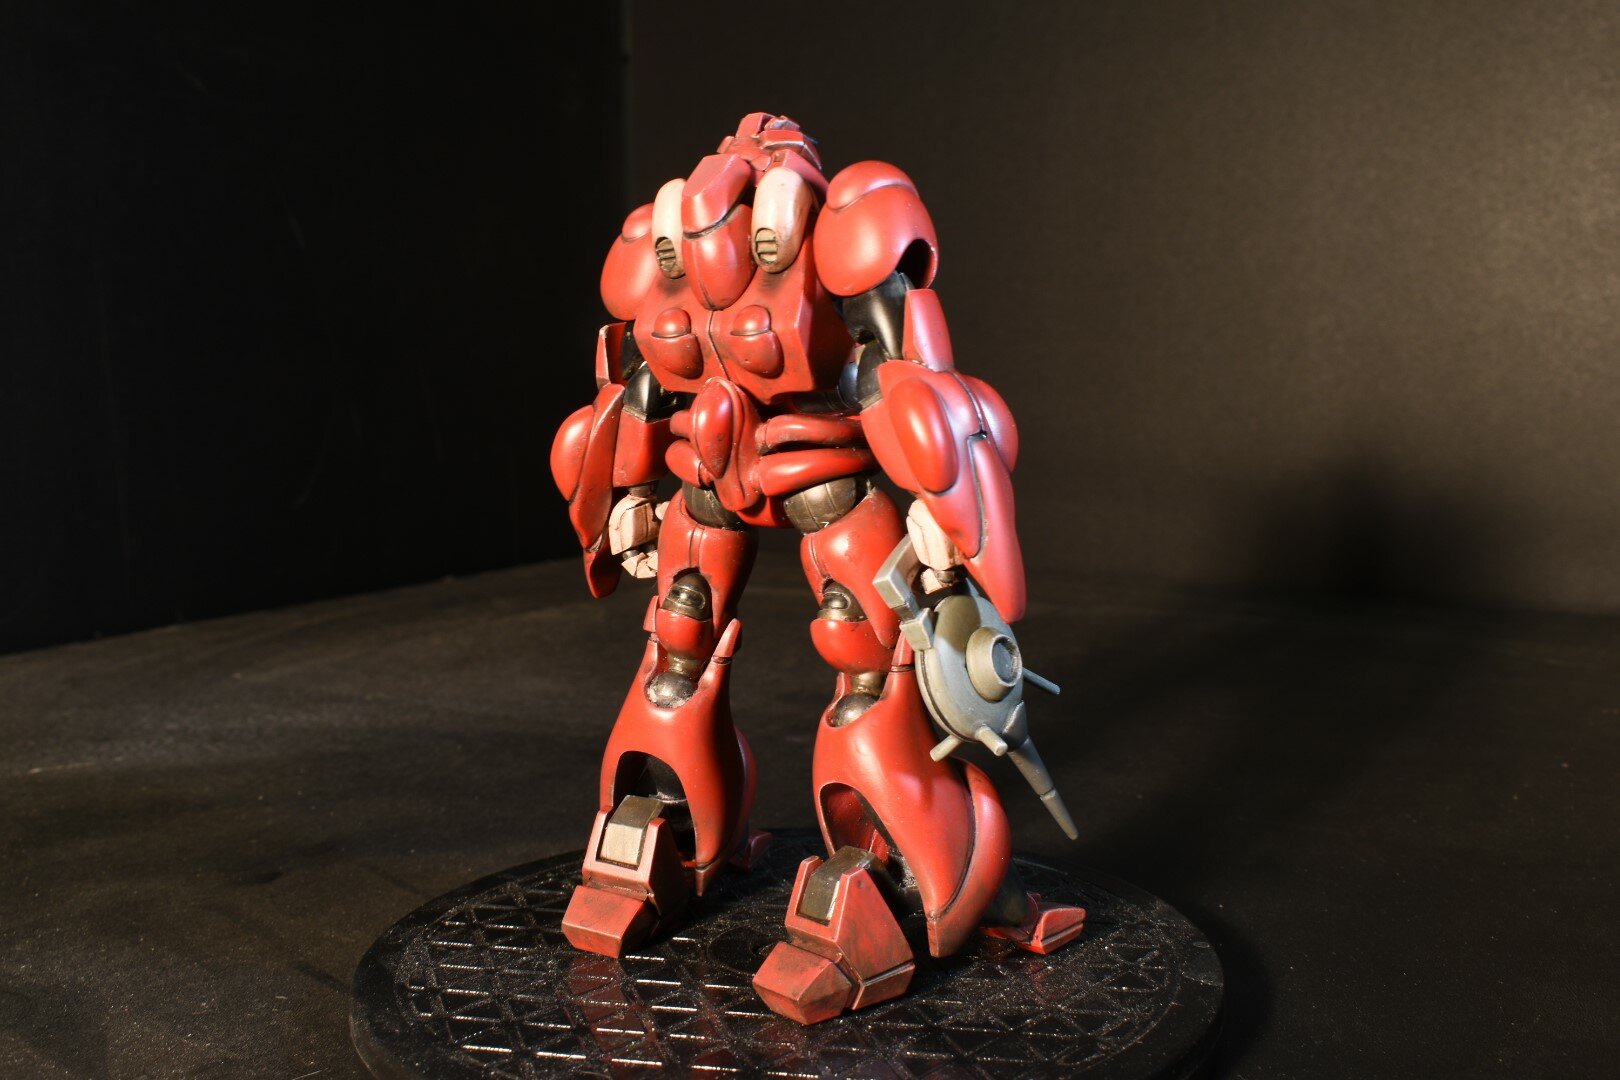
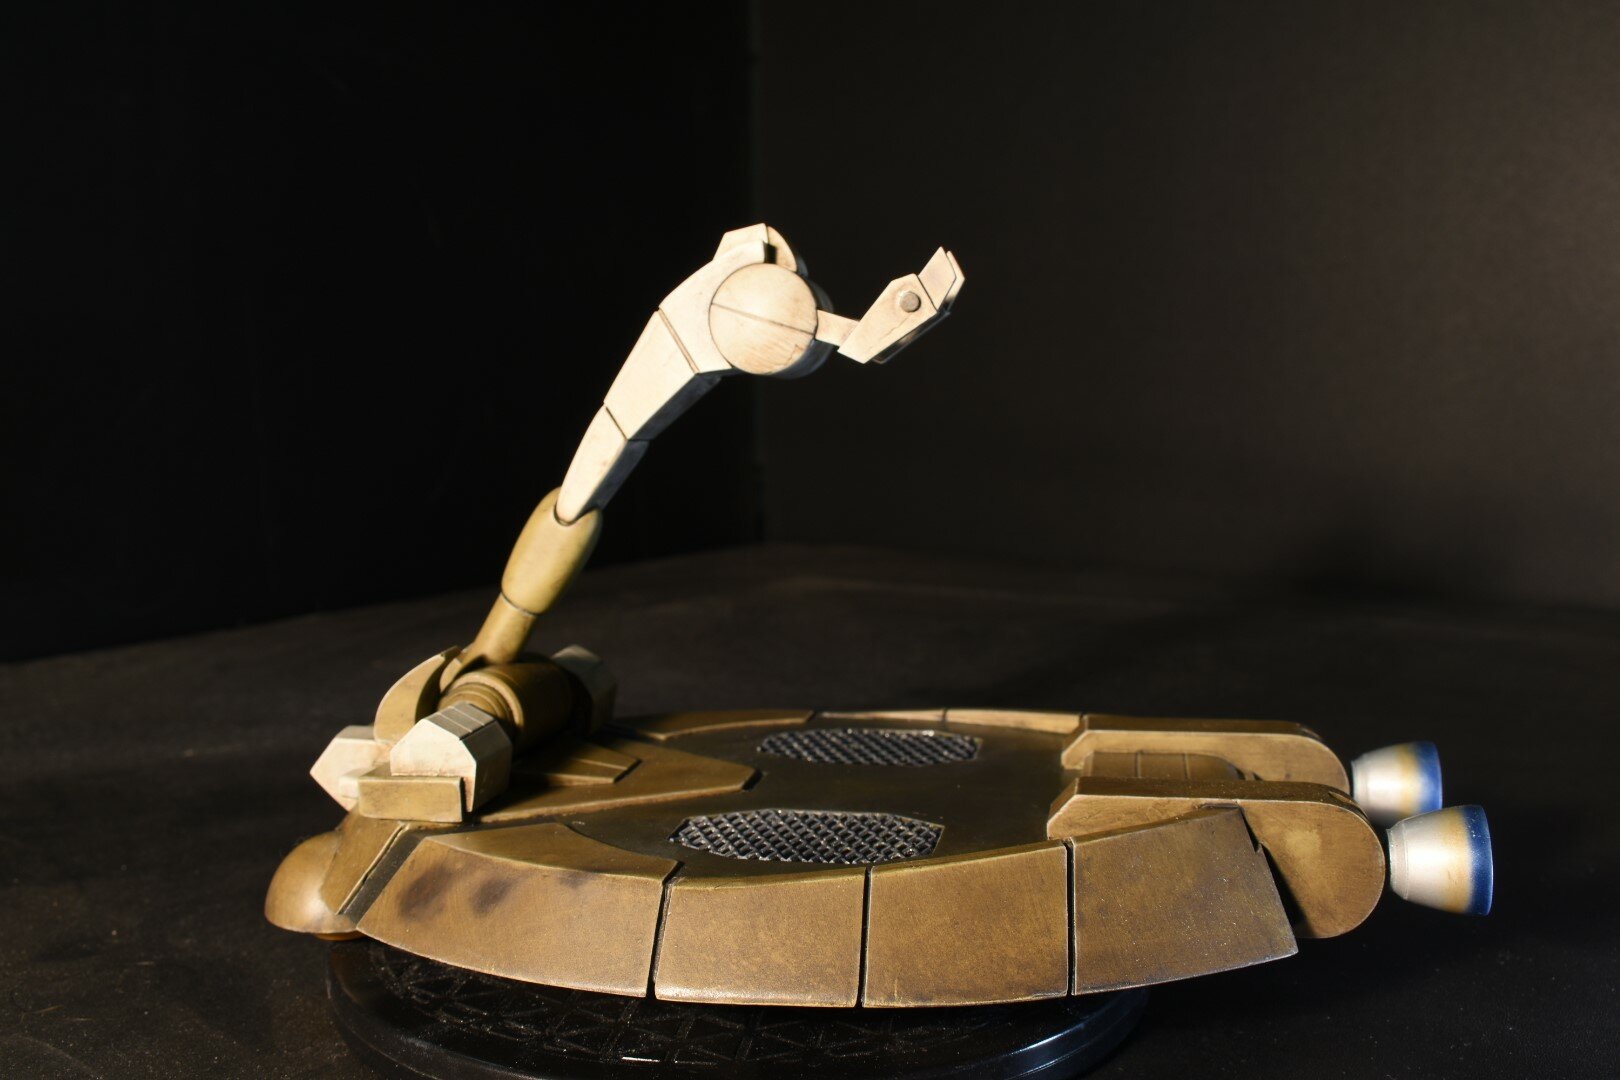
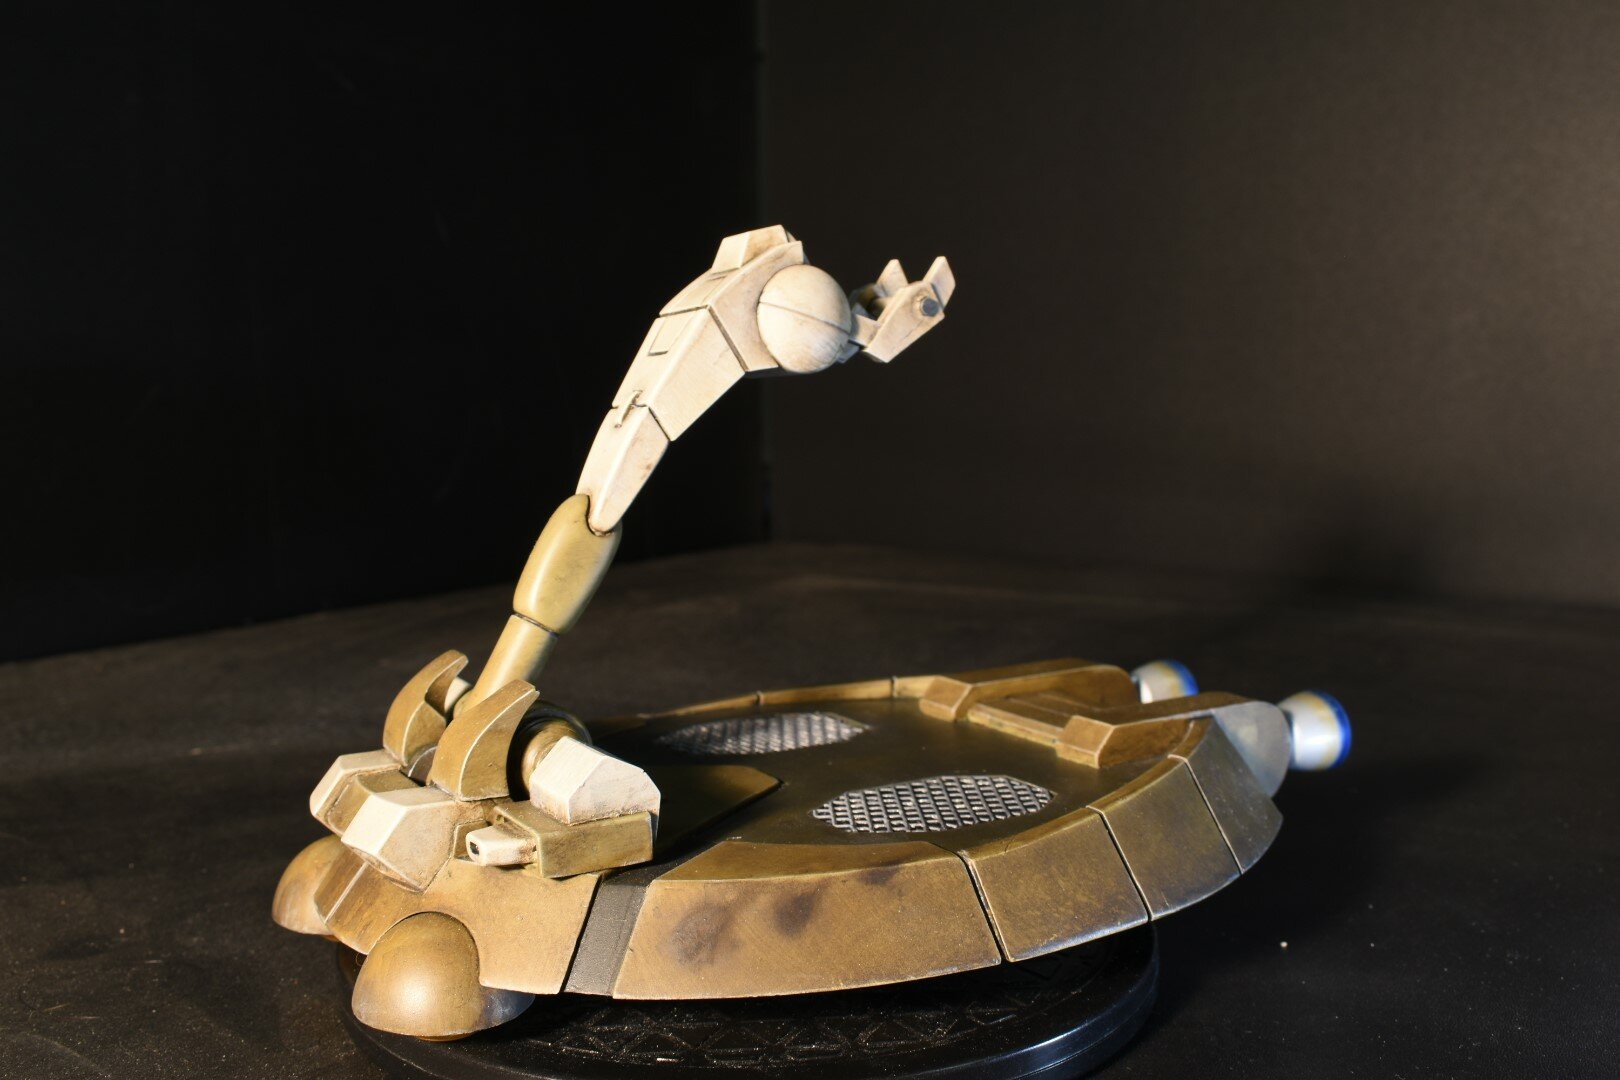
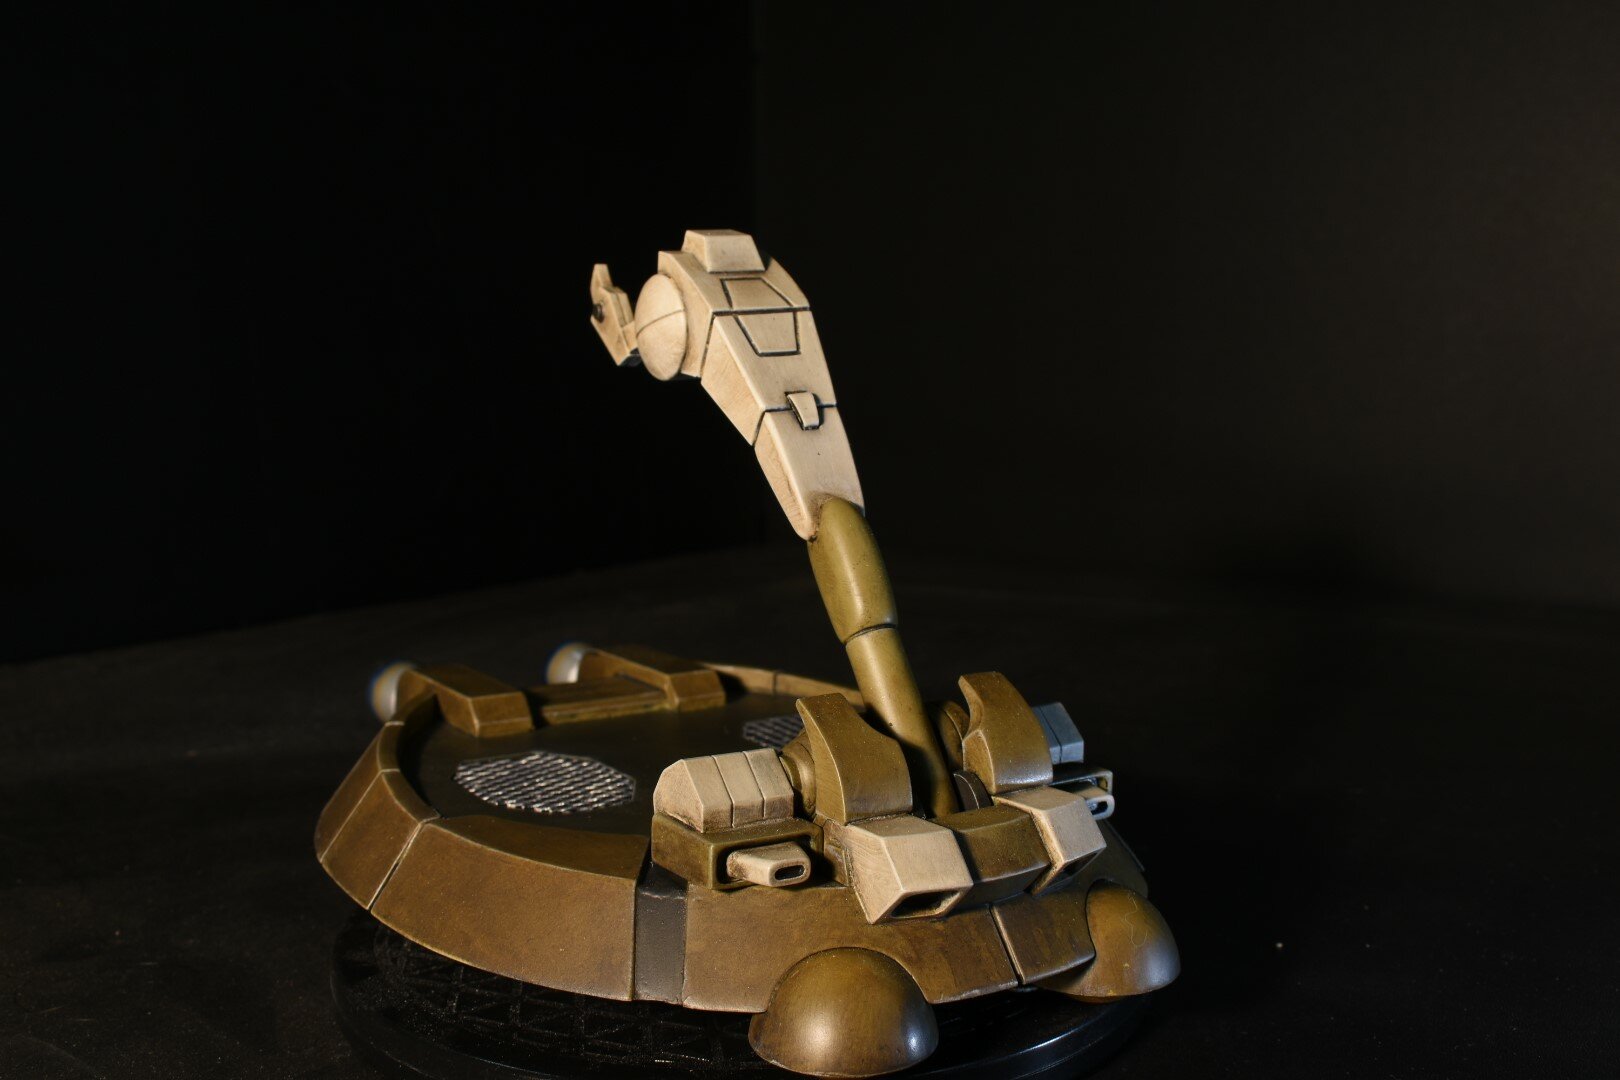
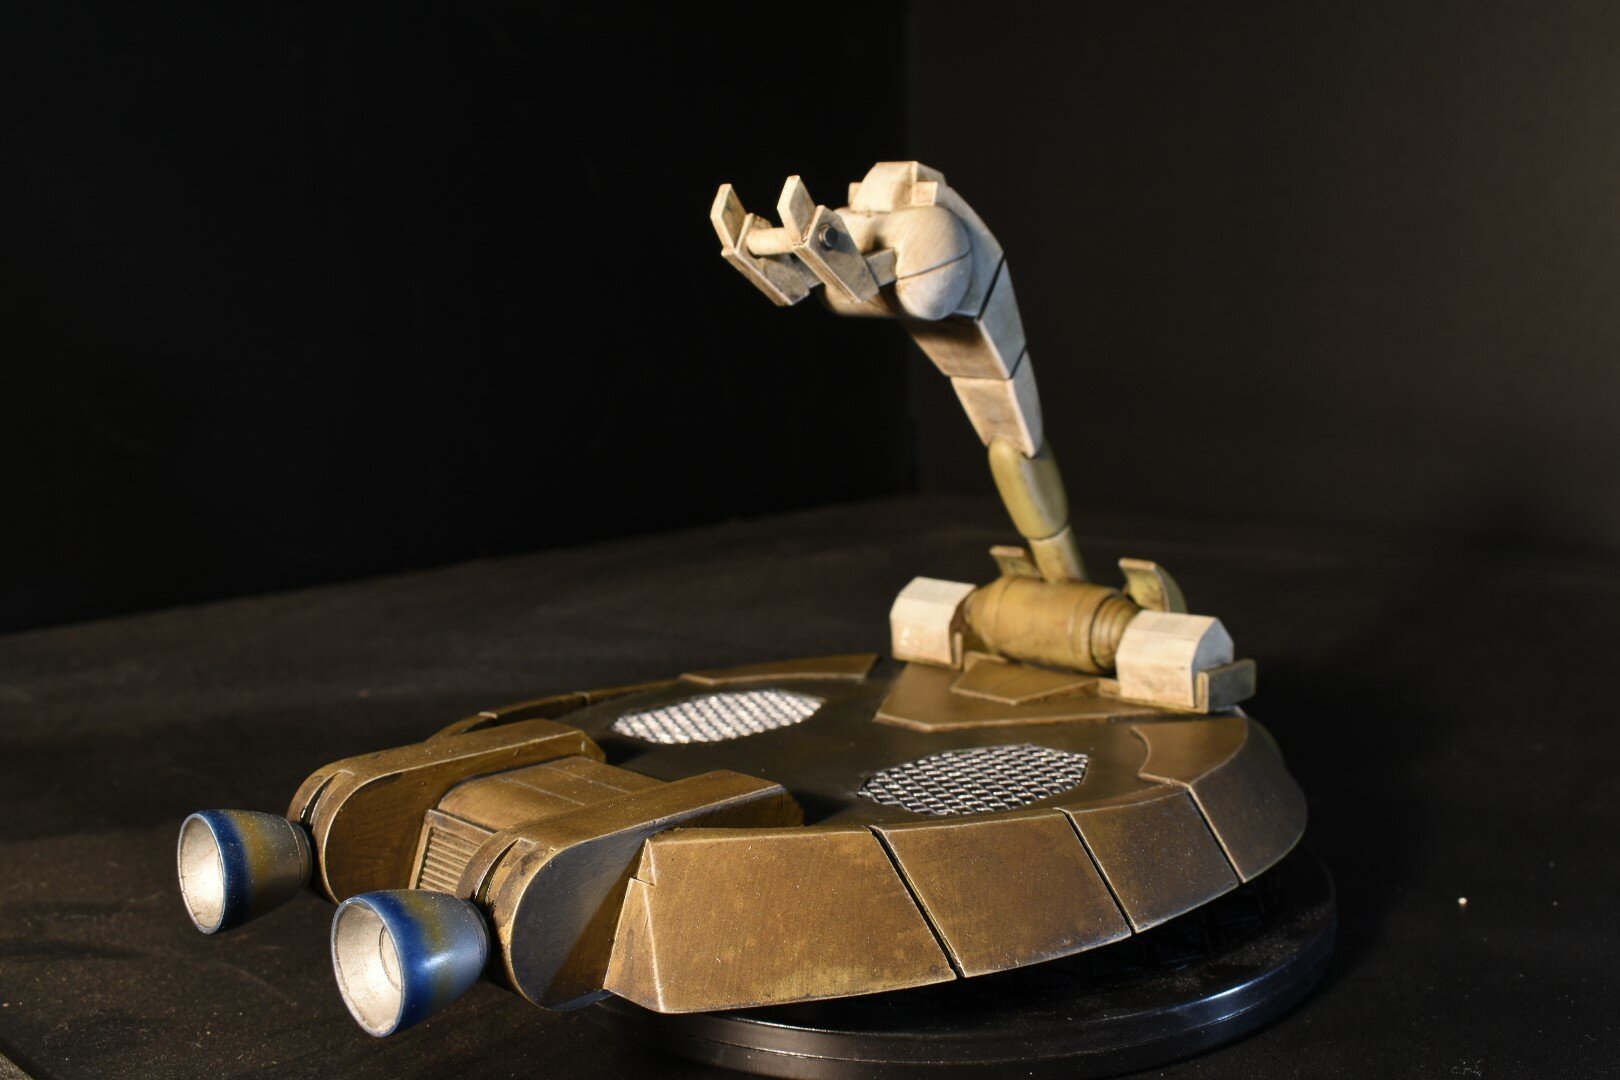
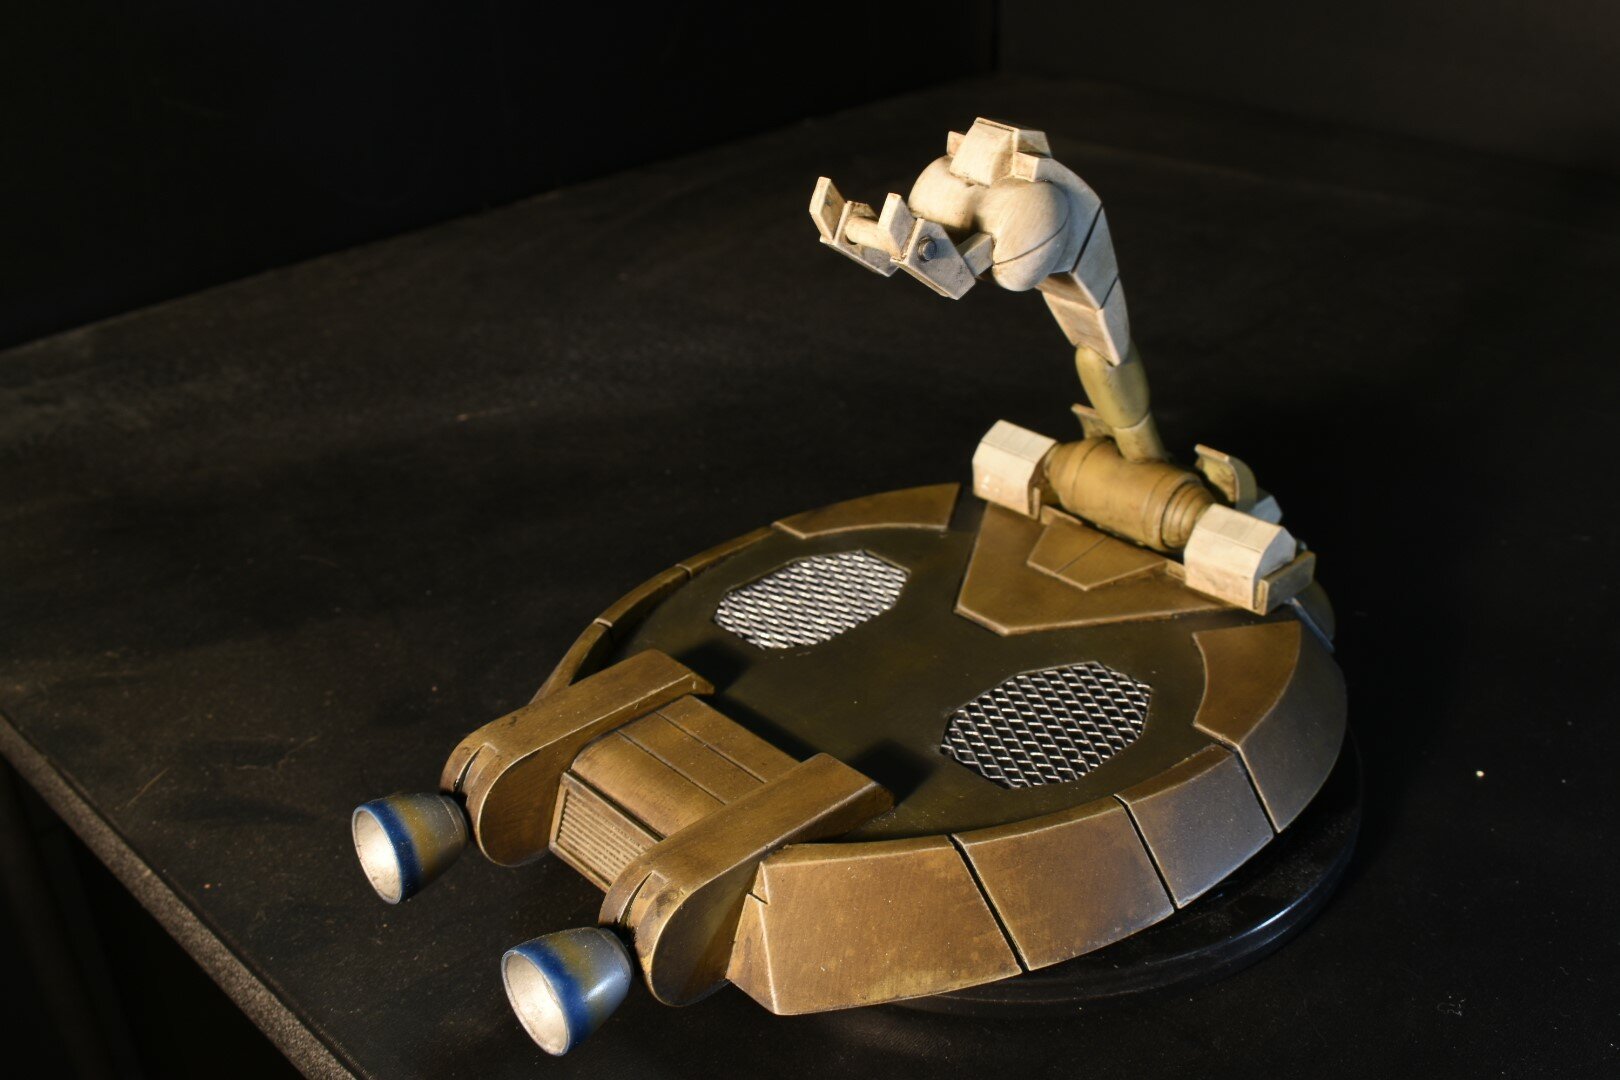
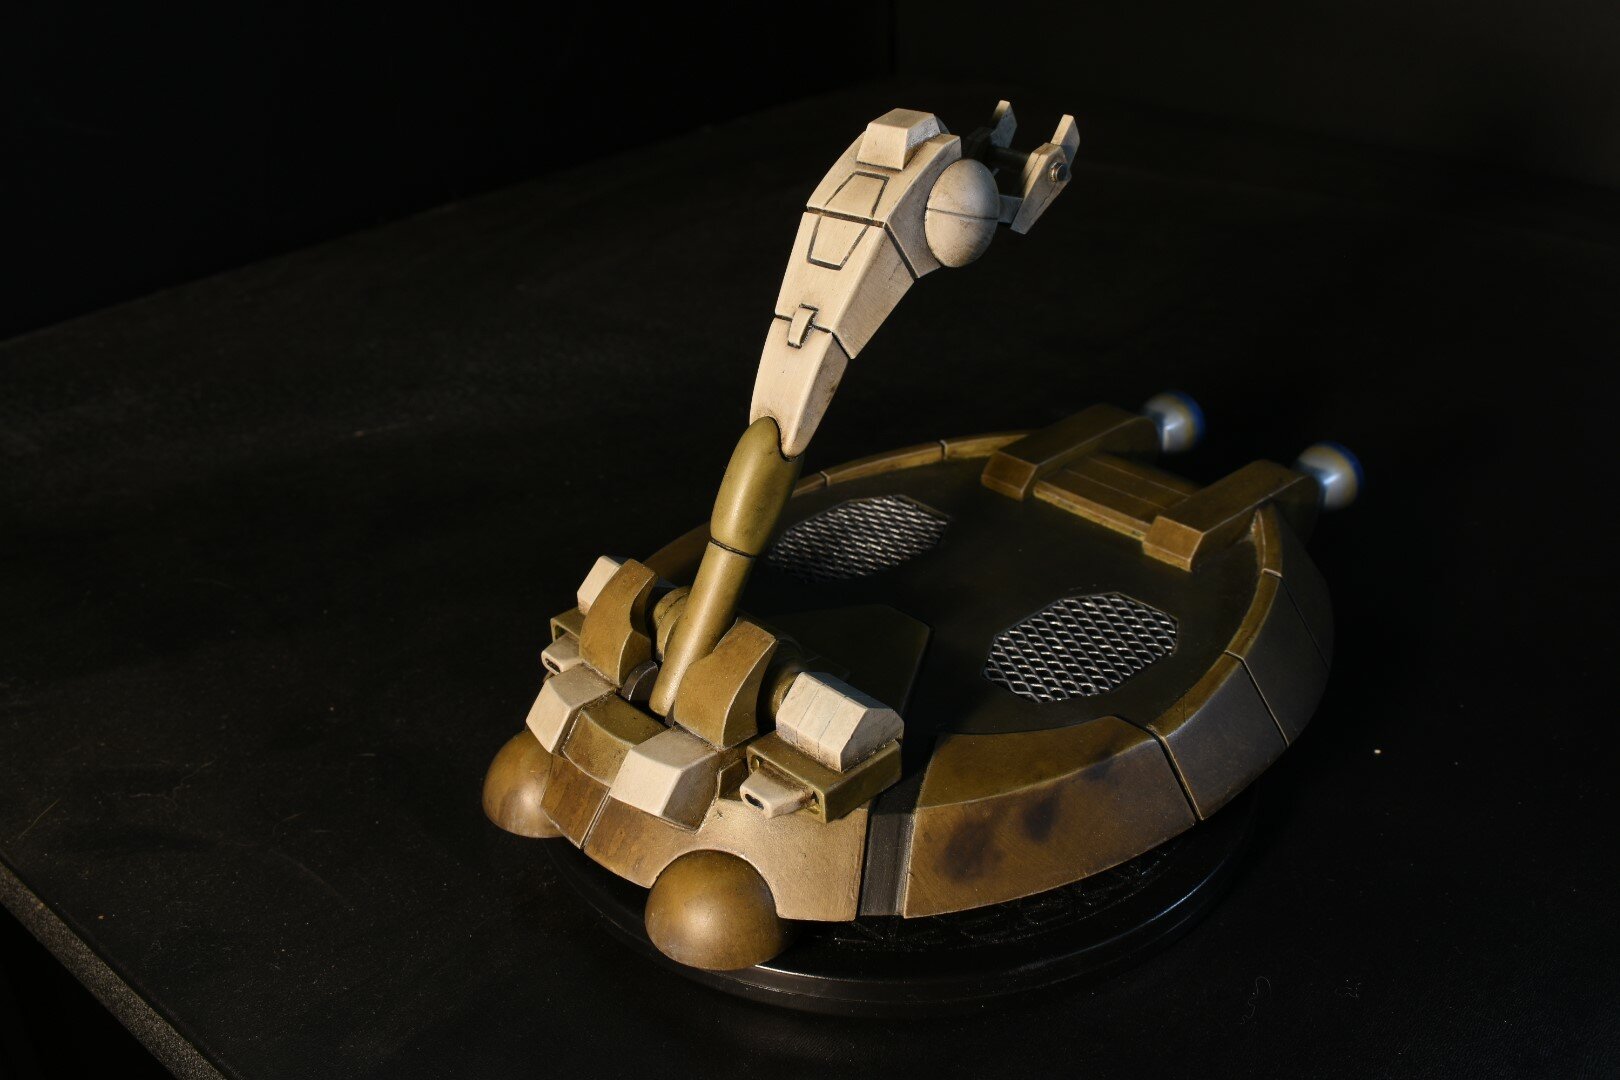
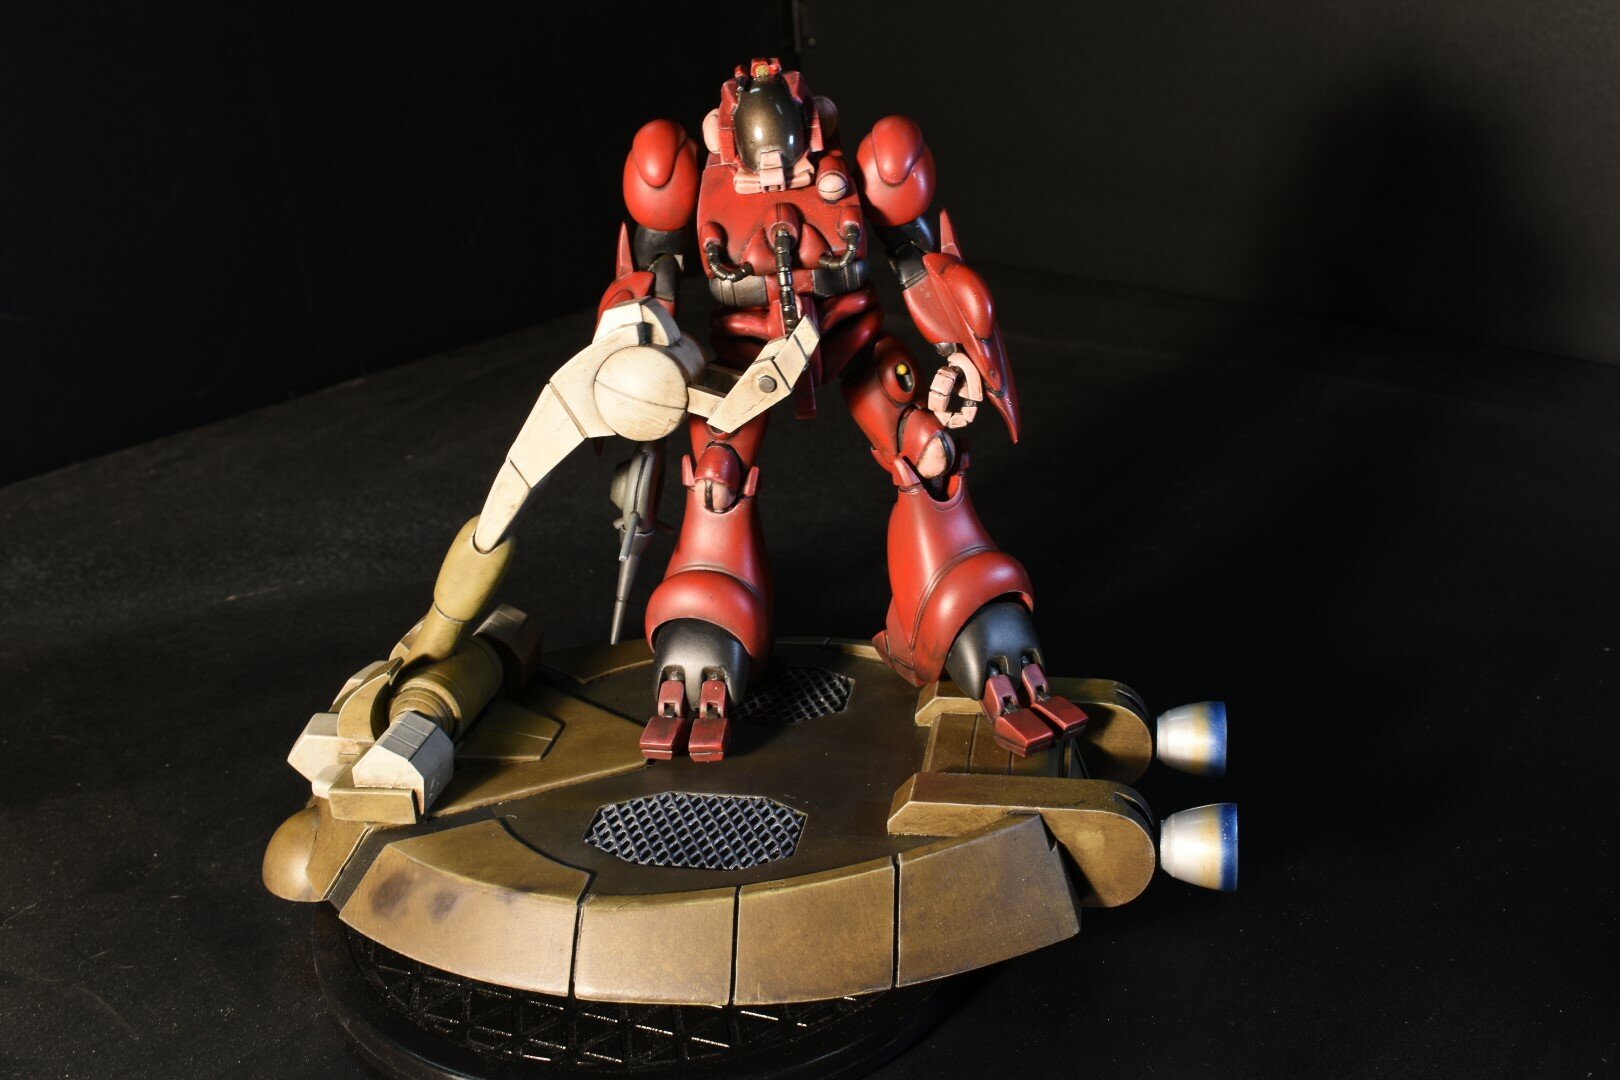
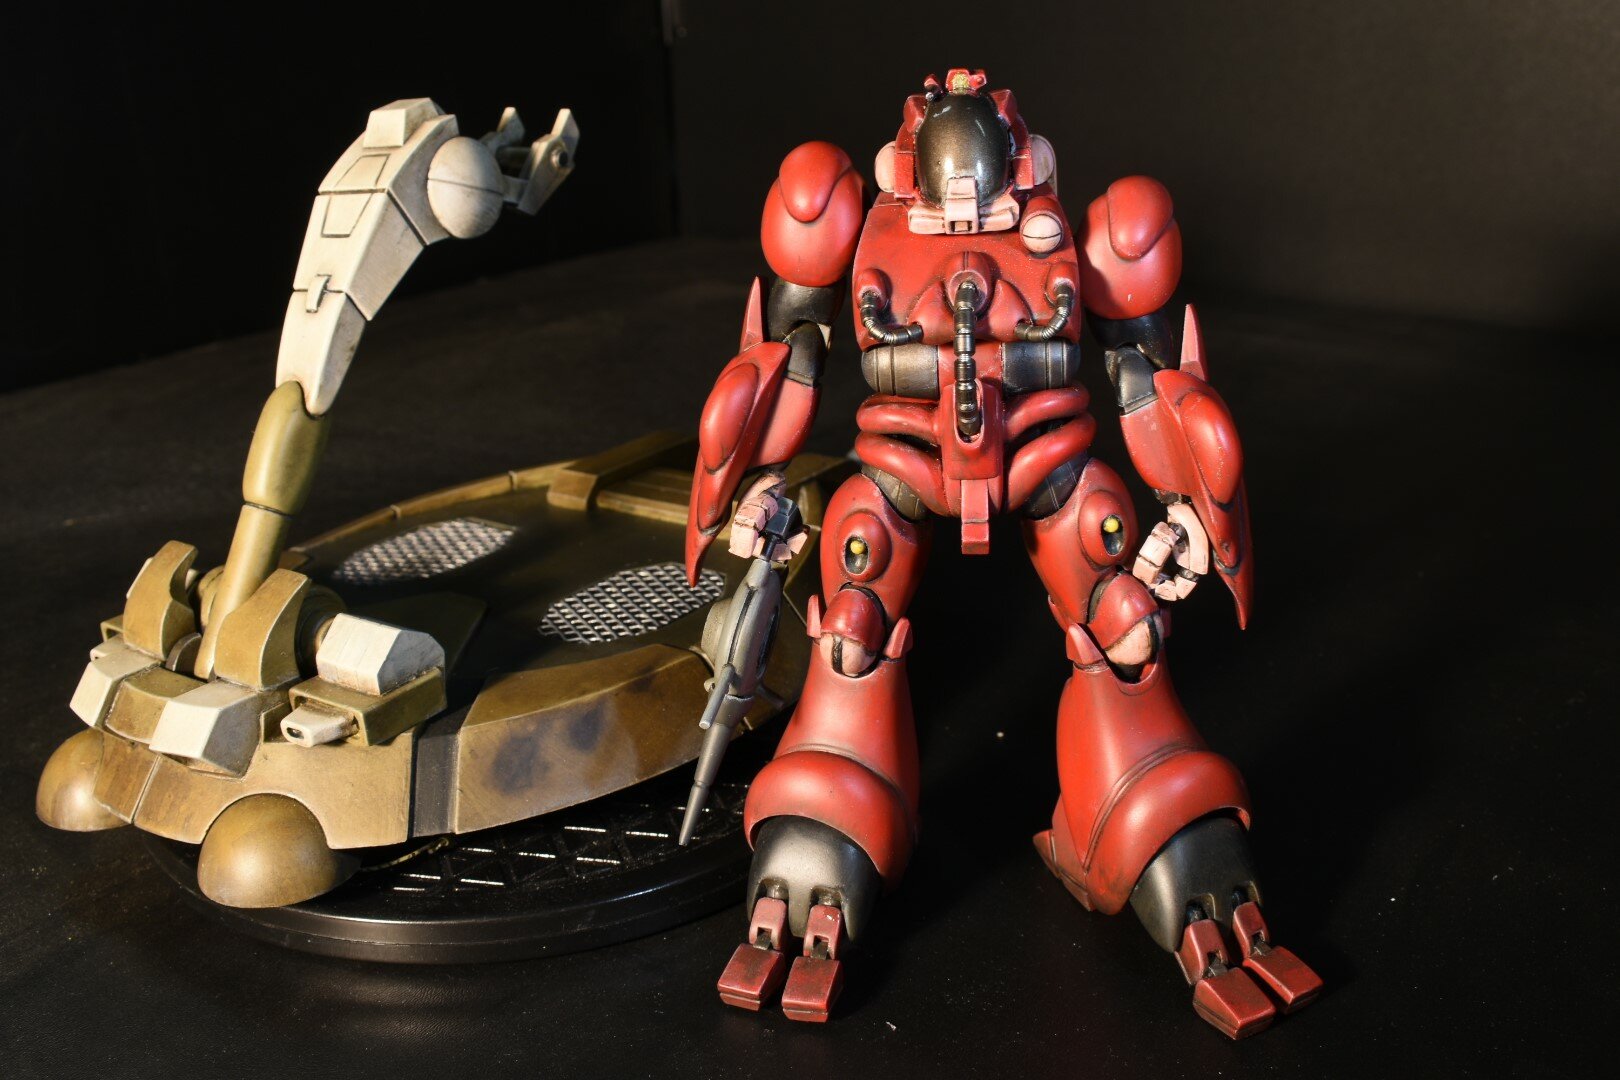
Thank you all so much for the feedback. I will be sure to put it all to good use. This is the first time that I have tried to photograph a figure in this manner. Most of my photography experience is of nature and landscapes. I have occasionally taken pictures of figures outdoors and with mood lighting and I thought they turned out OK. The reason why I was thinking the lightbox would help was because the pictures I took of the figure (pre-final flat coat) in my detolf cabinet turned out much better. It has evenly disbursed, multi-directional, dimmable lighting which a lightbox would be able to replicate even better. I liked the gloss look so much that had I won I was planning to make the green one clean with ultra shine and build a mothership interior display box with lots of mood lighting to reflect off of it. As requested here are some more pictures of the base, warts and all. Here's where one of my major last minute mishaps occurred. I was literally applying the last swipe of blue to finish it up and the ramp box on top snapped off from the side. I had only a little over a day left before the deadline so there was no way I was going to properly repair it in time. It still took me a while to get it back to this state and was the reason I didn't have time to finish the cannons. Eventually I will have two slightly raised platforms with one cannon apiece on this side. I'm going to leave the front semi-circle as high gloss and etch in a line for detail to replicate the show. Because of that I will need to smooth it out more so that it doesn't show as many ripples and bumps. I'm going to change the mounting position so that it is slightly in front of the display and looks like it is floating. I will also be carving out sections of the front plate and putting in recessed pipes and hoses which will be lit from the interior lights.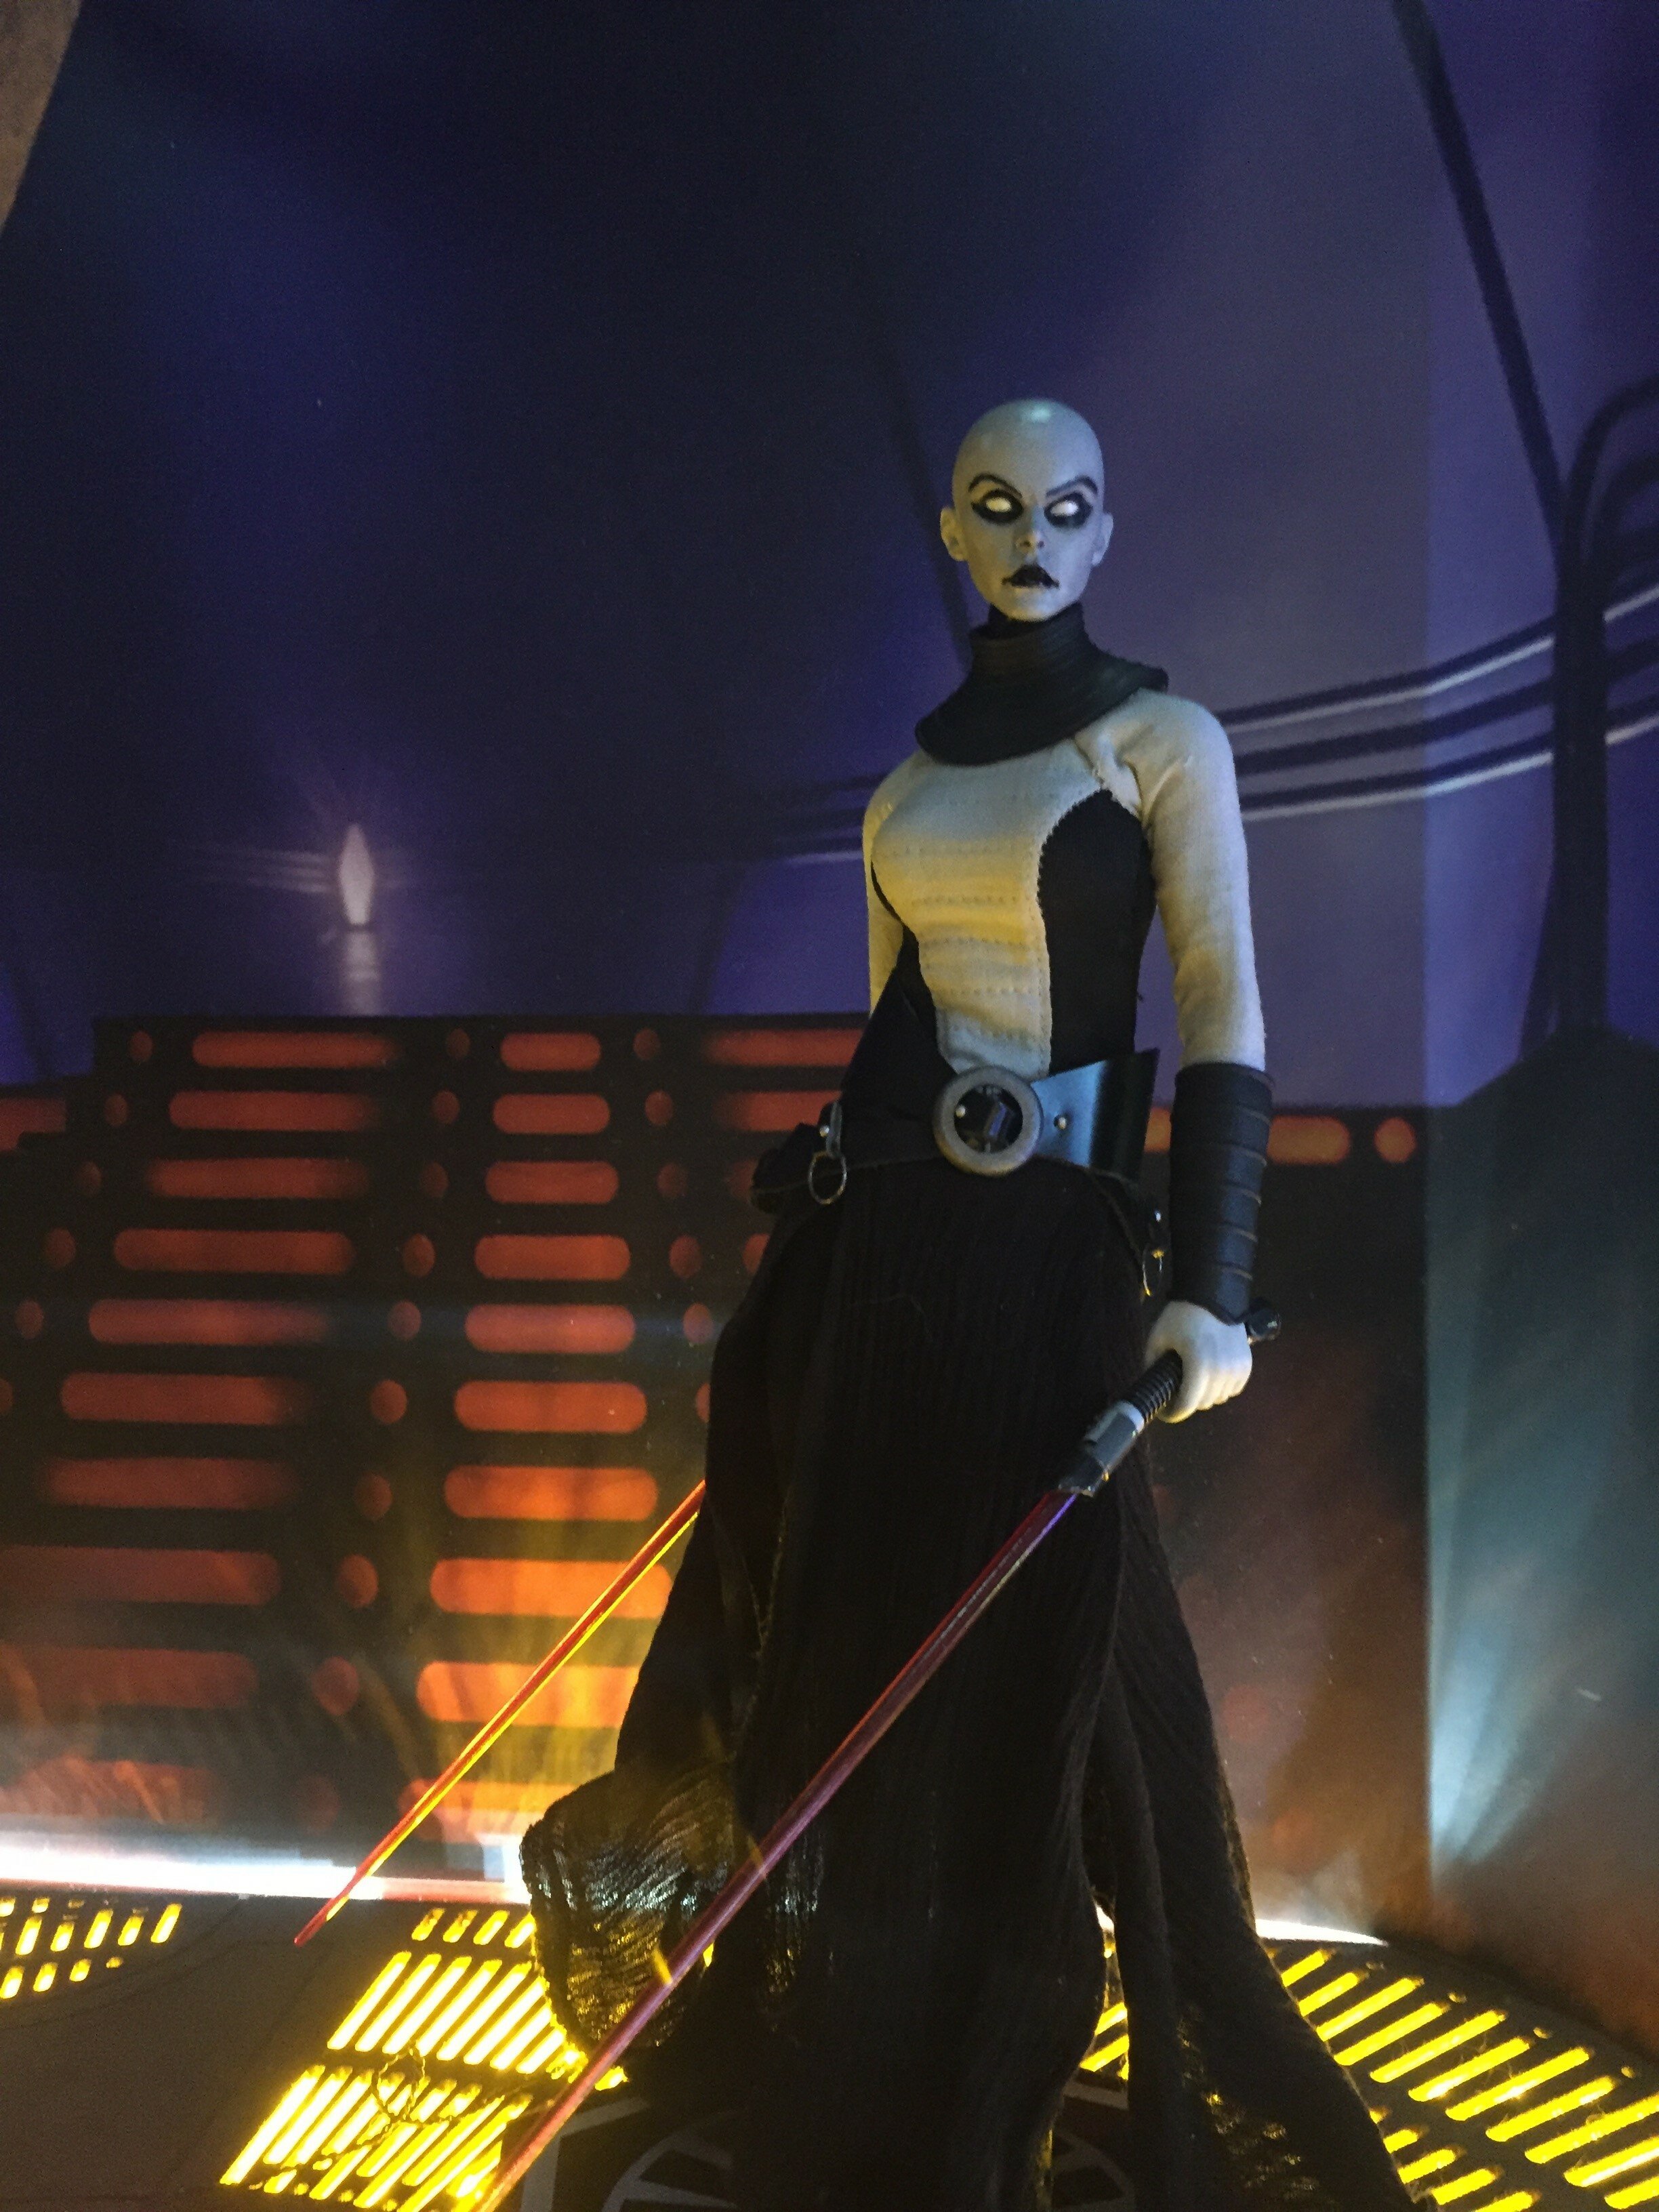


-
1/48 SOUTHERN CROSS BIOROID
Boobytrap replied to captain america's topic in Anime or Science Fiction
One thing the recent contest taught me, among many, is that I need to improve my picture taking. So I went back out to see if I could take some better pictures to share. They are improved but still not great. I'm definitely going to be investing in a light box. I think the better light source and lighter background will help things out. And of course... practice, practice, practice.
-
MOSCATO HOBBY MODELLING CONTEST!!
Boobytrap replied to captain america's topic in Anime or Science Fiction
Way to go Ted! Fantastic job. -
Macross Plus Movie Edition - US THEATERS
Boobytrap replied to VF-1A Cannon Fodder's topic in Movies and TV Series
Just got back from the showing. It was a great time. There were probably over 40 people in the theater. I haven't seen + in years and certainly never on the big screen. This is an experience I would like to have again with other Macross titles. Hopefully someone like RightStuf or some other distributor gets to sell it in the States soon. I'd love to watch it on my home projector. -
MOSCATO HOBBY MODELLING CONTEST!!
Boobytrap replied to captain america's topic in Anime or Science Fiction
Thank you so much for the kind words. There is no doubt I will finish it. There are also some additional ideas I had for it that I had to set aside due to the time constraint that I will be adding in. Your fantastic work deserves all that I can do to highlight it. -
MOSCATO HOBBY MODELLING CONTEST!!
Boobytrap replied to captain america's topic in Anime or Science Fiction
Most definitely. I need to take a little bit of a break first. I've been pushing myself pretty hard the past week+ to get this done (probably over 50 hours) and I'm a little burnt out. Once I recharge my batteries I will finish everything I planned for it, but at a much slower pace. -
MOSCATO HOBBY MODELLING CONTEST!!
Boobytrap replied to captain america's topic in Anime or Science Fiction
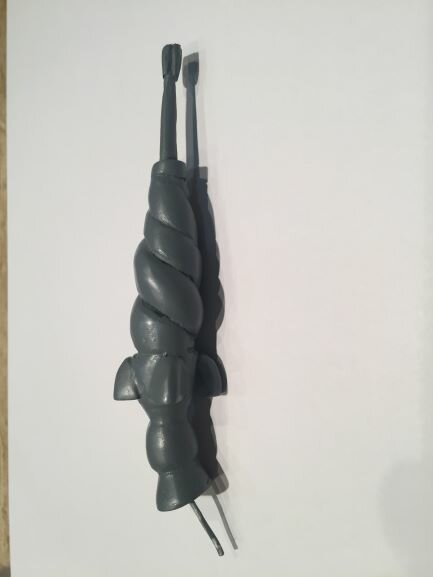
Yeah I sculpted the claw like thing in the back, the partial disk in the front, and the city tower. I also sculpted a couple of cannons but I ran out of time to finish and mount them. The figure is on a thick acrylic rod. There's no chance of it ever breaking or falling. I bumped that thing more times and in more ways than I care to admit so it has been thoroughly tested 🙂. And that diorama... 😵. While I agree that your figure is more than strong enough to stand on its own that thing is a whole other level of awesomeness.