

wm cheng
-
Posts
4281 -
Joined
-
Last visited
Content Type
Profiles
Forums
Events
Gallery
Posts posted by wm cheng
-
-
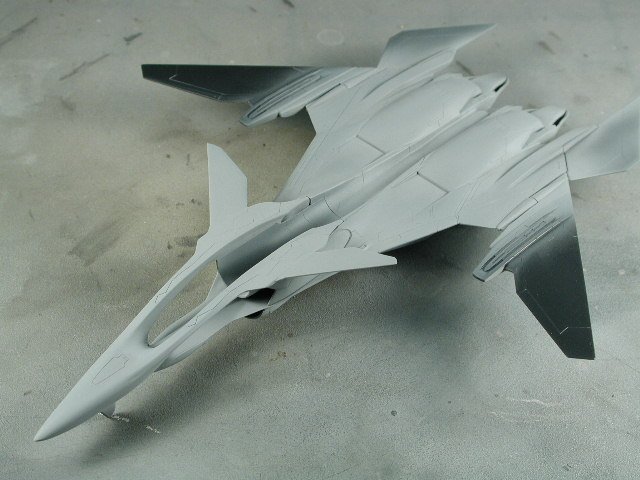
This shows that patch underneath the nose. The molded vertical fin is a bit thick - I could of chopped it off and made another one from a thinner styrene - or I took the lazy man's approach and carefully shaved with an exacto knife the leading edges to look thinner at the edges.
-
Here;s a close up of the light grey panels with all the little corners and intricate shapes. I really think there should have been a decal made for this. Boy it really tells you how spoiled we are from Hasegawa kits
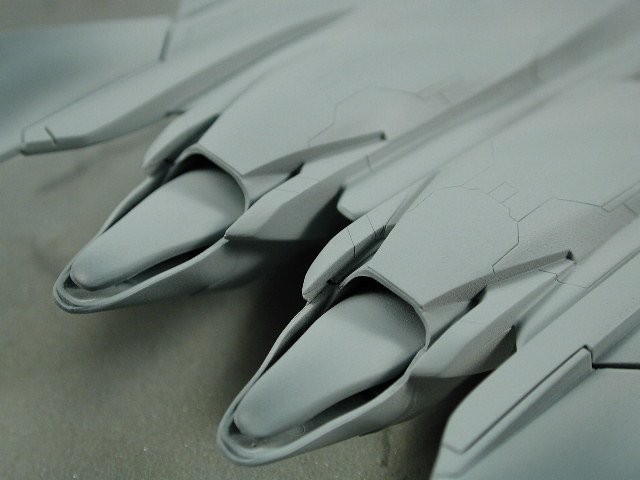
 I finally remembered to drill out the cannon port. Its the same process as with the other Yukikaze kit or the Valkyrie intake verniers, I use a small pin vise with a small bit, then work my way up to a bit that is the appropriate size. This gun port is a bit tricker since its show shallow - you want a hole that is almost parallel with the surface of the fuselage - in the end it gives an oblong eliptical shape. I did this by drill down a bit - which creates a cavity for the larger drill bit to sit in, then slowly work my way to a horizontal position with the drill bit. This way, there is less likelyhood of the drill bit slipping and scratching across your fuselage when its in the horizontal position.
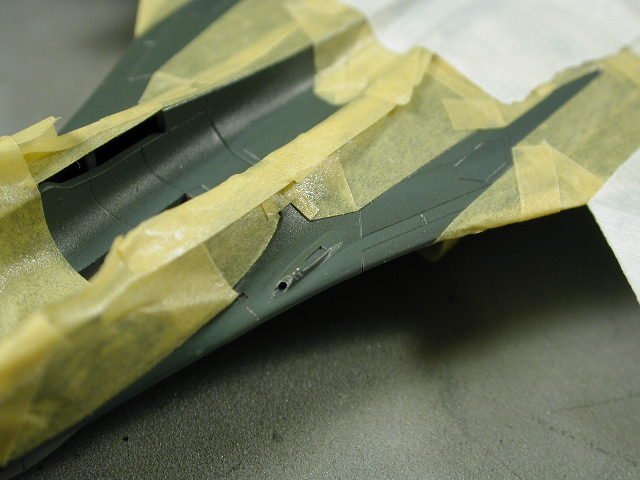
-
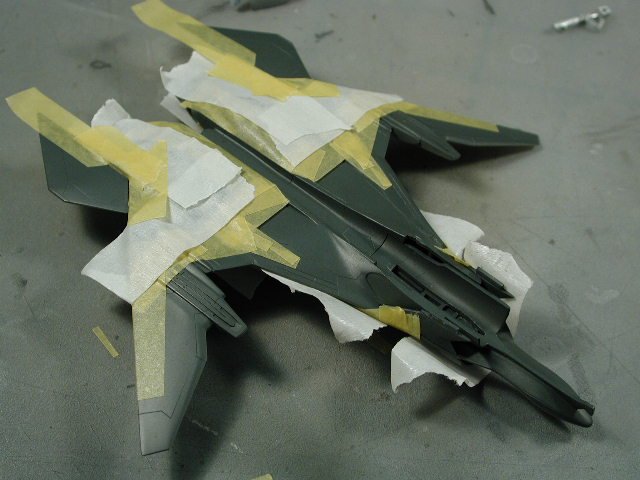
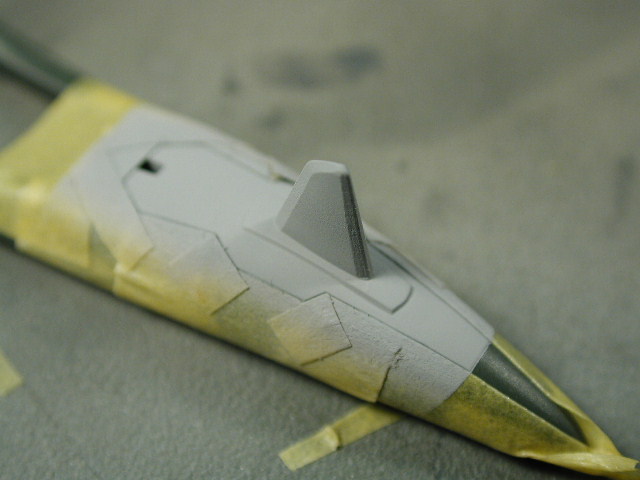
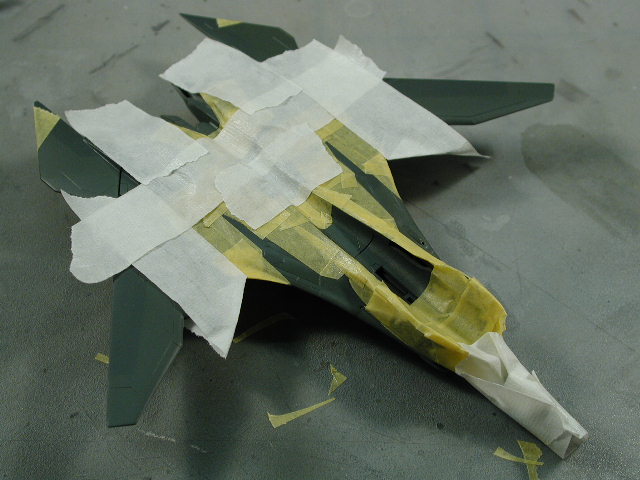
This is the masking for the light grey panels. I used Tamiya Sky Grey for these areas - however in hindsight, it should be a darker shade - perhaps a mixture of neutral grey and sky grey because the background green is still considerably darker and sets up too high of a contrast in my opinion. I am hoping that subsequent weathering will tone it down a bit - but its hard - since this is a relatively new aircraft - there shouldn't be much weathering right?


-
Here's the shot of the underside - its wierd that the underside of the forward nose section is also this lighter grey-green - I've checked in a few places to confirm. Its seems to defeat the lighter grey of the belly sky camoflauge.

-
Here's the pattern - its pretty complicated since the instructions are mono-chrome - so I had to rely on some web references too. Overall I am very happy with the colours that turned out. There is a really nice differenciation between the two grey greens right now - however, its wierd, but later on, when I clear coat this layer of painting with the same glossy sheen, it darkens the lighter green so the contrast is not as high as this. I might after all the decals are done, remask these areas and spray them with a flat clear-coat to pop it out again - wish me luck.
-
Here's the top pattern for the lighter shade of grey/green. My Tamiya masking tape supply is hurtin' after this bird
-
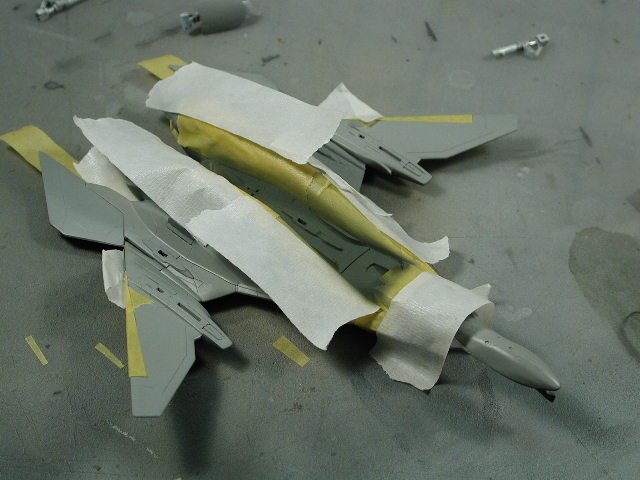
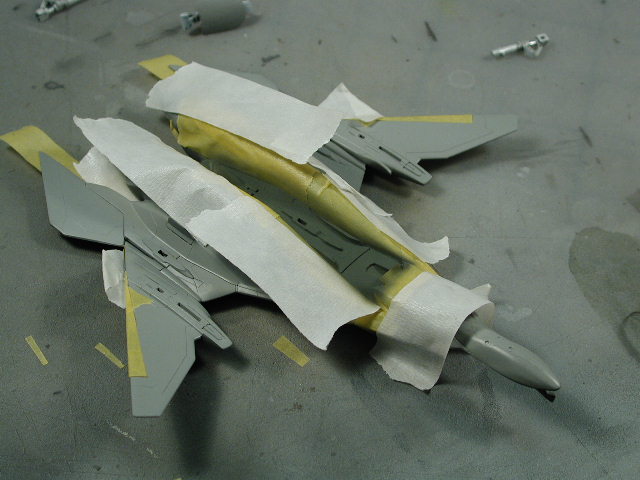
I am masking the dark green for the underside here. I just found out now that I should not of glued the main underside intake, it would of made painting this central green strip easier. Now I have to carefully mask around the intakes.
-
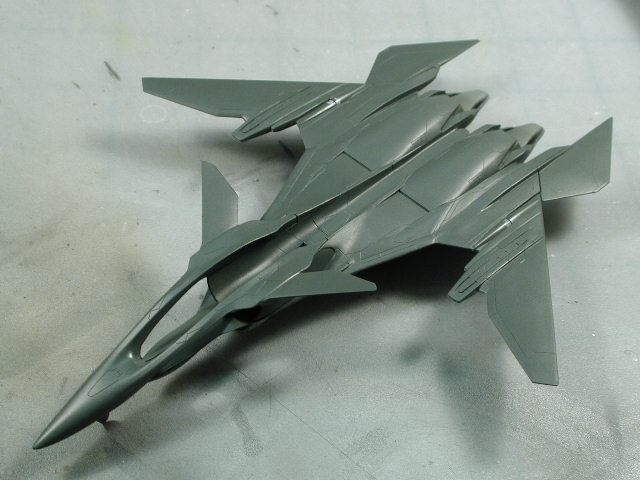
This shot shows the cockpit pod in the position to be accessed by gound crew, there is a separate piece included in the kit that mounts in the fuselage rails that will keep the pod in this position (removeable of course).
-
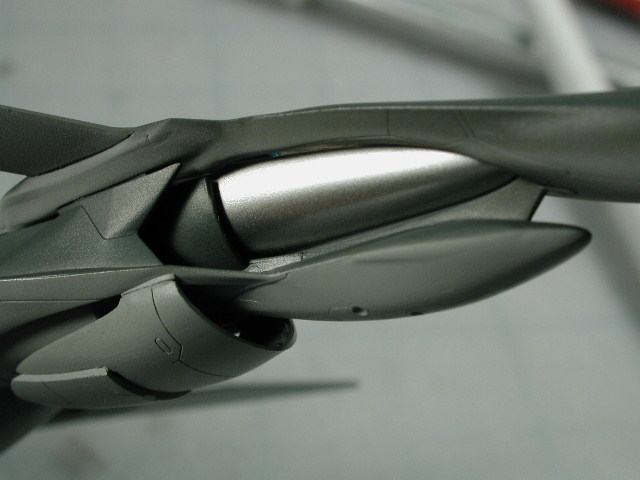
Here's a shot underneath showing the metallic finish on the cockpit pod and the intracate intake fins all around the nose area.
-
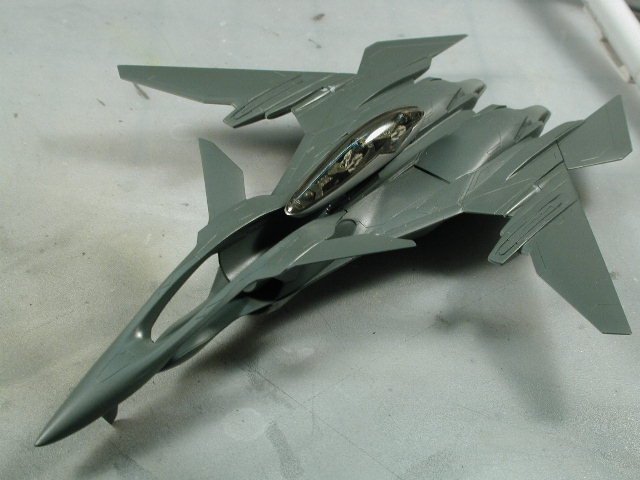
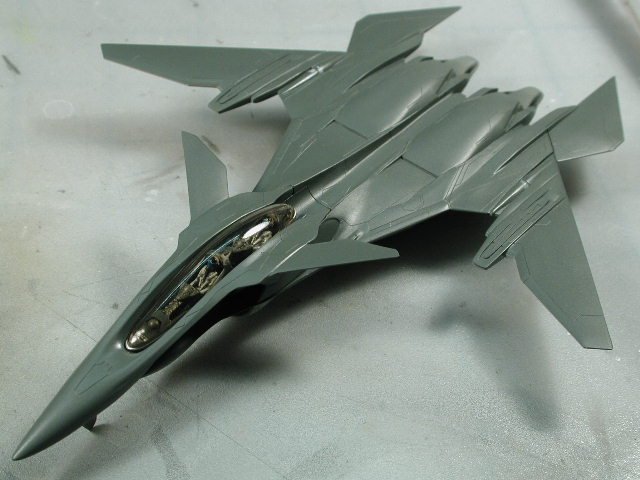
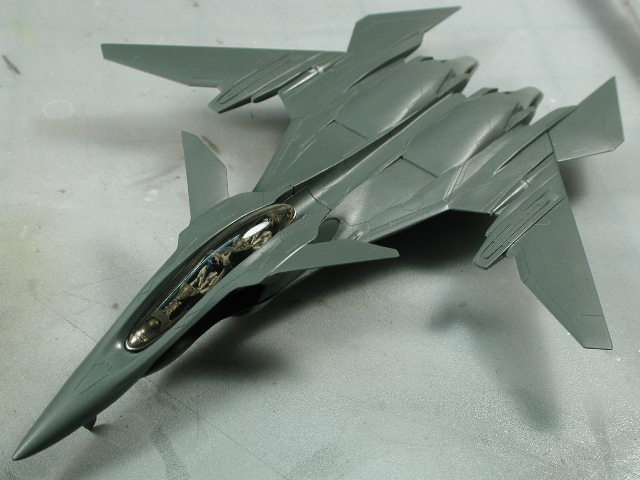
Here's a close up of the front cockpit nose section and how it all fits together. The nice thing is that once its together its still all removeable.

-
Here's the piece with the nose section back on - I love the way this thing is designed. Looks like thats it for tonight - more updates later...
-
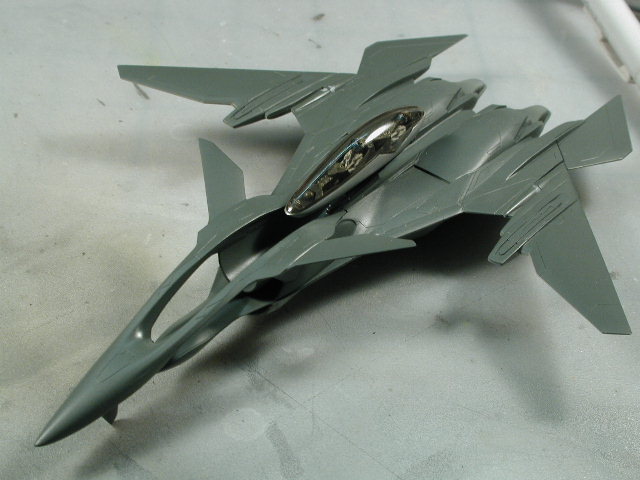
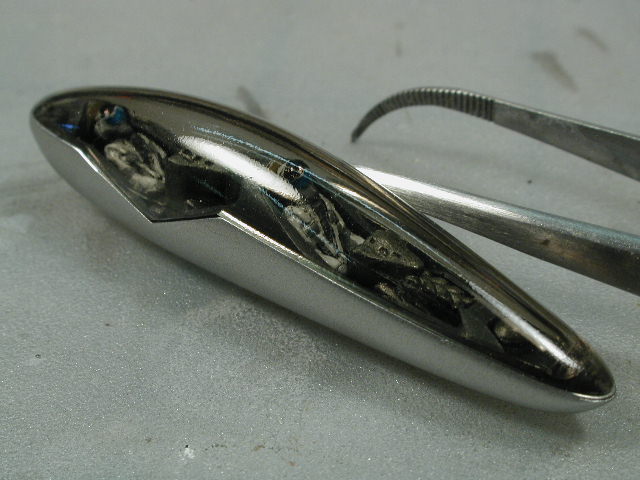
I just couldn't wait to pop in that cockpit pod for a looksee.
-
The underside was a mixture of Tamiya Sky Grey (75%) with White (10%) and some Green (15%) The shine you see is a Clear Coat of Model Master Semi-goss.

-
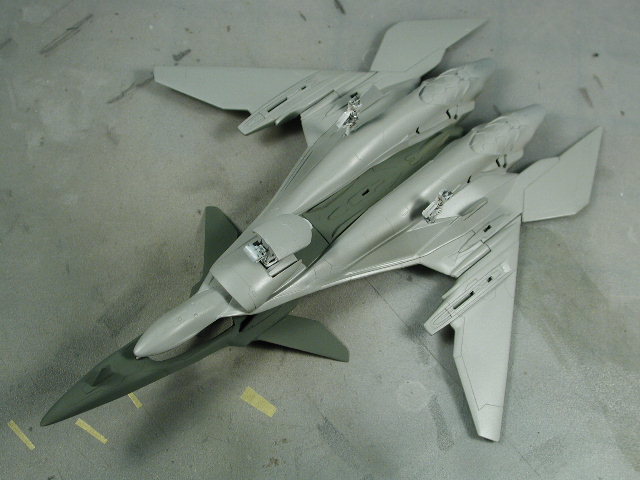
Here the top of the aircraft is painted the dark grey with a hint green and neutral grey. Mixed to my eye. THis will be the darkest grey on the aircraft, looking at the pattern of masking that I will have to do, I decided it was easier to mask from the dark colour working my way to the white being painted last on top of everything else.
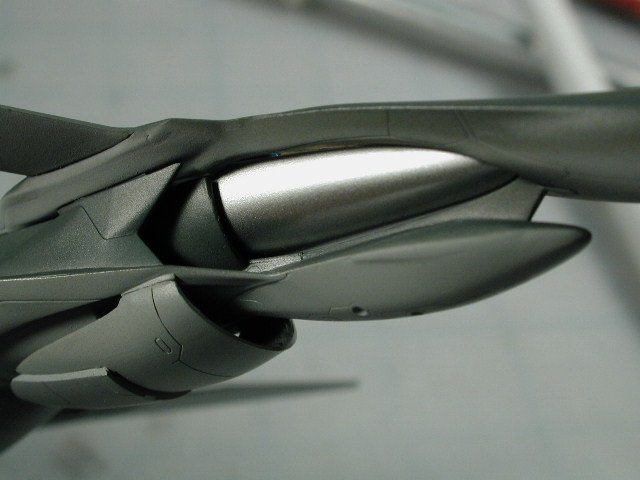
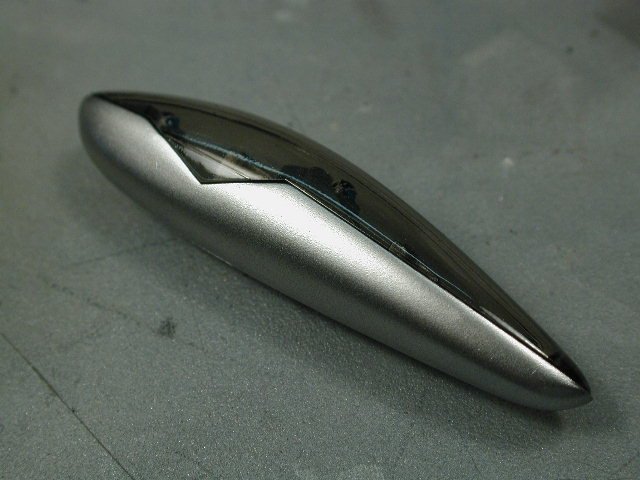
The metallic "Polished Aluminum" did not have to be polished - and this was what I was told that this paint had the advantage over other metallizers that have to be polished - because you don't polish it, its much harder and doesn't come off on your fingers afterwards. You don't even have to seal it in with a clear coat if you don't want to. But I did anyways.
-
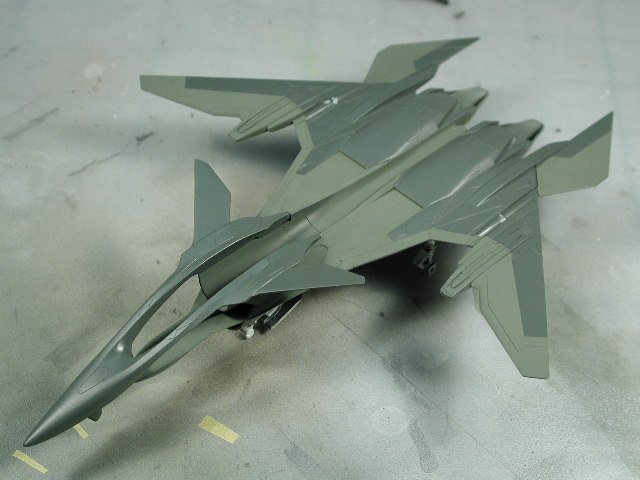
I decided to paint this Mave in the greenish grey colours that I have seen in the anime and the few pieces of web reference I have seen. I don't know why all the paint instructions and that 2 page Model Graphix insist on a bluish grey version of the plane. Its not what I saw in the anime. I took the colours off the DVD box art of the "feminine" guy in the red jacket and the top view of the FRX-00. Here the top of the aircraft is painted the dark grey with a hint green and neutral grey. Mixed to eye.

-
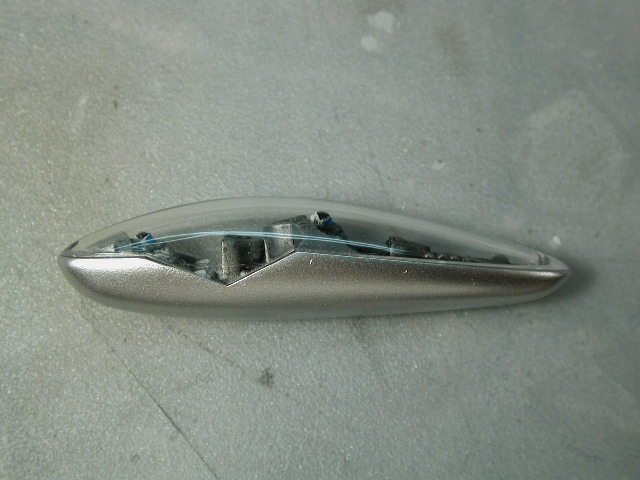
I tinted the canopy with Tamiya Smoke colour airbrushed through and several layers of future floor polish to even out the pebbly finish the Smoke colour left behind.
I find that this tinting leaves hints of the pilots inside while obscuring the lack of detail - in fact it looks like there is more detail than there was under the canopy.
-
I decided to tint this canopy as well to better match my other Yukikaze Superslyph and to look more like the Platz resin model. Plus while the cockpit is fairly detailed, its not that fantastic and it would take forever to properly detail something this small - plus there is precious little reference around for these planes.
-
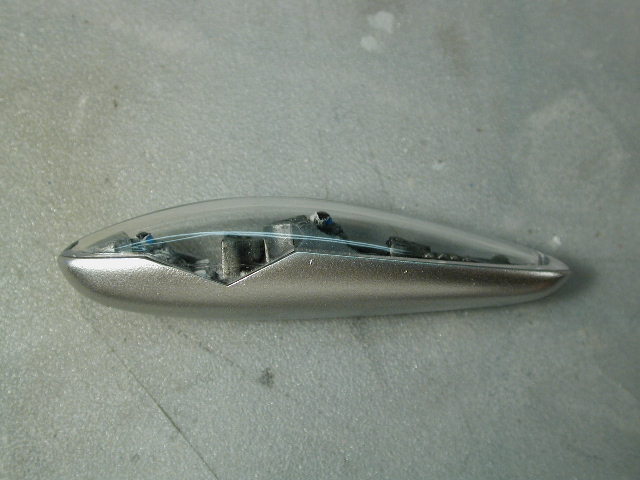
Here's a better shot - Bandai provided an exceptionally clear and flawless piece of plastic. This is without the future floor wax yet, note how perfect the reflection is already.
-
Here is a test fit of the canopy - thank God I don't have to fill any seams here!!
-
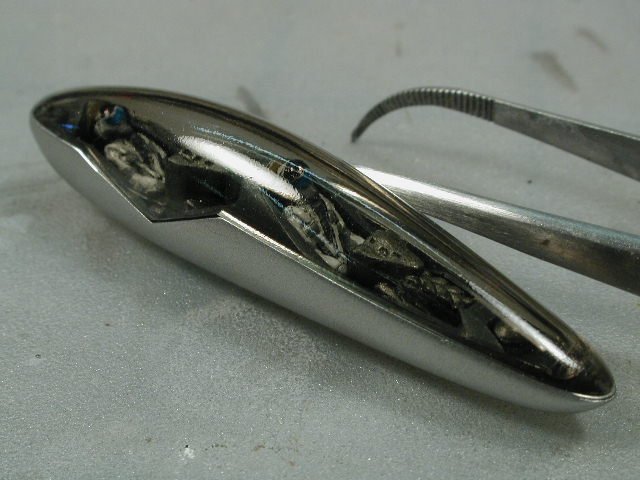
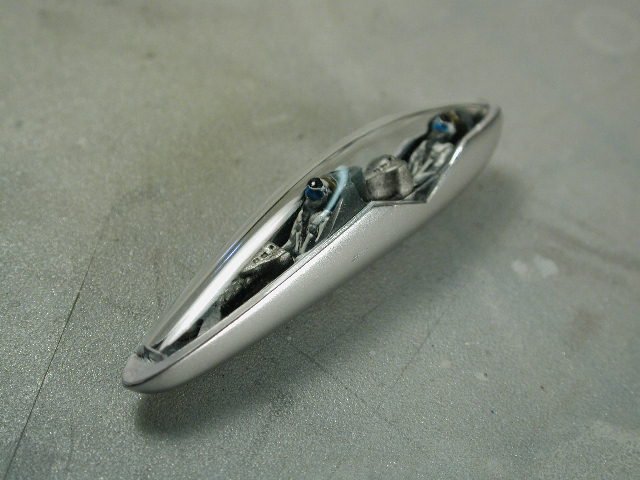
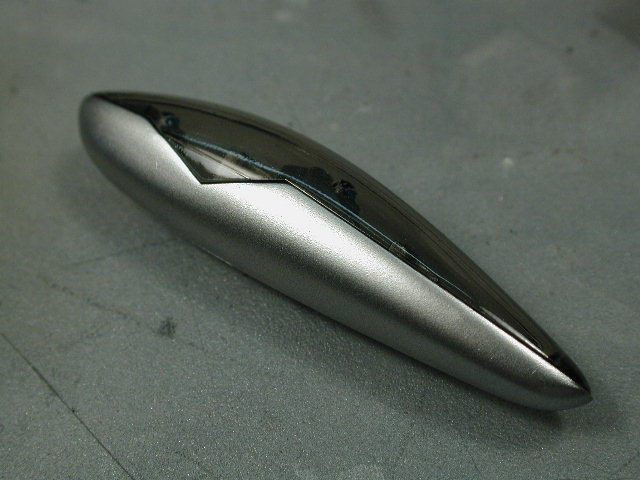
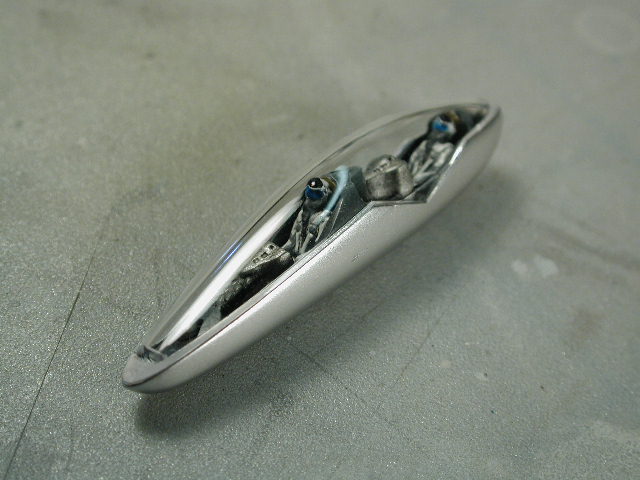
Here's the cockpit tub and pod. Its really nice that they decided to have it as two separate pieces so its really simple to paint one part (Pod) silver and detail the cockpit insert. The cockpit insert was painted dark grey overall, with metallic grey for the instrument panels and olive for the seats and a tan headrest (although the latter can hardly be seen once the pilots are fitted). The pilots are painted white with grey accents and a dark grey oxygen mask. I used Tamiya transparent blue for the visors and a black Gundam marker to draw in the blast visor on top of the helmut. These were all hand brushed since they were so small and I did a black wash to pick out the recesses and a light dry rushing to pick out the raised details. The pod was sanded first, then painted a gloss black as the undercoat as per the instructions for the Polished Aluminum AlcladII Lacquer. I think it works much like a mirror, with the black surfaces reflecting the metal particles. Boy, I was really happy with the metal finish
 It looks grainy in the photo, but it really looks metallic in real life. My camera in Macro mode pics up everything. The grey cutting mat that everything is sitting on looks like sandpaper, but you know that they are generally smooth.
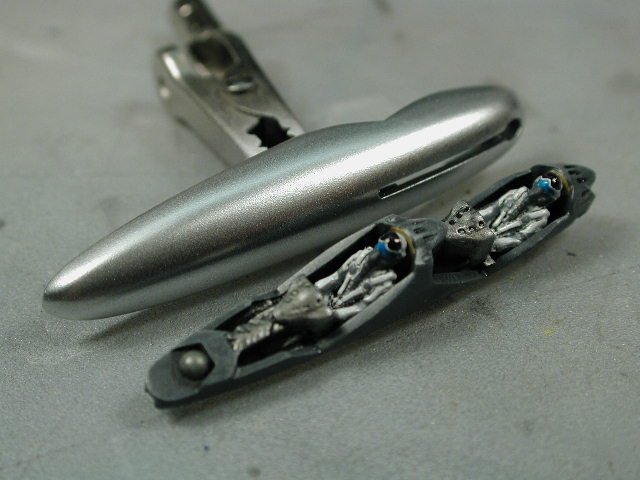
-
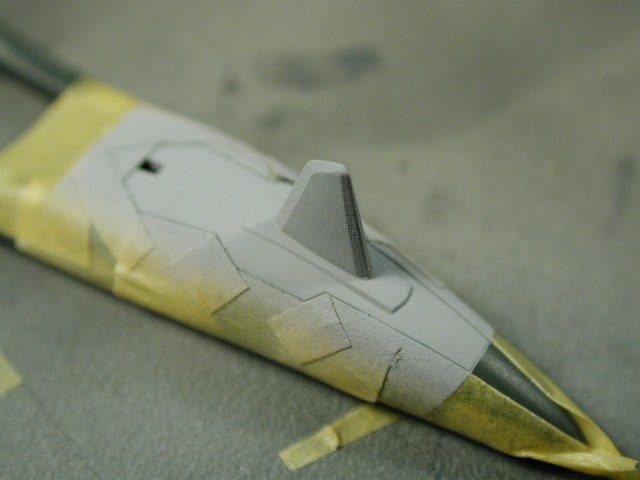
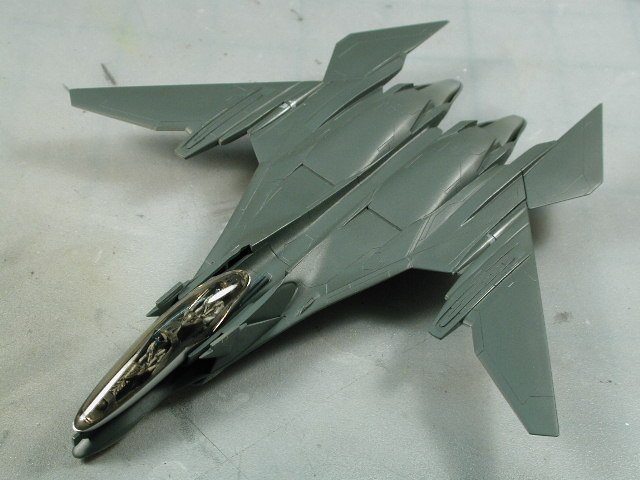
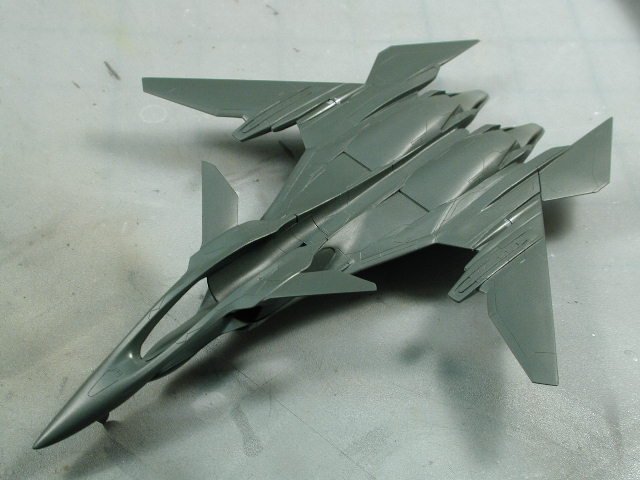
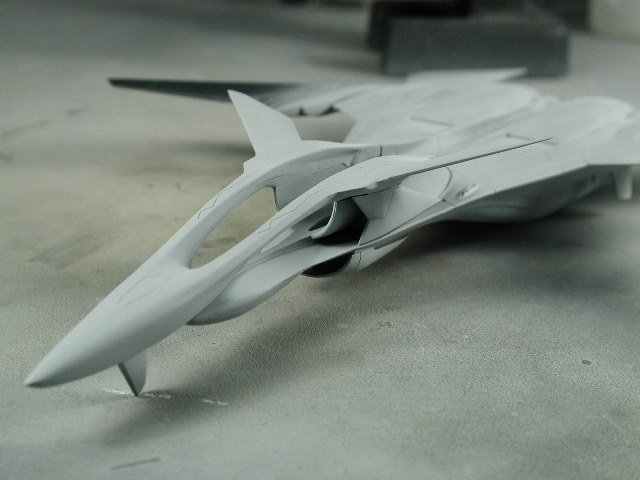
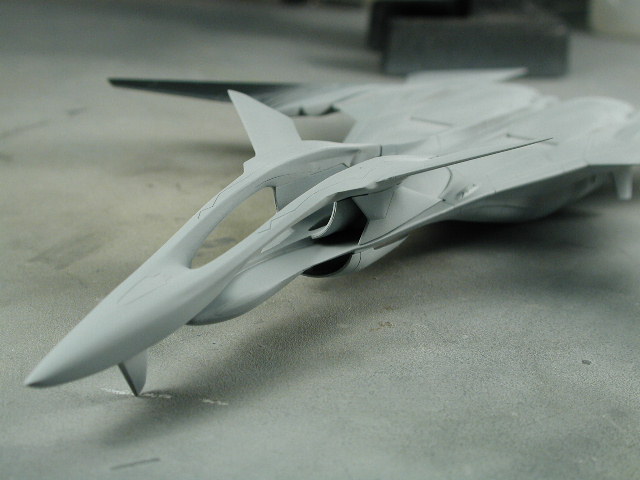
The primer grey really shows off how complicated the nose section geometry is.
-
I only sprayed the primer over the areas I thought I needed some sanding or fillng to see where the flaws are, I guess I should of primed the entire plane - just lazy I guess. But since the overall colours are dark, its not as important to get an even undercoat as light colours require.
-
Since that snap was a clean break, I thought that I would leave the line in as a panel line detail and fill all around it and make sure the top surface was flush.
-
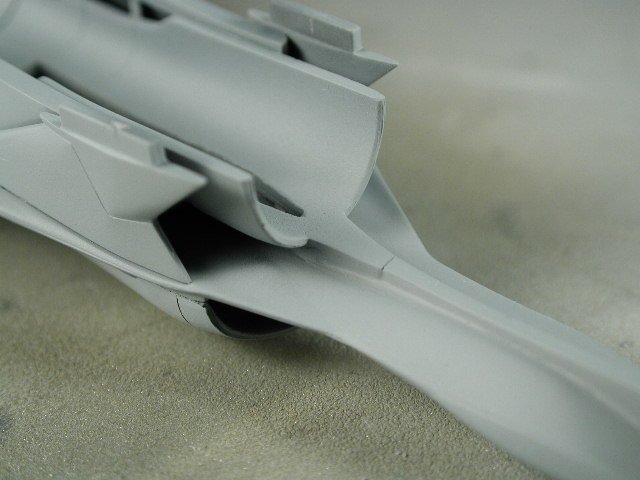
The primer shows that I did an okay job at eliminating the seam at the tailcone area - not great since I can still see hints of it. But the real thing to this bird is the complex painting scheme - I didn't want to blow all my effort here. So its good enough for now. I'm sure I'll regret it after I finish but I'm just too anxious to move on!!


1/100 Bandai FRX-00 Mave step-by-step
in The Workshop!
Posted
Here you can see how the lighter grey-green has blended with the background darker grey-green Damn! I couldn't tell untill after the gloss/semi-gloss coat was applied - I guess the original colour made such a contrast because of the finish. The glossier something is, it does tend to be darker, and the flatter/matte something is, it tends to be lighter - must remember this in the future.