

wm cheng
-
Posts
4228 -
Joined
-
Last visited
Content Type
Profiles
Forums
Events
Gallery
Posts posted by wm cheng
-
-
Wow, great work Kurt, I love those little weeds growing out of the tarmac!! Great product, I did a little search for them, and they have a carrier pattern, I'd love to set one of those underneath a Valk!!
Thanks again for sharing great work!!
-
Hey there,
Enamels are much harder/tougher paints, they wear pretty well. However, as Cmd McBride as mentioned they require a spirit based solvent (to clean but can be used straight out of the bottle to paint) which the vapours are unpleasant and requires ventilation to use. Additionally they require a bit longer to dry, 5-6 hrs for the glossy stuff or 3-4 hrs for the flat stuff. Generally they are more toxic.
Acrylics are easier to handle paints, but they tend to scratch more easily. Acrylics also use thinners to clean but they are designed to be used straight out of the bottle to paint with. The thinners are usually some alcohol base and are not as toxic as spirit based solvents for the enamels. These paints do dry quicker, 3-4 hrs for glossy or 1-2 hours for flat depending on the thickness of the coat you apply.
I would definitely recommend acyrlics especially to beginners since they can clean up with just water. However, that being said, after all my years in modelling, I use Tamiya Acylics almost exclusively now (after trying just about everything in the market).
Good luck.
-
Hey LTSO,
Great start - man I love this plane!! I can't wait to see more. Don't hesitate to start on anything just because I've built it - hey its posted to encourage people to try it or build it - please do what you want and I'll be watching

Just an observation (don't take it the wrong way) but your grey lines seem a little coarse - like I can see the spray pattern or lots of little dots that make up your line. What type of airbrush do you have and what tip or spray pattern are you using? This could also be affected by the amount of pressure you are spraying with and the type of paint. You should get a fine line with no real visible dots - you should try to get a finer spray - the goal is to make it not look like its spray painted on. I also didn't get what you mean by dusting it after the white coat on top.
Please don't worry about deviating from my techniques - they are just my trial and errors with my particular equipment - everybody has a different working style and haddicap (mine is that I suck at hand painting
 - I can't get rid of the brush marks) so I airbrush everything. But I want to learn from everyone here too - so please feel free to experiement so we can all learn!!
 -
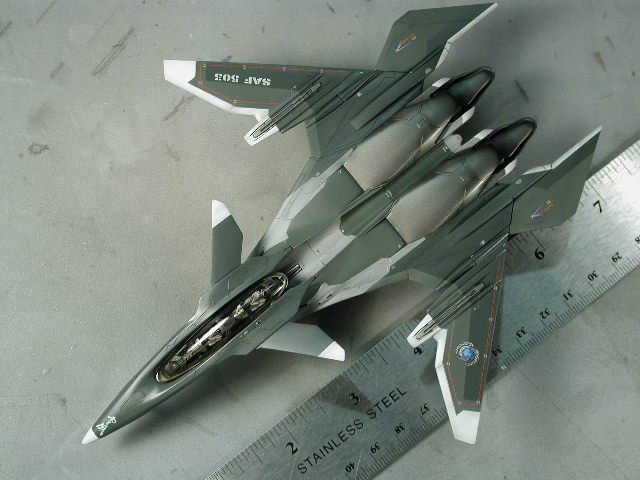
In these pictures you might forget how small this model kit really is. It makes the Hasegawa Valkyries roomy by comparison.
I'll wait till tomorrow when there is sun in my dining room to take some proper pictures of this new baby. I still haven't got a real clue on how to paint the missiles - any suggestions other than the instructions pale purple would be helpful.
Till tomorrow...

-
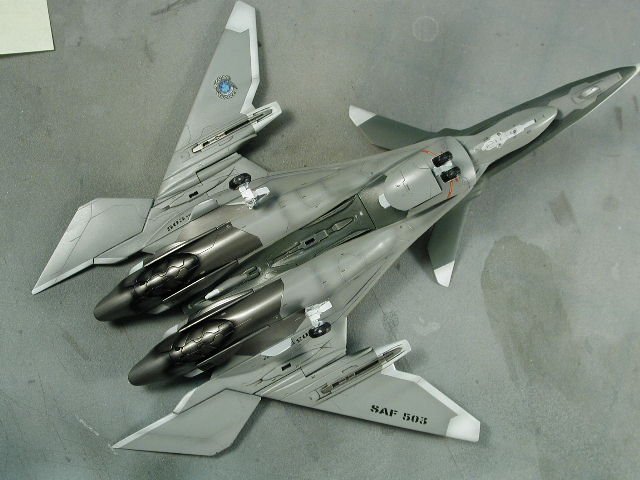
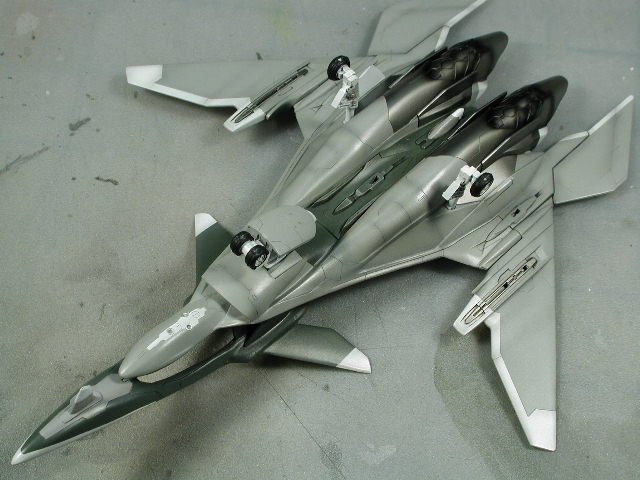
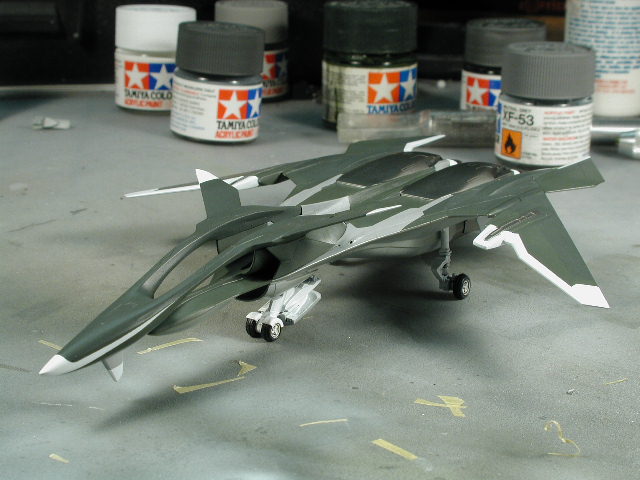
I left the underside that semi-gloss.
-
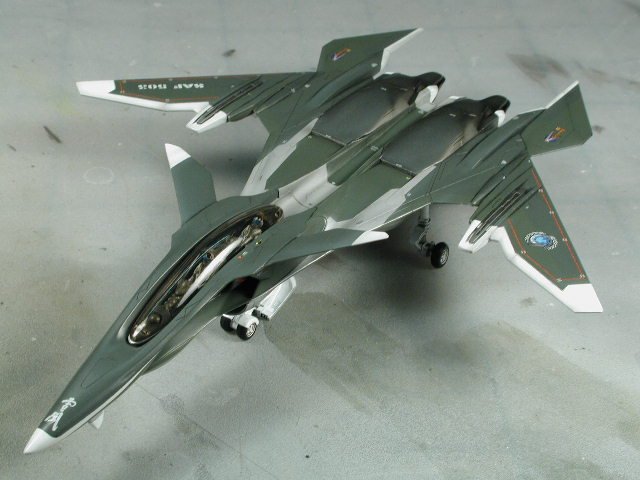
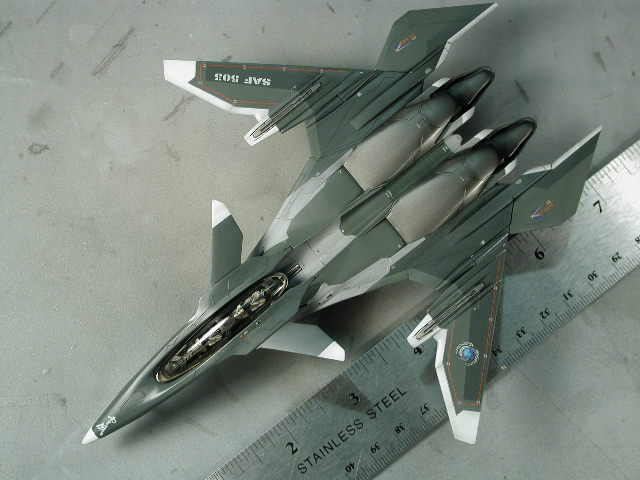
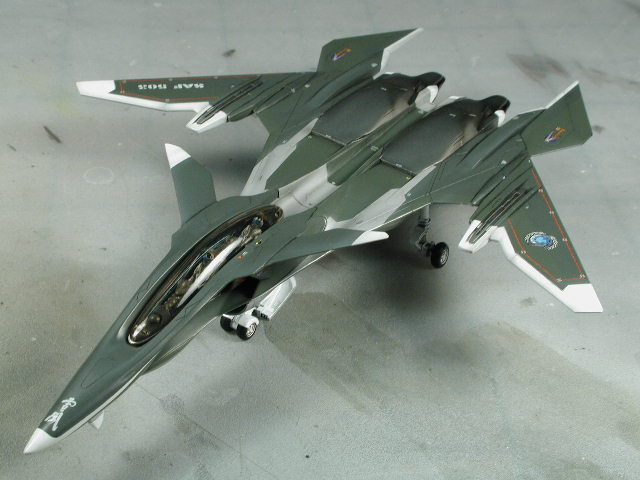
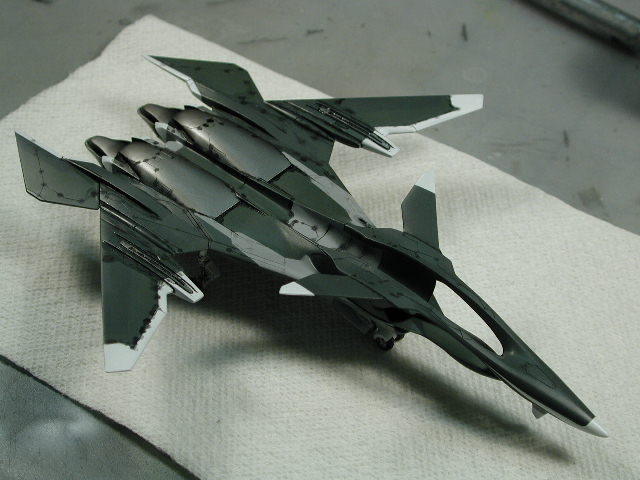
A rear view - its intersting how the flat pieces catch the light, in darkness or a darker environment, the two grey/green colours are still very close, but in bright light, you really see the contrast. In fact it makes the metallic steel look even more glossy.
What do you guys think of this grey/green version instead of the bluish one in the Model Graphix and the instructions?

-
Another view.
-
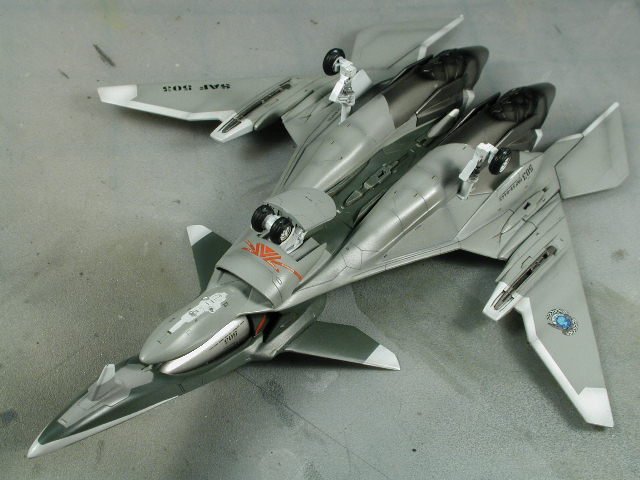
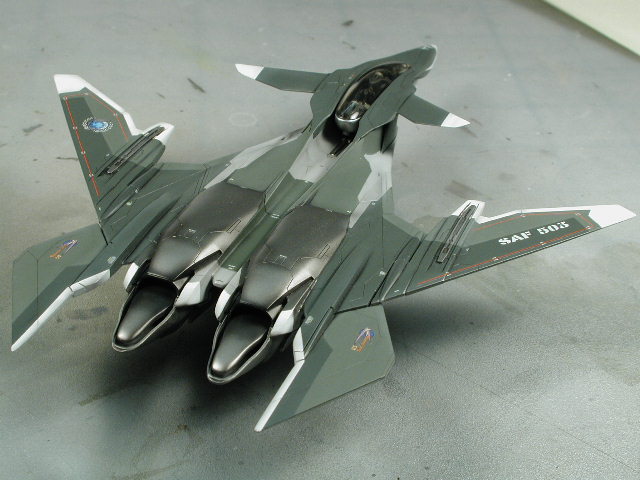
Viola!! It turned out really well
 If I may say so myself I am so happy, I really was upset when after all that careful masking, the colour blended so much with the darker grey when I clear-coated the entire thing semi-gloss. In fact, I like it better now, where some parts of the plane is semi-gloss and some parts are flat - it gives an intersting sheen to the aircraft (especially when you walk around it) - especially where I chose to break the flat/semi finish at the panel lines. It makes it look more assembled from separate pieces and a sense of scale - sort of like the Enterprise A in the Star Trek movies with their subtle off-white panels.
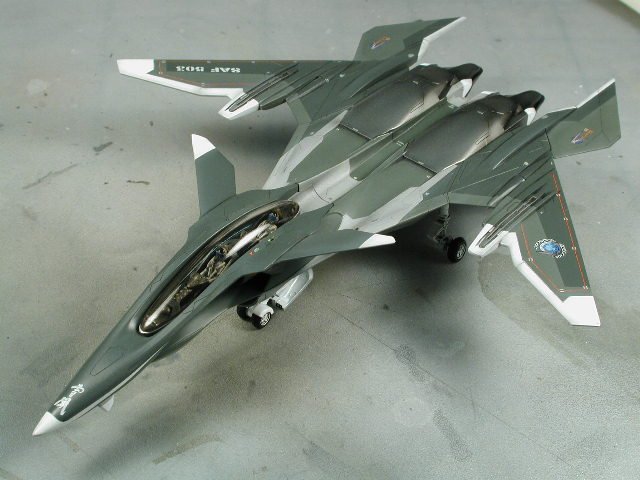
-
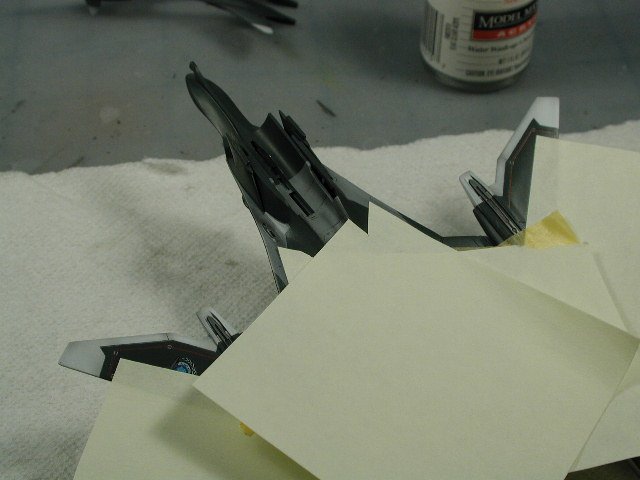
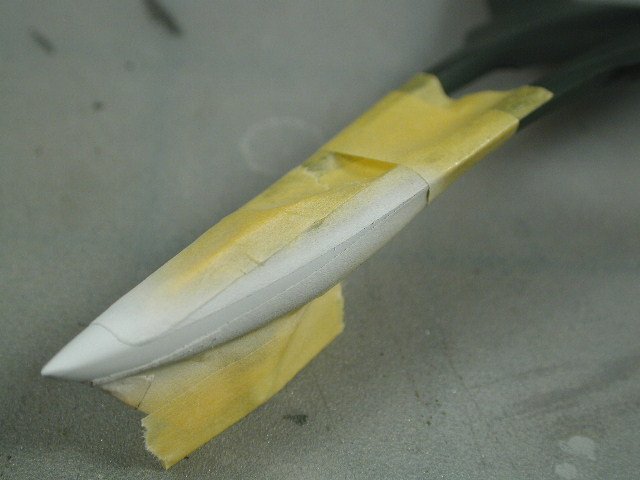
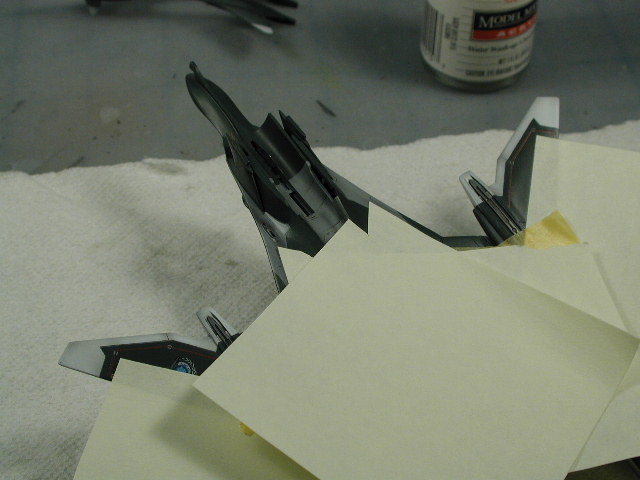
I couldn't wait any further, 2 hours after my last semi-gloss clear coat, I started to try the flat-coat idea to bring back the lighter green-grey colour. Here is my "hair-brained" idea with the post-it notes. It didn't pull any decals off this time around, in fact, it kept falling off, and I had to re-adjust and apply the post-it notes before each time I spray the flat/matte finish clear-coat.
-
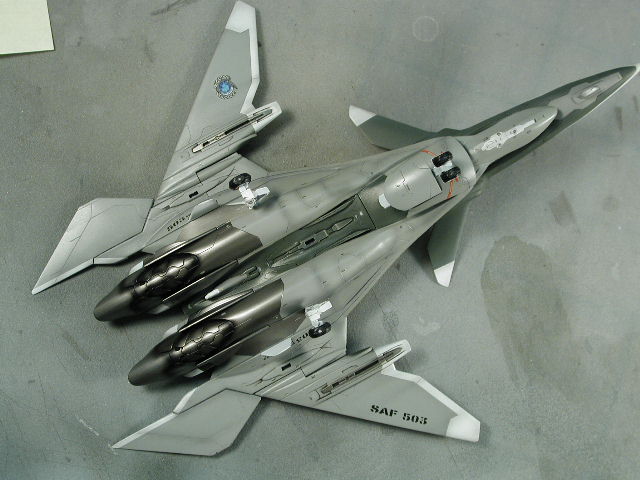
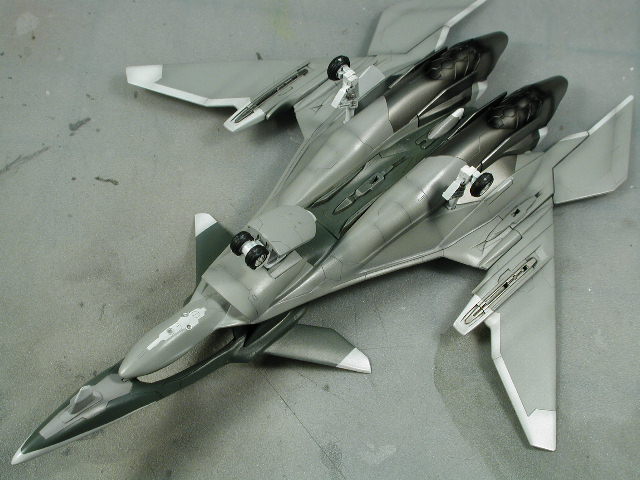
Here's the underside. The decals for the forward sensor area (the little irregular white patch) really do make that area pop out - I'm glad that I spent the time to mask that irregular shape out - I think it would be worth it. In the end, I am going to but dabs of blue transparent colour into the camera lens openings. The decals for this area came as three sections of little stencils, all held together with decal film. I again trimed this off and applied each stencil separately - if you leave the film on, I am afraid it would cover some neat details and a camera lens or two. (I'll do a shot close-up of this when I finish it off with the camera lenses - I also painted the lens housing in a silver). At this resolution it doesn't look like much, but all those little black smudges are separate stencils!!
I'll let you know how the flat-coat goes in a little while!
-
A brief update while I let my clear-coat dry. Wow... holy micro decals Batman!! I think I need a few seconds to let my crossed eyes adjust!!
Well, after the decals on the last Bandai kit (Yukikaze Superslyph) were generally oversized (more like 1/72 than 1/100) well, they more than made up for it on this kit. These are tiny, in fact most of all the warning stencils were so small that they turned to be little blurs or smudges. As insane as it was, I spent the better part of the day applying all these little smudges - you may not be as crazy as this, and still the kit would be pretty much unchanged <_< Oh, well too much time on my hands.
I did cut out all the decal film between the red walkway lines on the wings - it was just too much film to hide. However, when you did this, you are left with a "U" shaped red stripe that was extremely difficult to get laid down in the proper geometry. I spent a good 1/2 hour on each of these red lines and a lot of water to keep them moist while I fiddled with one section or the other. But I believe the end result is worth it, a huge decal that were to cover most of the wing would have been easy to put on, but looked pretty bad in the areas between the red lines especially if the text and round emblem was to go on top of that too. What killed my eyes were trying to trim around the excess decal film around all the little stencils - but if you don't you'll end up with blobs of decal film around all these little smudges which is worst! Because the decals were so small or fragile, I applied them with water, brushed them into position with a damp brush, then dried the brush to "wick" out the excess water, and dabbed MicroSol setting/solvent solution on the edges once they were in position to help hide the decal film edges.
-
Hey guys - I'm back,
Took a break to go to Wonderland because it was such a nice day yesterday - Man was it crowded!!
Back to decalling today - hopefully I'll post some pictures today. Just got a brain-wave last night - I plan on masking after the decals to do some shades of flat clear-coat on this bird to bring back the lighter green-grey - but I was cautions because the last time I masked after I applied the decals was my Elintseeker's radome (those of you who follow or care remembers what a nightmare that became when I pulled of chunks of decal). I thought I would clear-coat the decals, then use Post-it notes - the sticky back is much less - well see how it goes.
I get my Future at a supermarket, Loblaws was the last time I checked - in the floor cleaning aisle. For those of you in the GTA, I saw a bunch of Future on sale up in Scarborough at Bamburgh Circle in the Chinese supermarket at Steeles and Warden on Saturday.
Thanks Cmd McBride for the nose white markings comments, I feel a little better about them now. When you build these things and put such effort into them - you are never happy of how it turns out - there are things I wished I did differently on each and every one of my models. Its part of what gives me the drive to continue builidng models - the promise that I will not do that particular mistake again on the next one!
Again for those of you in the GTA, Northstar Hobbies in the west end carries Tamiya masking tape as well as Collector's Lane Hobbies in the east end. I have started to see them poping up in local Anime stores such as Pacific Hobbies in the Pacific Center.
Lastly, the post shading. I used a neutral grey this time - since its a shade lighter than the underbelly sky grey. I always use a shade darker than the base coat I want to post-shade over. I dilute in with Tamiya thinner more than usual 2:1 paint:thinner to get a very viscous consistency. This helps to not lay down a lot of paint and allows the airbrush to achieve a finer line. Then I very lightly (key here is build up in layers - SUBTLETY - error on the light side - its always easier to add then fix if you put too much) airbrush as fine of a line as I can - "tracing" around all the panel lines and any contours I want to highlight. Its kind of like shading a 3-d sculpture and its a bit of taste to determine where you want it and where you don't. Since this is a relatively new aircraft, I did it very lightly. I find when you over postshade stuff, it looks more anime like kind of like the Gundams we see everywhere. Once you are complete - immediately seal it in with a clear-coat. This post-shading layer is very delicate, since its such a light misting, it can scratch off easily.
Hope to post soon.
Good luck!
-
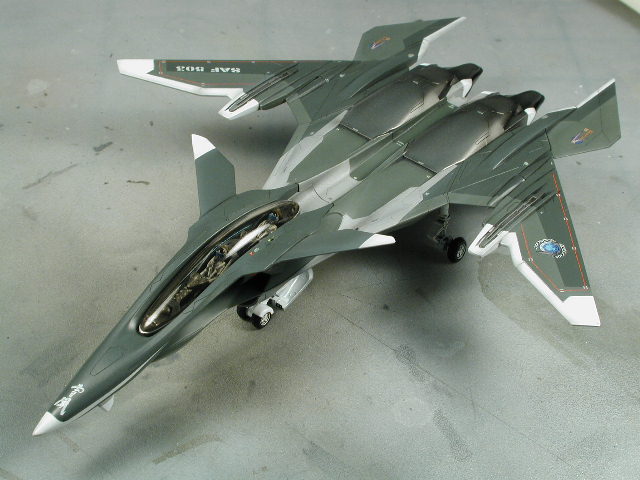
A great view!! Its decal time soon, as soon as I let the clear coat dry!! Ya!
-
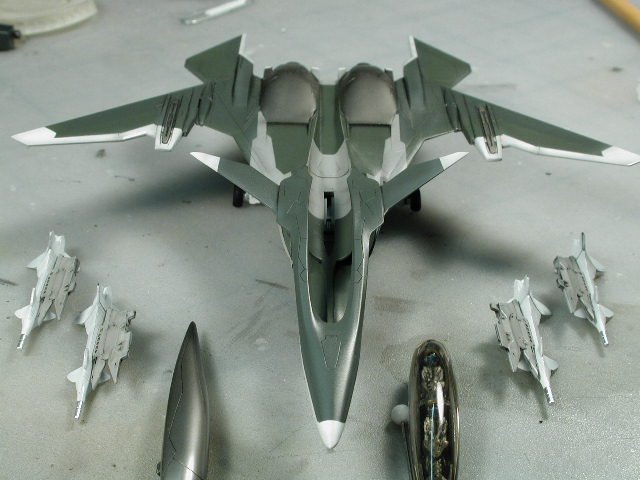
The weathering on the top is really subtle - I didn't want it to look battle-worn, just tie all the colours in a bit (the photo doesn't really show subtelty well). There will be another light dusting of grey after the decals to tie those in - so its always best to error on the side of caution. You can always add more, over-doing it is a harder fix. This photo shows the other missiles (I decided to paint the bodies/shaft white - like the Superslyph, but haven't decided on a fin colour yet - I don't think I'll take the instructions pale purple) the centerline tank (which there are no paint instructions - but I did the Alclad Steel because I like the finish so much - in hindsight, this will be my Alclad test model
) and off-course the cockpit pod.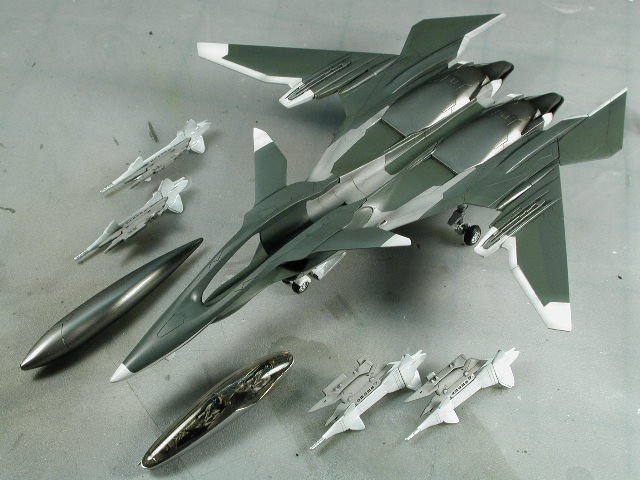
-
Here's a shot after I wiped off the excess oil paint and did a light little post-shading on the panel lines with Neutral Grey. I darkened the forward edges of the white with the grey, and this had the effect of darkening the white while lightening the dark green/grey which reduced the contrast of the white markings to blend them in a bit (they did stand out a bit starkly - bullseye
)
-
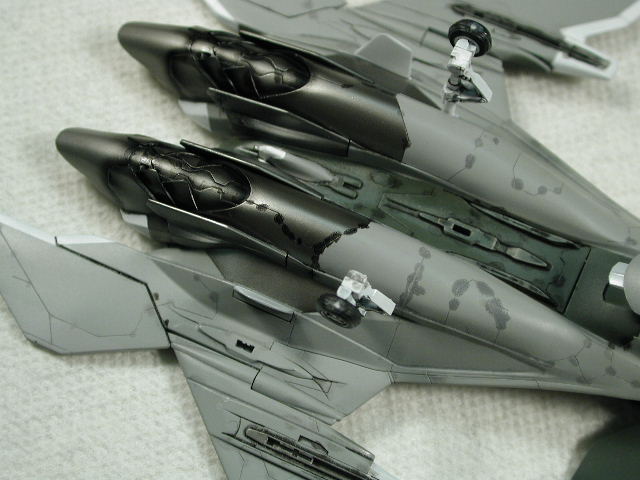
This shot is a close up of the different greys - the black wash for the engines and dark moveable surfaces and the lighter grey for the regular panel lines.

-
Starting the old wash...here's my spotted bird.

-
Hey LTSO - I updated my signature to include my old website (well directory only - I haven't had time to learn any HTML) sorry
 I don't think there are any pics of the Elintseeker there but here's the address to the old boards:
 http://www.macrossworld.com/cgi-bin/mwf/ik...ct=ST;f=20;t=33
http://www.macrossworld.com/cgi-bin/mwf/ik...t=ST;f=8;t=6198
I think Rob did the PDF write ups at: http://www.robsthingies.com/
Hey does this mean you are starting on the YF-19 - if so please post..
-
1/72 = 0
1/60 = 3
1/48 = 1 (2 more soon)
-
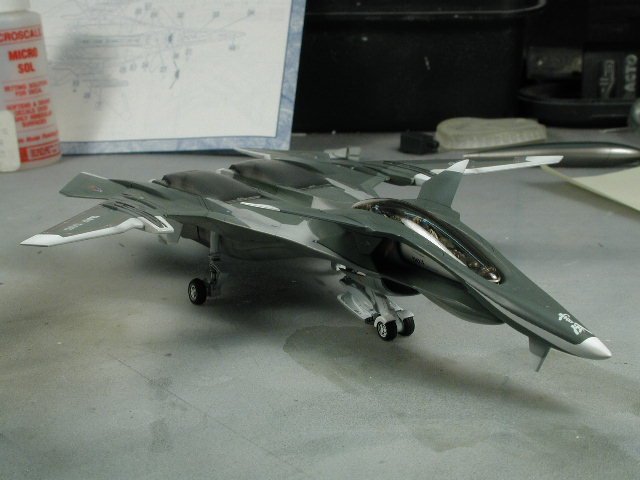
This is where I'll let the plane stand overnight for the clear-coat to dry. (Must keep hands off - before I ruin any other paint finish) I can be so impatient especially when I get to this point where I would do the oil wash, post shading and decals. I have repaired the wing-root hinge area and put lots of coats of clear-coat over that area as well as paint the wing pylon details in metallic steel as well.
I think my plan is to tone down the white and light grey with a neutral grey when I do the post shading phase. Then at the end - after the decals and clear-coat to protect the decals, I will remask the light green and spray those with a flat/matte finish. So I will keep the semi-gloss of the darker shade and engines, but get a flat sheen on the lighter green areas - hopefully that will restore the original contrast between the two colours.

-
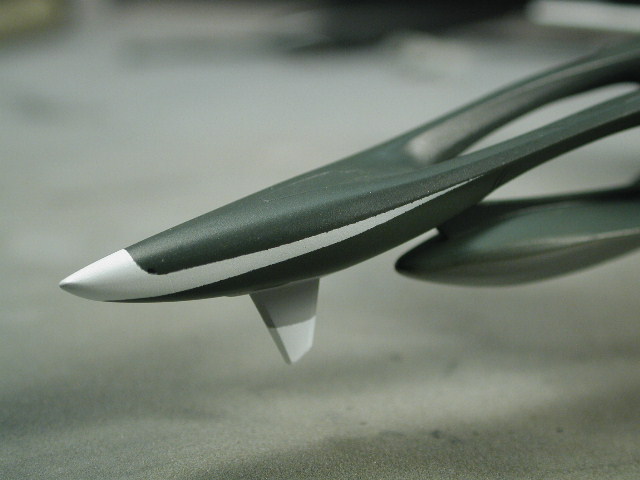
This shot shows the "bumps" better - I don't know how to get a smoother line?
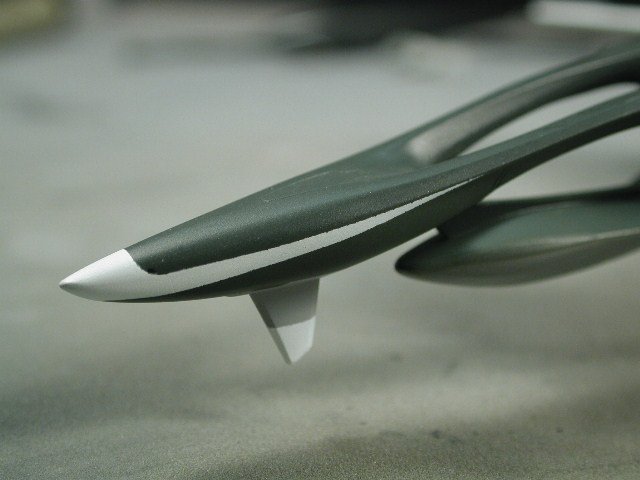
-
Well here it is, not too bad, but not great, if you look closely, the edges isn't perfectly smooth. The overall contours are right and there is no overspray, but there are areas where the adhesive on the Tamiya masking shows through as a fewy little bumps - normally I wouldn't look this closely - but its such a small plane - I mean this line is only an inch long! So any imperfections will show up large in scale comparatively. Aftermarket decals would be great for this bird!! This really should of been a decal! What's next, Bandai will want us to spray the stencils "no step" in 1/100 scale

-
Yes we are spoiled with Tamiya
I'll have to try this Future soon. - how is it for finger prints after its on?Tamiya smoke sounds great for panel lines - its basically thinned down black. I might try it on the engine portions - but I'll stick to a darker shade whenever its available. I think the darker shade is a little bit more forgiving since it won't be so bold.
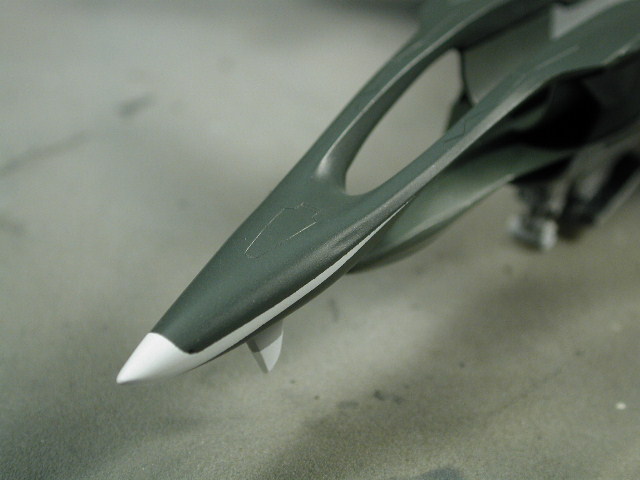
Well here's my day - trying to get this nose stripe on right took several trys especially trying to get both sides to be symetrical - and off course everything is a curve!!
-
Hey Sam,
I use Tamiyas too, but use ModelMaster Acryl Clear Coats, they come in flat, semi-gloss and gloss, I highly recommend them - and can tell you that they are safe with the Tamiya undercoat as well as the oil wash above. I would be careful when you thin down the oil wash - any artist oils will do, but the thinner is important. I use low-odour Varsol, which is a mineral spirit based thinner but really weak. The weaker the better - look for low odour stuff, they are generally less potent.


VF-4G Lightning Build Up
in The Workshop!
Posted · Edited by wm cheng
I see its a double action if I'm not mistaken (you press the trigger for air pressure and pull back for paint flow?) They are a little hard to master at first. I would invest in Tamiya thinner - I know its a bit expensive, but if you use Windex to clean the airbrush and only use the thinner to thin the paint then it will go a long way (mine has lasted me for over 4 years). You can thin Tamiya paints with water, but the thinner has some flow additives that aid in airbrushing, and might be able to help atomize the paint pegments while still inside the airbrush barrel producing a finer mist.
3:1 paint to thinner is a good ratio (I don't know if its the same with water though). You could try a little more thinner when doing the pre/post shading than you would normally to just cover the plane. I might try a higher PSI around 20-25 when I usually paint, unless the stuff specifies a lower PSI like metallics or heavier stuff like the Alclad. Try practicing on a piece of paper or card for a while first to get the hang of the line - you should be able to get a pretty smooth line that is 2-3 mm thick without problems, then practice to get a 1mm line around the thickness of a fat "B" pencil. Its just practice. I usually still practice on a piece of cardboard just before I spray on the model everytime to check paint consistency and get my hands into the practice. It's like warm-up whenever you play any sports