

wm cheng
-
Posts
4281 -
Joined
-
Last visited
Content Type
Profiles
Forums
Events
Gallery
Posts posted by wm cheng
-
-
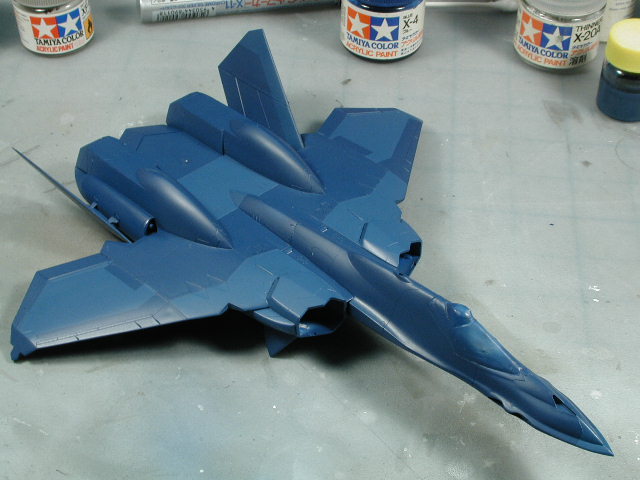
Hmm, I think I'll do a colour inbetween the two blues tomorrow instead of a darker one. When I weather it slightly, the different shades will tie together better.

-
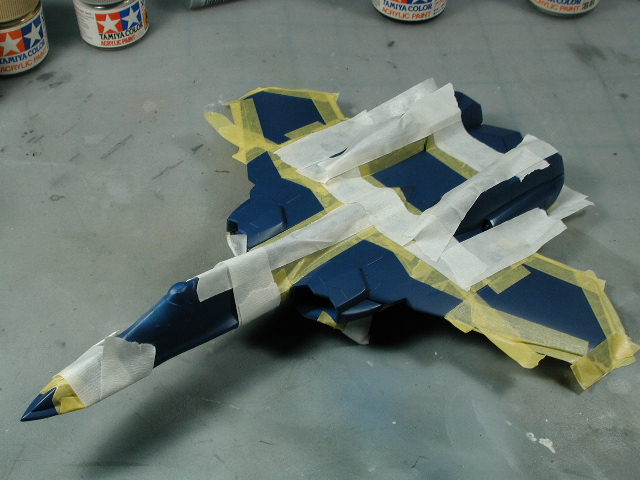
And still more masking... I was thinking that I will do a shade lighter and a shade darker - then with three shades, I will vary the finish from semi-gloss to flat, giving me a total of 6 shades in the end I hope.
-
More masking...
-
Hey don't worry about it Capt Hungry
 I love reading what others have done - the more info always the better. It helped me out as to what to expect and what to avoid - I will always welcome all modellers point of view (until I am old and crotchety
  ).
).Good point Gerwalker, I hadn't intended to go the expoxy route either - I generally find that the epoxy is harder than the plastic (especially this Hasegawa plastic) and thus harder to shape without damaging the surrounding plastic. I still intend to use the lenses supplied, I find it hard to believe that after all the good engineering that Hasegawa has done, that these wing tip lights will fit so poorly. I'll come to that bridge when I have to cross it.
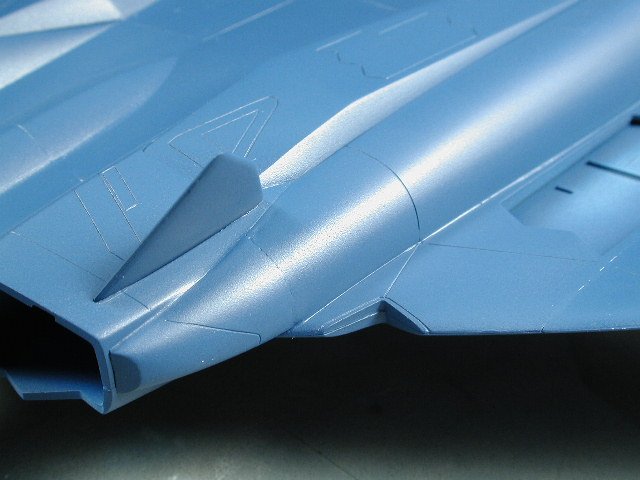
Here's a shot of the lighter tone - I hope t doesn't dissappear when I gloss coat the entire thing in prep for decals

-
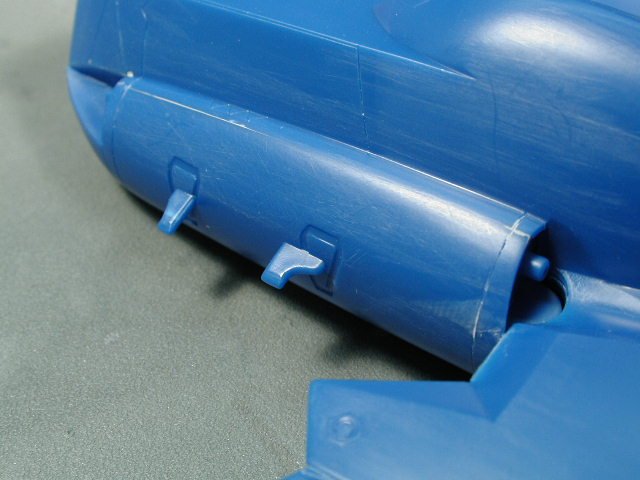
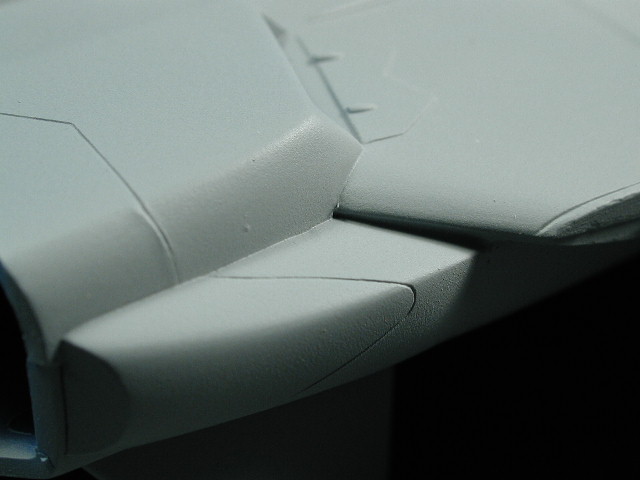
This other problem area where the bulge joints the engines is also fixed with another coat of Mr. Surfacer, I used that Tamiya Tritool scribber to restore those panel lines and I drilled out the "laser" ports. Actually I take back what I said about drilling these out after I sanded this area. I can't really reach the front laser port because the fuselage of the YF-21 is in the way or my pin vise is just too fat - so I would recommend drilling them out before hand then installing them into this bulged housing.
Its off to masking for that panelled effect now.
-
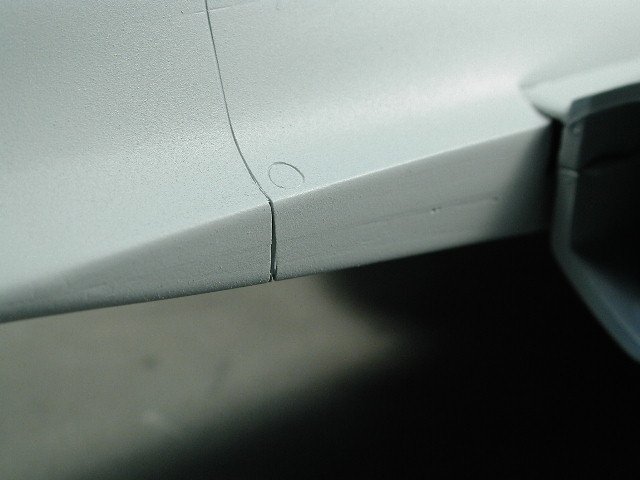
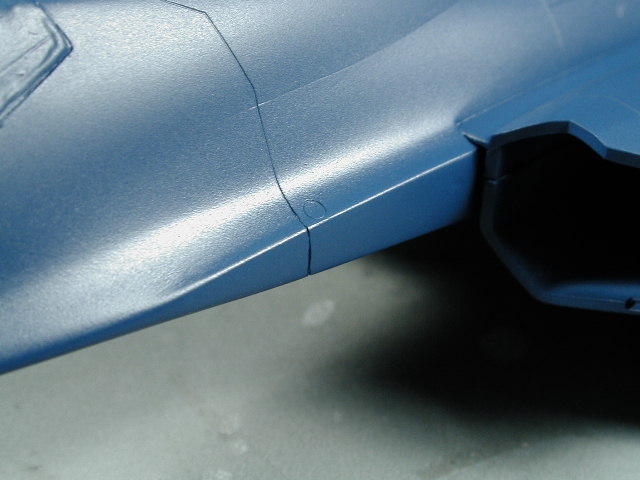
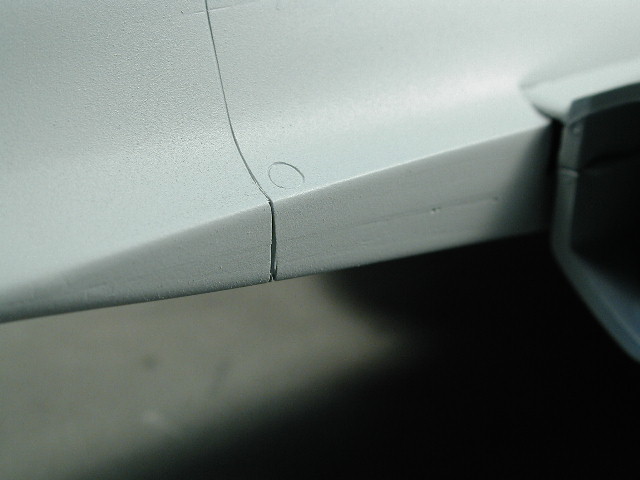
Here's that crucial joint that didn't turn out so great when I primed it, but after another coat of Mr. Surfacer and sanding, then the layer of blue paint, it is pretty seamless now.

-
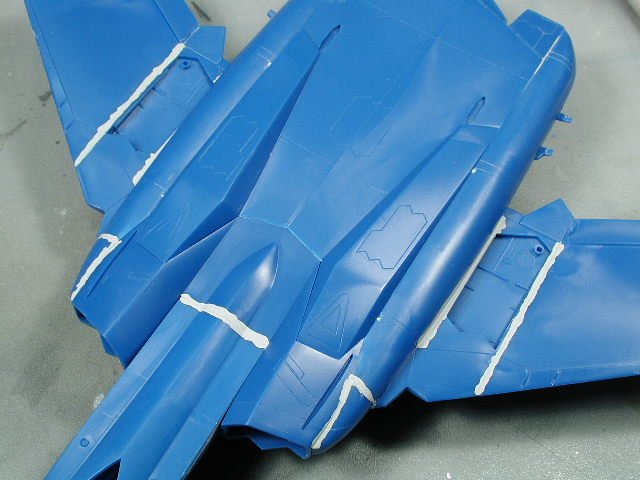
Here are a couple of seams that I think turned out okay after painting. I will separate a different shade at the filled break - I think its fine to have this separation, I suppose some could majorly fill it and feather it back to look like one piece, but I think the YF-21 already looks like too many big pieces IMHO.
-
I am actually really happy with the way all the seams turned out - the fill job was pretty good (if I do say so myself
). Actually, yes there are some seams, maybe more than we would expect from a top notch company like Hasegawa, but certainly less than most model companies out there (anybody ever built "Airwolf" from AMT/ERTL - I think there were more gaps than plastic in that kit, its amazing it held together ). It may seem like I filled a lot of seams, but it wasn't a big deal, I usually spend a day or two sanding all the Valkyries I have built. I was just a bit more careful on this one and outlined some of the seams because I read that other article that was suggested on the Starship modelling site. The leg seam on the VF-1 sucked too or the YF-19 for that matter. I still think that this has been the easiest Valk from Hasegawa to date - lots of big pieces  However, I haven't tried to fit the wing tip lights yet nor the canopy decals - so knock on wood
 I wish there was more articulation on the lower surfaces.
-
Mr. Surfacer is essentially a really thick paint. I just paint/dab it on with a fine small brush (one that you don't really care about - since its not kind on your brushes - it will eventualy loose its point) in the problem areas. If its a seam, I try to push the Mr. Surfacer into the crack and fill it. Then I would sand the excess around the crack away usually with a 600 grit and maybe working my way up to 1200 before I paint. I have also put Mr. Surfacer on after I primed in the problem areas as well, here you have to be careful that when you sand, you are trying to only sand away the Mr. Surfacer and leave the surrounding primed plastic if possible (I always sand away some primer near it - so its important to get 1200 grit to feather the primer so that there aren't any ridges or steps where the primer has been sanded away). This is why a very thin coat of primer is best, I use it only to see where the mistakes/problems will be before I paint - and in some cases, bring the colour from a dark blue to a more neutral base before painting.
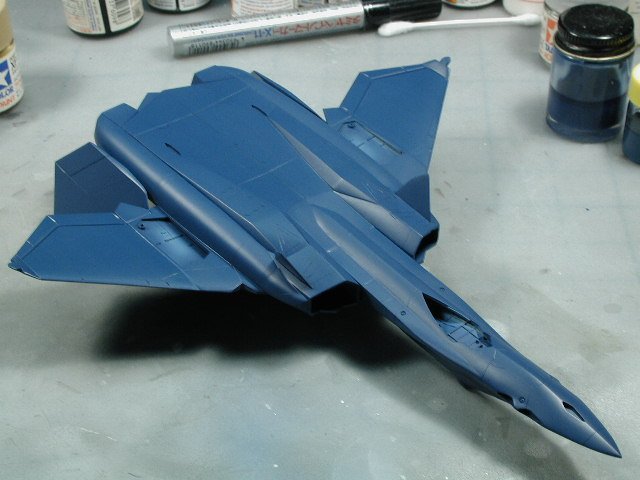
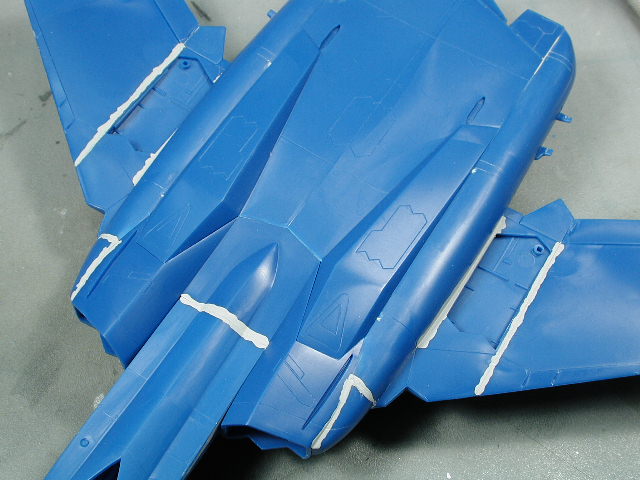
I mixed a pleasing blue, that I feel is not too screaming blue a bit more military in tone as my base under coat. I can't even begin to tell you what ratios are in it, since I started with a little and kept adding till I got the right shade. However, I did start with a base of X4 Blue, then mixed in XF18 Medium Blue, with XF53 Neutral Grey, XF24 Dark Grey and XF1 Flat Black (but mostly X4 Blue with some flat base mixed in). All colours I use are Tamiya Acrylic Paints except for the clear coats.

-
Hey, I'm glad that I'll soon see some new modellers around here - can't wait to see your pictures. Wy don't you try your local hobby shop - Tamiya acrylic paints are pretty easy to come by around here. As to the colours, that depends on the models that you would be building first. However, I find a few colours indespensible, such as flat white, gloss white, flat black, metallic grey, gunmetal, sky grey, neutral grey, and dark grey to start off. I would also highly recommend the Tamiya thinner - it comes in a larger bottle. Its a bit expensive, but it has some addititves or flow agents that help with airbrushing. If you only use it to thin, it can last for years, mine usually last around 5 years or so. You can use the regular blue windex to clean your airbrush and accessories.
Good luck.
-
WOW!! Great work - just like the CG model in the movies
-
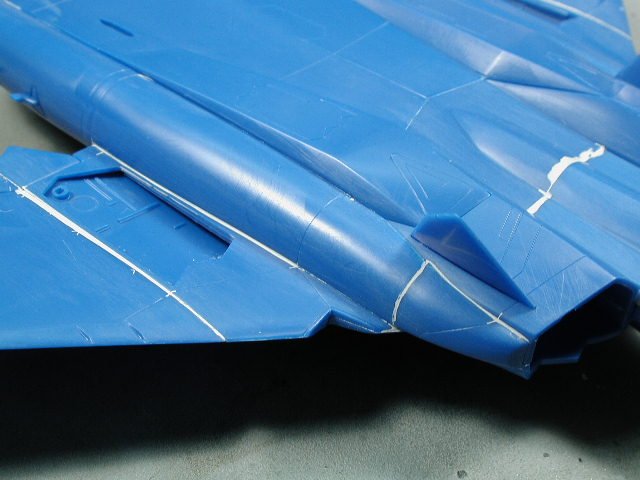
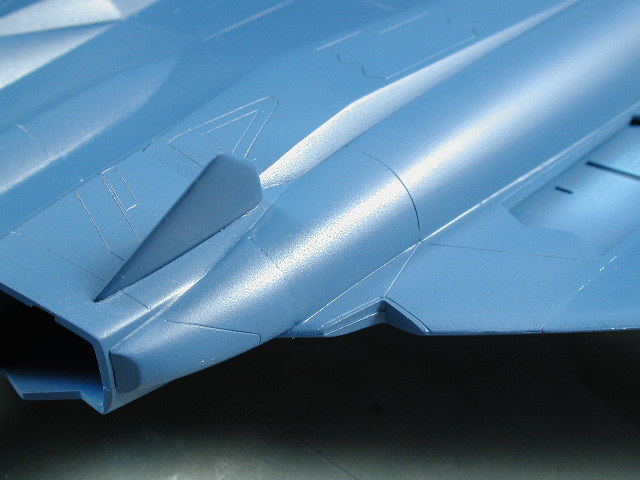
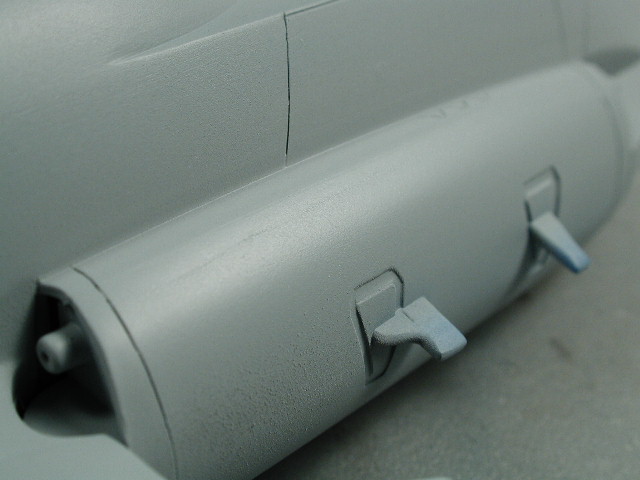
This was one of the articles problem areas, which I don't think turned out too bad. I am going to leave those hints of separation and paint it as a panel demarkation line with a little weathering it will liven an otherwise smooth plane.
-
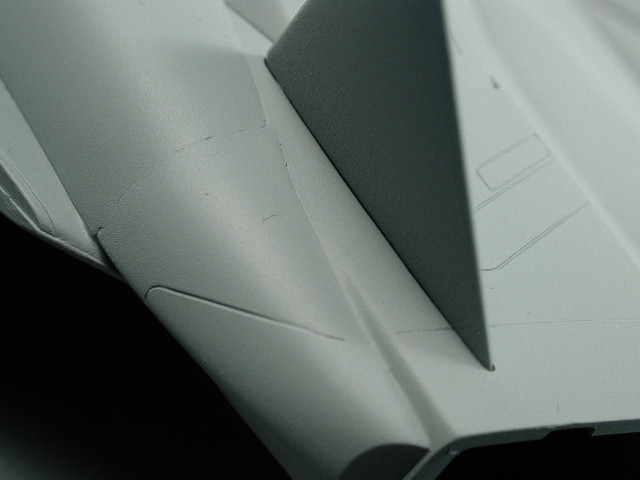
This wing root area definitely needs more Mr. Surfacer, this should be perfect, since it is close to the front and will be in a high profile area likely to be seen quite a lot. Once again, more Mr. Surfacer and sanding to come

-
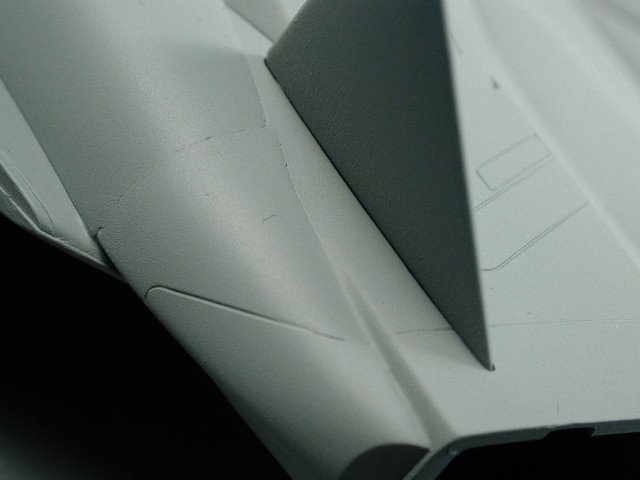
This wierd joint area seemed to be fine.

-
You can see here that problem area still has a slight blemish, I'll have to re-paint with Mr. Surfacer and re-sand this one - you also notice on the round portion the primer looks kind of like felt (extremely magnified though). I am not sure what happened, but it sometimes happens to me when I don't have the air pressure set properly for the type of paint I am using. I will generally rub this down with 1200-1500 grit sandpaper. Its annoying though - does anyone know exactly what causes this? I suspect that I am using too high a pressure and the paint is drying before it actually hits the surface - its seems to go away when I lowered the pressure. For this primer, I am spraying at 15-10psi - its that Alclad pre-mixed primer.

-
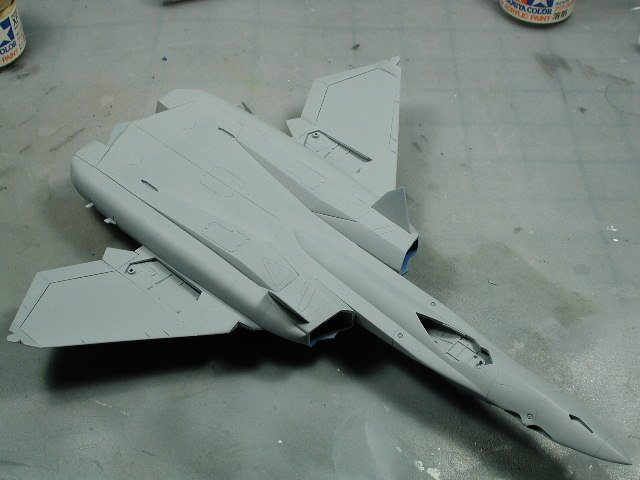
The lines are starting to come together now...
-
Thanks Gerwalker, thats an excellent reference! I'll definitely use it, although a little less weathered, it is a demonstrator after all

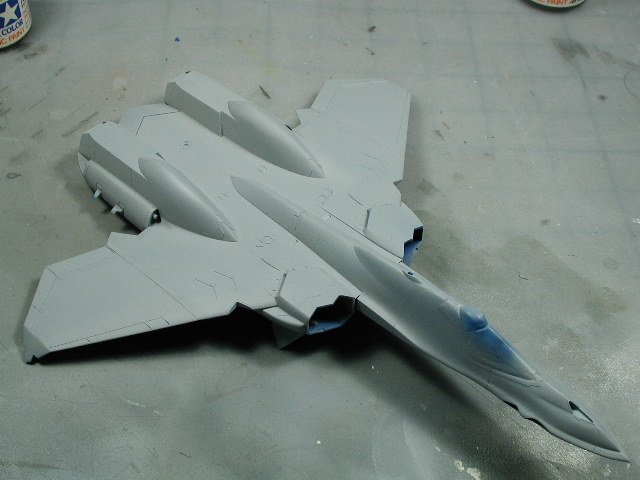
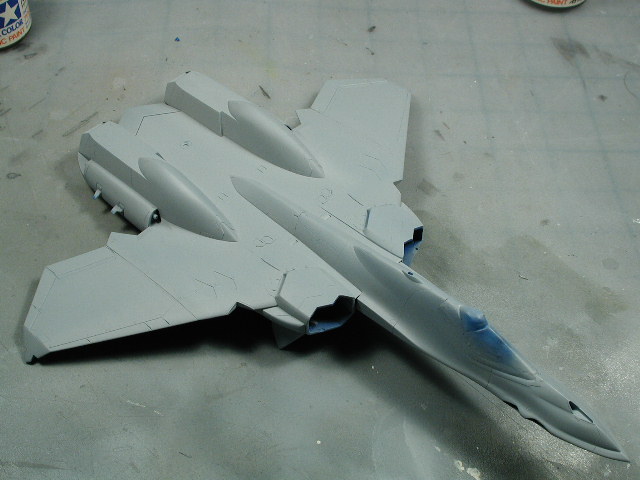
Well here's the primer coat to see all the missed areas. At first glance its not all that bad.
-
Wow! Chronocidal, amazing work, so is this a hobby or it looks more like a proffessional job!
I would love some larger high rez stuff, do you have a site, ftp or mind e-mailing some shots of this beauty to me - just for personal gawking of course
 This is my favourite Enterprise.
 -
Absolutely beautiful Anasazi37!!
Great work as always, I love those little access panels for the RMS missiles, any chance they can be in a light grey or grey so they don't stand out so much - you know me for subtlety
Can't wait for these puppies!
-
You see, this side seems okay.
-
As mentioned this was the only major touble spot that I could be worried with. I don't know whether its designed poorly, or I just glued it down a little too low (I personally think its probably my fault
) but there is a bit of a transition problem from the fuselage section to the bulge flaring. I've built up this area with Mr. Surfacer, so only the primer will tell if this works. IF it works out fine, I will drill out the "gun" ports with a pin vise - I don't want to drill them out if there is any further sanding to be done in this area - since once hollowed out, they will be more delicate. Becareful, you can see the stress marks on the tabs that hold the rear rudder/stabilizers on already.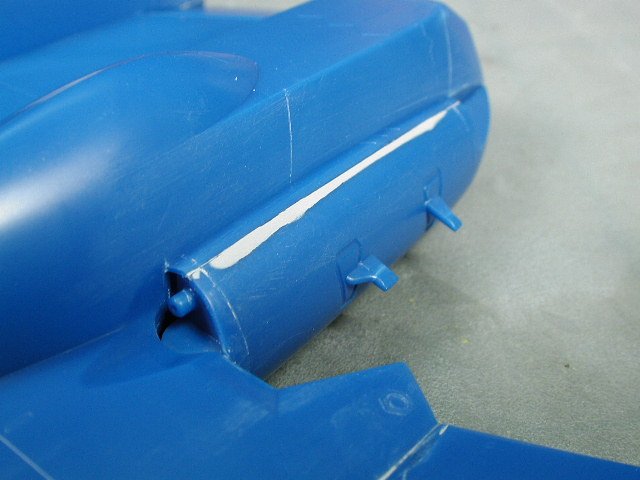
-
Another shot of some minor filling. Obviously that guy never built an ERTL/AMT kit
Gawd they are awful!! I scrubbed this baby (old toothbrush) with dish detergent after the sanding to get all the loose grit away and its drying now awaiting its first coat of primer. After reading that article, I did take a closer look at the wing tip lights, and they appear a bit small - at least smaller than the scribed outlines on the wing. So I decide to error on the safe side and cut them smaller than the scribed lines on the wings. I was thinking that after I paint this sucker, and when I am ready to mount the lights, I can file down the wing tips to match perfectly the size of the supplied clear pieces.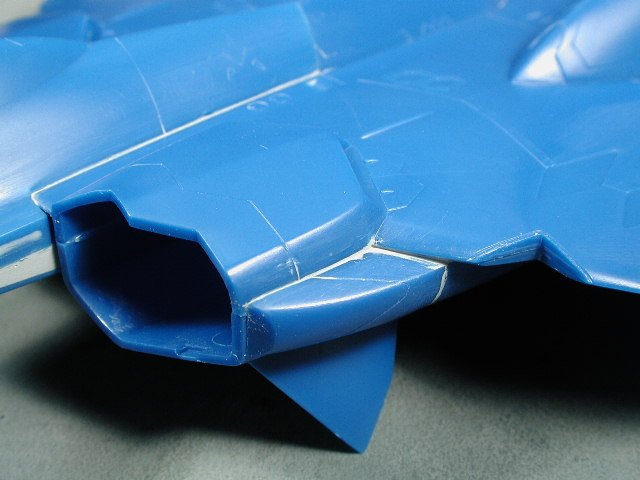
-
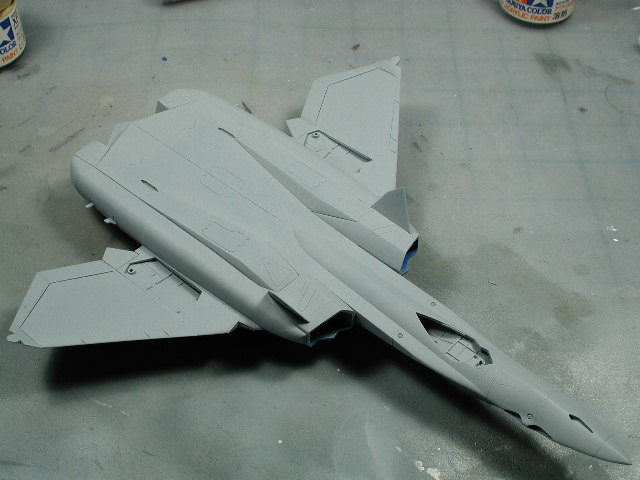
Here I have sanded away most of the excess Mr. Surfacer. These Hasegawa kits fits generally good enough with just the Mr. Surfacer, I hardly ever have to use putty (none on this kit yet). Becareful since the plastic is quite soft and the engraved details are very fine, I find that I did lose some after sanding. But as you can see what is left of the Mr. Surfacer, there aren't really too many gaps.
-
Okay, that article has me all nervous now. So I've really scrutinized a lot of joints and decided to go safe and fill everything you see here. Sometimes I don't think a joint is necessarily a bad thing, it shows how the aircraft was put together and especially in transforming mecha, it shows that certain parts to move around. As long as the joint is purposeful, according to line art, and rendered correctly, with no unsightly or uneven gaps. So I decided to heed the other articles advice, you can only improve the model, the only loss is that there might be extra sanding involved - hey these might be problem areas anyways that will show up after a priming coat.


1/72 Hasegawa YF-21 Step-by-step...
in The Workshop!
Posted
More masking to come...