

Nyankodevice
-
Posts
525 -
Joined
-
Last visited
Content Type
Profiles
Forums
Events
Gallery
Posts posted by Nyankodevice
-
-
3 hours ago, Big s said:
At that size, will there be a cockpit?
i cant find any decent reference material so no not at this time.
-
1 hour ago, Big s said:
I know there’s the mini kits in 1/72 and there’s the upcoming Zenith model kit in 1/48 scale. What scale will this be?
mine will be approx. scale 1/25 (23cm), however you can just scale it up or dawn in the slicer

-
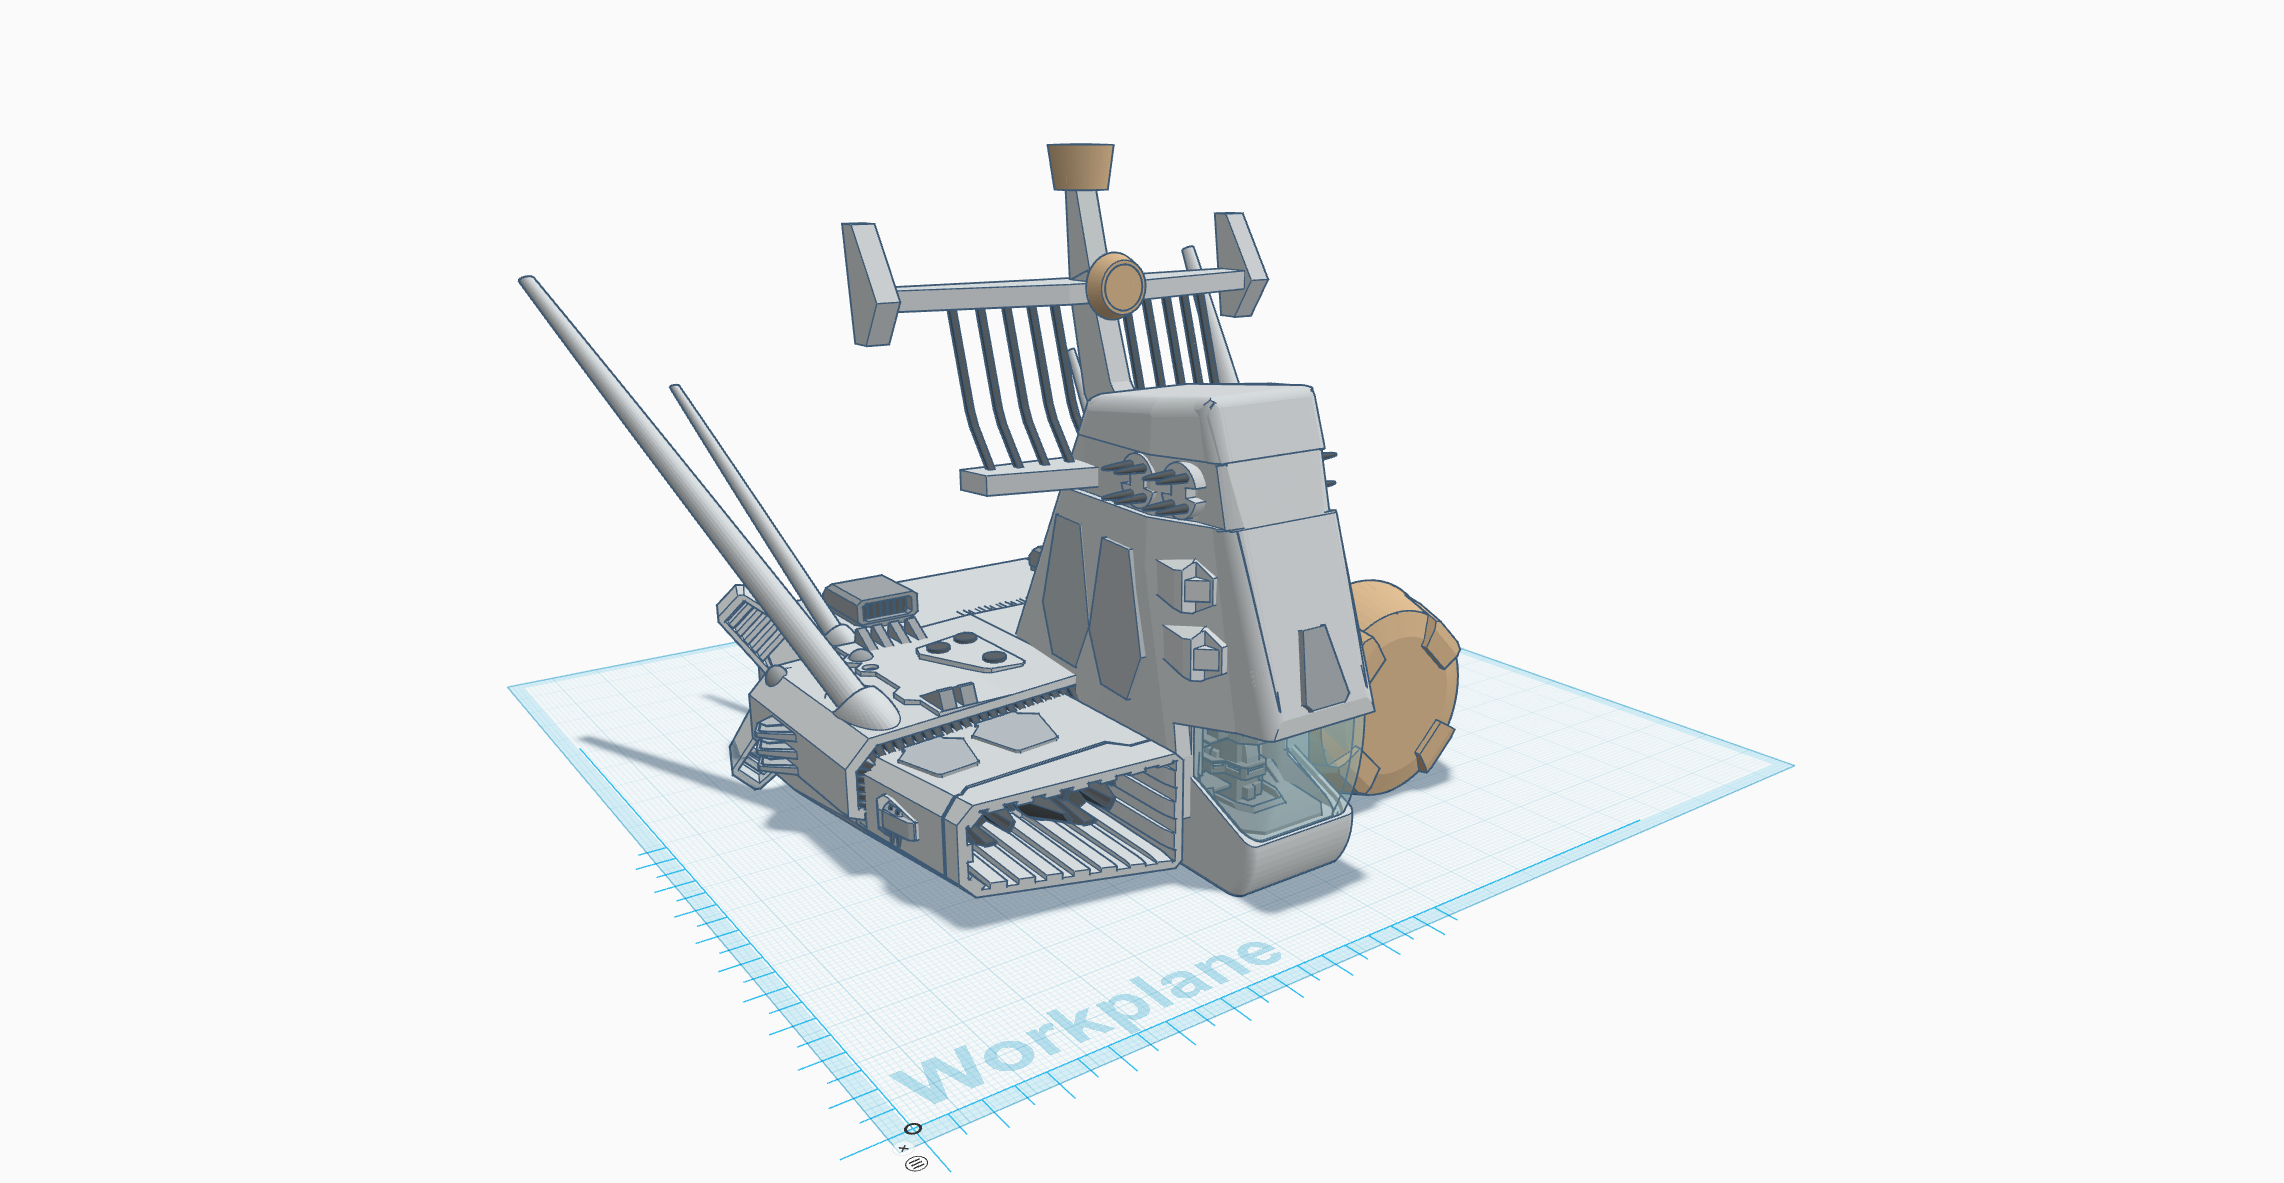
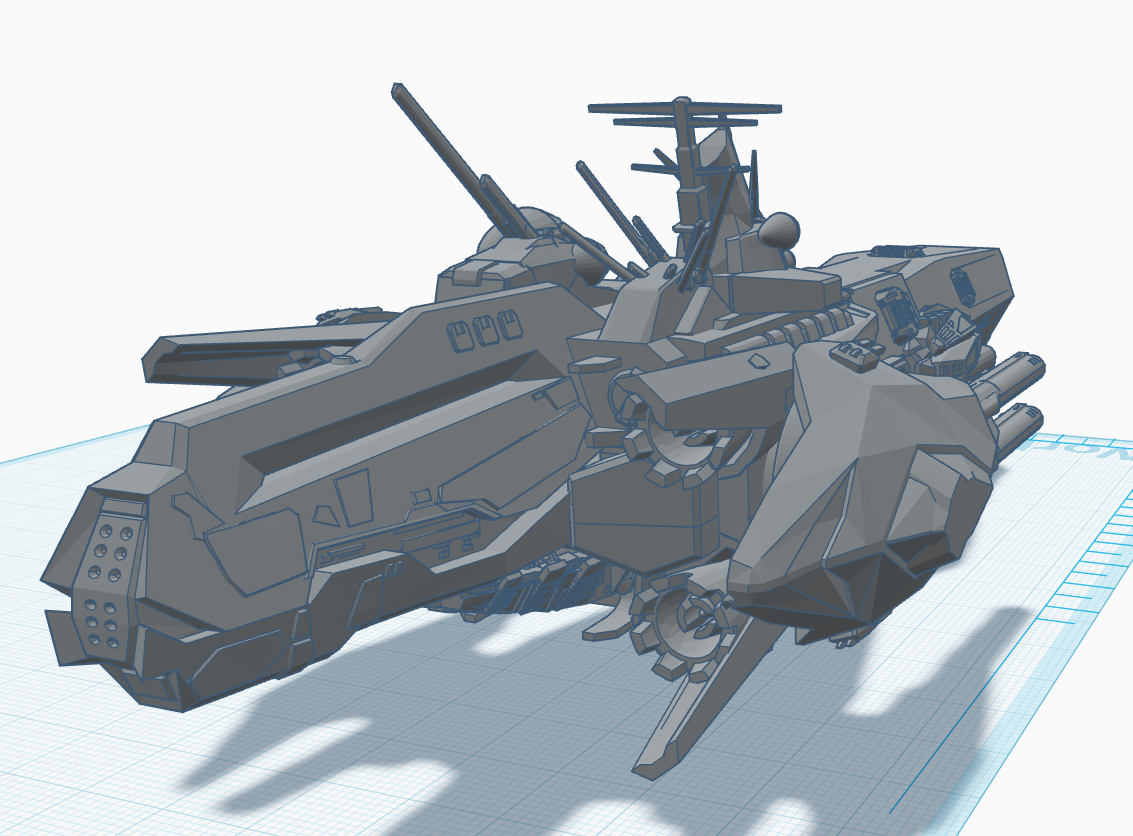
hi everyone, here in the summer heat i have been creating this in tinkercad...
its one of the mechs from Front Mission Evolved (with my own interpretation mixed in)
i will now work on getting it print ready for FDM printers.
.png.914f081b2ced2dc93a22ed35ab0502a0.png)
.png.4616545e966fd90a1892473d71f4b2b7.png)
.png.cb0886b92f19b728bf7676e052b2f035.png)
.png.5143198aaefc8f0b4bd3a8b796fe2be5.png)
-
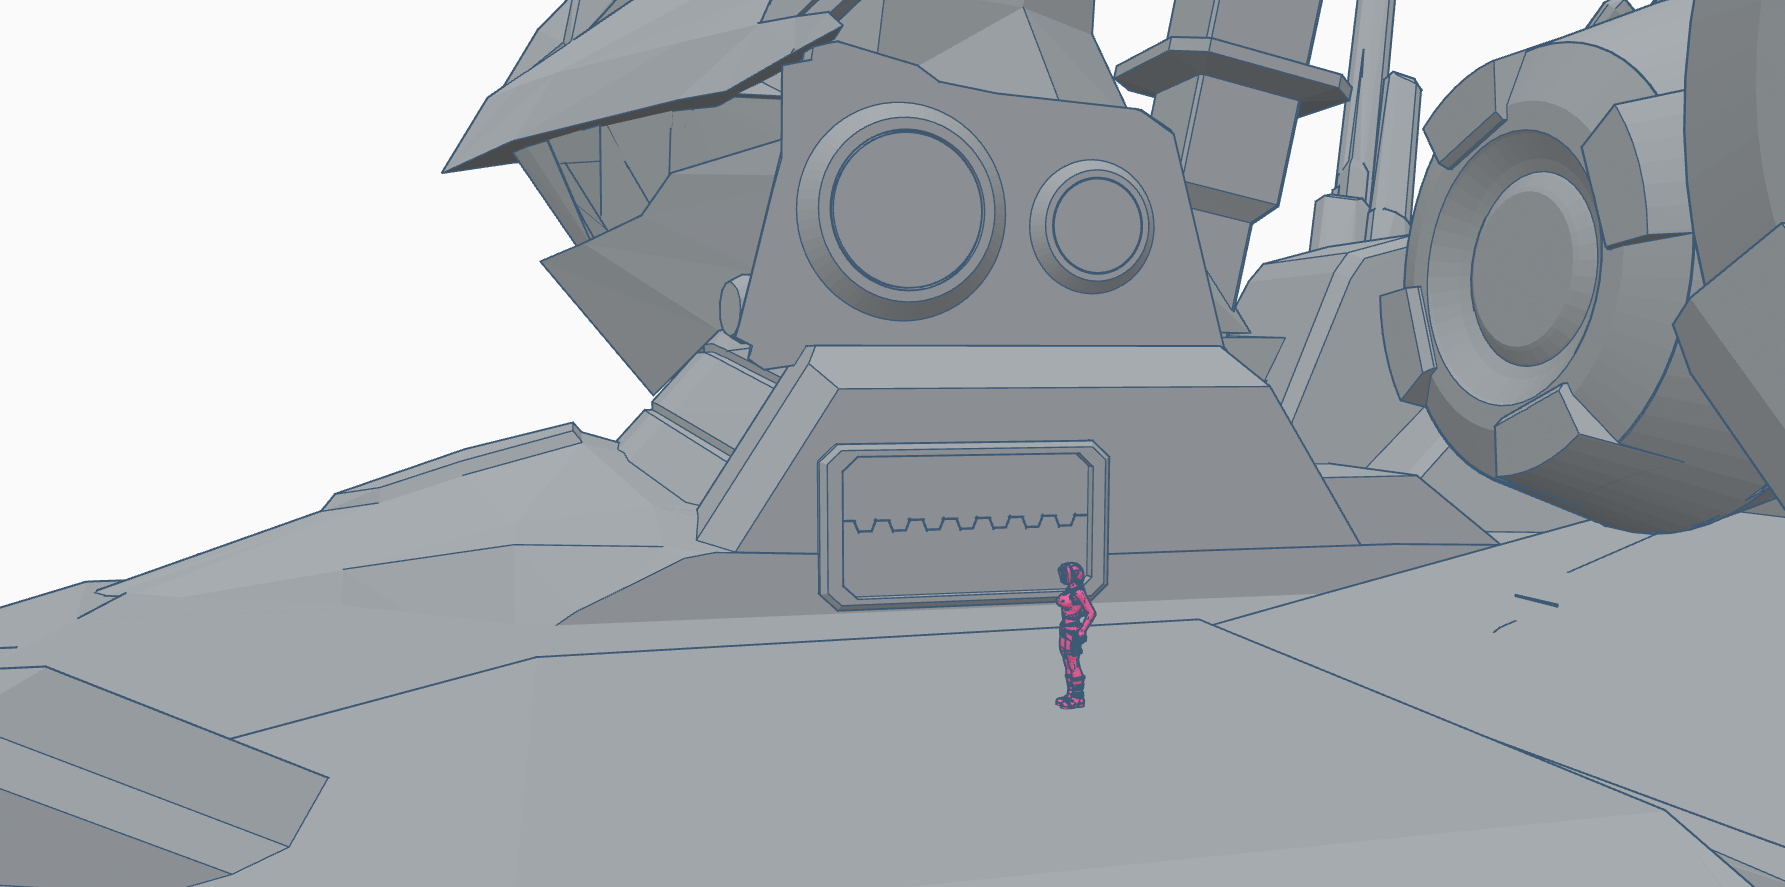
@Nyankodevice Nicely detailed look at the bridge. Gonna print it?
its not finished yet but yeah i am.
a little update.
.png.826c54fb5b4306aa18590c6df77c3a55.png)
.png.00c5610137fc1b8fe3cc6733a44682b8.png)
.png.295817bd834b7dfff9ccb6504ad86d69.png)
.png.04664a43a2dd22e9db58ffd5d49cd9bb.png)
.png.c1e99a980240f7a01768b4f2b10a6bb6.png)
-
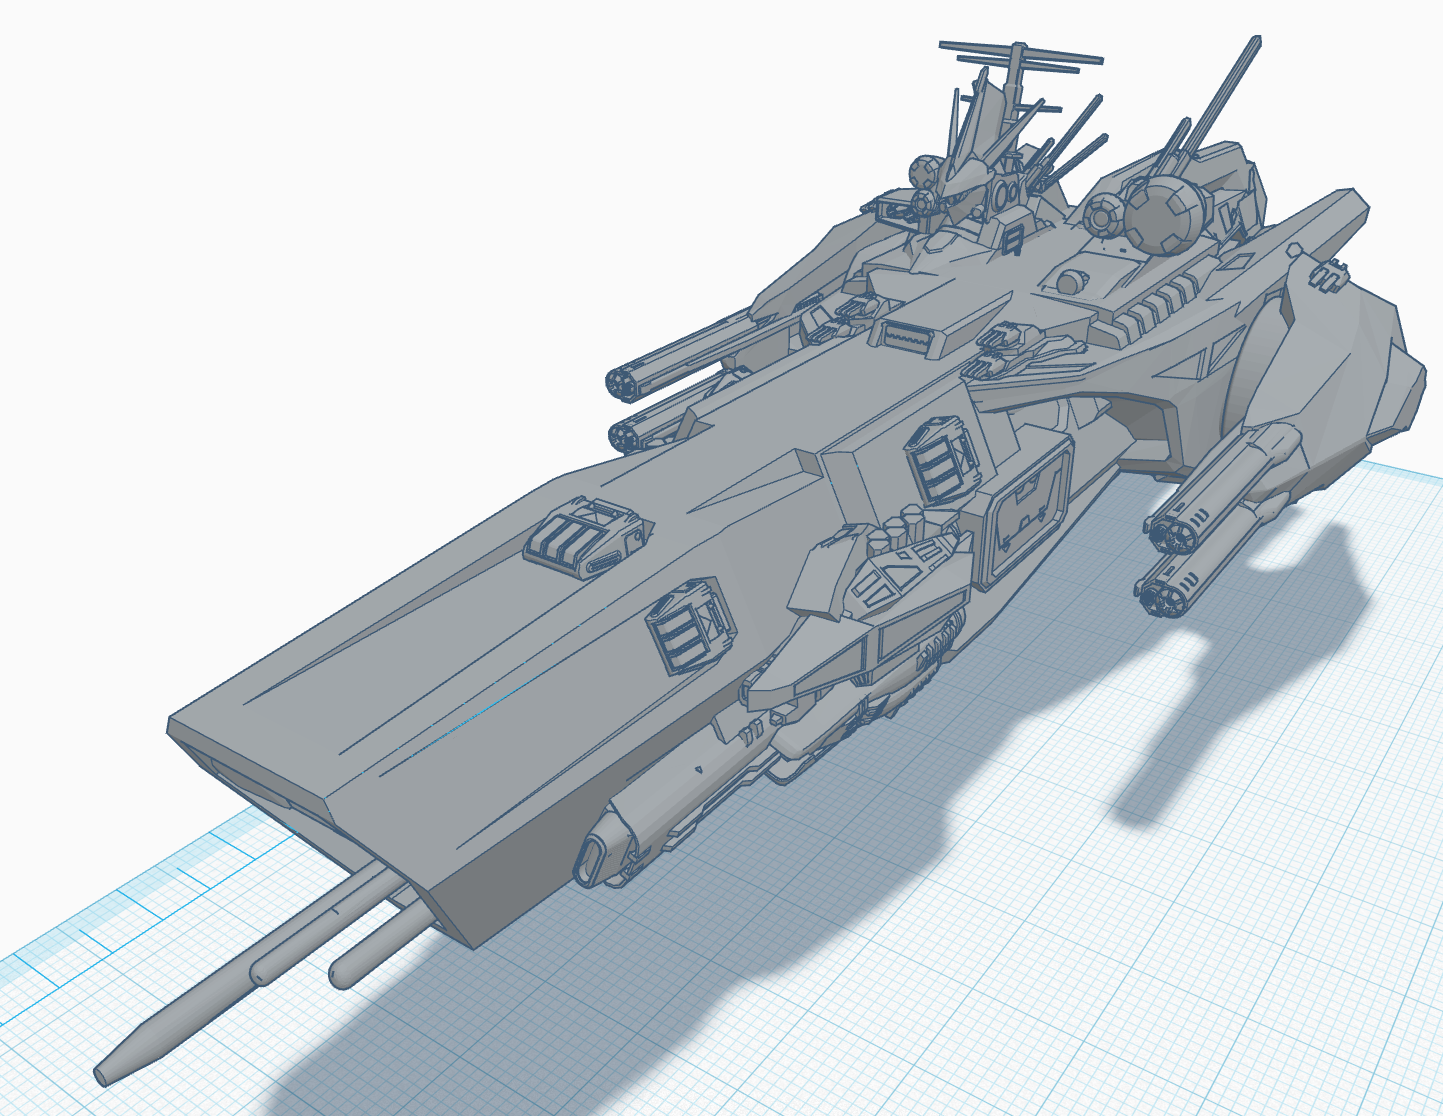
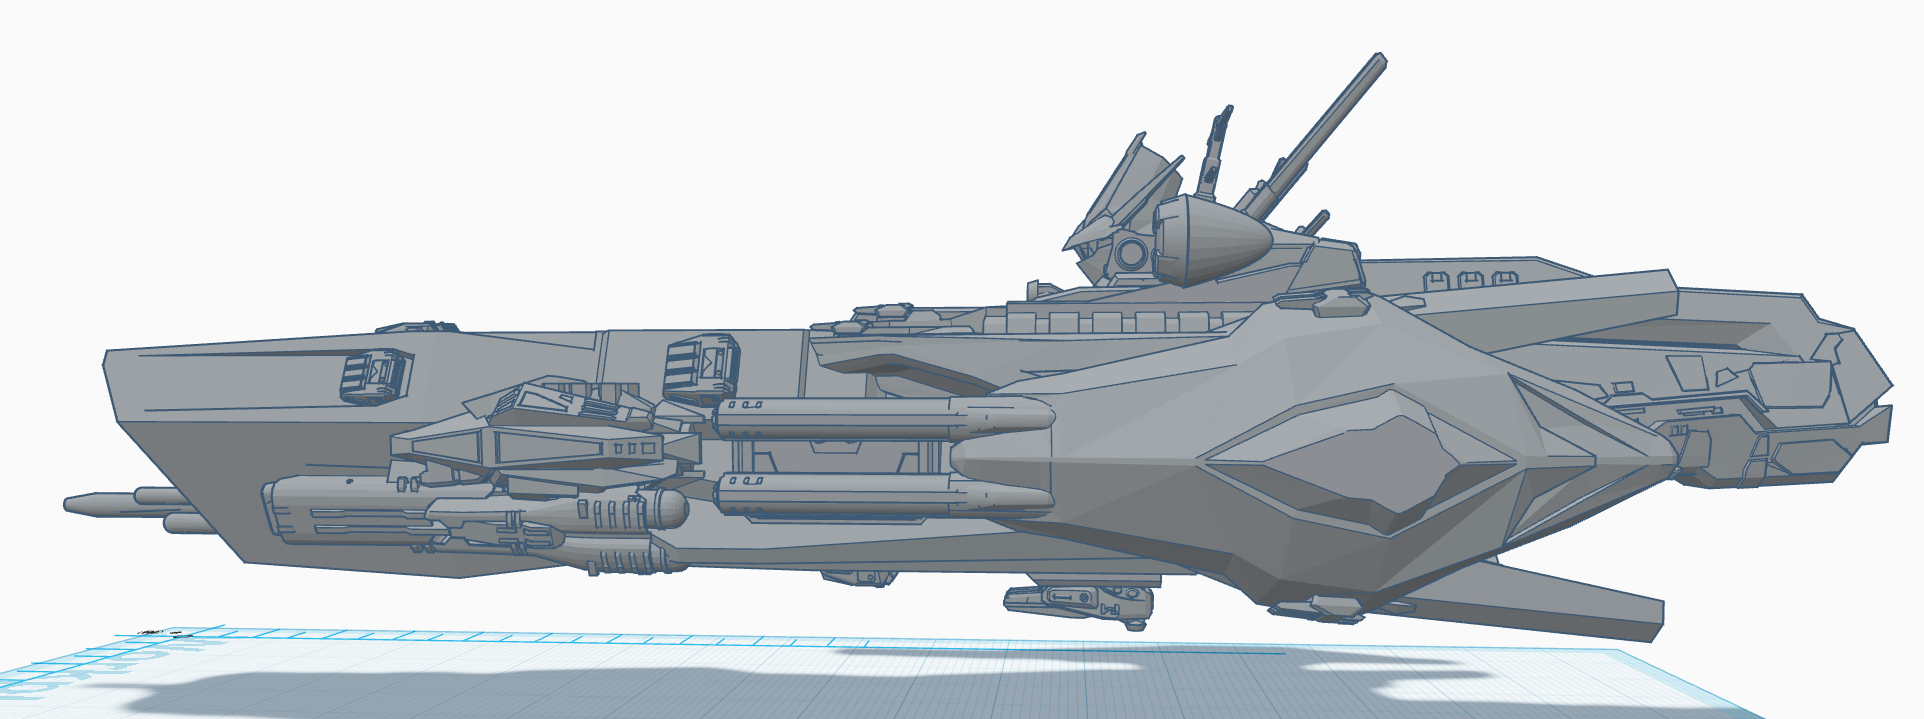
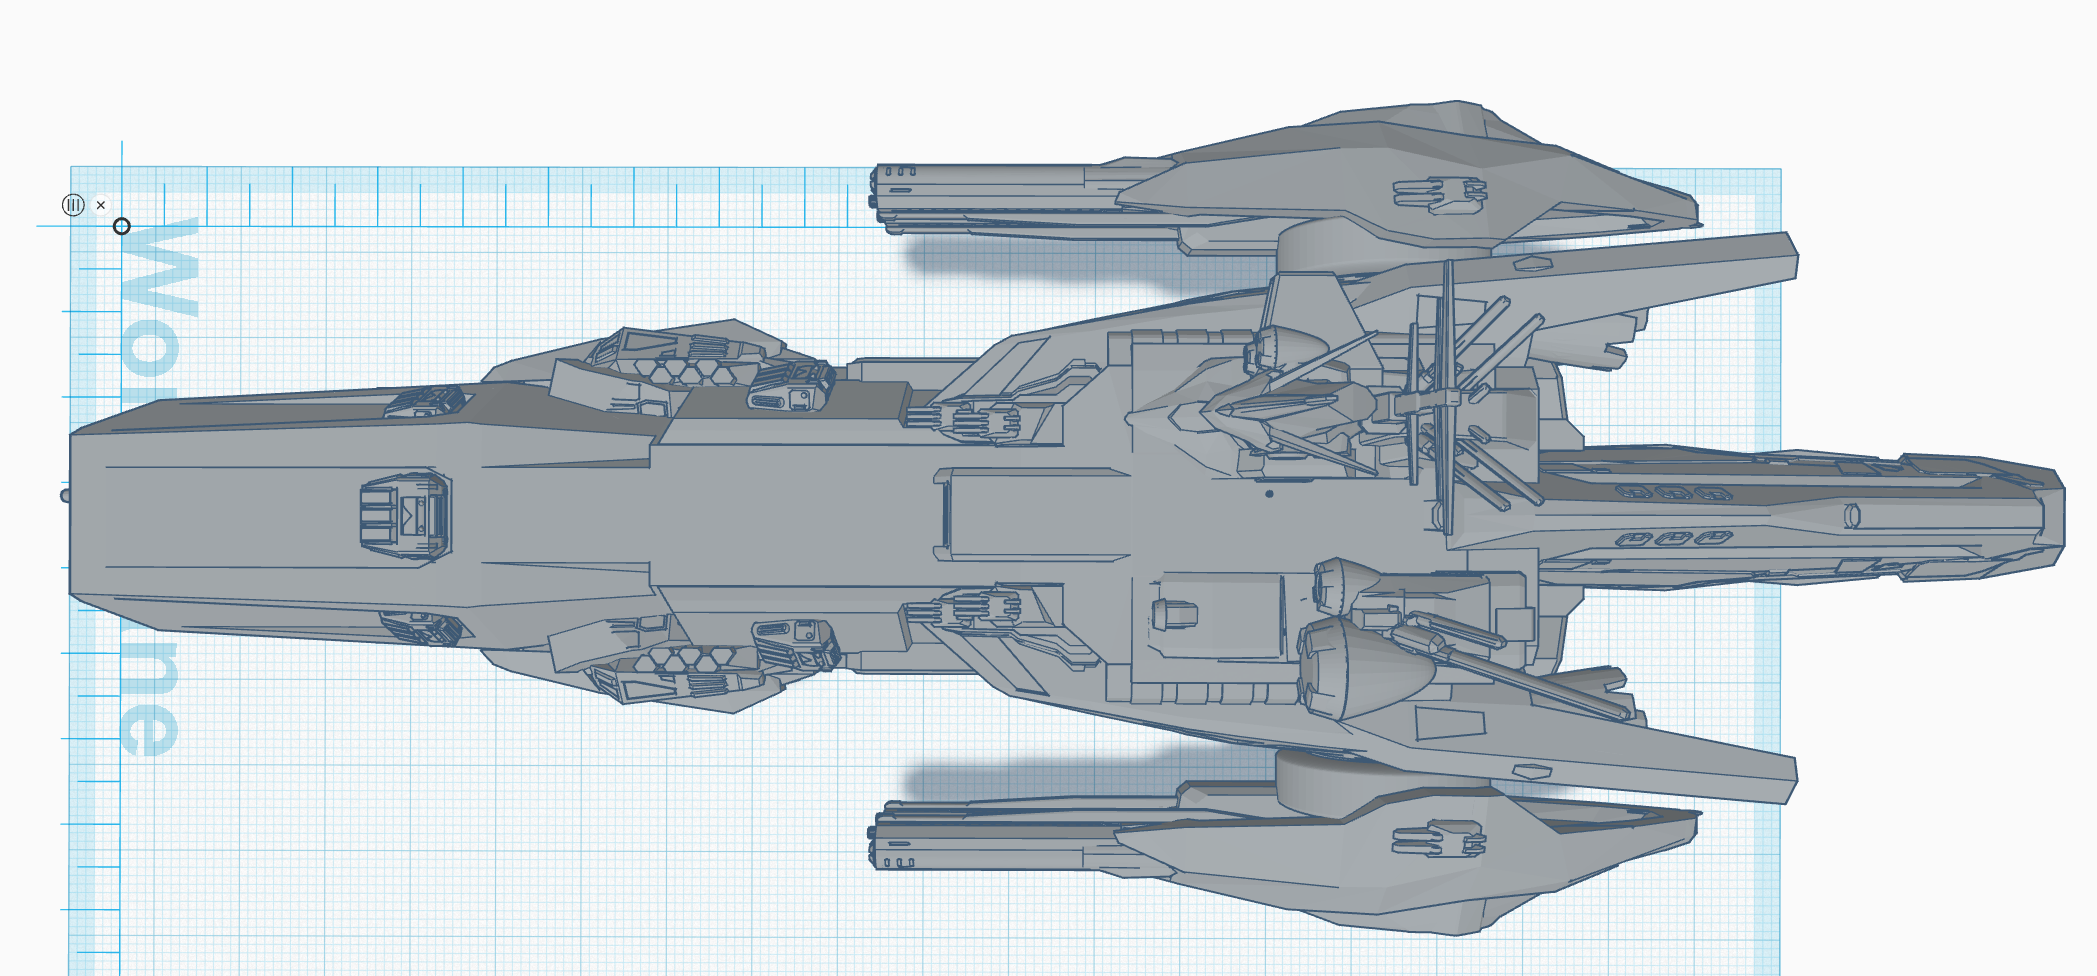
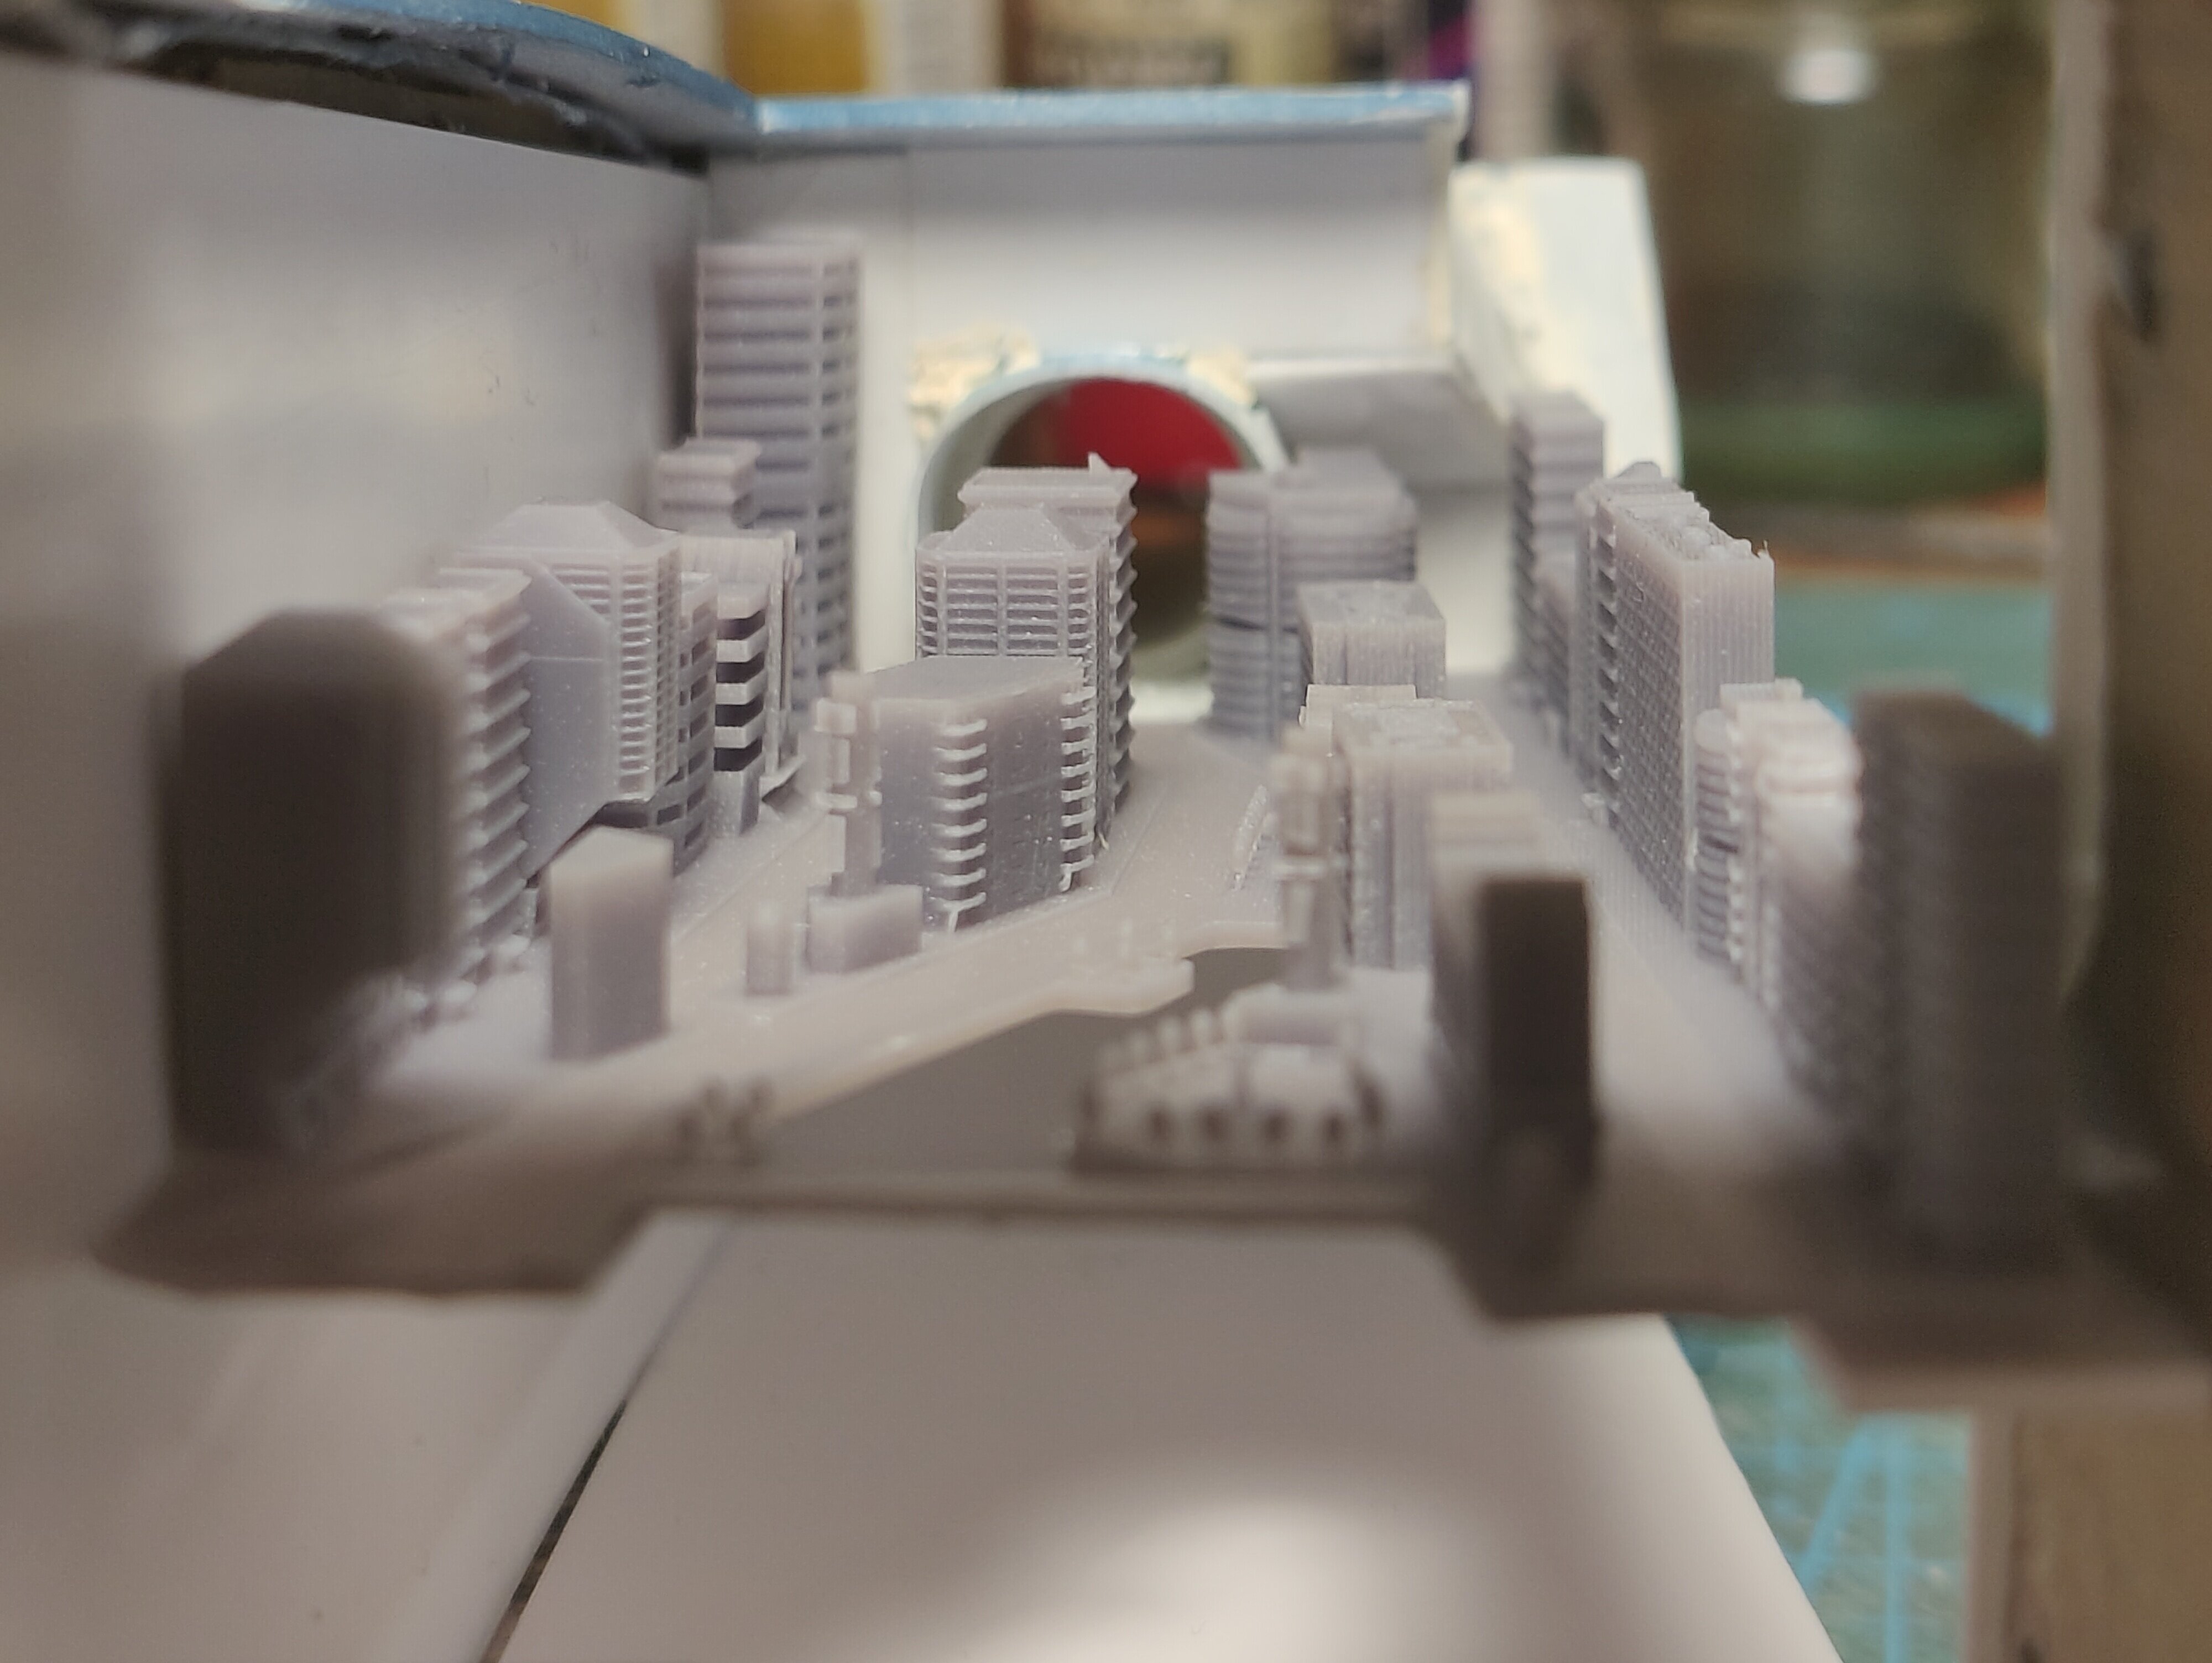
doing some progress in designing sdf-1 bridge for 3D print
.png.d2c64fd5361dded87bfea6b96c2e923f.png)
.png.9cd284de038136635e9f34335b447cfd.png)
.png.6f66e51ee77a39a2f7881516c252104c.png)
.png.527903dc2358c88bba026ad51f4cb339.png)
-
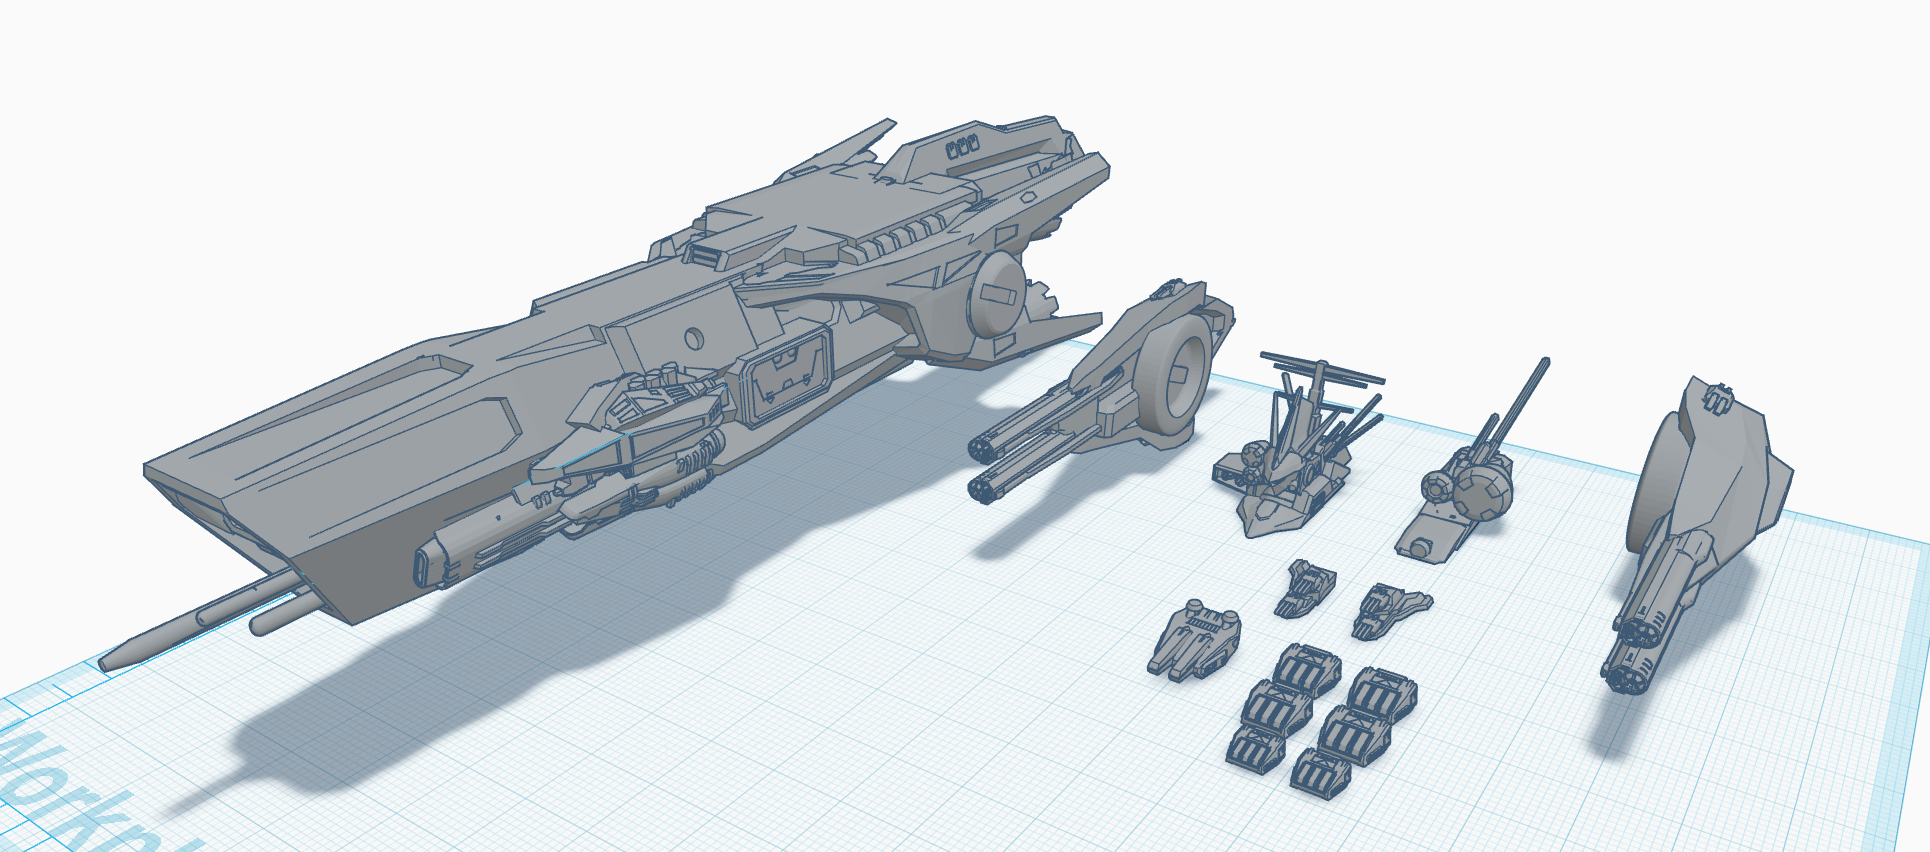
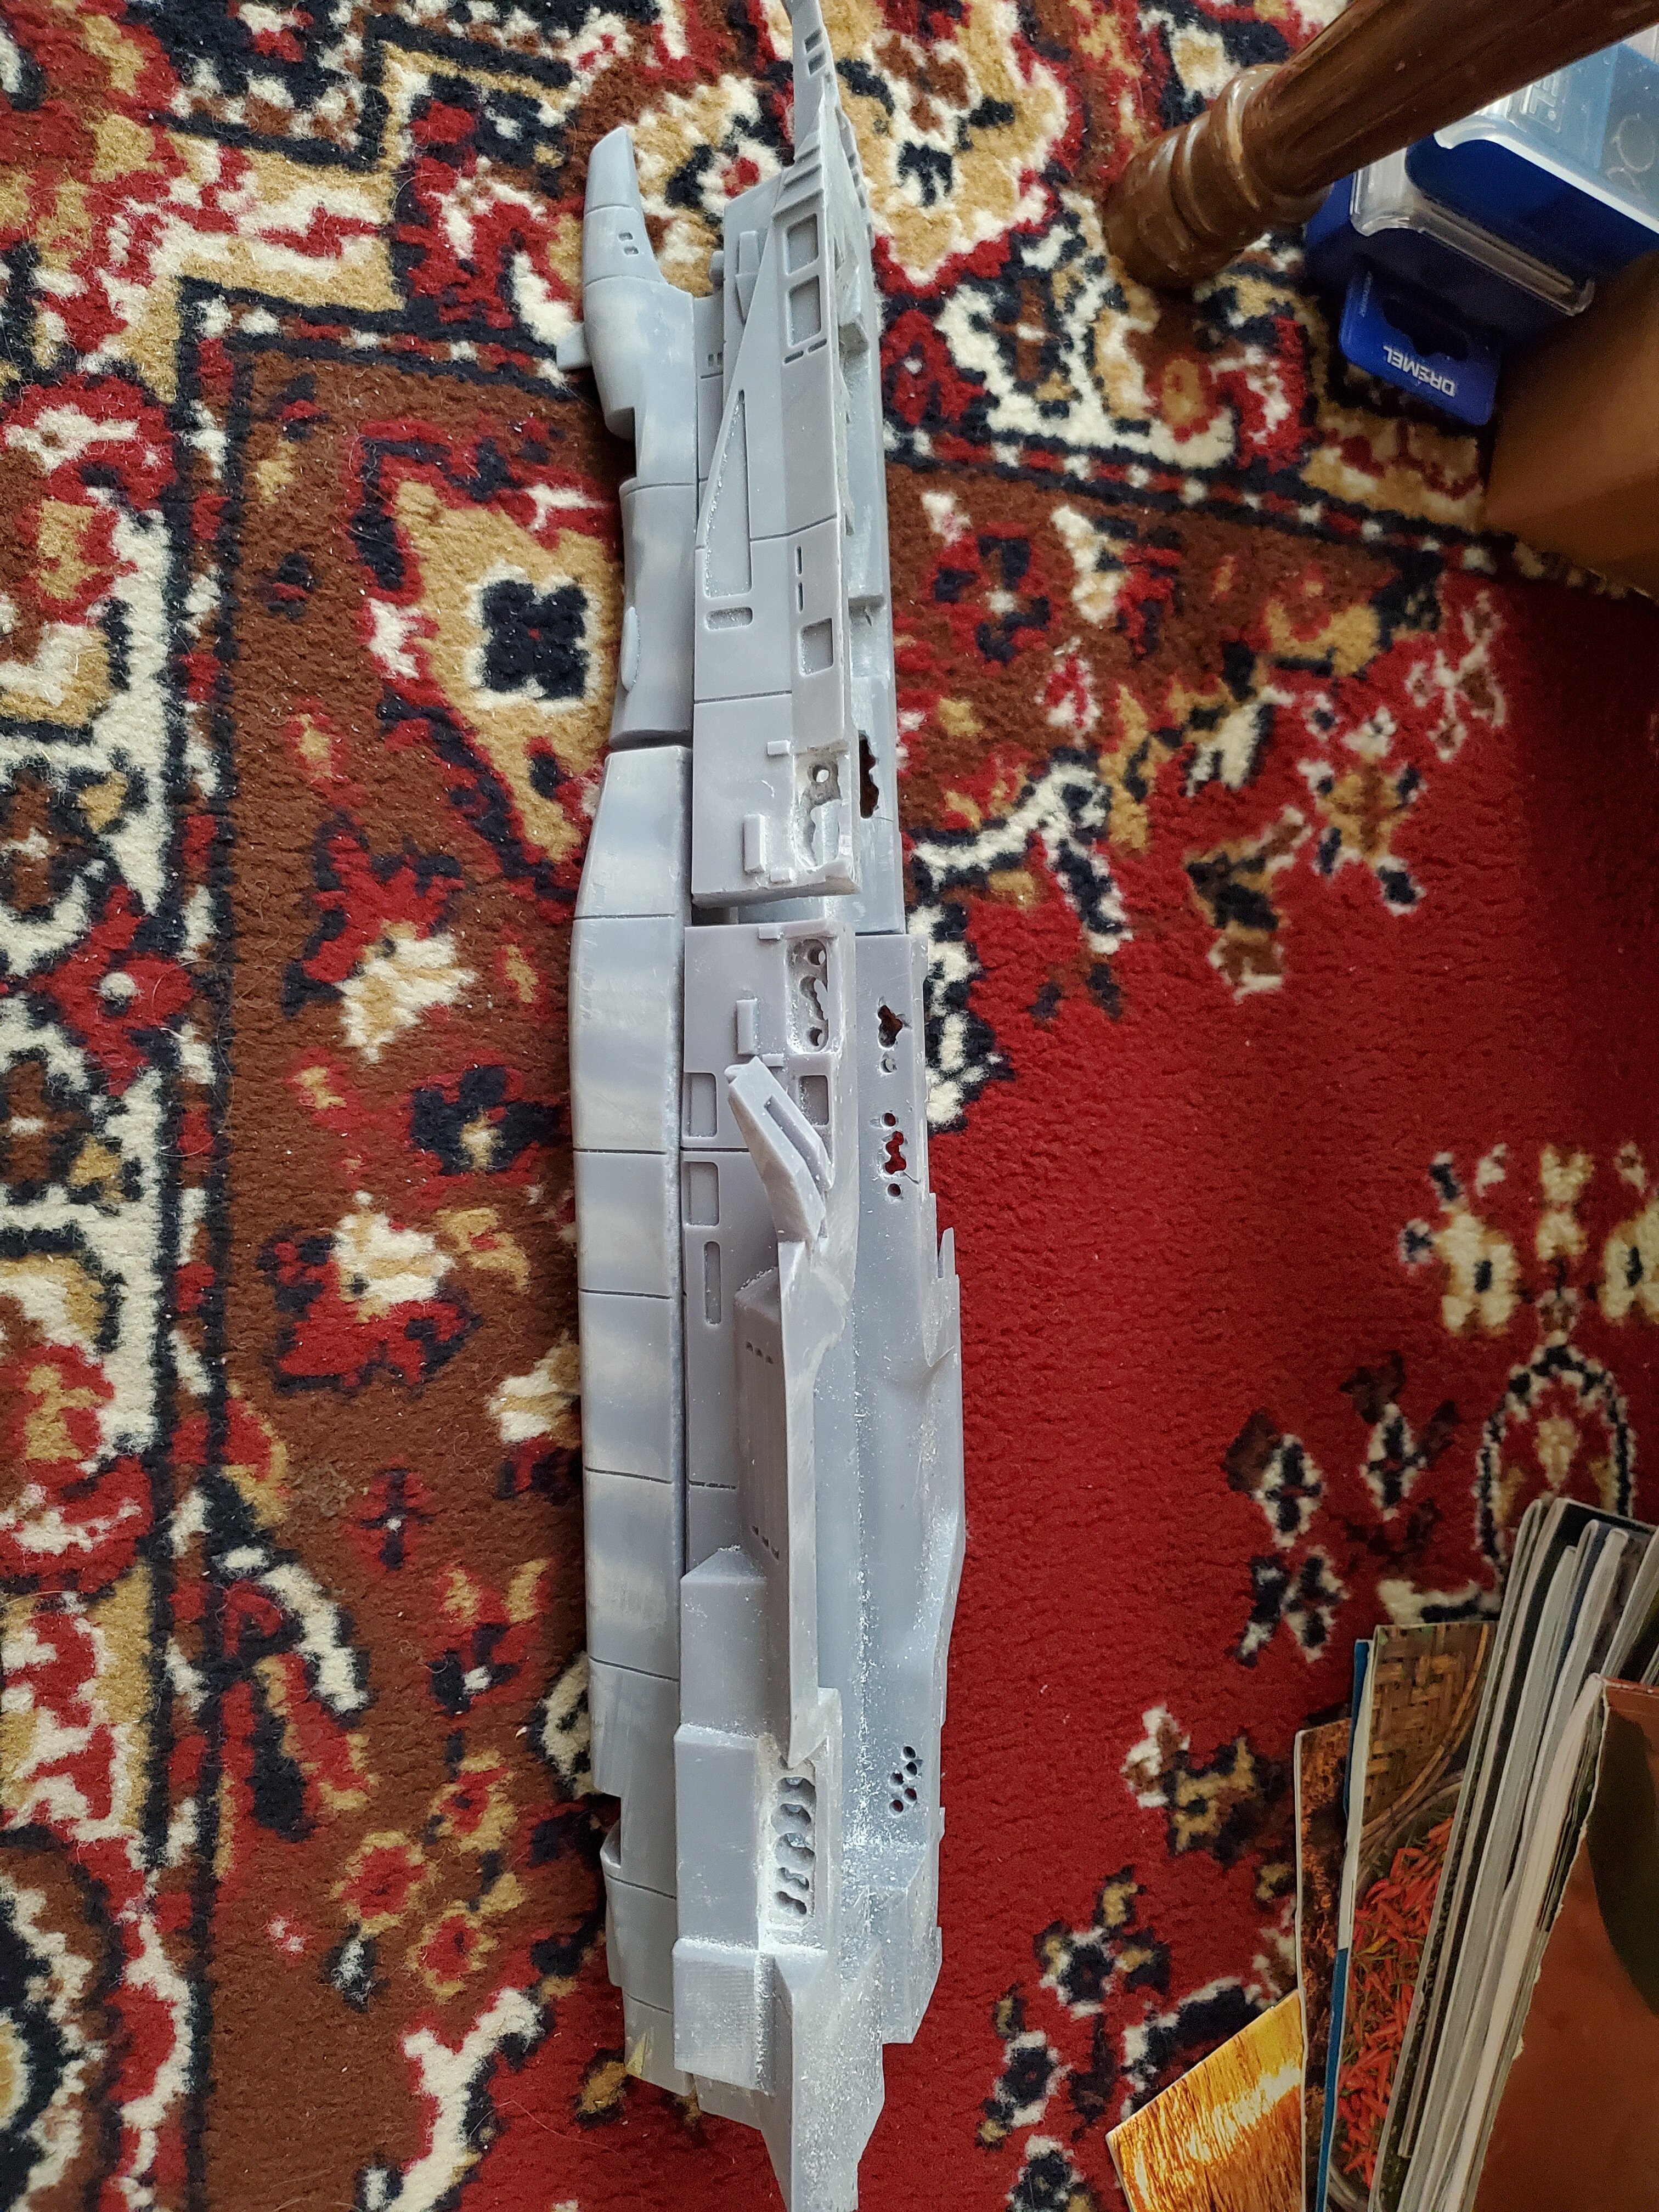
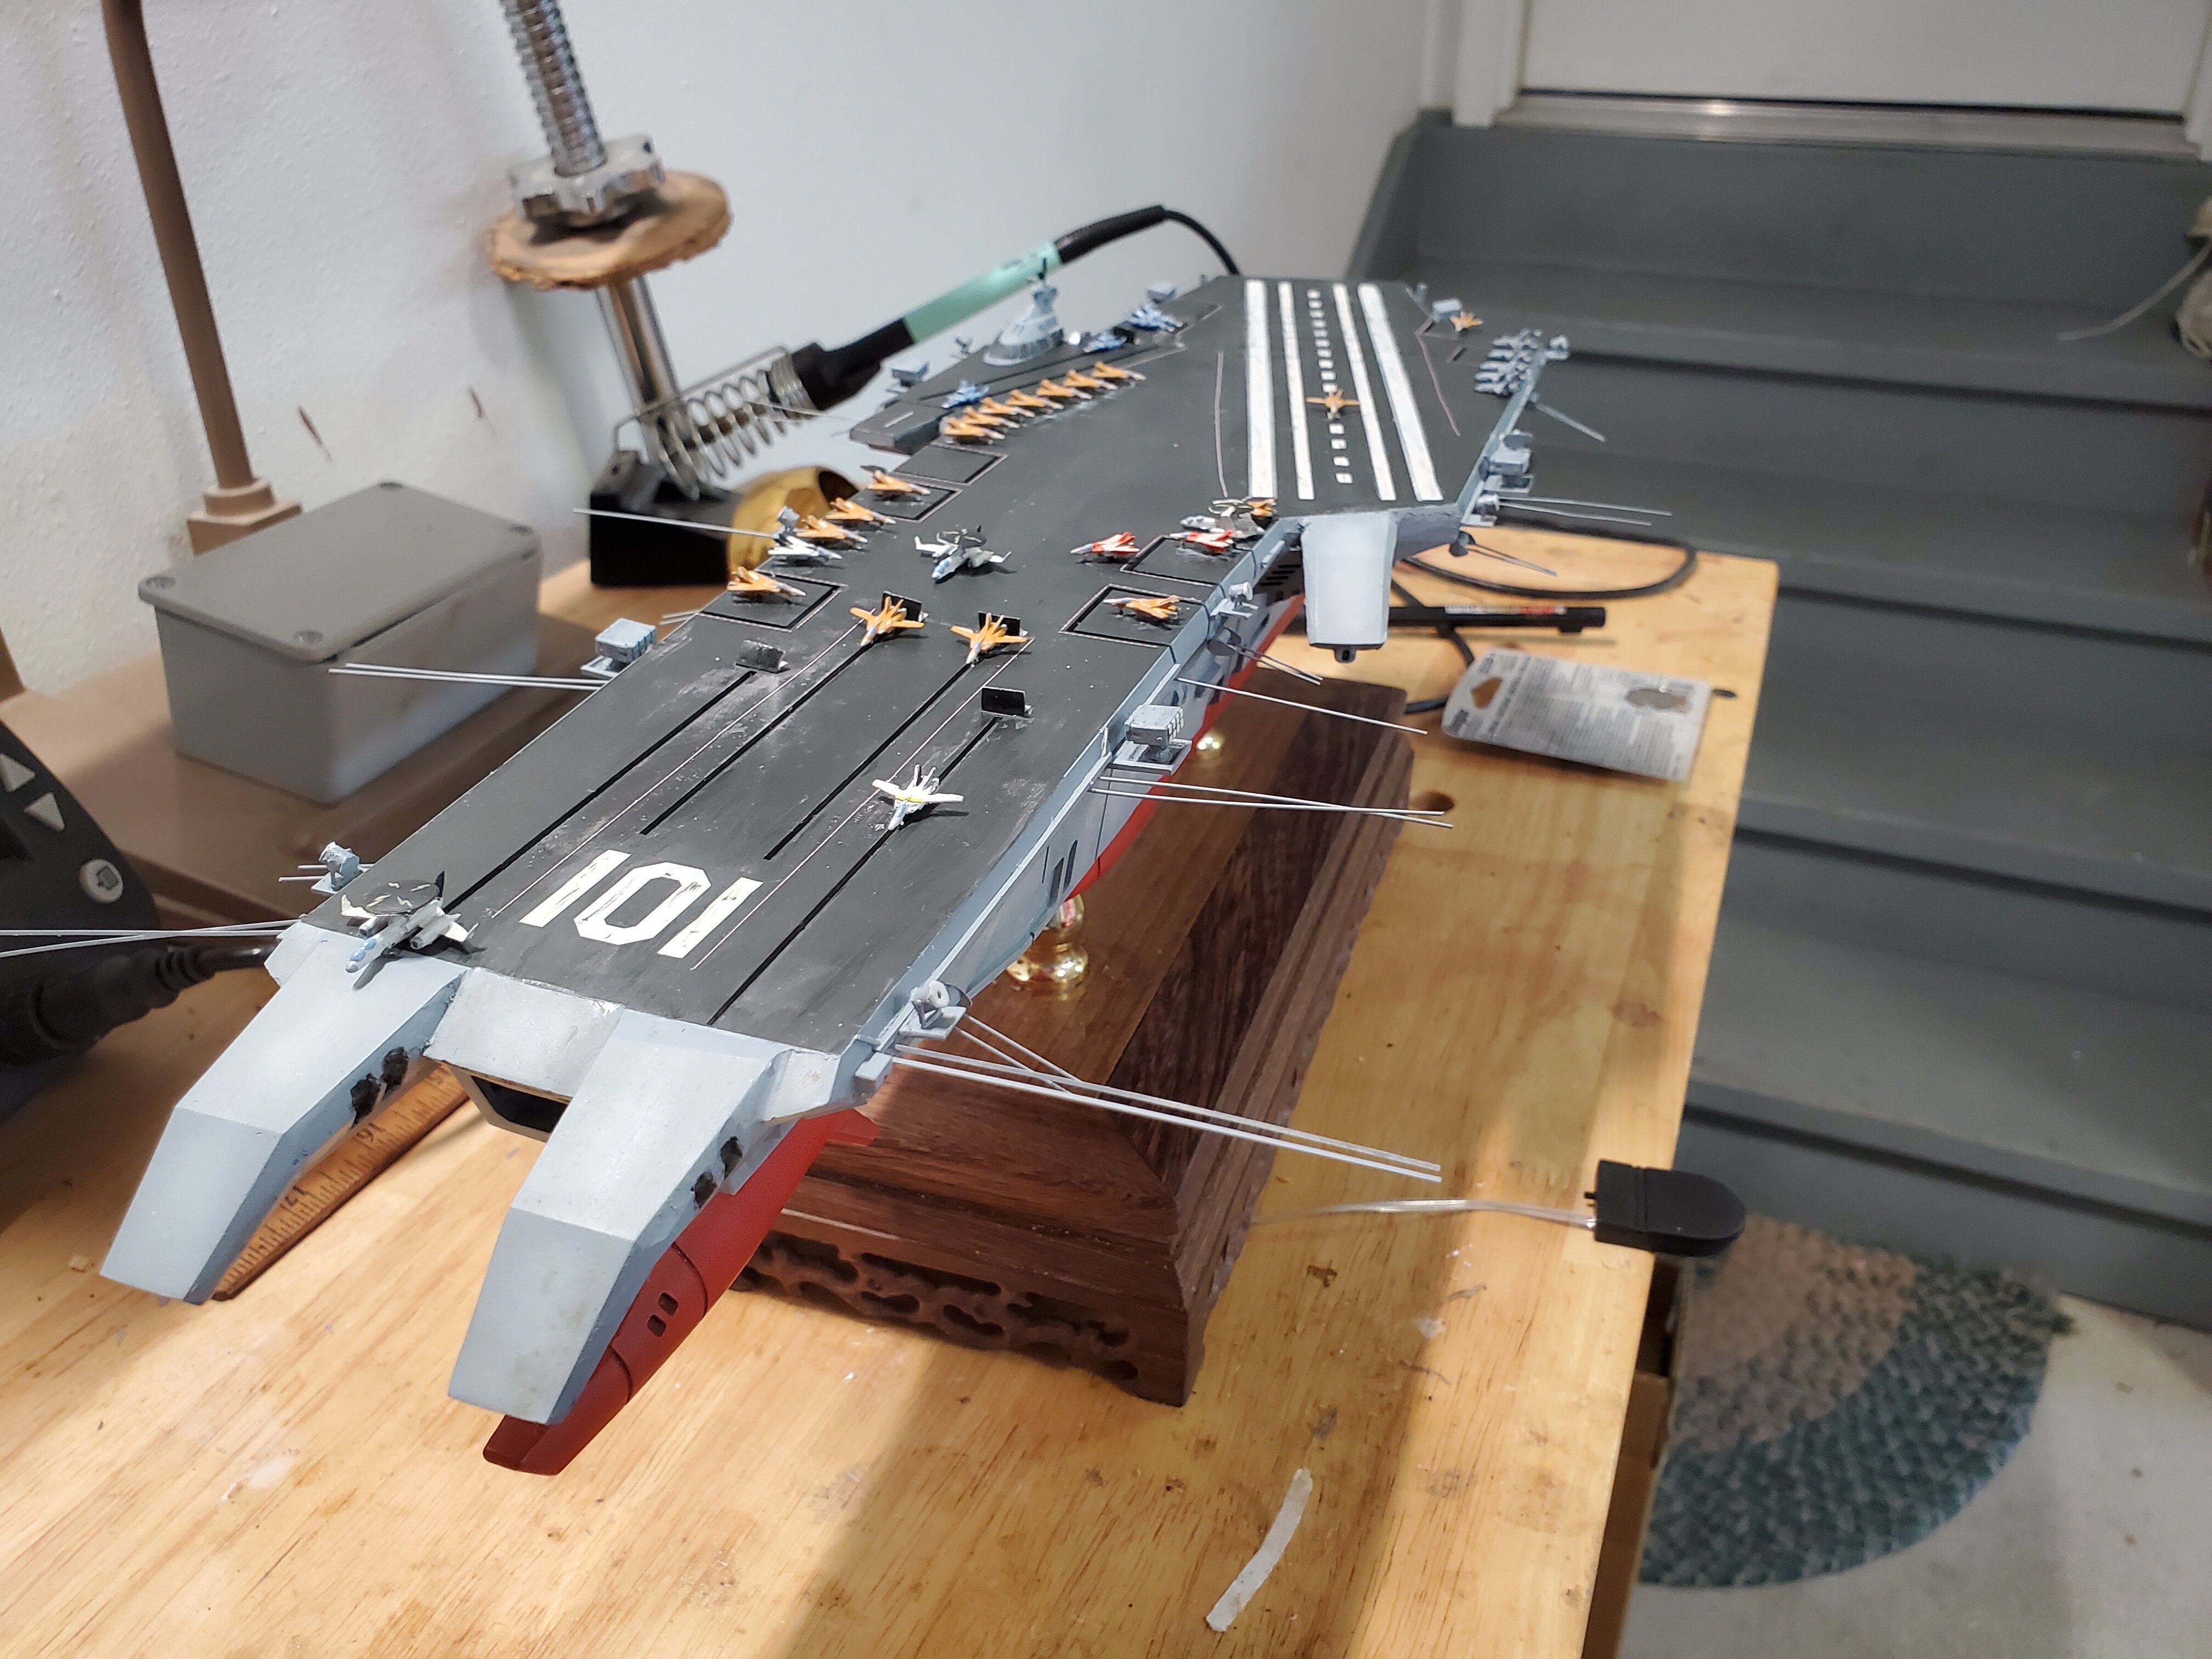
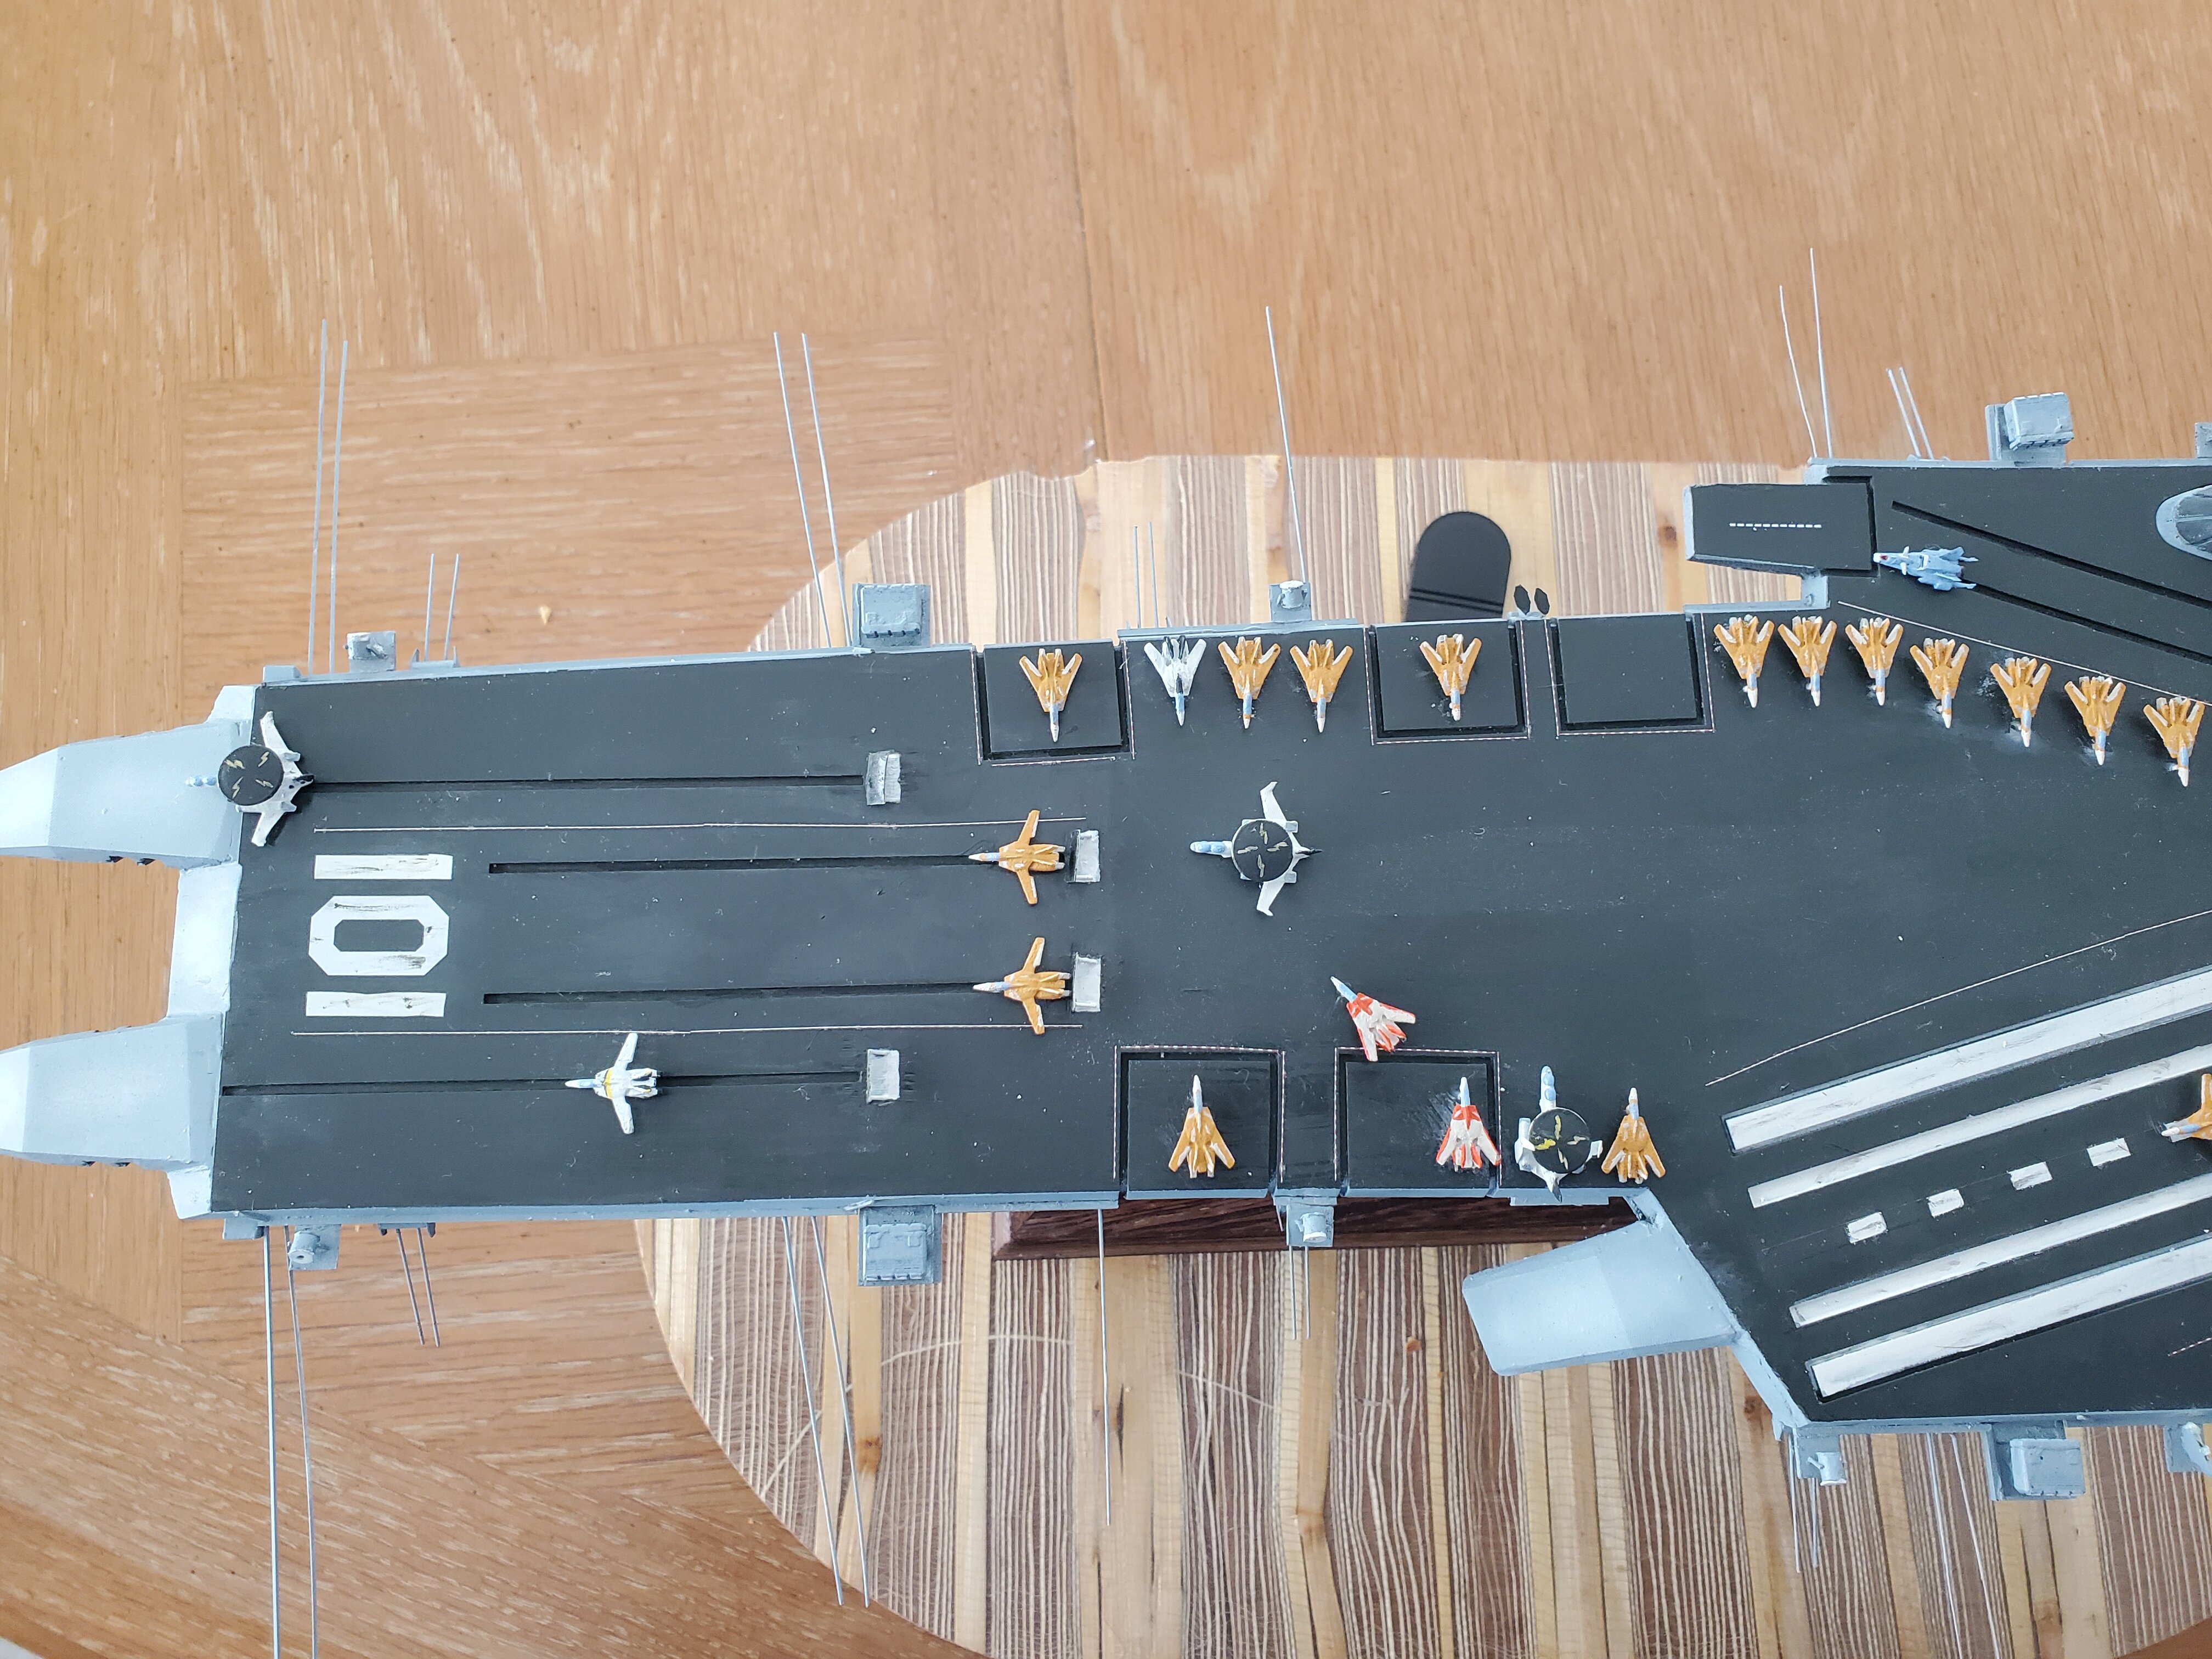
i have updated the ship, i found some weakspots
and have fixed that
https://www.thingiverse.com/thing:6893163/files
-
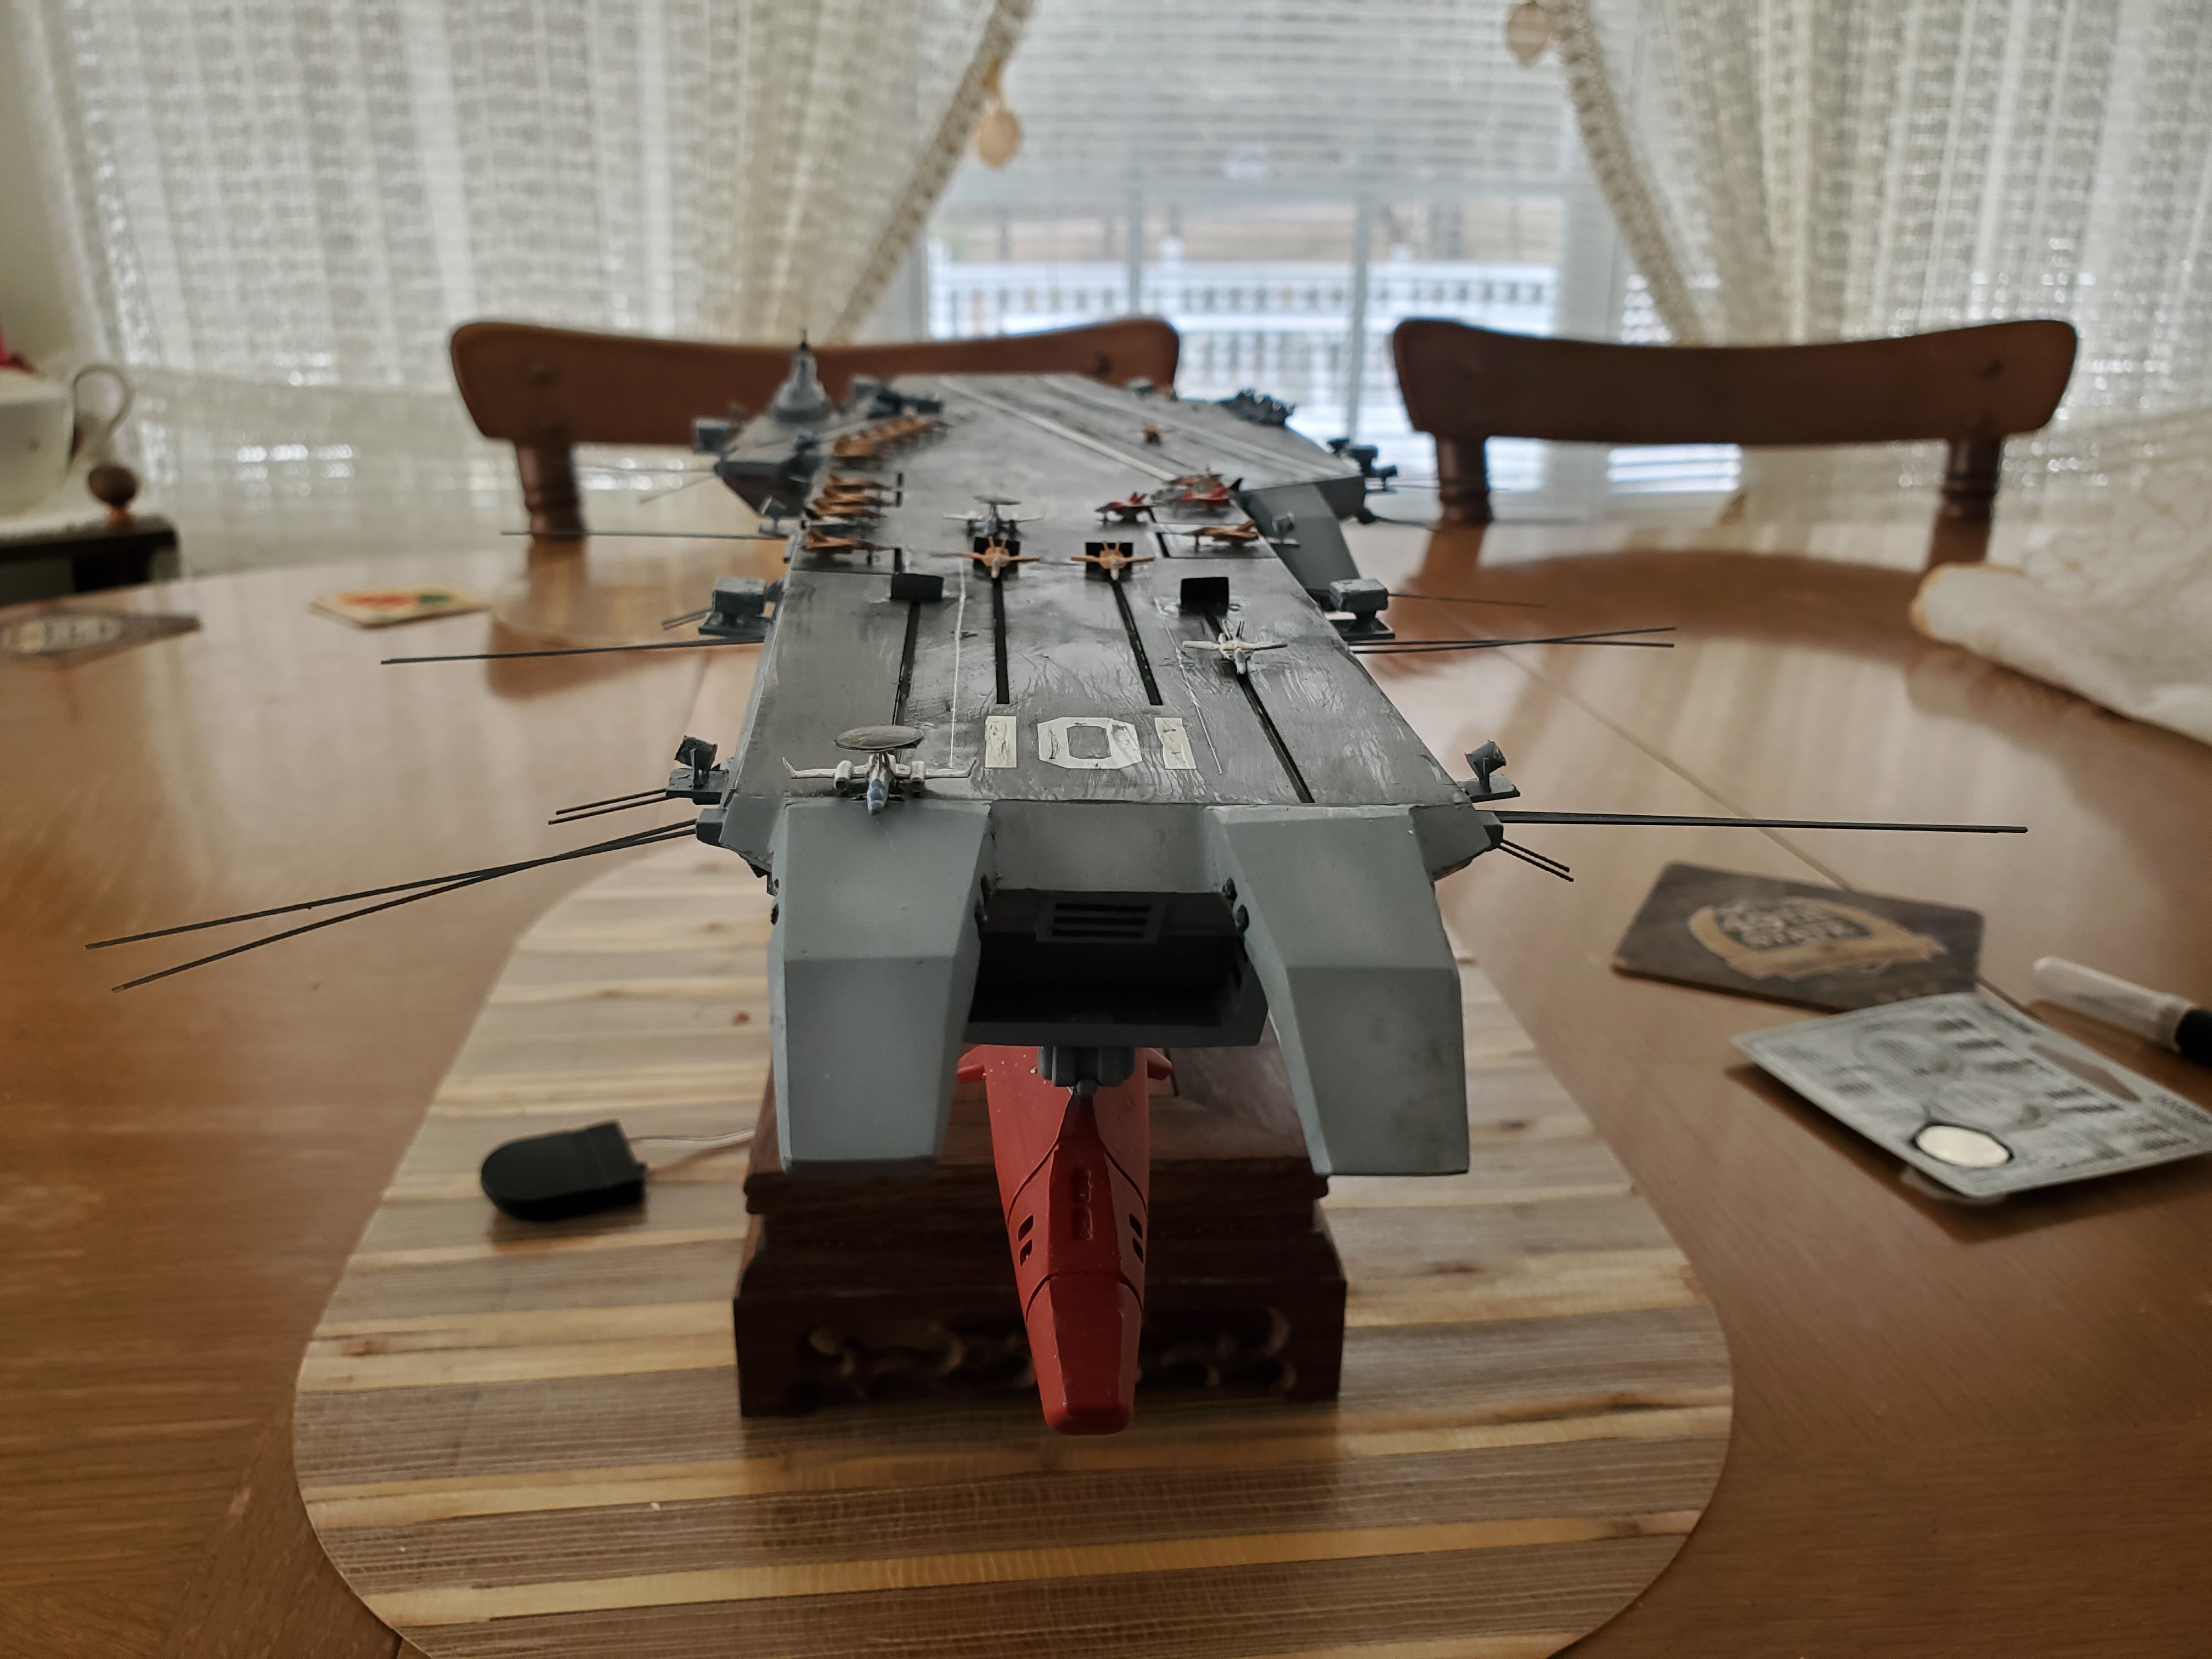
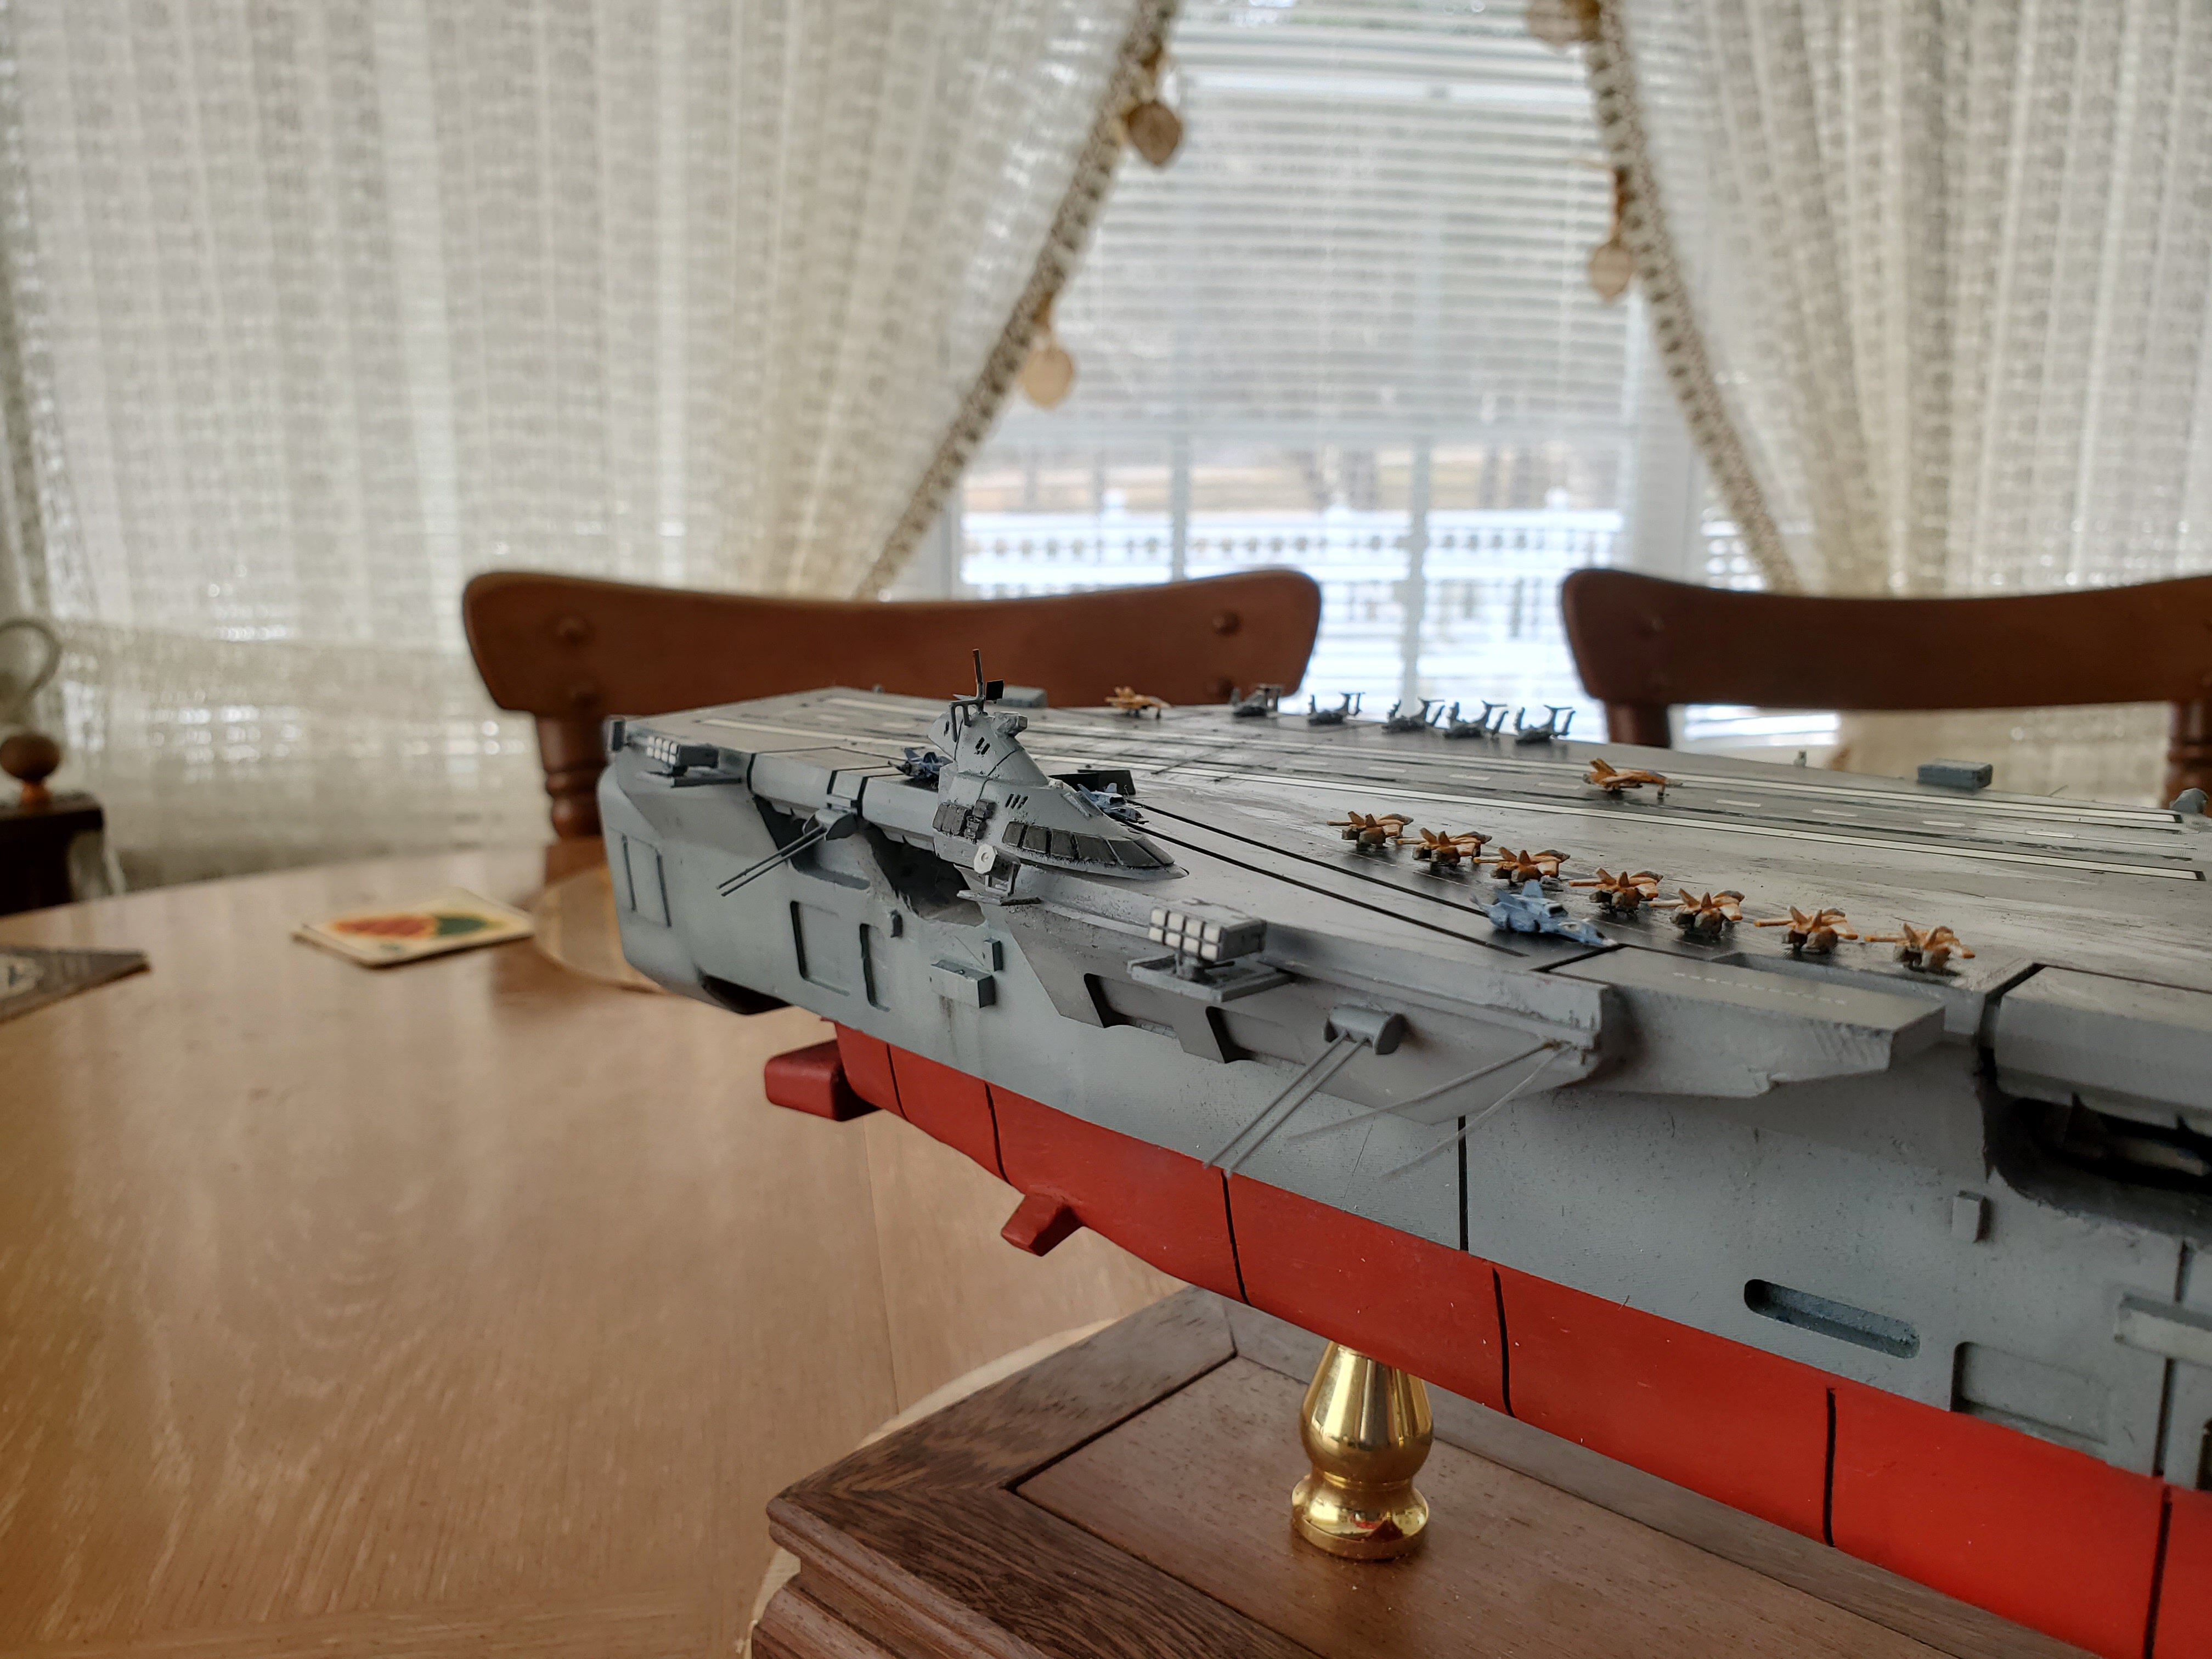
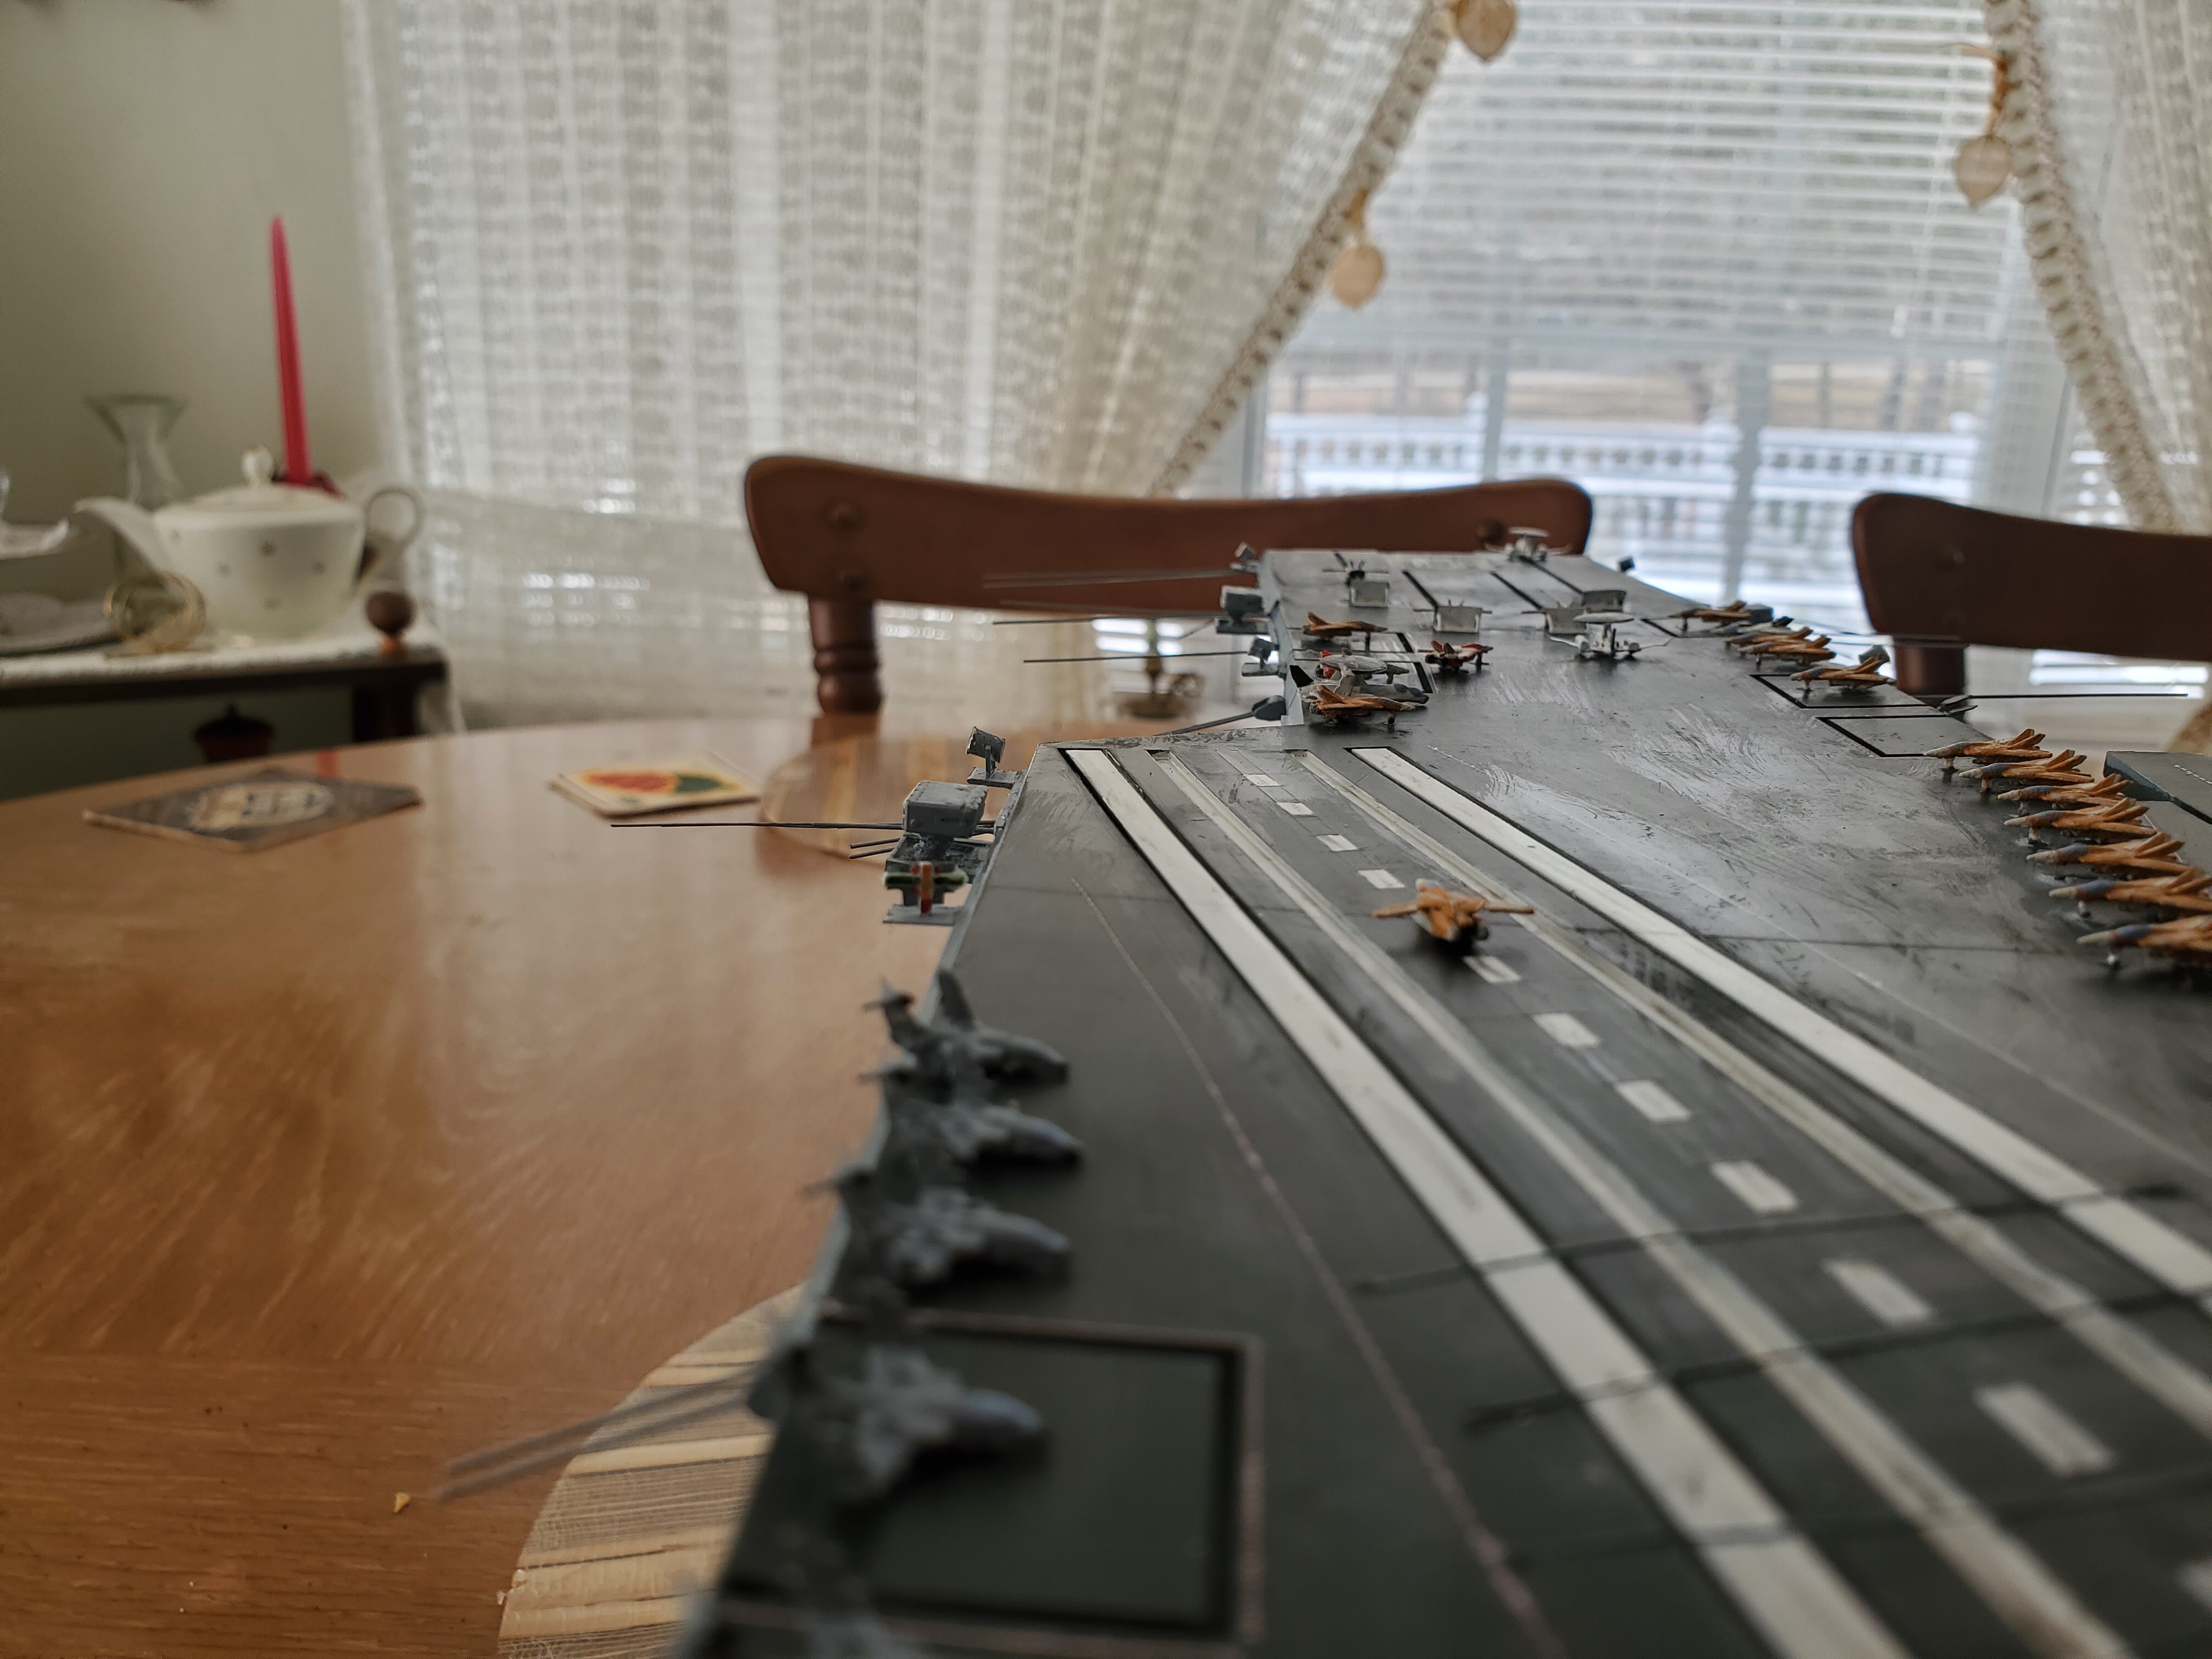
hi everyone been some time since i posted something... been busy with life and stuff..
here is a kitbash i made with some scratchbuild parts
if any of you want. heres a link to download the stl files
https://www.thingiverse.com/thing:6893163
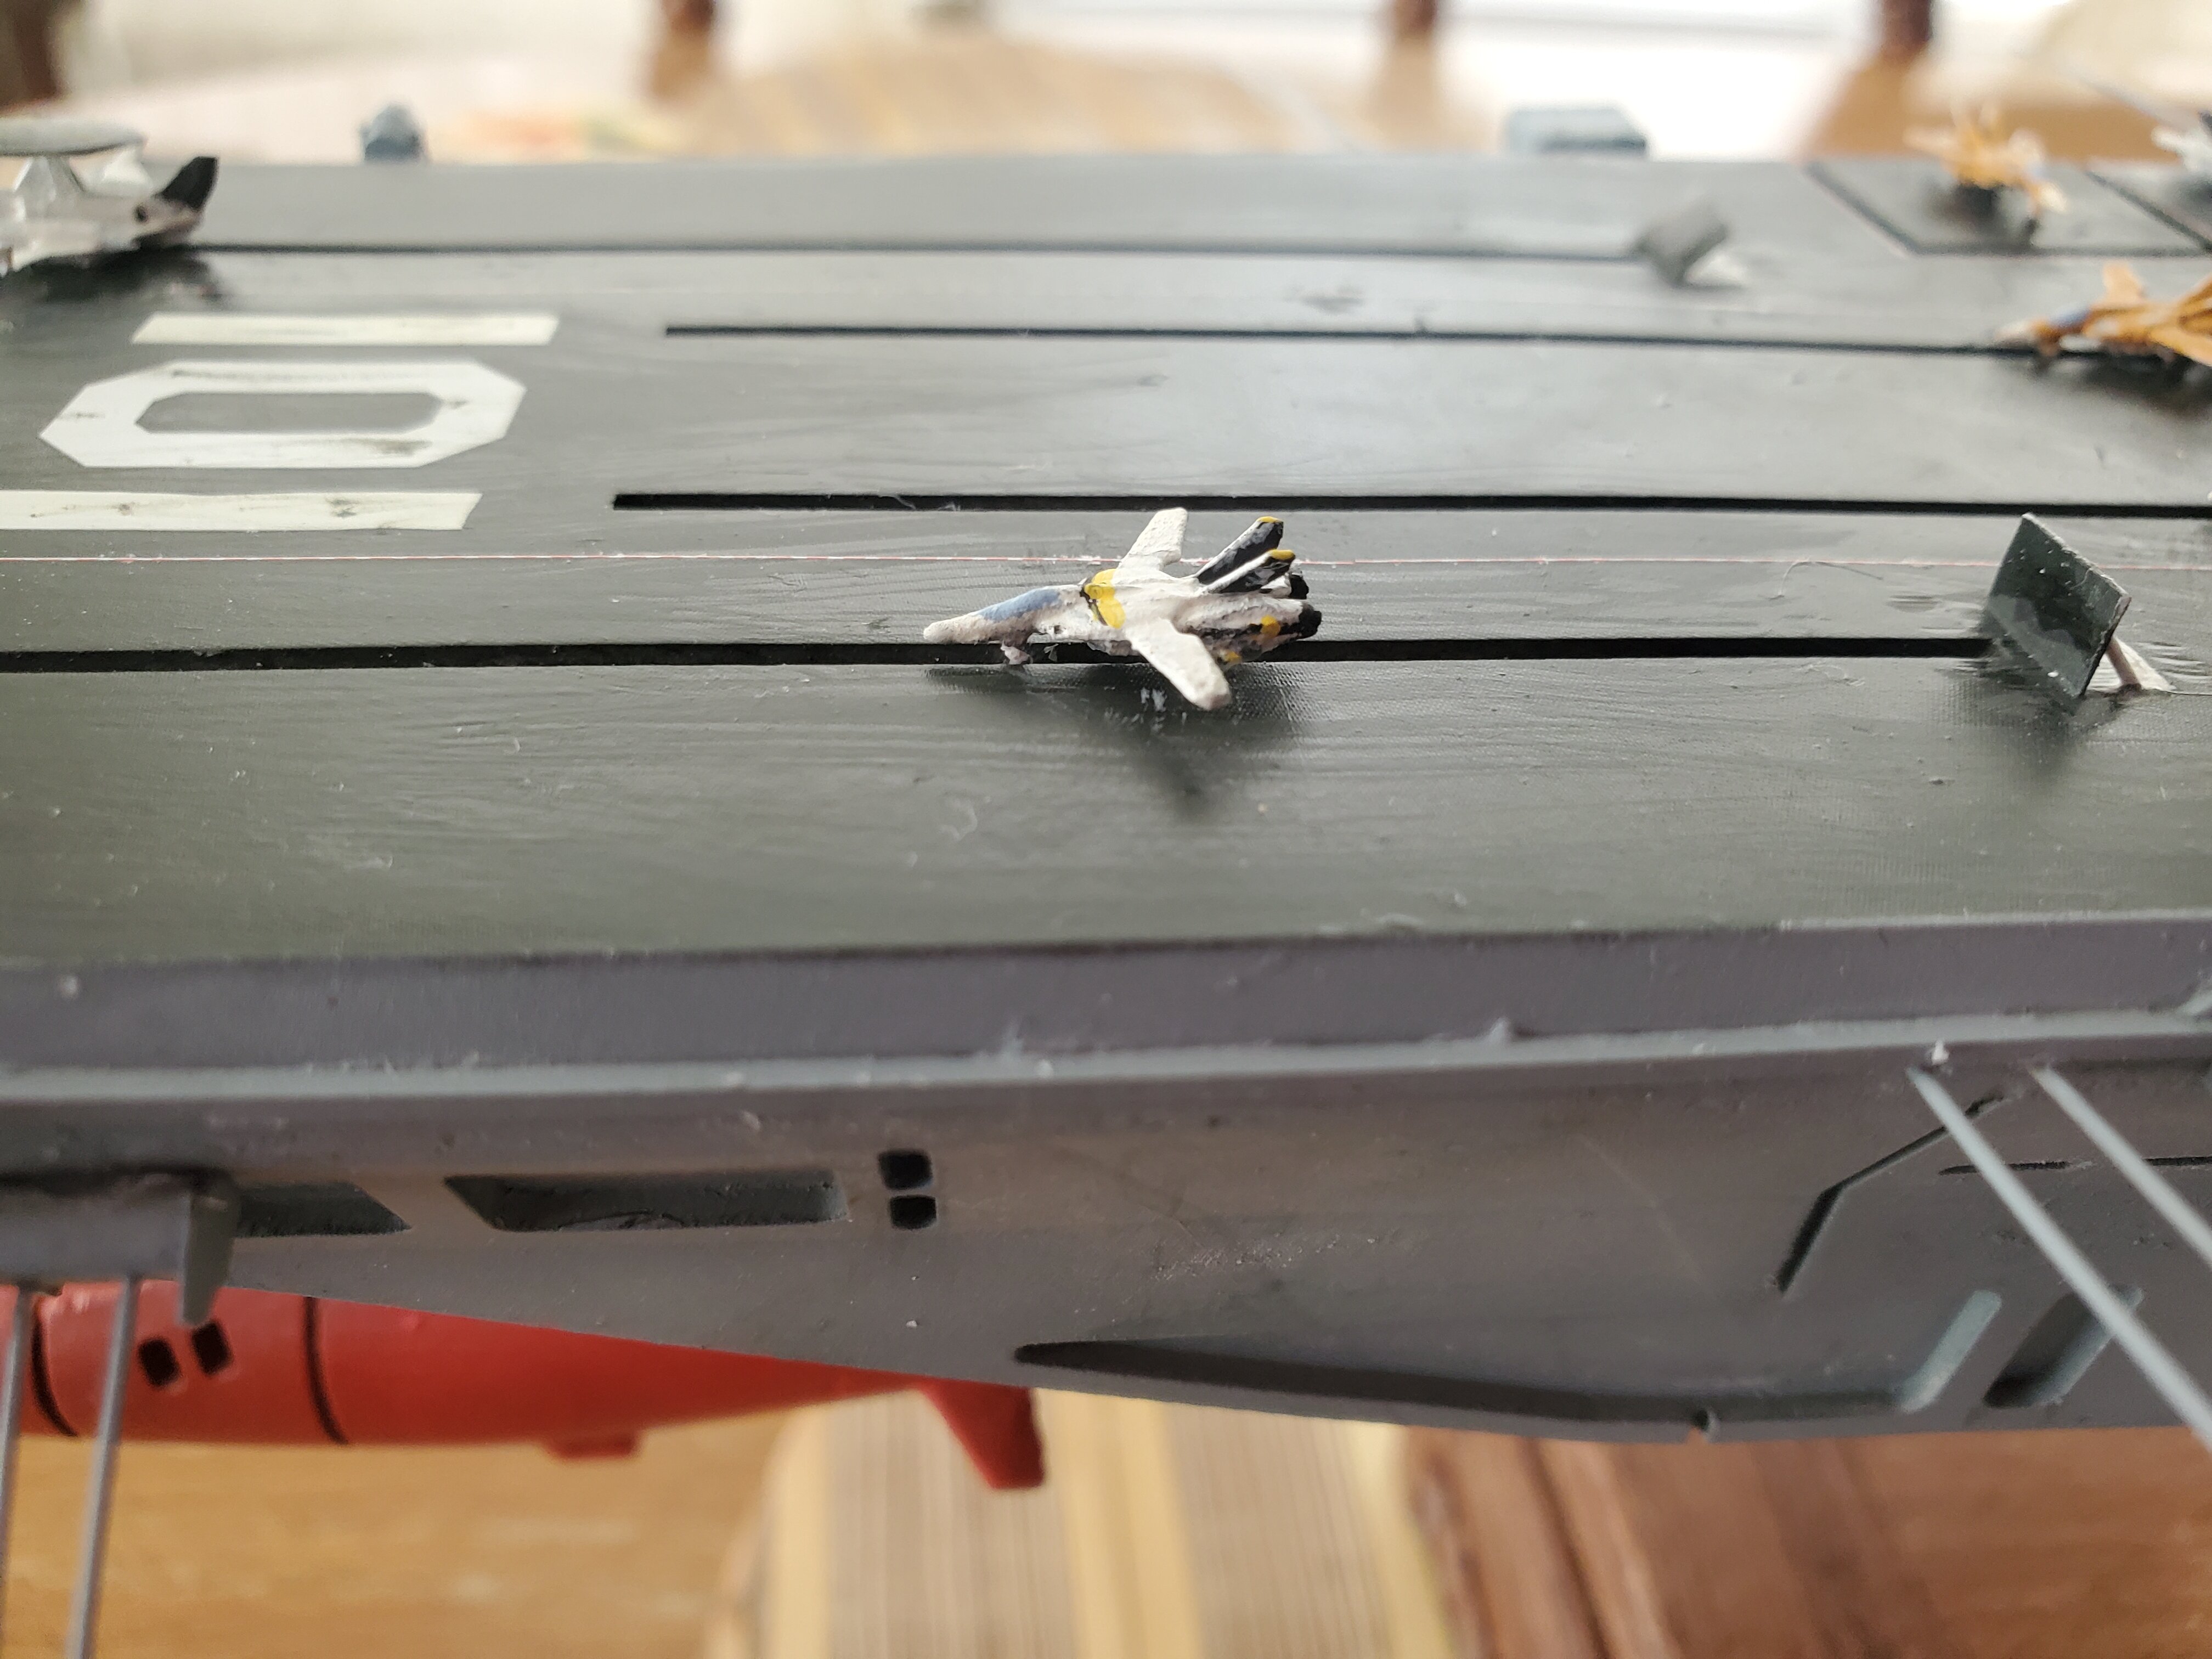
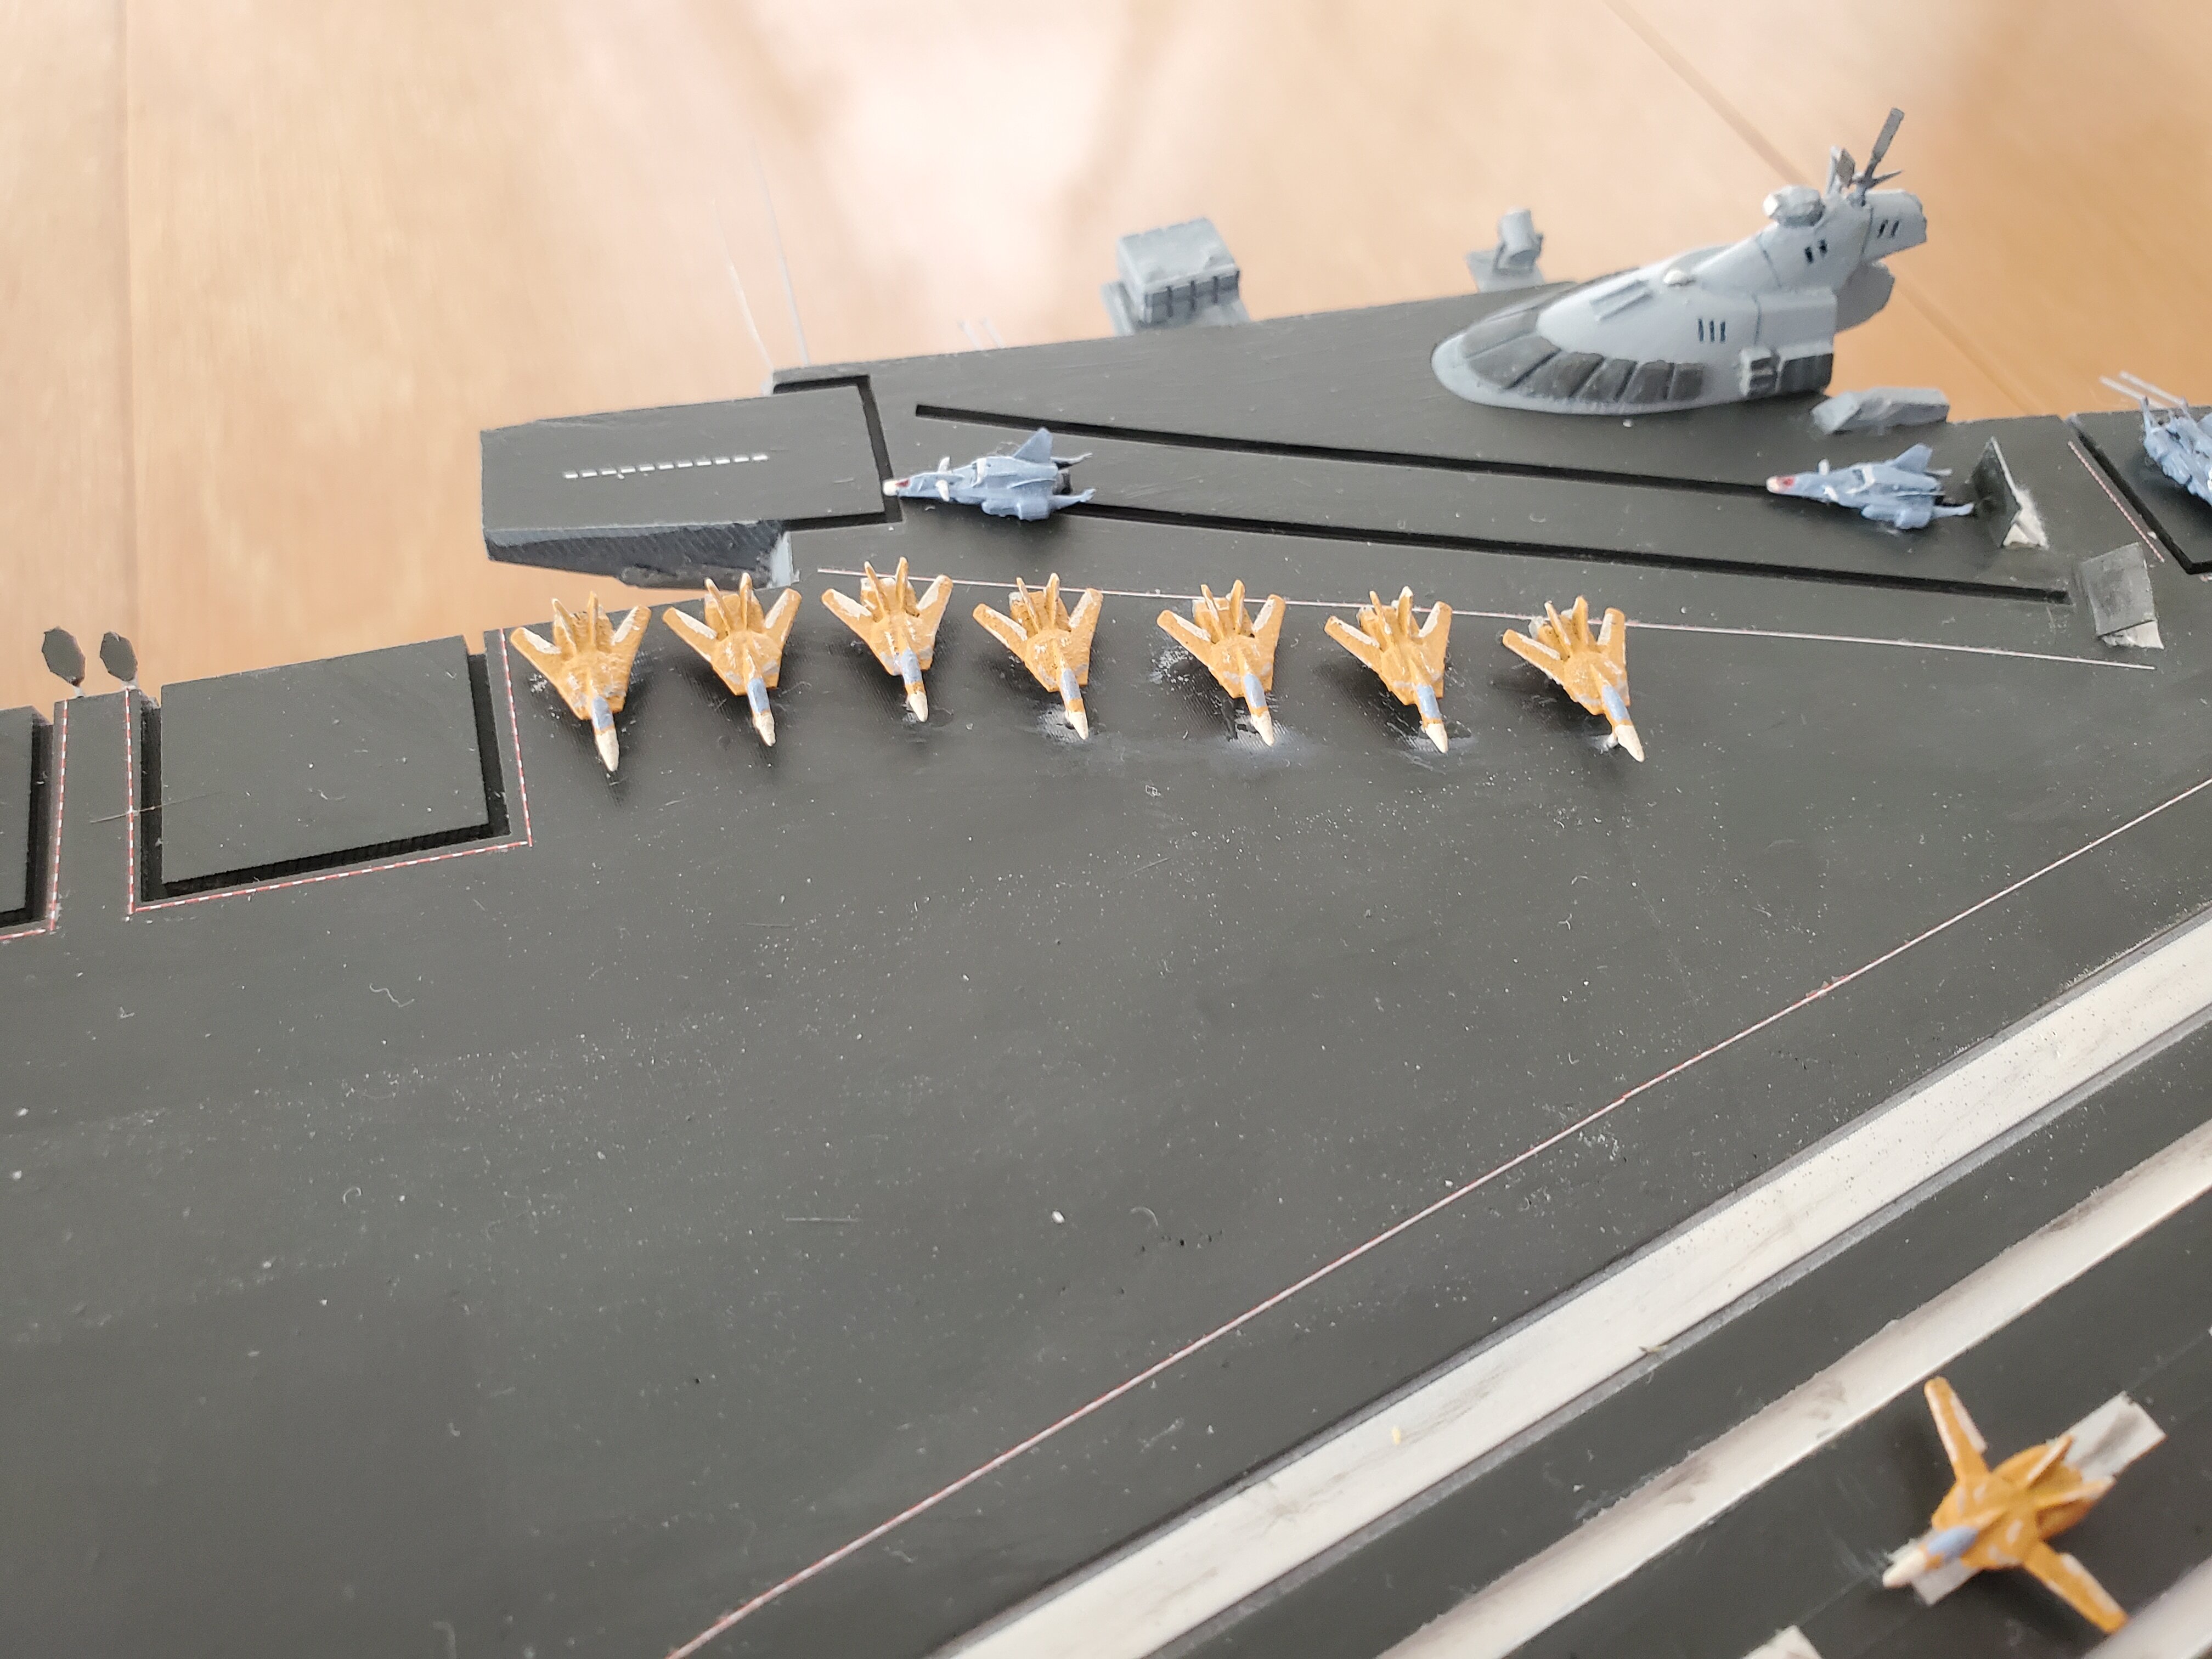
and here are some pictures of the spaceship

have a good day...
-
On 1/9/2024 at 12:05 AM, neptunesurvey1 said:
Thanks MT for posting some of the pictures. Here are some more. Enjoy.


this looks amazing...
where is this sculpt from?
-
which type of lid fits best?
-
22 hours ago, Shawn said:
How hard would it be to make the little support vessels in a 3D printer?
Ever since the Model Package Art book came out, I've been hoping someone would take it up as a fun side project, and would look especially good on such a fantastic custom.
")
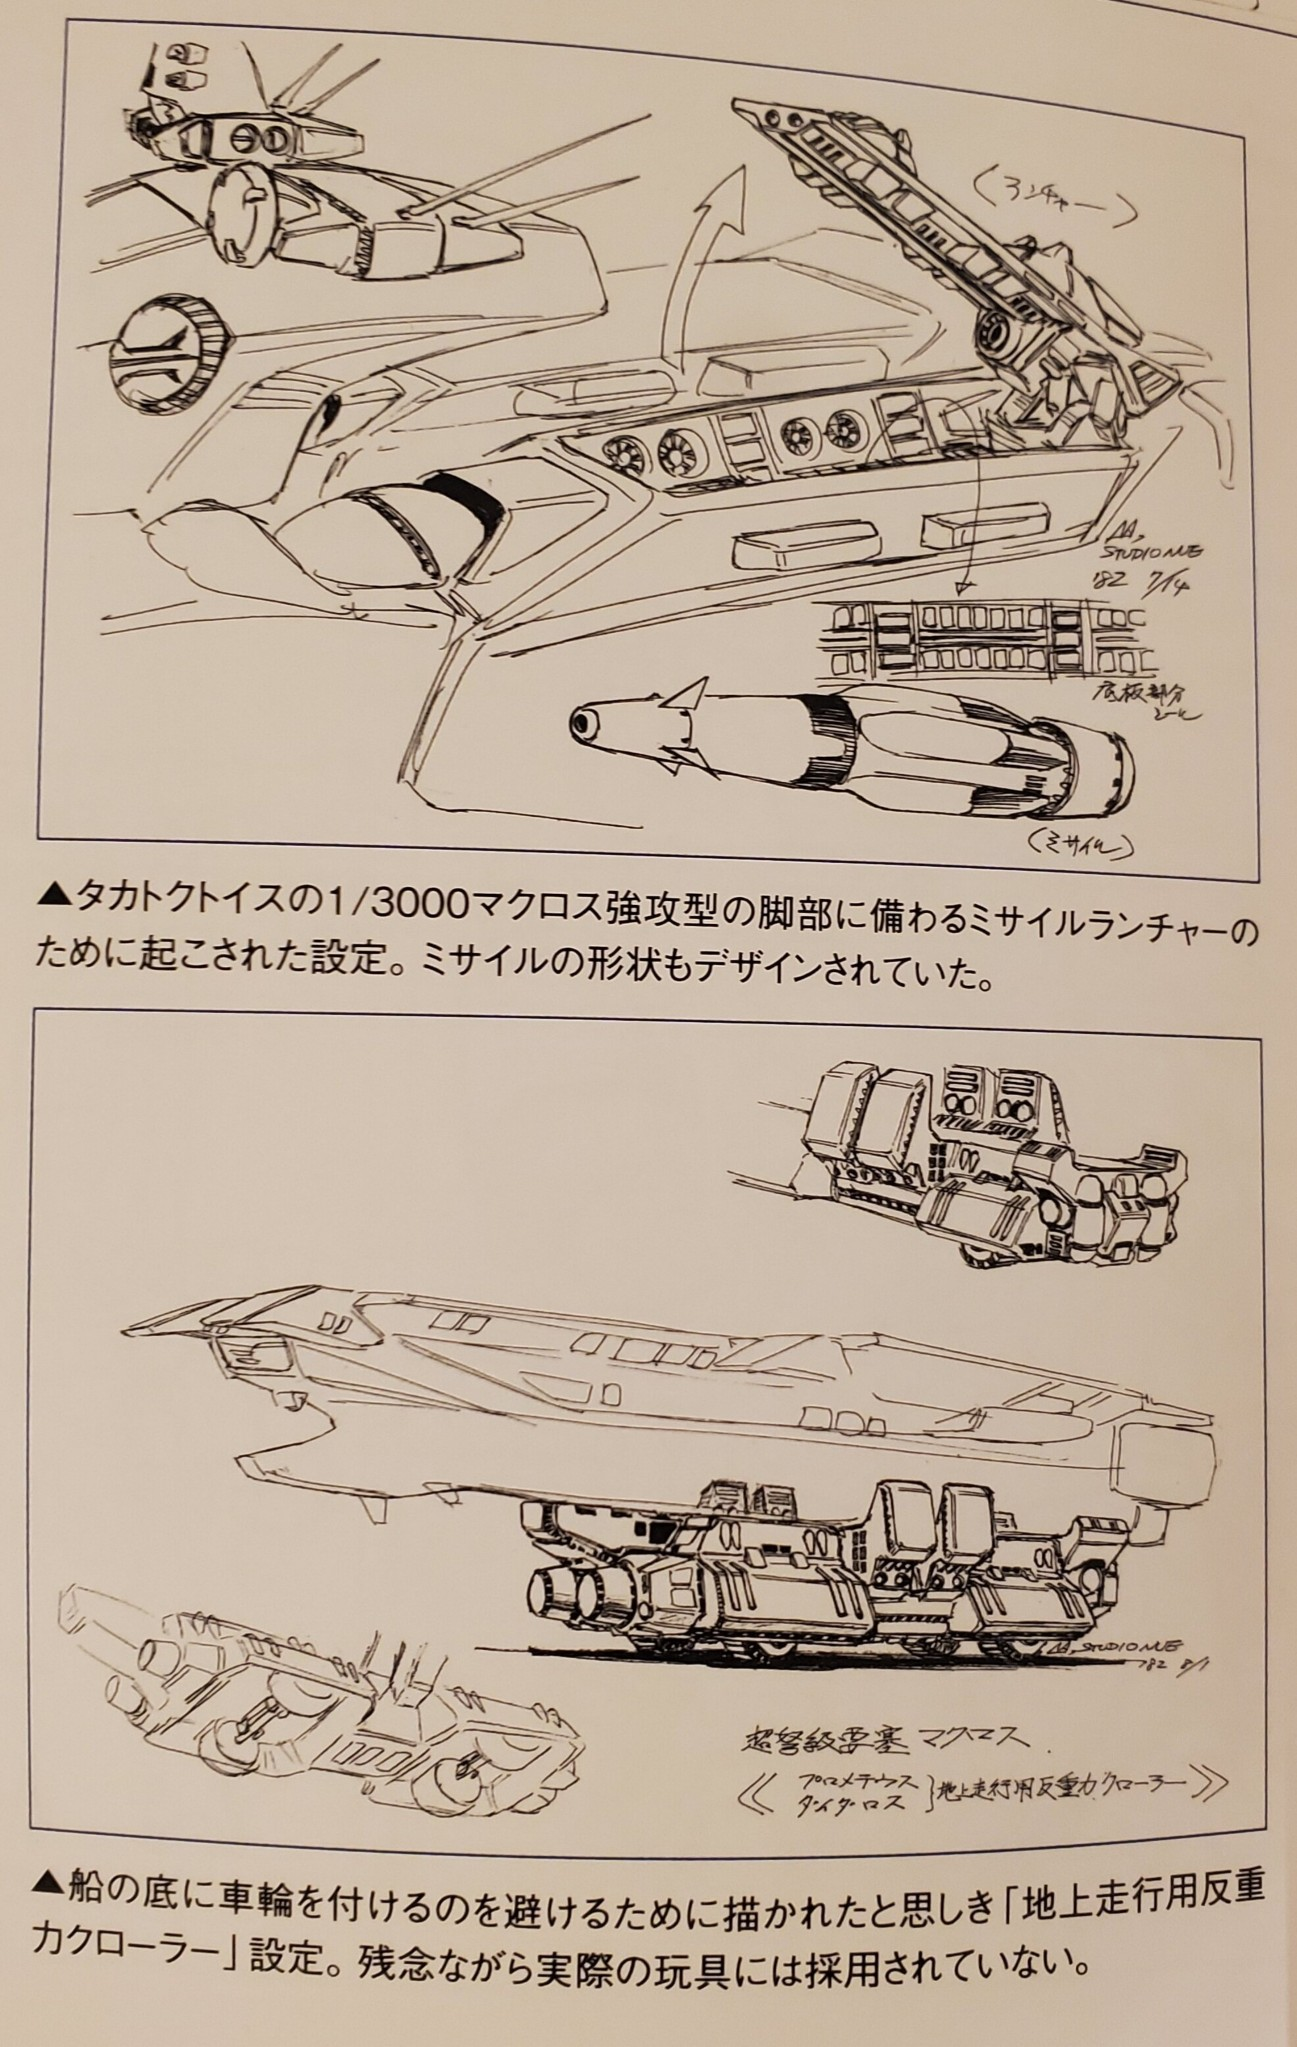
looking at the translation it says something about takatoku missile in legs
-
2 hours ago, arbit said:
Very nice!
It's not that clear to me what that elevating gun looks like, or where it goes exactly.
The rolling vehicle to carry the Daedalus is more clear, but you would have to design it for a specific model or toy, I guess.
im more concerned about the weight it must carry on those 4 small wheels, wouldnt it sink down into the ground?
-
40 minutes ago, Big s said:
Yeah, looking at the diagram, it’s definitely the back of the lower leg in ship mode. I don’t remember seeing the back open up like that in the show, but there appears to be a cannon and oddly placed missile tubes
dont think it made it into any animated media, also imo its a badly placed weapon, theres already a turret and a missile turret placed on top of it..
but i could easily make a version for my ship, since its so big..
-
On 8/19/2022 at 8:03 PM, arbit said:
@tekering Wow, the Matchbox has never looked so good! Fantastic work,
A couple questions: I am worried about your wood screws eating away at the plastic over time. Maybe I misunderstand the mechanism, but could you possibly use a screw and nut with washer instead? You could lodge the nut with epoxy (Add some pla plate to fully bury the nut).
Since you are planning to change up the guns, have you seen @Nyankodevice's SDF-1 guns on Thingiverse? https://www.thingiverse.com/thing:5389365
hi guys i made an updated version of my cannons, also i have uploaded new rail cannons too
https://www.thingiverse.com/thing:5961035 the new cannon
https://www.thingiverse.com/thing:5961048 the Rail cannon
https://www.thingiverse.com/thing:5961088 missile turrets
@tekering this is looking good, keep up the good work
-
On 7/25/2022 at 11:24 AM, arbit said:
Whoaaaa looking good. Which line art are you using for the city, or are you making it up as you go?
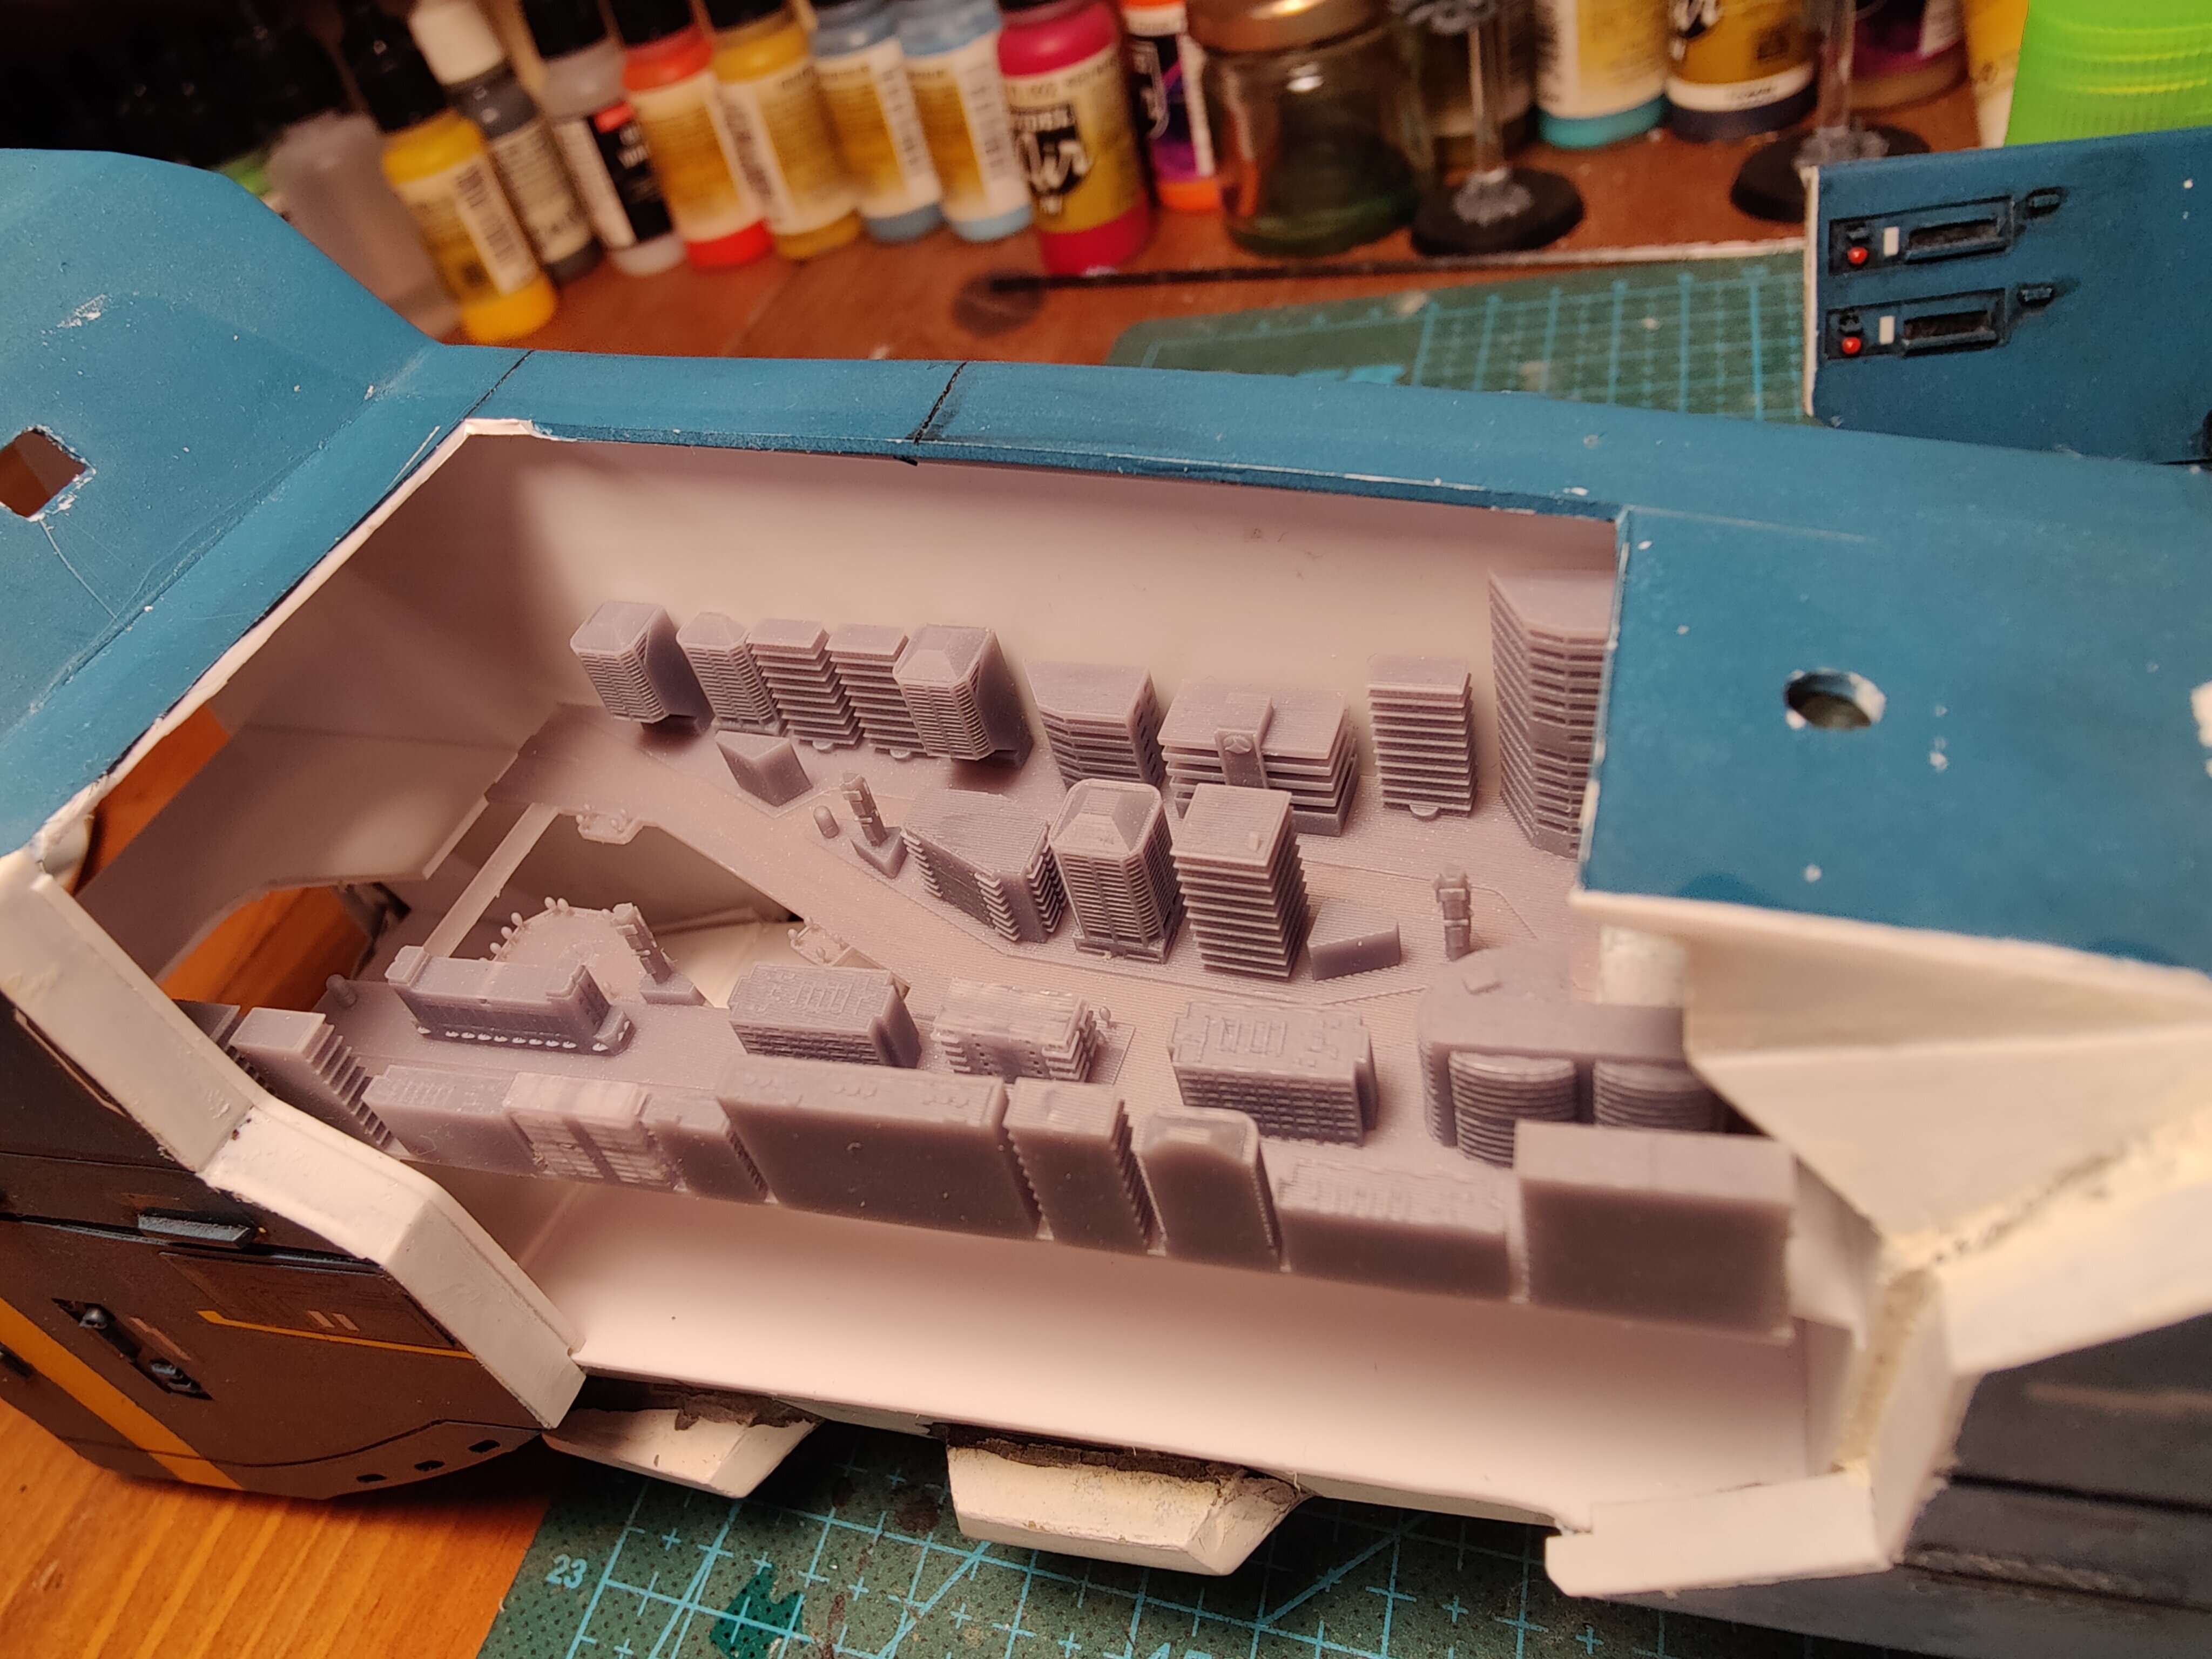
Thx... Making it up as I go xD
On 7/25/2022 at 7:26 PM, derex3592 said:See......that's what I always thought too!!! City was in the center section of the ship with parts that perhaps extended into the legs that we were never shown in the original show.
As I understand it, the center of the ship is the military base and factories
-
not only are the legs backwards, the leg fins are upside down too lol, the wide part of the fins should be pointing up
-
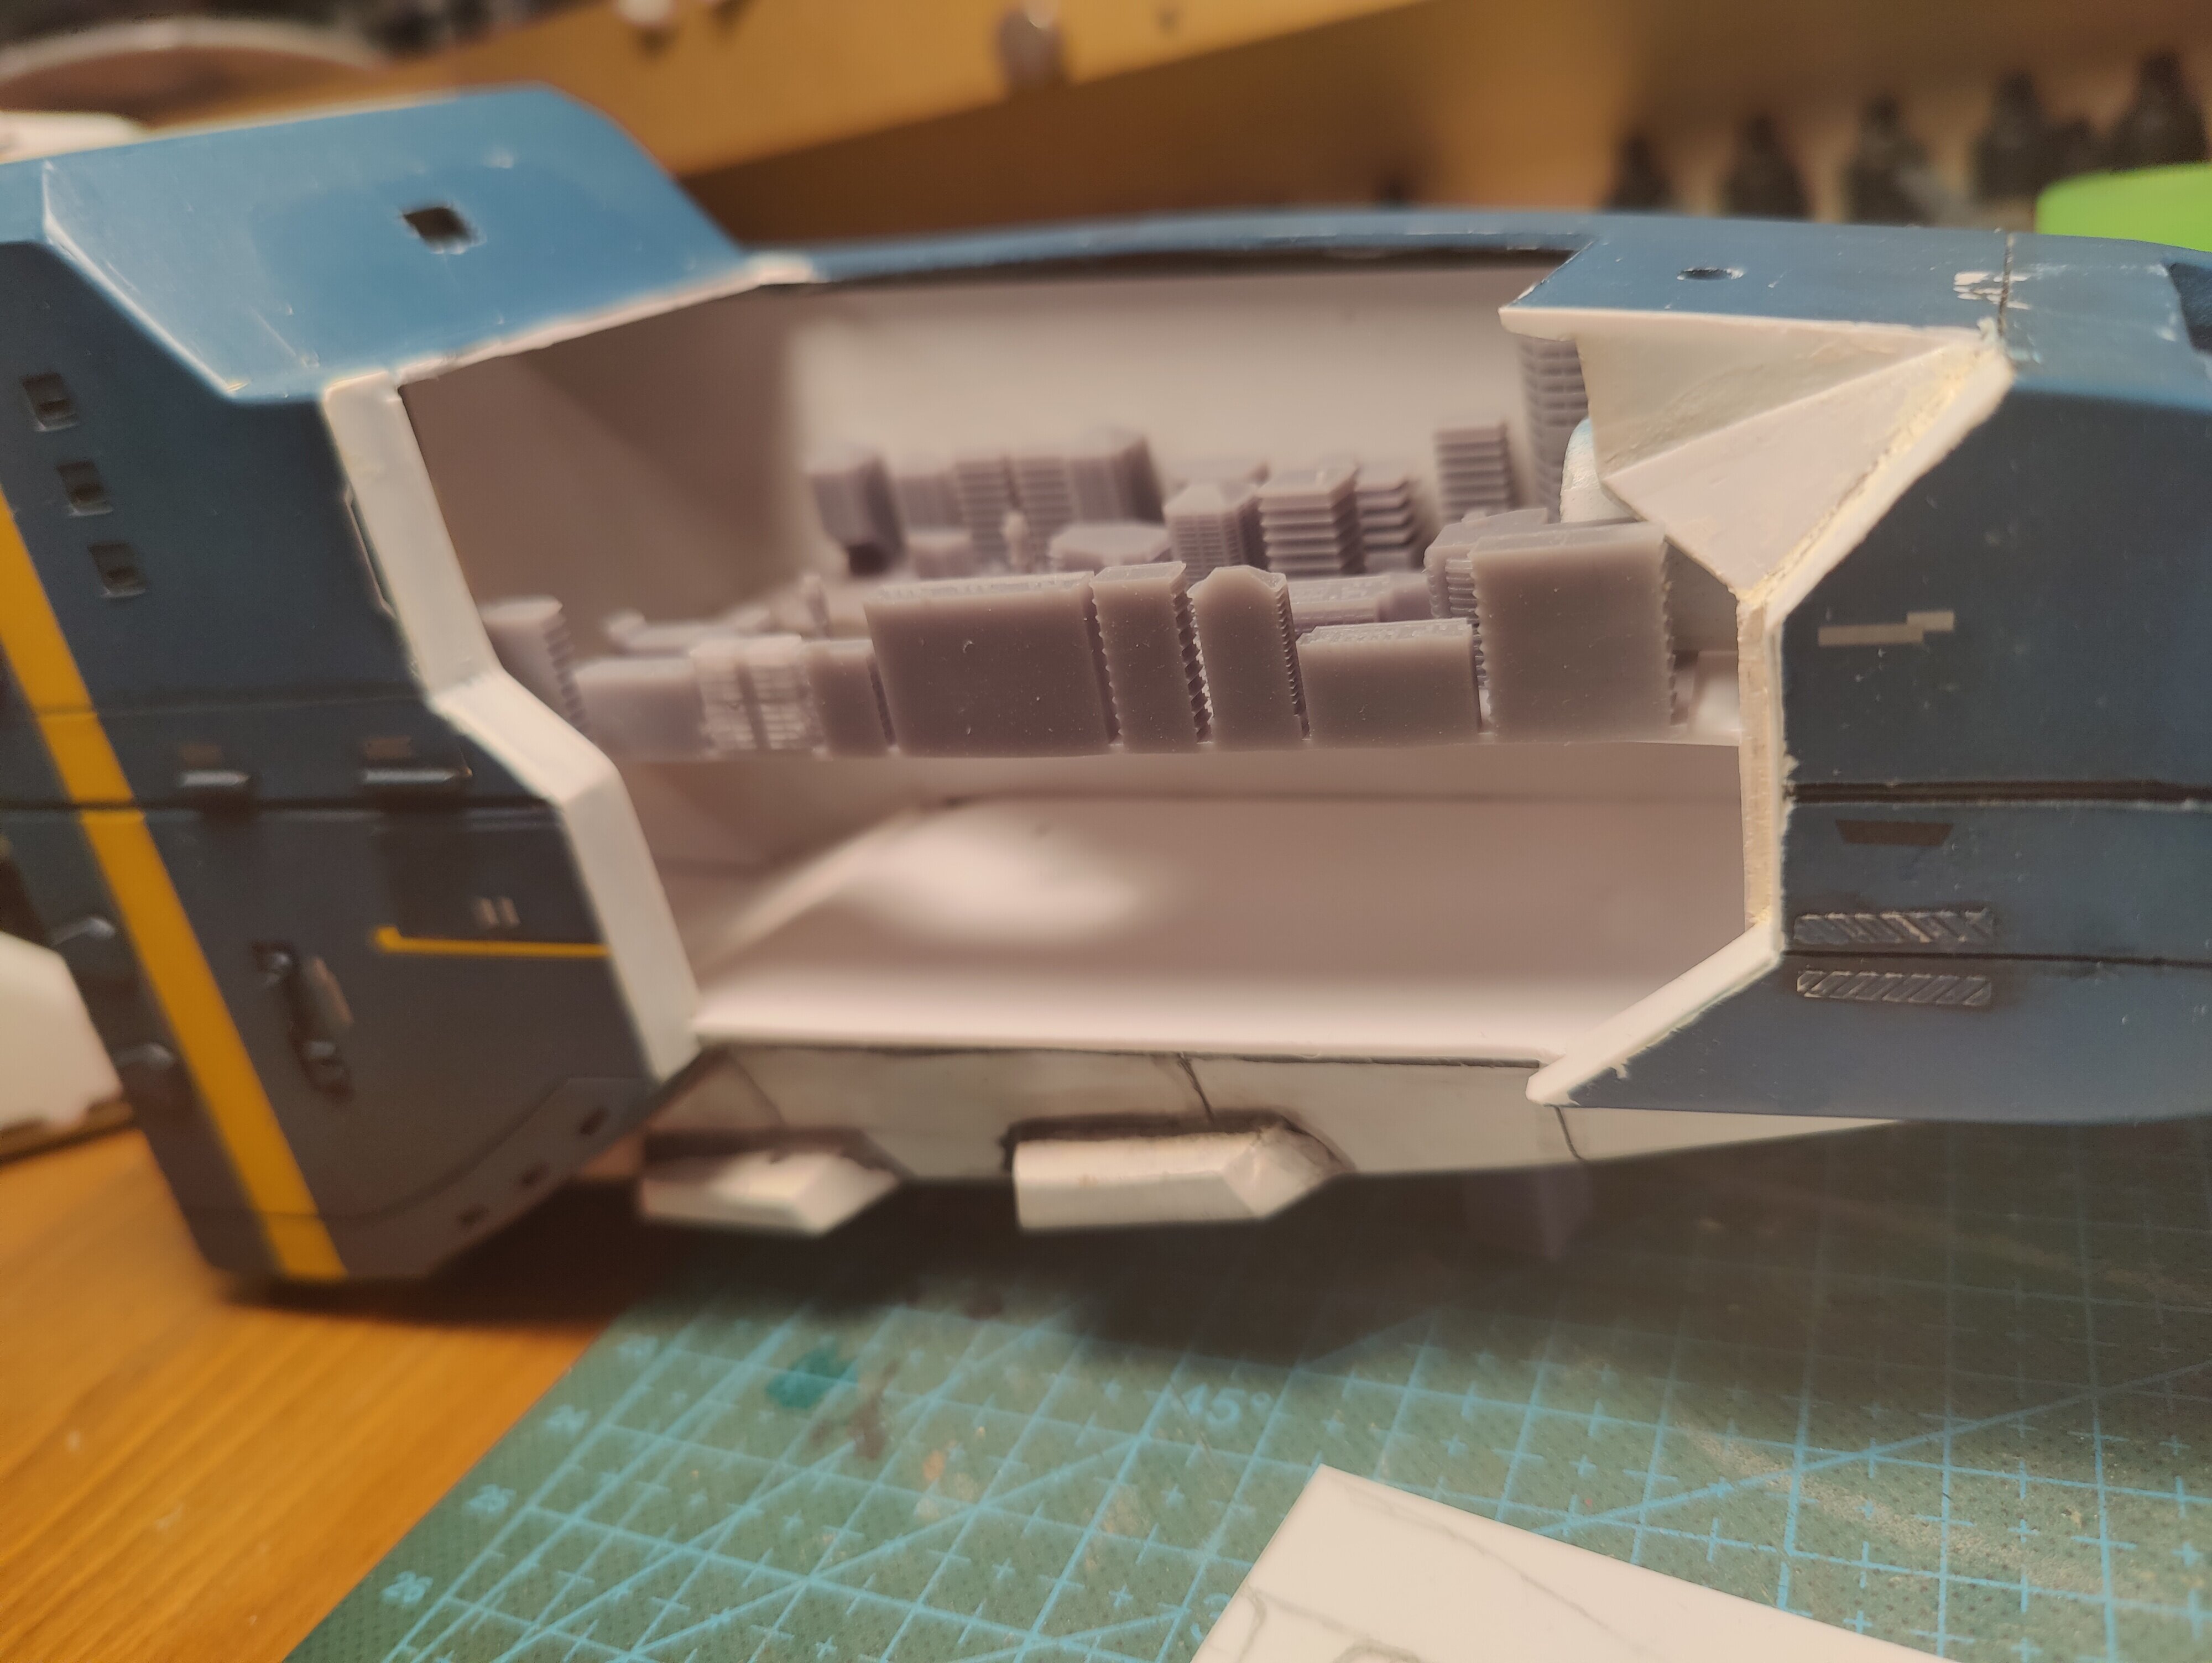
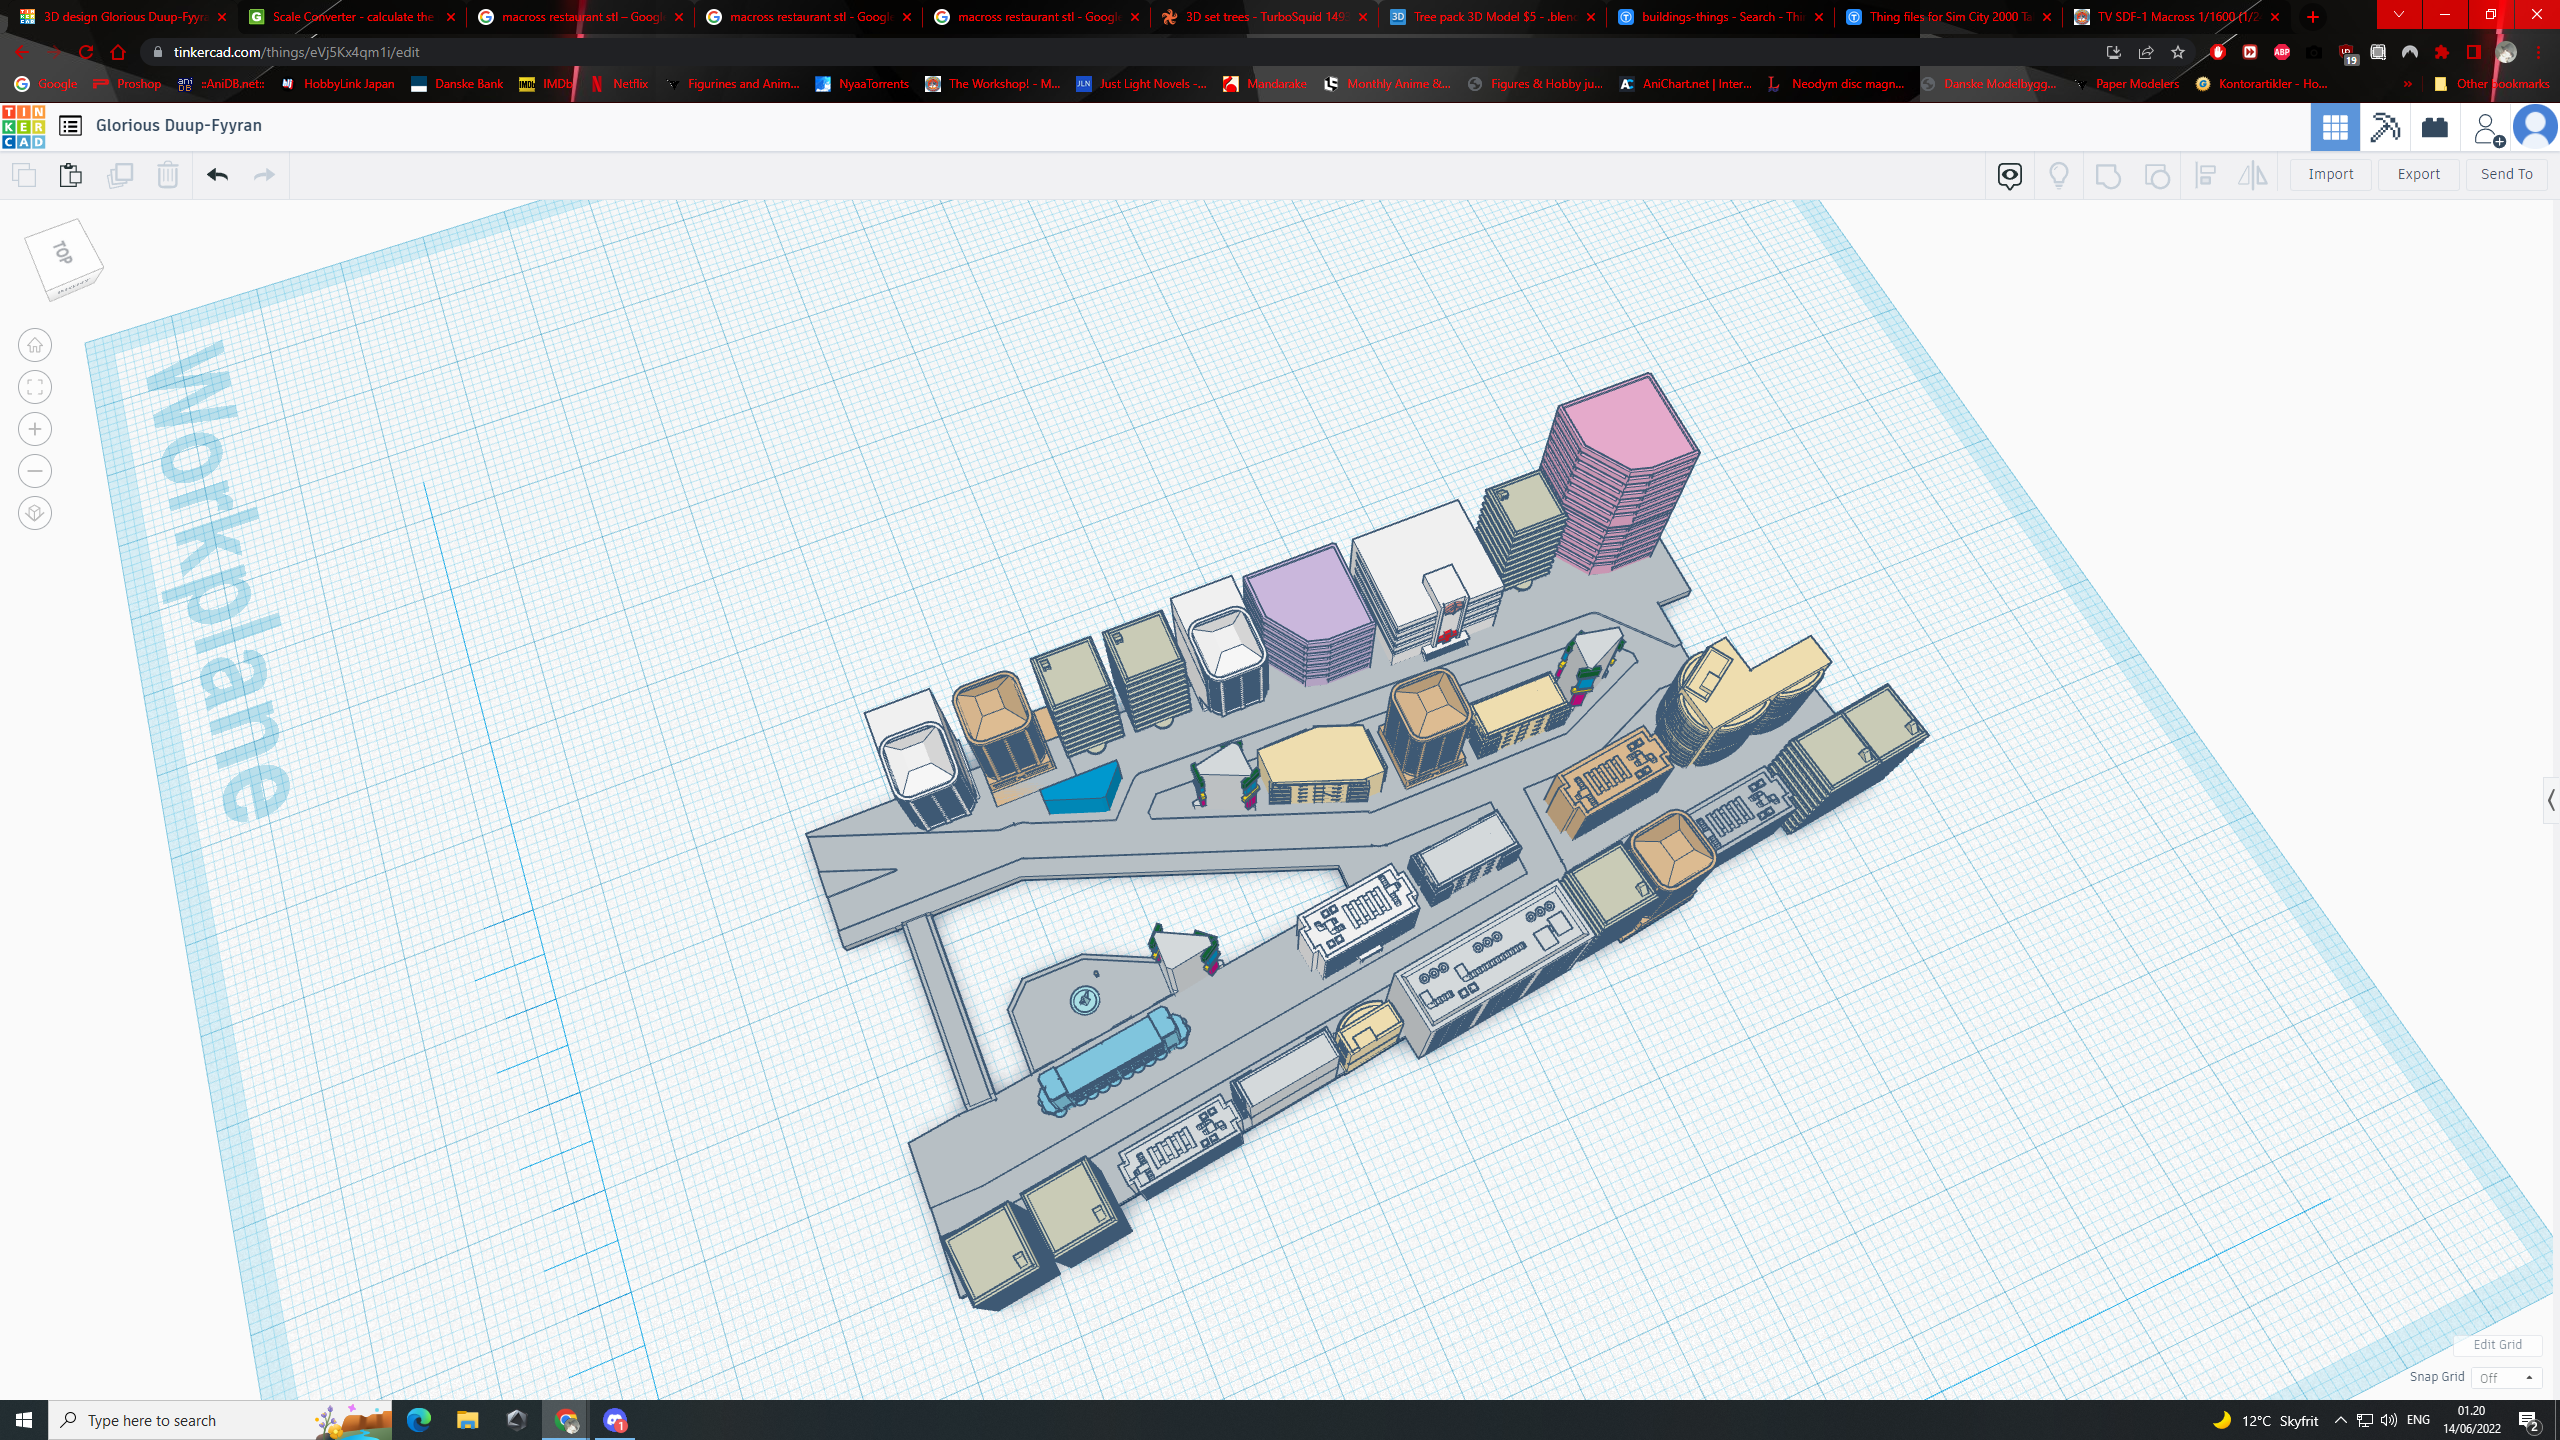
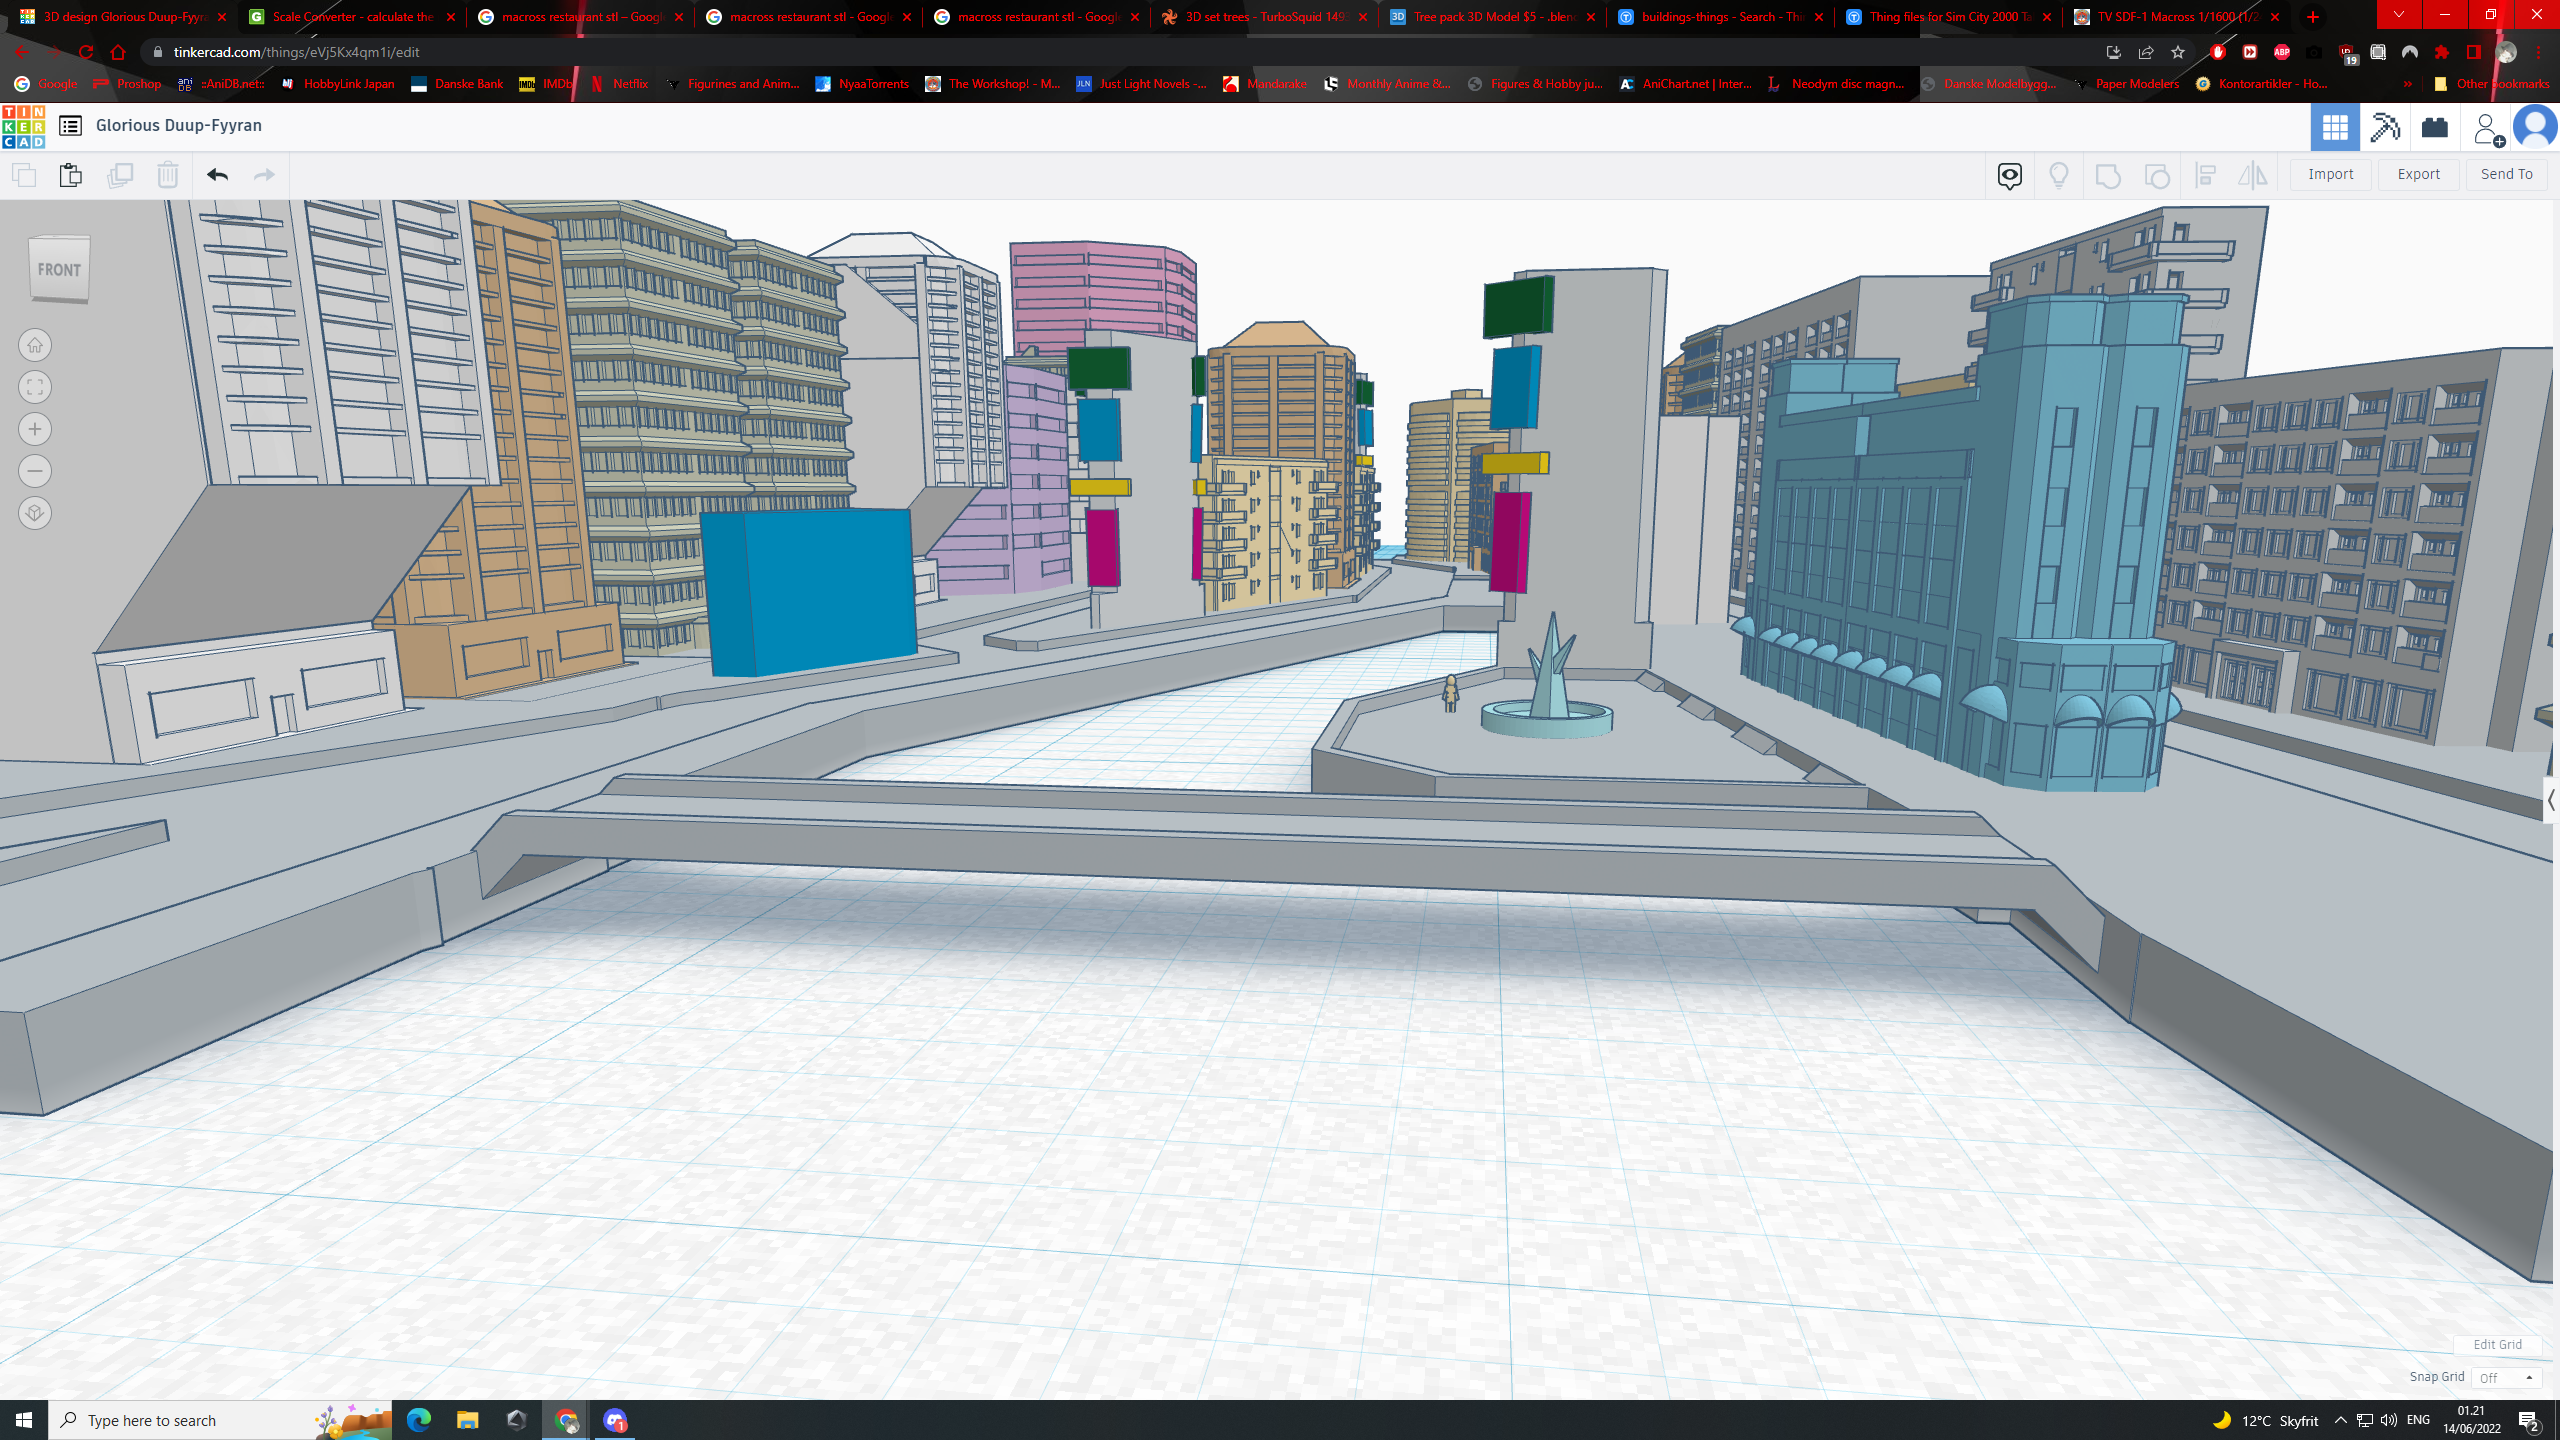
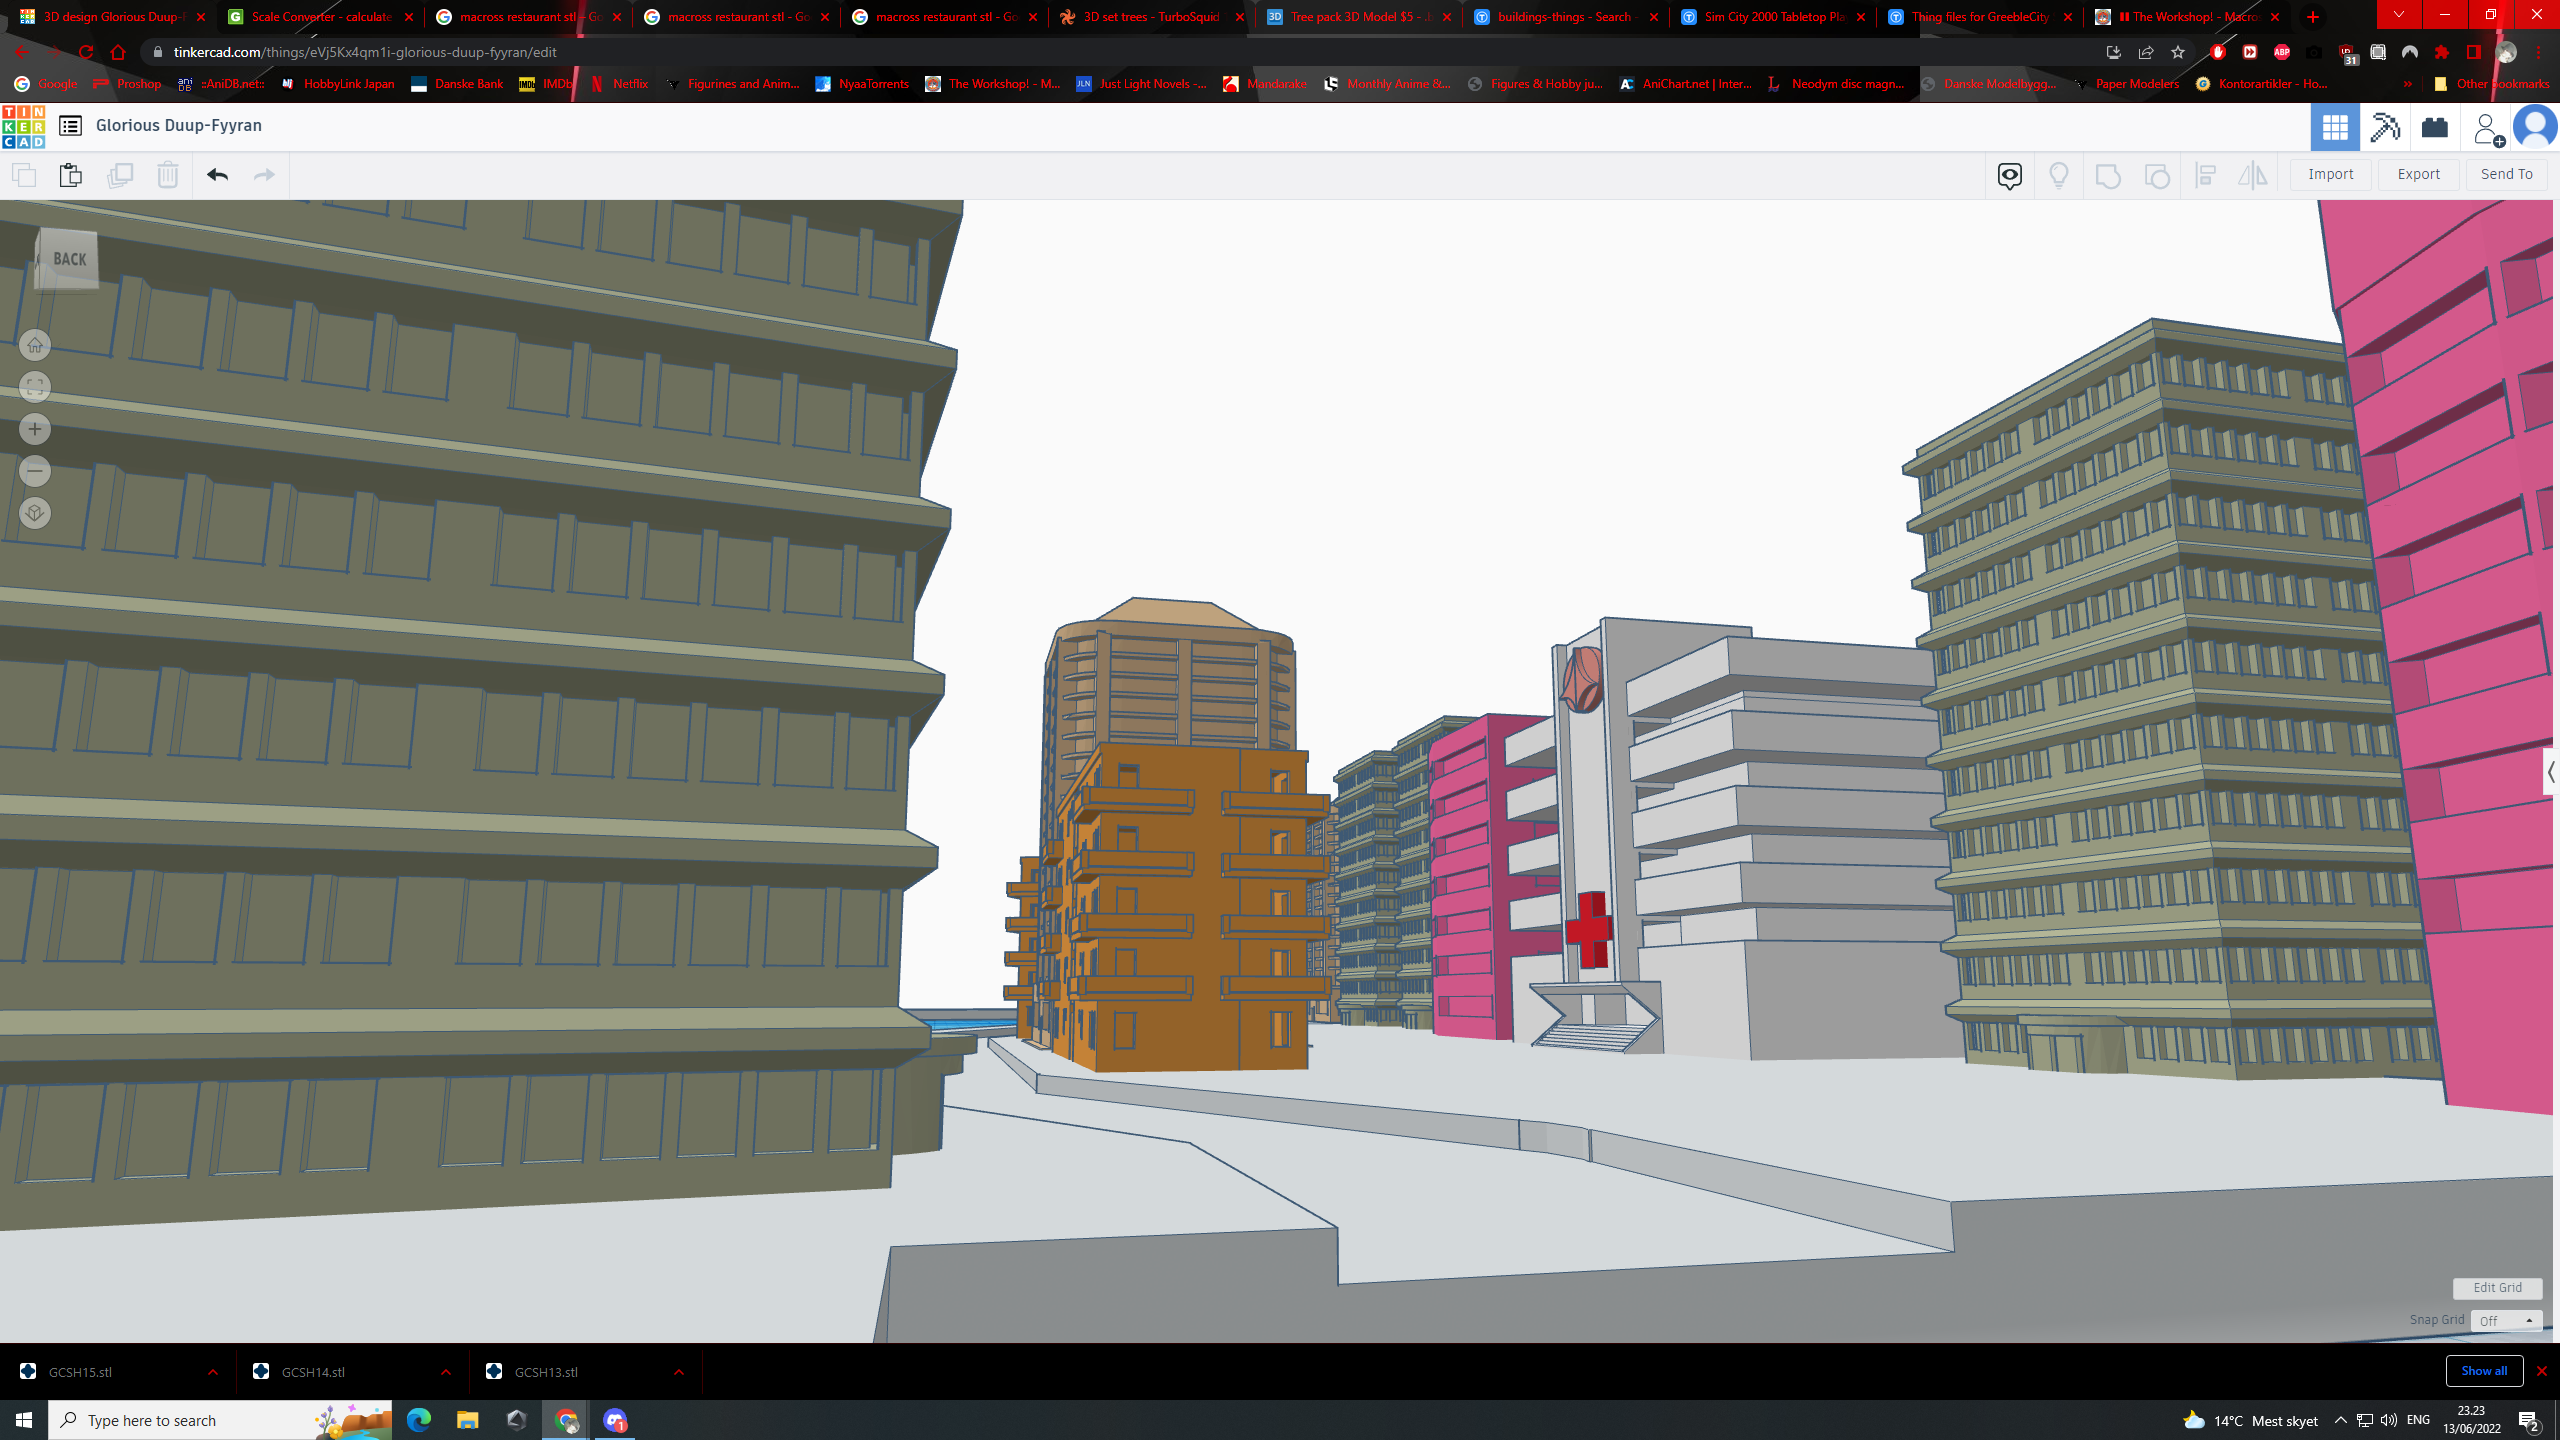
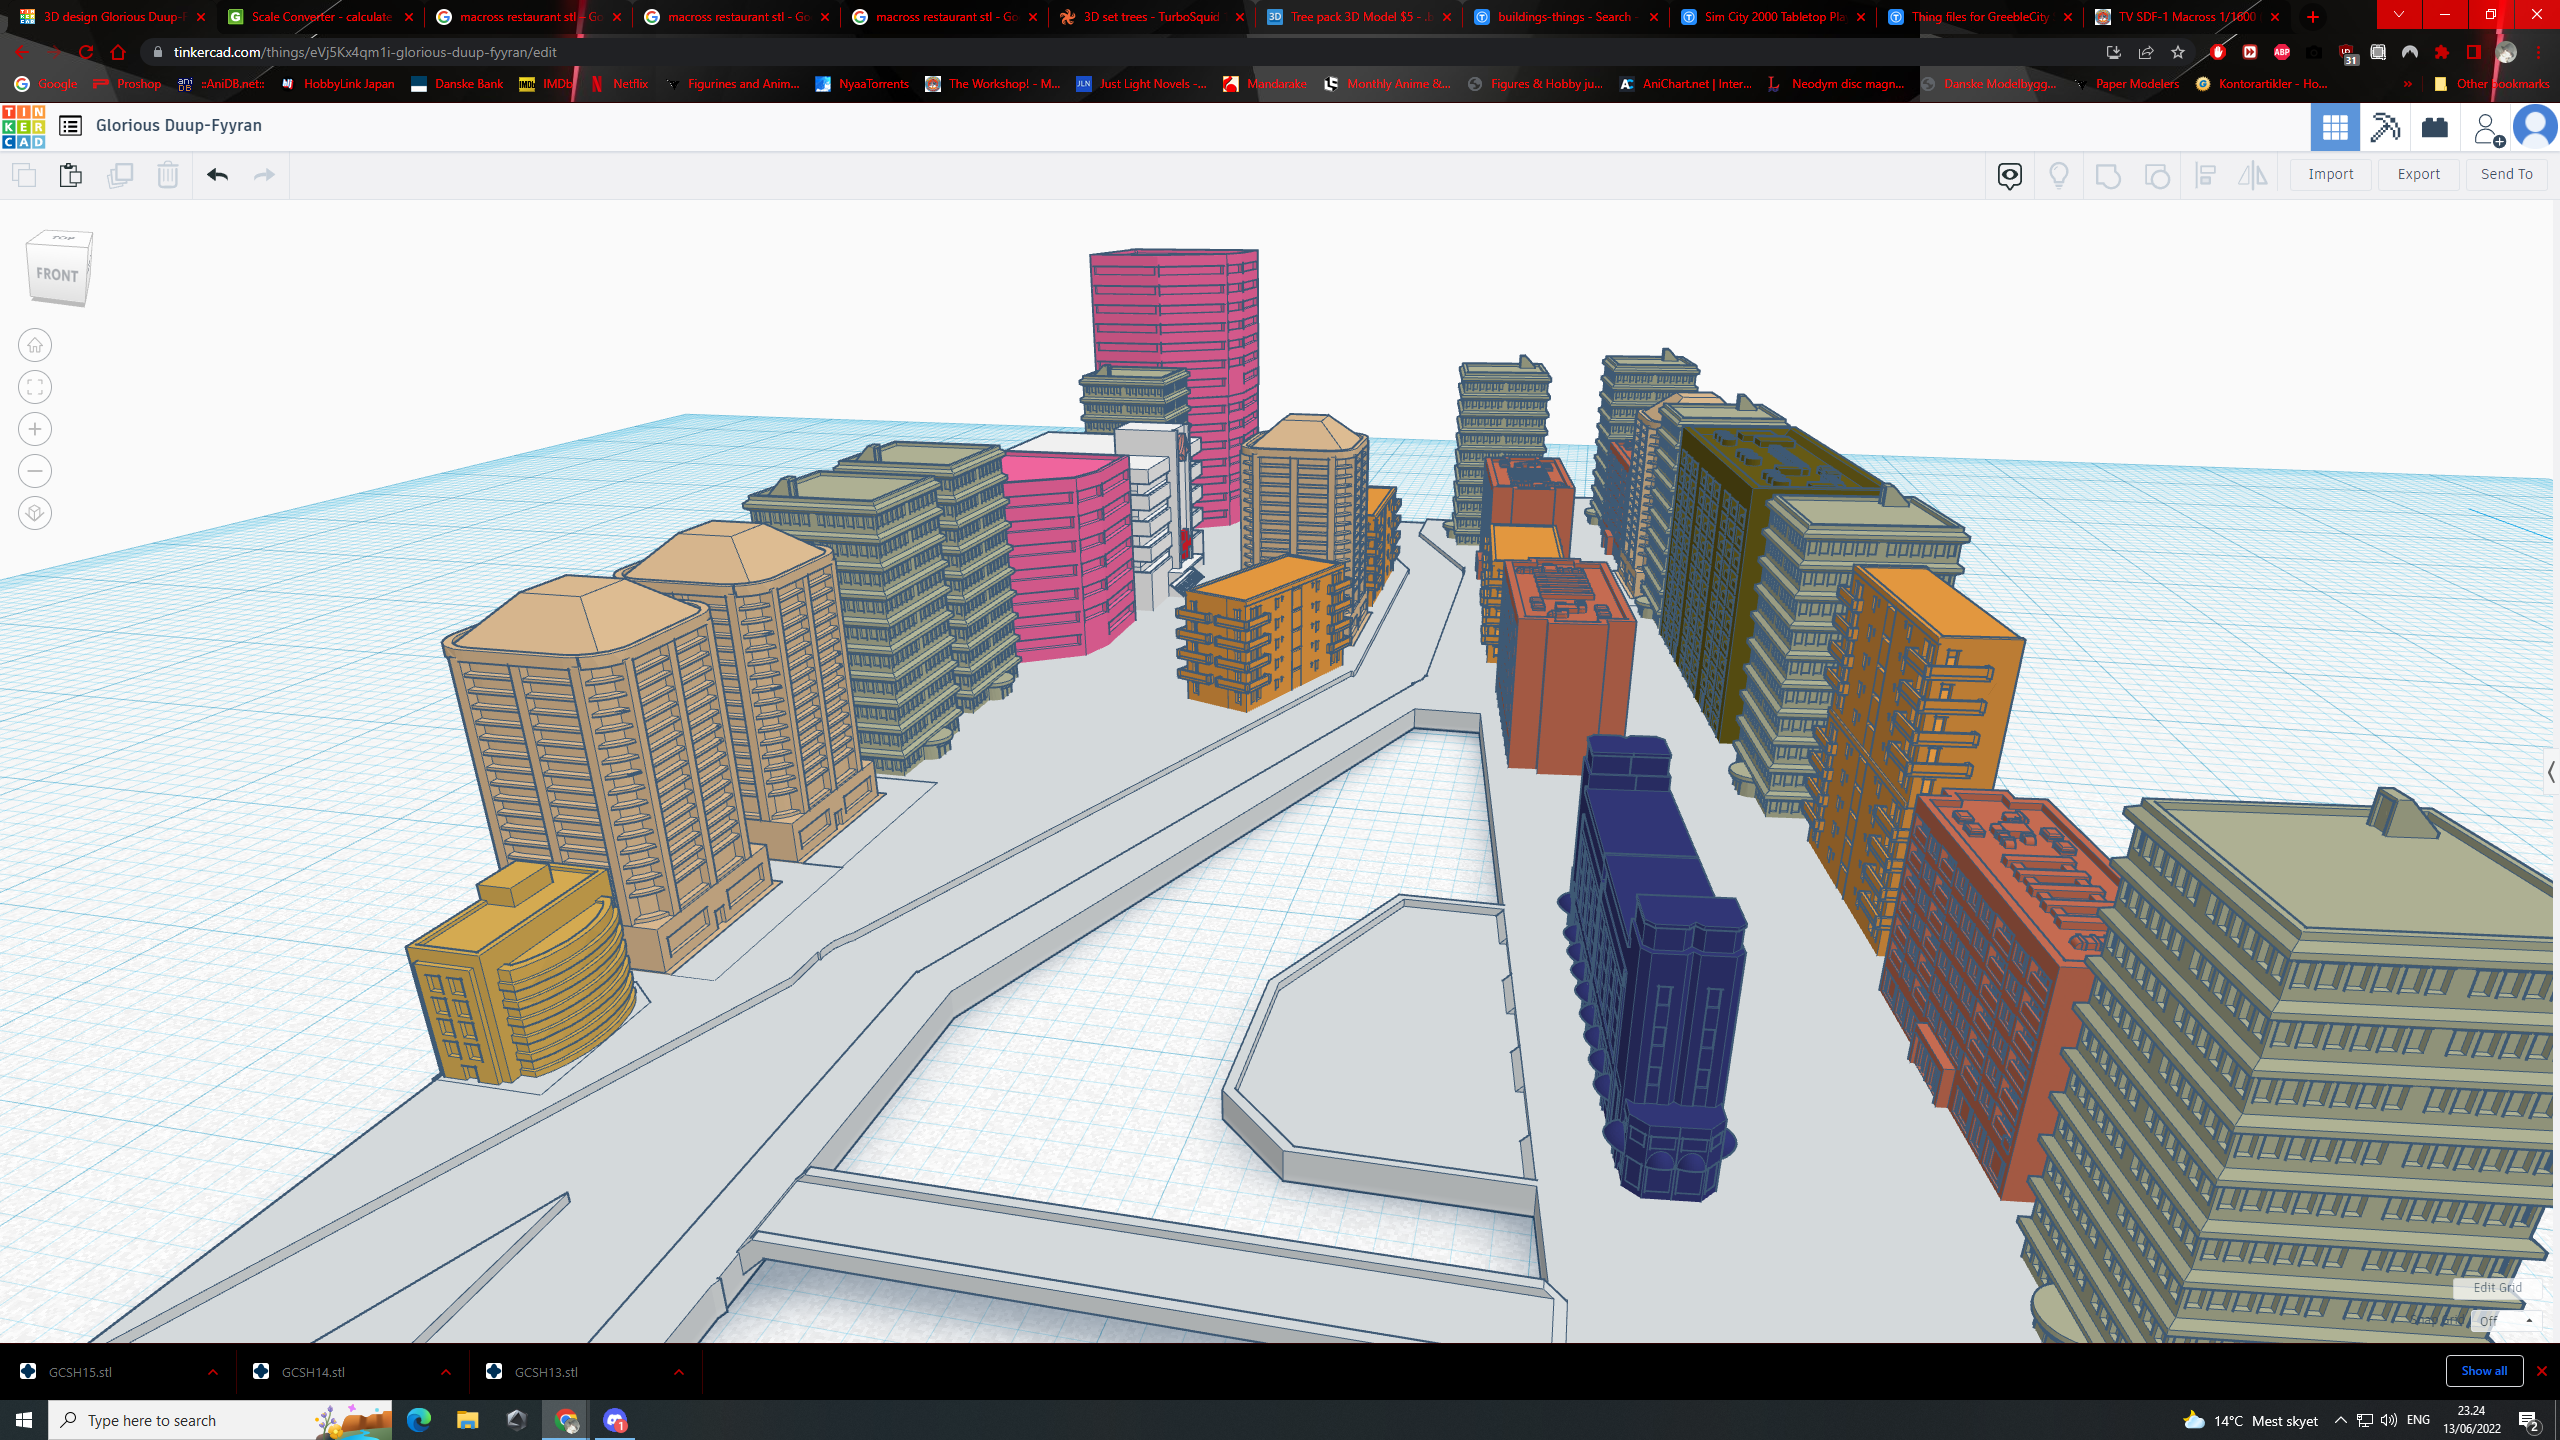
second part of the city

-
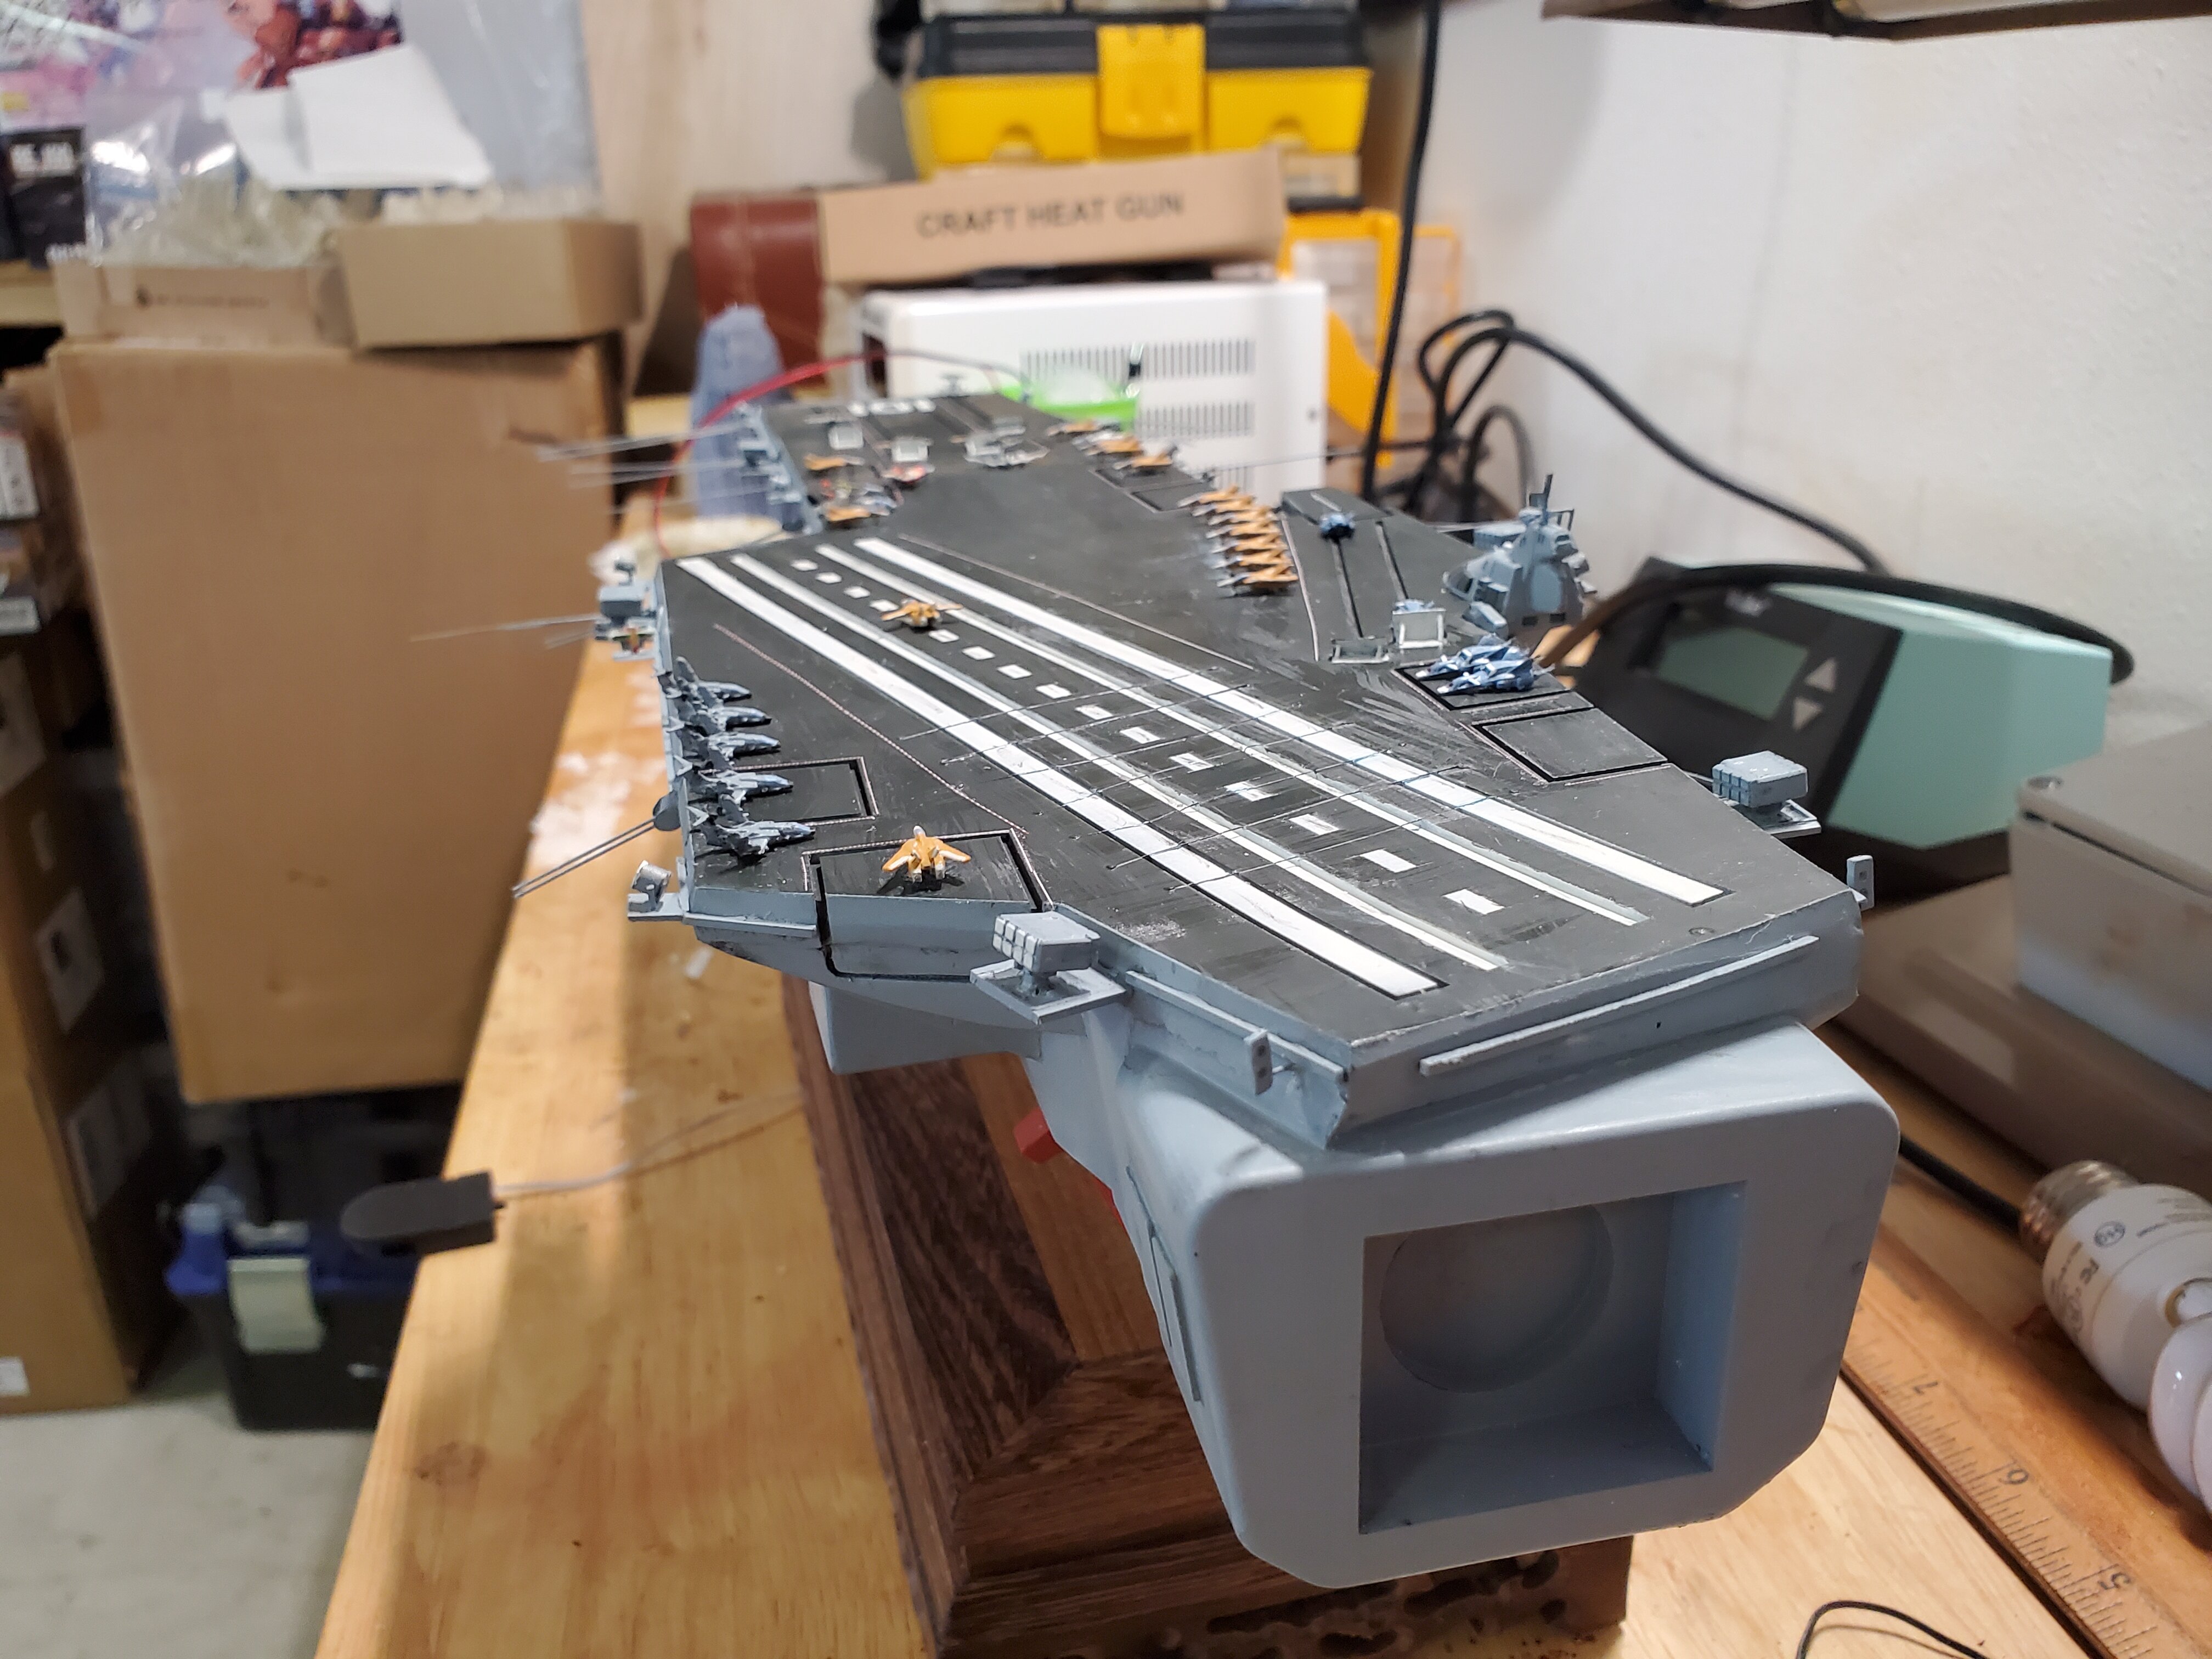
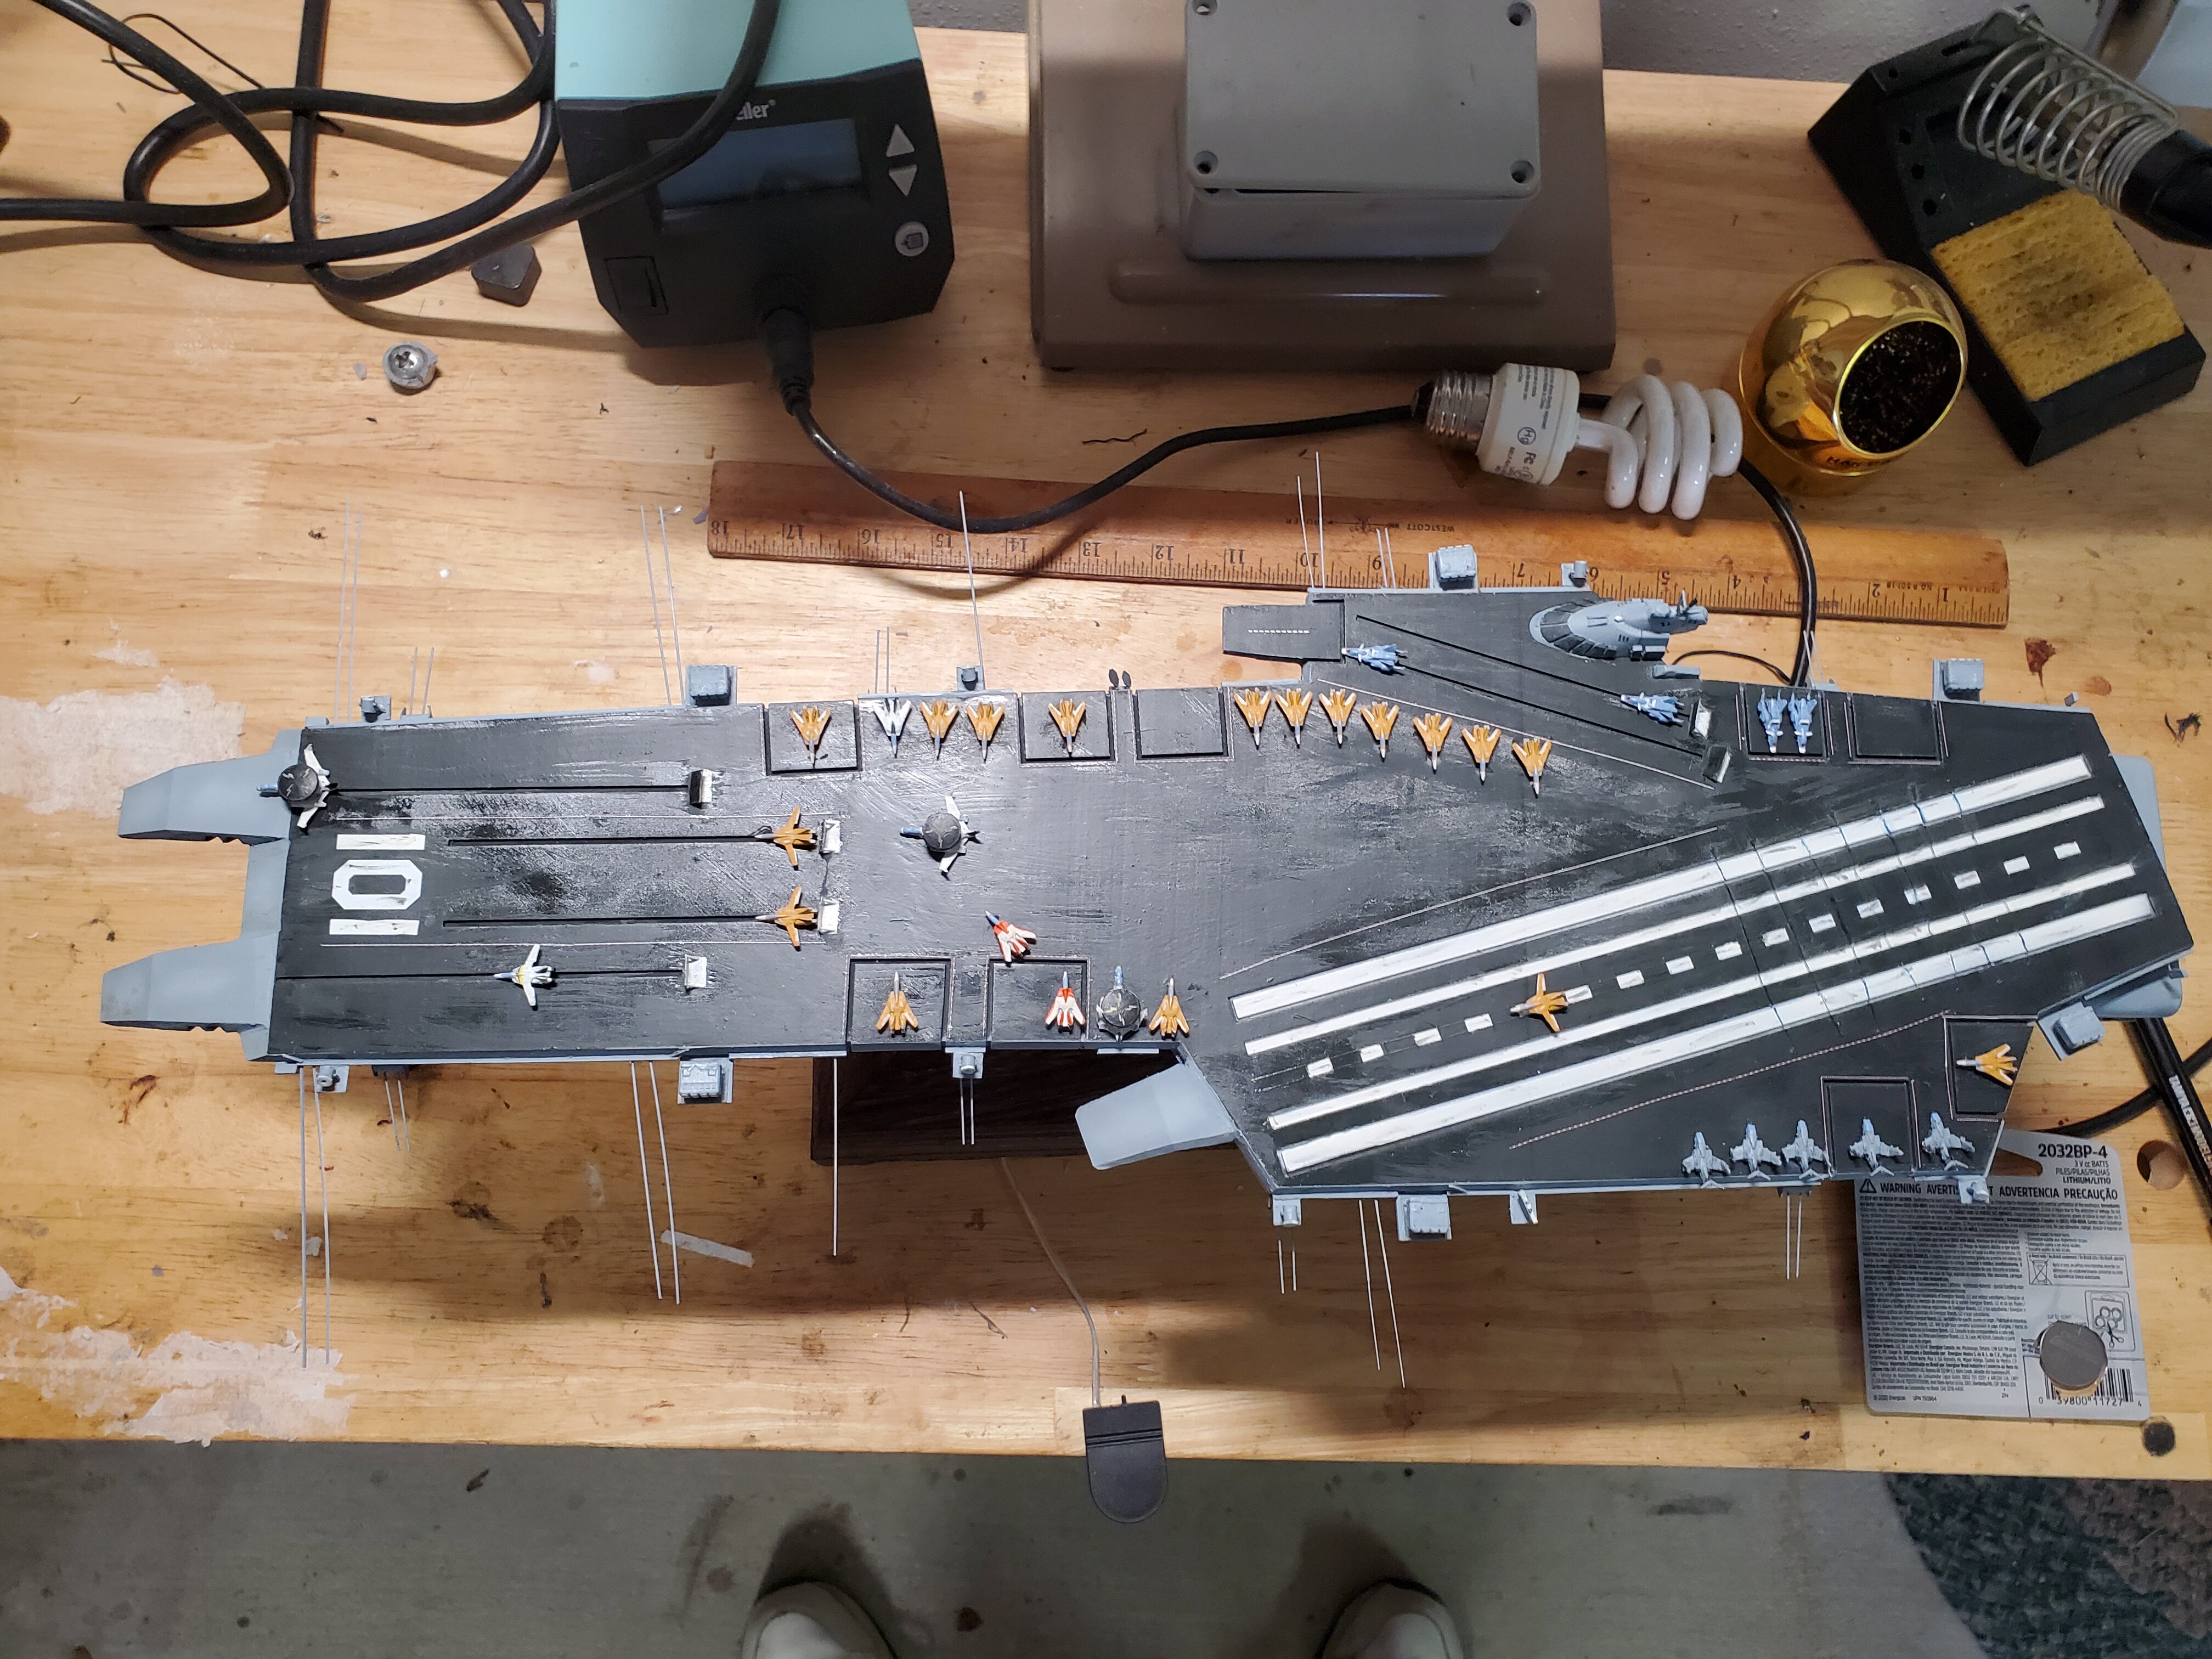
first low res test print (took 1 hour and 27 minutes)
looks quite alright
-
On 6/8/2022 at 8:45 AM, tekering said:
Thanks for all the kind words, gentlemen. I appreciate the encouragement. 😊
This week, I've focused on the conning tower sensor package and communication relay equipment -- you know, those two iconic circles inset on the starboard side of the bridge, and the antennae on top -- very little of which was represented on the vintage toy.
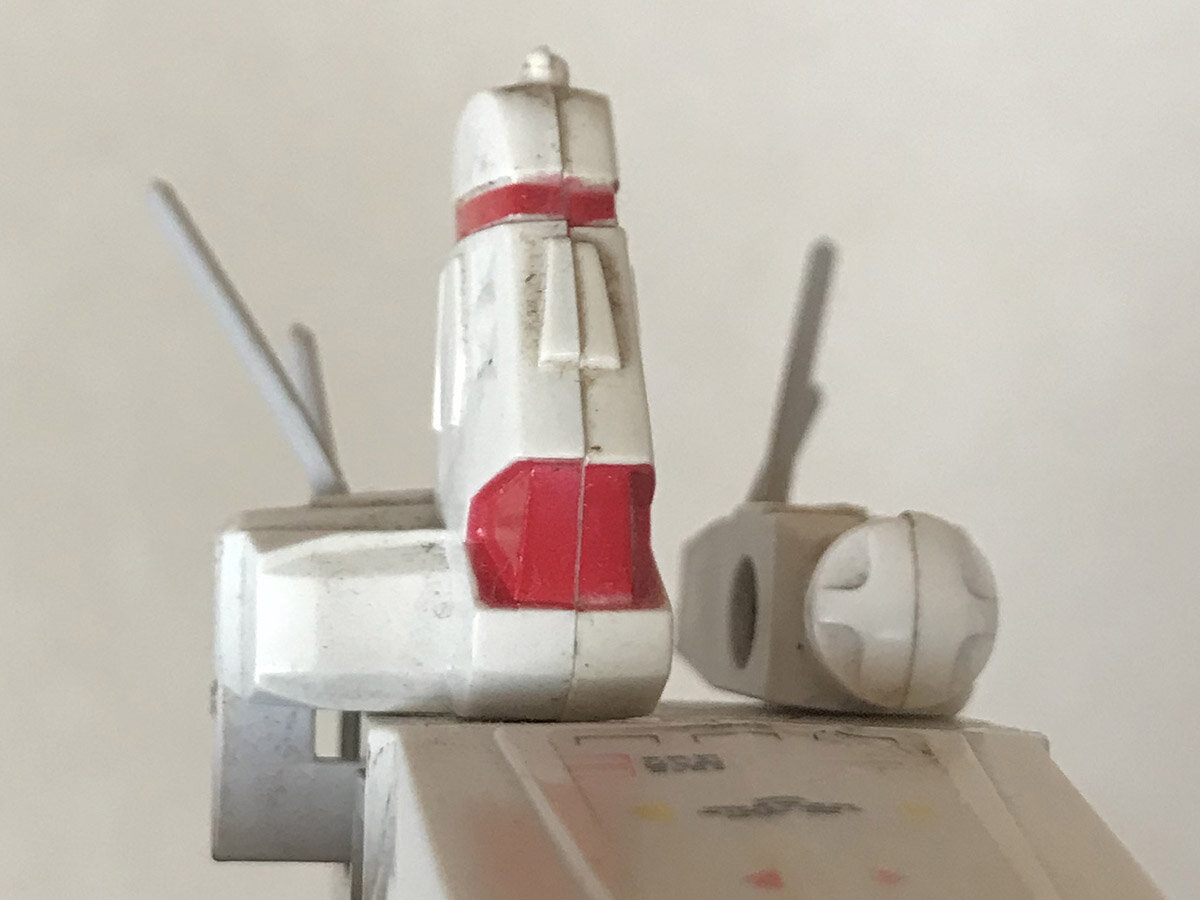
Like, they didn't even try. 🙄
So, I drilled, cut, and filed out most of the area where the detail was missing, and mounted a styrene plate behind it.
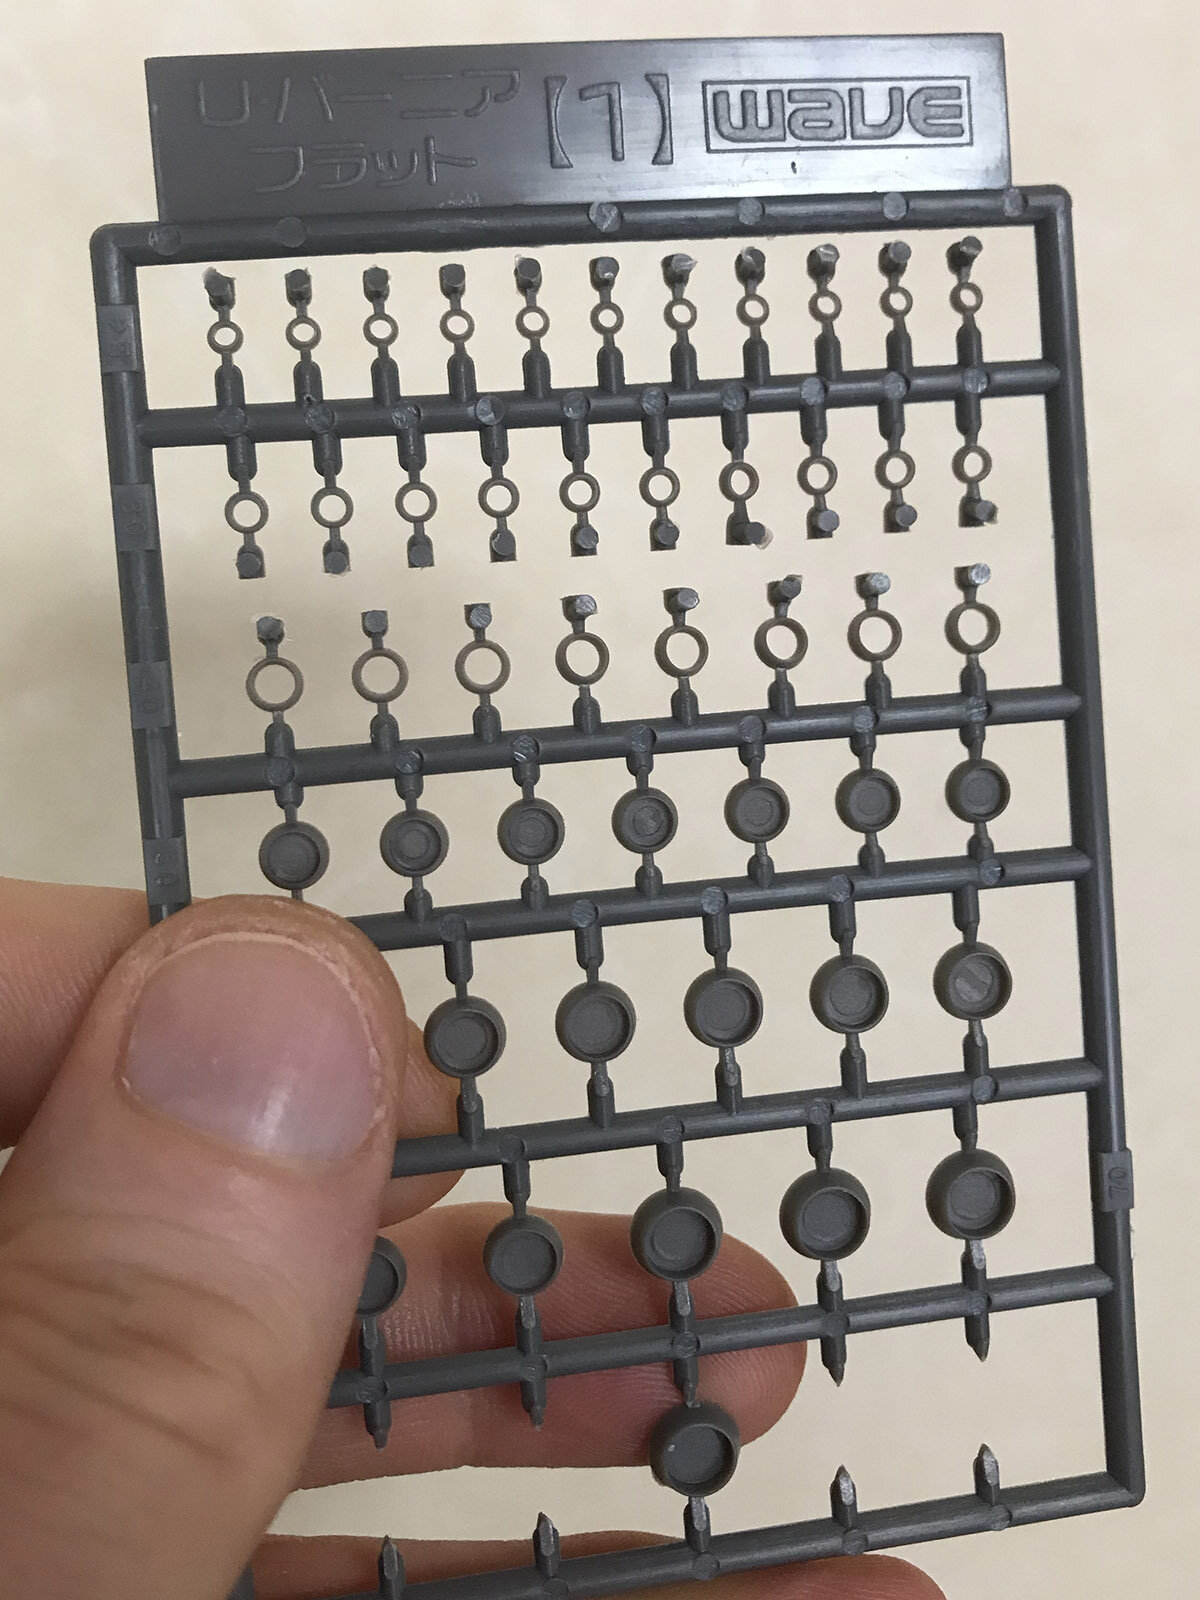
Wave has a set with multiple sizes of verniers intended for this kind of customizing, and I figured a couple of the tiny ones would suit my needs well enough:

They're the right size, but too thick to suggest the massive scale I'm after. I used my dental files to drill out the center of each, giving a greater sense of depth and considerably thinning down the sidewalls.
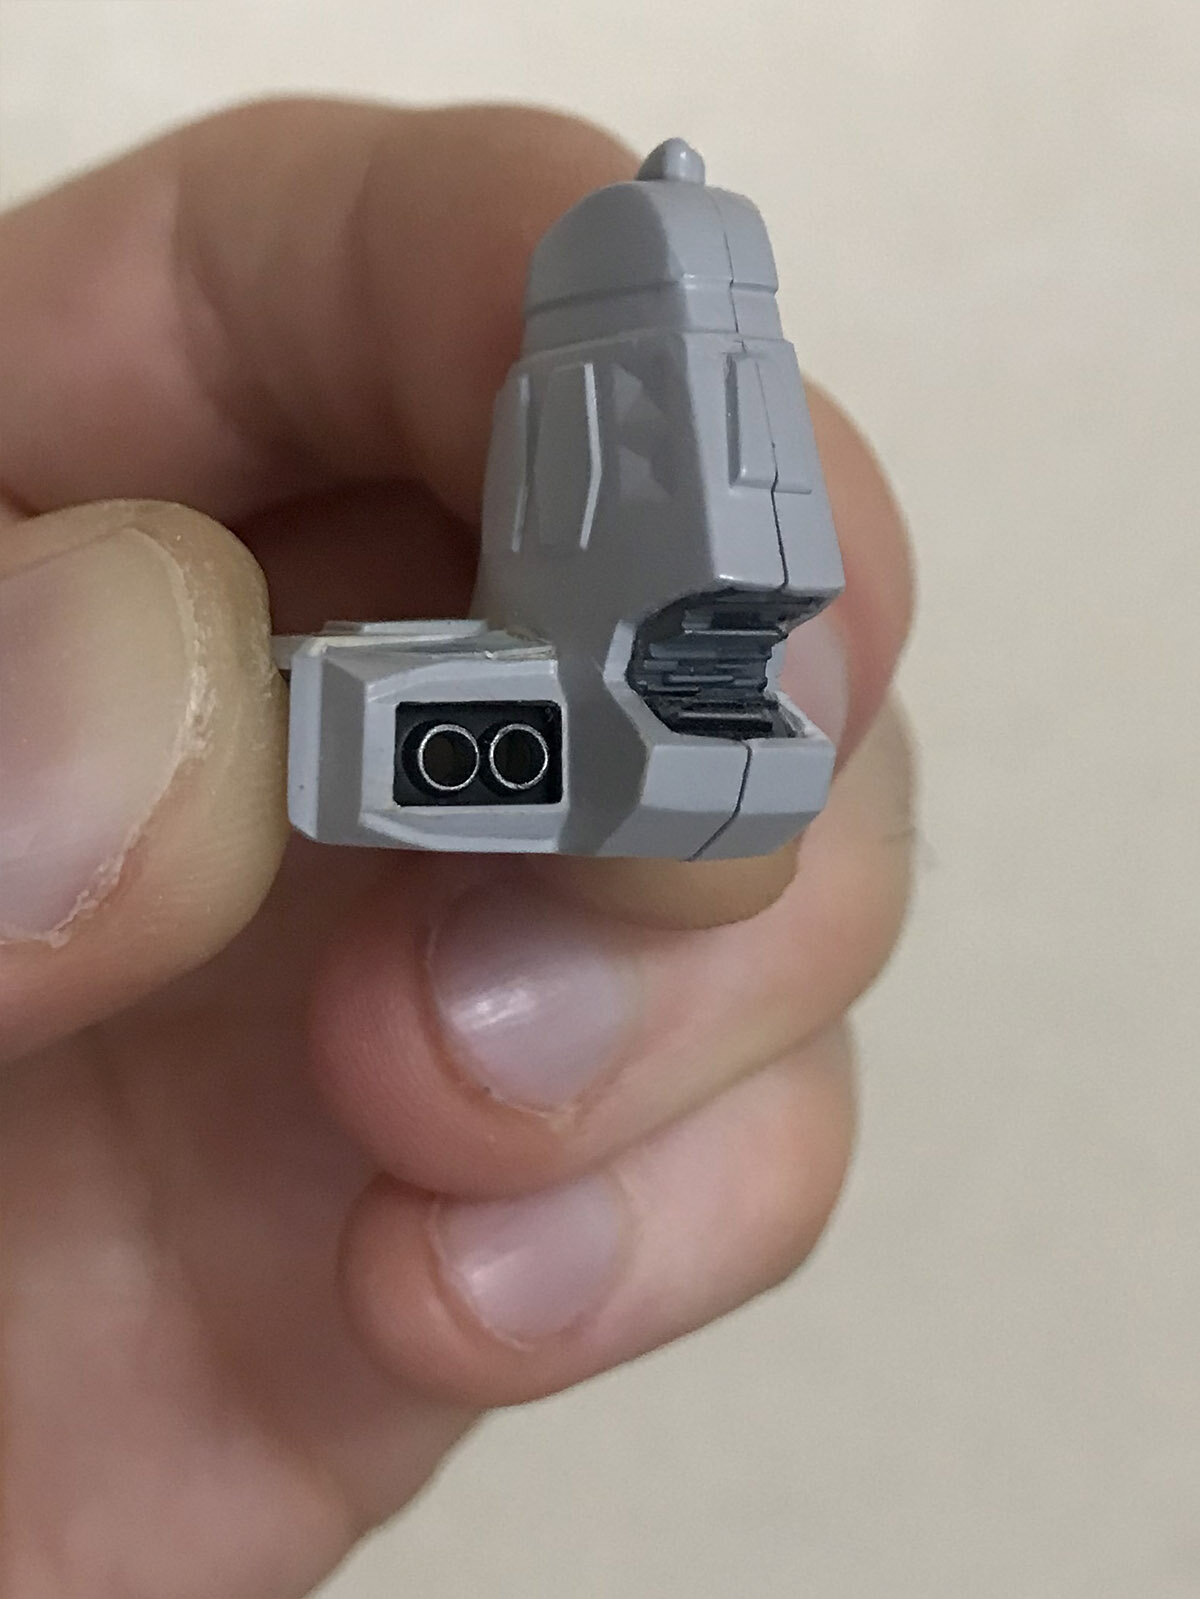
After painting, they started to look as I'd envisioned.
I then used parts from Tamiya's "Waterline Series" of 1:700 battleships to kitbash the communications array on top of the conning tower:
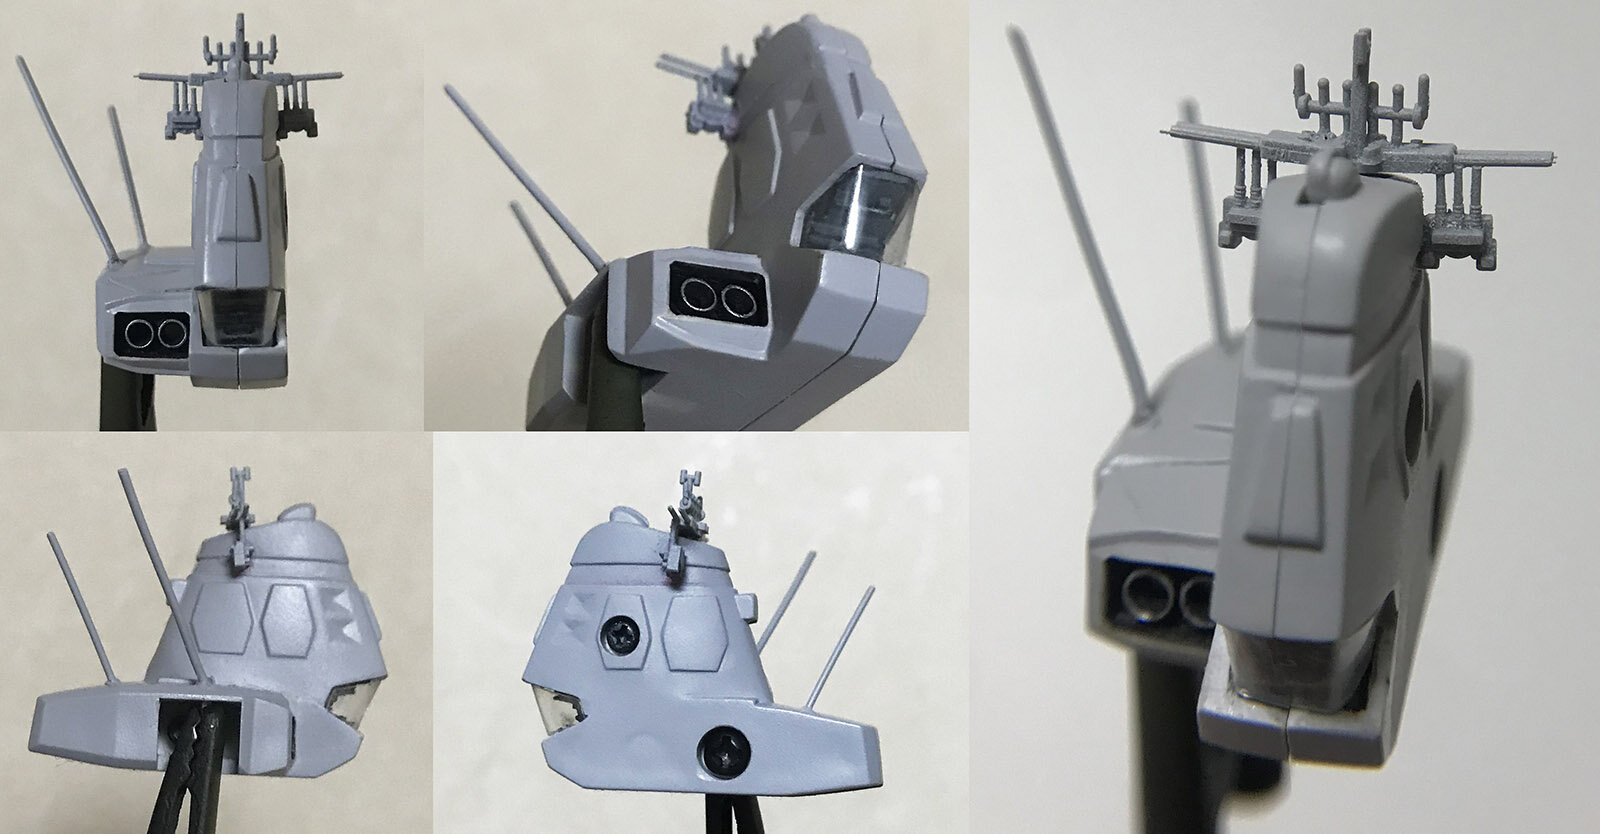
The large antennae behind the conning tower (which were properly represented on the original toy, until they inevitably broke off) were reproduced using two different gauges of paper clips.
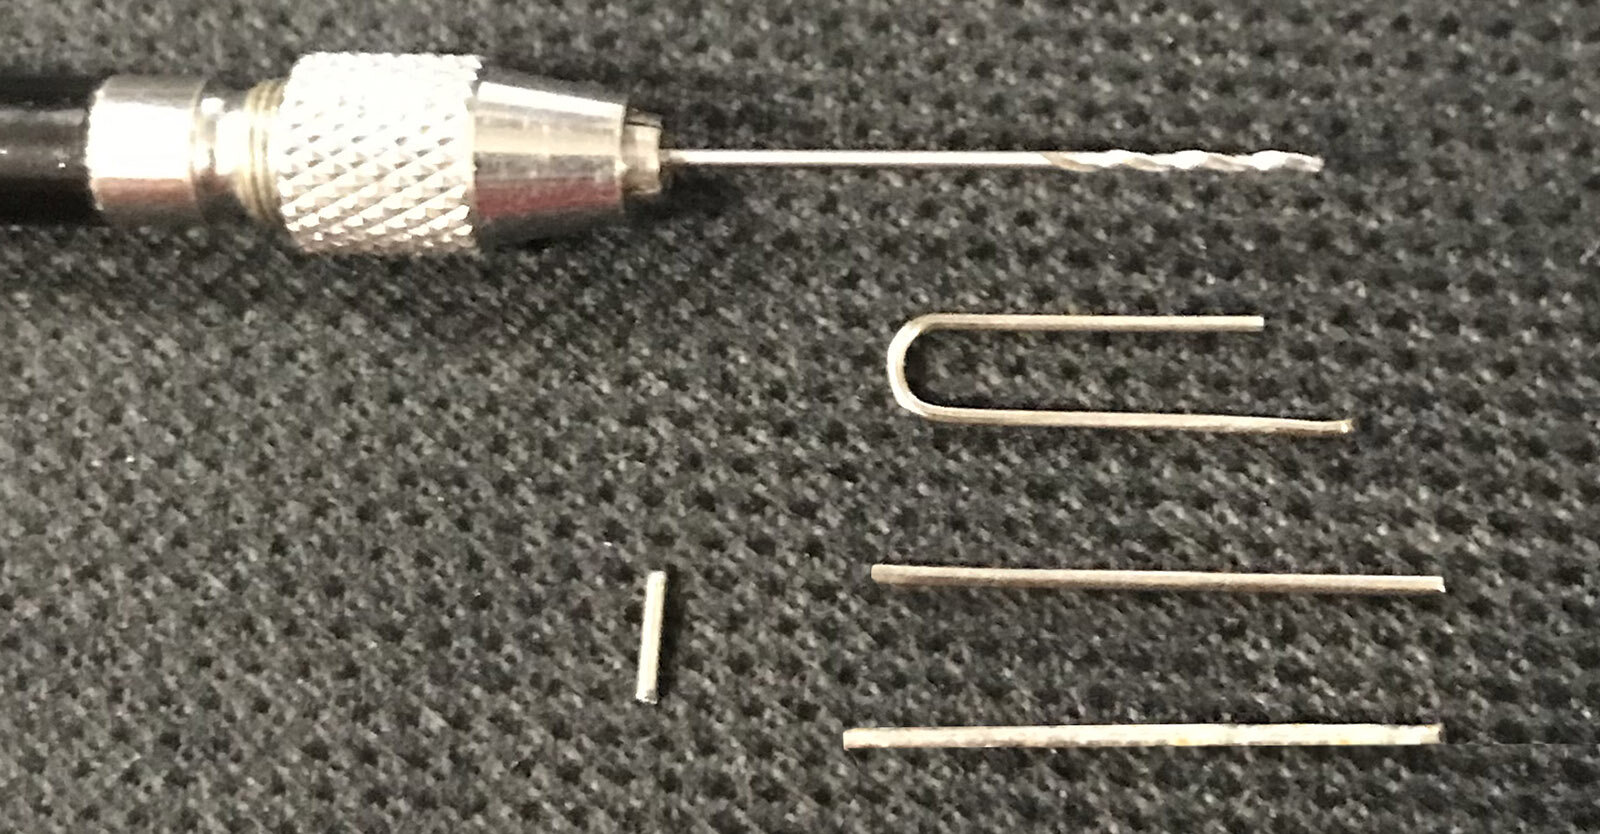
With tiny holes drilled into the plastic to securely mount the metal parts, I can be assured these antennae will never break off!

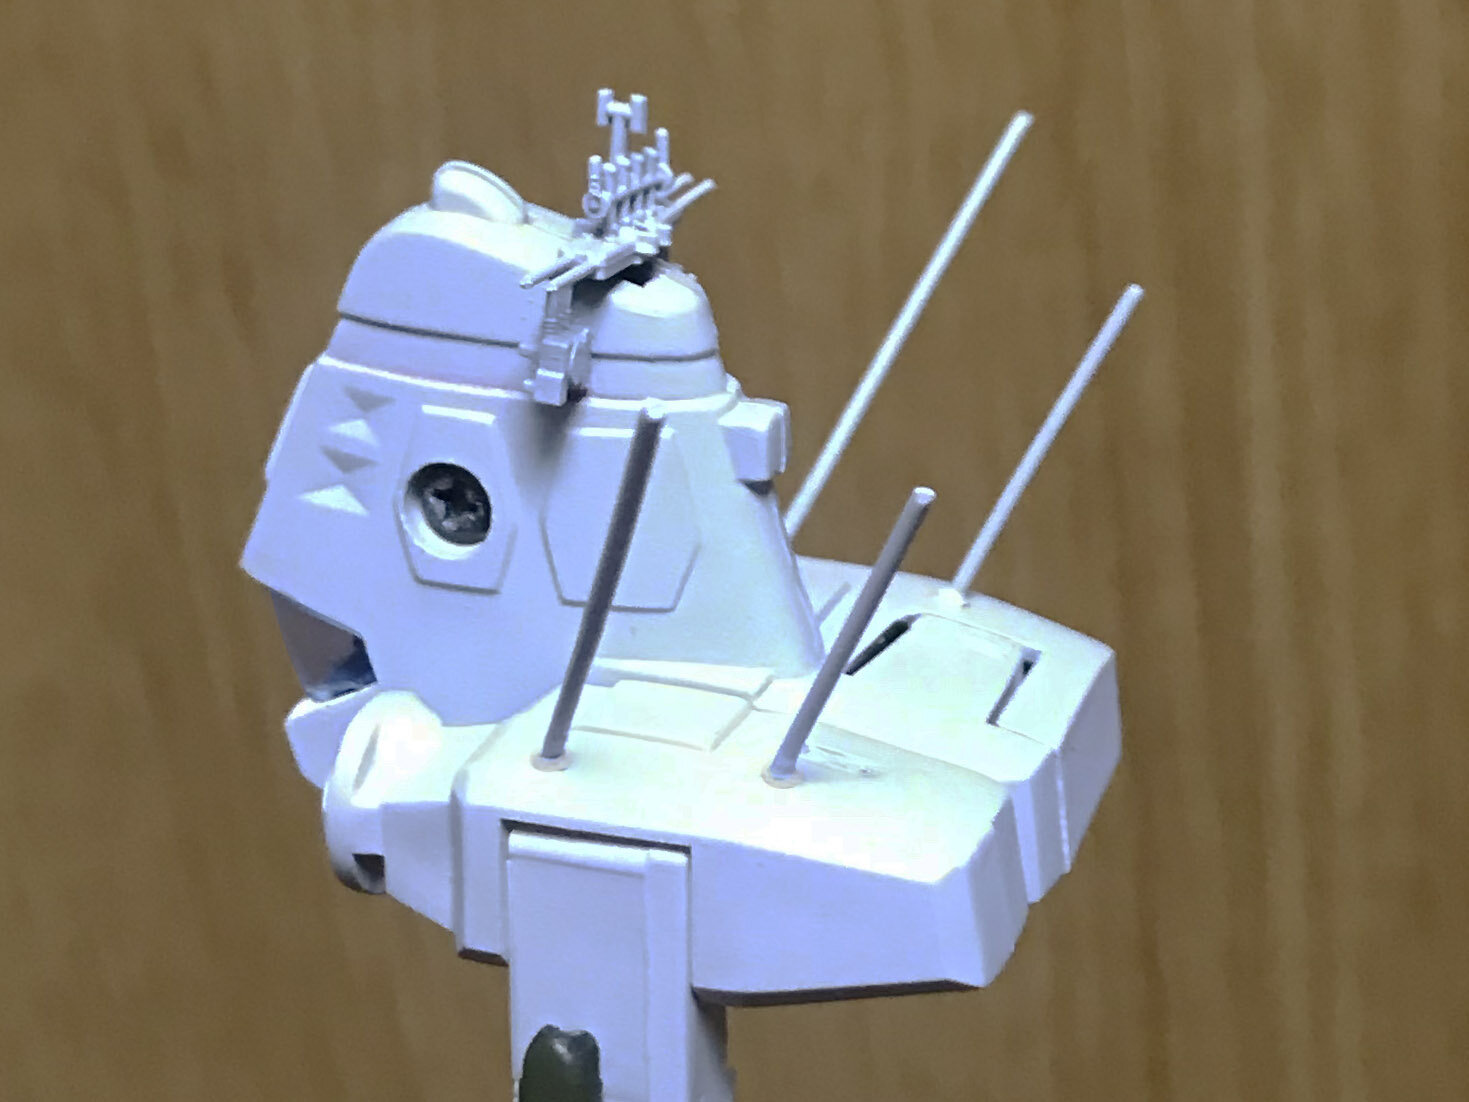
That's the basic aesthetic I'm working towards, which is why I've decided to eschew photo-etched parts, hyper-detailing or realistic weathering for this project. I'm trying to maintain the look of a mass-produced toy, rather than a model kit.
The most difficult part of this process, for me, is deciding where to draw the line.
nice.. this looks clean, awesome job... keep up the good work
-
On 6/10/2022 at 1:09 AM, arbit said:
I remember when this was still an awe inspiring grail toy, and even today we don't have a 1/3000 TV SDF-1 toy. Why?
they dont look at Macrossworld forums
or they would have seen all these beauties including my SDF-1
-
-
starting to look good
-
43 minutes ago, tekering said:
Are you planning to print the whole street in one go? 😶
perhaps, ill certainly try
-
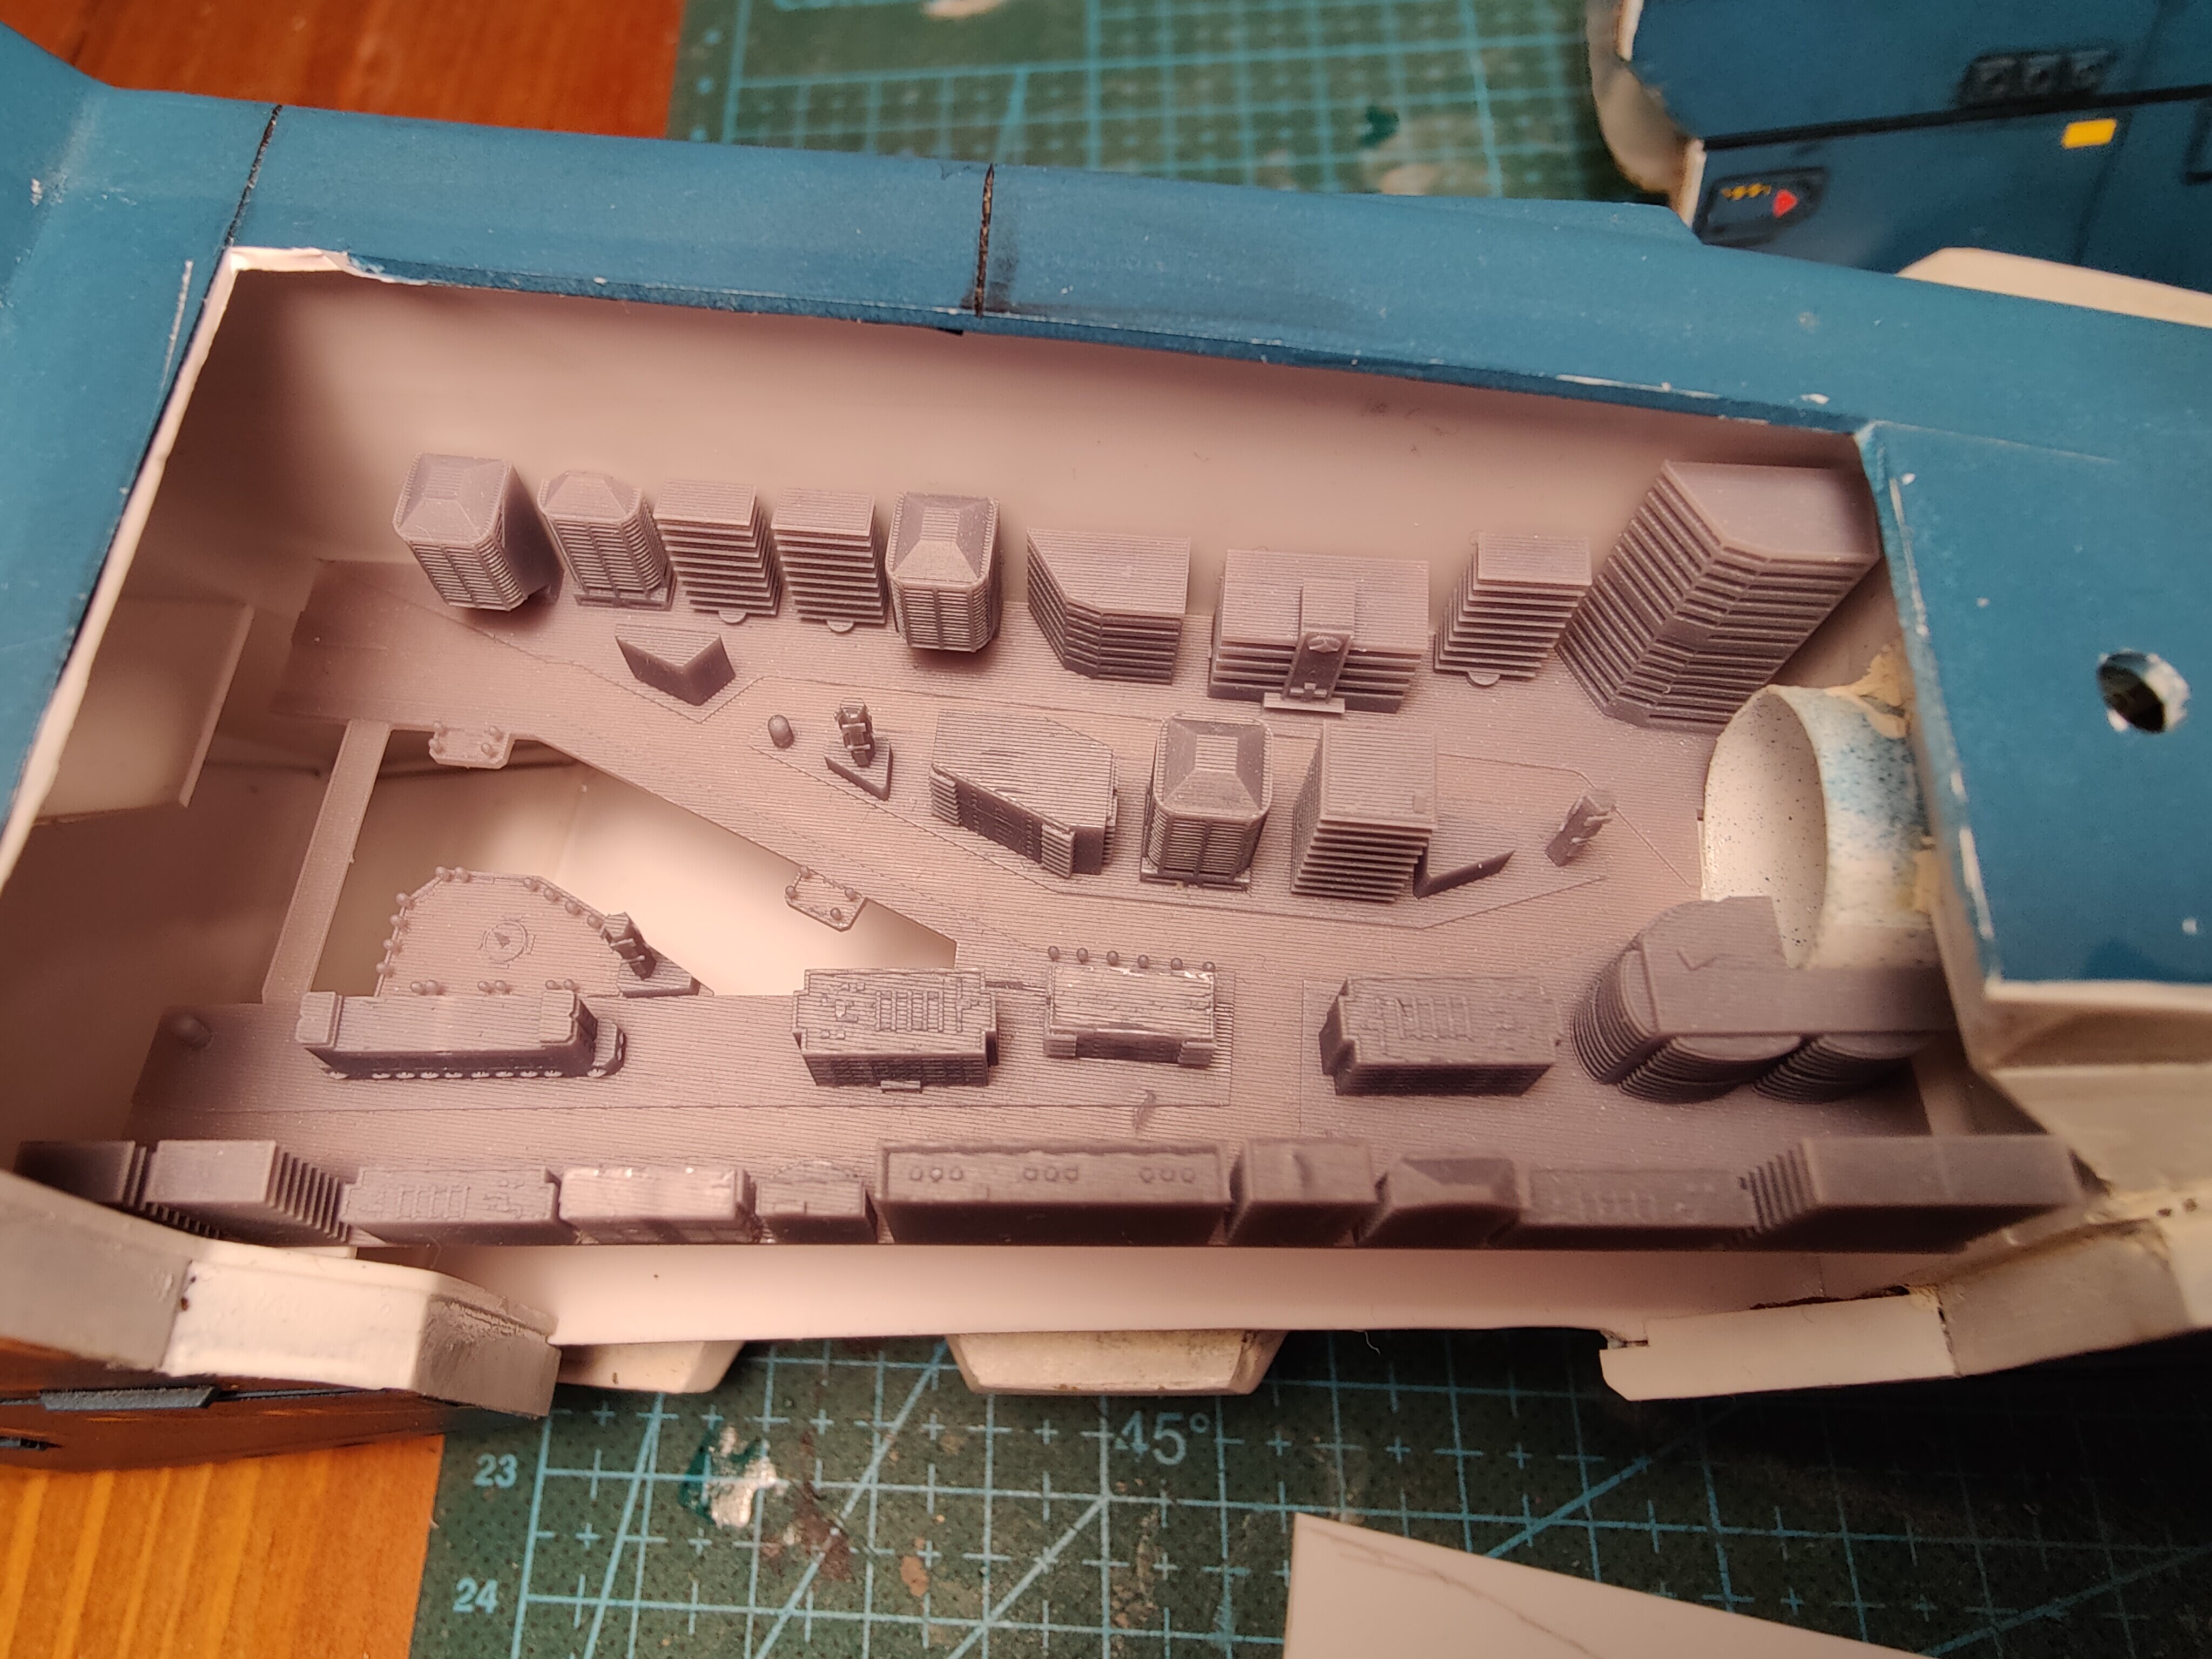
another update!
the hospital
-
so the other part of the city is in the making xD


Whats Lying on your Workbench MK IV
in The Workshop!
Posted
update on the Zenith mech from Front mission Evolved
a test print...