

Nyankodevice
-
Posts
517 -
Joined
-
Last visited
Content Type
Profiles
Forums
Events
Gallery
Posts posted by Nyankodevice
-
-
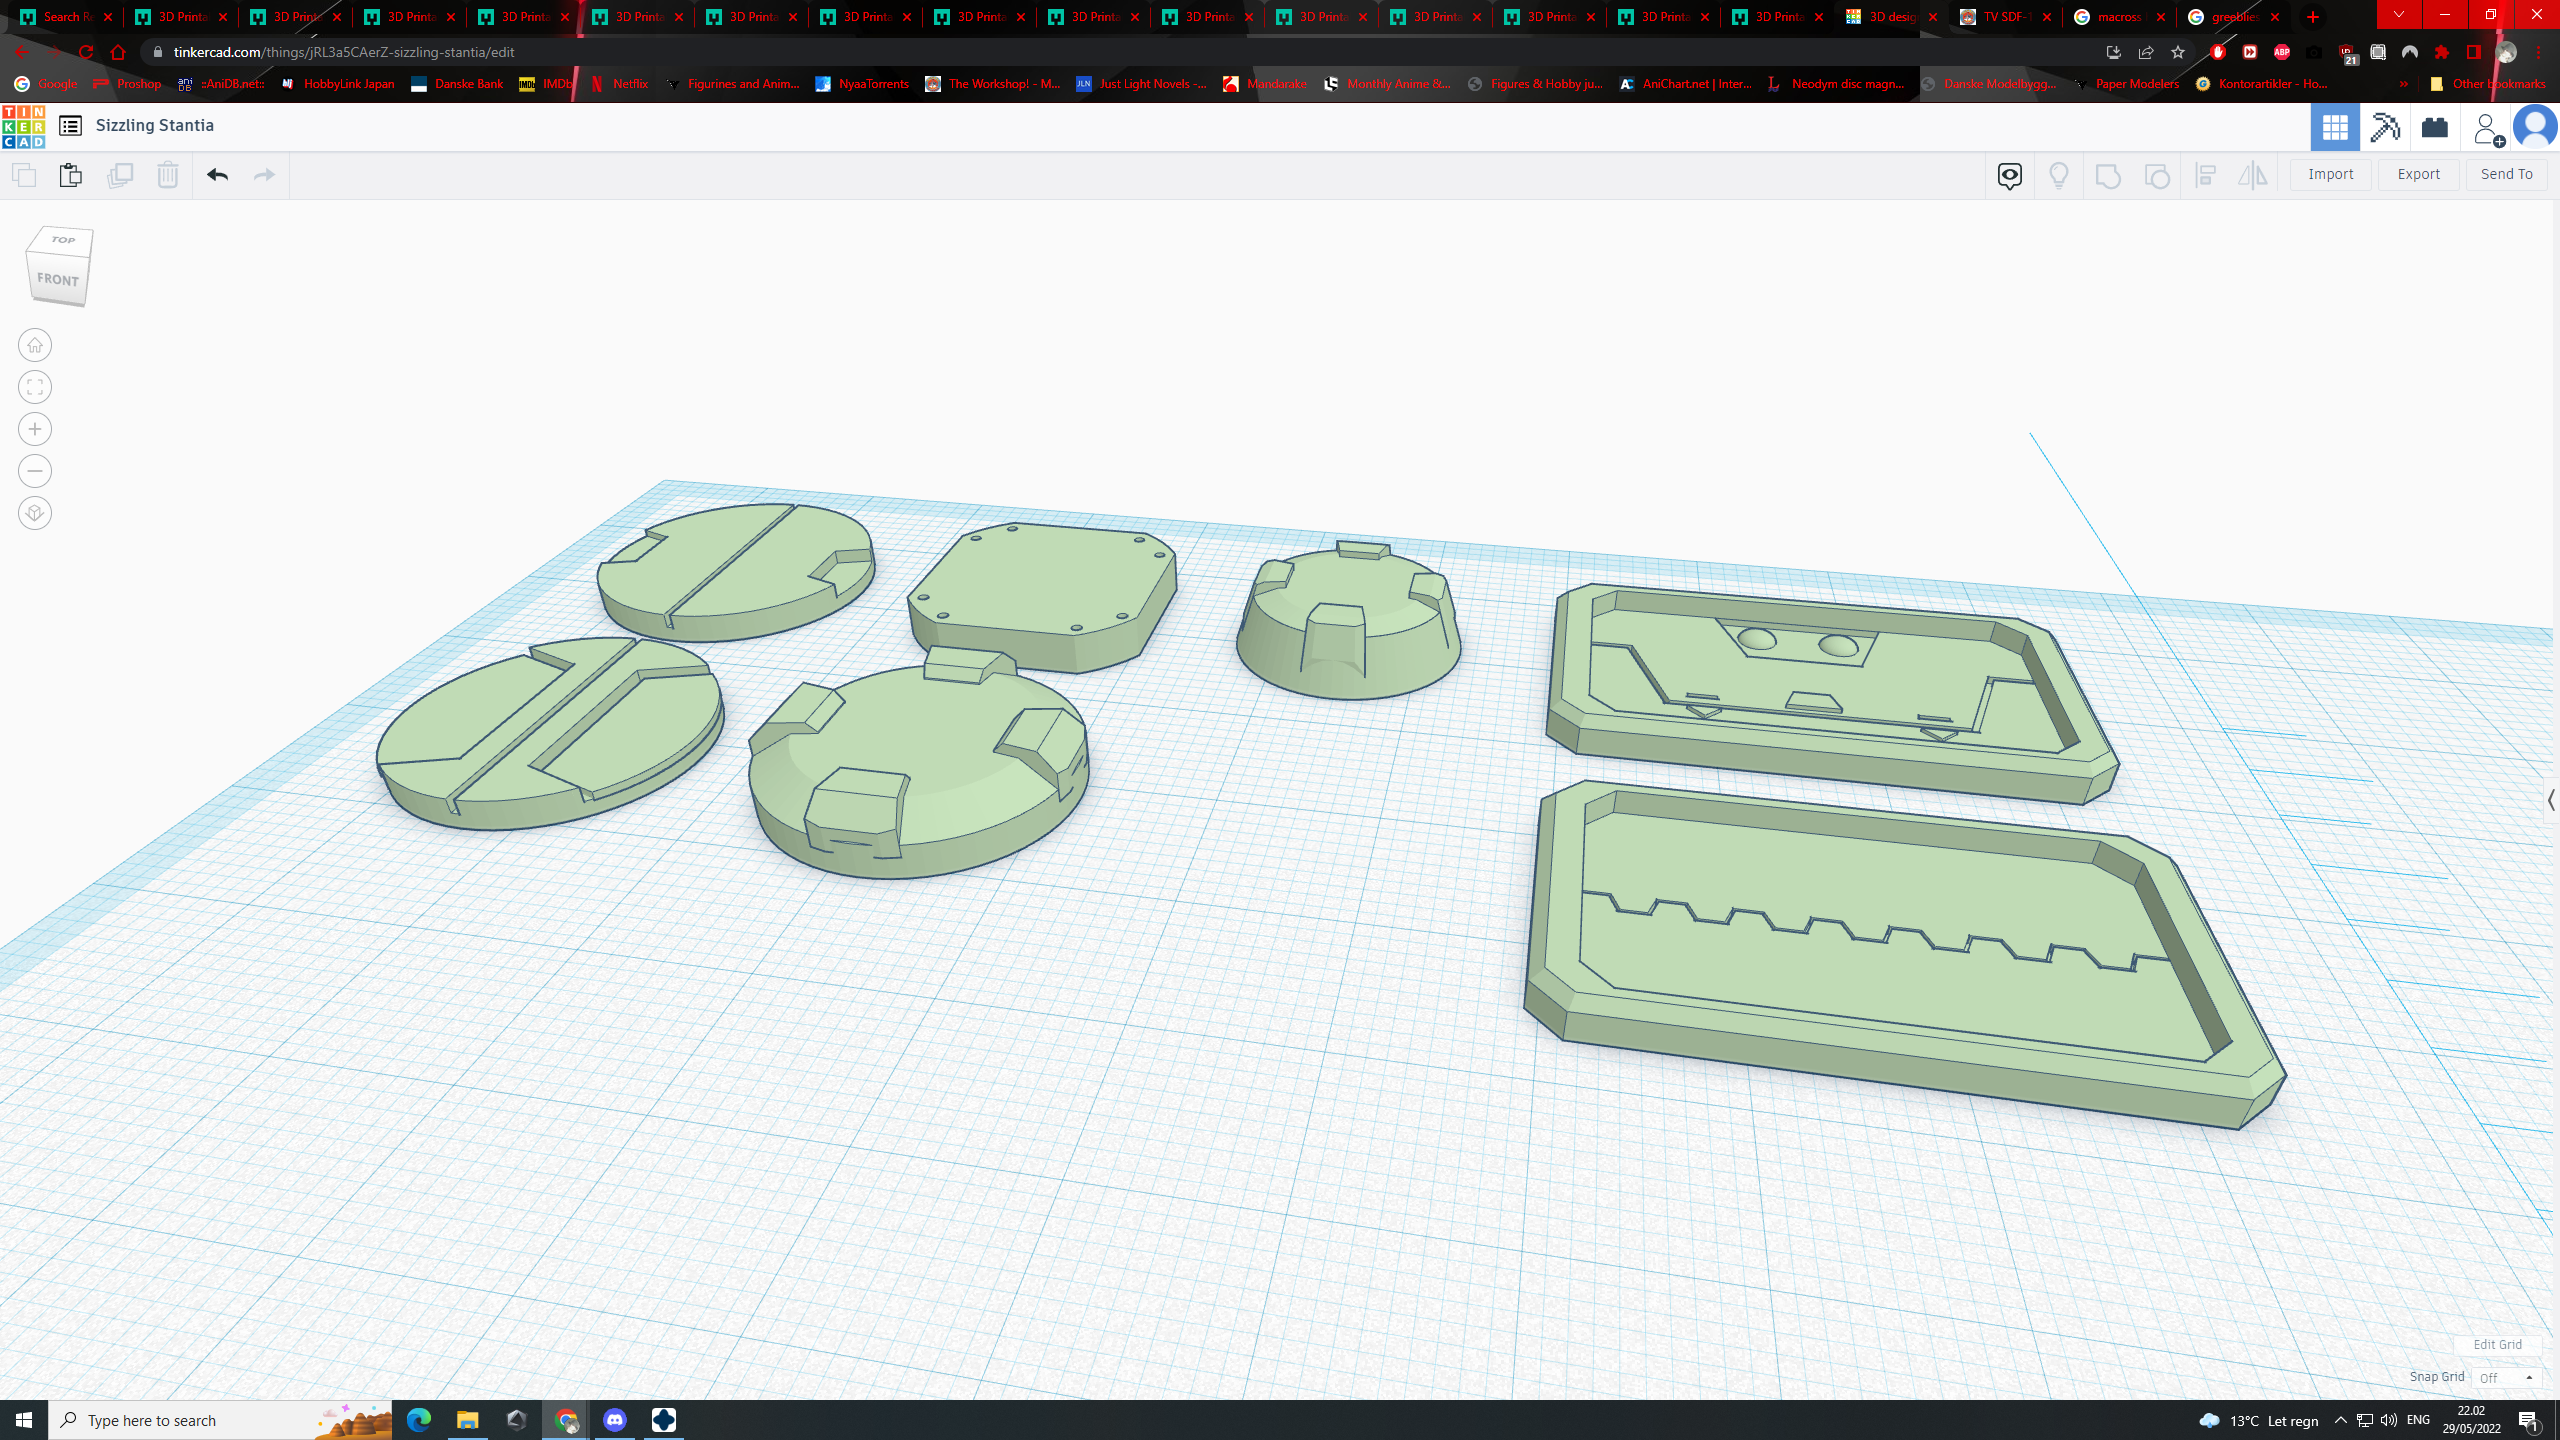
which type of lid fits best?
-
22 hours ago, Shawn said:
How hard would it be to make the little support vessels in a 3D printer?
Ever since the Model Package Art book came out, I've been hoping someone would take it up as a fun side project, and would look especially good on such a fantastic custom.
")
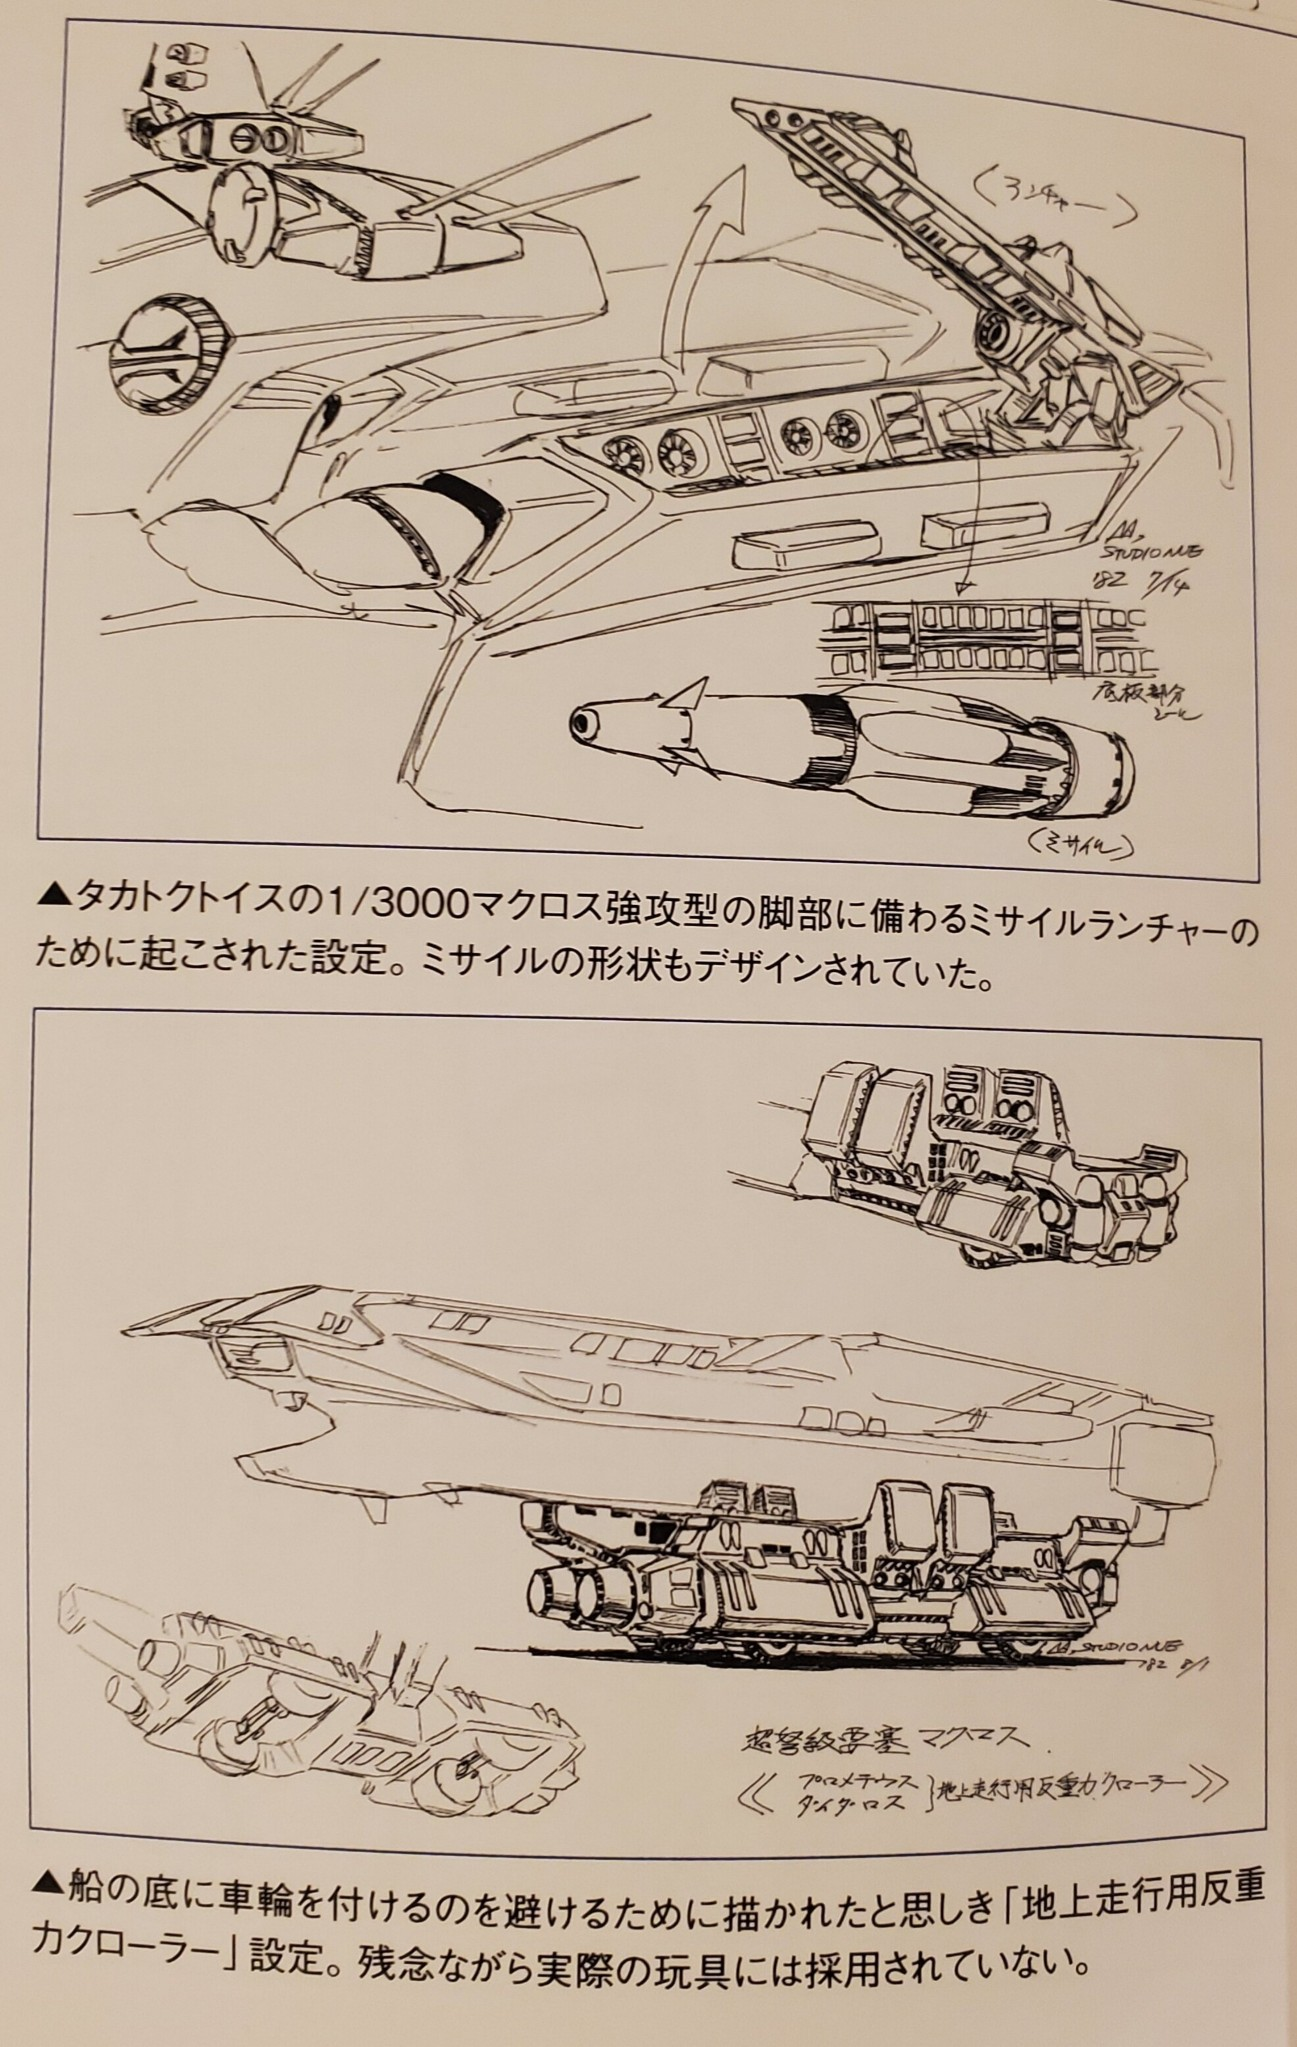
looking at the translation it says something about takatoku missile in legs
-
2 hours ago, arbit said:
Very nice!
It's not that clear to me what that elevating gun looks like, or where it goes exactly.
The rolling vehicle to carry the Daedalus is more clear, but you would have to design it for a specific model or toy, I guess.
im more concerned about the weight it must carry on those 4 small wheels, wouldnt it sink down into the ground?
-
40 minutes ago, Big s said:
Yeah, looking at the diagram, it’s definitely the back of the lower leg in ship mode. I don’t remember seeing the back open up like that in the show, but there appears to be a cannon and oddly placed missile tubes
dont think it made it into any animated media, also imo its a badly placed weapon, theres already a turret and a missile turret placed on top of it..
but i could easily make a version for my ship, since its so big..
-
On 8/19/2022 at 8:03 PM, arbit said:
@tekering Wow, the Matchbox has never looked so good! Fantastic work,
A couple questions: I am worried about your wood screws eating away at the plastic over time. Maybe I misunderstand the mechanism, but could you possibly use a screw and nut with washer instead? You could lodge the nut with epoxy (Add some pla plate to fully bury the nut).
Since you are planning to change up the guns, have you seen @Nyankodevice's SDF-1 guns on Thingiverse? https://www.thingiverse.com/thing:5389365
hi guys i made an updated version of my cannons, also i have uploaded new rail cannons too
https://www.thingiverse.com/thing:5961035 the new cannon
https://www.thingiverse.com/thing:5961048 the Rail cannon
https://www.thingiverse.com/thing:5961088 missile turrets
@tekering this is looking good, keep up the good work
-
On 7/25/2022 at 11:24 AM, arbit said:
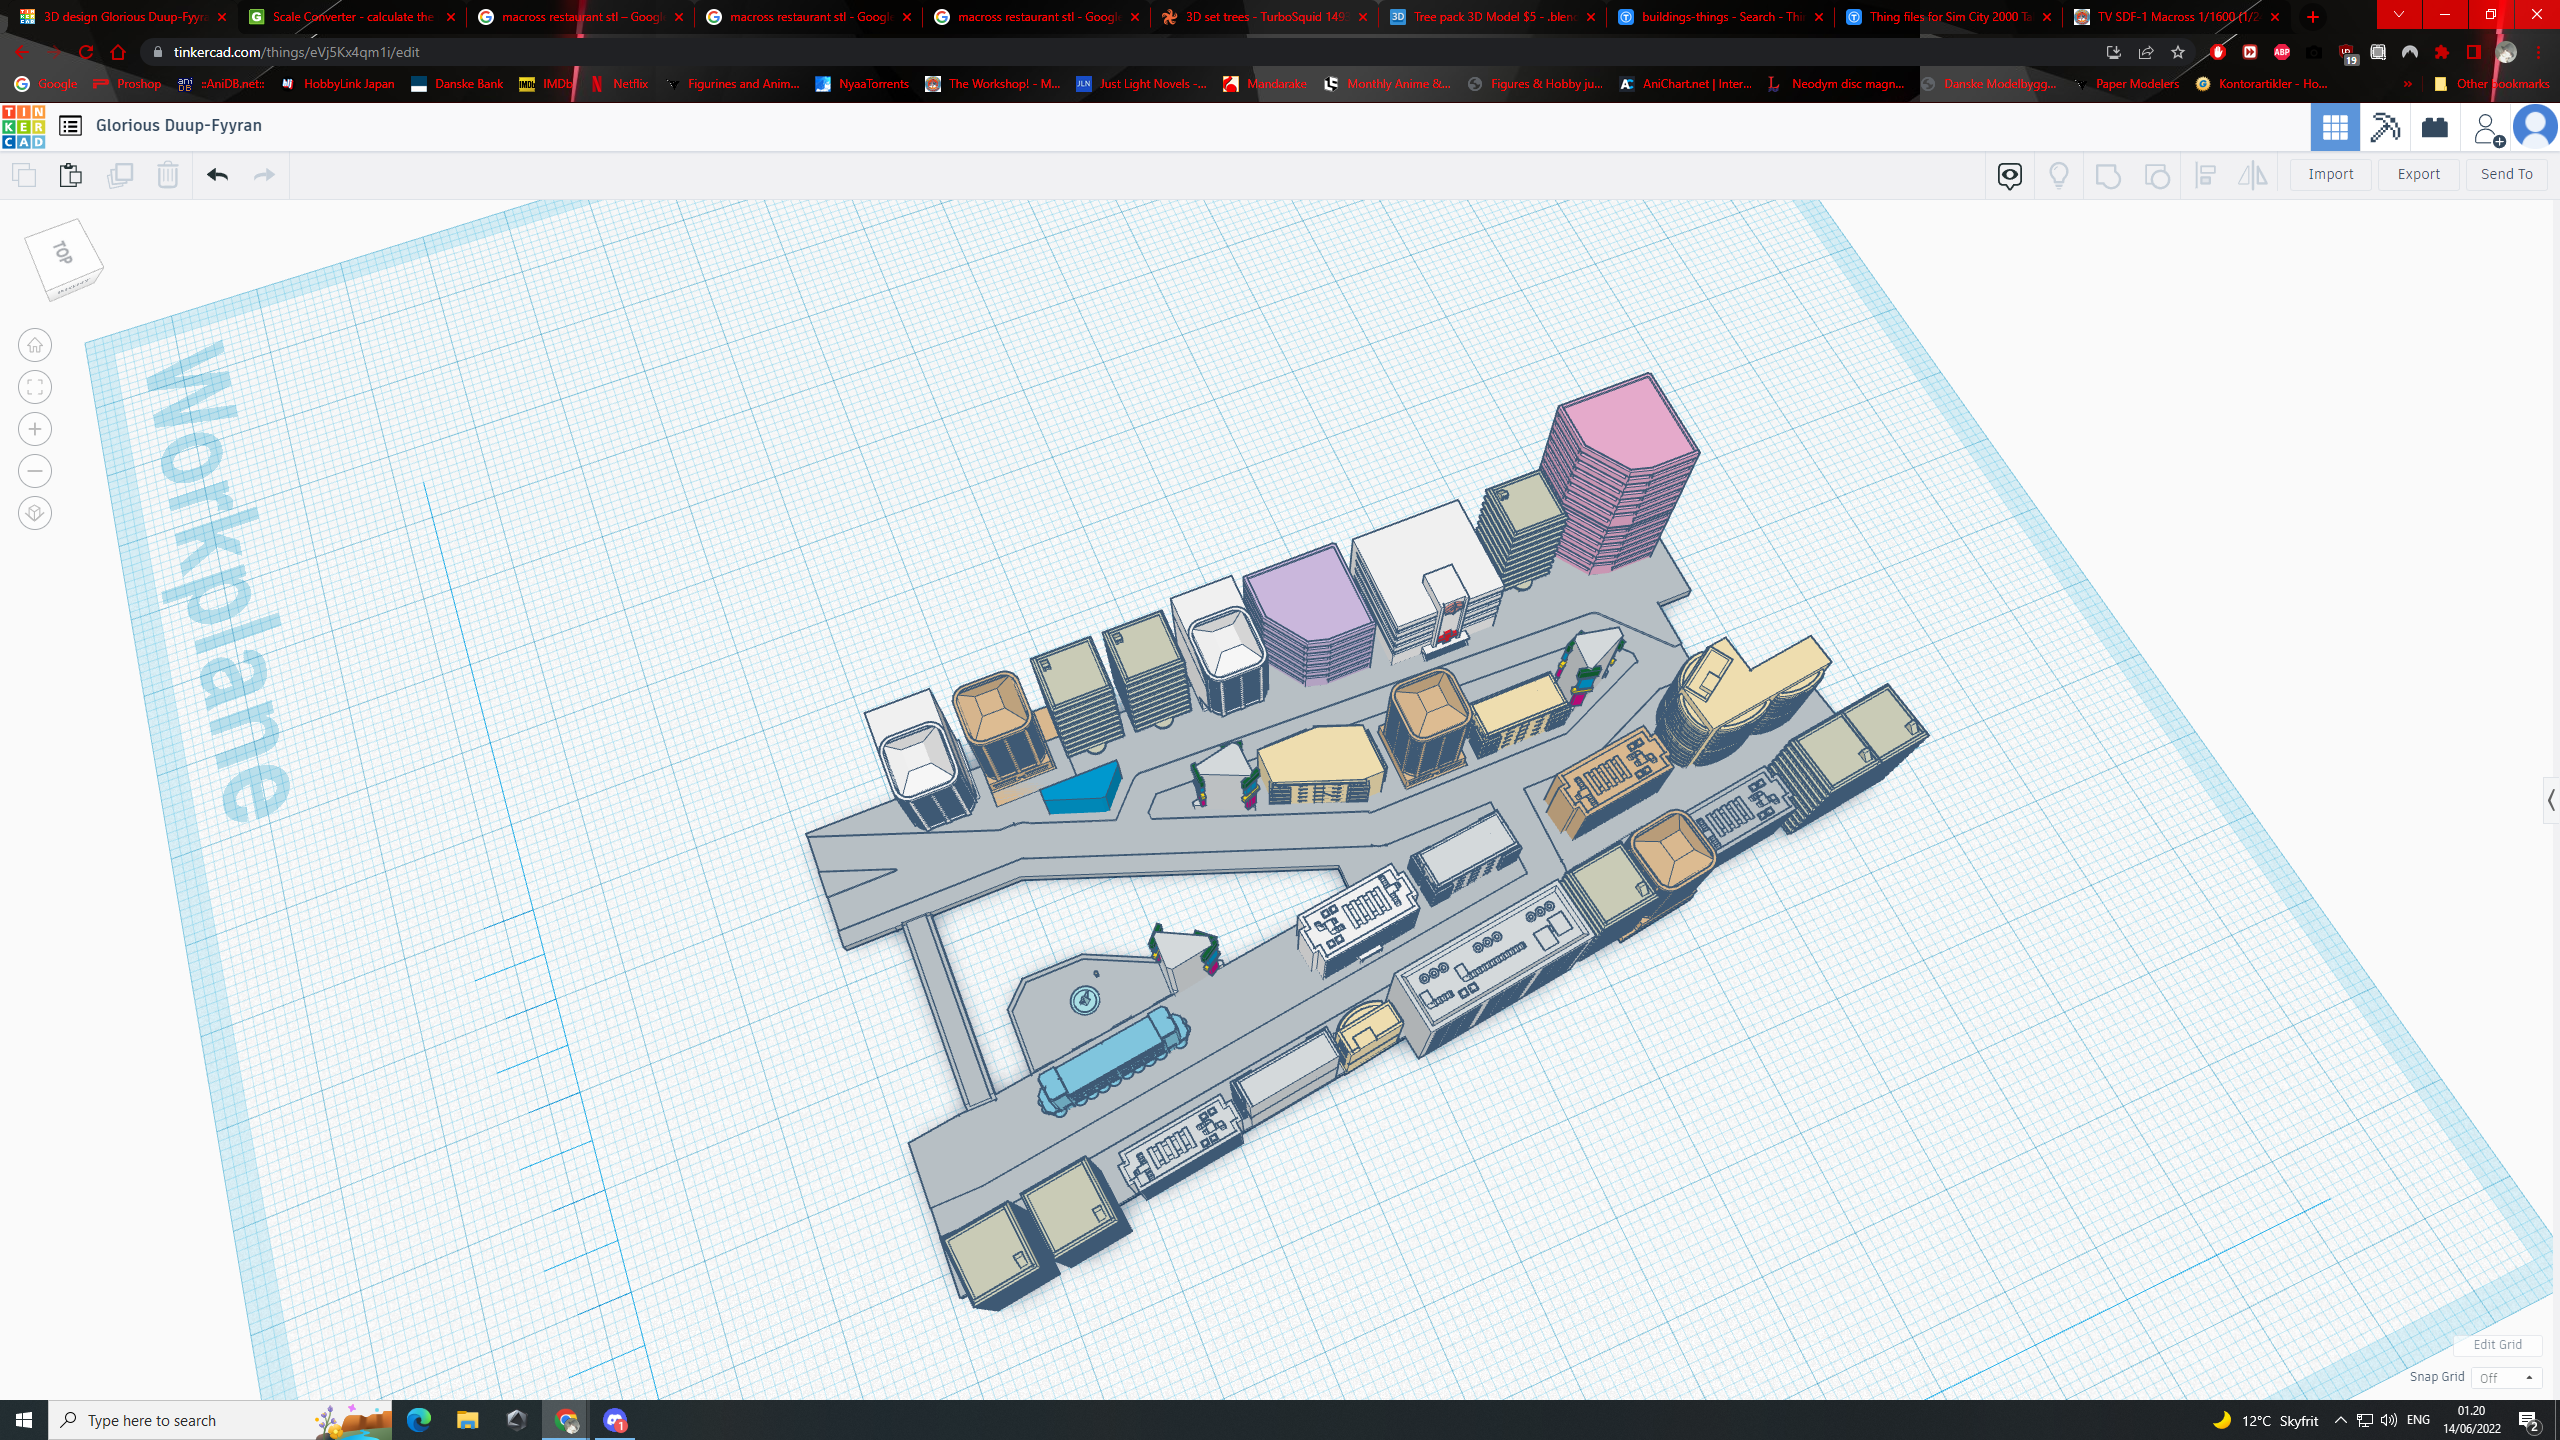
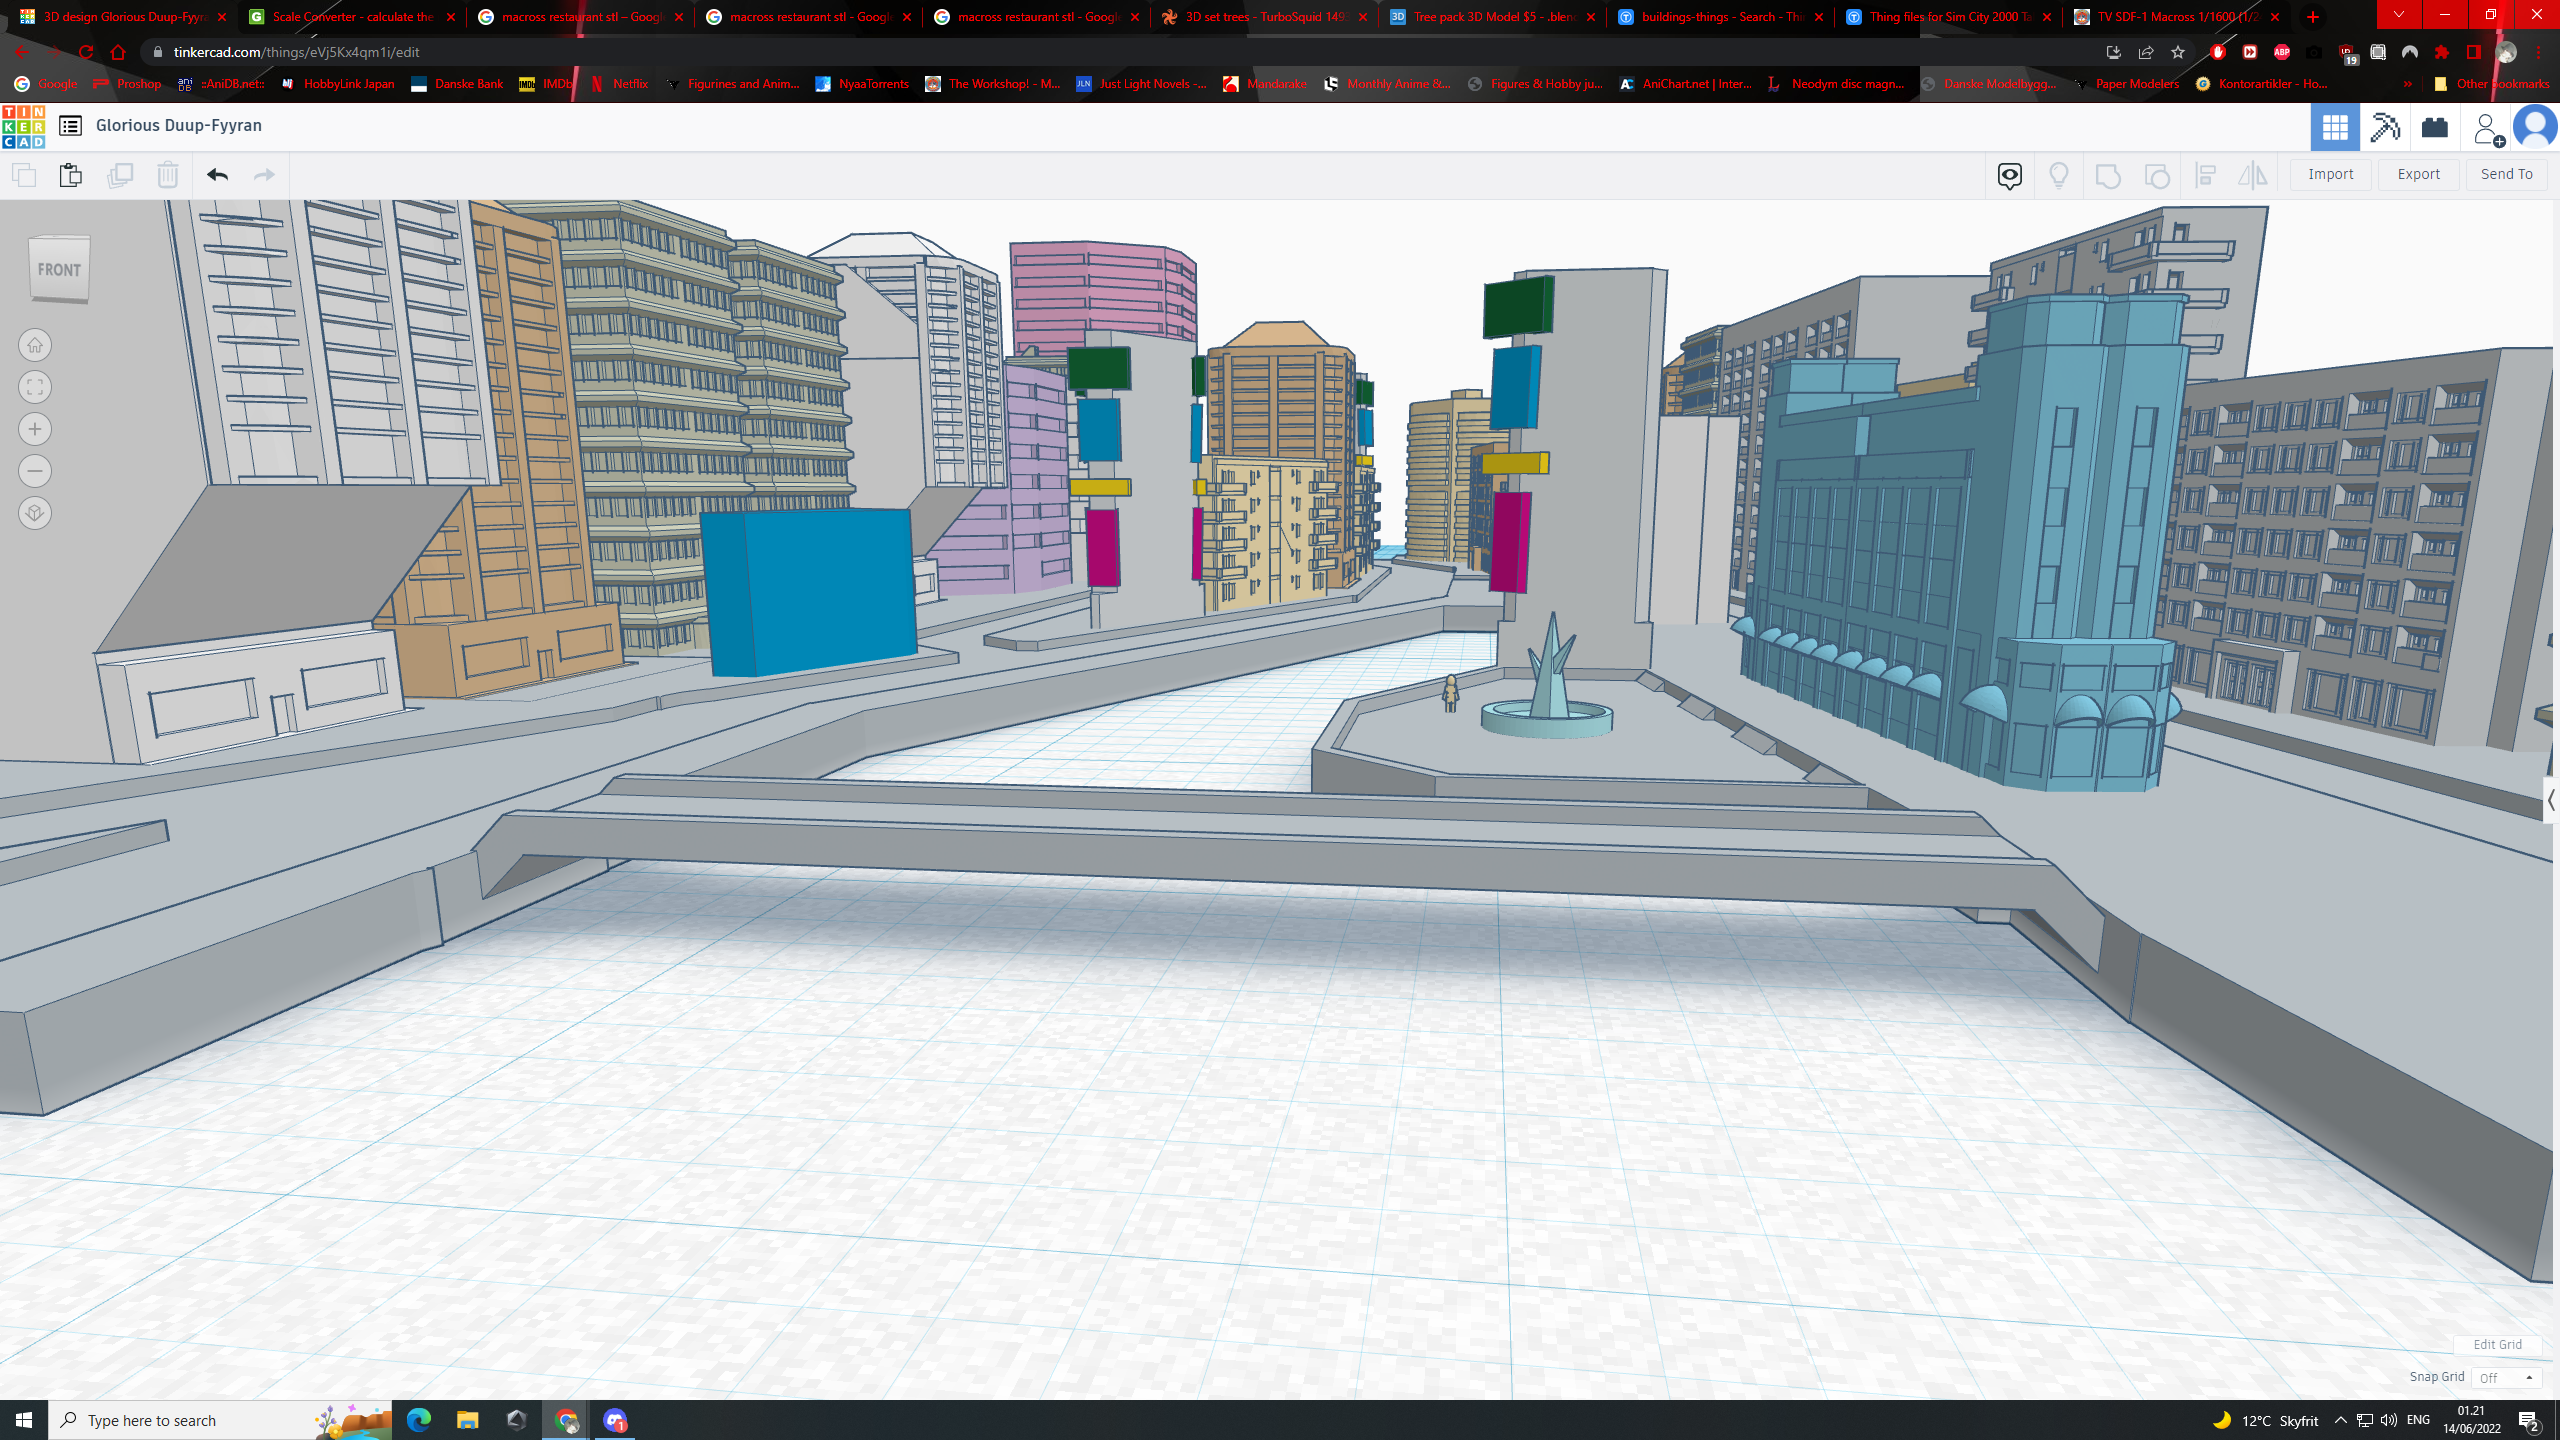
Whoaaaa looking good. Which line art are you using for the city, or are you making it up as you go?
Thx... Making it up as I go xD
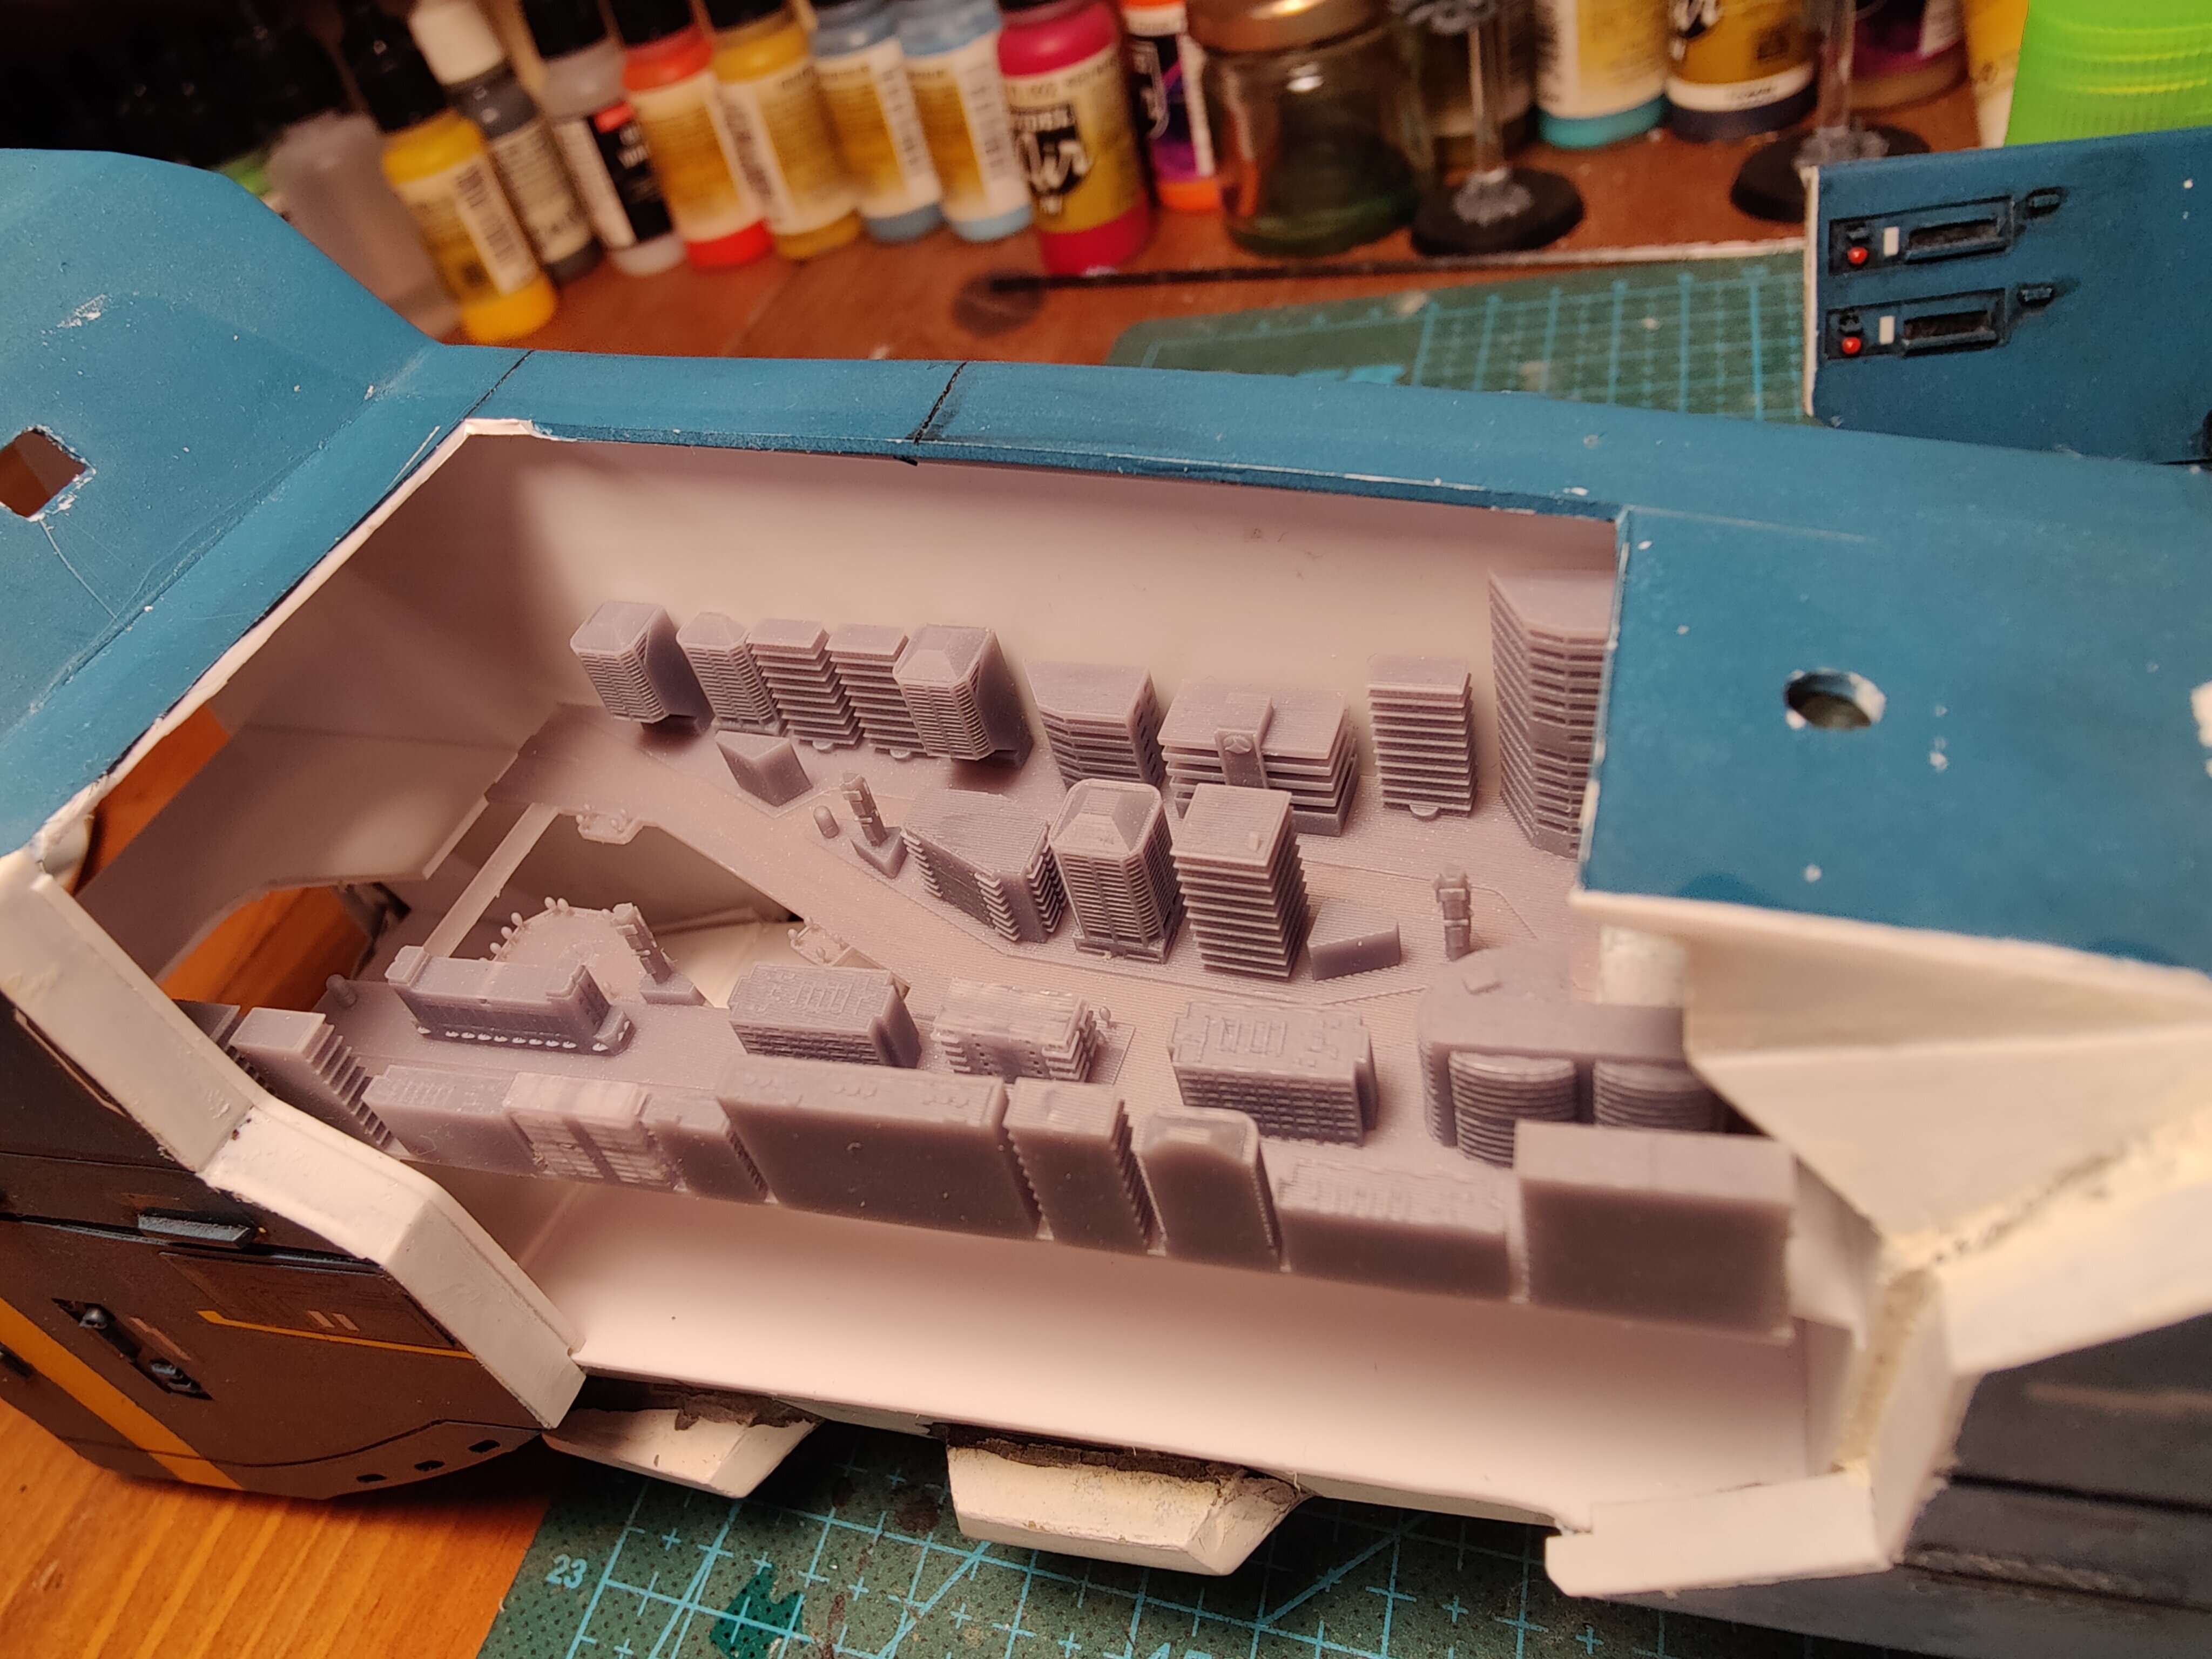
On 7/25/2022 at 7:26 PM, derex3592 said:See......that's what I always thought too!!! City was in the center section of the ship with parts that perhaps extended into the legs that we were never shown in the original show.
As I understand it, the center of the ship is the military base and factories
-
not only are the legs backwards, the leg fins are upside down too lol, the wide part of the fins should be pointing up

-
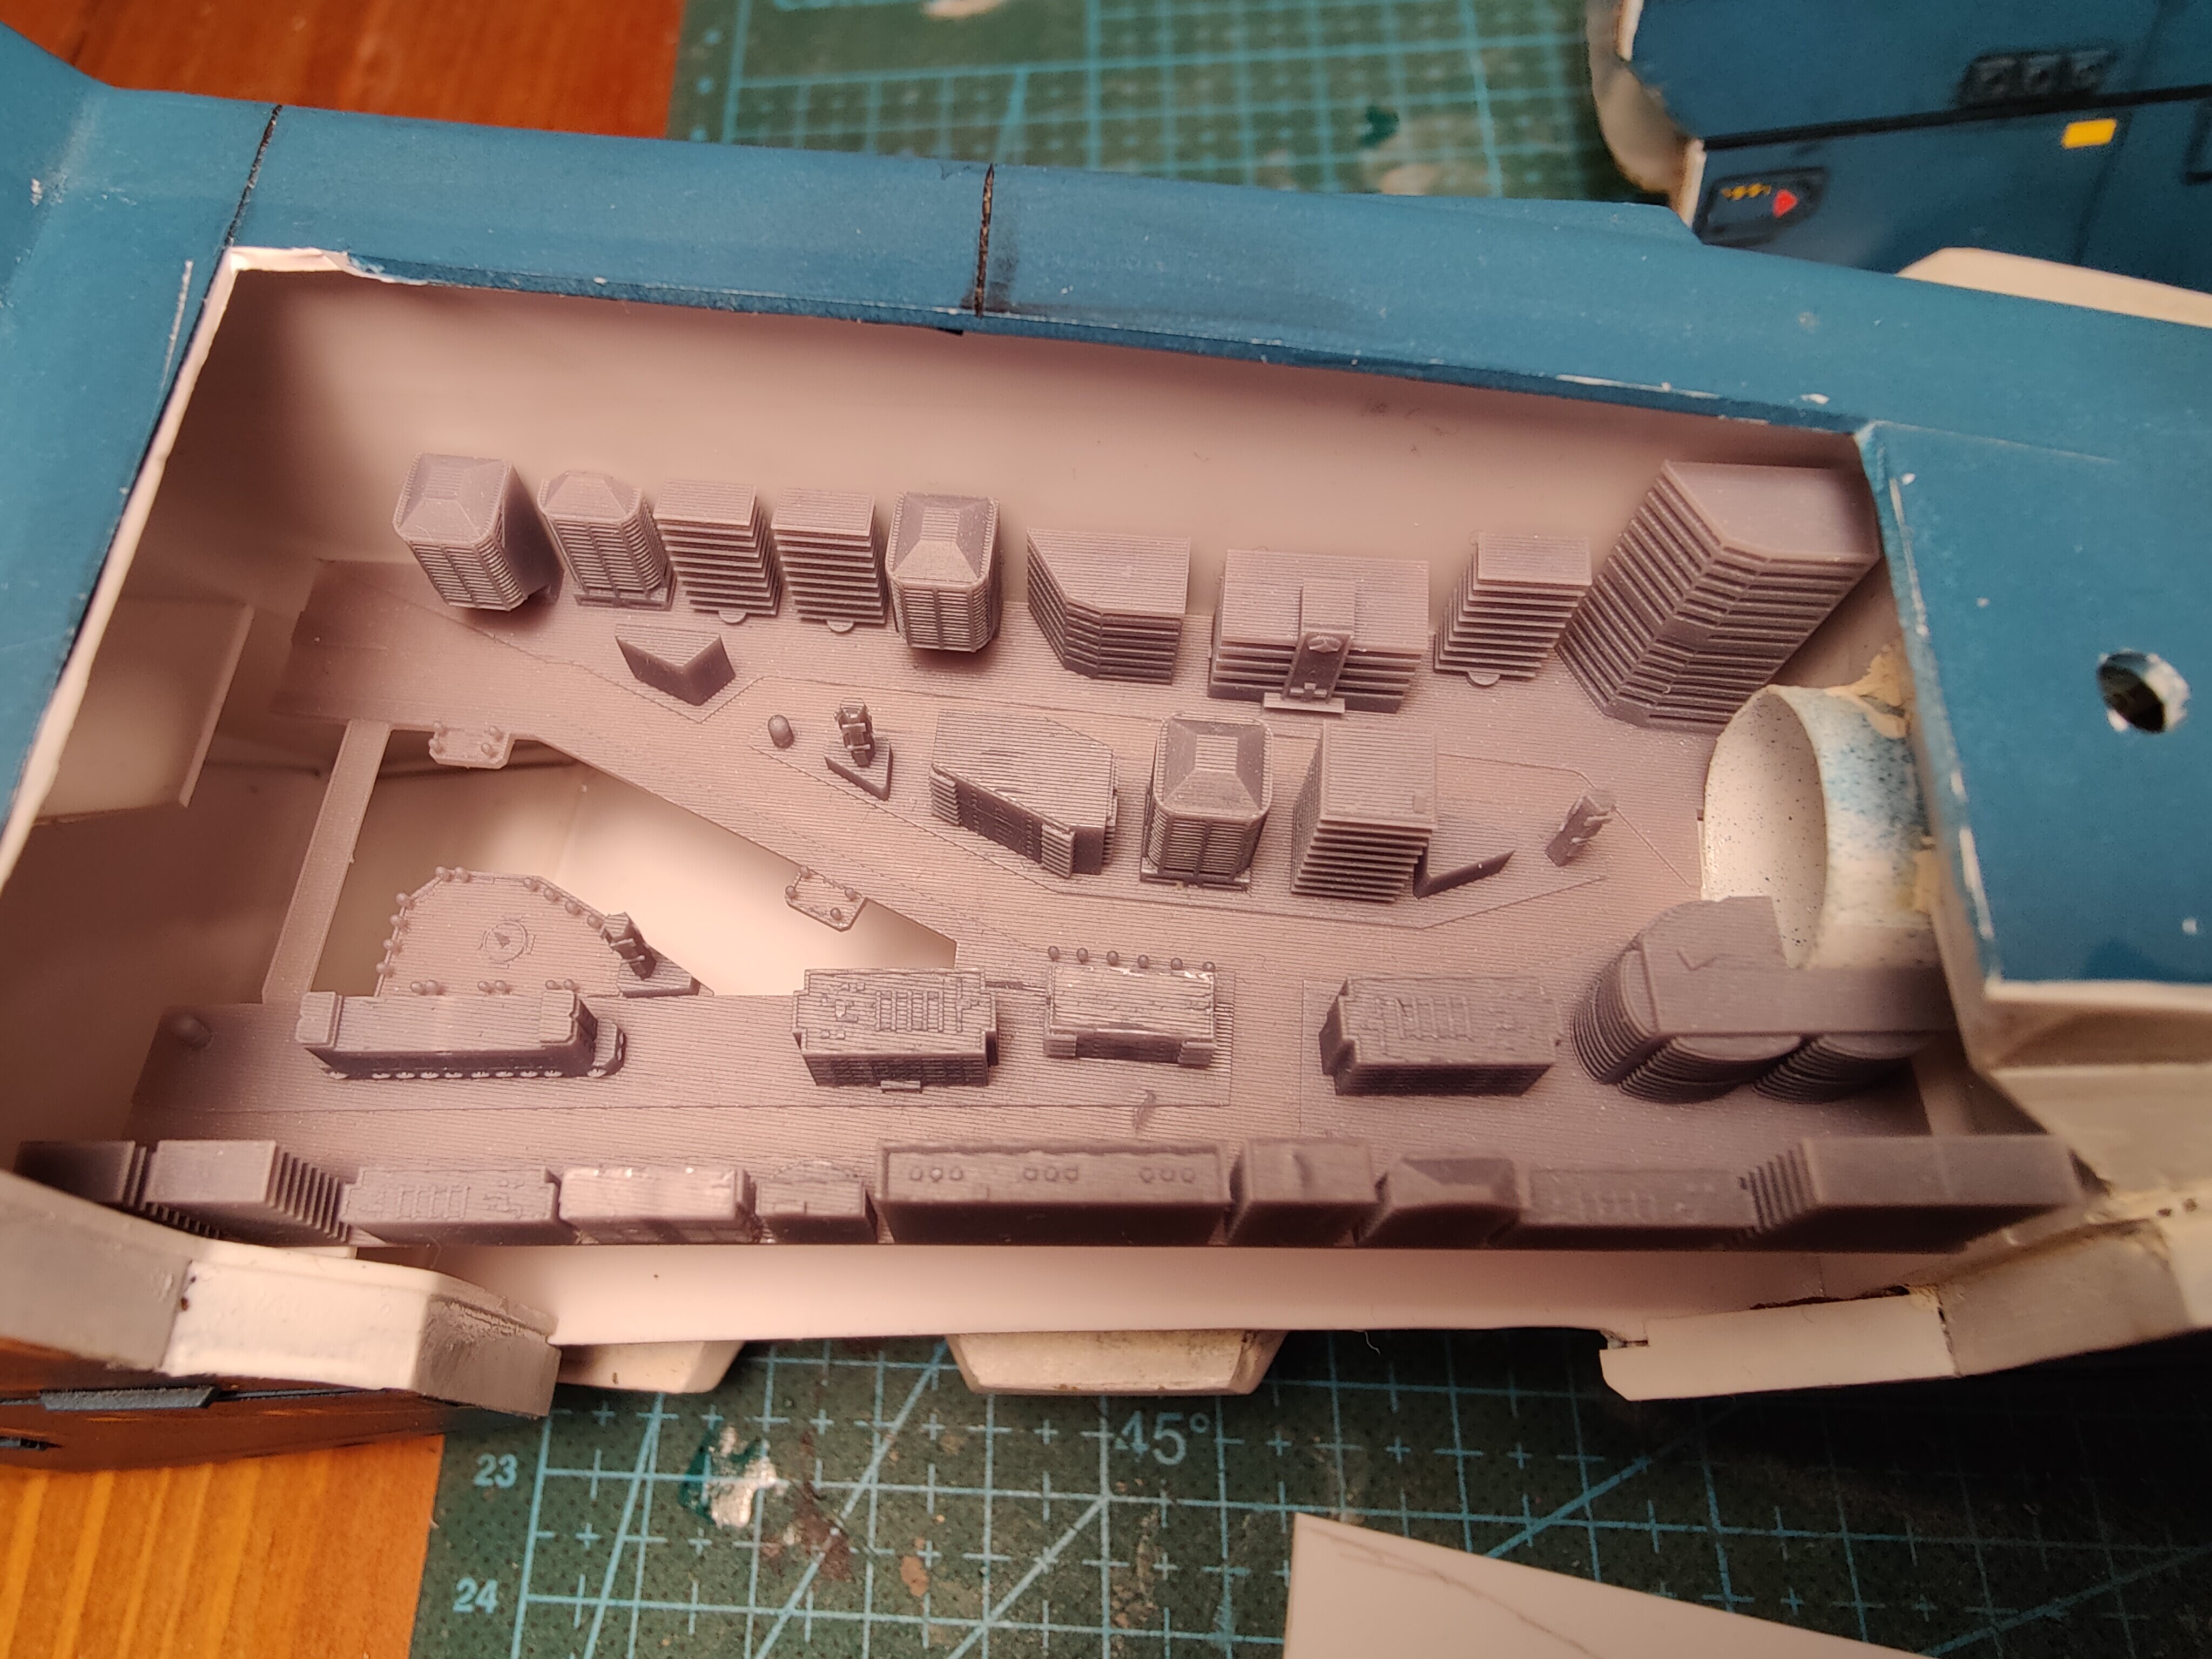
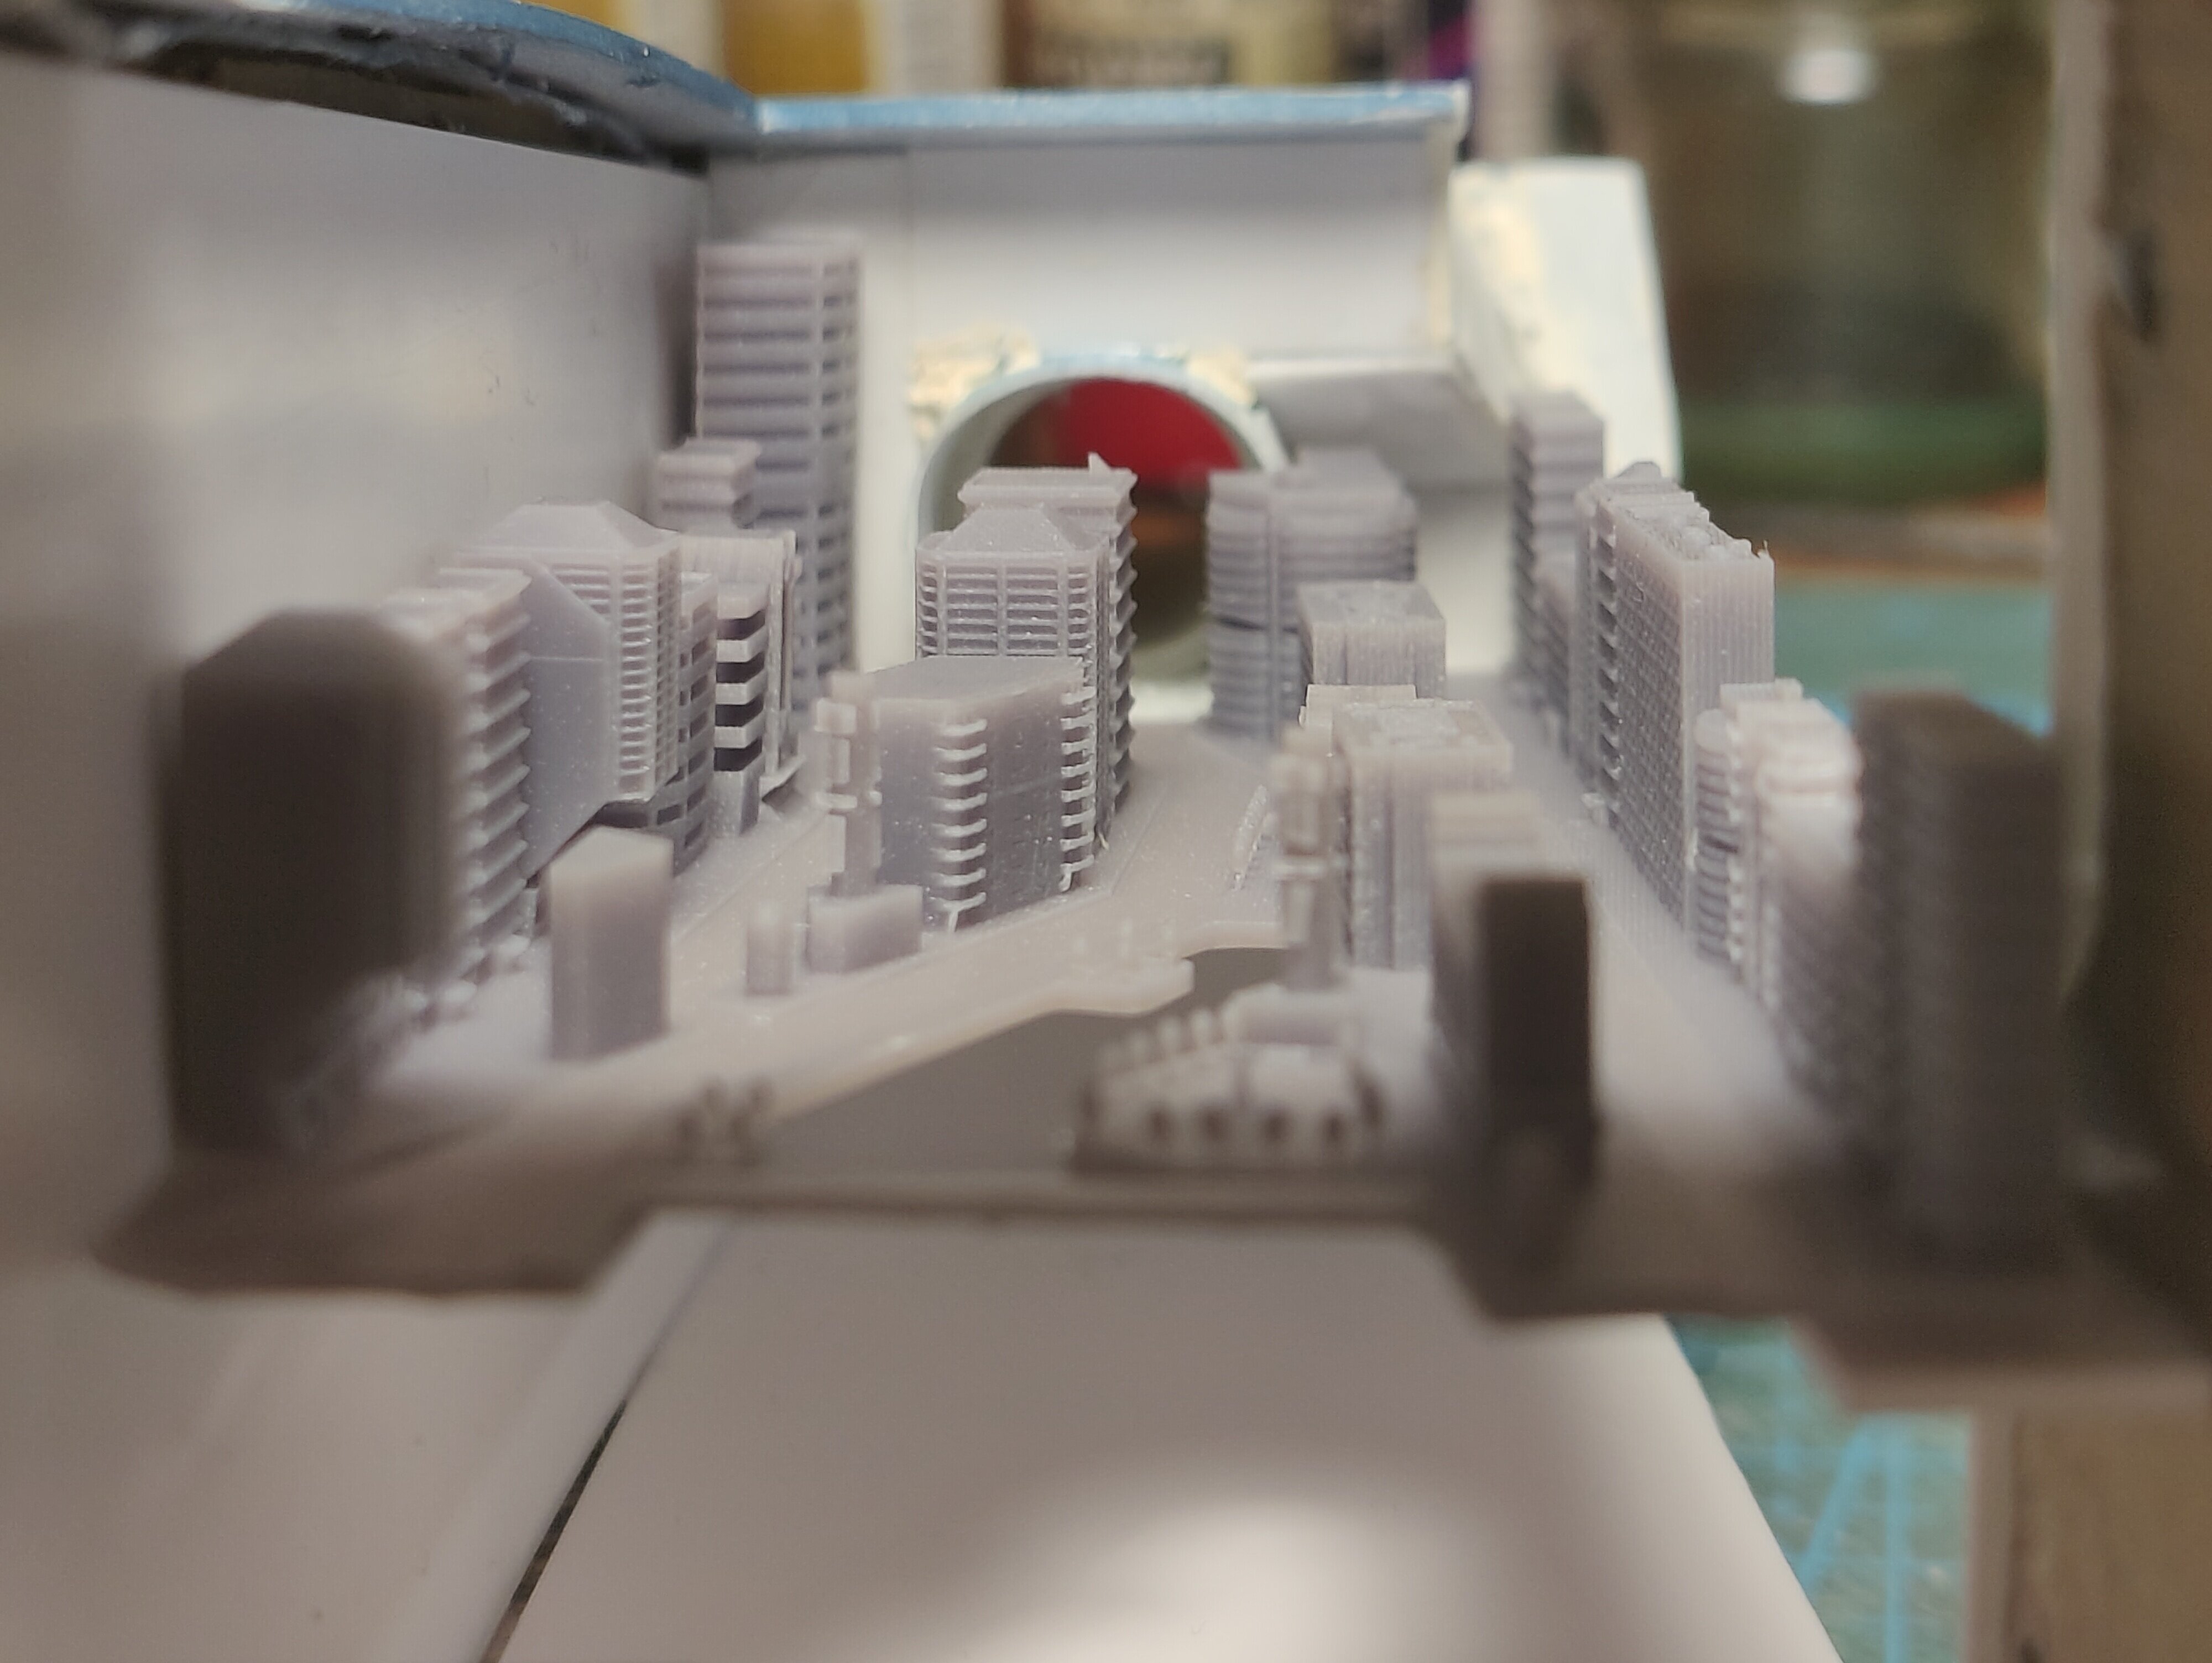
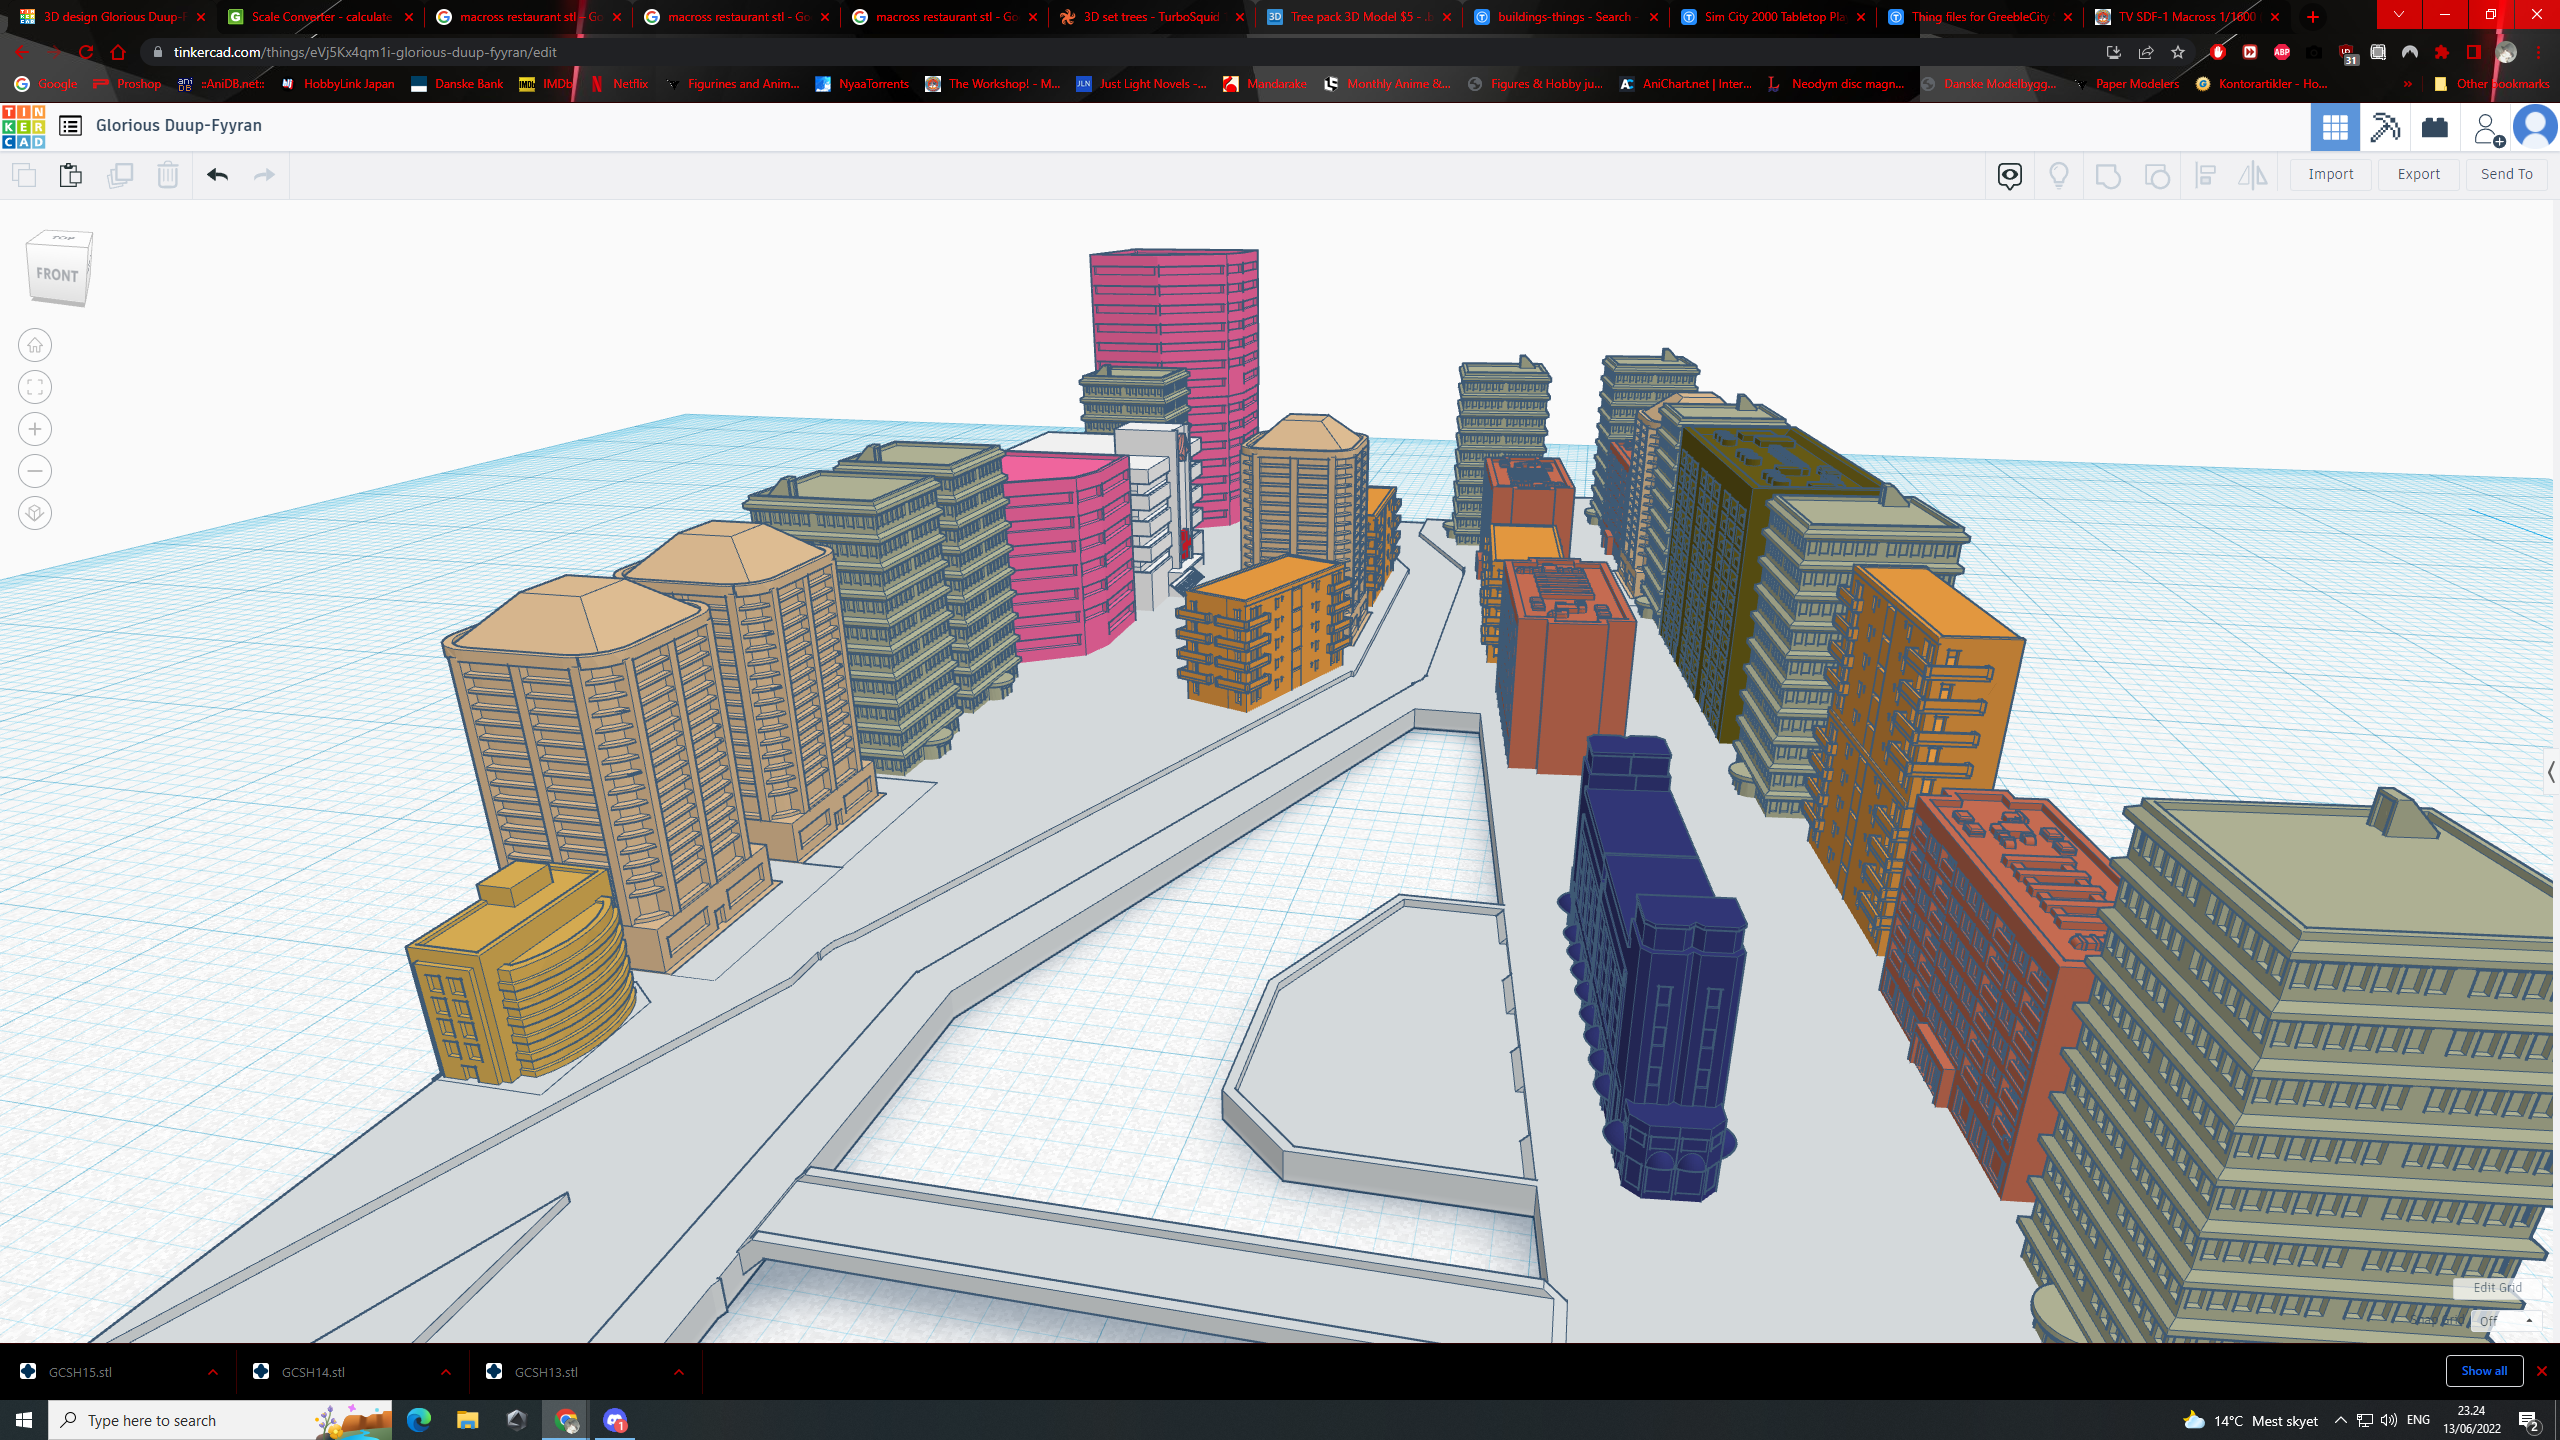
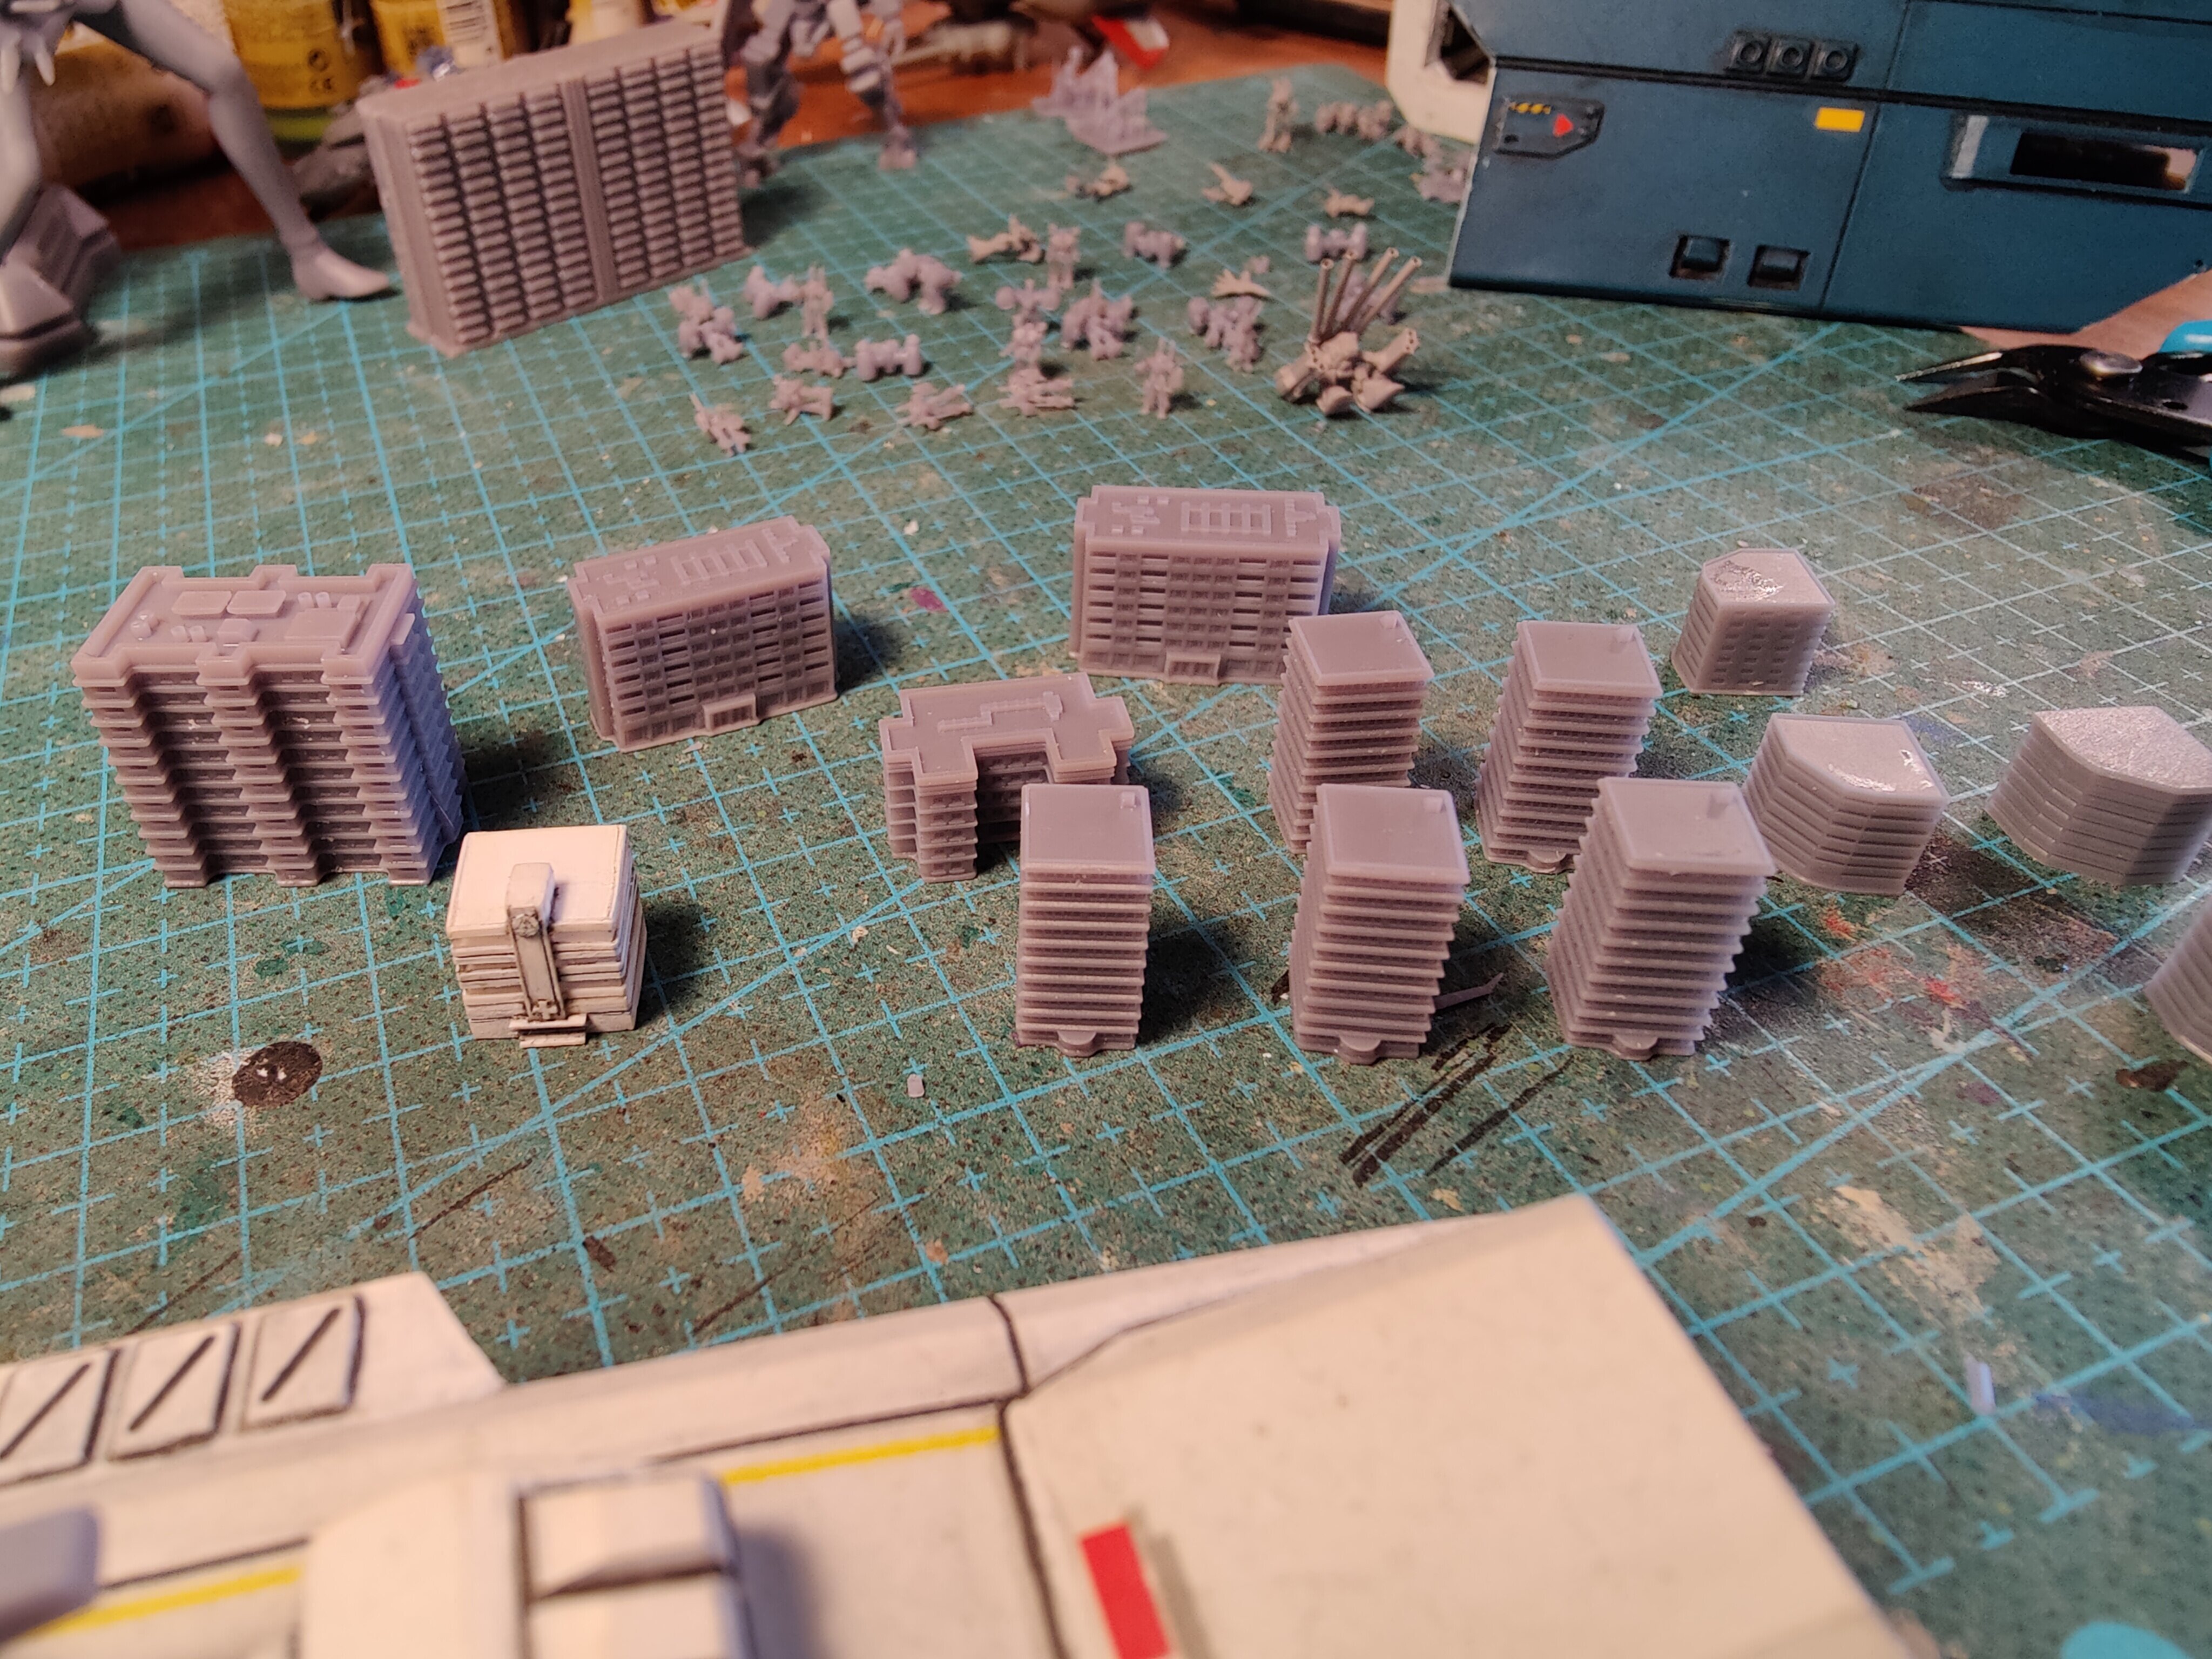
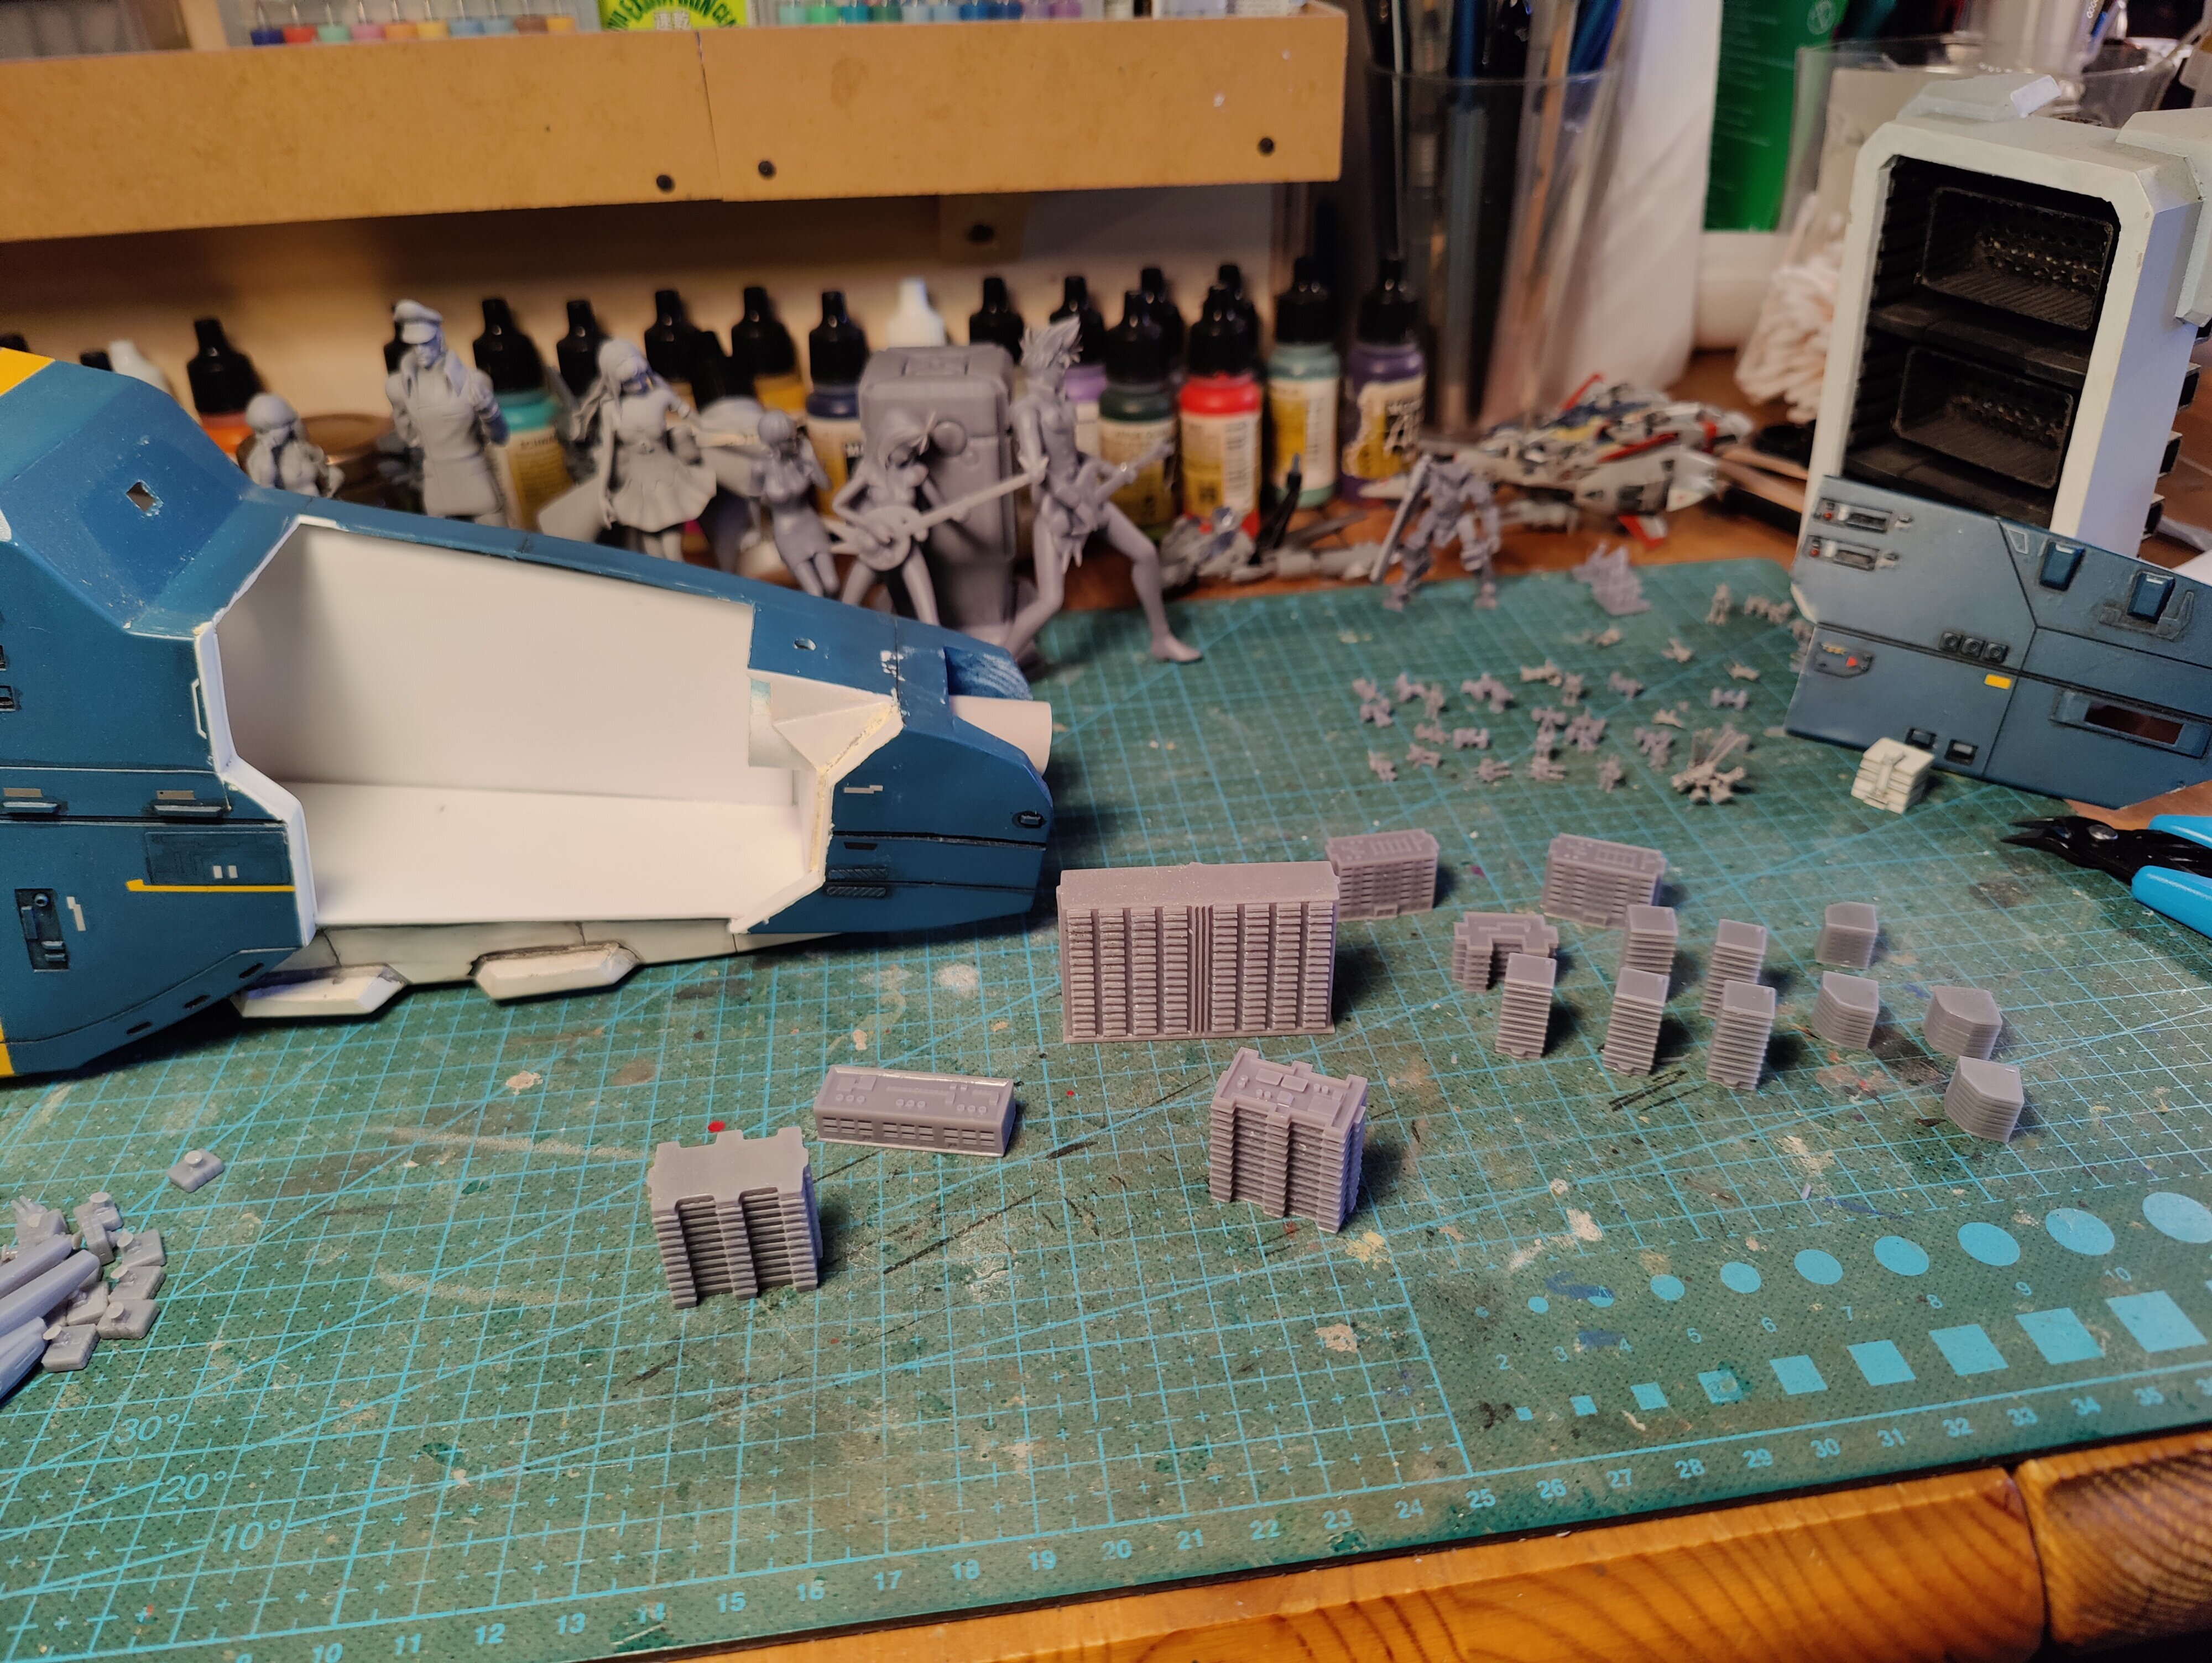
second part of the city

-
first low res test print (took 1 hour and 27 minutes)
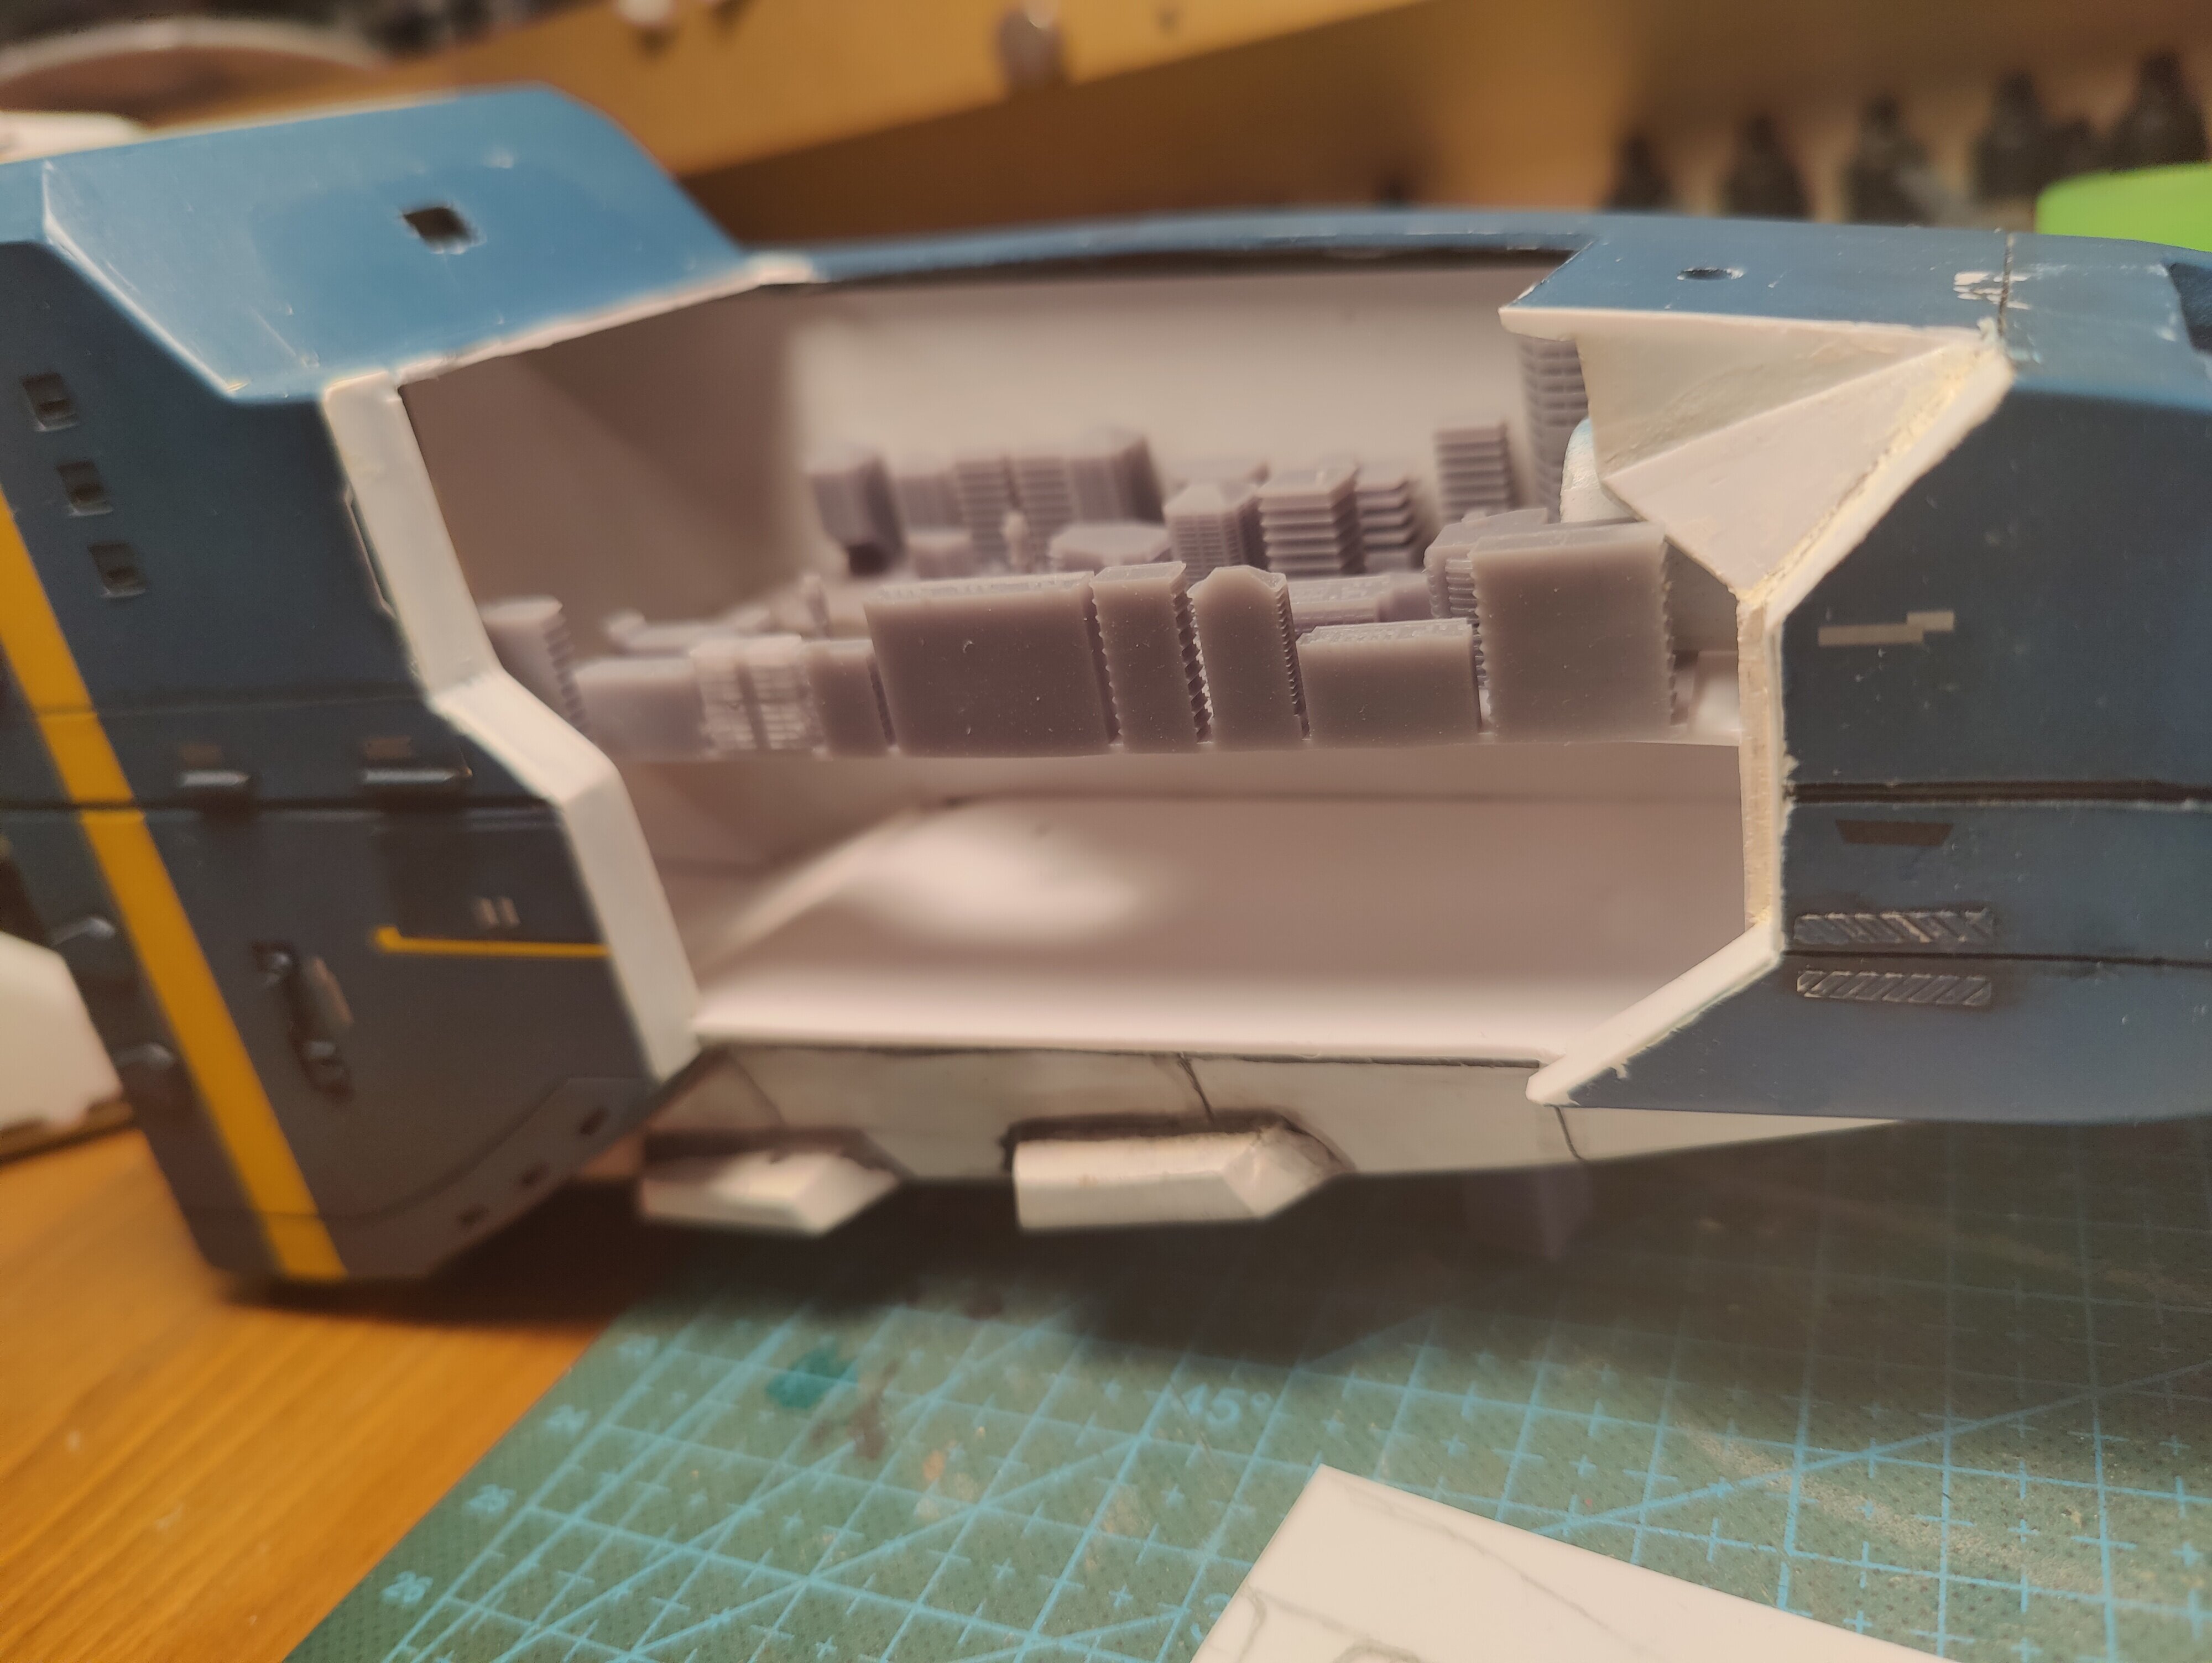
looks quite alright
-
On 6/8/2022 at 8:45 AM, tekering said:
Thanks for all the kind words, gentlemen. I appreciate the encouragement. 😊
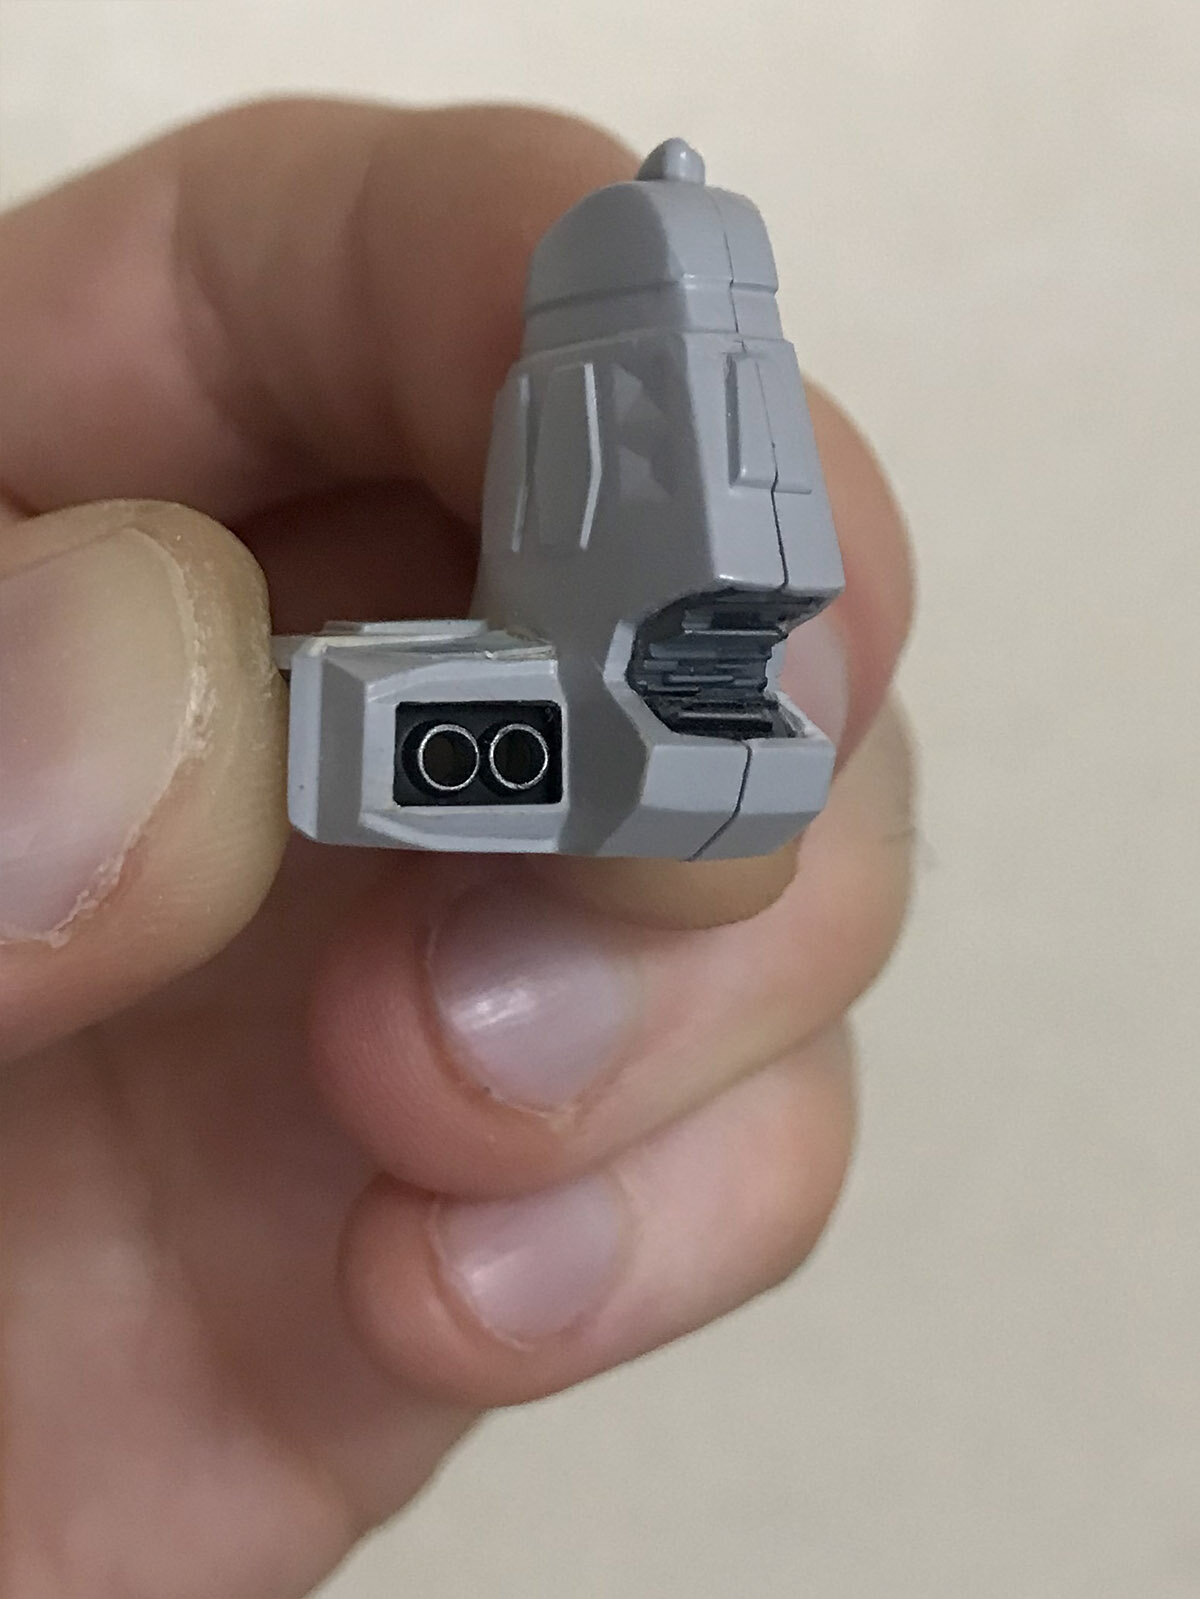
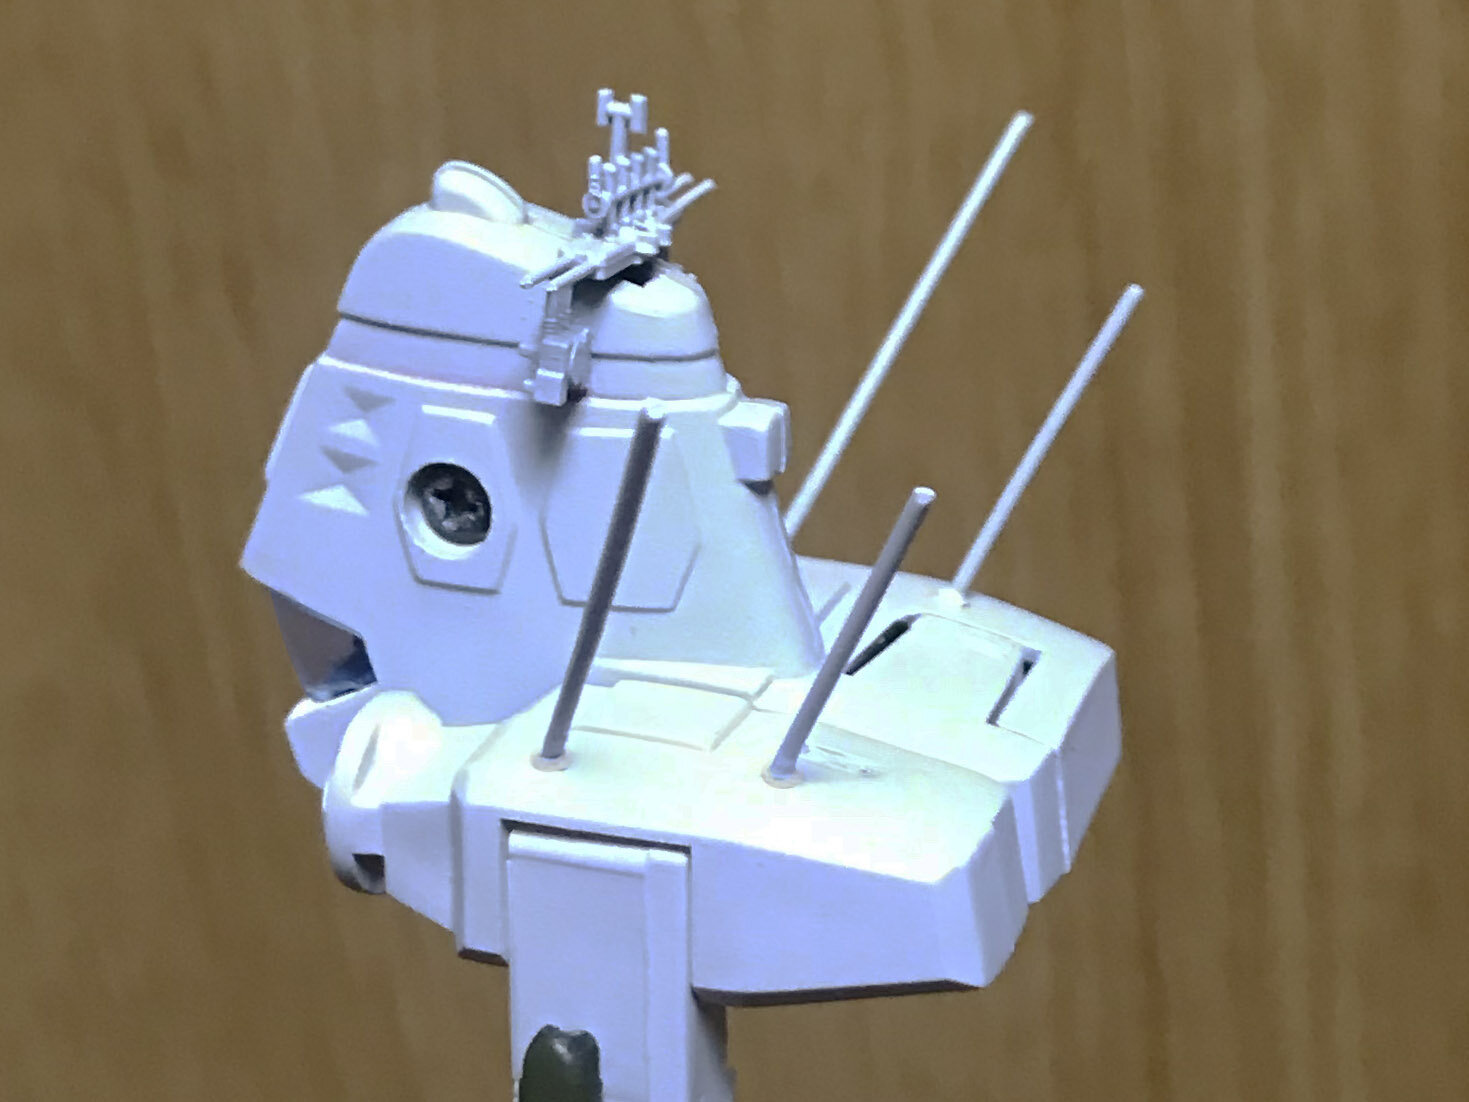
This week, I've focused on the conning tower sensor package and communication relay equipment -- you know, those two iconic circles inset on the starboard side of the bridge, and the antennae on top -- very little of which was represented on the vintage toy.
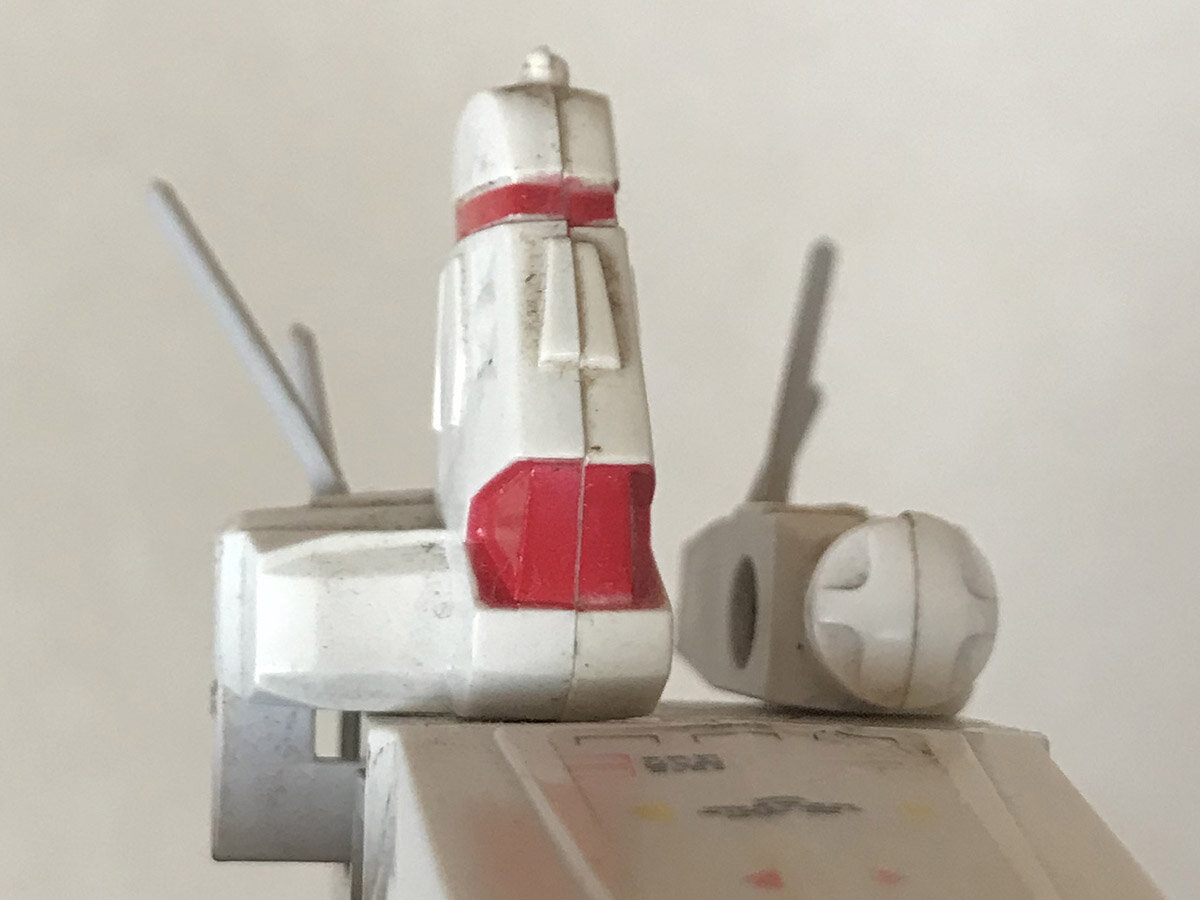
Like, they didn't even try. 🙄
So, I drilled, cut, and filed out most of the area where the detail was missing, and mounted a styrene plate behind it.
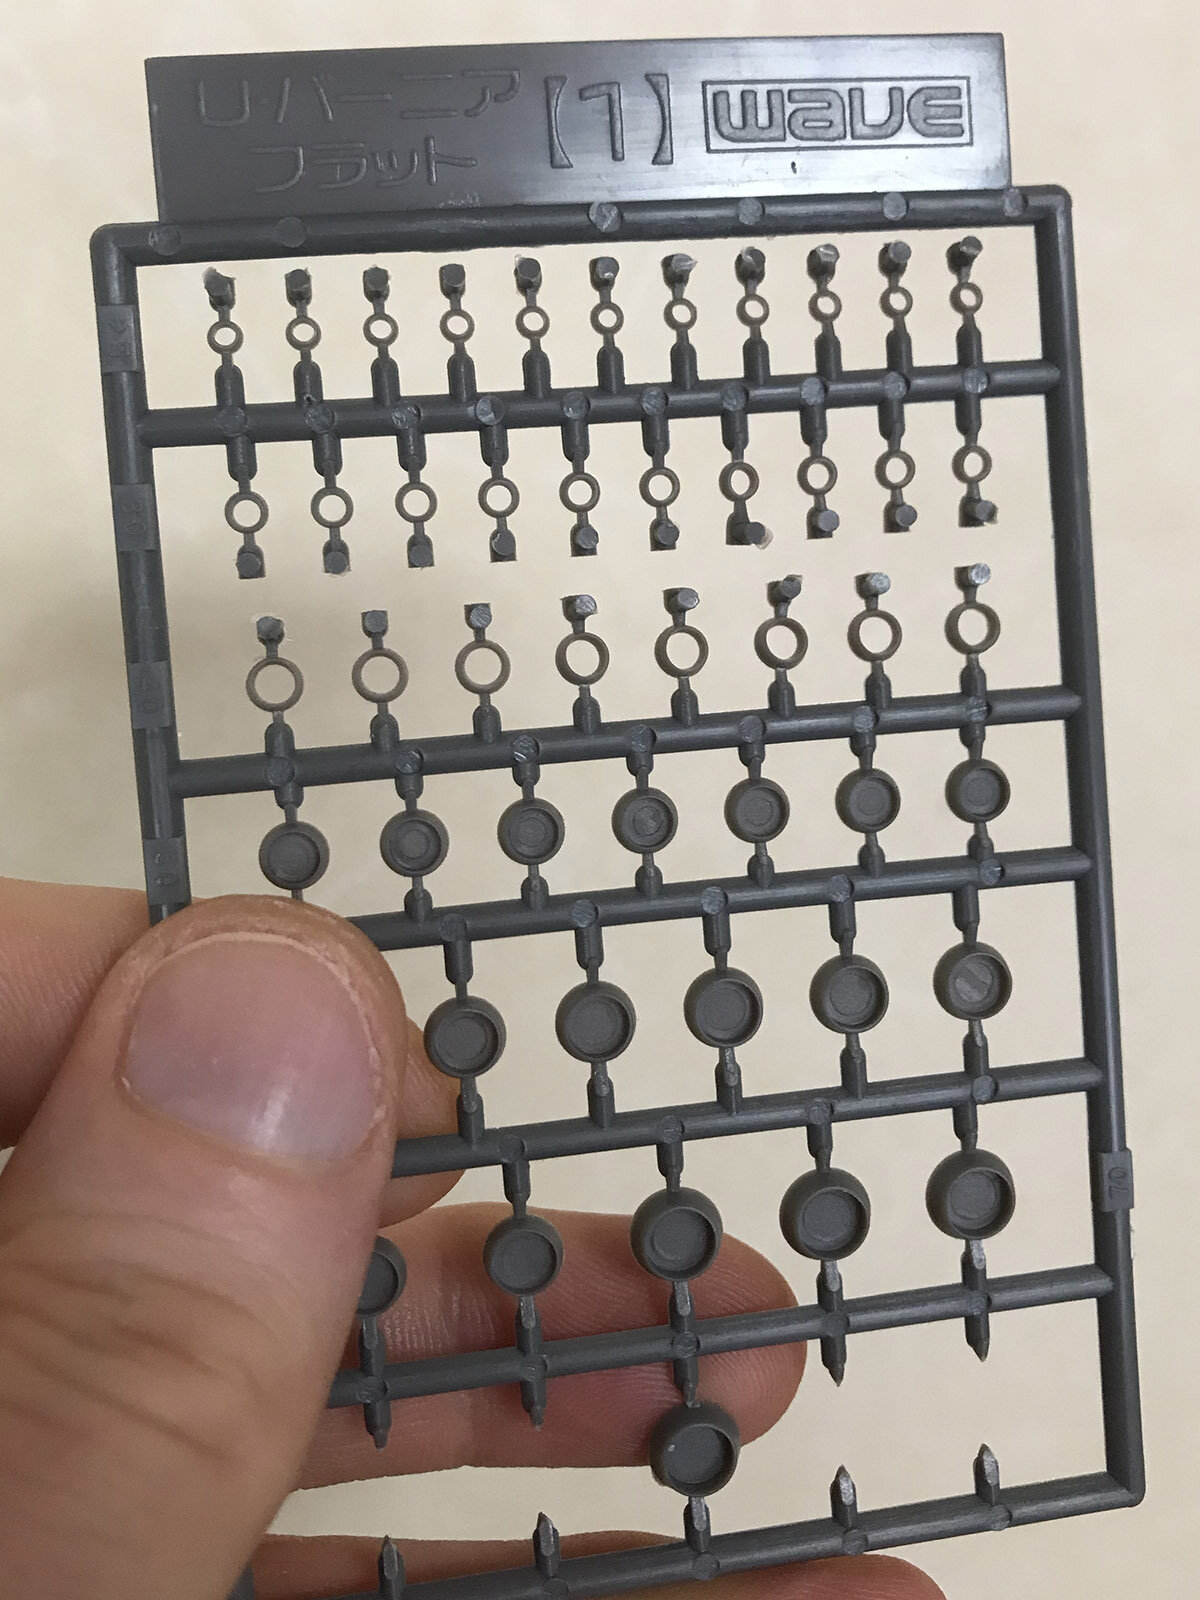
Wave has a set with multiple sizes of verniers intended for this kind of customizing, and I figured a couple of the tiny ones would suit my needs well enough:

They're the right size, but too thick to suggest the massive scale I'm after. I used my dental files to drill out the center of each, giving a greater sense of depth and considerably thinning down the sidewalls.
After painting, they started to look as I'd envisioned.
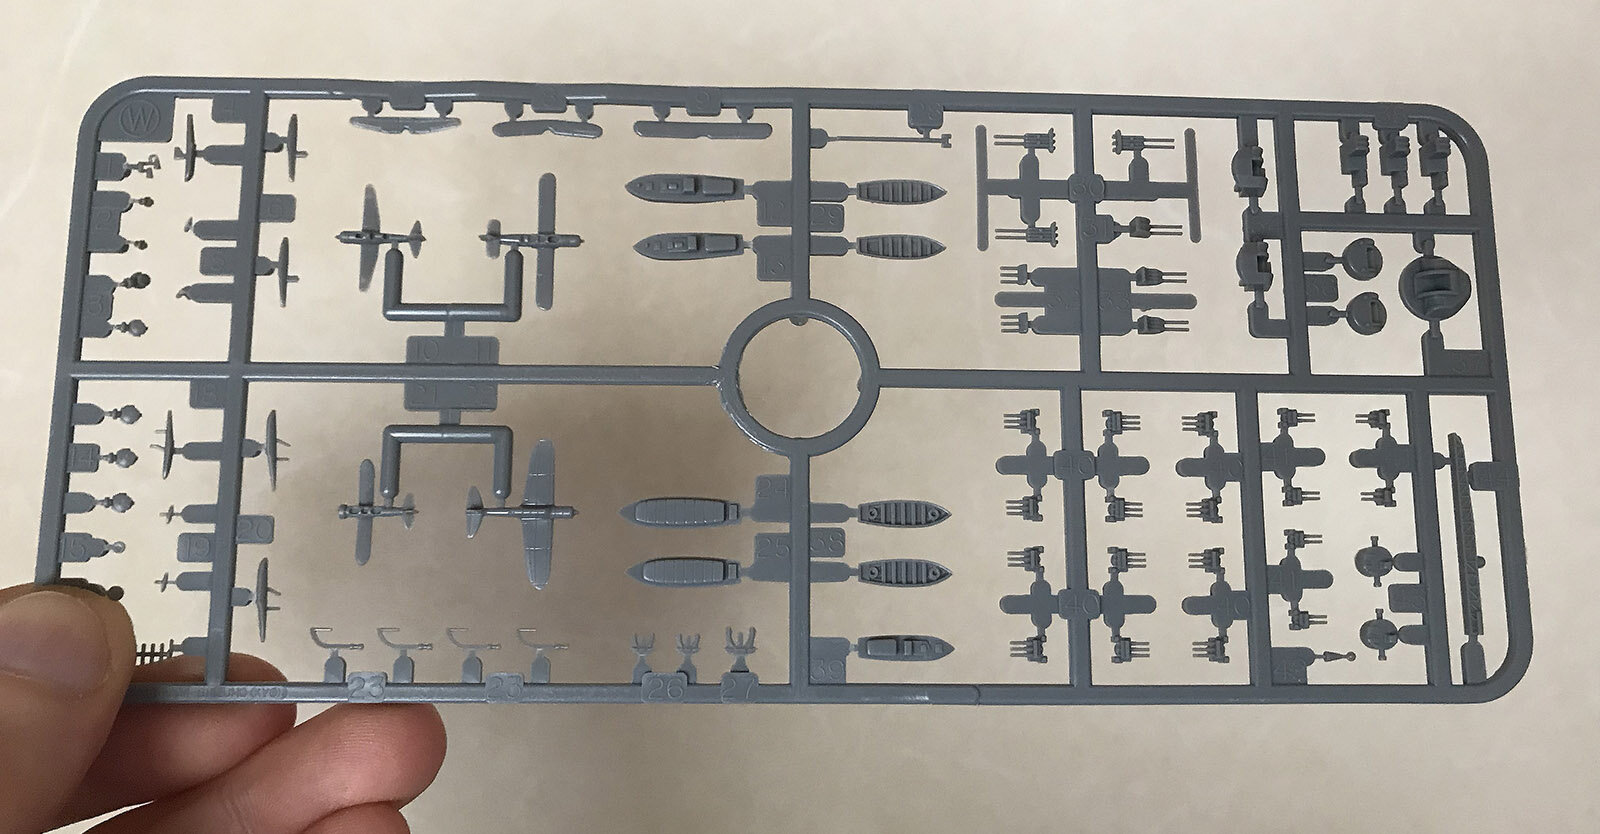
I then used parts from Tamiya's "Waterline Series" of 1:700 battleships to kitbash the communications array on top of the conning tower:
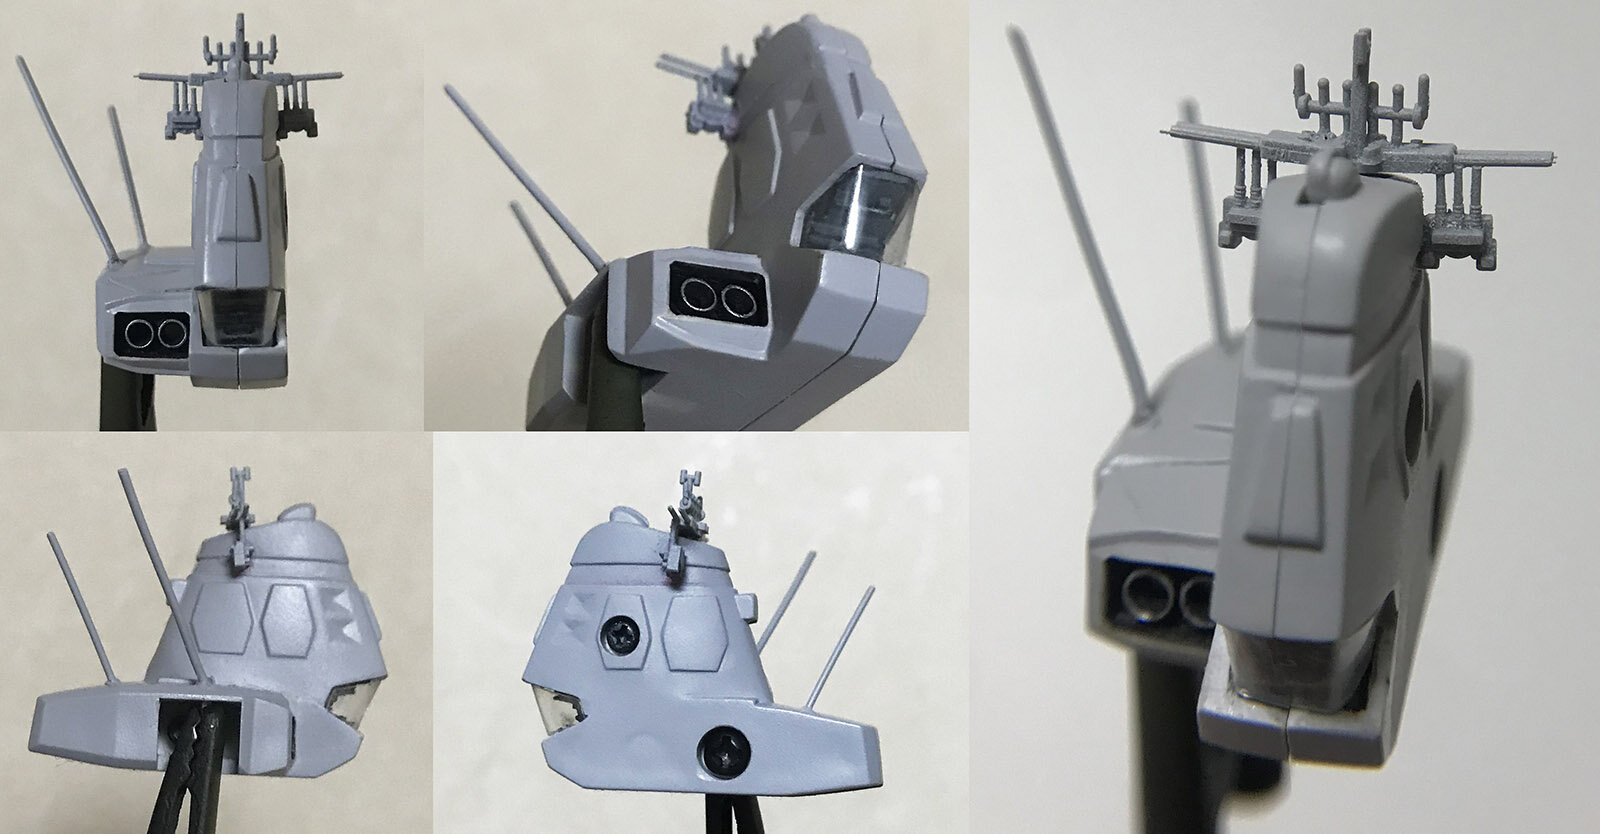
The large antennae behind the conning tower (which were properly represented on the original toy, until they inevitably broke off) were reproduced using two different gauges of paper clips.
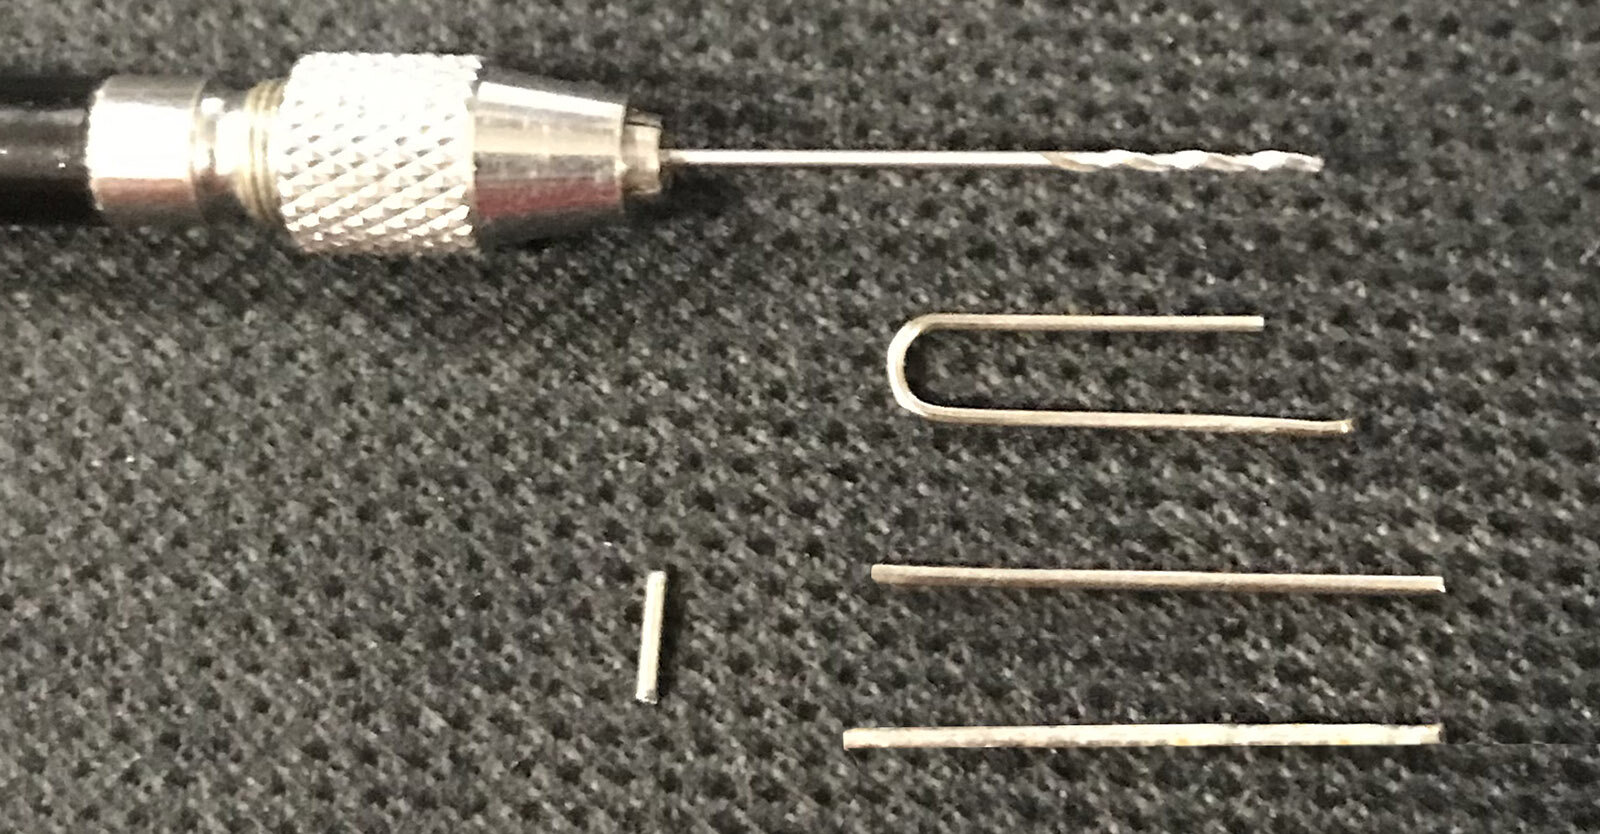
With tiny holes drilled into the plastic to securely mount the metal parts, I can be assured these antennae will never break off!

That's the basic aesthetic I'm working towards, which is why I've decided to eschew photo-etched parts, hyper-detailing or realistic weathering for this project. I'm trying to maintain the look of a mass-produced toy, rather than a model kit.
The most difficult part of this process, for me, is deciding where to draw the line.
nice.. this looks clean, awesome job... keep up the good work
-
On 6/10/2022 at 1:09 AM, arbit said:
I remember when this was still an awe inspiring grail toy, and even today we don't have a 1/3000 TV SDF-1 toy. Why?
they dont look at Macrossworld forums
or they would have seen all these beauties including my SDF-1
-
-
starting to look good
-
43 minutes ago, tekering said:
Are you planning to print the whole street in one go? 😶
perhaps, ill certainly try
-
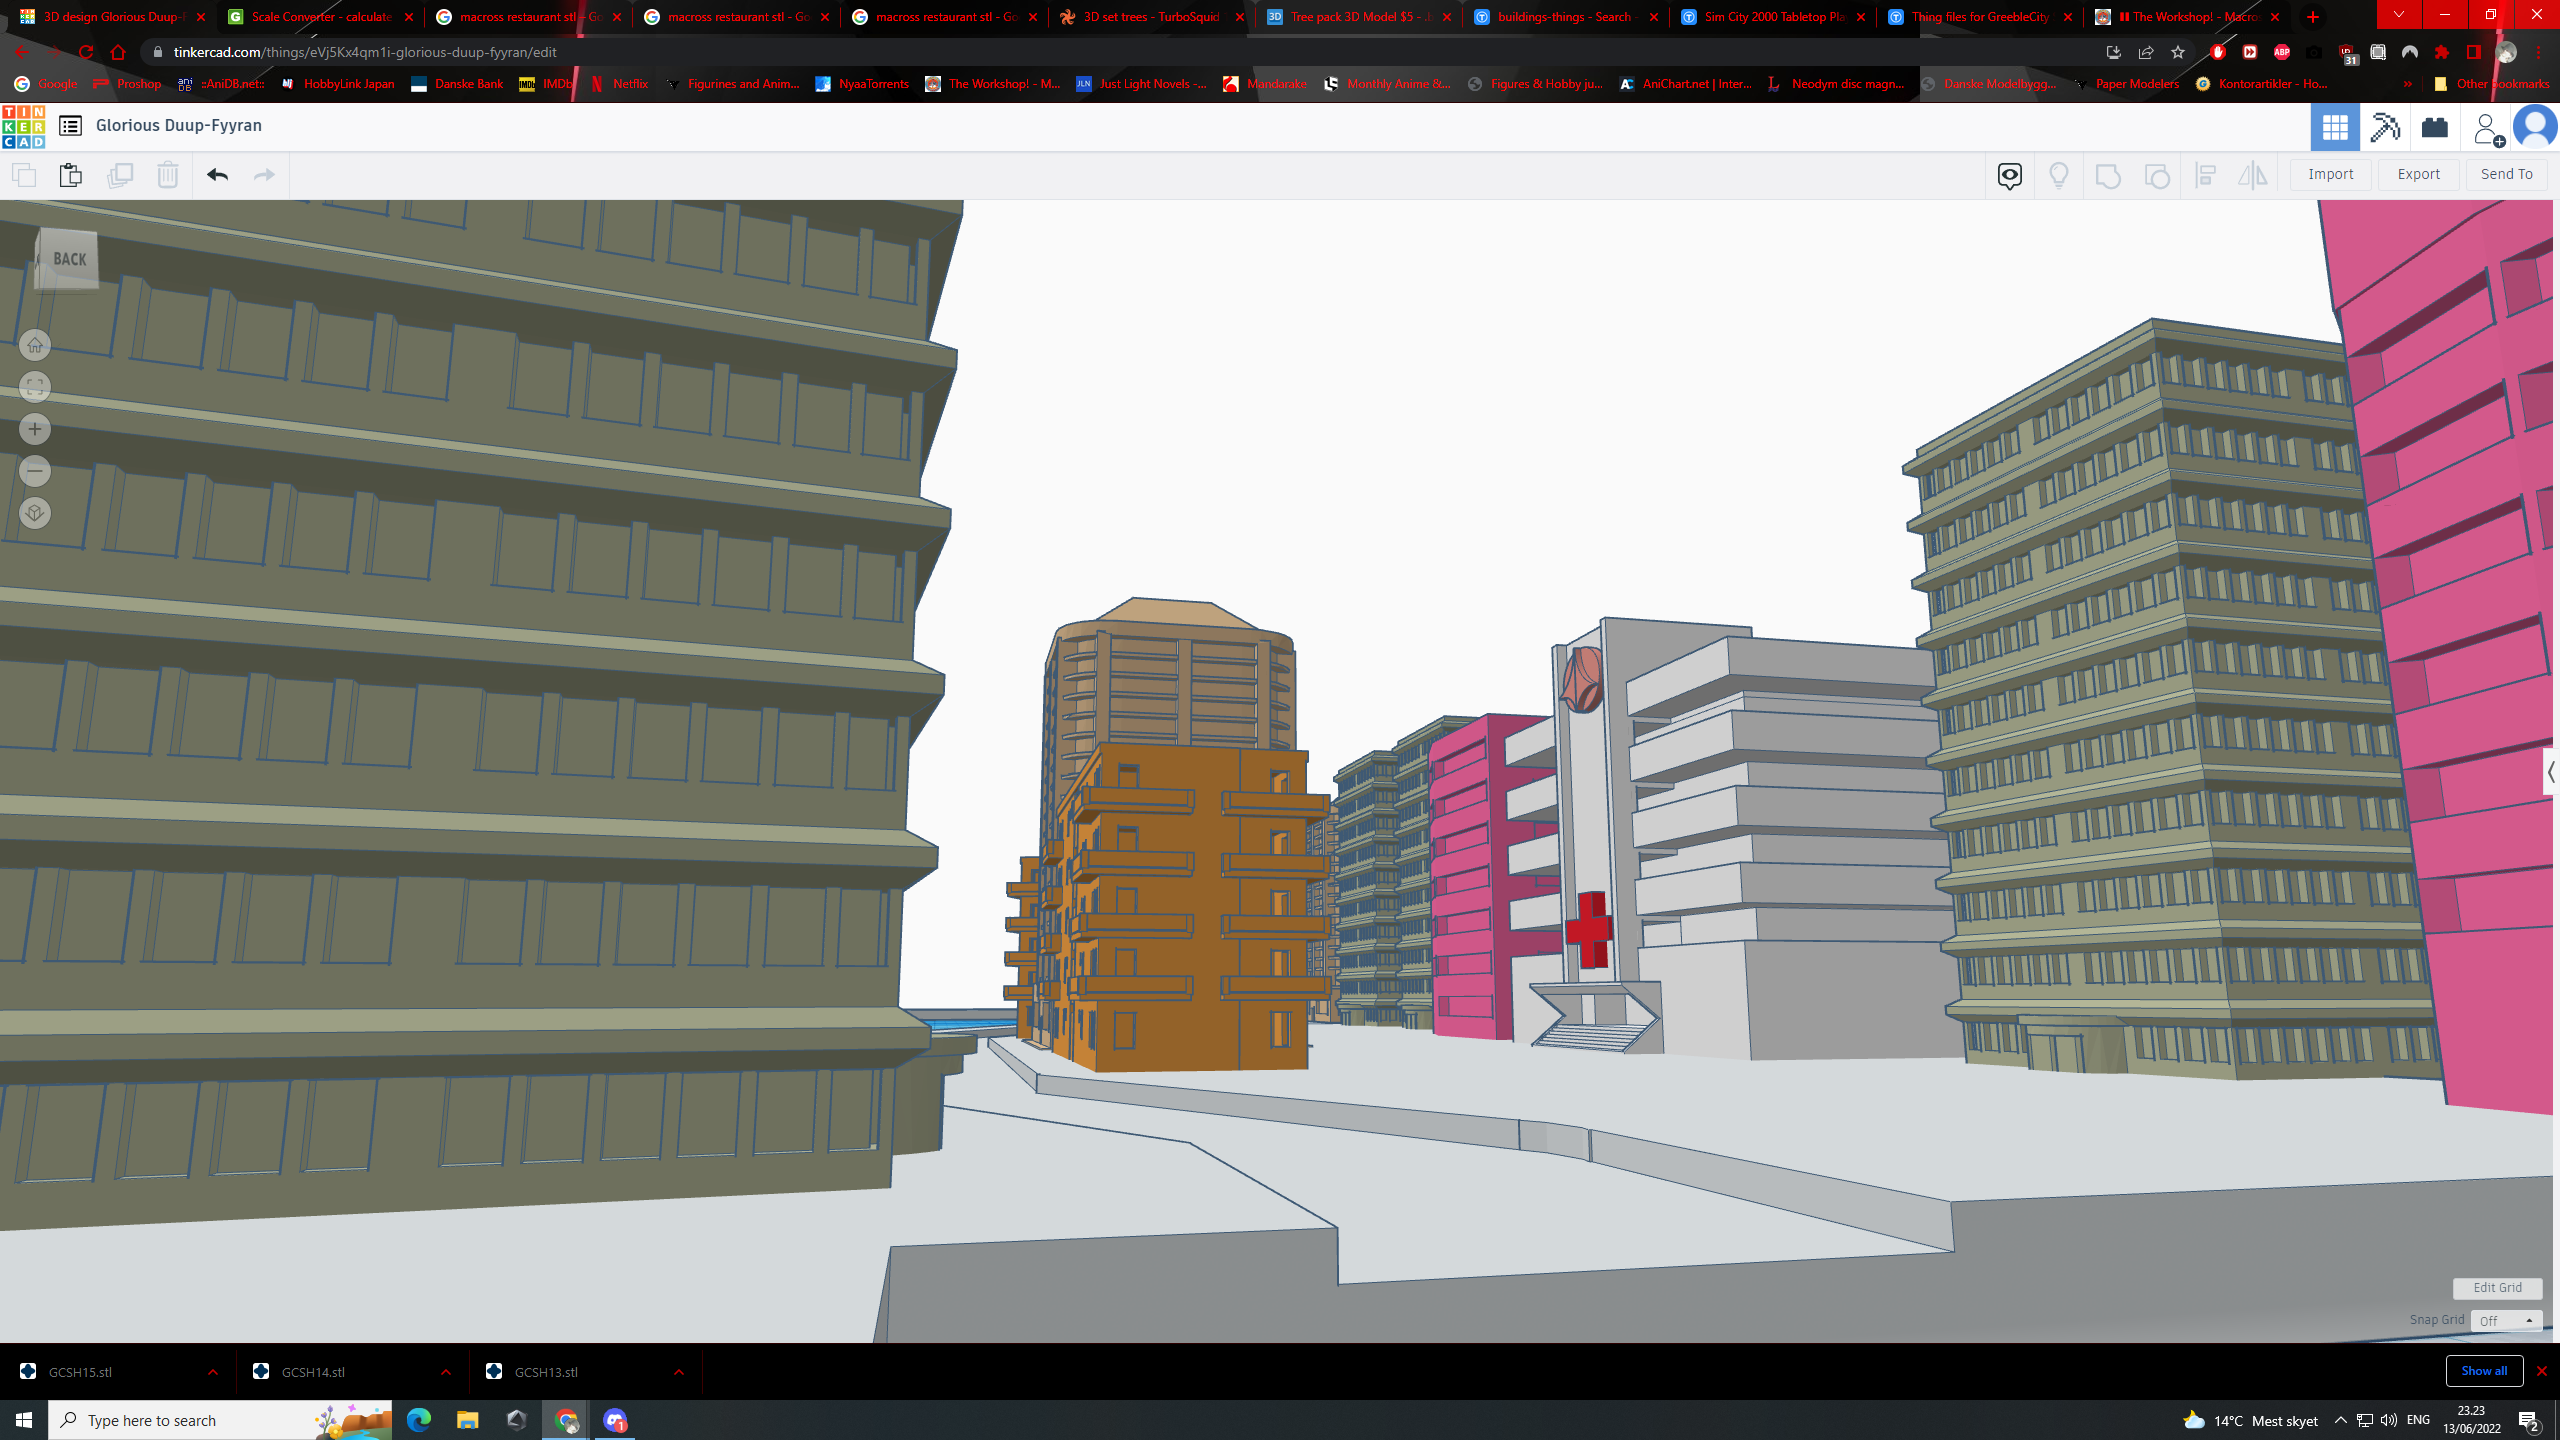
another update!
the hospital
-
so the other part of the city is in the making xD

-
2 hours ago, arbit said:
Mega Macross-Bash! Looks like a VF-2SS with a bunch of other stuff.
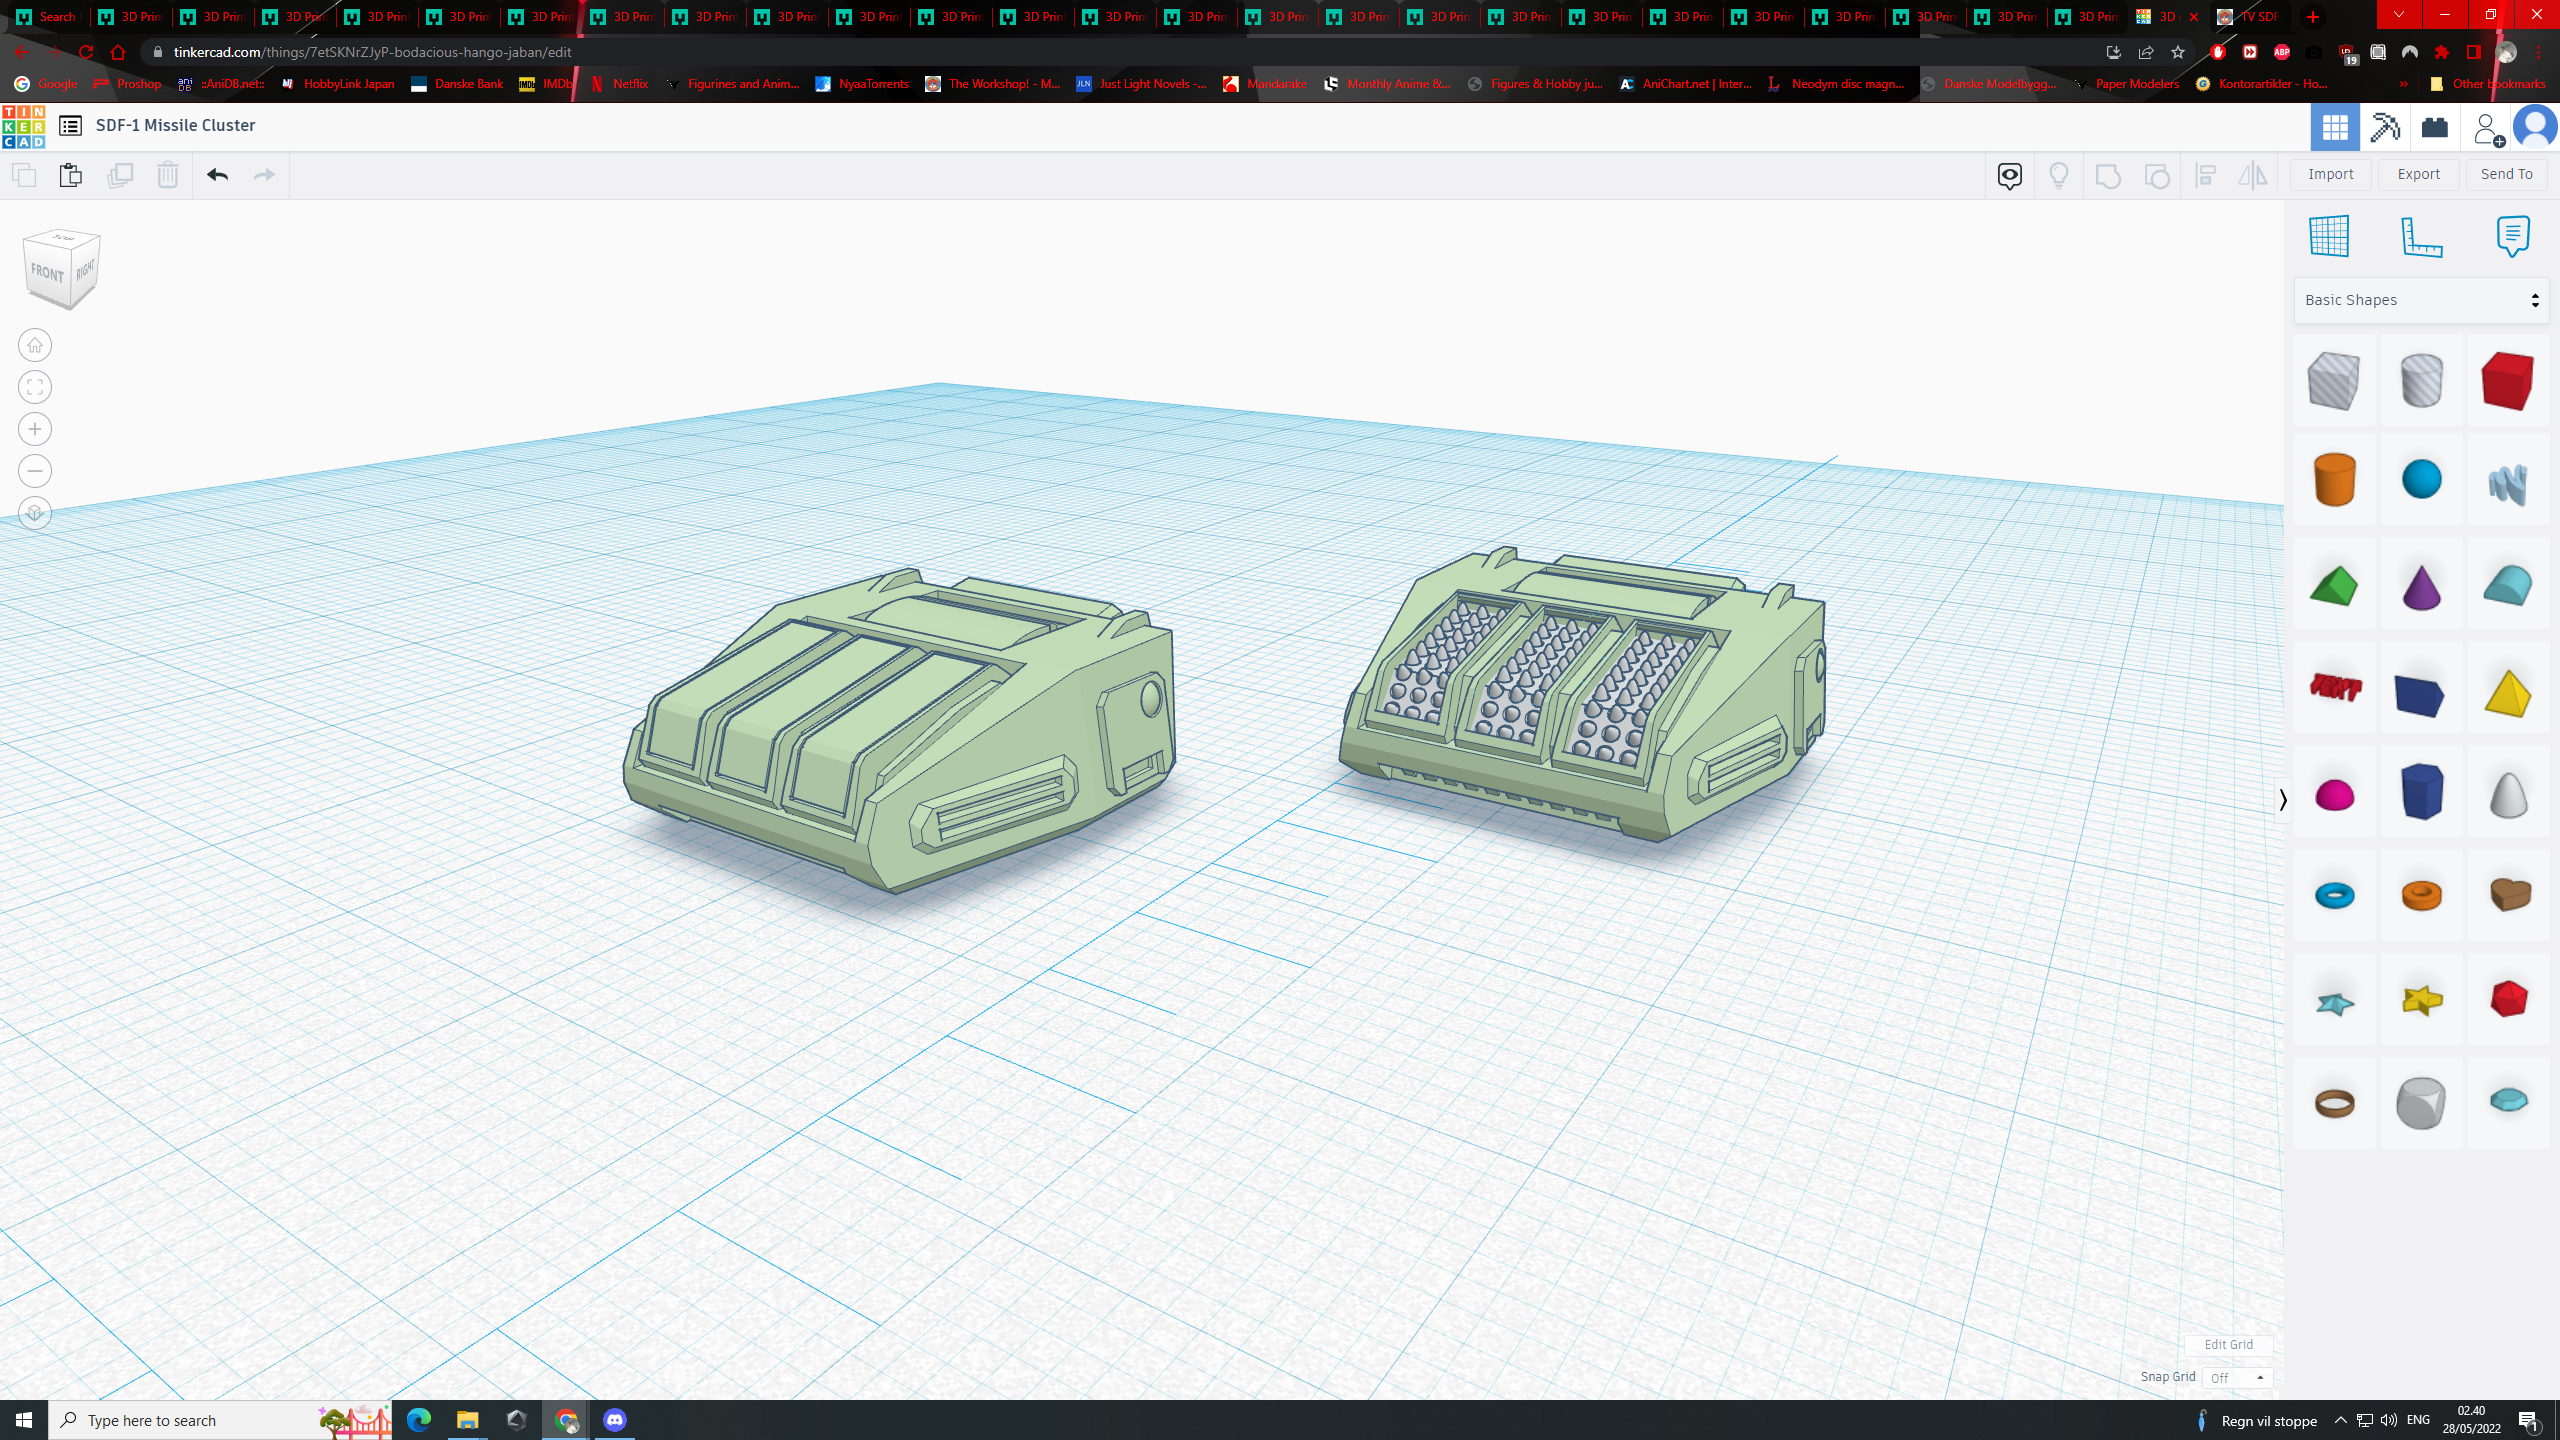
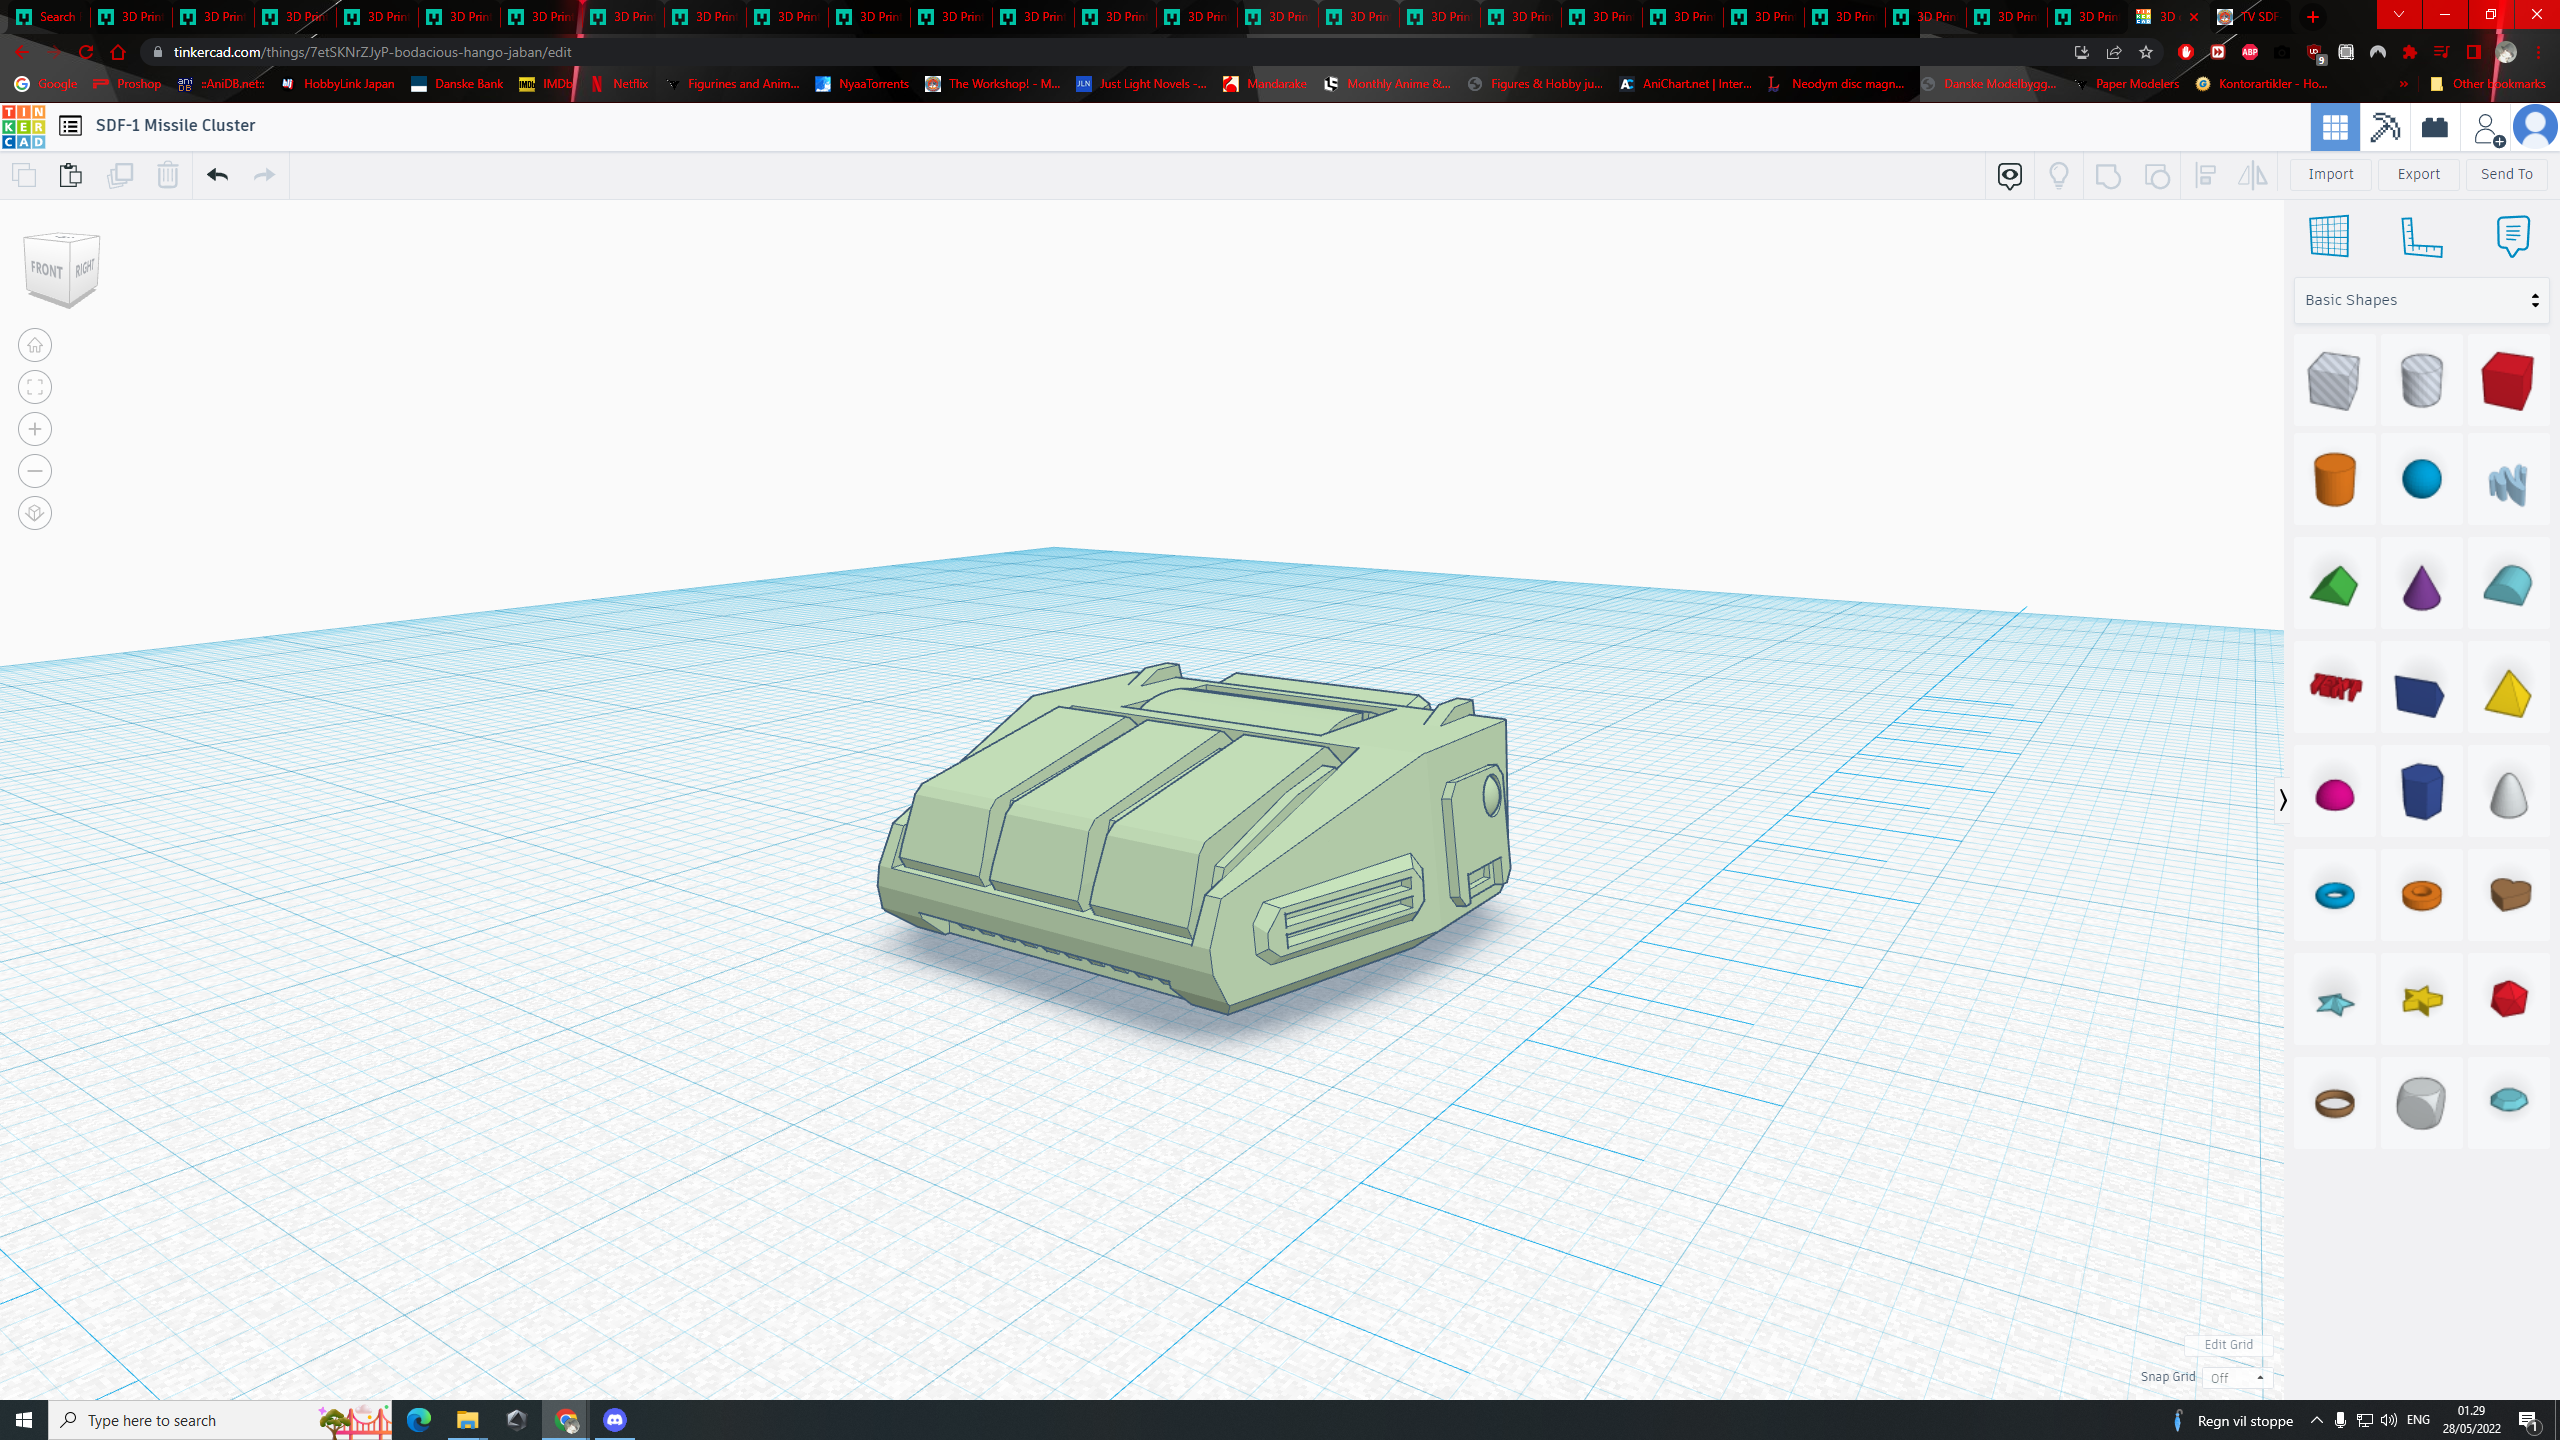
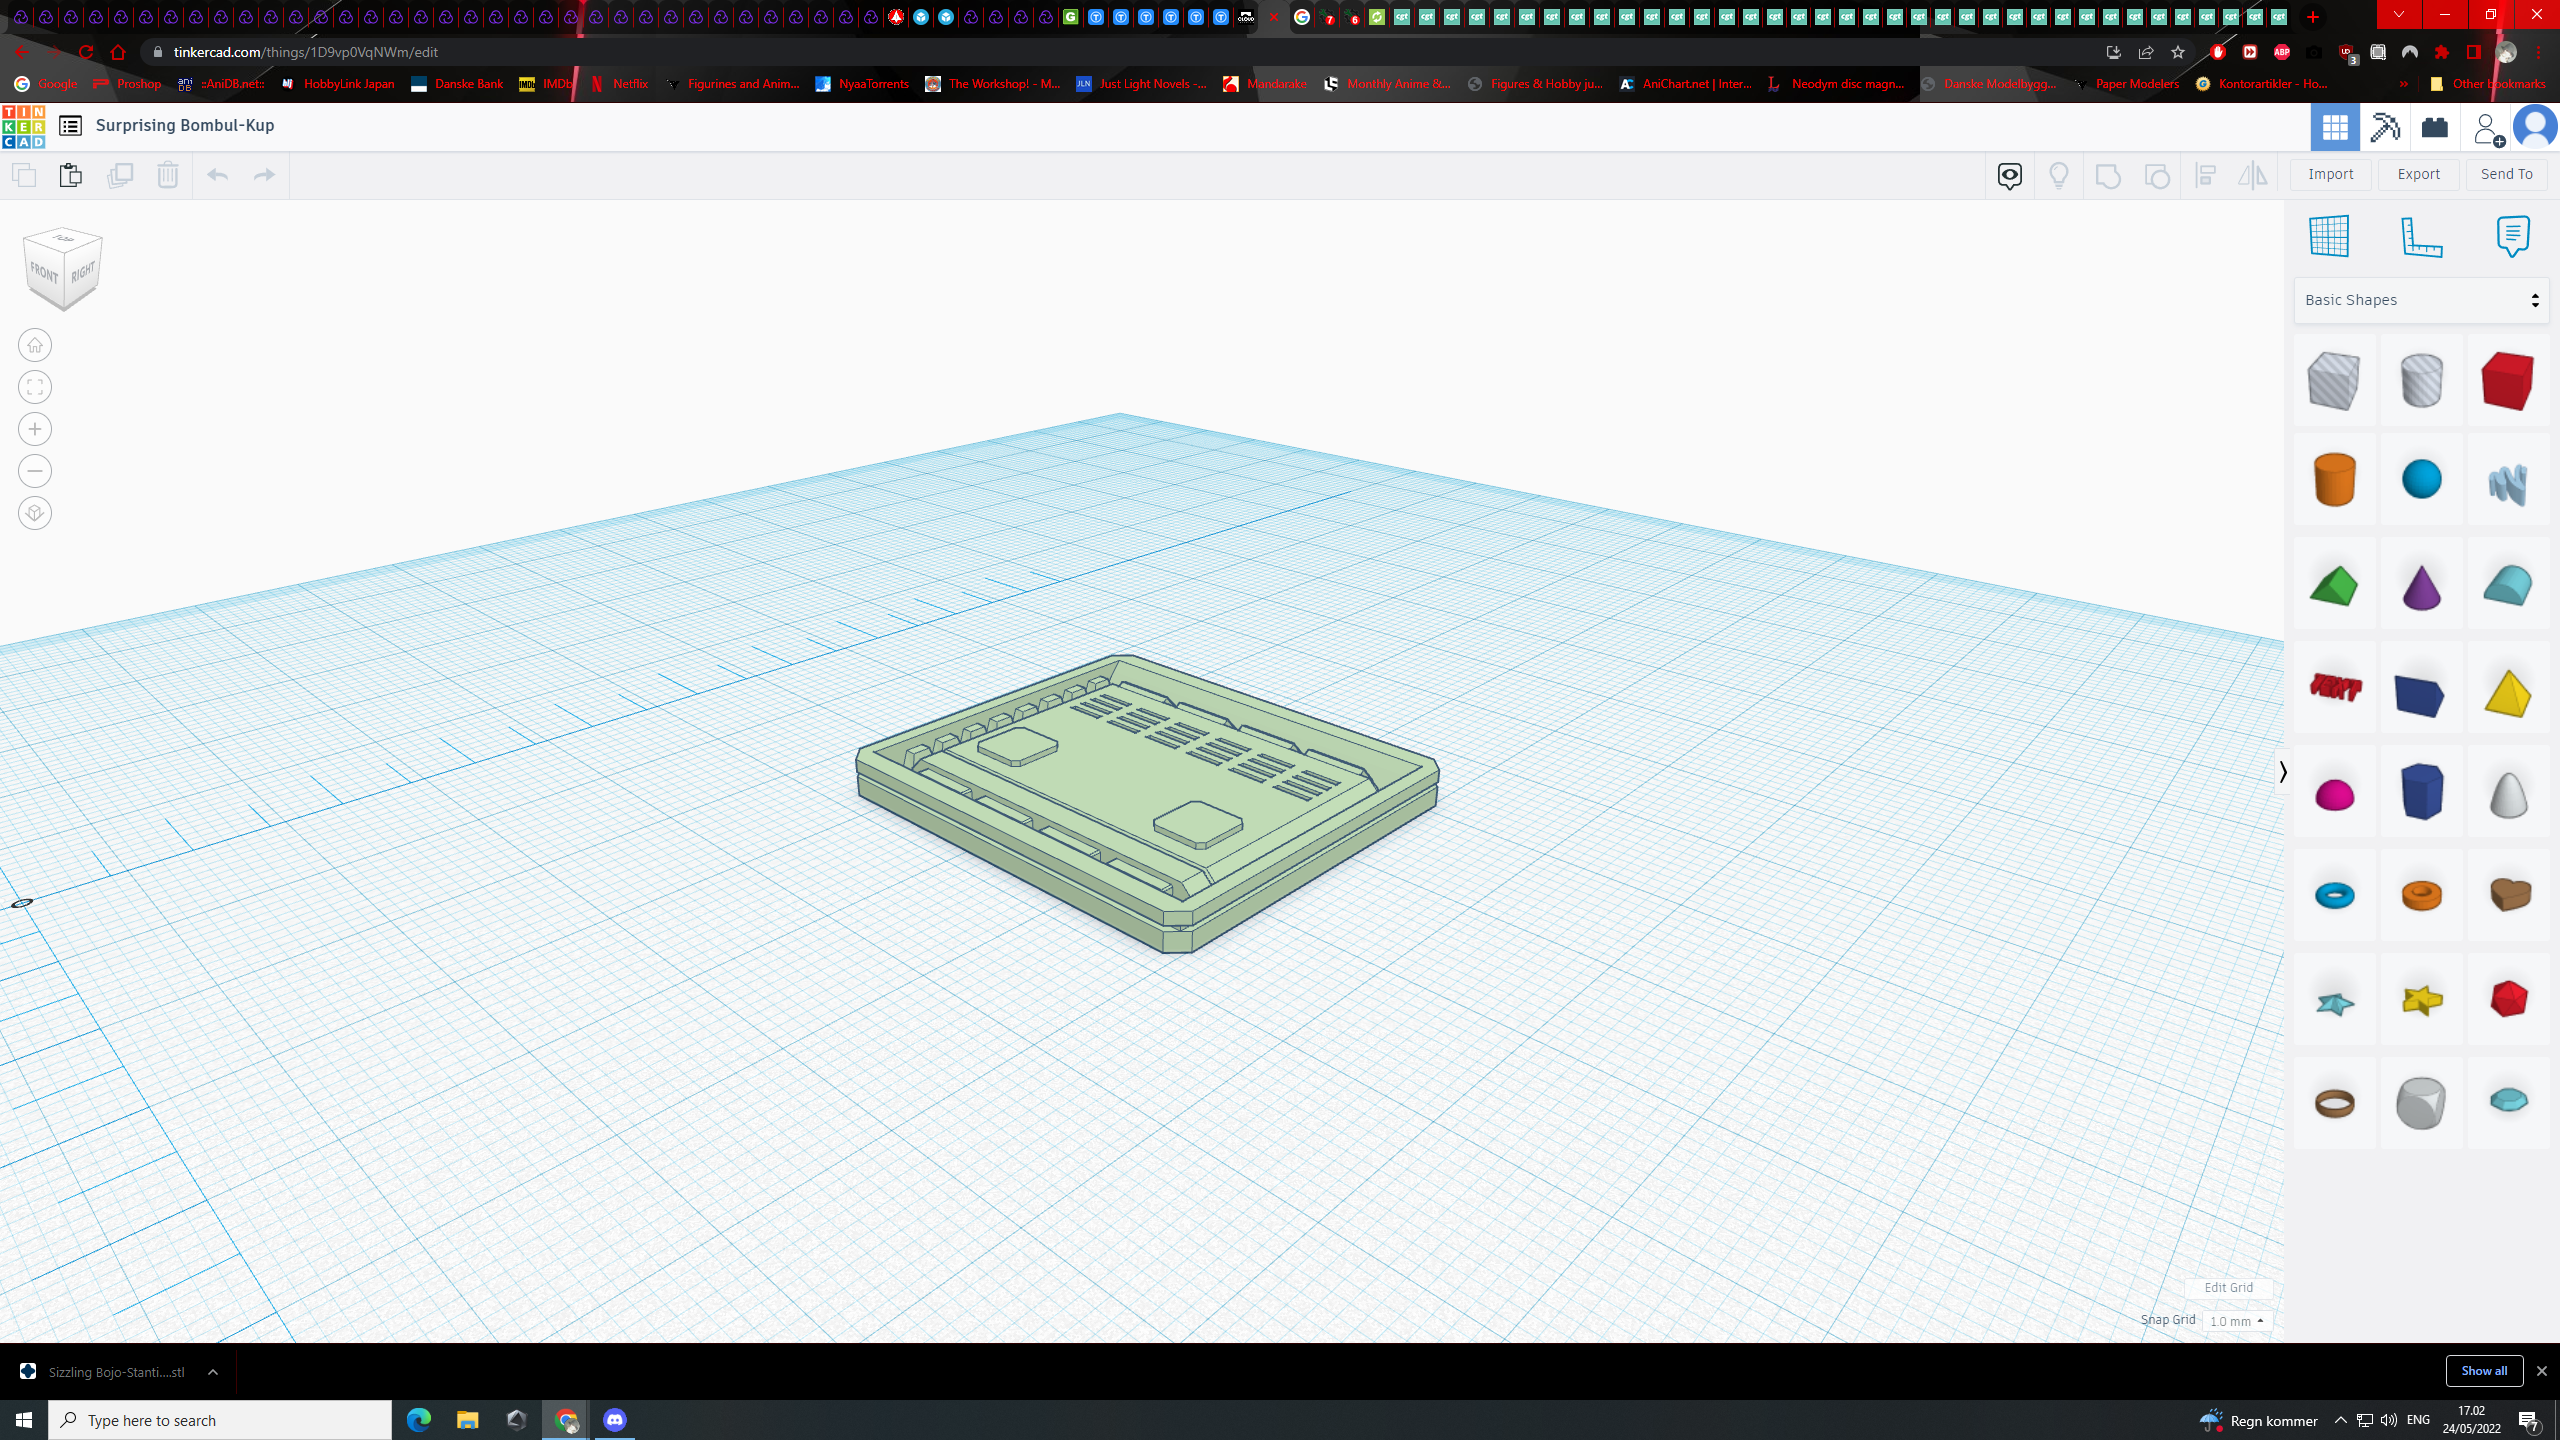
Great job with the hard surface modeling designs. Do you like this CAD software you are using?
it is a VF-2SS, well the front of it anyway xD
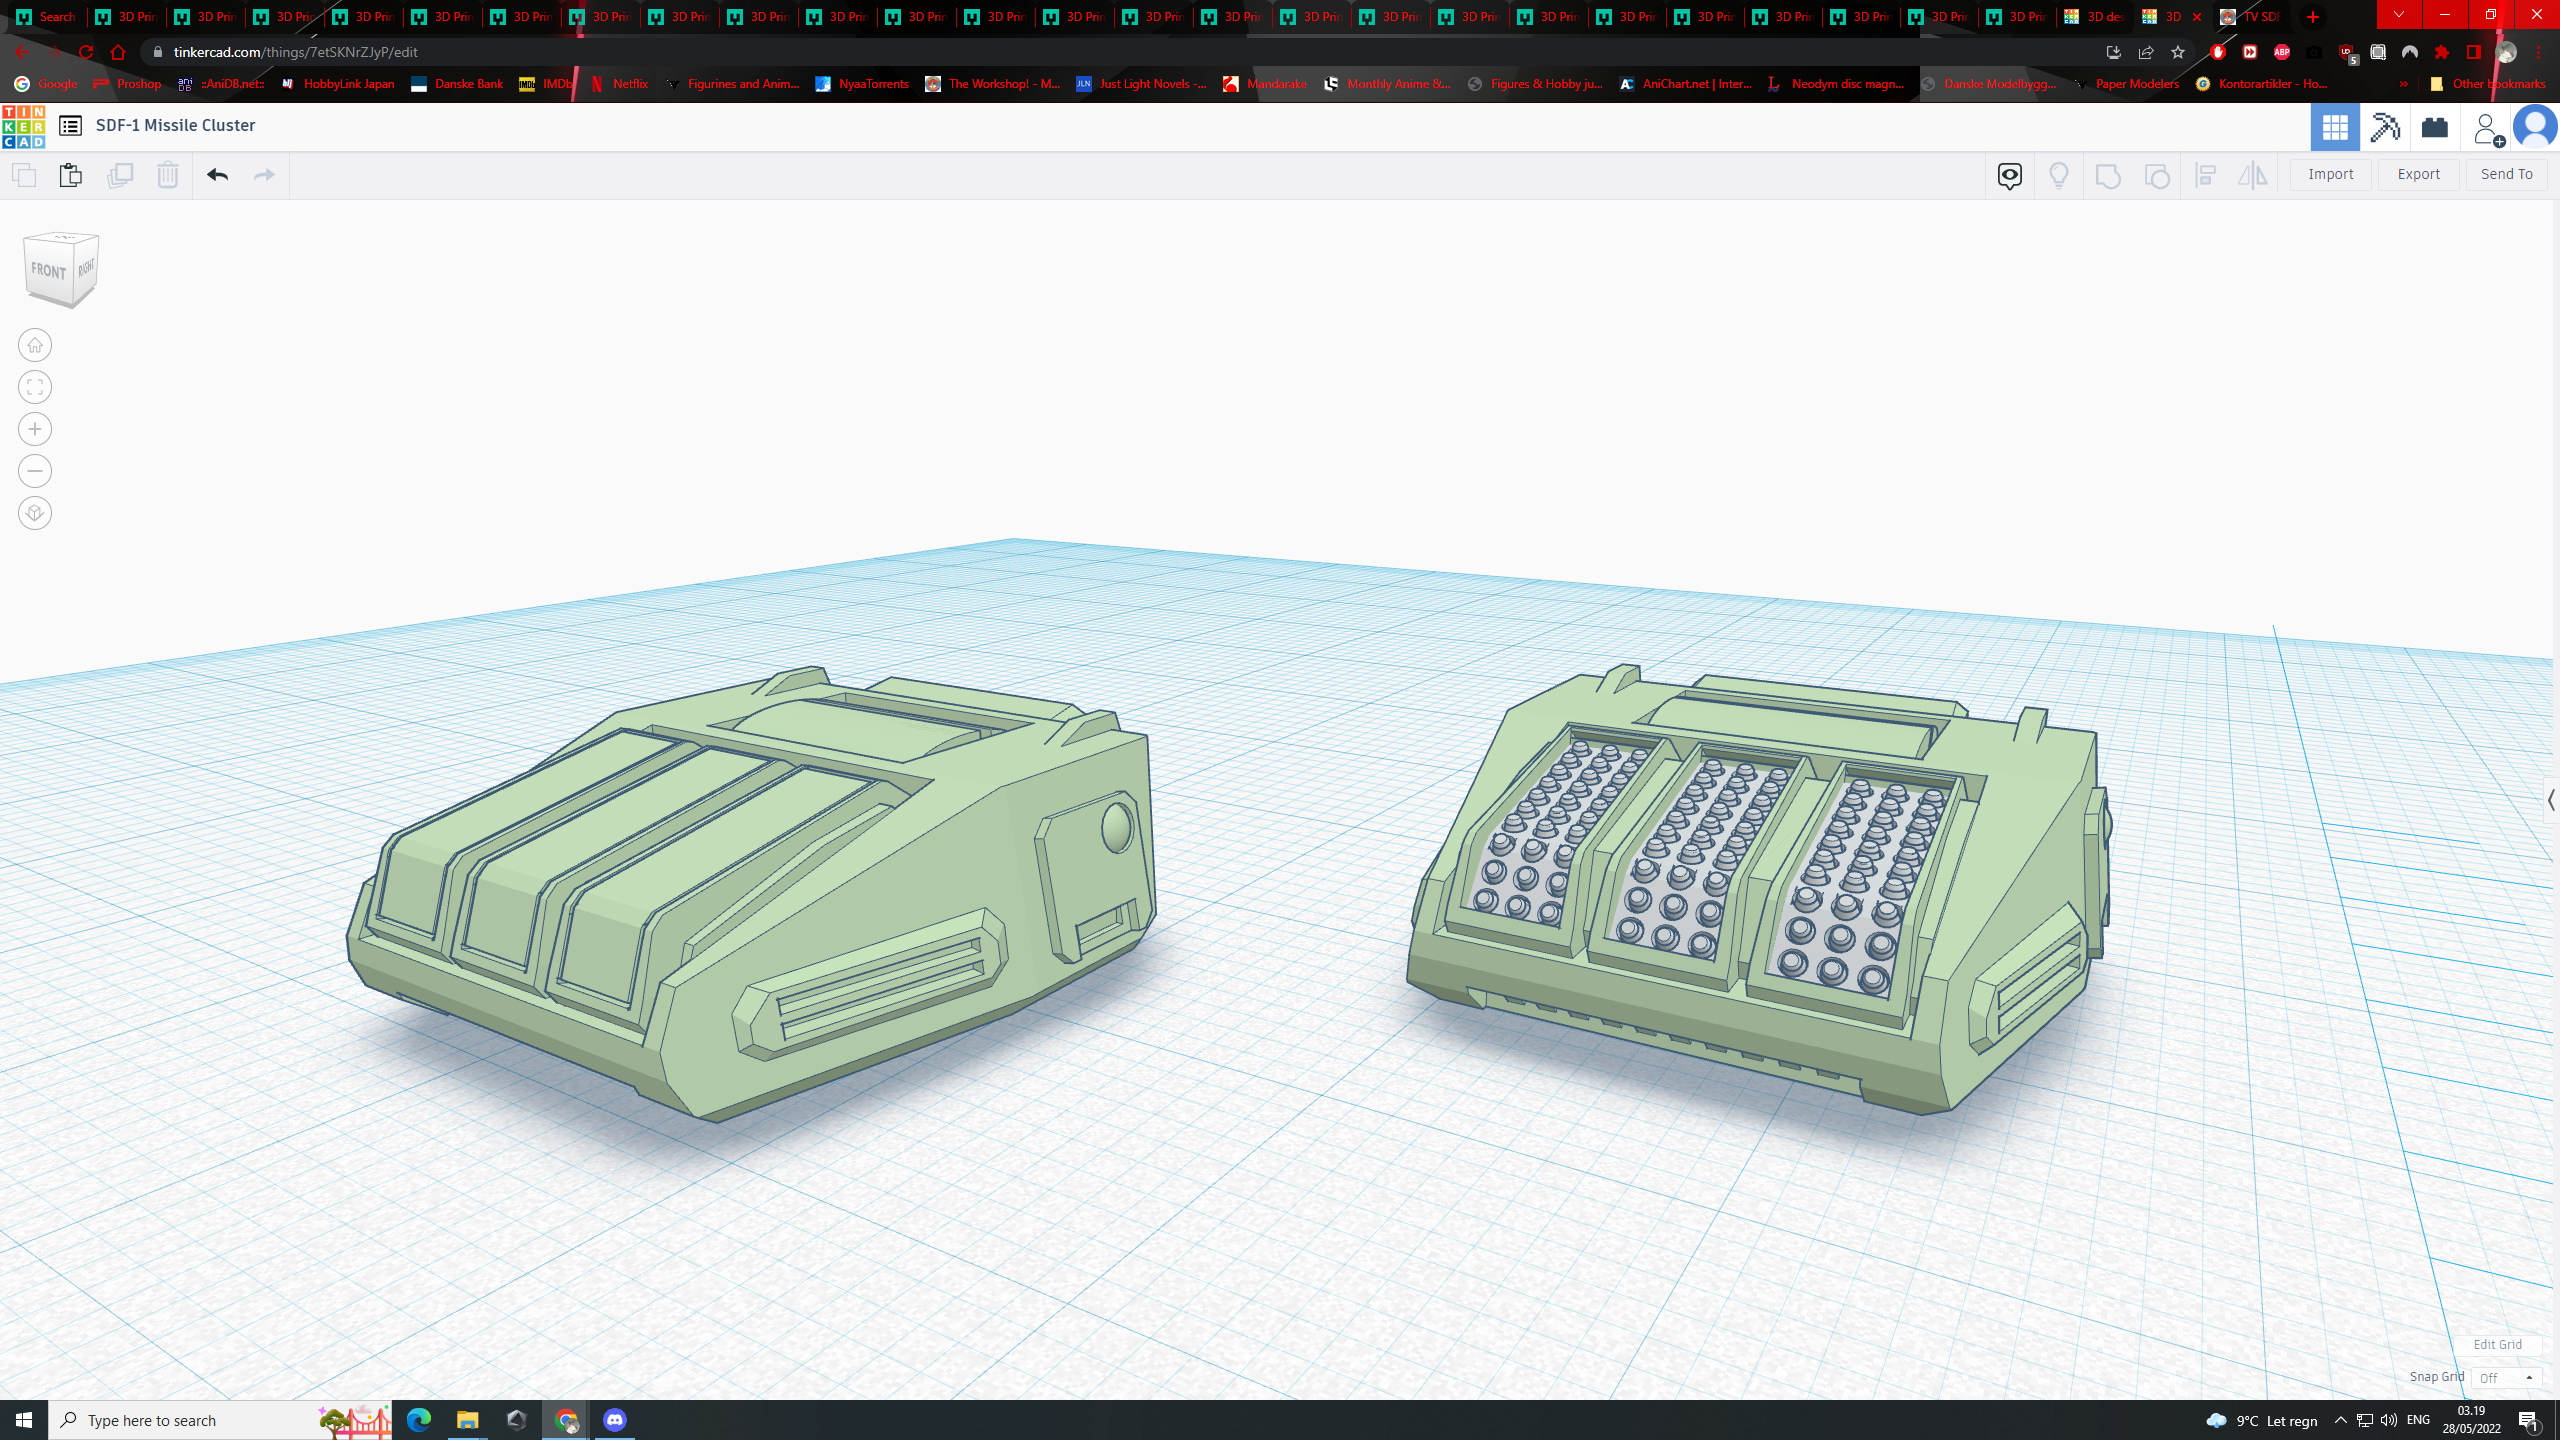
the software is TinkerCad and i find the software a bit clunky to use, but as long as it is mechanical parts i need and not organic shapes,
its fine i guess. its actually easy to make parts for macross in tinkercad, because of the philosofy behind the original macross designs
-
On 5/28/2022 at 8:50 PM, Mommar said:
Oh shoot, the Man, the Myth, the Legend returns!
lol. hey Mommar
On 5/28/2022 at 8:52 PM, Mommar said:So these two things are your own designs? The bigger one is a really incredible design.
yeah they are made from various parts from different sets.. xD
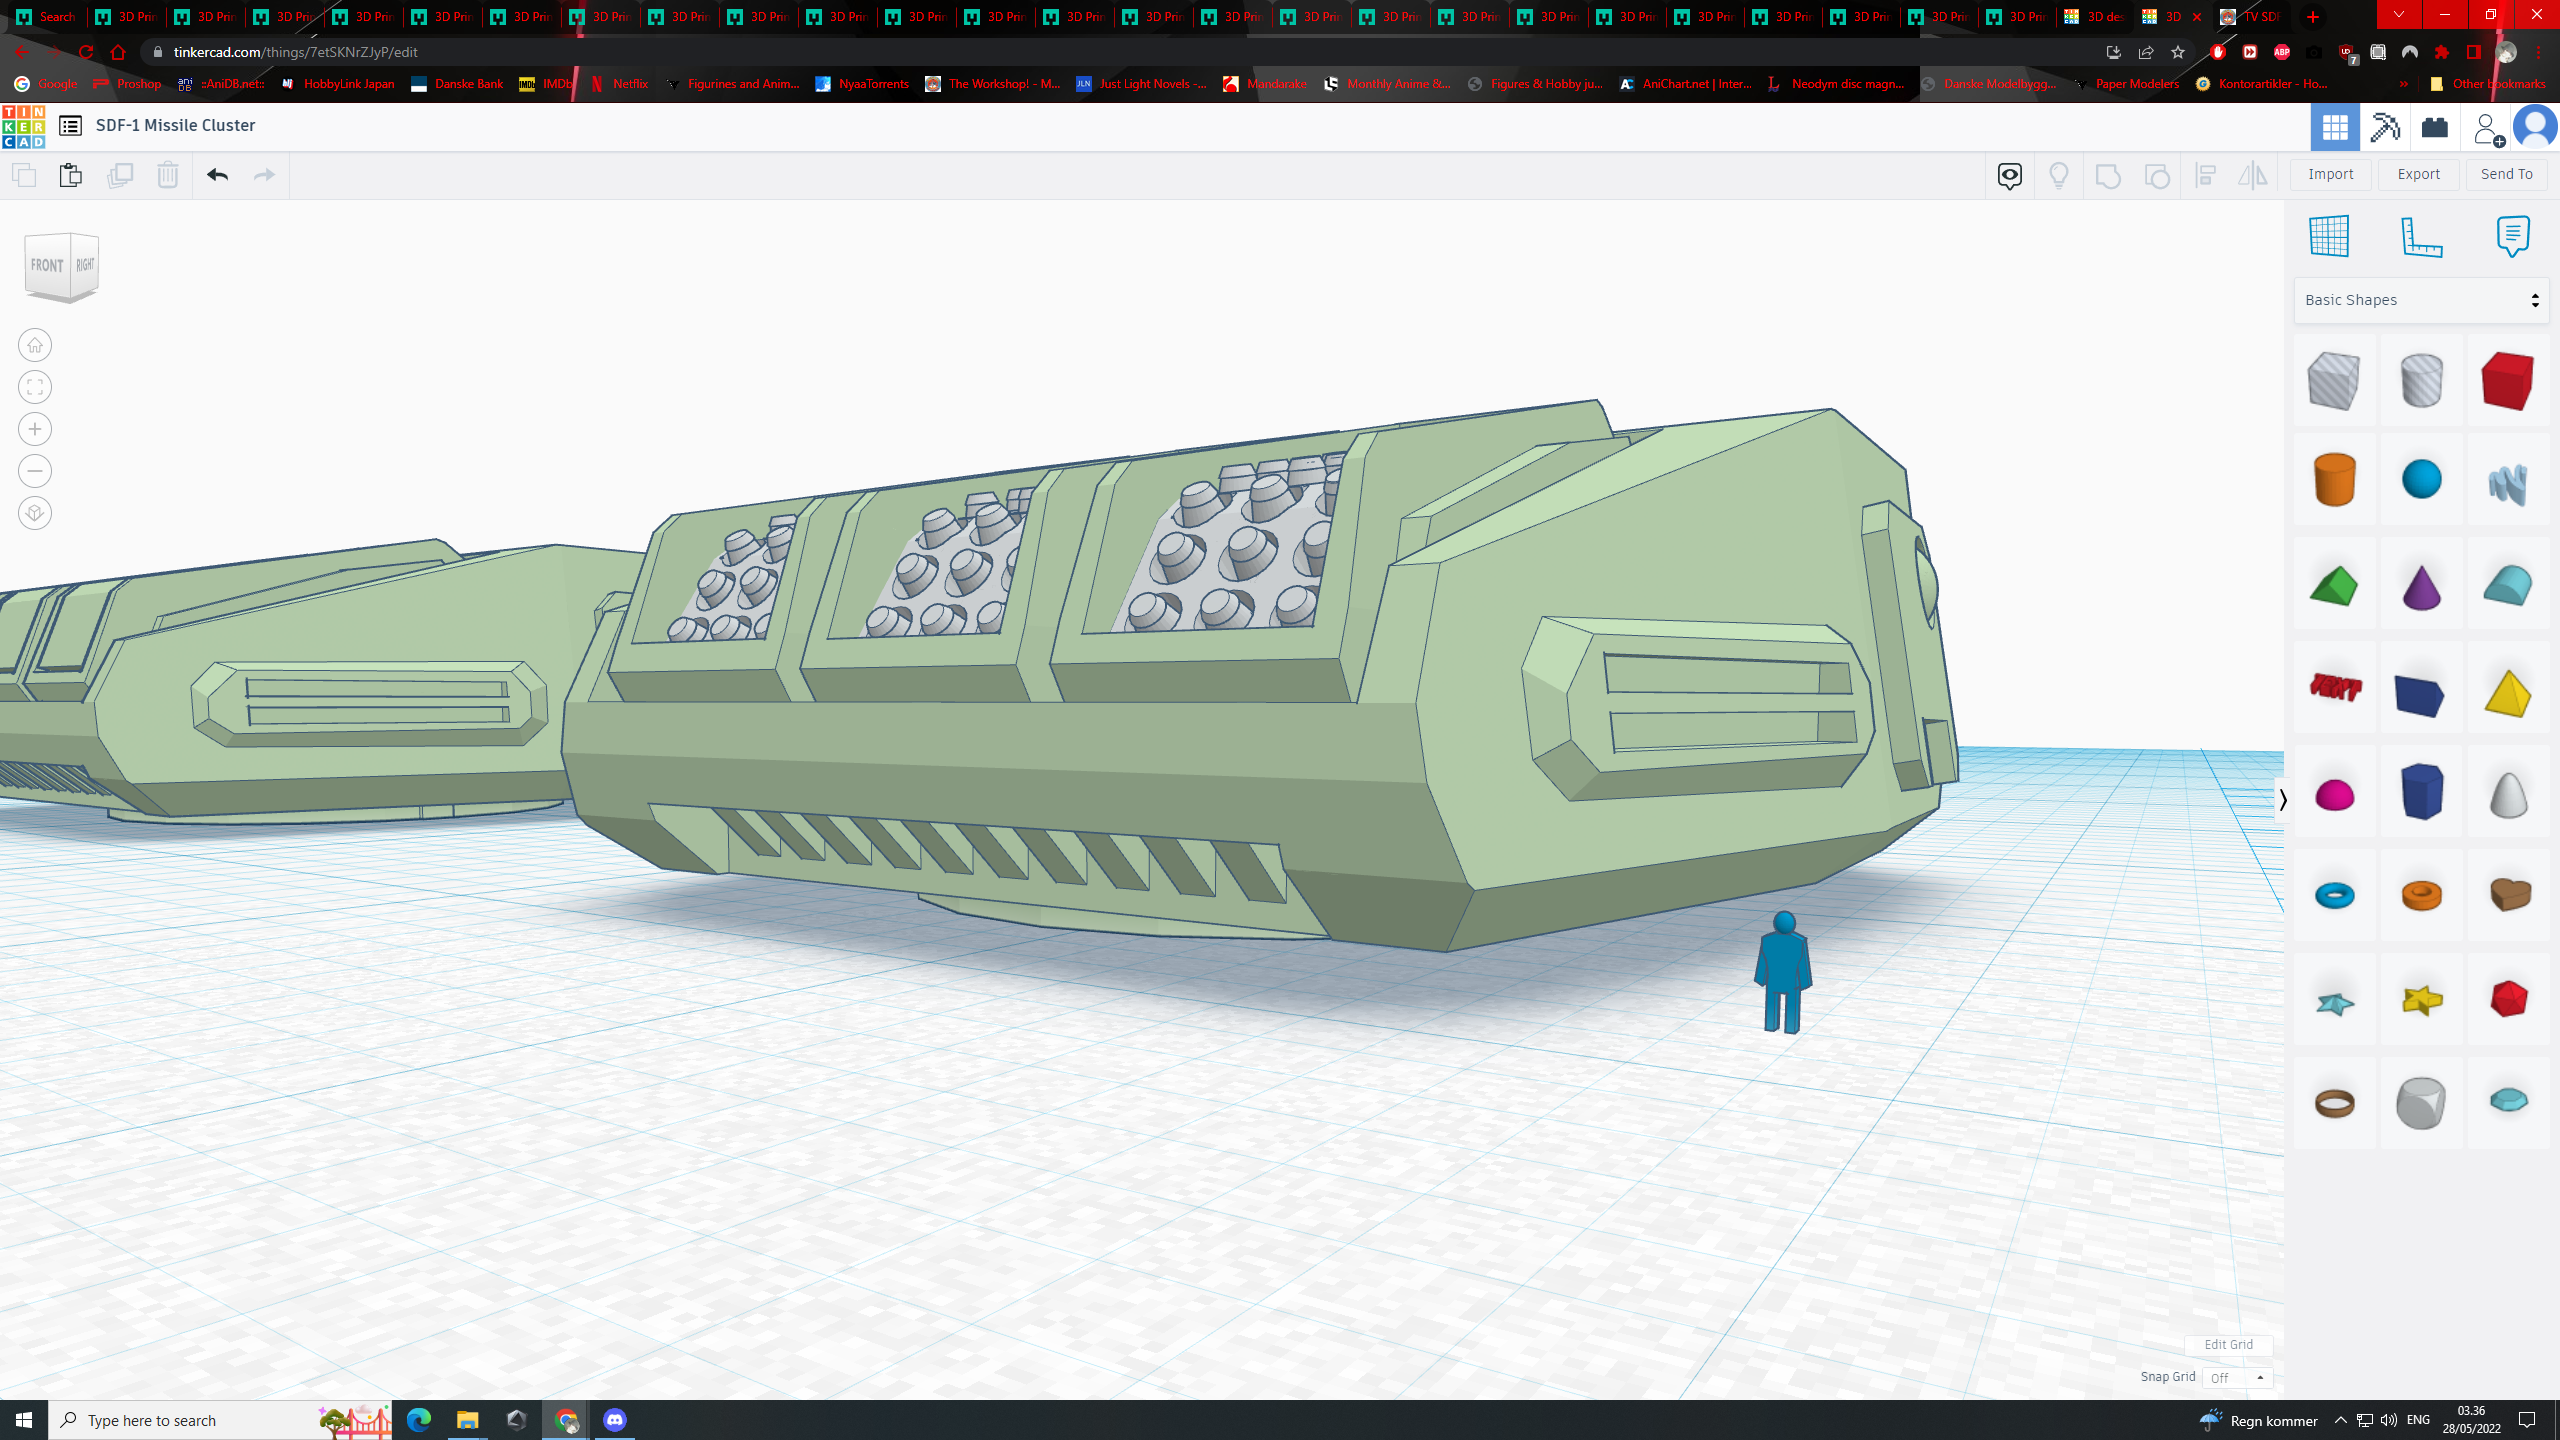
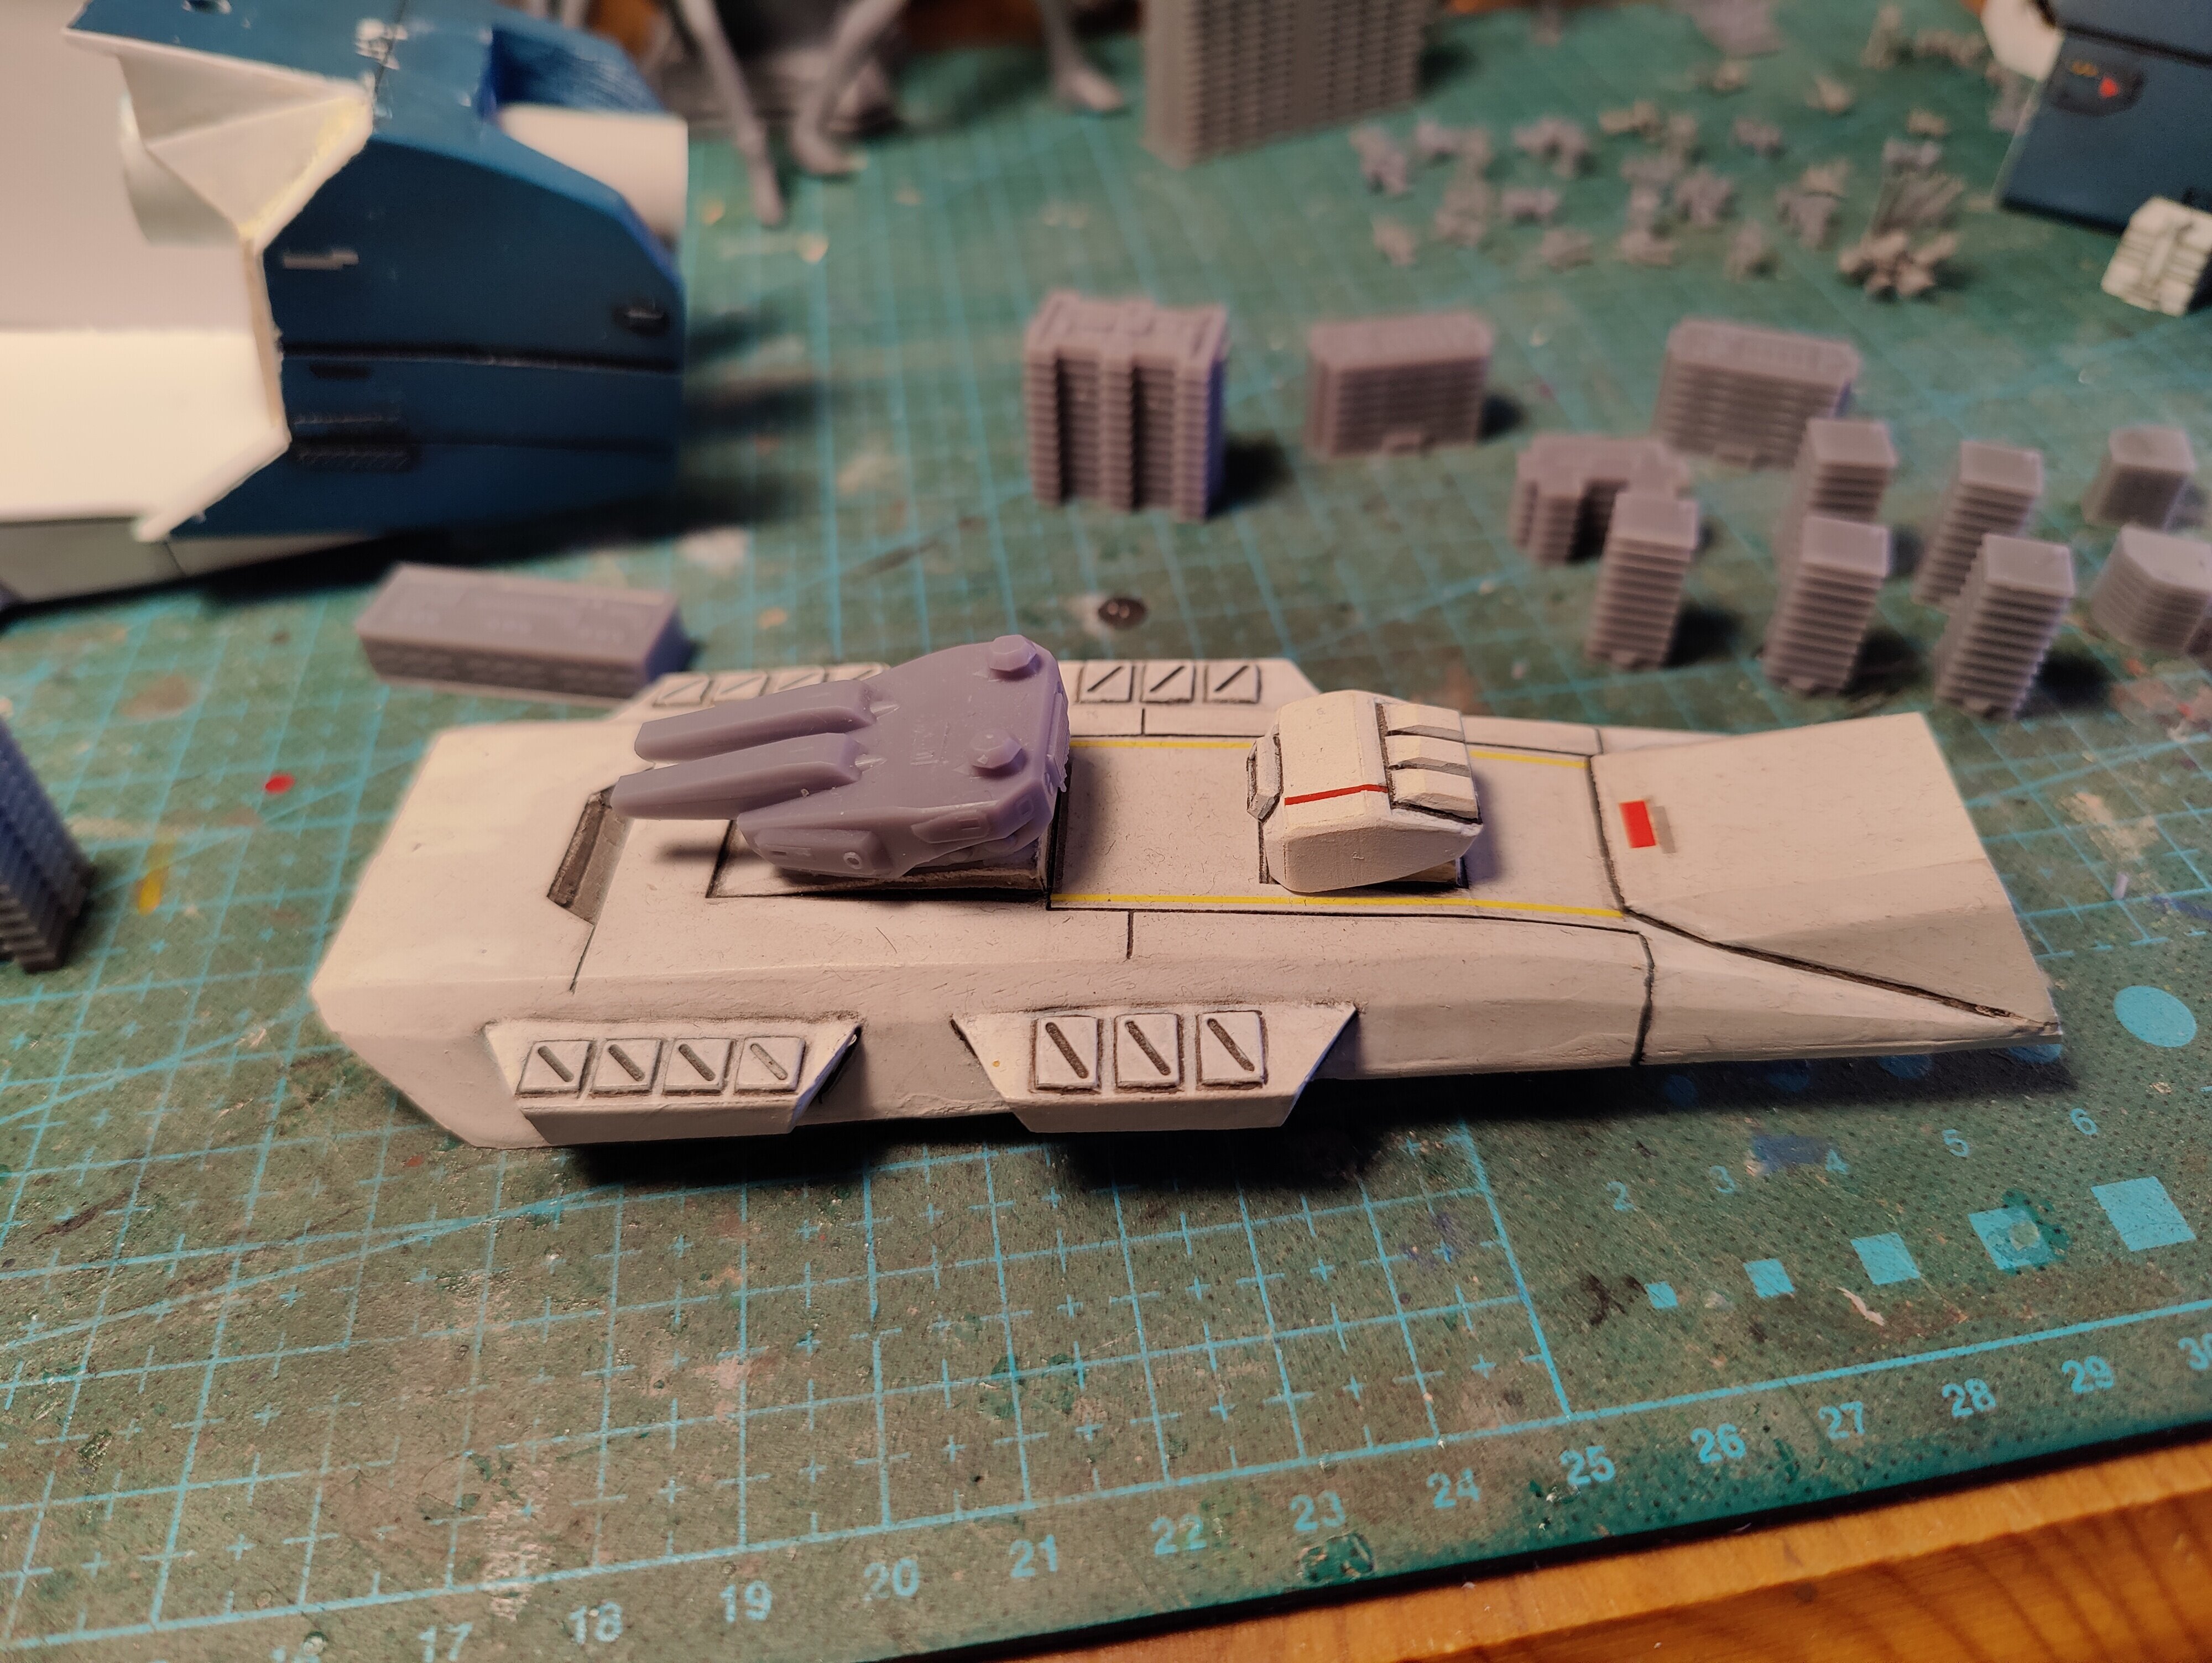
Update!
SDF-1 greeblies part 1
-
a man for scale xD
he is 5´8 or 177cm
-
-
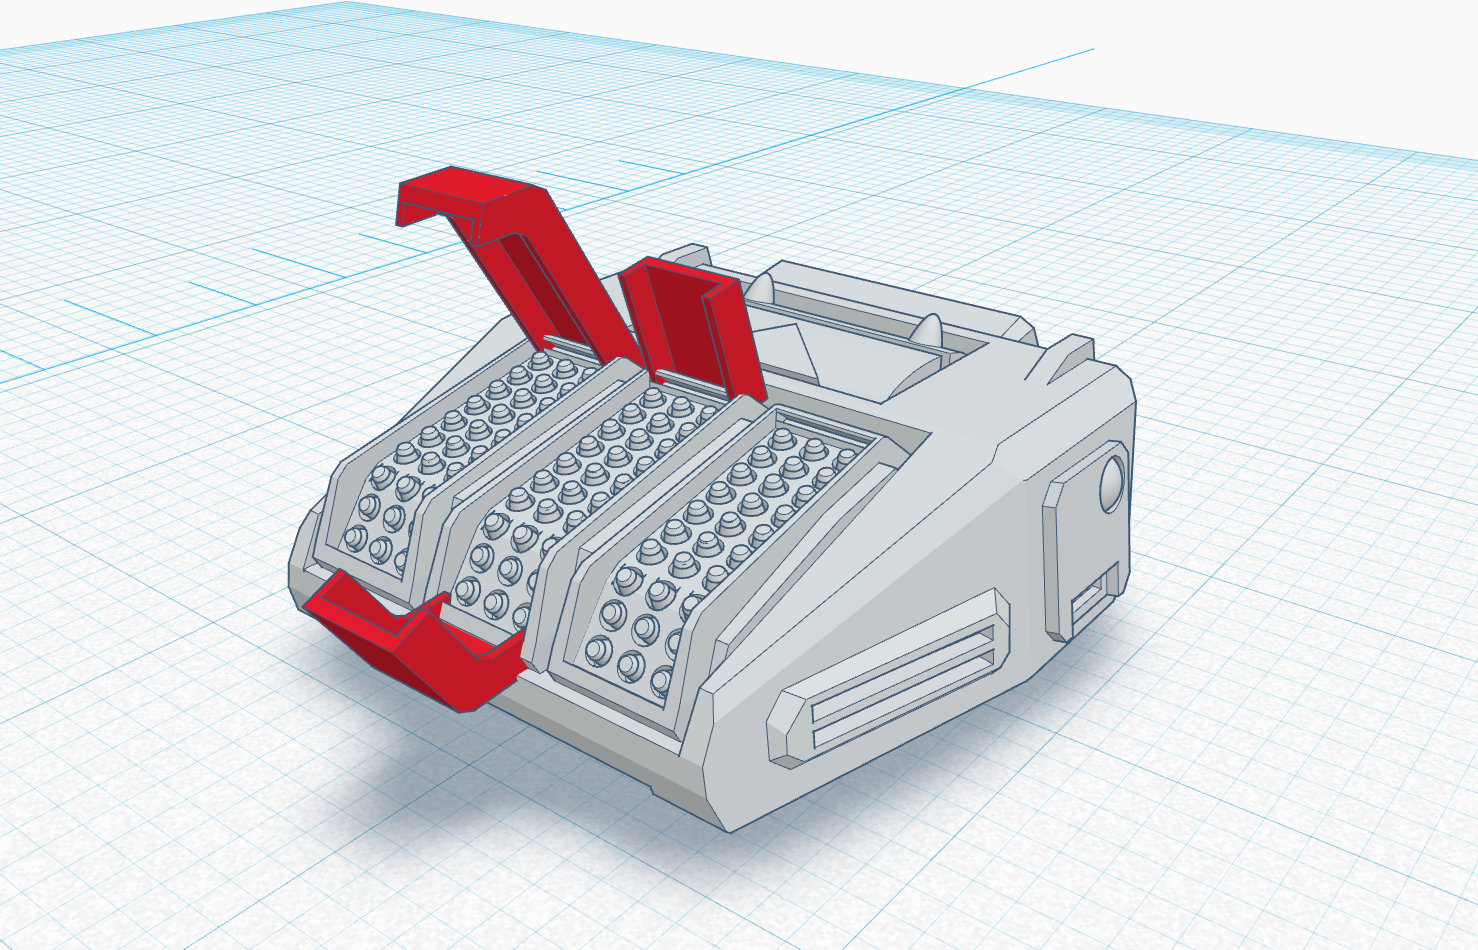
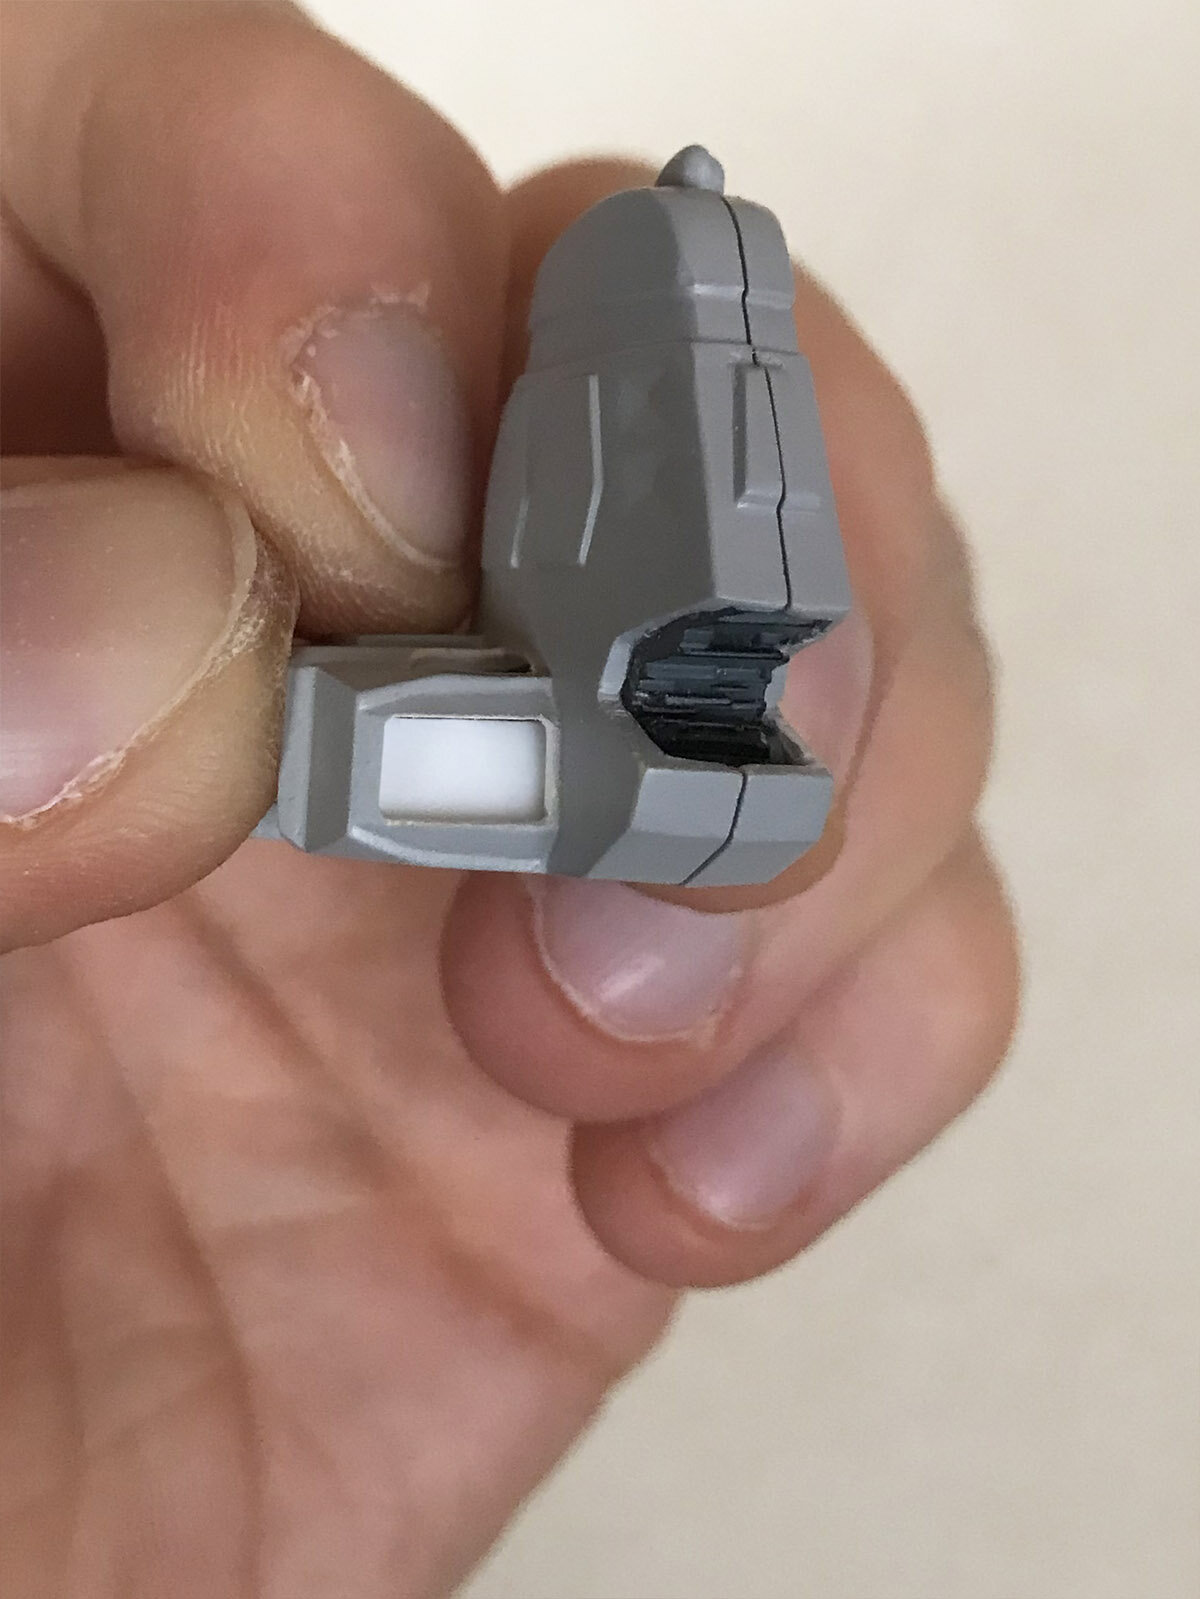
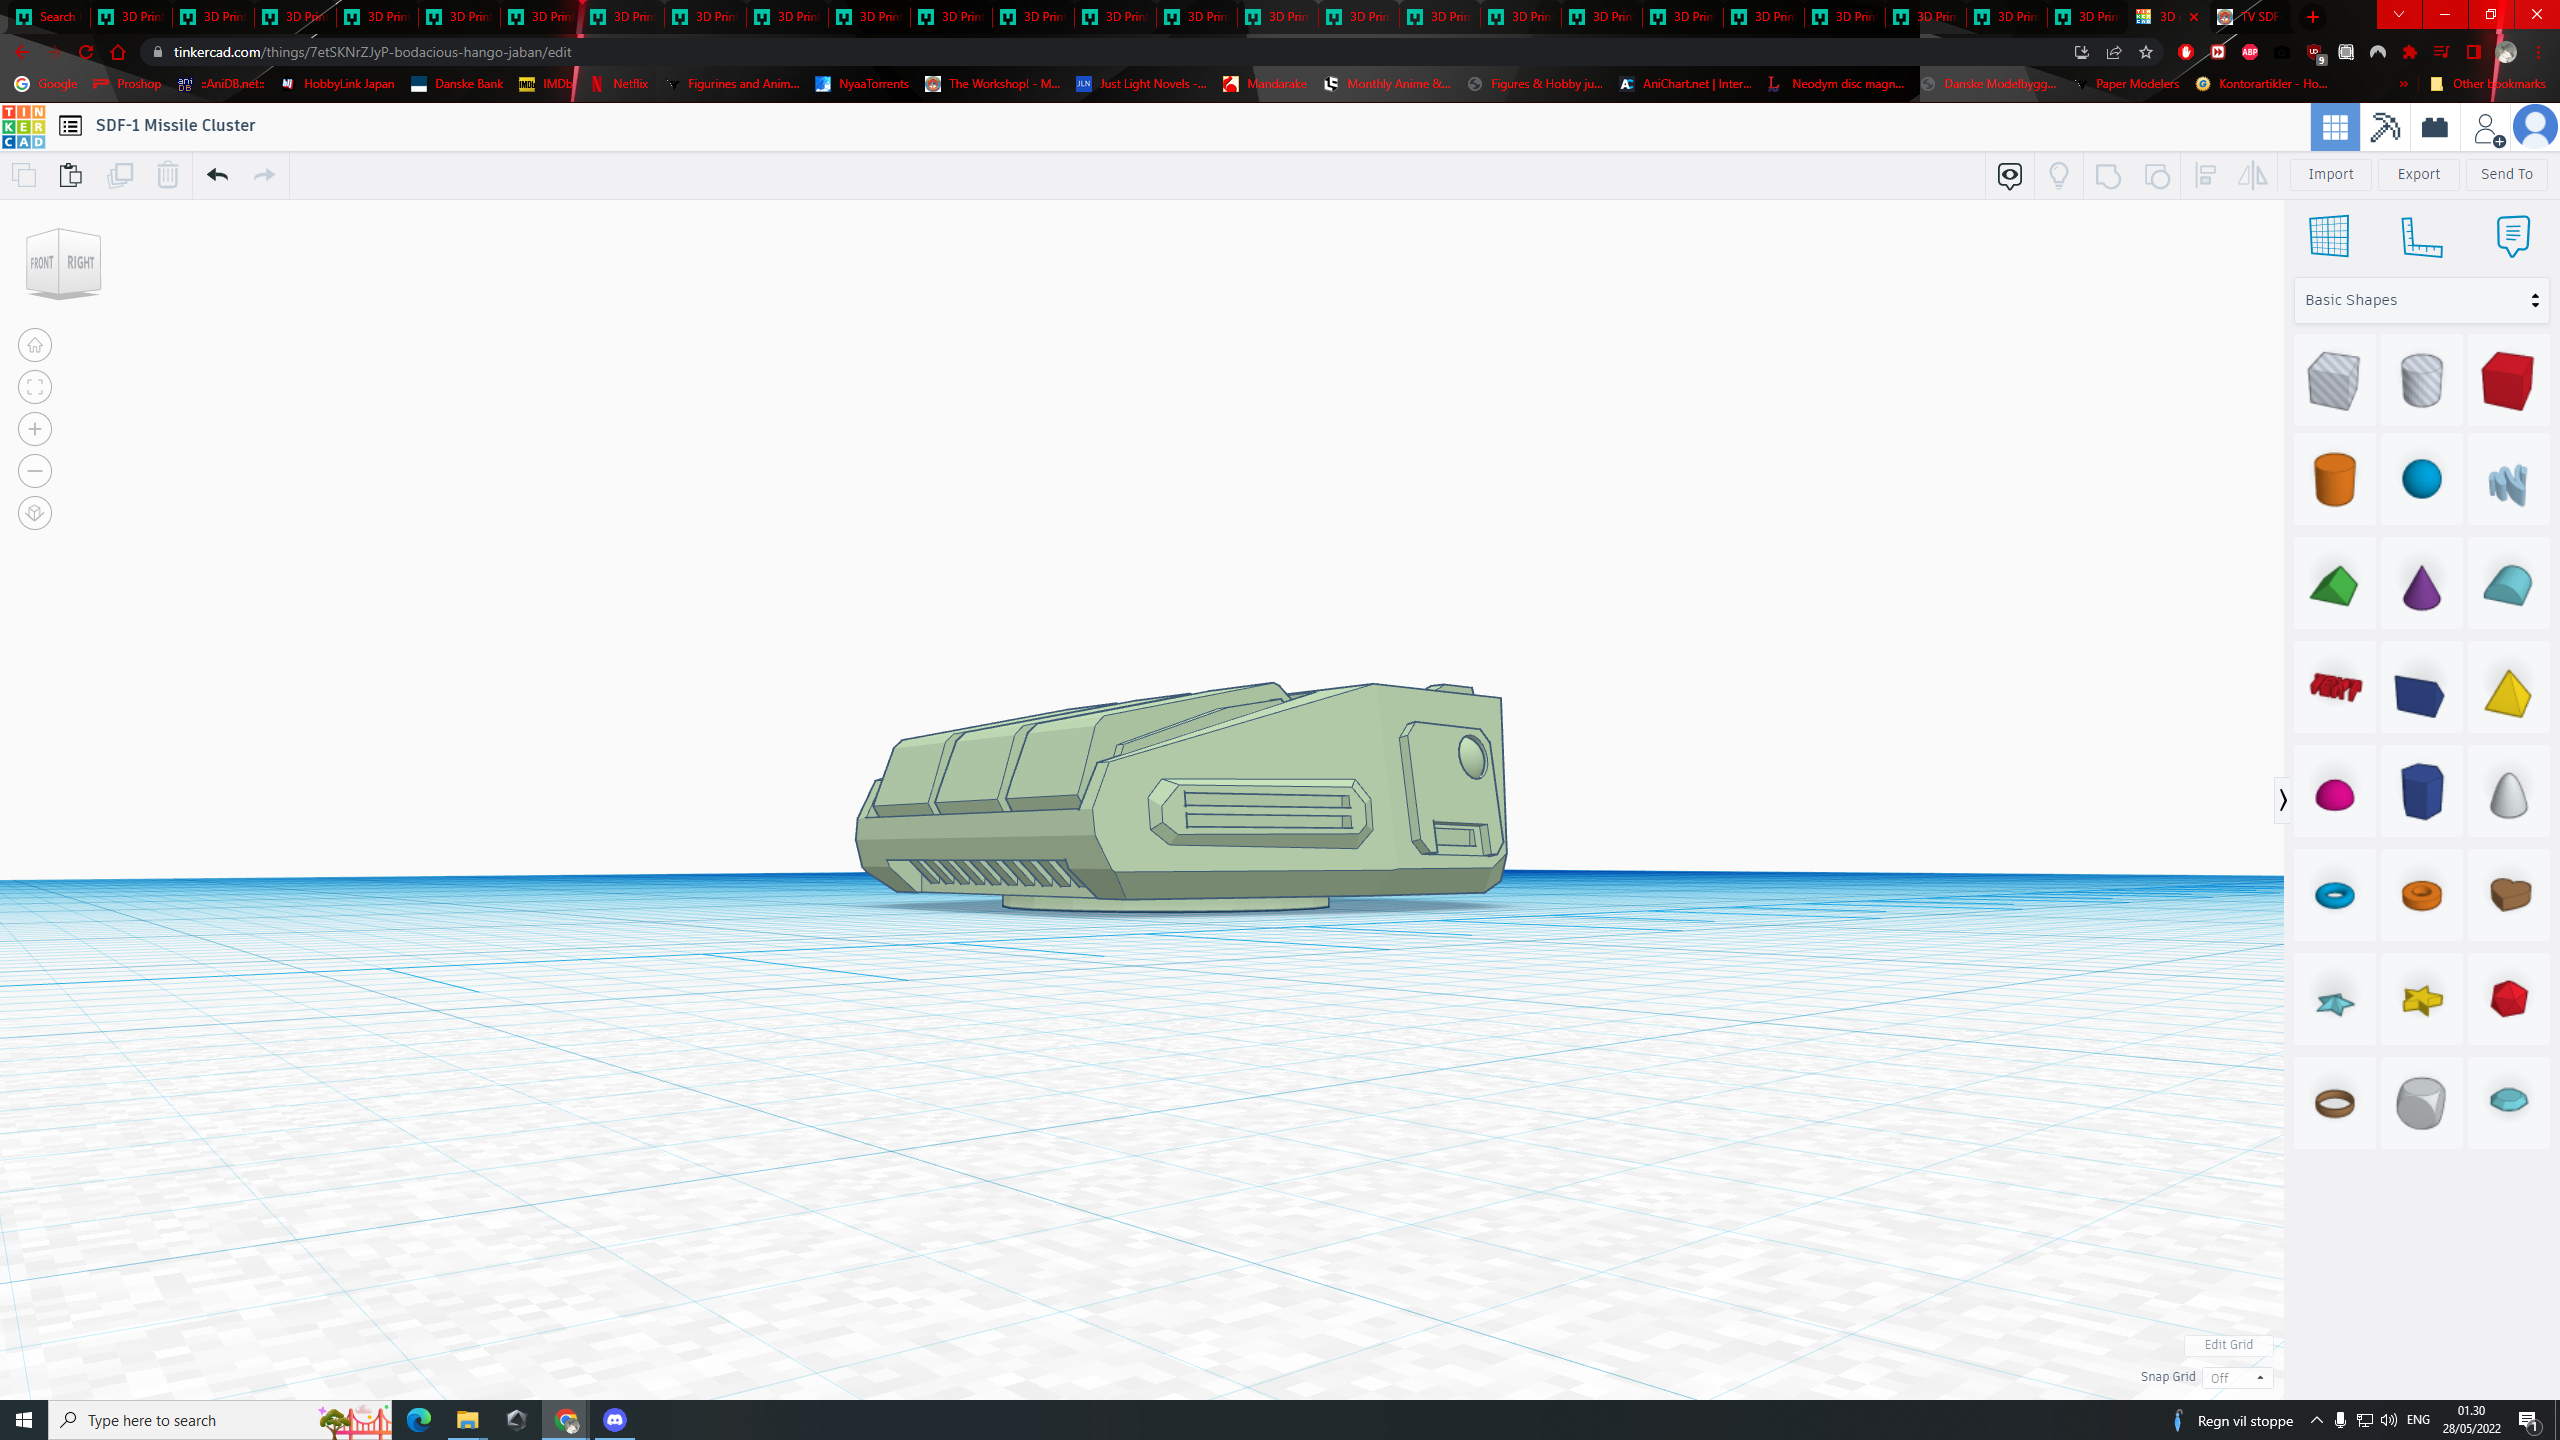
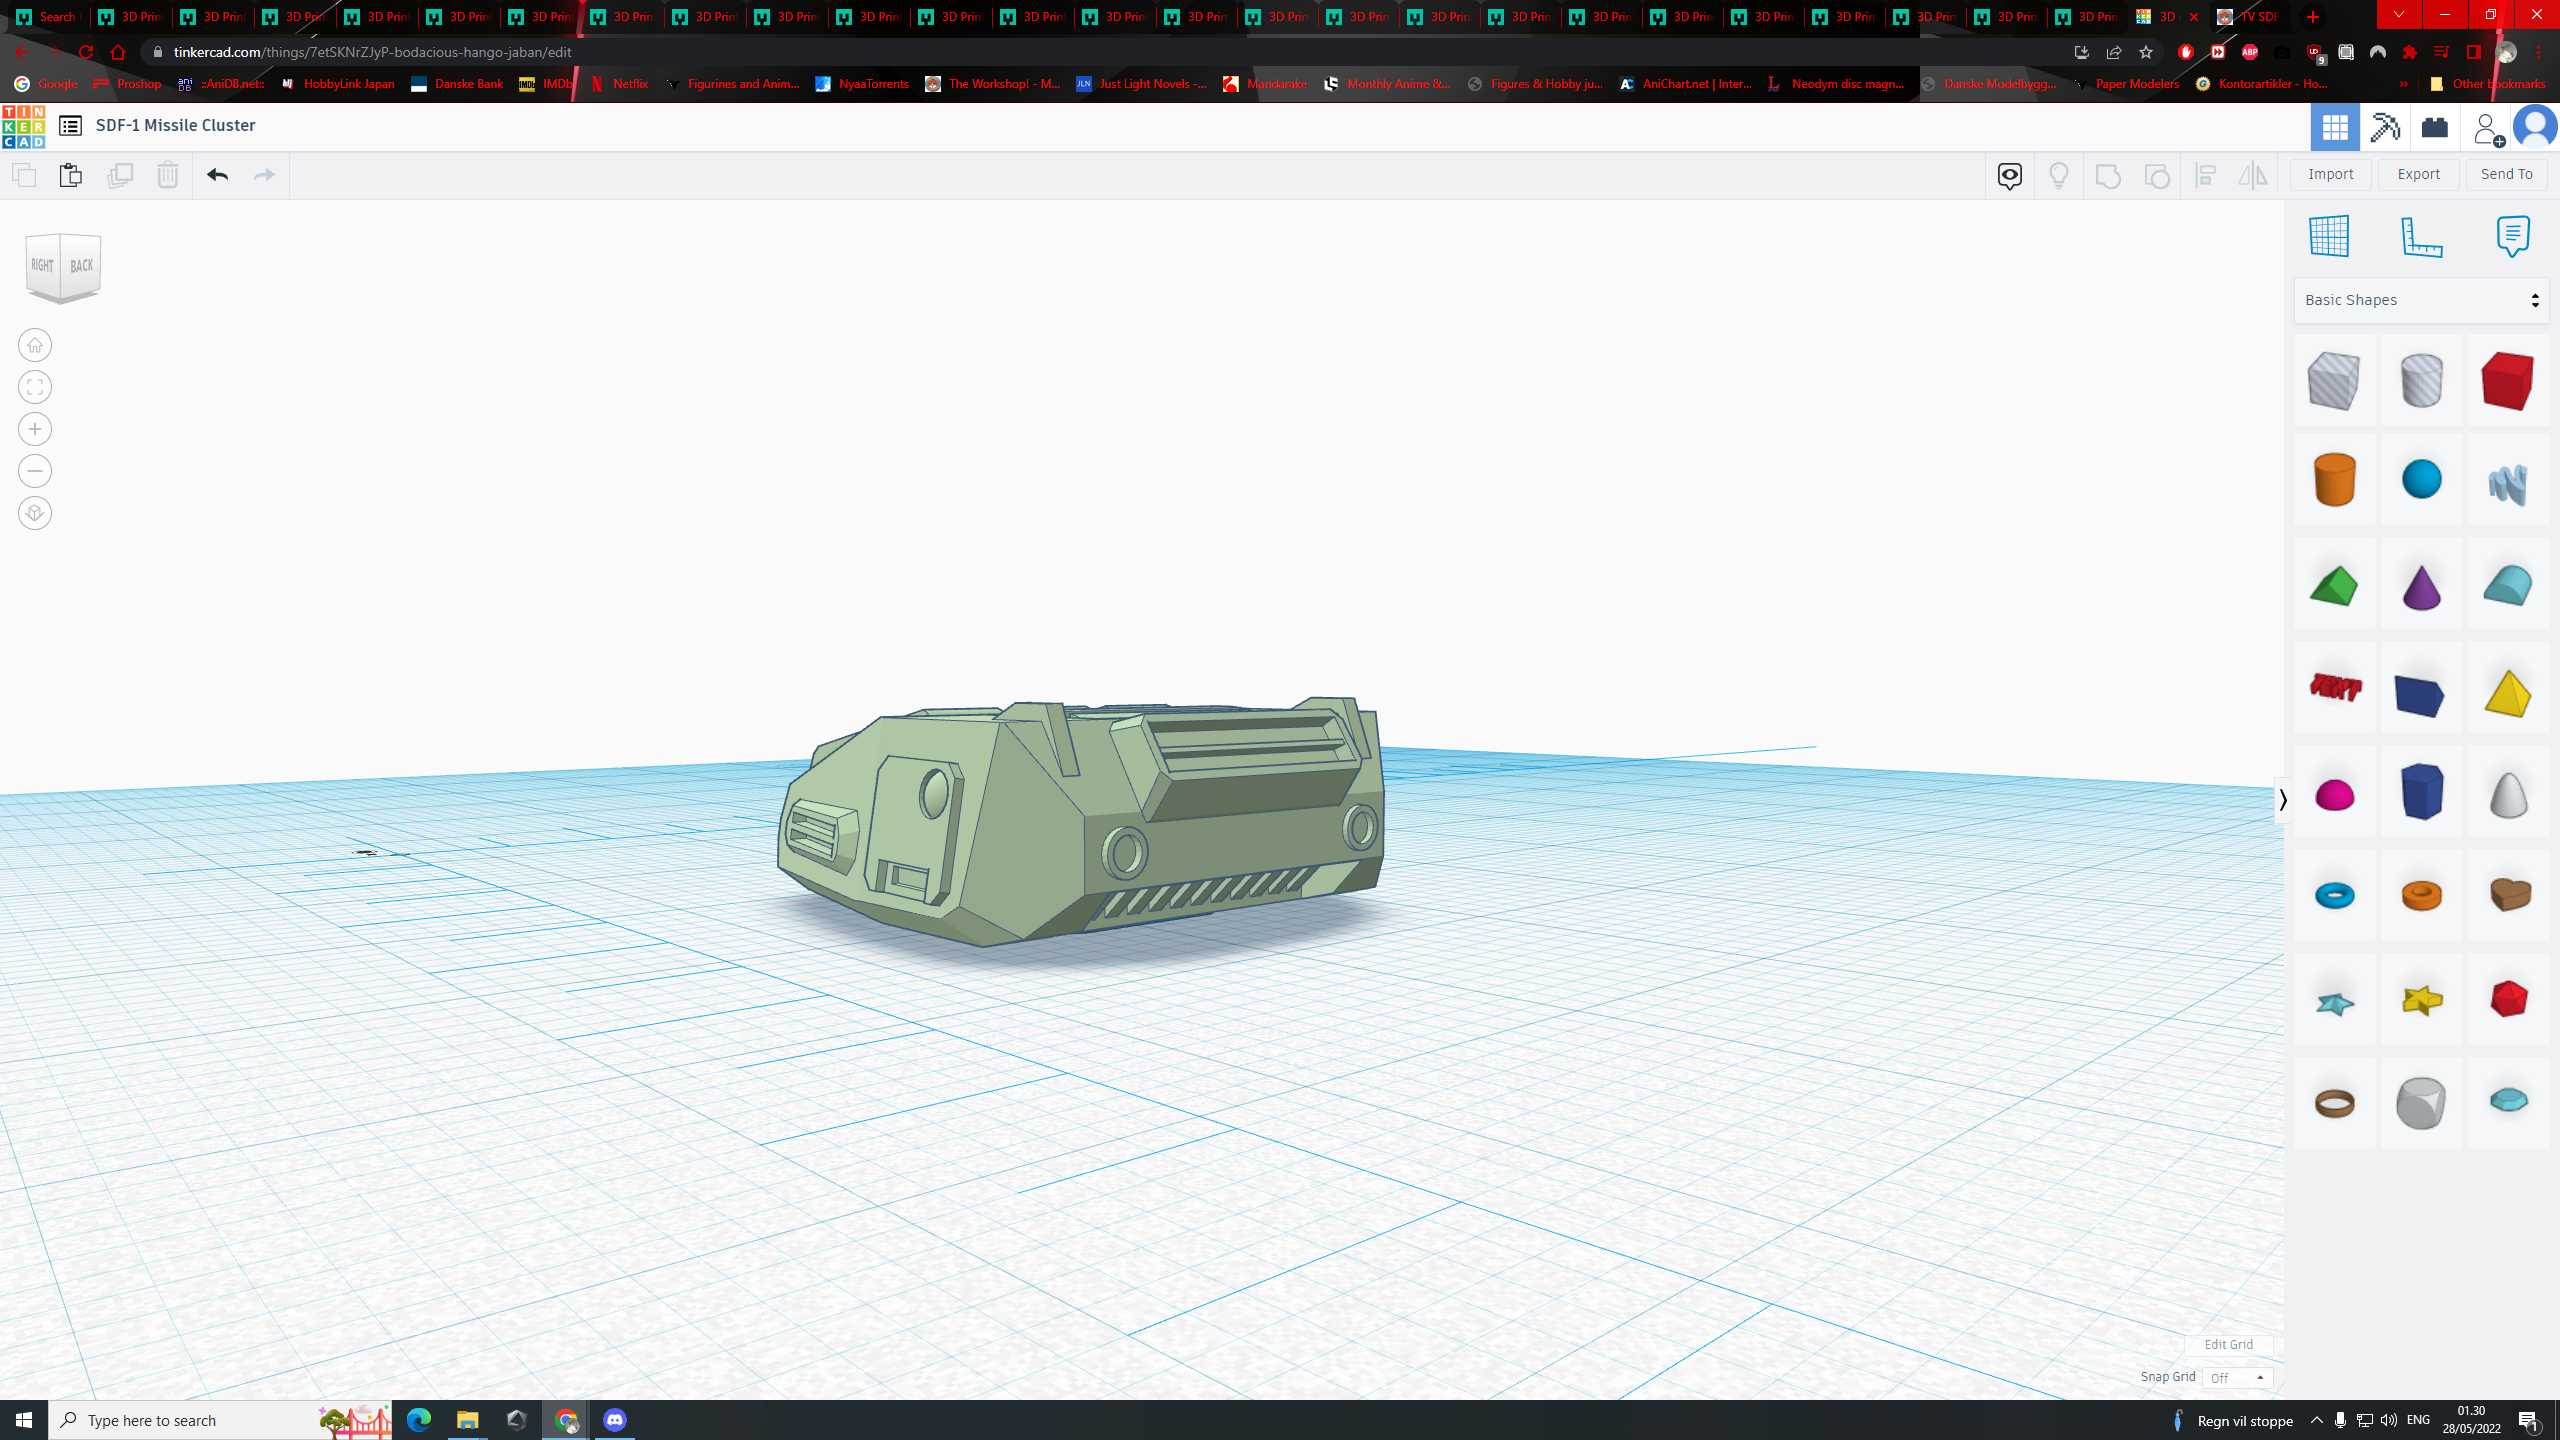
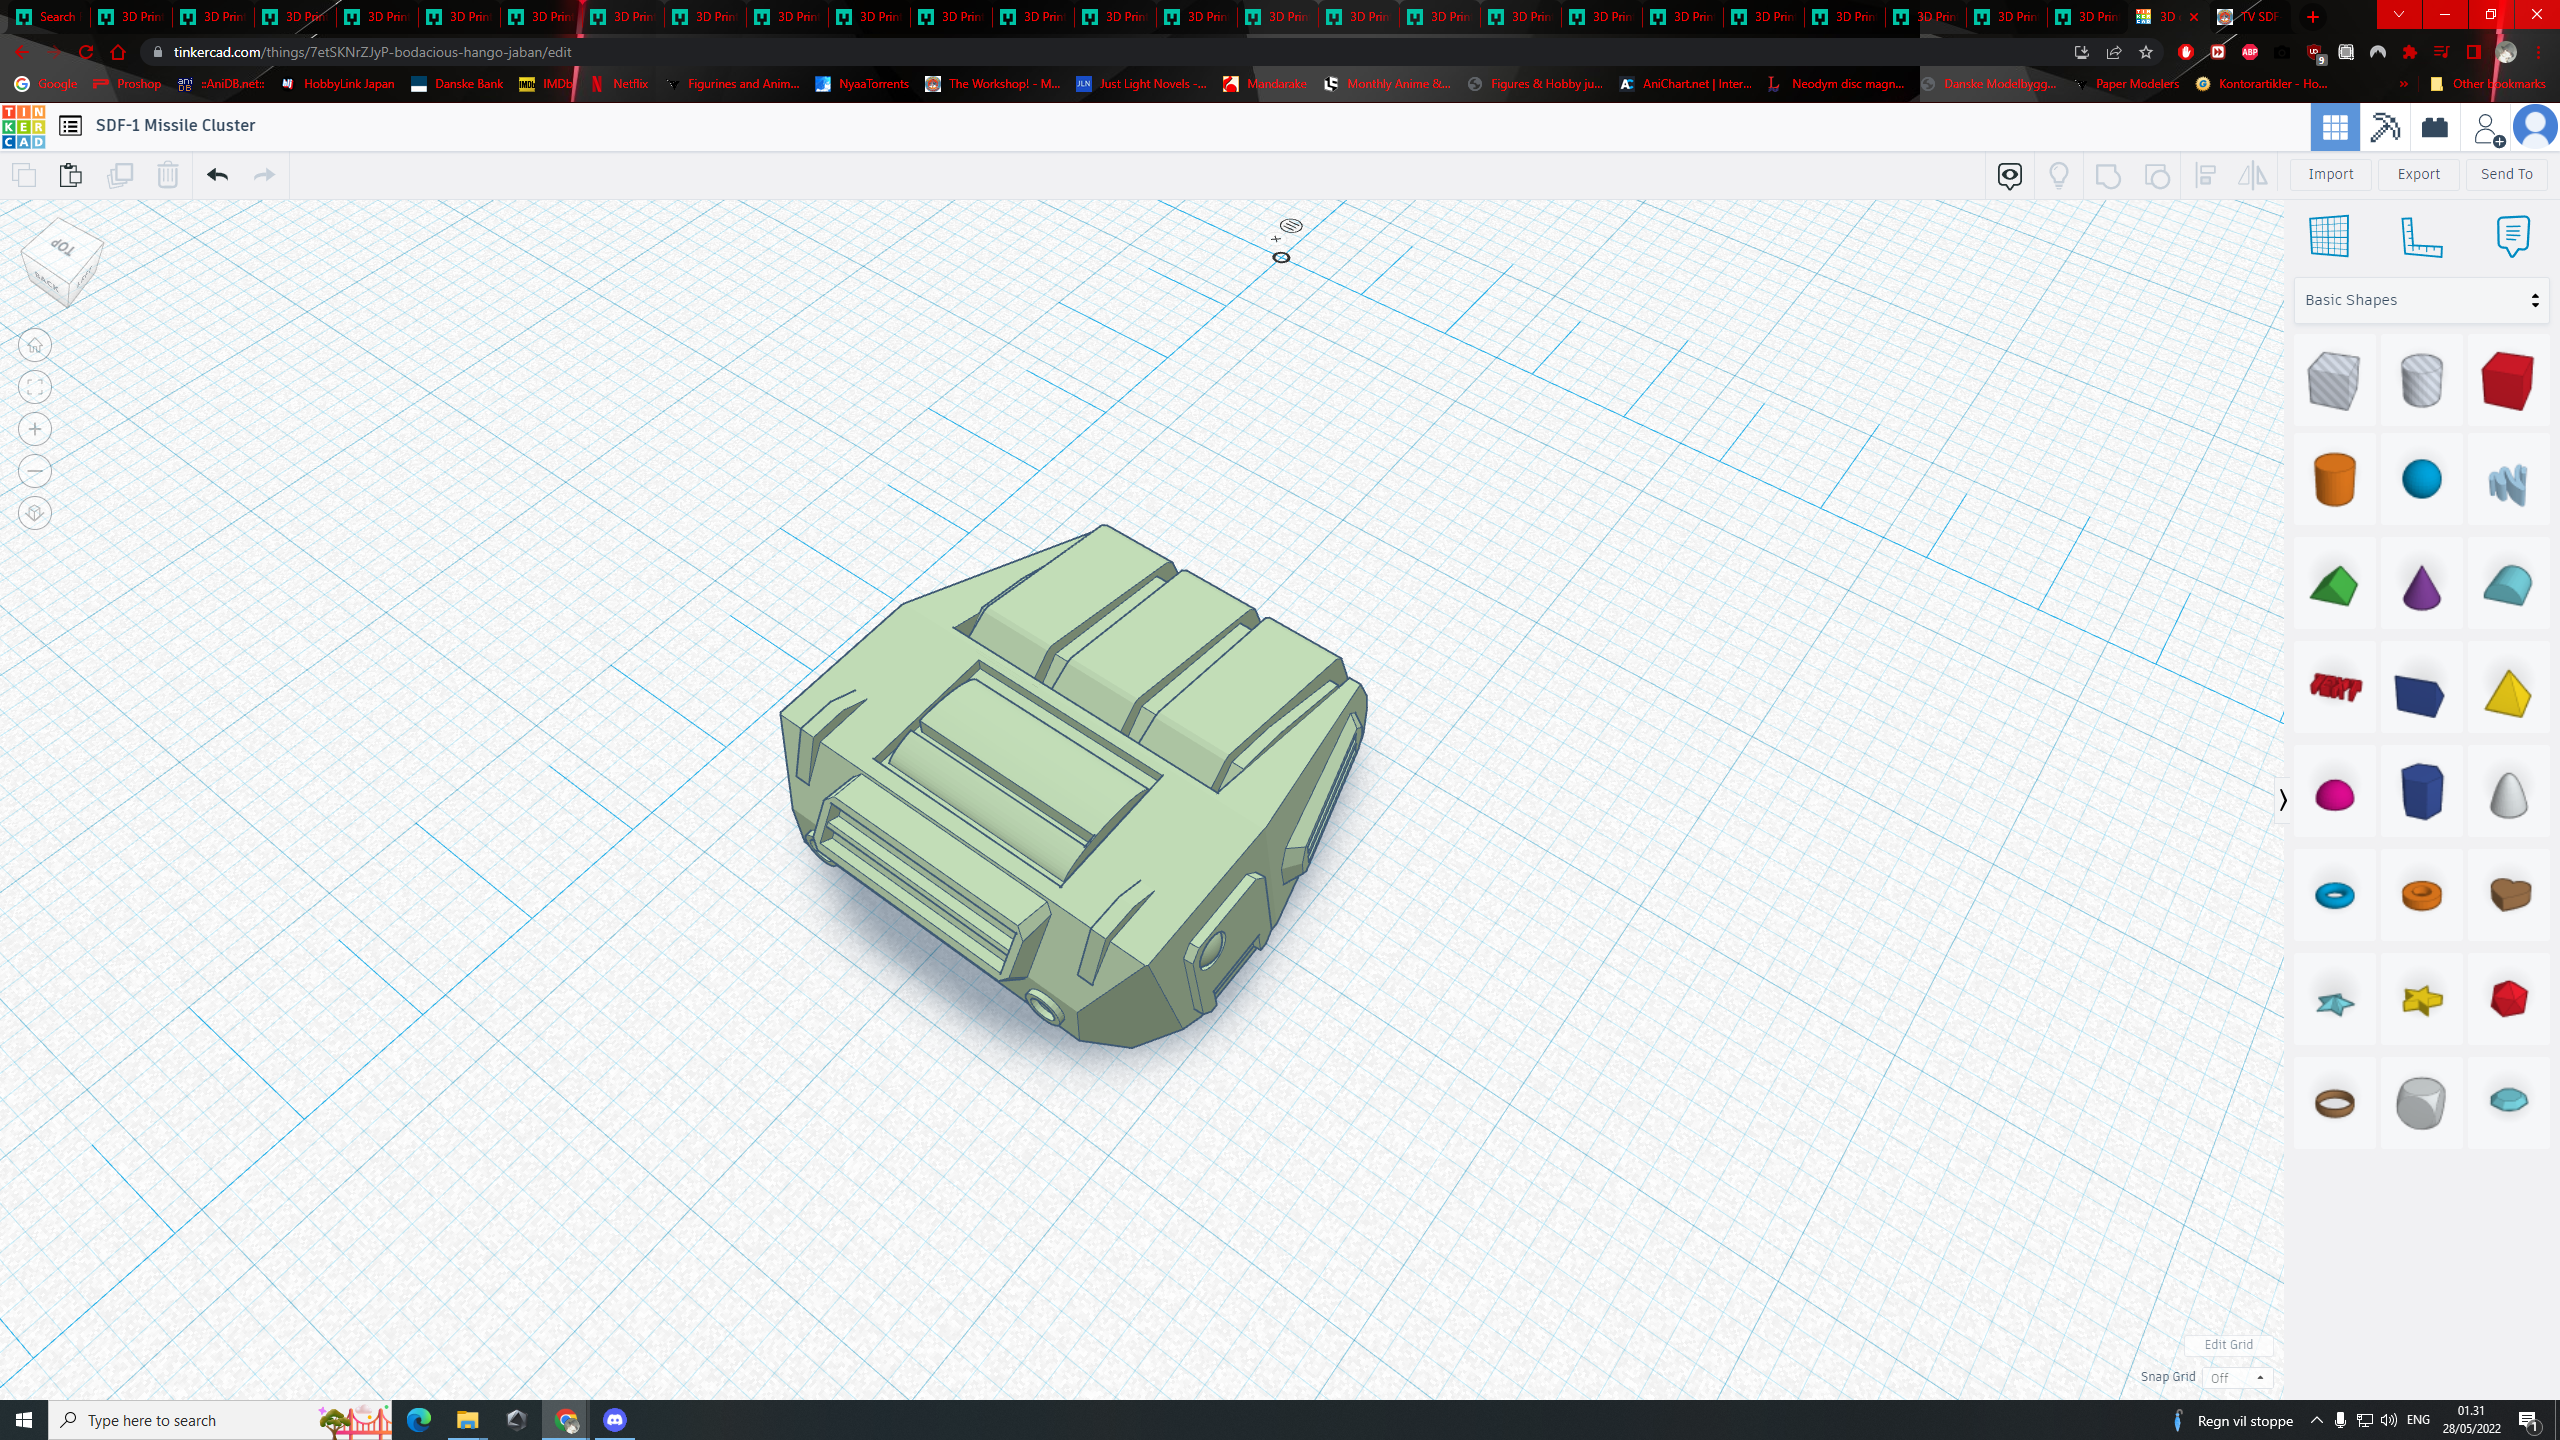
another update!
an open Missile turret
-
4 hours ago, MechTech said:
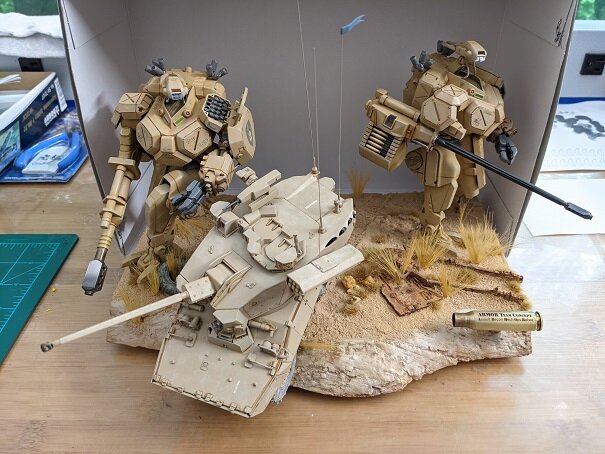
Things have been busy here lately! Here are some project updates. We had a Sci-Fi theme this past club meeting, so it was time to complete EVERYTHING with little bits waiting in the wings.
The oldest project was the AV-98 (2), I believe. Finally completed that! I LOVE this kit! Model accuracy with near "action figure" pose-ability.
A couple of building tips to help you with this one. Parts are Styrene and ABS. Superglue works, but could tough to get in small spots. I used Acetone which fused both together great. You might need a little more than standard thin cements. Acetone dries QUICK!
.jpg.335cd856da790a91afd3e03e7211d095.jpg)
.jpg.79a9159b4907b1009ef7c2b31f3fce44.jpg)
.jpg.2e9914cd47a5b2fea941e84d7a9d96ea.jpg)
.jpg.05a51fe5e13caa0393c1b7ccf3845993.jpg)
This kit has dry transfers and stickers. When you're careful, the transfers are awesome and look clean - no clear "halo" around decals and no clear coat needed (unless you want to seal it). I left off the clear coat since it could get scratched and look funny over time. You can see the micro power switch and push-button for switching light modes.
The "Remington 870" looking shotgun "chambered for 90mm rounds!" It actually has a pump-action movement!
.jpg.863da9e7d857a4acd6b409a750496c7c.jpg)
I SUCK at painting figures! The PVC material didn't glue well either with super glue. The bad glue job didn't show up until paint was applied. I found out later that Acetone works on gluing this material too! Isao Ota's eyes came out looking like he was high. So what do you do when you look high (not that'd I know), you wear sunglasses! So I took sprue, shaped it and cut thin slivers to make him sunglasses. Now its harder to tell when he's angry all the time under there.😁
.jpg.cc0e08cd3f8421bcf43aafdfba93eba7.jpg)
.jpg.988e944502b3570028390d6431bdfef2.jpg)
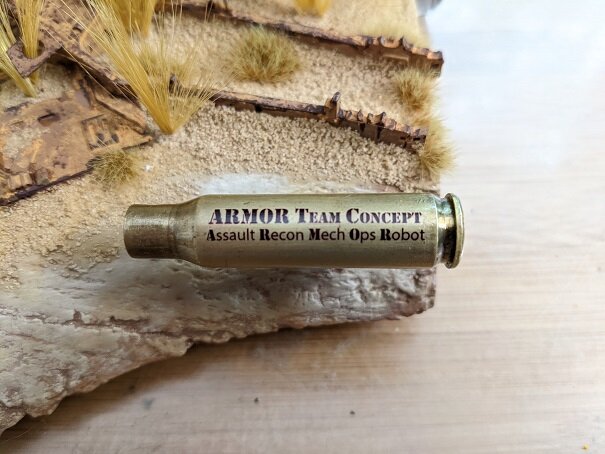
The 1/35th ARMOR Diorama was basically done, but needed a creative label for it. There were pictures posted before of the shell being soldered and lacquered. It took three tries to get this right. Here's the completed label now. "Assault Reconnaissance Mechanized Operations Robot."
The Turbo Spitfire is coming along slowly. LOTS of repainting parts to get a good finish on the name plate (to be shown later). A Zinc Chromate looking undercoating was applied. This will show up with chips and rub marks under the main color later on.
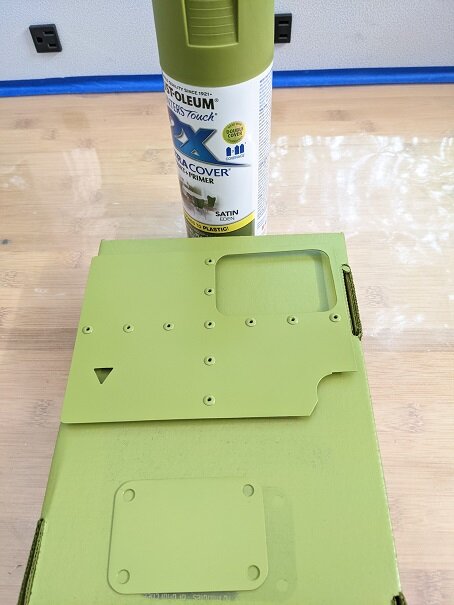
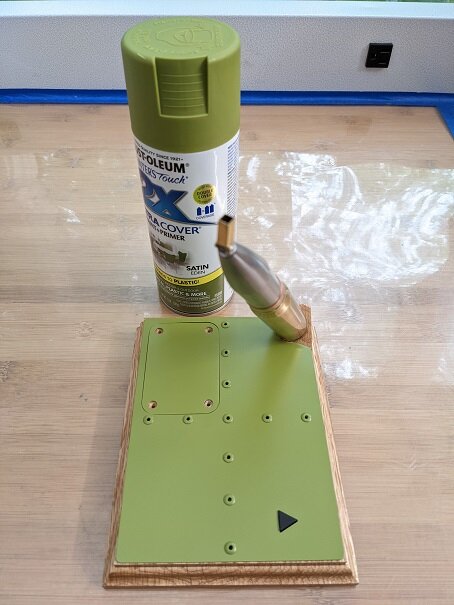
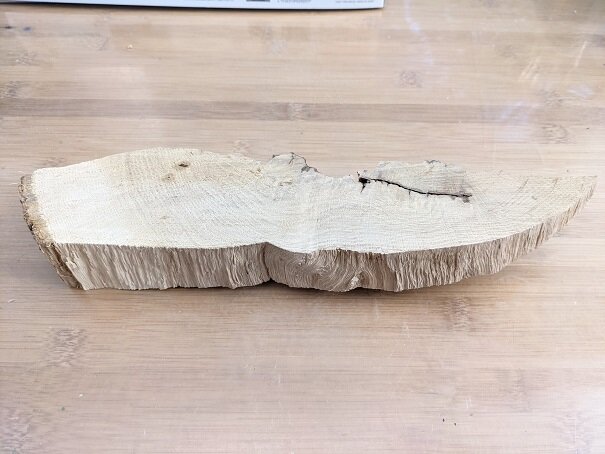
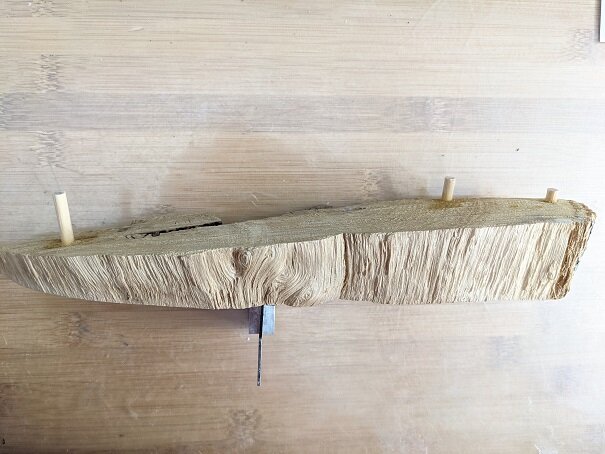
While waiting for paint to dry, I started work on the next base for an upcoming project. It is a sliver of oak cut from a fallen tree. It looked so cool and organic, I knew it would get used one day. Pegs were added to level-out the top of it.
That's it for now. Back to the Spitfire (hopefully this weekend). Thanks for checking in! - MT
LOOKS AWESOME!
never seen those 1/35 mechs, but i love them xD
-
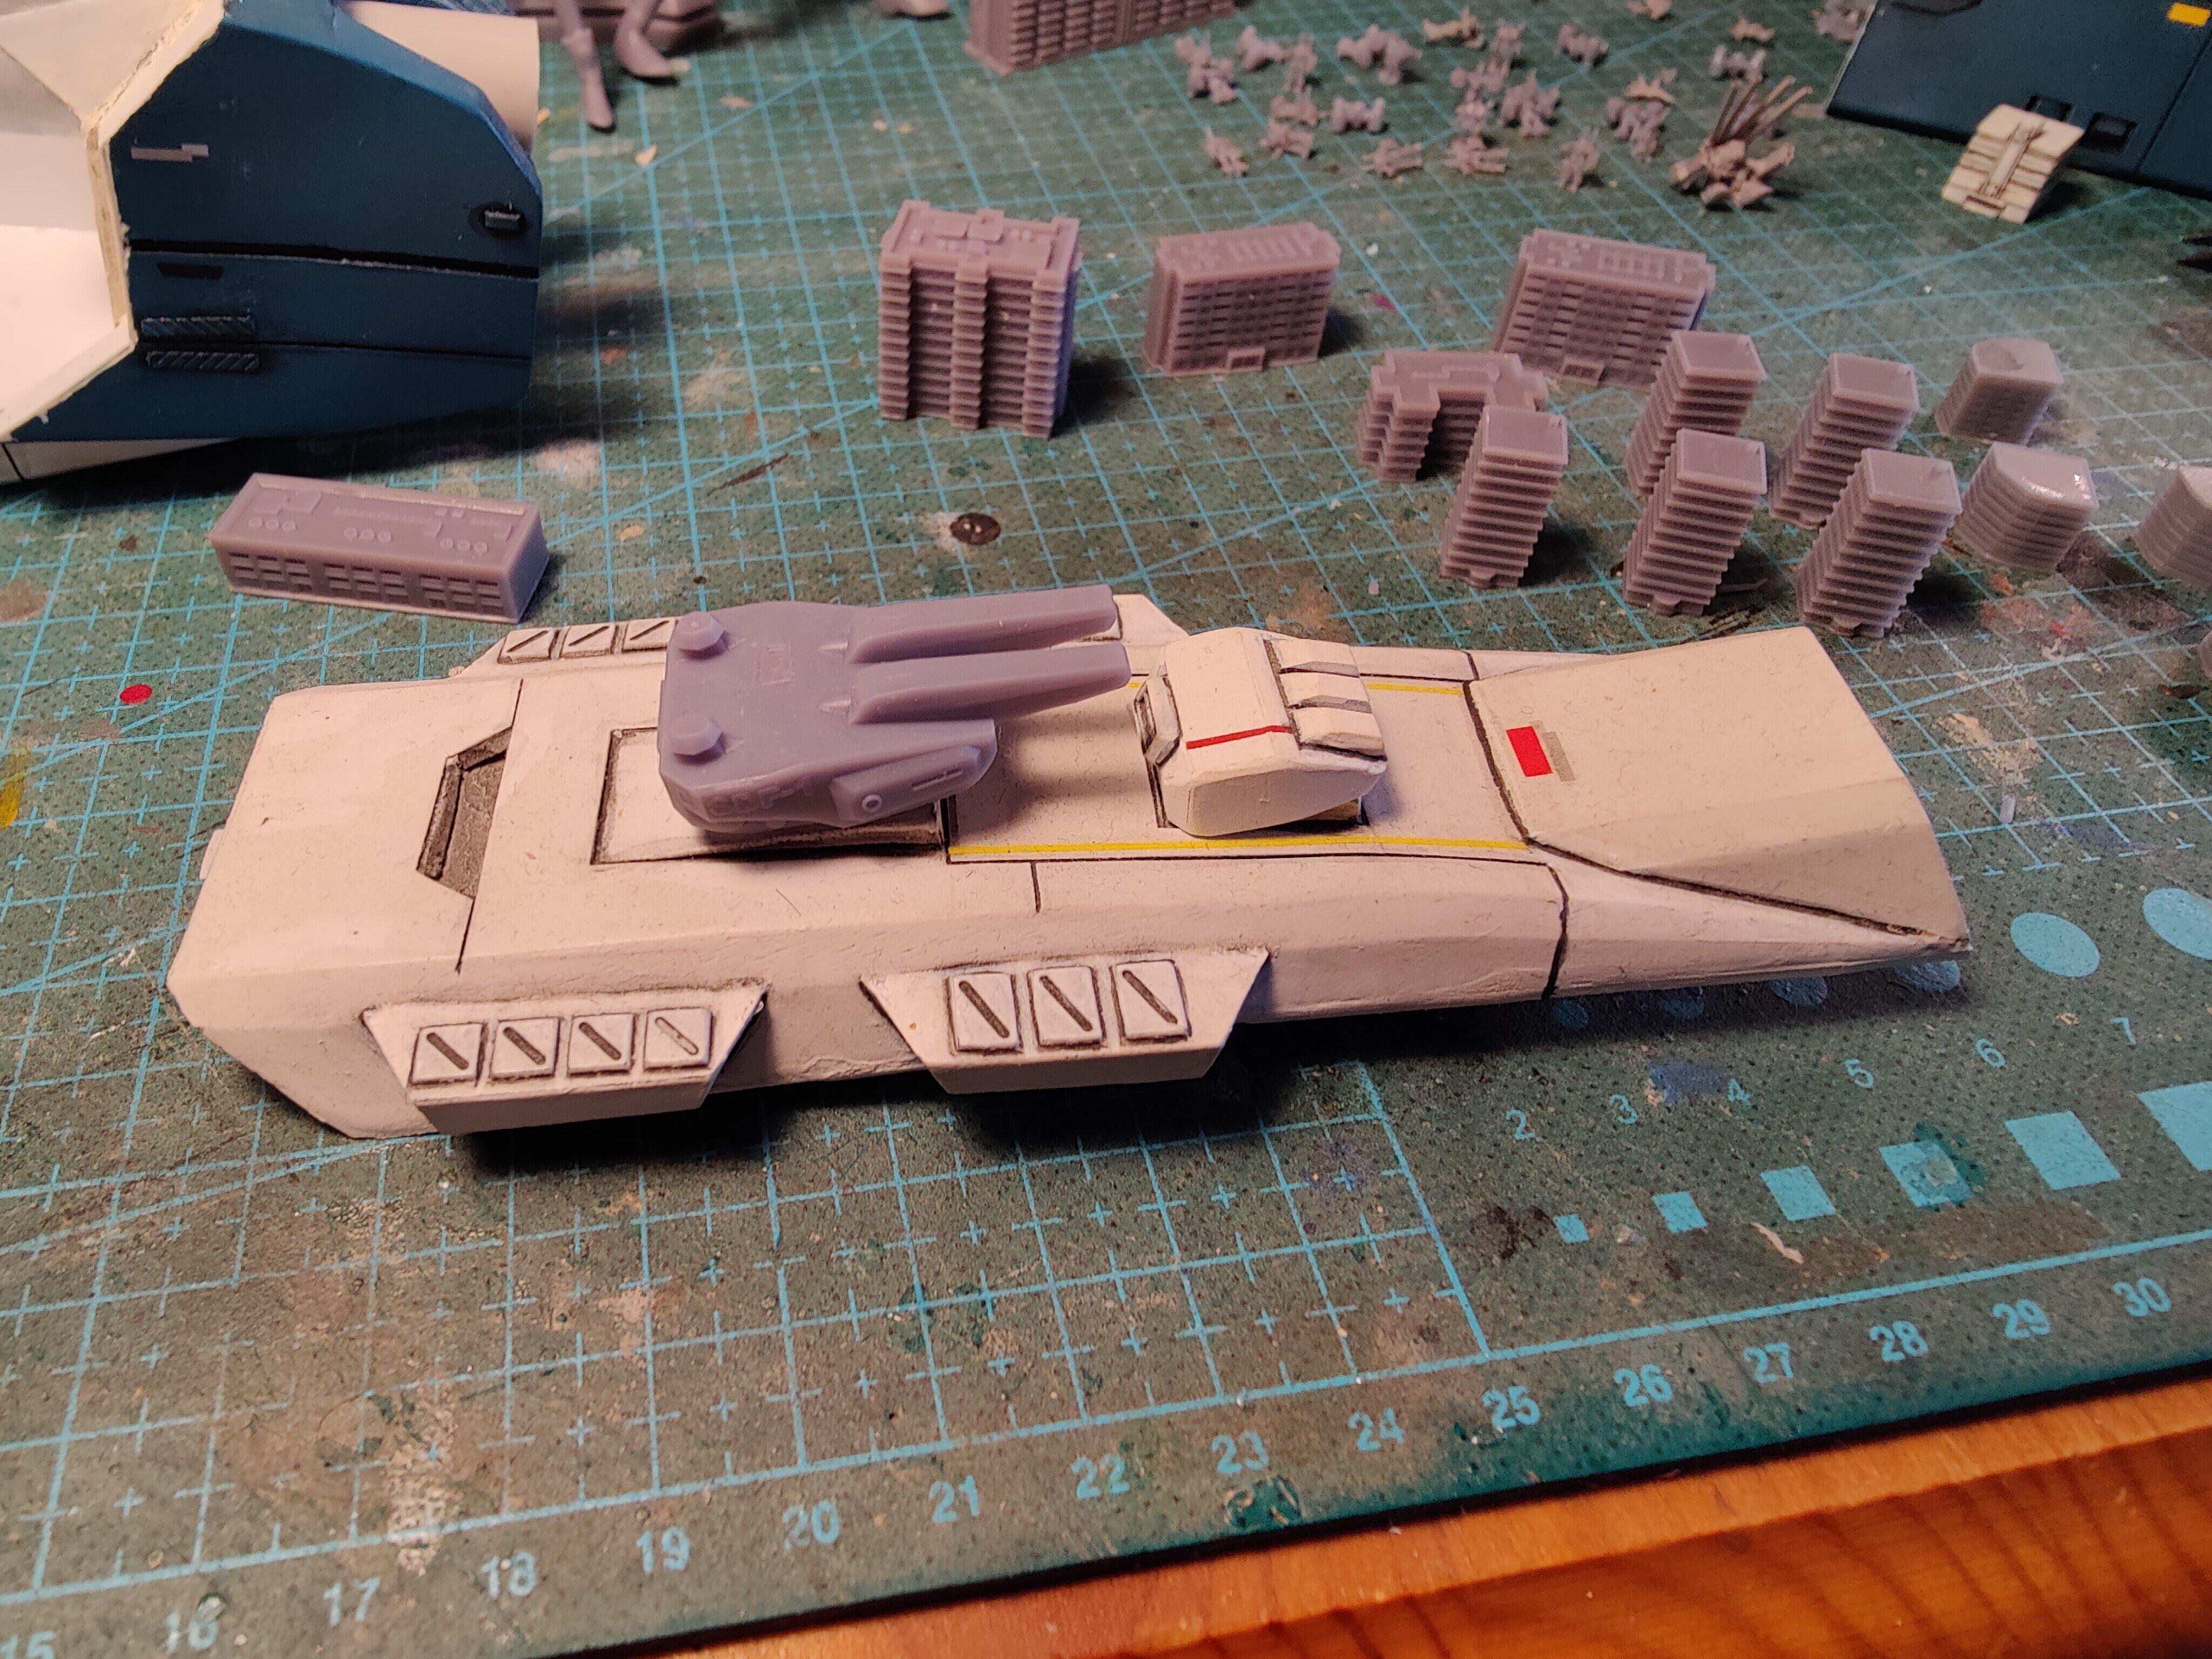
progress in the ship weapons department...
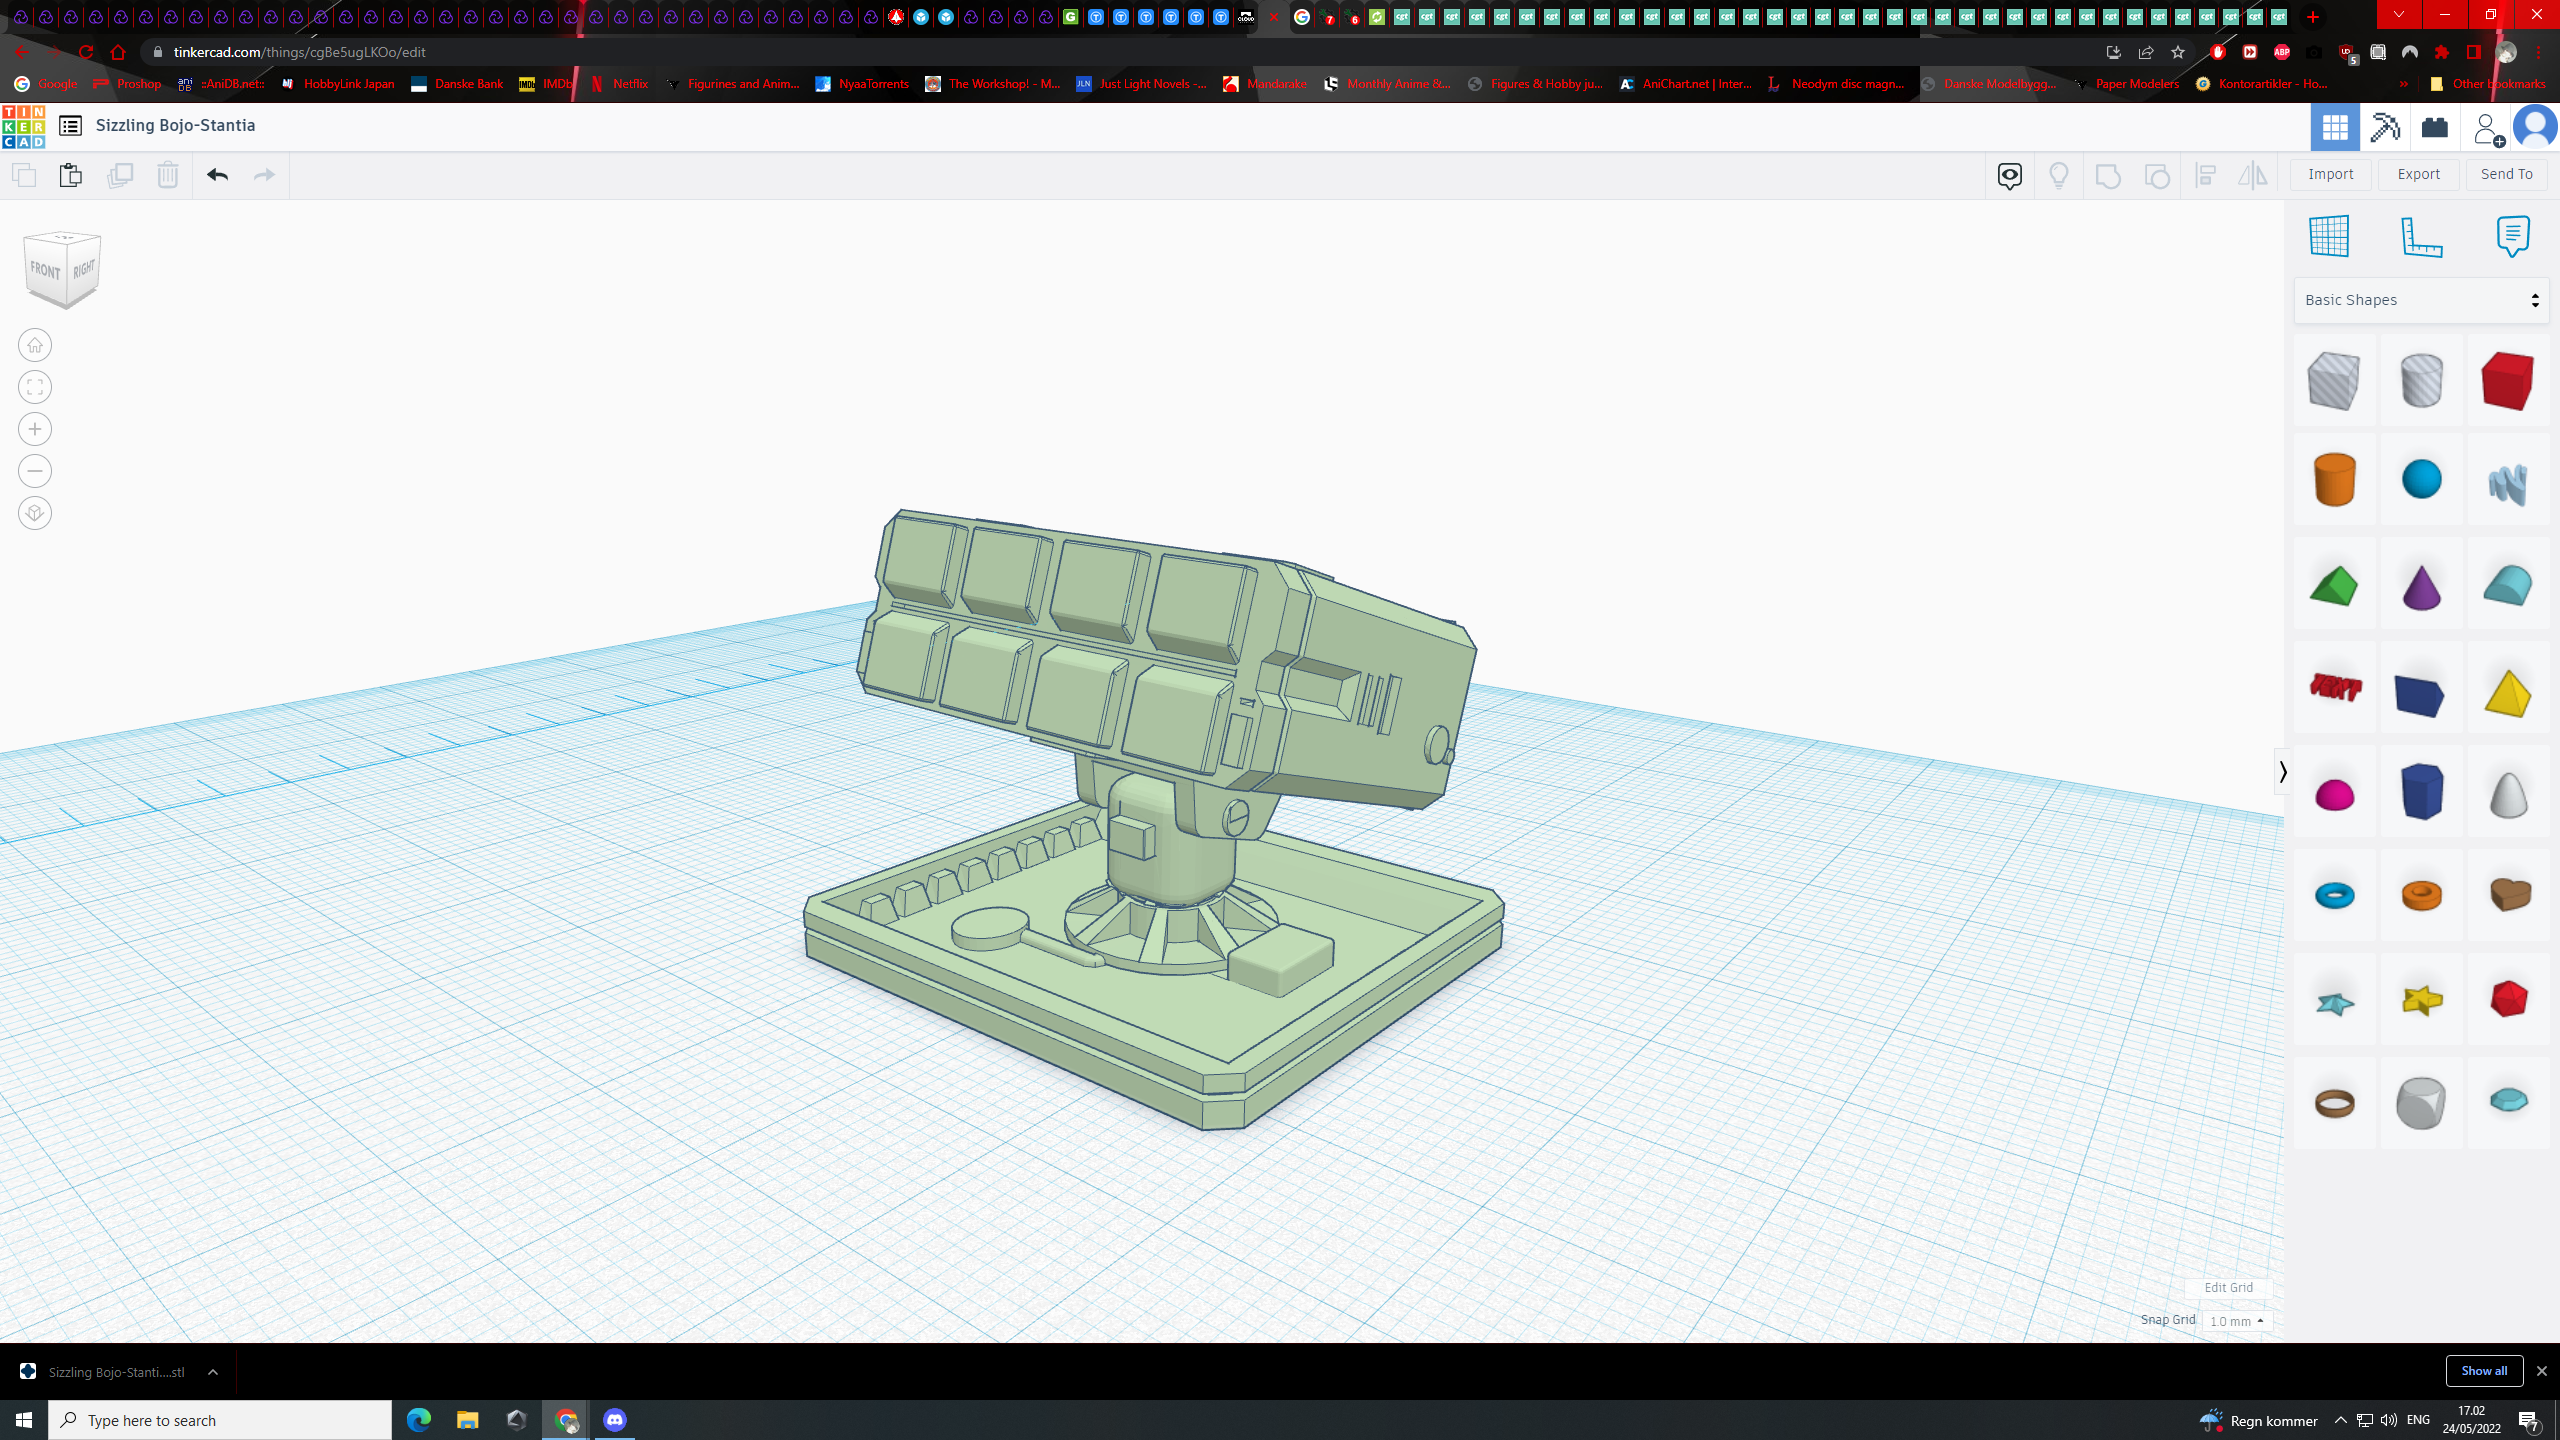
missile turret
-
thanks to Massassi Order on thingiverse
i have this...
and im gonna add lots of these as details on the ship
also i have printed these for the other half of the city

and since i already changed the design on the cannons i ought to change the design on the large missile turrets
this is all for now...
oh and here a turrets in its right place


Whats Lying on your Workbench MK IV
in The Workshop!
Posted
this looks amazing...
where is this sculpt from?