Iceblue106
-
Posts
145 -
Joined
-
Last visited
Content Type
Profiles
Forums
Events
Gallery
Everything posted by Iceblue106
-

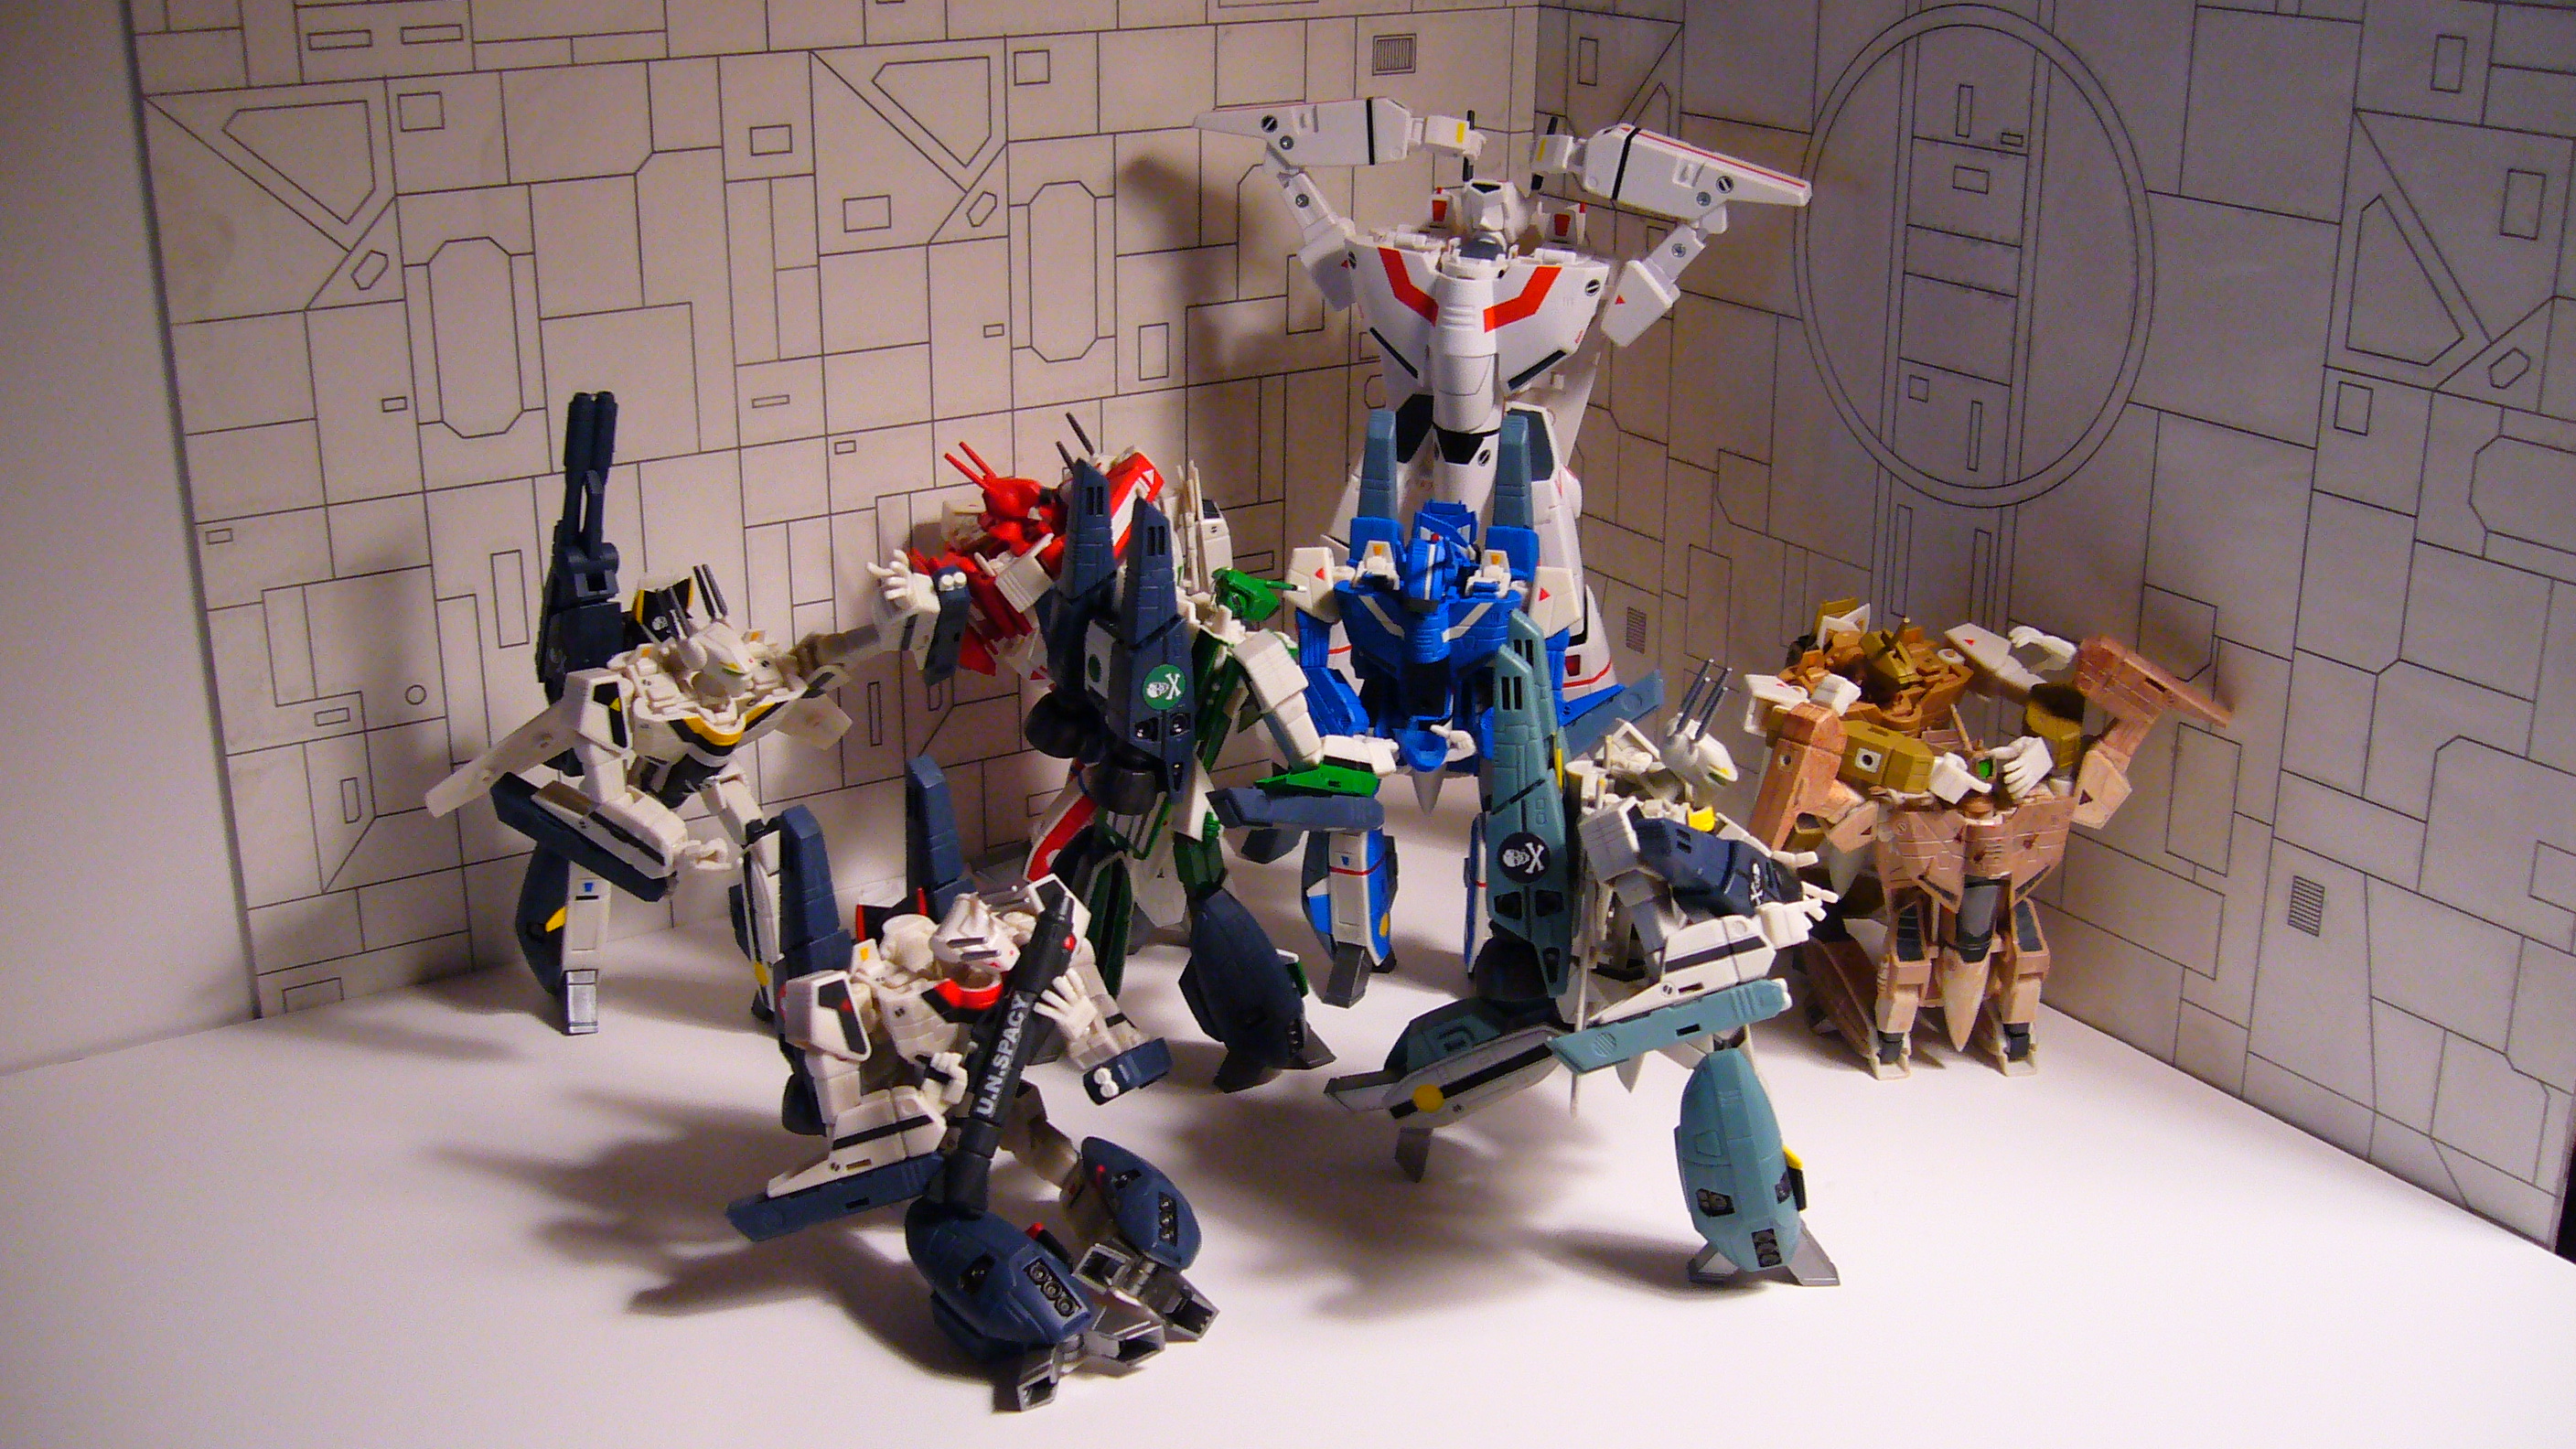
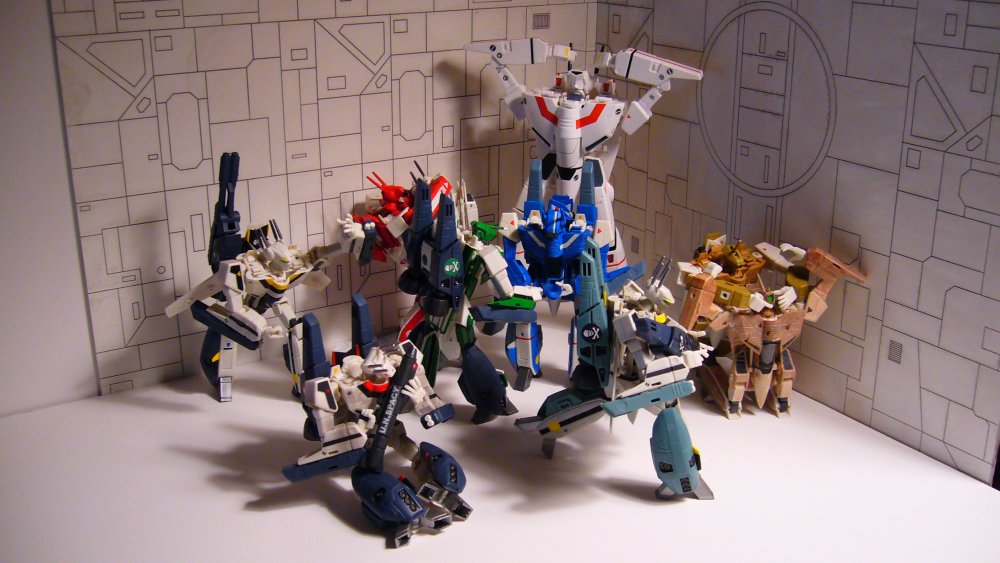
Strike A Pose! V.4 - The Macross Mech Pose Thread
Iceblue106 replied to JCSaves's topic in Hall Of The Super Topics
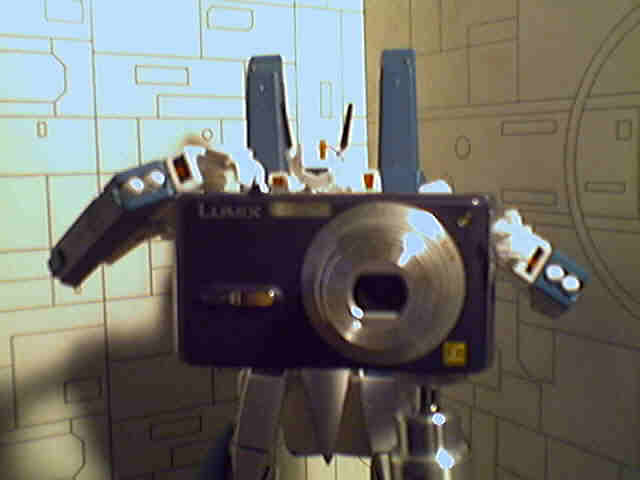
I have to apologize for the fuzziness of these next 2 pictures, as you can see my decent camera was appropriated by a little bugger who thought he would be funny and use it for his own personal use. Blue

-
1/48+fp's, 1/60, And 1/72 Picture Gallery Pt 4
Iceblue106 replied to VF-18S Hornet's topic in Hall Of The Super Topics
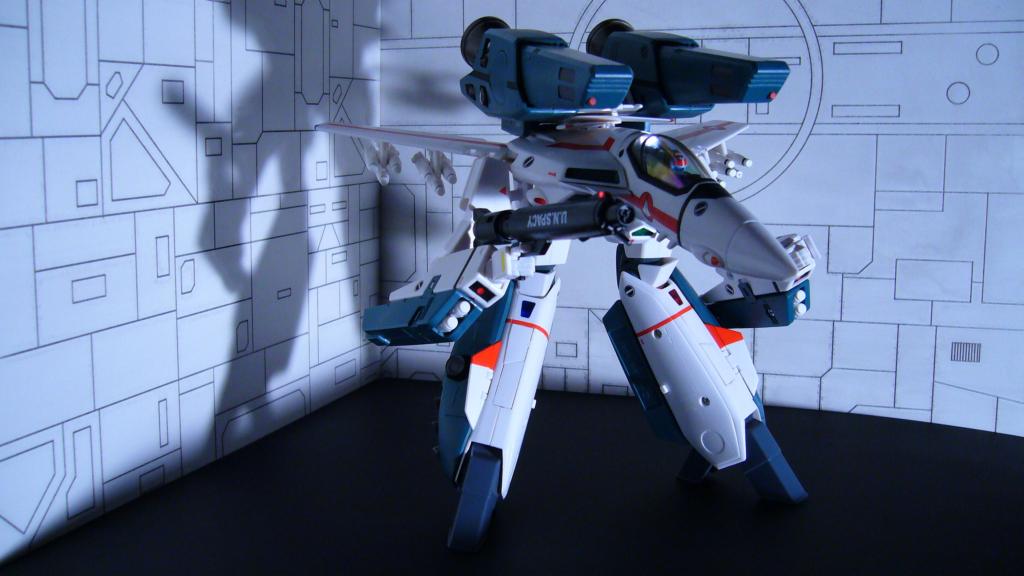
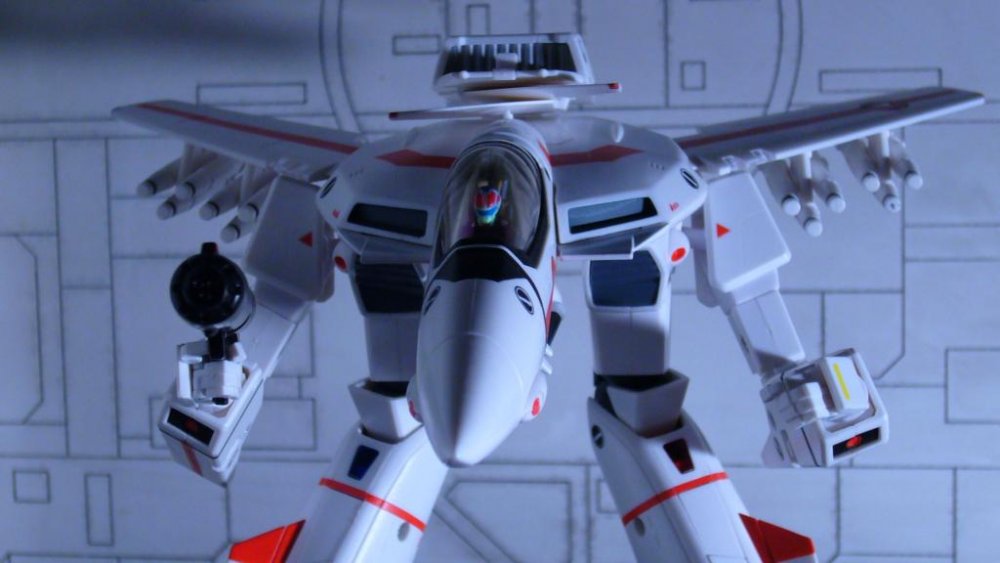
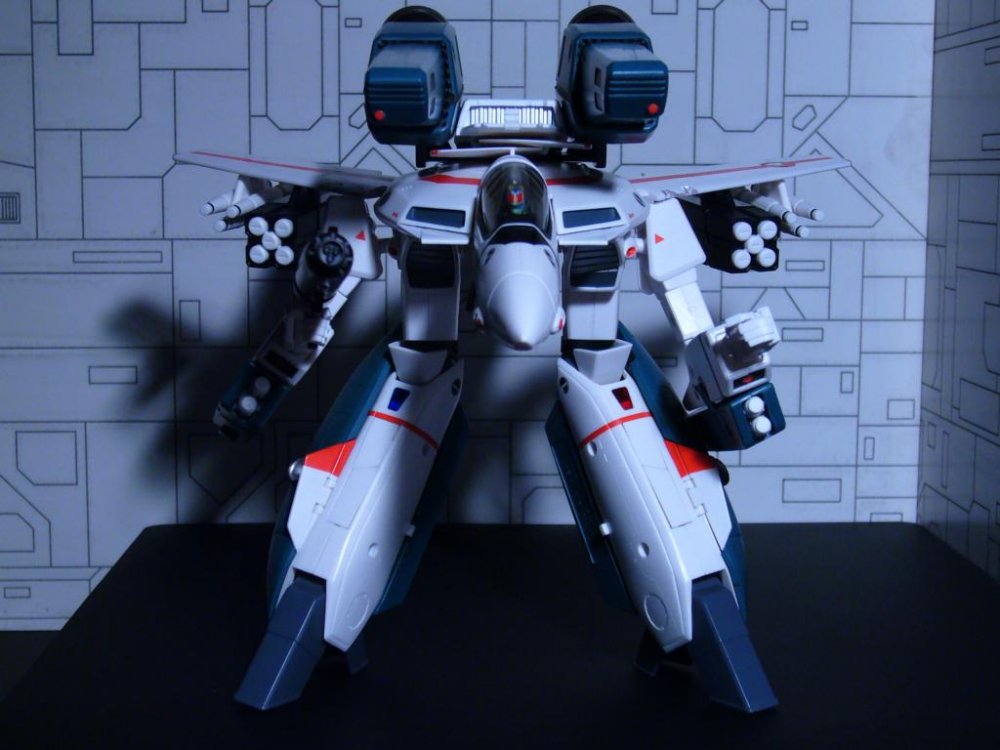
Thanks BlueMax!! Here is a few other shots I have tried Blue Same as before but with tundrayeti's wall detail and fast packs equipped. And here are some shots in Gerwalk mode with fast packs equipped.


-
1/48+fp's, 1/60, And 1/72 Picture Gallery Pt 4
Iceblue106 replied to VF-18S Hornet's topic in Hall Of The Super Topics
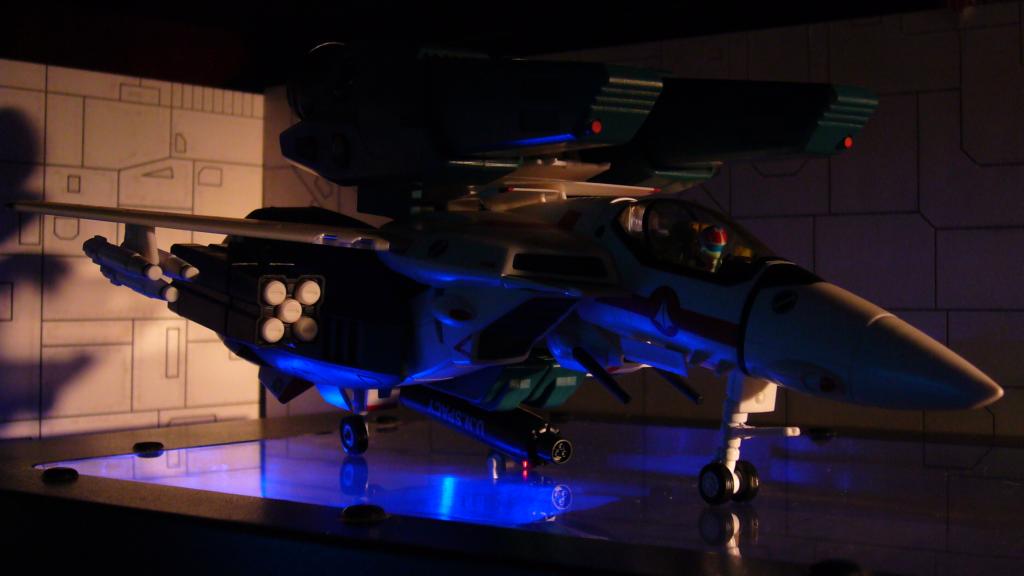
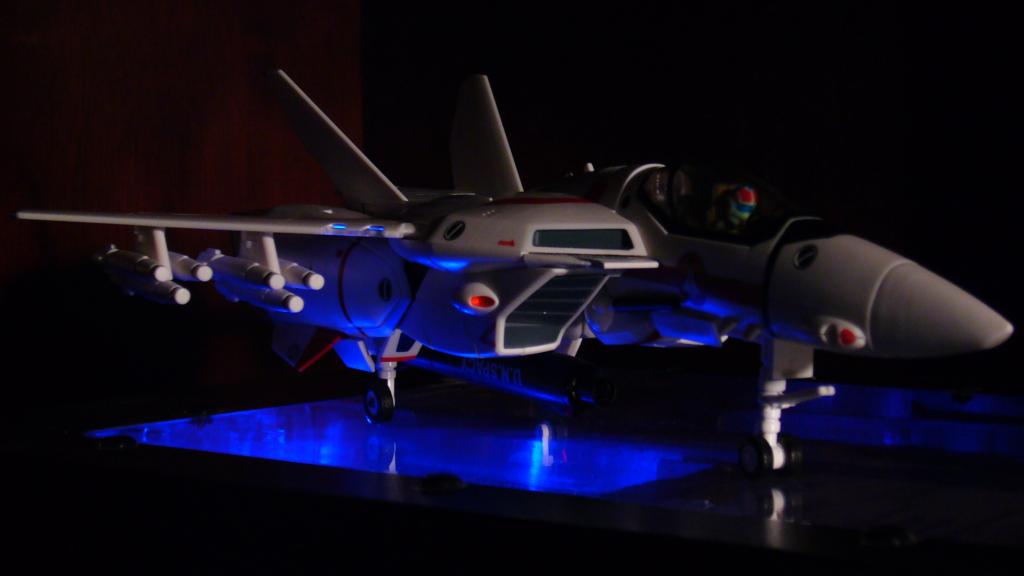
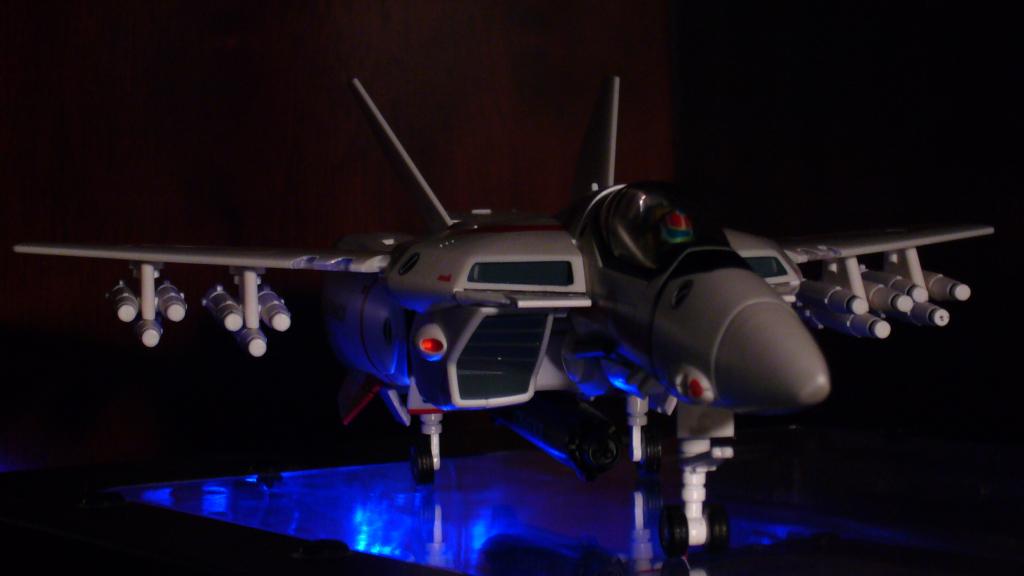
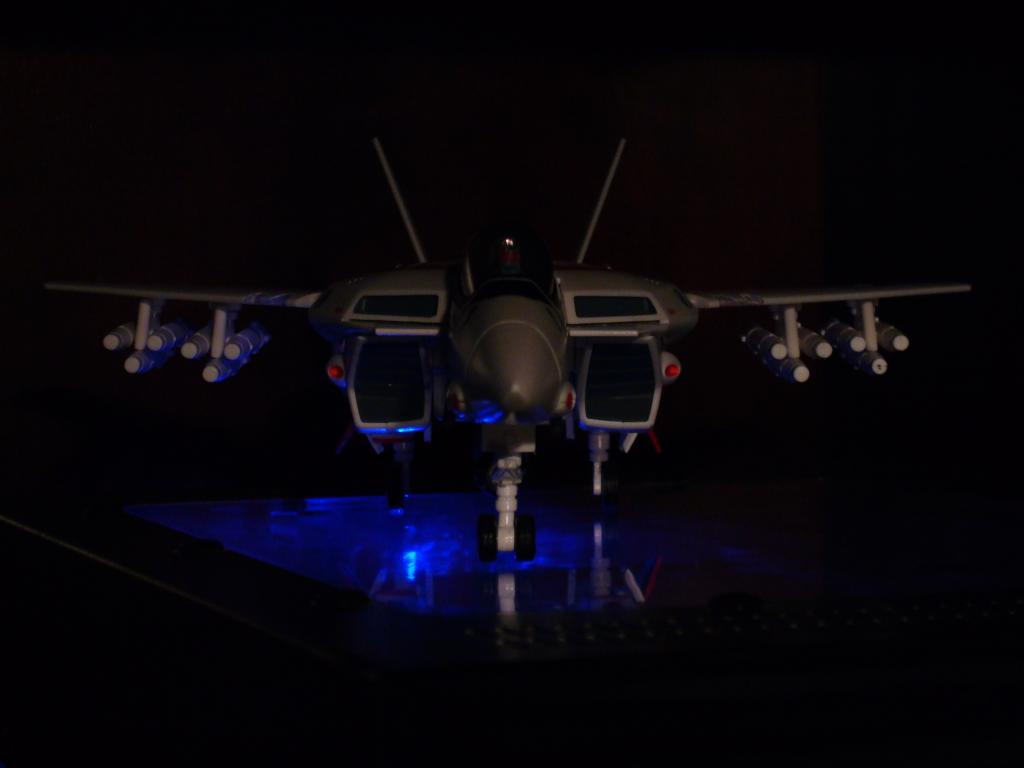
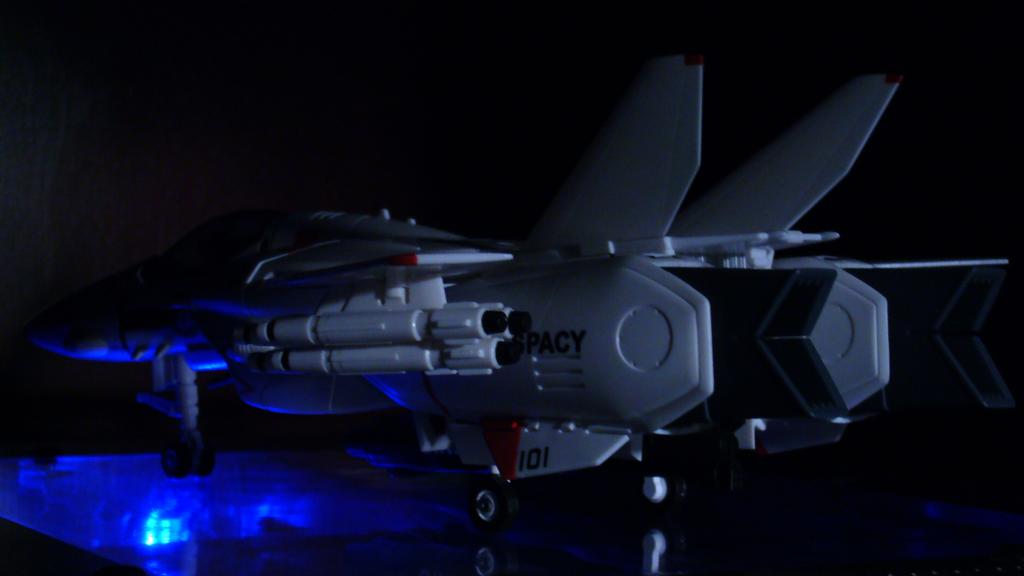
Hello all, Here is my attempt at some dark pictures of my hiky tv version with blue computer lighting from the deck, and artificial lighting from different angles. Blue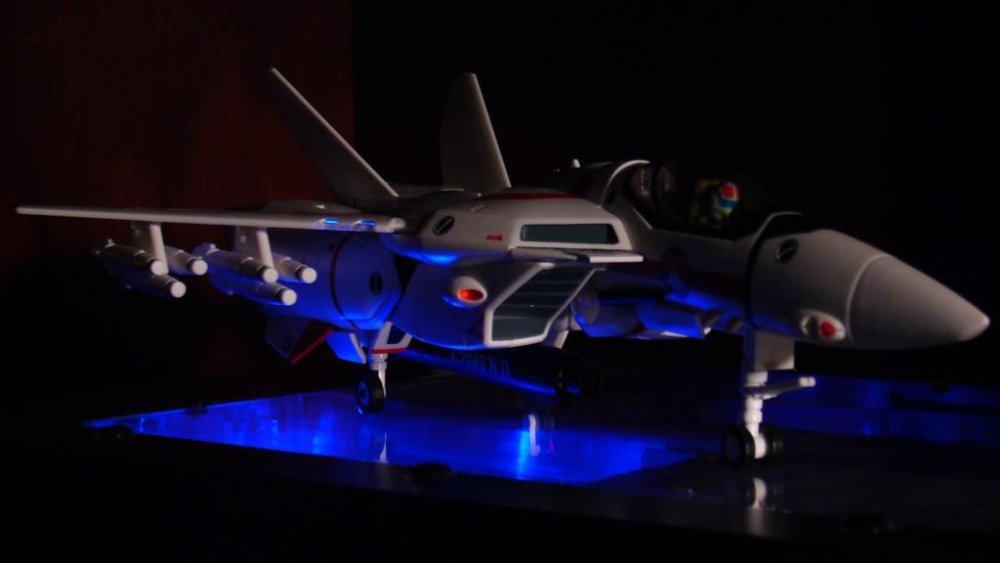


-
Giving your control panel display and lighting
Iceblue106 replied to leading edge's topic in The Workshop!
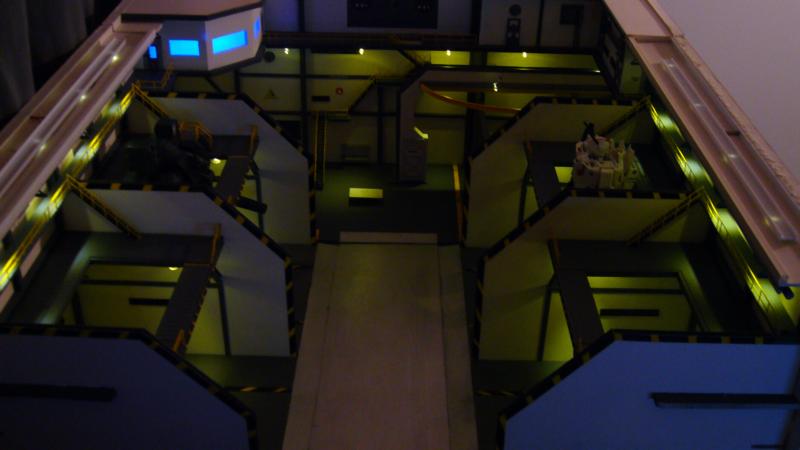
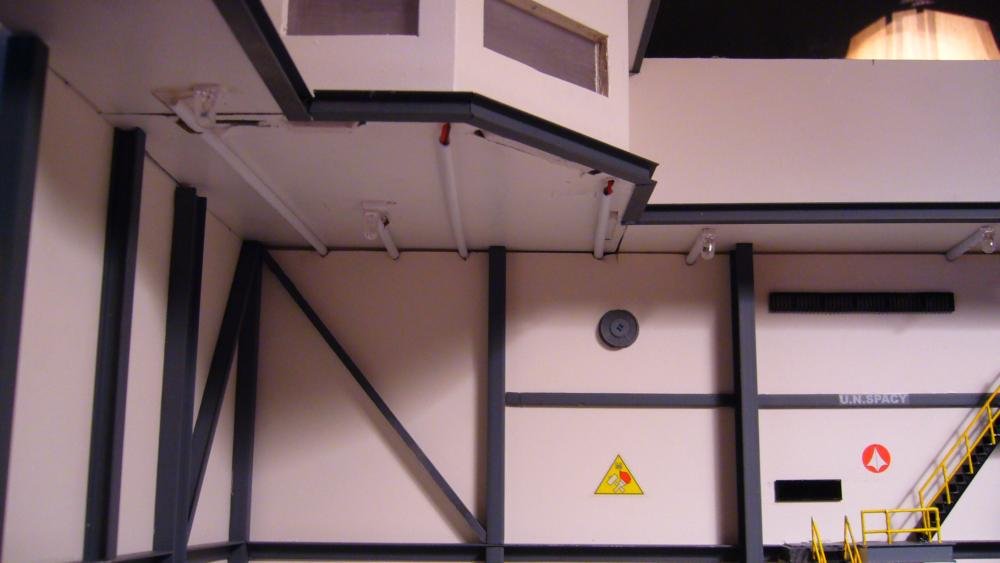
I've been following this post and was wondering if anybody has actually applied these methods to their Valkyries, and/or hanger diorama's? I would be interested to see pictures of these results from anybody out there that has done just that. I have a few projects that I have incorporated LED lighting into and have included them below, but would be more interested to see what other people have done. Blue 1/100 scale VF-1A with Green LED eye. 1/100 scale hanger deck with multiple LED's 1/60 scale Tomahawk hanger deck with multiple LED's


-
Strike A Pose! V.4 - The Macross Mech Pose Thread
Iceblue106 replied to JCSaves's topic in Hall Of The Super Topics
I have to agree with Ruskii...that is a sexy set up!! love the mini squad escort service. Blue -
Agreed with Cent ...however I am glad to have heard of this problem from you all so I can perform a simple fix like applying a clear coat or even some kinda sealant over the tips of the stands before I run into this problem myself. I will post pics when it has been done regardless of success or fail. Blue
-
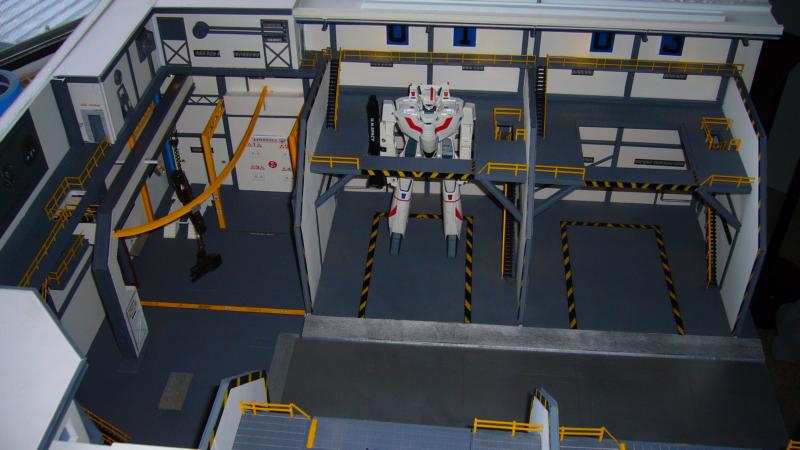
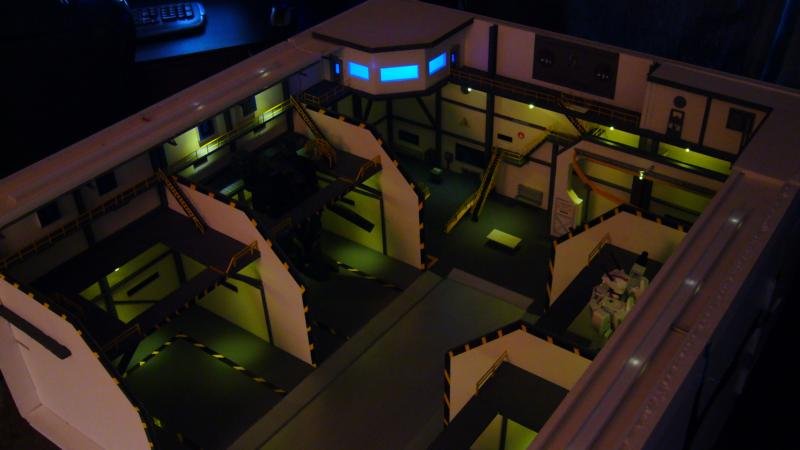
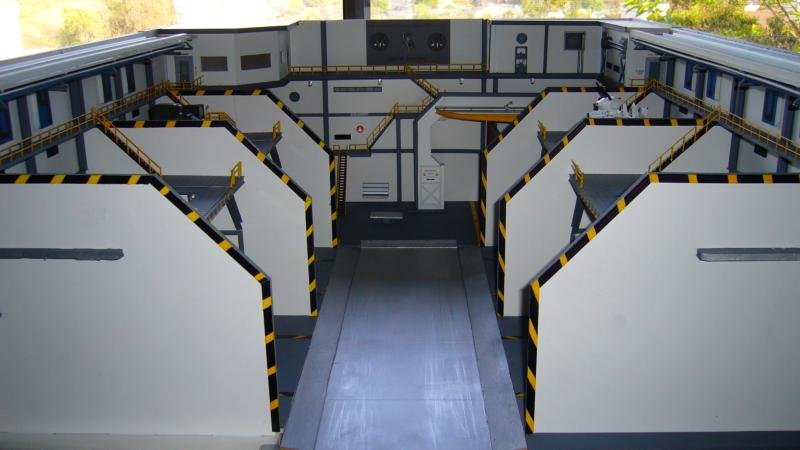
Oh I almost forgot the most important pictures of the bunch... the complete hanger all lit up!! Thanks again for viewing this build. If you have enjoyed this build, than make sure you check out the story (by Rob Elwell) where this idea originated from. "Destroids Last Dance" can be found at http://www.destroidslastdance.com/ See you all again when I begin my next Hanger build which will be titled " 1/60 Valkyrie Hanger" (or something like that) which will feature the prototype panels created by our fellow member Tundrayeti!! Blue


-
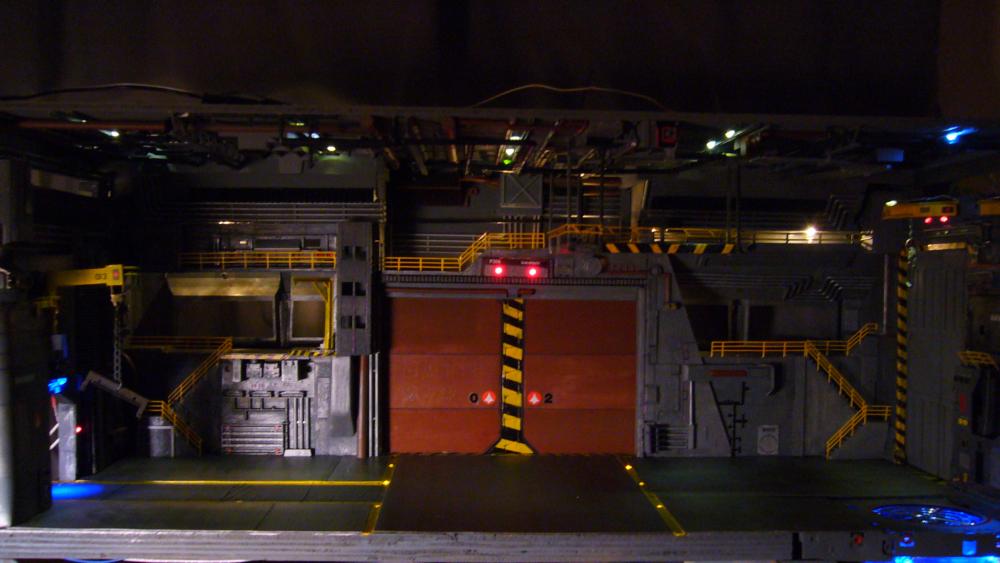
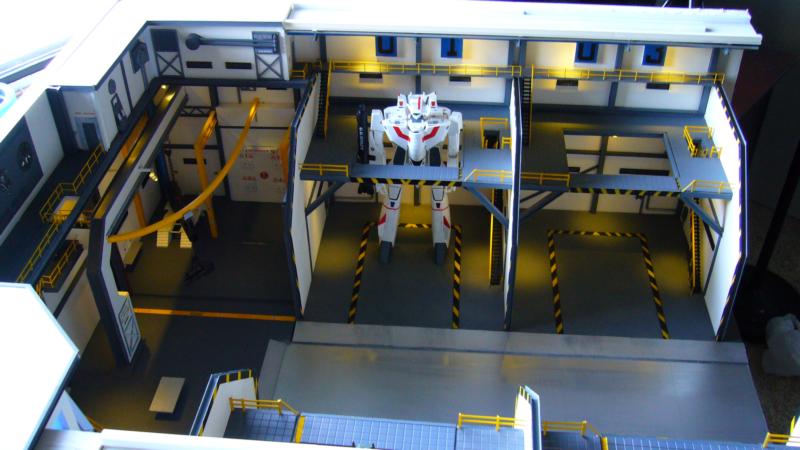
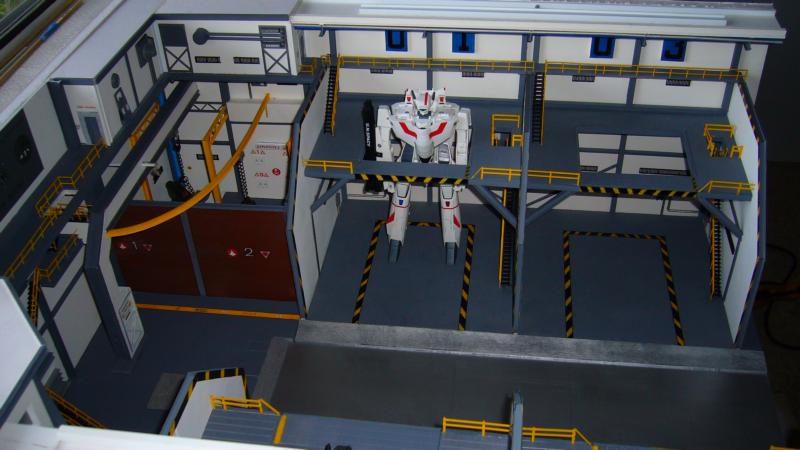
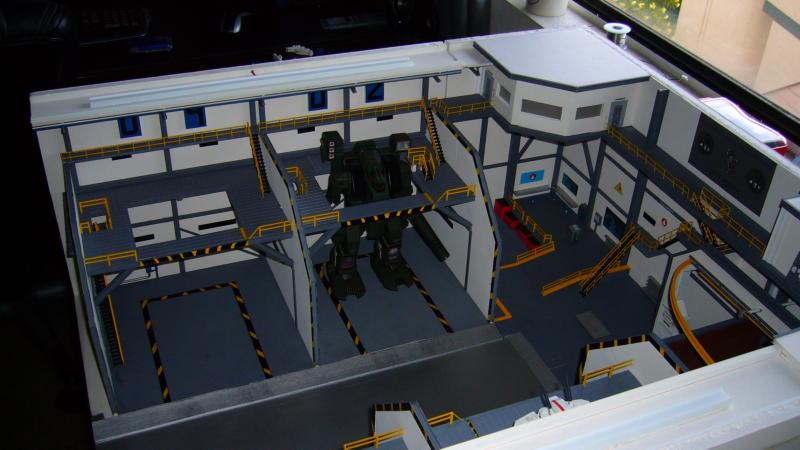
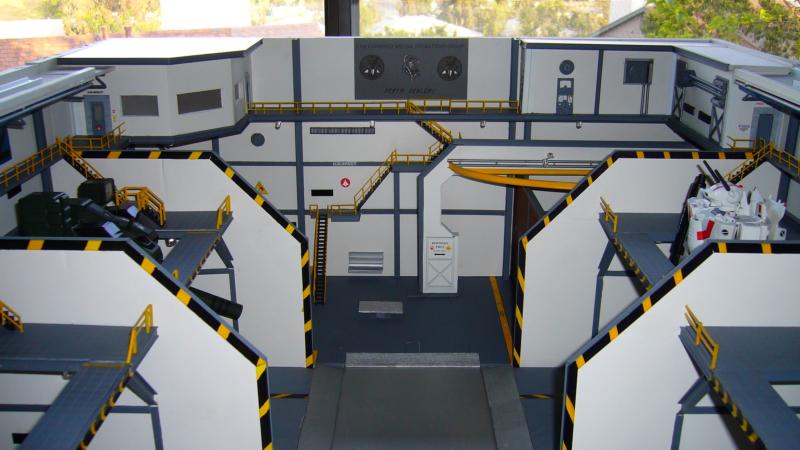
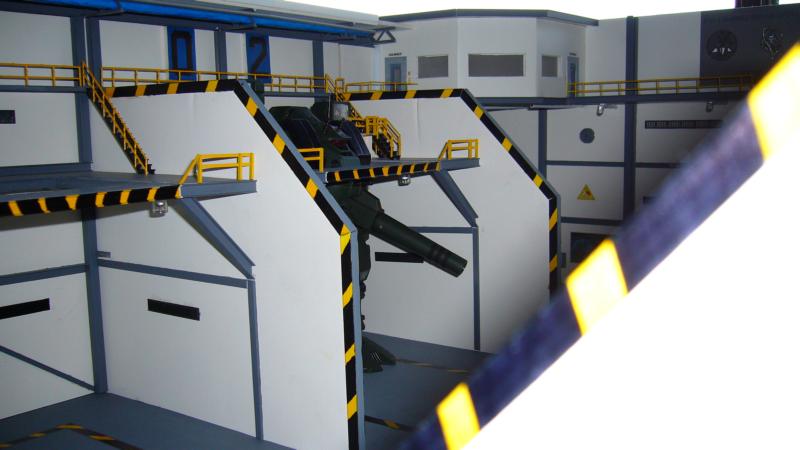
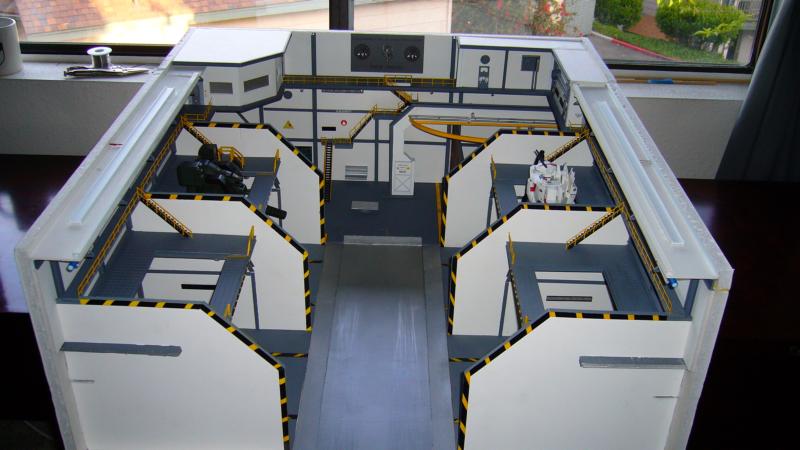
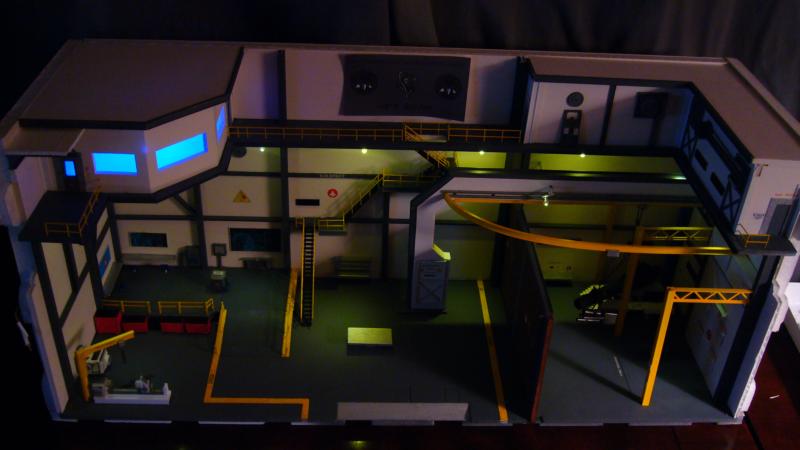
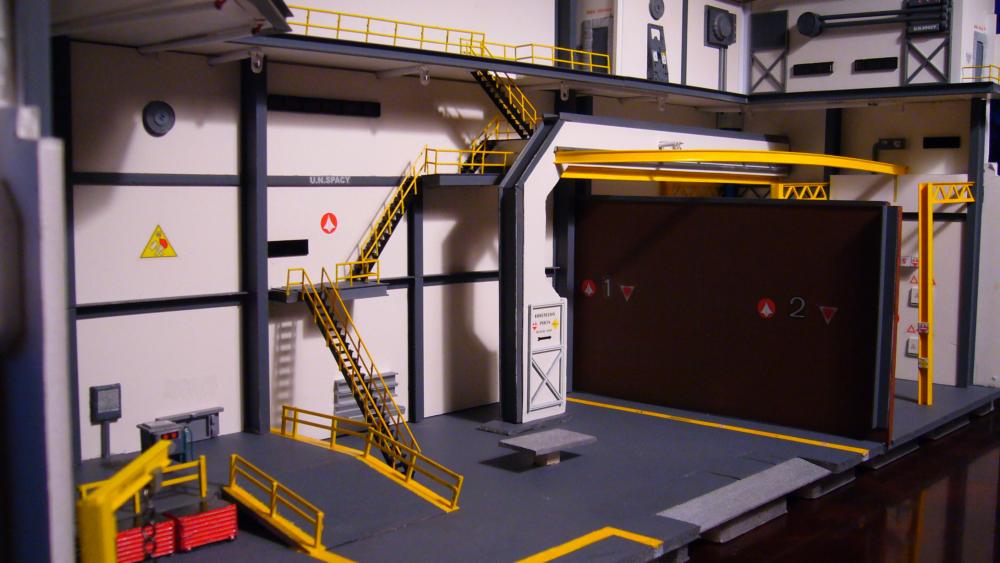
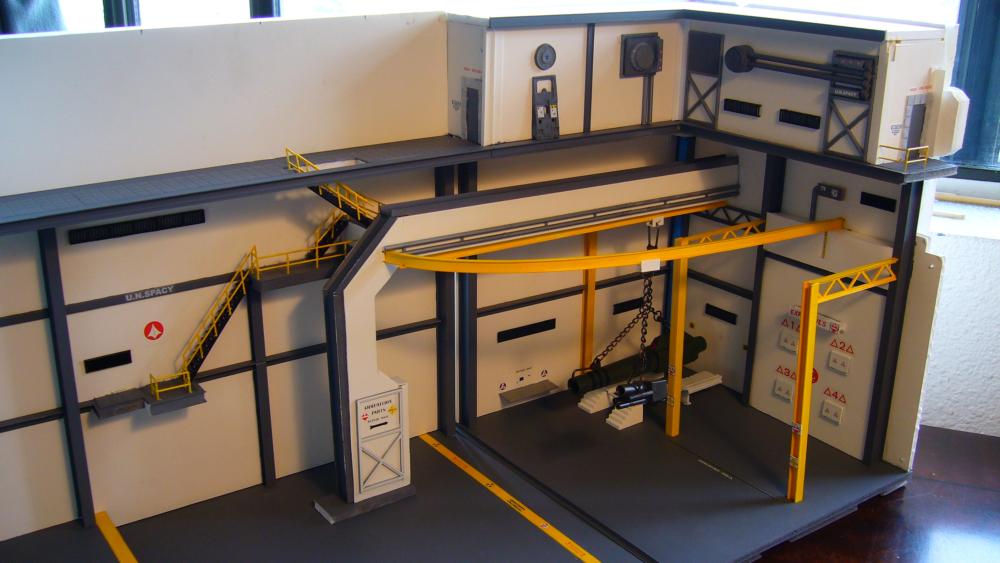
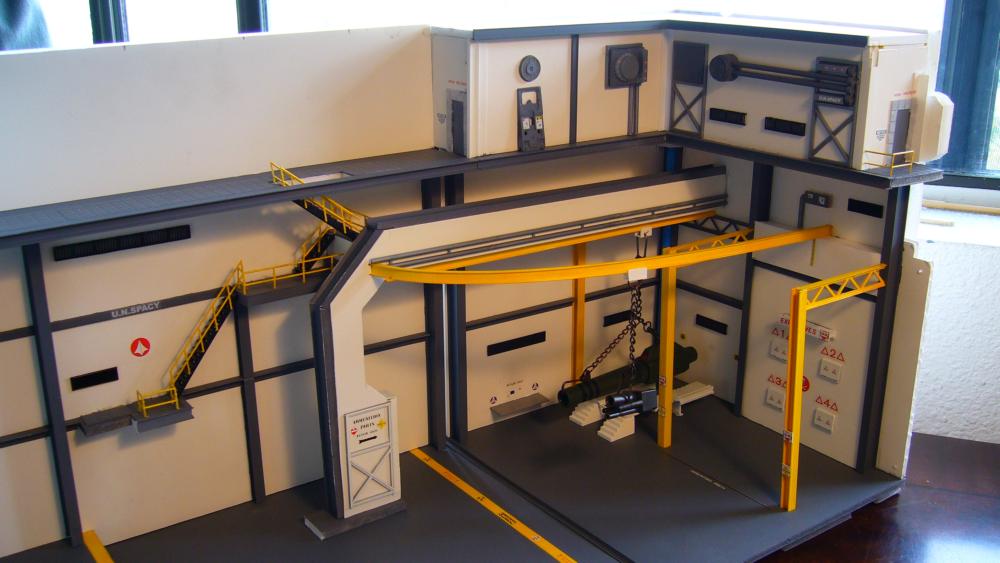
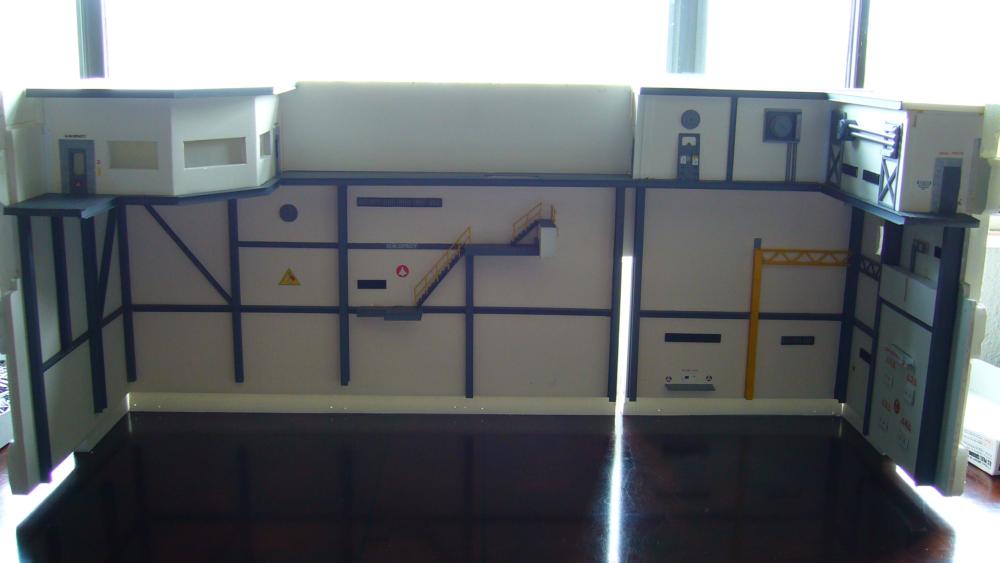
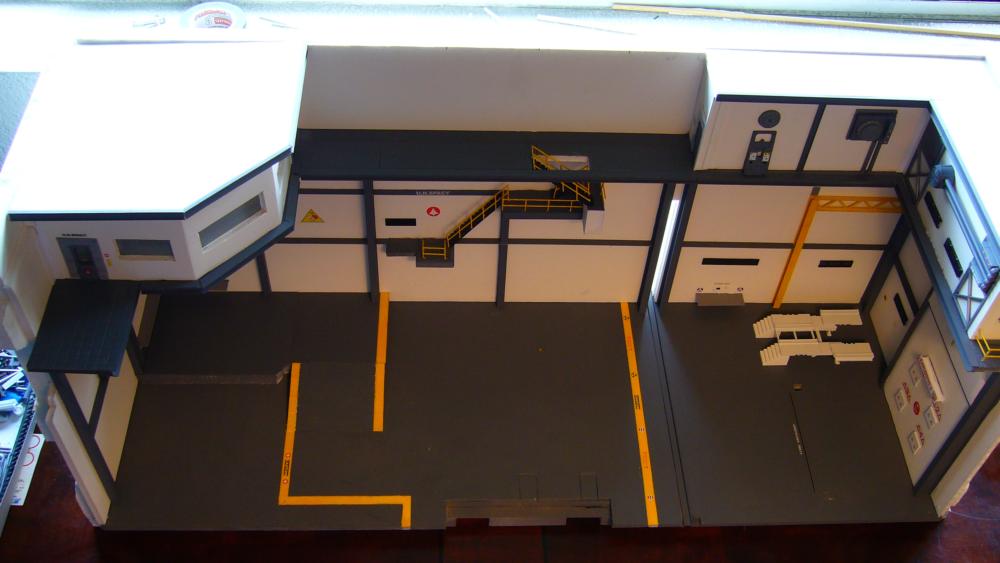
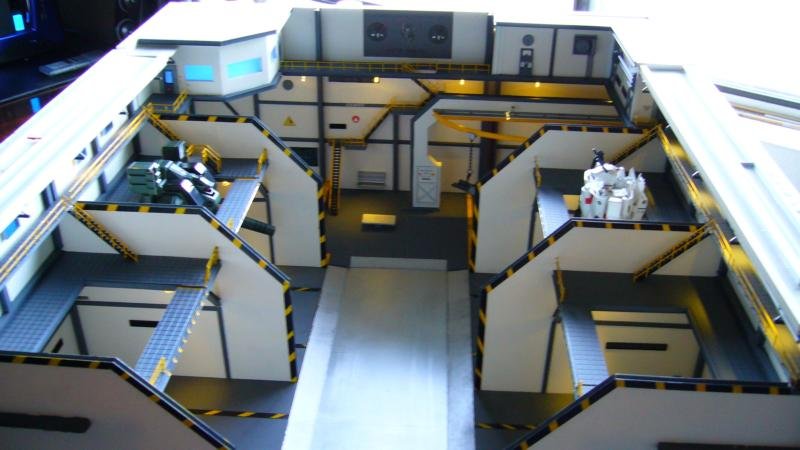
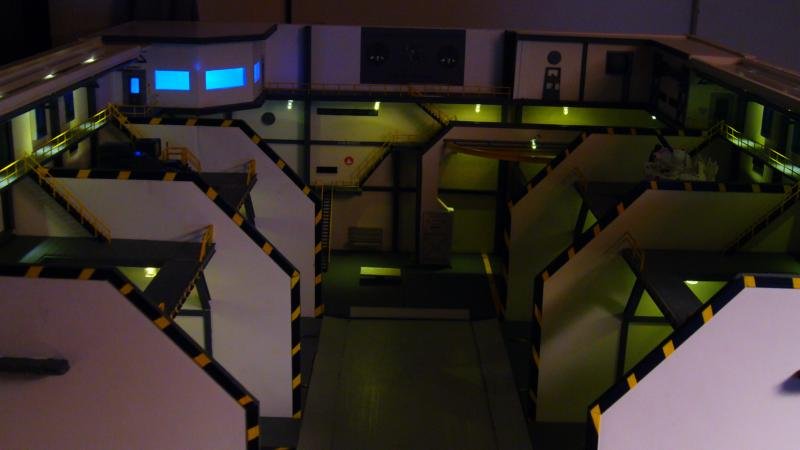
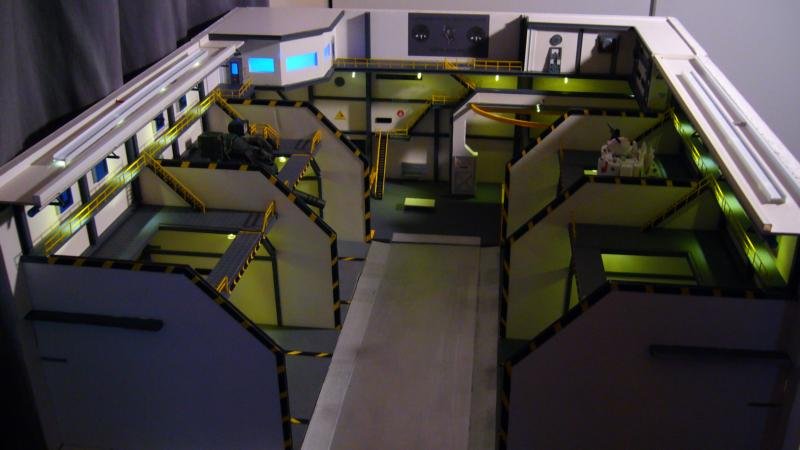
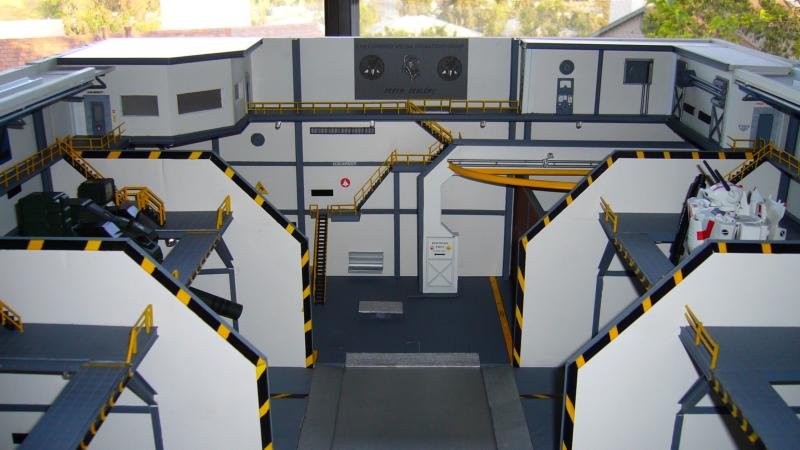
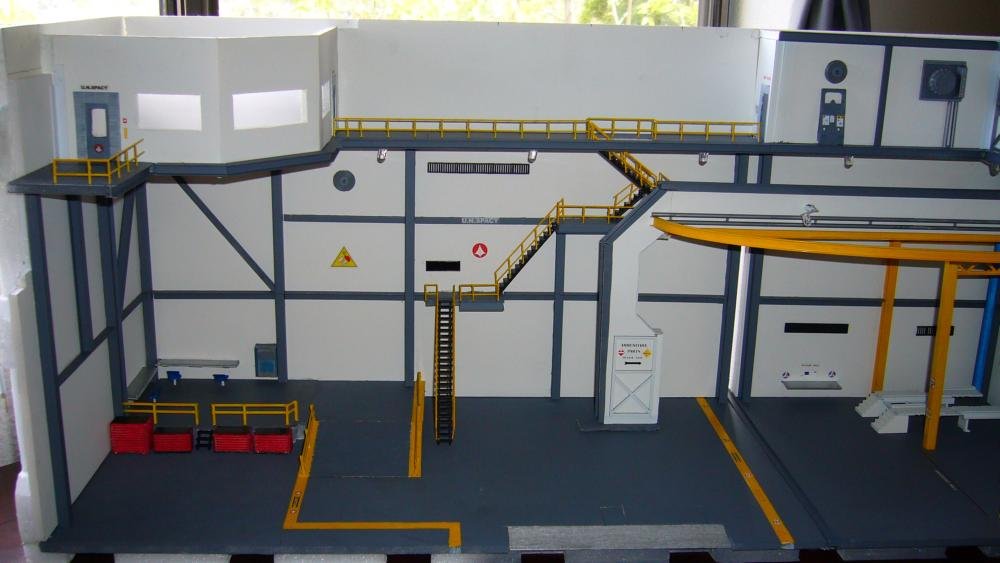
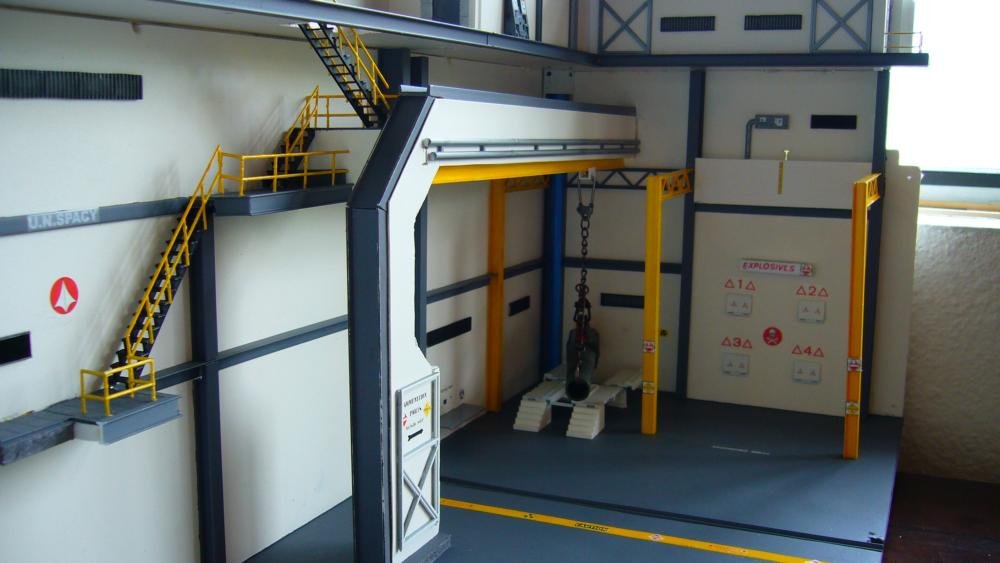
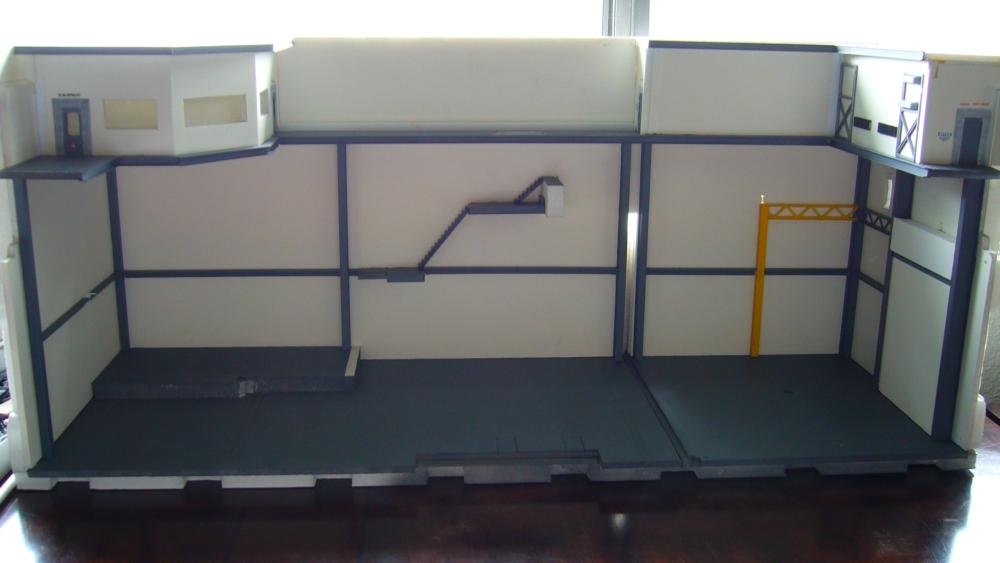
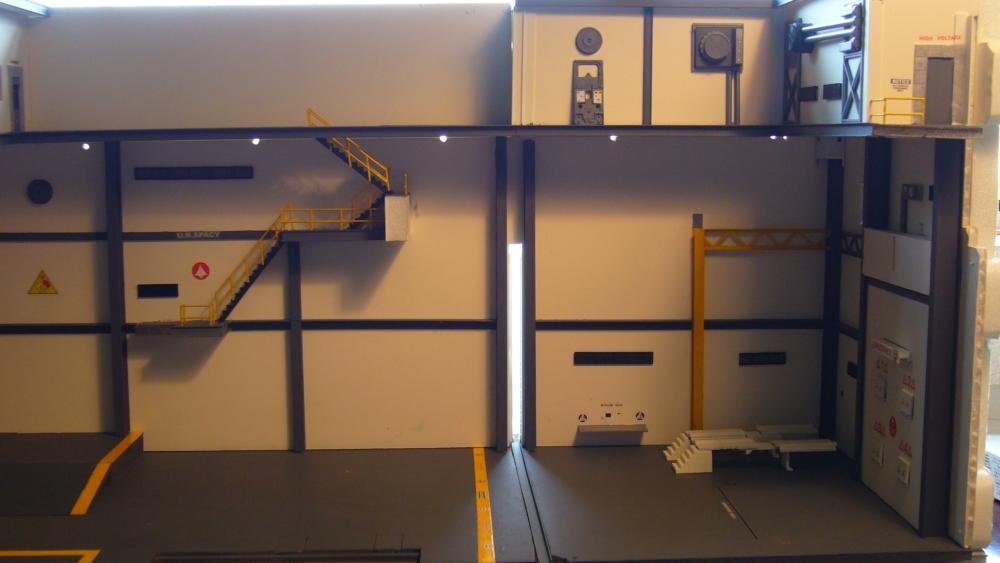
Thanks for the comments Mech!! It has finally come to that time folks! The final assembly of the 1/60 Tomahawk Hanger Build. In the pictures below you will be able to see different views of all 4 sections assembled. (Bays 1&3, Causeway, Bays 2&4, and the Maintenance/Weapons Facility) Hope you all enjoy the views and thanks for hanging out with me through the building process. Blue


-
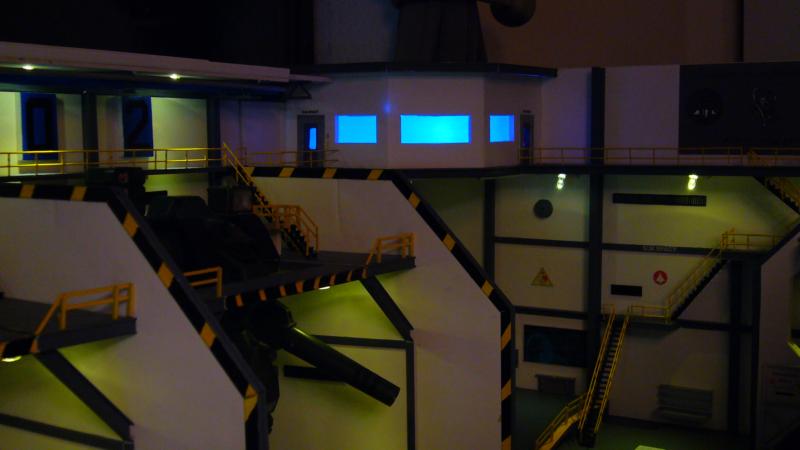
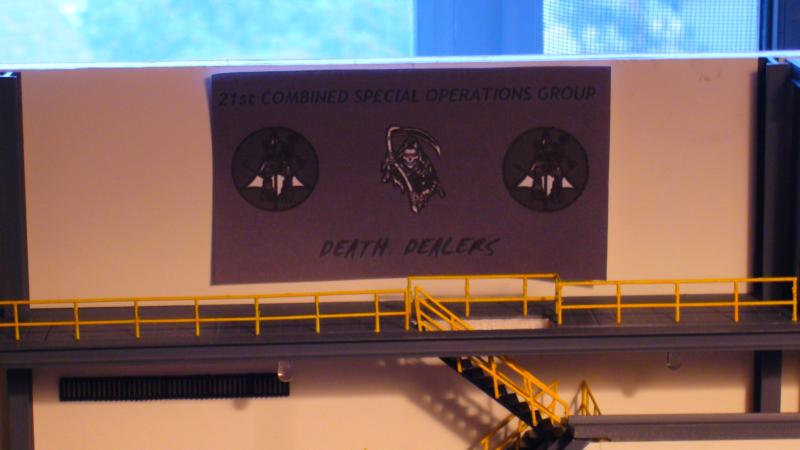
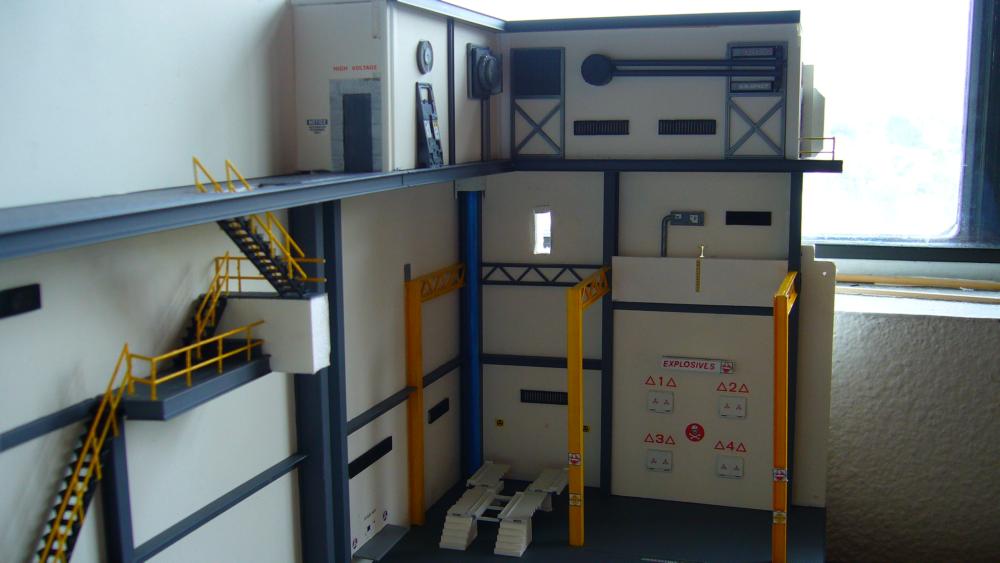
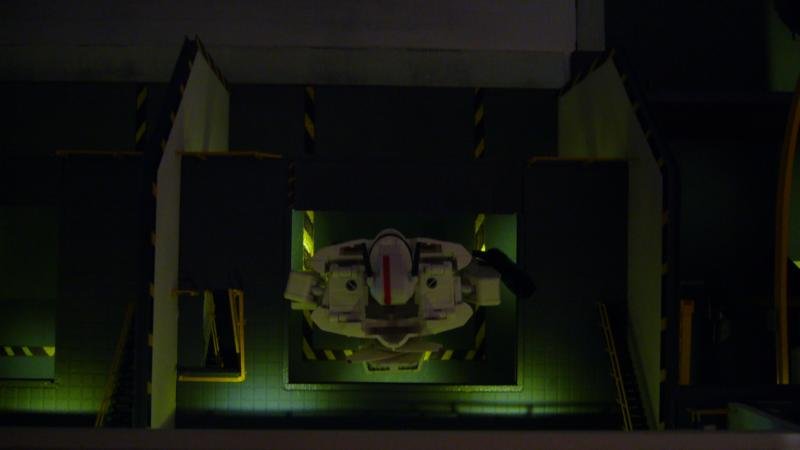
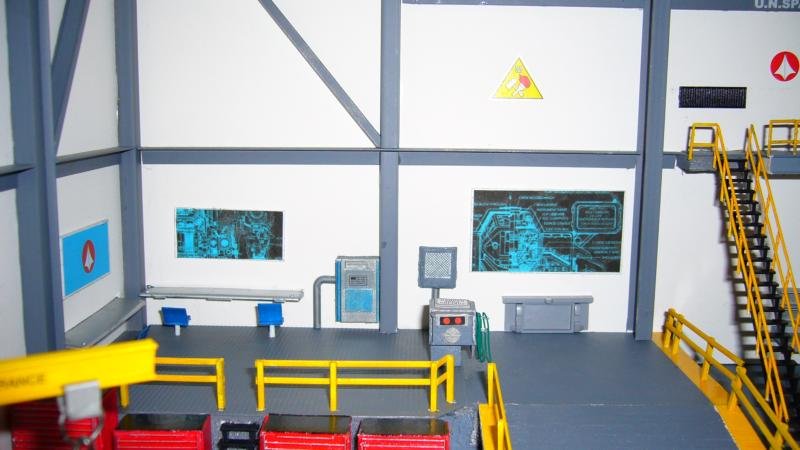
Well here we are with the pictures that complete this section of the build. Here you can see the mock ups of large scale monitors used in the diagnostic area. The large monitor shows a blueprint cross section of the tomahawk head/shoulder and shoulder mount light. The second monitor shows a cross section of the chest/hip armament cluster, and the 3rd monitor shows the Macross screen saver. (blue screen with kite shield) Also shown is the Banner detail on the top center wall, and finally the light show. I reduced the size of the pictures so it should be easier to download/view. Hope you enjoy and see you next time with more of the build. Blue


-
Strike A Pose! V.4 - The Macross Mech Pose Thread
Iceblue106 replied to JCSaves's topic in Hall Of The Super Topics
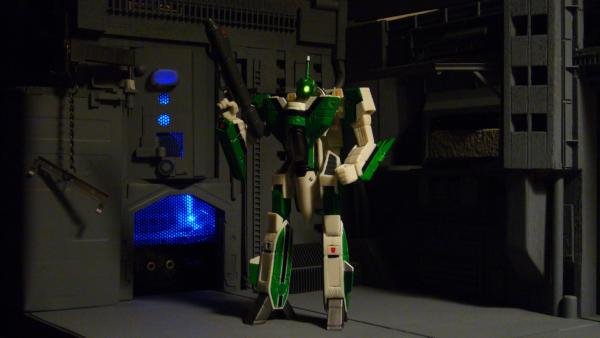
Lol you caught my bluff, yes in all actuality that green re-paint was taken from the Robotech Battlecry game color scheme. It is "Izzy's" paint scheme and a better view of it can be seen in the 1/100 scale section of the Gallery. http://www.macrossworld.com/mwf/index.php?...m&album=392 I had originally posted this on the Robotech Lost Universe site but for some reason I cant seem to access it anymore. Anyways, if you would like some more close up images send me a PM and I can send you some not posted here. Blue -
Thanks for the compliment MaidenJapan!! I do apologize for the resolution size...I hadn't taken into consideration that it may make the viewing slower and more difficult. I will change that at once. I am thinking 800 x 600 would be better. no? Blue
-
Strike A Pose! V.4 - The Macross Mech Pose Thread
Iceblue106 replied to JCSaves's topic in Hall Of The Super Topics
Just thought I would drop this little tid bit off...... With the recession/depression still in effect, the unemployed Hikaru Ichijo is forced to become a stay at home dad. Because of this, his dear friends Max, Milia, Roy, and Hayao have volunteered his services to watch over their siblings as well. In the pictures you can see the Focker twins tormenting each other....one has taken the fastpack attachment of his brother and is running off with it. Hikaru Junior is making out with Max and Milia's daughter, Max Junior is investigating a problem with his heat shield as Hayao's daughter points to what may be the problem. Meanwhile the Cannon Fodder twins are fighting as usual, Hikaru's other son is licking his gun, and Hikaru is about to pull out his turrents over all the mischief and mayhem going on. Blue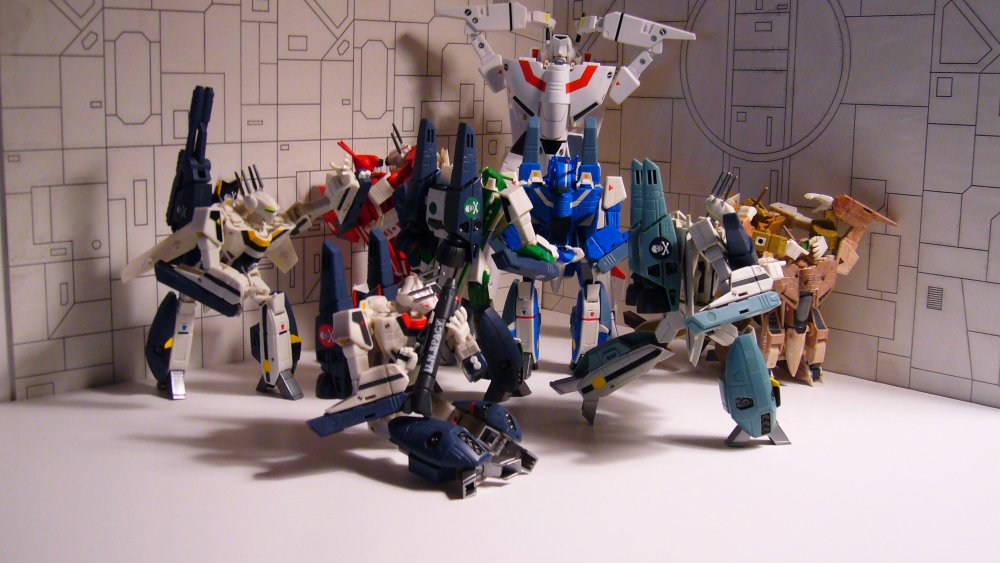
-
This is a kinda late entry but wanted to say that's an excellent job on the Jotun Valkyrie Also wanted to put in a little tidbit about where you can find it from the tv series....or at least it appears to be a Jotun to me. If anyone is interested, check out episode 27 (Love drifts Away). There is a brief glimpse of what appears to be a Jotun Valkyrie between 17:50 to 18:00 minutes of this episode. It appears in the back with a destroid in the fore ground. There is some difference in color also and it appears to be missing the single jet pack, but other than that it sure looks like the scratch build that you have completed in this forum. Make sure you look quick or stop and watch it frame by frame because he gets blown to bits in a very short time. Blue
-
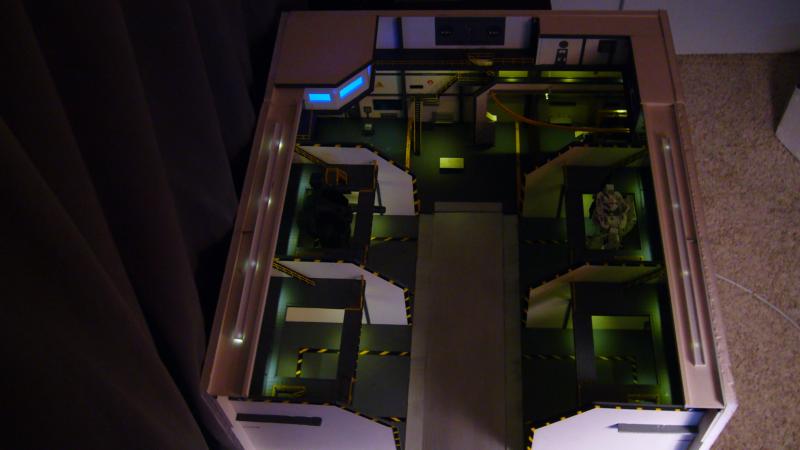
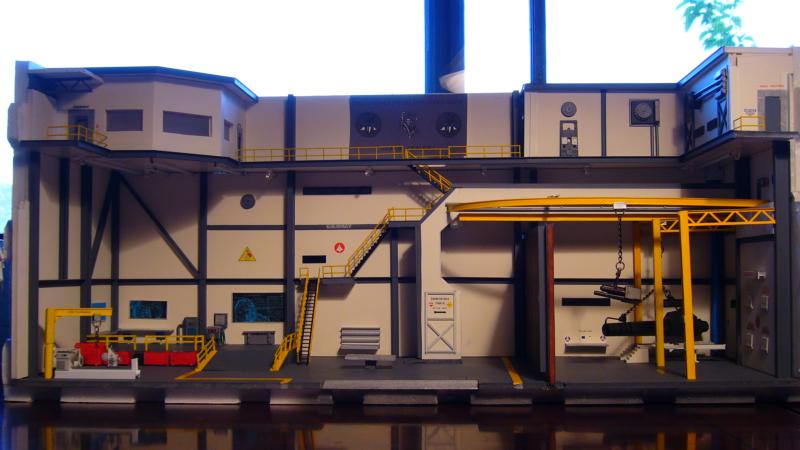
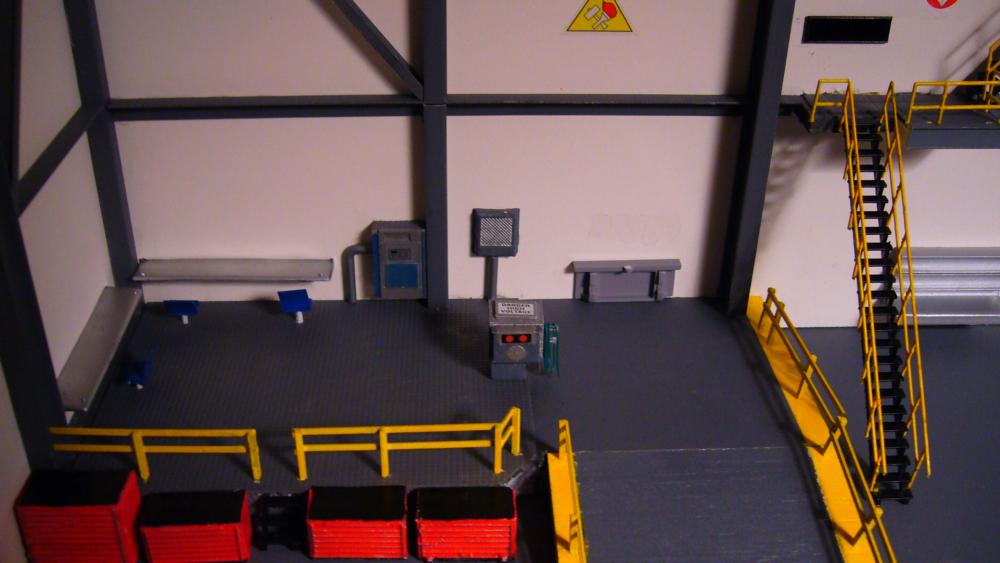
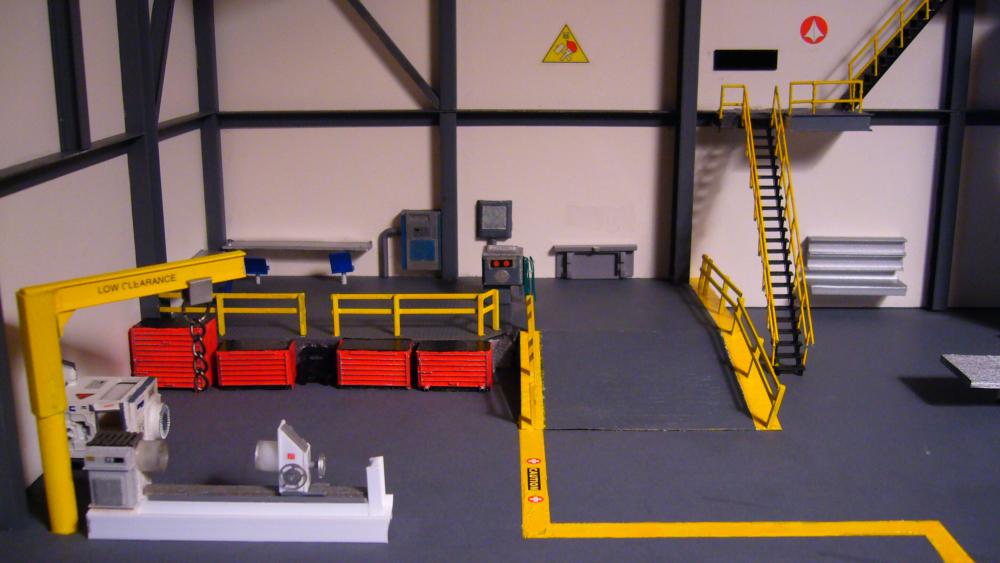
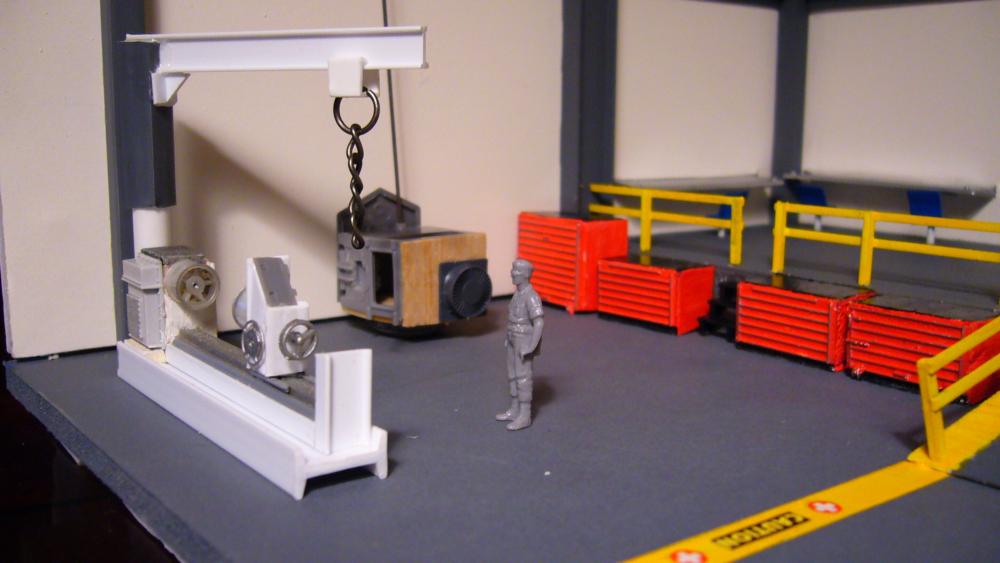
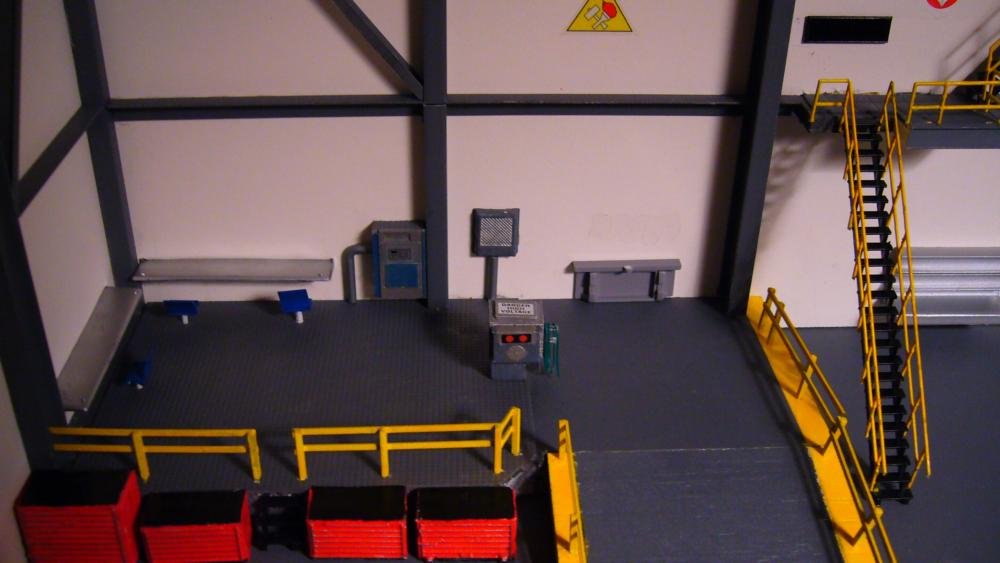
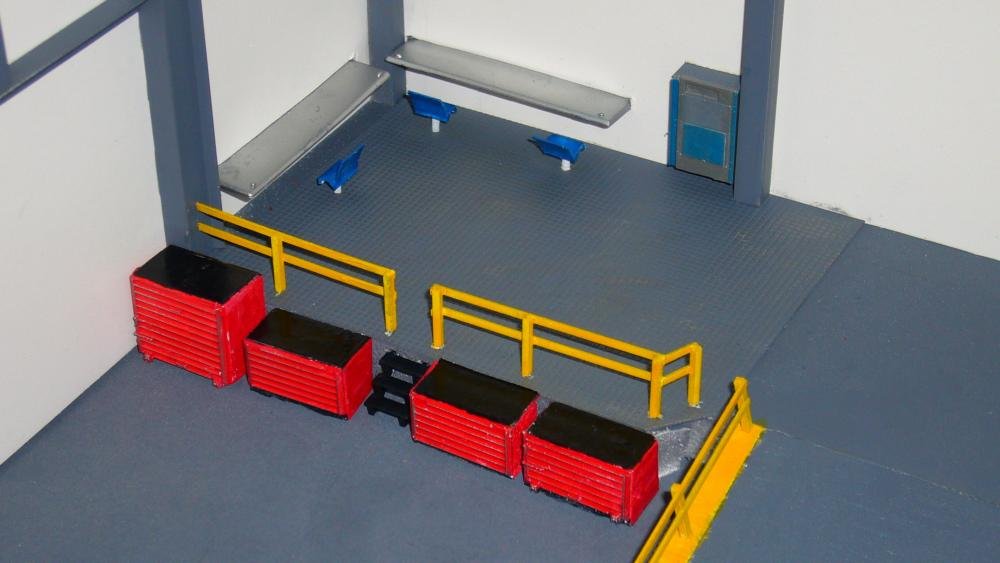
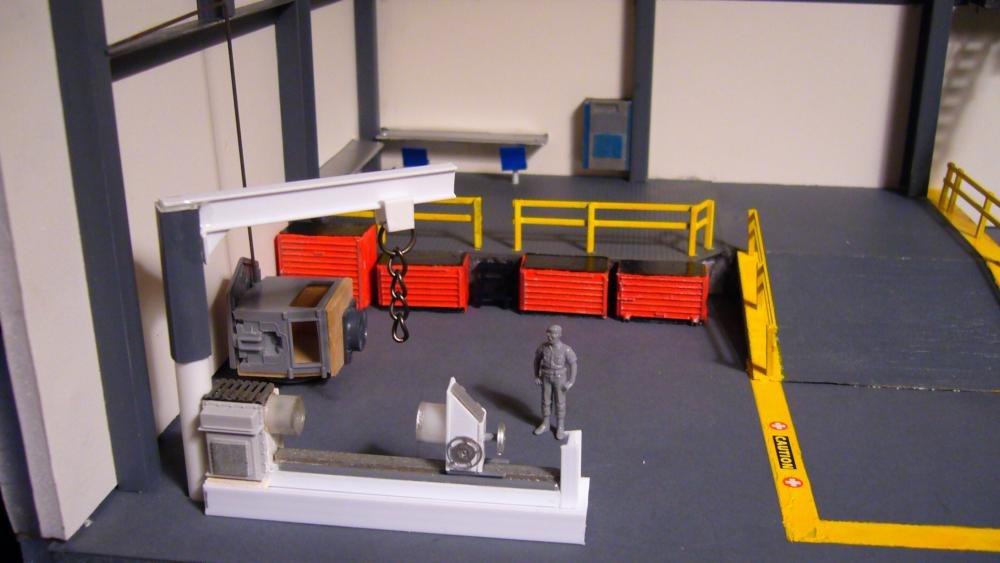
Thanks Miriya!! Here are some more pictures to look at. In the next few pictures you can see the added detail to the diagnostic area in the back. I added a electrical test stand (with green cables) vent on the wall and a base for the large monitor that is yet to be installed on the back wall. Also paint and decals where applied to the CNC machines as well as the jib crane. Off to the right (behind the stairwell) is a work bench with 2 book cases above it as well as the steel table that mentioned in the story. Last picture is a little blurry but shows the added decals to the divider door. See you all again soon with more up dates Blue


-
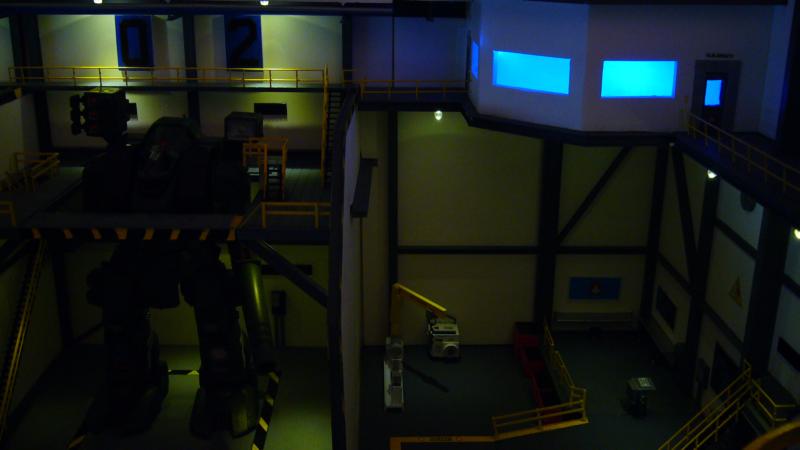
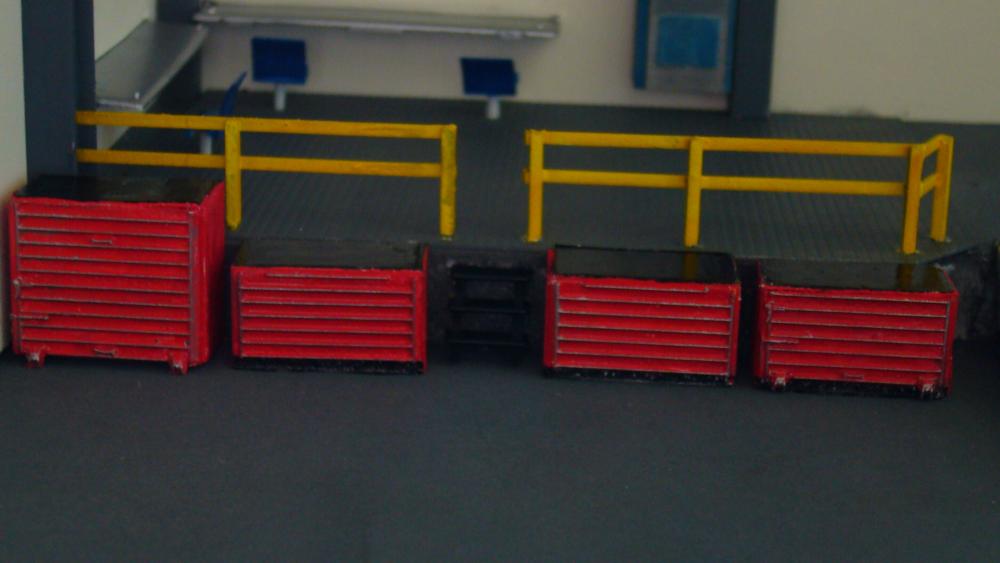
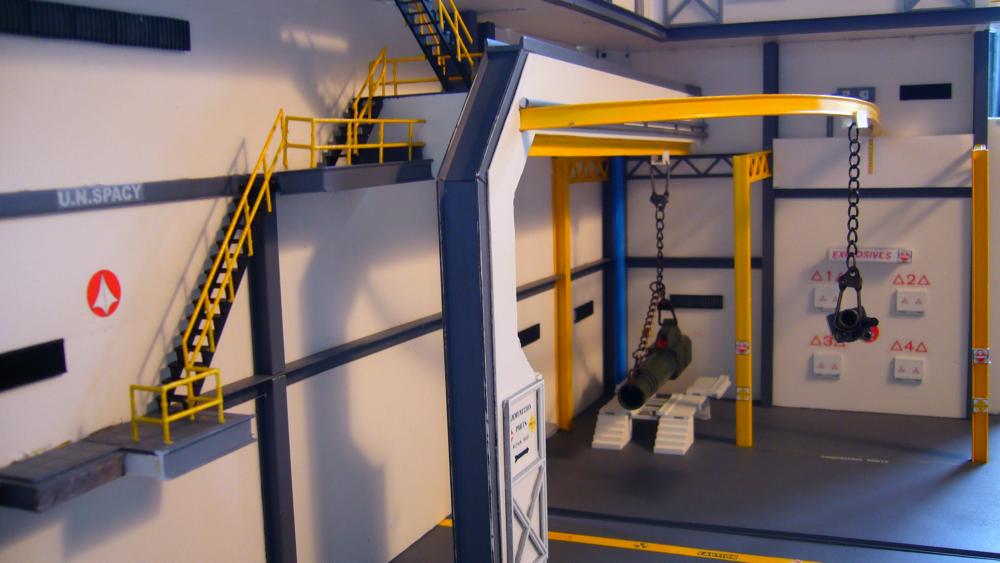
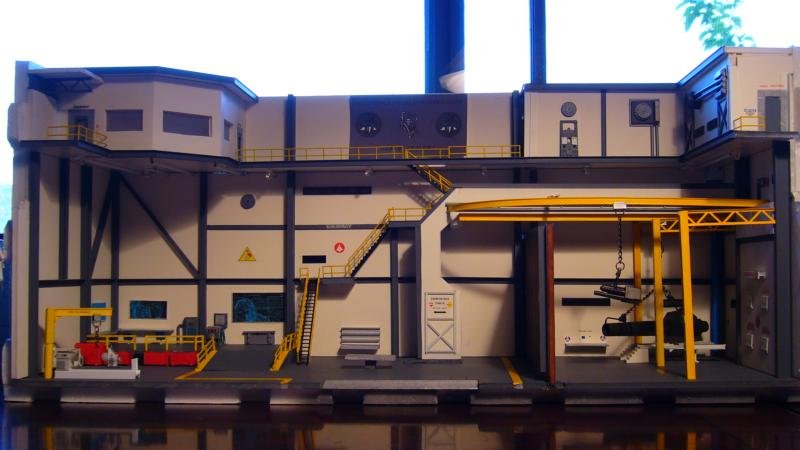
Back again, Here is an update for the hanger build. In this section I am focusing on some of the details for the diagnostic area, (in back with the blue chairs) tool room, (red tool boxes), and the machine shop which includes a scratch built CNC turning machine, Jib Crane and a CNC Lathe. Only a few details left to do and this section of the build will be complete! Enjoy the pictures and see you soon. Blue


-
Anime52k8, Thanks for the link and the info I will definitely look into this... Blue
-
Len_d69 what did you use for materials or more so where did you get them to build your flexi stand? reply here or PM me please. Blue
-
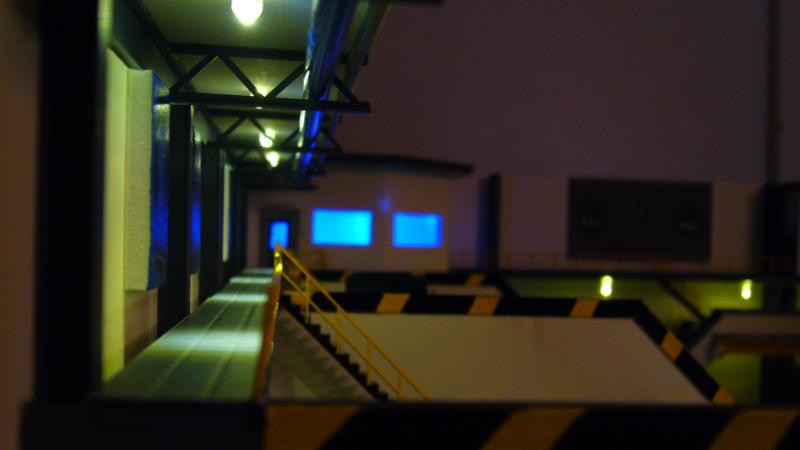
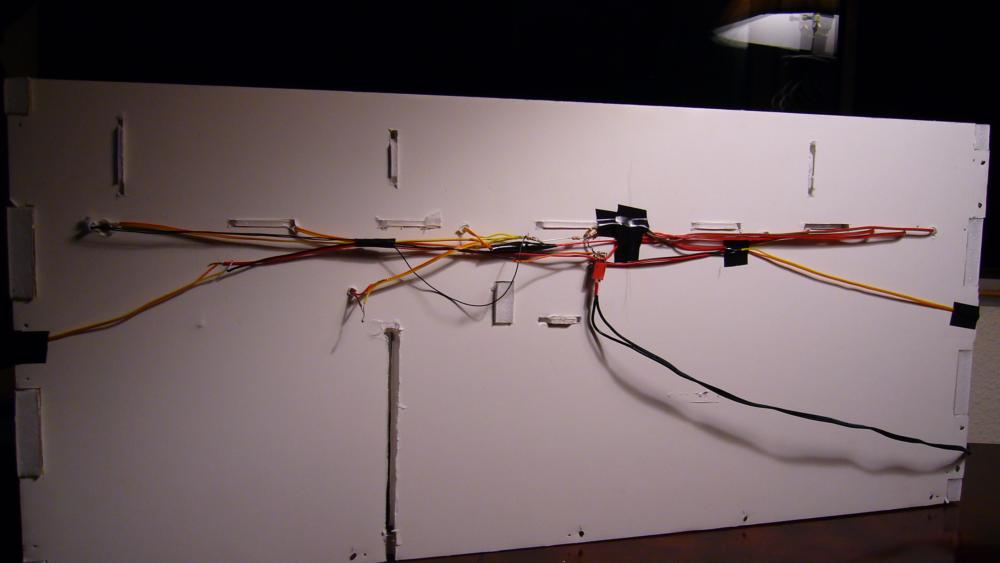
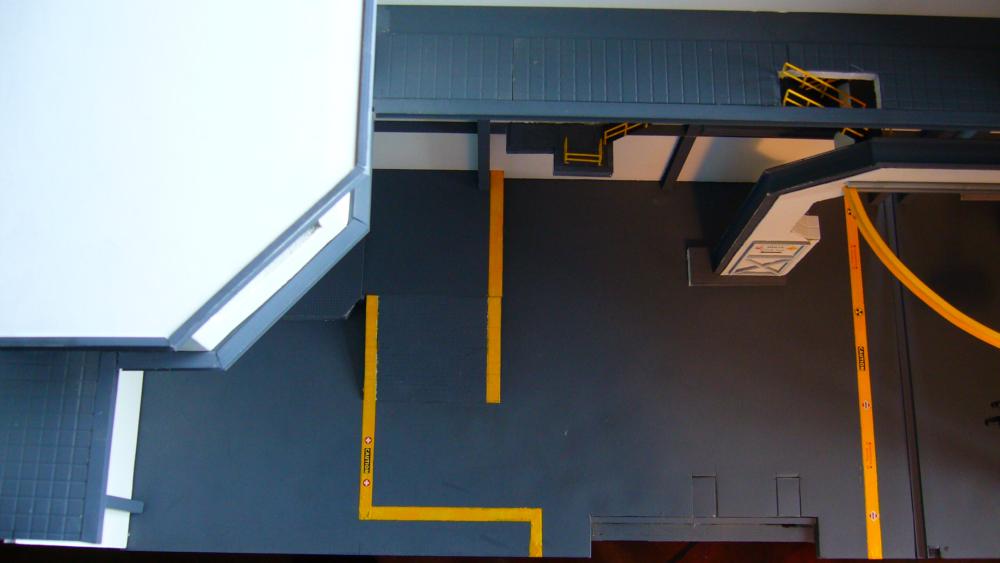
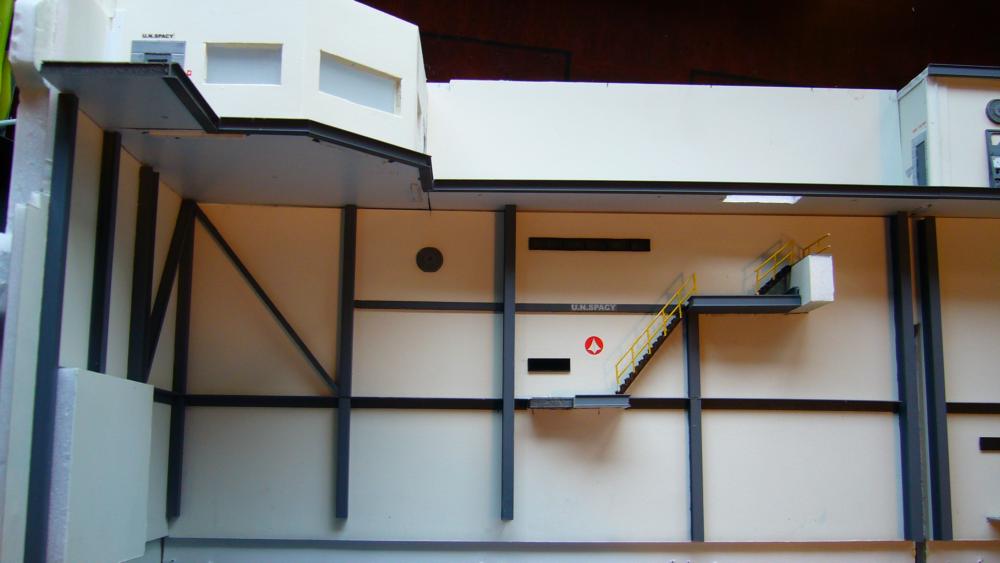
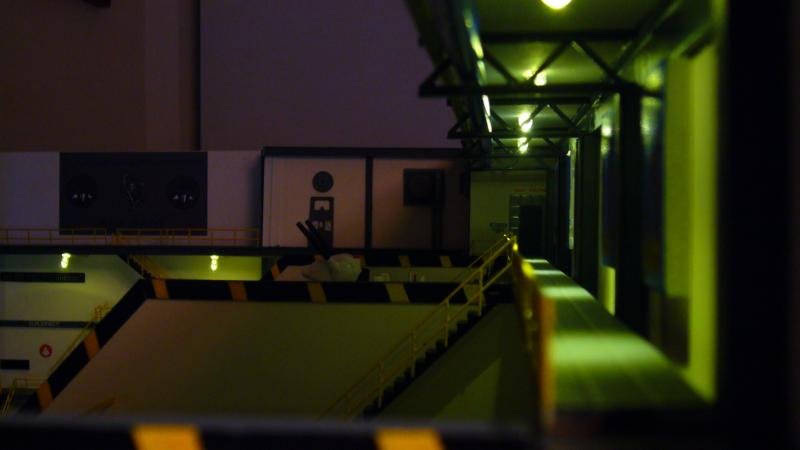
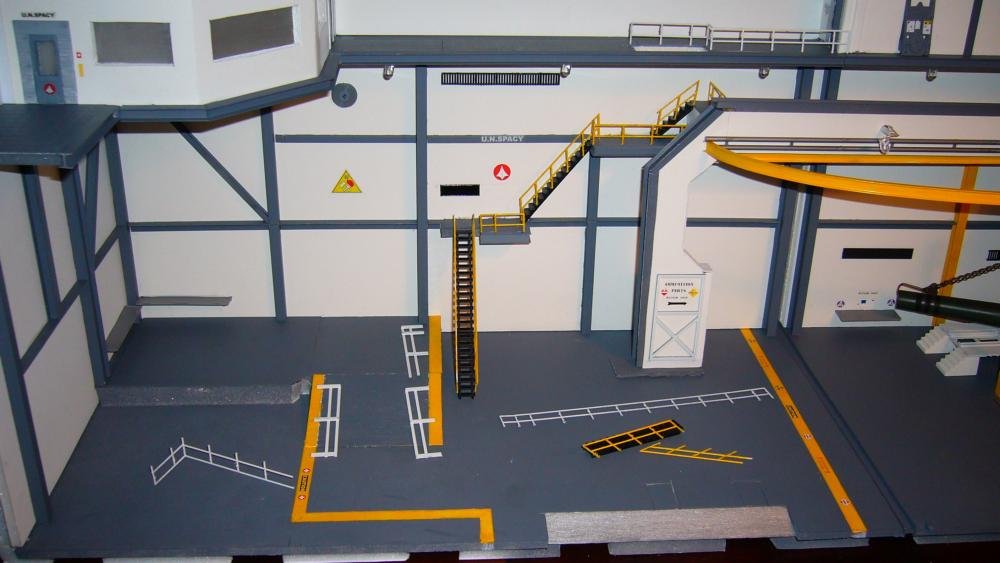
Just a quick stop to share a few pictures of what has been keeping me busy with the project. In the next few pictures you can see the addition of detailed stairwells and railings that will be painted and applied in position, other than that I have used the same techniques as I did for the first part of this project with mock up conduit for electrical wiring and lighting. The last picture shows my "spaghetti" wire mass that I will eventually clean up and secure. As for now I am just happy to have finished pain in the arse job of soldering, splicing, adding resistors, and converting to a power-pack source of power that won't fry the LED's. Anyways this is all for now...see you next time when I have more accomplished. Blue

-
Need some painting advice for VF-19 & VF-22,please.
Iceblue106 replied to Maxtype's topic in The Workshop!
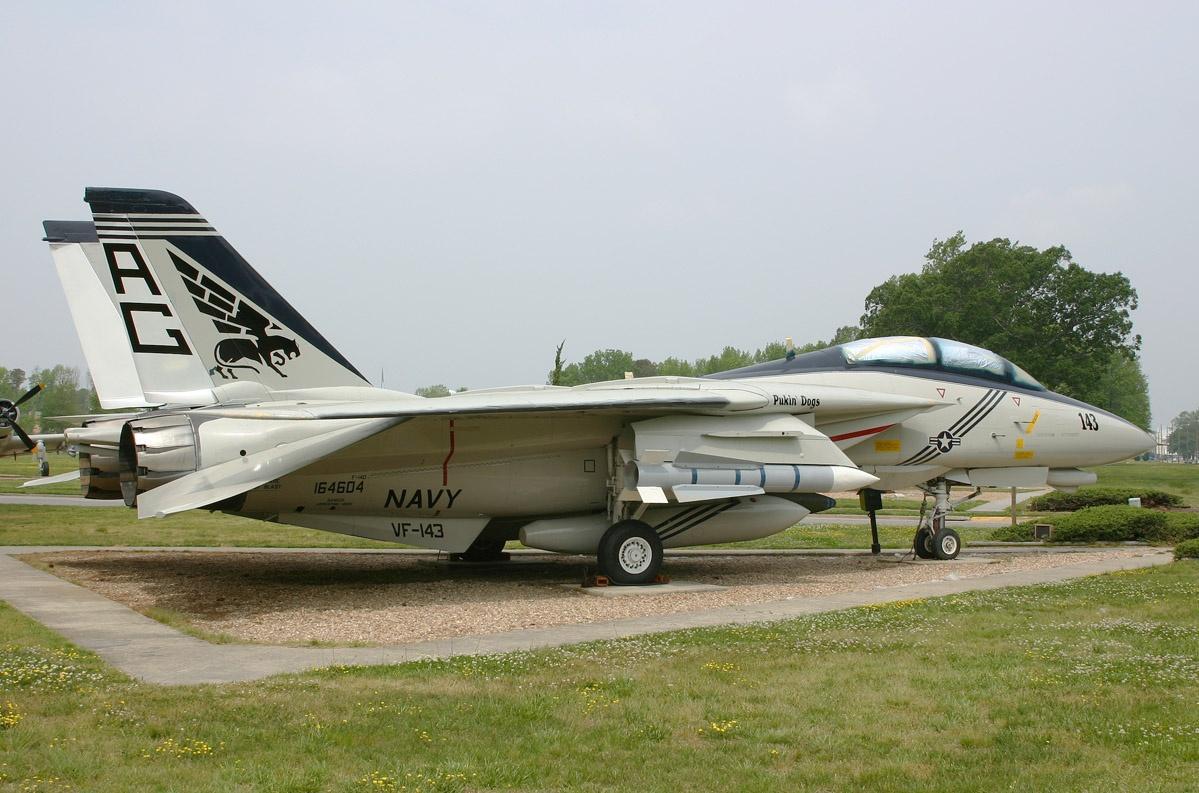
Hey Maxtype, I would love to see this project with the Puking Dogs Insignia!! And being a former member of the actual squadron (before they converted to F-18's) I have to agree with Chronocidal about the blue. It is a shade too bright in the above picture. However if you use that same blue with the 36375 gray paint scheme that we used to use I think it wouldn't be that bad or you could go with the darker blue (15044) Also if you want an alternative to the blue, we used to paint the tails of our other jets with a dark gray instead. I will include some pictures that may help you as a reference. looking forward to seeing how it turns out Blue

-
Hello all, I recently purchased a 1/60 VF-1J (Hiki) with Super parts and noticed hairline fractures right out of the box I know that there is the option for replacements but other than this I was curious if anyone has come up with an idea as to how to fix it, or even prevent it through modification of the structured area? (and I mean besides applying super glue) Please reply if you have done something (other than replacement or superglue) that has been effective. PM me if need be but please give me your feed back. Blue
-
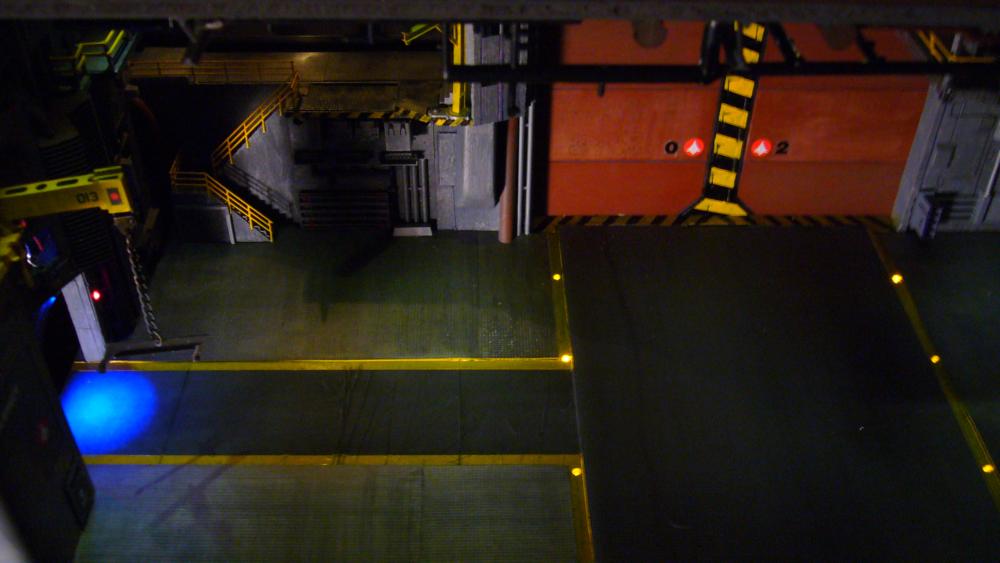
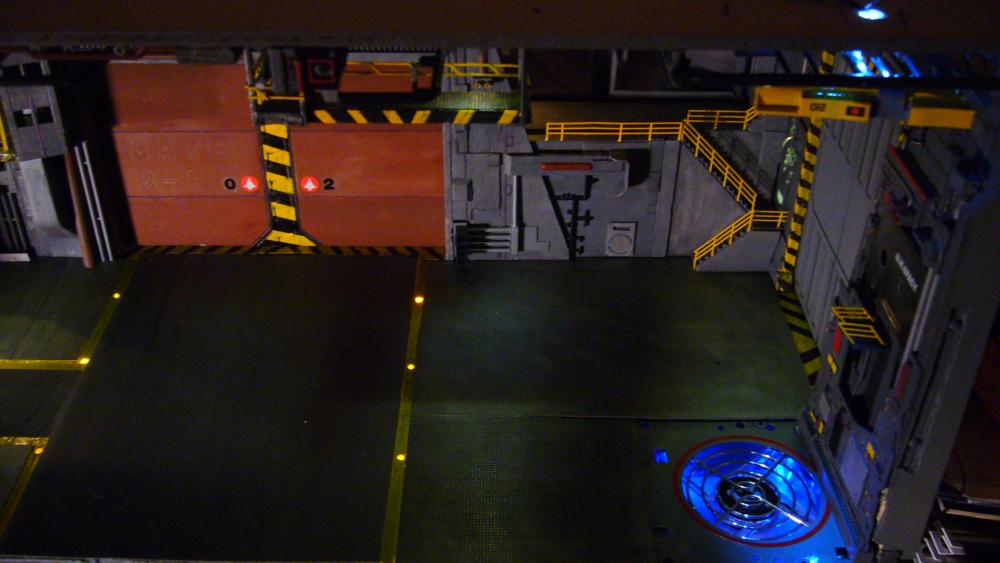
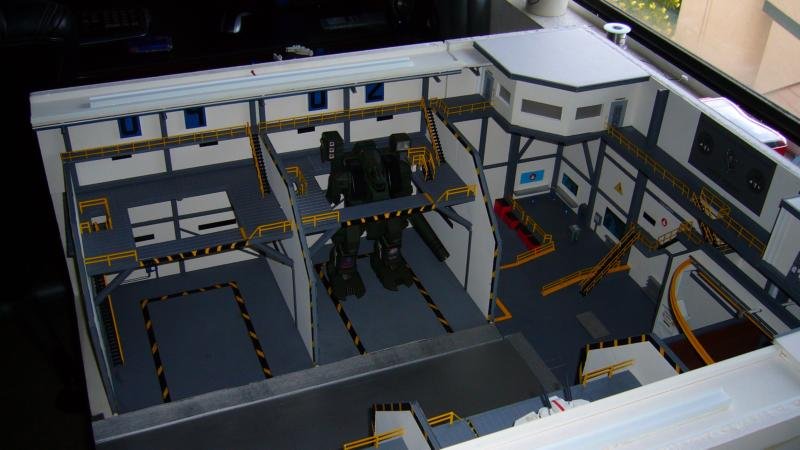
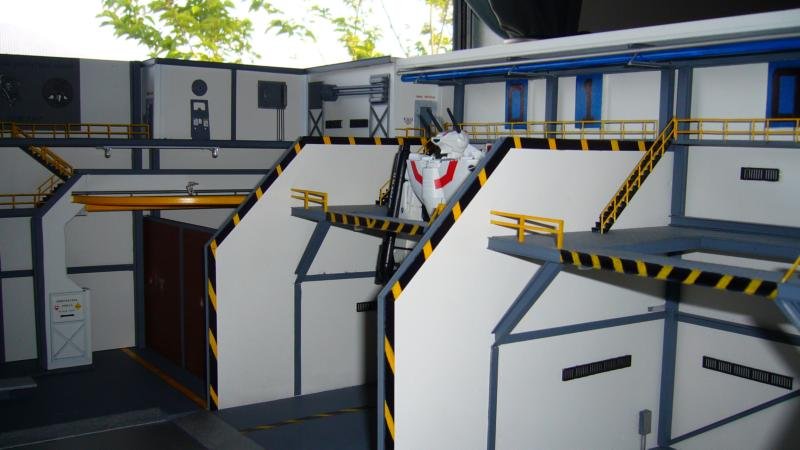
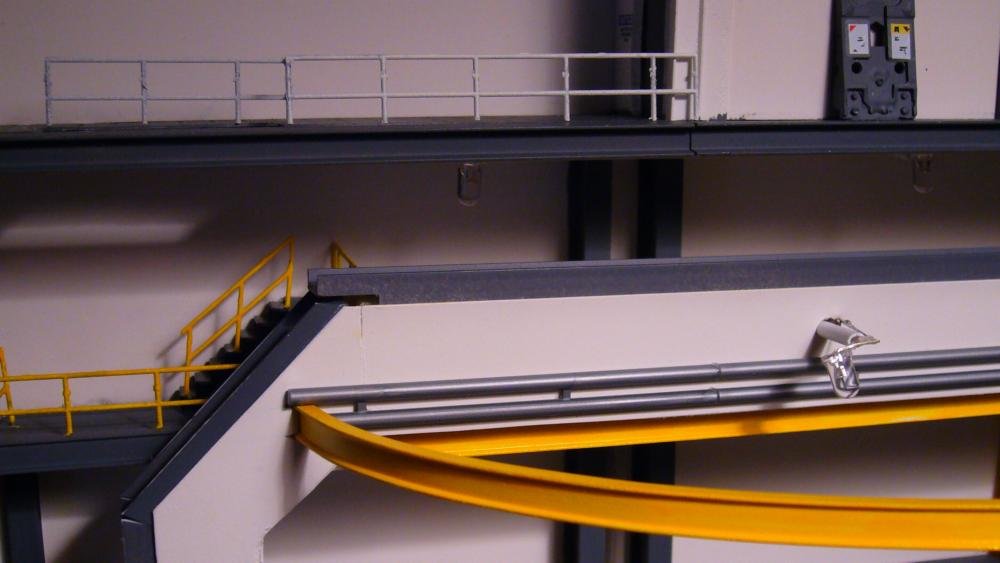
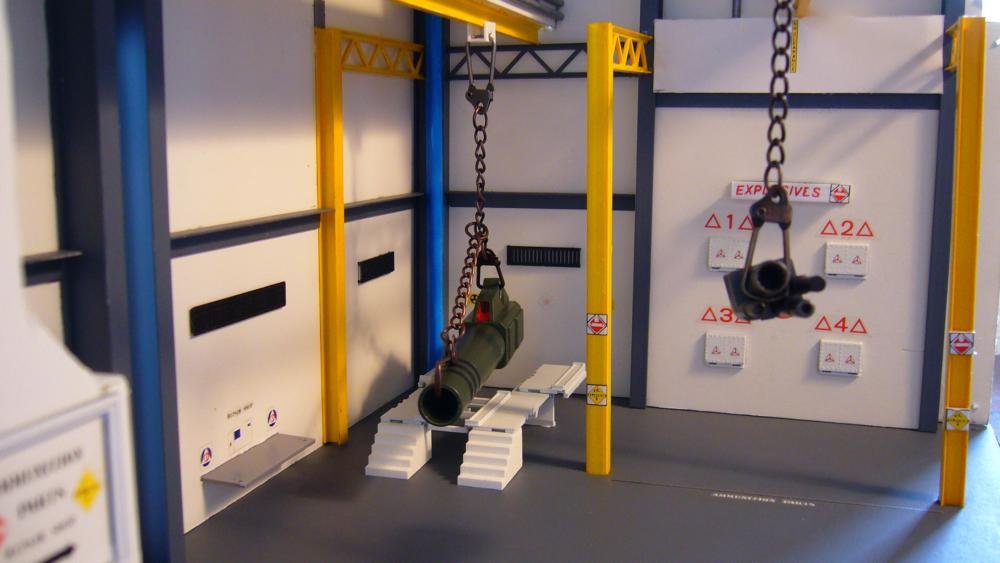
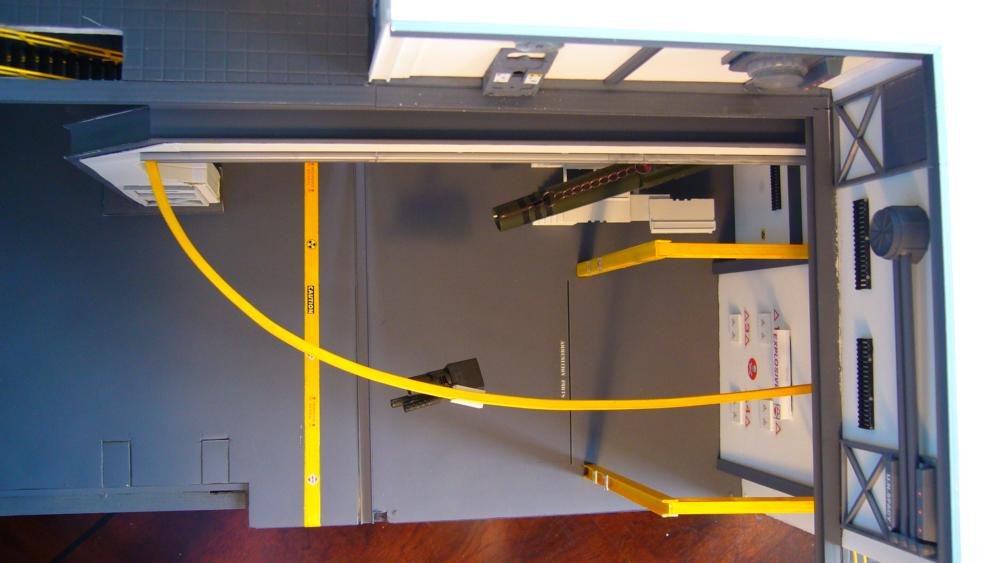
Ya sadly I have to agree with Rob...for this build it needs to reflect that of the story line of "Destroids last dance" However when this is all said and done I will be adding all those goodies to my next build which will include the prototype panels shown by Tundrayeti (and no I don't mean the ones he designed for miriya but the actual first panels shown on his diorama madness forum) Anyways that build will include those as well as all the stains, battle damage, forklift accidents, pilot errors and whatever else I might think of. as for now its back to the build....oh and speaking of which....here are some more pictures showing close ups of the detailed areas as well as a few birds eye views of the weapons repair and loading area. Blue


-
Just wanted to say...."simply amazing" RedLion!!! awesome work !! You have my deepest respect as well for a job well done with paper!!
-
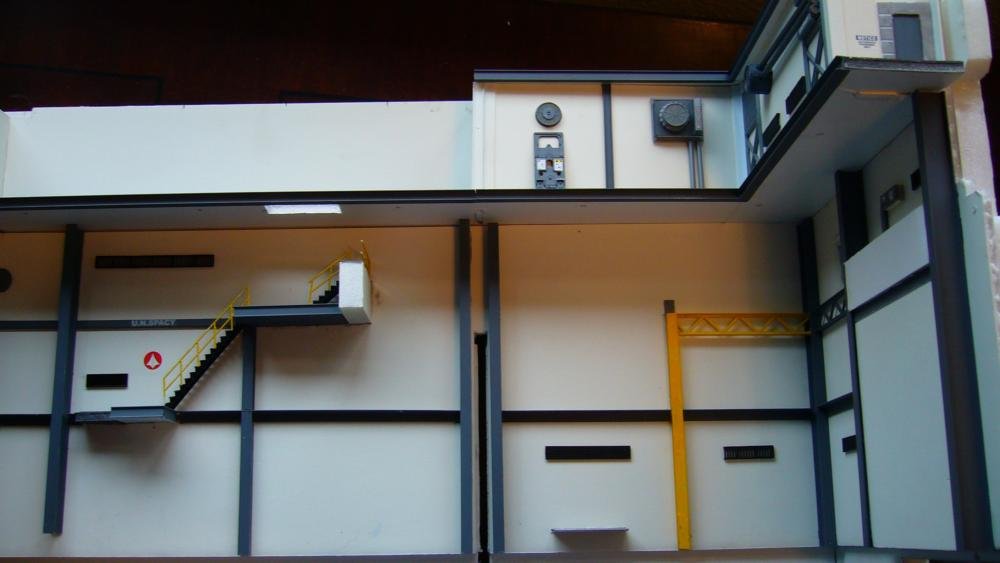
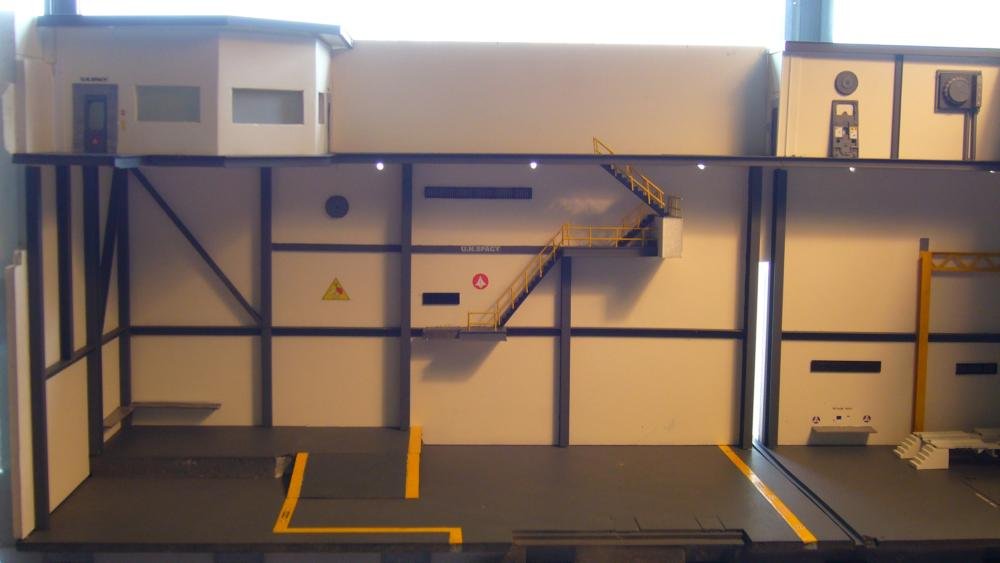
Thanks Thor!! Well here is another progress report for you all to look at. In the next few pictures you can see the added structural detail to the back wall, side walls, upper levels, as well as added detail to the flooring. I have made more progress than what is shown here but need to charge my battery for my camera in order to bring you all up to date. As always I hope you enjoyed the eye candy and see you next time with more Pictures. Blue


-
Miriya.... I would suggest going the cheaper route IMO. I have been building an assortment of diorama's and to be honest one of the best primers I have found to work on virtually anything is a product called "Painters touch" by Rust-oleum. Its a wet or dry sandable primer that doesn't melt plastic, and drys fast. I've used it in every build so far, and also it provides a nice flat color too. (my 1/100 scale hanger was painted almost completely with this primer, and in the current "Tomahawk Hanger" build all the gray structure pieces as well as the base floor are painted with this same sandable primer. This is just my suggestion but I know it has worked pretty good for my diorama's. Blue
-
lol well sad to say, I am still at the eraser part in life....haven't had the urge to go out and blow (a minimum of) 400 bucks on CAD software, nor do I have that kind of cash to spend at the moment but perhaps in the near future. As for now its the old drawing board and equipment from ITT Tech. and MechTech thanks for the encouragement...its nice to know that we're not the only ones that have been there or done that before