Iceblue106
-
Posts
145 -
Joined
-
Last visited
Content Type
Profiles
Forums
Events
Gallery
Everything posted by Iceblue106
-
Damn Yeti these are looking awesome man!! Keep up the great work and keep us all posted. Oh ya and also I will be picking up the panels today from the post office (sadly I wasn't home for the delivery so I got a "sorry we missed you" card and will have to wait till later to get them) lol that sucks but I will be sure to send ya some kudos and anything else I can think of when I get the panels in my hands. Blue
-
Thanks Yeti! Its taken some time, even had to scrap the drawings and re-draw up new prints.... I just wish all the ideas would come to me at the same time so I wouldn't have to make changes, but how good of a builder would I be If I couldn't think on my feet and change at direction at the lost possible moment? I am sure you can associate with this process.
-
Word has been sent lol.
-
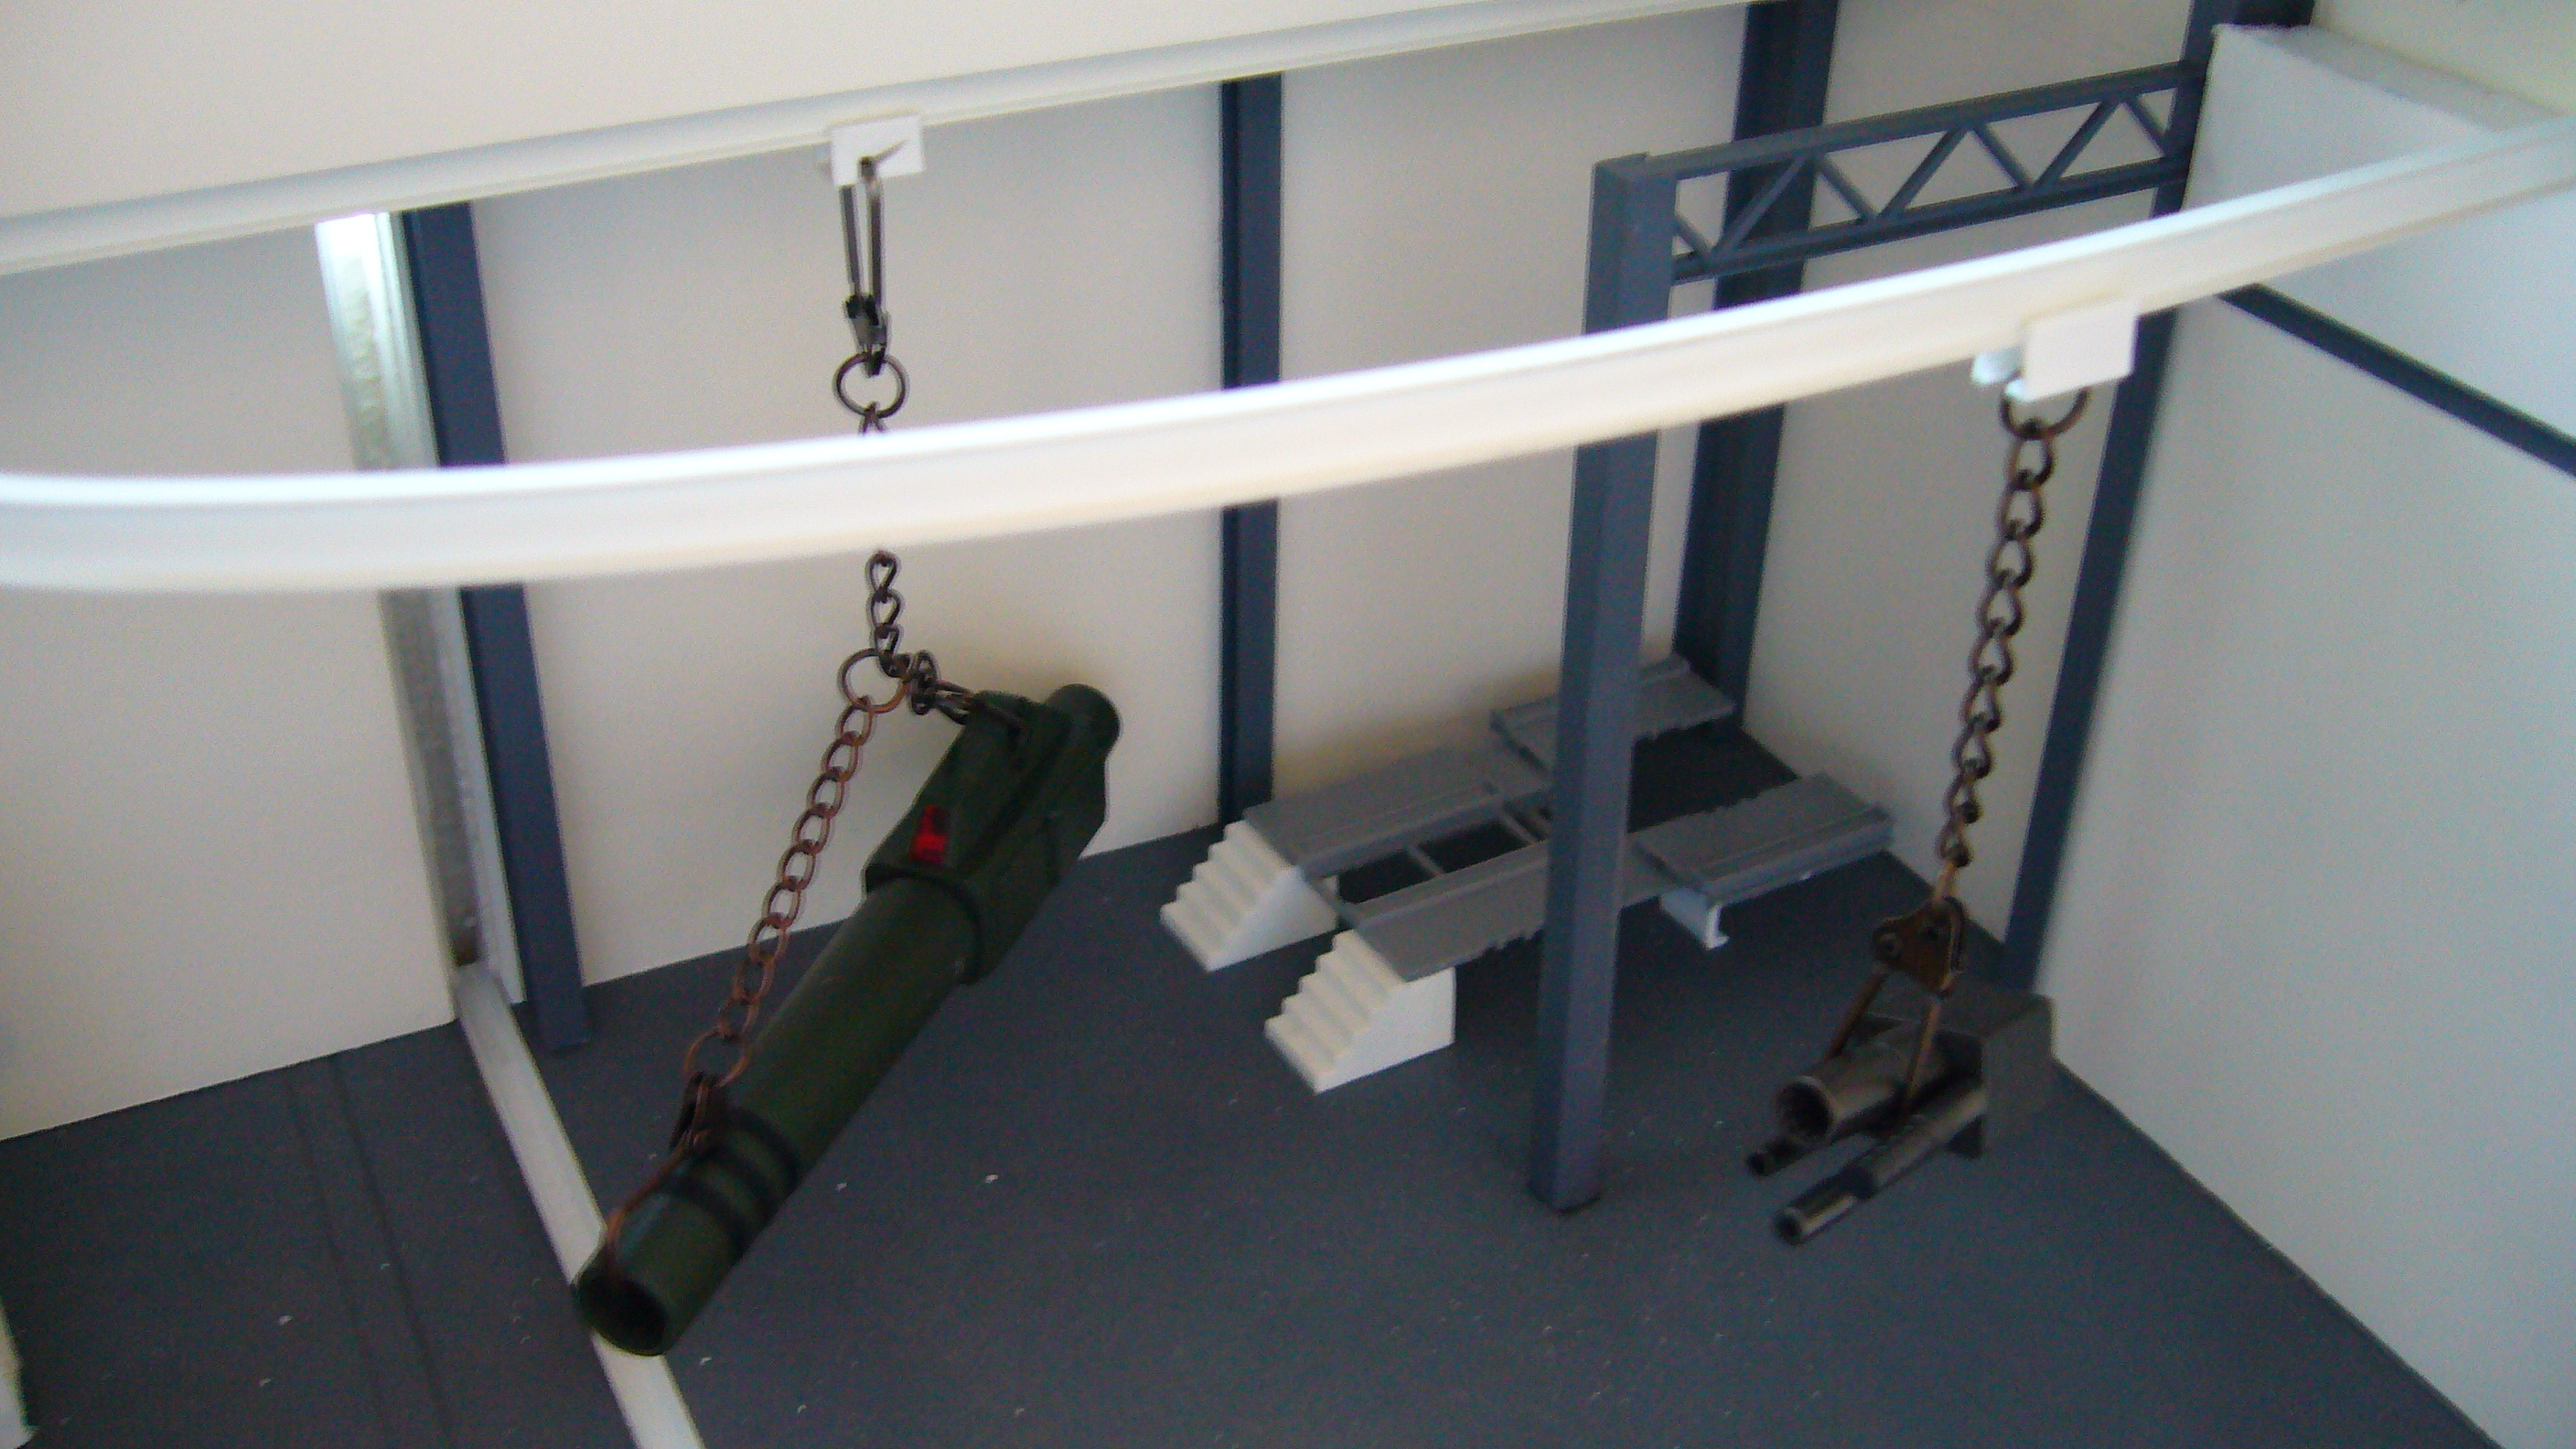
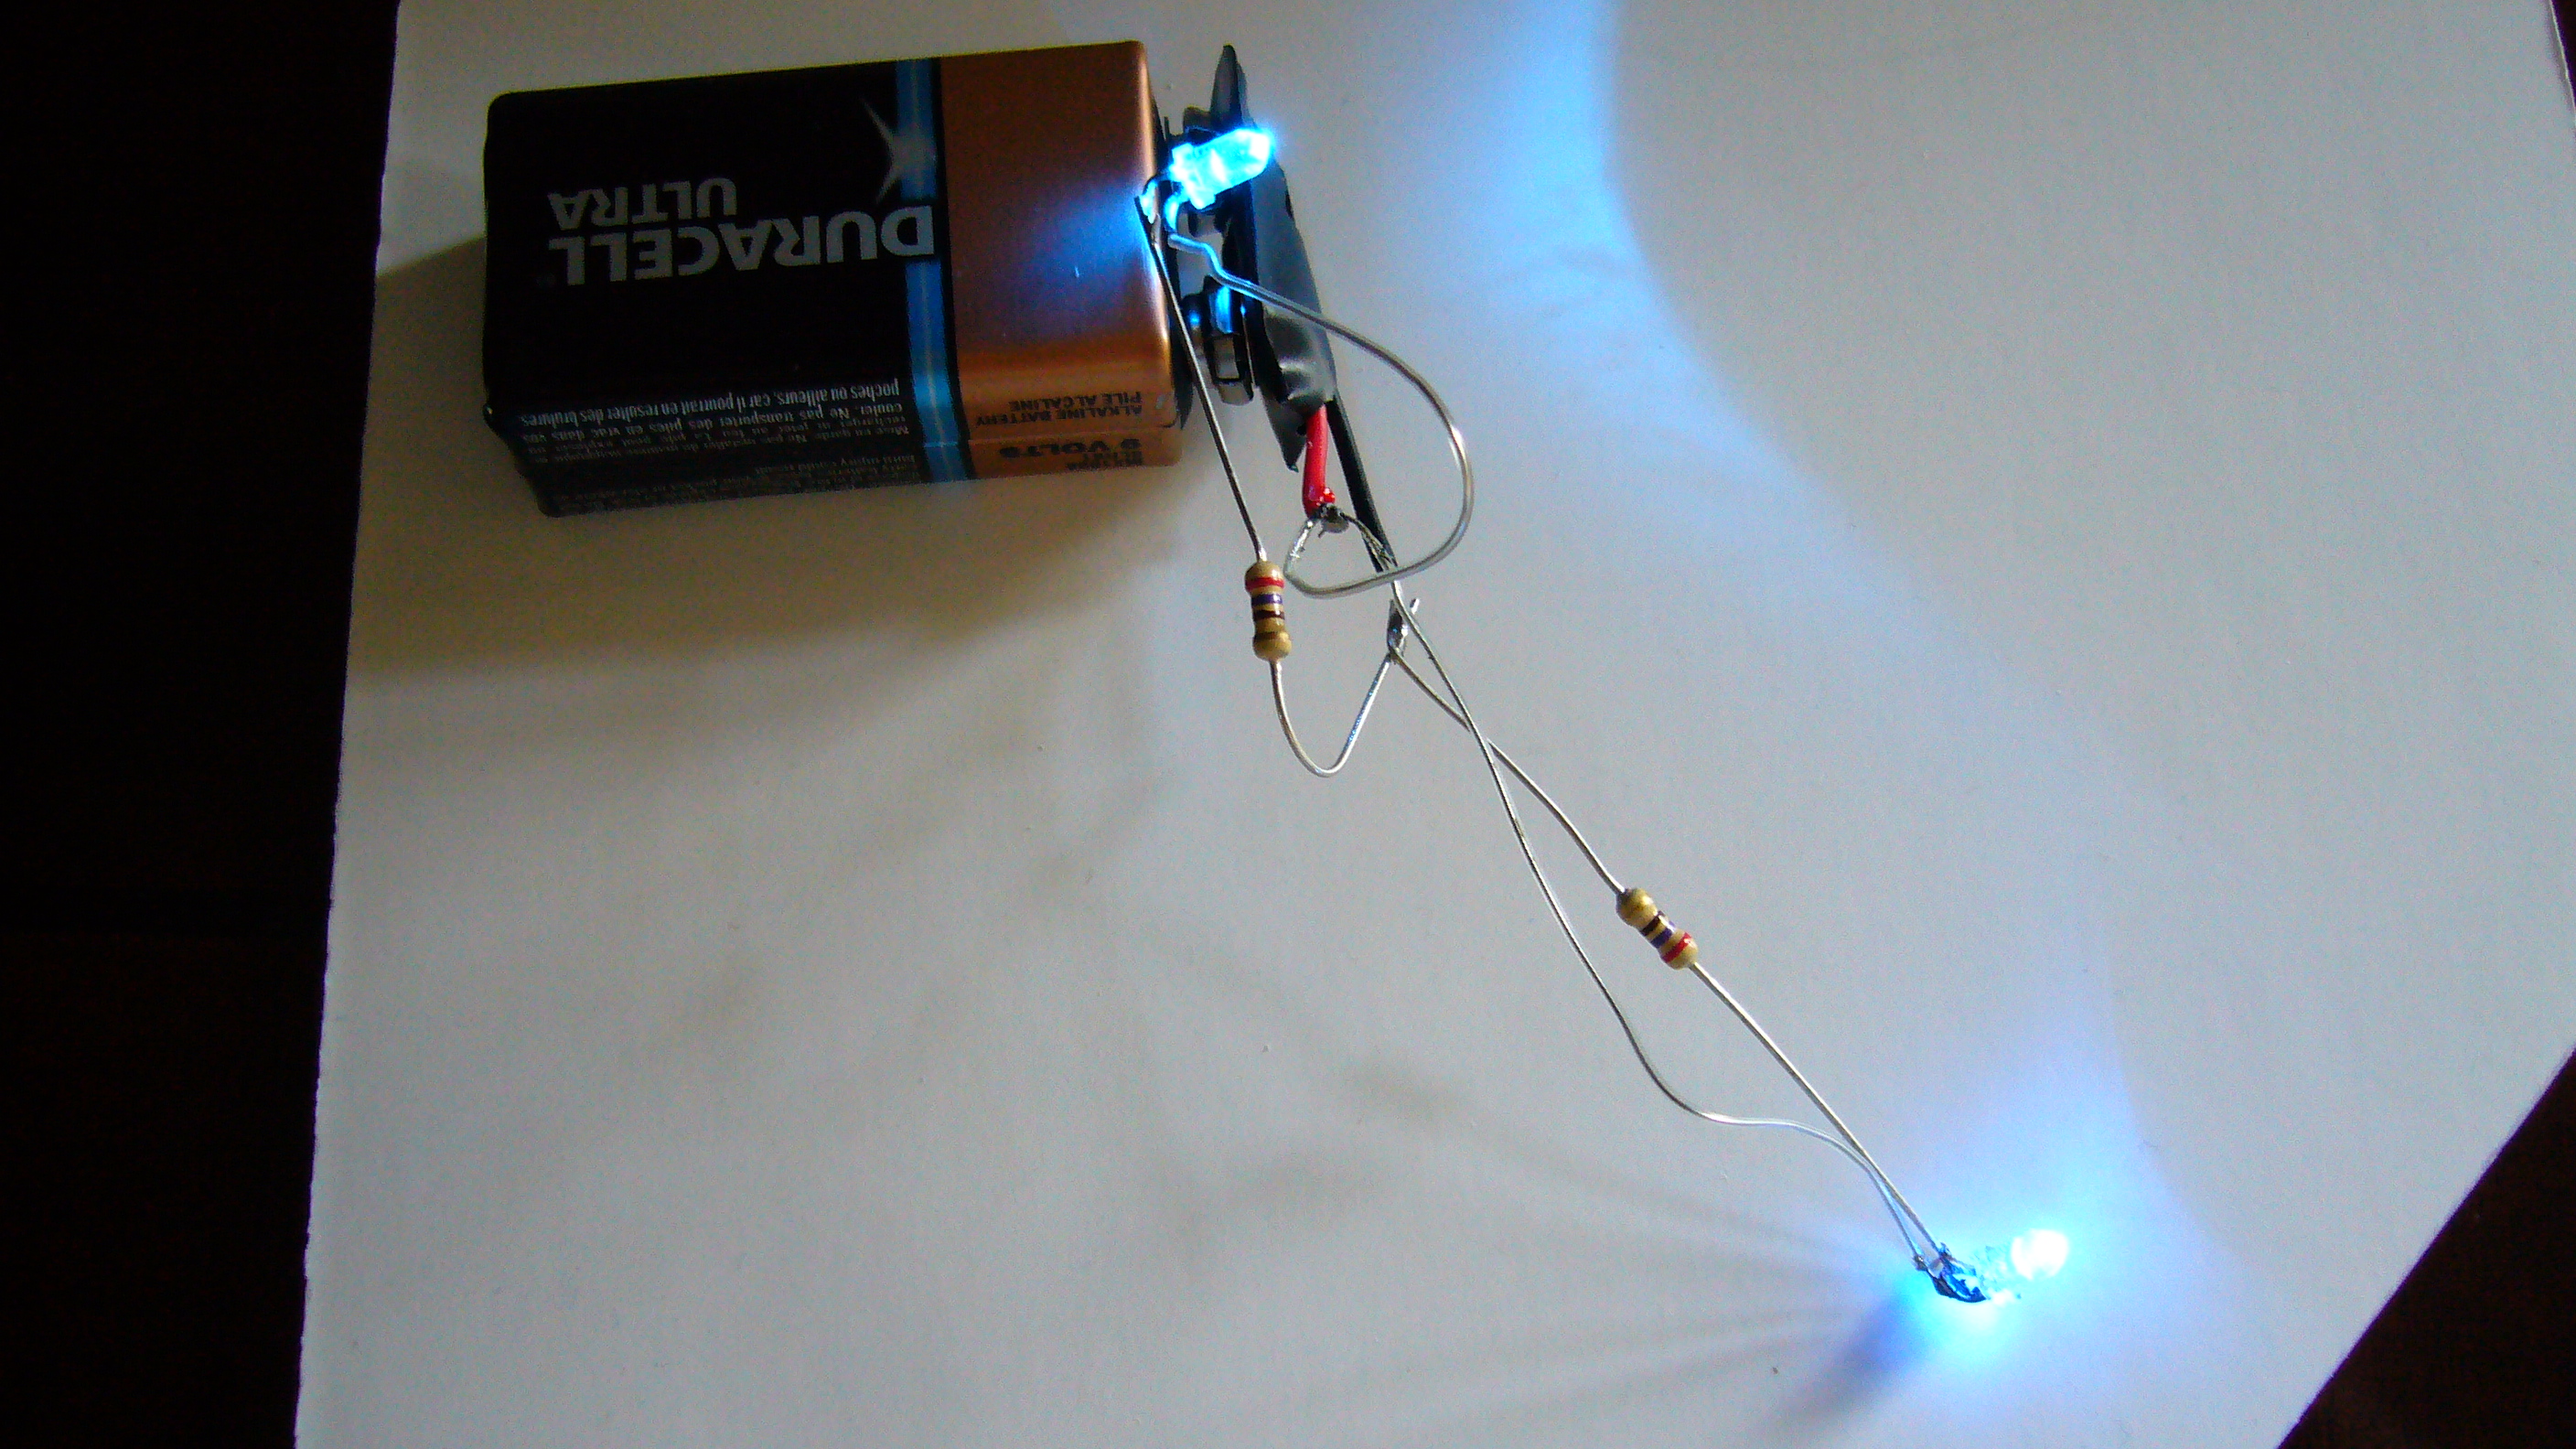
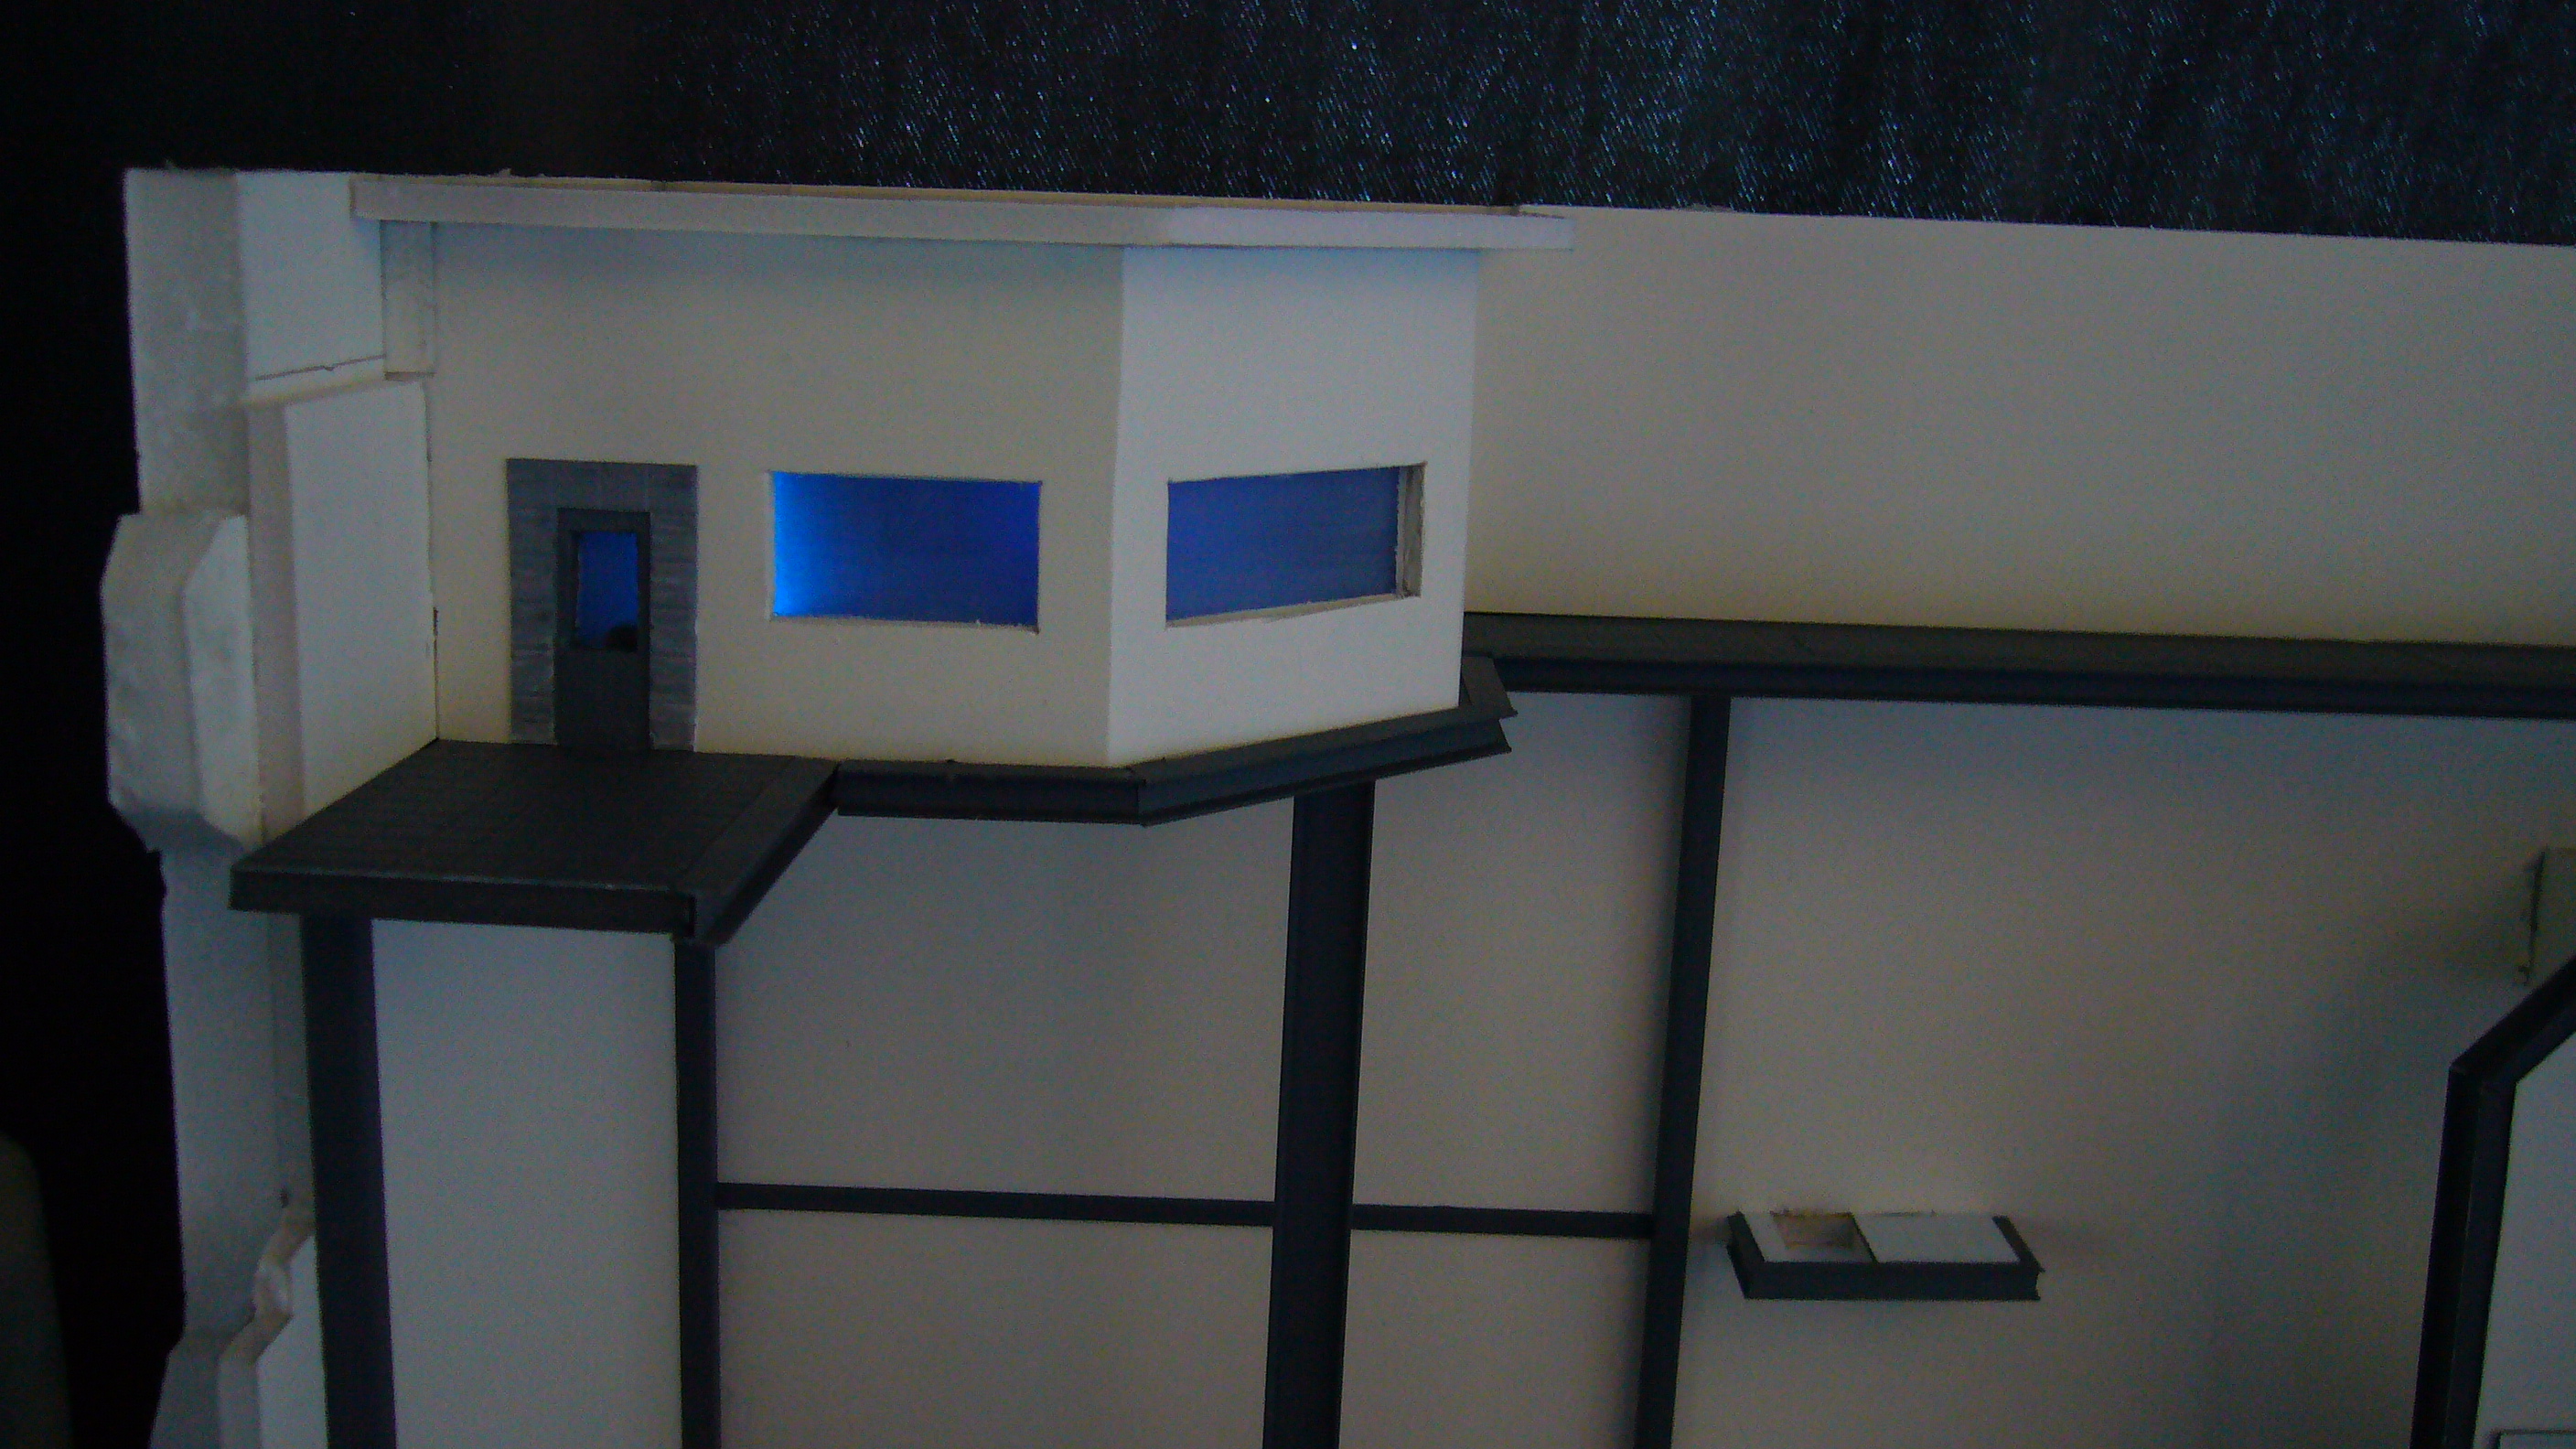
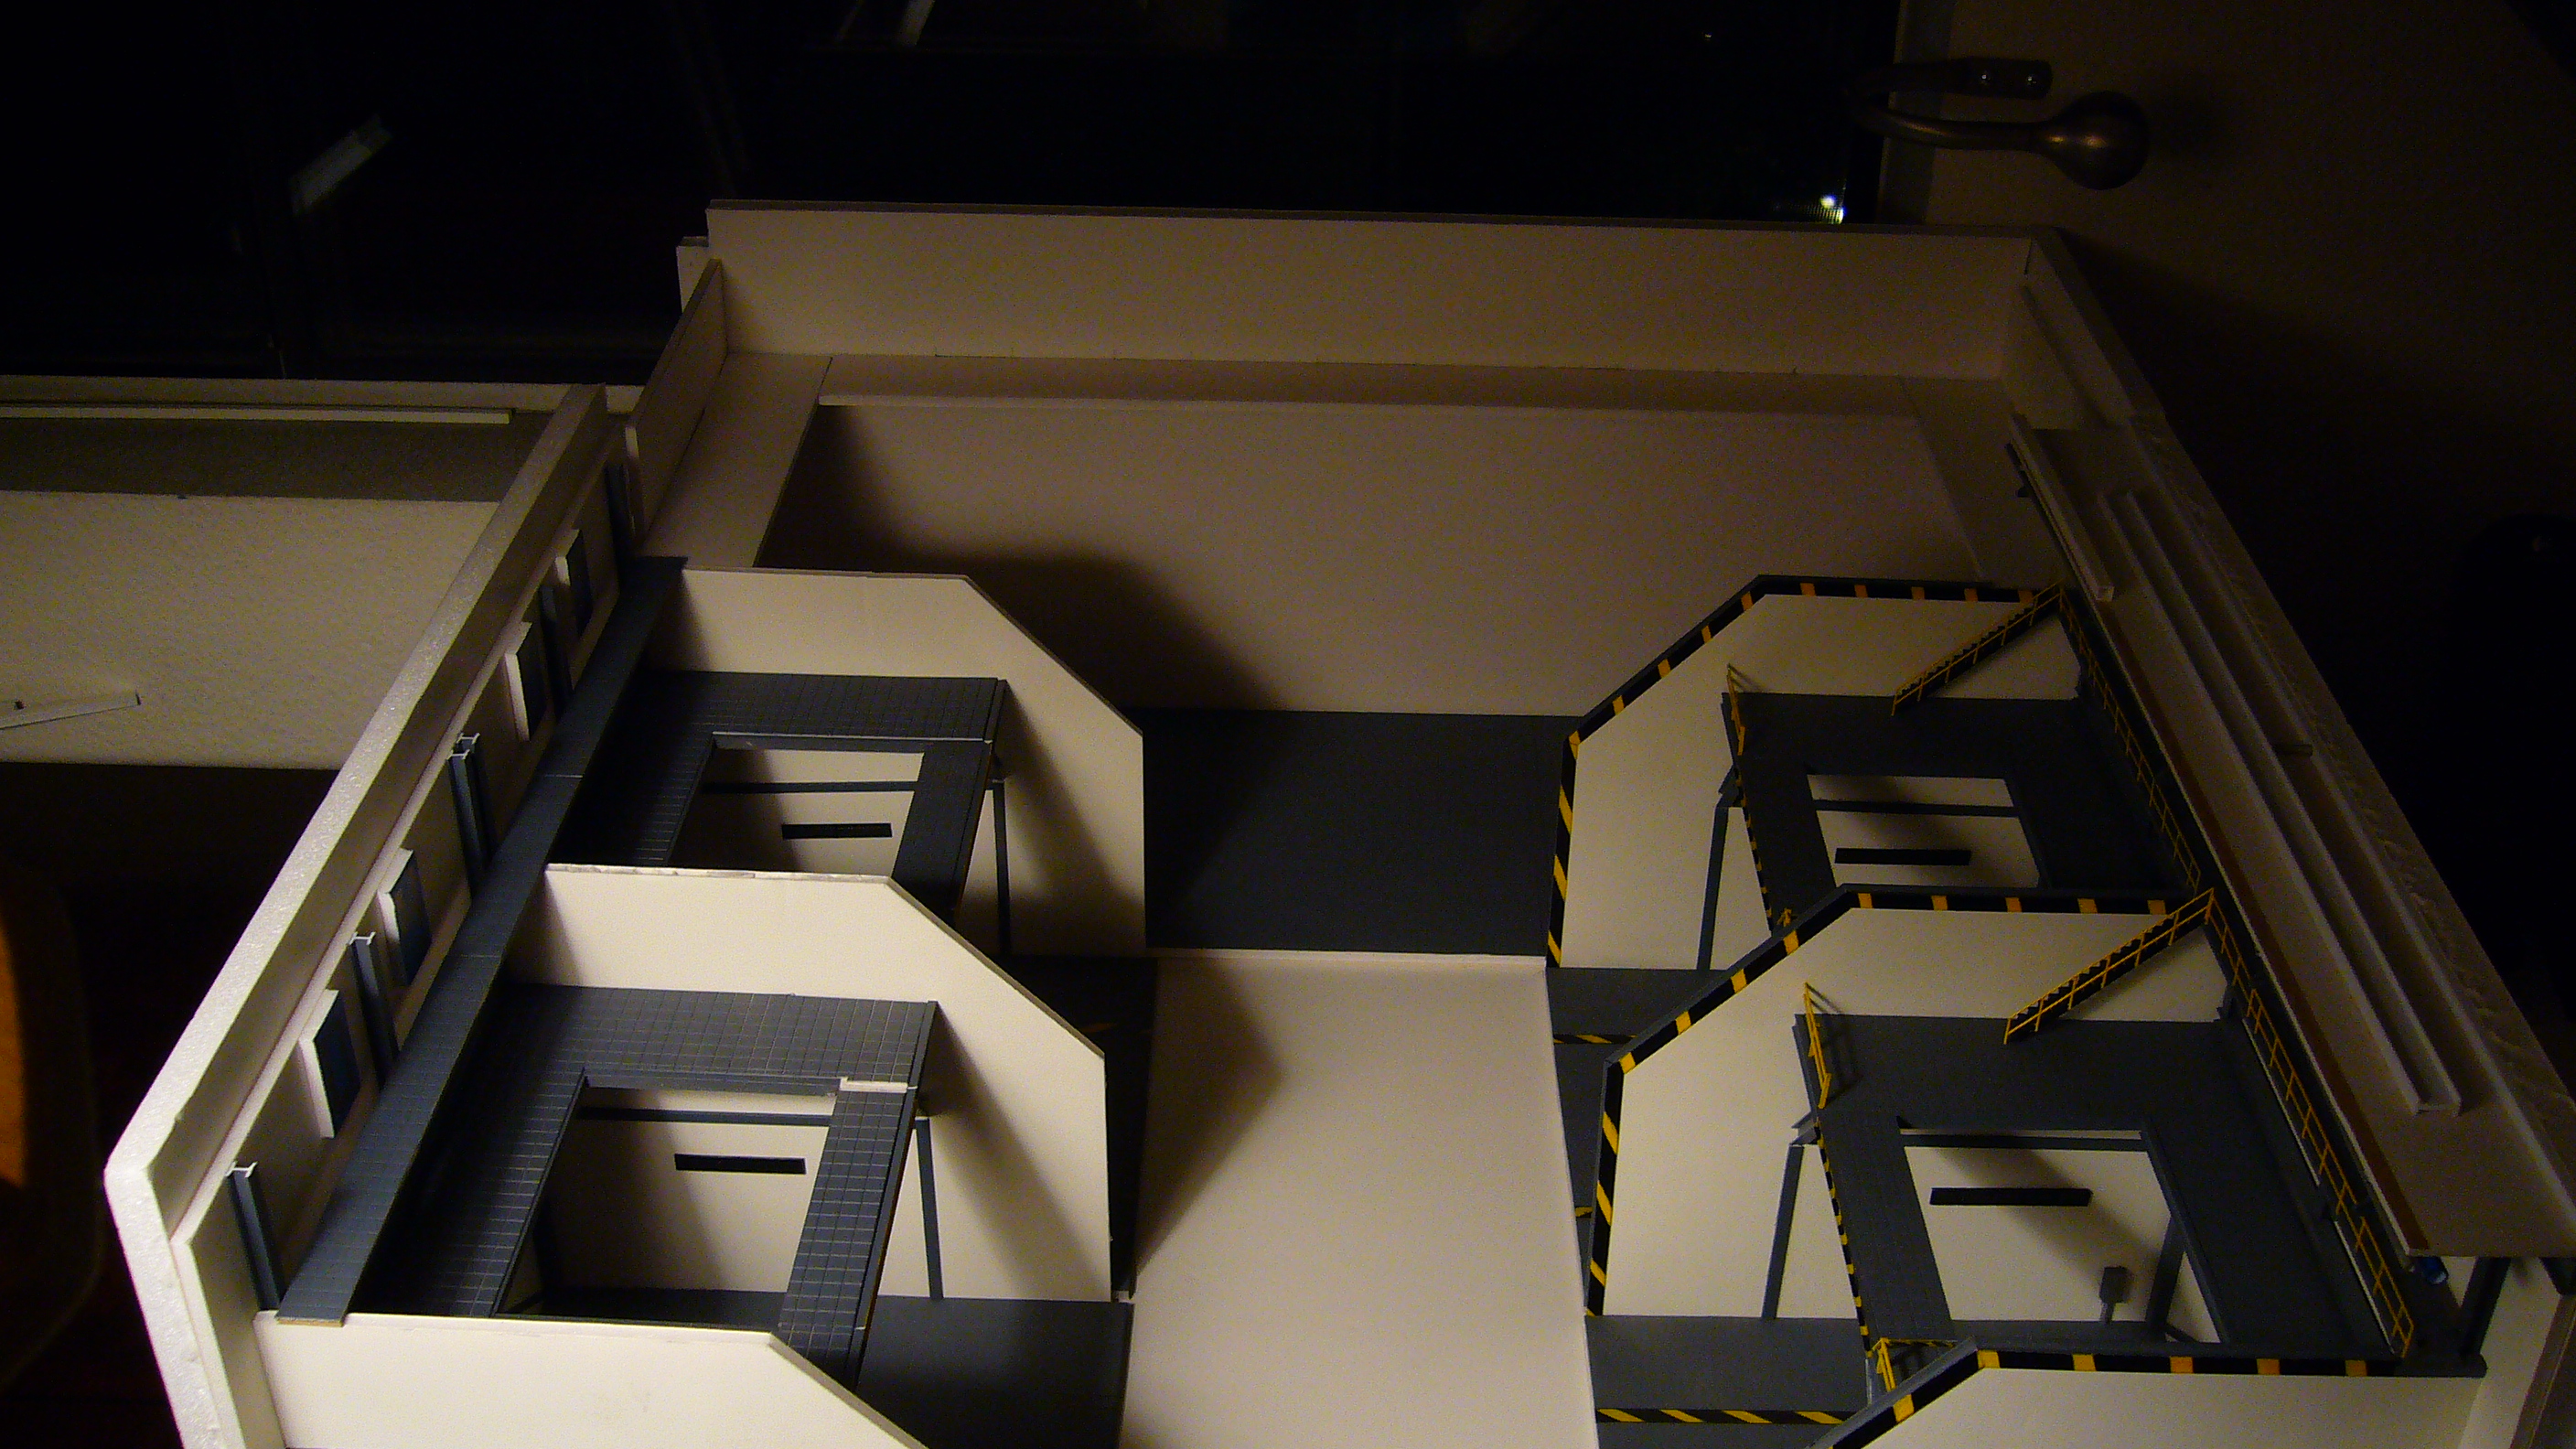
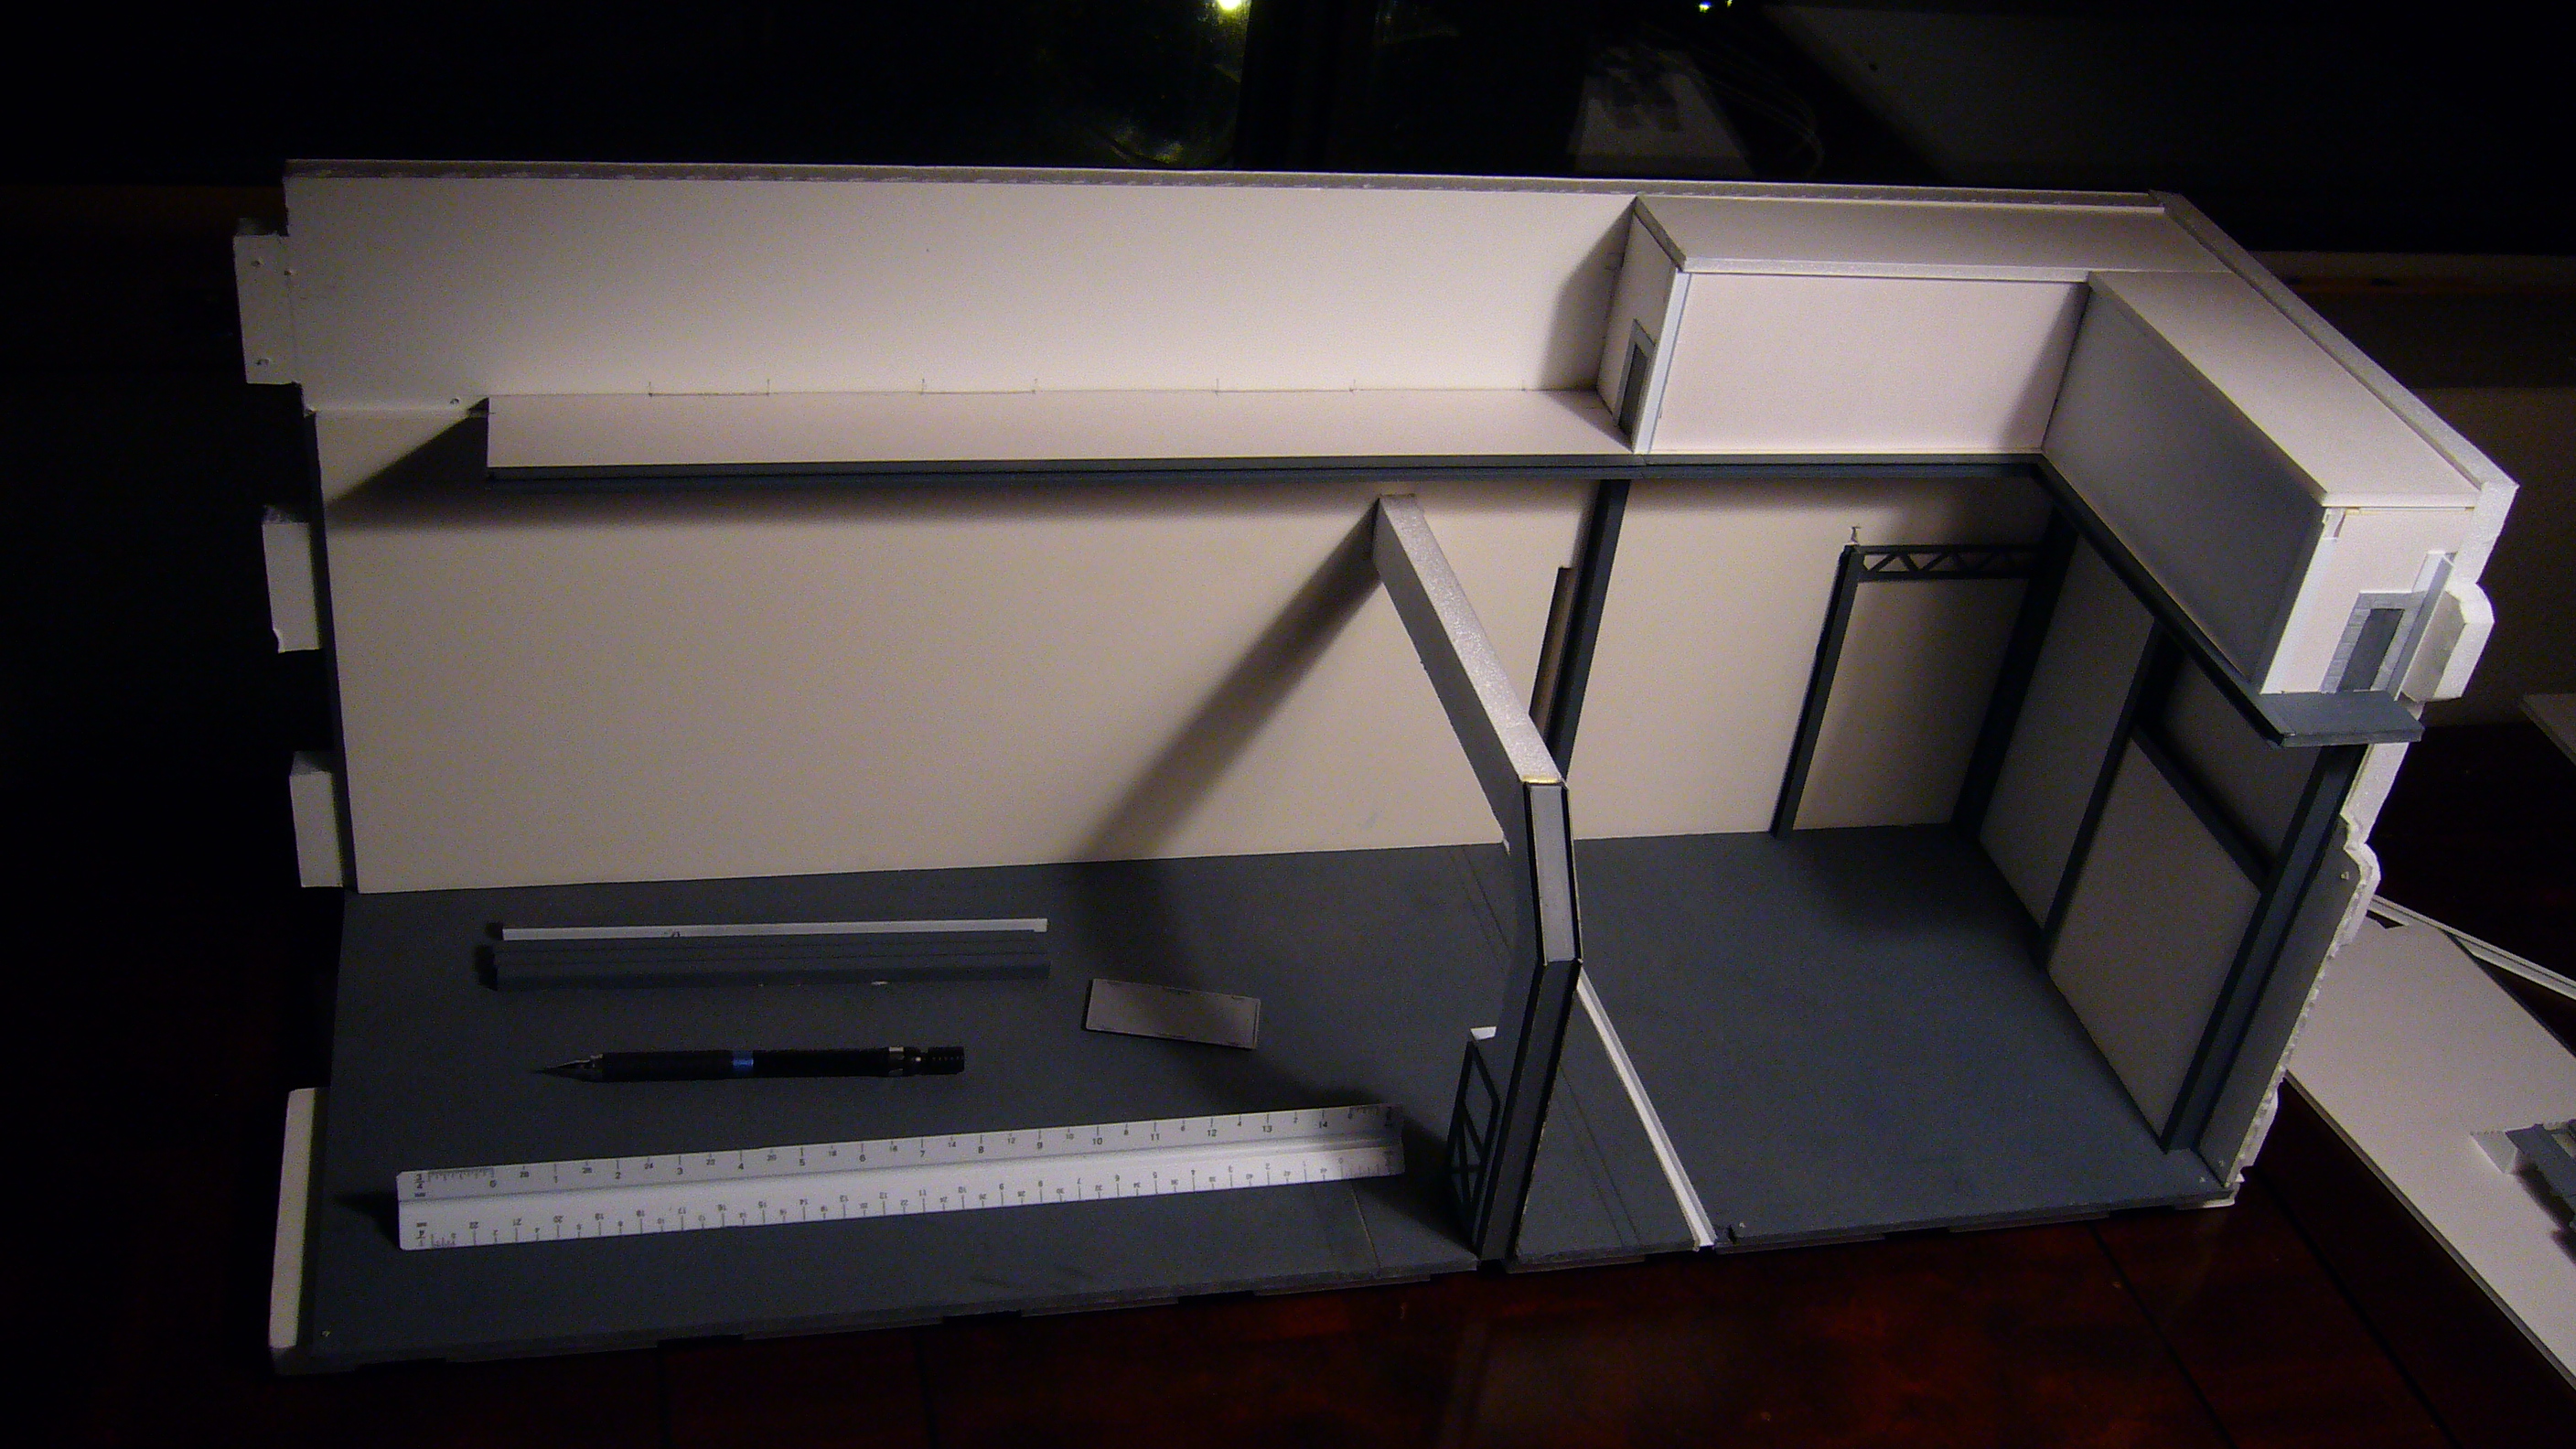
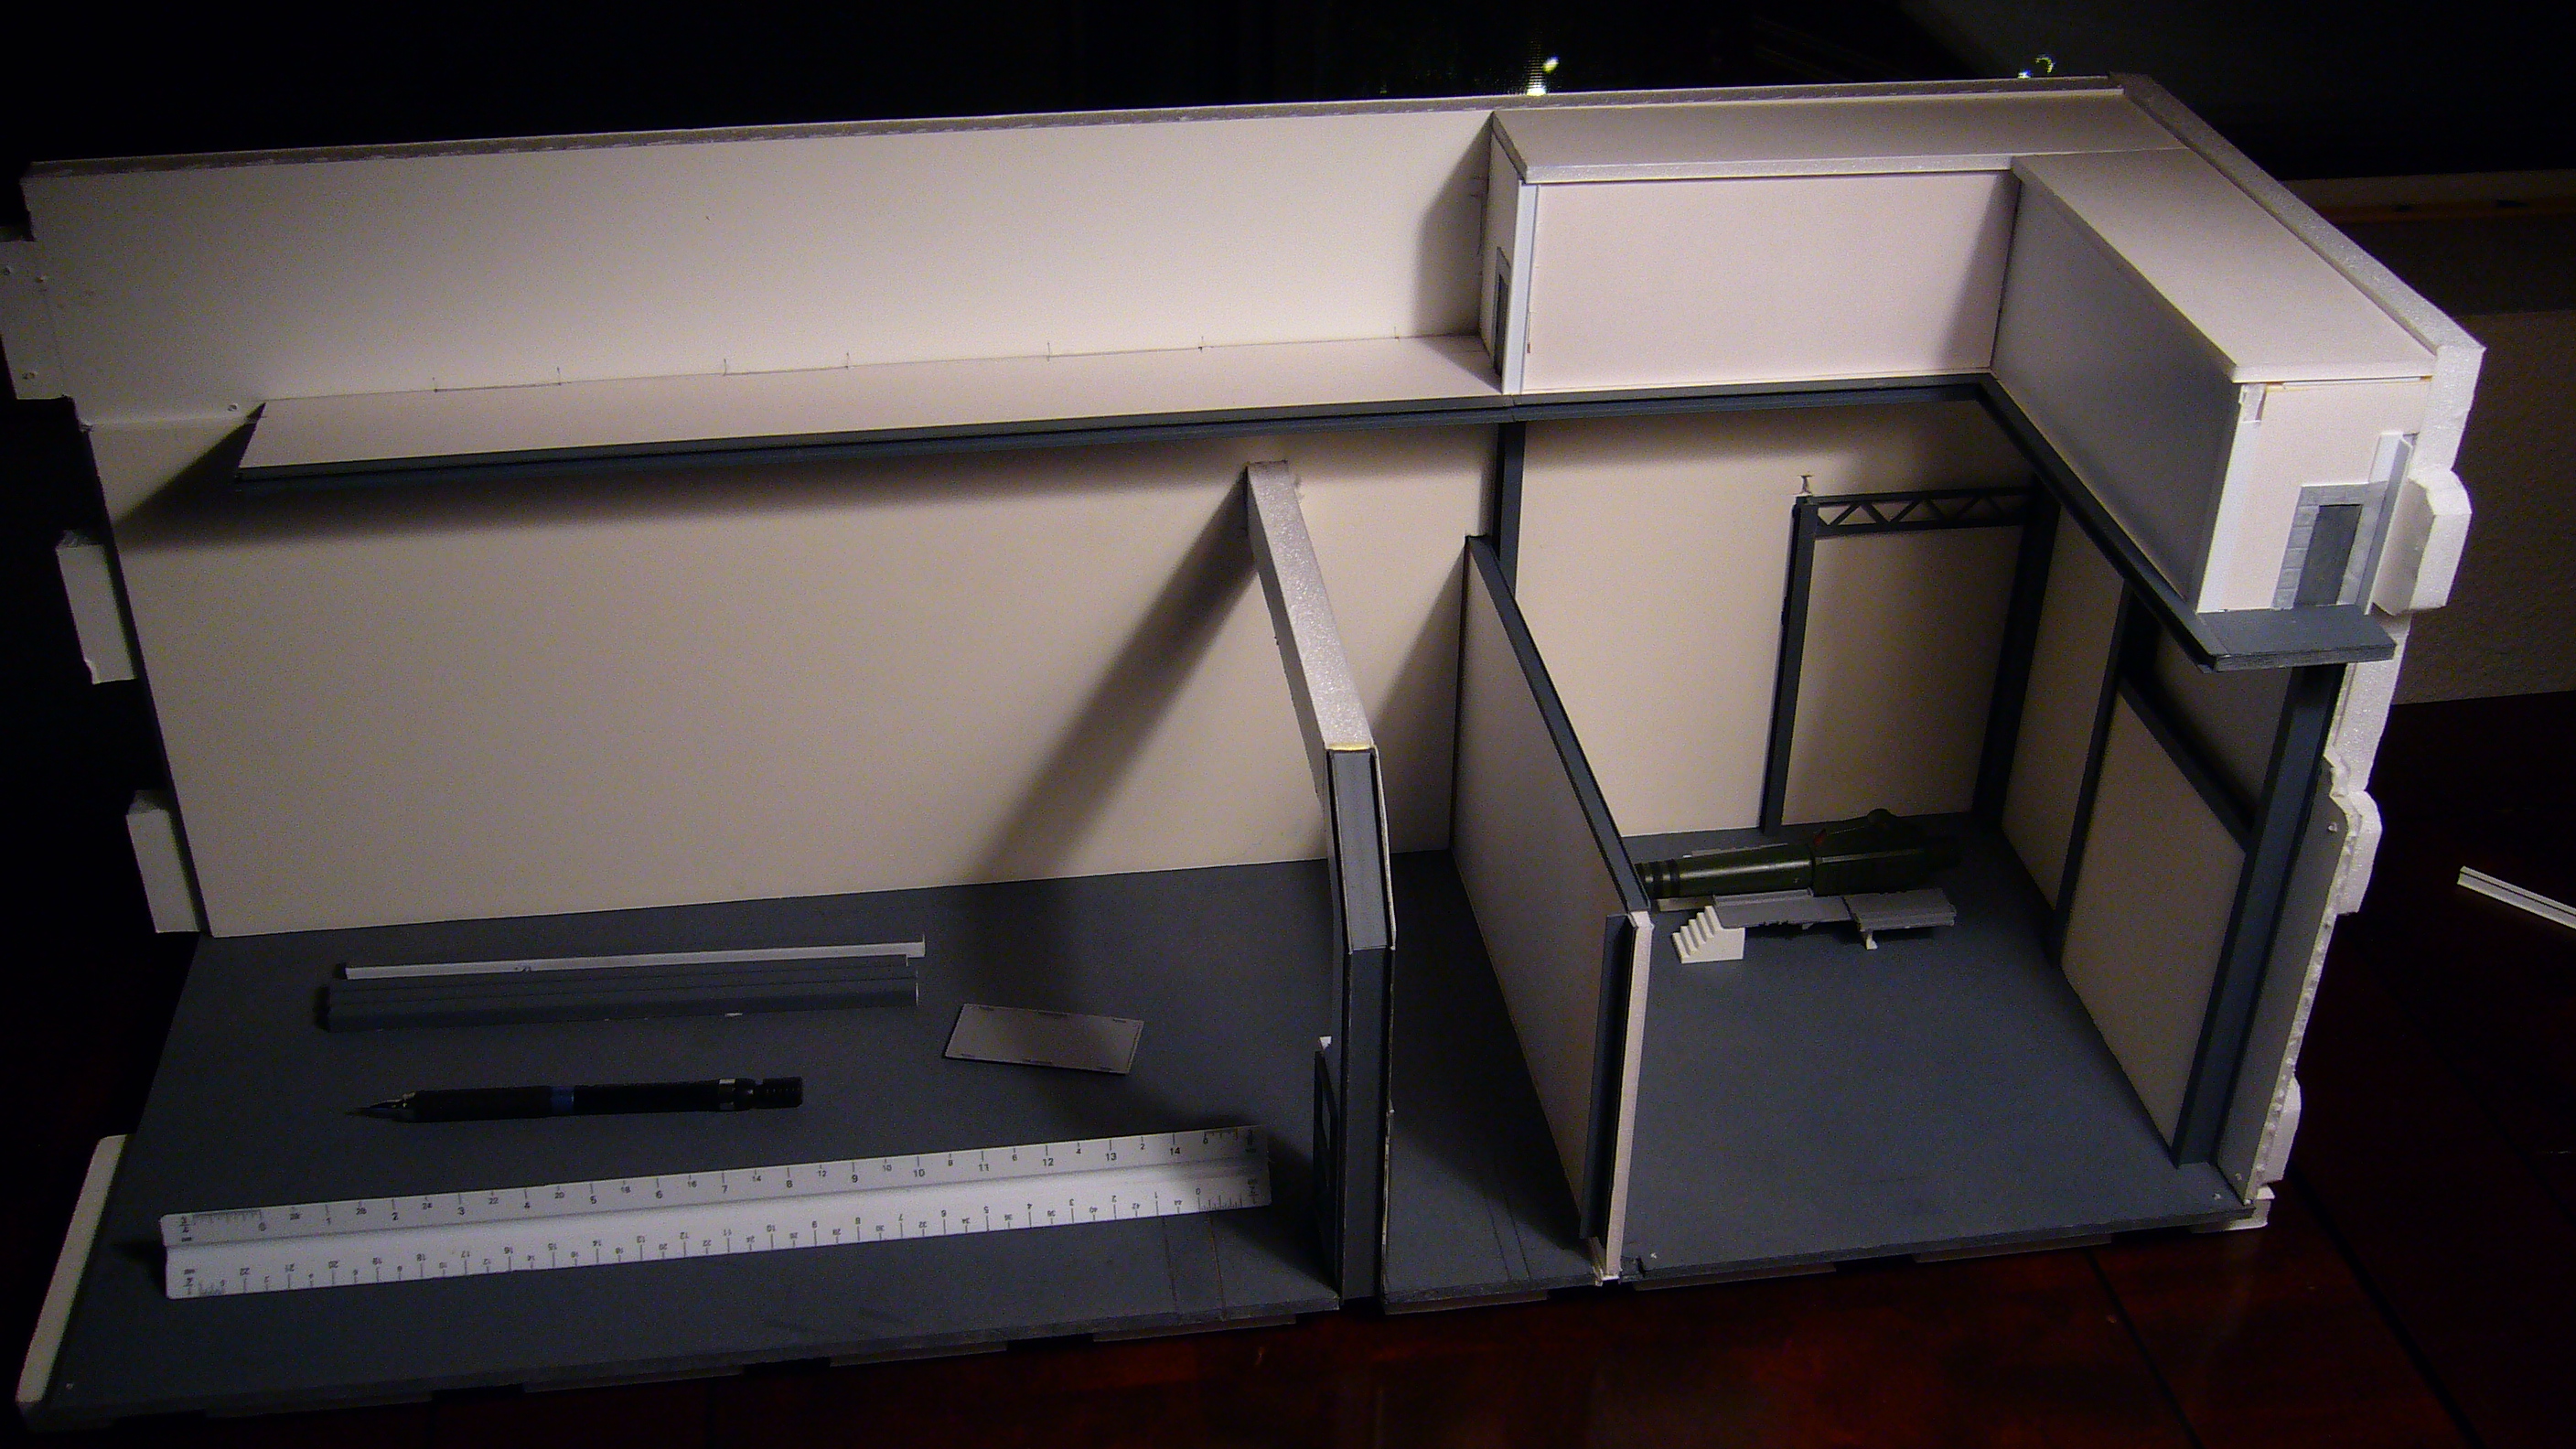
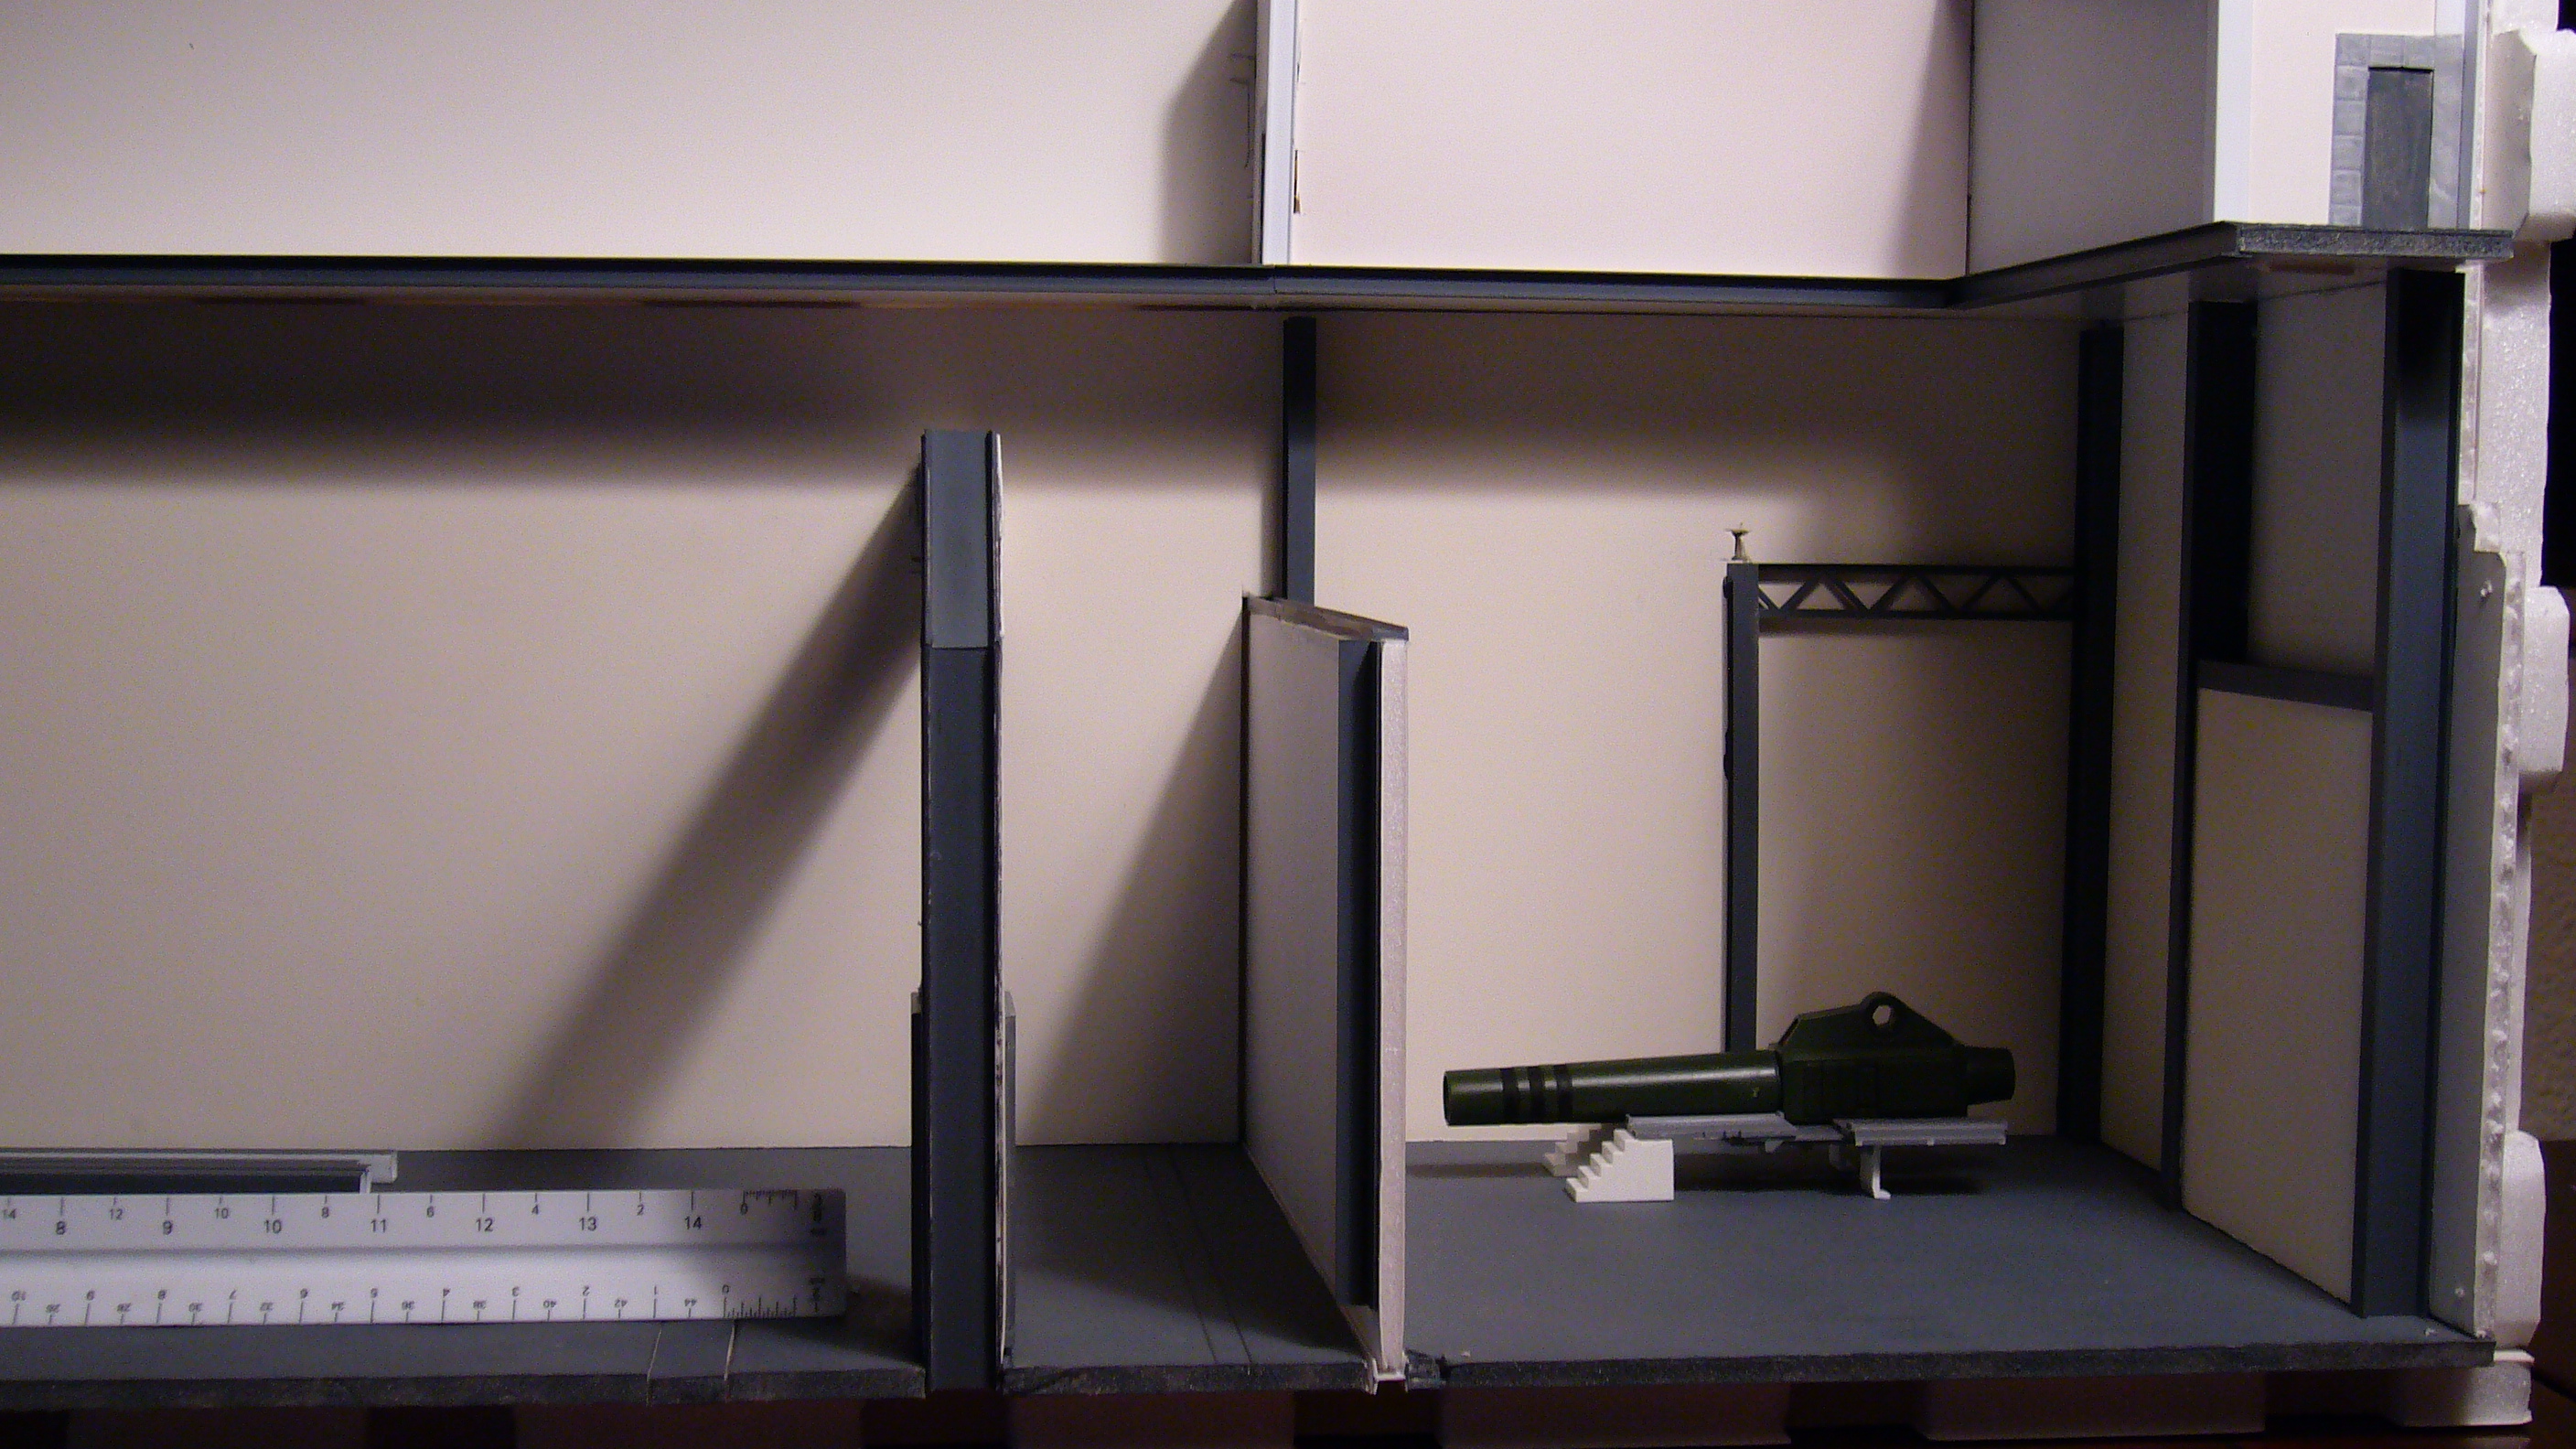
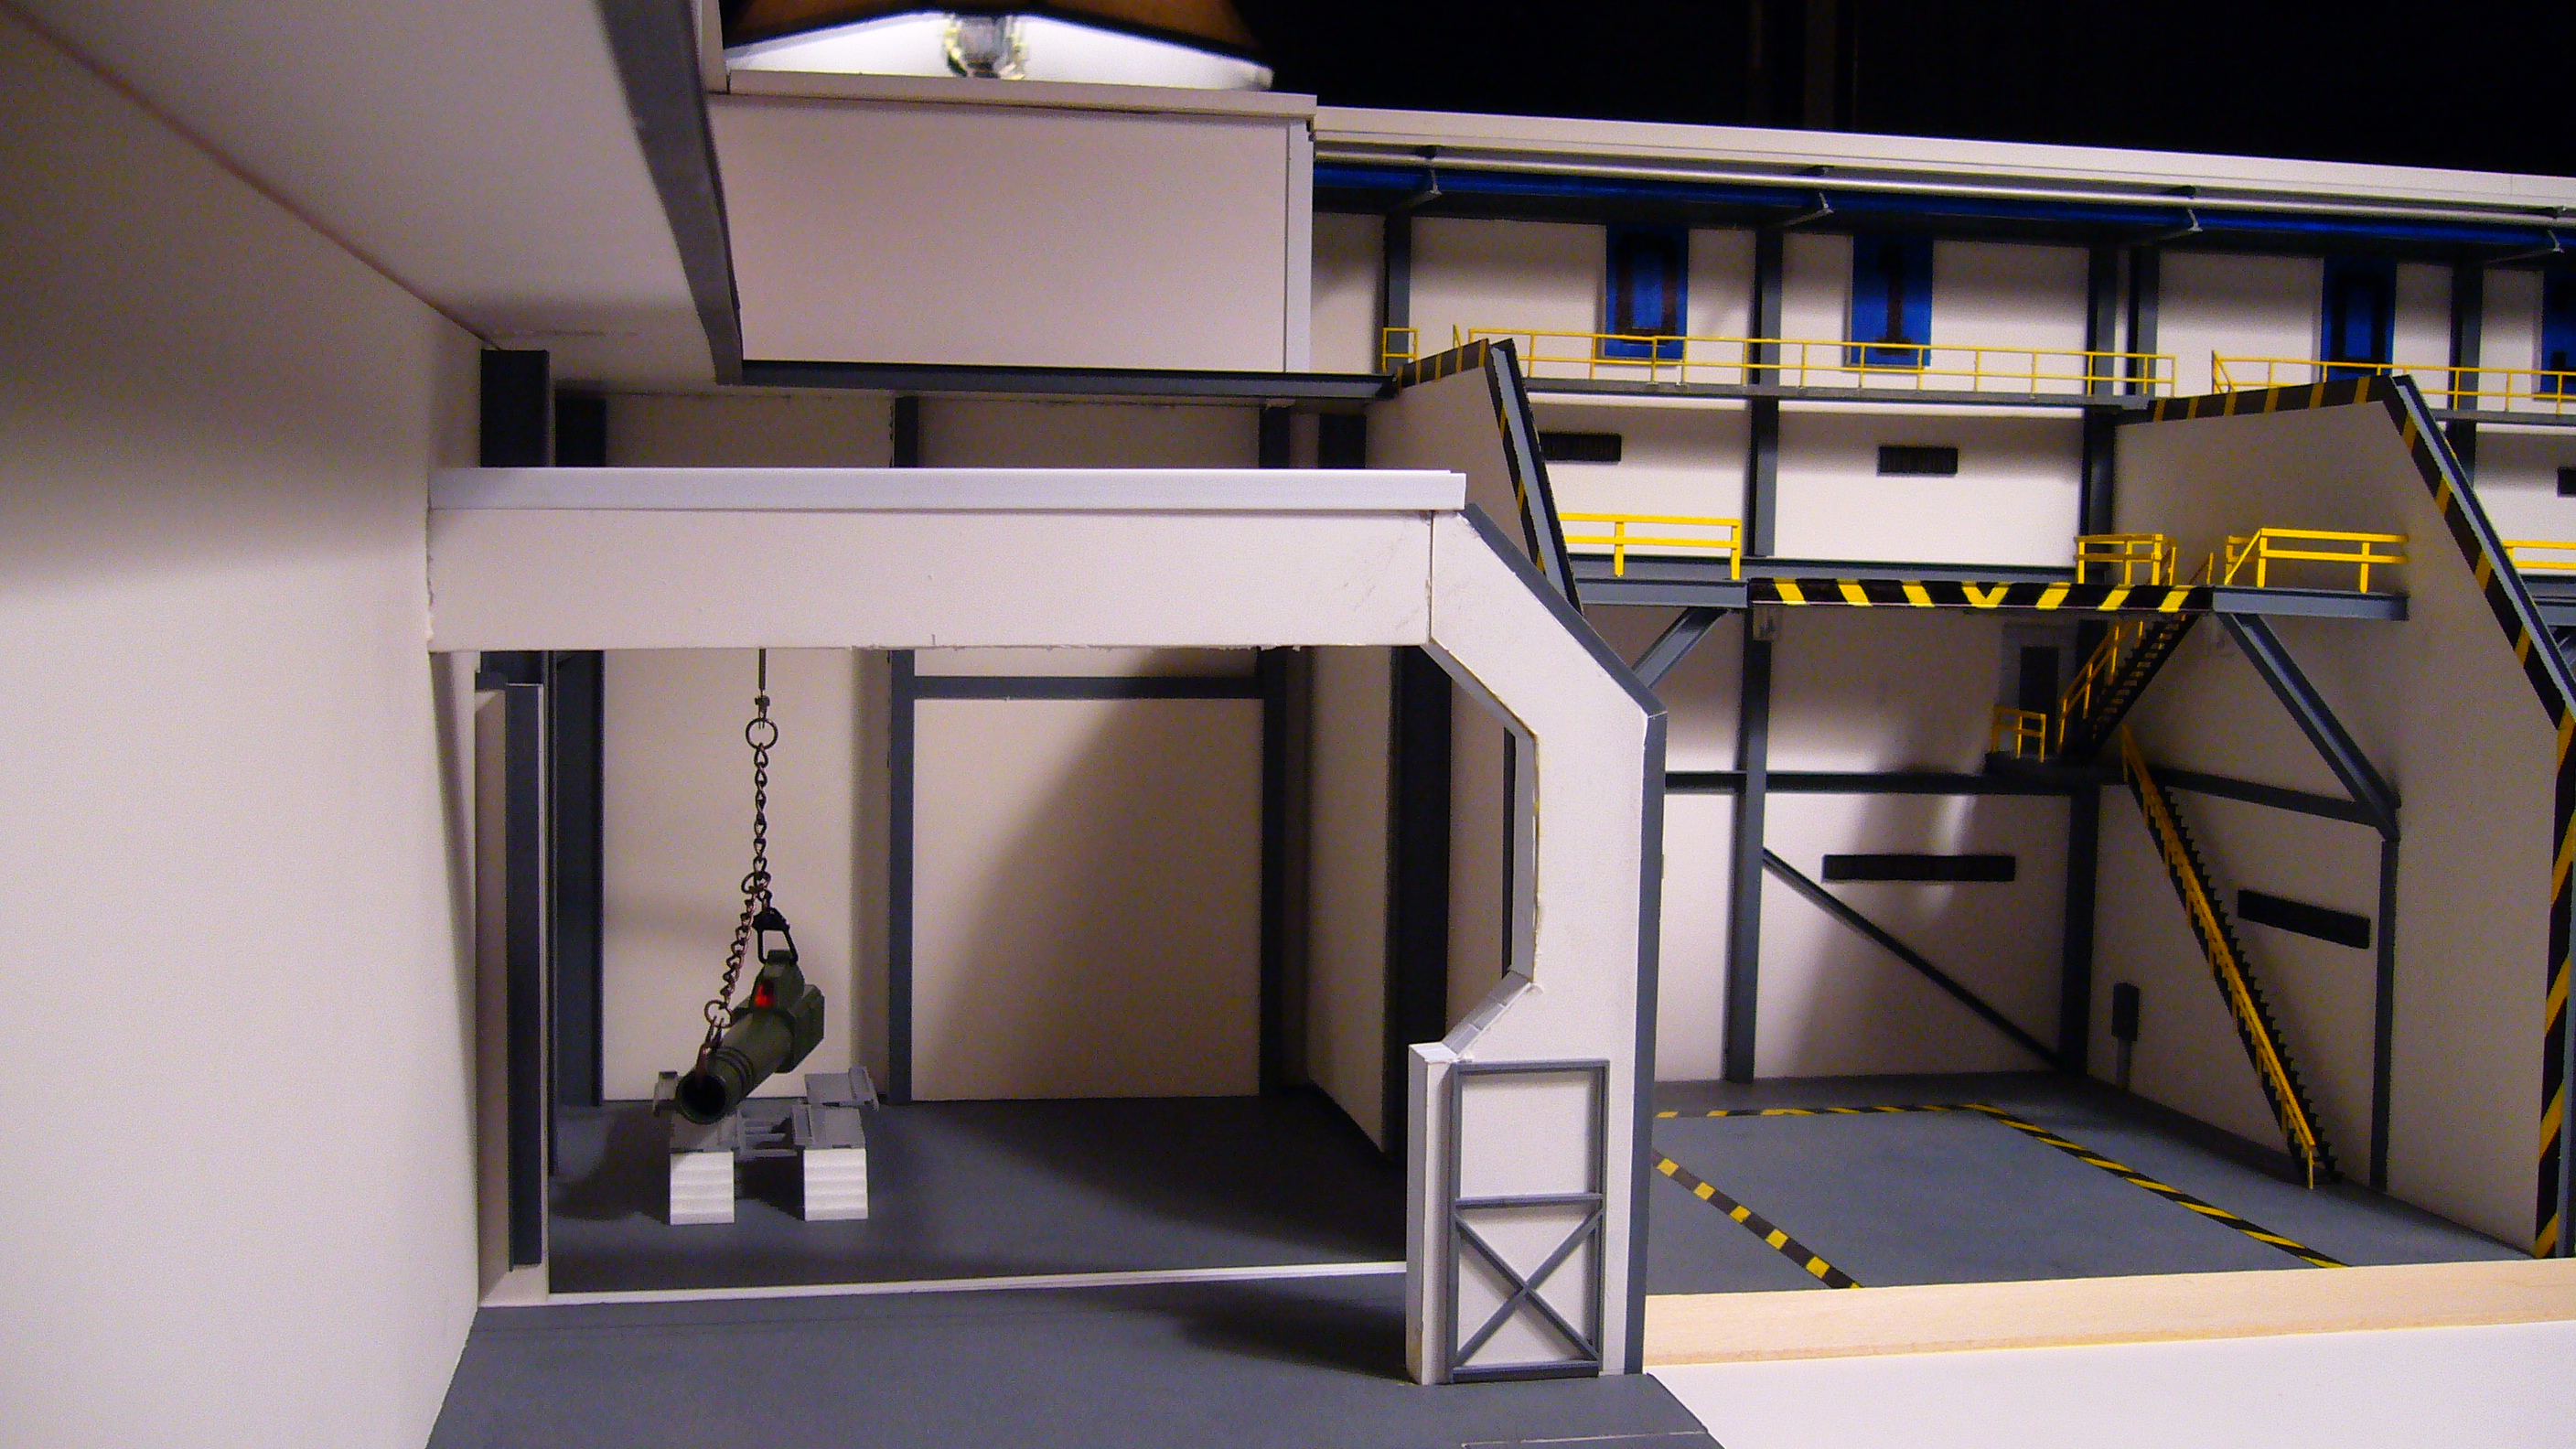
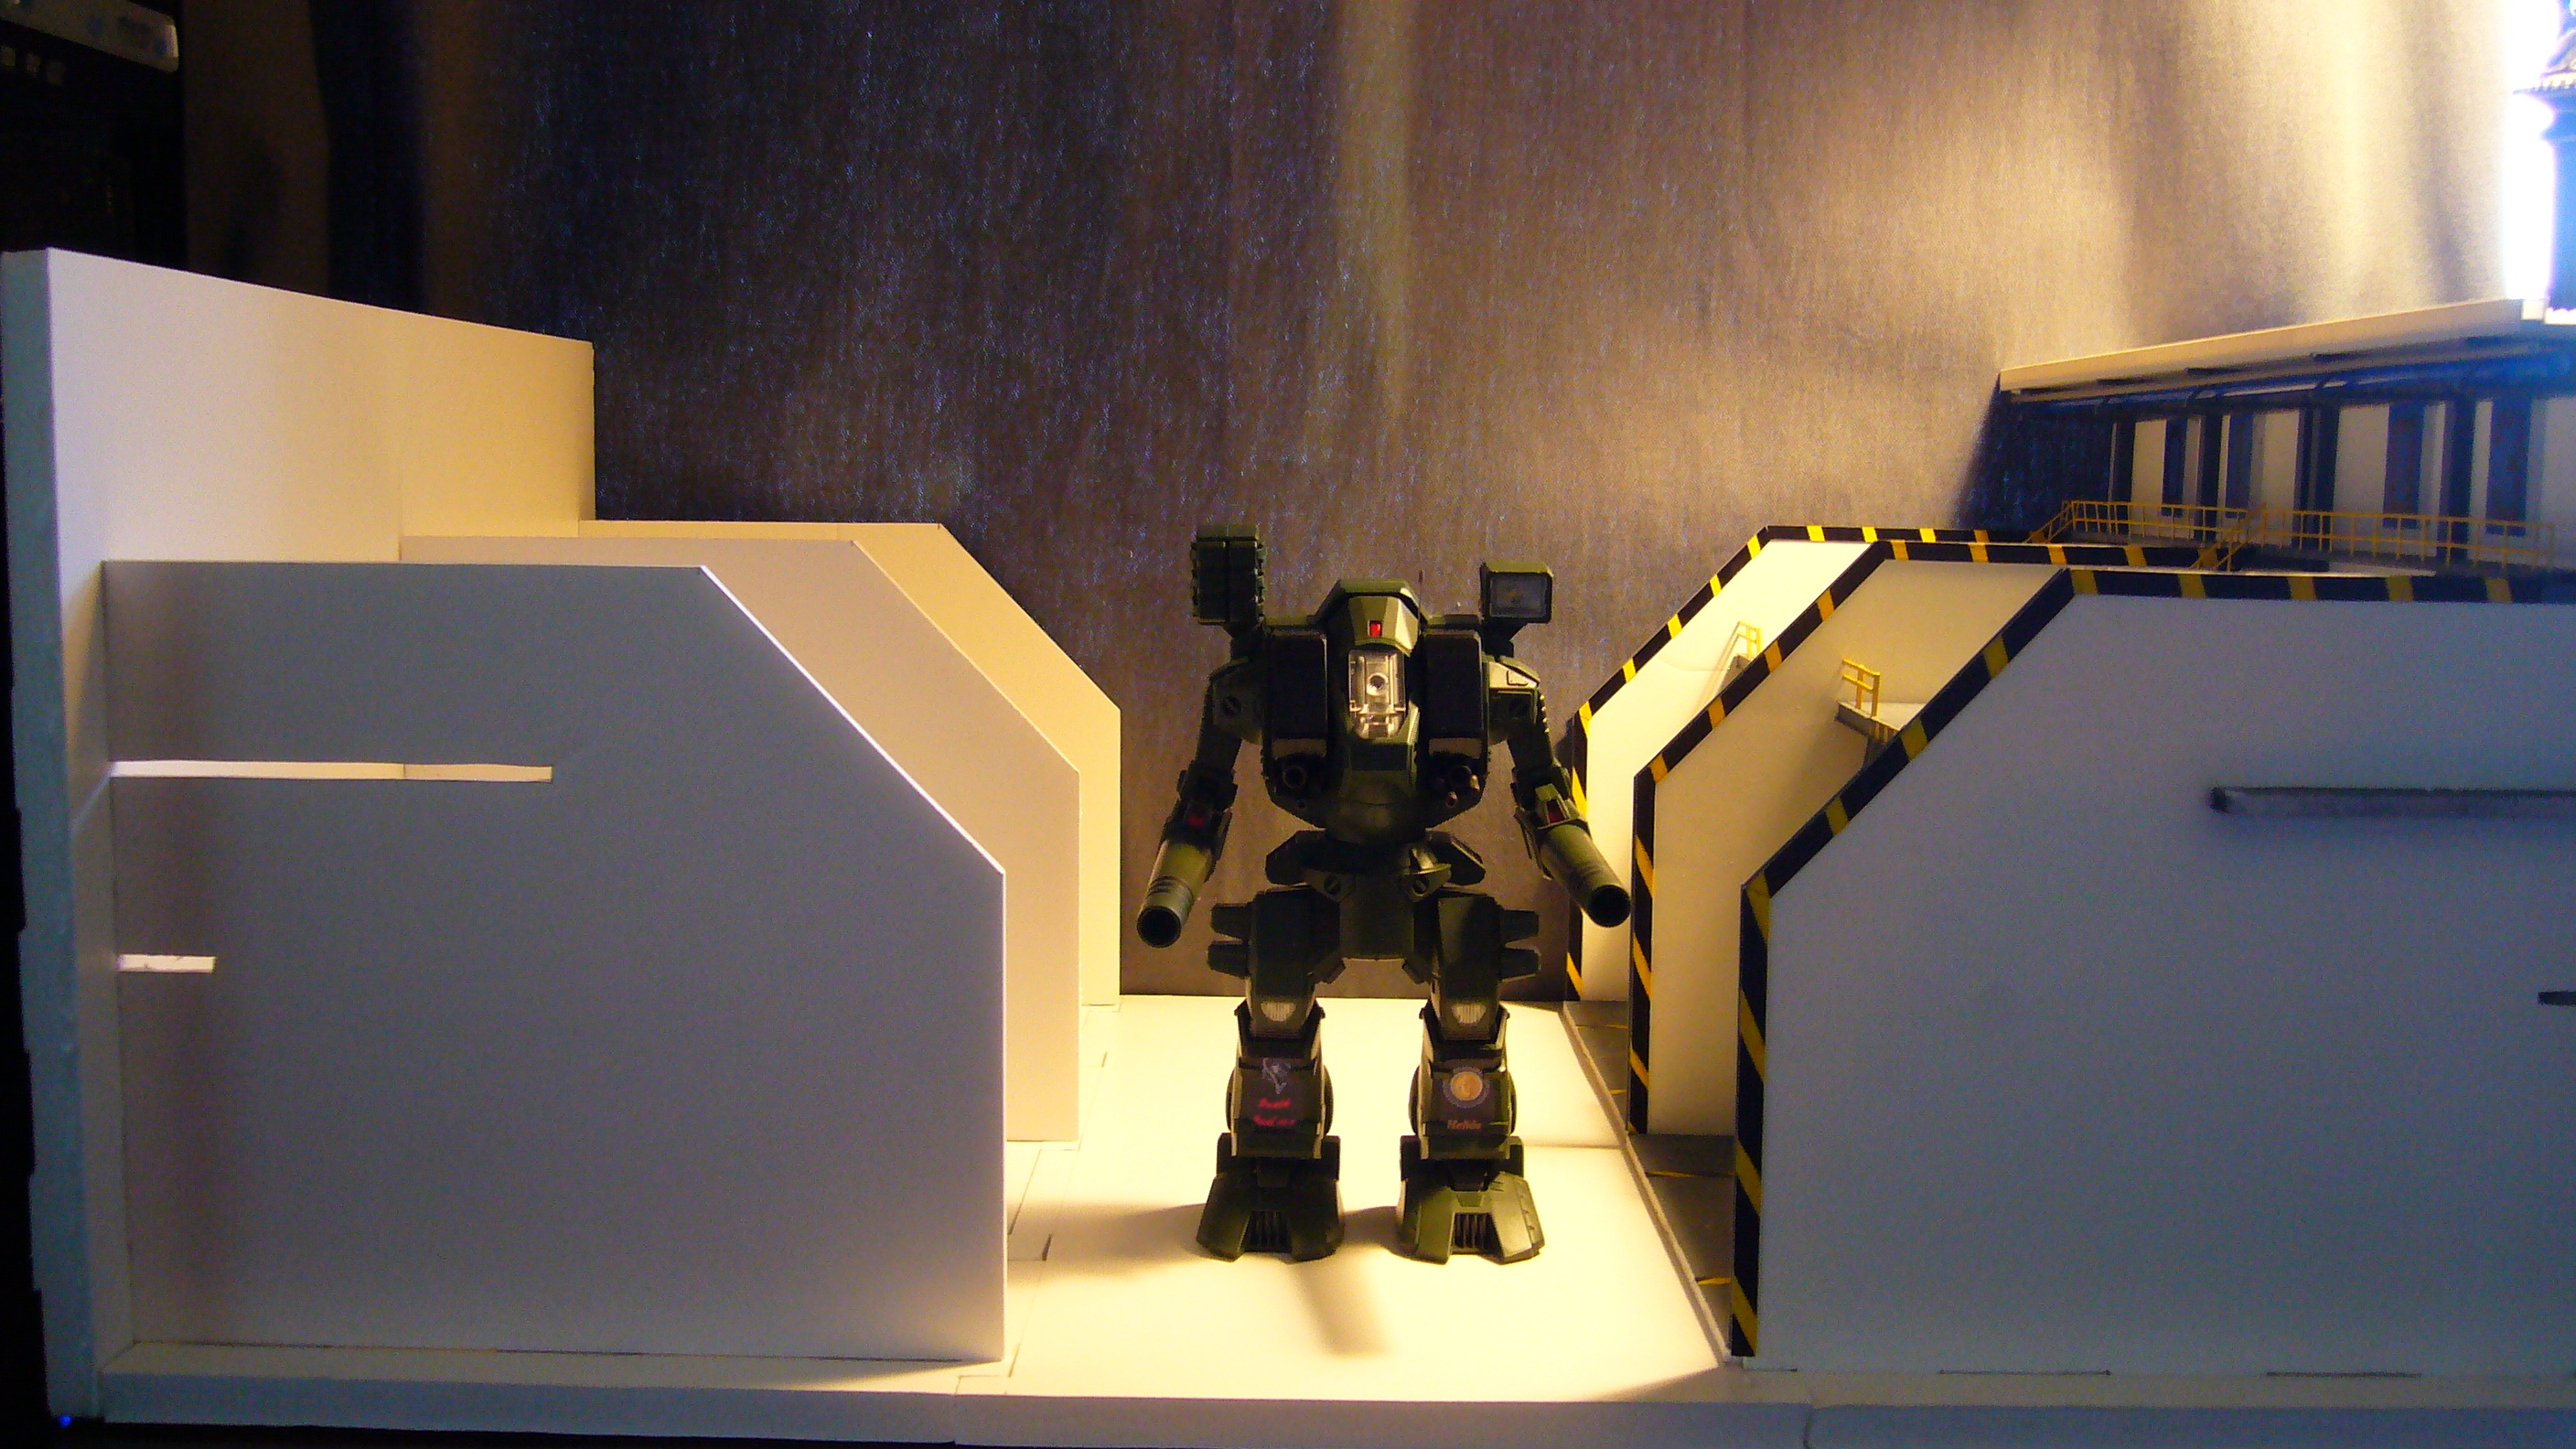
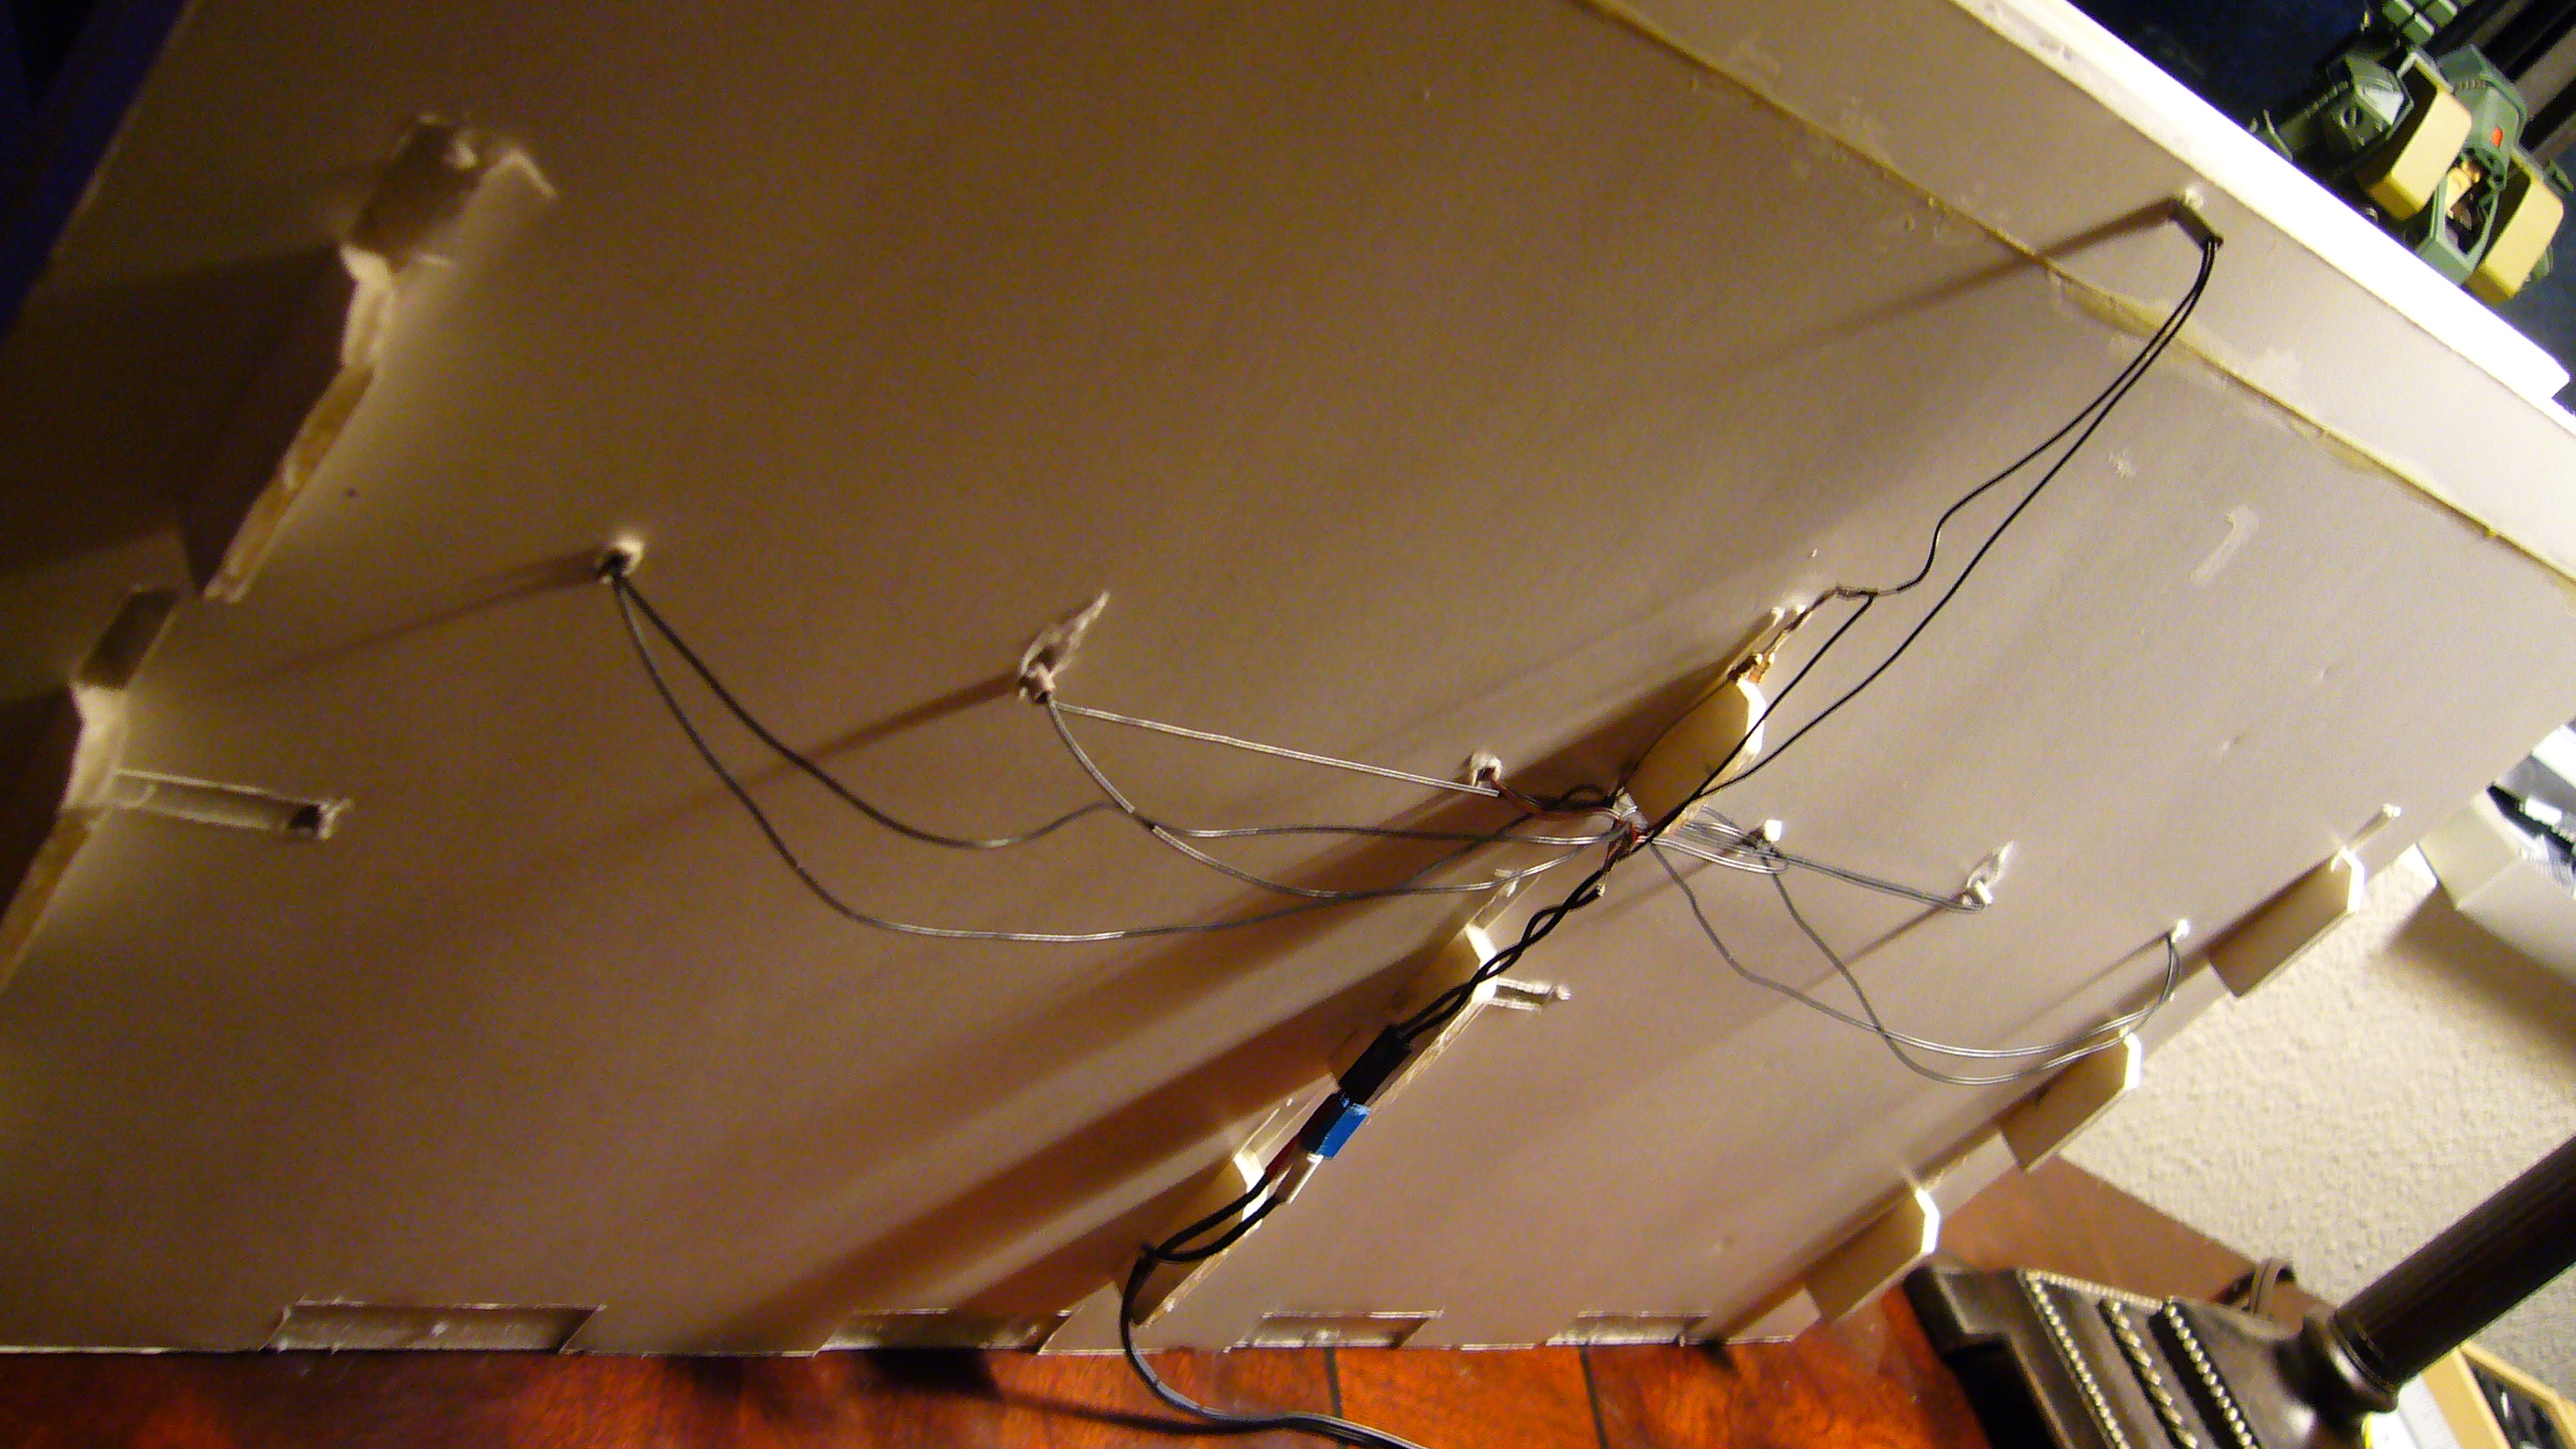
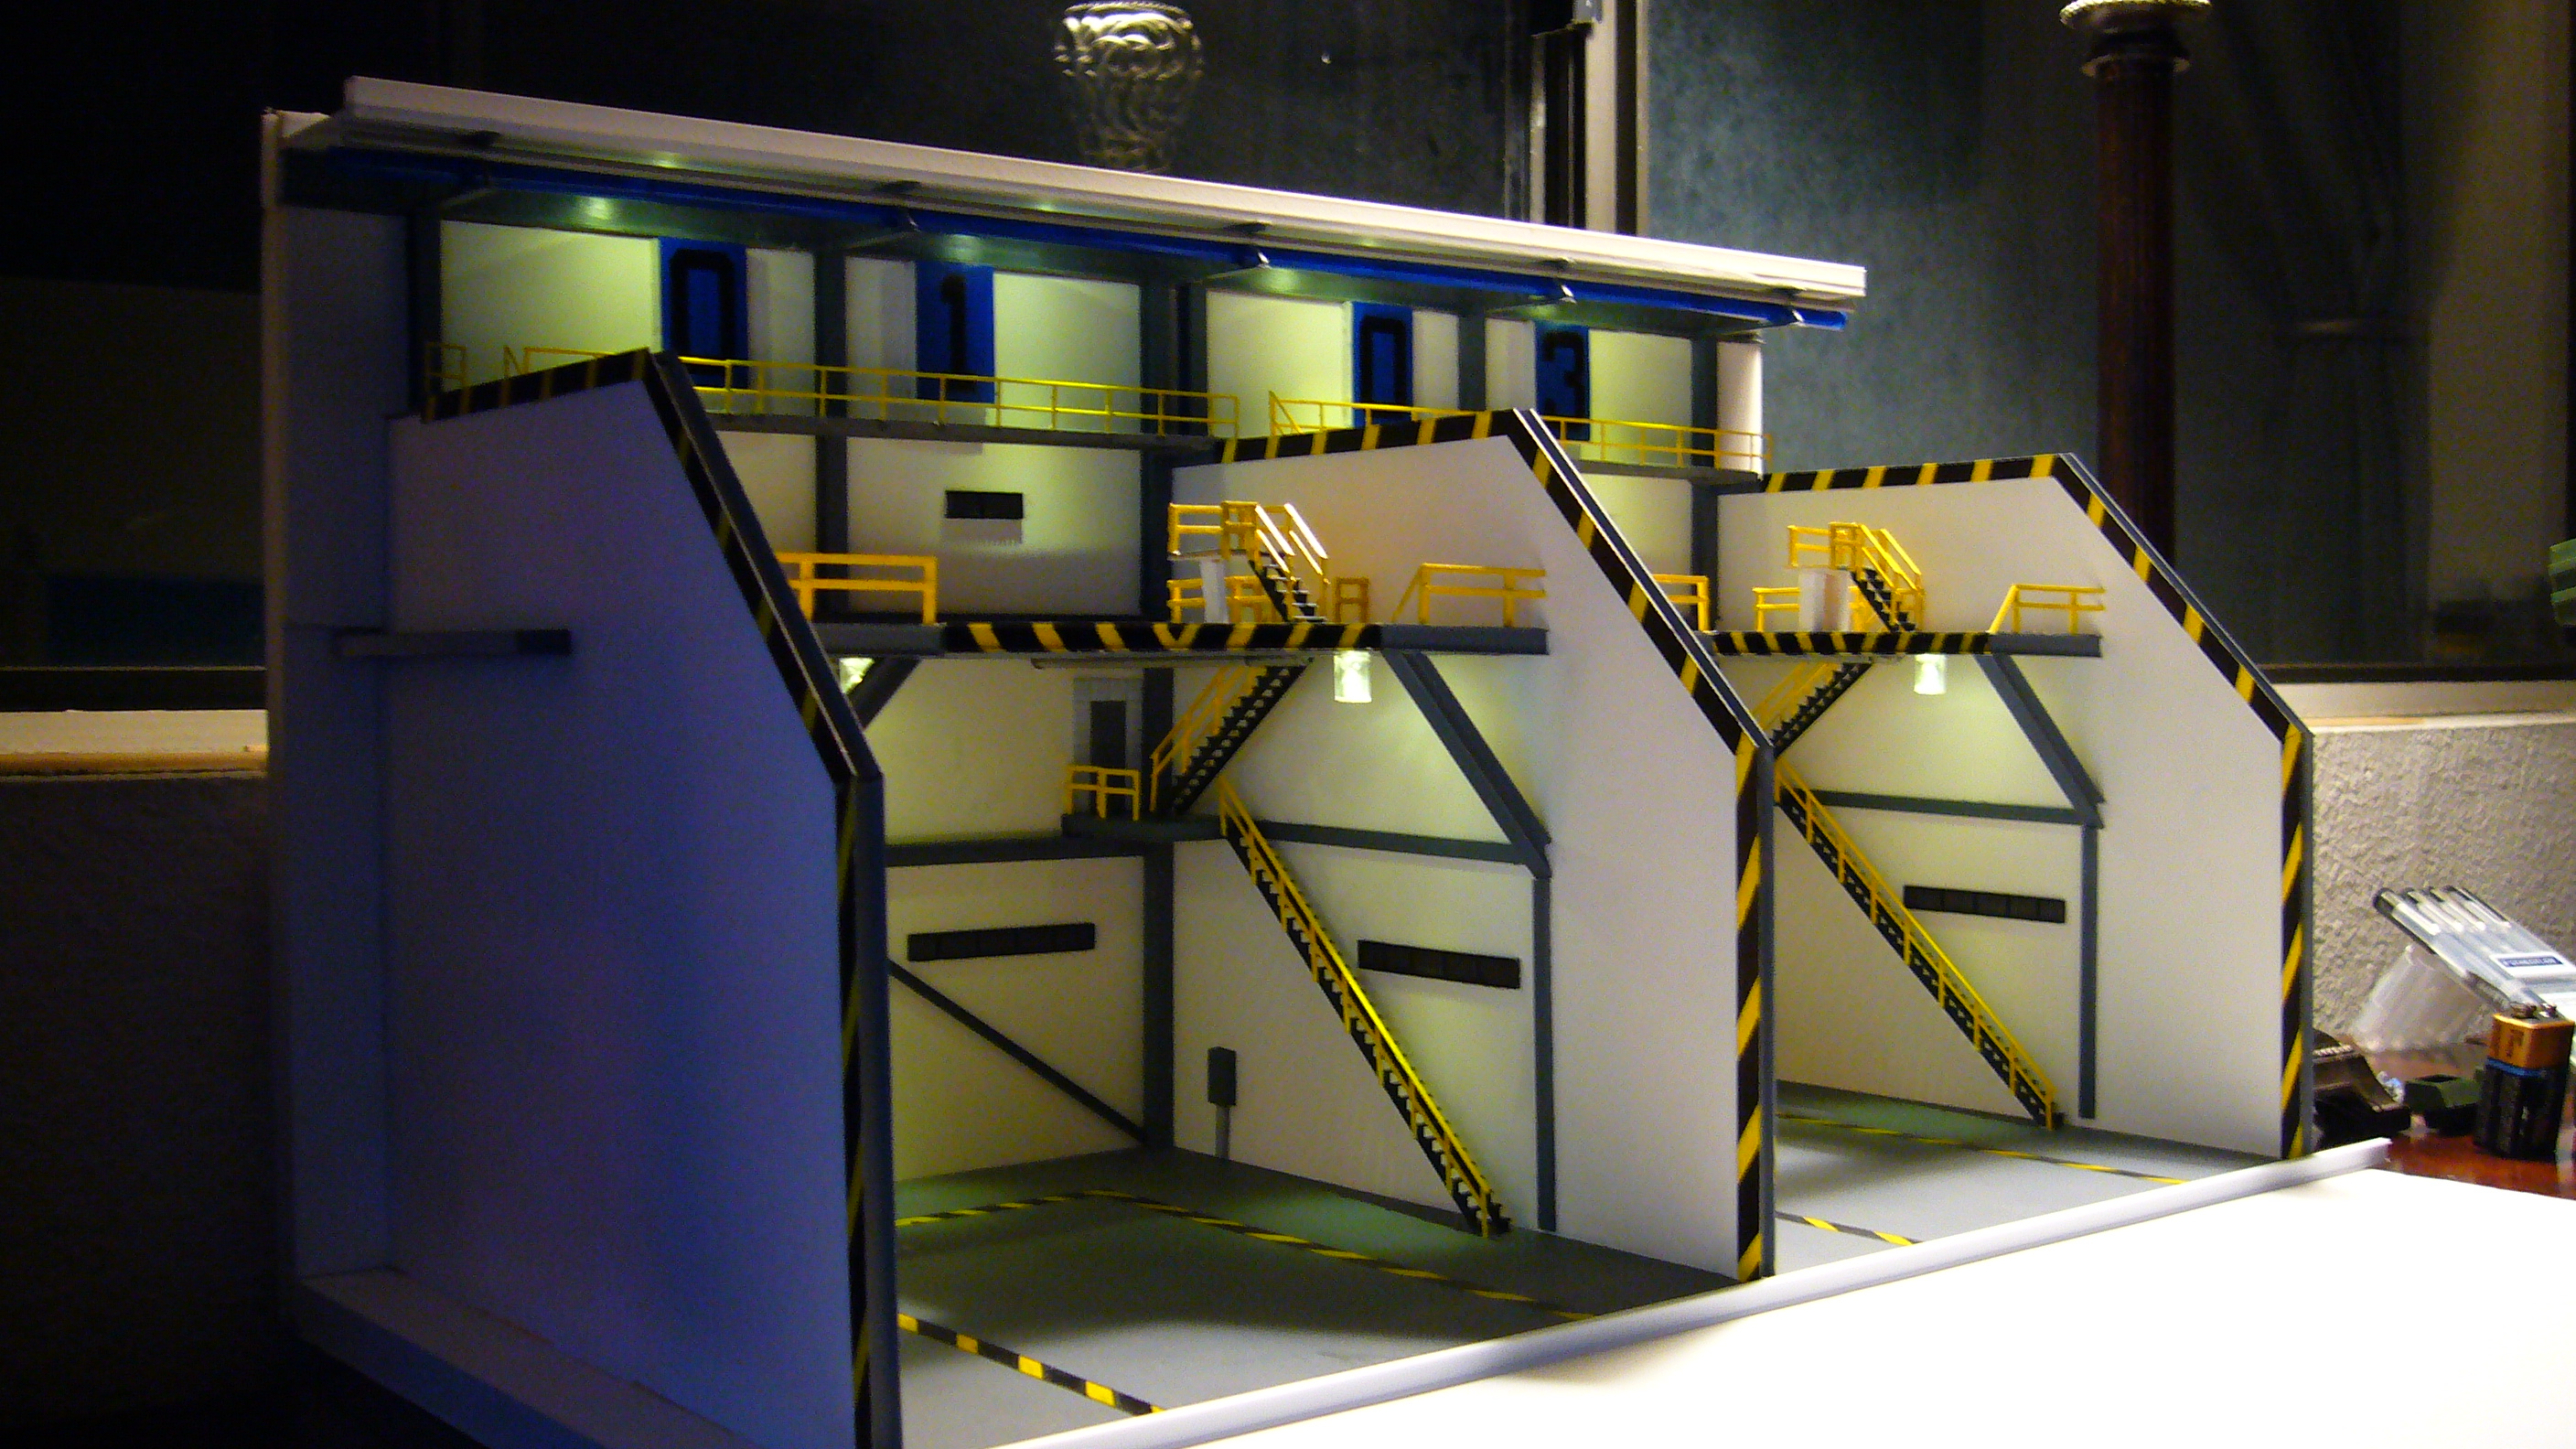
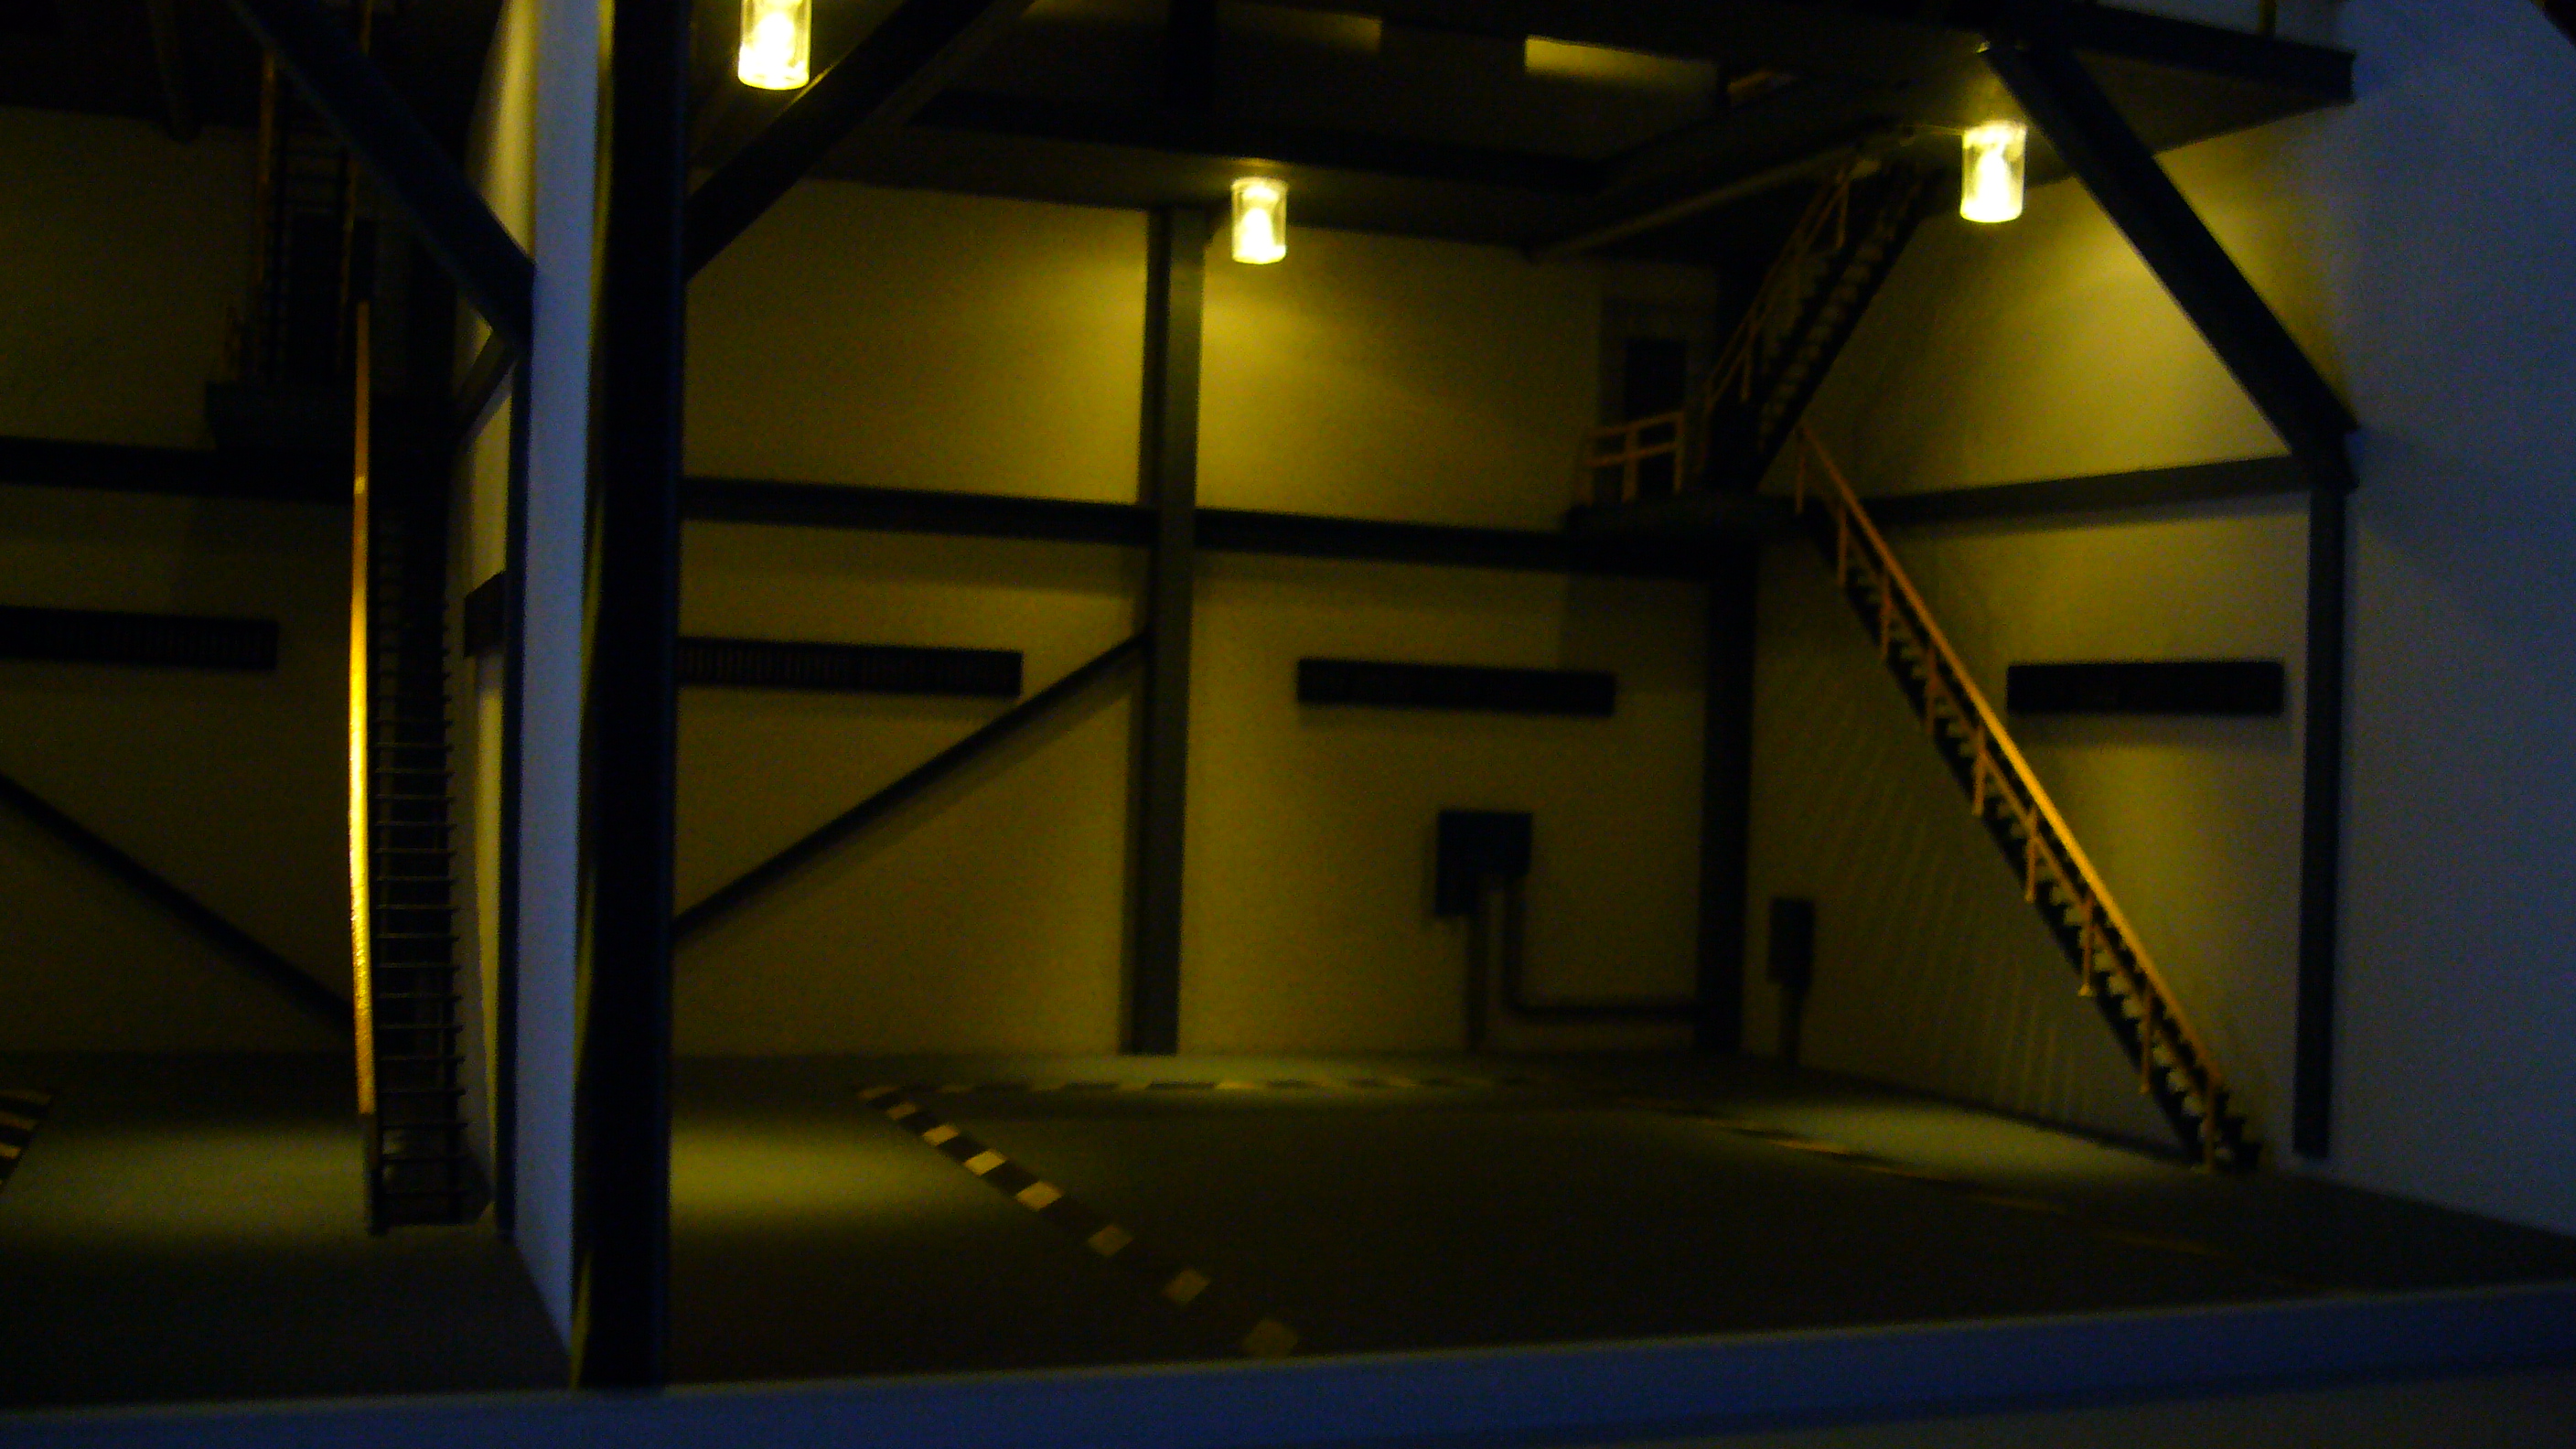
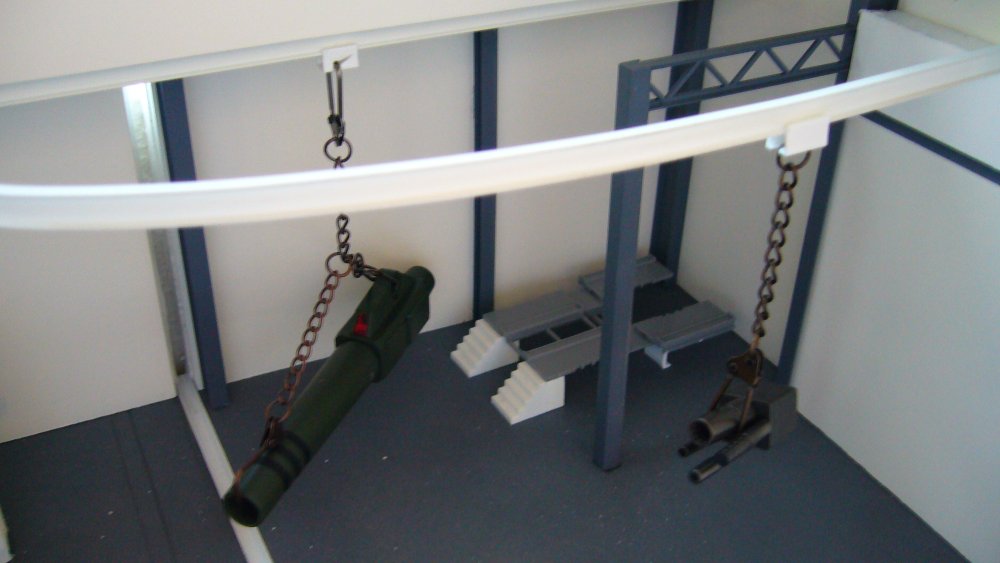
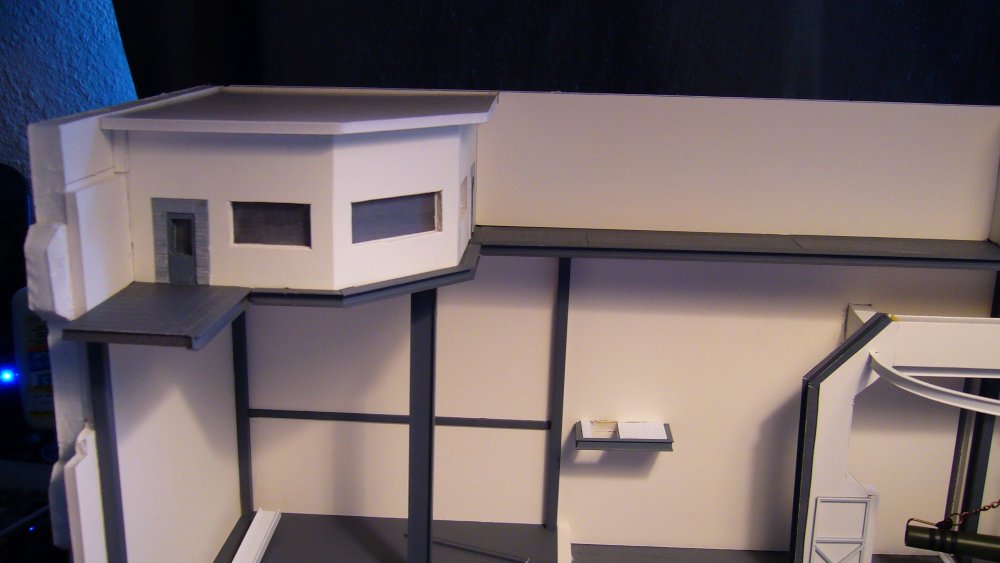
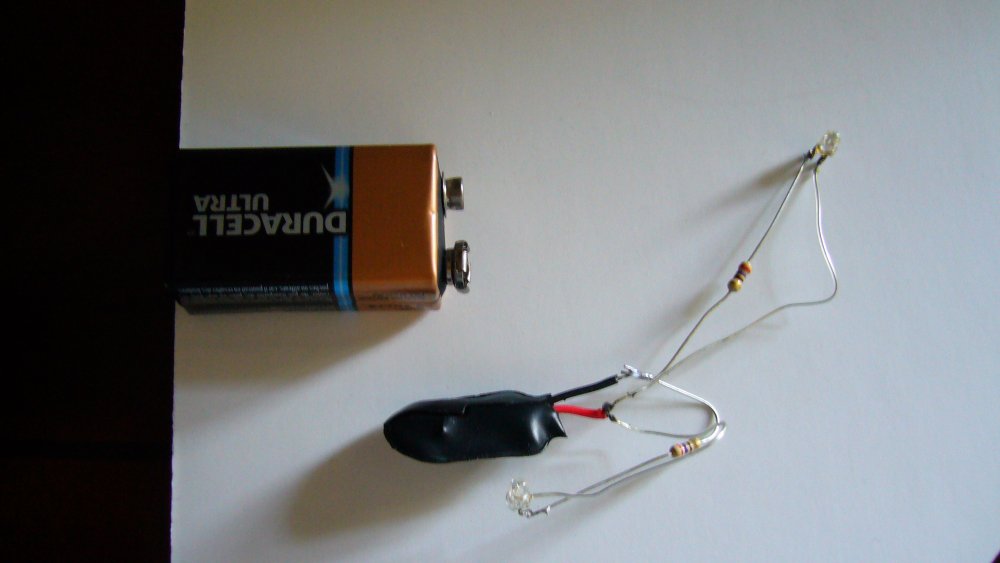
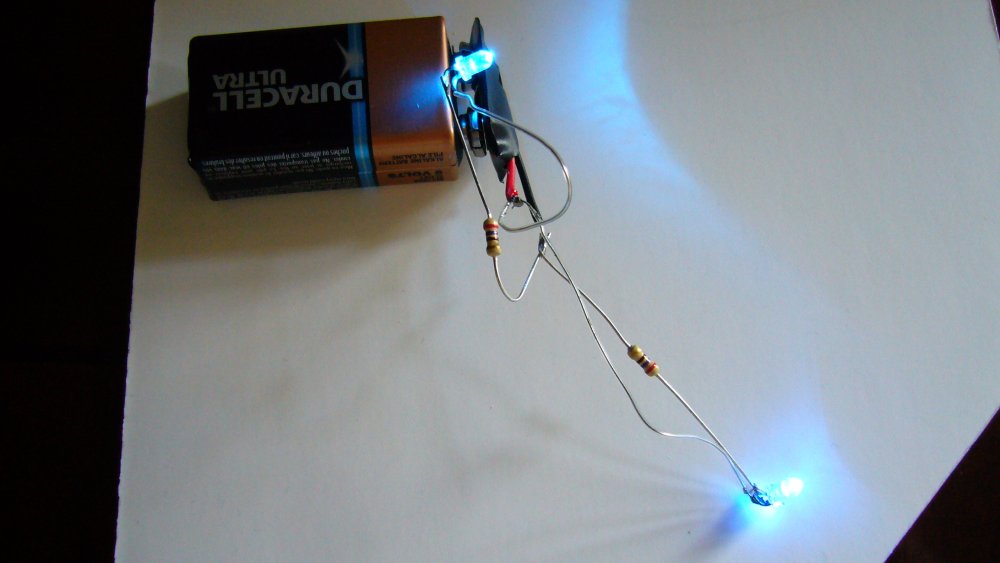
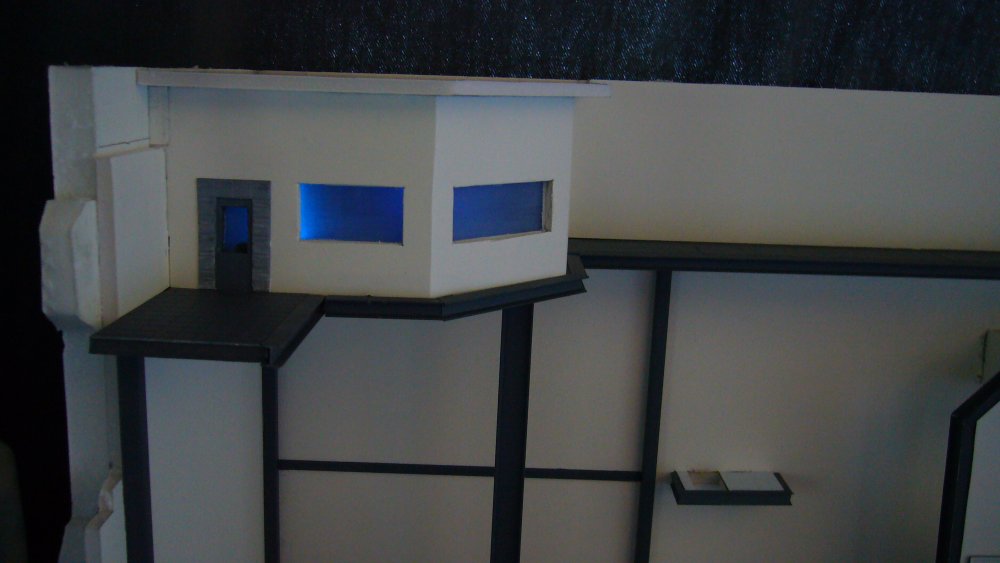
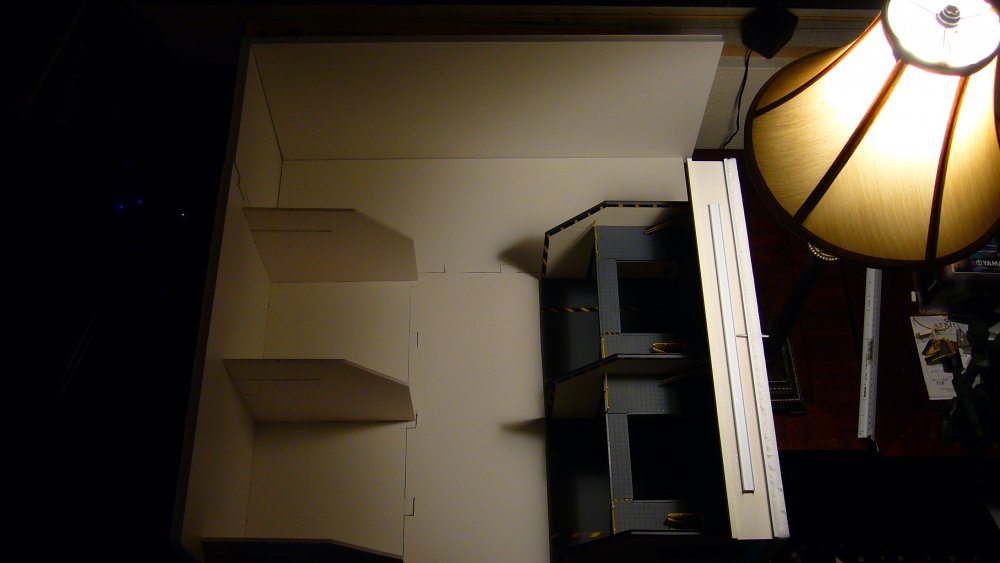
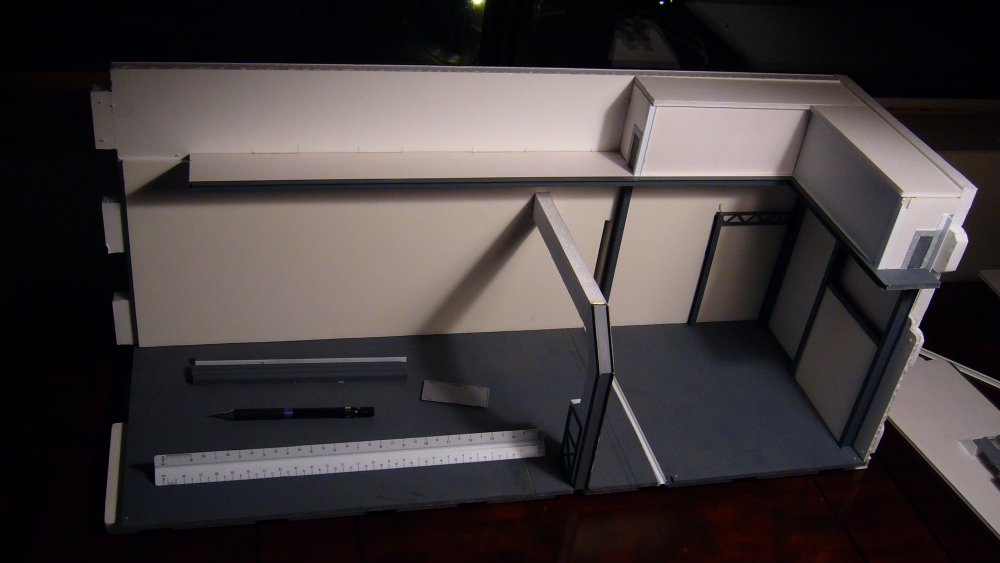
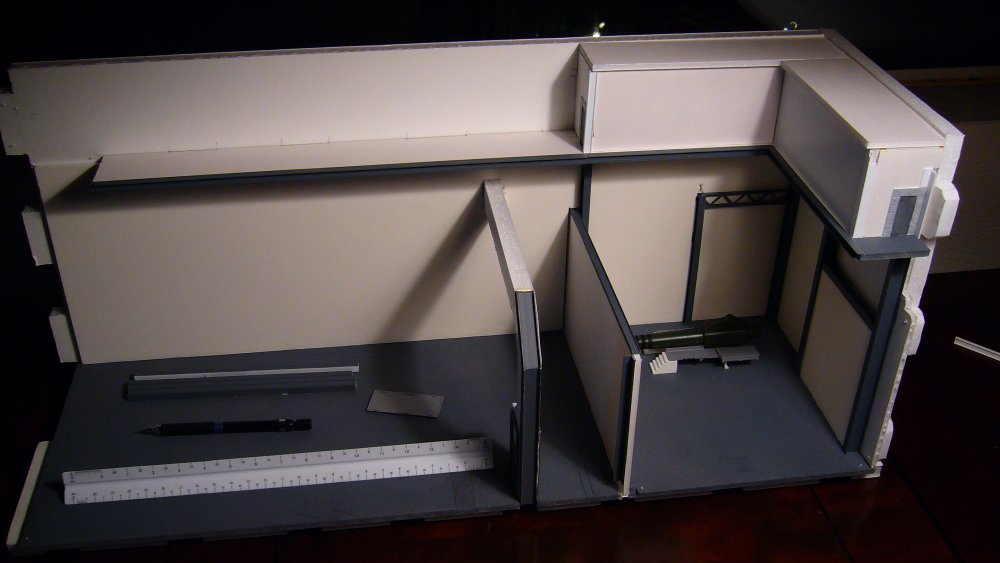
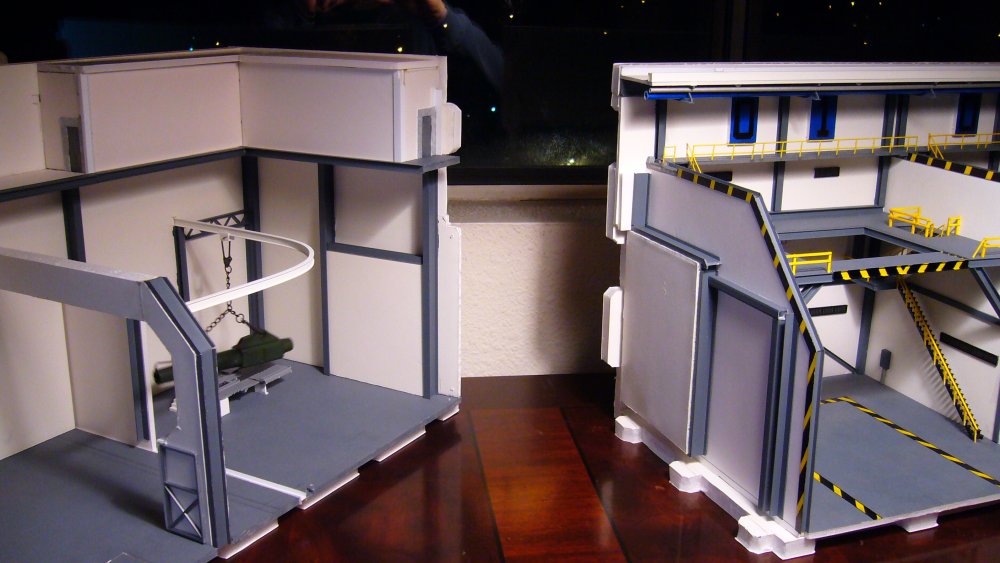
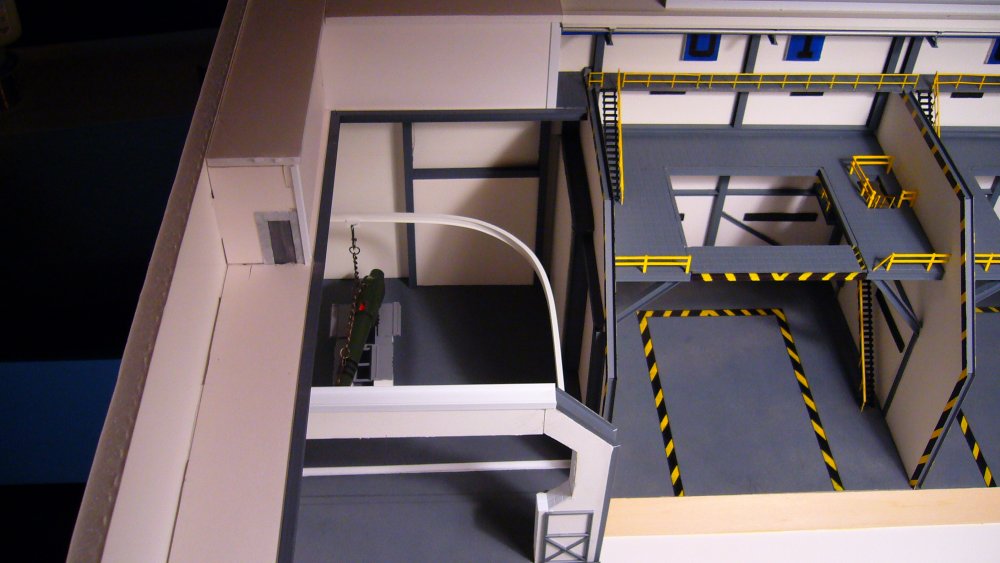
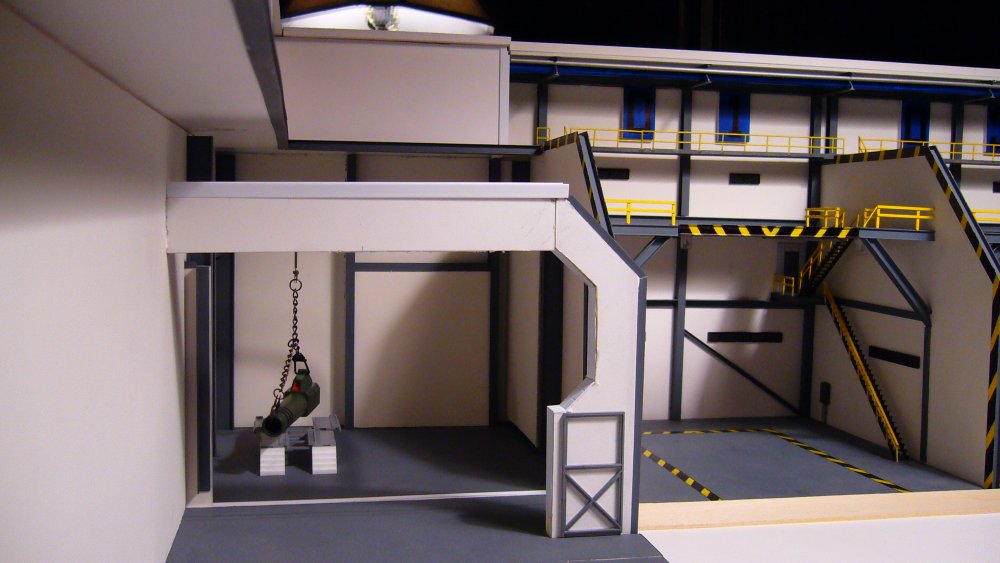
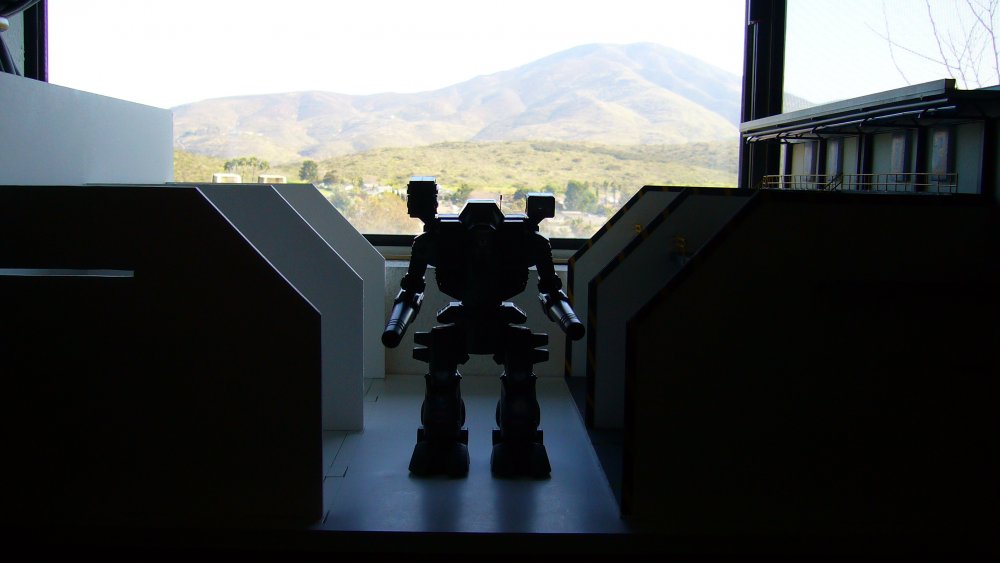
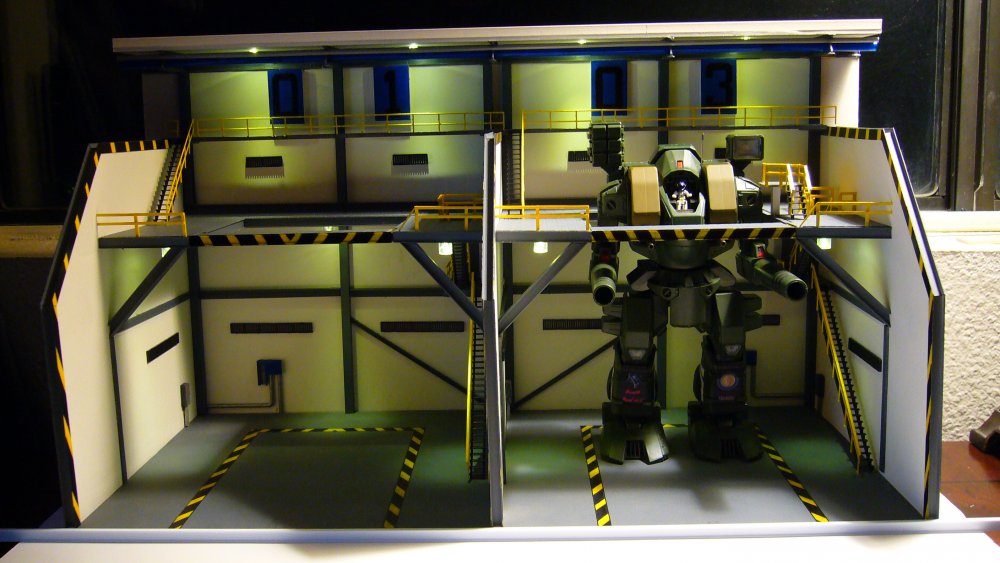
Back with some more progress to the build. I have made some changes to the weapons repair/ammo prep stations. The first picture shows how the stations used to look like and the changes made are shown is the pictures there after. I ran into a conflict with the crane structure as it was too close to the divider wall structure when mated with the duel hanger cell. I fixed this problem by moving the main crane structure and incorporated 2 crane systems out of the single structure. Now the main beam is used for repair of the "big guns" and is more structural compatible for the weight/size ratio of the guns. The initial crane rail is now connected to the same wall as the main but now supplies support for moving/loading ammo and ammo containers (chest packs, shoulder packs, gun clusters etc.) as shown in the picture below. I also build a control room with windows and doors made with clear sheet plastic that was sanded with polishing sand paper to give it a milky look. I then soldered up a simple light harness with LED's, resistors, and a 9V battery to perform a light test in the control room. After the test I decided I will need at least one more Blue LED for the desired lighting. This is all for now but as always I will see you next time with more progress and/or changes to the build. Blue


-
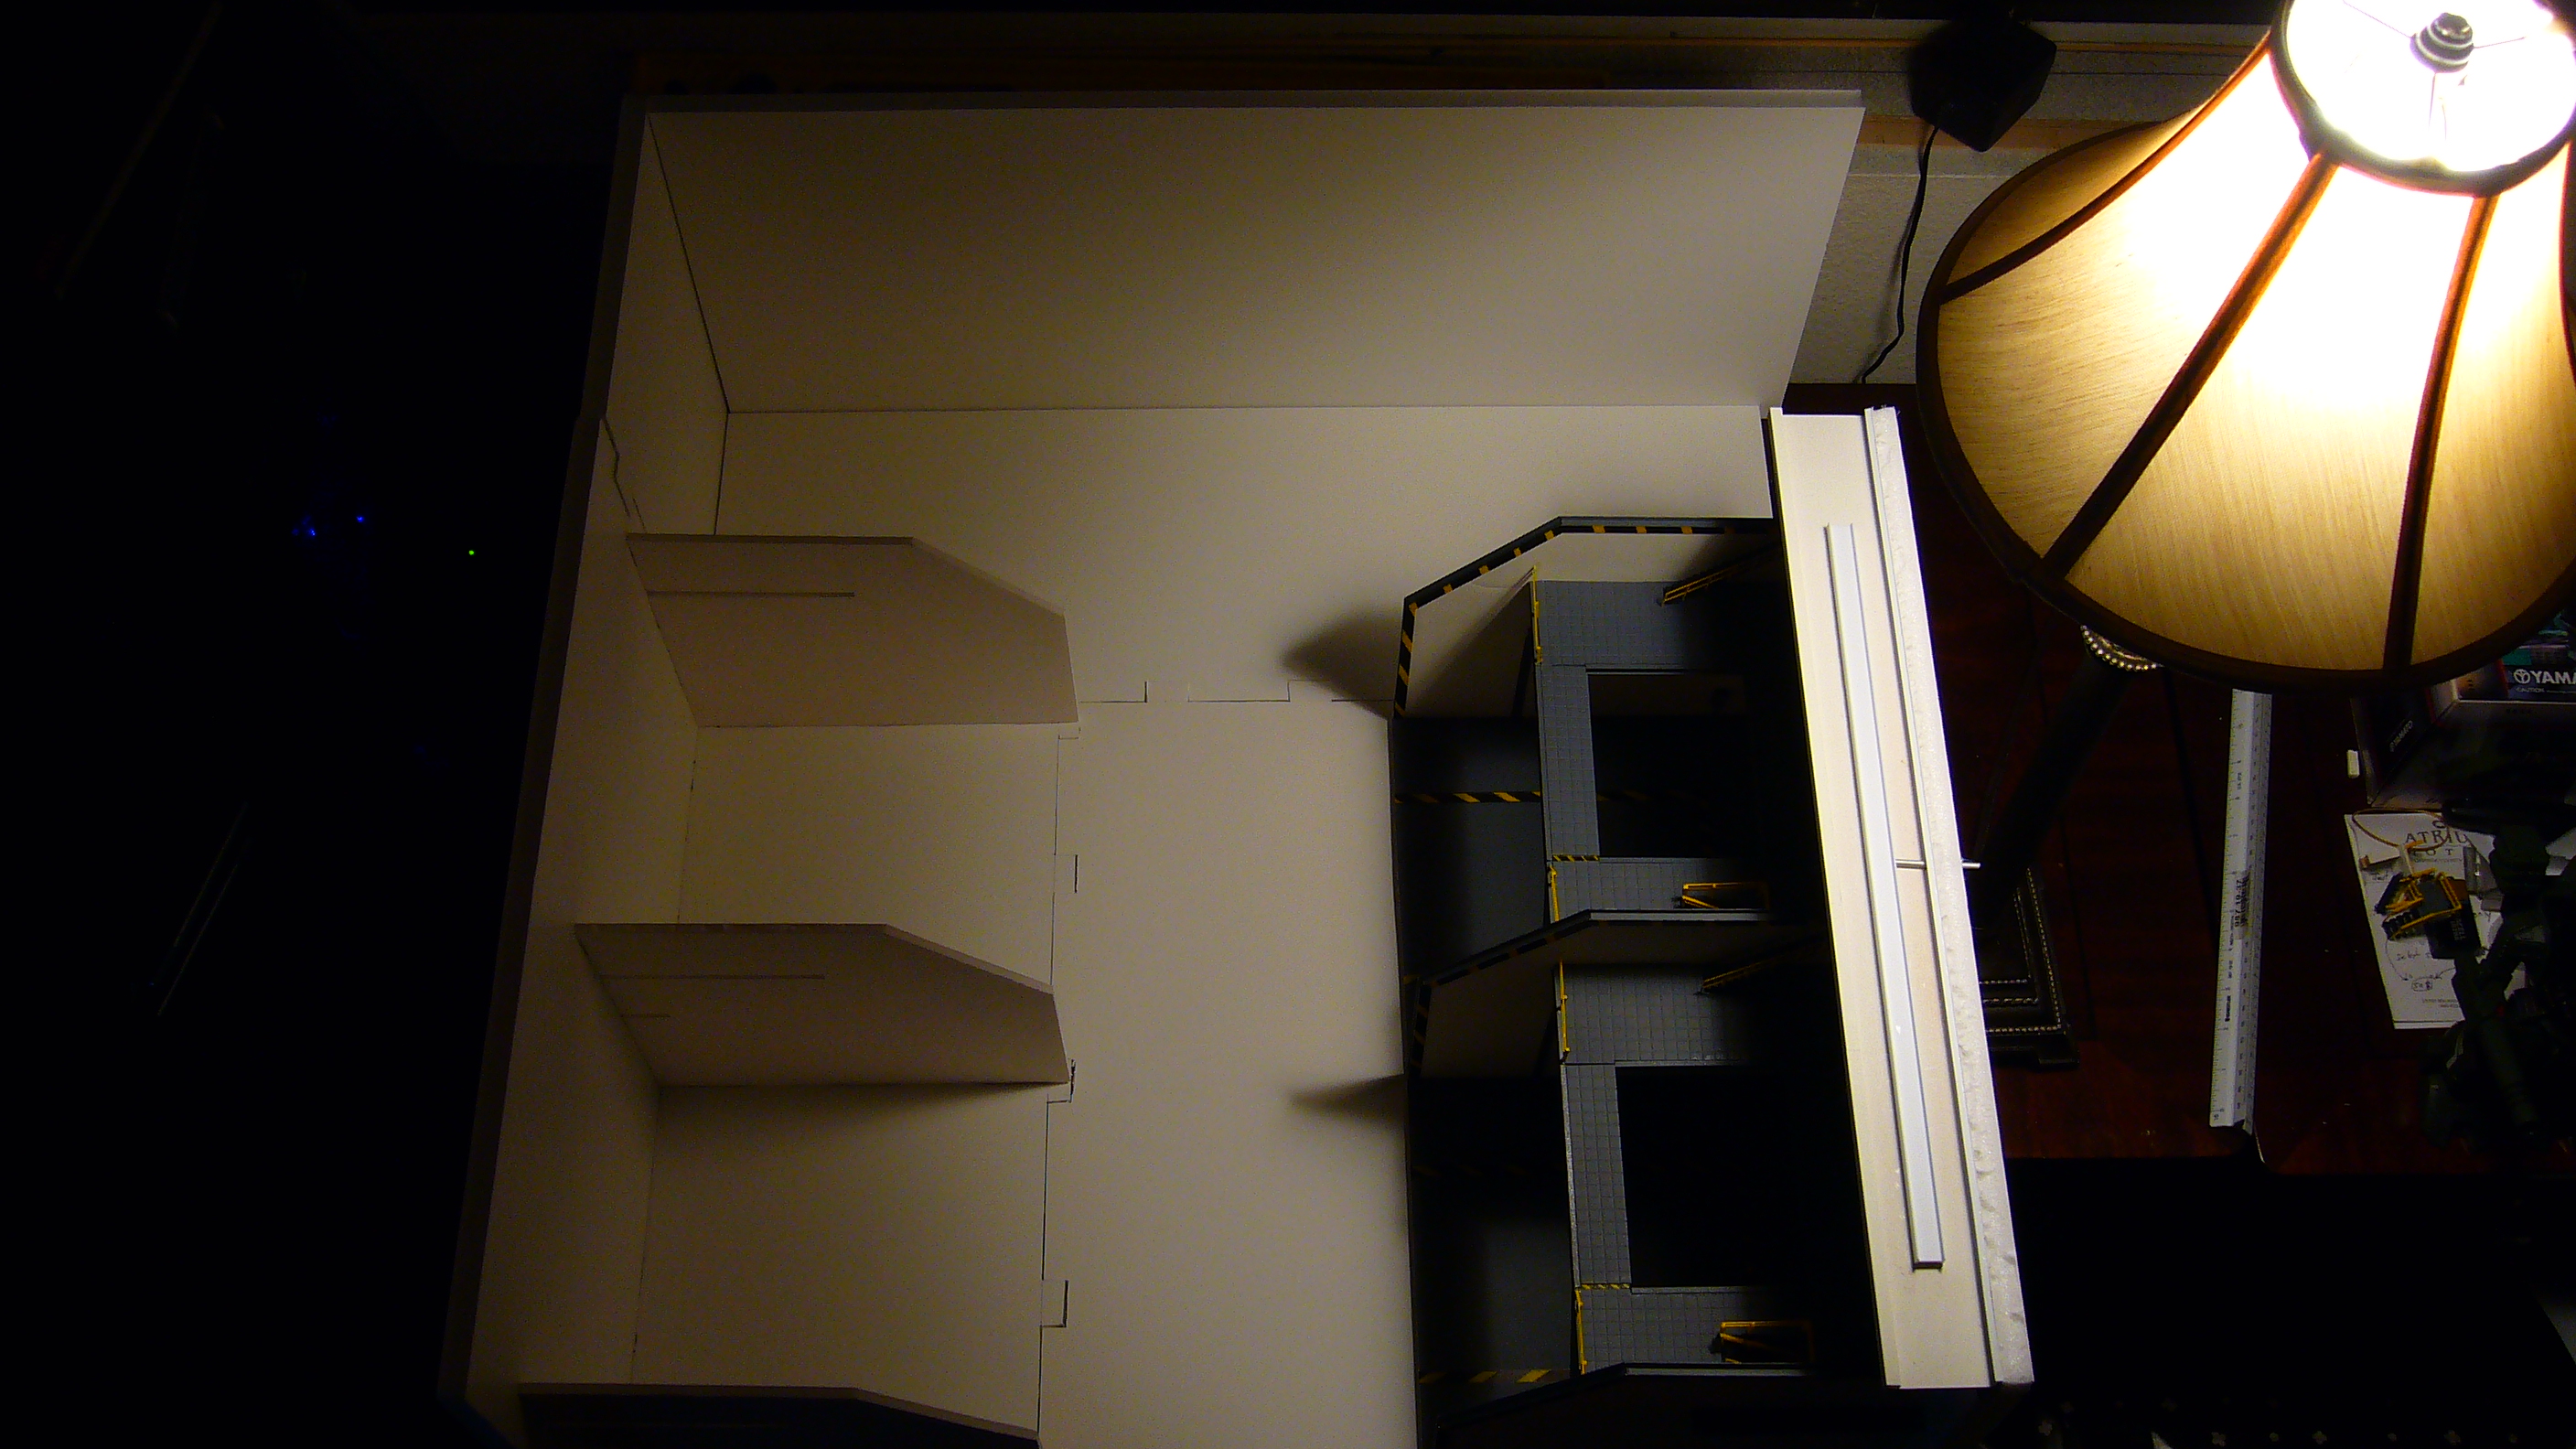
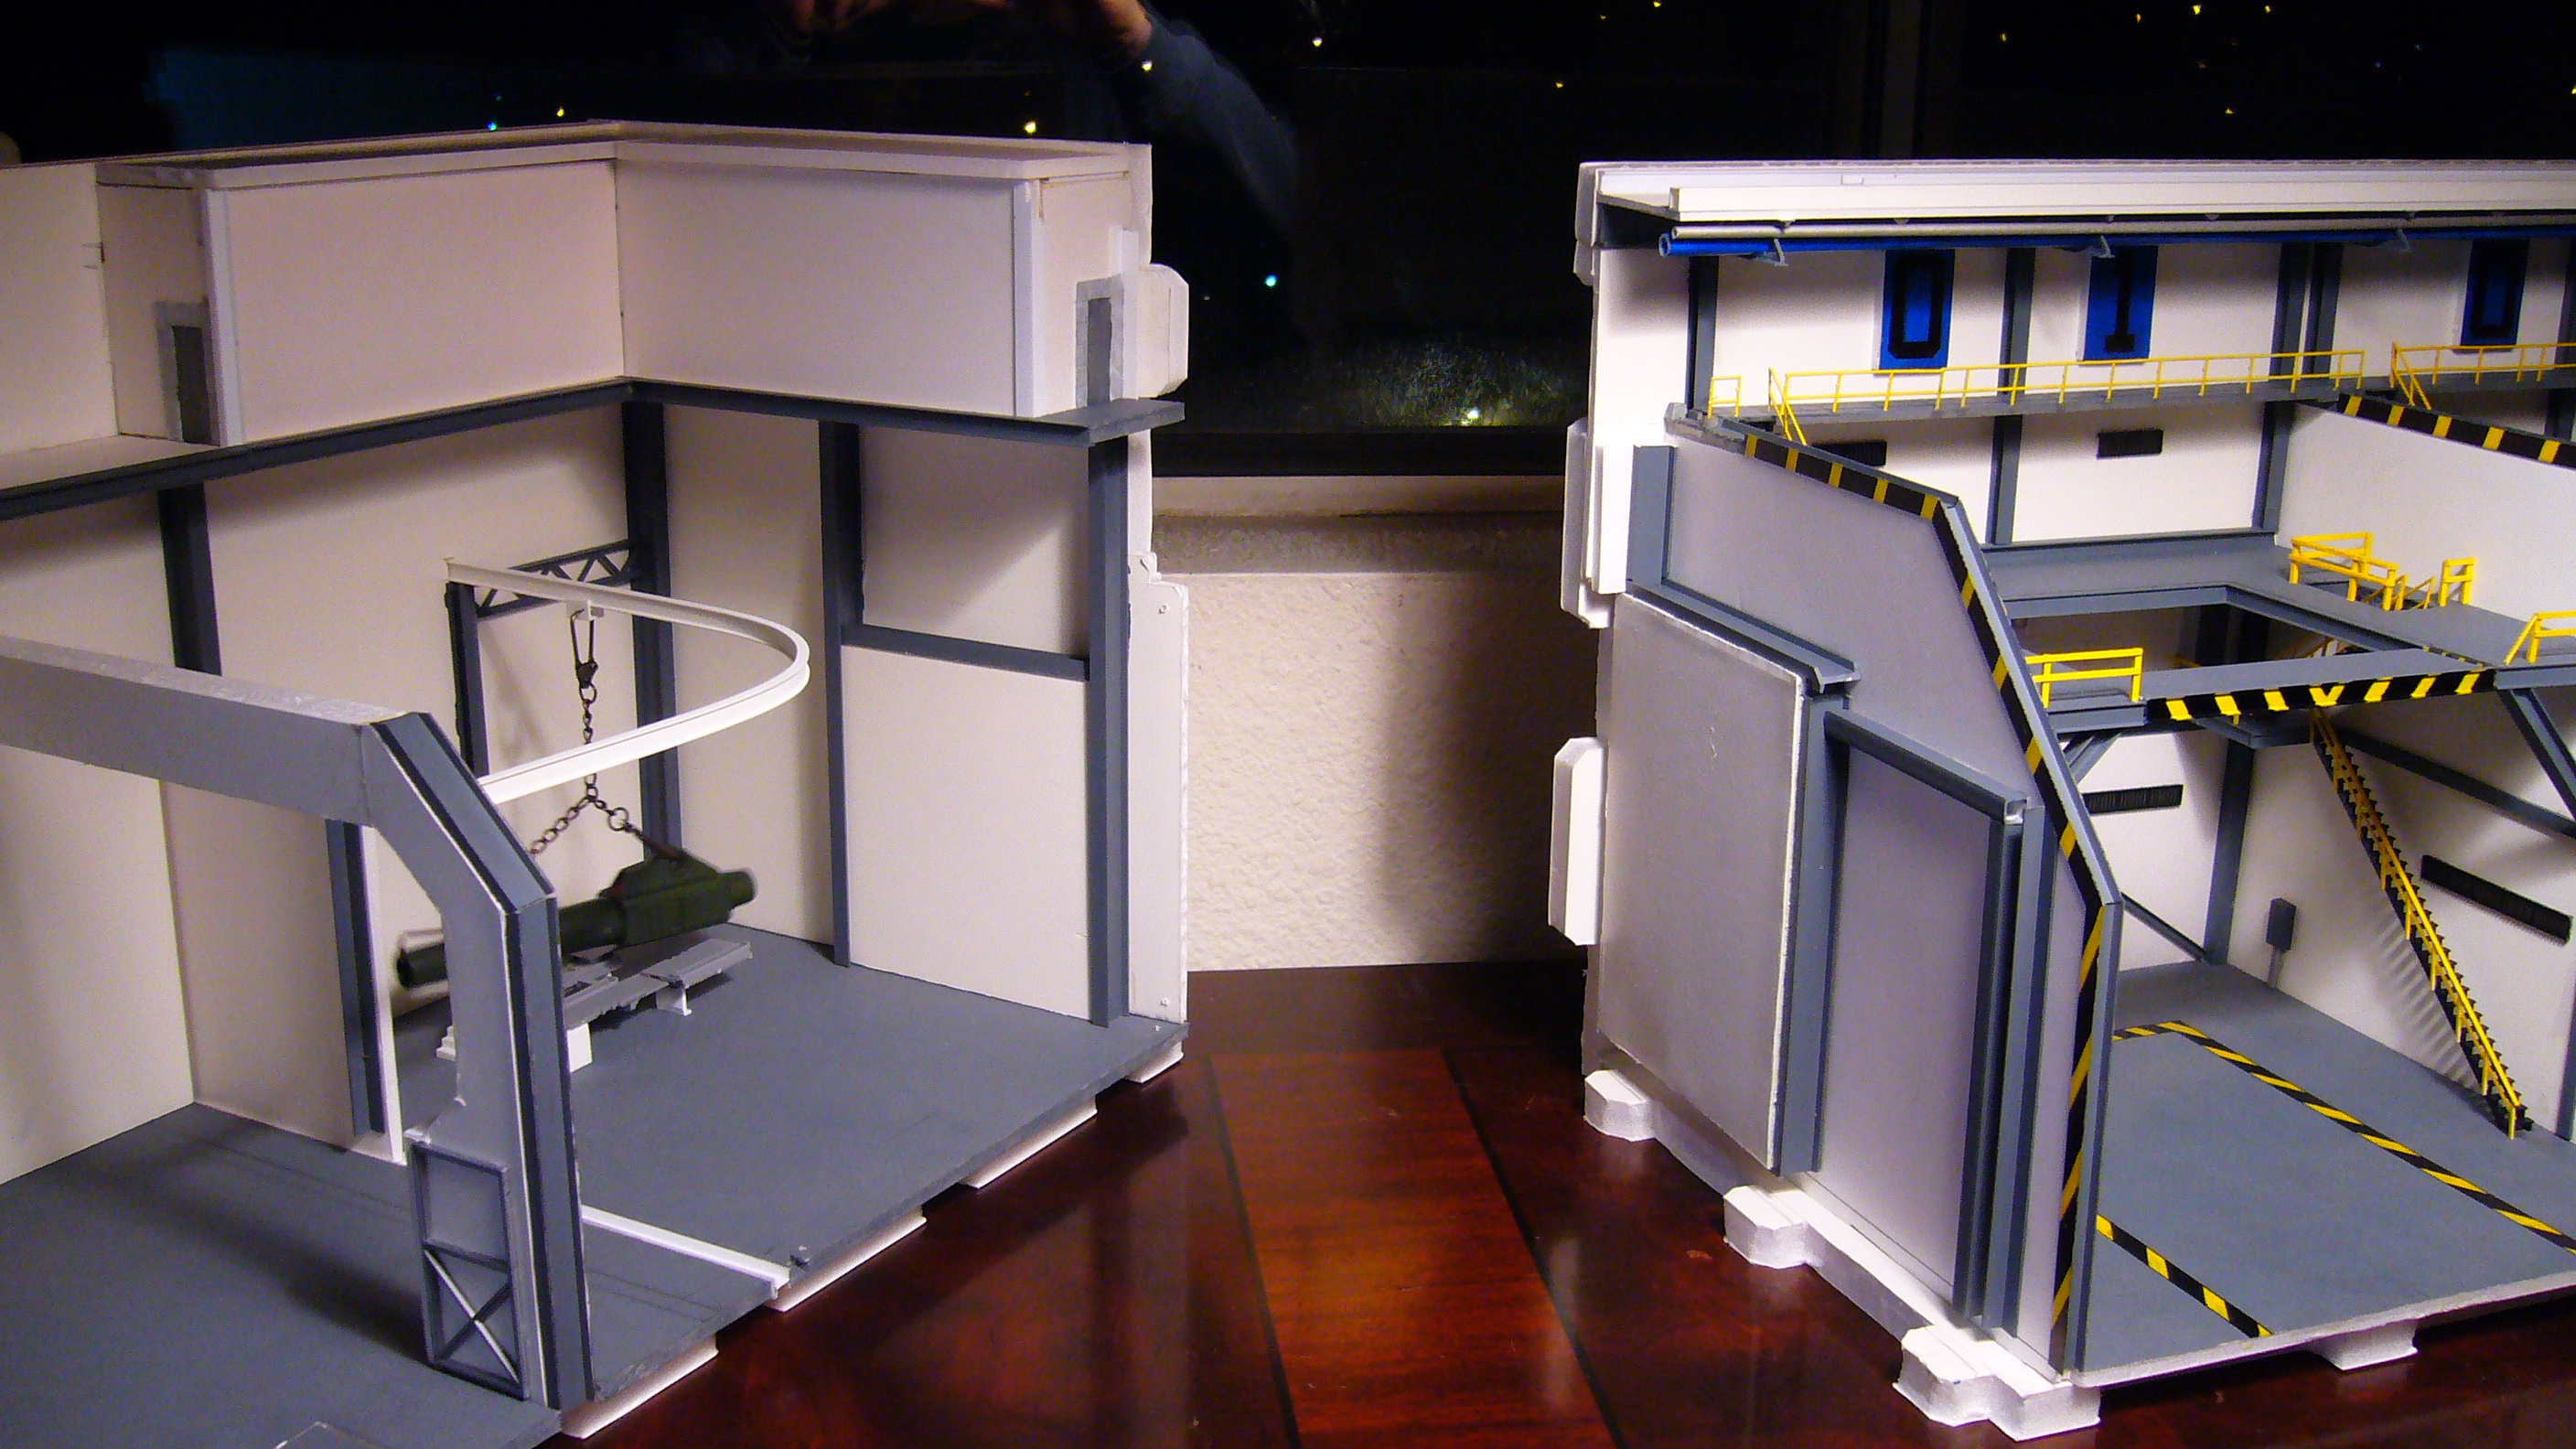
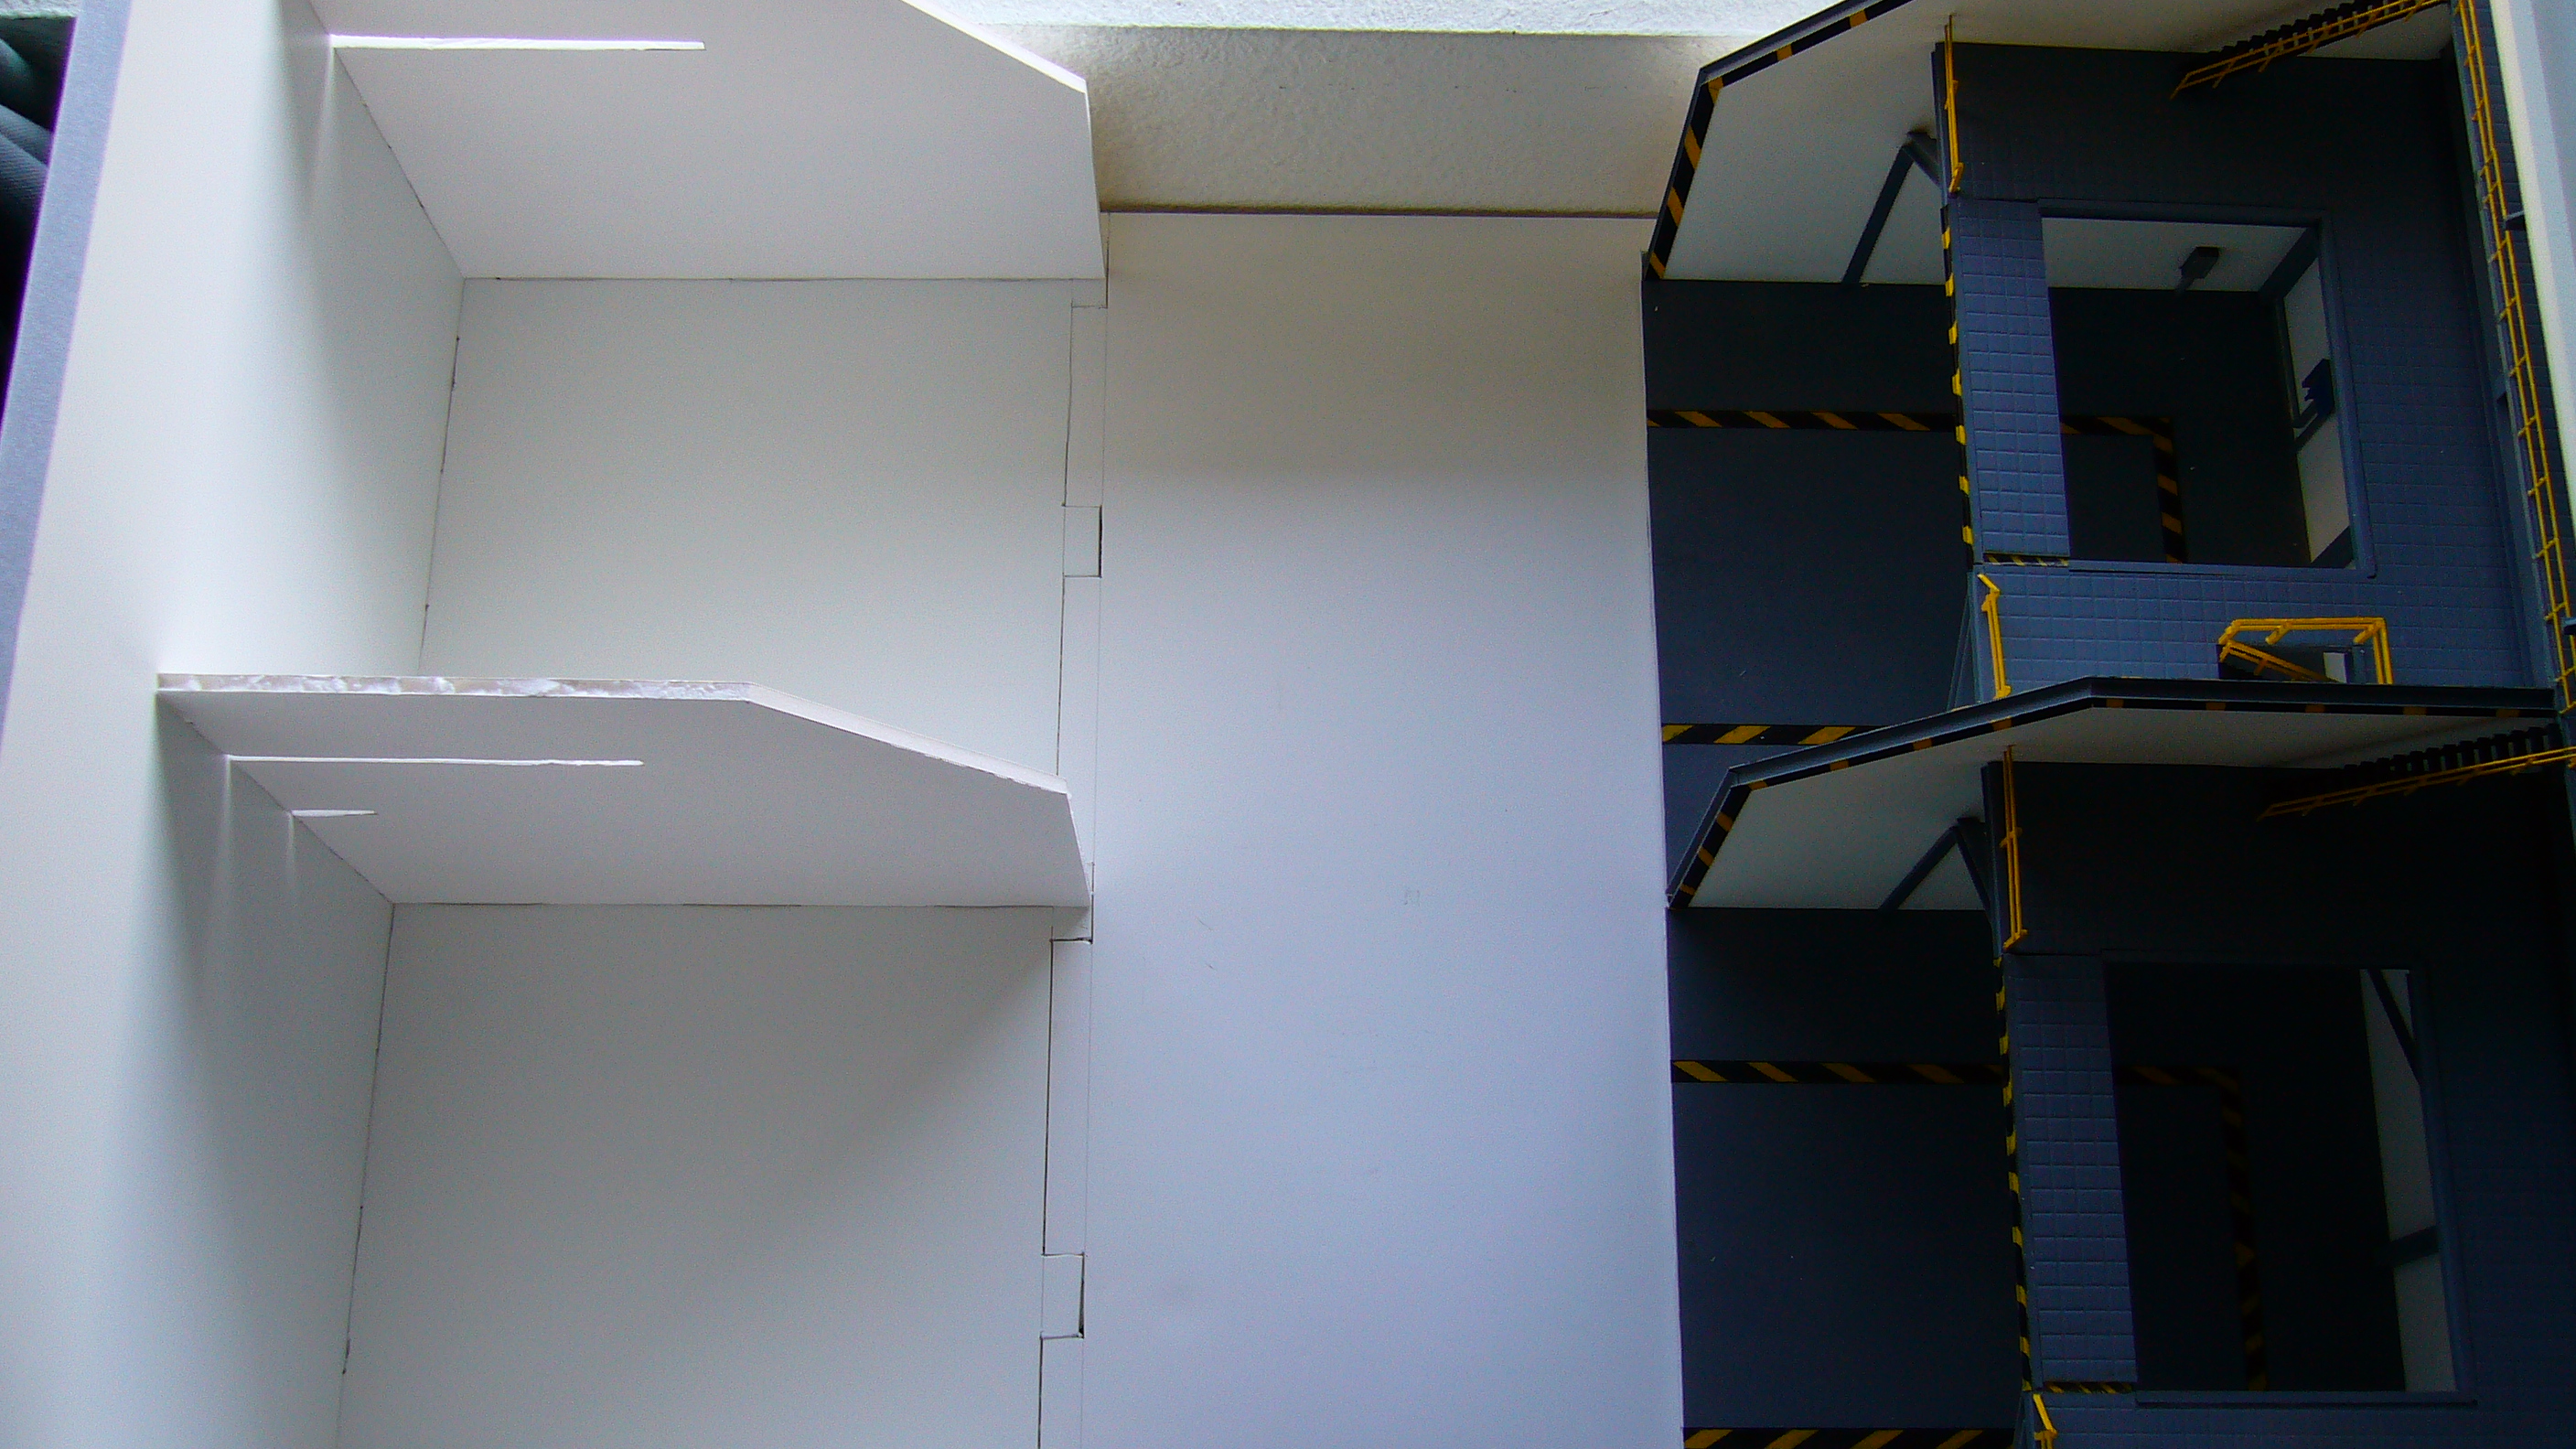
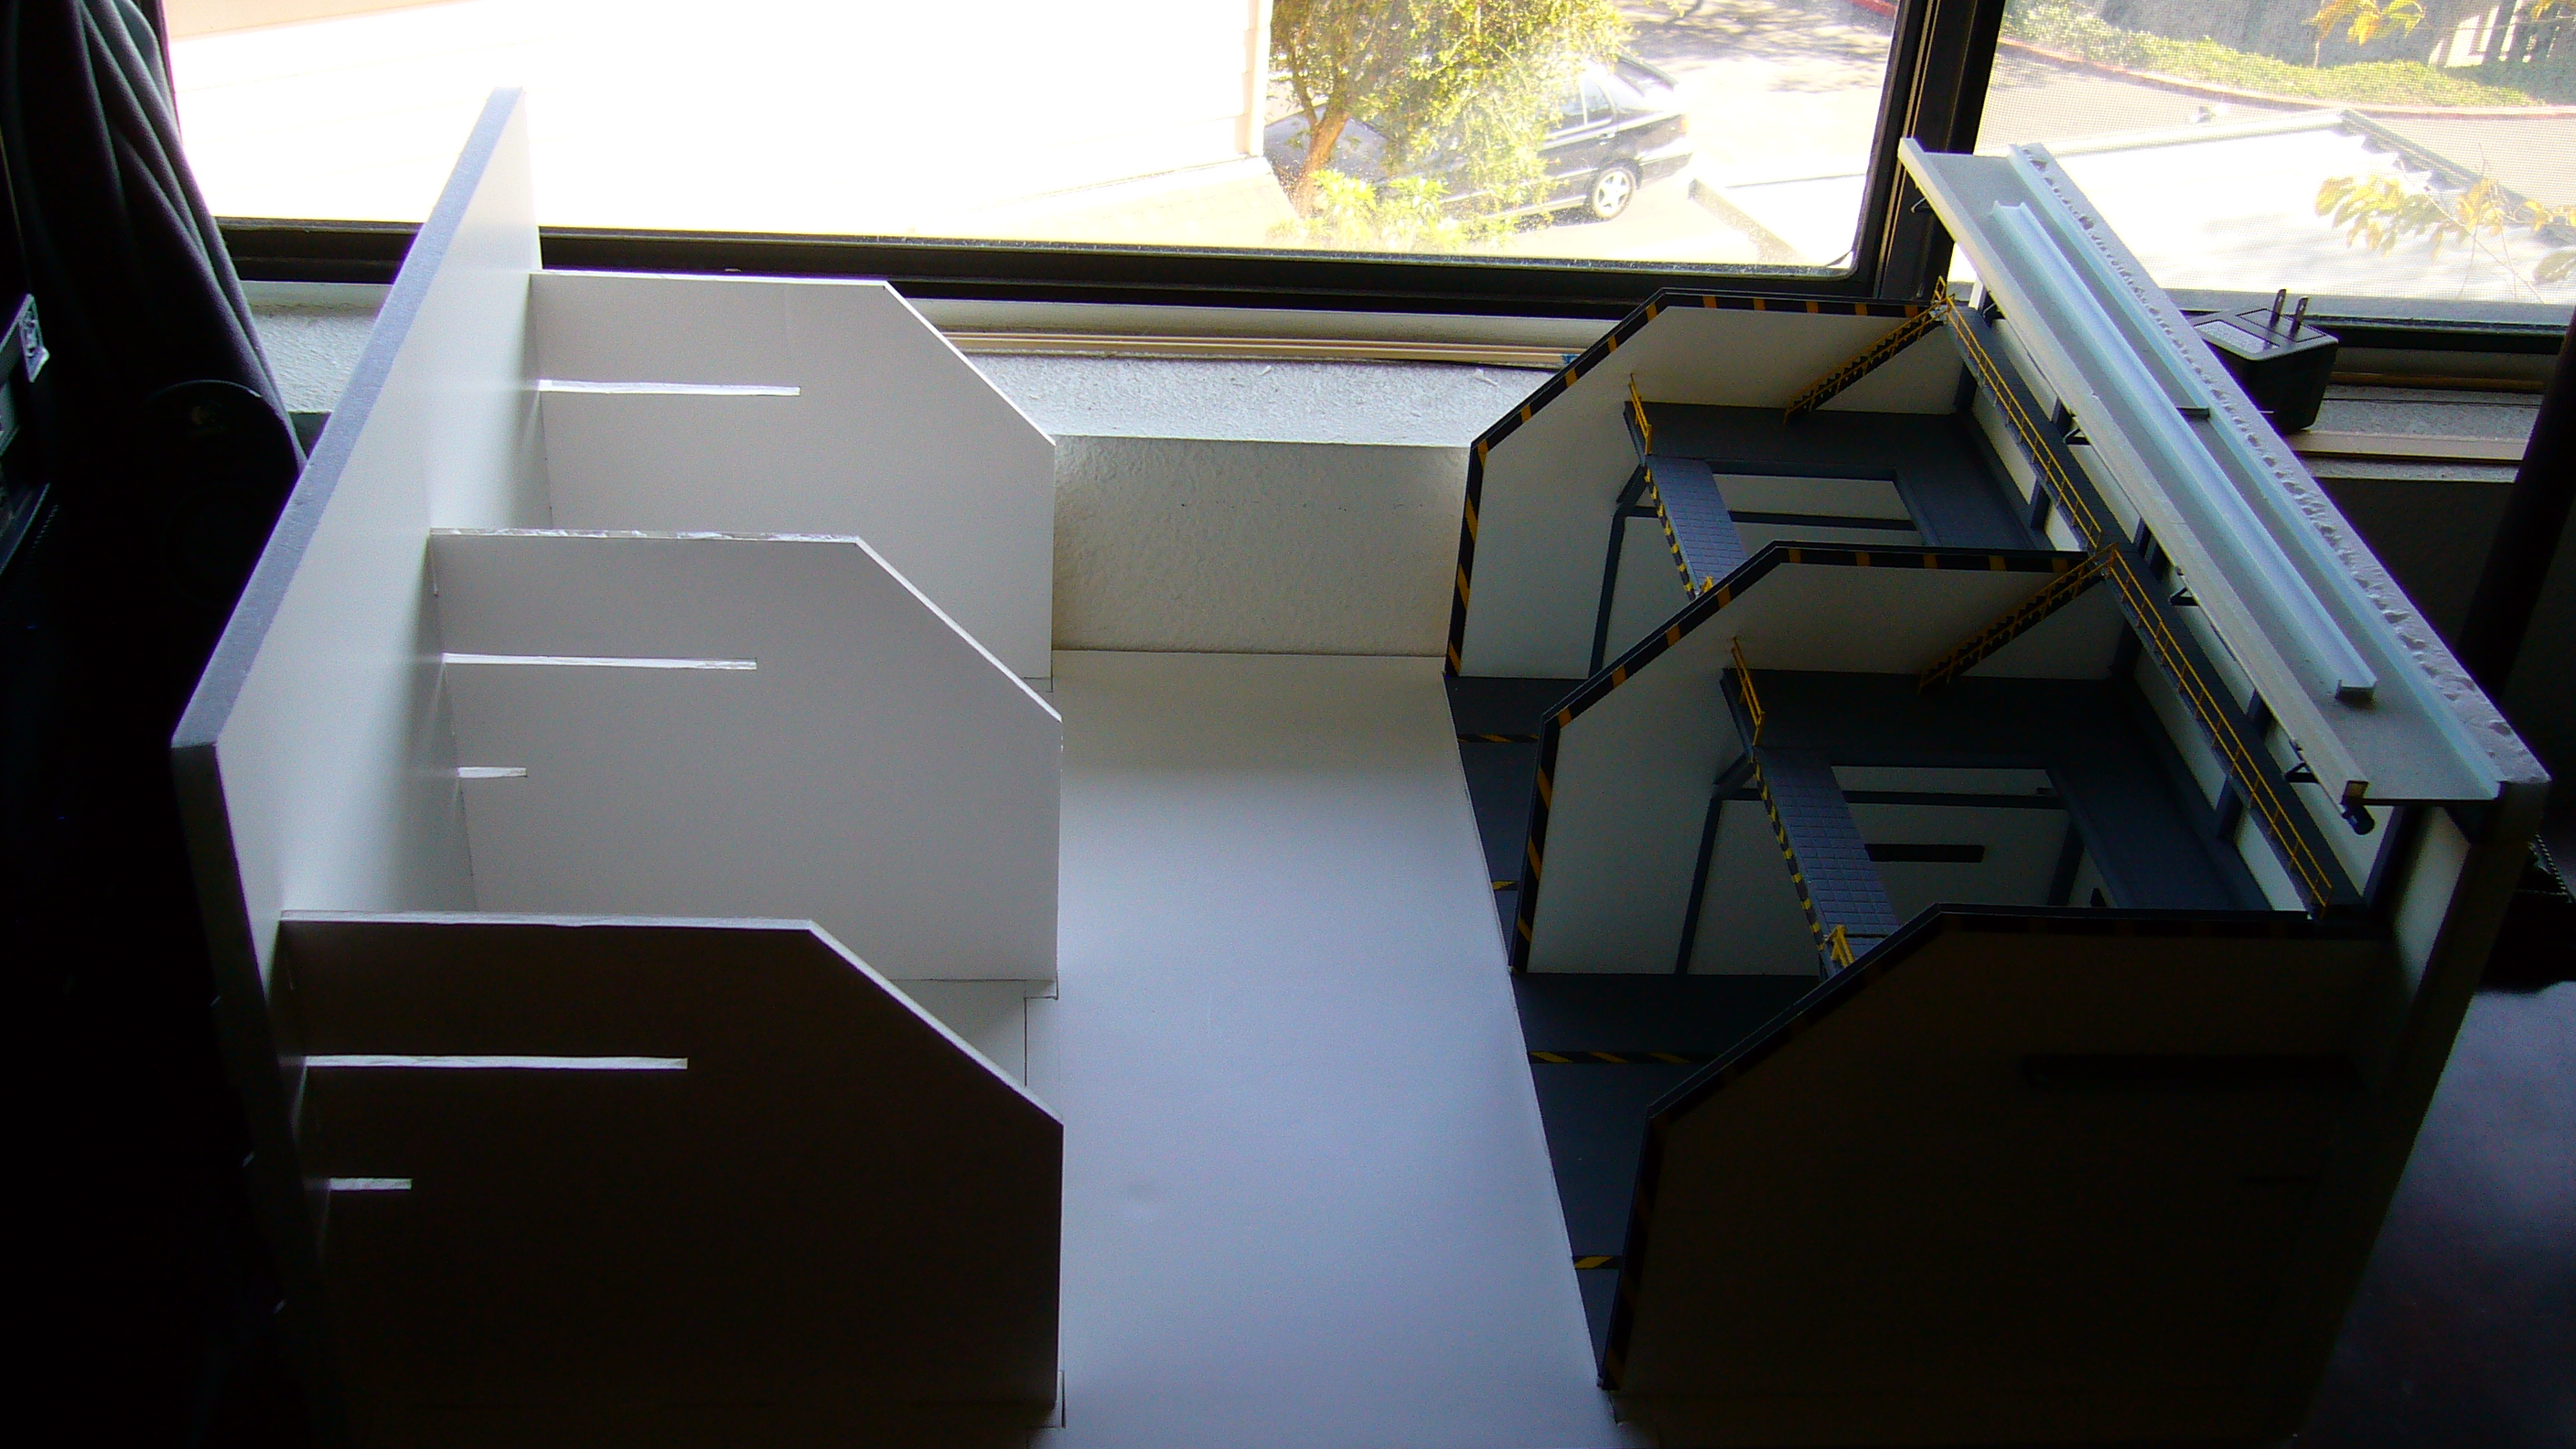
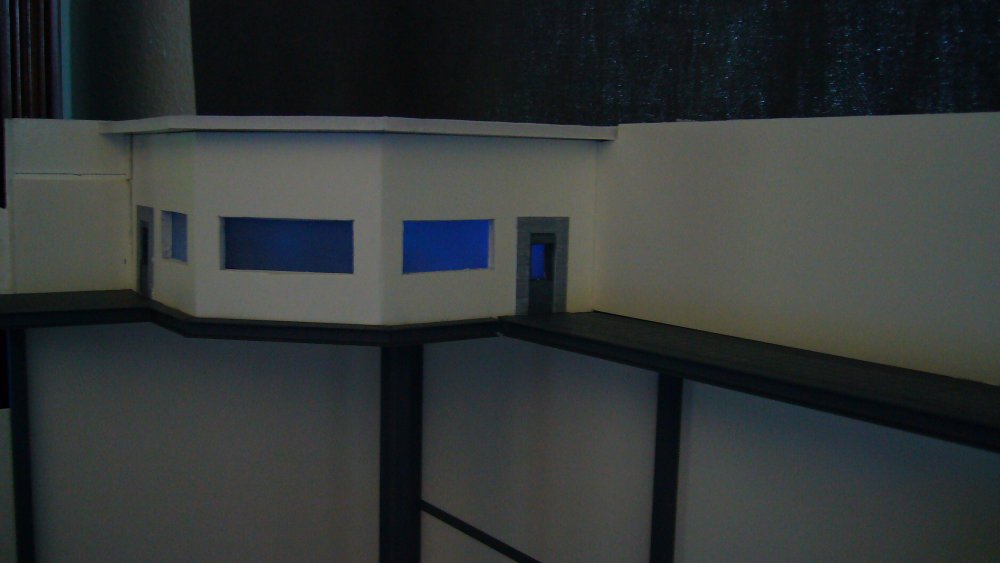
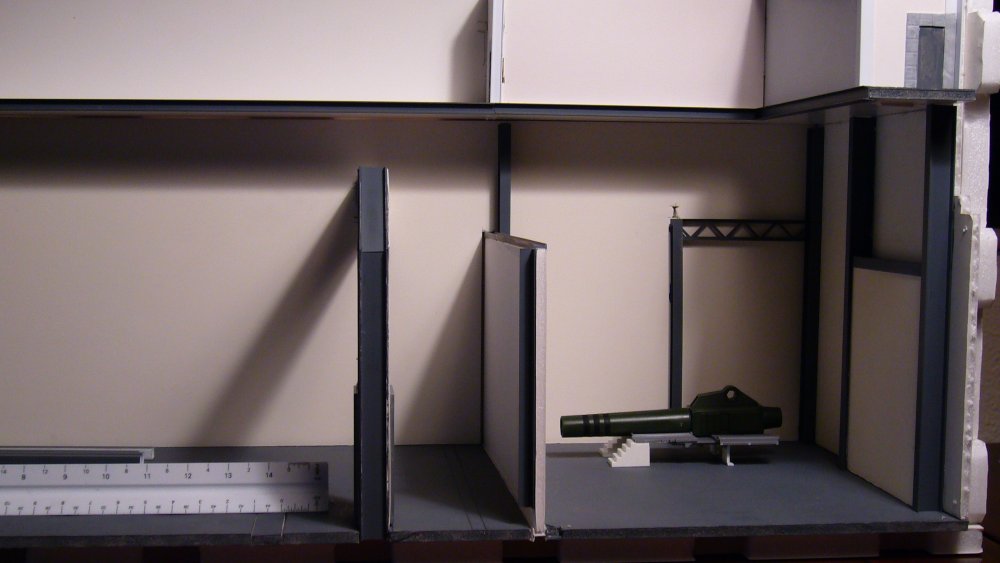
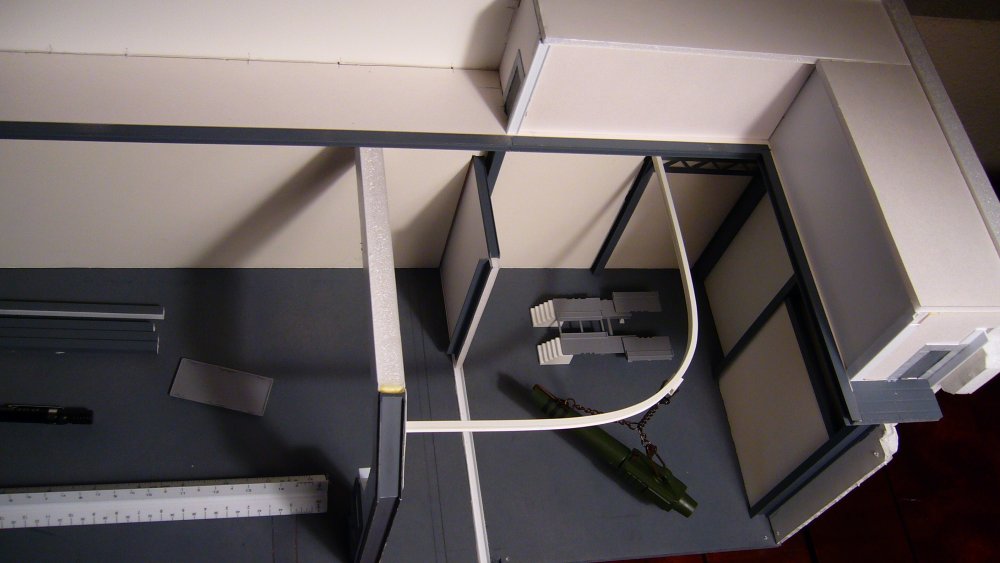
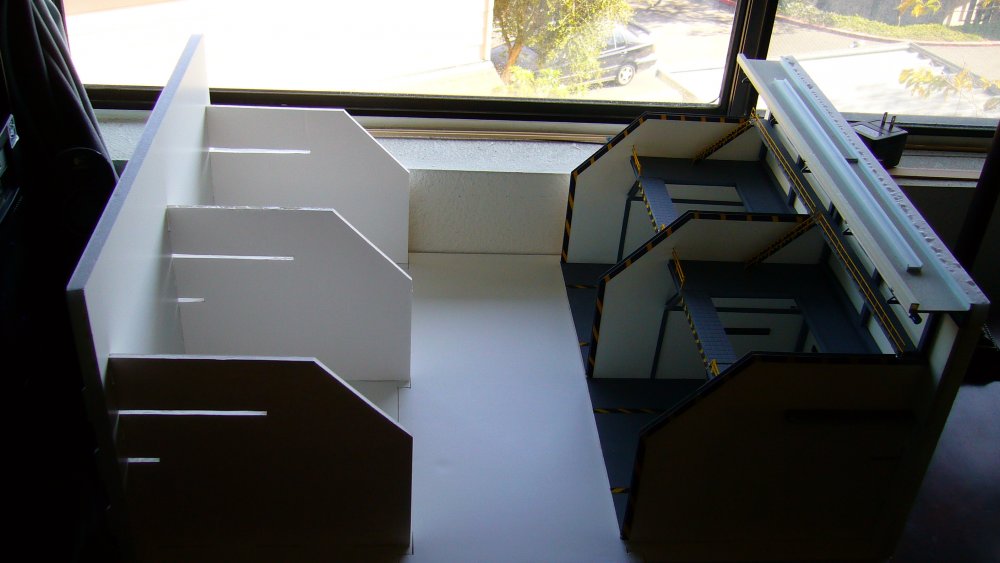
Hello All, Well after much turmoil with the moving and selling bit of the condo, I have finally been able to get back to this project. The first picture is a duplicate from where I last left off and then went from there with new images. I have progressed with some detailing of the mated (double) hanger, however I have moved my focus to the Weapons Repair and Ammo Prep stations within the Maintenance Area section of the overall hanger build. In the prep area you can see the initial foam board construction followed by added detail to the walls and structure, as well as a weapons crane rail for moving the heavy cannons of the Tomahawk. Also added is a divider door that slides open and closed to provide added protection and containment during repair and/or reloading operations. The last 3 pictures show how the Maintenance area mates up with one section of the (double) hanger bay and the causeway (thus showing off the modular aspect of this build) and also provides a close up of the Weapons Repair/Ammo Prep Area. Hope you all have enjoyed these pictures and I look forward to seeing you again with more progress soon. Blue

-
Congrats Yeti!!!! These panels are looking great and I see you already have a few people interested in them. I'll put in some plugs for you, spread the word a little more and see if I can get you more leads / Customers. Anyways kudos to you and don't forget to check your (personal) e-mail. I sent you a reply. Blue
-
Just an update for all of you who have been fallowing along. Wanted to apologize for this post going stale. I'm currently in the process of selling my condo and relocating at the same time. I honestly haven't made much progress since my last post and would like to let you all know that I will continue as soon as I can. Thank you all for your support and for viewing this build. Blue
-

Izzy equiped with DYRL version fastpack and armament.
Iceblue106 posted a gallery image in 1/100 Customs
From the album: 1/100 Toynami VF-1A "Izzy Variant"
-
From the album: 1/100 Toynami VF-1A "Izzy Variant"
-
Izzy in Battroid mode posing to match drawing version
Iceblue106 posted a gallery image in 1/100 Customs
From the album: 1/100 Toynami VF-1A "Izzy Variant"
-
From the album: 1/100 Toynami VF-1A "Izzy Variant"
-
From the album: 1/100 Toynami VF-1A "Izzy Variant"
-
From the album: 1/100 Toynami VF-1A "Izzy Variant"
-
From the album: 1/100 Toynami VF-1A "Izzy Variant"
-
colored drawing version of "Izzy" paint scheme in
Iceblue106 posted a gallery image in 1/100 Customs
From the album: 1/100 Toynami VF-1A "Izzy Variant"
-
There is a good possibility of doing just that however it will be when I build a hanger for my own personnel display... This one is for Rob and is based off of his story.
-
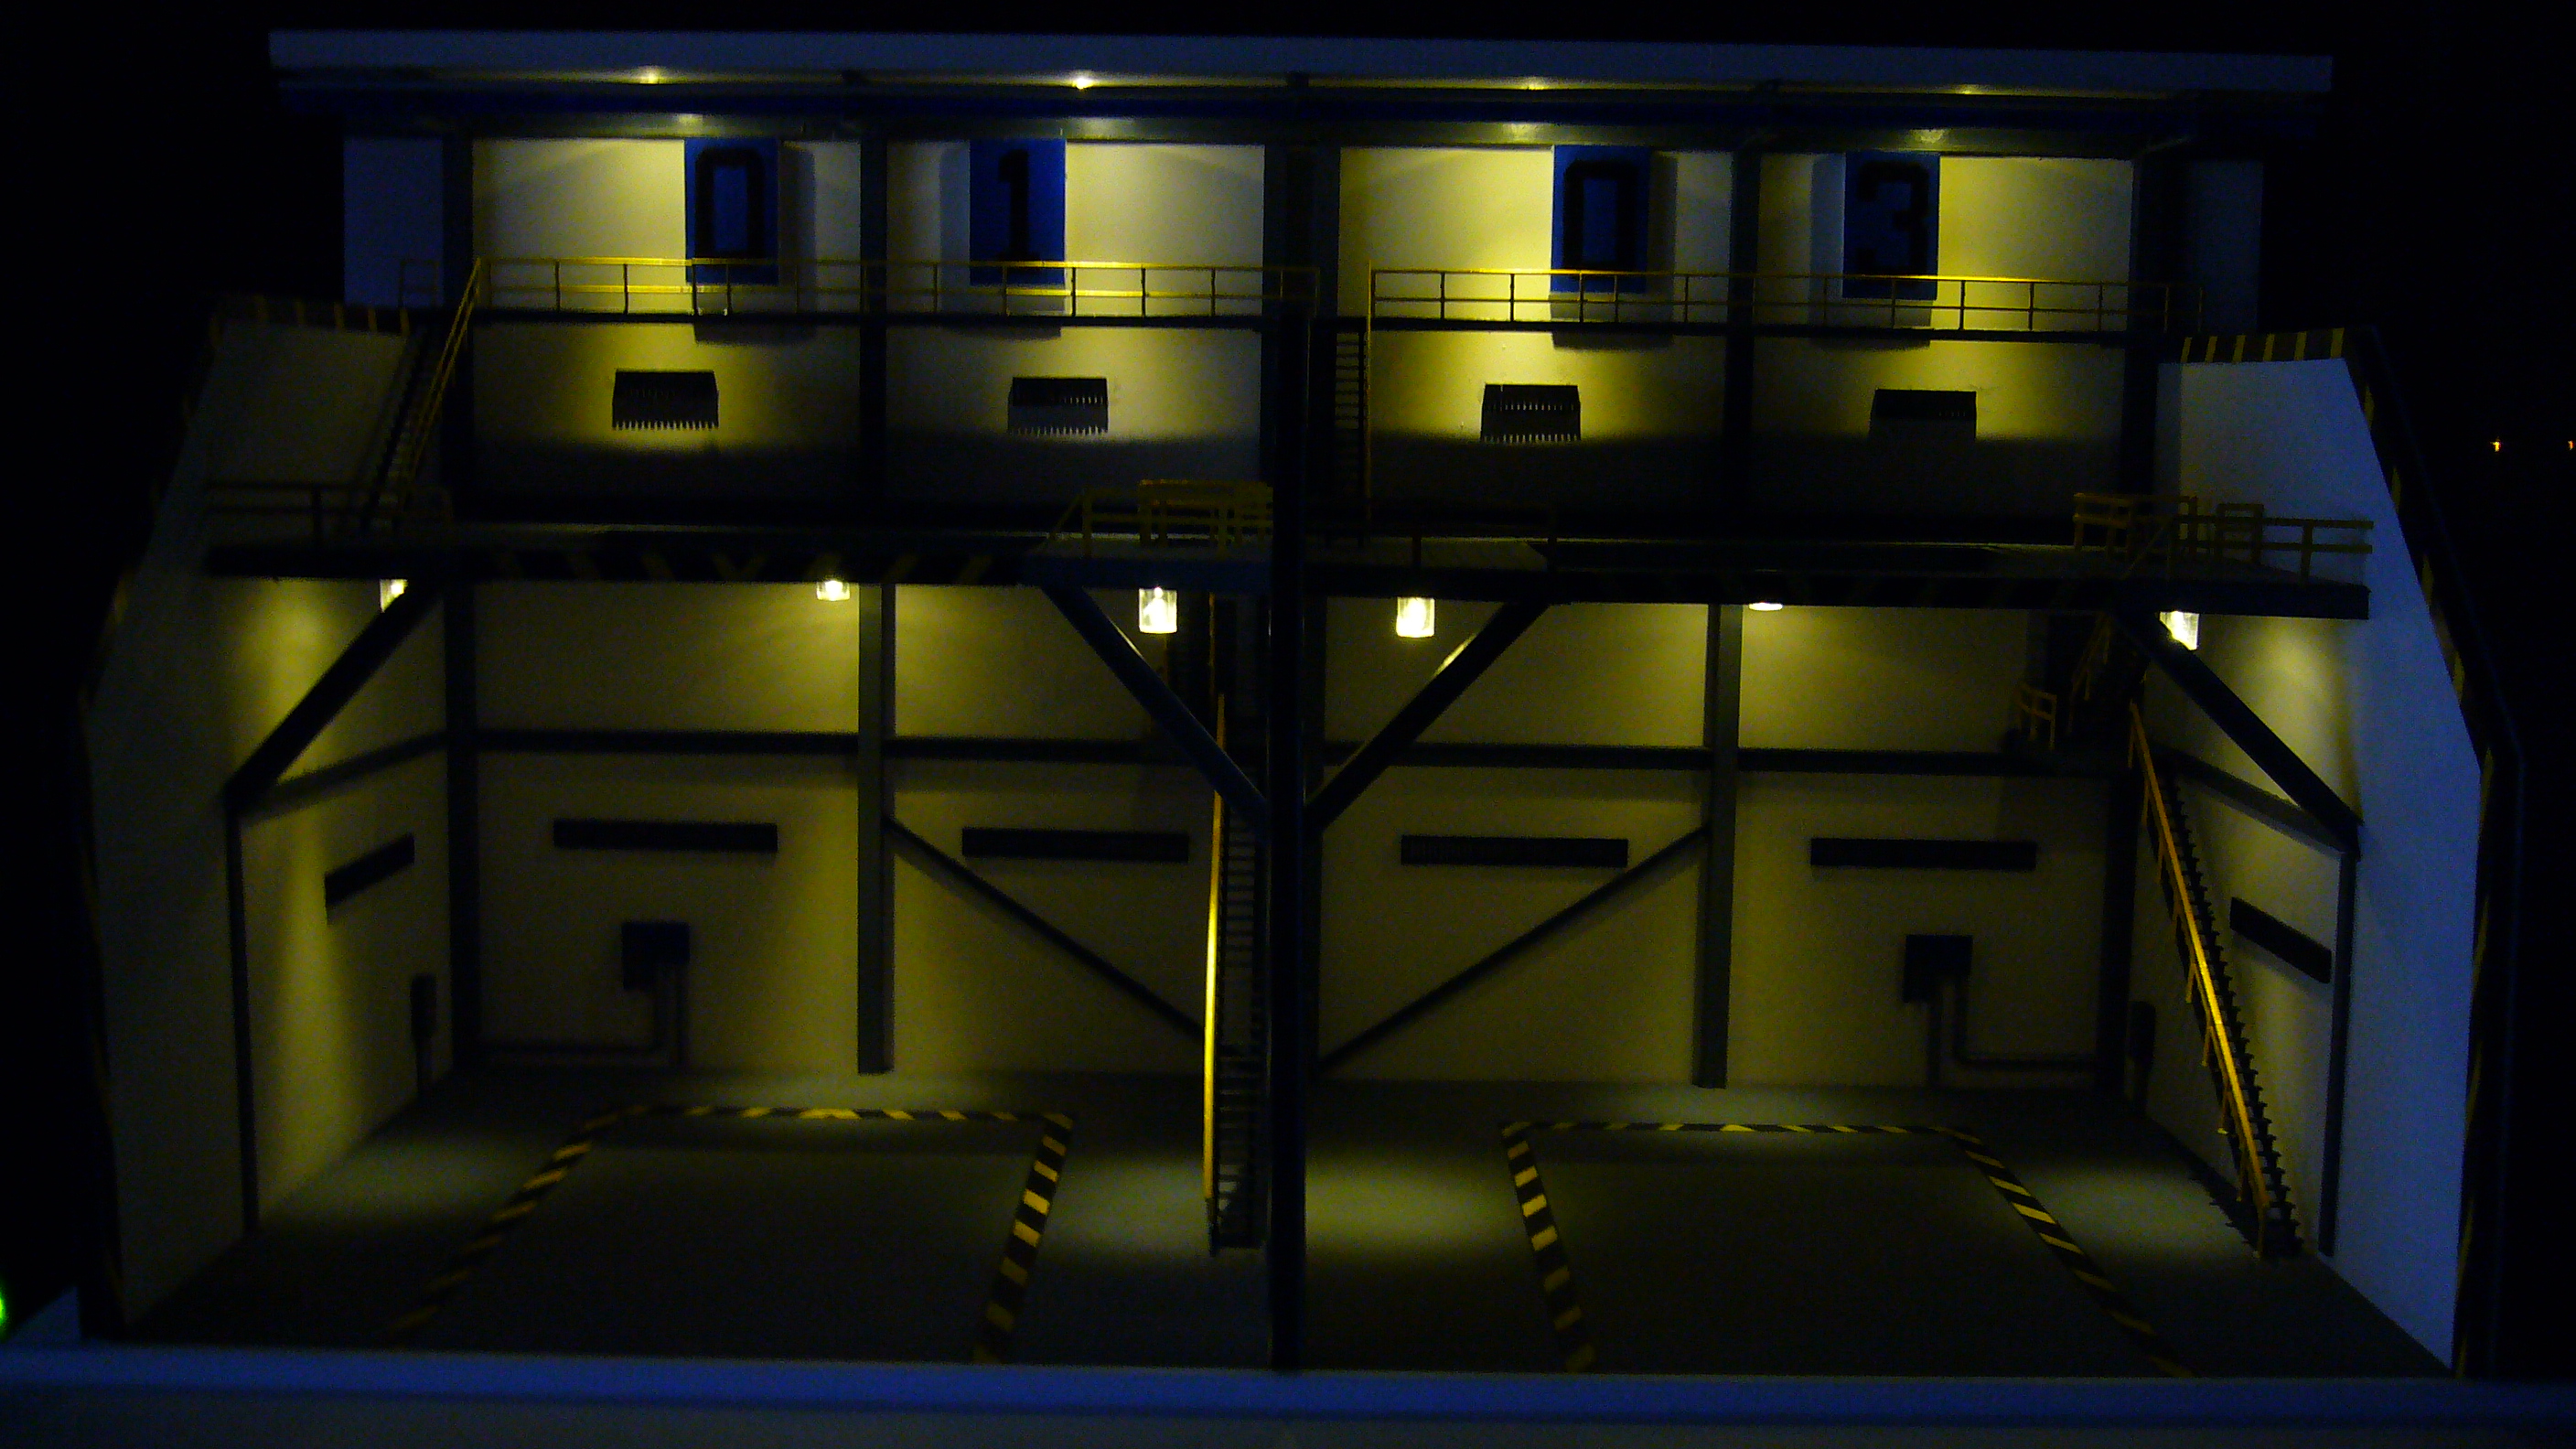
Thanks for the compliments Kicker, however I'm uncertain if the worth of the hanger would match the cost. Meaning that the materials (Mostly styrene packs) tend to cost more than I think one would pay for a completed basic model. To fabricate a complete 2 bay section without lighting costs around $60 US dollars, and it costs me around $80 US dollars with lighting and power adapter. (and that's the pricing just for materials) Unless I can find a cheaper distributor for the styrene pieces, than I'm afraid the above costs would have to be the bare minimum charge not including labor or shipping and handling. Not to mention I still have to complete this larger build that I am working on right now. If the interest is there, I may be able to build some kits for individuals should an agreement be made with cost and time issues. As for now I will focus on this build, but to all the members out there who would be interested please PM me. Blue P.S. the above mentioned cost for materials only will result in a build similar to the picture below.

-
Not a problem >EXO<, I'm a patient man. Thanks for the reply and I'll be looking forward to your PM Blue
-
Thought I would drop by and show some more progress on the build. In the next few pics you can see the additions I have begun to make. (Included a cause way, a mirrored section of the first hanger build, and a soon to be maintenance area) Enjoy and feel free to ask questions or make comments First picture is a demo of a side by side setup, fallowed by across the cause way set up, and then lastly the mock set up with maintenance area minus one wall.


-
Absolutely amazing work EXO!!! Silly question, but will these be cast for multiple sale? Or do you hand sculpt every single one for sale? Regardless, I'm in!! Blue EXO's new motto: Will work for wine just kidding of course
-
Mav buddy, You never fail to amaze and inspire me with your work man!! Many many Kudos to a fine job!! Keep the pics coming bud! Feckin awesome man!! Blue
-
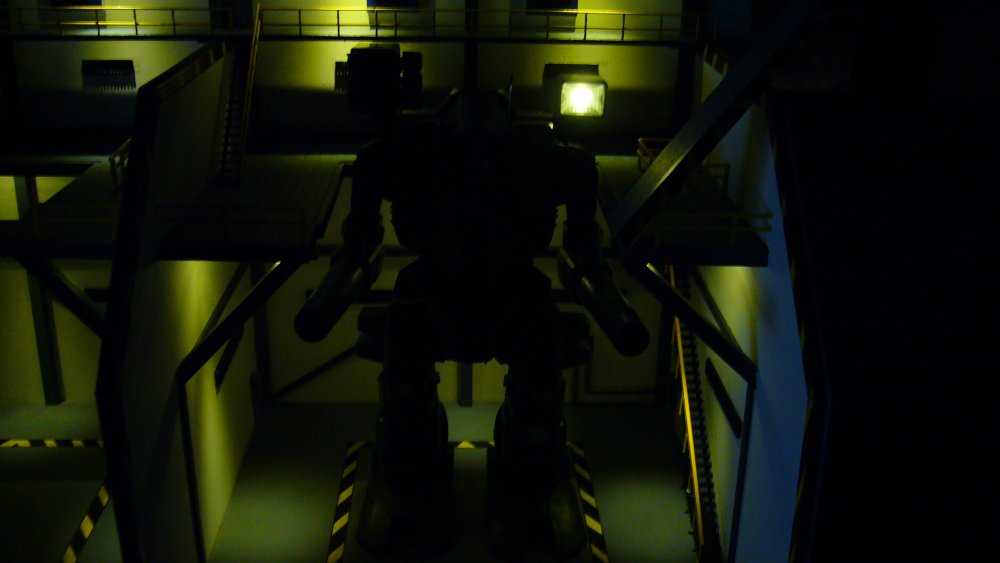
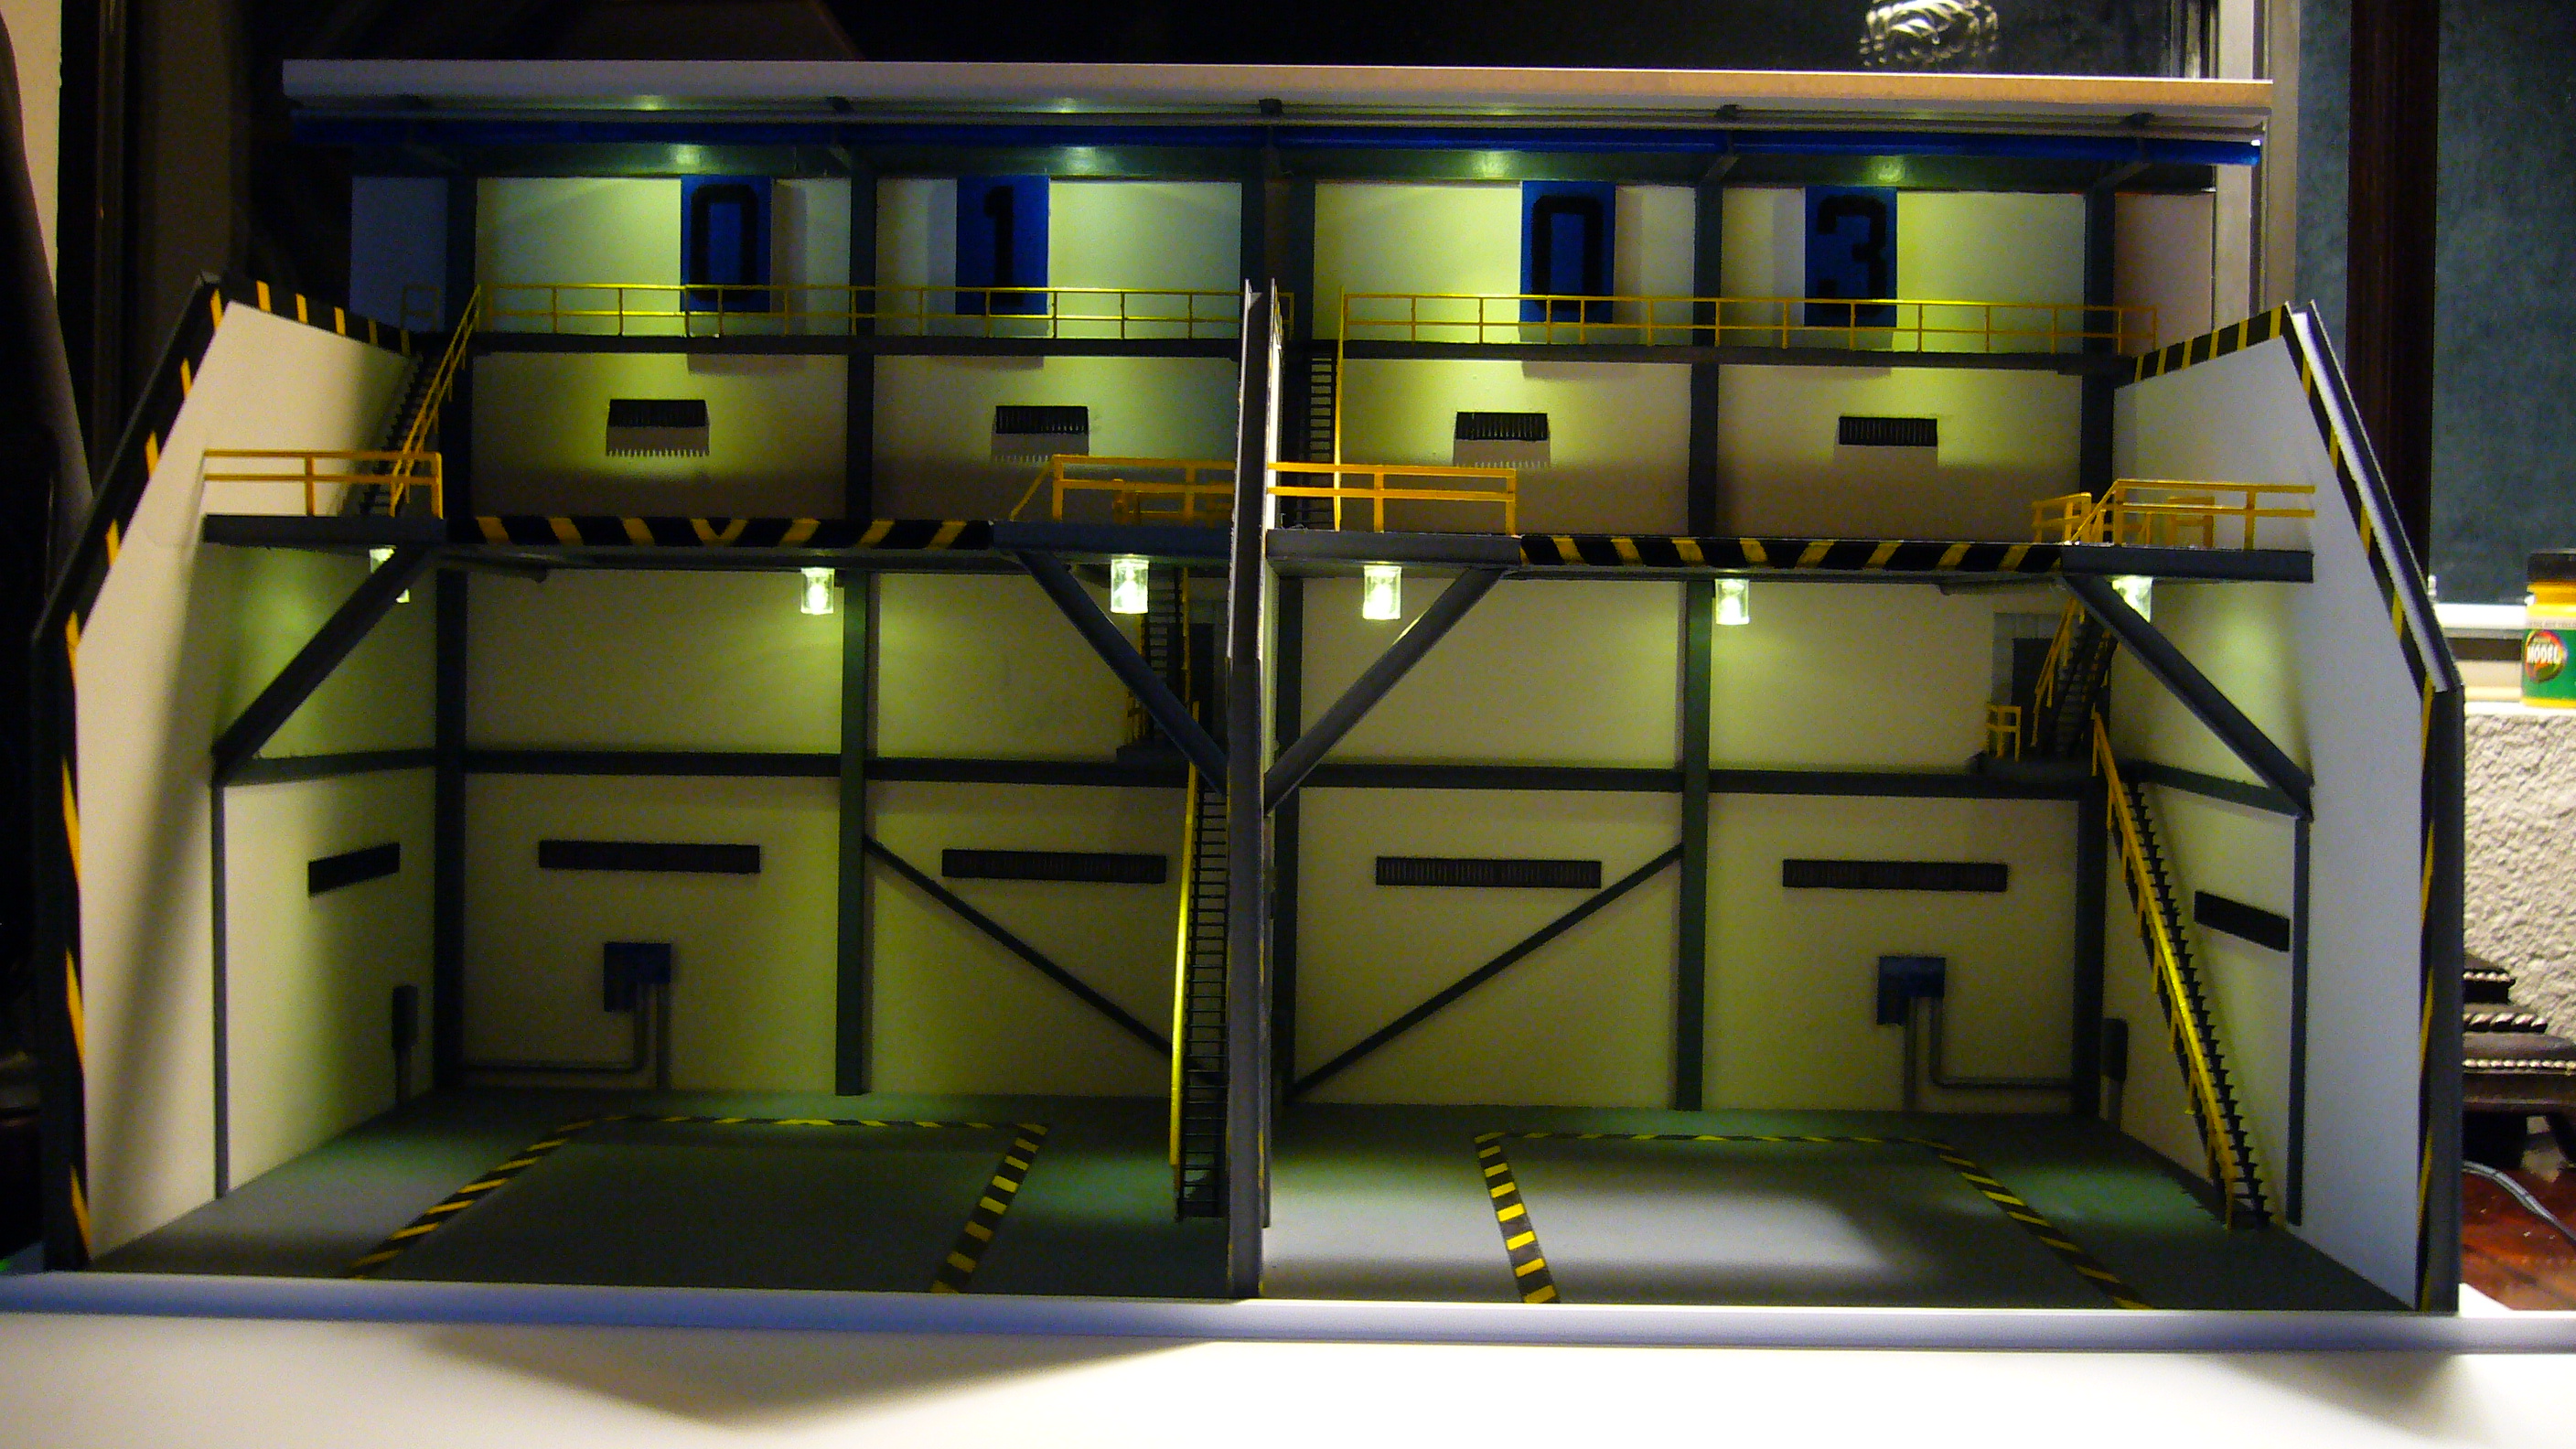
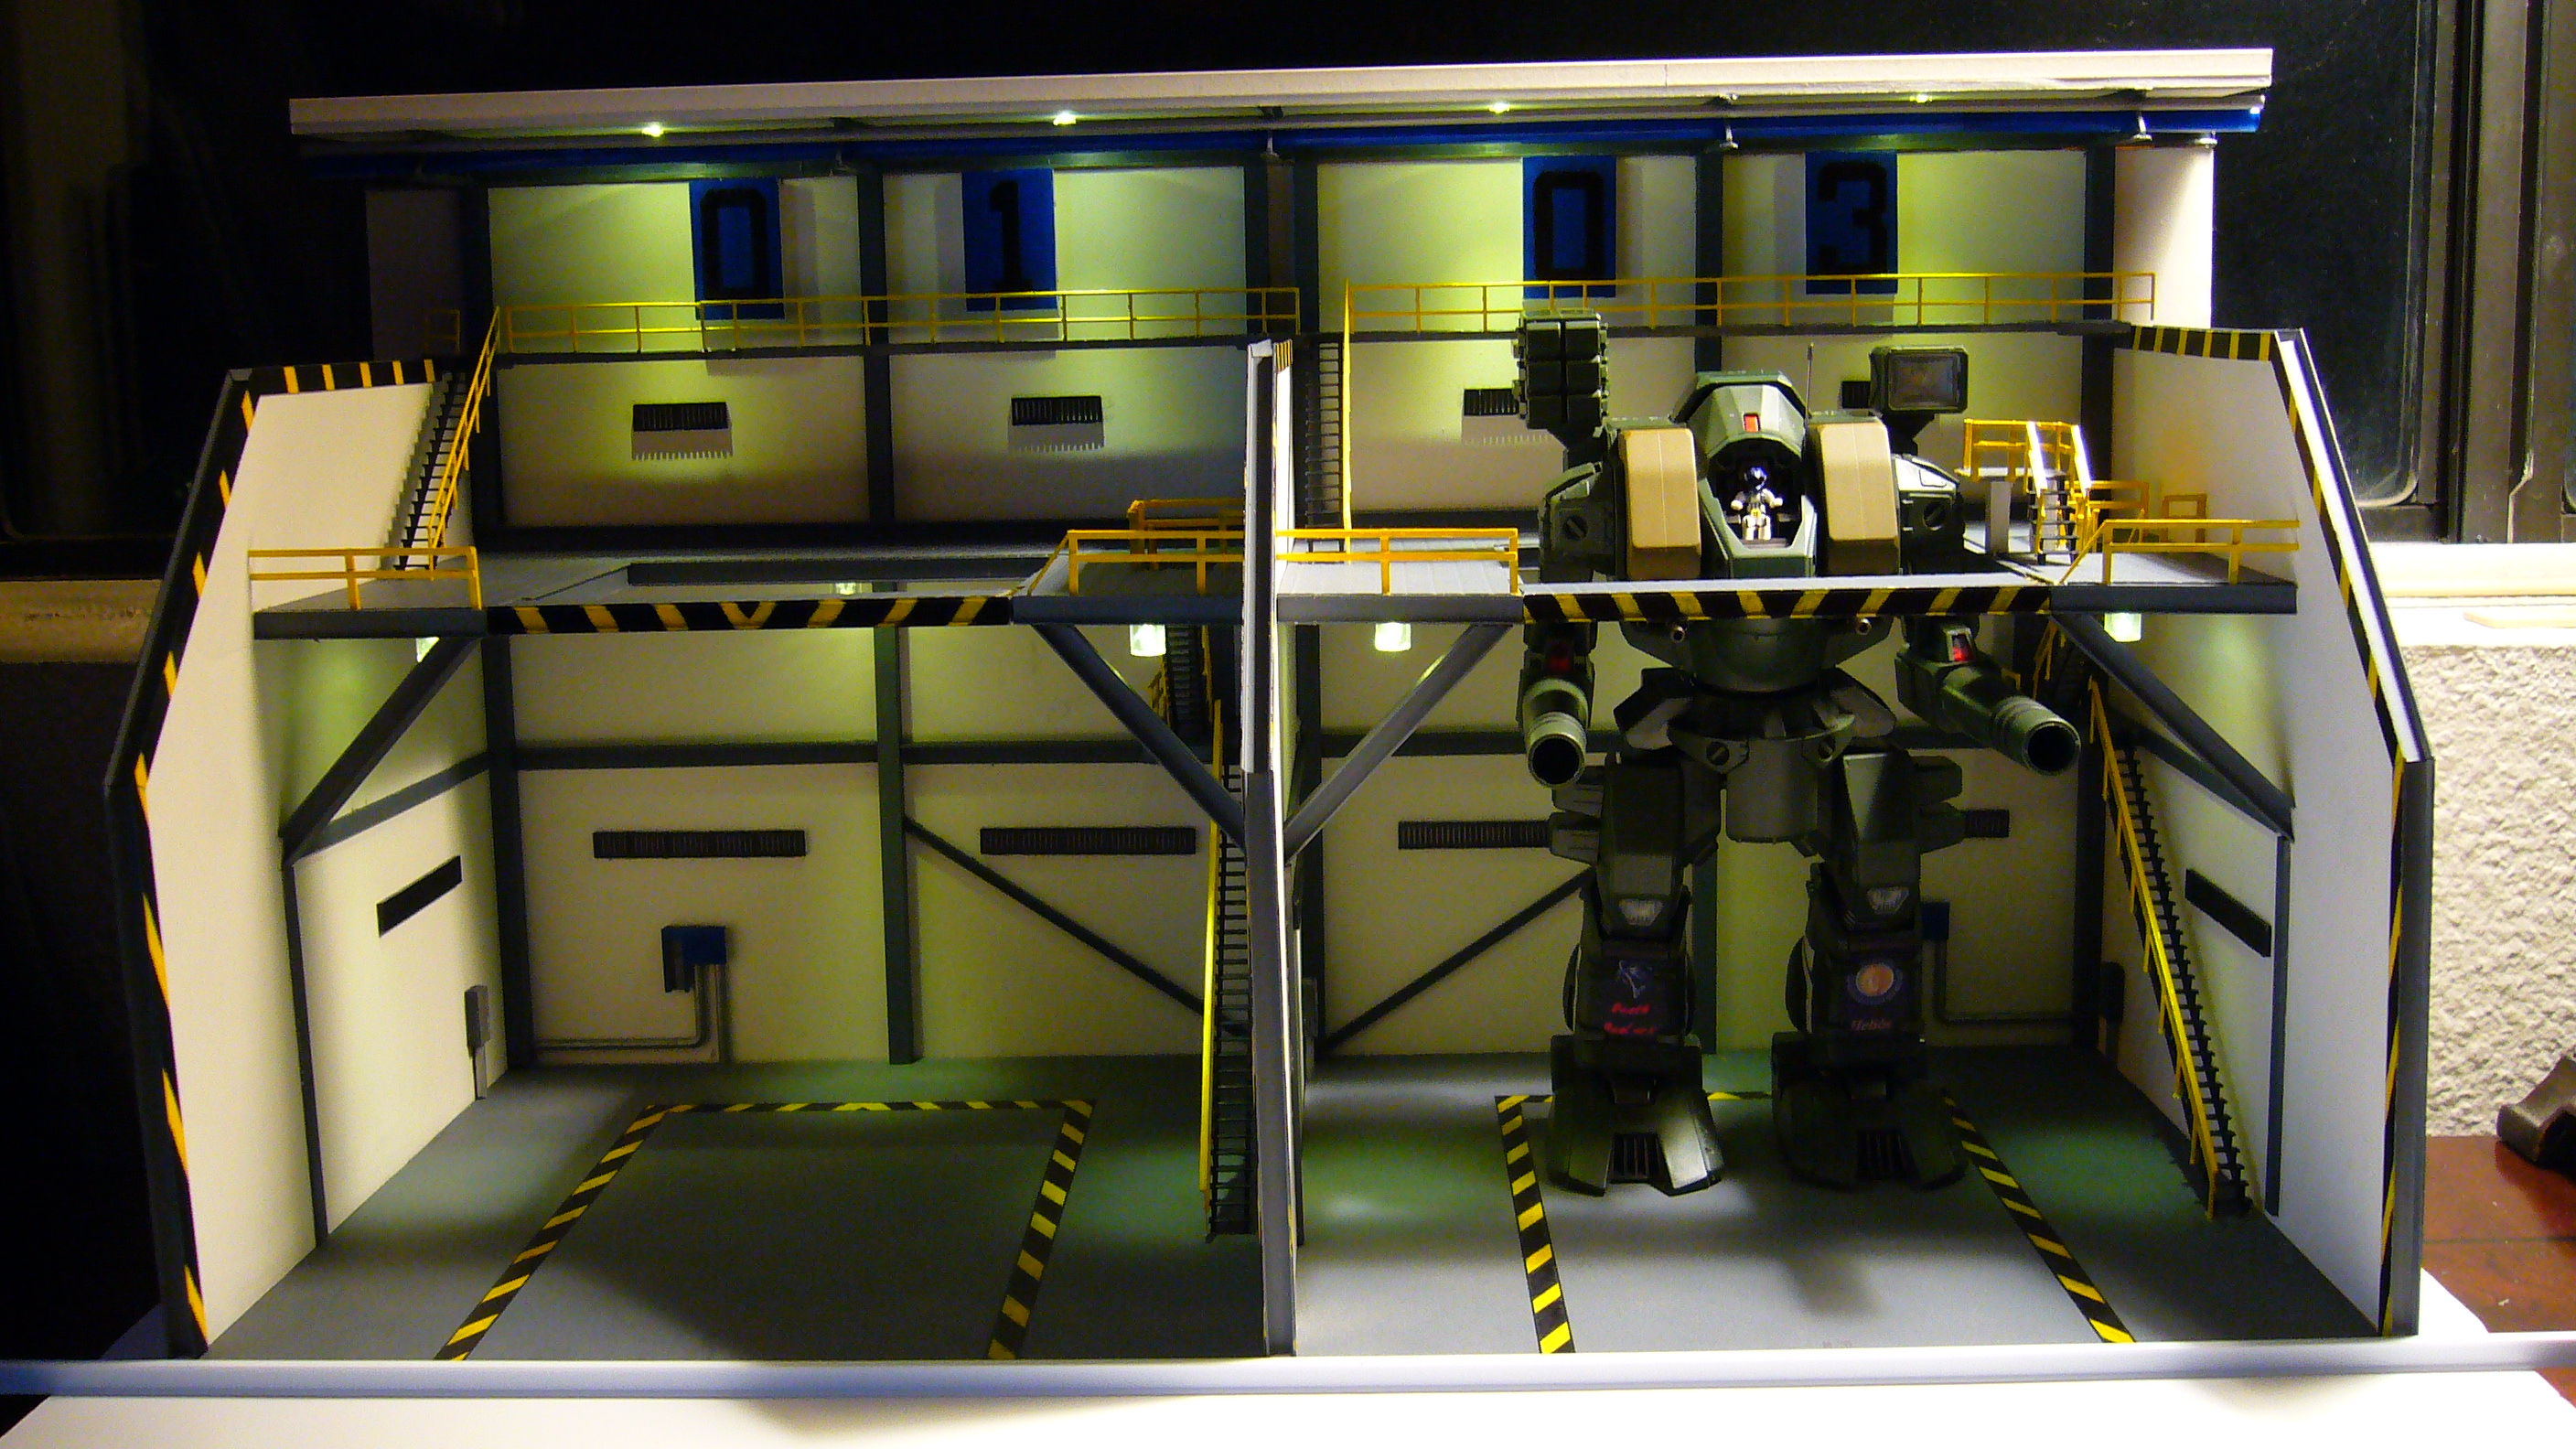
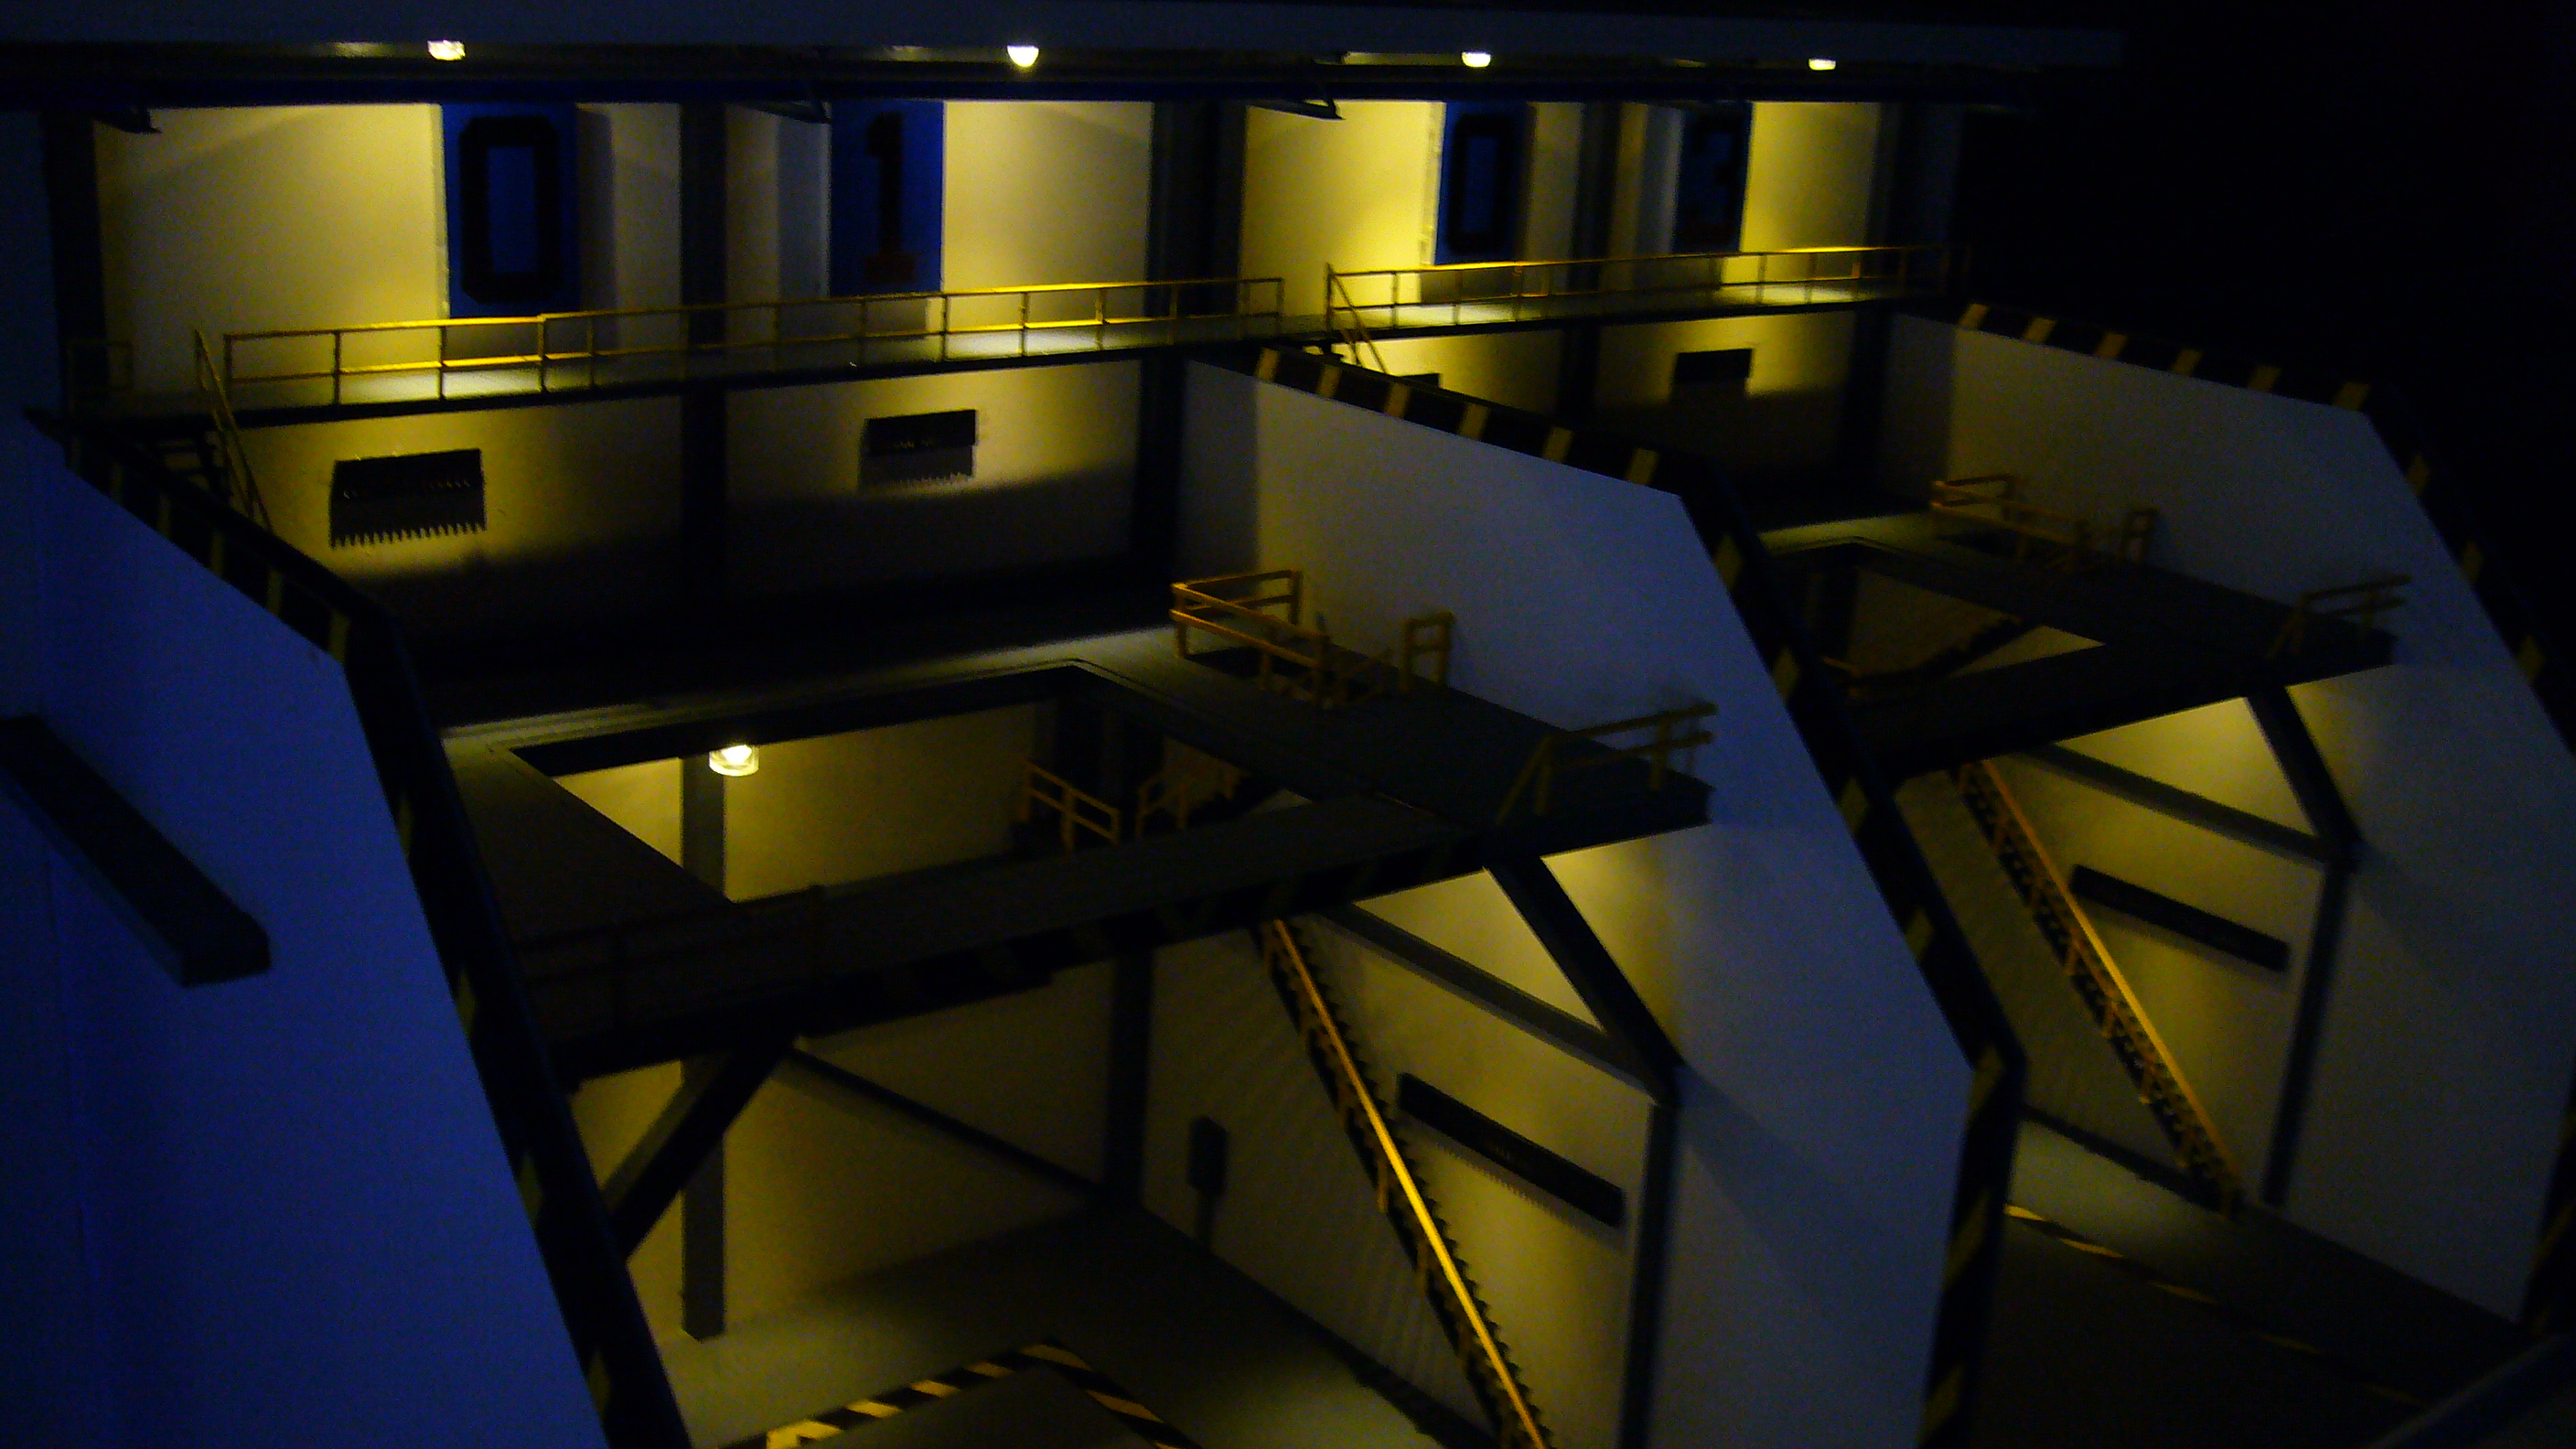
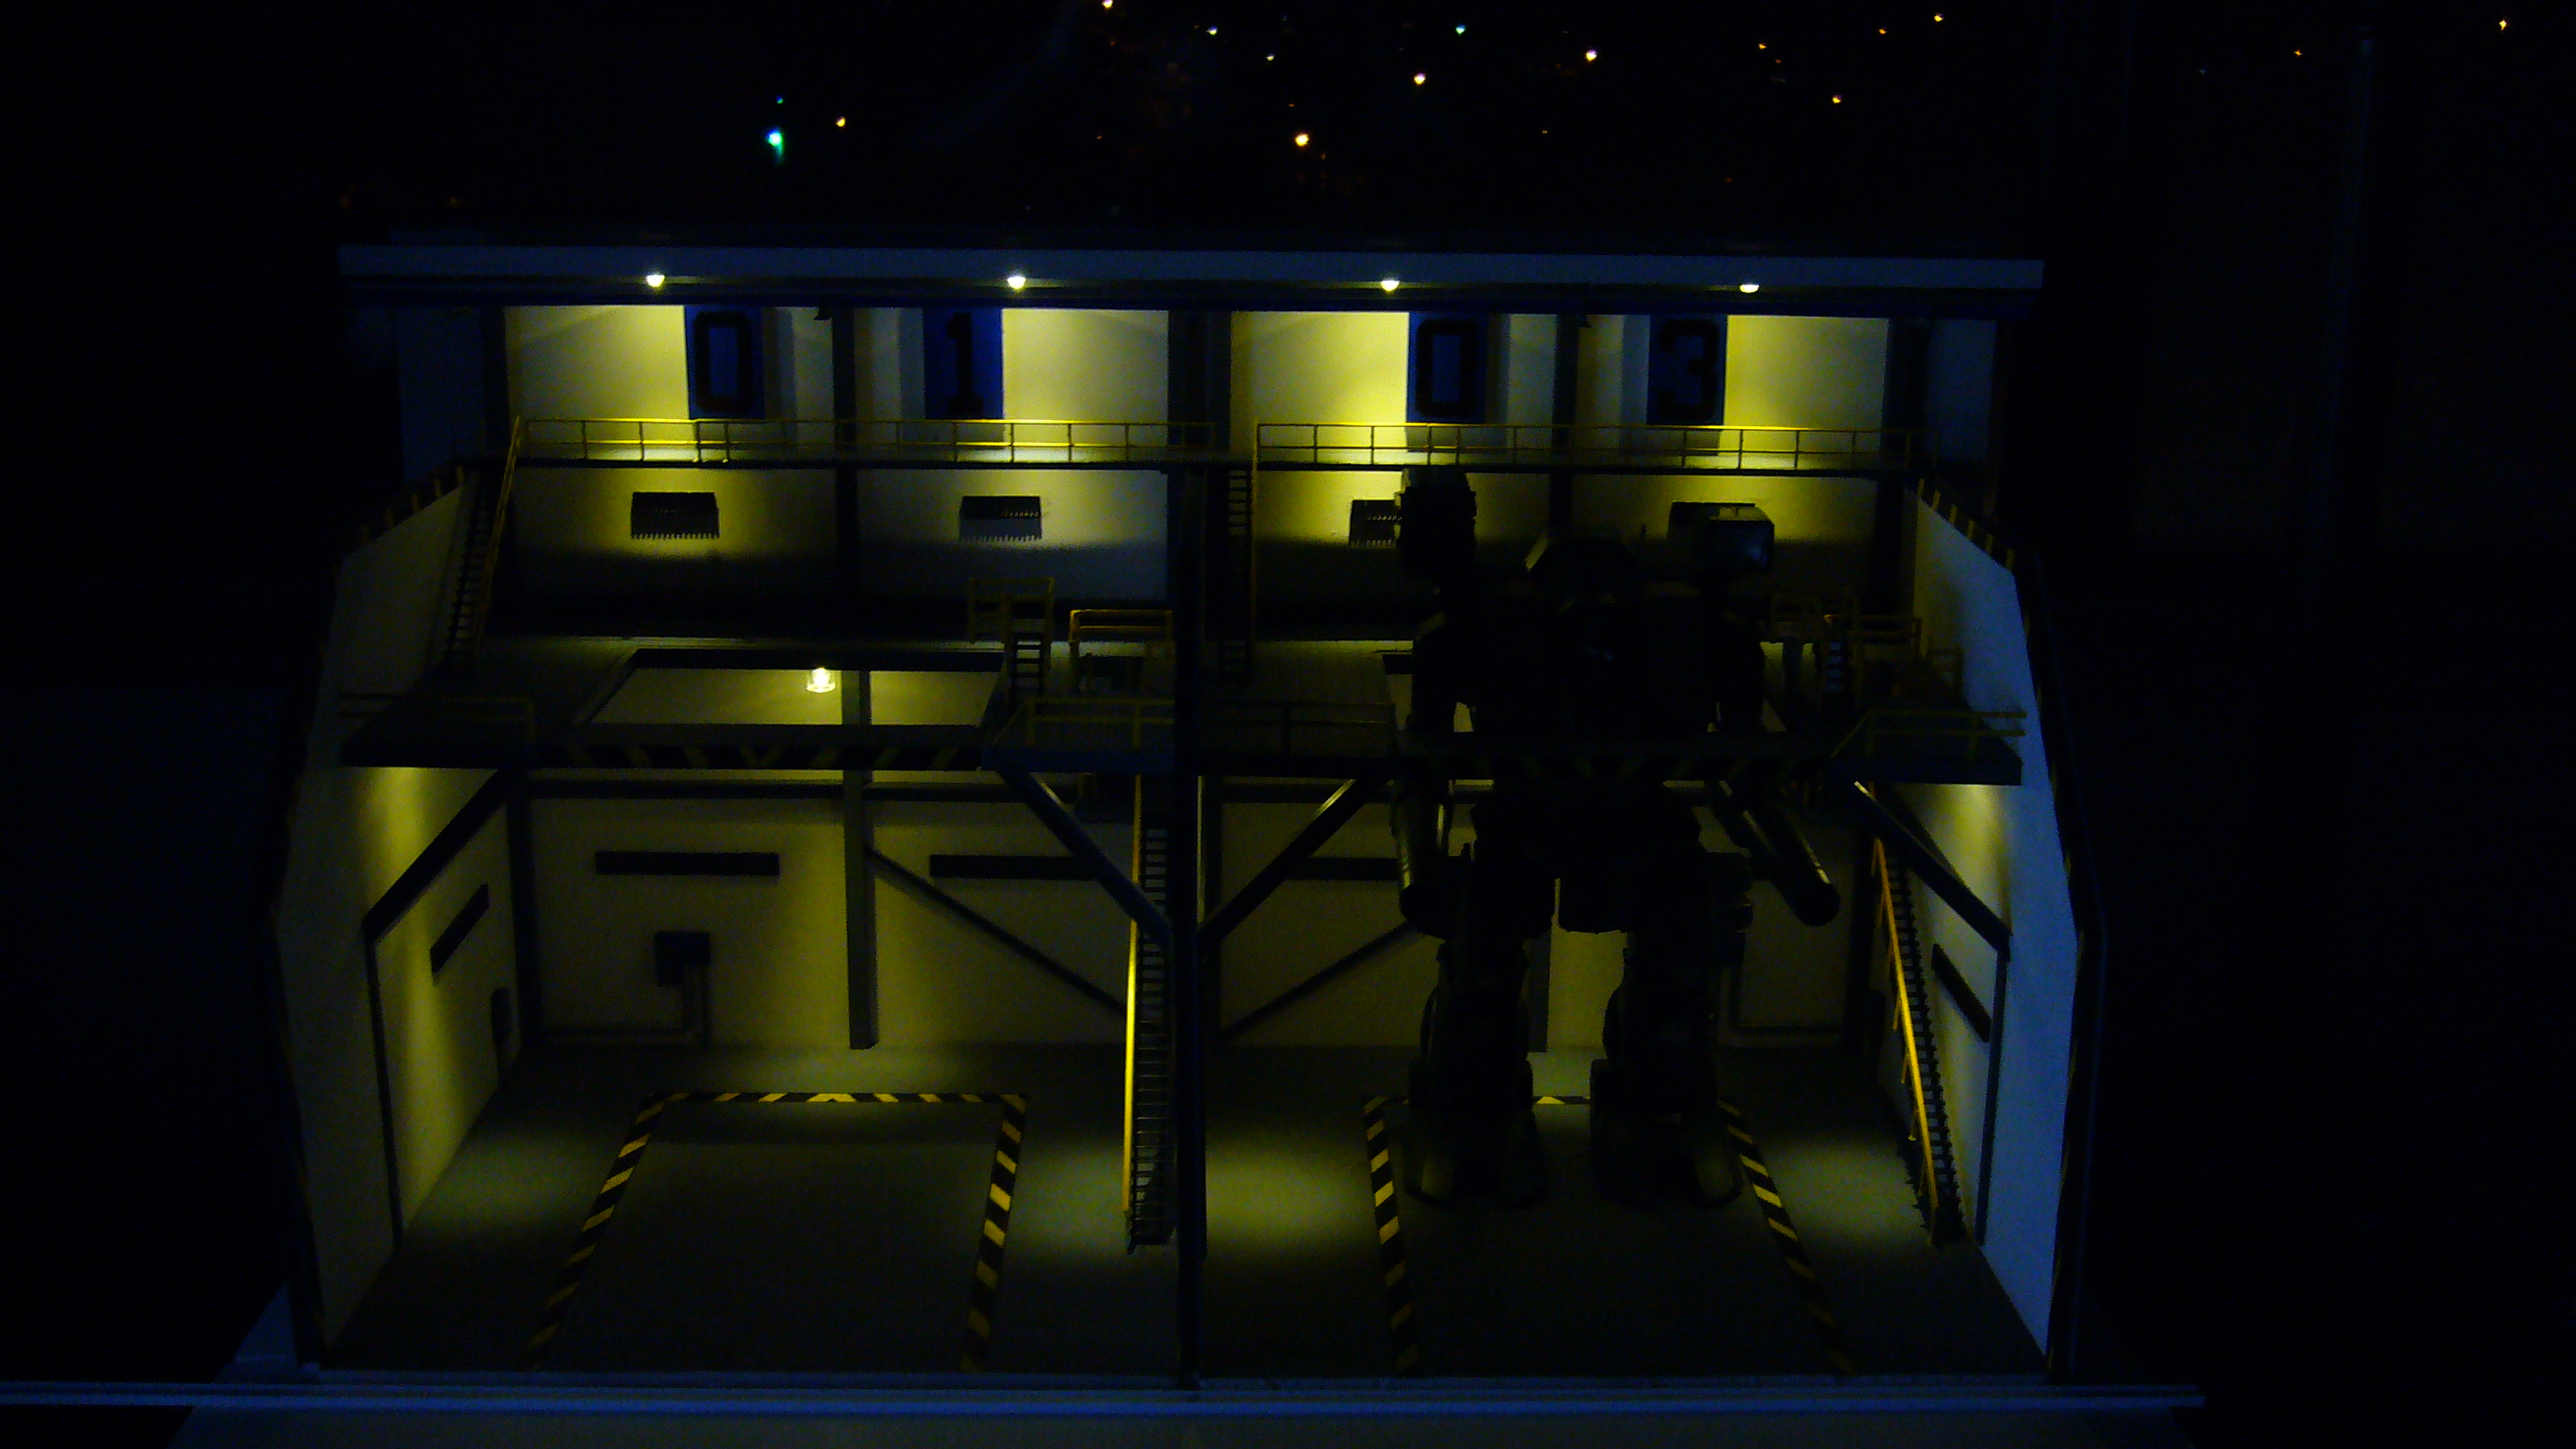
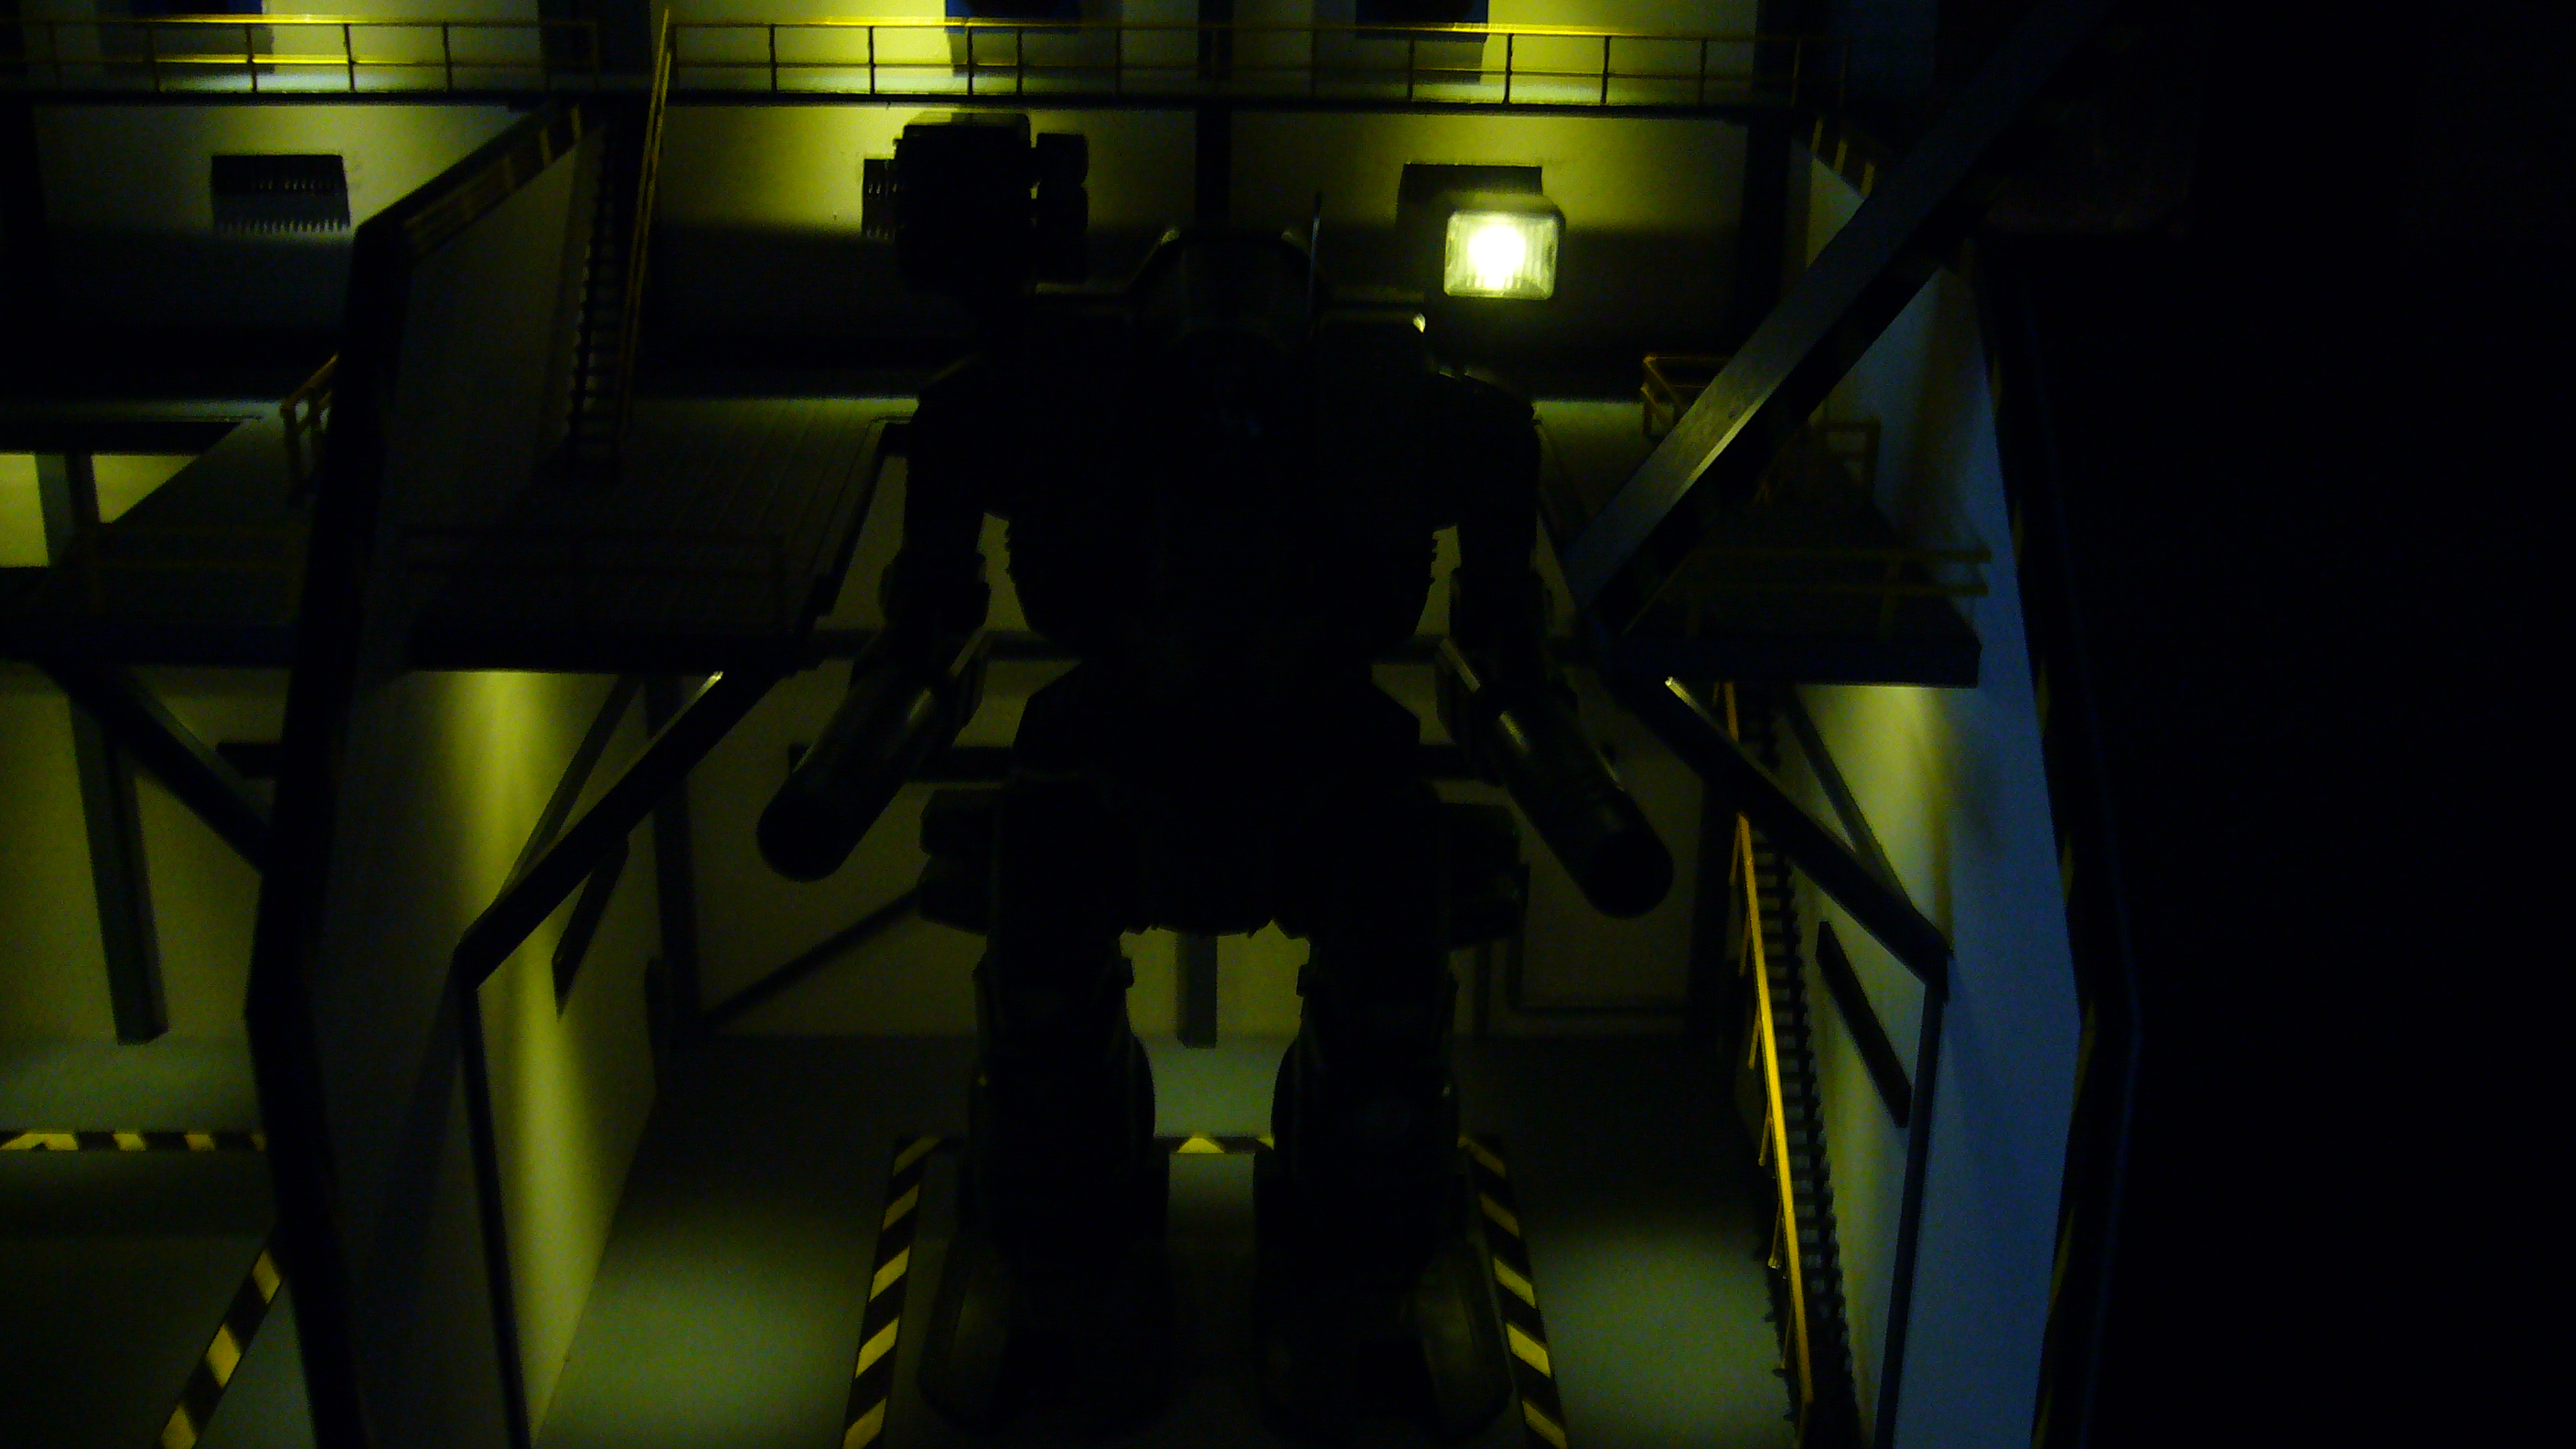
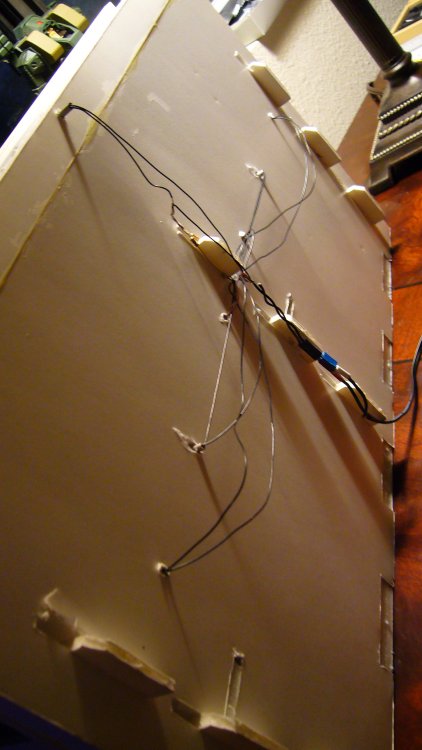
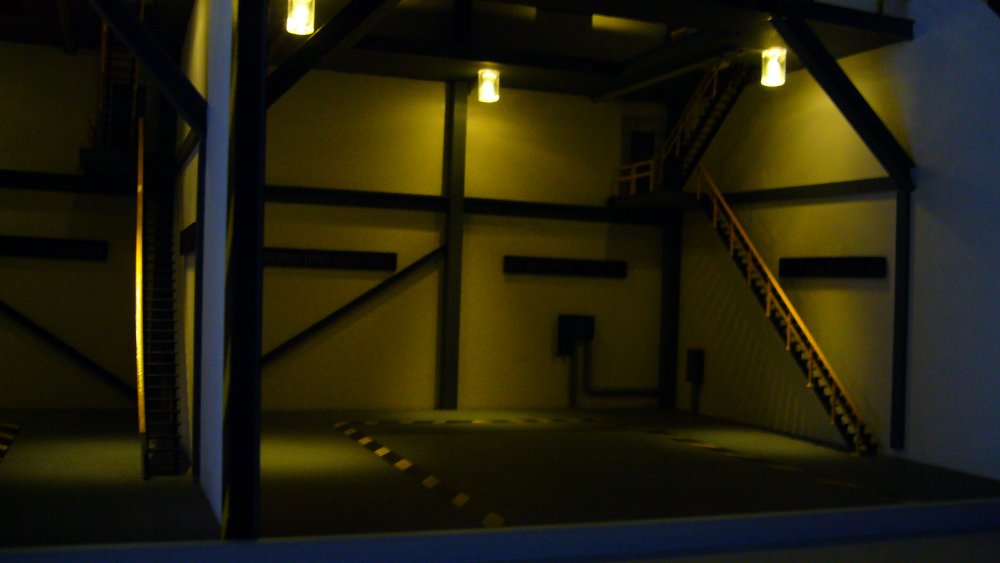
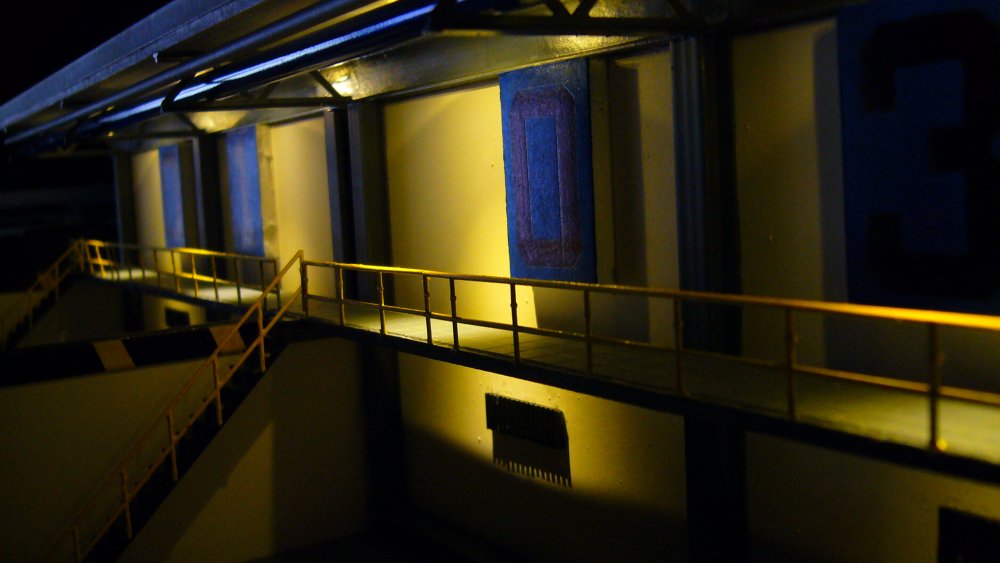
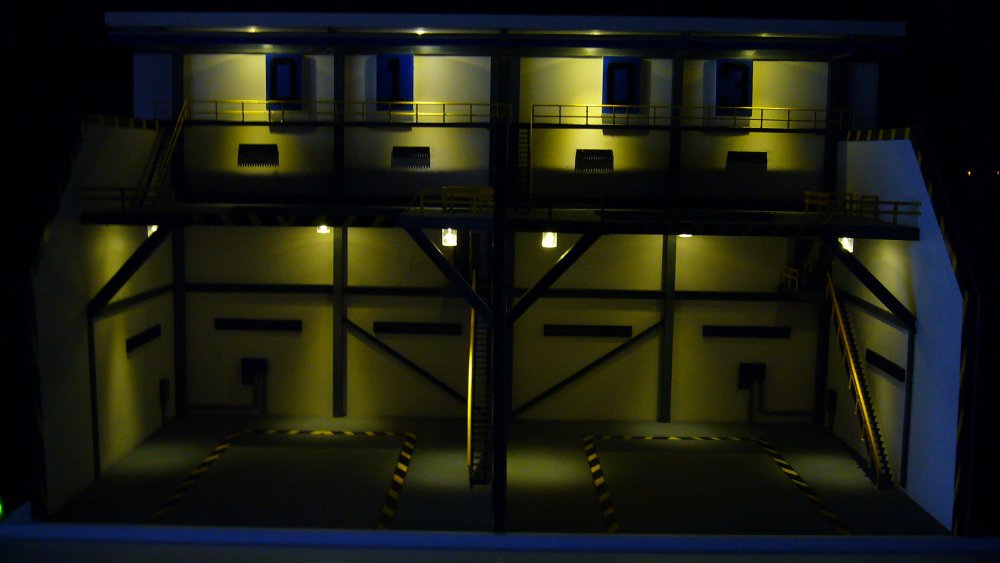
Hello again!! I'm back with yet another update as this part of the project comes to its conclusion. In the fallowing pictures you will see clips of the wiring harness and a temp cover to provide some sort of safety from snags and such. Also will be included pictures of the hanger in different lighting settings as well as different angles for your viewing pleasure. (and even a couple with a Hawk included) The first few will have normal lamp lighting on and then the fallowing pictures after that will have only the lighting of the bay itself. (with some reflection lighting from my computer monitors) I hope you have enjoyed this project thus far and look I forward to showing you the other sections (in the near future) that will compile the overall display of the diorama called Purgatory. (as described and detailed by the Author and Creator of Destroids Last Dance, Rob Elwell.) So without further ado...kick back once again and enjoy the eye candy!! Blue


-
The lighting assembly is hand made and consists of 1/8 inch round styrene tubing for the conduit and 1/4 inch clear tubing that can be found at a pet store or anywhere they sell clear tubing for fish tanks and such. the clear tubing allows a nice fit if you where to install LED lighting as well.
-
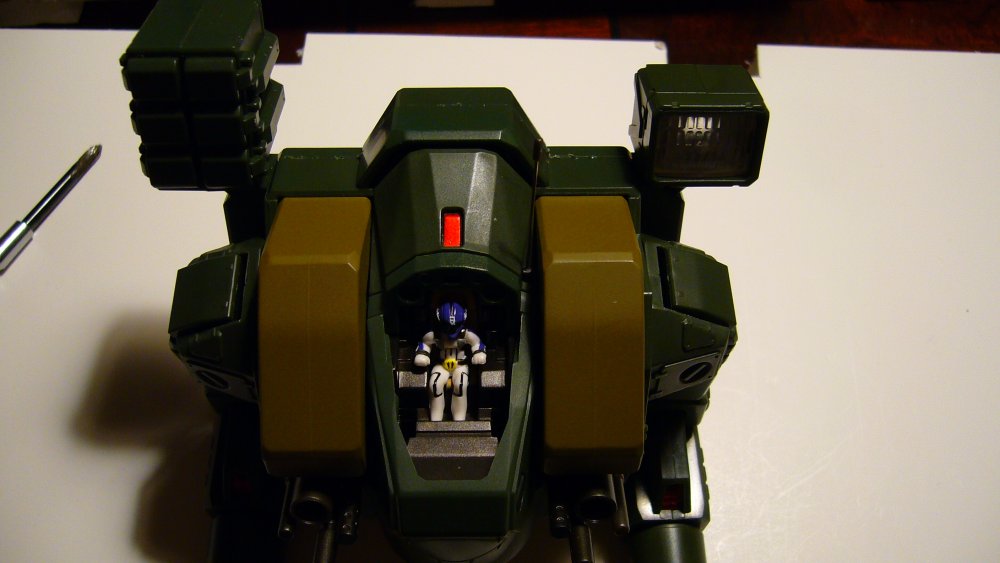
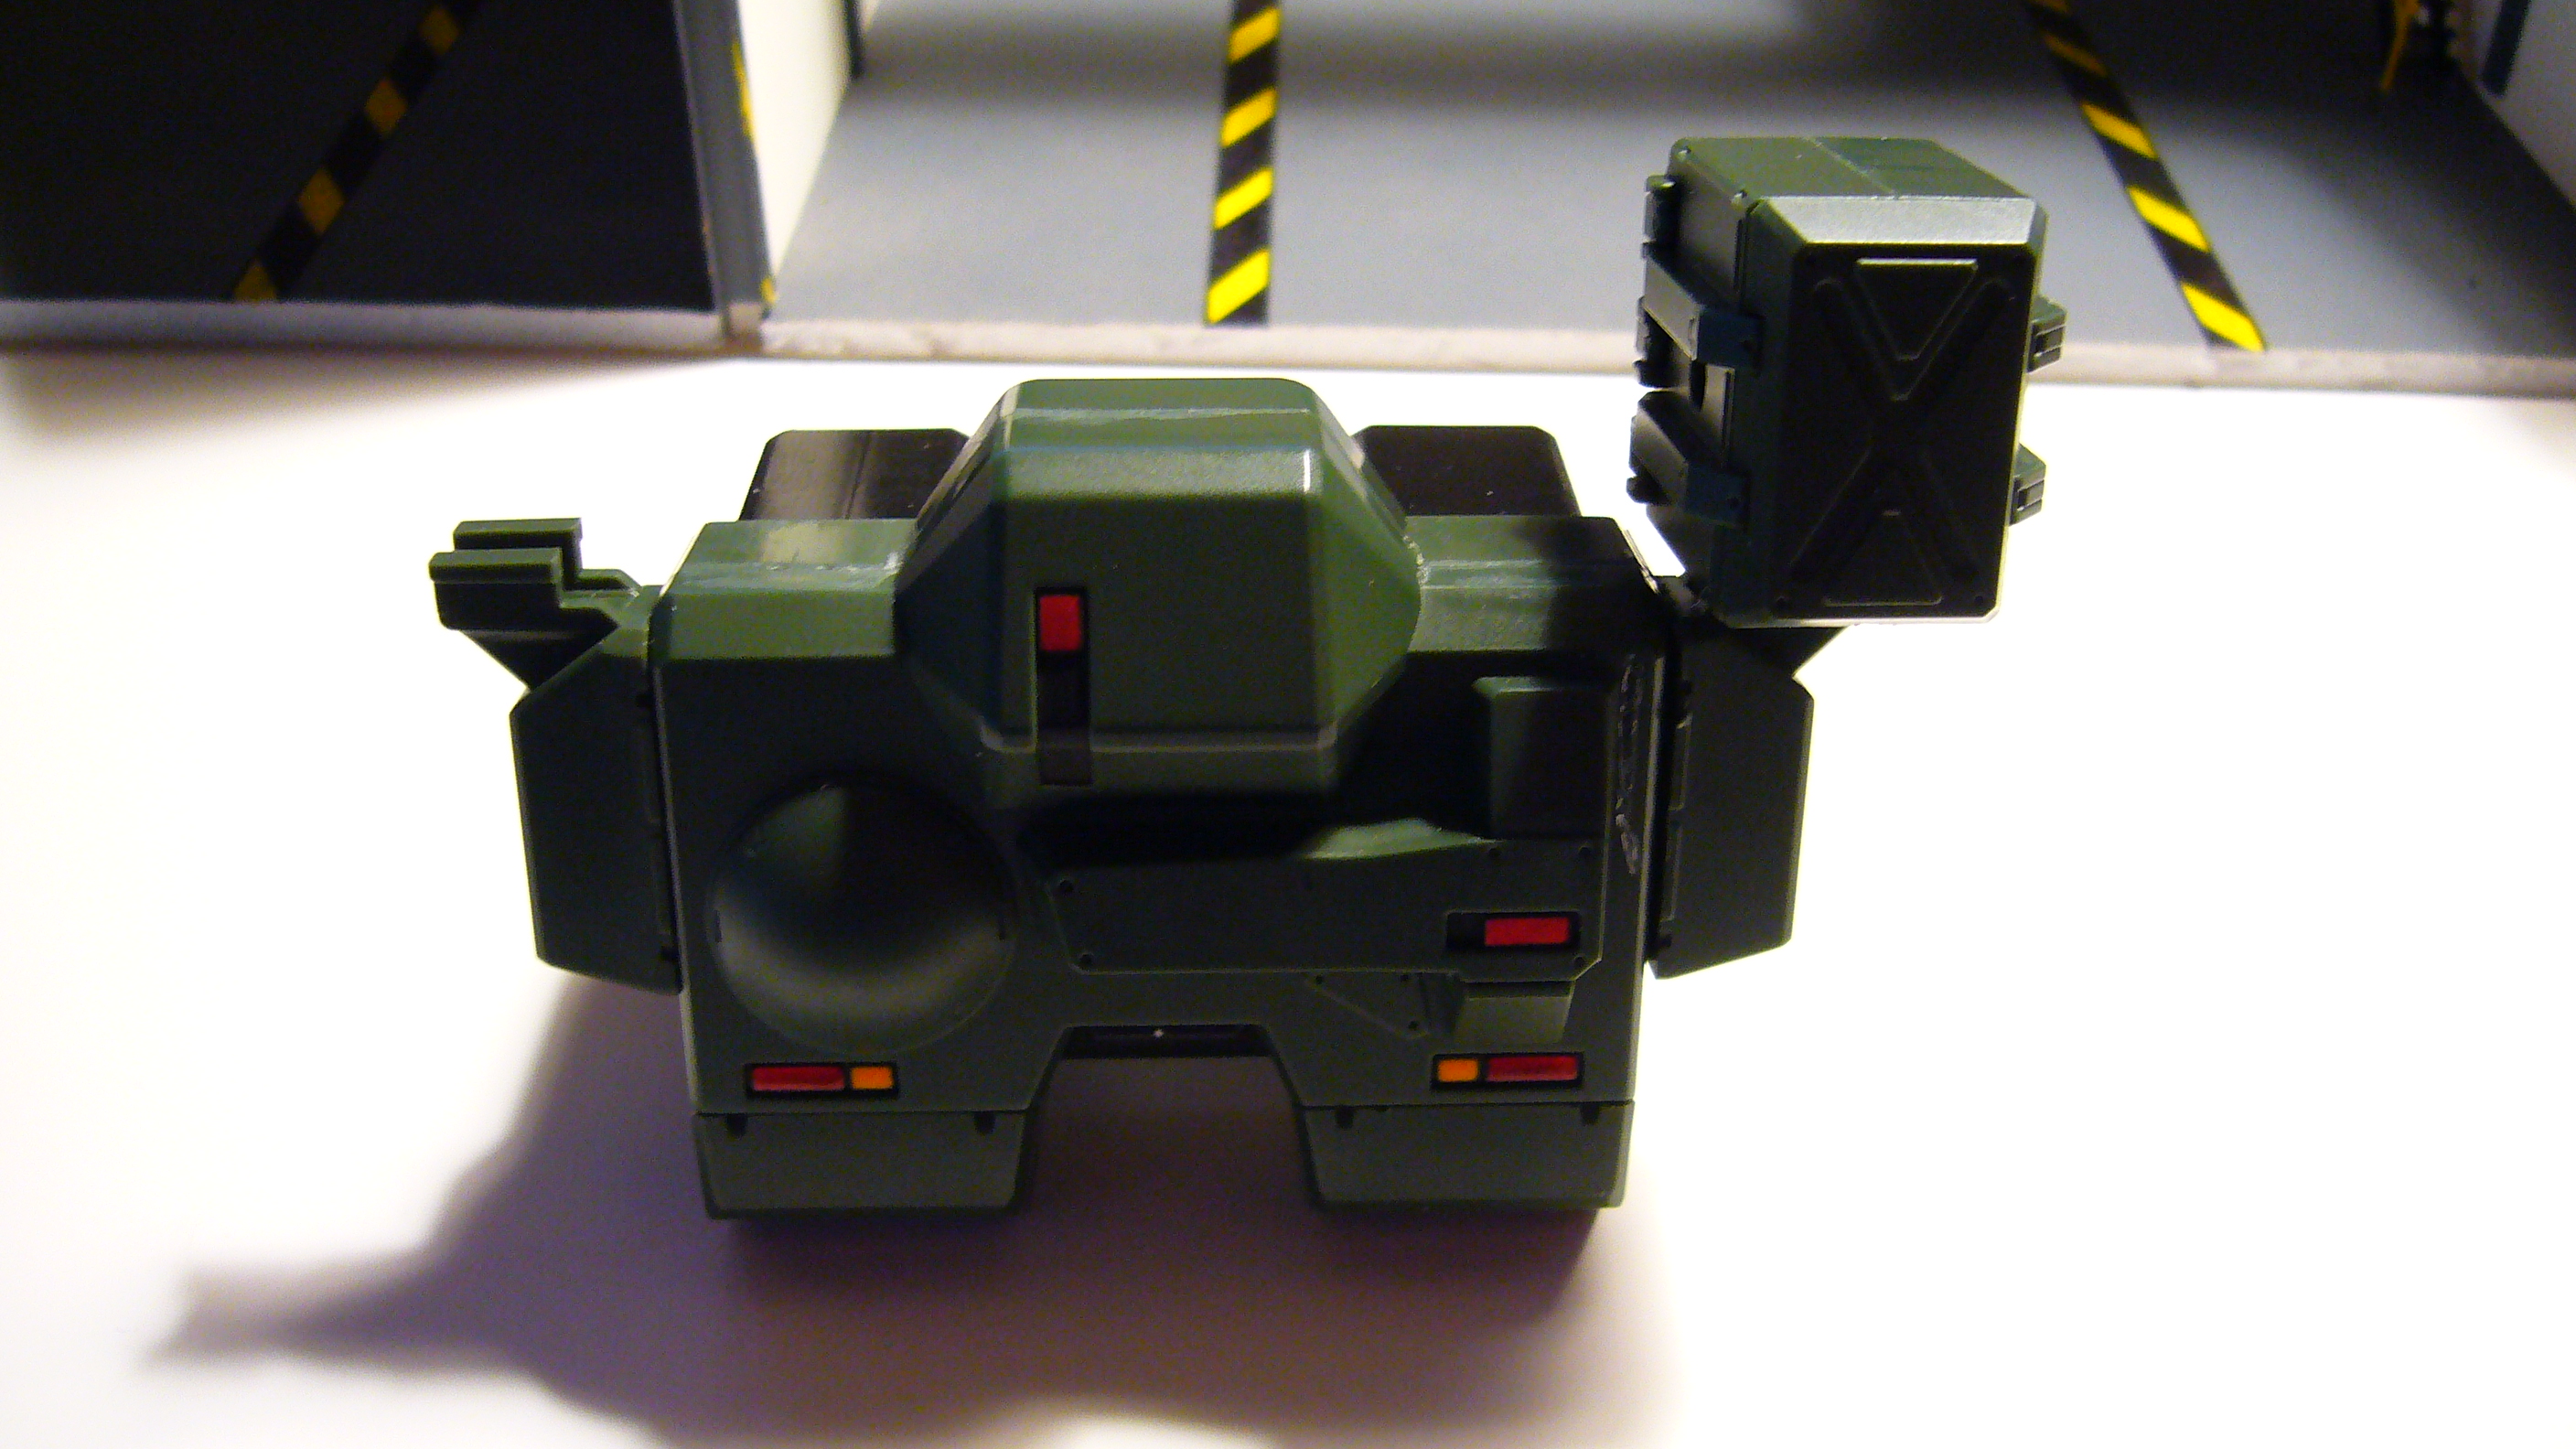
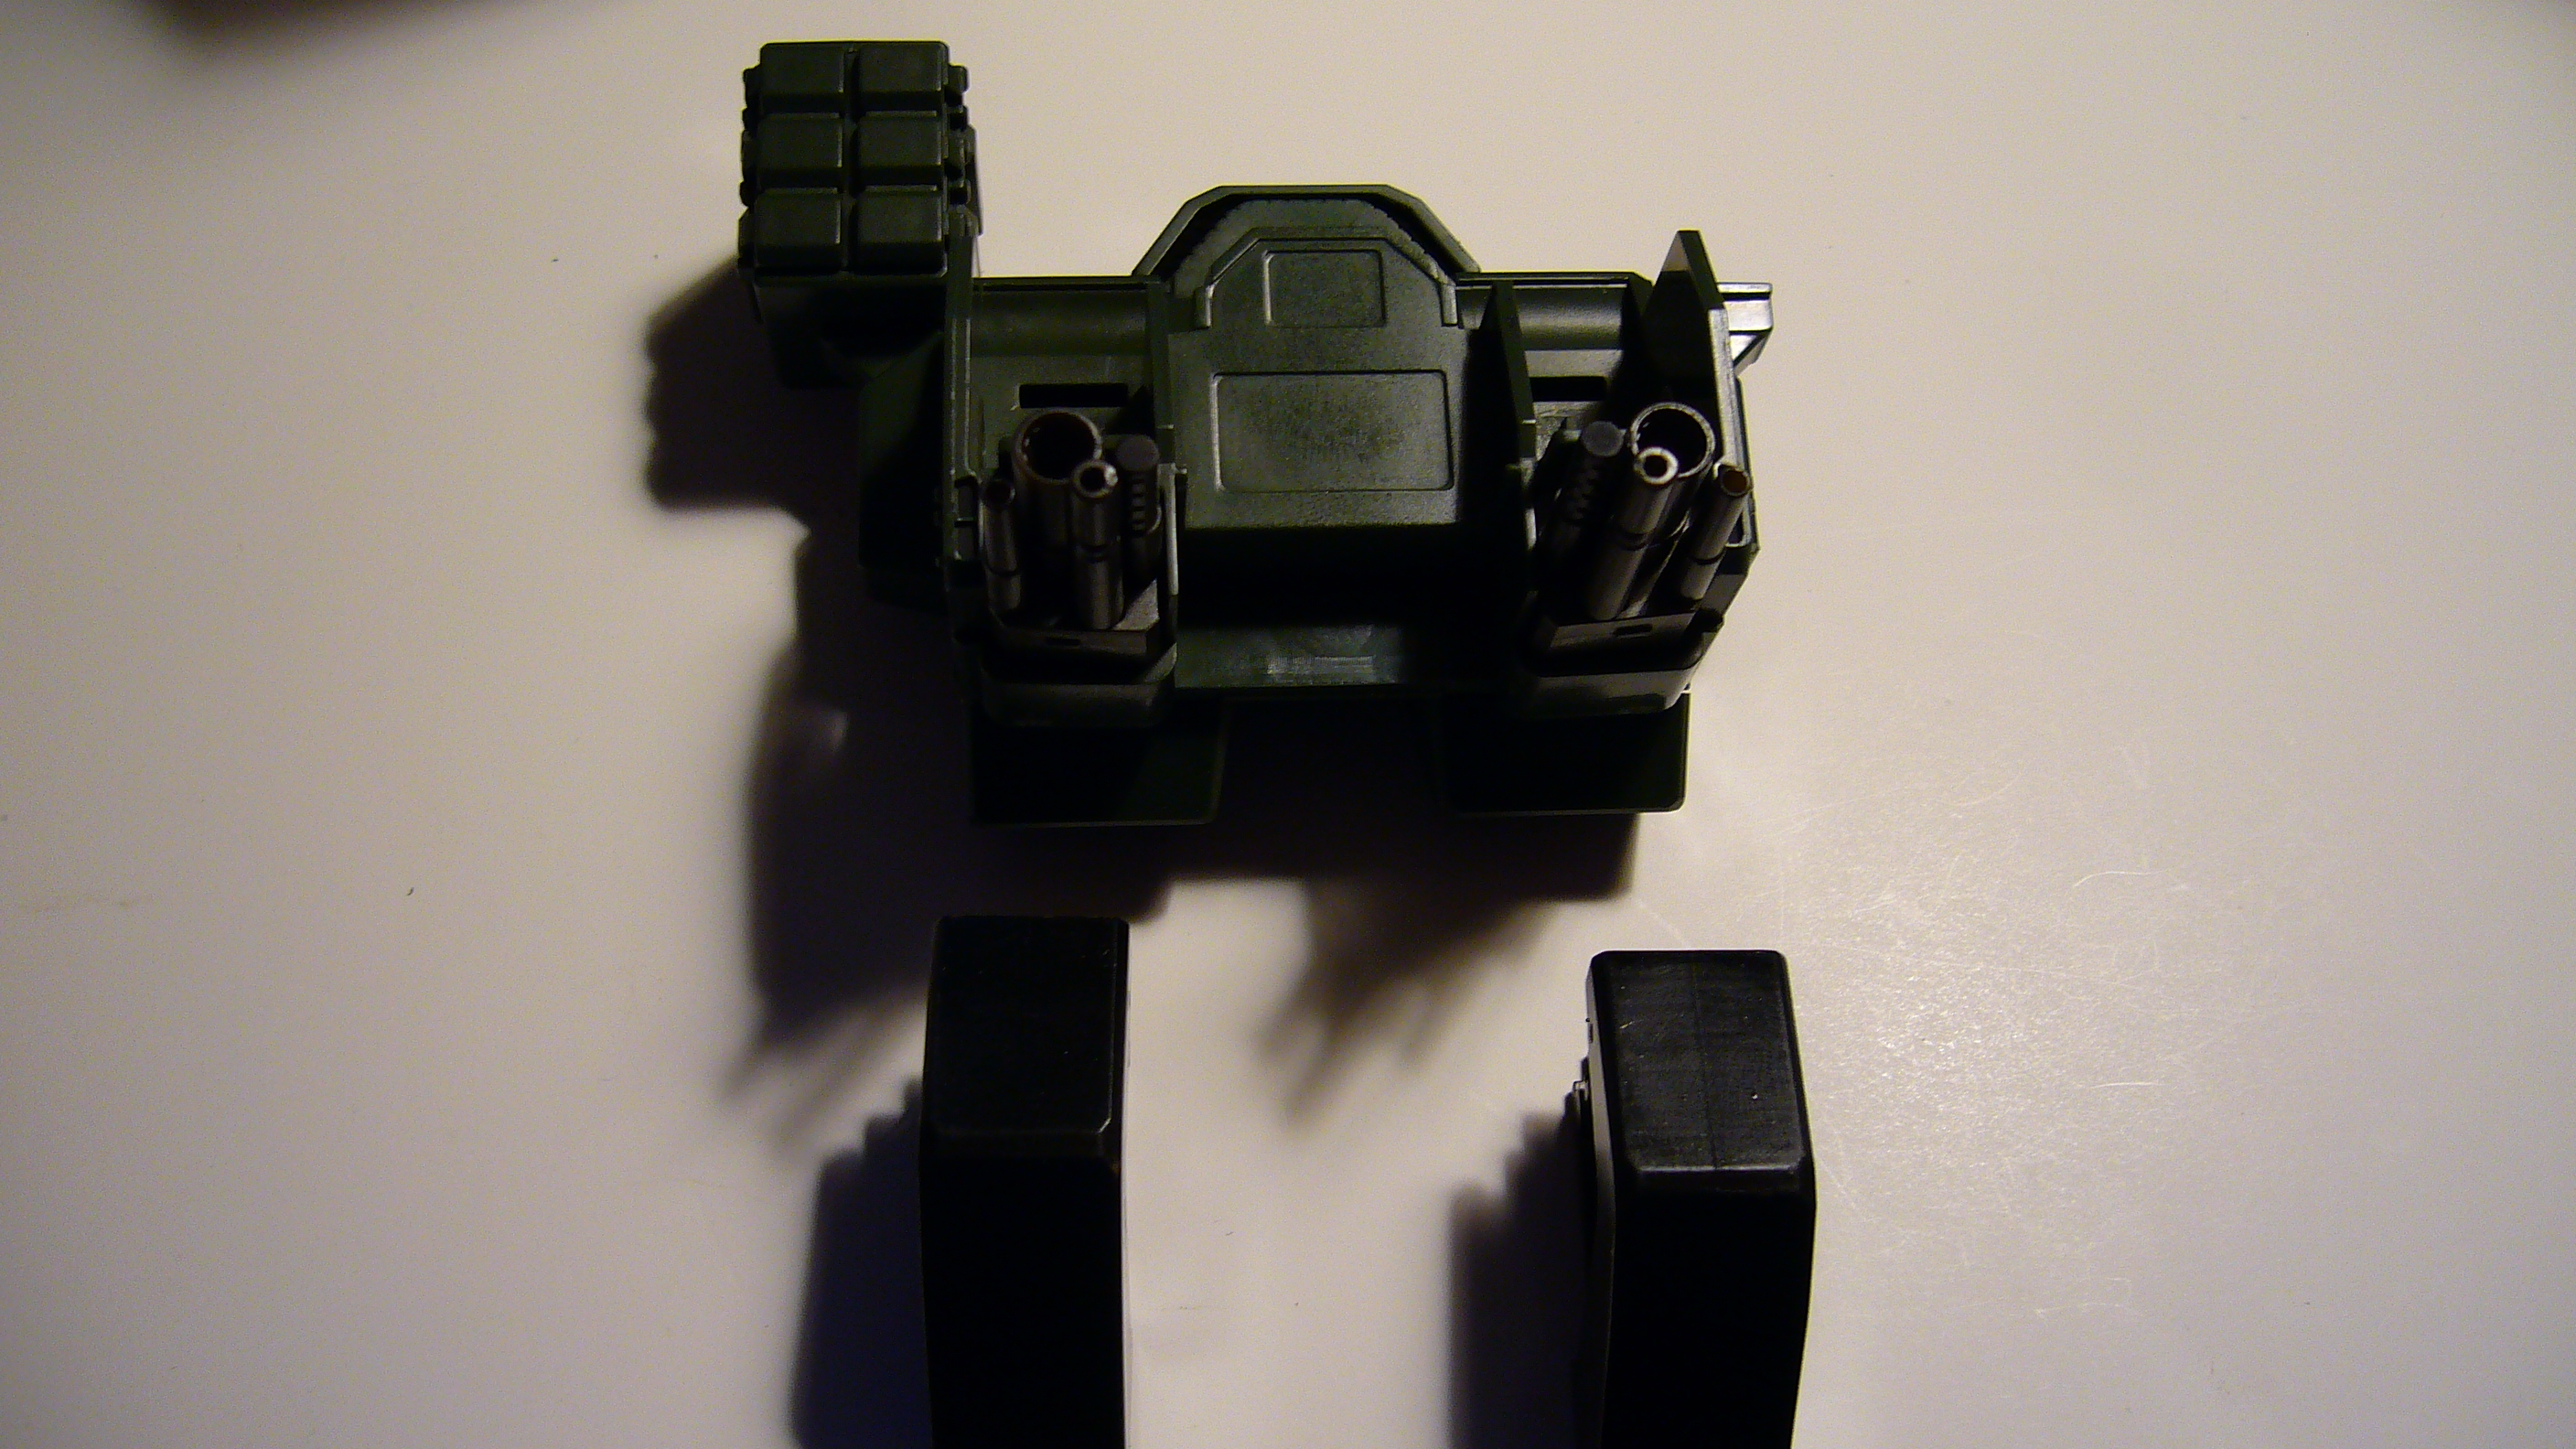
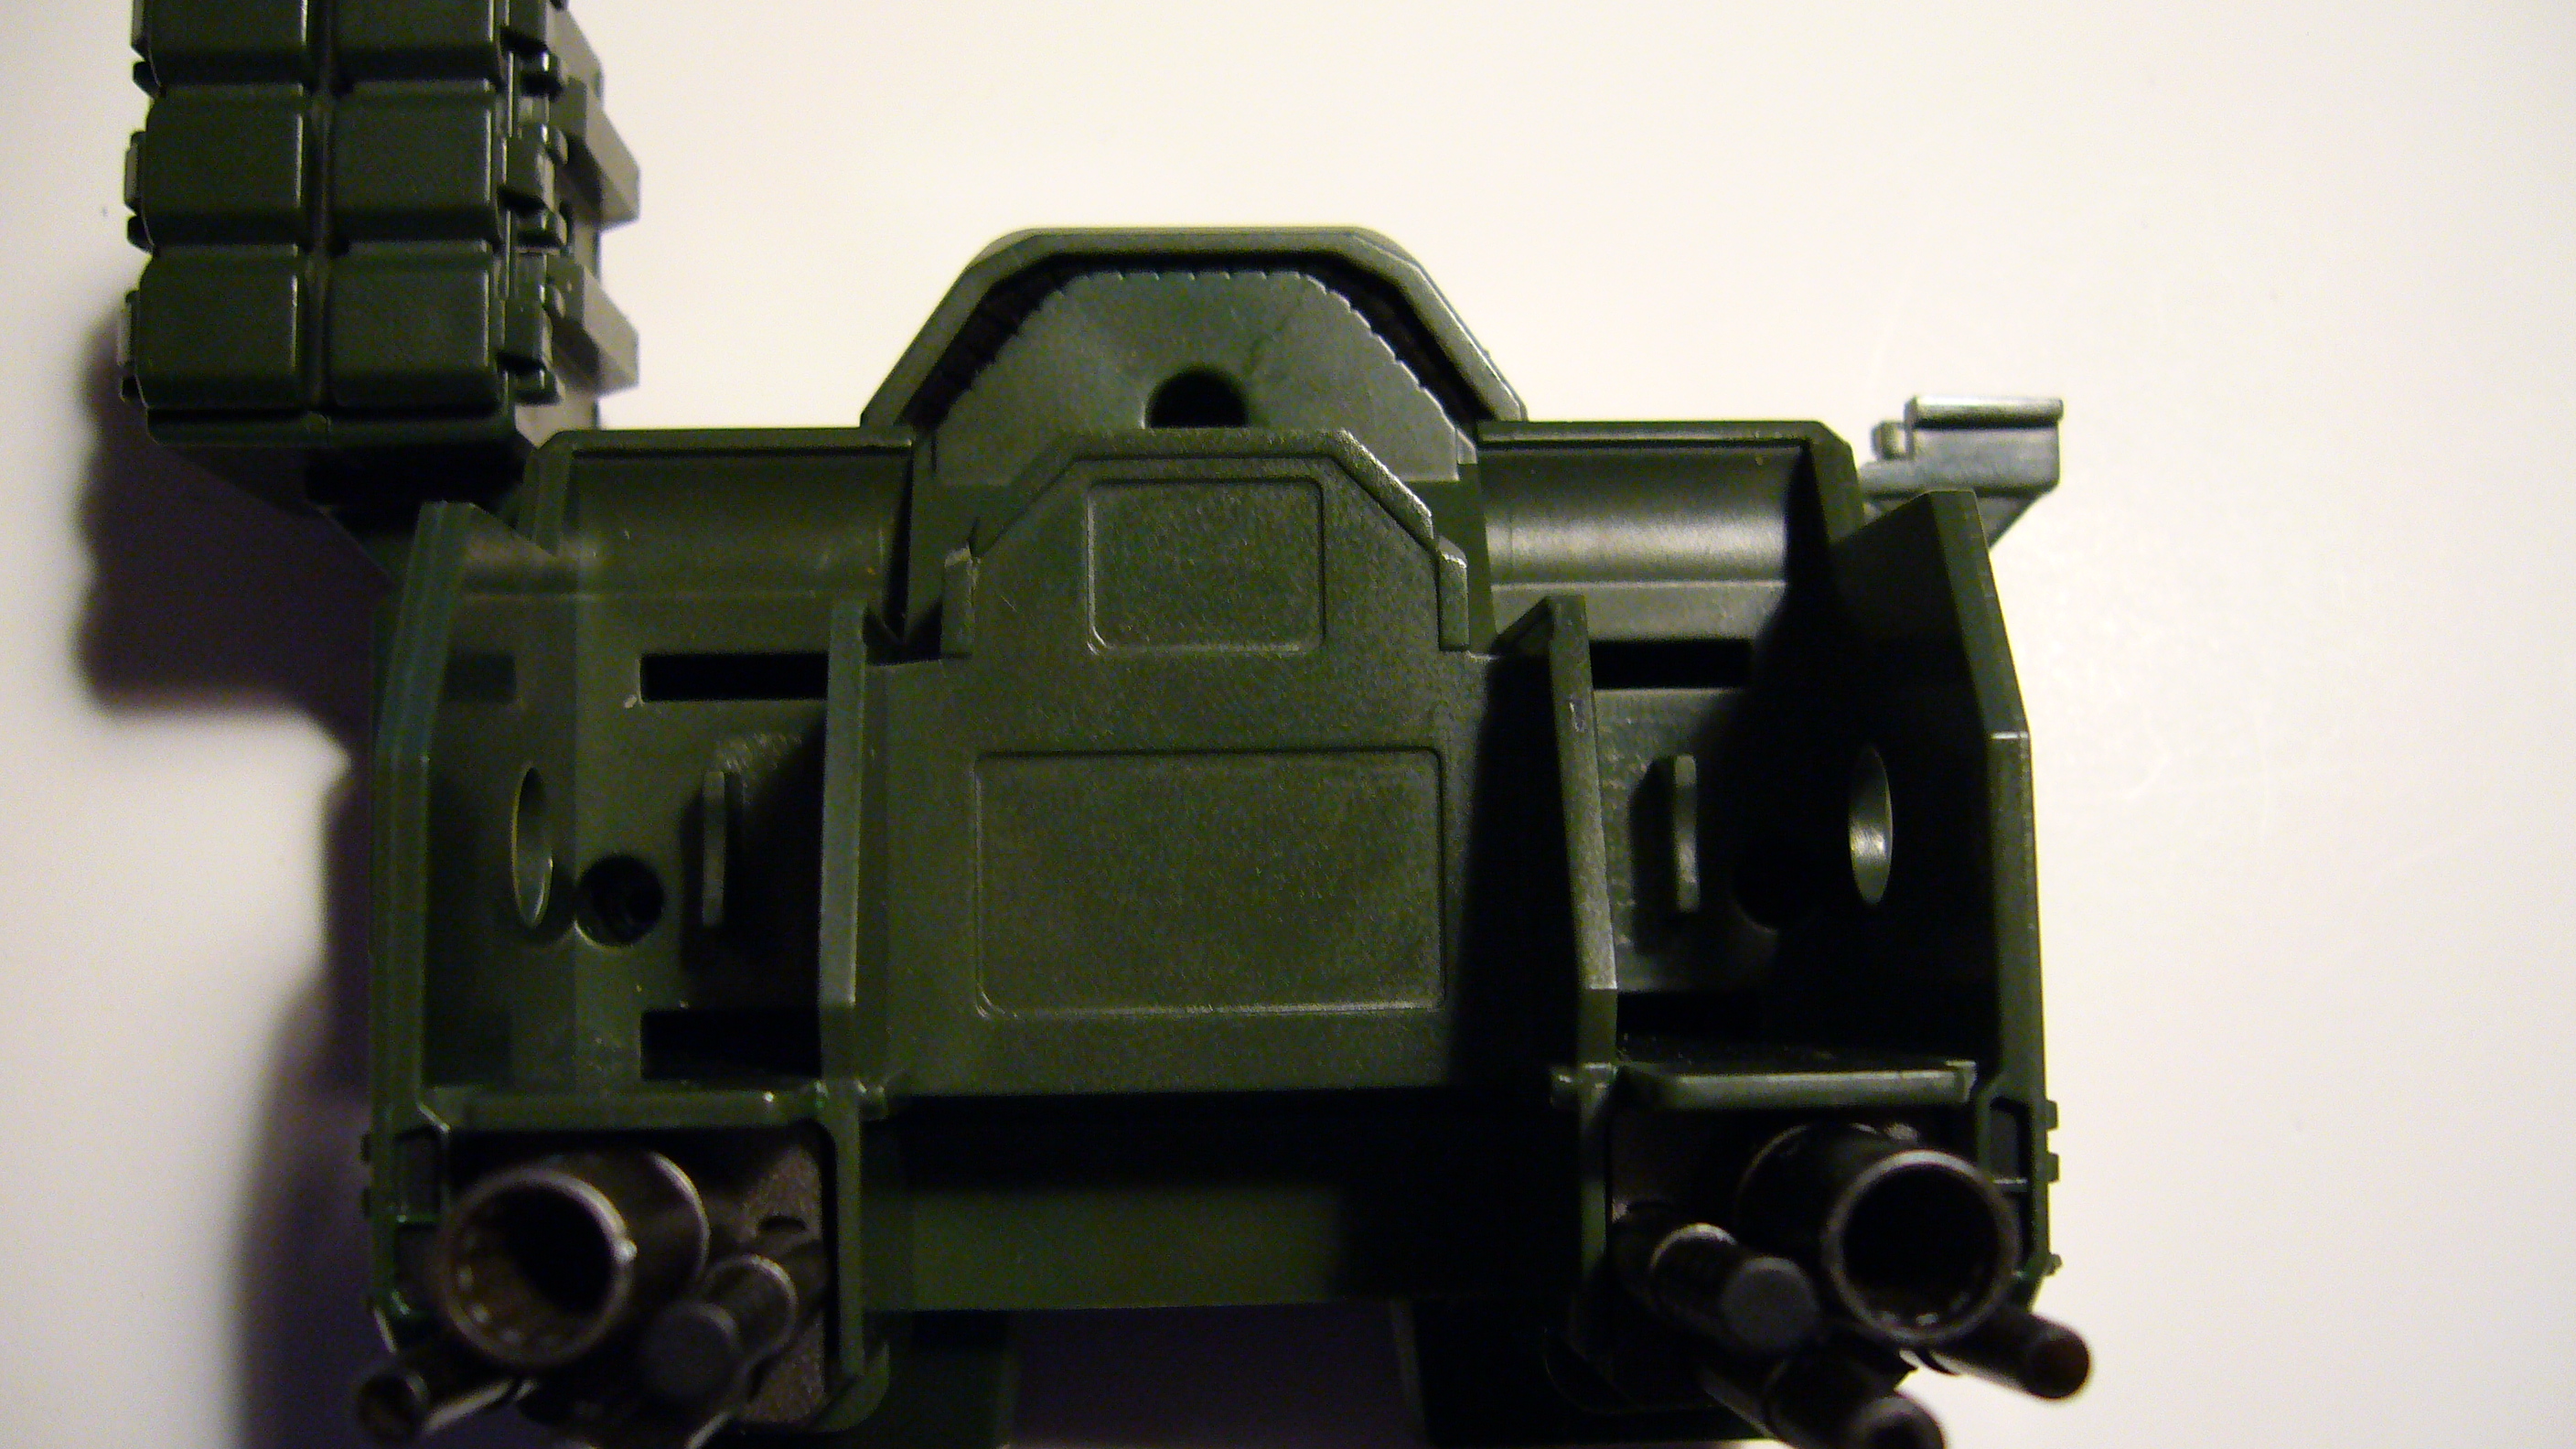
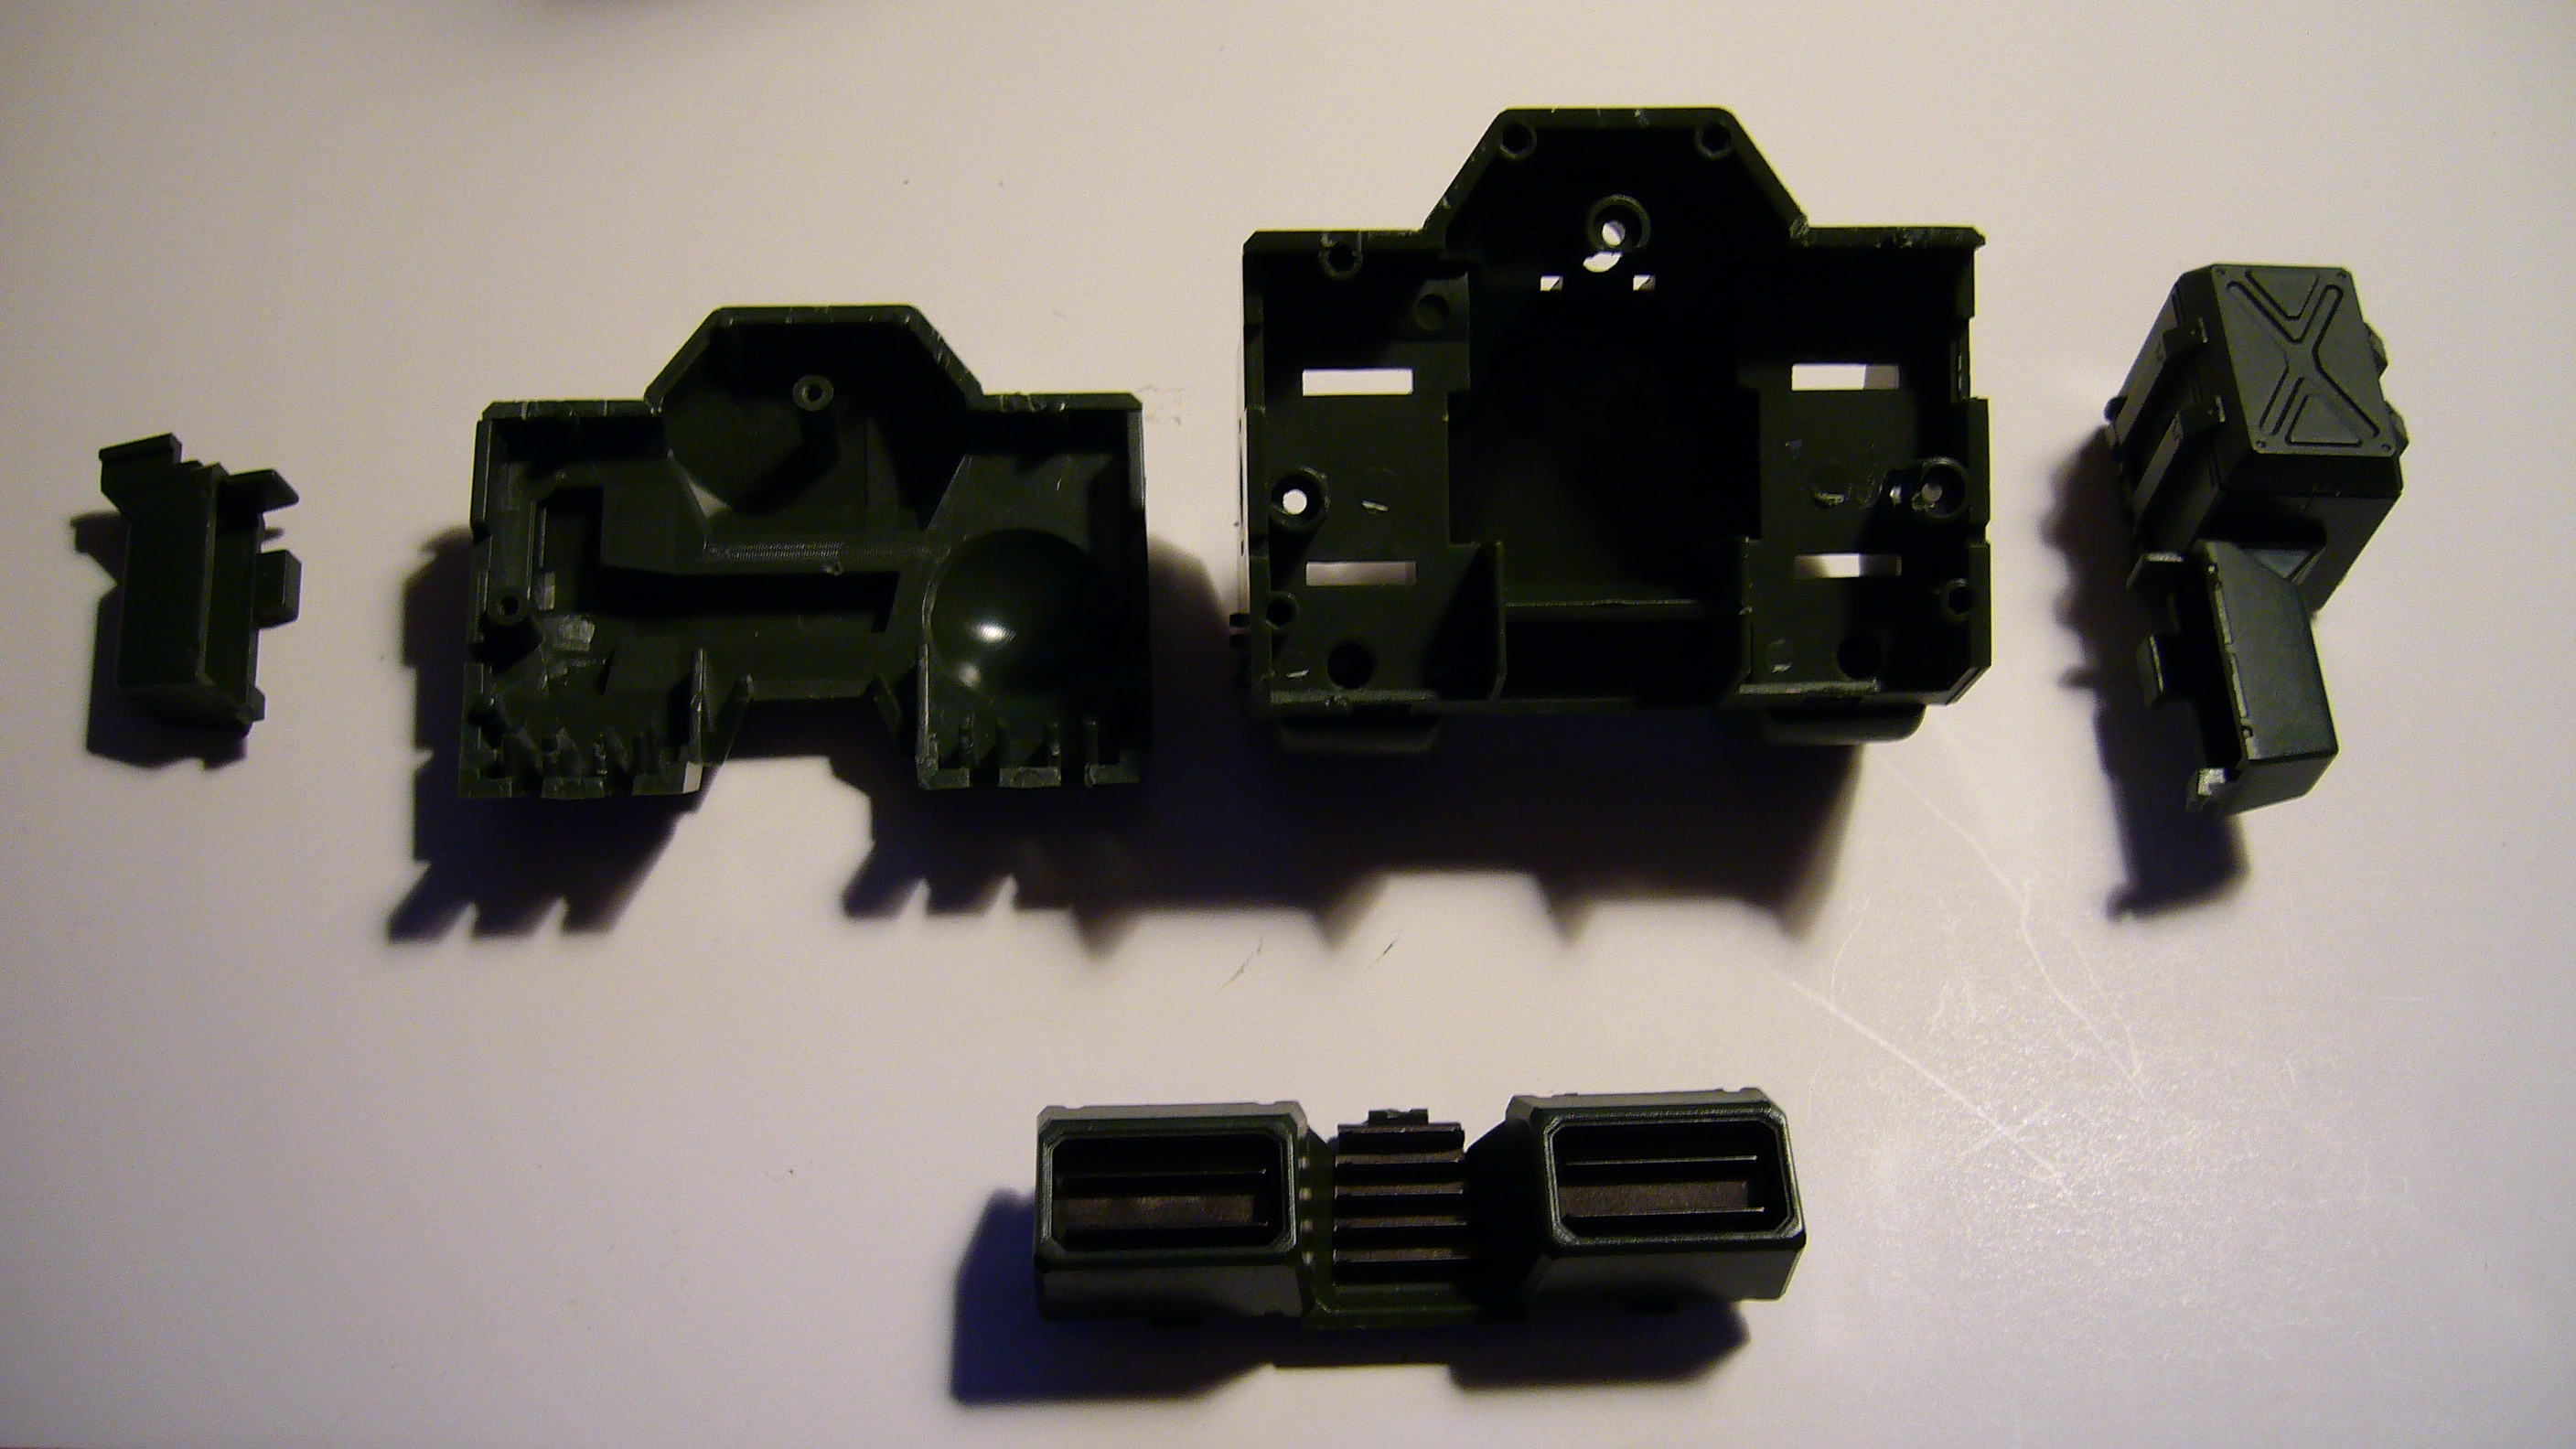
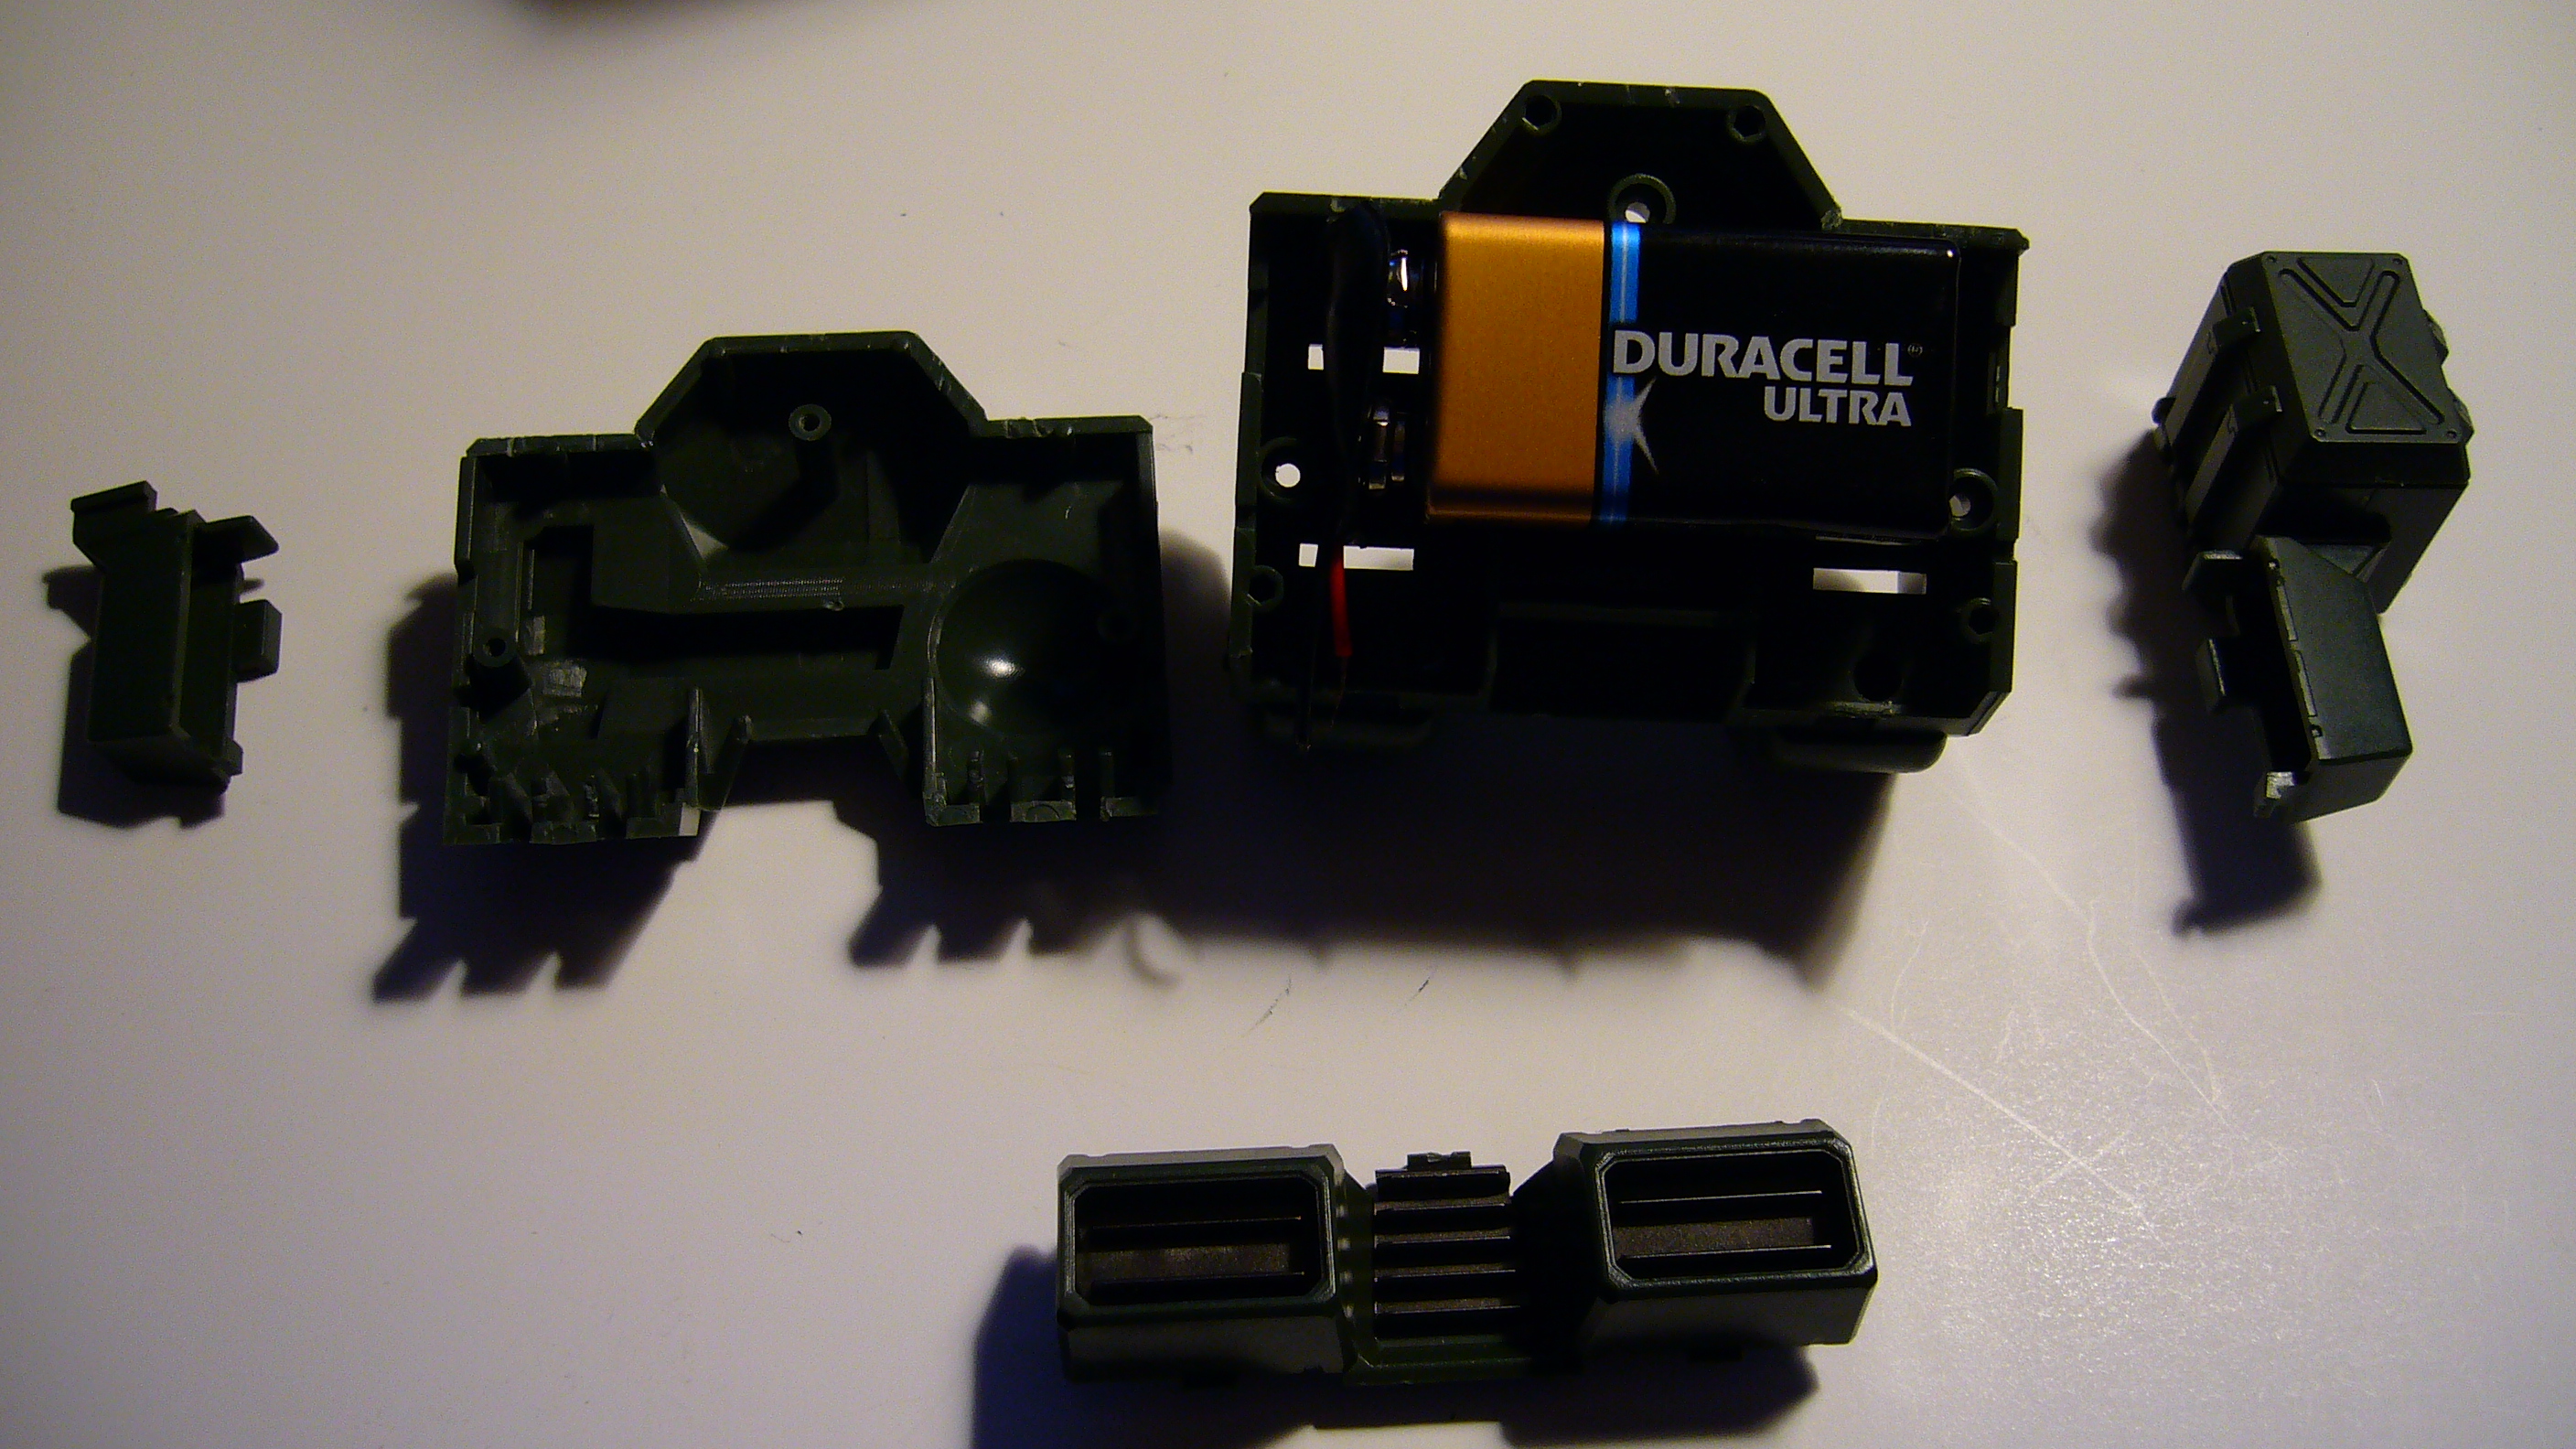
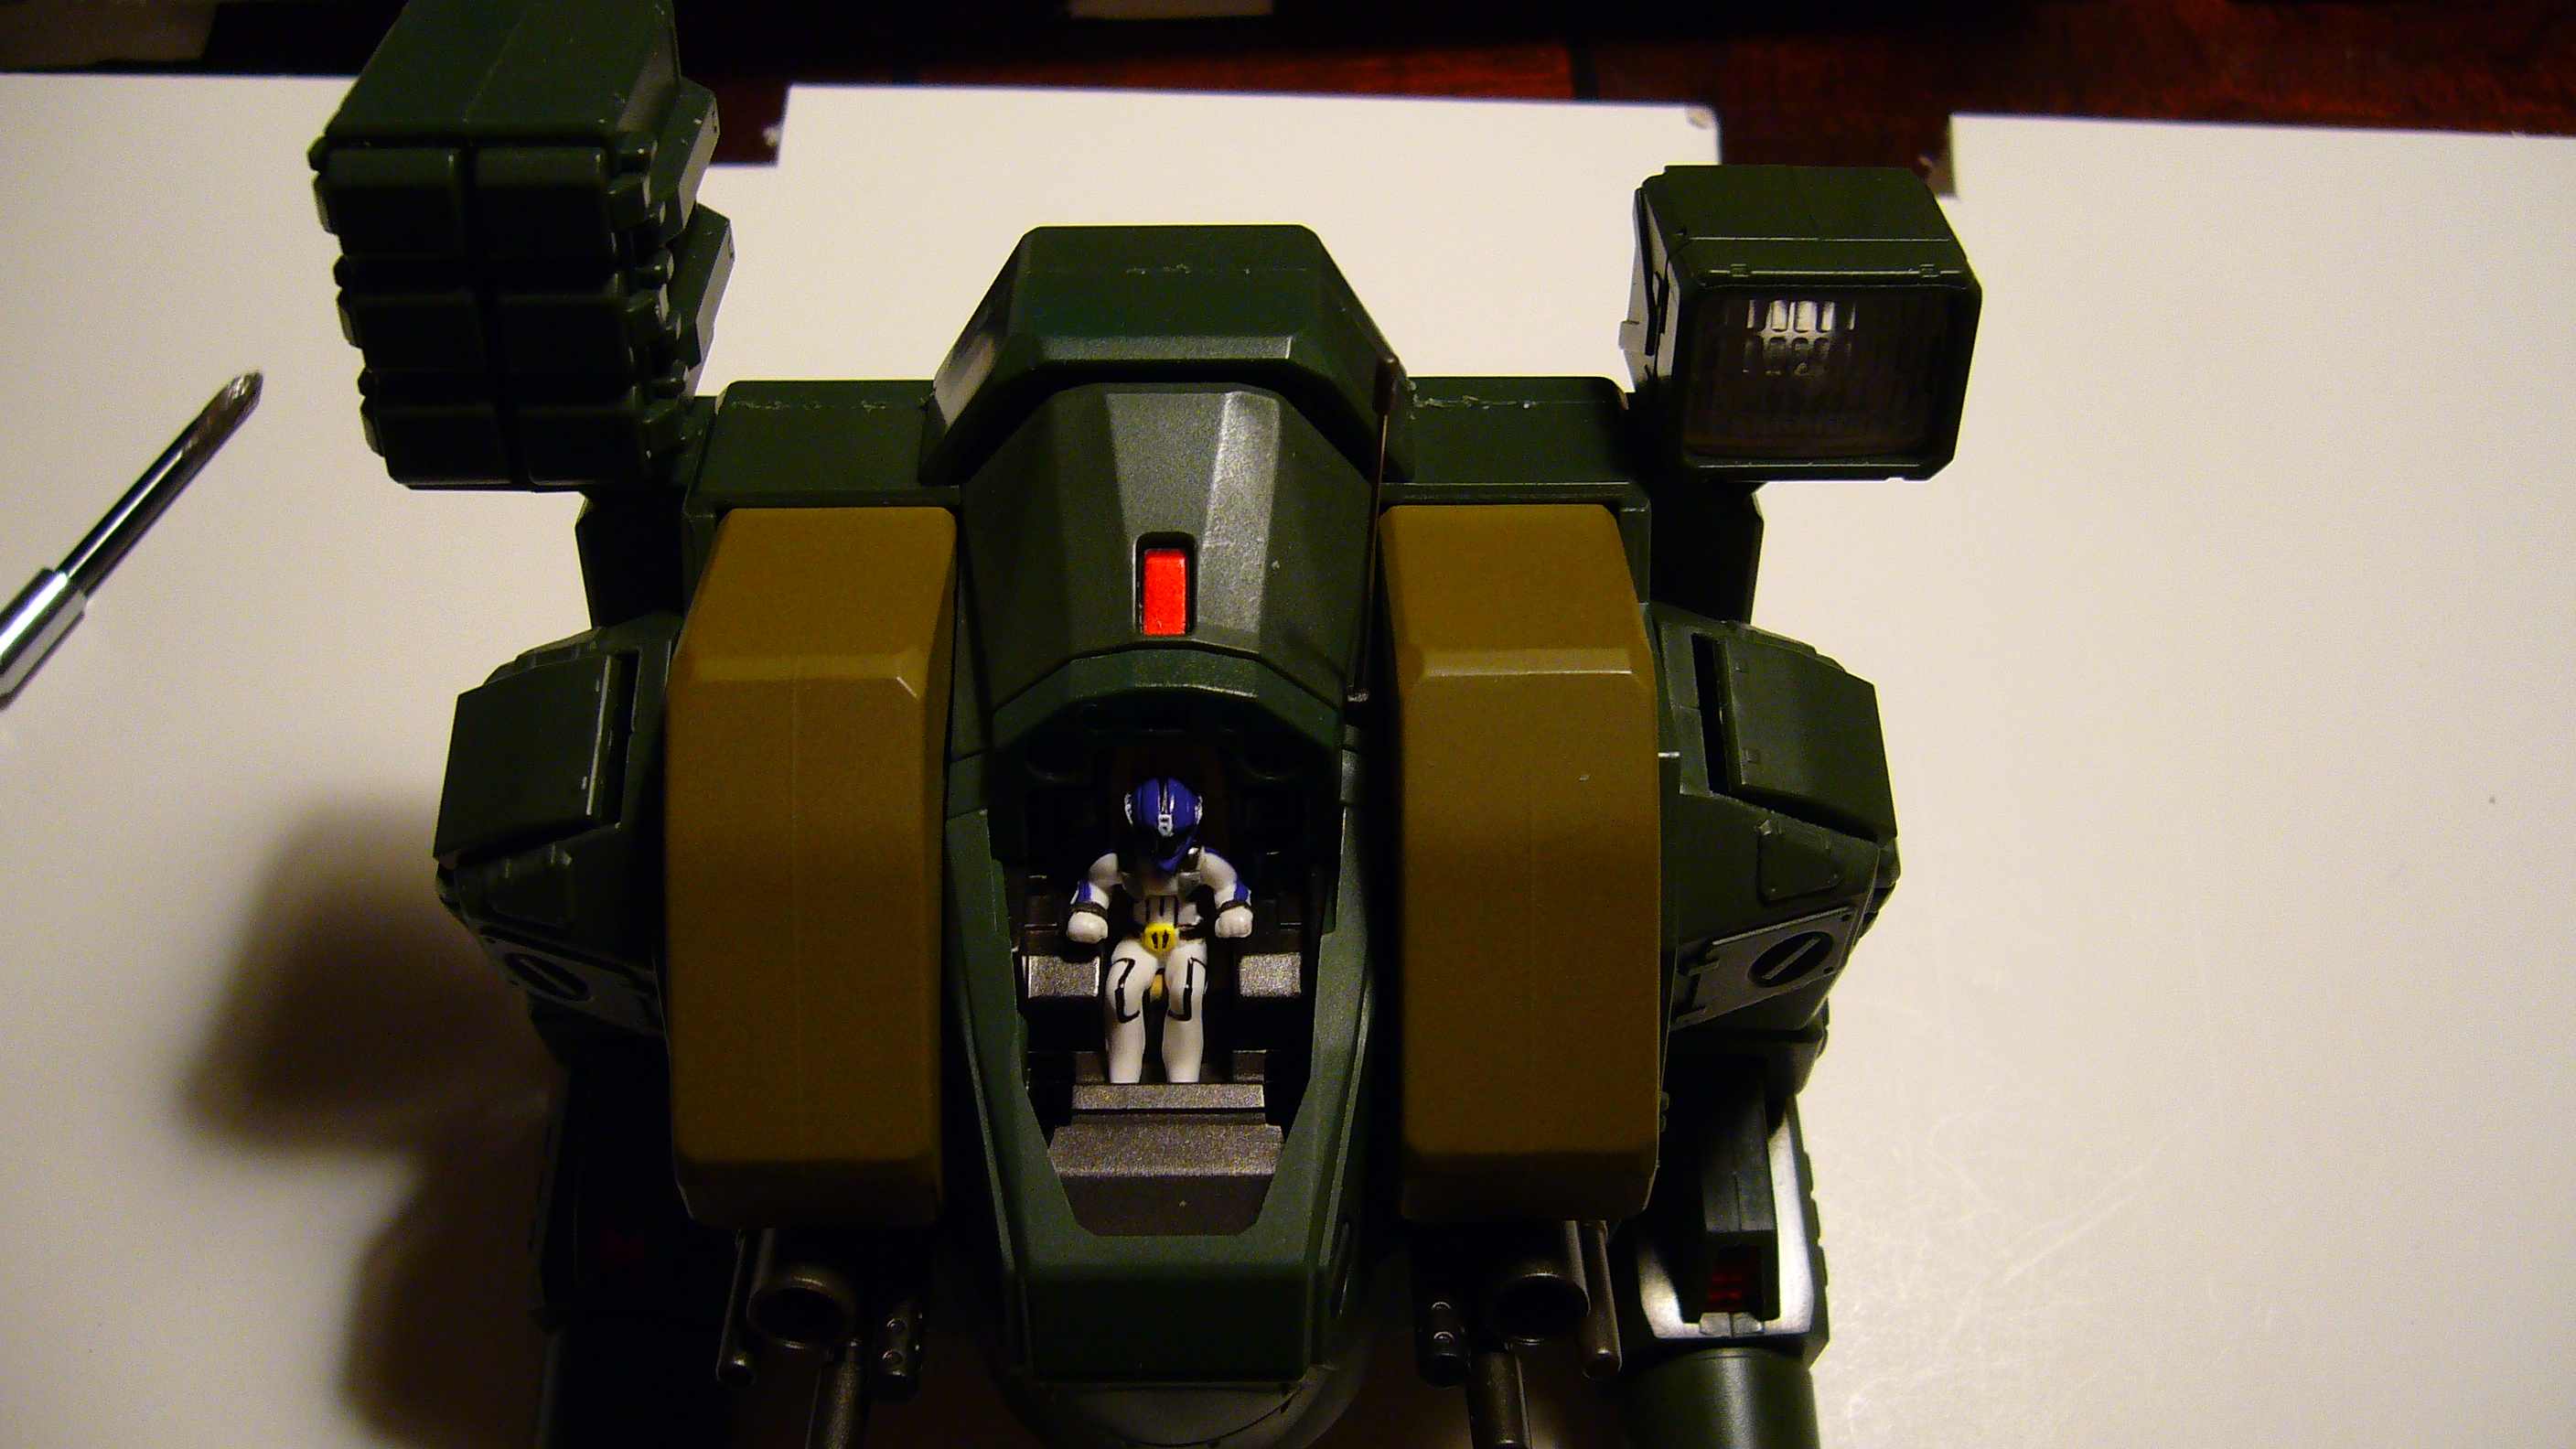
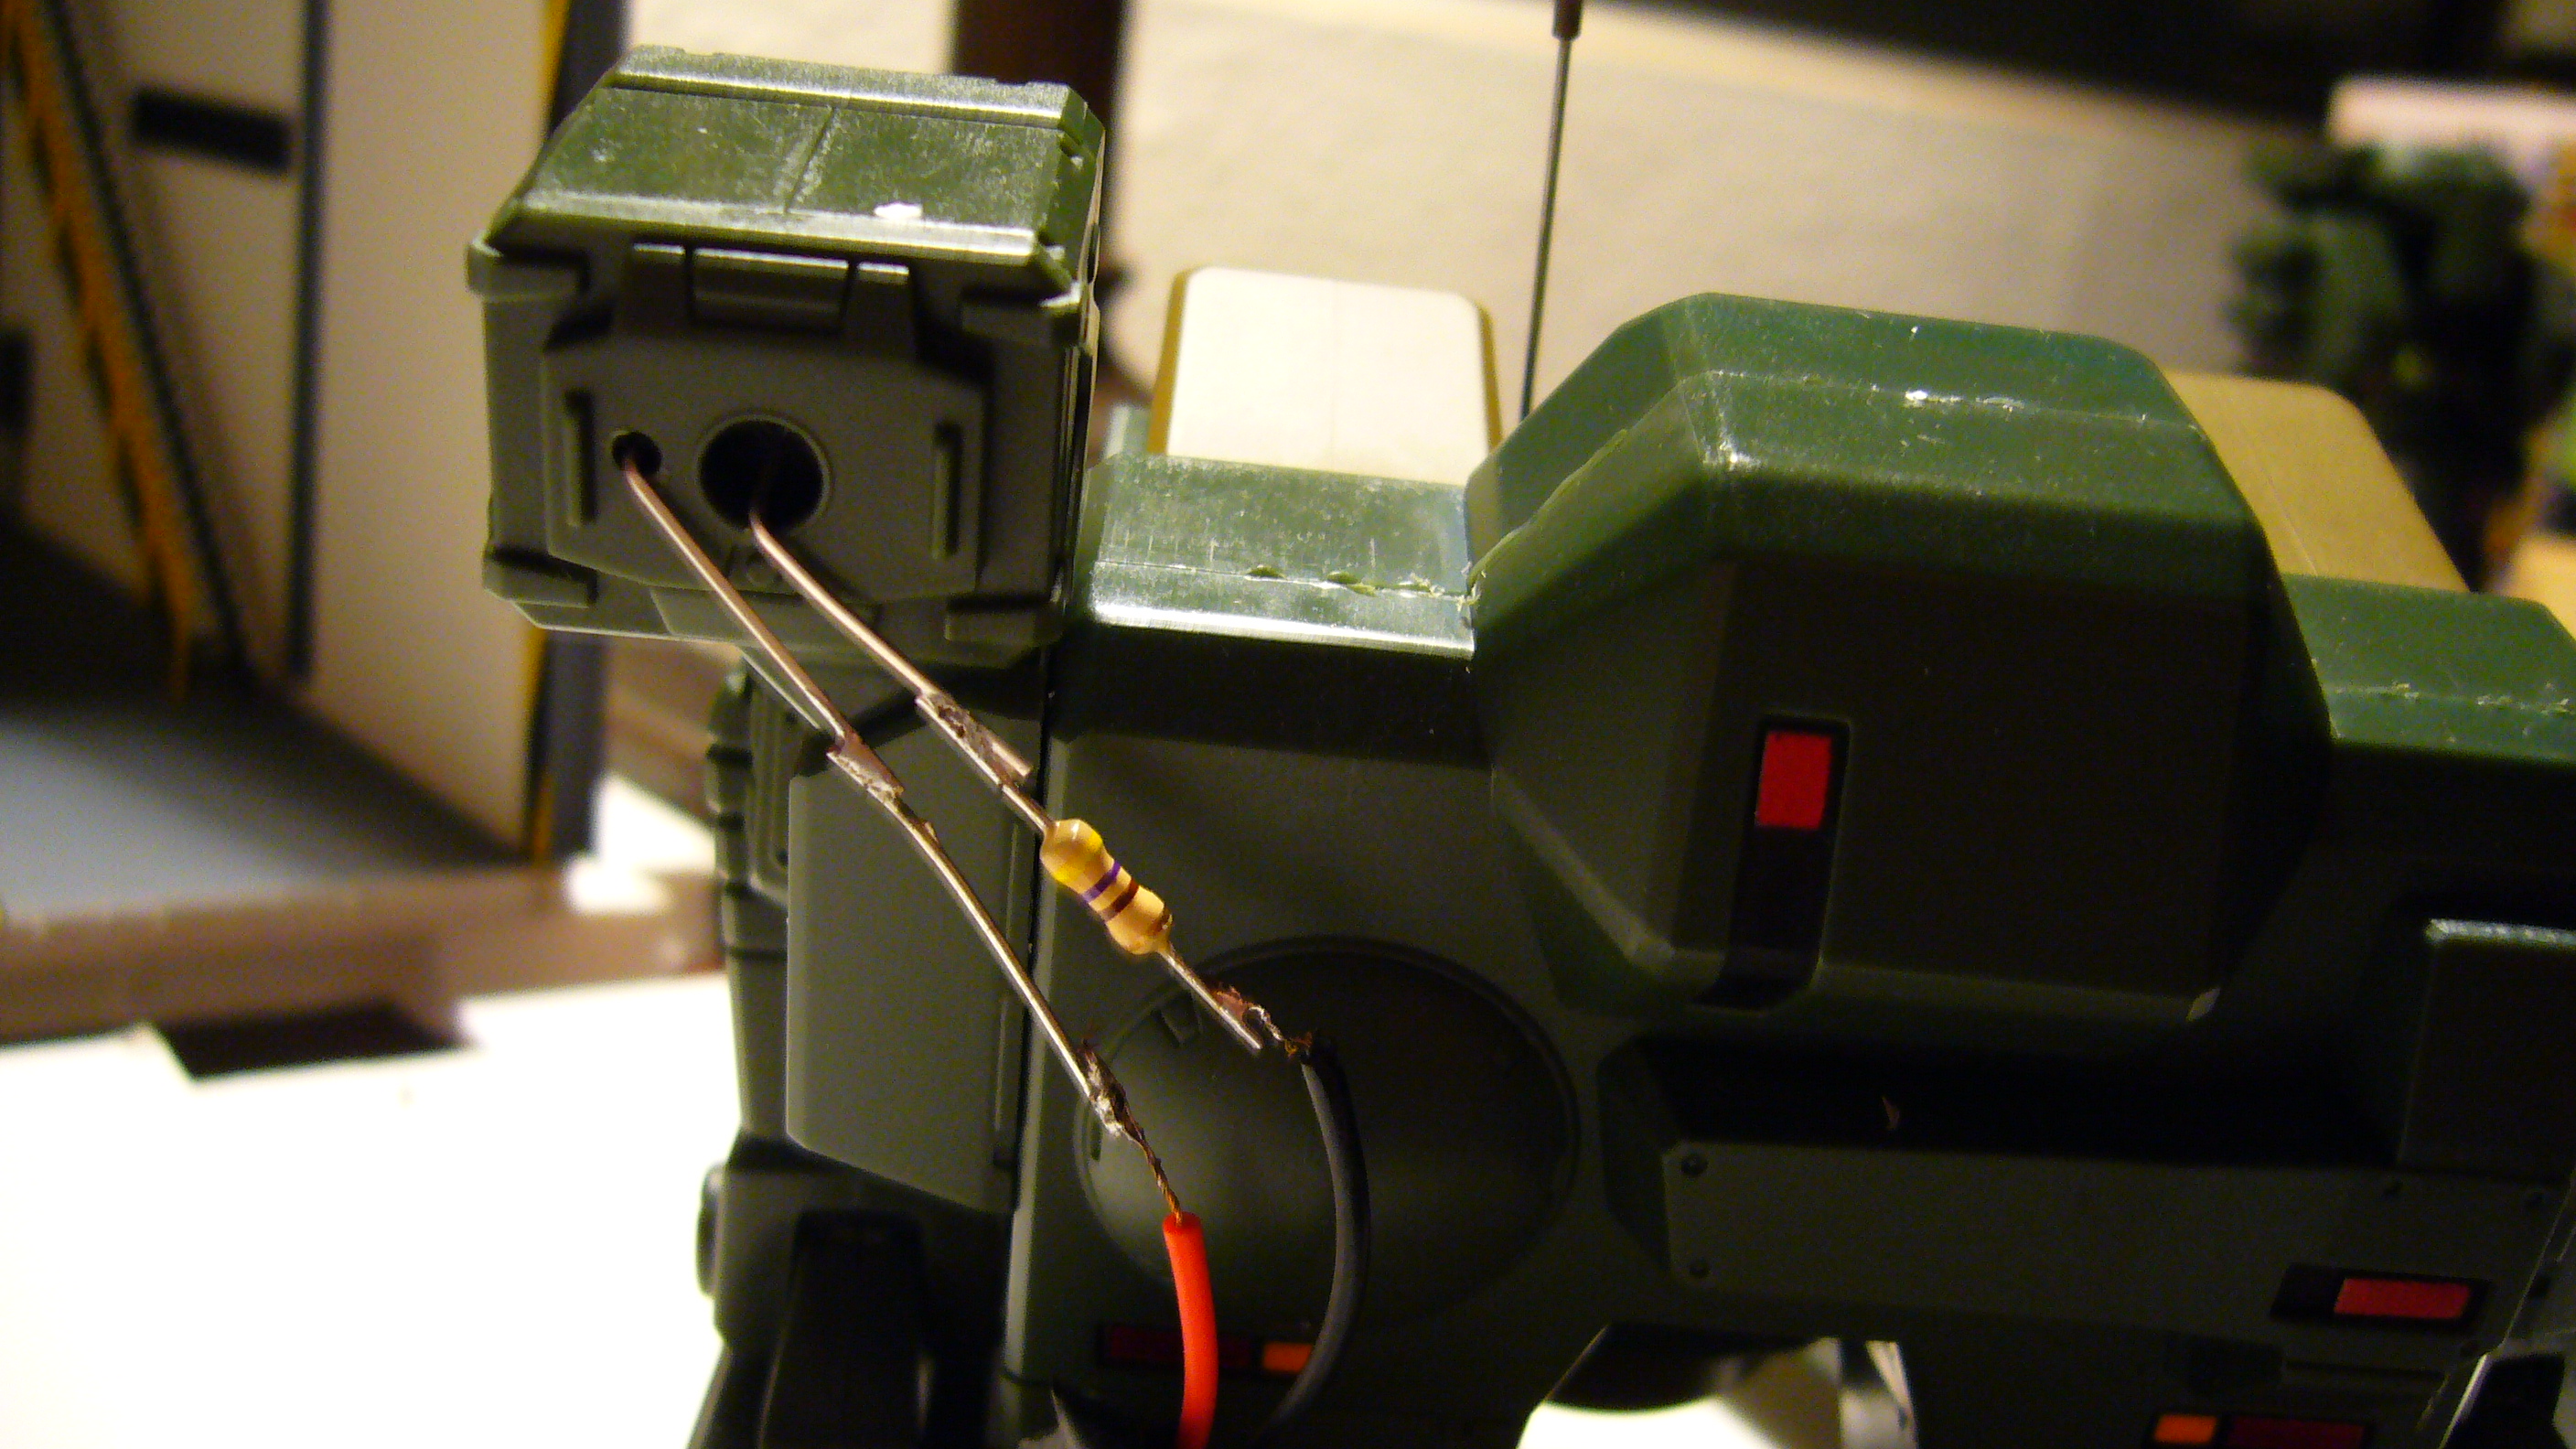
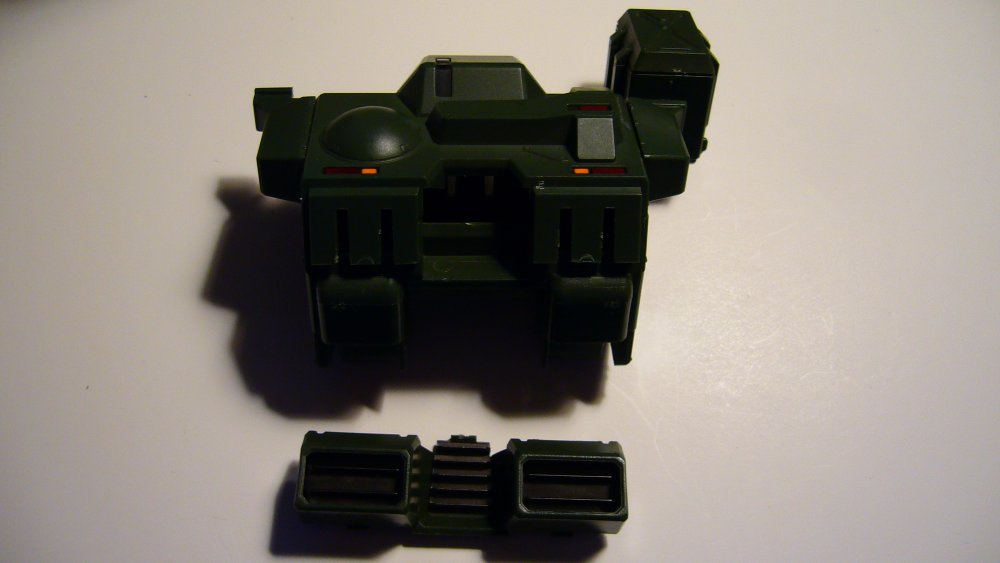
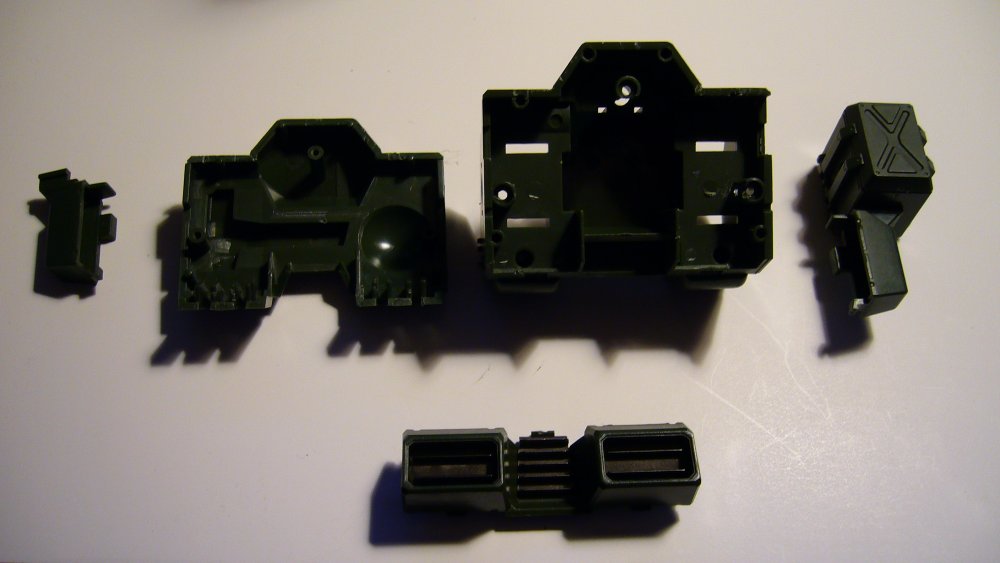
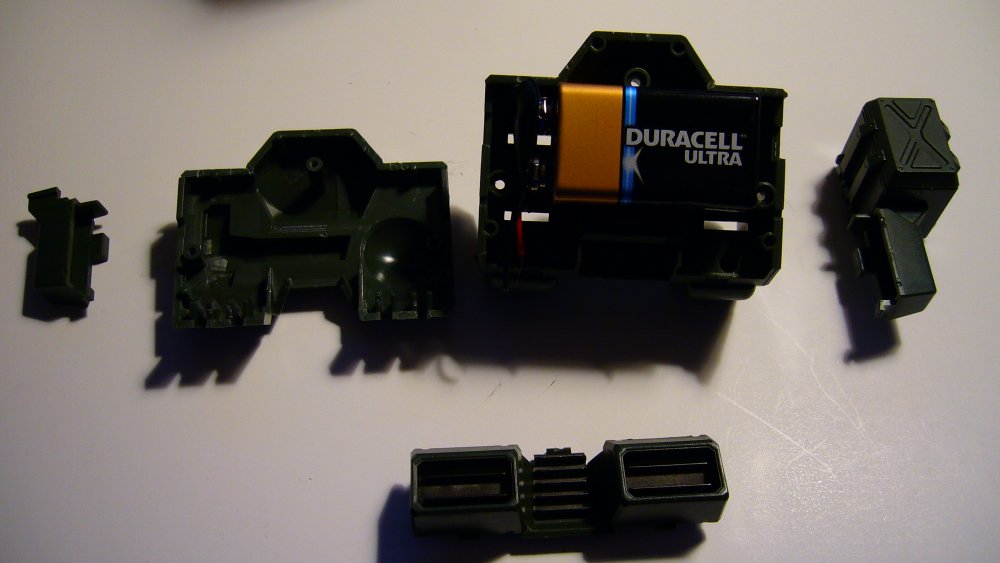
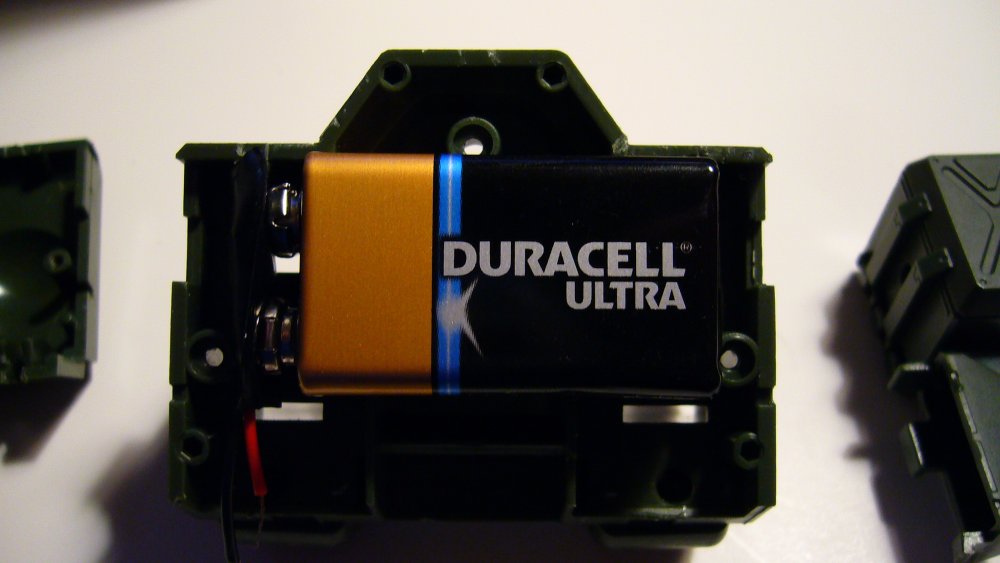
I've actually been doing some tinkering with this concept/idea and have made minimal progress... I was trying to fit a standard 9volt battery within the back of the Hawk itself. It fits dimensionally with some minor trimming of the mounting posts. (internally) However the battery unfortunately is too thick and leaves about an 1/8 inch gap when you try to install the back plate. Sadly because of this I have decided to do a complete internal wiring and have an out source power connector. (plug in method if you will) Regardless I will post more on that later on. For now I will include pictures of the attempt to install the 9 volt battery below. To disassemble the chest section you need to pull off the arms and then pull out the chest missile packs. Once these are removed as well as the cockpit and upper head cover, you will be able to see the 3 screw locations that enable access to the inside. Remove these and then on the base of the back, pull the exhausts outwardly (front to back direction) With this done you can remove the back cover as well as the side shoulder mounts and gain access to the internals. Blue


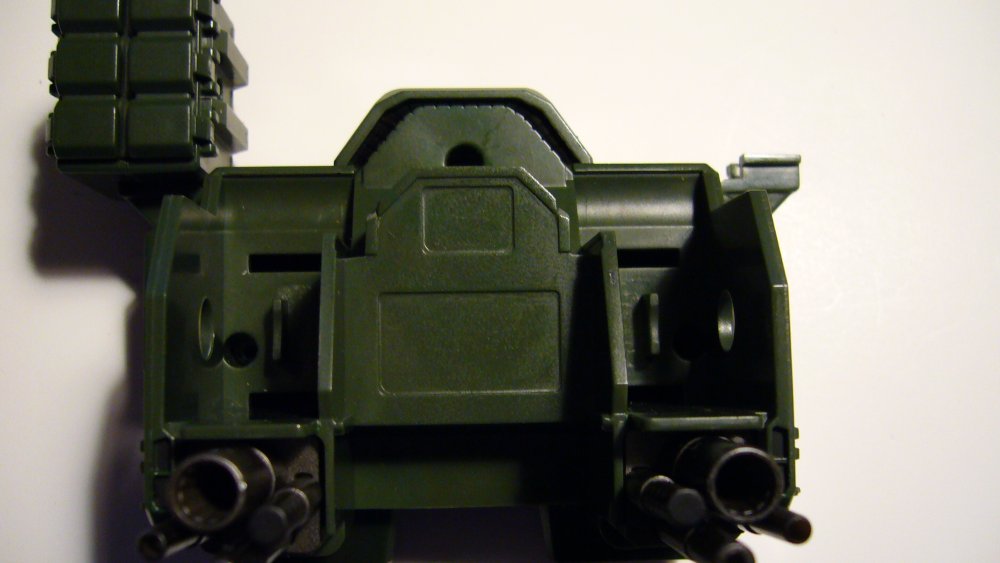

-
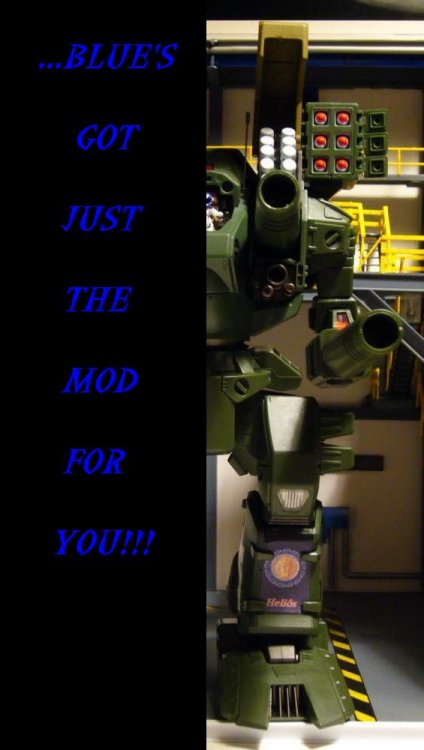
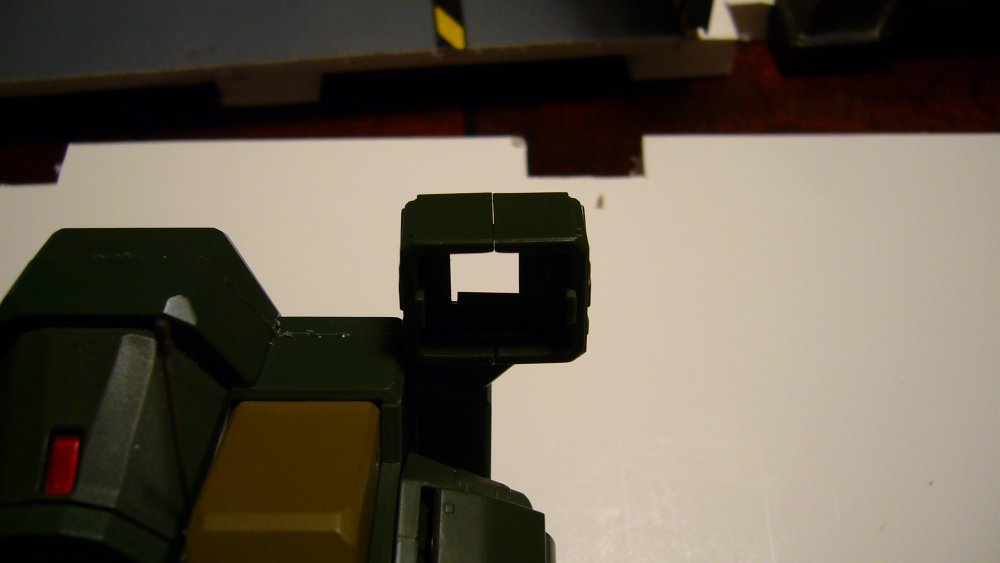
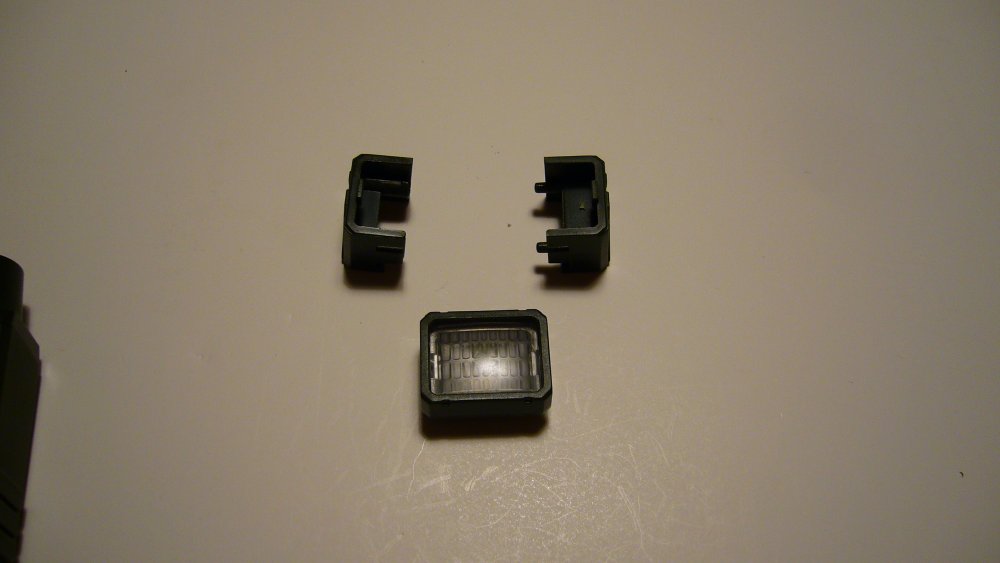
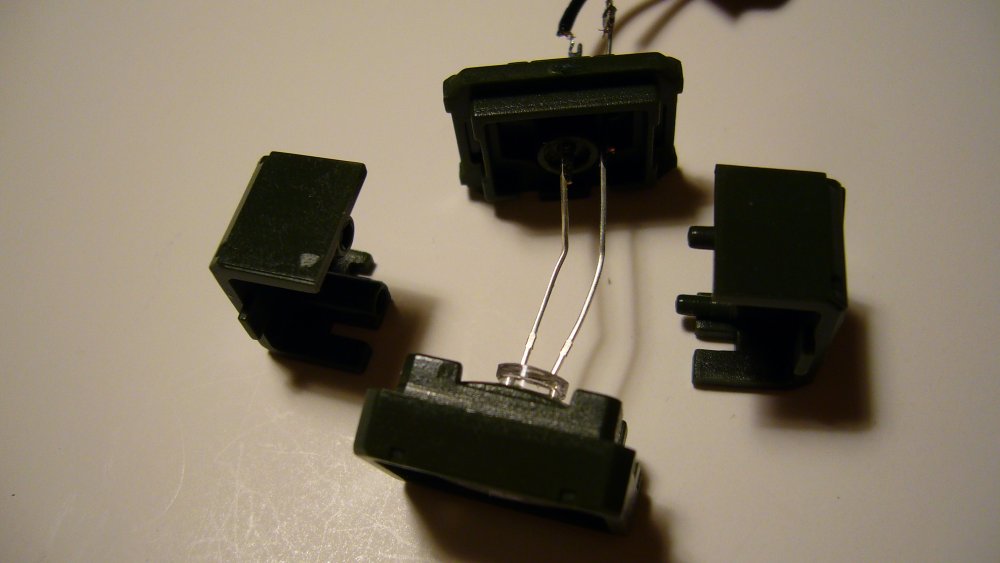
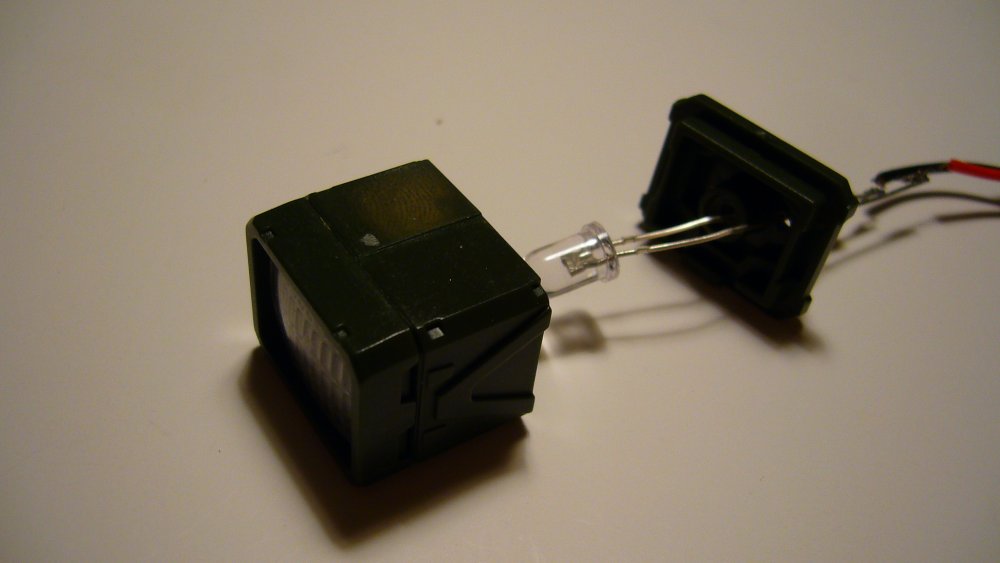
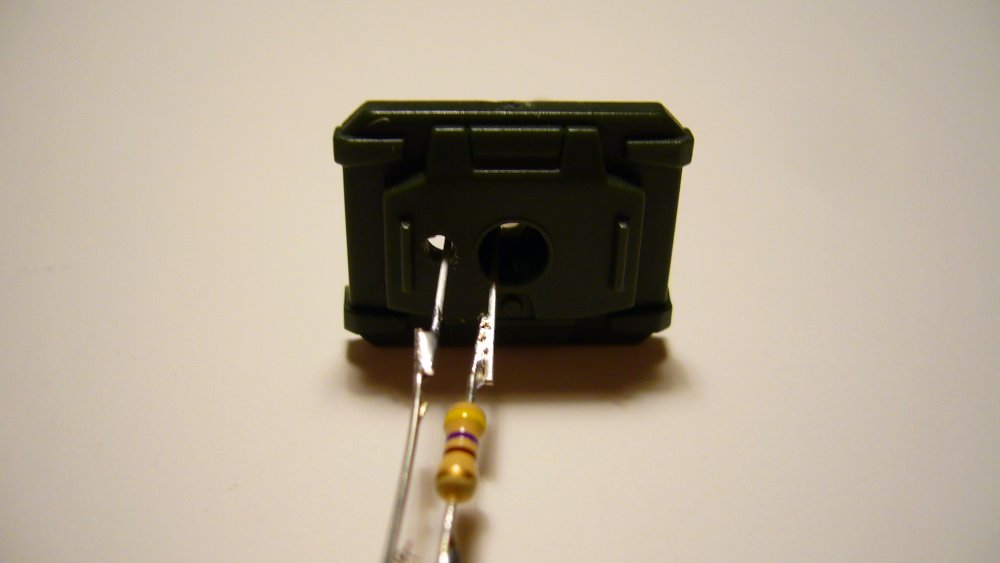
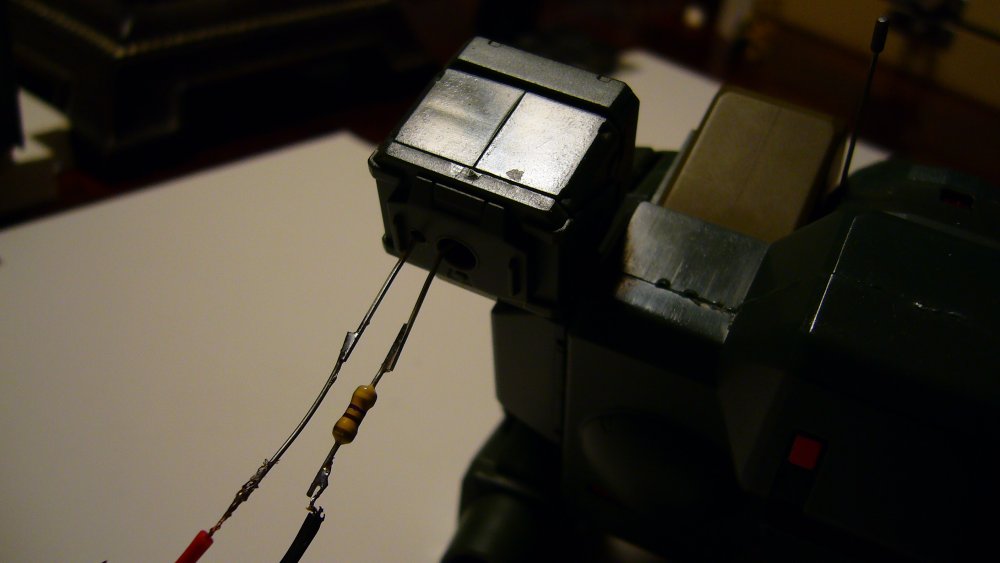
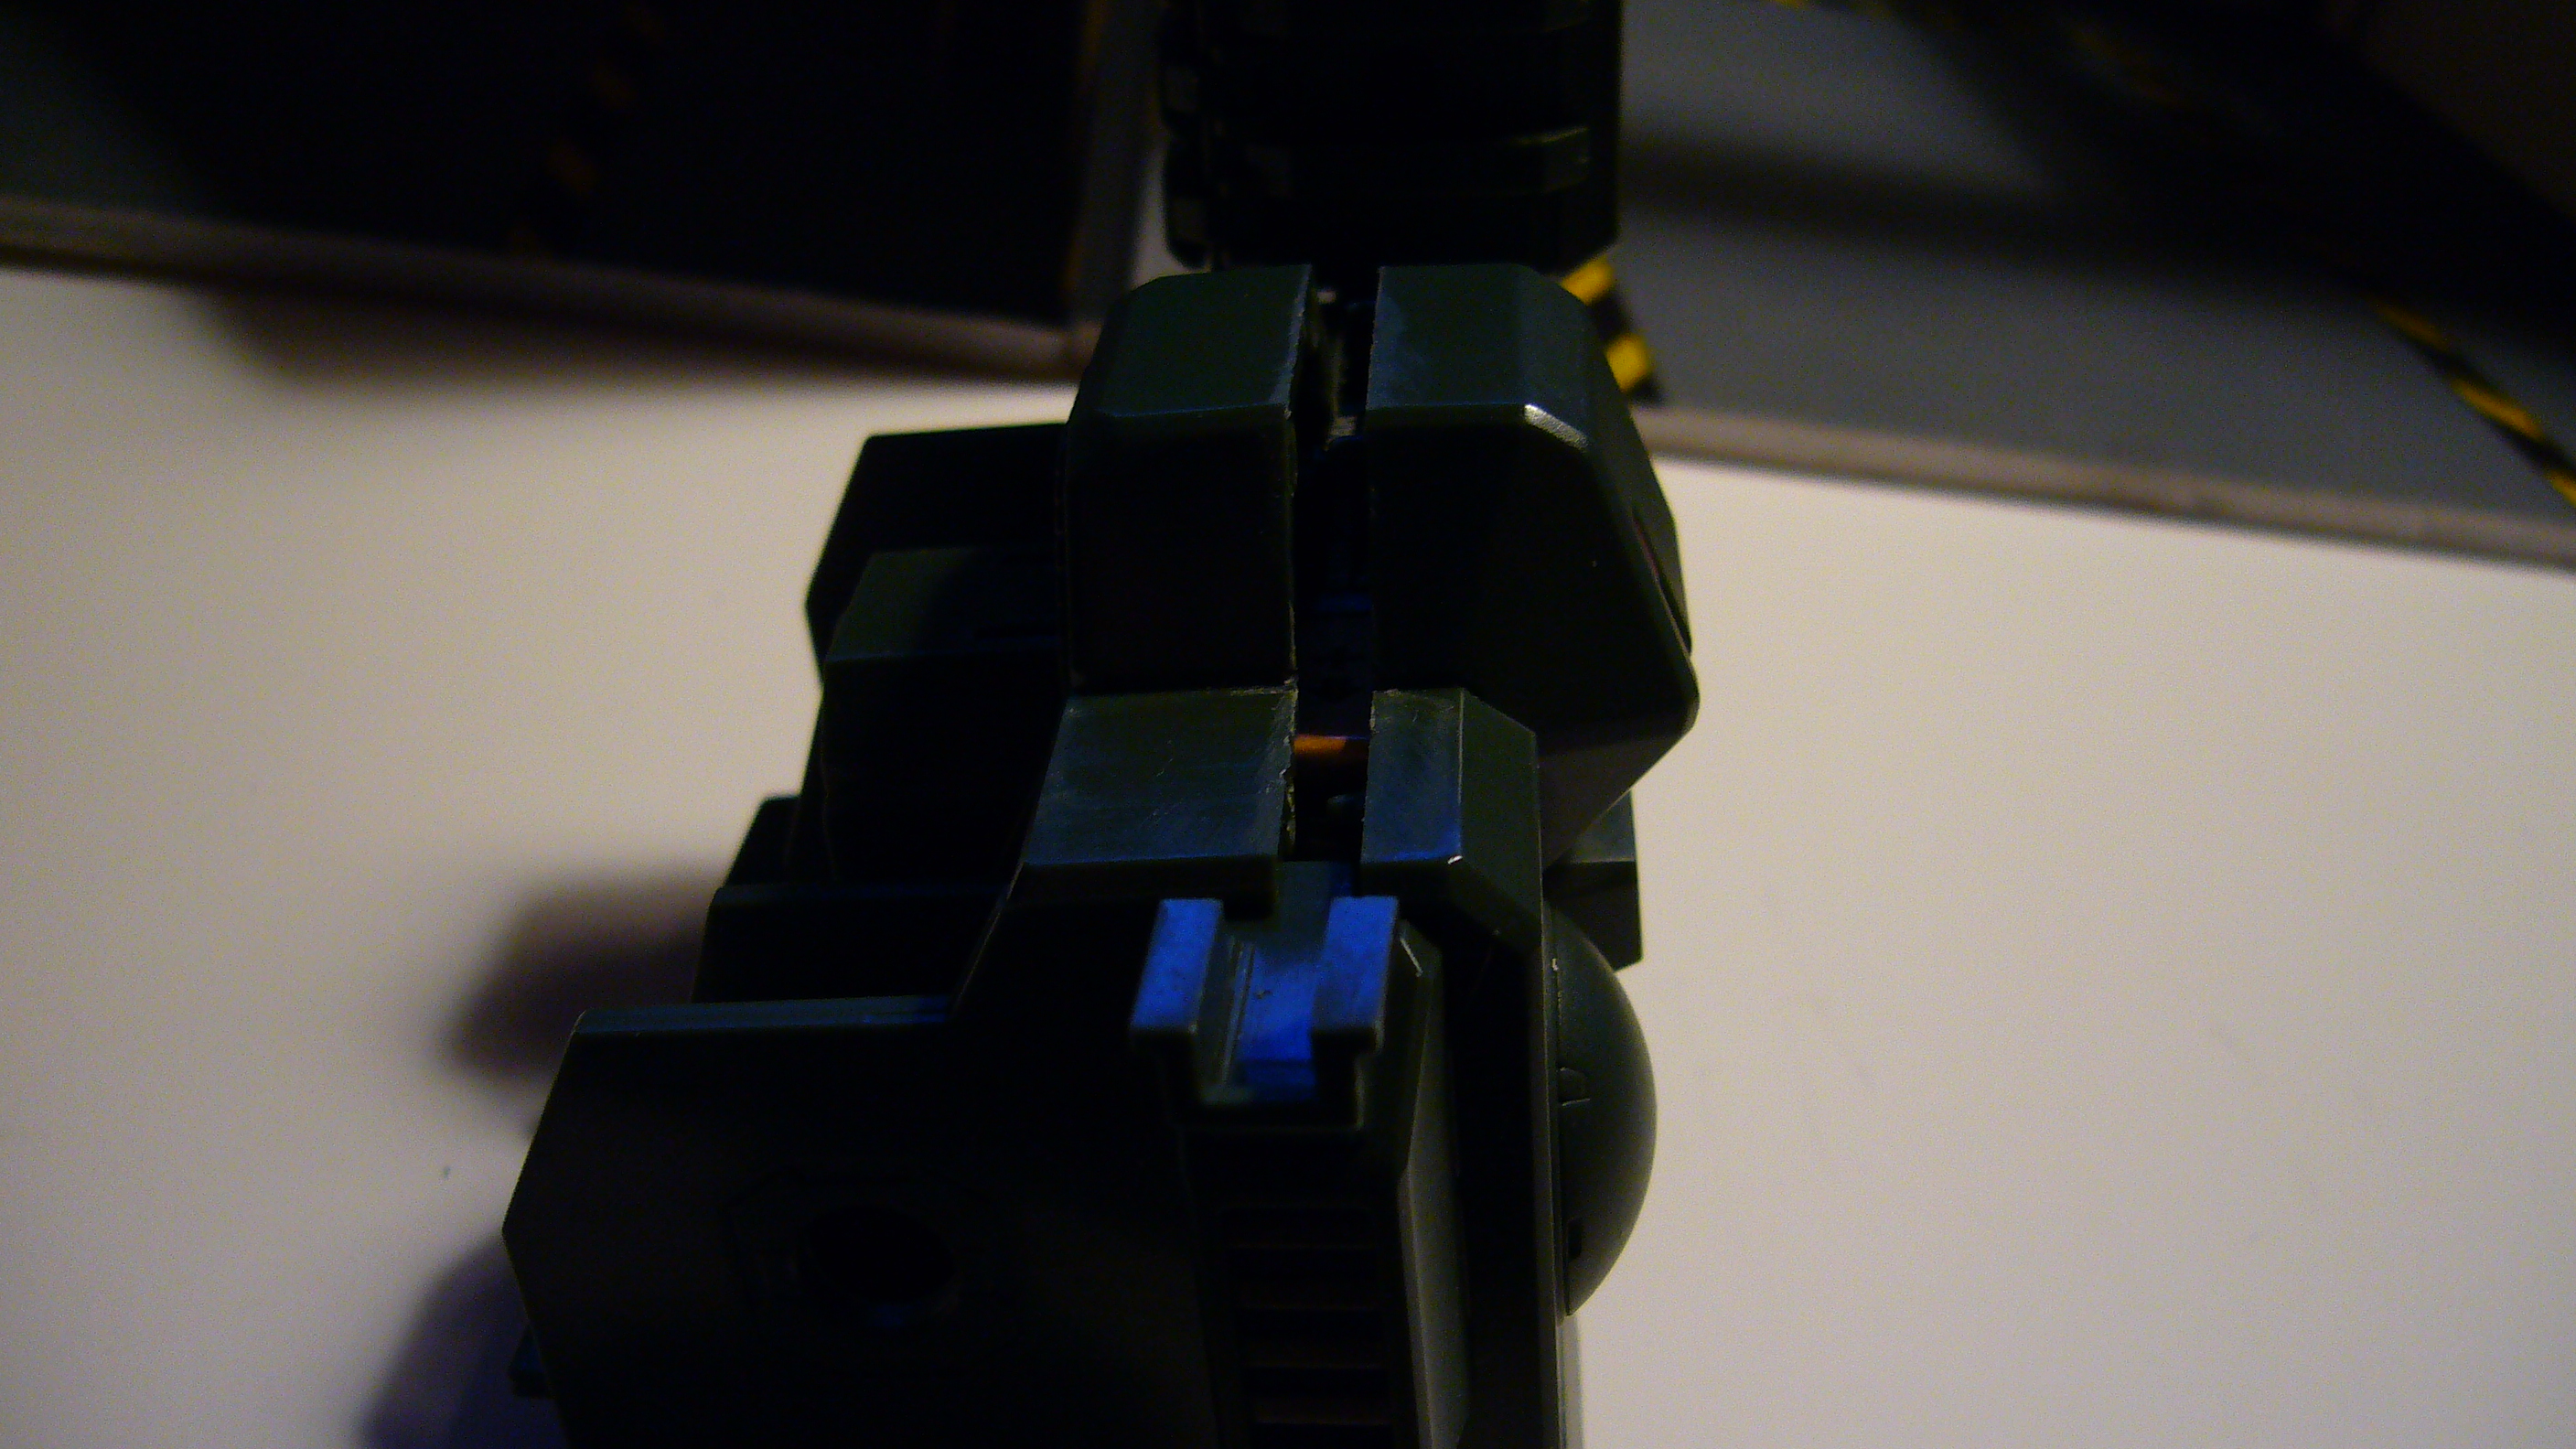
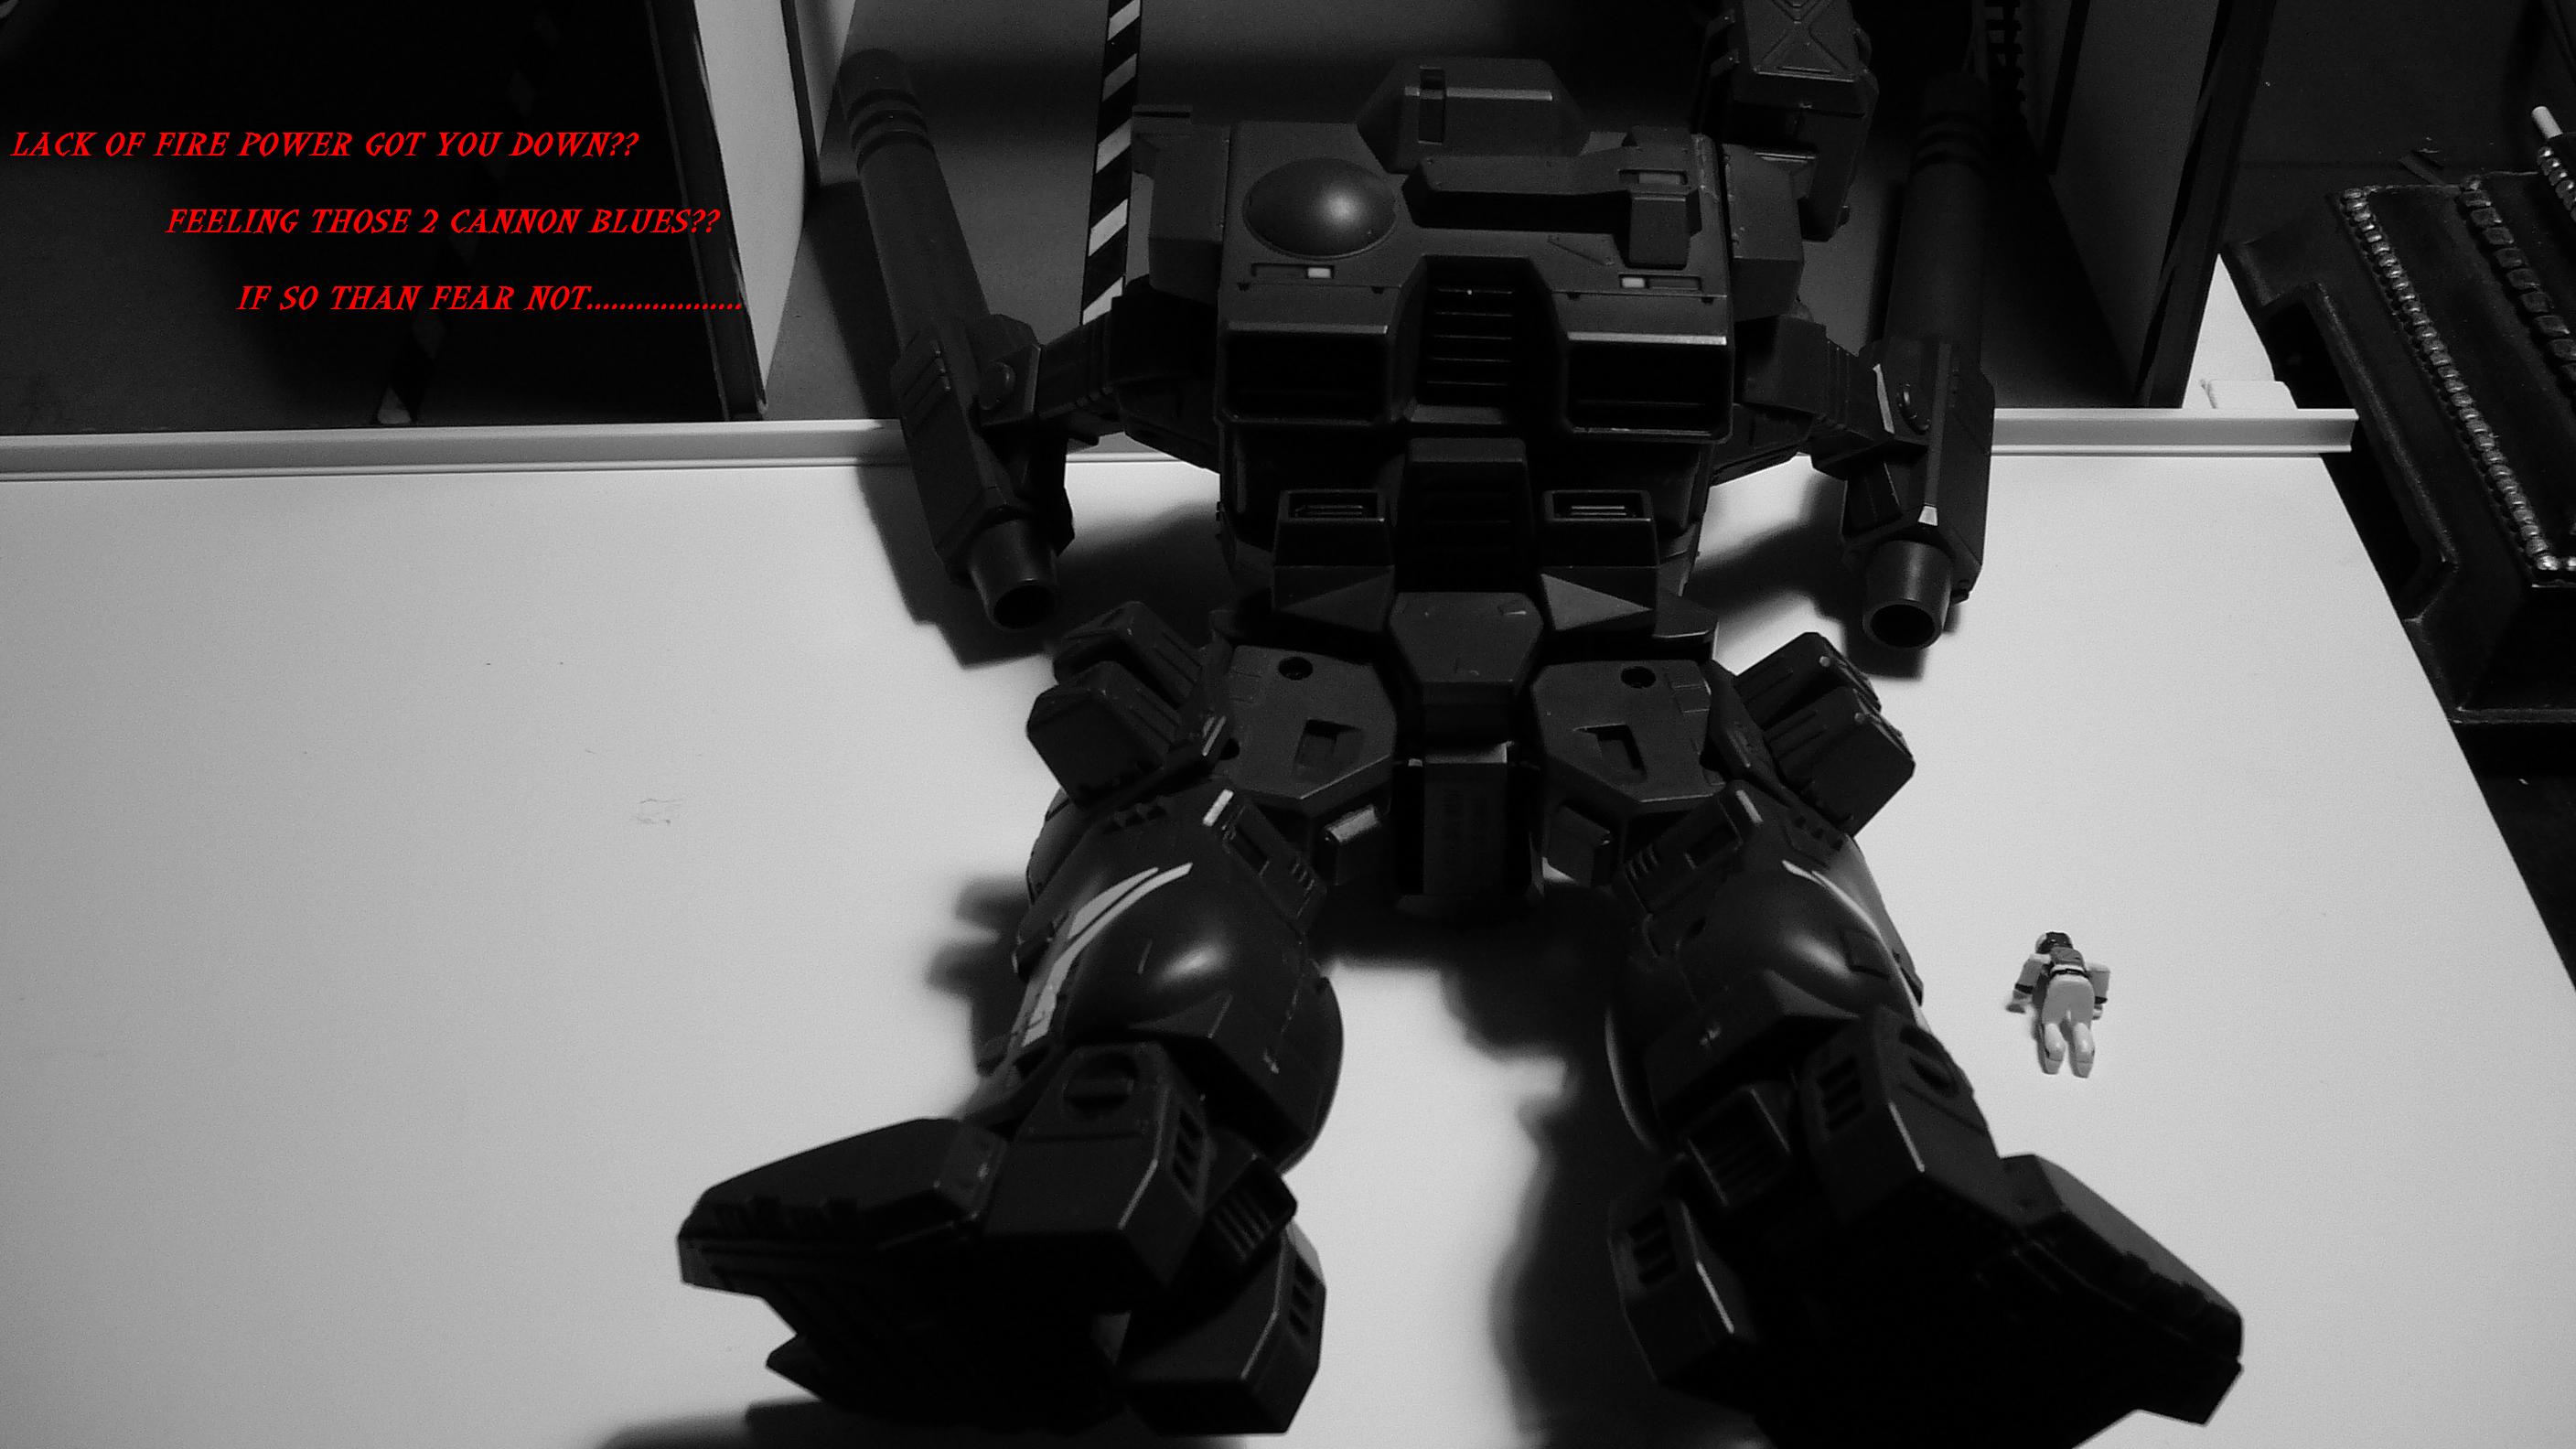
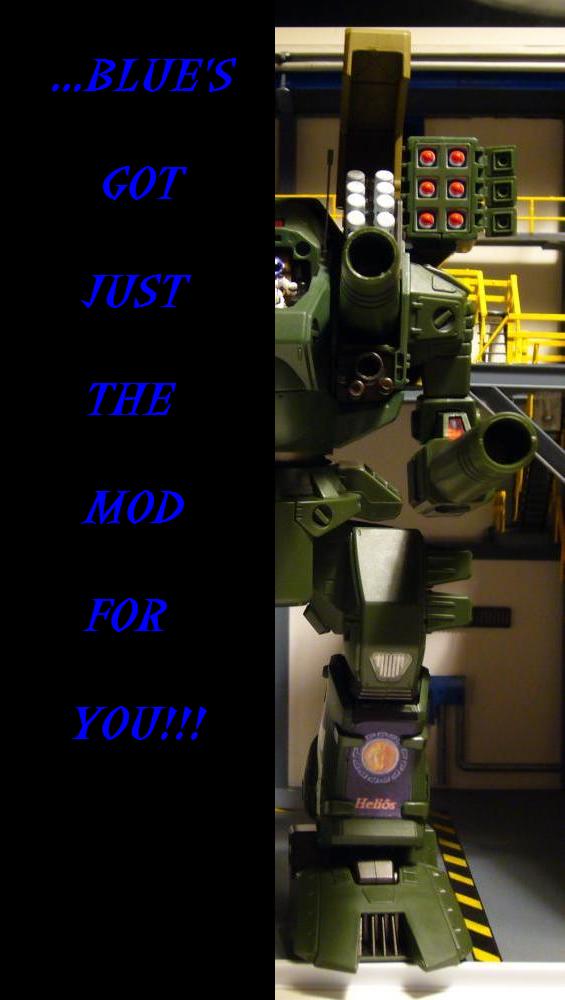
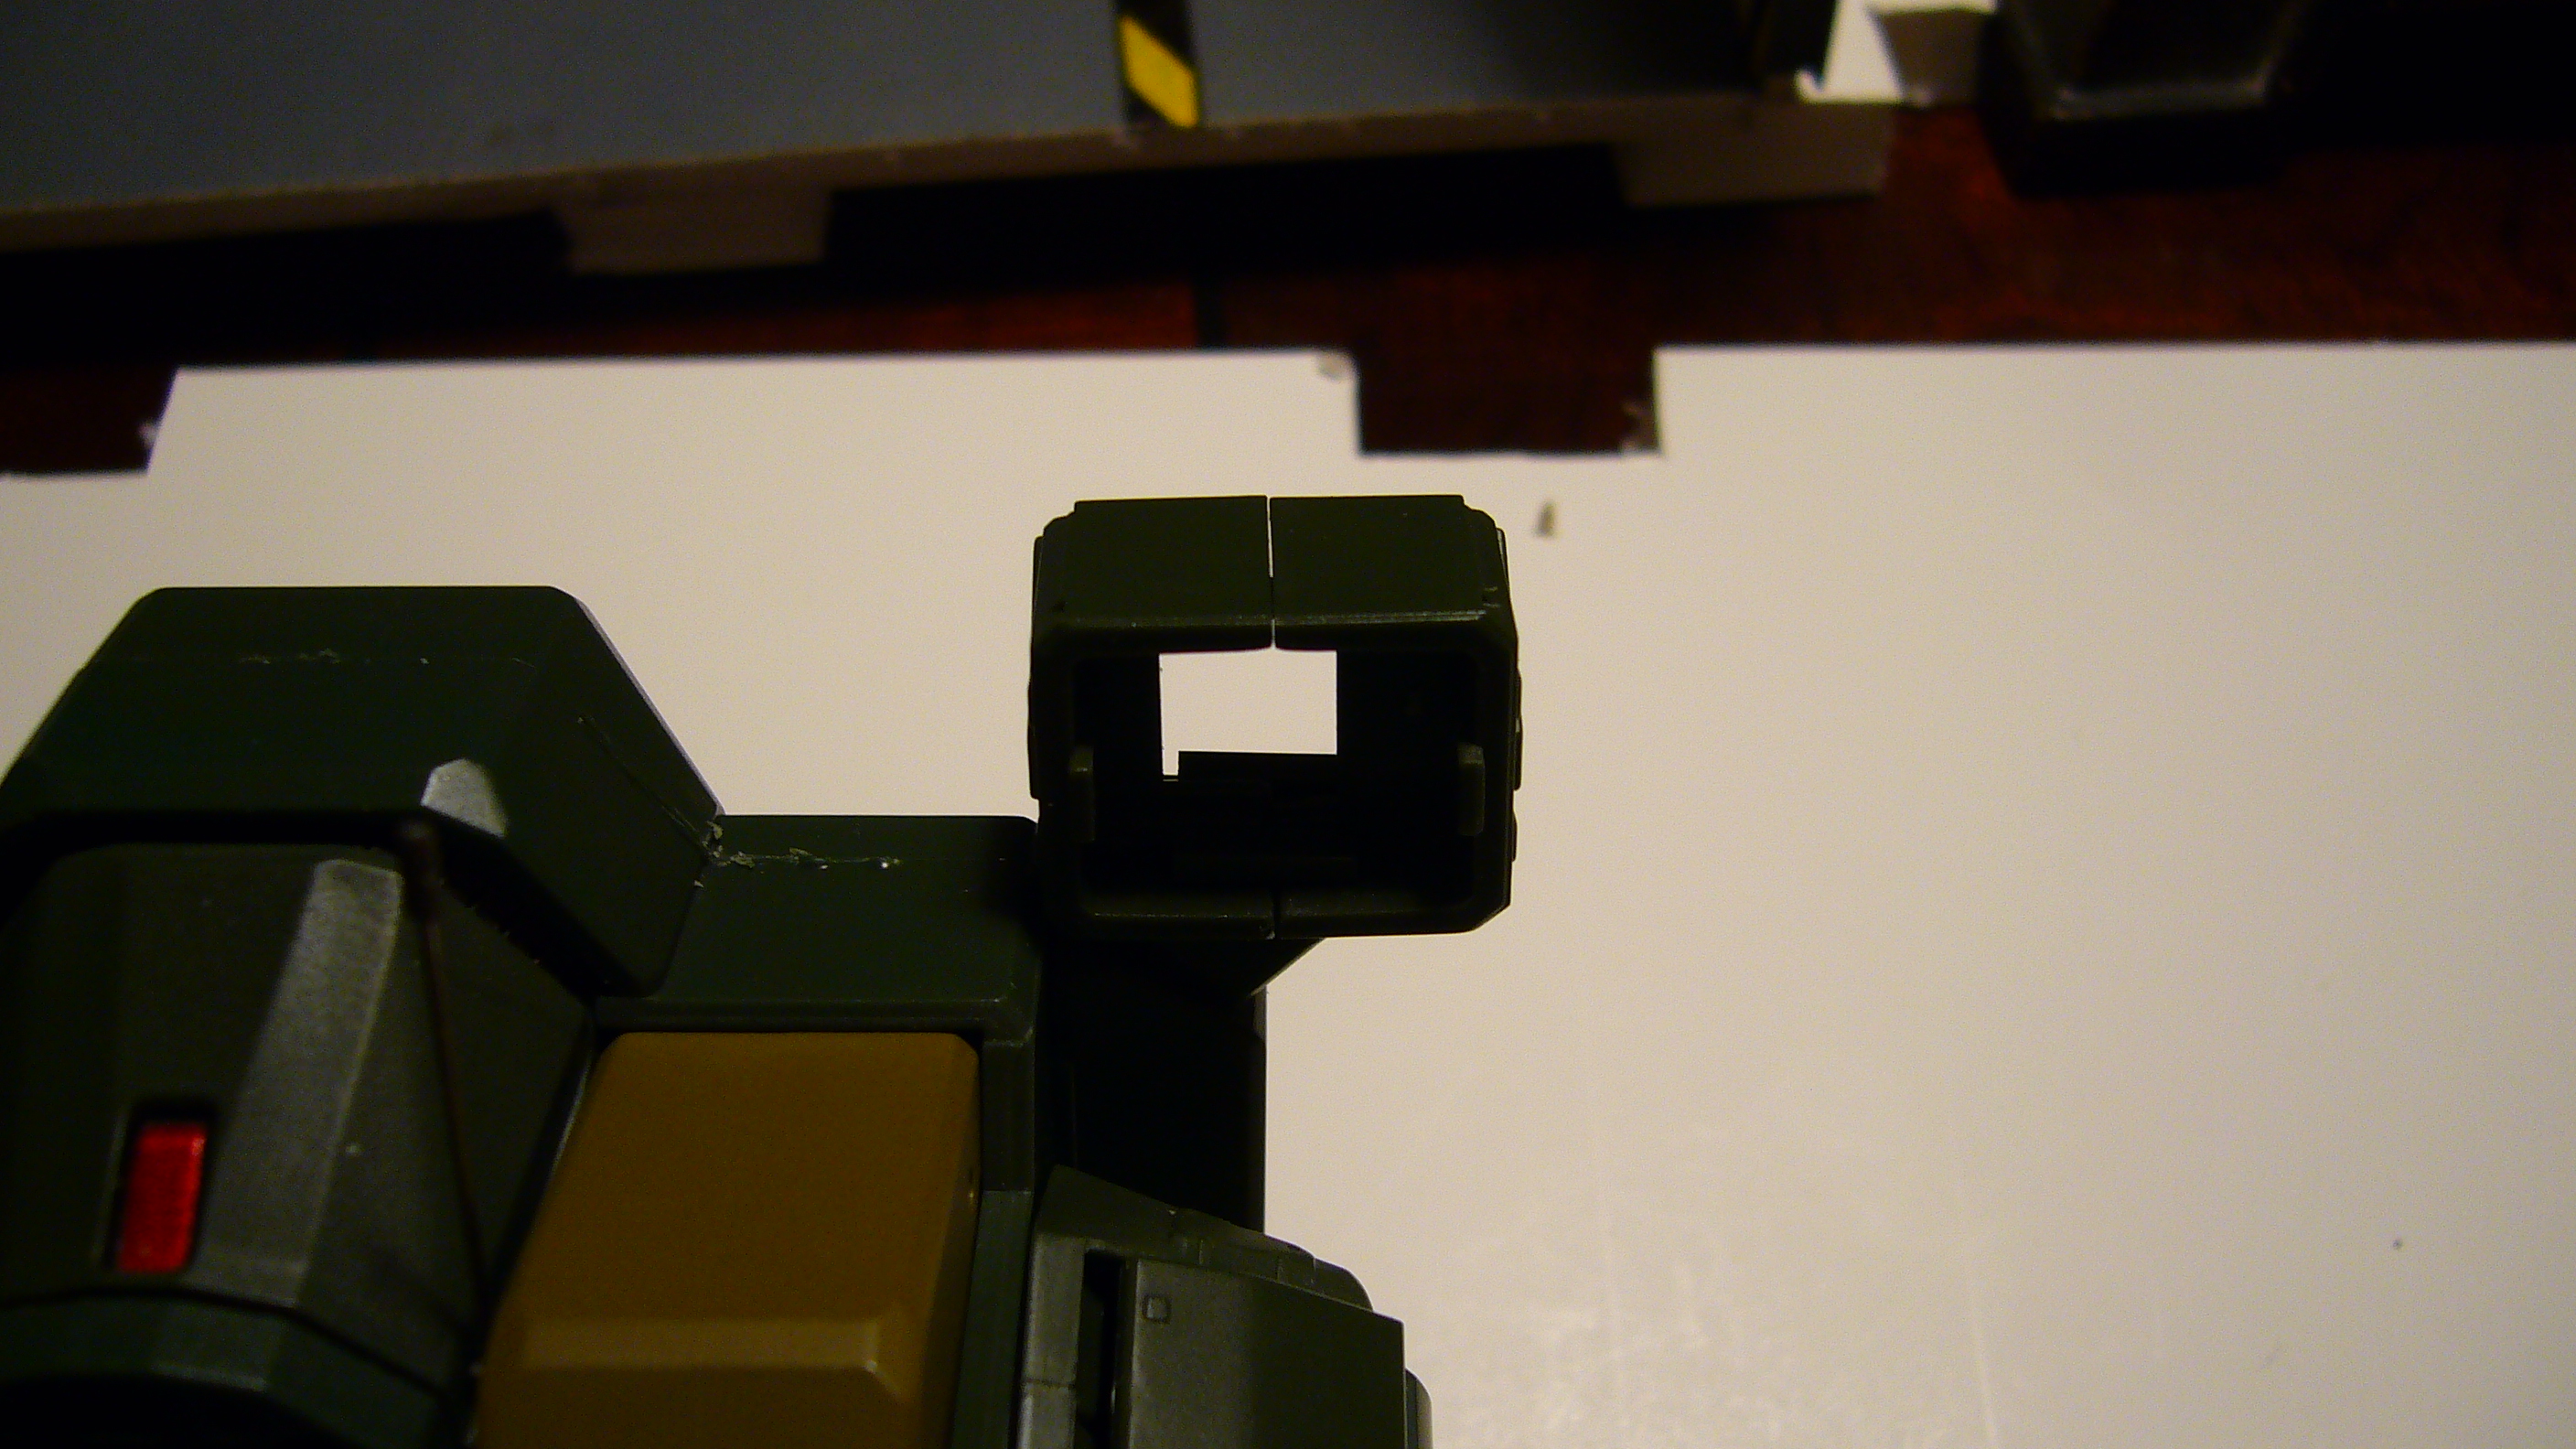
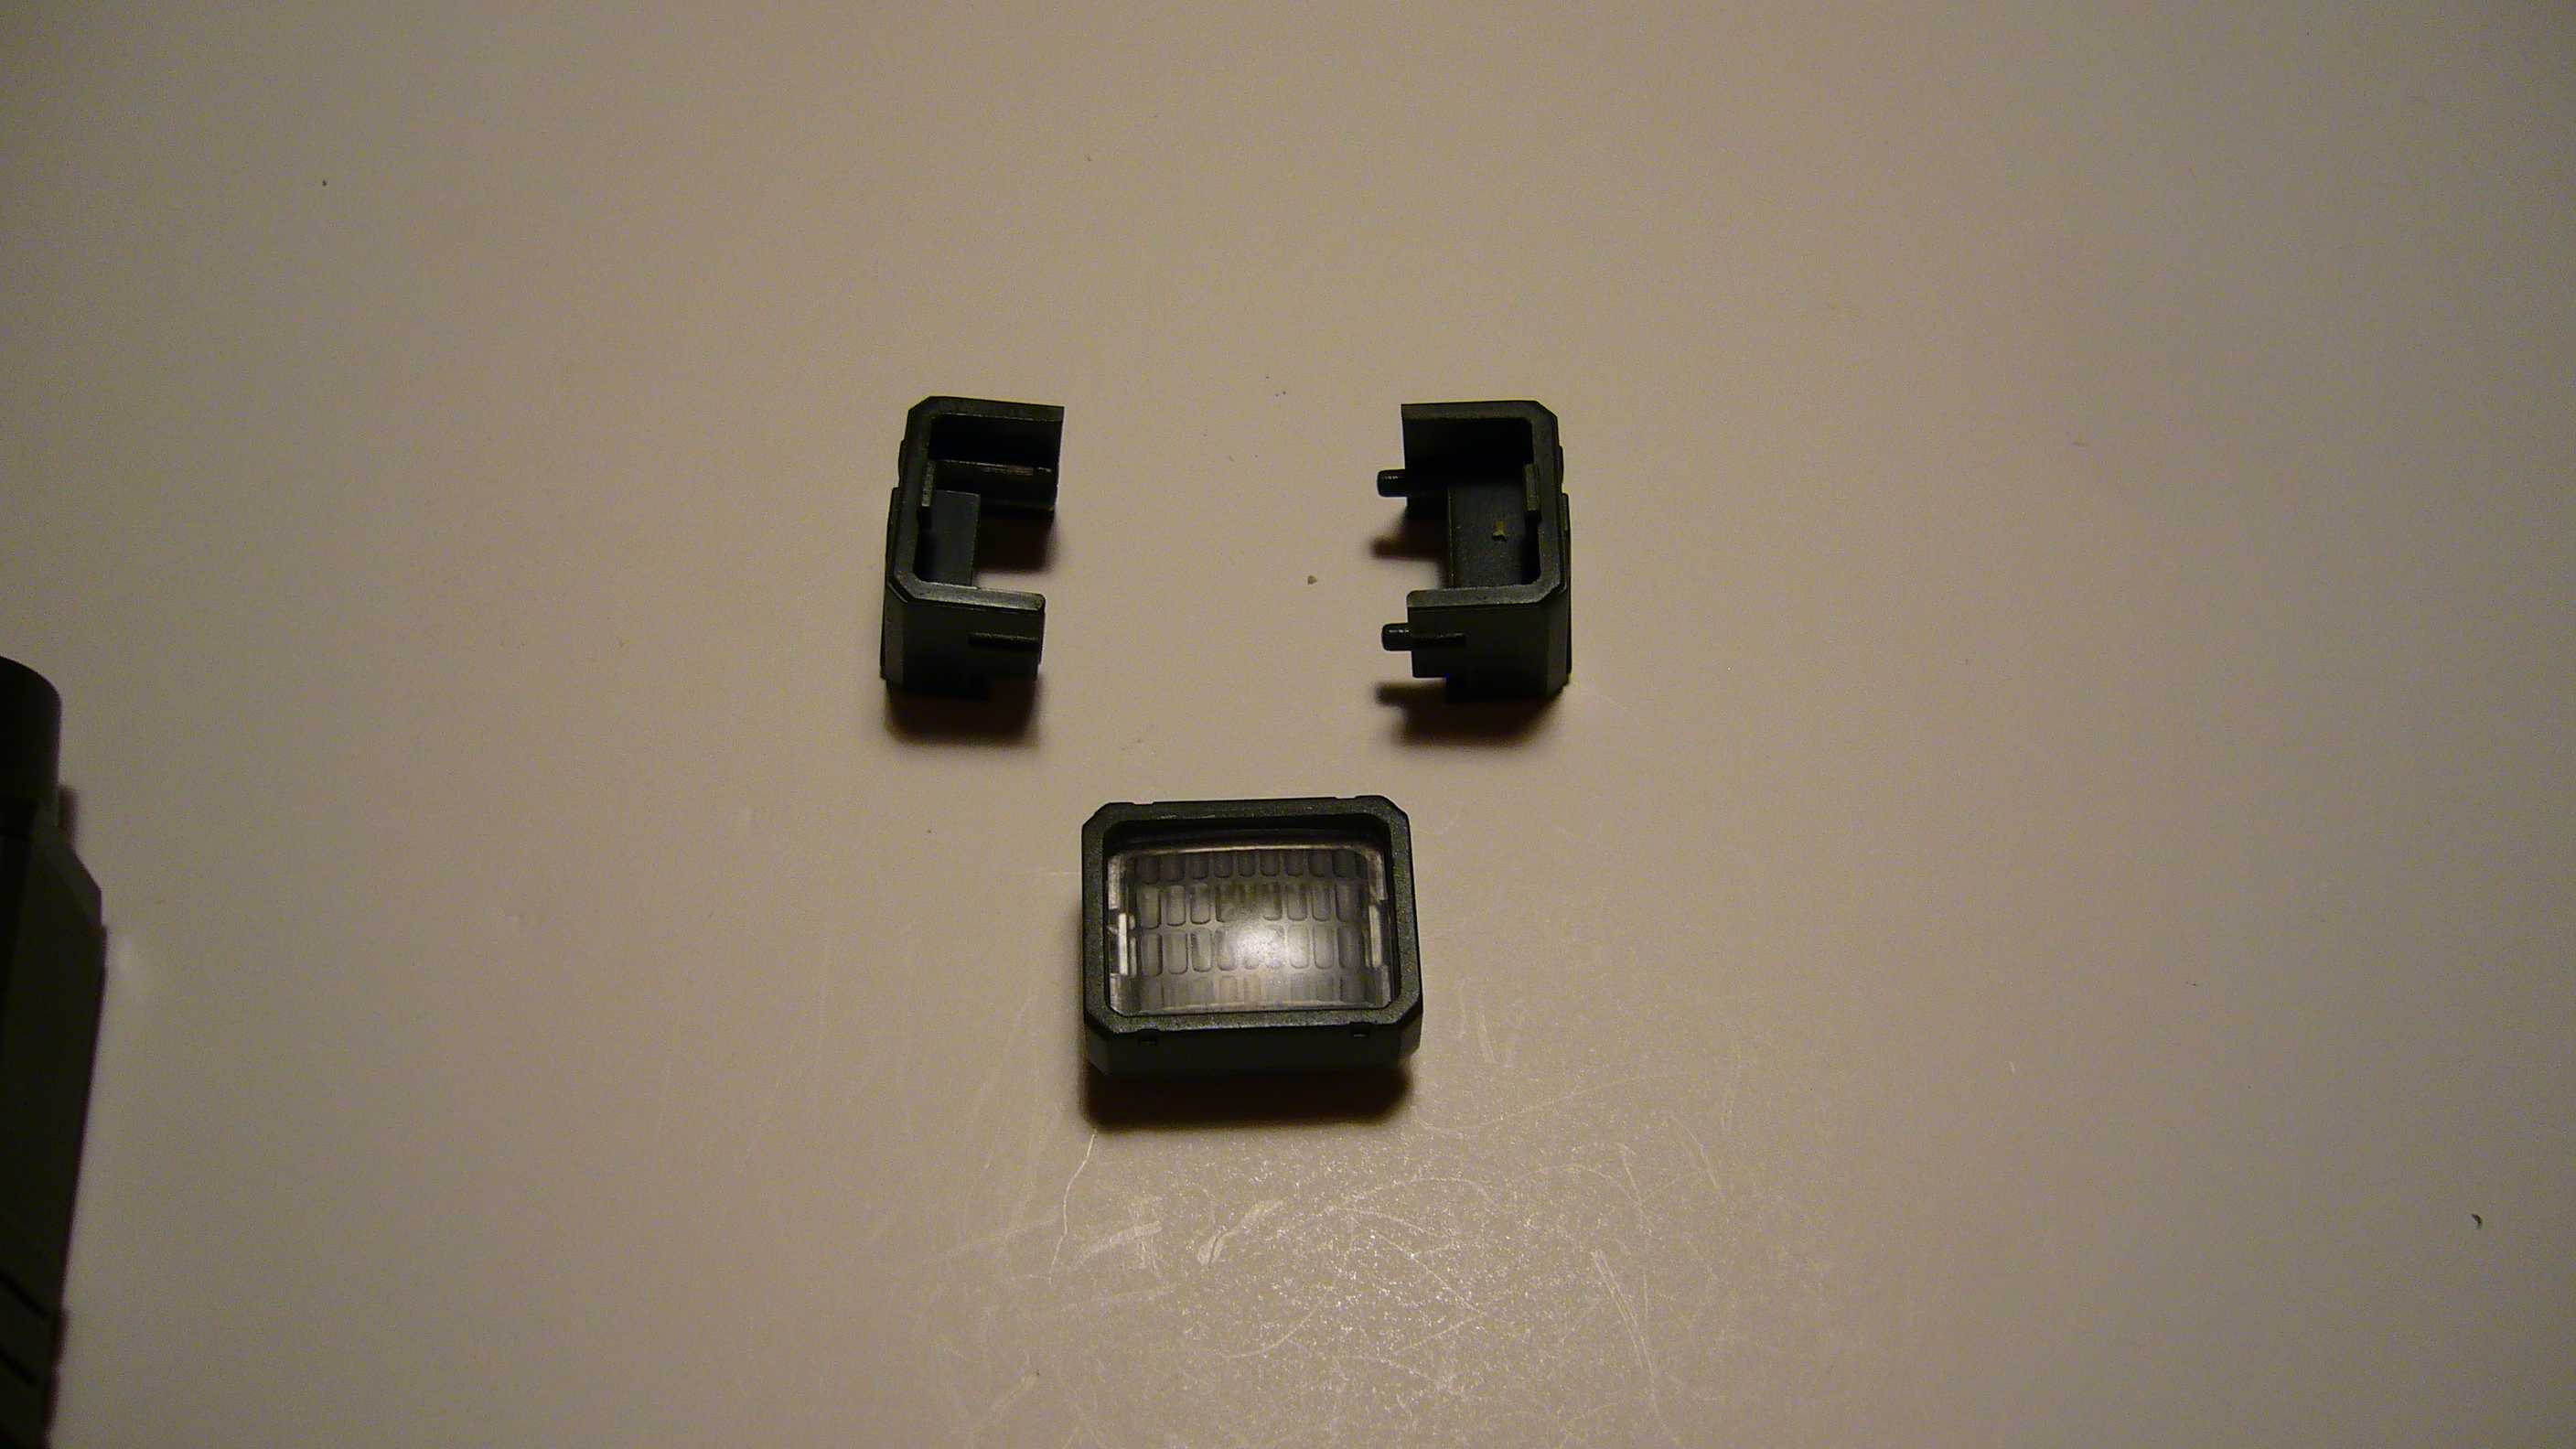
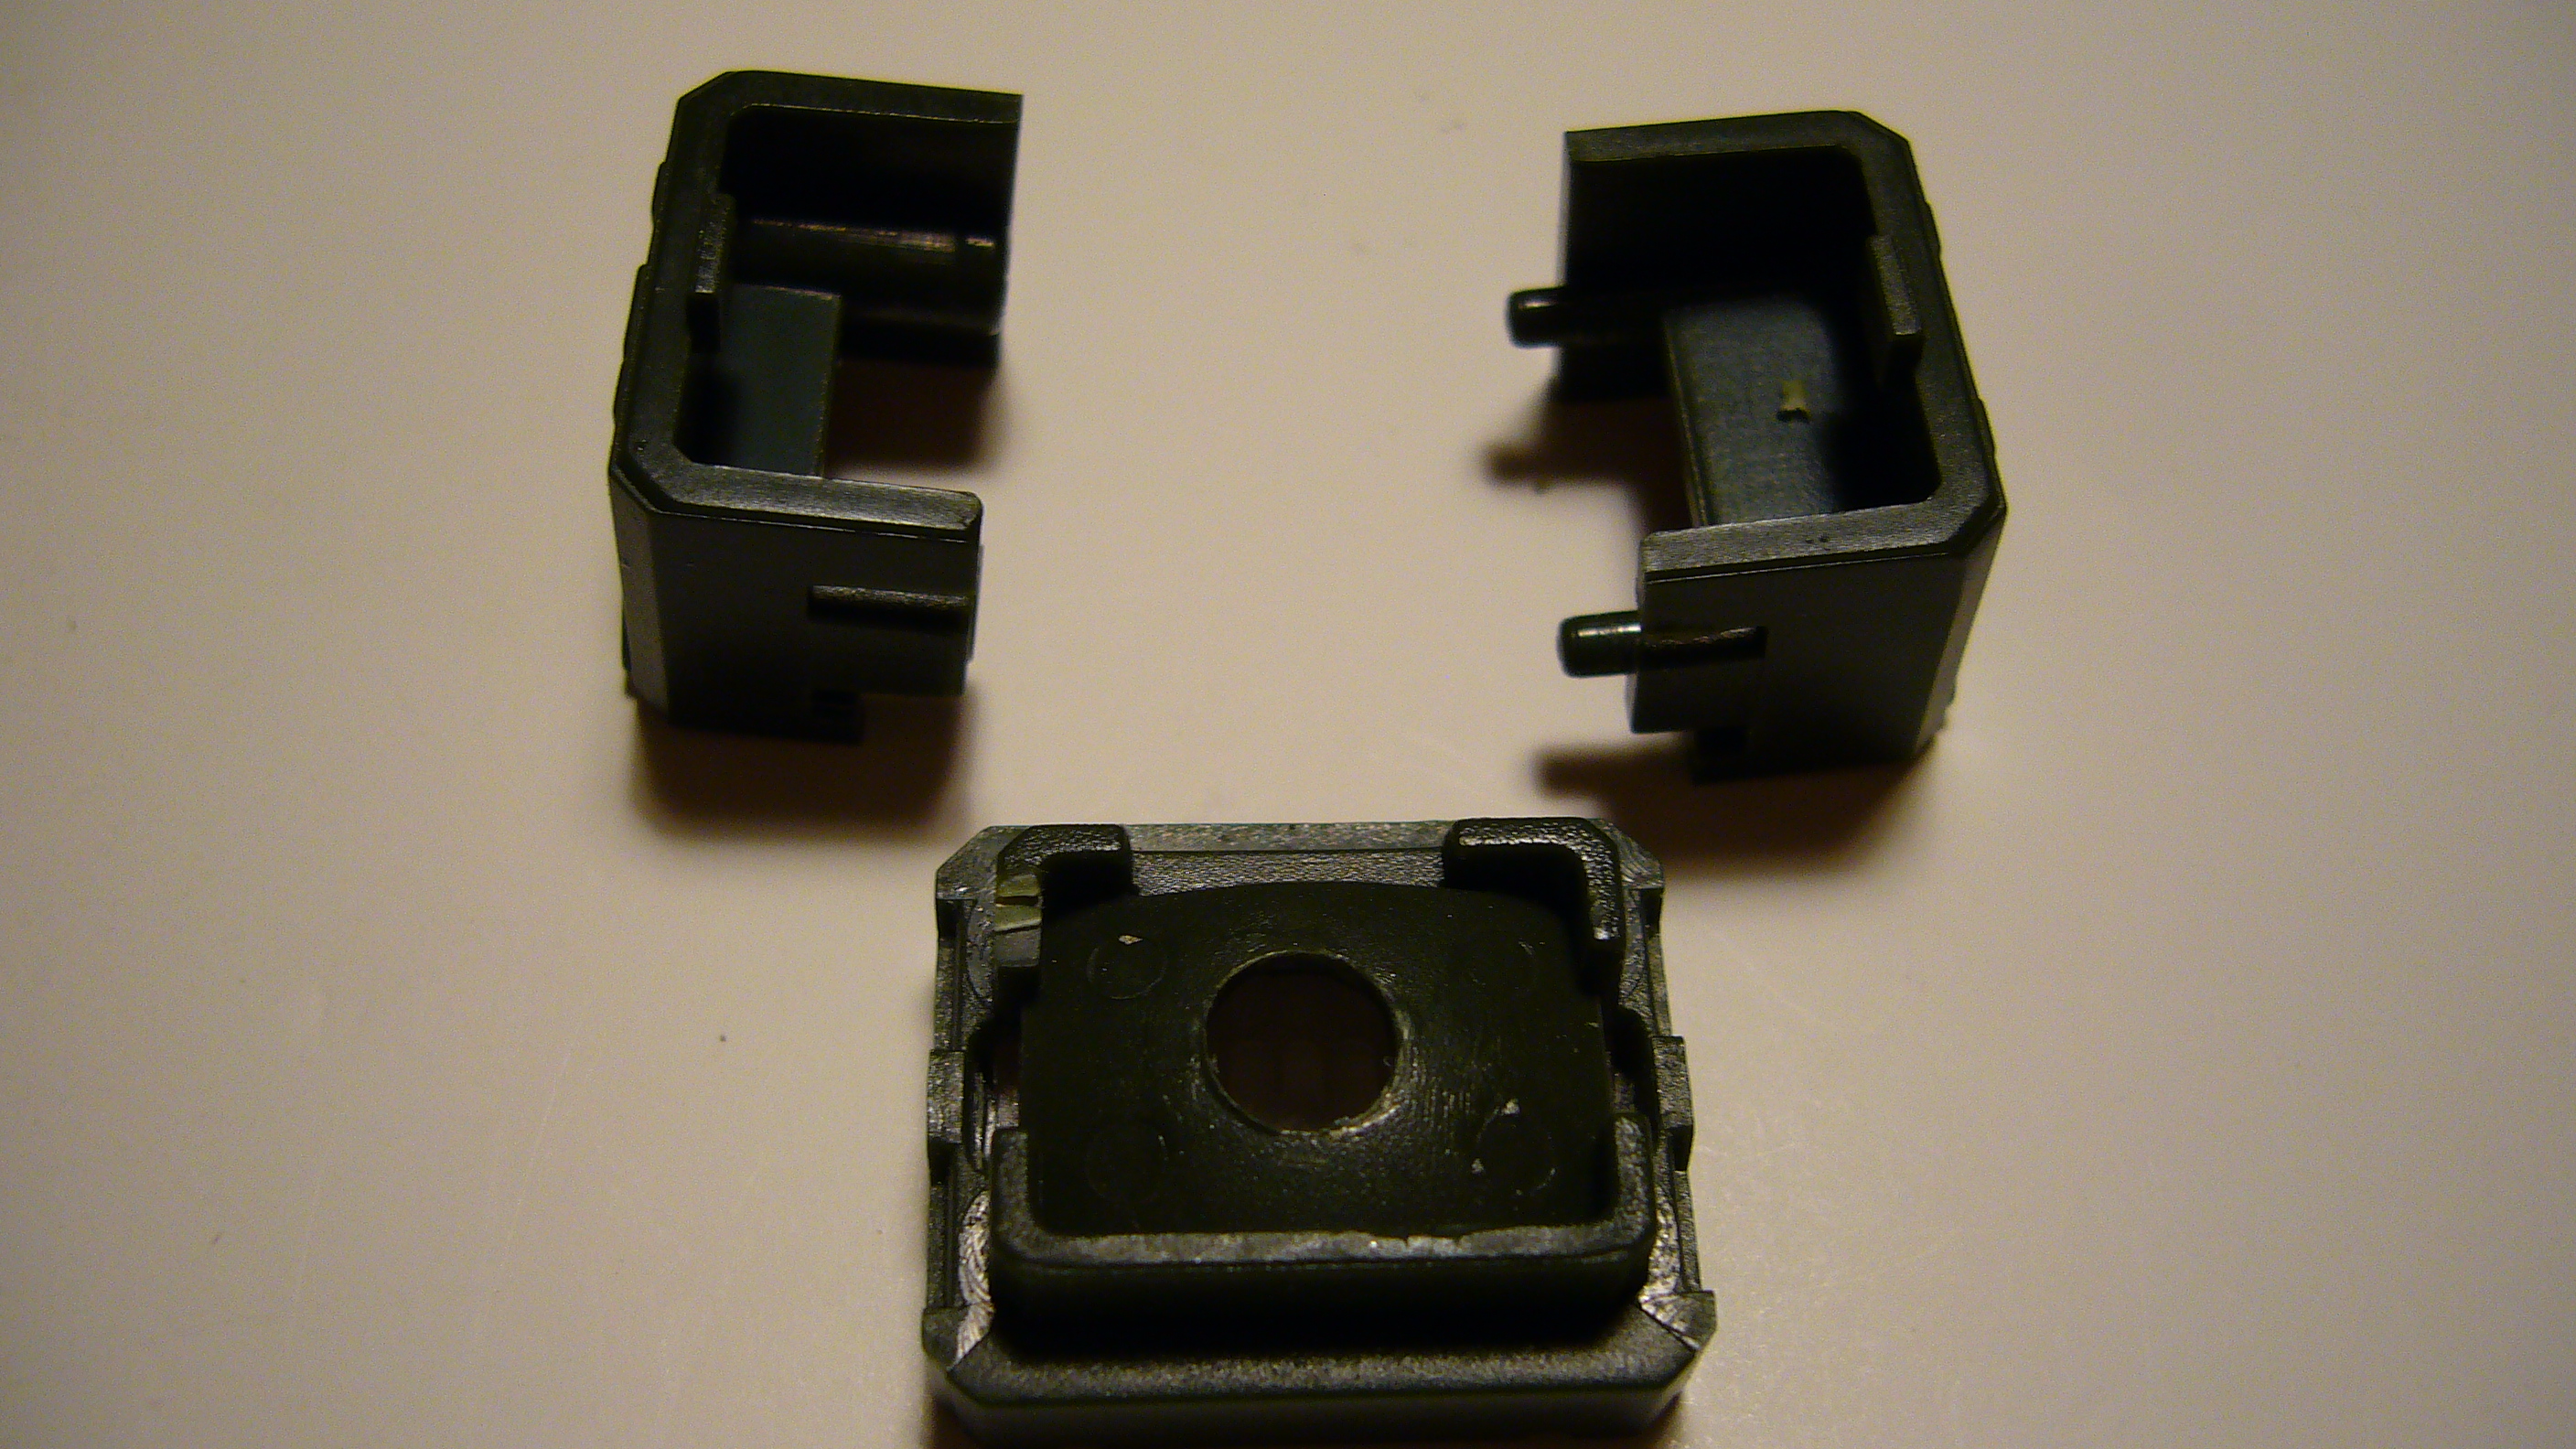
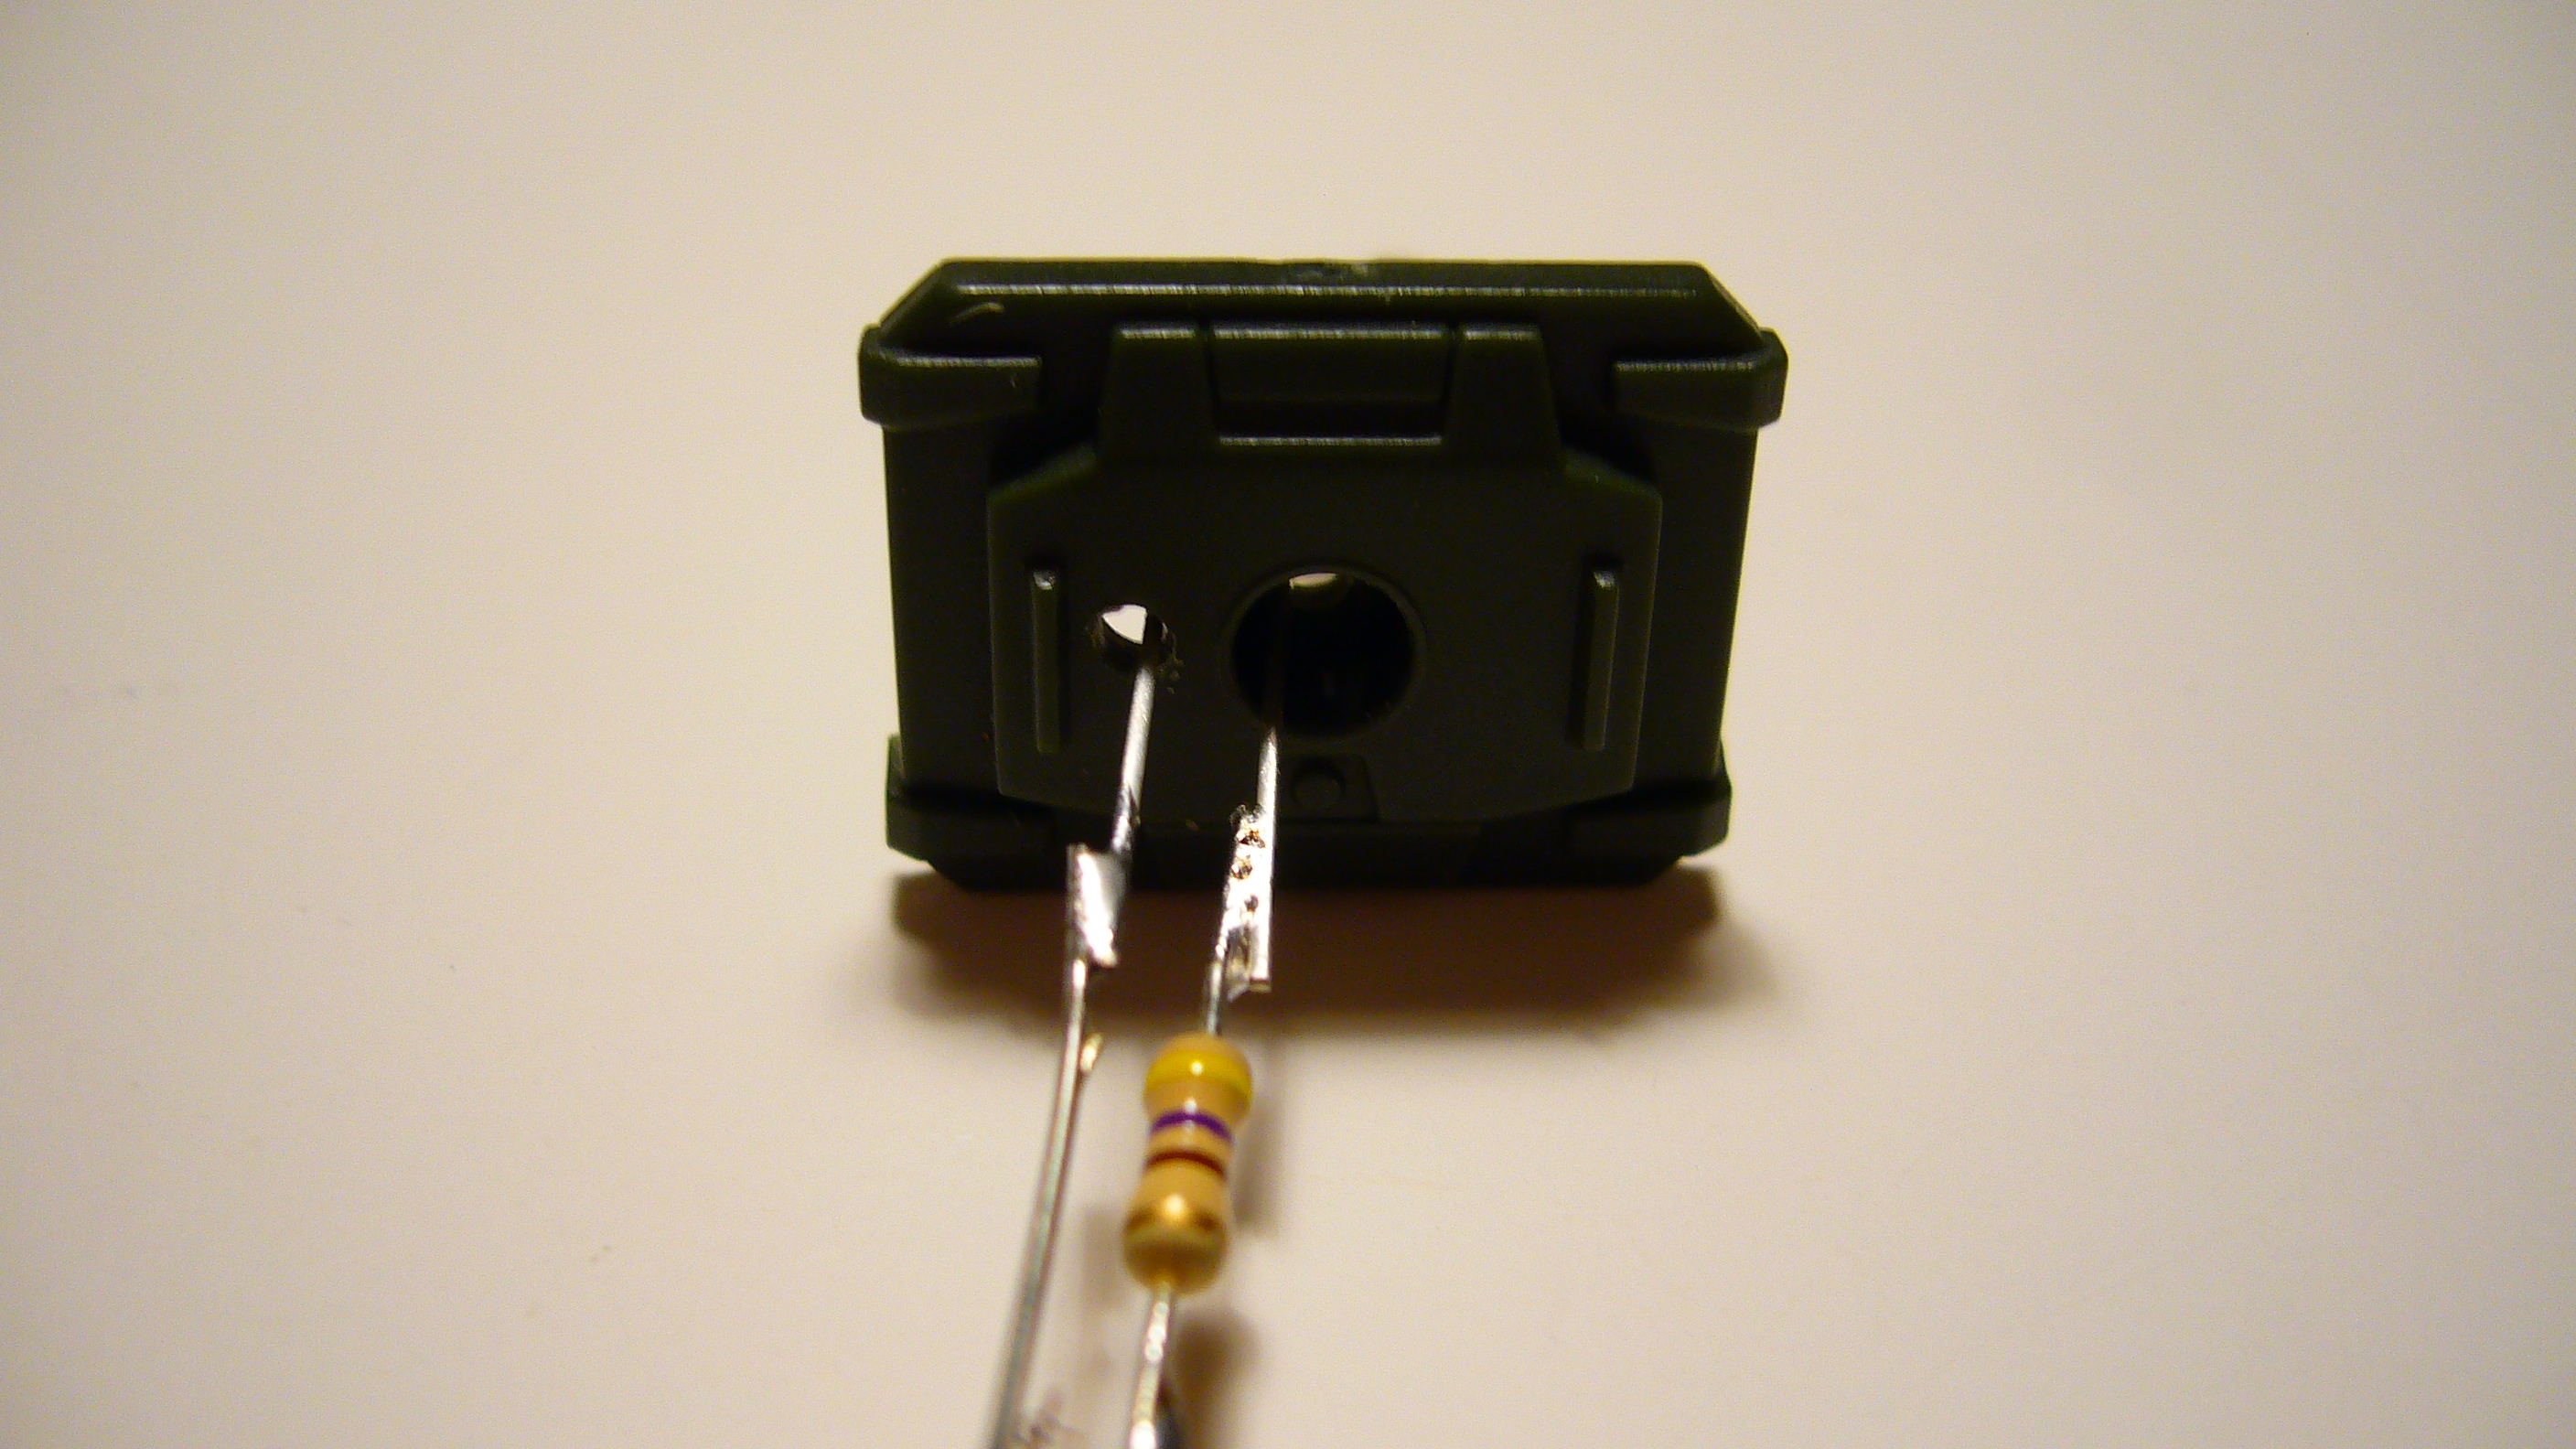
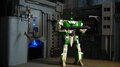
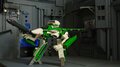
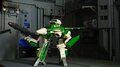
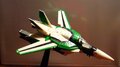
Hello all, Well I have this terrible tendency to want to tinker with things. Whenever I get a new toy I have the curiosity of a cat of just how its put together and how it could be improved and/or modified. So with that said I have decided to start this thread and share a little Tomahawk love. (which may be horror to some of you) My first pictures are what I like to call my promo pictures. Anyways this thread is designed to walk you through steps of disassembling your hawk and adding the modifications should you wish to do the same. Otherwise you can just sit back and watch in either horror or in pleasure as I work some wonders. With that said welcome to the pictures... Note: Precision tools are required for the following procedures. In the first steps I have decided to take apart the shoulder mounted light fixture. The modification it is one I'm sure most would dream of doing themselves, that being the installation of a white LED for a somewhat realistic addition to the hawk.