-
Posts
619 -
Joined
-
Last visited
Content Type
Profiles
Forums
Events
Gallery
Posts posted by kyekye
-
-
Wow! The fun never ends with SDF-1!!
It's so awesome to see both scales side by side!
Always great inspiration! Both you and wm cheng!

-
Ha ha that carrier was actually in one of my pictures with the 1/2000 sdf-1. This was actually one of the first place I look to see if I can use for 1/2000 vf-1. But I actually find the planes that came with the futura carrier to be too big and thick. Another place I looked was the planes on the micromachines aircraft carrier. But those lack the detail. In the end, the easiest way to make them and paint them is out of stylene rods. This is because you can cut, sand, polish, and paint the vf-1 while it is still part of the rod. And when you are done painting, just cut it off from he head of the rod. This way, it is alot easier to handle!
Sigh.... I thought it was too good to be true....Sigh
 Nothing is easy in this world!! Arrggg!
 I should have seen it because I went through your pictures many many times. It was one of those 'Oh very cool angle!' shot - except for I skipped the Enterprise ship sitting in front of SDF-1 - kinda blended in!

Every time i see something and say, 'wow this is tiny, I might be able to use it!' and bring next to SDF-1 only to find out it's too big for scale.

-
-
Oh, I forgot to add!
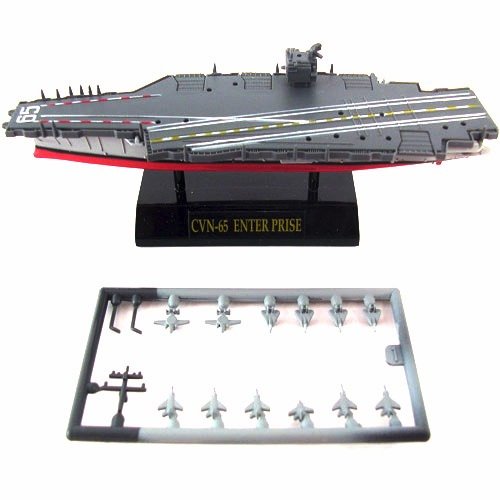
I found one of these at the local hobby store. It's Some kinda Japanese candy toy from Furuta (Furuta Battleship Collection. This one is CVN-65 Enterprise)
It comes with 4 types of modern jet planes (12 total) and the scale is something like 1/2400. I guess you know what I'm thinking

-
Today is 'Foot fetish' day

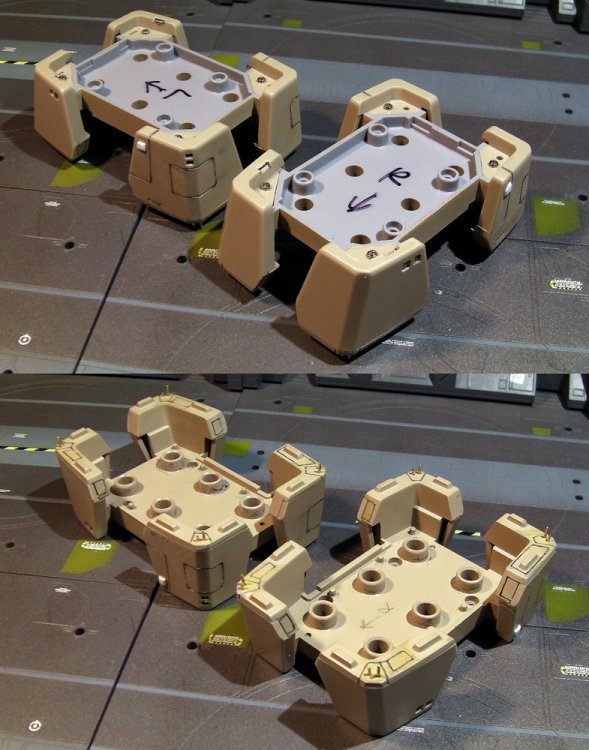
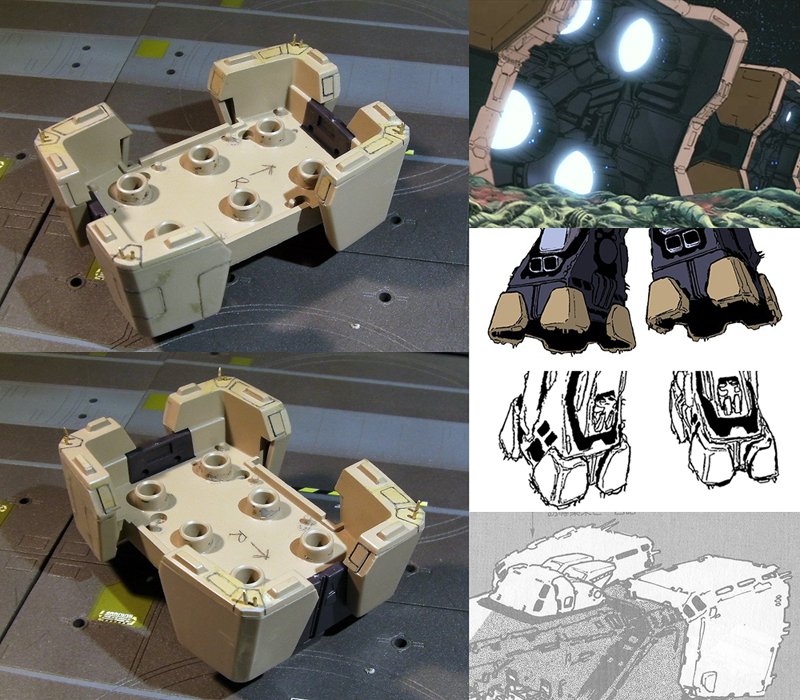
Adding Panel lines with engraver and antennas on each foot.
I spent some time on it, but ended up with only 1 side bottom..

One note, the bottom sole material is softer and kinda easier to engrave panel lines. However, the top has very hard material and takes multiple strokes to get good panel lines engraved.
So..at this rate, it looks like it will be another 3 more days with foot fetish for me..

-
The LED saber for the 1/48 gundam is actually powerful enough for fiber optics, and it is tidy in a way that everything (battery, led, on/off switch) is in one unit smaller than one AAA battery.
Also, let me know what parts you need the scan for taking apart; I don't have time to do the whole thing, but can so individual areas for you and WM Cheng.
Thanks! I've ordered both - so that I can use fiber-optic cable and choice of LED light. Lighting is still just a plan. Since I have 0 experience with electrical parts, There is a big chance I might just skip it.

For the parts, I'm done separating for now.

At the time, I was stuck and desperate so I searched web in Japanese, Chinese..etc for clues.
 Somehow I got the info I needed. Probably I might need some help again when I put it back together later
-
You can go the easy route... When I was in HK this Christmas, I picked up some 1/100 gundam saber hilt that lights up (led with watch battery). It is small enough to fit onto the celing of the 1/3000 city. I think you can buy them online. Let me look for you...
Here are the pics and video
http://jqmodels.wordpress.com/2010/02/02/beam-saber-hilts/
Here is where to order them:
Wow! Thanks!!
That looks awesome!
It seems like it's sold out almost everywhere. After some more search, I found other one at G-System shop.
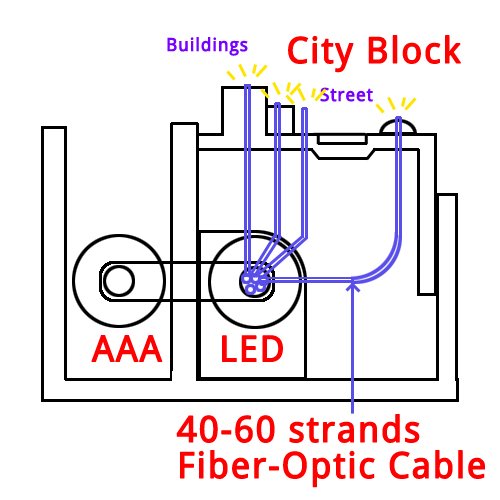
Although my first idea with that fiber-optic light one was slightly different.
Here is a section view of my crazy idea

but I can't tell until I see the product, so LED light saber will be a great back up plan!
-
Hey KyeKye, that looks amazing!! You guys are fantastic - now you've pushed me from just a oil-wash of a toy to a bigger and bigger deal
 I'm trying to not turn this into a model (as I don't have time for a full build) - but you've convinced me that this toy deserves it. I love your ideas. Still gotta find a few hours to sneak in.
What do you use to cut your brass wires? I hate doing it because it makes me think I'm mangling my sprue cutters and ruining the cutting edge.
That Valkyrie is insanely small. I'd love to see what you use to build it up - let alone paint it. Great work so far. When you put it together again, are you going to putty and fill up the seams?
Oh Boy.. I've done it now

I would still say that 'parts separating' was 90% luck and 10% skill.. every time I got to the 'glued' parts, I closed my eyes and prayed...to Captain Global!!

I use just regular small wire cutter for brass rods (.020-0.51mm - got it from floral/craft shop!
 ) Drilling holes on the edge with pinvice was quite a job itself.
For small scratch build parts, I use Mr. Epoxy putty (strong) or MoriMori. I prefer Mr. Epoxy Putty for easiness, but takes 6-24 hours to full hardening while MoriMori only takes about 30 min.
-
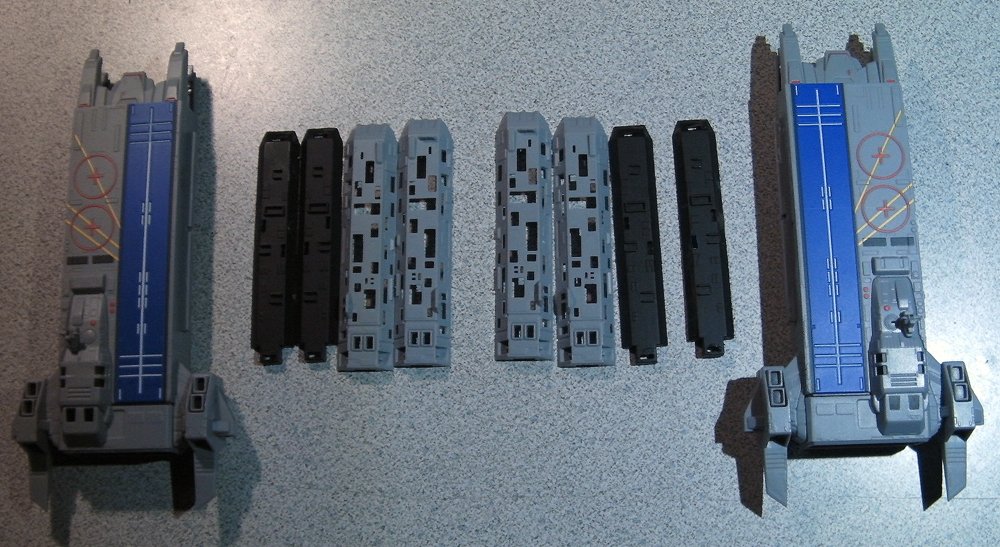
Not much to post today because I repeated the same thing I did yesterday on ARMD-2

Thou I still managed to prime the metal parts and glued them on both ARMD 1 & 2.
All the metal tips are rounded - to protect my fingers
 . Also added some more antennas on the bottom as well.
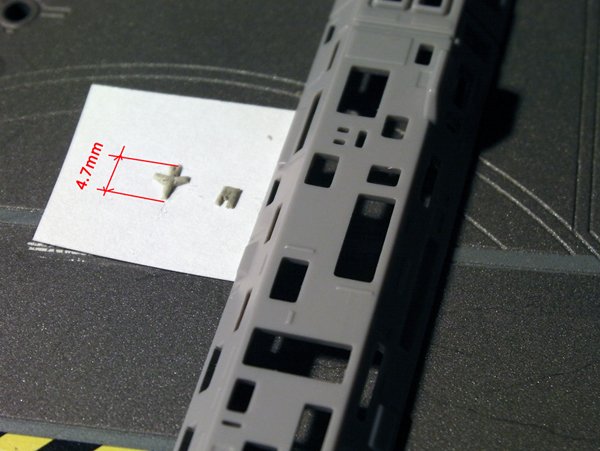
While I was waiting for the metal primer to dry, I made a dummy VF-1 with putty to check the size. 1/3000 of 14.23M = 4.74mm
 Hmmm...That's too small
  . I'm not sure what to do about it yet.
 -
Wow, another amazing custom sdf-1 WIP! The magnet for the bridge is brilliant!
Where did you get the Photo Etched parts? Is 1/700 the right scale to use or you just pick the ones that same to match of the scale of the sdf-1?
I will definitely closely follow this thread.
Thanks for your nice comments.
I'm using "whatever photo-etched part I think will fit". some are from 1/700 scale ship, but others are something else. For example, the bridge detail part I'm using is some German pilot belt buckle.

-
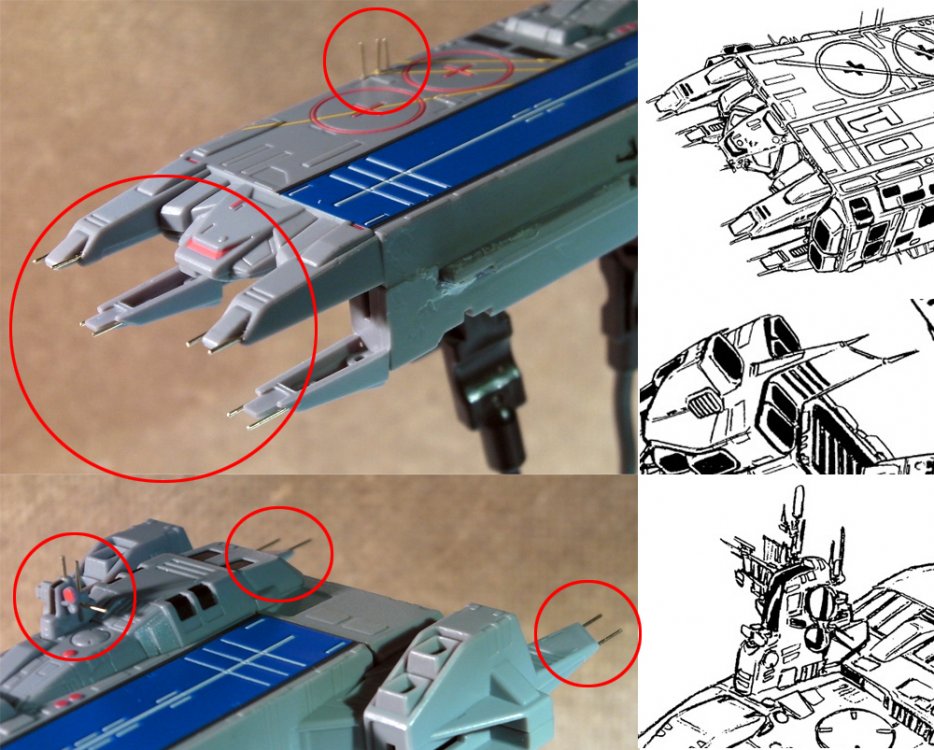
Adding details to the ARMD. Actually Yamato did a pretty good job with all details and panel line on ARMD. Things missing are mostly short antennas and Numbering on the panel. ('01' and '02' decal would've been a nice touch. Yamato?) I think I have left over decal from somewhere though.
So I drilled pinholes with pin vice and added a bunch of 0.5mm diameter rods. I thought about tapering the tips, but I will end up getting poked by it. So instead, I rounded the tips with a file.

Circled areas now have antennas. The lengths are not in sync yet. I'll need to cut them in better lengths, prime them and glue them tomorrow.
Going to bed now..
-
Are you gonna put some light in the city section??
It's quite challenging man!

Just checking possibilities for now. Never used the lights in the models, but 1/2000 model by 'vf_1s' sure looked nice!
For 1/3000 model, there is some space under the city and behind city just enough for 1X AAA battery.

It doesn't hurt to get one light kit and check the size and flexibility of optical cable. If it doesn't work, I can use it somewhere else later.

-
Man, I don't know how you managed to get those pieces apart. I tried for a good bit of an hour just trying to take the leg apart to get at the city based on the scans and all I really managed to do was get the gray piece of the front of the leg off, but couldn't get at the screws in the back of the leg. The turret and other piece covering the screws are glued in pretty good and I'm afraid I'm going to stress the plastic or break something entirely if I try any harder. I've pretty much given up on painting the city at this point which I would have loved to do.
I know exactly what you mean.
Now that I think about it, I must have been possessed or something. What was I doing with $400 toy..

I had a number of chilling moments while I was doing it.

BTW, Check out what I found! Link
Probably it's not that bright, but it might work for me since I have 0 experience with these kind.
-
Thanks for nice comments!
 -Mom! Crazy people are telling me I'm crazier!!
  (jk
(jk  )
)Originally I was planning to only work on weekends, but I got carried away and lost some sleep during weekday nights... Not good.
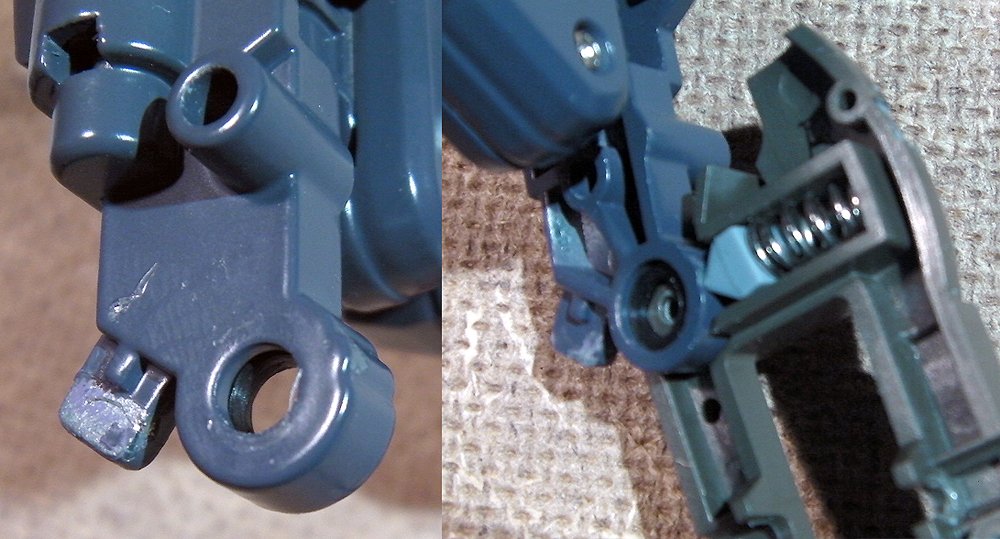
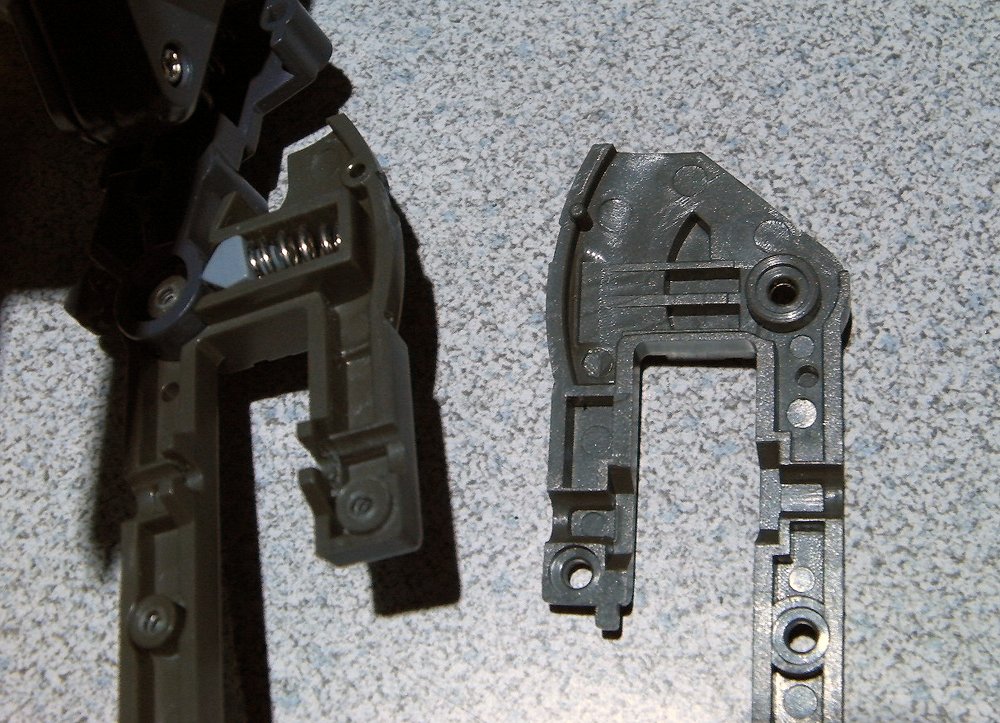
BTW, someone asked me about knee ratchet joint area - inside view. So here it is.
You can see 2 lock areas on the ring (left image) and triangle peg is pushed by strong spring (right image).
You can see the front/back direction by the knee cap position (the area with glue stain)
-
I didn't know - great work so far! Definitely subscribed!! Too bad you didn't do it earlier before I "ripped" off my bridge! ;-)
Thanks! Mine got delivered a little late and I took a couple of days getting familiar with transformation and moving parts.
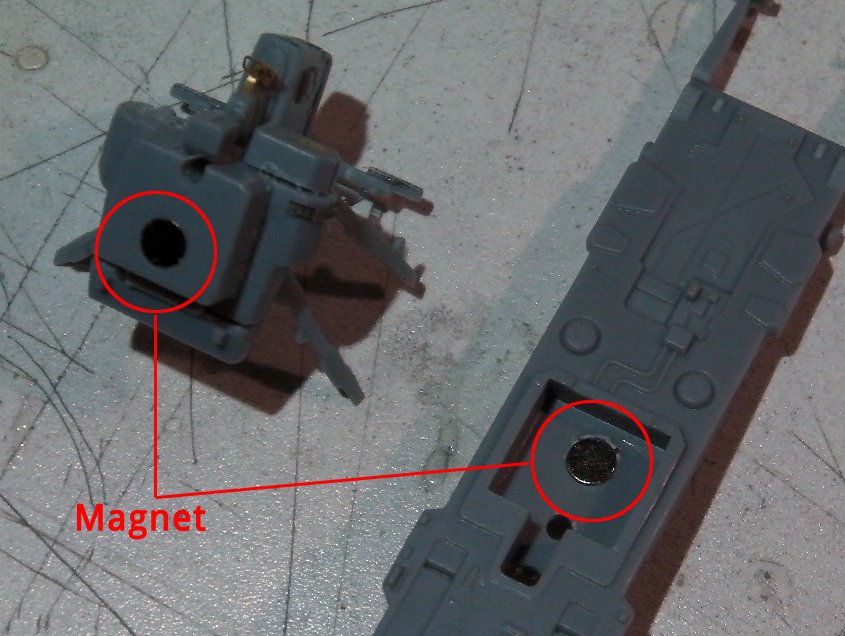
Even though I separated head/bridge without damage, I decided to add magnet so that I can remove the head during transformation. So I ended up drilling hole on the head anyways

-
Since I'm adding photo-etched parts on the head, I would be afraid of touching it during transformation.
So I decided to use magnet on the neck/head joint. I can remove head while transformation and put it back.
Neodymium Magnet Grade N52 (part name:D21B-N52 from K&J Magnetics)
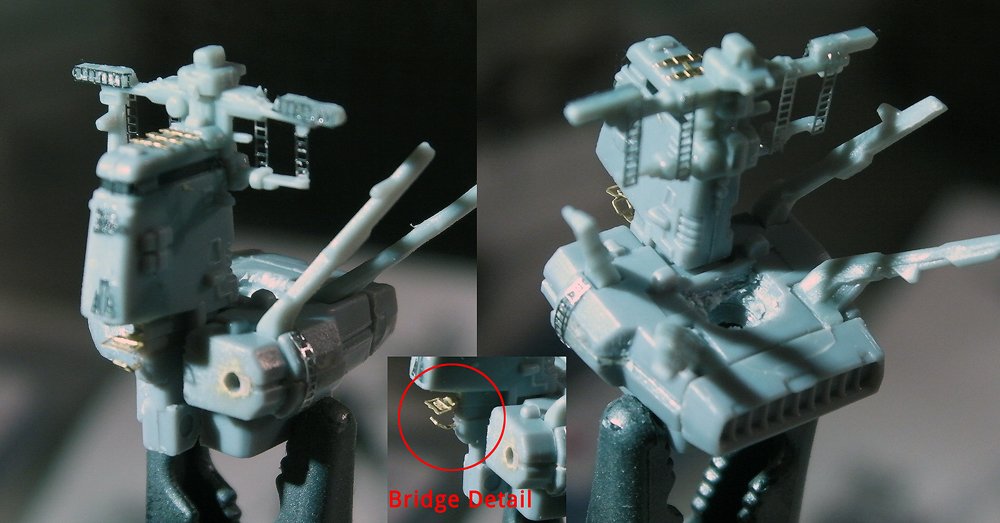
Now I can work on the head details.
*Adding antenna lines and small panel details.
*Filled portion of side gap with putty
*adding metal rod for yellow disk antenna and sensors on both side of the head.
*I think I'm gonna cut out the glass shield and replace with thin clear plastic. So I added main bridge details using Photo-etched parts.
*photo-etched parts placements are temporary. I'll need to prime them before paint. Some minor gaps will be also filled with primer later.
Again, my camera is not doing a good job getting focus on MACRO

-
-
-
I found a web page showing all 1/2000 SDF-1 parts, so I'm gonna try to get to the knee.
-
Oh hi,
I'm kinda doing it here
My camera isn't that good (compare to these days standards, that is) and I didn't take step by step pics (too many parts) - so i got lazy and took photos only after I'm done with each area. I'll add the photo of the area I'm having trouble with now.
Oh I found a web page showing all parts and assembly instruction of 1/2000 SDF-1 here. The page is in Japanese, but it doesn't really matter.
It appears that the Thigh parts came in pre-assembled...
 But it still shows the parts assembly for the Thigh.
 -
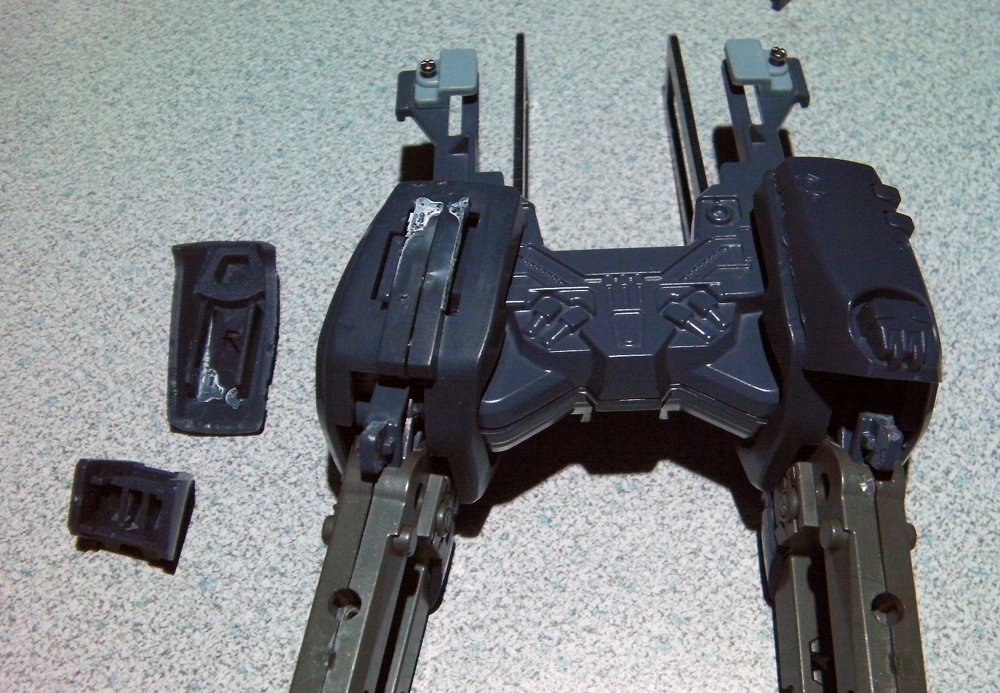
Hmm. I'm kinda stuck at Thigh/hip area.
I can see the front cover should come off first to get to the rest of parts and to split the main thigh. but the knee cap is the mistery here. Does it need to be removed first before the front cover? So far, there were some hidden screws inside unexpected spots, so I'm afraid if this might be one of those.
In worst case, i can still just do masking, but really want to remove the grey metalic part to paint separately.
-
Hey Keykey - why don't you post pictures for us of your disassembly process? Feel free to add to my thread if you want.
Oh hi,
I'm kinda doing it here
My camera isn't that good (compare to these days standards, that is) and I didn't take step by step pics (too many parts) - so i got lazy and took photos only after I'm done with each area. I'll add the photo of the area I'm having trouble with now.
-
This might be asking too much, but since you started it

Can you scan the rest of assembly manual as well if you have time? It will be greatly appreciated..
Seeing the leg assembly telling me it's not as simple as I thought for the rest of body.
I'm almost done with separating parts for paint job, but I'm stuck at the thigh with knee joints. It will be great if you can tell me the order of the thigh/knee assembly. (backward or forward - doesn't matter)
I can't figure out if the thigh front cover comes off first, or knee cover. Basically I'd like to separate the Leg frame from dark blur parts.
Thanks in advance!
-
Disassembling Engine side (?) of chest block
The front panel was glued somewhat tightly, so took me a while to open it to reveal screw holes.
After that, the rest was easier.
Started showing some metal parts (shoulder joint and cannon joint)
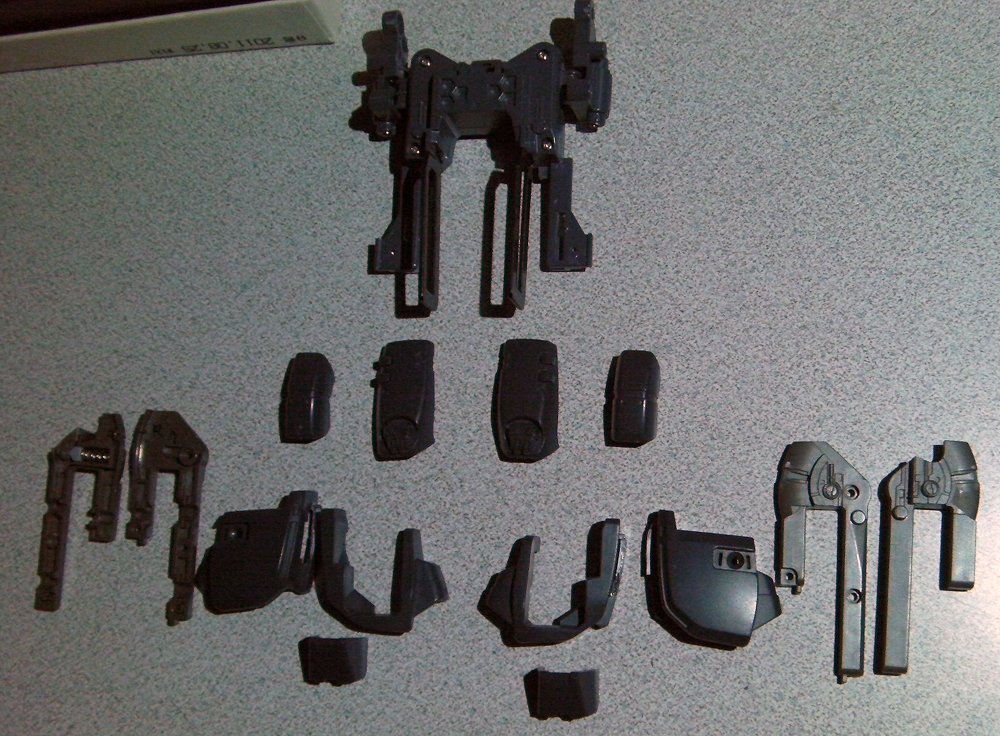
Main Body completely disassembled - This part was the most difficult so far. As getting to the center, Yamato used more glues and longer plastic pegs to put together parts.
I want to work on the remaining leg parts, but I can't figure out how it's assembled. I might end up using some masking for the knee joints to paint.
That's it for today. took me about 4 hours for today's progress.
Tomorrow, I'll get to the ARMD-1 and 2 if i have time.
Oh. please pardon me for separating posts. I'll need to use this to back-step assembly later.

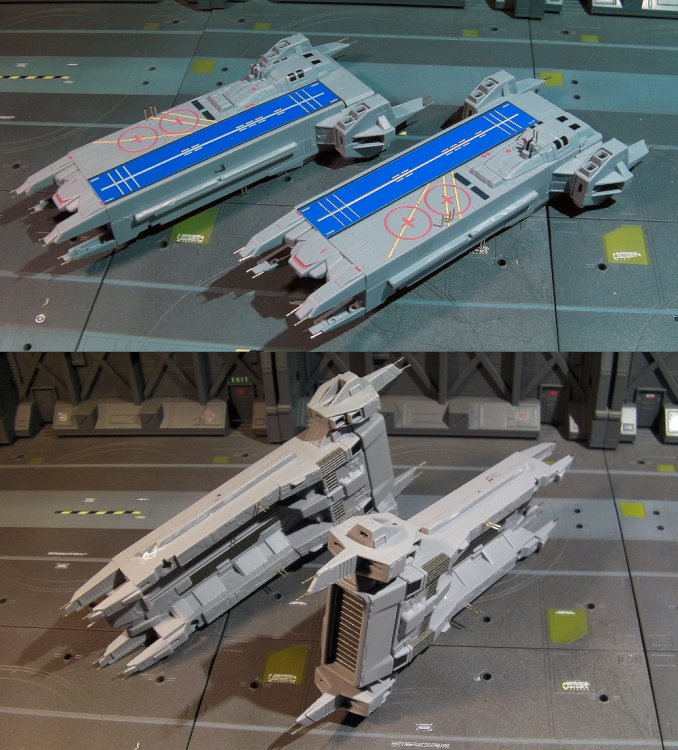
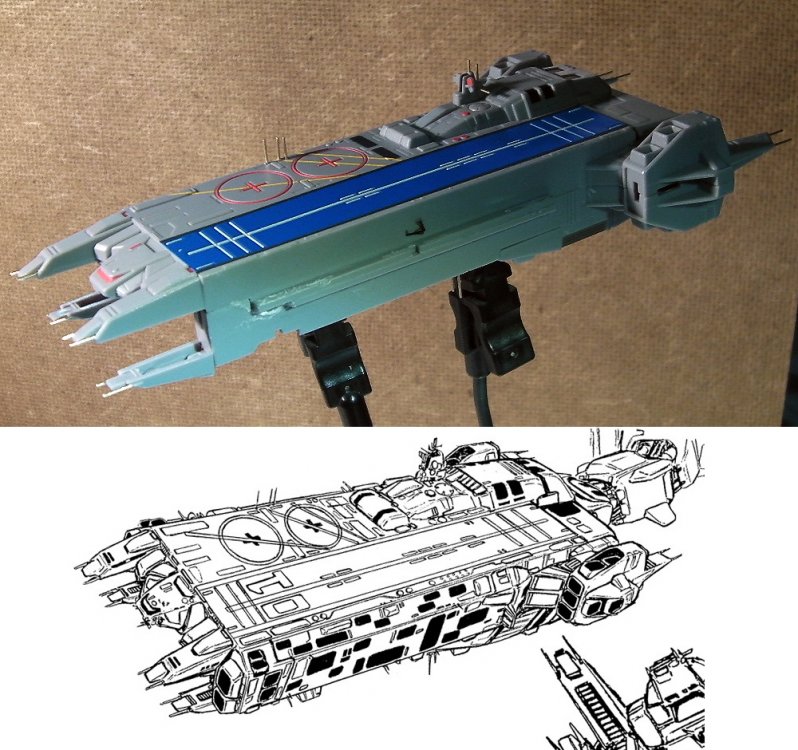
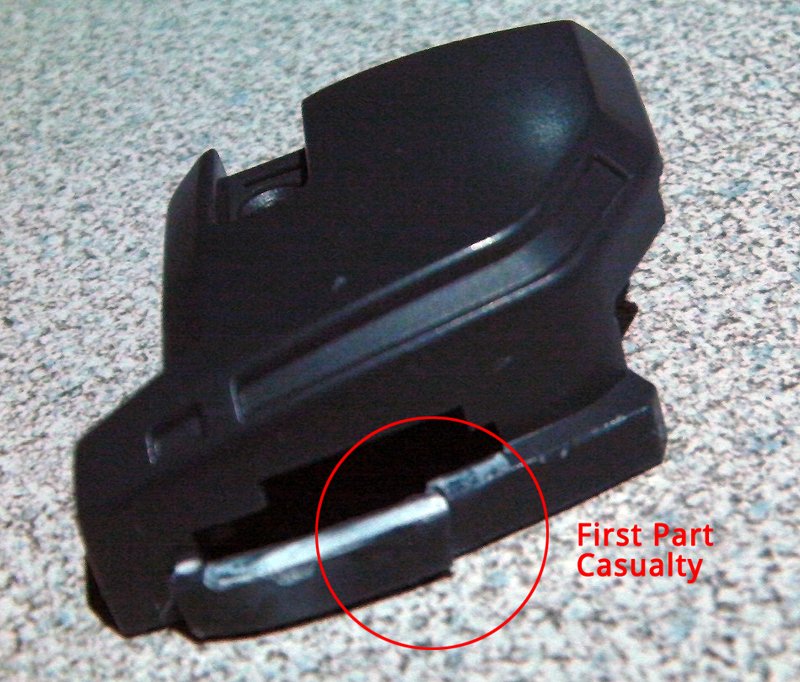
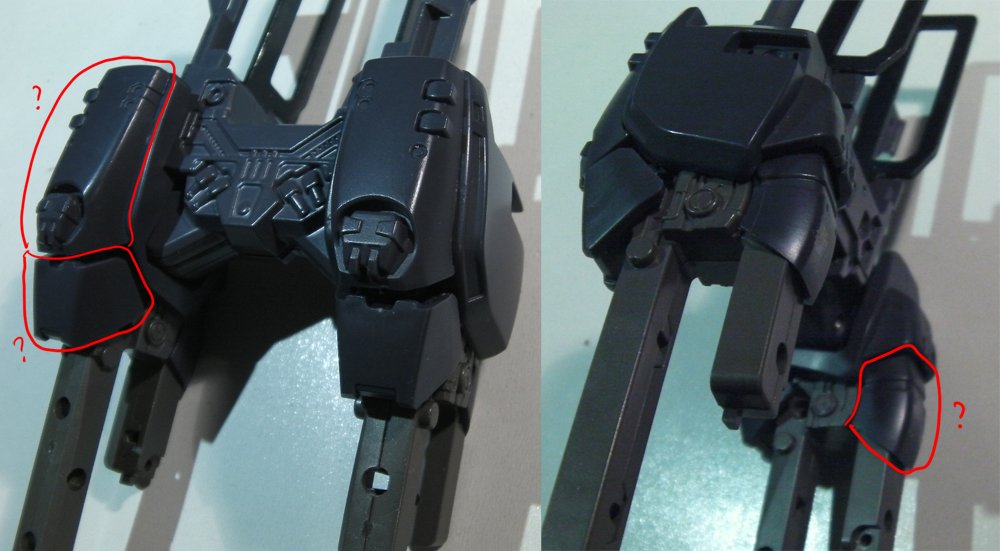
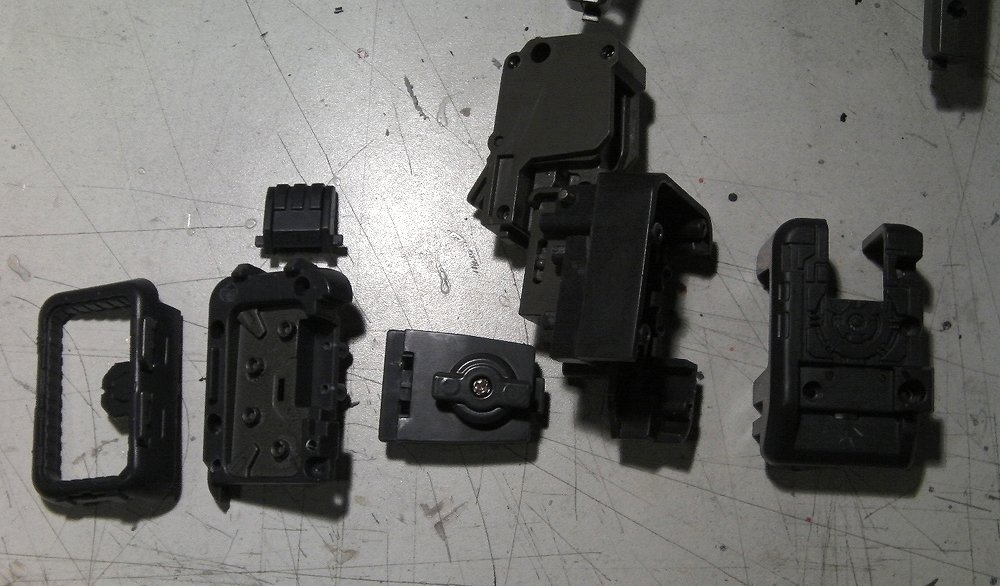
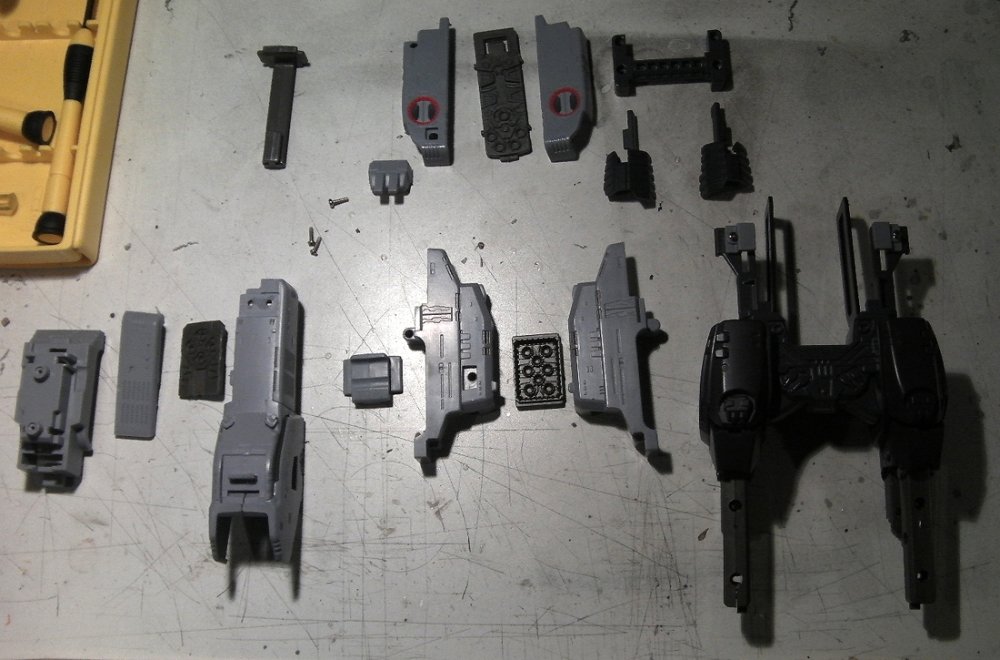
Yamato 1/3000 SDF-1 Custom/Detailing by Kye
in The Workshop!
Posted
Well, I can't sit around and doing nothing after your cheering comment! So here is take-2 on 1/3000 VF-1.
I used clear plastic sheet to trace parts over it. So it's all there (6 parts total including Super pack and gunpod!), but kinda hard to see. I'll have to spray primer to see what it actually look like. And some more cutting and sanding. If I like it, then I'll make 2-3 more. VF-D, VT-1 and VE-1 for sure! Gotta have those!