todd77
-
Posts
232 -
Joined
-
Last visited
Content Type
Profiles
Forums
Events
Gallery
Everything posted by todd77
-
That guide was posted quite a while ago (by me ): A while I concede that the waist joint isn't as tight as I would have liked on mine, it still does a very good job of holding the upper torso since the waist has two joints - the ball one and a ratcheted joint - the latter which helps a lot in keeping the hefty upper torso erect. I certainly won't be taking mine apart as it is fine as it is. It's nonetheless a solid piece of engineering - lots of gimmicks and fantastic articulation. To me at least, it's the best representation of the Ingram to date.
-
Mine too. Same goes for my Max 1S. And these two also suffer from a slight gap, especially without the FAST packs, between the chest and back plates in fighter mode, at least in mine - I have to always fiddle with the leg placement in order to reduce the gap. Strangely, my Hikaru and Focker 1S don't have these problems.
-
Looks like Yamato have added quite a bit more detail to it overall. Absolutely loving it! Can't wait to see it in its proper colors!!
-

HELP…! Look for some recommendations…
todd77 replied to Renegade Zentradi's topic in Anime or Science Fiction
Another vote here for Planetes despite the absence of mecha (unless you count the robot arm ). And if you do enjoy it, you might want to give its sister-production, Twin Spica, a try as well. Both are at the very top of my list of favorite animes. -
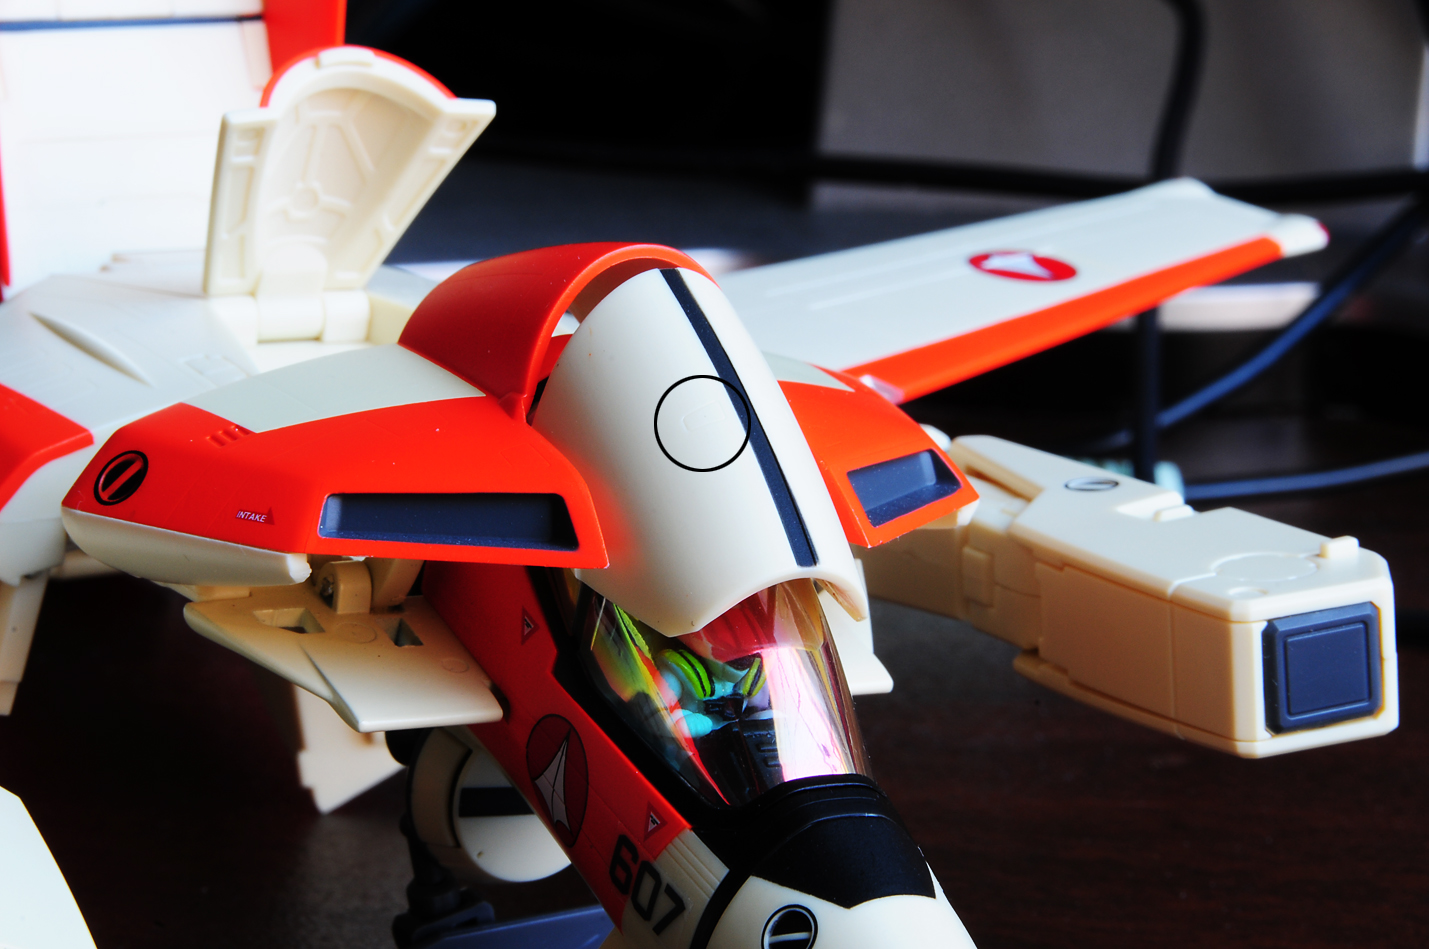
Are you referring to the two rectangular panel lines on the two sides of the central line of the heat shield? If so, I can confirm that they are indeed present. They are very fine though, like all the other panel lining on the V2s. Here's a pic: I really love the Ostrich v2. Didn't even realize that the sides of the head flip open to reveal extra details until I saw the pics posted in the Gamu review. A really nice touch, that. However, for the asking price, I wish there were more tampoed details though. Kinda weird not having the designation number and the U.N. Spacy insignia printed respectively on the side of the nose and on the fast pack leg attachments when all other DYRL variants have them. Oh well...

-
Official Bandai 1/60 Scale DX Toy Thread Ver.6
todd77 replied to Duke Togo's topic in Hall Of The Super Topics
I keep mine off. I tried putting them on during my first transformation and found that the fitting was way too tight. Like you, I didn't want to risk chipping the paint the off. -
Official Bandai 1/60 Scale DX Toy Thread Ver.6
todd77 replied to Duke Togo's topic in Hall Of The Super Topics
You'll have to make sure that the arms remain (slightly) BENT at the elbows so that there's just enough gap for the arm armors' pegs to hold on to. If you straighten the whole arm, as you would in a normal transformation without the armor, it's only natural for the thing to pop off as the armor will be pushed off. It's a fiddly thing but the arm armor can remain attached in fighter mode (if you have the patience for it ). Oh, and mount it on before locking the legs to the wings. Like you've mentioned, there simply isn't enough room to put them on once the legs are locked in place. -
Official Bandai 1/60 Scale DX Toy Thread Ver.6
todd77 replied to Duke Togo's topic in Hall Of The Super Topics
Yeah, despite its daft appearance, the stand is pretty usable - it makes posing the battroid a much less fiddly task as the legs of my armored Ozma aren't stable enough on their own. Just wish the stand allowed you to angle it particularly for the fighter mode. -
Official Bandai 1/60 Scale DX Toy Thread Ver.6
todd77 replied to Duke Togo's topic in Hall Of The Super Topics
Ahem. -
Just got a notice from Hobby Search that the Ostrich that I had reserved is now in stock! Wee, this is going to be my first 2-seater valk
-
Official Bandai 1/60 Scale DX Toy Thread Ver.6
todd77 replied to Duke Togo's topic in Hall Of The Super Topics
Yup, found one on one of the missile pods. The other is still fine. The one that I found is quite tiny though. Hope it doesn't get worse -
Official Bandai 1/60 Scale DX Toy Thread Ver.6
todd77 replied to Duke Togo's topic in Hall Of The Super Topics
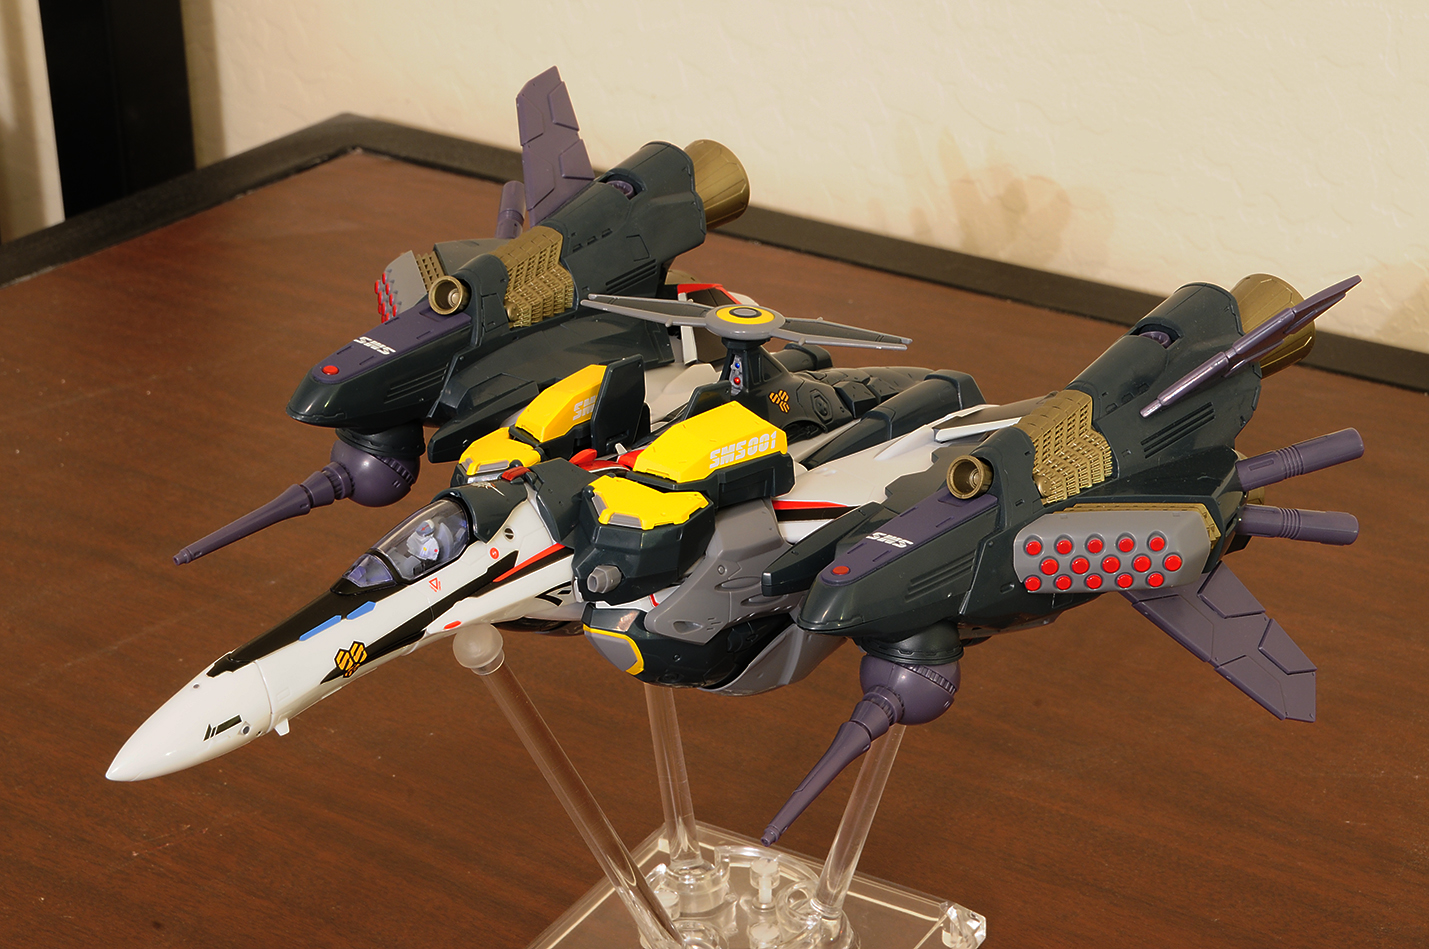
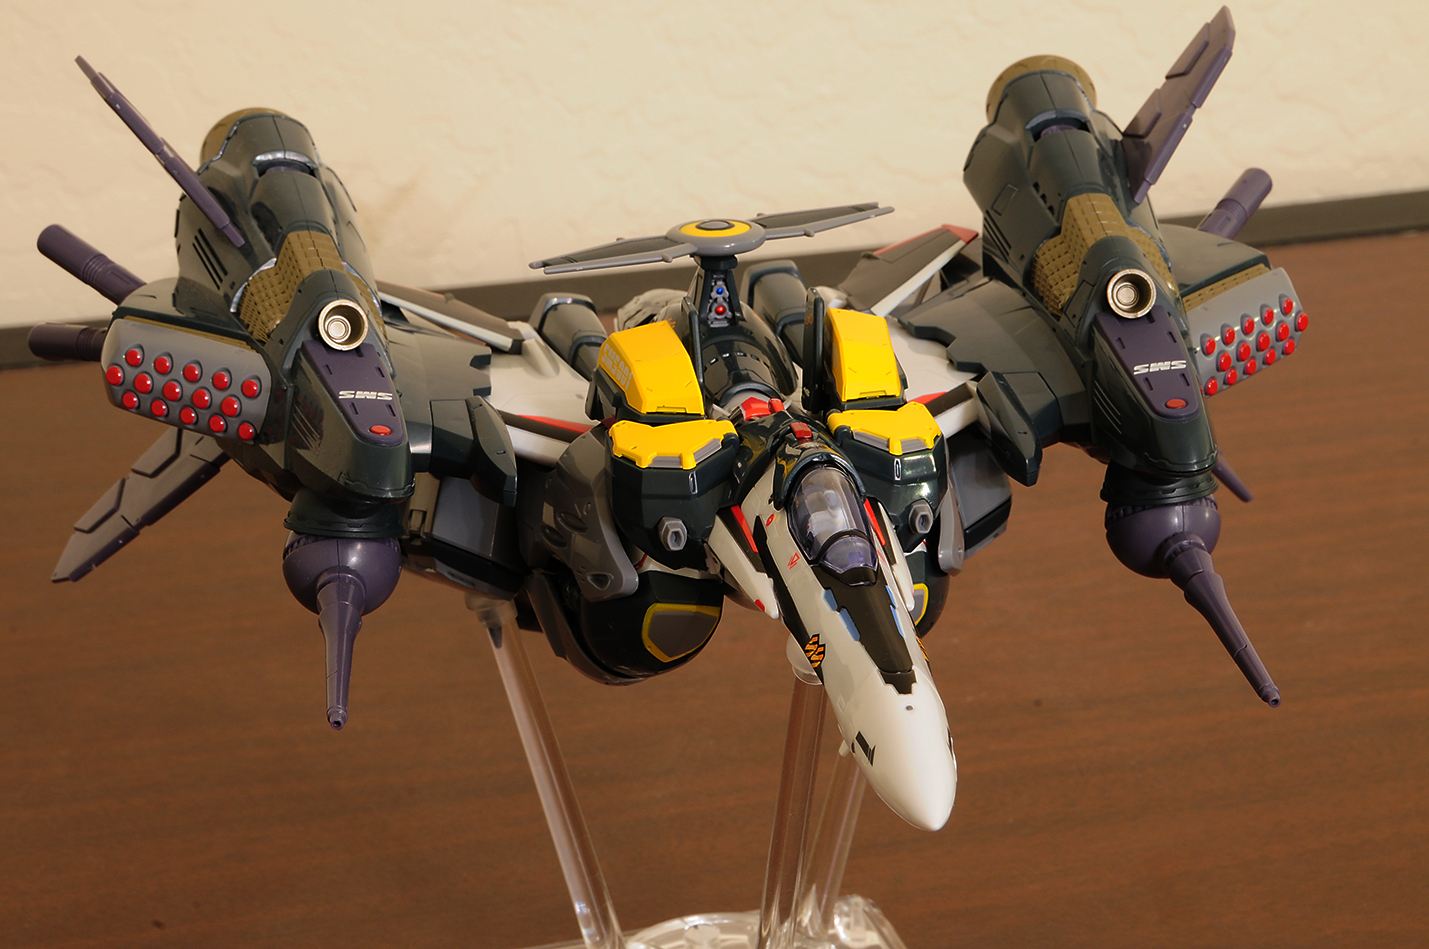
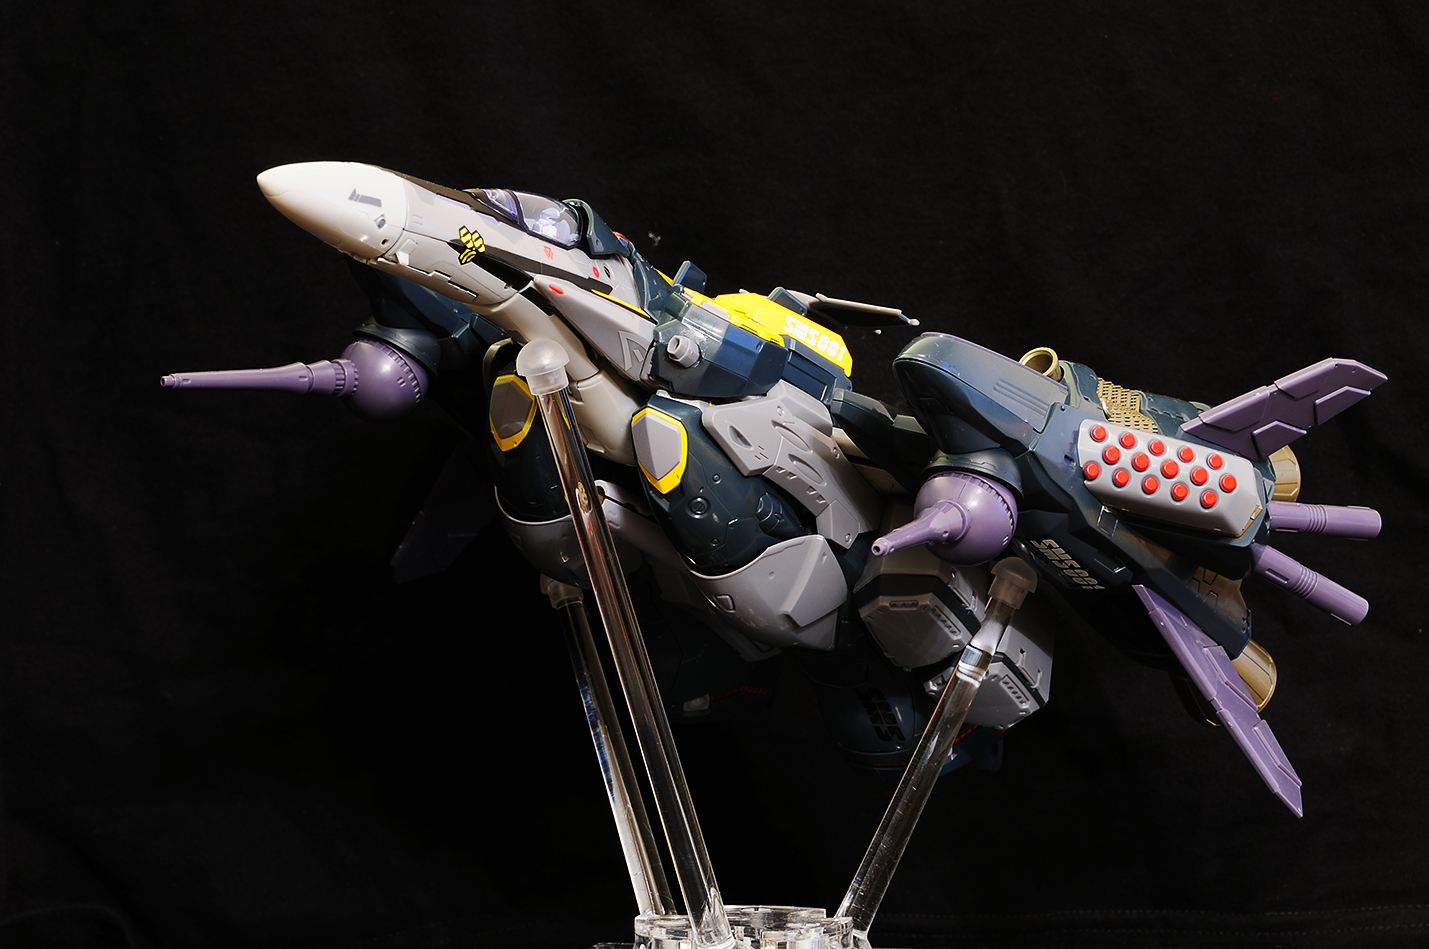
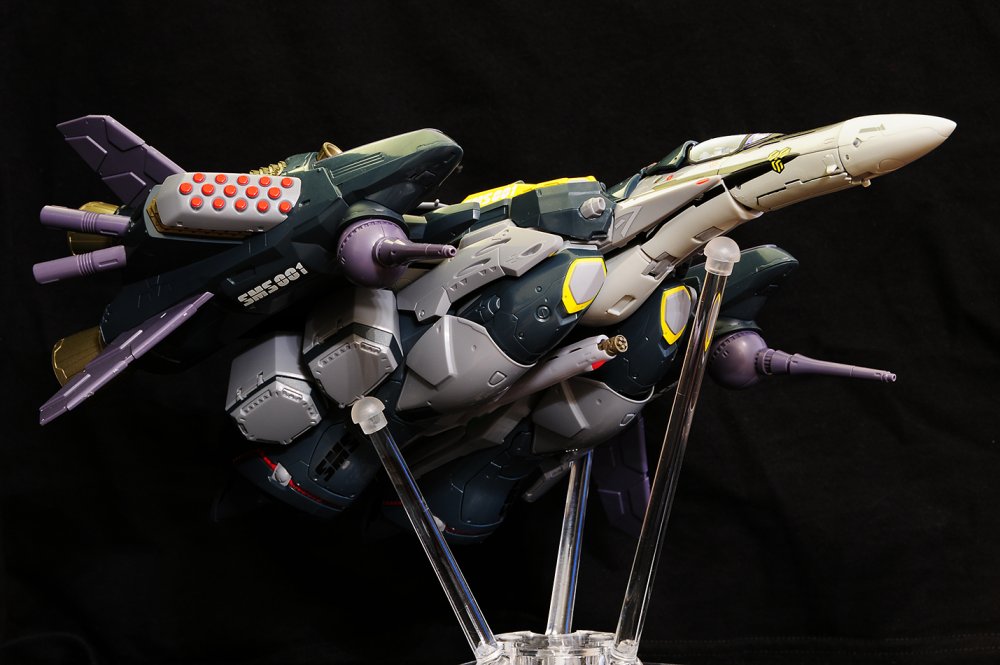
Actually you can. It's a very tight squeeze though and usually results in one of the nacelles not being as high up as the other. Just slip in the gunpod like normal BEFORE locking the legs to the wings. Officially though, I don't think you're supposed to mount the gunpod in fighter mode. Here's a pic:
-
Official Bandai 1/60 Scale DX Toy Thread Ver.6
todd77 replied to Duke Togo's topic in Hall Of The Super Topics
Could you post a pic of the stress mark on the ball joint? I tried looking for them on mine and couldn't find any (either that or I'm blind). What's worse is that I've always been casual about popping the thing on and off my Messiahs However, I've always done so by gripping on the strut as close to the ball joint when pulling it out and pushing directly on top of the ball joint (again on the strut) when putting it on. -
Official Bandai 1/60 Scale DX Toy Thread Ver.6
todd77 replied to Duke Togo's topic in Hall Of The Super Topics
<Raises hand> I have. -
Official Bandai 1/60 Scale DX Toy Thread Ver.6
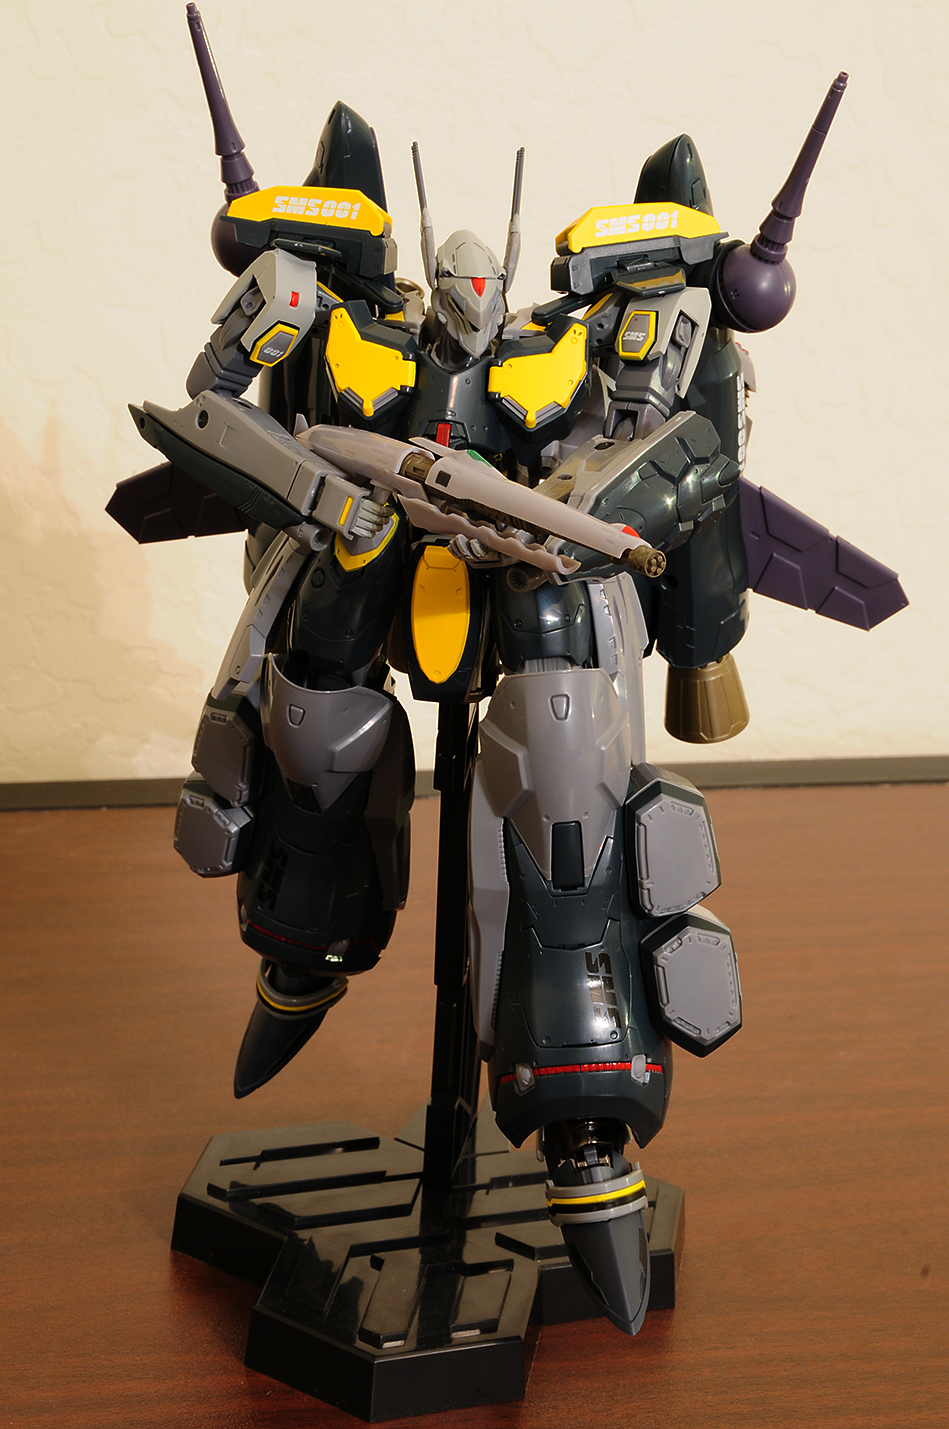
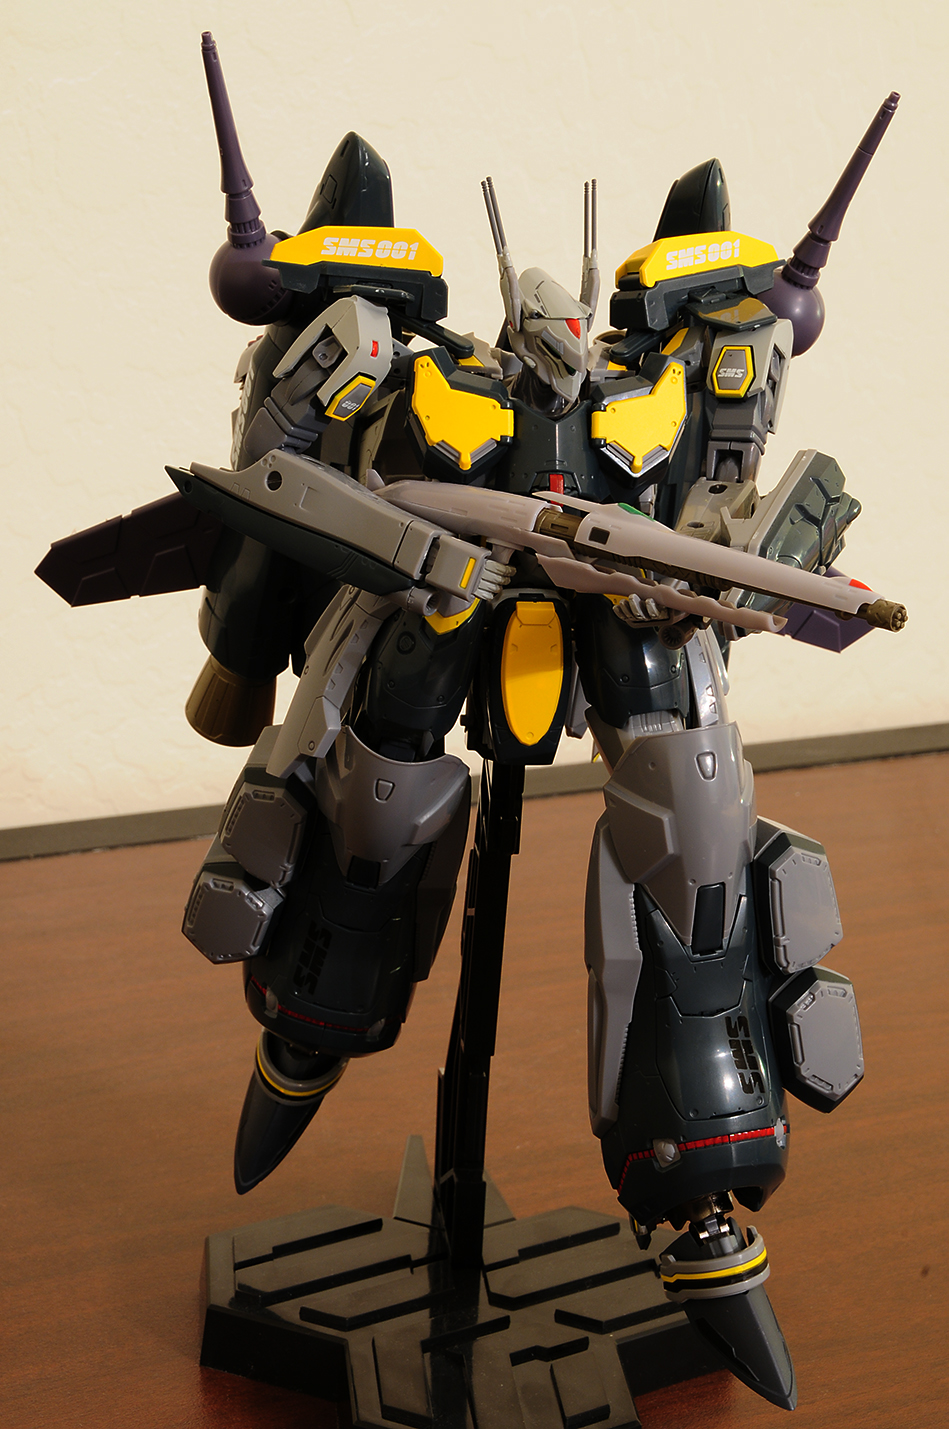
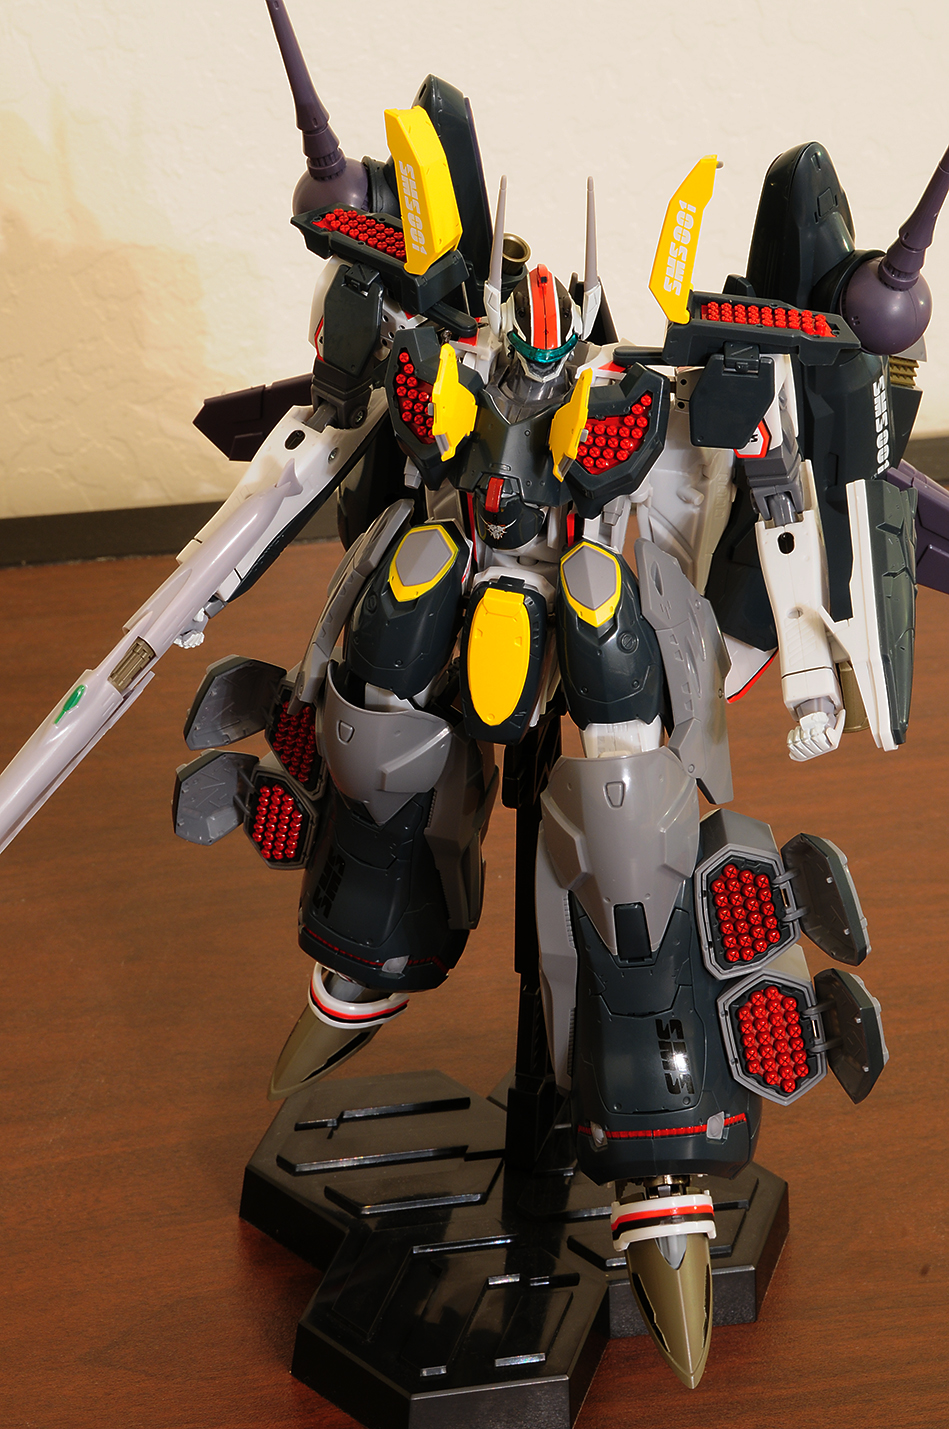
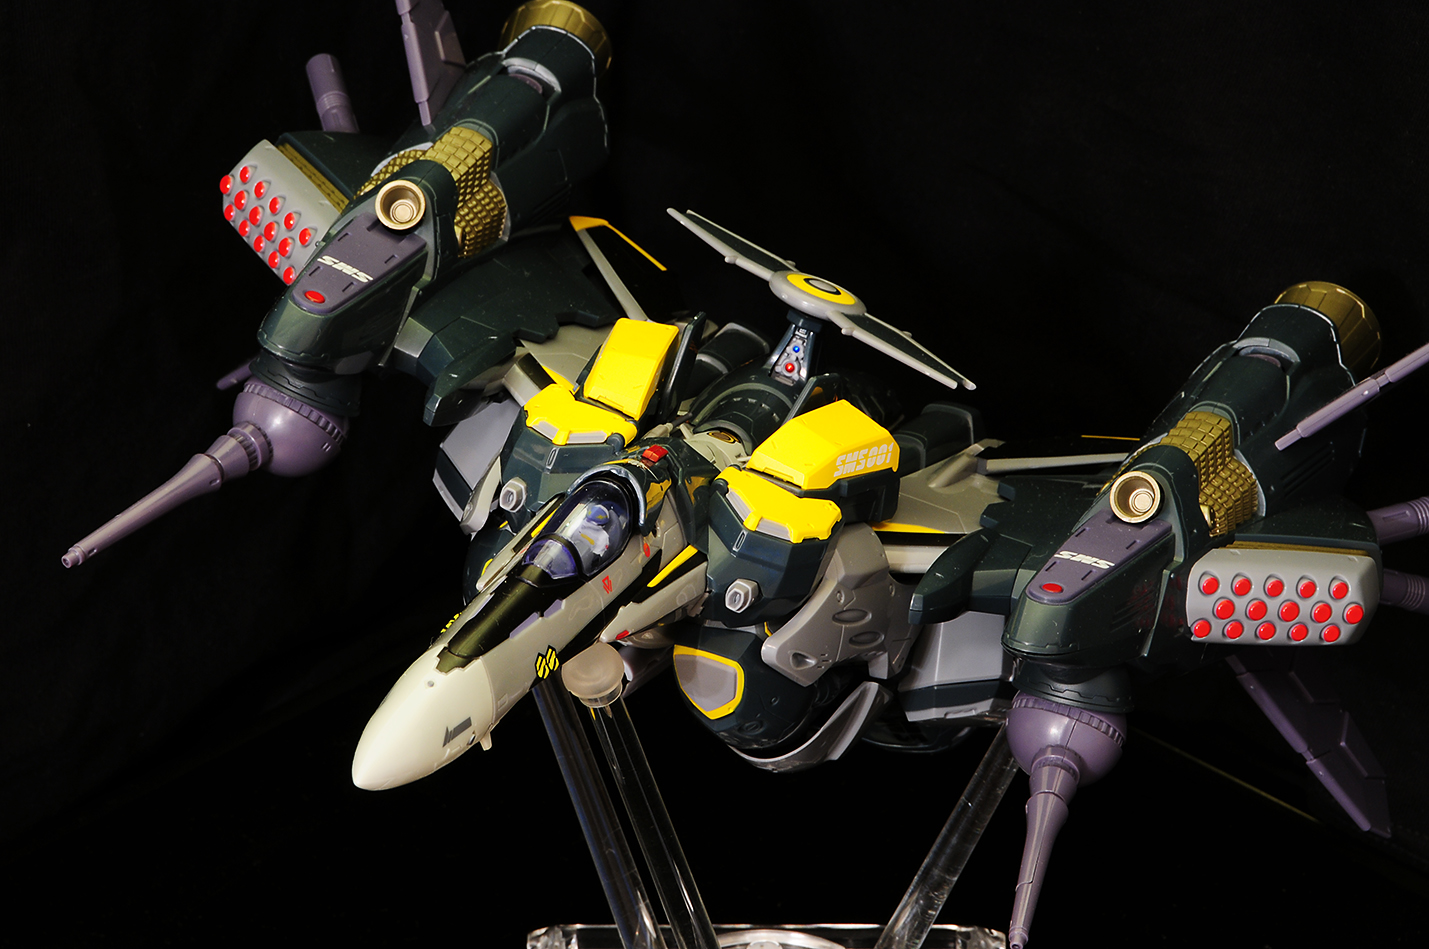
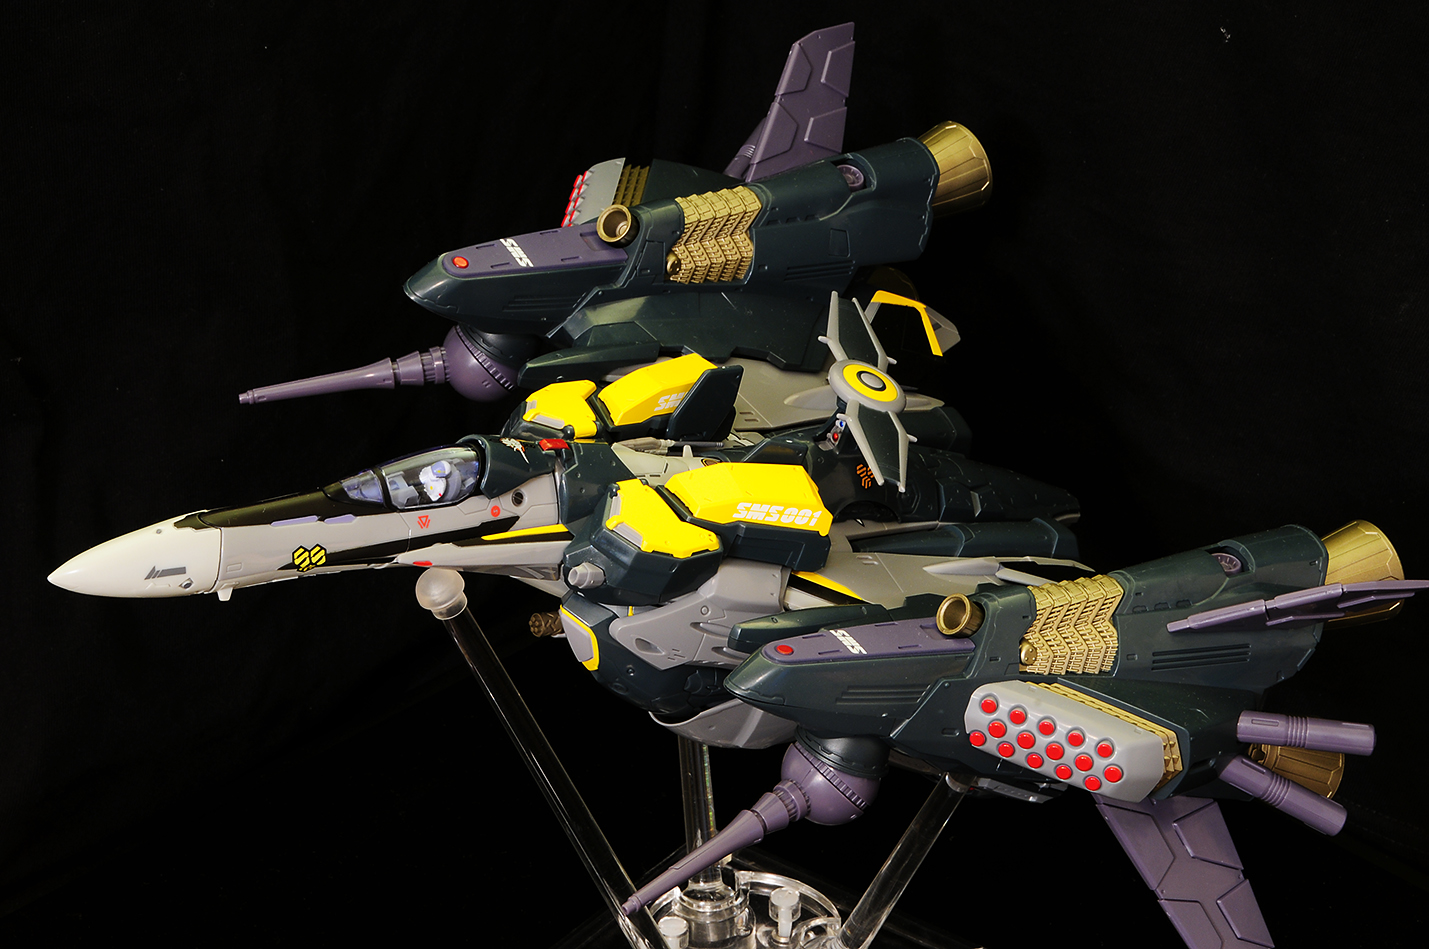
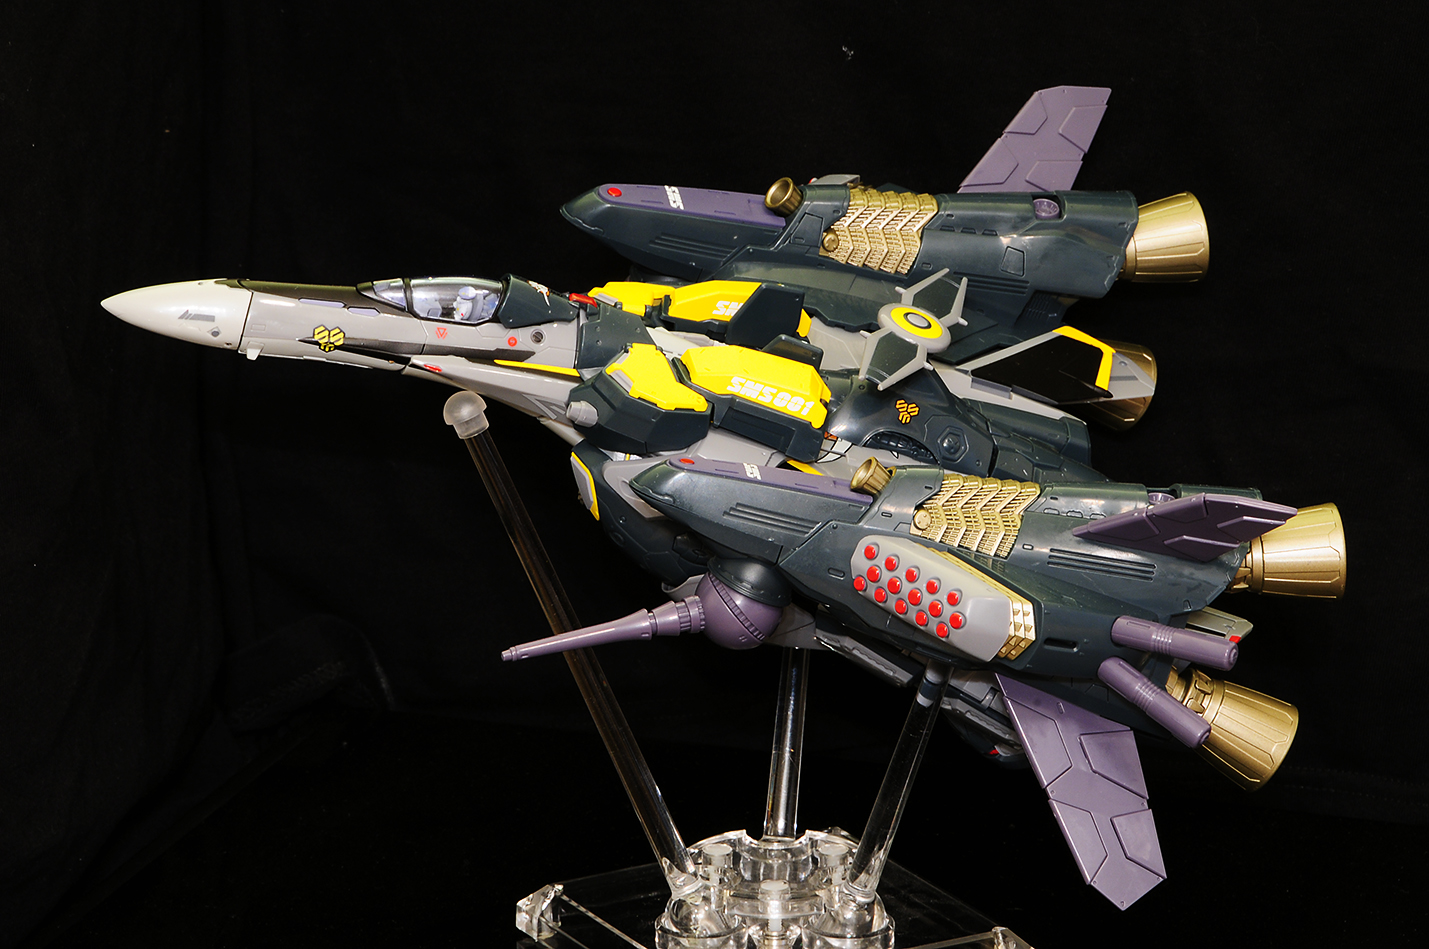
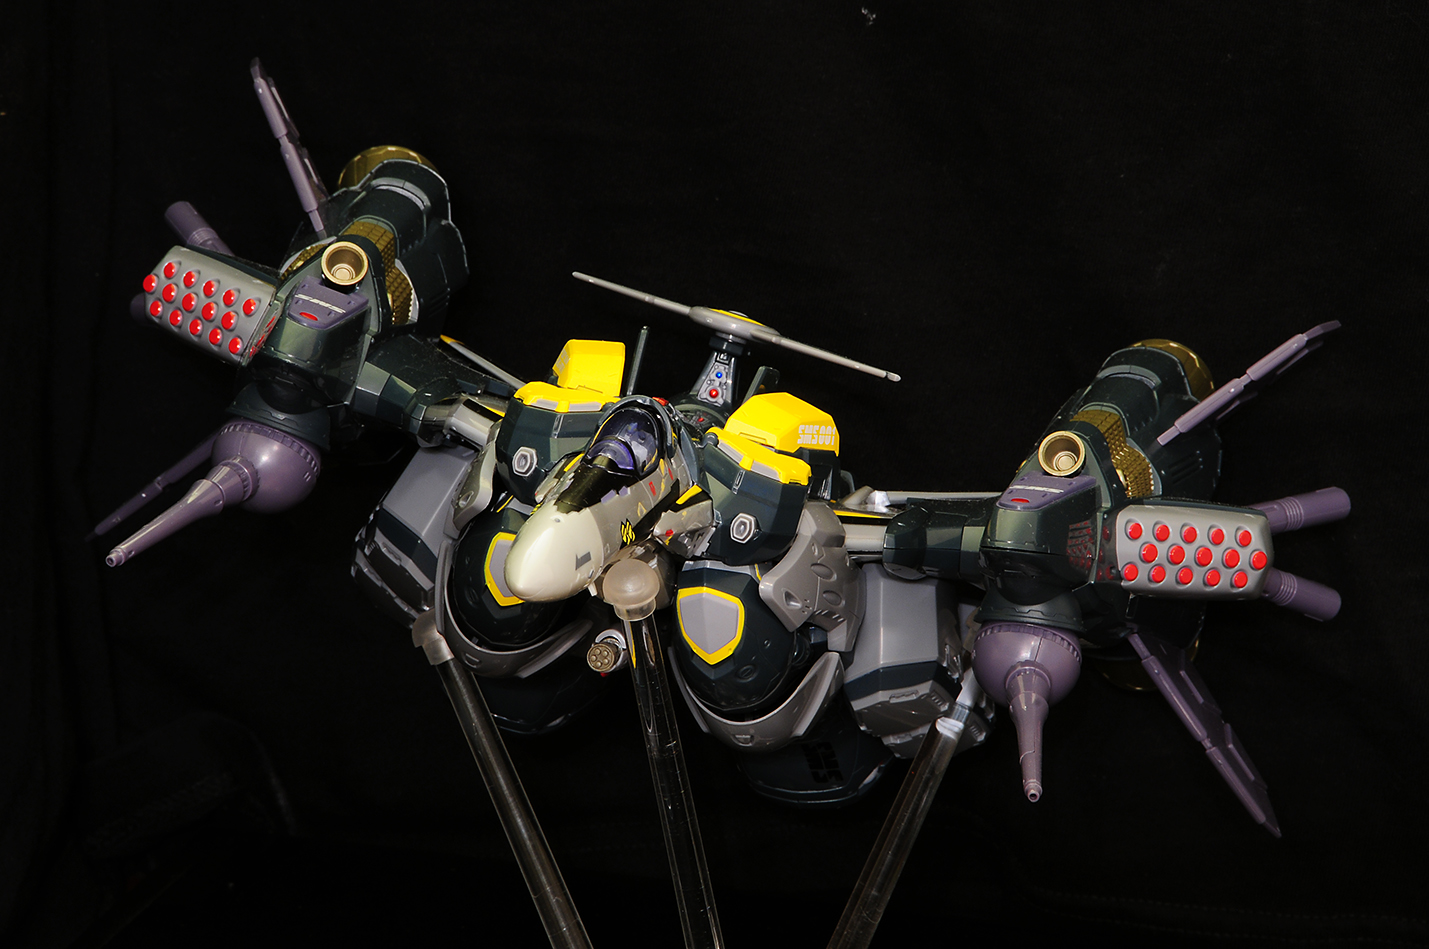
todd77 replied to Duke Togo's topic in Hall Of The Super Topics
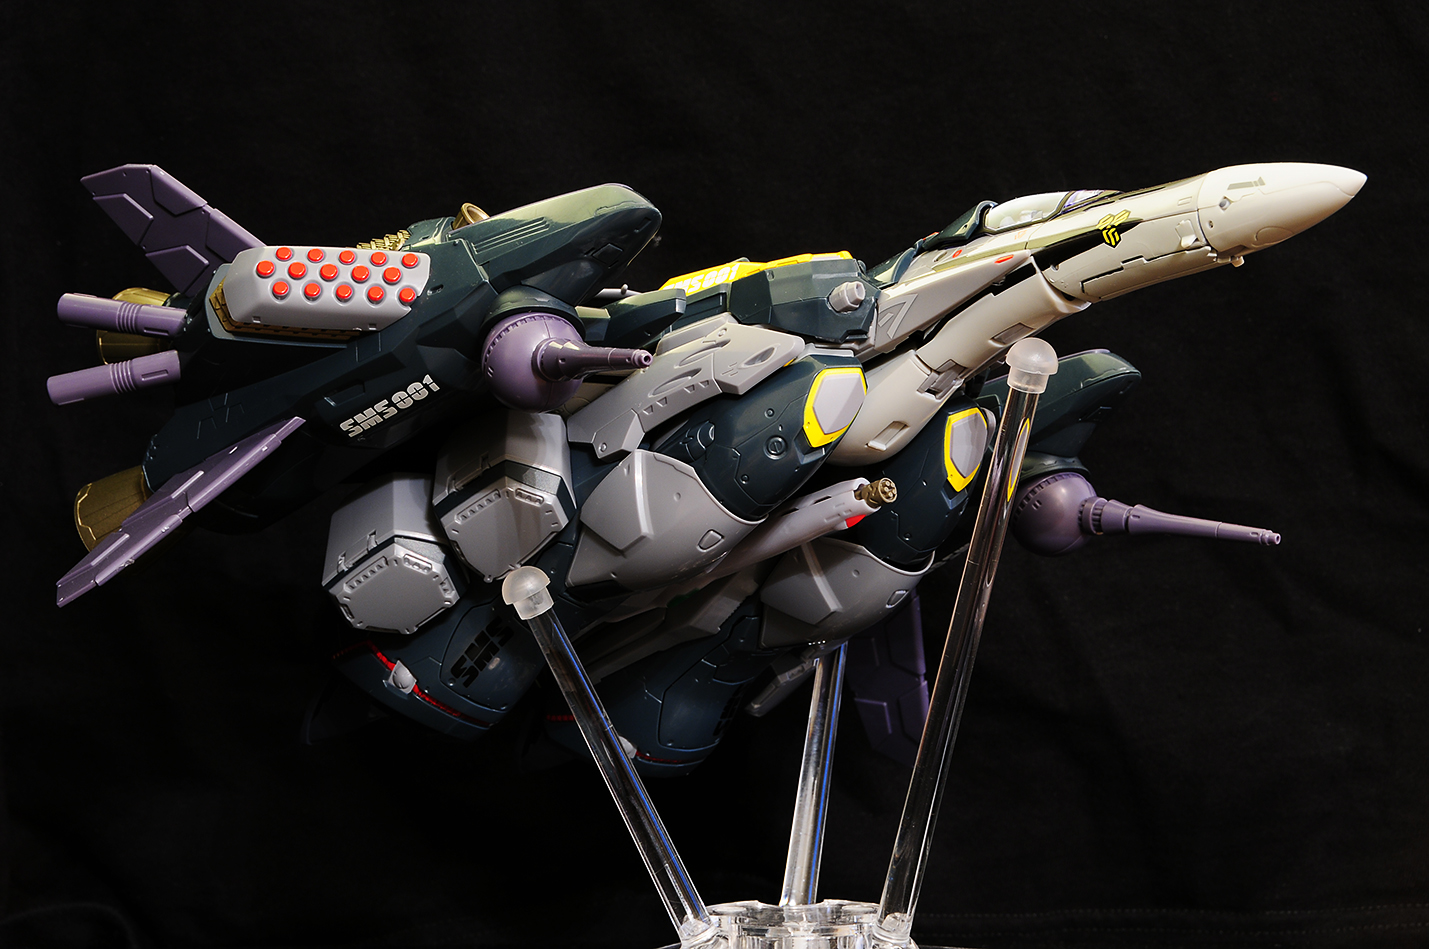
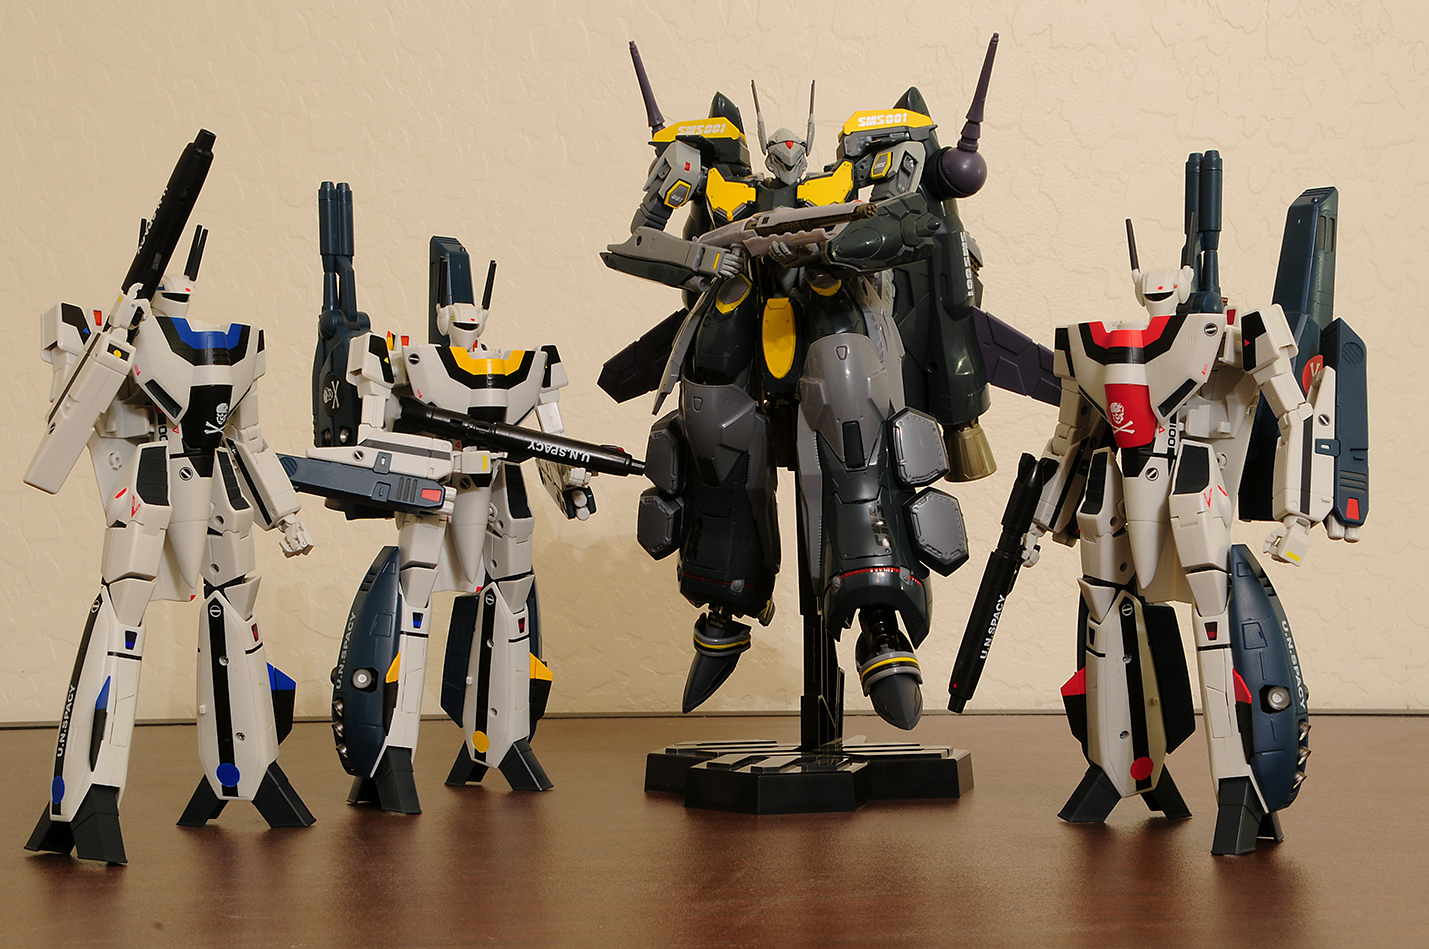
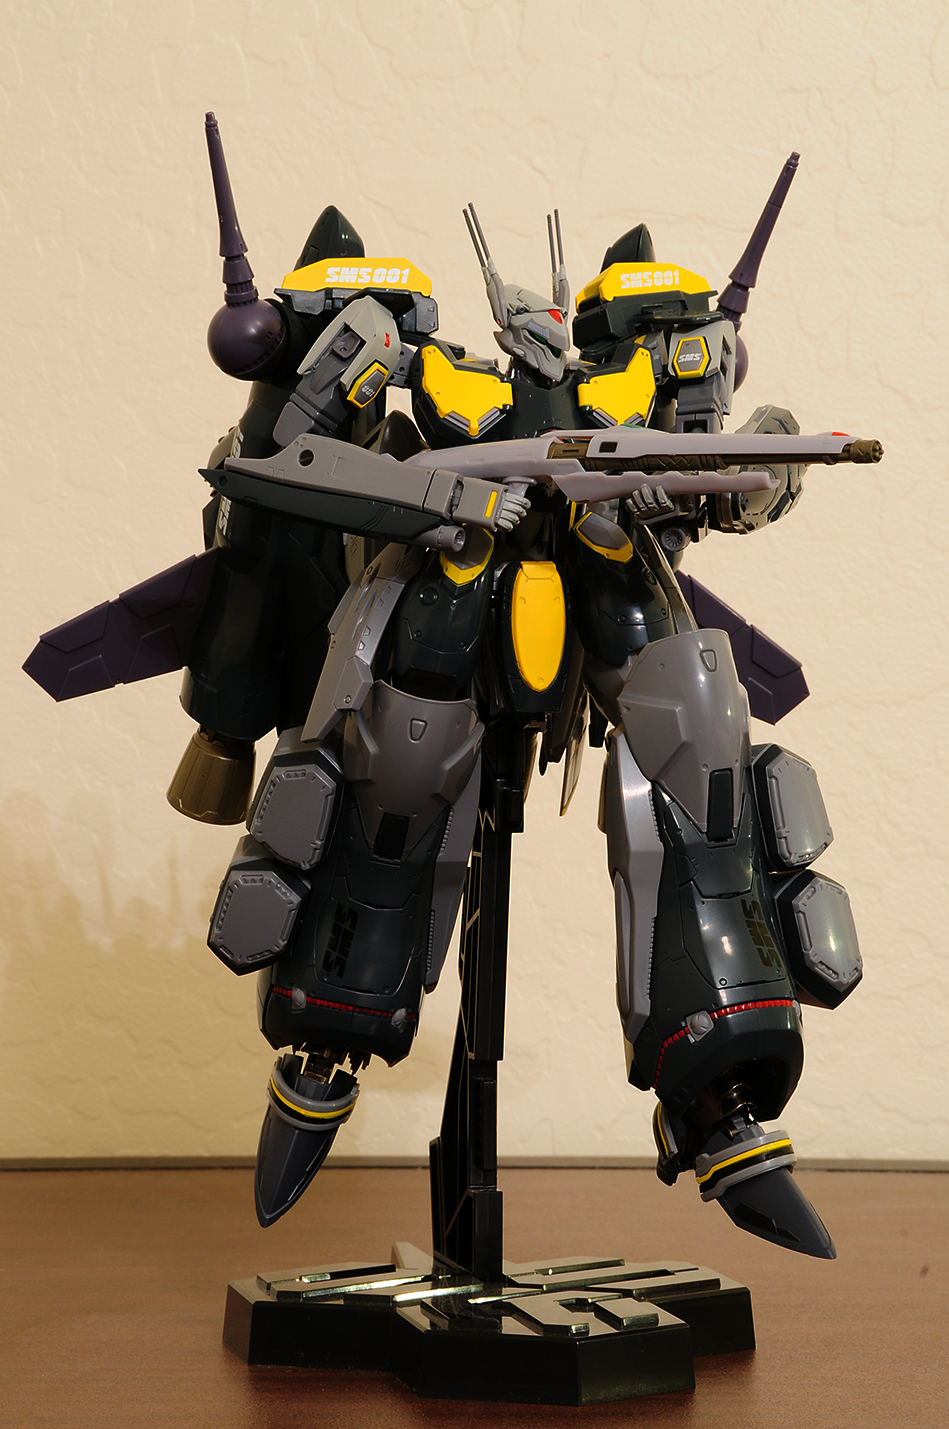
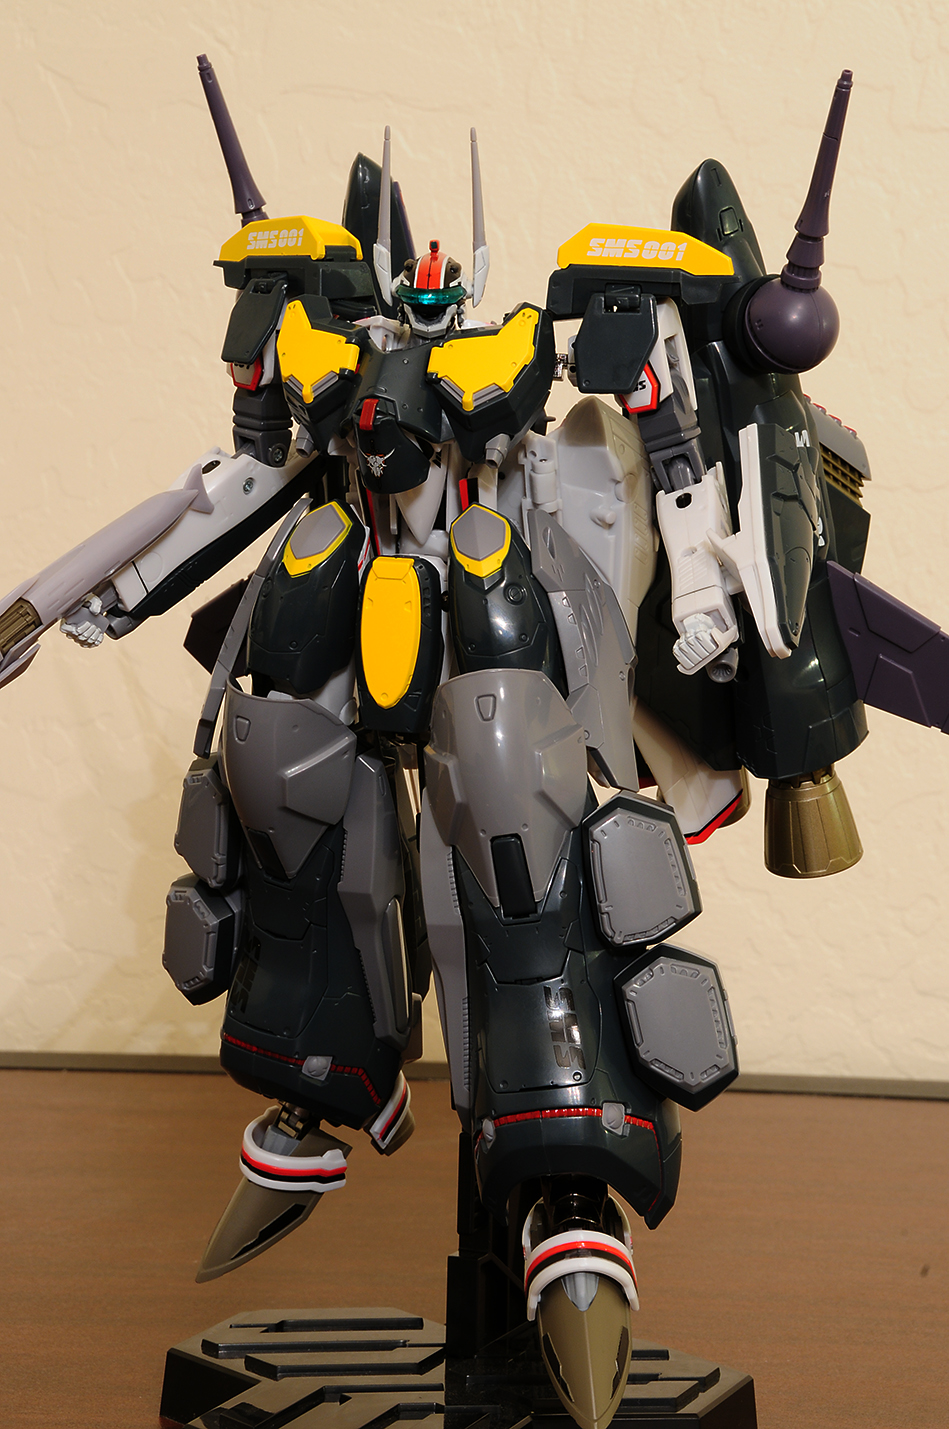
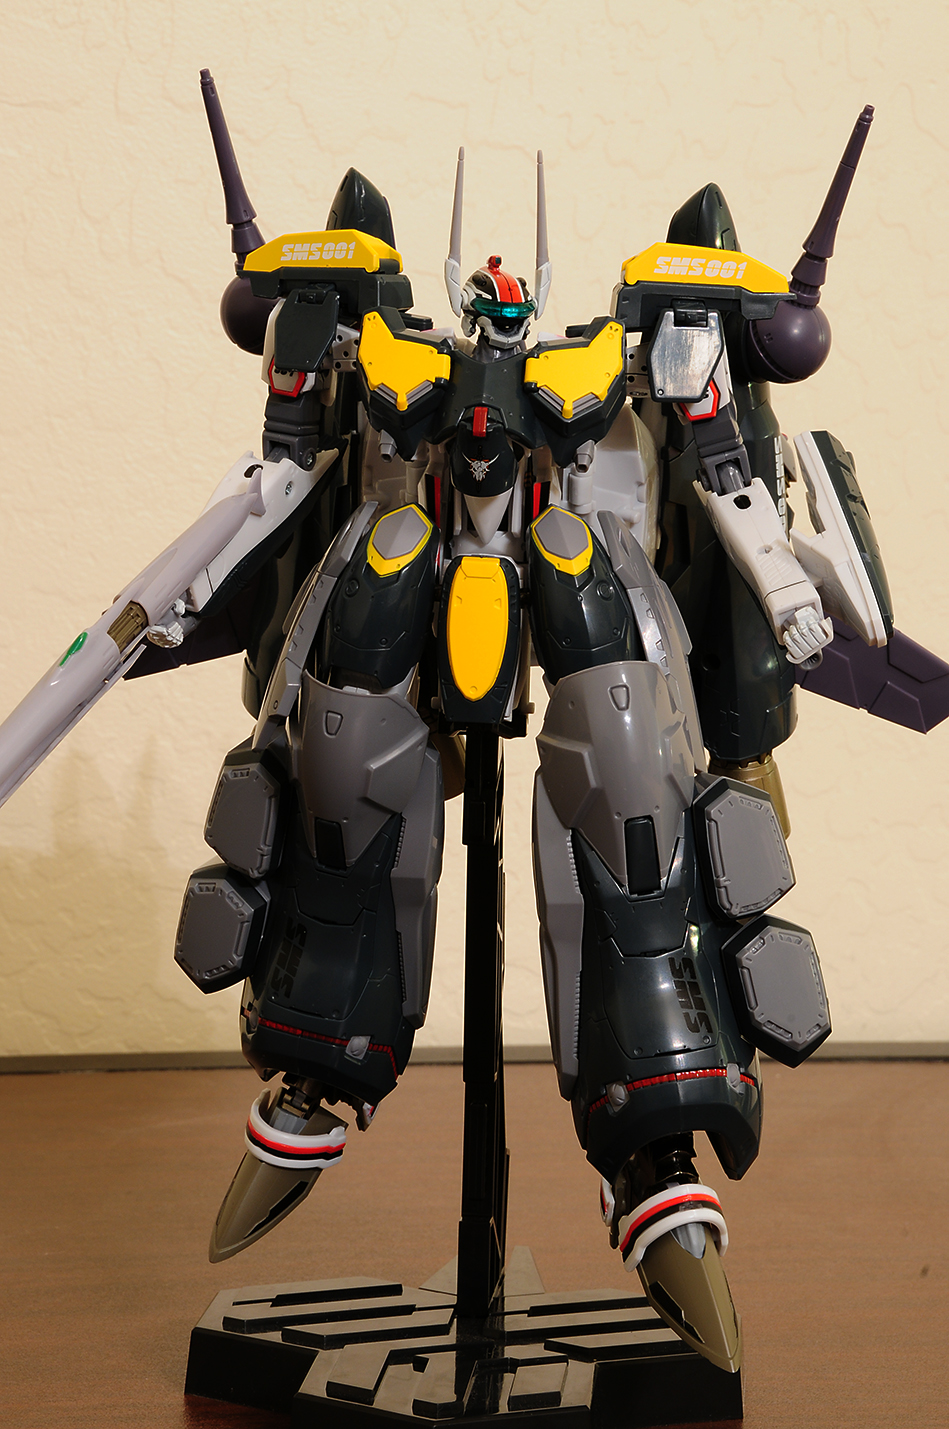
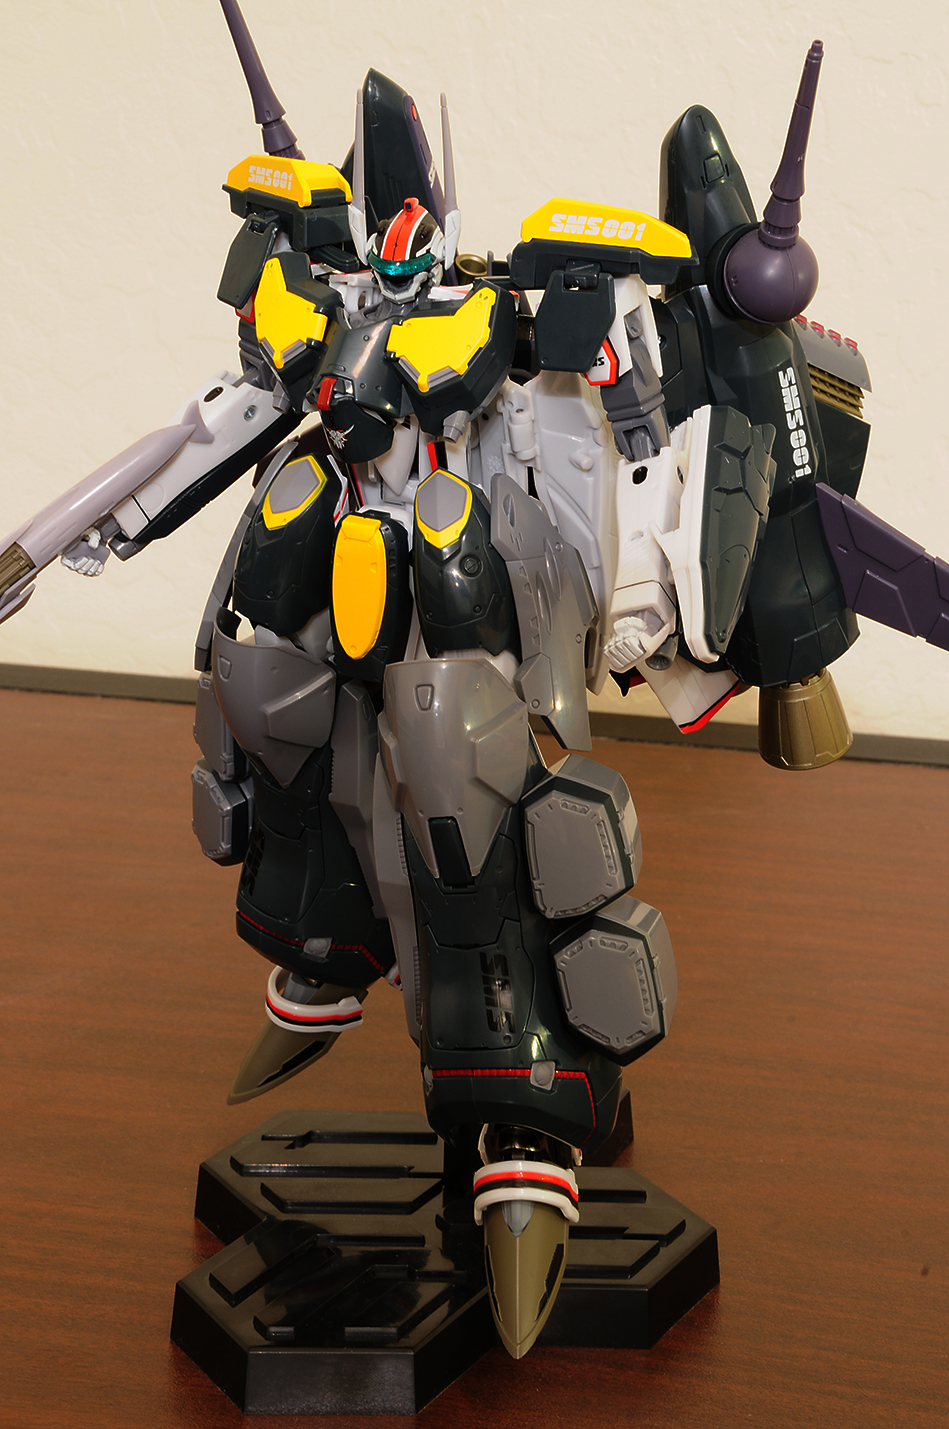
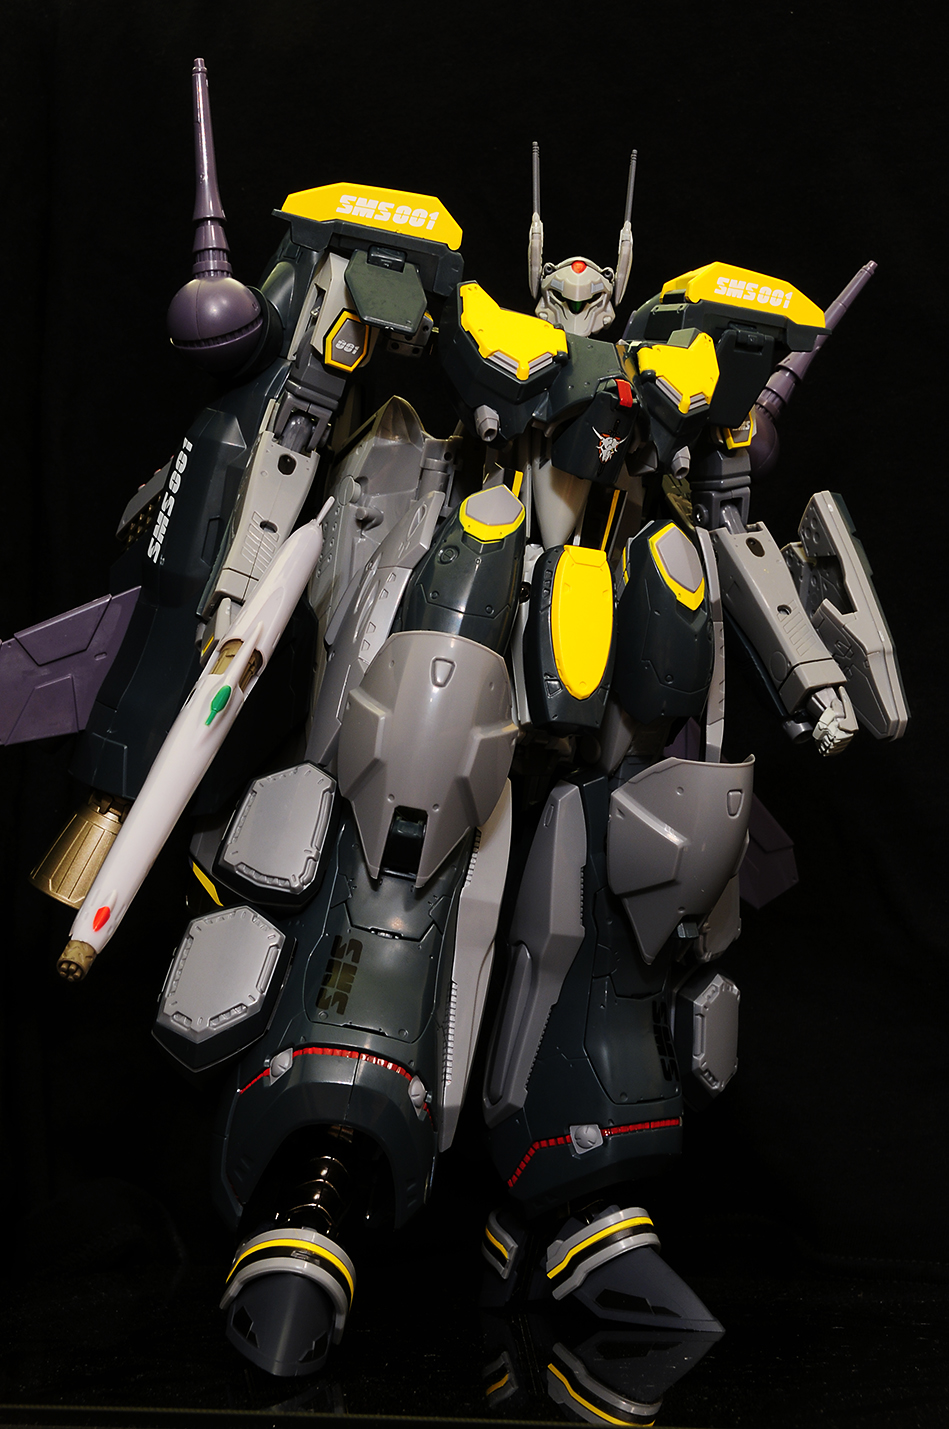
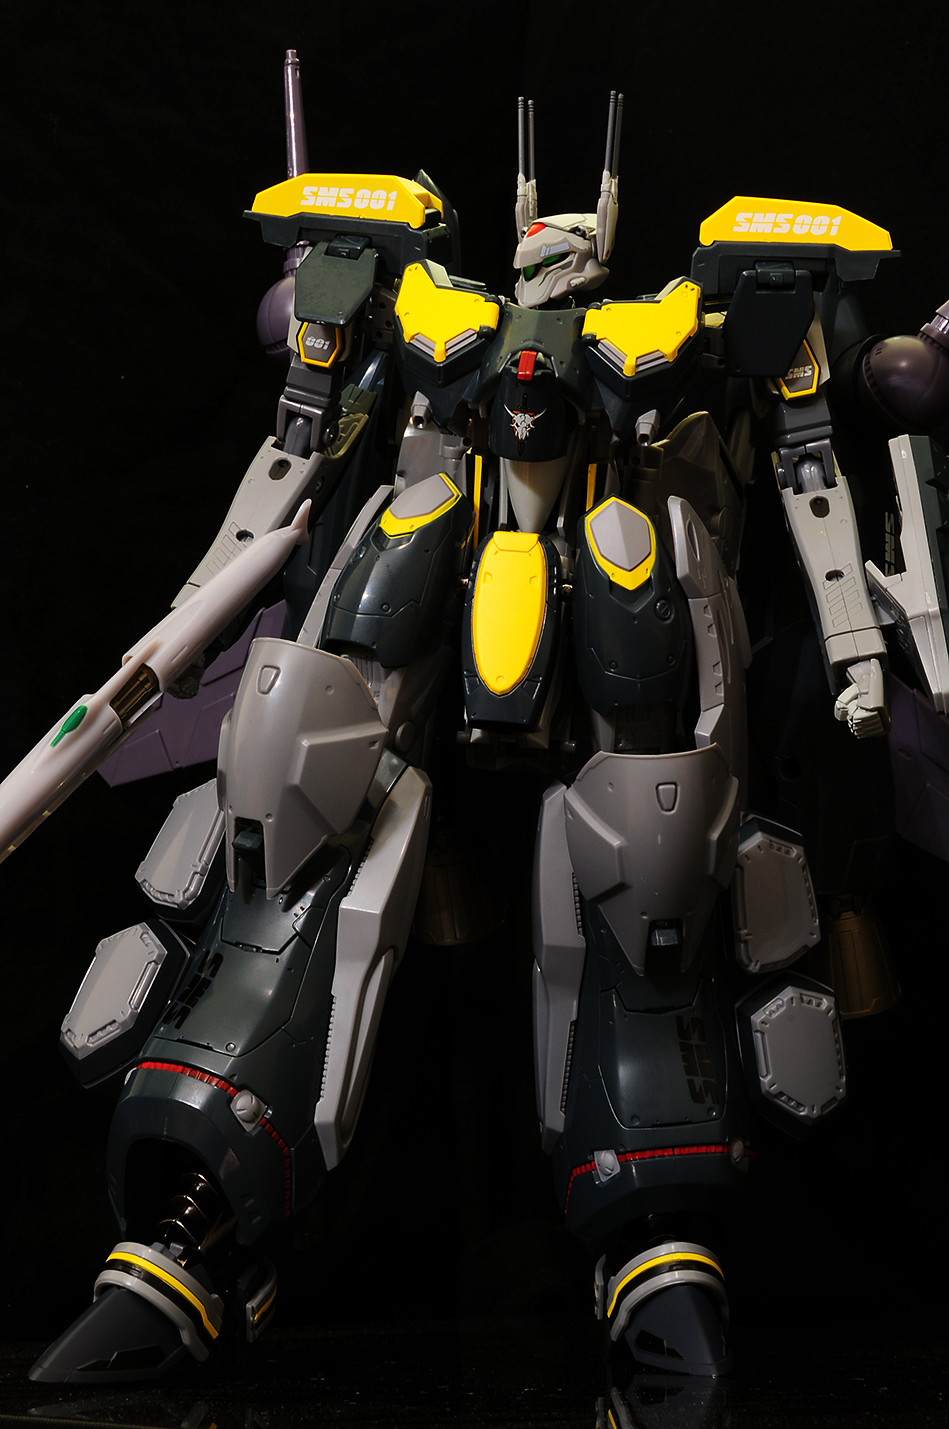
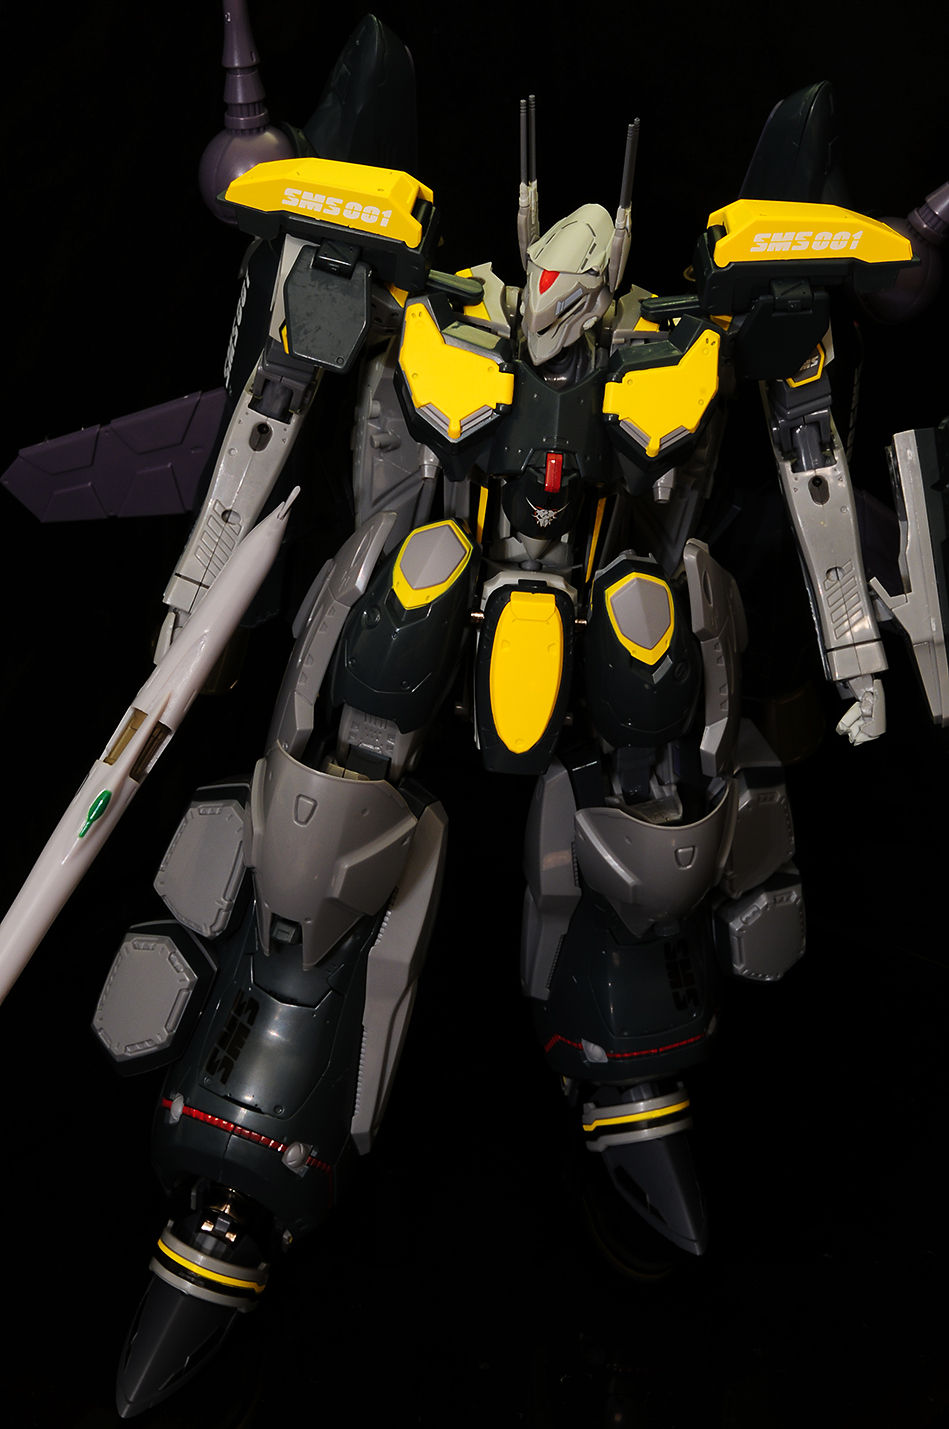
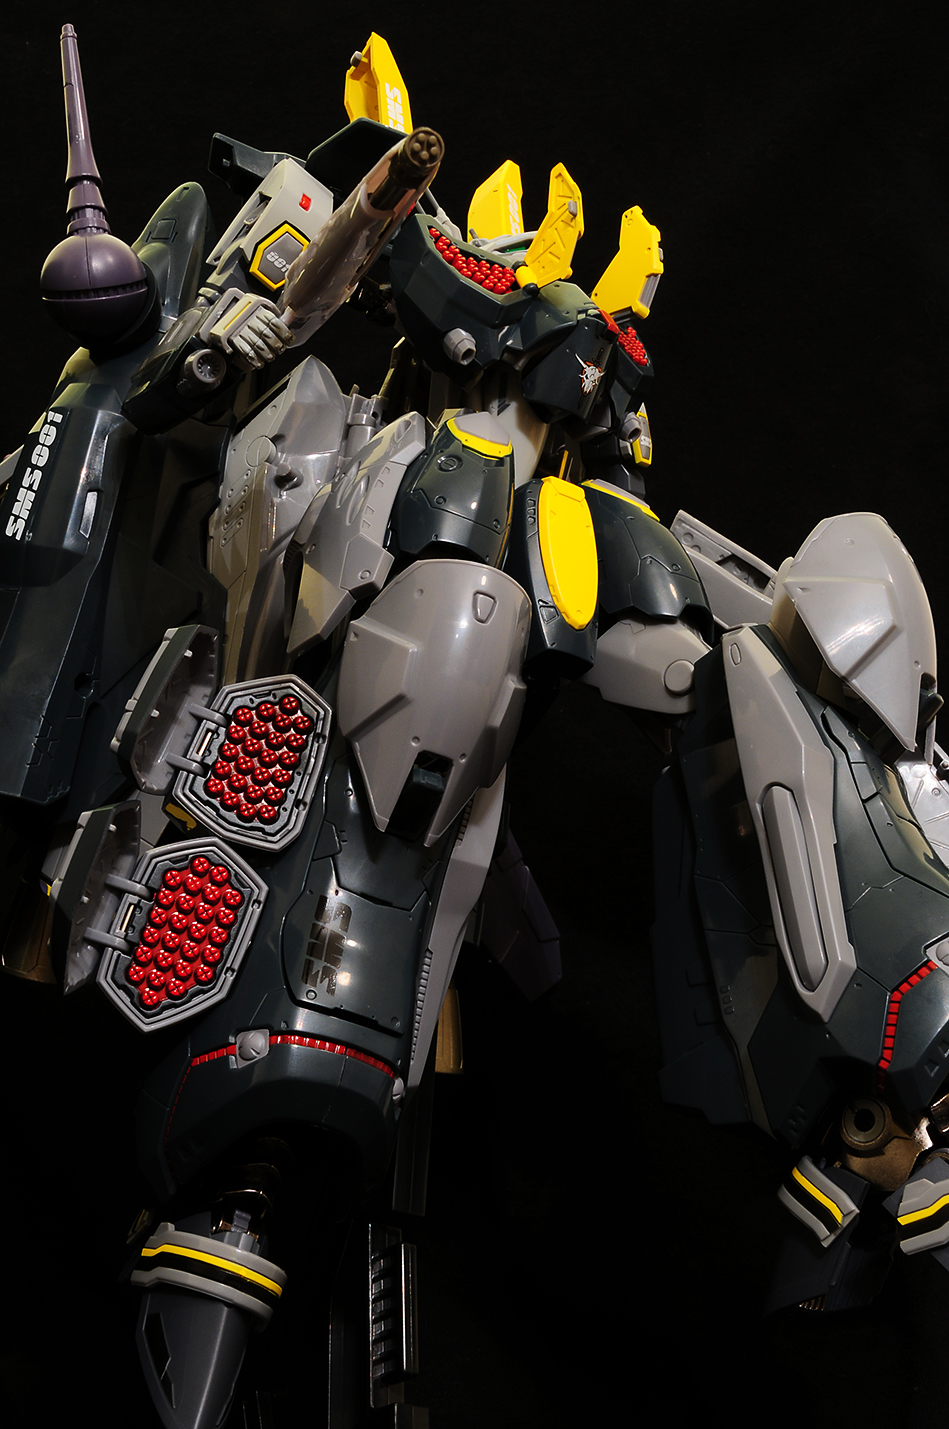
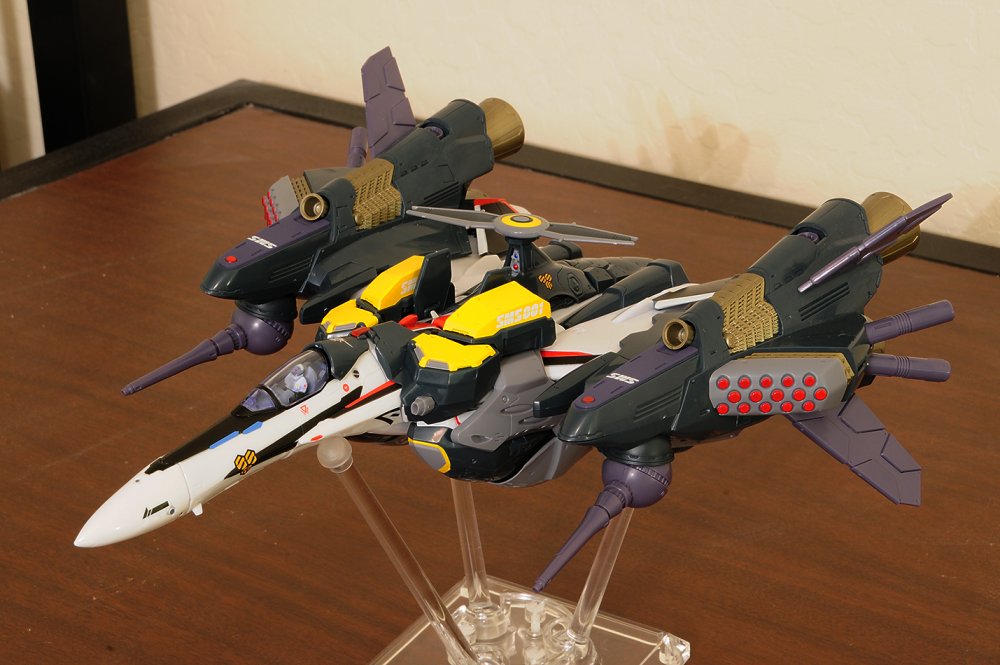
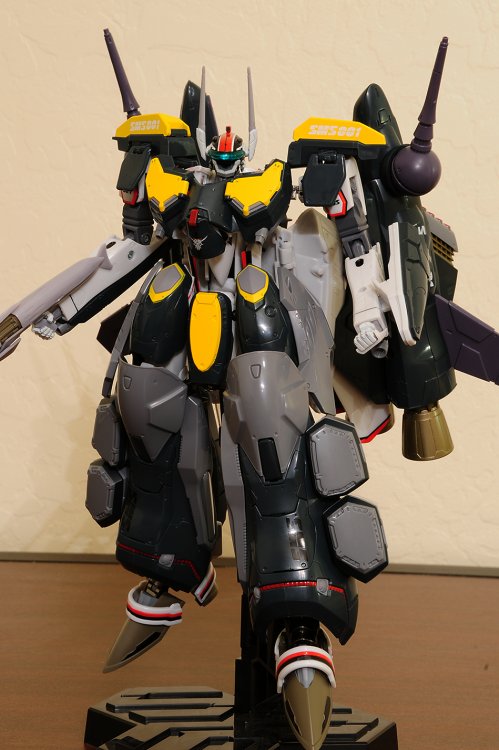
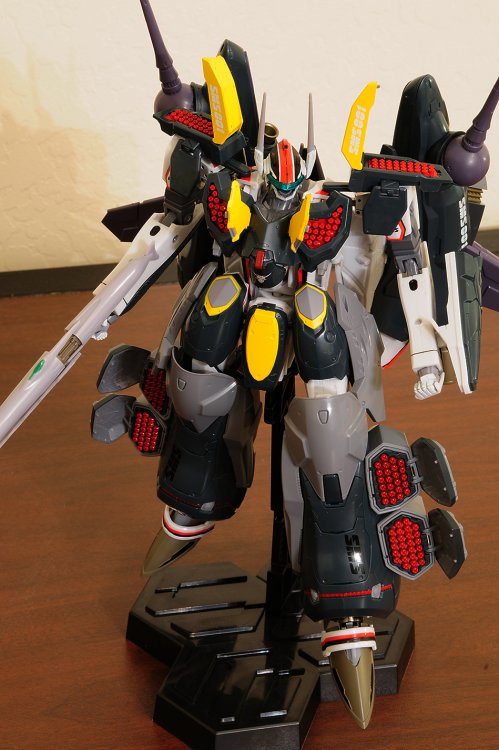
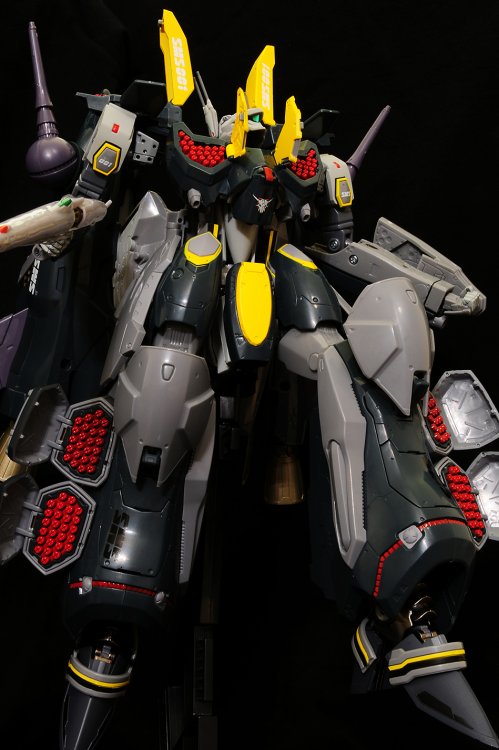
Took some more pics of my armored Ozma in battroid mode: Valkyrie S-class: And as some have requested, pics of full armored Alma (Alto + Ozma = Alma ): Fighter: Battroid:


-
Official Bandai 1/60 Scale DX Toy Thread Ver.6
todd77 replied to Duke Togo's topic in Hall Of The Super Topics
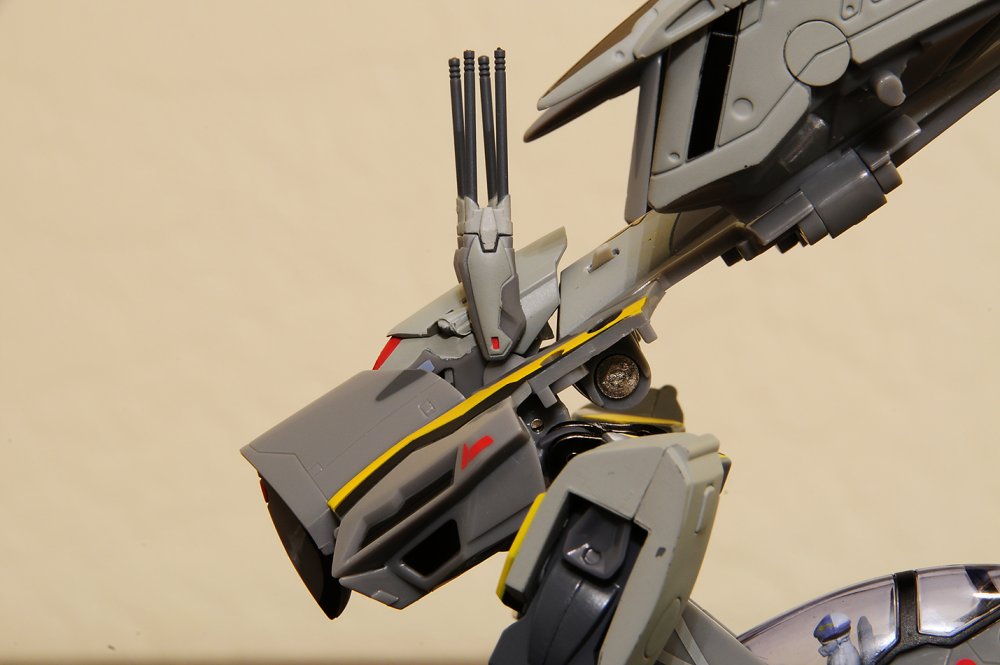
Are you referring to the hip gun armor pieces - those curved, gray chunks that you slap on to the side of the intake armor? If so, yeah, those are a real pain to put back on especially when the wings are already locked to the leg armors. I don't suppose there's a way to transform the toy without removing them? Even the instructions say to remove them. -
Official Bandai 1/60 Scale DX Toy Thread Ver.6
todd77 replied to Duke Togo's topic in Hall Of The Super Topics
Really? My reissued Alto is still rather oily particularly at the intakes. Maybe it's less the case of oil than it is of super-glossy surface? My SOC Gunbuster also exhibits the same oily surface. Guess I'm owning it right then? -
Official Bandai 1/60 Scale DX Toy Thread Ver.6
todd77 replied to Duke Togo's topic in Hall Of The Super Topics
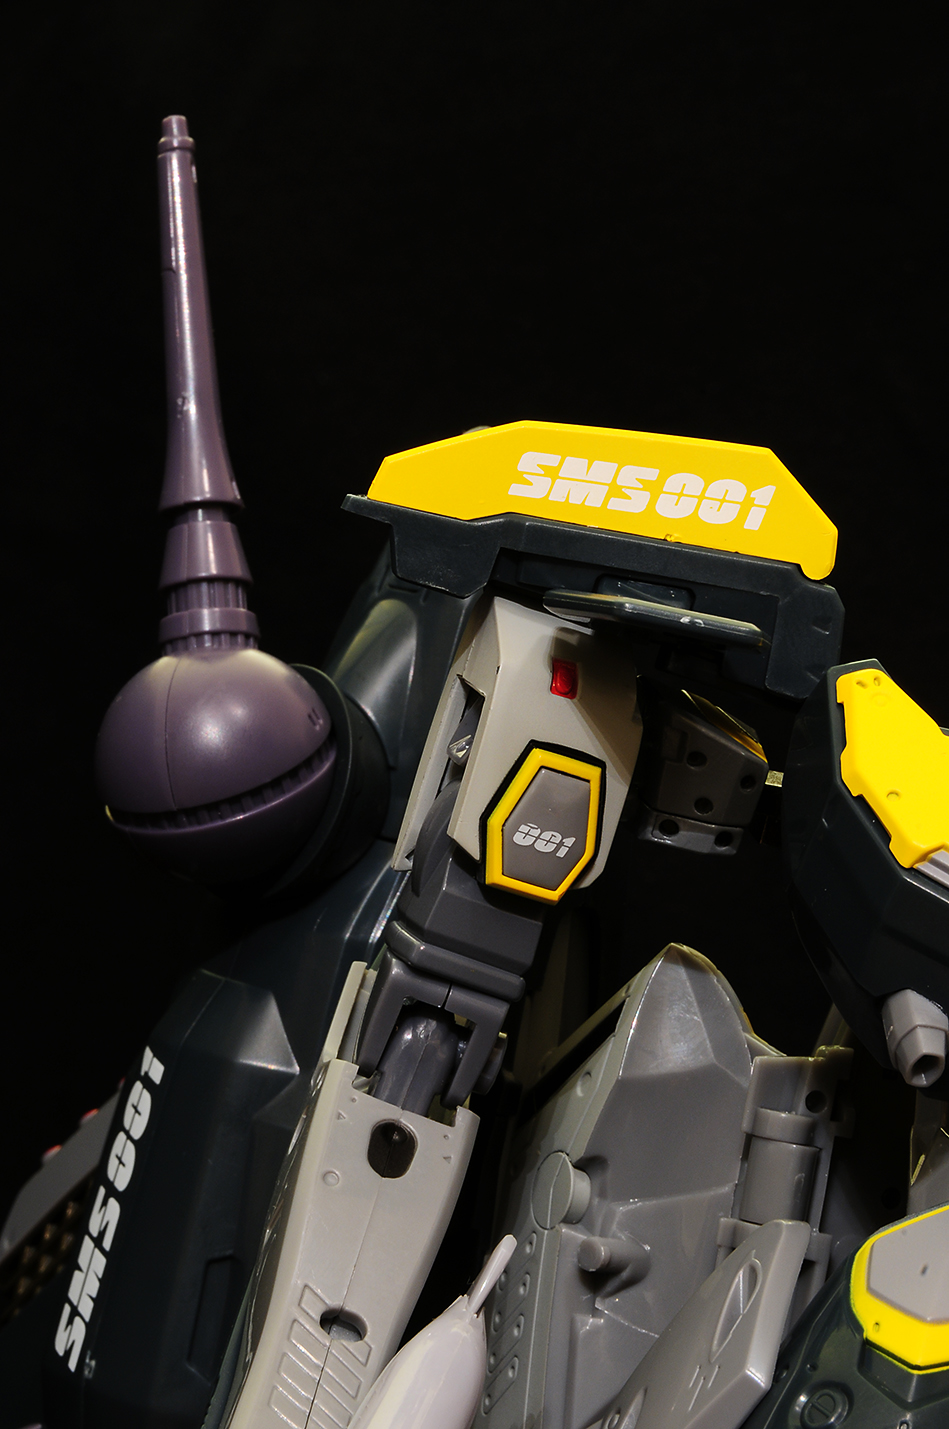
Yep. Scratches on the black stripe of the left wing. Paint chippings on the shoulder's yellow border and the head's red dot. These can be easily remedied with Gundam markers. The one that I can't quite correct is the gash through the 001 designation on the right shoulder. I'm not too miffed though, just a bit disappointed since the toy came like that out of the box. I like it nonetheless as it is a really impressive-looking piece and to me at least, is more playable than the super Messiahs especially in battroid mode. -
Official Bandai 1/60 Scale DX Toy Thread Ver.6
todd77 replied to Duke Togo's topic in Hall Of The Super Topics
Um, mine was shipped from Anime-Export which is Japanese based so wouldn't my impressions count as from outside of Hong Kong (I'm currently residing in the US btw)? -
Official Bandai 1/60 Scale DX Toy Thread Ver.6
todd77 replied to Duke Togo's topic in Hall Of The Super Topics
Yeah, not only does the armor set look more menacing, it one-ups the super set by not obstructing the knee articulation, allowing for more dynamic poses, especially with a stand. The only downside is due to the back-heavy wing armors which makes the standing poses a little tricky. And yeah, in fighter mode, it's no plane, it's a flying tank! -
Official Bandai 1/60 Scale DX Toy Thread Ver.6
todd77 replied to Duke Togo's topic in Hall Of The Super Topics
Agreed. It's far easier for me as well to remove the armor pieces like those on the wings, arms, and hip guns (according to the instructions, these have to be removed anyway during the transformation and are probably the most annoying part in the process for me particularly when switching to fighter mode) and transform the toy without worrying about them flopping and popping all over the place. In a way, it's kind of like a parts-former to me, only that you're using the same parts, taking them off and putting them back on. I still like the toy nonetheless if only because it looks really good, particularly the fighter mode. It's really a shame though with regard to the paint application and scratches. Compared to my other three Messiahs, Ozma's turned out to be the worst out of the box. Either I was lucky with the other three (no major paint slops or scratches and all the tampo markings were fine) or simply unlucky with this one. Anyway, still looking forward to Alto's armored pack! -
Official Bandai 1/60 Scale DX Toy Thread Ver.6
todd77 replied to Duke Togo's topic in Hall Of The Super Topics
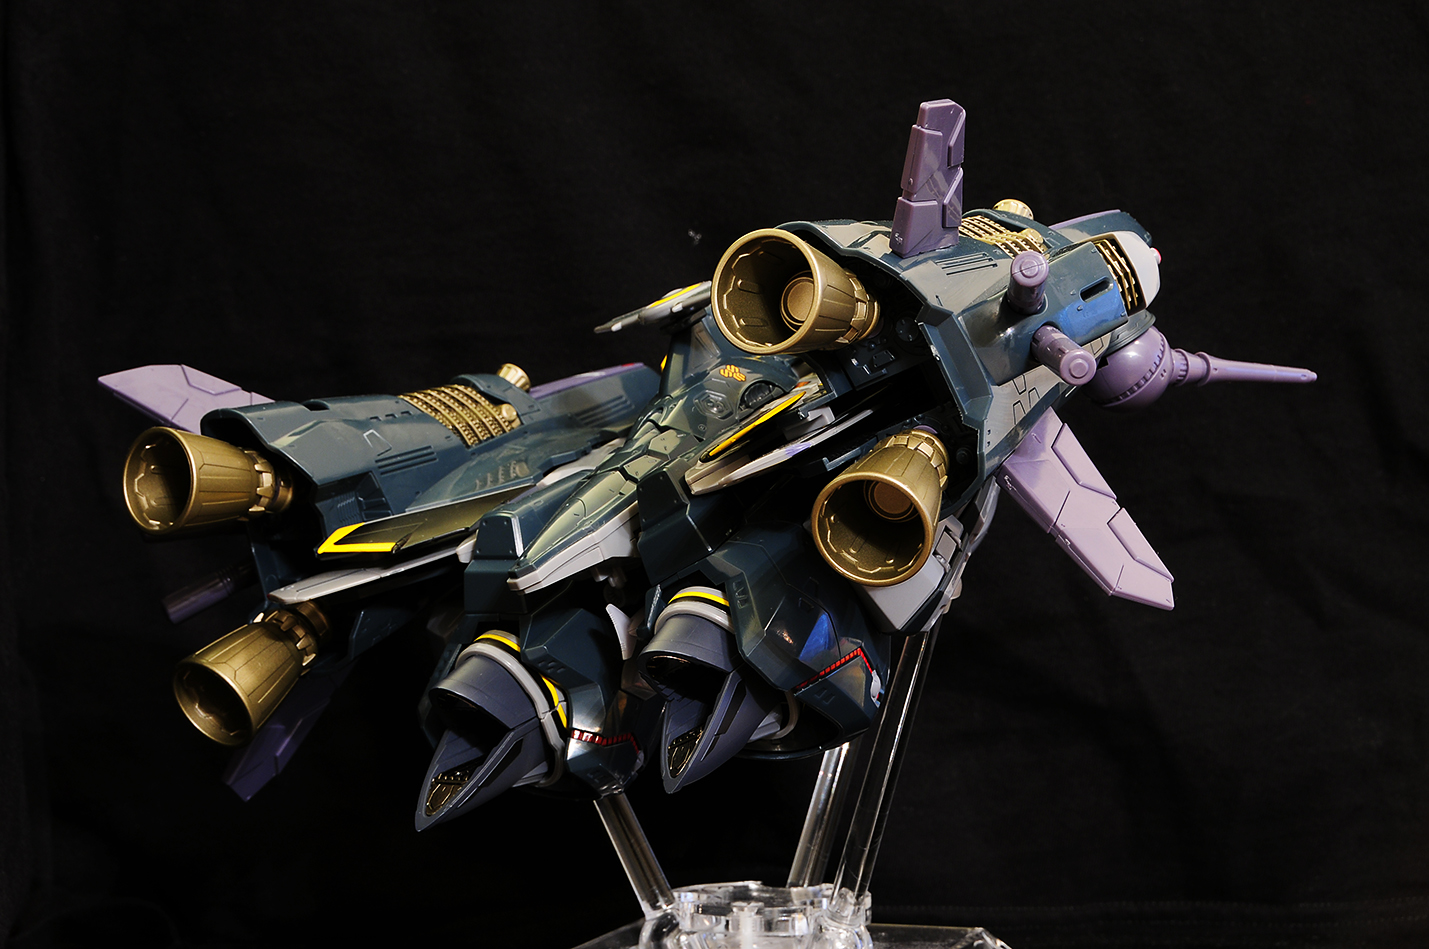
The fighter mode is really secure and it is indeed fun to woosh around since everything locks in nice and tight. Speaking of fighter mode, now that I've had more time to tinker with it, I actually prefer it without the gunpod on as the legs will lock in much more securely and their nacelles can be raised much higher. I'm not even sure if the gunpod is meant to go on in fighter mode. Anyway... back to wooshing my armored 25. -
Official Bandai 1/60 Scale DX Toy Thread Ver.6
todd77 replied to Duke Togo's topic in Hall Of The Super Topics
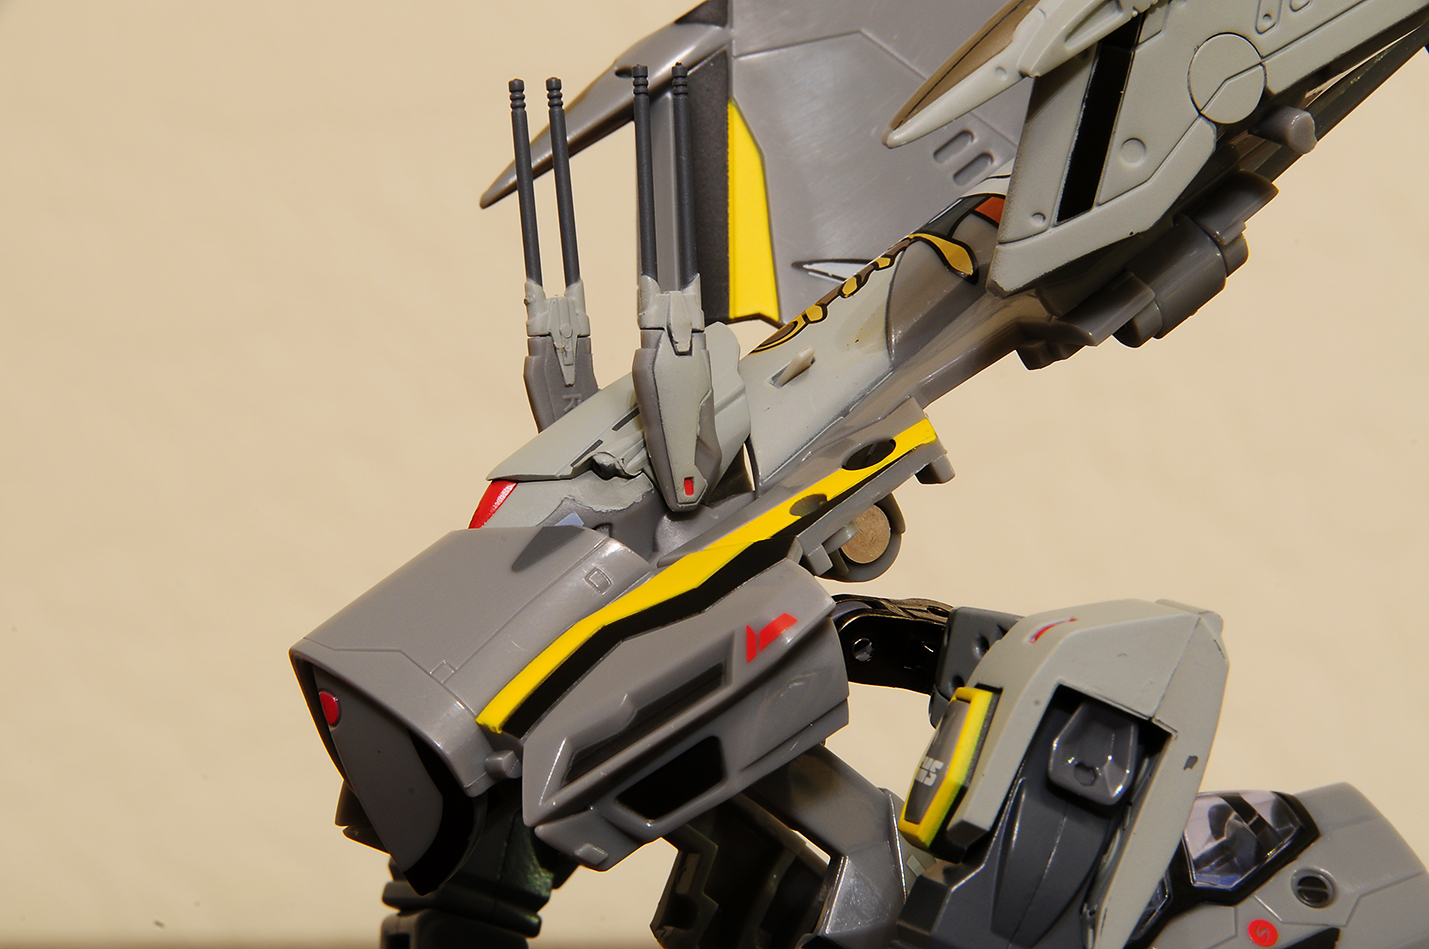
Tried to transform it back to fighter mode with the neck piece and it seems like a no go. Well, that's to be expected. This is as far as I could push the head in. Anymore and I'll likely have a few new scratches: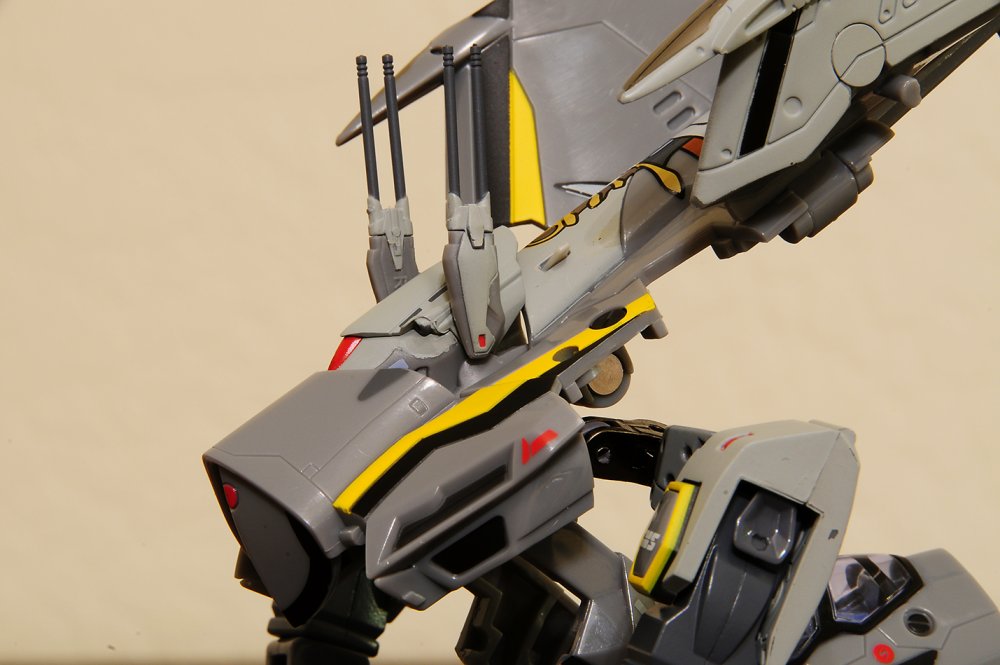
-
Official Bandai 1/60 Scale DX Toy Thread Ver.6
todd77 replied to Duke Togo's topic in Hall Of The Super Topics
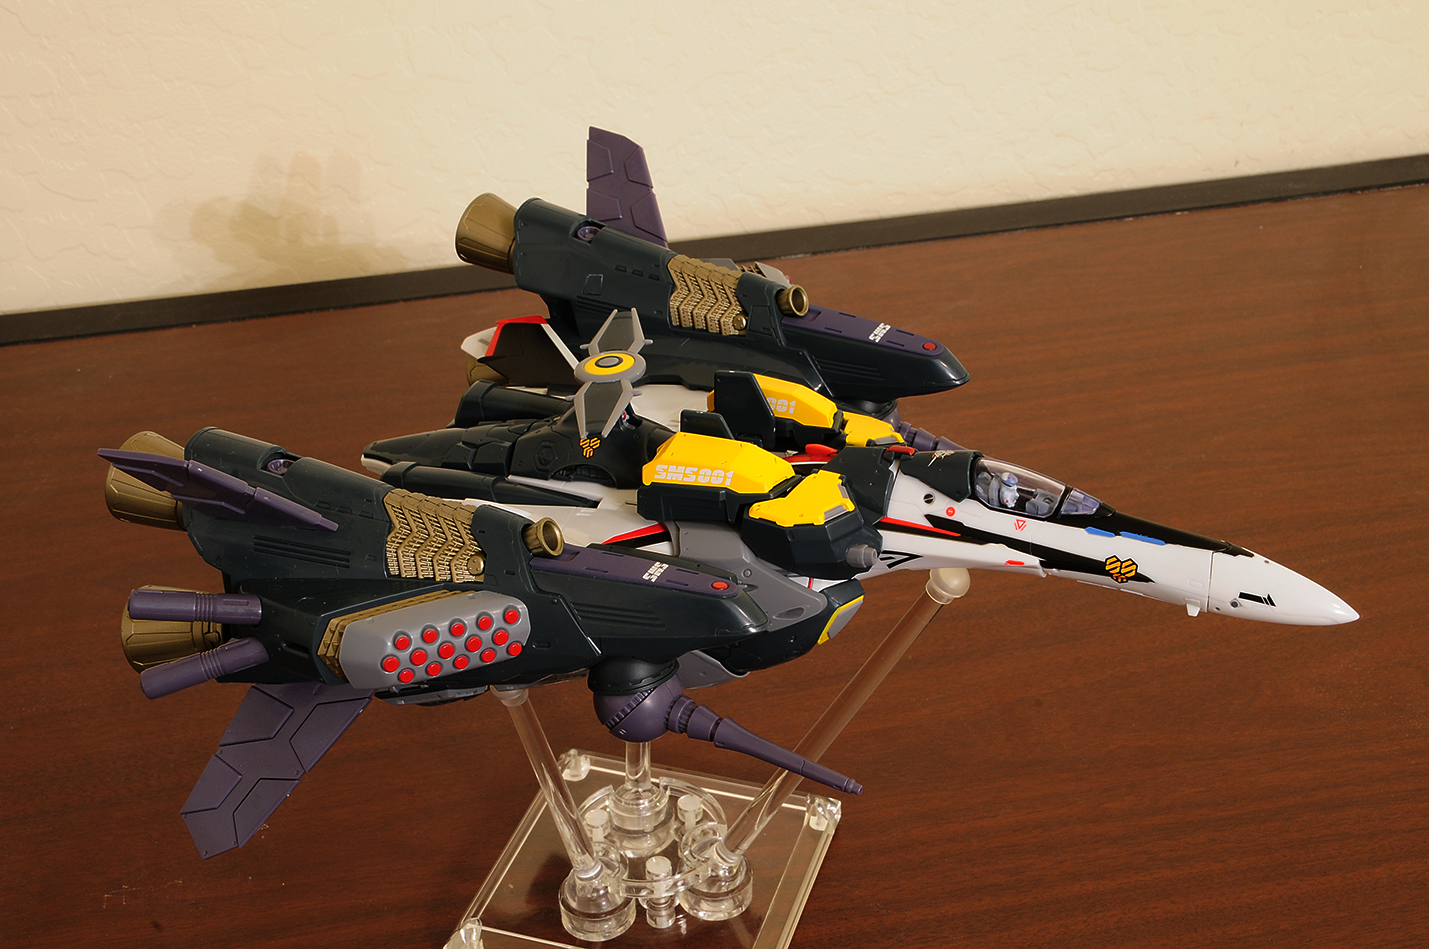
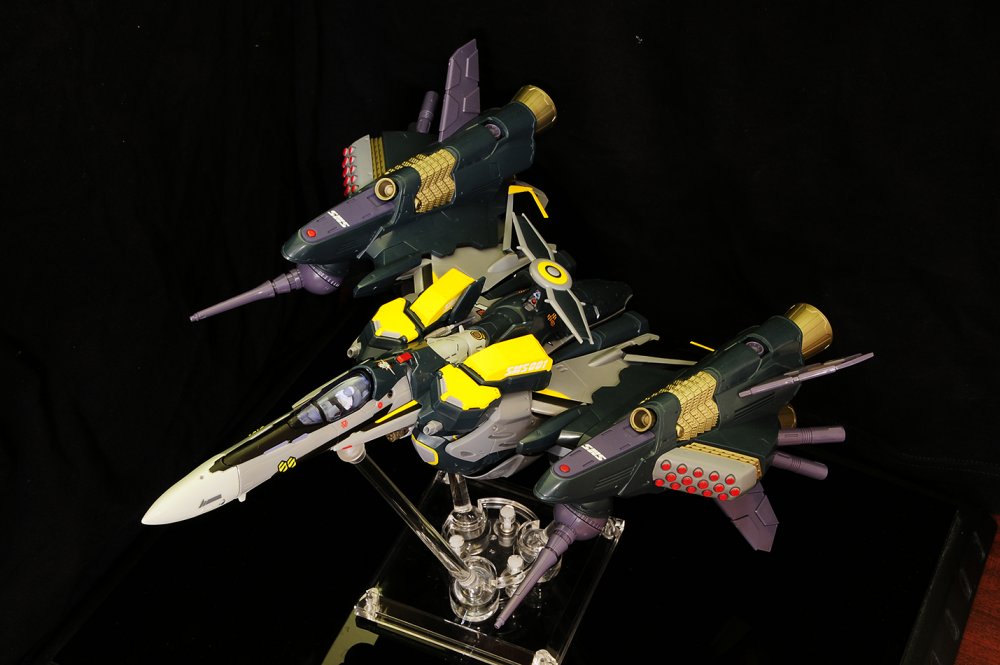
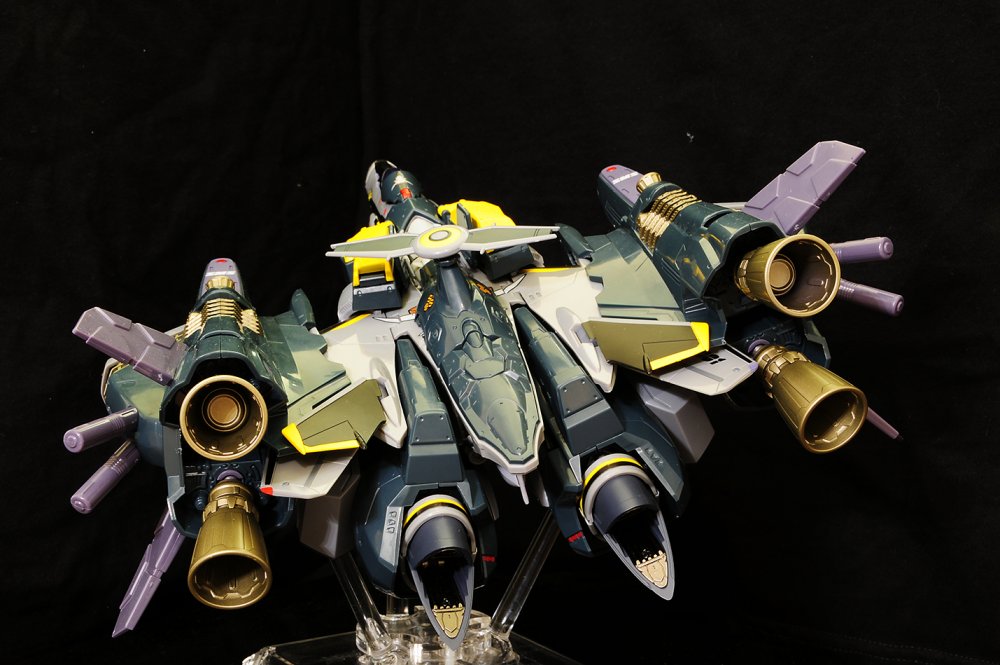
Just finished taking some pics. Hope they turn out okay... Fighter: Battroid: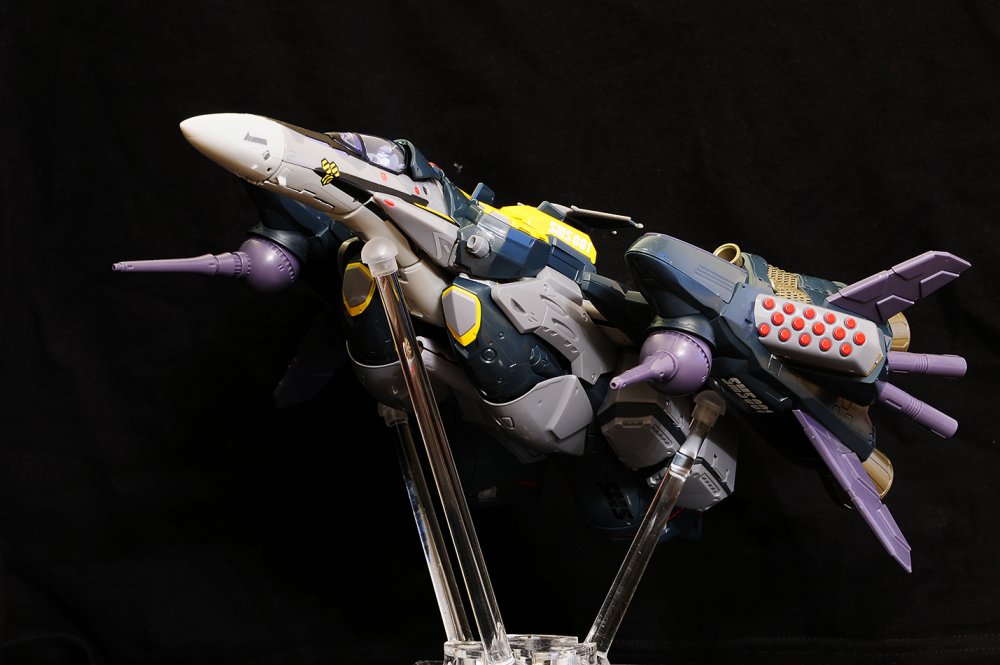


-
Official Bandai 1/60 Scale DX Toy Thread Ver.6
todd77 replied to Duke Togo's topic in Hall Of The Super Topics
Thanks to Graham's earlier pics, I can now attach the gunpod - got to place the gundpod first before locking the legs to the wings. It's a bit of a squeeze but it works. Thanks Graham.