

ghostryder
-
Posts
968 -
Joined
-
Last visited
Content Type
Profiles
Forums
Events
Gallery
Posts posted by ghostryder
-
-
On 11/2/2020 at 2:57 PM, lavinrac said:
Q: Does EVERY one of these have the ratchets on each side of the chest slightly OFF from one another so both intakes' don't point exactly straight ahead? My Blue Gakken Legioss has that 'odd feature' and I'm just wondering if thats all of them.
Pretty much all of them from my experience. My Red Singapore one is worse than my MIJ Blue and Green ones. Once locked into fighter mode, with that shoulder array flap clicked into place, the difference seems less noticeable.
-
1 hour ago, SailCat said:
I need to rebuild/fix 1 arm; the metal linkage for the head is busted, so I need to see if it's replaceable and source a part if it is; do a deep clean of the whole toy, and hopefully find repro labels for after the cleaning. I've decided to not address the yellowing.
I haven't had much luck sourcing replacement parts, other than the occasional part out on ebay. I've also had no luck finding replacement stickers.
I've had to replace the metal linkage on a head and replace an entire hip ratchet assembly, but was able to repair the black shoulder hinge using pin nails and epoxy. Maybe a small screw could be used to replace the peg on your busted arm.
-
On 10/21/2020 at 3:08 PM, SailCat said:
My google skills have failed me. Are there any online restoration walkthroughs/resources for Gakken 1/35 Legioss toys?
What specifically are you looking to do?
-
37 minutes ago, JB0 said:
I actually meant the armature hanging the null rays under the wings that lets them move to the arms without detaching. Though I think this toy would look better with a fake canopy hanging off the bottom than with the big plate laying on top of it. It is wildly obvious there's an entire robot torso down there, why hide just a tiny bit of it?
Ah, gotcha. I can't tell for sure, but I think the null ray armatures actually collapse to become part of the biceps.
-
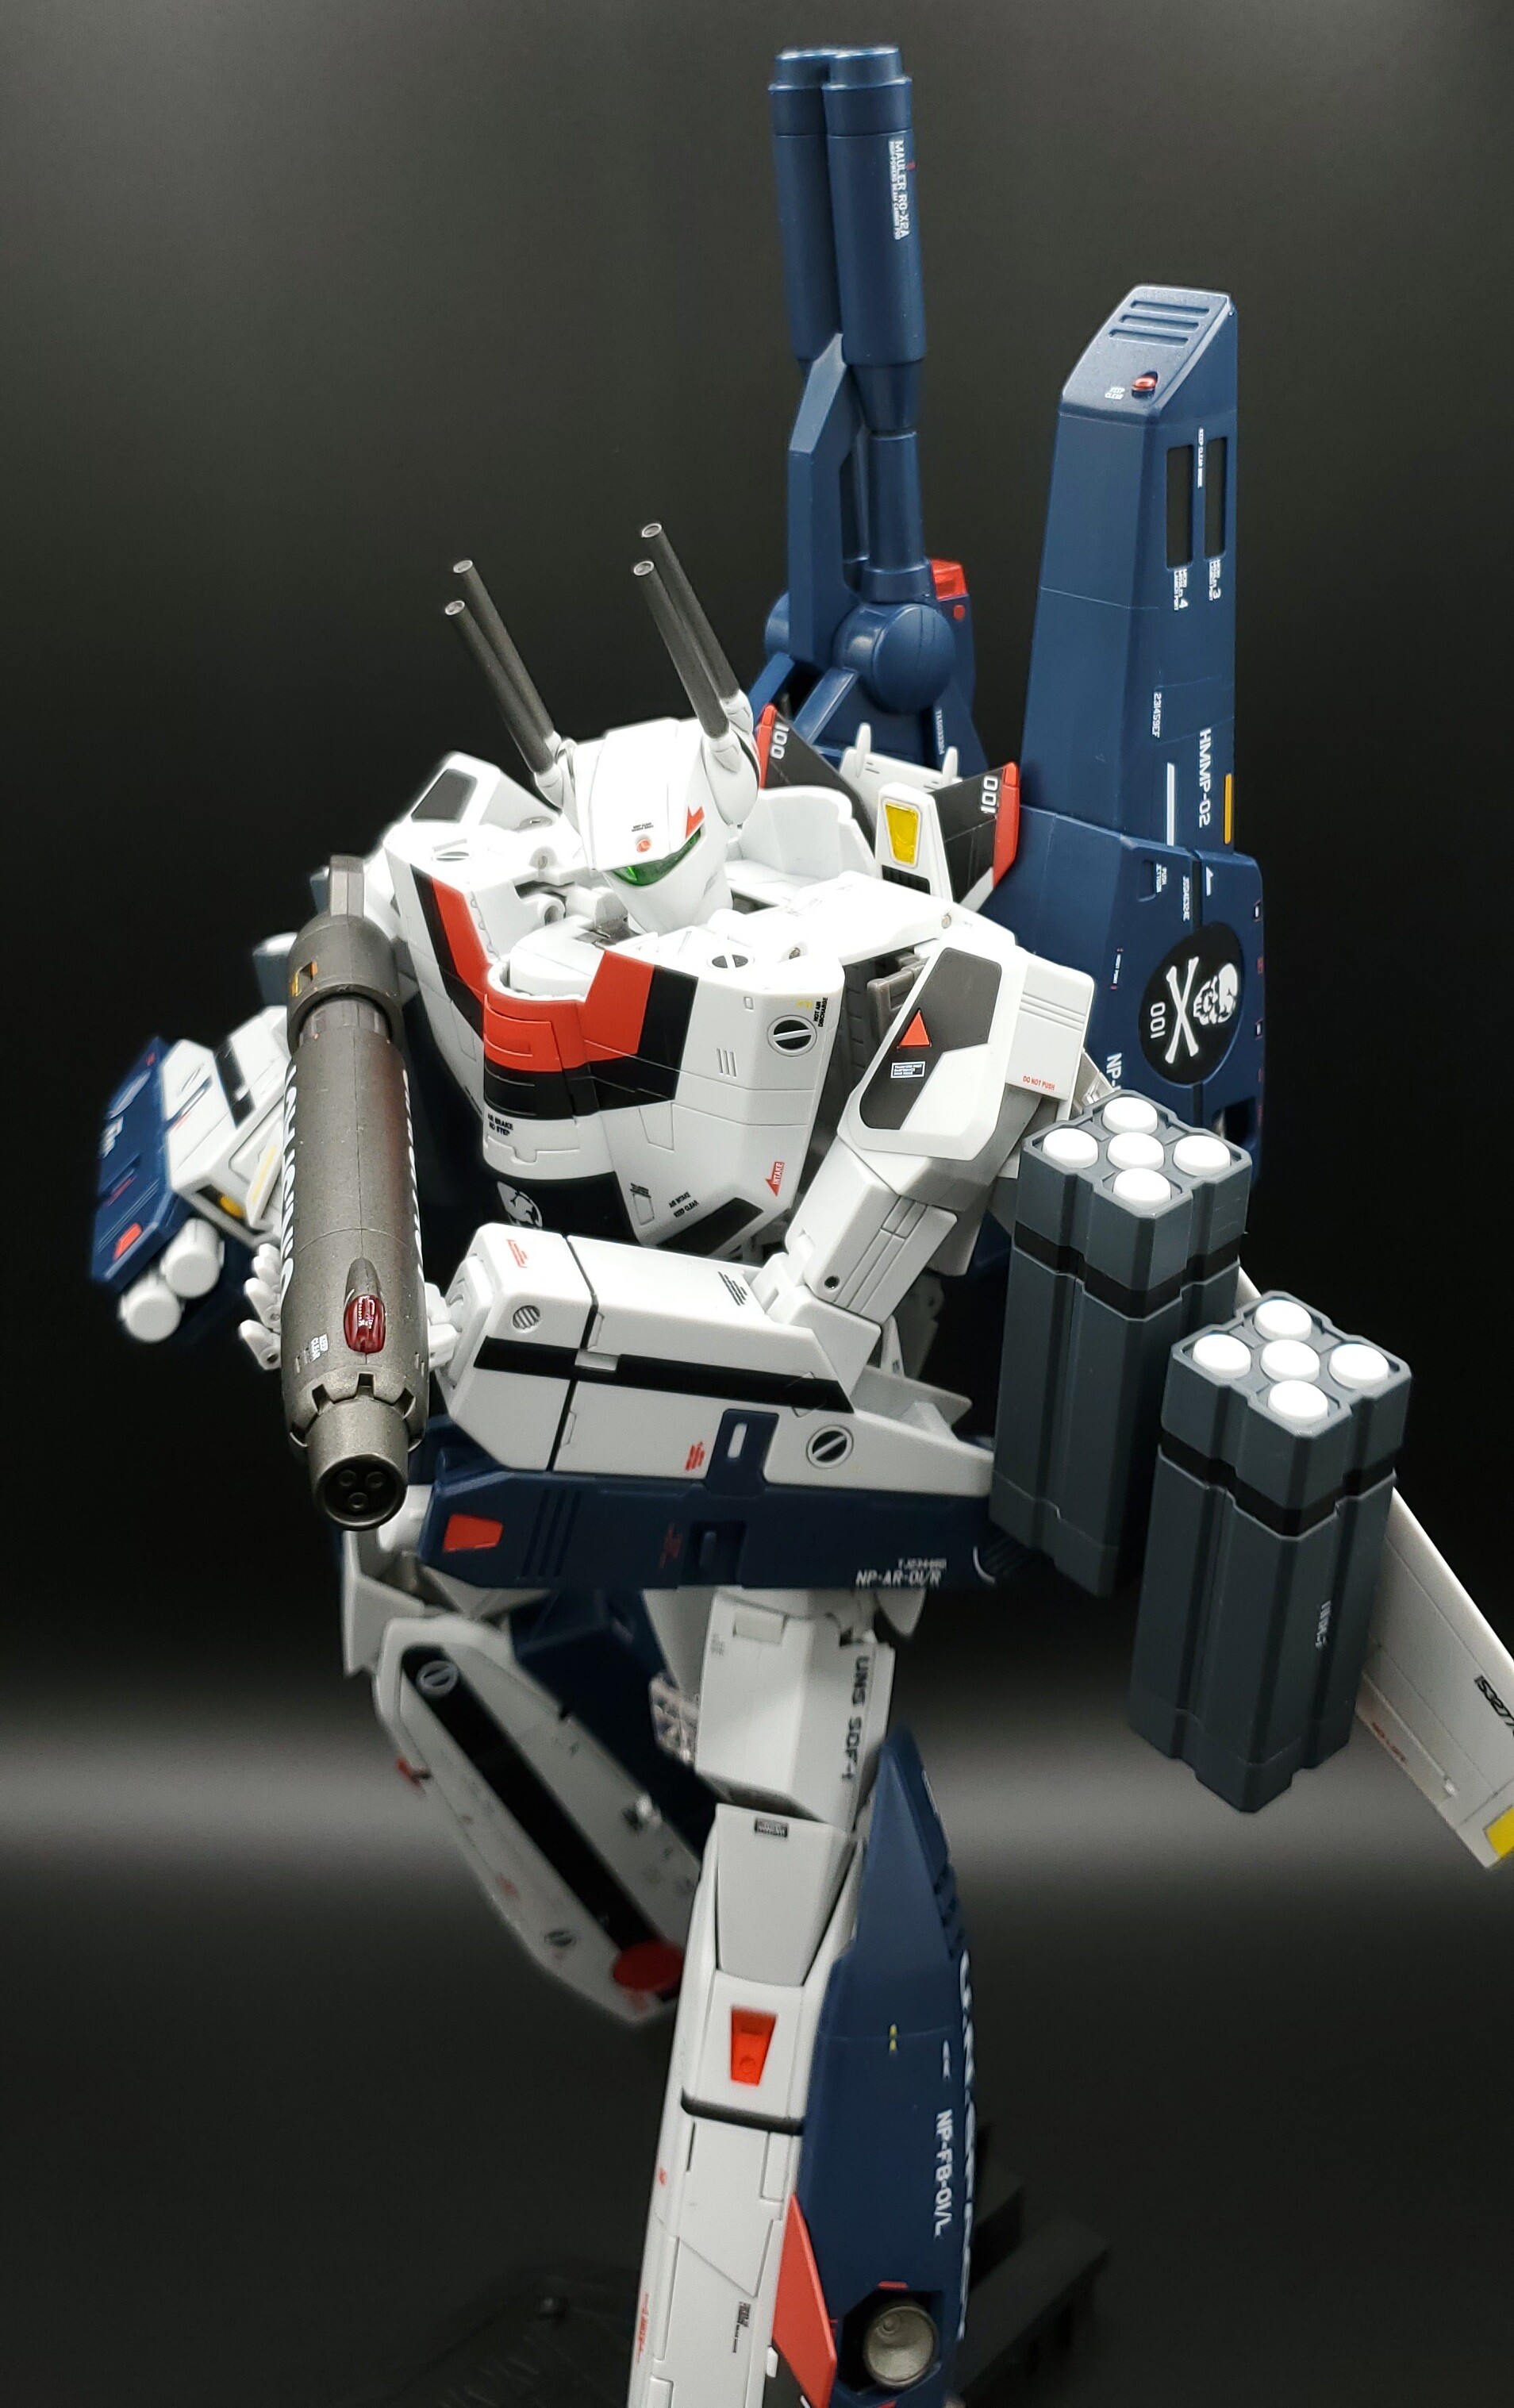
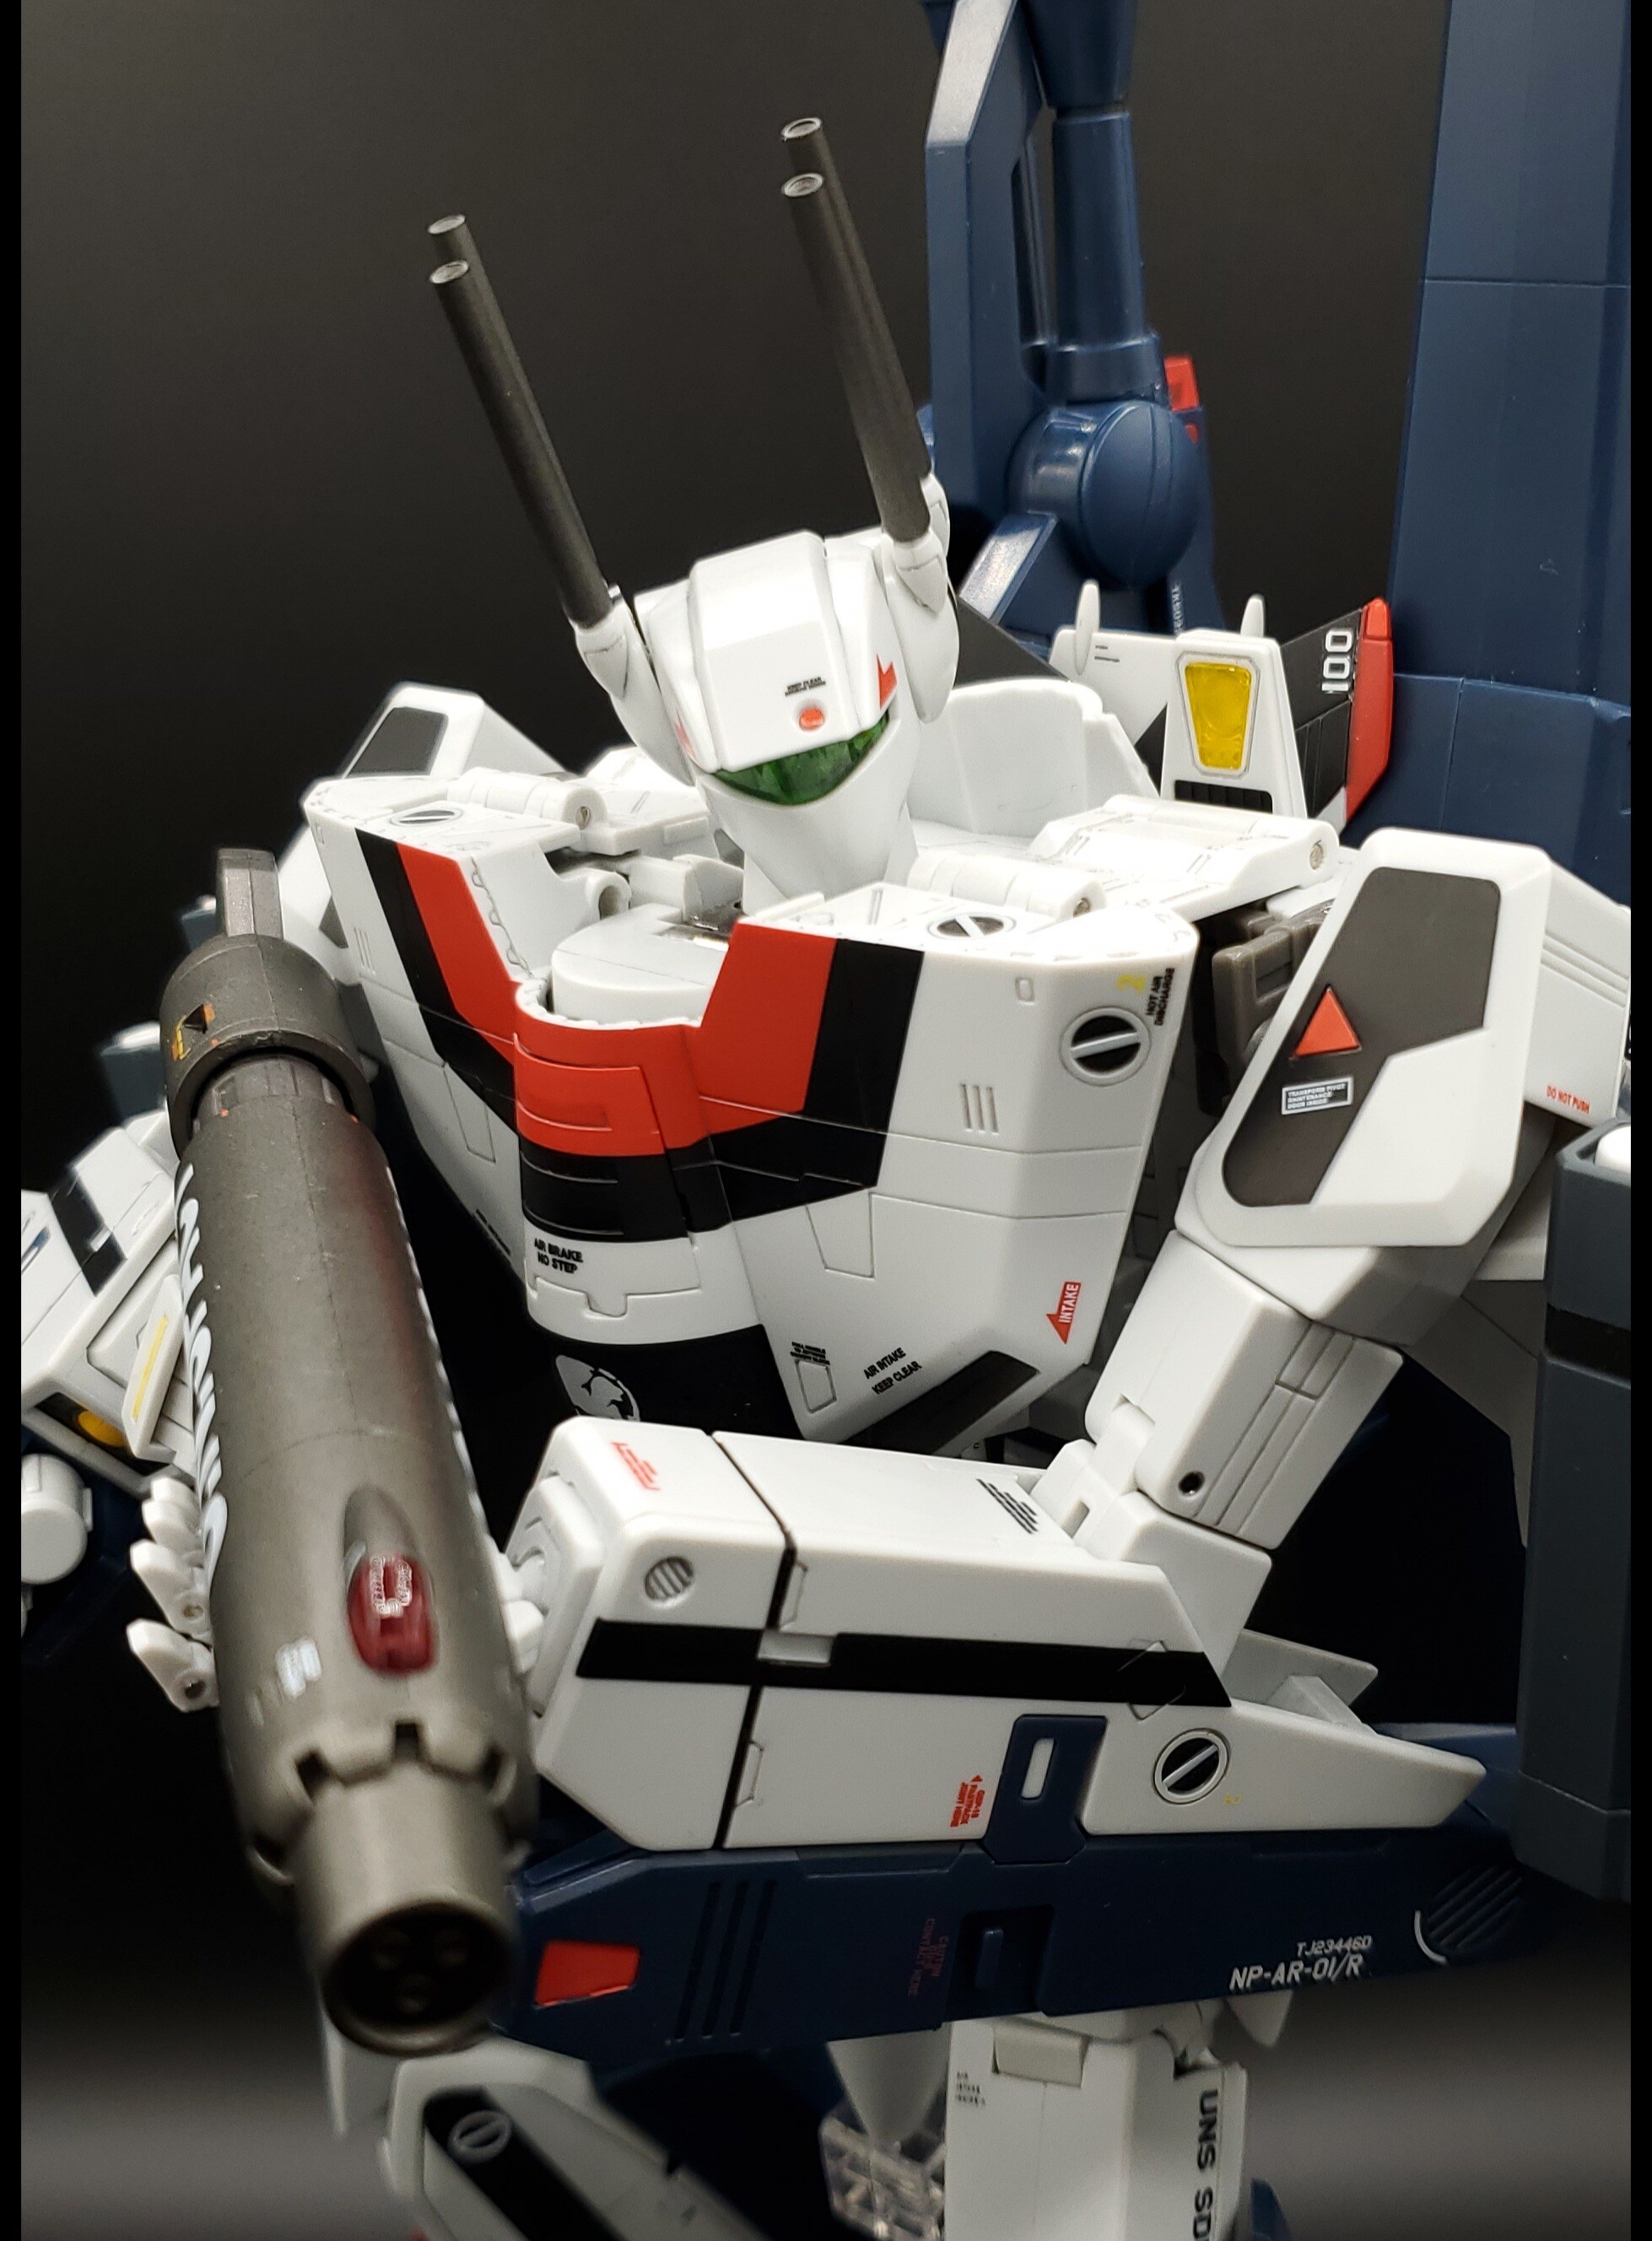
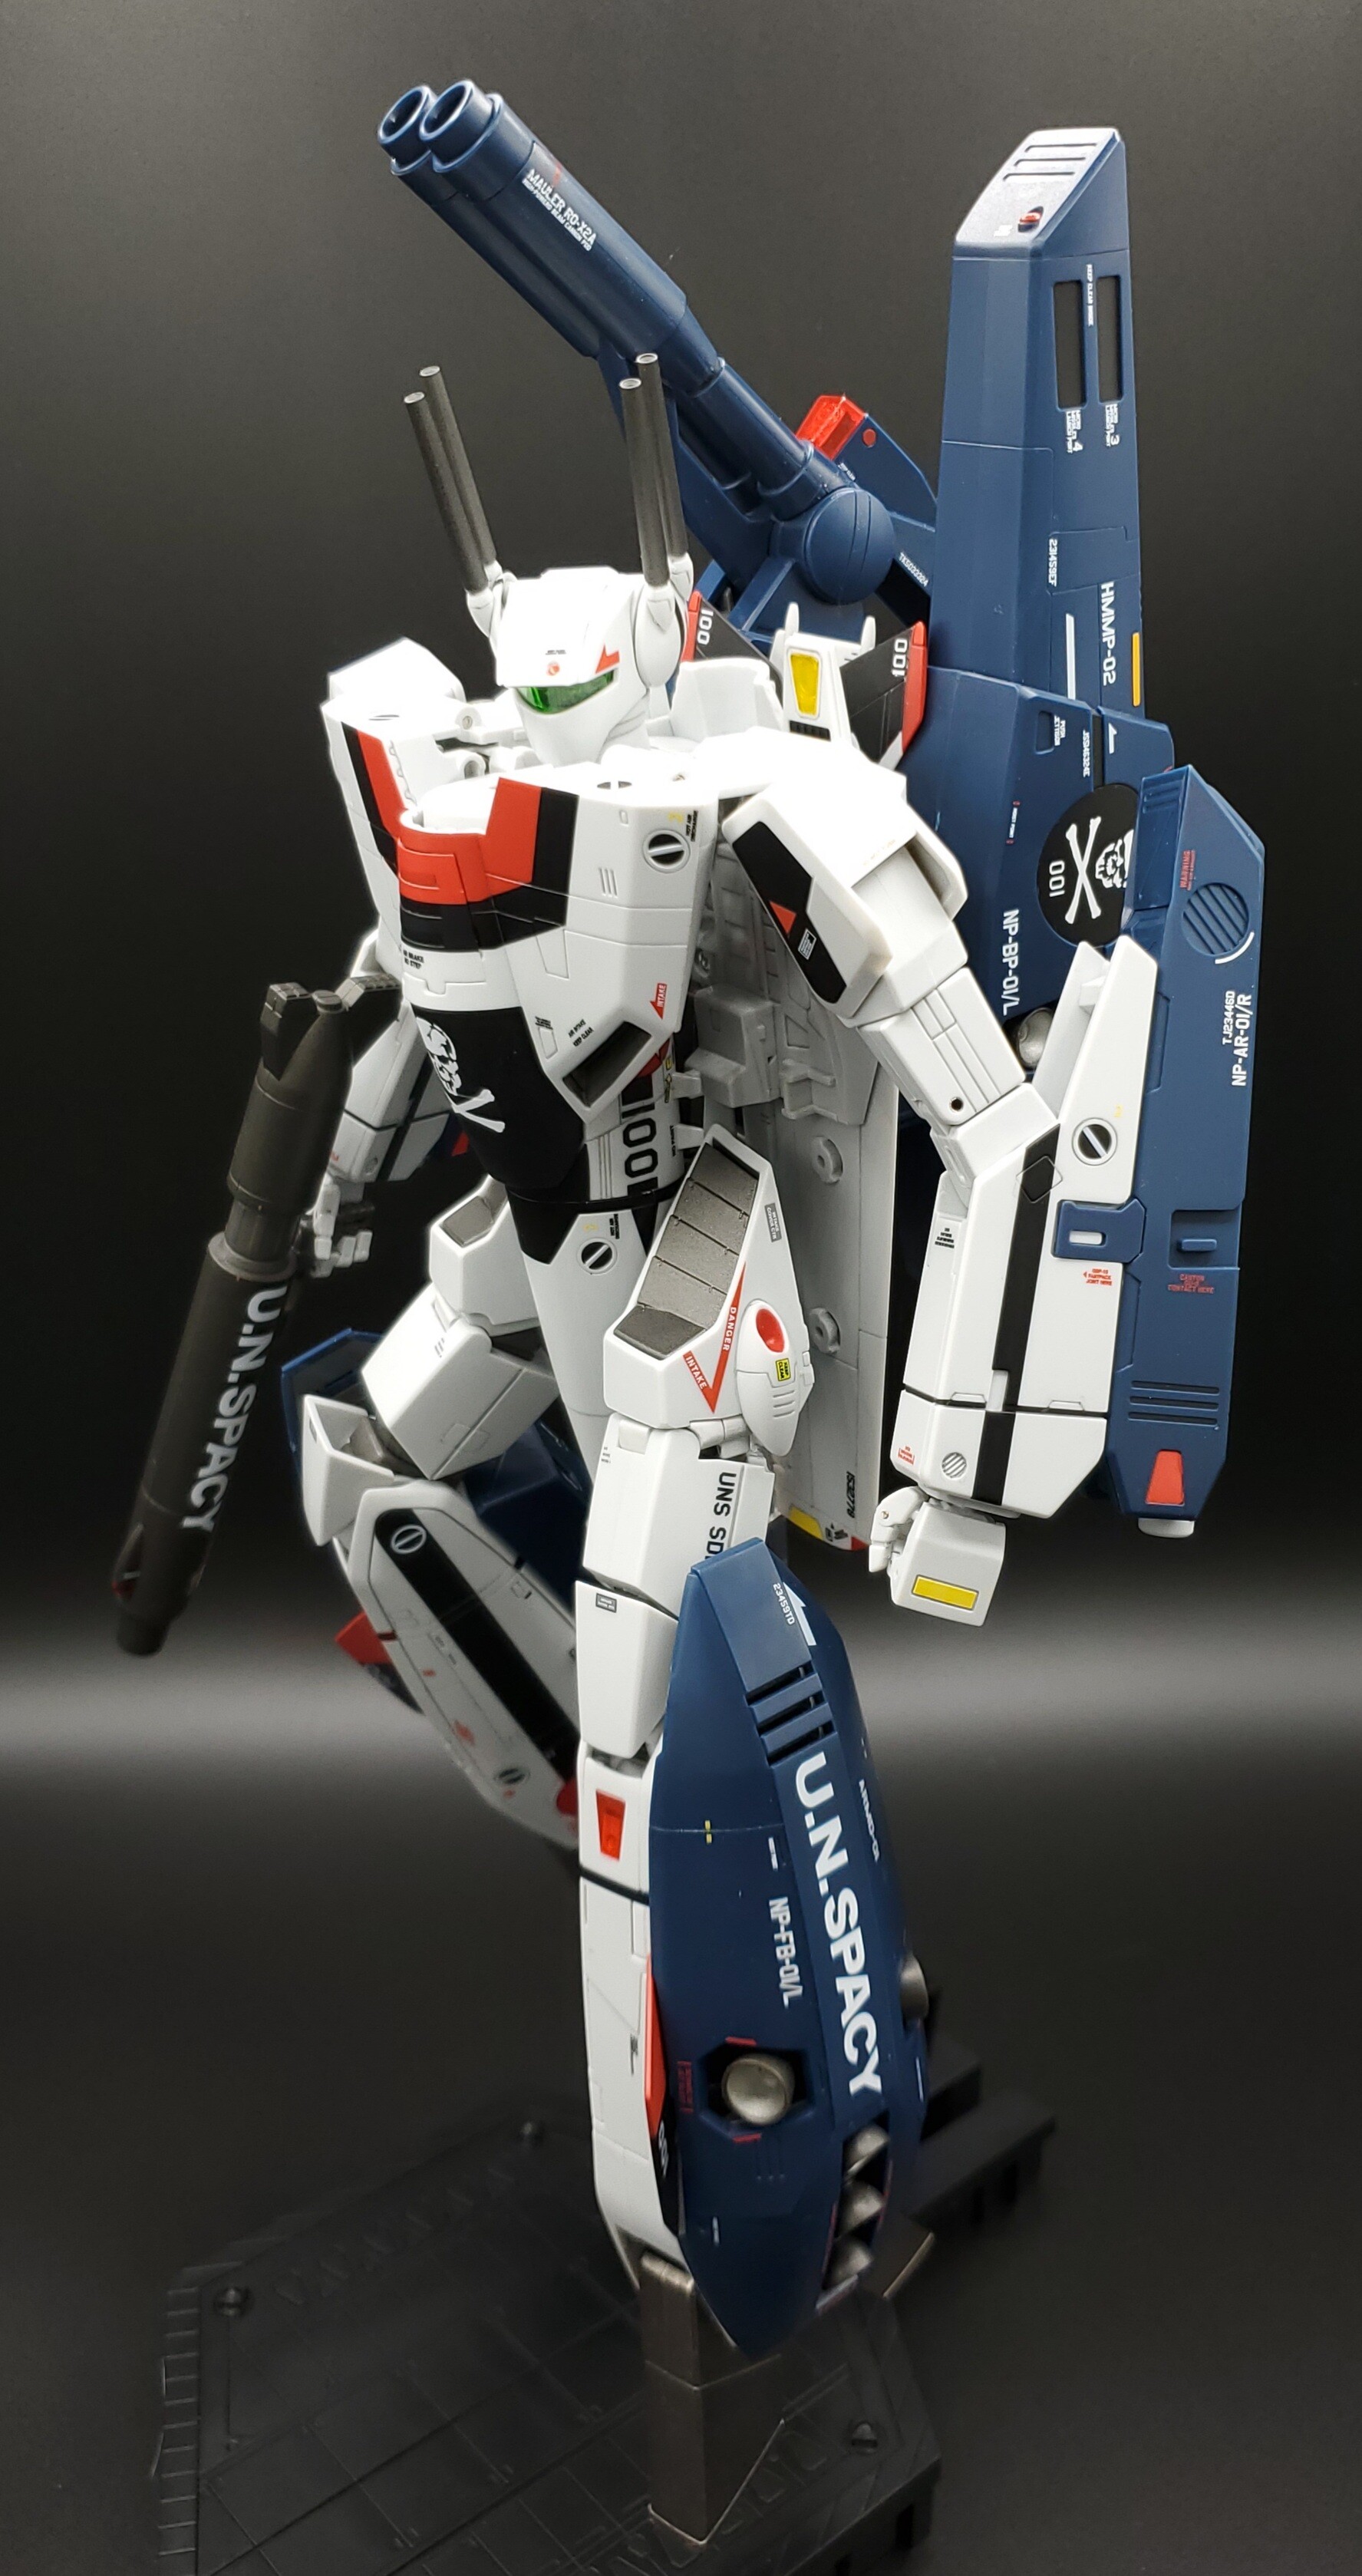
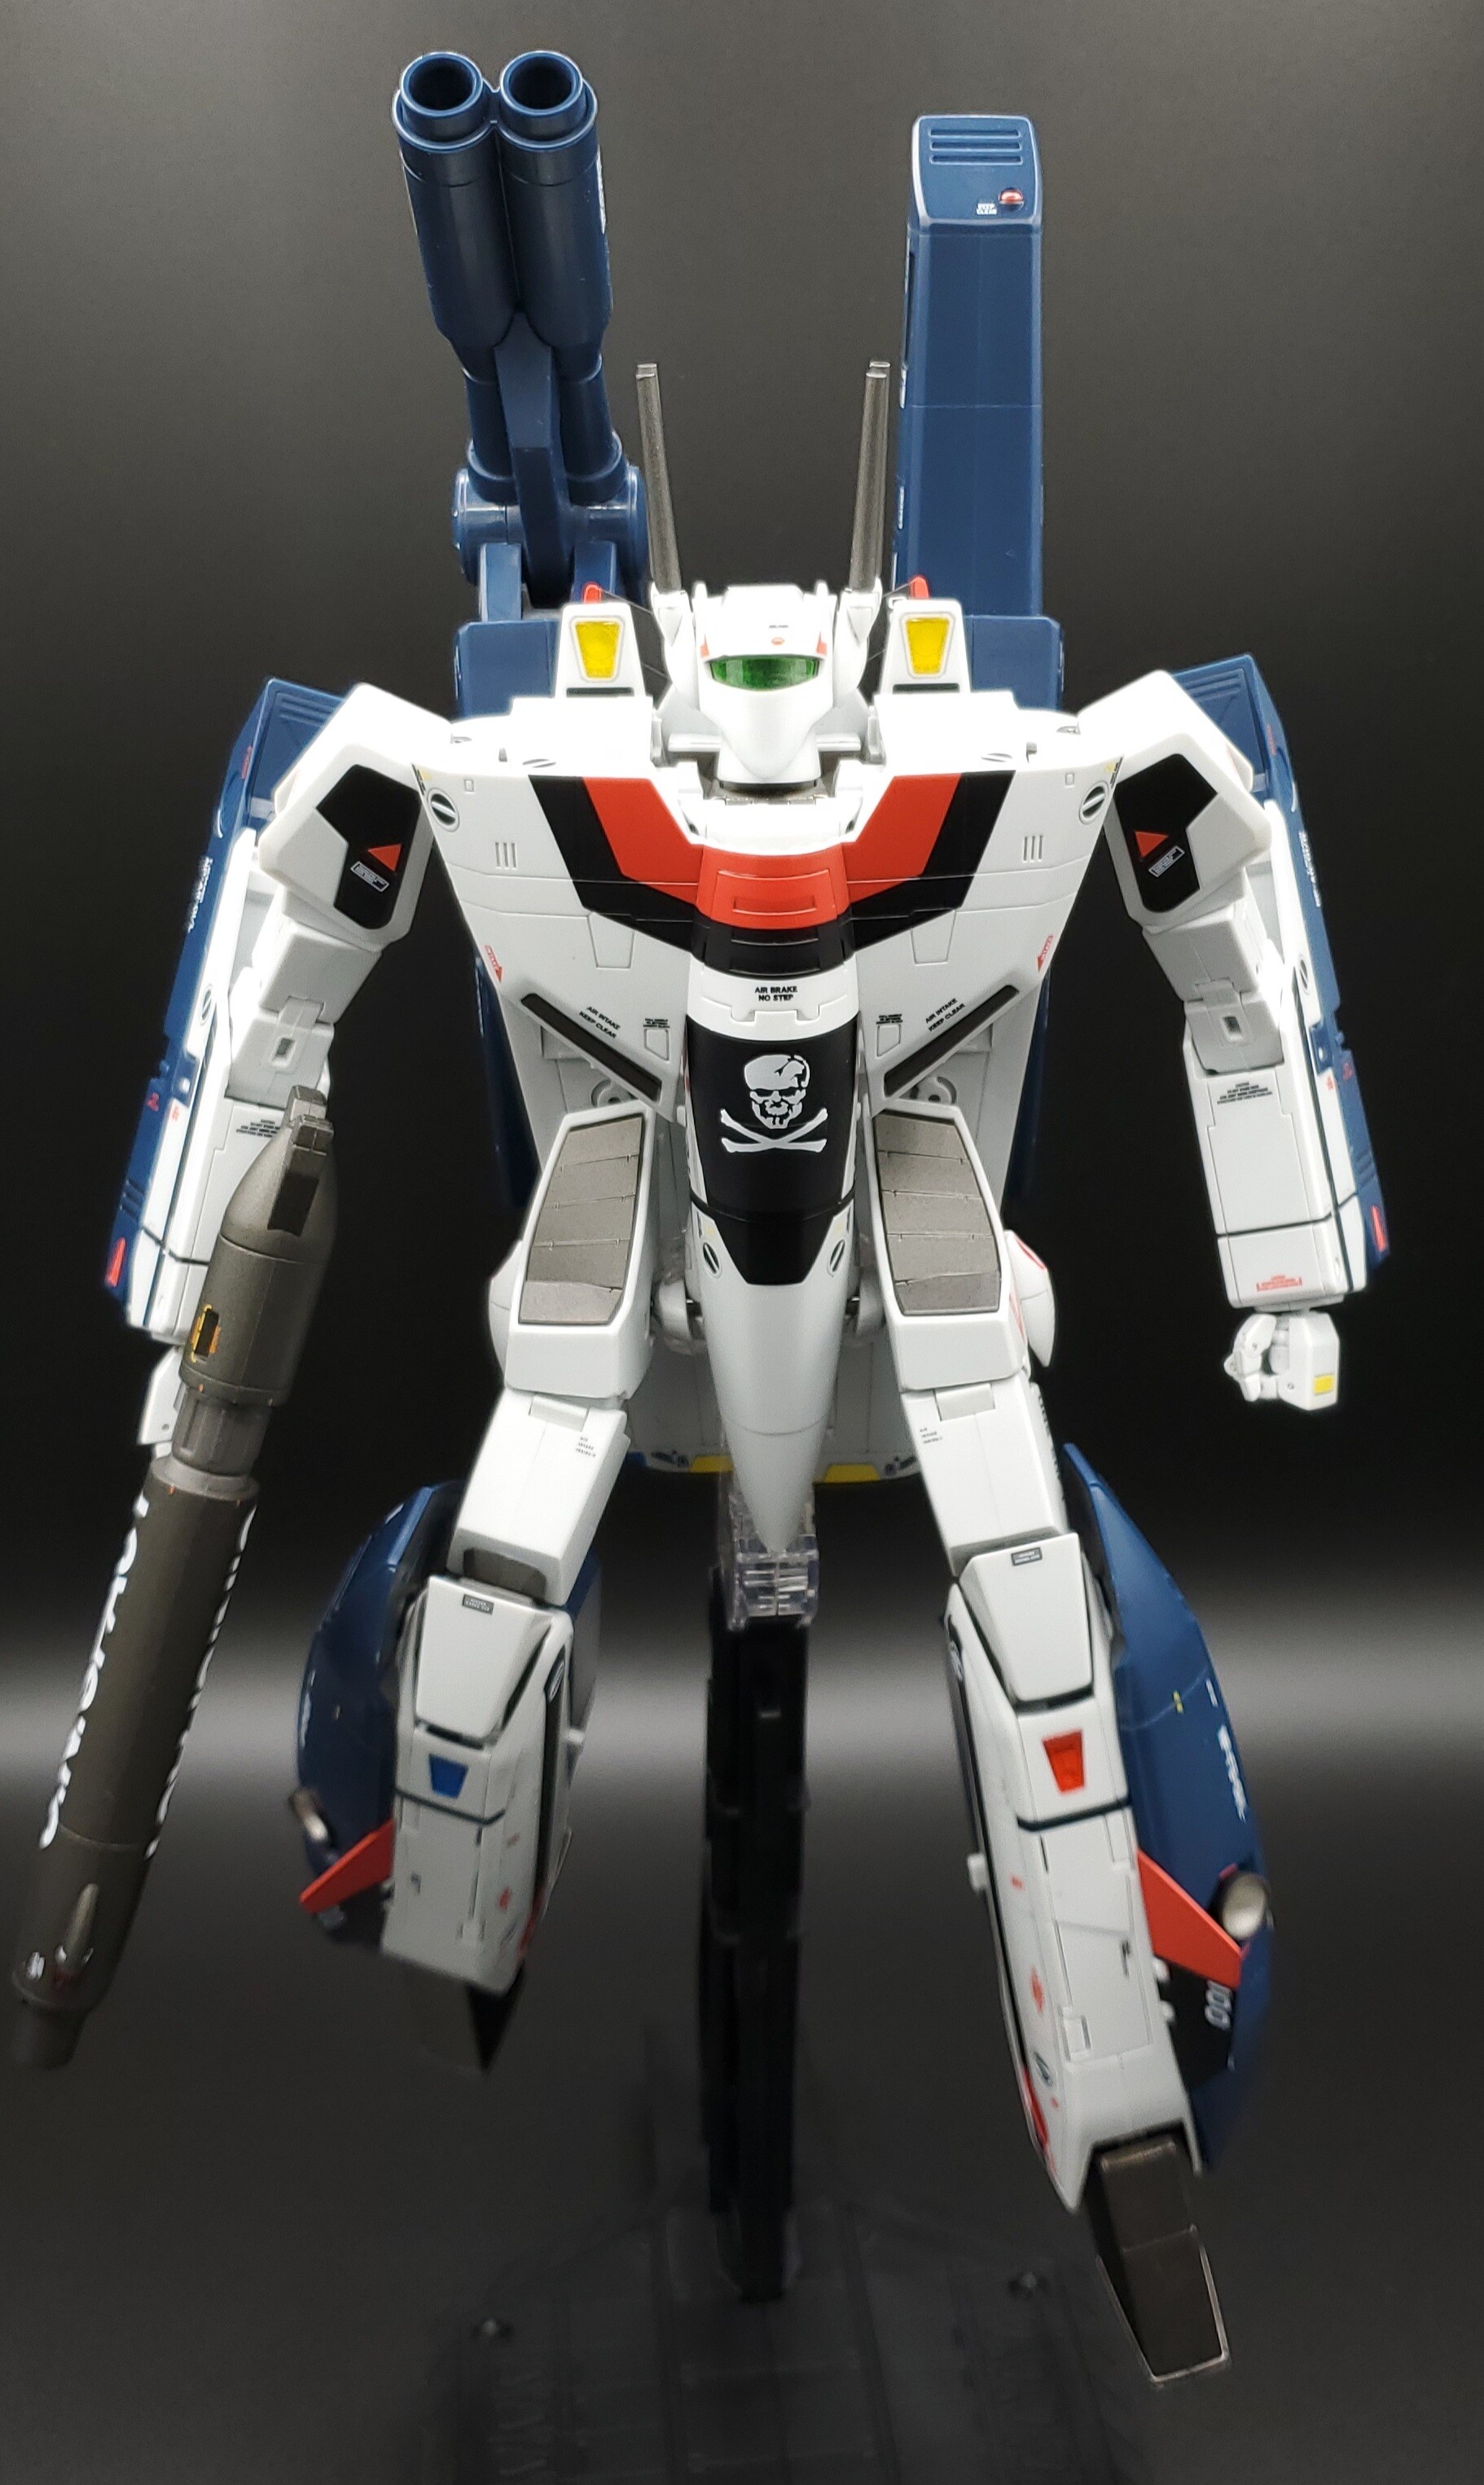
Finally, some better jet pics:

-
1 hour ago, JB0 said:
The armature is just... it is a move I've hated in several toys. I've ranted about scorpion-tails before. I'd say this is a particularly ugly one, but... it isn't the biggest problem with the jet's underside.
There's no meaningful diffrence between a part that detaches and reattaches vs one hanging off a scorpion-tail between attachment points, but it seems a lot of people think it is a huge improvement*. I think at this point I will legit knock the pins out and remove the armature entirely on any future toys I get with one.
Looks like there's a mushroom peg joint on the armature, so maybe you can just pop the whole dang belly plate off. The fake canopy would be showing, however. Frustrating thing is that without that fake canopy, maybe they could have been able to store the arms completely instead of them sticking out the sides of the jet.
Not sure why MP-52's thighs are so skinny - I don't see any "MP-moment" leg transformations like we saw with MP-36 Megs (how they got the legs to flare out from the gun handle halves). MP-52's legs are just sitting there under the plane with giant gaps between them and around the thighs. So the only reason I can think of for the skinny thighs is solely for articulation.
Lots of missed opportunities to make this an amazing seeker mold.
-
On 9/16/2020 at 10:27 PM, twich said:
So, I just got my first and only KO/3P masterpiece transformer, the Robot Formers Oversized Thundercracker Seeker mold MP-11. Man, this thing is huge! The build quality is nice and it fits together well! My Arcadia 1/60 35th Anniversary VF-1J looks like it could be a drone or a ghost booster for thundercracker! These toys are supposed to be around 1/48 scale, right? Anyway, very impressed with it....now only if they made Macross jets that big!
twich
Is this the one yougot? https://www.ebay.com/itm/Transformers-Robot-Formers-MP-11-Amplified-Model-F11-C-Thundercracker-Toy-12-H/193211589360?hash=item2cfc4ee2f0:g:d7YAAOSwm2pd0ArI
I was curious if the knees and feet look like the pics in the auction, which more or less match the MP-11 mold. The Robot Hero version has closed of knee joints and minor changes to the feet. Maybe these are recolors of the Tanaka OS MP-11, which is a direct OS of MP-11 and slightly smaller than the Robot Hero.
-
50 minutes ago, RedComet said:
Oh man, I was hoping to debut the DYRL Max like I did with Roy, but you beat me to it by a week or two (I got stuck on paint colors) Well, glad those decals @Anasazi37 and I cooked up are going to good use
") Stay tuned right here to see some 1S Max with weathering in the near future!
Stay tuned right here to see some 1S Max with weathering in the near future!
Oh, I'm just whetting their appetite for your awesome weathered customs . Some battle damage from his aerial skirmish with Milia would also be epic.
And sorry, forgot to give you props on the decals as well.
-
37 minutes ago, DYRL VF-1S said:
Awesome work! This is the kind of creativity that I could never do.
Thanks! There is no creativity needed to paint red parts blue, just tons of masking and a steady hand. We have such talented forum members who can really bring these toys to life with weathering and backdrops/dioramas.
-
6 minutes ago, Shawn said:
That Max VF-1S is incredible, nice work!!!
Have you thought about painting the wheels white? (my only real gripe with the Bandai 1/48)That didn't even cross my mind, but you are right. Definitely needs white landing gear.
-
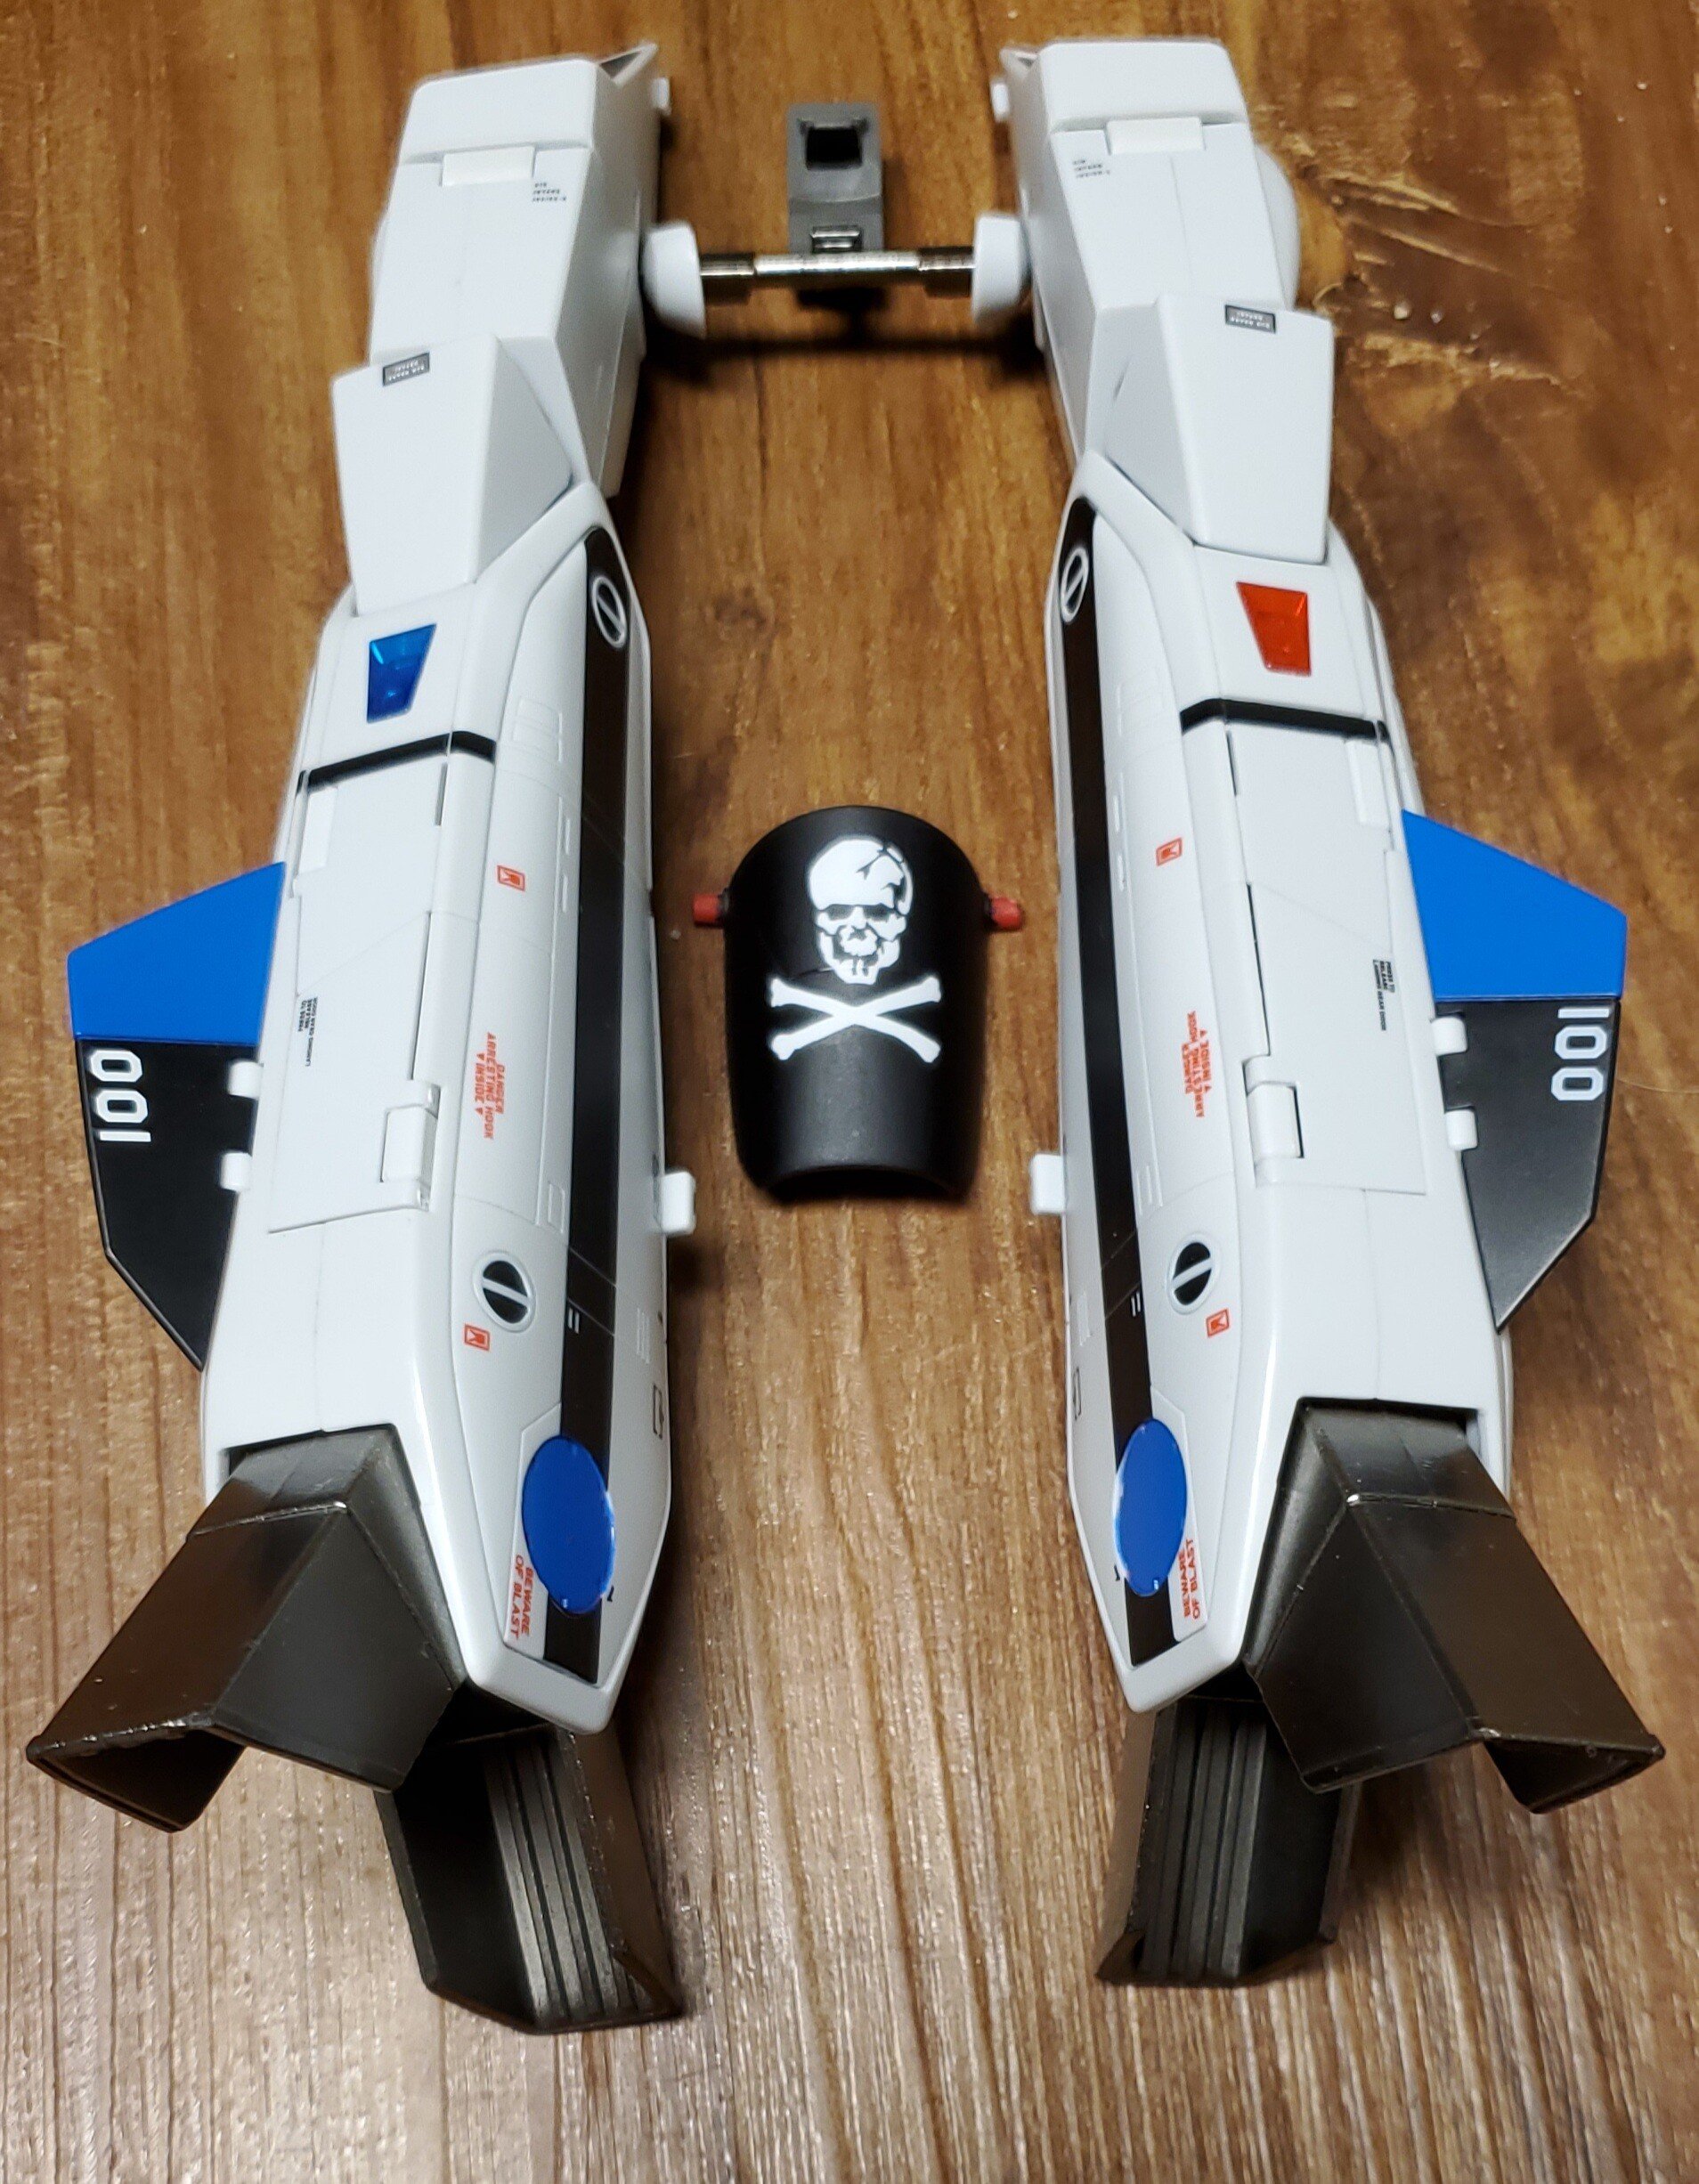
VF-1S Max nearing completion! Corrected tailfin modex number, jolly roger skull, and pilot name decals courtesy of Anasazi37


...and Max Taii at his greatest:


-
5 minutes ago, DYRL VF-1S said:
My fellow Coloradan, I do not see a pic.
Friggin vgy.me... I attached the photo, hopefully shows up now.
-
On 8/6/2020 at 10:29 PM, RedComet said:
Just planning on XF8 flat blue for the first test shots. Will let you know how it looks.
I just went ahead and tried the Tamiya Brilliant Blue (actually the PS-30 instead of the TS-44), as I was looking for something a bit brighter than the blue Yamato has been using. Anyhoo, here is the best shot I could get to represent the color. No turning back now!:
-
So for those who've made or plan to make a custom Max VF-1S, what blue are you using? I'm looking at Tamiya brilliant blue. I don't plan on trying to match the SSP emblem blue, as it looks too dark.
-
4 hours ago, David Hingtgen said:
Are those custom stickers for TC's tailfins? (Mine has been boxed up so long I forget what exactly it came with).
Yes, I cut the wing and tailfin stripes out of vinyl adhesive sheeting to look more G1 toy, and of course painted the tailfins black.
-
41 minutes ago, Mechapilot77 said:
had no idwea the robot hero ones were improved. the seeker mold is large enough in jet mode for me though! haha. good job on the paint. so nice. was the thundercracker already toy colored or you went from light blue to that?
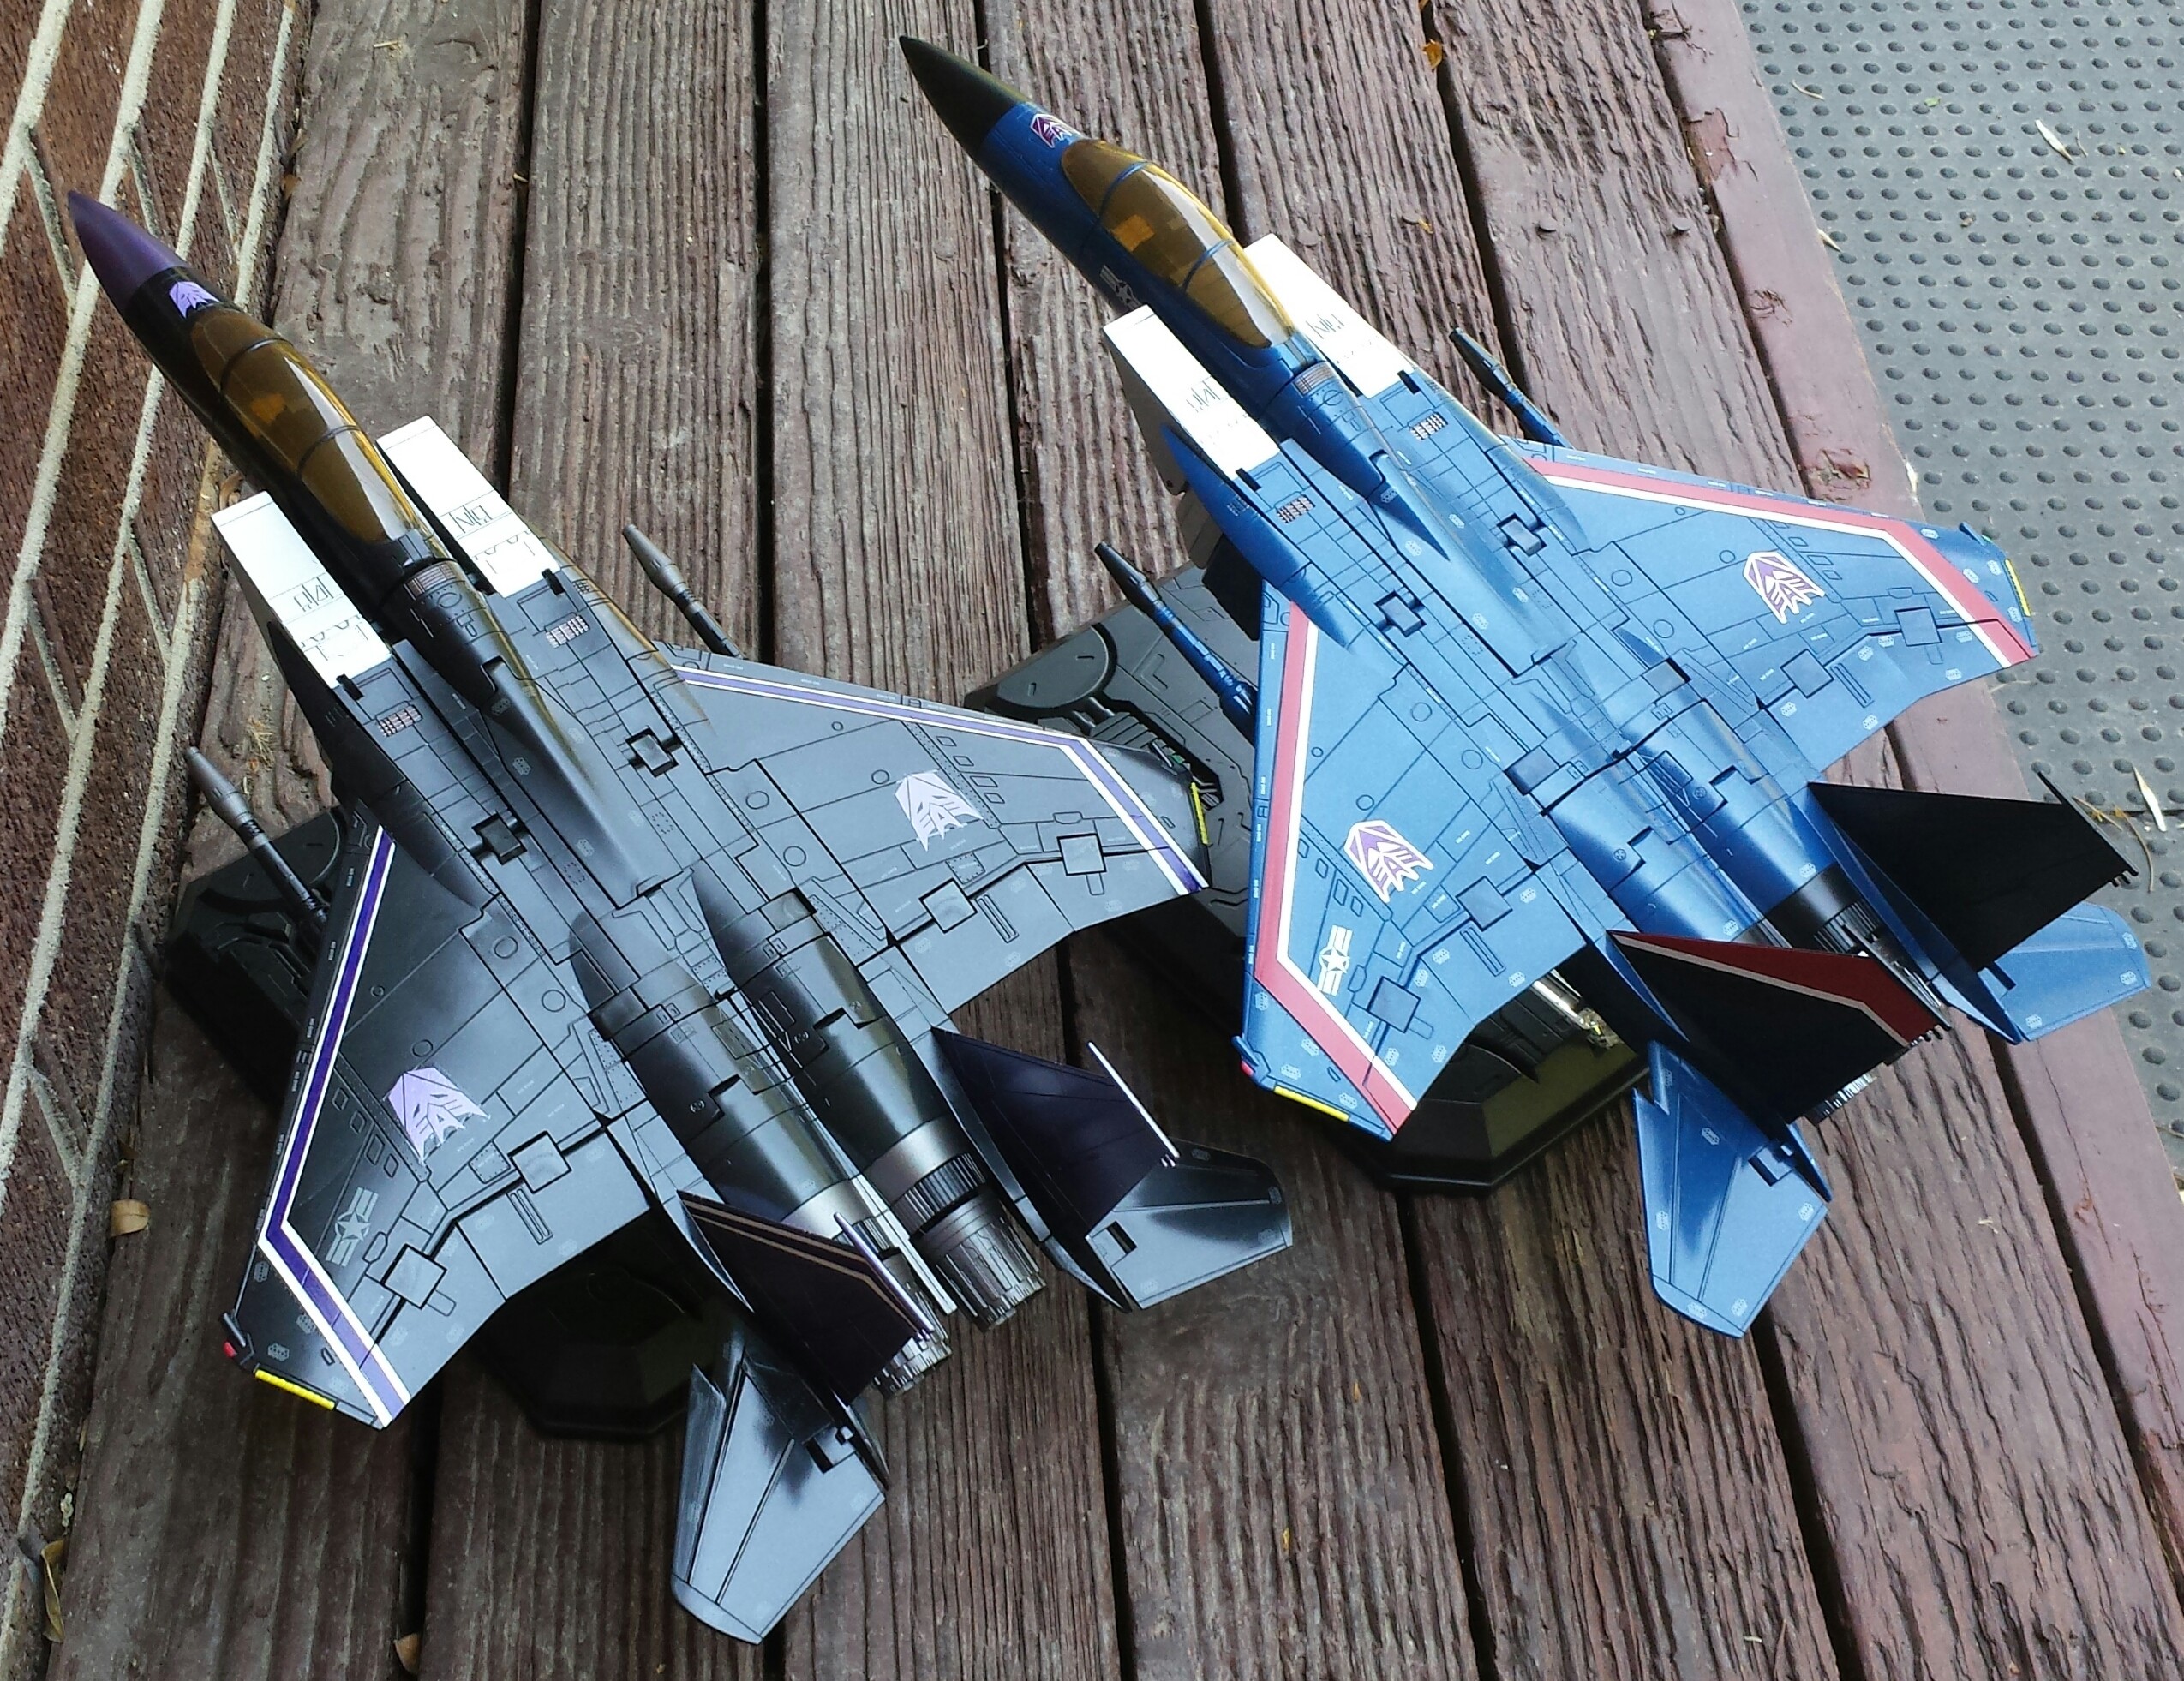
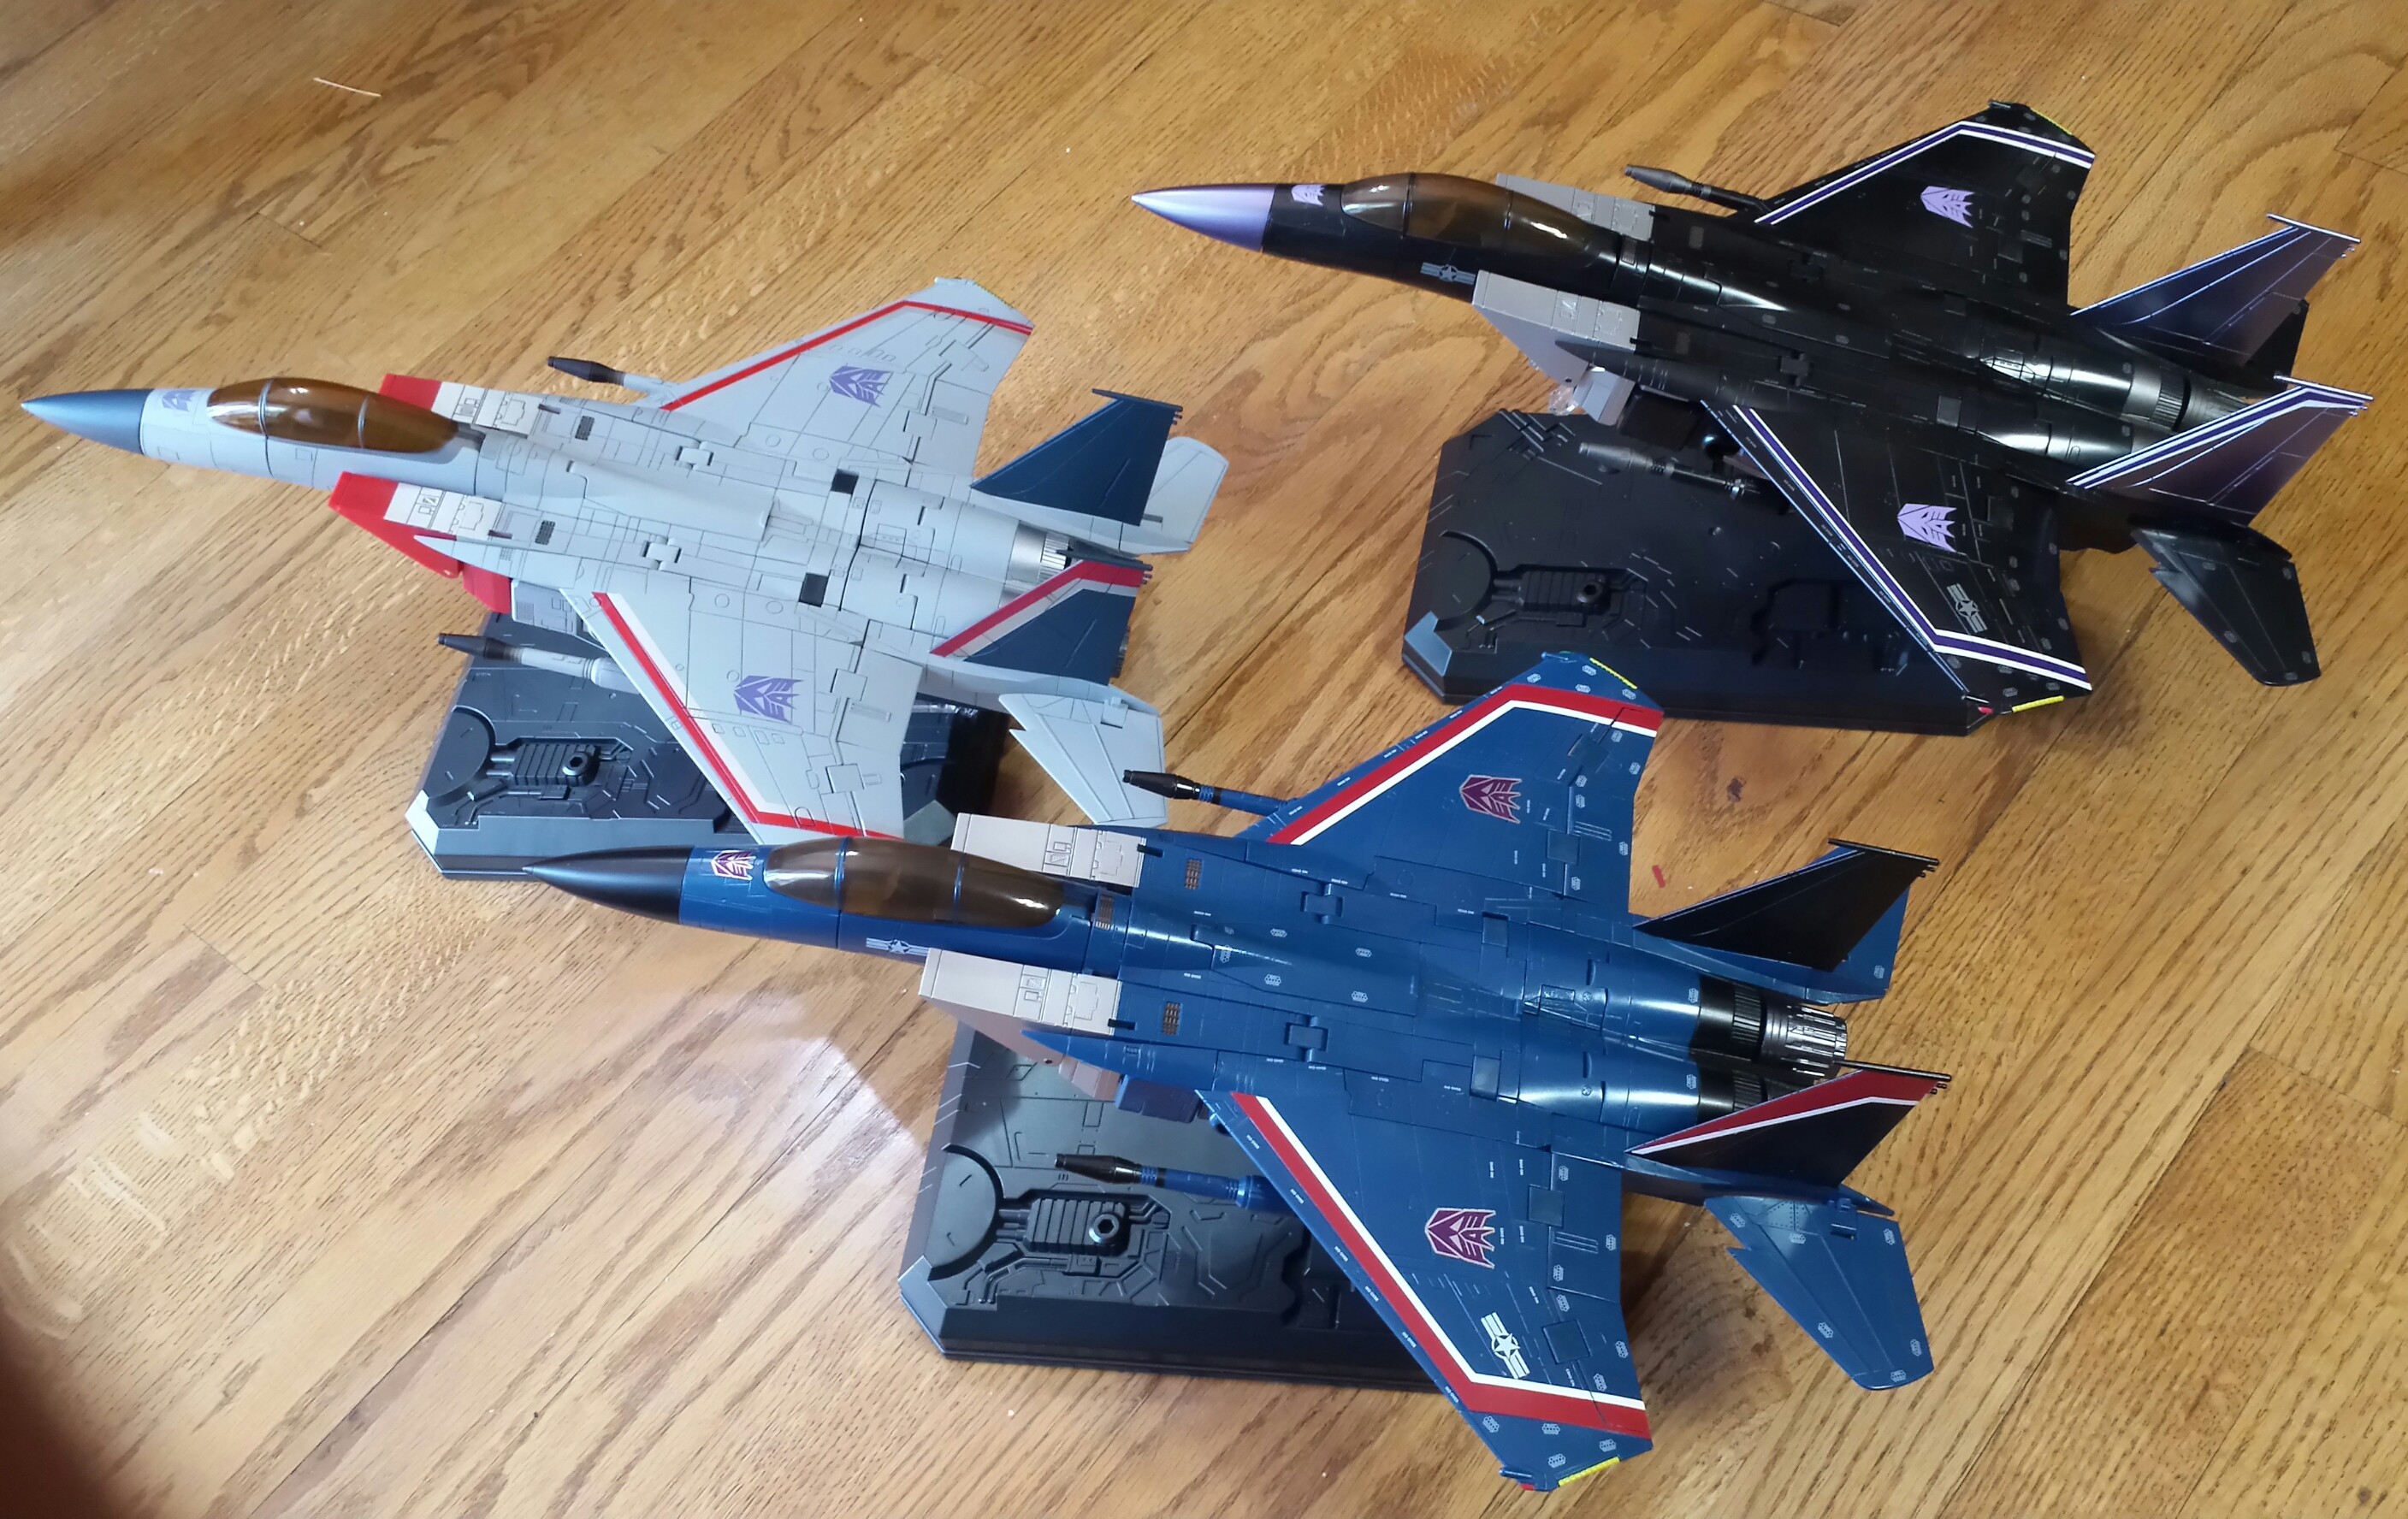
It was originally toy blue, but in the MP-07 deco. Skywarp was orignally MP-06 colors, and Starscream was Walmart MP-03 weathered colors with black tabs.
Here are more jet mode shot (still need to remove USAF tampos):
-
That pic reminds me of how I decked out my model planes as a kid. Just a ridiculous amount of munitions for that unrealistic Doug Masters/Iron Eagle scenario.
Kind of unrealistic give the drag penalties of the Rhino's towed out pylons, but might work as a missile truck far behind F-35s painting the targets.
I do like the look of those CFTs. Certainly better than that ever-present centerline tank, but I wonder what the transonic drag penalties really are relative to the rest of the air frame, especially without the engine upgrades.
-
7 minutes ago, sqidd said:
@ghostryder inspired me to re-pose my Battroid 1S Hikaru for the first time since I un-boxed it.
Nice. I think you captured the feel better! And you are literally a few joint clicks away from the 1/55 Strike Valkyrie box art
")
Oh, and I give Justice a pass because it was my first Metallica tape. Being a bass player now however, it's hard not to ignore how they neutered Jason's lines.
-
36 minutes ago, Anasazi37 said:
Oh no! Glad I put doubles of everything on the sheet. Was it an application issue or something with the decal itself? Feedback is always appreciated. I know some members have experimented with ways to remove the tampo on DX valks. The one specific example I can remember was for the YF-19. @tekeringused Mr. Colour Lacquer Thinner to remove a white marking that was printed on top of a black painted stripe.
No, your decals were top notch. I didn't let the future base coat dry long enough and it must have interacted with the Micro Set.
Thanks for the tampo removal tip!
-
1 hour ago, Anasazi37 said:
Looking good! Glad the decals worked out for you.

Yes, they are nice quality! I f-ed up the tailfin 001 a bit, so may need to touch up or redo. I have not tried the nose 001s yet, need to figure the best way to remove the crooked tampos.
-
59 minutes ago, kkx said:
Was it easy to remove the canopy cover and paint it black?
Pretty much as easy to remove as the Yamato 1/48 heatshield. I sanded everything lightly, painted gloss black, added Anaszi37's decal, sealed with Future, and then a light coat of Mr. Hobby flat.
-
40 minutes ago, treatment said:
Nice pics.
You might have missed it, but I posted my black-heatshield Hikaru-1S back on June-14 both here and in the scale-thread:

Nice! The glossy look is even more chunky-esque. Is that heatshield from a Yamato?
-
-
I'm still waiting for the Jolly Roger decal to dry and then dullcoat (thanks Anasazi37 !), but I don't recall seeing any pics of Hikaru's 1S with black heatshield/fastpack symbols. I know red is supposed to be official, but something about that black heatshield brings back those same feelings I had when I first laid eyes on the 1/55 strike valkyrie box art as a kid.


Bandai DX Chogokin 1/48 VF-1
in Toys
Posted
So no more "100" on the starboard tail fin?