
Palantirion
-
Posts
98 -
Joined
-
Last visited
Content Type
Profiles
Forums
Events
Gallery
Everything posted by Palantirion
-
05-20-22 I lied. This is the final coat of paint on Roy's collar. It needed to be evened out slightly more. Sanding the repaired slat. Non-pro pro tip: Use a dry swiffer sheet to catch fine dust particles so you don't have to sweep them out of all the crevices below. Slats installed. And painted. This consisted of the custom gunmetal as a base, then drybrushing antique gold across the leading edges. Long shot. One might notice that one of the slats doesn't sit in perfect alignment to the others. That is because where it broke a little bit of material was lost and this changed its angle slightly when I glued it back into place. I could have removed it and made a new one, but there is some risk involved with that. We mutually concluded that since it is very close to correct that it was fine to leave it as-is. The error is only visible from one specific angle, which is not a primary one.
Royscollarfinalcoat.jpg.09b95484d784135b0f4f3bb2739af240.jpg)
sandingbrokenslat.jpg.e7c64e4dafb7d134670b7bd29275646f.jpg)
slatsinstalledsandedandpainted.jpg.5d0fcba11ffaffbf90b9bab8be70dde3.jpg)
slatsinstalledsandedandpainted.jpg.9c9f891efc07c3b886cf1be76012340f.jpg)
slatsinstalledsandedandpainted.jpg.c0848dd852ba053f346a4853ffa48838.jpg)
-
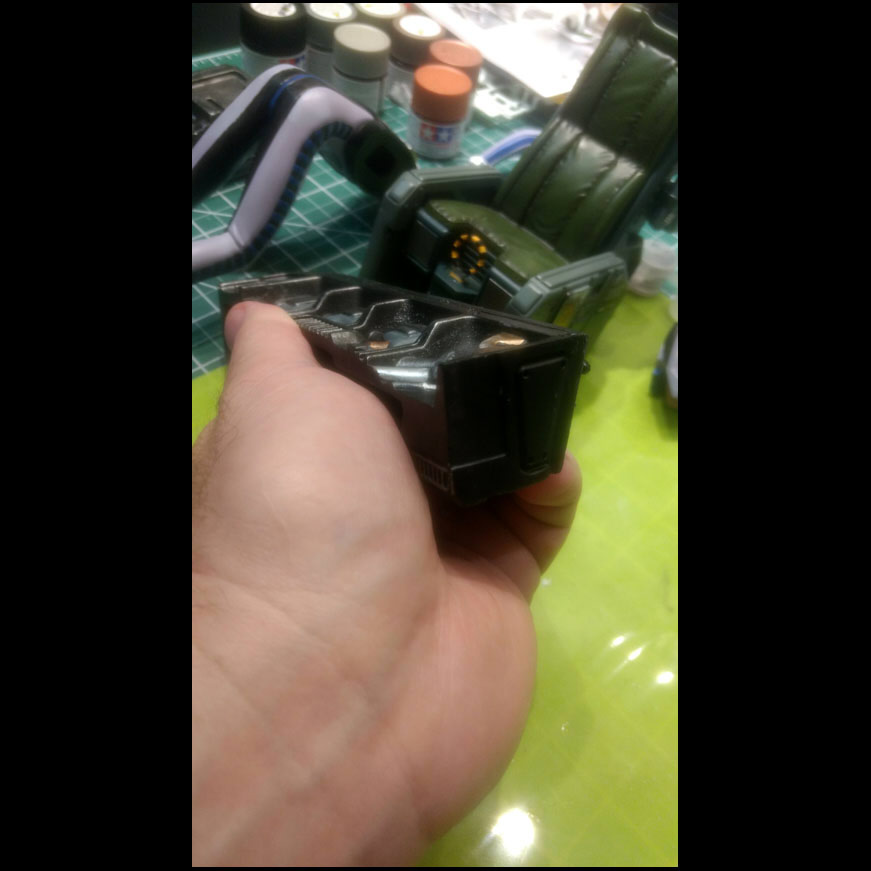
05-18-22 The lower center console, finished. Painting the side console's silver. Sanding the side console edges, fine tuning. And the other one. From time to time I'd use my dehydrator to speed up paint cure times. Relatively inexpensive, one of my unexpectedly best tool purchases. Especially useful for quick-curing oil washes (not relevant to this project). After fixing so many things I then noticed that there were a lot of minor scratches on the black of the cockpit... ...so I went around painting and feathering them. Painting side console details. These would be all the chips that weren't part of the silver; various spots within the black, the gray, and a couple clear red and orange. I lightly sanded and painted Roy's collar again. Done now. These 4 vent slats had been broken off. One of which was lost. So I matched up the ones that remained and glued them back in. Thankfully resin fractures without much elasticity, so it's fairly easy to fit parts back together if you have them. Some more touchup on this side console. All these parts are finished now (not the shield or canopy). This is a new vent, made from styrene. It was tricky to get the side angles to match, a fair bit of eyeballing and then trial and error refinement. Based. This other slat was damaged, so I used putty to rebuild part of its edge. The replacement slat, painted with a custom mix black/antique silver to match the dark (almost black) gunmetal used throughout the model.
smallconsolefinished.jpg.0248274f05eb6c01dad82cdc8c84a71d.jpg)
refiningandpaintingsideconsoleedge.jpg.a6ab2dac3aa0f043f51ee6f610dd7c4b.jpg)
refiningandpaintingsideconsoleedge.jpg.aabdc3f95539aa4865288162518a22f2.jpg)
refiningandpaintingsideconsoleedge.jpg.60e3195ce08957eae9fc3aaef1458426.jpg)
sideconsolesindehydrator.jpg.bf5358e17f439ef32cef5a89220bd625.jpg)
cockpitinteriorscratches.jpg.fb6ba3df76a17d086bf09ae9c5a8341f.jpg)
spotpaintingscratches.jpg.ddc6e89f736b743ee785346112af2b1c.jpg)
paintingothersideconsoledetails.jpg.73349894b513de84e2ad34979c02c823.jpg)
Royscollarpainted.jpg.f5a596e87cf9eeba591ef395c2c2888f.jpg)
replacingbrokenventslats.jpg.a8550e30d086f4bcde139041255d69e2.jpg)
replacingbrokenventslats.jpg.04344365d366fe2f7a63dc33cc45edaf.jpg)
refiningsideconsolepaint.jpg.df04491a3f9329386f5fbee5b078e8d5.jpg)
finishedparts.jpg.f423762d1ecfa67d2b94d09a126e722e.jpg)
shapingreplacementslat.jpg.3399ea940b5bbae1780c60c07244c962.jpg)
replacementslatbasecoat.jpg.5a406f2ced92f1d248b892f809d21c5d.jpg)
repairingdamagedslat.jpg.58df513a137894bc3ff7cab0ff3be421.jpg)
replacementslatmetalliccoat.jpg.38c493e513f00f7fadc28d9fd80e64fd.jpg)
-
05-17-22 Sanding the sides of the console edges. There were small chips and in some cases this meant that the paint was just lifted. But it all had to be sorted out and unified before repainting. Yes, more sanding. Did some touchup on the lower console, pulling the base metal color over some of the candy to clean up the edges. Painting the side consoles' silver.
sandingsideconsoleedges.jpg.5d1411c4b57b3fb26eeba12867bdbfff.jpg)
sandingsideconsoleedges.jpg.ab3d9ec3afdf51843b8f92ebbf197cec.jpg)
smallconsoletouchup.jpg.0292b2fe345b0dc51deeba5408a8d18e.jpg)
paintingsideconsolessilver.jpg.d08f64e8fbf419e010ddeea8bf5e005f.jpg)
paintingsideconsolessilver.jpg.f2eb1b8284bb18daff4581c32c7bfe4d.jpg)
-
05-16-22 Pedals are now repainted. Lower center console, at the beginning of painting the candy red (and blue) buttons/switches. The left dome is Tamiya clear red over the silver base, the right one is with only the base. A nice effect, and really easy to to. Small details done. Because of some very shallow chips I ended up doing a light repainting of the center console frame.
paintingpedals.jpg.fa252d5572f3d71e39189ec26e6a05ce.jpg)
paintingsmallconsoledetails.jpg.00343bf9361518244e84148eeebb41e3.jpg)
paintingsmallconsoledetails.jpg.0a99d3726f28f8cdde03c434a2a4f1d2.jpg)
paintedLCDconsoletrim.jpg.62a04b5d142c271cf68e37a3d4aa707c.jpg)
-
05-15-22 Found yet another chip, up in the far front. Sanded it down. More sanding and painting of that console support. Finally looking decent. The new front chip is painted, and the front details are repaired.
frontchipsanded.jpg.f7bb72cdce1c2e75c44a20209ee7a3ff.jpg)
standsandedandpaintedagain.jpg.78ab046b9f49c667a9fb78e0f1184b31.jpg)
frontfinished.jpg.c51b702f34a0382ff64b86e0068a9991.jpg)
-
05-13-22 Second try at painting the console stand. Front detail painted again. The obligatory overhead shot. There was a lot of touch up required on the dark rounded areas on both sides of the cockpit floor. After painting.
standpaintedagain.jpg.2694e826e6b8c7553baecc150c0455a6.jpg)
frontdetailpaintedagain.jpg.994d2eccfd2de2f5181f174a178d2679.jpg)
overhead.jpg.51b724d85a49f89011834d10d099df5e.jpg)
touchuponcockpitsides.jpg.ec008fce2a7b6a55edafdbf8a5b35b9b.jpg)
-
05-12-22 DOH! I was done and then saw that I had missed small chip. on this seat rail. Here it is filled - more carefully than other areas because it is so hard to sand/file around there. Makes more sense to take more care with the putty application than spend additional time having to remove material. Thought I was done with the console stand, but it needed more material. After sanding. Rail, sanded. Console stand, painted. More to come, it's not a great color match and needs more coats anyway. Rail repair painted.
missedseatrailchipfilled.jpg.2f8b5456ec6f0a423f66fec74bffb4fc.jpg)
morematerialaddedtosmallconsolestand.jpg.de84e66348caf6d9fde6bc9509e20792.jpg)
sanded.jpg.d1c312800d06c20b71030d40fd2e2879.jpg)
seatrailrepairsanded.jpg.41c9a8e99271eef87c82895d06fea29a.jpg)
standpainted.jpg.3153258935bd2cc492465d28644fb83b.jpg)
railrepairpainted.jpg.1949c197130883626543350f9dd5d10c.jpg)
-
05-10-22 That corner detail, primed and sanded. Lower center console, sanded. HUD supports primed... ...and painted. Lower center console, painted. Not finished, but base paint is done. Front detail painted. Again? Yes. I realized that my earlier mix of slightly metallic black paint had the wrong tone (was too warm) and wasn't a perfect match. So I repainted it. The corner, painted. Overhead pic, showing the various areas. I started taking pics from this angle later on in the project. Doesn't do much for seeing detail, but shows relation of elements well.
sidedetailsanded.jpg.9d857e00d262308005d3dbfeca5be9cf.jpg)
smallconsolesanded.jpg.66e228353c1079a428184fd9d8ffe01c.jpg)
HUDsupportsprimedandpainted.jpg.8a5137526b7d8a27291c4fac943f525c.jpg)
HUDsupportsprimedandpainted.jpg.8f60f0472829b1ba4343b3df16986fc7.jpg)
smallconsolepainted.jpg.12c191a1521441944cb06de19877fa80.jpg)
frontdetailrepainted.jpg.dd9867ec79ca0f1c7a15eafb90e1897b.jpg)
sidedetailpainted.jpg.98fb276e3a16aa01c89da21fb872a3f7.jpg)
overheadpic.jpg.8428849512b4b06137dd2e8f05ae0dae.jpg)
-
05-09-22 Filing closer to the final shape for this rear detail. Working on shaping a new surround for the left red dome, and smoothing out the flat area in the middle. There was more sanding needed. Yep, more. Filed and primed the repairs on the lower center console. Not all the way yet, but closer. Still needs fine tuning, and a replacement of the missing section at the far lower left. Refining the hole. Filled that lower left area. Rear detail painted, finished. Seat rails all finished. Floor paint not complete yet. Priming and more sanding on the center console stand. Painted that left front detail. You may notice that the contour of the hole's cross section is different than the middle version. Apparently, it is. The left and right versions of that detail have a sharper inner edge, the middle a softer rounded edge. Their sizes are slightly different too.
sandingreardetail.jpg.4004b28a995b5e22ade81f2179d8c5b3.jpg)
sandinglowerconsole.jpg.1487f2285c064f85331bb4cbdbd8cd02.jpg)
seatrailrefinedandprimed.jpg.ecc5132bcbcffc7d0d48b91e87254640.jpg)
smallconsolerefinedandprimed.jpg.3e78d909eb350c76ad44c28a62a731d8.jpg)
frontdetailprimed.jpg.f0dd9443aa2bc2ca164e76f1282e240d.jpg)
morefillingonsmallconsole.jpg.15492c279ec92a4f2ca56fc8cf892ce2.jpg)
reardetailpainted.jpg.cbbb39c732684ad077e02d3babb67fd8.jpg)
seatrailrepairspainted.jpg.d62e3315983b509d7cb51e86dd51f968.jpg)
sandingandprimingsmallconsoleandstand.jpg.2be4192c07668e21c2c428fc86720e60.jpg)
frontdetailpainted.jpg.9229f58d0c0b95f743a6844f30ea57c9.jpg)
-
05-08-22 Sanding and priming the HUD supports. Went through a few rounds of this to fine tune them. Also, I forgot to mention before that I used the existing, cracked, HUD panels as a spacer to ensure that when I glued the supports back on they had the original width at the top. Reverse angle. Notice the small gap in the far support. To be fixed. Filing this corner repair again. Another area that seemed simple but went through at least 3 revisions before I was satisfied. More seat rail refinement. And more center console support refinement. Dremelled-out the hole in this repair. And by Dremelled I don't mean Dremel. Far too big and clunky, and too powerful. I used a $15 nail polishing rotary tool via Amazon. They accept 2.5mm shafts and are super easy to use for more delicate and precise applications than a Dremel. Seems like the styrene-to-resin hardness range is pretty similar to the nail-to-horn hardness range.
sandingHUDsupports.jpg.1a5a7c4bc7907687942ca452bbca42f6.jpg)
sandingHUDsupports.jpg.d1b8cbe6b57f3aa7120f0b0c4d794f19.jpg)
sandingleftsidecockpitrepair.jpg.b5ad436ab95879c04e801ddd40a9ad04.jpg)
sandingseatrails.jpg.a420e567a4e15ab98714408899df7dde.jpg)
sandinglowerconsolestand.jpg.09b96611b37b914ebf23a172d43faeb8.jpg)
sandingleftfrontdetail.jpg.49c52a7cc125431ff0d141ce811612e3.jpg)
-
05-06-22 Sanding that lower edge of the center console, starting to look pretty good. It may not be clear from the pics, but there is an angled miter fillet toward the more open area that also needed to be shaped through putty and filing. Putty beginning on the HUD supports. Port seat rails filed.
sandinglowerconsolestand.jpg.262993fb938f229cc252112dc7415f29.jpg)
sculptingrepairsonHUDsupports.jpg.5b859f9f17a71fe754b19c742b0fe26c.jpg)
sandedseatrails.jpg.917011b1efd7923cabc958aa002fa810.jpg)
-
-ROFL, I spent so much time looking that I never actually read the sign! Thanks for pointing it out.
-
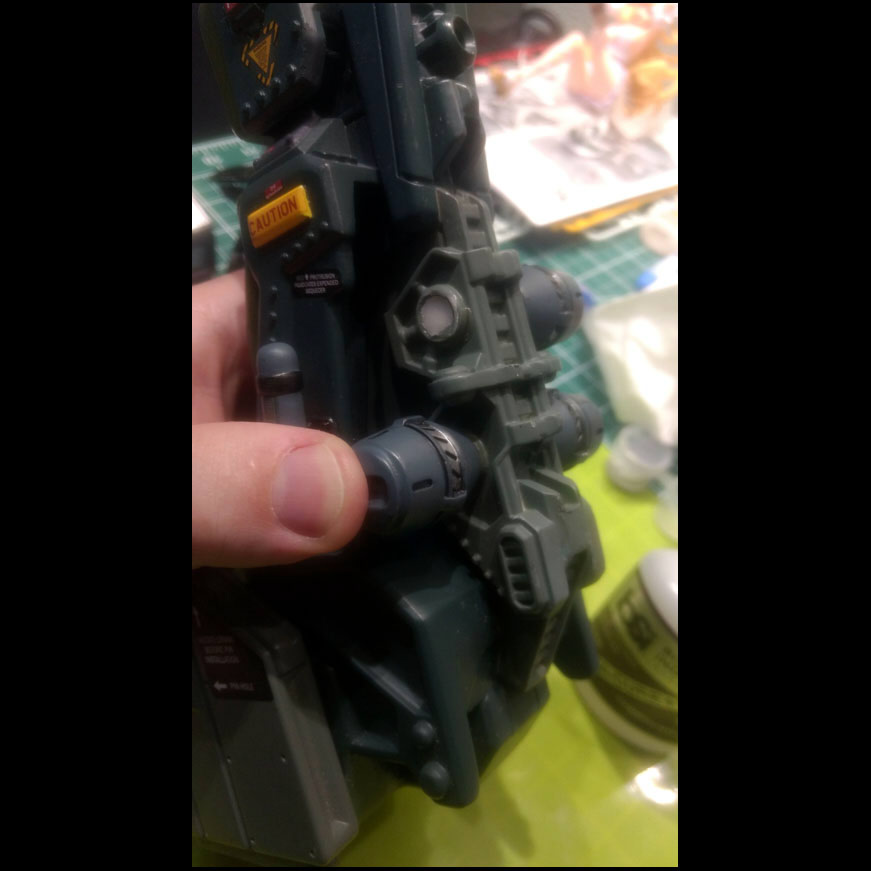
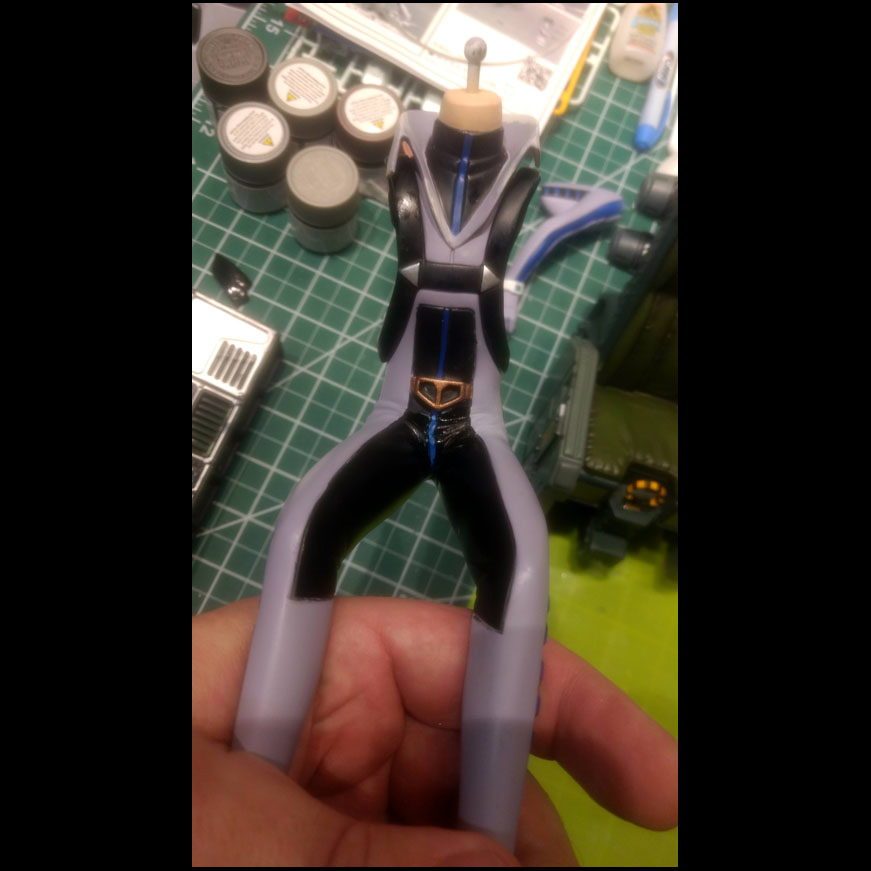
05-05-22 This was a fun day, finally got to see some parts reach their fixed state. But not this one, not quite yet. I did find a good color match though. Also touched up various scratches on the seat cushion and the ejection handle. Roy moved around a lot. Repainted the damage done to both decals. I thought that was going to be really hard, but actually it wasn't too bad. Thankfully I didn't have to repaint any lettering! Painted the purple on Roy's leg... ...and collar. And yes, you can still see the inner support of the replacement pieces if you look closely from certain low angles. It's the best I could do at the time. At least they are invisible from the more common higher viewing angles. Turning my attention back to the side consoles, sanding deep chips in the paint. And more sanding. But technically filing. Diamond files are small enough to get into little detail areas, and fine enough that the resulting surface is smooth enough for painting. I also went through and refined the contours of all the replacement rivets. Painting the blue trim on Roy. You thought it was painted before, but not well enough. That was the base coat. You don't believe me, scroll back up and look at the difference. Both HUD panel supports had been broken off. And some of them was missing as debris. So I began their repair by gluing them back into location via the snapped, but otherwise undamaged, rear supports. From the other angle. Putty will be used to fill the gaps, just like all the other repairs. Some small chips on the throttle. Painted. Also, notice the slight red overpainting onto the silver? I wanted to fix that, but it's original Kidslogic application, so I left it. Otherwise where do I draw the line on "fixing" their imperfections.
improvingseatrivetsilver.jpg.b2c6f8d17acabfddf6998c0c03c69f6f.jpg)
paintedscuffsonseatcushionandpullring.jpg.ae4d31d02fd85bf20e35f38647ffb2d1.jpg)
painteddecalrepair.jpg.29d8bee5a6a8e95c54c71c69cf128dbb.jpg)
paintingRoypurple.jpg.96e068f18578bdf69ea19d6860c06610.jpg)
paintingRoypurple.jpg.0777021b24c22bc5edce3a4fe1f08de2.jpg)
sandingsideconsoleedges.jpg.1663e8a023f531f01c8d031c276732cd.jpg)
sandingsideconsoleedges.jpg.bbf966563483606f68051c08cf947506.jpg)
refiningsideconsolerivets.jpg.5711d389c32e1a4749c2ddea90f3b0bd.jpg)
paintingRoysblue.jpg.6a6829246d335b7971dc42dd499ca5f4.jpg)
HUDsupportsgluedbackon.jpg.a6d444c2a107c92fe480abbf415f7058.jpg)
HUDsupportsgluedbackon.jpg.0ead55fae1d9b903bc35e78082b76afc.jpg)
paintingthrottle.jpg.4897645fe8f8a70c619ed61bff9bbfae.jpg)
paintingthrottle.jpg.b6e4e0c36888bb45d8f7c1a36b298bef.jpg)
-
05-04-22 When is purple not purple, but it's purple? Various shades of acrylic paint (especially blues) will vary in how they darken as they dry. This [can] make it very difficult to dial in a perfect purple color match. I used the inside of this arm to test swatches and dial in the right ratio. A hair dryer helped speed up the time lag to see color shift. More sanding on the collar, far finer grit now, just unifying transition areas. Painted the seat rivets with a base silver. Not close to the correct color, but at least the base coat lets me see any defects in the repair. The main LCD panel joysticks. One had to be repaired and touched up. The two primary joysticks, display and two-piece to go in the hand.
purpletestswatches.jpg.76eb4571c89768b4c1c273087d097184.jpg)
refiningcollar.jpg.5c47eed0185b0459513ef49265ed7823.jpg)
paintingseatrivets.jpg.b920d5262daec82f2a5c8ae98ce6a6a3.jpg)
paintingrepairedLCDconsolejoystick.jpg.4bbba6b030214ce76f3a477881acdce7.jpg)
paintedalternatejoystick.jpg.e7fd828c90d65b3bc0191220ad7120a6.jpg)
-
04-27-22 Ahhhh, the seat rails...Such a simple shape, that was so hard to correctly angle a tool on! Both rail sets had multiple chips. Most of the sanding was diamond files, various angled ones. There is no way to remove any parts, so reaching between the outside rails' sides and the cockpit walls was really tricky. Here is one set, puttied. And the port side. Making more progress on the lower center console damage. And beginning the filling of the upper details.
seatrailsfilled.jpg.484b0fd8bad6a64d270f38839fa40b66.jpg)
seatrailsfilled.jpg.8ce4b9976b06f13aa8f91bc8bb738a0d.jpg)
centerconsolestandfilled.jpg.8803b56ecedccebfa44affcb38d5e51a.jpg)
centerconsolefilled.jpg.82d14a1a9b7198050403887c3bf7cca6.jpg)
-
04-26-22 Sanding the collar repairs to hide seams and thin the profile of the new sections. Primed. Filed the front cockpit "thingy" putty. Filed this rear detail. Filed this chip repair. And sanded/diamond filed this hard to reach area, made more difficult because it needs to be flat and straight in 4 different planes. Thankfully the grate area was undamaged! More sanding of this detail. Overall shape is good, inner recess needs more work.
collarrepairssanded.jpg.3e54e2870f151b9ec84308320e4ed5f2.jpg)
primed.jpg.8ecbc53e0b4d3b73f56d48bb73f2ce9c.jpg)
cockpitfillingssanded.jpg.f6f5b5681ecc003d4805015c9c6855a3.jpg)
cockpitfillingssanded.jpg.6c5a3075bbc1a1999d04d3ad7461762c.jpg)
cockpitfillingssanded.jpg.071704e4956274f6459af53c34b6f1cc.jpg)
cockpitfillingssanded.jpg.1038eff0ac89517e3b3f27a5f8c43804.jpg)
cockpitfillingssanded.jpg.6ed312b6301d27306f3cfb45cec601cd.jpg)
-
-Thanks man, appreciate it! Prior to doing any work like this (this being my second restoration project, and the first without any small detail) it would have blown my mind too. Now having tackled it I can honestly say it's not all that hard. It's mostly just being willing to try and fail and then try more until you get to your goal. It's a lot more about determination than talent, and it gets easier as you gain experience.
-
04-24-22 (part 2) I now turned my attention to the cockpit itself. Which started with flagging all the repair areas with blue tape. Although often one flag represented several points of damage. Like the pic below, this flag is for the center console's broken upper edge and also for both broken foot pedals... ...which in this picture had been glued back on. Thankfully they fractured cleanly and I did not need to fill any gaps in material. They were repainted though, to ensure uniform color. One of the few easy fixes on this project. This corner detail had a chunk of resin missing. As did the bottom left of the center console. This was, as I would learn, the most difficult area to file/sand. Puttying the center console. Gluing the center console's upper edge back on. Note the metal wire, which strengthens it internally. Or, apparently, didn't. I would have to fill and sculpt the missing detail, something I wasn't sure I knew how to do at the time. Also puttied this corner that had had a chunk chipped off. Putty on this front detail. Fairly messy application, I over filled it intentionally because I figured I would have to carve out (rather than sculpt in) the recessed shape. This detailed projection is behind the seat, under the rear console that lights up. It had been broken completely off and lost. So I had to sculpt a new one to match the one opposite it. Initial application is heavy, assuming it would be best to file it down after curing. One of the joysticks was broken, so I pinned it. This was the 2-part one that you can put in Roy's hand. But it was the tab that broke, and jammed in the female side, so this pin will be the replacement for that function. And I also glued the throttle controls back onto this side console.
flaggedareasformainbodyrepairs.jpg.816ac9e8b5f6f71250e792ed3ffd3416.jpg)
flaggedareasformainbodyrepairs.jpg.3184df65345bd74801c7483863407986.jpg)
flaggedareasformainbodyrepairs.jpg.65566c07a0f69f62eae4ab3e89d48035.jpg)
flaggedareasformainbodyrepairs.jpg.42866b7a34ea924182355a06997144bb.jpg)
flaggedareasformainbodyrepairs.jpg.1ca05205857c30ad877500619a21a245.jpg)
flaggedareasformainbodyrepairs.jpg.ecd22609178d90de0f4f1001674f59c1.jpg)
flaggedareasformainbodyrepairs.jpg.032e2998b92b92c5673eb960ddd07c83.jpg)
flaggedareasformainbodyrepairs.jpg.fc188c36555fb27564647d4653459817.jpg)
flaggedareasformainbodyrepairs.jpg.6ab6d580fdd667054dabb7da7d0f7db0.jpg)
pinned.jpg.cb93135e160ae84ccdb5f7b213517653.jpg)
throttlegluedon.jpg.6e323014025b9a45c6e87dfb33dafea6.jpg)
-
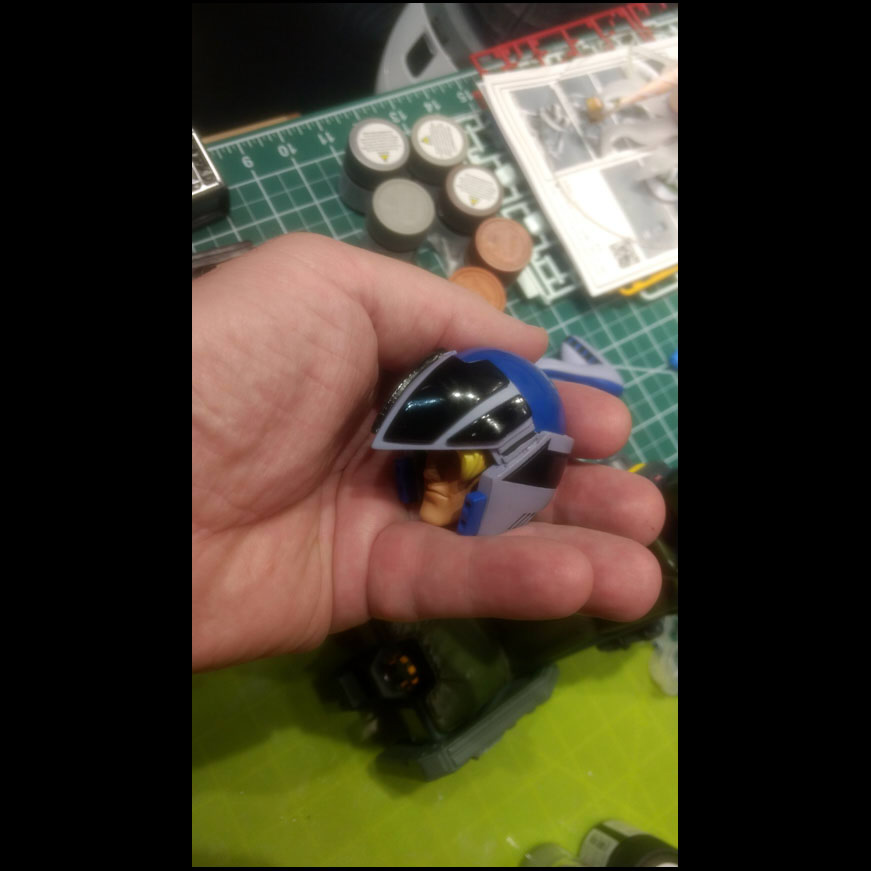
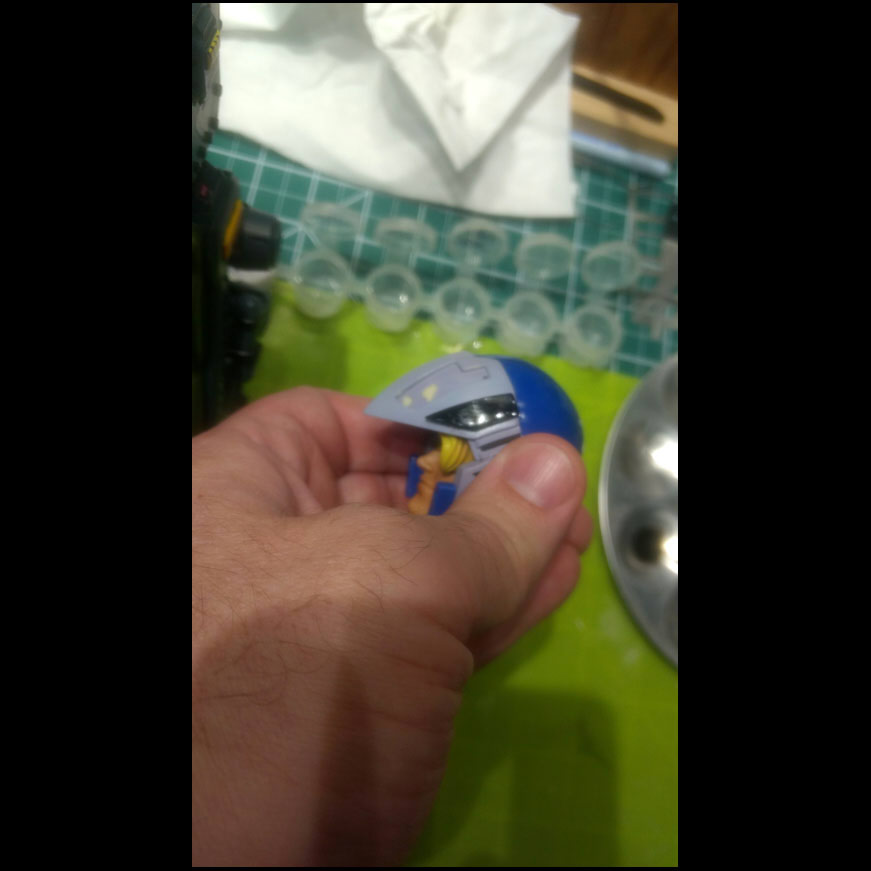
04-24-22 (part 1) Roy's helmet reassembled after the black and purple repainting. Careful attention was paid to clearcoating them with a matching sheen to the existing paint. Fairly straightforward, Tamiya Flat over the purple, and the black was simply Tamiya Gloss Black. There was also a small scratch on the blue that needed touchup. I cut replacement rivets from a styrene rod and glued them in place. More work to come. Ditto for the various missing rivets on both side consoles. Maybe 10-15 of those. These are Roy's new collar points, cut from a sheet of styrene. Pretty much just eyeballed these, which was easy because I just followed the lines of the existing collar. Here they are glued in place. This is one of the few areas where perfect "hiding of crimes" is not reasonably achievable. Because the collar is so thin there is not enough surface area to make a strong glue bond. And it is too thin to pin (with my limited skills). So I made an inner support that will underlap both the new and existing collar areas. You can see one in the pic below., where the collar appears thicker. The idea was to first make a strong bond, then file the support thinner and smoother so that it was far less visible. Much more work to come. Using putty to repair a busted edge on this side console. Pencil for scale. Filling the collar gaps with epoxy putty. Which will also strengthen the bonds. The central LCD panel and frame had been hit hard enough that they were both detached from the base. Luckily, however, neither were broken. A few tiny chips in the frame's silver paint (not fixed as of this pic) but otherwise it was a simple matter of gluing the LCD and board back in place and then the frame over those. You can see the broken base of one of the side joysticks in this pic (opposite the hole for the other in the left-side black area). I used a file to round over the new rivets on the chair (on both sides). Without a ridiculous amount of time these would not reach perfect. But I realized early on that perfect was not existent on this cockpit anyway - there was a lot of fidelity variation from KidsLogic. Thus my goal became to fix things to within the tolerance range so that they would appear to have been unmodified.
chairrivetsgluedon.jpg.83c9f87e49fae7d721b44d59311608e9.jpg)
replacingbrokensideconsolerivets.jpg.6028f4bf434e0a95cae4b15c8623ec19.jpg)
leftsidecollarparts.jpg.6b9512af3c675c42147df351bfe24fab.jpg)
gluedinplace.jpg.f2bd6626ef1723bedc9f6be602f5a6ea.jpg)
moresideconsoleedgerepairs.jpg.e7add66a3aa3982153d41f202d47a1d7.jpg)
collarfilled.jpg.bdad05bdc35e874444b8f4b038a06a11.jpg)
mainLCDarefixed.jpg.877ebf978911dca20fee3426343bd898.jpg)
chairrivetsrefined.jpg.a714b6f75fdeb4a64f936f14e9a8e4f7.jpg)
-
04-23-22 The thumb, painted. I used both Liquitex heavy body acrylics (thinned considerably with airbrush thinner) and Tamiya model acrylics. The former for custom blends (like Roy's purple), the latter when I could find a match with what I had on hand. For consistency it is better to use a color, straight from a bottle, but often that's not possible. All paint on this project was applied by brush, partly because I wasn't confident in my airbrush skills at that time, but mostly because the KidsLogic paint was so thick that a brush application gave the right visual depth. To avoid brush marks I would use multiple thin coats. Repairs were sealed with Tamiya clears, also brushed on. These marks are from loose pieces bouncing and rubbing during shipping. I found that gentle wet sanding with a worn-out Godhand 400 grit sanding sponge was sufficient to remove the marks without cutting through the original paint. This is the same principle as Mr. Clean Magic Eraser (which is just a block of melamine foam), but more aggressive. And while we are on the topic of sanding, BE AWARE that there are THREE different grit standards! In the USA companies usually use the SAE standard of measurement, European companies usually use their scale which is (usually) denoted with a "P" next to the grit, and the Japanese scale is not denoted as such but pretty much every Japanese or Chinese sandpaper grit will use that standard. This matters because the grits do NOT correspond directly, AND as they get finer the differences become more pronounced (it's not a linear scale). You can Google or Wiki for more info, but in practice you just have to keep it in mind so that you can understand the cause and effect as it pertains to your project. The other aspect of sanding no one seems to talk about, and companies do not reference as far as I know, is the "tooth" or depth of the sanding medium. This became apparent to me when removing these marks. The same Godhand 400 sponge (roughly equivlent to SAE 320 grit), if new, would have cut through the paint very quickly while leaving a very smooth surface. But the worn sponge I used allowed for much finer control because it cut much less - but the grit had obvisouly not become finer with use! So what happened? The grit wore down, it lost some of its depth. So it cut with the same degree of fidelity but removed less material. I thought this was an important detail to remember, as it would not have been possible to gently remove these marks if I only had fresh sanding sponges - as even a finer grit would still have too aggressive a tooth. I stopped counting the marks on the leg when I got to 25. All but one (a deeper one) were removed by gentle sanding. The deeper one was sanded and then colored with a couple thin layers of the purple, essentially glazing. Sanding down the primer, the thick KidsLogic paint created noticeable steps along the chips' perimeters. The primer helped fill those, but it also required a lot more sanding. Refining the leg textures. Some of the many side console chips, sanded smooth. And painted. Not exactly perfect, this would be improved later. Gluing the seat pods back on. CA glue (Bob Smith, to be exact). In hindsight it would have been better to pin these, but I knew the seat was going to stay in place pretty much forever once this was completed so the risk from handling was minimal. Painting the black on Roy's suit. Starting to paint the gloss black on the helmet panels. Sorry for the crap photos. I had an older phone at the beginning of this project. Painting the replacement end of the side console.
finalthumbpaintcolor.jpg.09b61432c403594965f511db6b5d37fa.jpg)
marksonarm.jpg.49fea45faf3f7c48a4d10bd55be23812.jpg)
marksonleg.jpg.ee54b6fe338fb819b17f80d9df7be98e.jpg)
collarrepairareassanded.jpg.60f235d4d06d1f4e08ba82b249688623.jpg)
refininglegrepairs.jpg.2c986f7343279cd57e50876547731cf9.jpg)
sideconsolechipssanded.jpg.131e1a6b4209e461ecfcc65ddabfc3c8.jpg)
sideconsolechipspainted.jpg.2e042710e0774d86f07f4599fa321de0.jpg)
-
04-20-22 The corner of this side console was broken off. Epoxy putty to build up the area. Btw, the lime green mat is a silicone mat. They are cheap on Amazon, and stuff like epoxy won't stick to them. Sanding to make it smooth. And by sanding I actually mean filing. Fine steel or diamond files are rigid, and thus better for sanding when you want a really straight, flat surface. Most often I use Godhand sanding sponges, of varying thickness which changes their flexibility. The canopy after polishing with Novus. Looks really good... ...except it casts shadows because the deep scratches are all still there. Which means that even if you don't see the scratches easily, you would see their shadows on the interior. Unacceptable! So will have to come up with a better technique. Scratches much more obvious when held up to a light. I got out various sanding pads, ranging from 1800-15,000 grit. At the time I thought wet sanding with these would be the right choice, following with Novus. Close, but not close enough. Better tools/technique to come later. Repairing and sanding a chip on the back of the seat. Had to match not just the angle but also the degree-of-round of the crease. Through almost all of this restoration I kept having to tell myself NO, don't make it better, make it match! When you get up really close a lot of KidsLogic sculpt is...to be nice: "crunchy". Far from the precision of a model kit or diecast. Which is fine, but those are my mind's references so I had to constantly adjust my goal. The thumb, primed. Priming repairs on the helmet. I was using Mr. Color gray surfacer, applied by brush. Still refining Roy's leg. More sanding on that first side console. Starting to get the shape right. Tricky to get a tool in there at the right angle. This was mostly shaped with a couple of diamond files. Priming this repair area.
sideconsolebreak.jpg.e74852a44ad4b5feaf2e8f2ed99cecfb.jpg)
sideconsolefilledandsculpted.jpg.0877562b4cac561790afe4784c144908.jpg)
sideconsolesanded.jpg.ced6c3722935ee1479c4623b0c6bd823.jpg)
canopyafterpolishing.jpg.f7e57cdb268093a87f6ac92550ac8f10.jpg)
canopyscratchedheavily.jpg.f4e35d198e341ec2cc18e8e197bbe3ec.jpg)
canopyscratchedheavily.jpg.c3e11993bcf983ea250363c1c8fe8e2a.jpg)
initialscratchremovaltoys.jpg.b66cf779a3039b22a9bc143f1def6ee5.jpg)
morerearseatsanding.jpg.5cec6aad1fb4f90cca8e59820648724f.jpg)
thumbpainting.jpg.5570ed0ac752d1146cde1bdaa0d45e26.jpg)
paintingpurpleonhelmet.jpg.13d61953ec4eea5c7a3108ec80a24245.jpg)
refiningRoylegrepairs.jpg.1a286fb92c122b1bb7cca8b018d09d05.jpg)
moresideconsolesanding.jpg.d9c2f9249293ab6c00c296f86fb8593f.jpg)
additionalsideconsolefillingandsanding.jpg.83f488e8157807de22f4e4a351b172bf.jpg)
-
04-17-22 Used Apoxie Sculpt to fill areas on this side console. I used this putty for all the filling during repairs. I've also used Magic Sculpt and find them to be very similar and essentially interchangeable. Use water on your tools to prevent them from sticking to the clay, smooth and shape it as best as you can and assume that you will need to sand later to achieve the final shape. Except in some areas it is very hard to get a sanding tool into the area, so in those cases you need to sculpt with much more precision. Drilled and inserted a pin (cut from a paper clip) to support the putty that will become Roy's new thumb. Putty to fill in the missing material on Roy's leg. The sculpt is rough, will be refined with sanding. Filled and seat chips. Thumb sculpted. And sanded. Prepping collar via sanding. KidsLogic's paint was VERY thick on this product. So any place the paint was chipped required significant sanding and/or filling. My thought to repair the collar was to make new pieces from styrene and blend those to into the resin collar. Hence why it was important to completely remove the paint from the transition area. Side console, after initial sanding. Seat fillings sanded.
chipsfilled.jpg.034eb06c4646c8f83264b8ddc7762f4a.jpg)
pinforthumb.jpg.03d4c6a0f7d10915dcc852f8b035f9d1.jpg)
Royleggluedandfilled.jpg.7a8d526adc72a8bab58c6ecd70897025.jpg)
seatchipsfilled.jpg.568d07d2ebe96fbf168e8c888fc9377b.jpg)
Roysthumbsculptedoverpin.jpg.e75401282c82c4c25a5900b315c08e88.jpg)
Roysthumbsanded.jpg.e4bf5148c6c52c8e4df2e4c091f3675e.jpg)
Royscollarprep.jpg.cdac4aa96fa800e7c8435da323562211.jpg)
sideconsolerepairsanded.jpg.587b4f6e5cd28285e202fd313c1141e2.jpg)
seatrepairssanded.jpg.ab05d97e17142fe15fb452338453d747.jpg)
-
04-16-22 This is your canopy after bad packing: This is your canopy after a single pass of Novus 3: Most of the damage was paint transfer, and the polish quickly dissolves the binder, removing the paint. Unfortunately removing the scratches took much much longer, but more on that later. Canopy had separated from the frame here, glued it back in place. Another pic of the side console, had cleaned it up a little prior to putty. Both sides of the seat had been chipped across a rivet area.
originalmarksandscratches.jpg.e40ab032593ee5d616b95b158136af08.jpg)
paintmarksaftertestpolishing.jpg.7b444c454f9350d1f05ca5e011ac7d82.jpg)
canopyframeseparated.jpg.715ab166e87ba8f542e6c69ffd3dc5fe.jpg)
chippedsideconsole.jpg.683a4e189ba10e2637098dcfeee00f28.jpg)
chippedseatsides.jpg.bff9a3a8ce7b82db6845bb75d9ae05c2.jpg)
-
04-14-22 I decided to start by repairing Roy. I'm not sure why. In some ways (mixing the exact purple) he was much harder to fix than other cockpit damage. In other ways, namely accessibility of the damage, he was much easier. Both collar tips were broken off, as was his left leg. I decided there was enough surface area through the hip break that pinning wasn't necessary. So this was a simple CA glue bond. Also, it will be reinforced later through the addition of epoxy clay to replace the missing material. Two black panels on the helmet were detached, and there were many chips. I glued the top of his helmet back on prior to the other repairs. Hard to fly without a thumb. Also glued the canopy frame back together. There will be touchup later. All 4 of these...things, had broken off the back of the seat. A really big chip out of one of the side consoles. This caught my attention at the time, and I didn't notice until later that there were 20+ smaller areas of damage on each of the side consoles. Lastly, I flagged all the (ones I noticed at the time) damaged areas within the cockpit. To be returned to later.
.jpg.4bec1635a3e6a268bf925c400473401f.jpg)
.jpg.509696bb51651ed2e82a14e108c6238a.jpg)
.jpg.b65373dadac18f28e6b19108684c0e18.jpg)
.jpg.8540f86b73ff6798a1bde416c71ff569.jpg)
.jpg.9c6e43f0f04bd6b11cc1ec371faec676.jpg)
.jpg.1ba6177643fd56df9e5431e6669c34e2.jpg)
.jpg.f9411d55254041538ed768076a9cd41a.jpg)
.jpg.a84f93cc3219a8637274cf7dc7dbb88f.jpg)
-
Hello again all. To cut to the chase: Last year I inspected and volunteered to restore jenius' secondhand 1/6 KidsLogic VF-1S cockpit, as a thank-you for all he's done for the Macross community with his AWESOME website. The cockpit had been trashed during shipping because the previous owner had simply tossed all the detachable parts into the cockpit, rather than repacking them in the protective foam. And hard resin makes for bad ping pong balls! The shield was cracked. Pretty much every component was damaged in some way. And the canopy (which became the bane of my existence) was scratched and marked from all the bouncing of parts within it. And it's frame was broken. But after examination I concluded that apart from one particular small stretched spot on the canopy it was all potentially fixable. So I worked on it over the course of 2 1/2 months and completed the restoration in about 80 hours. My purpose in posting is to document the process, in the hopes that it might inspire others as to what is possible with very little skill and a lot of determination. If at any point I neglect to specify as aspect of a technique, post your question. I will share as much as I know. As I condensed the photo log to "only" 219 essential pics I will have to nibble away at updating the thread with one or two days' work at a time. Please be patient as I'm not sure how long it will take to update the story to its conclusion. Here are the parts on my table, separated as a sort of triage to mentally prepare an order of operations for the upcoming procedures.
.jpg.cee77a4bd0579e806c91a96f18562e4f.jpg)
.jpg.b9452d5468920607587e299475b37b5f.jpg)
instudioforrepairs.jpg.45d266c7c0f0afae46ed938b969e782b.jpg)
instudioforrepairs.jpg.23d949d0356fa6e0f10b6b911094bce6.jpg)