

NZEOD
-
Posts
1955 -
Joined
-
Last visited
Content Type
Profiles
Forums
Events
Gallery
Posts posted by NZEOD
-
-
4 hours ago, kajnrig said:
According to Japanese fans, the basic plot is the same, just super condensed. Spoilers for plot-relevant mecha details:
- Mirage hijacks a Ba and uses the insta-camo feature on it to generate this scheme. She uses it to help Hayate and Freyja escape Windermere.
- Reina I think hacks the drones and Messer uses them in his death fight against Keith.
- Chuck and Arad get Armored VF-31s. Pic in case you missed it:
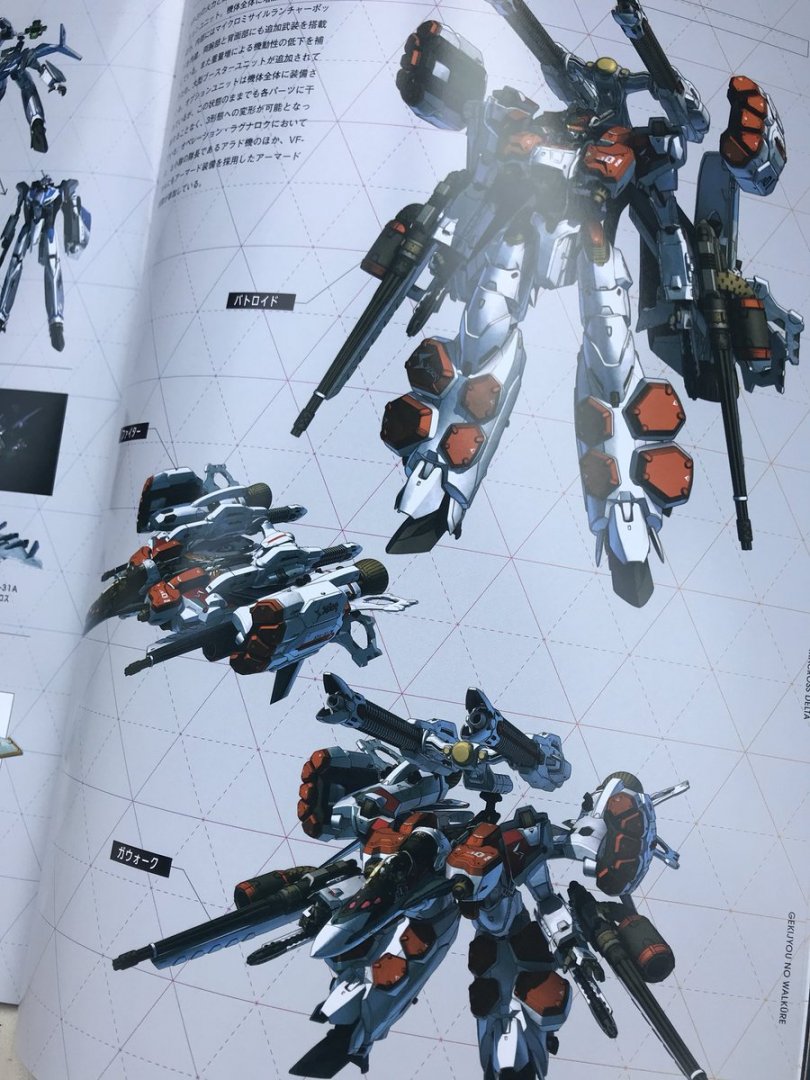
Armoured??? Thats not armoured. Thats death blossom mode! Damn!!!
-
I'm guessing that Ba is a fantasy machine? Or was it in the series and I missed it?
-
wait... is the movie different from the series?
-
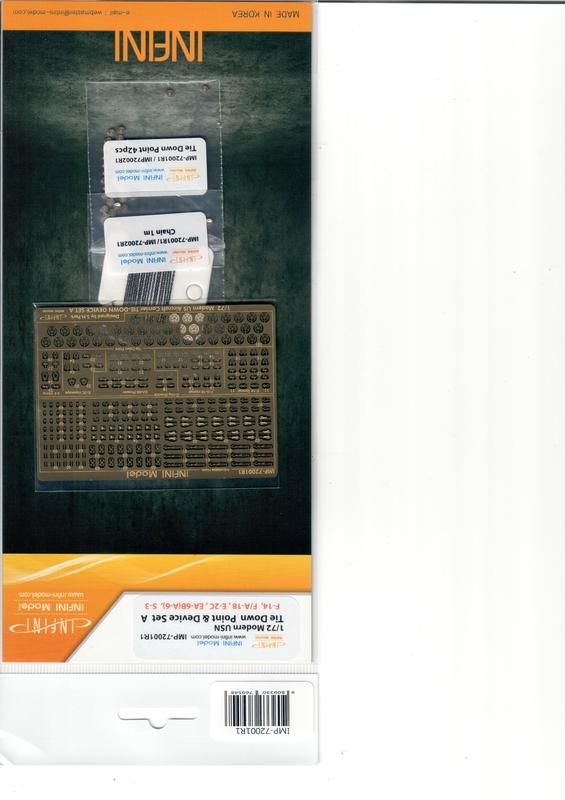
The figures I bought ... so far - eyeing up another 25 for the Destroid dioramas...
Plus the 1/72 scale chains, hooks and tie downs. A Wave Corp. VF-4 of VFA-213 Black Lions is going on one of the Carrier Deck displays in a weeks time.


-
Expect a black lions one in a weeks time team
-
I'm assuming its simple enough to omit the Lil Drakens so the 31F can be built standard.
-
9 minutes ago, Grayson72 said:
Wow! great find on those figures Nzeod, thanks for sharing!
I'm going back to get some more. French ground crew for destroid techs and the black hawk helo pilots with body armour as destroids pilots for my wave destroids
-
Waves destroids were amazingly well designed so this one should be easy
-
-
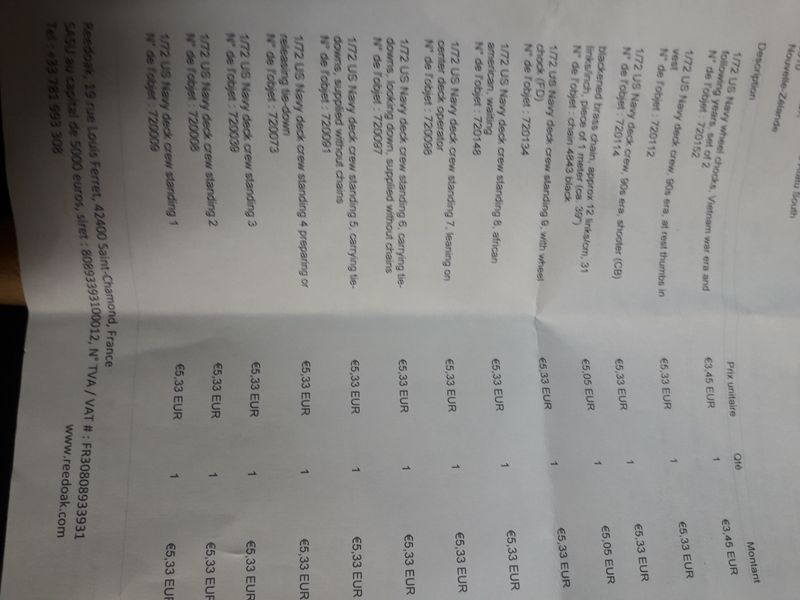
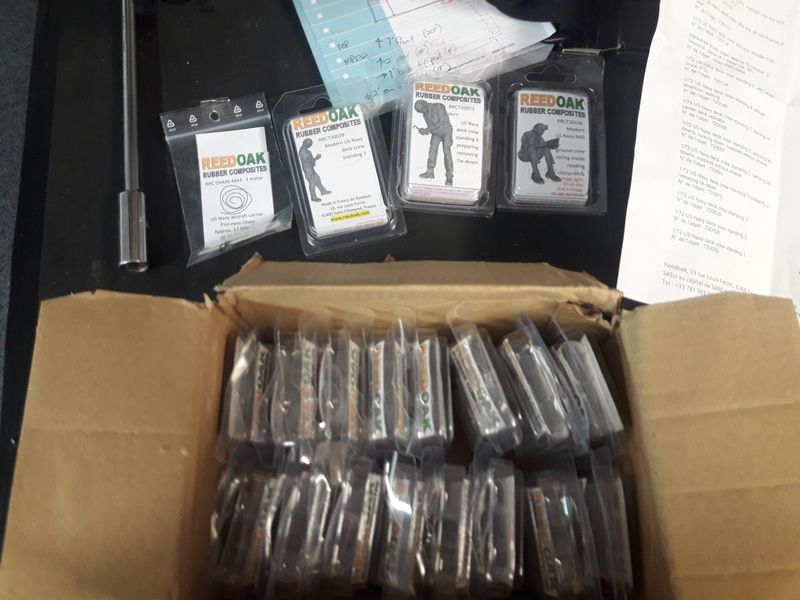
Ok... I came across a source for 1/72 carrier deck figures from a guy in France who operates under the ReedOak label.
Carlos, the guy making the €600 carrier deck dioramas has some of the figures in his diorama wip images painted plain white. As they were insanely detailed I assumed they were photoshopped images of real people... well...
They aren't!
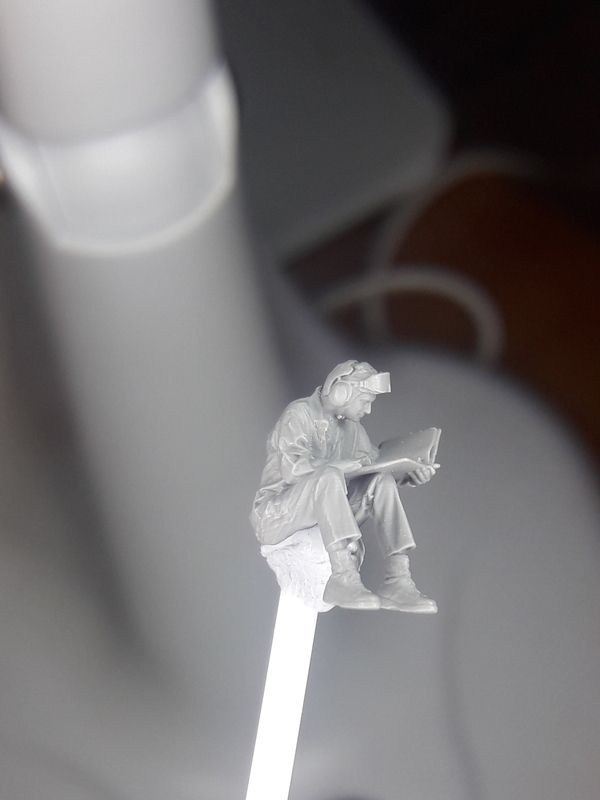

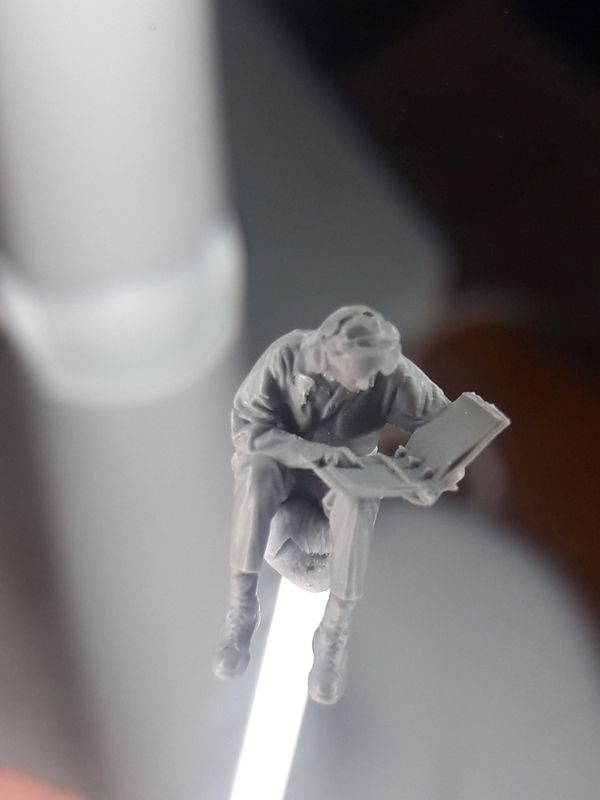
You can actually see the damn ring binders on the Checklist SOP folder!!
Sooooo me being me... I bought every different pose he had. And this just the US Navy crews. There are helo crews, RAF crews, Russian ones and French ones, men, women, Caucasian, African American.
-
If I touched alissas makeup products I'd be executed
-
It's not my colour polish
-
Check again... more images. Nail polish was for scale reference... these are 1/144
-
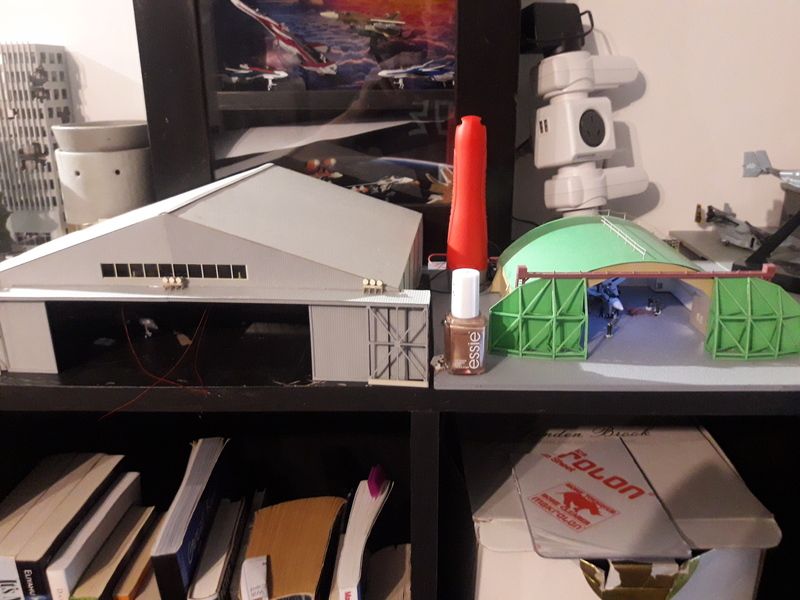
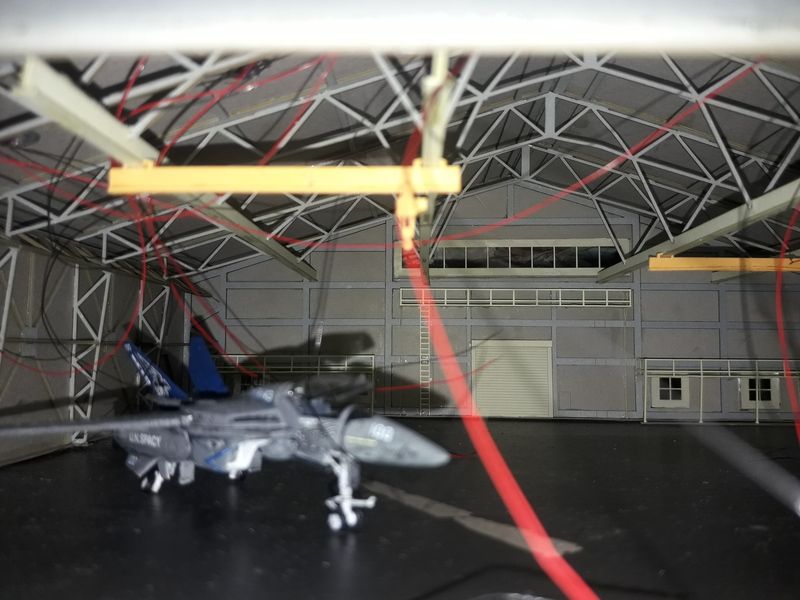
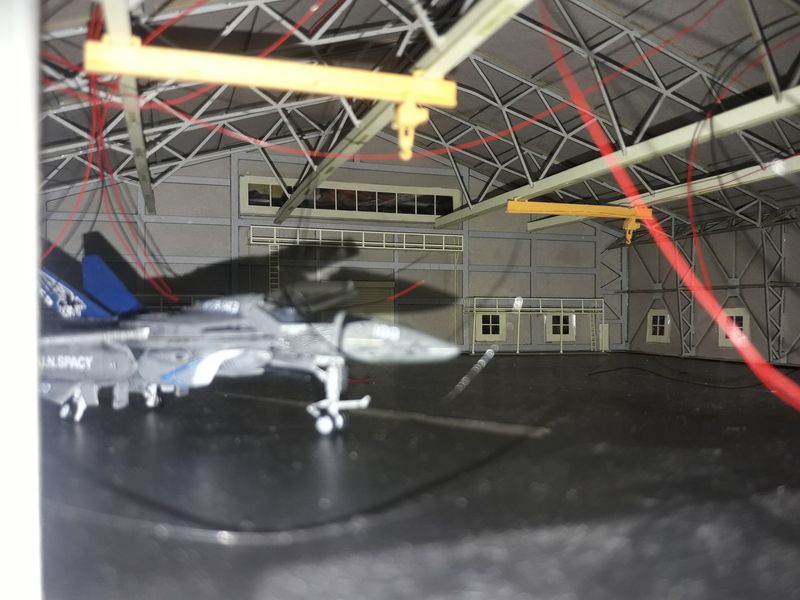
Another hangar nesting completion for my macross airbase
-
who was the Aussie printer?
-
On 6/04/2018 at 9:36 AM, arbit said:
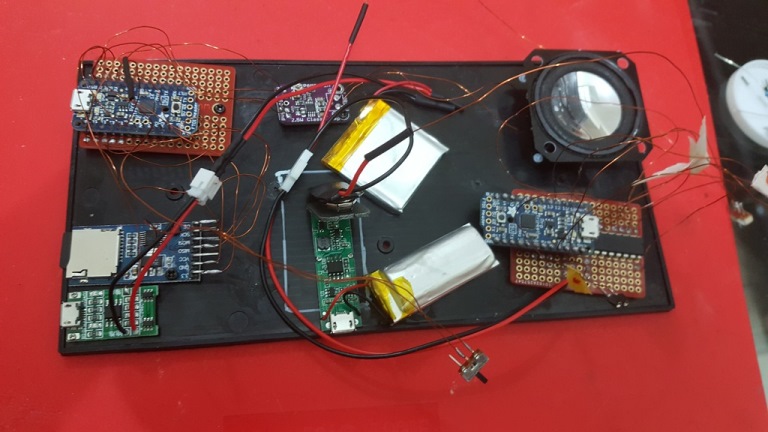
Preparing the electronics in the base, and threading the wires one by one.
That is two Trinkets, one for the lights and sounds, and one dedicated to the motor. There is a motor driver IC, an amp, a speaker, two LiPo's and LiPo chargers, and an SD card.
If you replace the Trinkets with Arduino Micros, this whole set up costs less than USD 20, with most of the cost going to the batteries.
Most importantly, anyone, and I mean anyone, can manage the Arduino. So let me know if you are interested.
Dude... seriously... Proud of how far and fast you've come with this
-
On 2/04/2018 at 2:02 AM, arbit said:
Google search tells me you have April Fools in New Zealand.
ah
ha
ha...
ha
well played
-
you better be joking.
btw... the real jetfire is far less glamourous.

-
3 hours ago, arbit said:
Cool. But remember, fiber wont work with movement.
ahhh yes it will..... there are plastic types as well as glass now
-
I'll have a play with a set of wings over this easter holiday and see what options I can draw up on simplified wiring paths OR fibre optics.
-
smd resistors would fit inside the wings so in theory all the wiring could still fit between the top and bottom wing panels. To solder to SMD resistors takes a special kind of patience/madness and a really good soldering iron and tip. I fail at it often.
Fullsized resistors could be hidden in the arms perhaps...
1/8w even smaller that 1/4
-
12 hours ago, arbit said:
The 1000ohm resistor is outside the valk. The wing is getting power from the 5V Out of the arduino powered by 3.7v-4.5v lipo. Why am i using 5V Out and not the GPIO pins, because the MaH from the arduino pins is not enough to power the 3x parallel leds with 1000ohm resistor.
But I suspect I have a short in there.
nope... its the Diodes themselves. They aren't made to exacting specs and so tiny differences can cause one LED to draw/suck a ton more current through it than the others regardless of the resistor.
In parallel you really need a single resistor FOR EACH LED not one for all.
Awesome little graphic link attached for what is likely happening with yours and causing the heat.
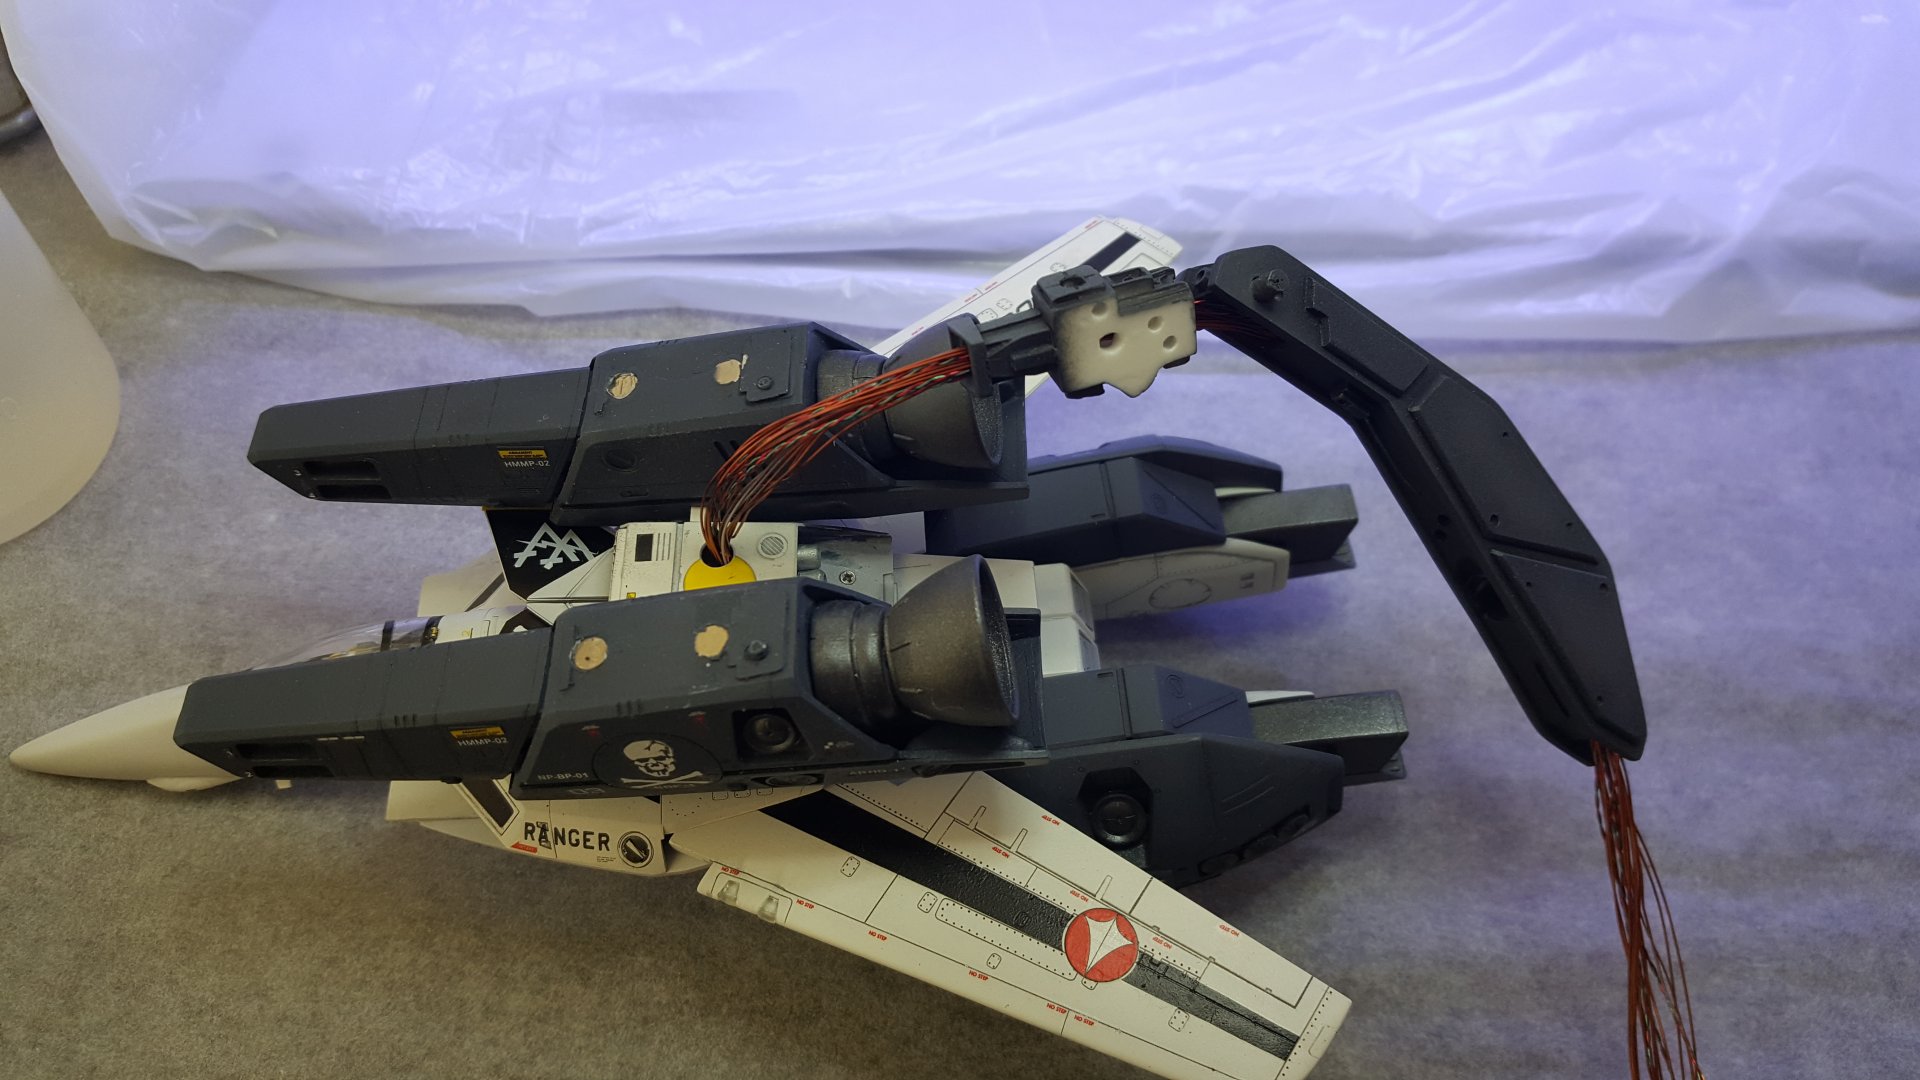
Do you have spare wings? I'd suggest building up a new set of wings with a resistor on each LED (still outside the wing to avoid heat issues) so you'll have 6 wires and not 2 entering the wings. Sorry for bringing the bad news.
If you continue with the original set you WILL eventually burn out the brighter LEDS.
You want a 1/8W (blue body) 82ohm resistor (grey red black) for EACH white LED, the same for the blue LED and a 1/8W (blue body) 120ohm (brown red brown) resistor for the red
I've based this on the 4.5v LiPo output. It will still work for 5V so your safe there.
-
12 hours ago, arbit said:
That's the warped wing. Not too worried about it, but...
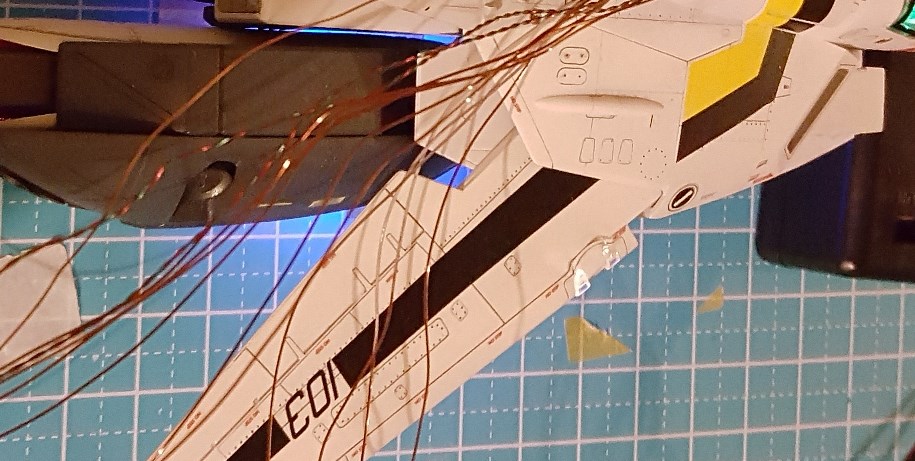
Where is the resistor? not in the wing? The resistor converts electrical potential into heat.
-
11 hours ago, arbit said:
Some stuff I have learned about Arduino on this build:
- The reversing motor sketch, micro limit switches, and motor driver IC are very reliable. Any bugs I had were user error.
- The Trinket has a couple high-powered PWM especially for servos, and the rest are normal PWM pins. I have been using the low powered ones which led to problems sometimes.
- I learned the "Repeat" code which is great for blinking lights at high speed without coding "On-Off" a thousand times.
- I also learned how to code Functions, which make complex blinking patterns for multiple leds/neopixels, and then you can call on the Function and "Repeat" the entire thing.
- Also learned how to break down the Neopixel Library Strandtest into its component parts, so I can use only the parts I want, such as Colorwipe, Rainbow, or Theater Chase.
Anyone wants details, let me know.
@Mechtech, I am sure I can code your Wave Motion Gun Pulsar Cannon effect now.
next exercise for you... try random fade and colour flicker so your engines randomly flicker and fade BUT don't ever reach zero/off. That way your lighting will get more a throbbing effect than to flicker. So assign a value range from say... 120 to 255 instead of 0 to 255 - for those curious, LED fade is done on a value from 0 (off) to 255 (max intensity) with Arduino coding.

Whats Lying on your Workbench MK IV
in The Workshop!
Posted
They are fine. Just not based on US carrier designs. The JBDs are different and no catapult system. Russian and Chinese systems rely on the planes own thrust to get off the deck which is why you don' see many on the carrier deck... need all the length they can get to launch, and why they can't run full ordnance and external fuel loads... too heavy.