Nekko Basara
-
Posts
675 -
Joined
-
Last visited
Content Type
Profiles
Forums
Events
Gallery
Everything posted by Nekko Basara
-
That is looking great, David! I see you used the copper-colored stickers on the elbow joints. Are they staying on ok? They've given me and others some grief by not adhering well to the corners they have to bend around. Also, a gripe I have with this kit is that mine tends to have a pretty visible gap between the torso and pelvis armor unless I pose it just-so. Yours looks fine in this area, though. Is it the pose, or does yours feel alright in that regard?
-
Something else I want to share with all you crazy Gunplars - I went looking for an alternative to the expensive and hard-to-find Mr. Hobby topcoats, and I landed on Krylon's Crystal Clear Covermaxx. Unlike most consumer clearcoats, it's an acrylic, so it shouldn't attack hobby paints or make Gundam markers run. The Infinite Justice was the first kit I've coated with it, and I am very happy with the results. The finish of the Satin version is comparable to Mr. Top Coat Semi-Gloss, but it seems even harder when dry (and it dries fast). I probably need practice with the spray, which is heavier than a little hobby rattle-can's, but the Krylon goes on thick. Nonetheless, I had no problems with it pooling or running at all. The only issue I had is that it lays down such a hard and heavy topcoat that any dust or fuzz ends up throughly sealed-in and hard to remove (with Mr. Top Coat I can just gently scratch any imperfection out with a toothpick and re-spray if necessary). But that can probably be addressed by careful surface prep and/or lighter coats. I tracked this stuff down at Walmart after having no luck finding it at Home Depot, Lowe's, or Michael's. I haven't played with the Gloss or Matte yet, but I plan to. By my rough calculation, this stuff is about 1/8 the price of the Mr. Hobby alternative by volume.
-
Hey, thanks! I'm not sure how long it took. It has been on my bench for the past three weeks or so, but I've only been able to spend maybe 20-25 hours actually working on it. As I've said, I'm also really slow.
-
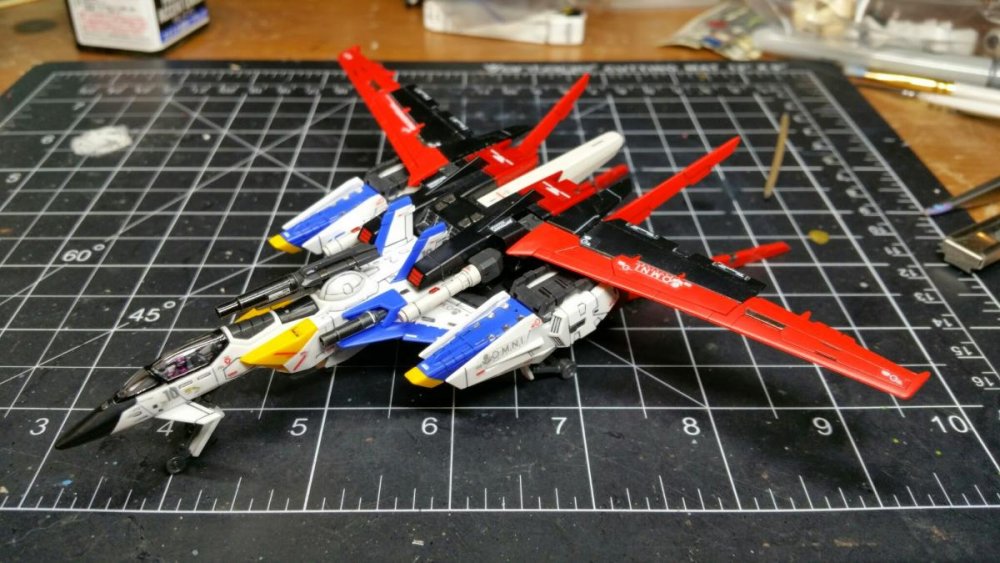
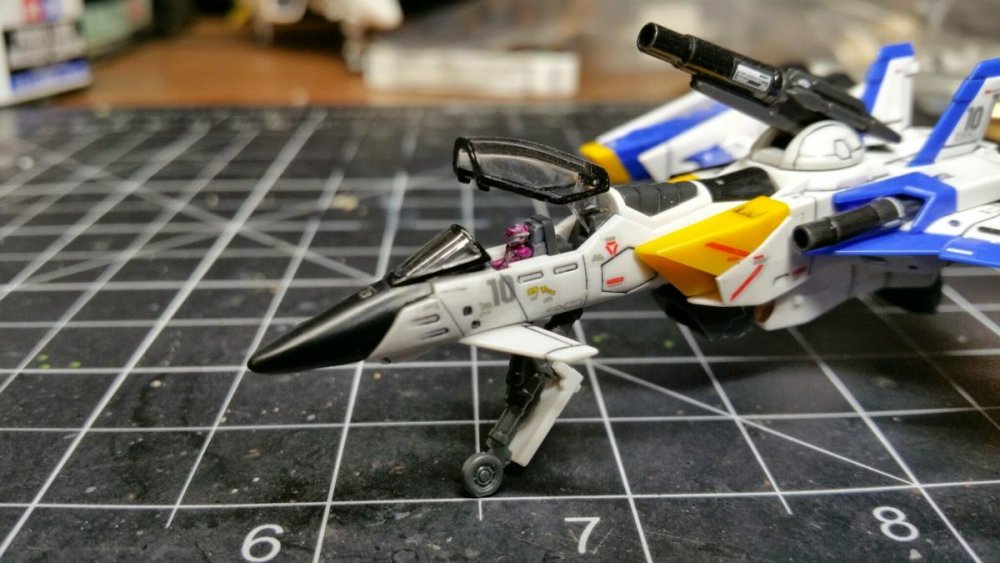
Just about finished with the Infinite Justice (sans flight pack). This kit doesn't have enough color separation or decals for my liking, but it certainly does cut a nice profile.


-
GM01 is the standard Gundam panel line marker, which has a sort of felt-tip pen-style tip (a thin metal tube with just a tiny amount of porous material sticking out). The liquid it dispenses basically an ink, very different from the paint contained in most other Gundam markers. It looks like the GM301 is a new marker that uses a "Fine" Gundam paint-type marker tip to dispense a thinned paint mixture, similar to what you get in a bottle as Tamiya's panel liner (or what many folks just make themselves by thinning enamel paint.) This mixture flows into panel lines via capillary action, rather than being applied directly to each line. I haven't used the GM301 myself, I'm just getting this from some badly-translated descriptions and this excellent video. Incidentally, it was not of any help here, but this link is tremendously valuable to me for identifying Gundam markers and sets.
-

The computer and electronics super geek thread
Nekko Basara replied to azrael's topic in Anime or Science Fiction
The Hyper212 series are sort of archetypical 120mm tower coolers. They are excellent, but plenty of other companies make similarly-designer coolers that will offer comparable performance if you want alternatives. I've personally had good luck with Xigmateks, although they also seem to have grown pricey/scarce. I just did a targeted search at Newegg, and it seems like some good options start in the $25-$30 range. You'll need about 160mm of clearance above the mobo for most of these coolers. That's not a problem for most standard cases, but I'm just mentioning it in case you go with an unusual design (or have side-mounted case fans that overlap the socket area). -
I would suggest rubbing the area with an alcohol-soaked Q-tip, and if that didn't work to your satisfaction, you may carefuly shave or sand the surface down (with a very fine grit) to remove the discolored plastic. I would not soak parts in alcohol because this can cause the plastic to become stiffer and more brittle over time. You may also notice when the parts dry that they have a whitish film or dust on them that you'll need to rub off; I'm not sure what this is, but I suspect it's related to the plasticizing agents being removed. I'm not saying parts will be ruined this way, but it's something to avoid, especially if the parts undergo stress. If I understand what happened, I'll just say that sprue attachment points and other areas you have cut do tend to be a bit porous and can let panel marker seep into the plastic a little bit. The best defense I have found is to simply keep the ink away from those areas (as you are rubbing it off, for example, rub away from nub marks). If you have to mark an area right next to an attachment point, that's a good time to do the marking on the sprue, before you cut.
-
I am in the middle of the MG Infinite Justice (the newer mold), but I've had an embarrassing mishap where a small sprue containing some of the flight pack parts got too close to the room heater and got warped. So I'll be finishing that without the flight pack until I manage to replace the parts. Luckily, none of the MS or weapon parts were affected. I also have a 1/72 Bandai VF-1S that is 90% complete, but it annoyed me so much that I set it aside. I really ought to finish that. After those, some of the kits "on deck" are the RG Strike Freedom and Destiny, and "The Fool" from Kawamori's Nobunaga series.
-
The way I handle excess gundam marker, especially when the lines are too thick, is to gently scrape it off with a toothpick that won't scratch the plastic. A funny coincidence is that I just picked up a 0.3mm pencil for panel lines right before David started posting his nice work with one. I'm excited to try it out.
-
The Newbie and Short Questions thread
Nekko Basara replied to azrael's topic in Movies and TV Series
I smell a conspiracy theory in the making. My eye is on Dole and Big Agro... -
Aircraft Super Thread Mk.VII
Nekko Basara replied to David Hingtgen's topic in Anime or Science Fiction
It's all that single engine's fault. -
I'm curious what folks' experience with this is. As I've mentioned, I don't do much painting on Gundam models, but I've been building fully-painted military models off-and-on my whole life, and I've never noticed mold release agent on the parts or had issues with paint adhering to unwashed plastic (even on fairly janky eastern European kits). Personally, I think the parts-washing advice may come from an earlier time when kit makers used more/different mold release, or didn't clean parts themselves. I don't feel it's necessary (although there's little harm aside form wasted time and maybe some soap or hard water residue if you don't do it thoroughly), especially if you aren't planning to paint your kit. What I am careful about is body oils, food grease, lotions, etc. Those can mess with paint or stickers if they get on parts. I frequently wash my hands while building, and keep an eye out for any oils on the parts I'm handling.
-
Gundam Build Fighters/Build Fighters Try
Nekko Basara replied to VF-15 Banshee's topic in Anime or Science Fiction
I really dig the ending theme as well. No offense intended to StylipS, though, but I am really feeling the urge to get five of the little Pucchiguy kits and some paint, and do them up as a Momoclo tribute instead! -
Oh good lord, the cubs are killin' me. I wonder if they are the same mold used in the Beargguy F kit. I already have two of those in the pile.
-
Don't feel bad, David. RGs are a 20-30 hour project for me. Everybody has their own pace. Besides, if you view building Gunpla as entertainment, then slowpokes are getting the most bang for their buck! Also, yes, those Olfa blades will fit the Tamiya handle. It's been my experience that snap blades are pretty universal; I've put a variety of makes into handles from the top Japanese and Korean brands as well as dollar-store versions without any significant fit issues. The only thing to be aware of is that there is another blade type with a steeper angle and sharper point that will fit these handles, but the blade isn't exposed properly without the handles made specifically for it. But those blades can be distinguished at a glance.
-
I have boring thoughts about hobby knives! I used the standard #11 X-Acto blades for the longest time. Then, about five years ago, I worked in a call center where nobody minded if I kept my hands busy working on models as long as I answered my calls and didn't bring any nasty substances like glue. I would bring in my kits in (mostly 1/144 aircraft at that time), cut all the bits off the sprues, and clean them up with a hobby knife and sanding sticks. BUT, because it was an office environment, even a #11 blade could raise eyebrows. So I switched to using the #16 blade because it had the smallest edge available, and after a few months of learning how to use that tiny edge to make really precise shaving cuts, I came to greatly prefer it. I realized had hardly ever needed the needle point or long edge of the standard blade. Then, when I started building Gunpla about a year and a half ago, I picked up the Tamiya basic toolkit (I already had dozens of X-acto knives, tweezers, etc, but I liked how self-contained the kit was). I had never used a snap-blade knife before, but I gave the included one a try... and again, once I got the hang of it, it became my new favorite. In my experience, 90% of what I use a hobby knife for is shaving off sprue nubs, molding flash, and the occasional decal. The snap blade is ideal for that, because it is wickedly sharp (and if it isn't, just snap it off and click up the next bit), has a small, straight edge without an unnecessary needle point to jab things (like my hand), and has a simple shape that makes it easy to judge your angle for shaving cuts. I now own a handful of different snap-blade handles, but generally prefer these blades for their sharpness. If I need a fine point for something like cutting stickers on a sheet, I'll still grab a #11 X-Acto, but I hardly ever use one on a model anymore. That's just my experience. I'm sure it all has more to do with finding the tool that works best for you and practicing with it. But I encourage folks to try different styles of knives and techniques, because (like me) you could be overlooking something you'd really like.
-
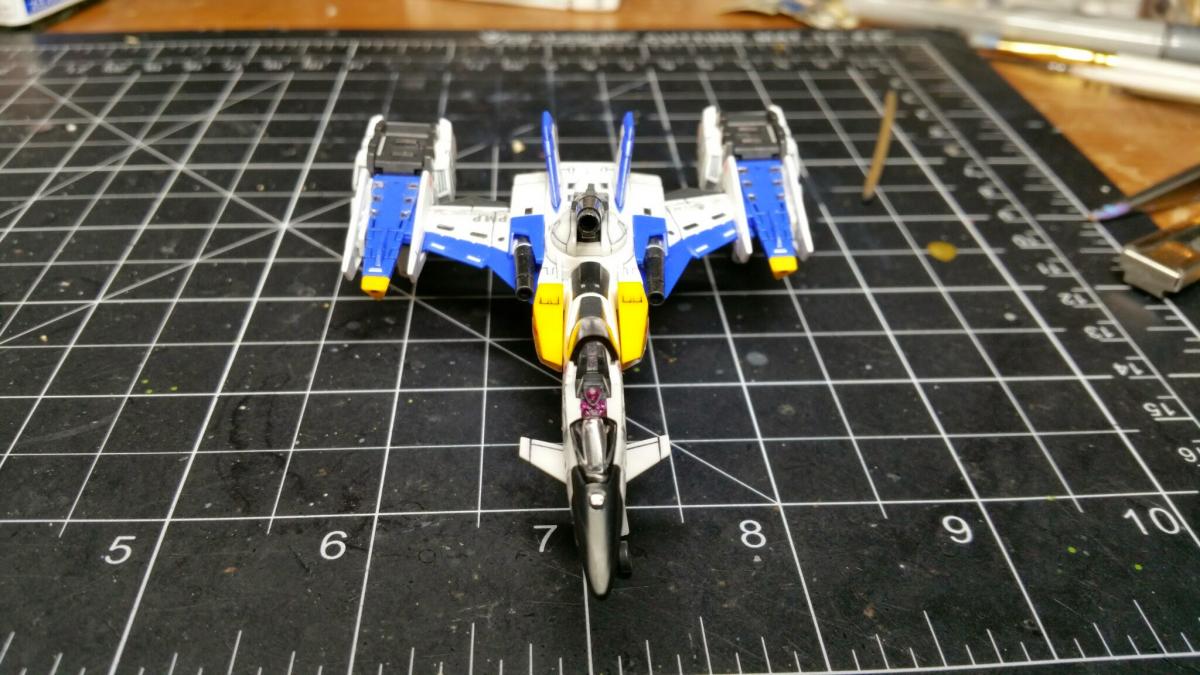
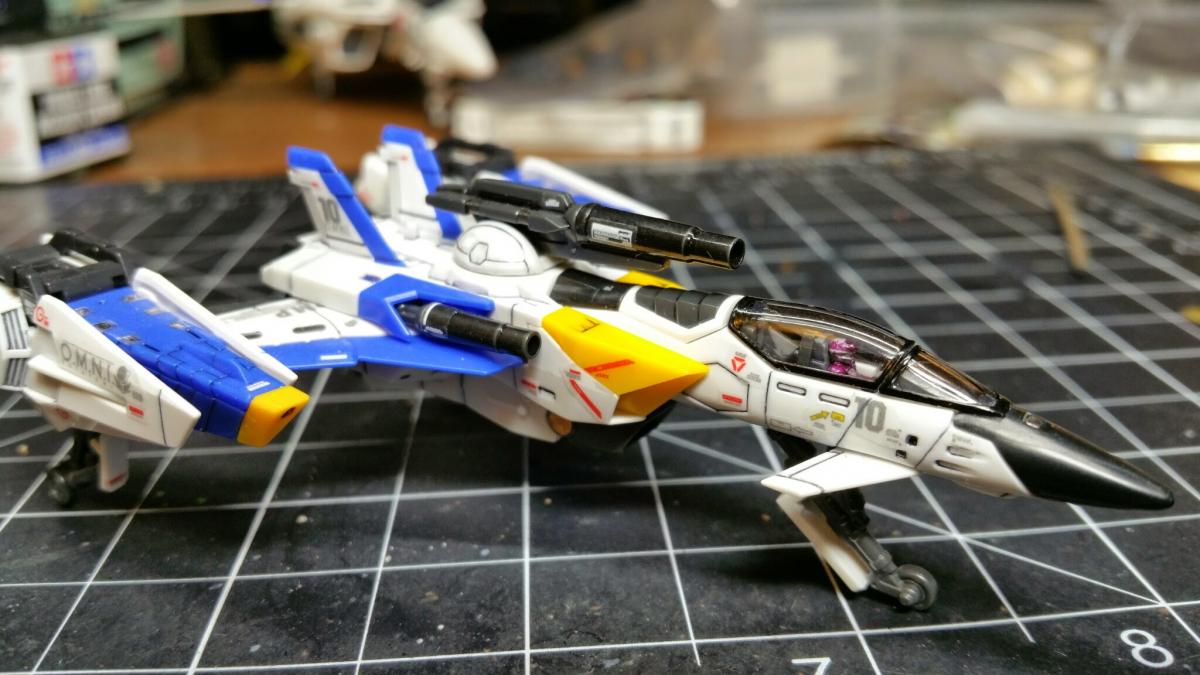
Here's my Skygrasper. Now I am noticing all the spots where decals run over panel lines and look bad!


-
That is looking excellent! Did you say this was your first kit? Do you want to see any shots of my Skygrasper? I don't want to come off as competitive by just tossing them up (and yours looks easily as good, anyhow). I did paint the canopy,and I agree with Hikuro that it's not as tough as it may appear.
-
This site has a better explanation of the three techniques for cleanly removing parts and getting rid of sprue marks than I could write. They aren't mutually exclusive, of course - you can cut a part free with sprue cutters, clean off the nub with a kinfe, and then file/sand the mark. Personally, I rarely resort to filing if I can help it, because it takes the longest and can scuff up and round off the surrounding plastic. I prefer to shave the nub down as gently as possible, using a sharp blade and a drawing cut, where I pull the edge towards me as I press against the part. I also find it's better to shave the nub down by degrees than get it all at once. The bottom line is that the less force you use, the less discoloration of the attachment point you'll have from stressing the plastic.* The degree to which the plastic is discolored and the mark is visible also depends enormously on its type and color. Finally, I find that once the nub is cleaned off flush, stress discoloration at the attachment point can be partially removed by firmly rubbing the area with something too soft to scratch the plastic (I usually just use my thumbnail). *This applies to the way most plastic gets lighter in color when it is stressed. Most plastic also seems to be darker at the points where it flows into the parts during injection-molding - this is especially apparent on metallic swirl plastics. As far as I know, there is no way to remove this color, so even when you cleanly remove the light-colored sprue mark, there will often be a faintly darker mark.
-
I am in no way a "pro builder," but I hope you won't mind if I chime in. I use both Gundam marker and the Tamiya "Panel Line Accent Color," which is basically just a pre-thinned enamel wash (I use it as a "pin wash" where you flow it into the cracks; I don't think it's suitable as a true wash that you would brush over the whole model and just let it settle into the cracks, but I haven't tried). I find that it flows just fine on unpainted plastic; I just make sure the parts don't have any dust or anything else on them that will impede the wash, because it will gather around that. I never use a wash on flat-coated parts because it spreads out into the rough coated surface and basically does the exact opposite of what I want a wash to do, making big "oil stains" rather than finding the crevices, and it can't be easily removed. I also do stickers last, because washes (or marker or other paint) will tend to flow around the edges and under the stickers, and is almost impossible to remove without ruining the stickers. If I wanted a realistic effect where panel lines and weathering went over the stickers (which is how I used to build military models with decals), then I would seal the surface with a good gloss coat before doing the wash.
-
I was going to say that I have a somewhat different approach to the decals. RG decals fit pretty darn well, but if I need to cut them it's usually because they hang slightly over the edge of a piece. In that case I'll slowly and gently run a very sharp knife along the edge of the part, using the overhang as a blade guide and getting as close to perpendicular as I can to the decal surface. A bit of a sawing motion helps as well (that's true of any cutting, which is the principle behind "draw" cuts). This usually removes the extra decal flush with the part, although if I'm not careful I may shave the edge of the part a tiny amount. If I need to actually change the shape of a decal, I'll pull it off (hopefully I haven't fully seated it yet) and lay it back down on the non-stick sheet. It's hard to get a decal back in its original place, so I'll use the spot where a larger decal was if possible. Then I cut off the part I want by eye, going firmly through the decal and backing in one pass, and re-apply the decal. I wouldn't trust myself to cut a decal on the model without marring the surface, and (with my luck) those scratches might pick up ink or dirt as I handle the kit while finishing it. If a decal falls across a panel line, I usually just burnish it firmly down into the groove with a toothpick that's too soft to scratch the plastic. I like MikeS's idea to make cuts around the panel lines, though - may have to try that.
-
I think there are two main reasons to do it as you build: 1) All of the grooves and such are easier to reach. 2) It spreads the task out. Panel lining can be annoying, so you break it up into little chunks as you go. Or maybe you love it, so you split it up for the same reason. The various tasks in building a kit are like different things on your dinner plate; most people (but not all) will prefer to eat a bit of each in rotation rather than all the rice, then all the greens, then finally the meat. I can't think of many reasons to hold off on it, unless you just prefer the flow of doing it as one big step at the end. I suppose on an assembled kit it's easier to tell what areas you can't see; I've certainly wasted a fair amount of time detailing areas that turned out to be totally concealed once I got the kit together.
-
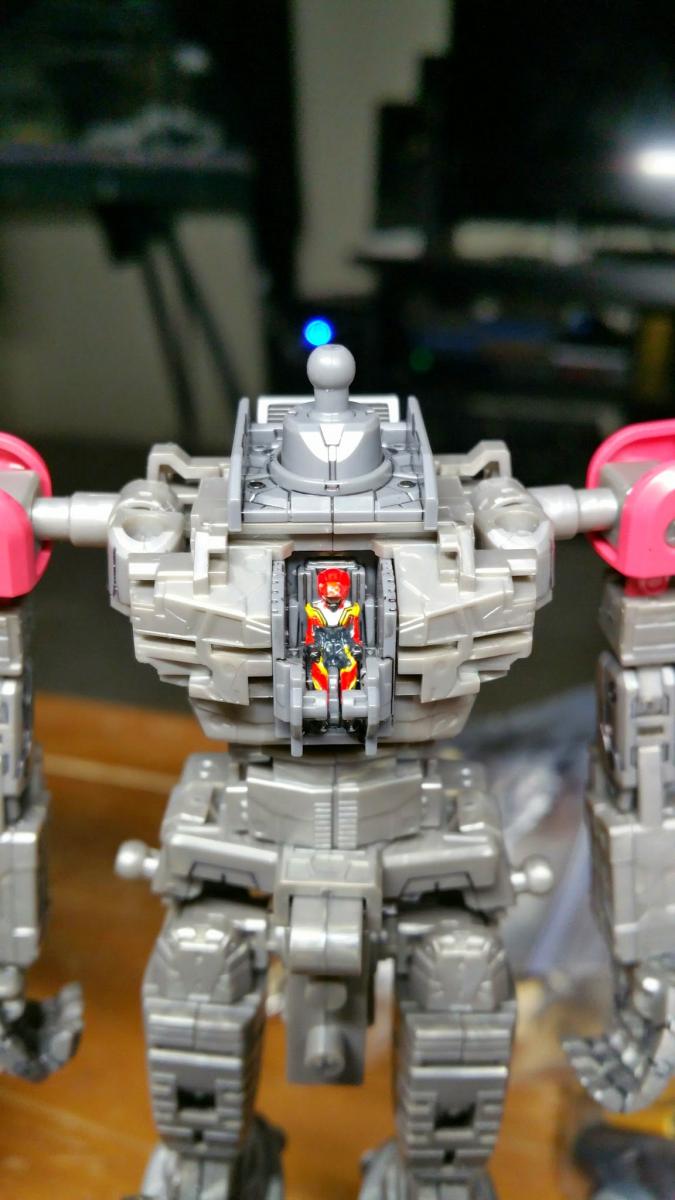
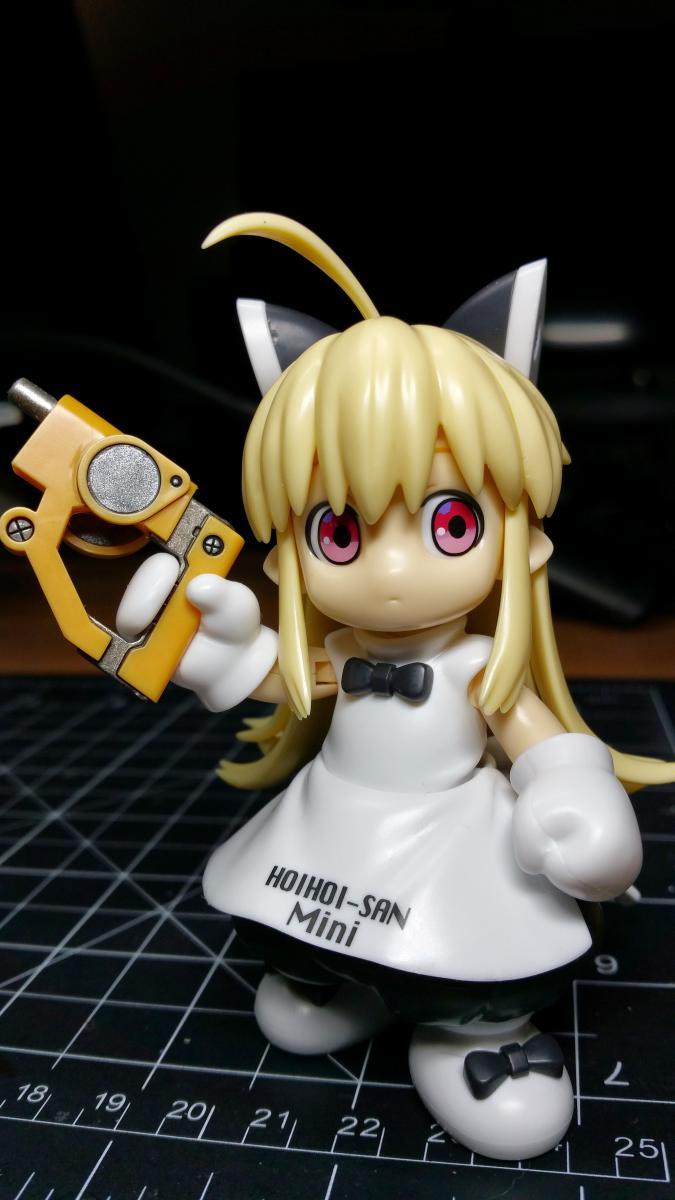
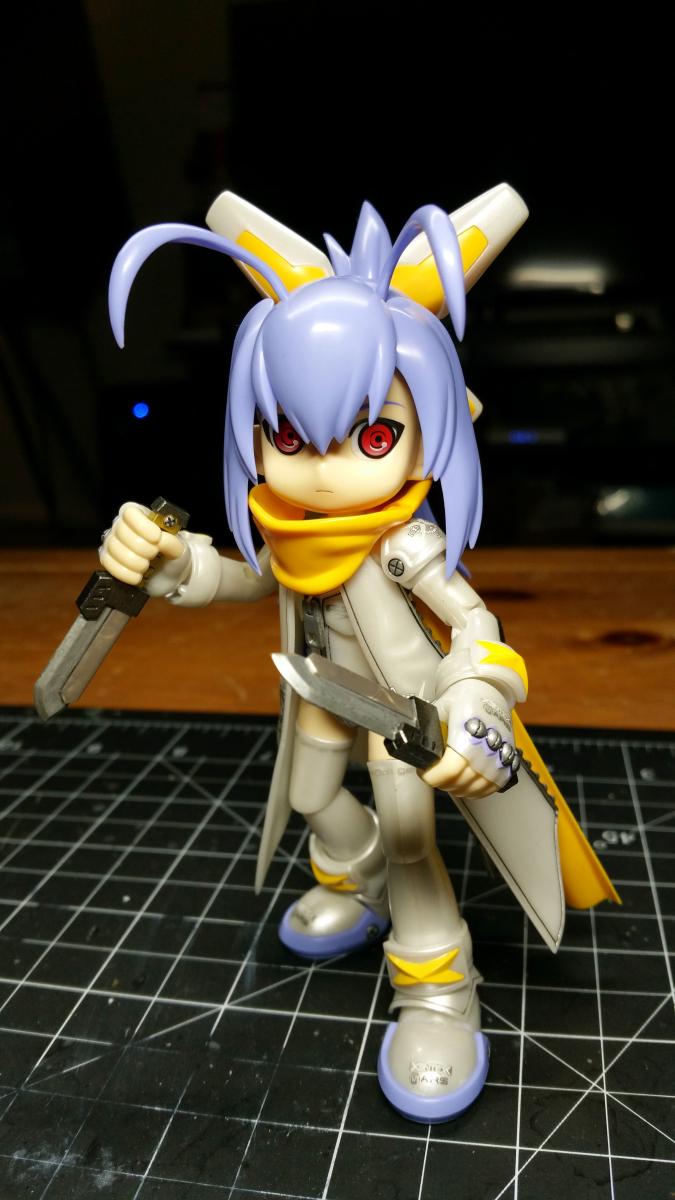
Maybe I'll start dumping pictures of my Bug Defense Force here and see if I can draw out any lurking Hoihoi-san fans. ;-)

-
Man, you are all about those special versions, David. Are you planning to cut your teeth on any of the regular releases, or jump right in?
-
Haha, thank you!