shiyao
-
Posts
374 -
Joined
-
Last visited
Content Type
Profiles
Forums
Events
Gallery
Everything posted by shiyao
-
My Japan Trip - Gundam, Girls and other Good Things
shiyao replied to shiyao's topic in Anime or Science Fiction
Hmm .. was it a thread? I thought it was a link to your blog. -
My Japan Trip - Gundam, Girls and other Good Things
shiyao replied to shiyao's topic in Anime or Science Fiction
sorry rob - the thought did cross my mind but I was unsure if (1) I'd be imposing (I'm not really a "major" MW character) (2) I'd actually make it to Nipponbashi (girlfriend wanted to see temples and poo) The next time I go, it will definitely be alone, and you will certainly be disturbed. big F: the link doesn't work for me? -
My Japan Trip - Gundam, Girls and other Good Things
shiyao replied to shiyao's topic in Anime or Science Fiction
falcon14141: It is a disease, this hobby of ours. But oh, if ever there was so benign a disease ... big F: No worries, go ahead and post the link! I'm curious about anything Tokyo ... The Duke: Penis Mightier? I don't know what that is, but it sounds like something every man needs ... Necron_99: Yes, it was a wicked fortnight. And not just the toy bits (although I DID go to a toy shop nearly every day, EVEN in Kyoto) - the sights and the people were amazing too. Japanese people are so, so polite and well-behaved. -
My Japan Trip - Gundam, Girls and other Good Things
shiyao replied to shiyao's topic in Anime or Science Fiction
Sorry about the pic sizes - I was too lazy to photoshop thumbnails for this one. Yes, stuff is cheap compared to Singapore. Gundam MSIA - for as little as 1000 yen each. In Singapore they are usually around 2500-3500 yen. FIX Figurations - 2500 yen in Japan compared to 6000++ yen in Singapore. MGs and HGs - these are just seriously, seriously cheap. 800 yen for HGs, 1500 - 2000 yen for MGs ... it's ridiculous. And not to forget - Mandarake - second hand heaven (Liberty as well) - ridiculously cheap and almost brand new stuff. Asobit City has some ridiculous deals on the weekend (Sousei no Aquarion for 9800 yen!!!!!). Transformers, oddly enough, are just as expensive in Japan; Macross stuff fares a little better. 1/60 YF-19 for 13500 yen - in Singapore the current price is 18500 yen. -
Hello everyone, I was in Japan from 10 May to 23 May. Mainly a sight-seeing trip (and to practise my Japanese), but I had the opportunity to visit Akiba thrice and Den-Den Town (in Osaka) once. Bought many toys and modelling materials, most of them of the "OMG this is so cheap in Japan I must buy it" variety. Highlights include the dark Sousei no Aquarion and a couple of Super Robot Wars (Gepenst Blue, Gepenst White, Huckebein, Cerebes (?), Alteisen and Wildwurger) 'bots. SRW bots are for sale by the way, if anyone is interested, drop me a PM. I'll start a sale topic soon enough. But ... the best bit about the trip was ... the GIRLS! http://thegreatsze.blogspot.com/search/label/Japanese The link is to my blog, where I've archived the entire trip under the "Japanese" category. Enjoy the pictures of mecha, babes and Japan (not necessarily in that order)! A teaser ... Some of my toys- sorry, some of the girls on the trip Mods, posted this here (over "Where to Buy Macross") since I figured I didn't specify exactly where the stuff was to be got. Feel free to move at will.
-
FIND MP-05 MEGATRON'S SHOULDER PIECE! MP-05 Megatron took a dive from my top shelf. I searched high and low and I couldn't find his missing shoulder (right) piece ... so I took this photo, hoping to post it on to MW for all you razor eyes to have a gander at it. It turns out the piece was sitting right in under my very nose ... I have since found the shoulder piece, but I thought I'd post this up anyway. The missing piece in question is the bit that turns into the bit you cock when Megatron is in gun mode (well, half of it anyway - the other half is the other shoulder piece). It IS visible in this picture ... HINT: Ignore Evangelion, Eureka Seven and Mospeada. This *is* a Transformers thread after all. Hope you guys know your Galaxy Force! Look carefully ...
-
Hey, DARKWIND and wolfx: it seems like you guys have managed to get some pretty articulate poses with your respective moto bisars. how about a photo review, and maybe telling all of us how you "modified" the moto bisar to become poseable? (like for instance, wolfx with electrical tape etc. .. ) thanks! also: these AM Drivers are on sale at Takashimaya in Singapore right now, so if anyone wanted, I could help out with purchases. just a thought
-
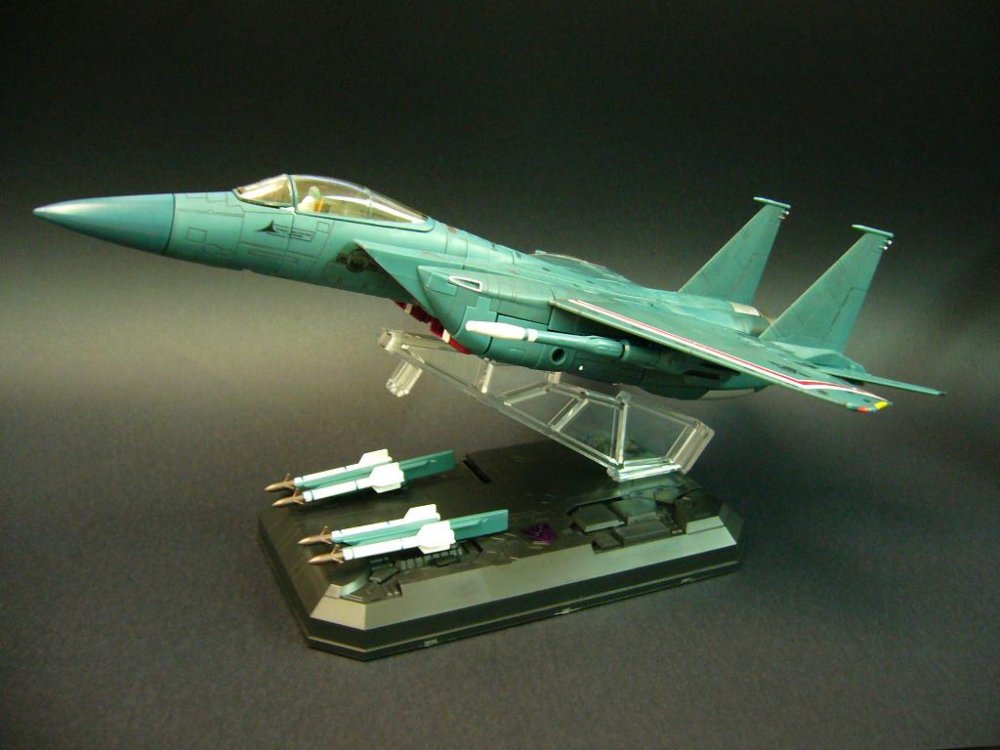
here's mine, folks. in reality the colour is actually slightly turquoise-ish. but it's quite nice as well, certainly no detraction. the big big prototype gun doesn't seem to fit very well into any of the provided hands. it sort of ... sags. the end result is that the gun droops along the ground. as you can see, i went for shotgun and mines instead. looks leaner and meaner, if you ask me. the feet are jointed interestingly - square blocks instead of the usual roundish pegs (a la MG style). unfortunately, the grip isn't half as good , and mr kampfer loses his feet quite often. the paint job on the kampfer is superior to previous FIXes. the "decals" are absolutely top rate. definitely worth the SGD$55 i paid (that's .. about 25 USD). and the great thing is - the prototype alternative is so ugly, you won't have to buy two of the toy (like we all normally do .. eh?) so as to make both alternatives! *curse and swear in direction of gerbera and gerbera tetra*
-
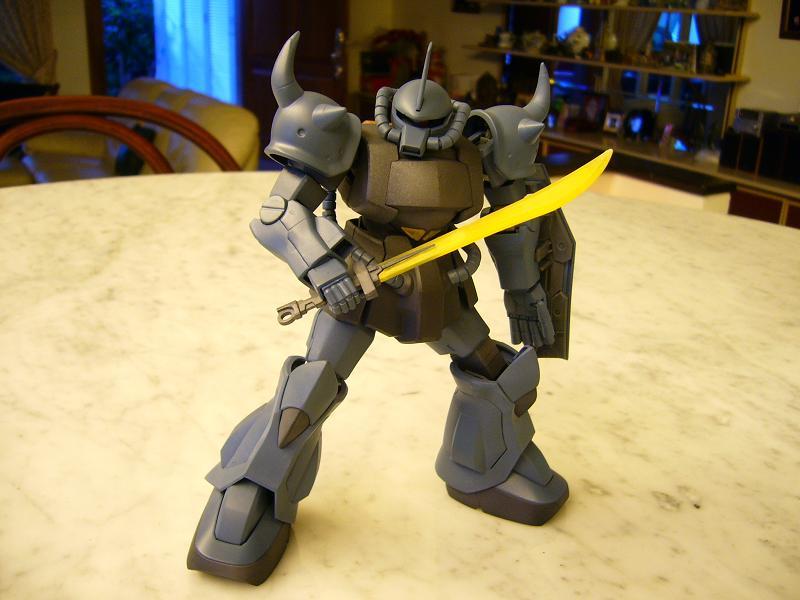
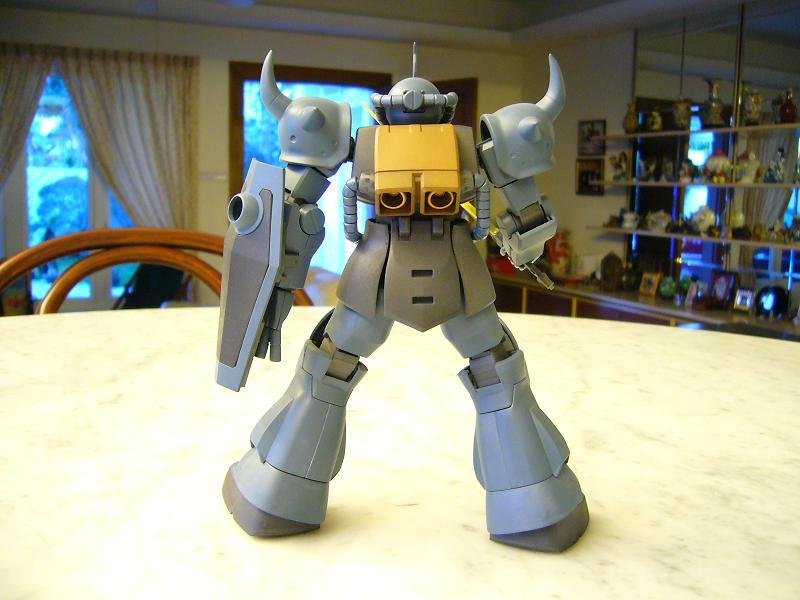
big F, you don't want to start on Gundam .. it will never never end. i mean never. i got into gundam to while away the time between binaltechs/alts and yamatos ... now i spend more on gundam than anything. anyway, here's my recently completed 1/100 MG Gouf OYW version - wanted a clean finish, was sick of making mistakes and calling it "battle damage". primary color intermediate blue, highlight colour a mix of engine gray and black, internals copper and smoke.


-
How do you paint a puttied, sanded, glued and primed model kit?
shiyao replied to shiyao's topic in The Workshop!
thanks for the replies guys. i actually *have* read fichtenfoo's MG tutorial before (some 273763232 times), as well as gone through wm_cheng's buildups. but they didn't mention much about test-fitting and (detailed) masking technique. dannychoo's gundam for busy people tutorial had some insight, but i think spraying parts on the sprue is generally not a very good idea (you have to spray twice, to cover nip marks). i guess it's mask mask mask then. so, for clarity: HOW TO MAKE MODEL KIT 1. Cut parts off sprues 2. Put unassembled parts into boxes, according to subassembly 3. Paint parts according to colour withthe aid of skewers, blu-tack and croc clips 4. MASK MASK MASK MASK 5. Paint details on, taking care not to spray outside masked area 6. Remove mask, spray GLOSS COATING (FFA) 7. Panel lines + Decals 8. Spray FLAT COAT (Tamiya flat base 30%+ FFA) / Top Coat / Mr Color Flat (?? how to use this last one??) 9. Make diorama 10. Enter into BAKUC 11. Make a lot of money 12. Die of cancer -
How do you paint a puttied, sanded, glued and primed model kit?
shiyao replied to shiyao's topic in The Workshop!
ah ... how about the test-fitting bit? i suppose the answer is "YES WE SNIP OFF MALE PARTS BY THE DOZENS EVERY TIME" ? -
How do you paint a puttied, sanded, glued and primed model kit?
shiyao replied to shiyao's topic in The Workshop!
(re: part 1 of my questions) Like for instance, how did pic #1 turn into pic #2 (L to R, attachments below)?? really just "masking"? even if you removed the parts into sub assemblies there'd still be a LOT of masking. and a LOT of waiting for paint to dry.
-
This question might have been asked before, and if it has, I apologize. My search turned up only tangential answers. So, my situation is this: Thus far I have been building my model kits by PAINTING everything first with an airbrush before snapping together. This means, of course, that I CANNOT get any puttying, sanding etc. done - if I did I would spoil the paint finish. But I *do* want to get rid of seam lines, potholes and the like. I really do. Does this mean that I have to mask every &^$#@%&^$#@ thing? I guess kits these days have fewer and fewer seams that require sanding, but some of them are still pretty obvious. Incidentally, is it true that anything on earth can be masked, given enough patience? SECOND QUESTION: This pertains to test-fitting. Looking through all the WIP builds on MW and on other sites, I notice that somehow everyone test-builds/test-fits their kits before putting on the paint. So my question is this: do modellers actually do the whole cut-the-male-part-diagonally-across thing when they are test-building? Does that not take up an IMMENSE amount of time? If not, how are these super-duper modelers doing their test fitting? I would like to test-fit too, but the cut-male-part-diagonally-across thing seems to be really inefficient, time wise. Thanks in advance! Sorry if this should be under a Super Topic, I really have no idea.
-
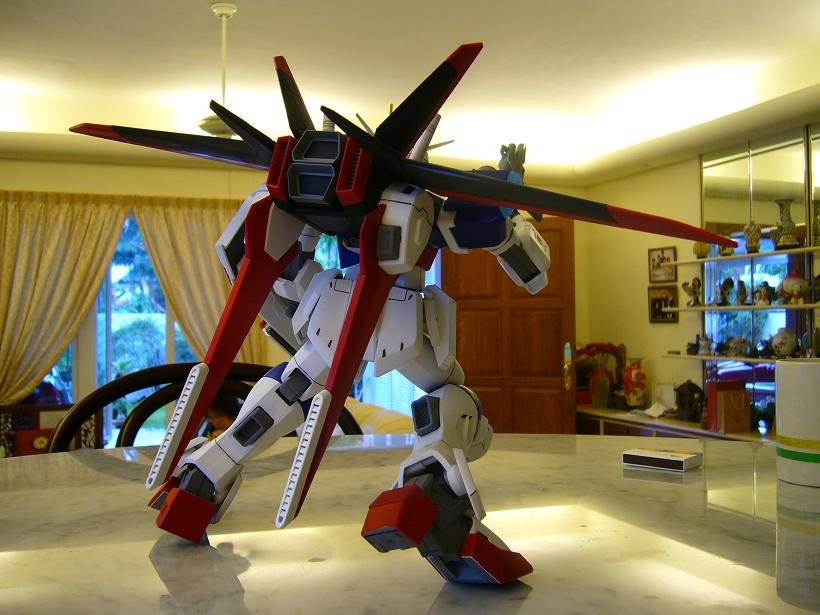
i posted my WIP force impulse 1/60 real detail over here: http://www.macrossworld.com/mwf/index.php?...st&p=441732 but I'm not sure if this thread is the correct one instead. someone more enlightened, please advise. thanks.
-
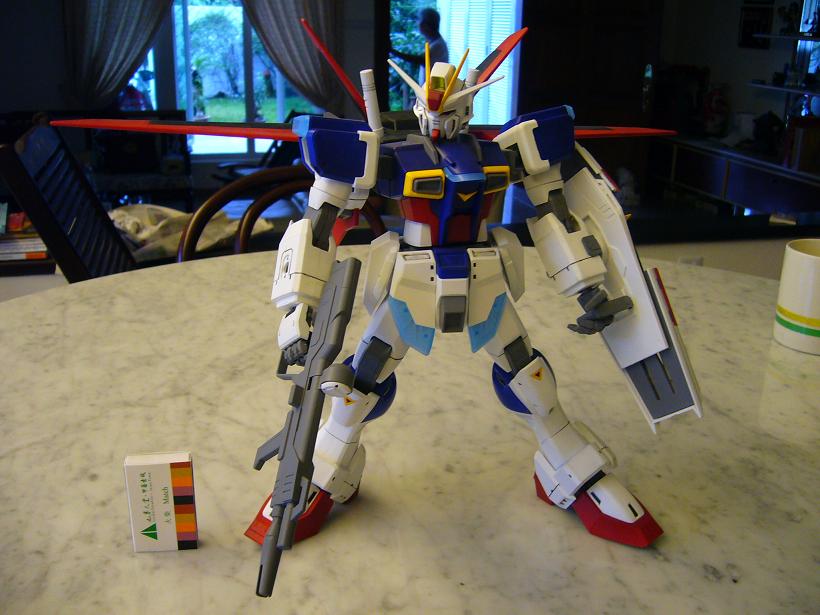
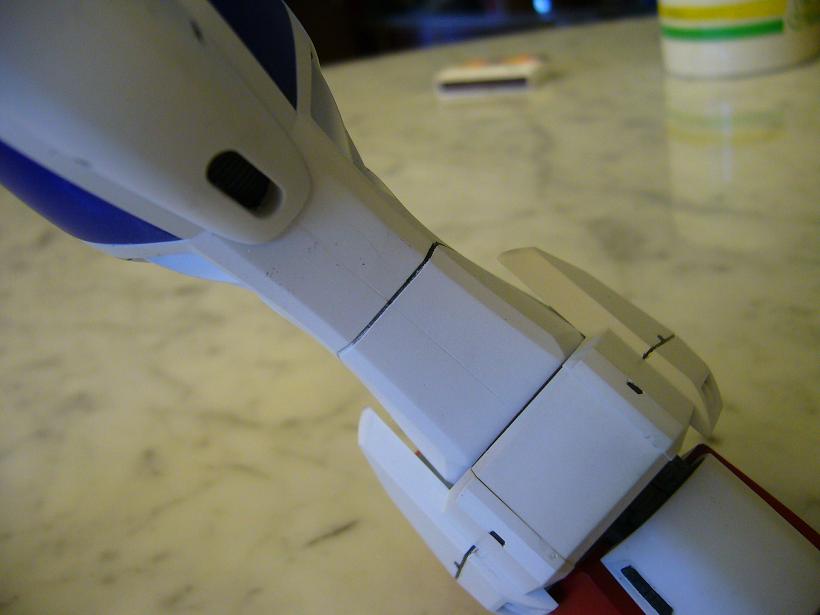
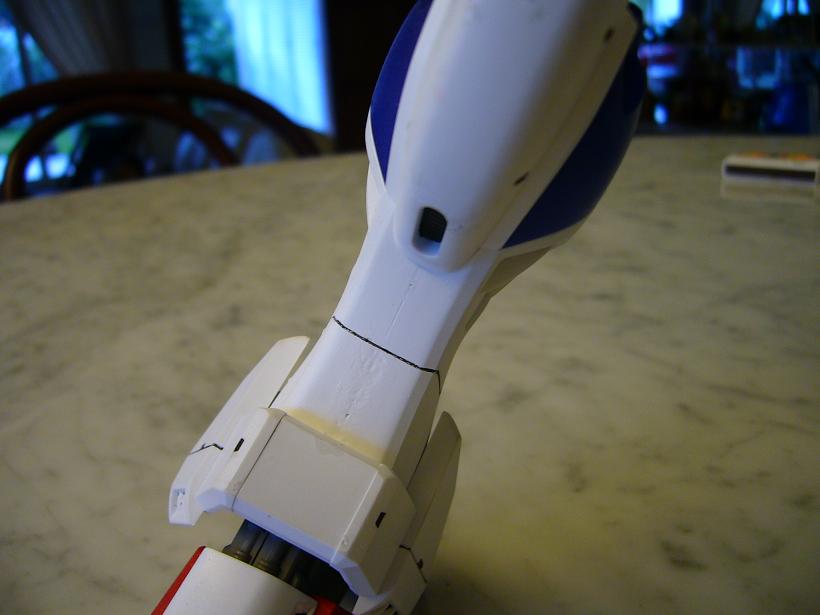
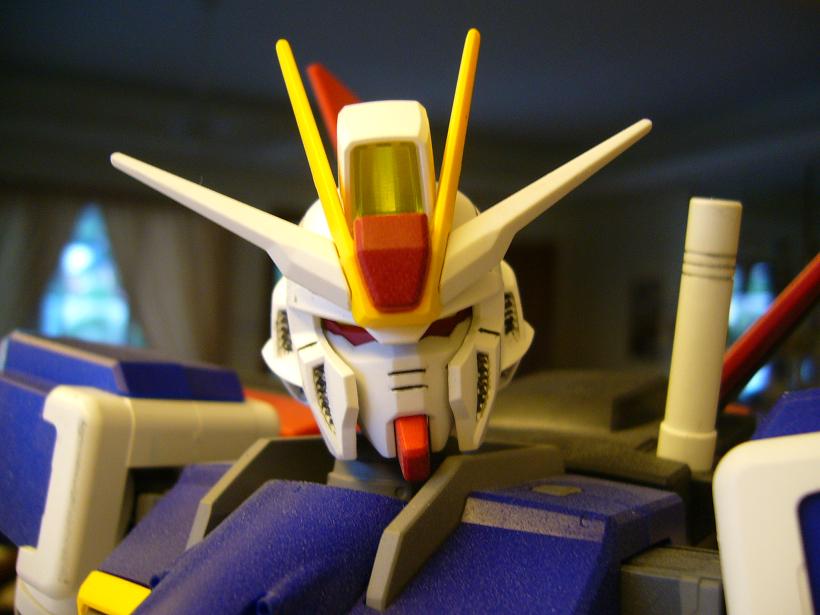
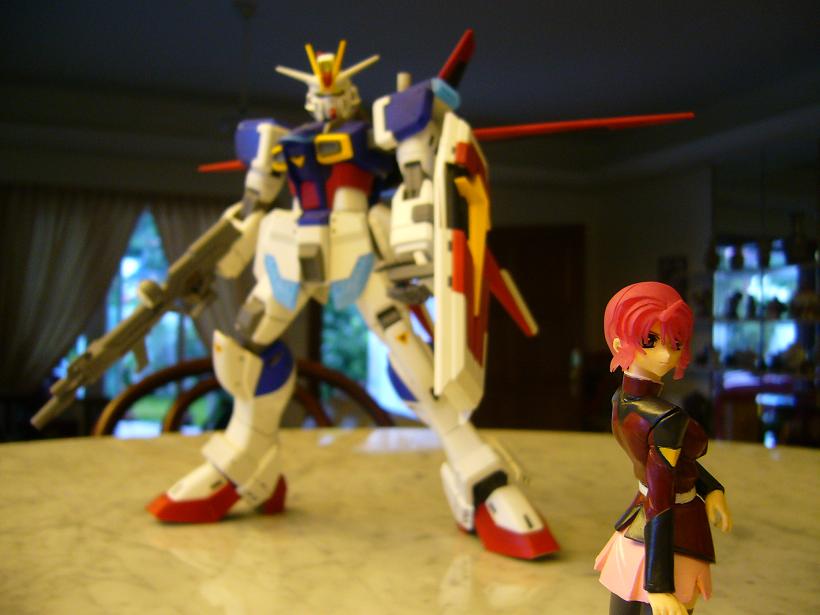
Hot on the heels of the rather depressing Rick-Dom, I present to you: 1/60 Real Detail Force Impulse Gundam! The plan for this kit was to learn cementing and sanding. Of course, that didn't quite turn out as hoped ... (the following questions/comments are numbered according to the way the photos are arranged) 1. Impulse from the front. "Gundam Blue" is actually quite a kiddish looking colour. The end result is a blue that looks little different from the one that came on the sprues. 2. Impulse from the rear. Not your most poseable kit, the 1/60 actually has quite little (visible) detail (unlike, for instance, the OYW RX-78-2 MG kit). The detail is mostly hidden by shoulder covers, the light blue skirt covers and the chest covers. 3. Here is the end result of my cementing (I paint a line of cement over the joined parts, and then sand in a circular fashion). Precisely - seam line still visible. But this isn't as bad as ... 4. ... THIS disaster over here. What happened was, I assembled two left feet for the Impulse (put the thigh the wrong way round for this leg), so I had to rip both sides apart, re-cement and re-paint. 5. OK seriously, how do you panel line a painted model??? I had stray marker marks going everywhere. You CAN erase them off, but they are more persistent. And you can no longer do that "anyhow panel line everywhere and then rub off with tissue/cotton bud" trick. 6. Another "plan" for this kit was to become Supreme Champion Masker. I figured since I was going to cement the legs together, I would have to mask the knees off before painting over the legs. (You can see some stray white paint on the knee as a result of a poor prior masking.) It is true - you really can mask anything, as long as you're patient enough. 7. Lunmaria Hawke, Impulse, Hashin!


-
thanks azrael. my question was, actually, this: "Should I gloss coat my painted model before I panel line, so that I can wipe away stray ink marks?" I was of the understanding that you can't wipe away stray ink marks if there is a flat coat (or no coat).
-
wow thanks for the tips guys. sebastian, i *think* i know what you're trying to say - if it works, that'd be nifty. another quick question: PANEL LINING a model after painting - is a gloss coat necessary? i shouldn't try to panel line a model that just has PAINT on, correct? and panel lining on a flat coat is suicide? *EDIT* sorry, all this is here because I'm wasn't previously talking about Macross kits. though my current question is pretty much applicable to any model.
-
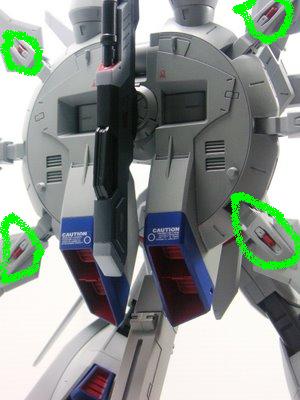
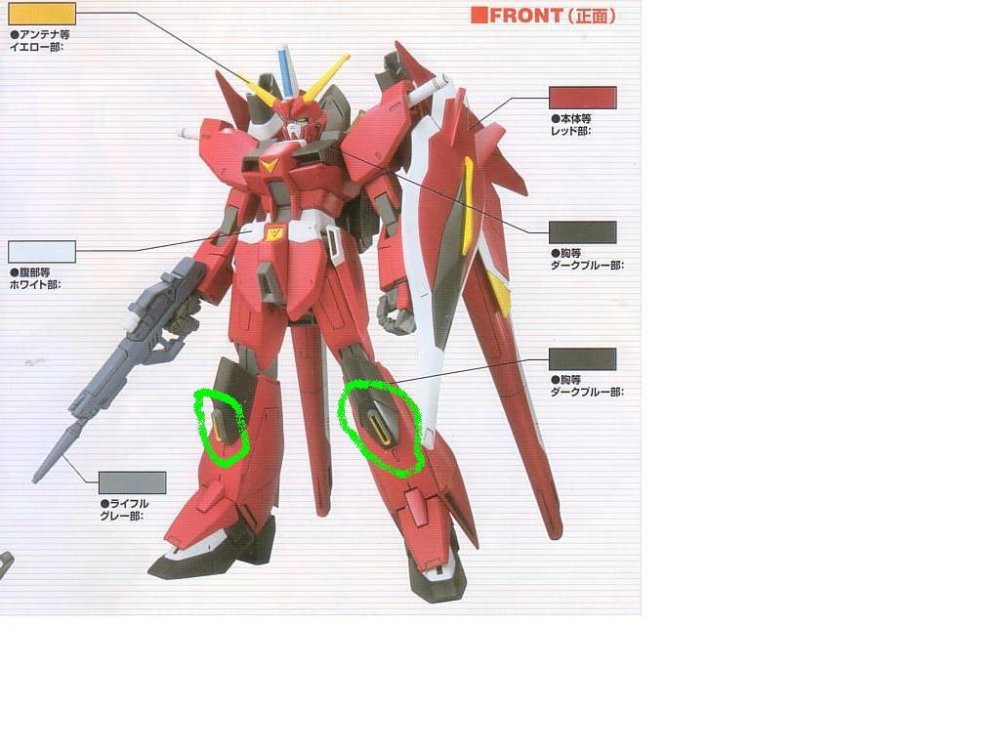
Some painting questions: How were the green circled parts masked/painted? (Gundam 1/100 Seed Destiny Ungradeds) 1. (Saviour) Outside grey, inside black, but yellow trim around the INSIDE of the ... thingy 2. (Legend) Little cannons were molded onto the grey plastic as one piece, yet he's painted them all completely red, or at least enough red such that we cannot see that the other side is still grey Thanks guys, I've been wanting to start on these two kits but these issues keep daunting me.

-
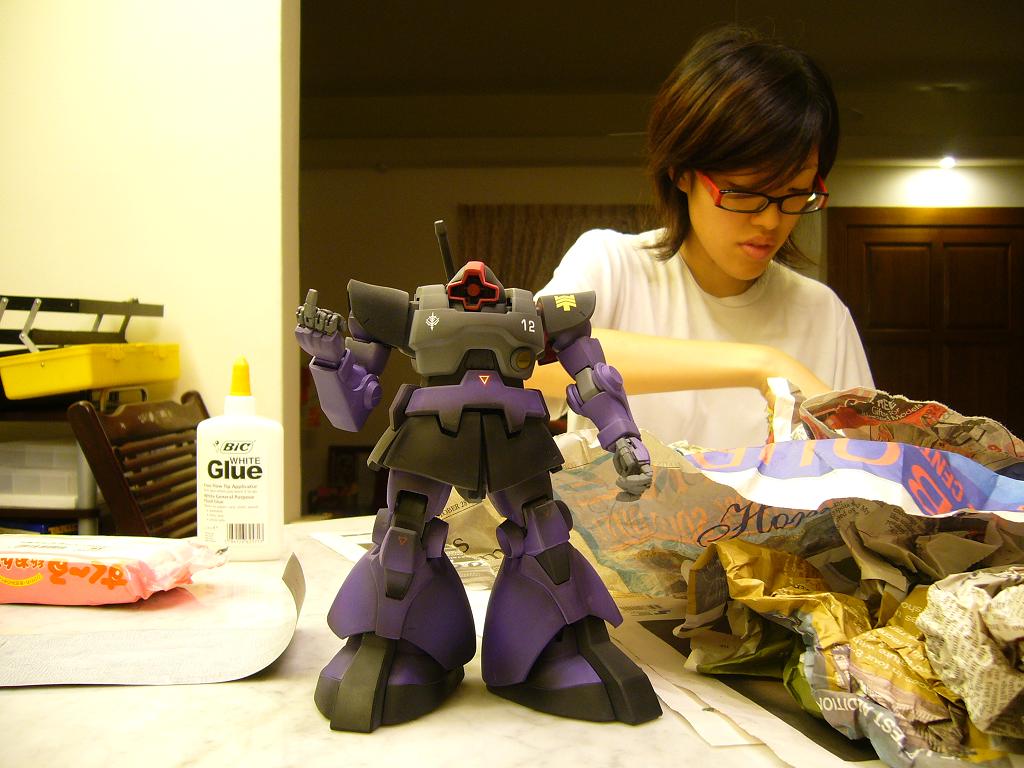
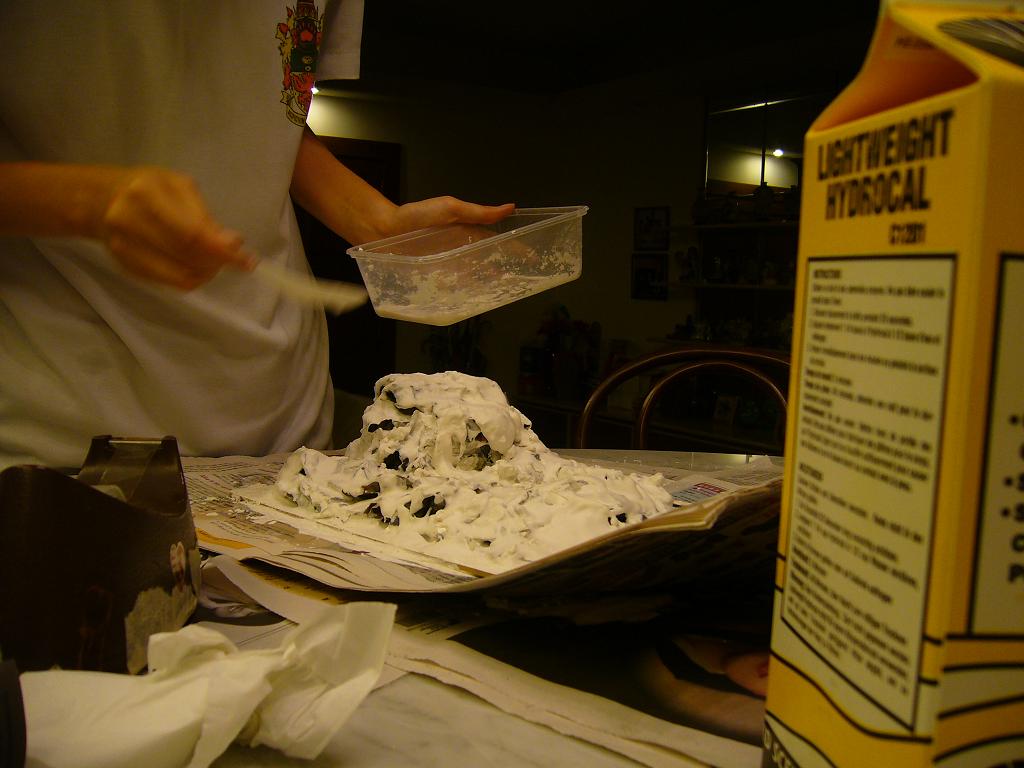
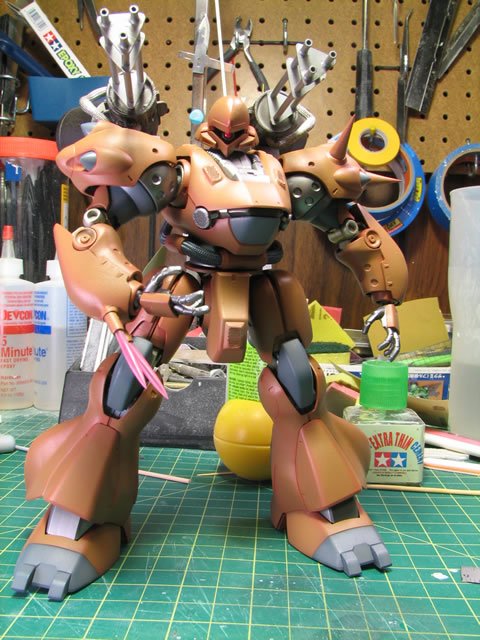
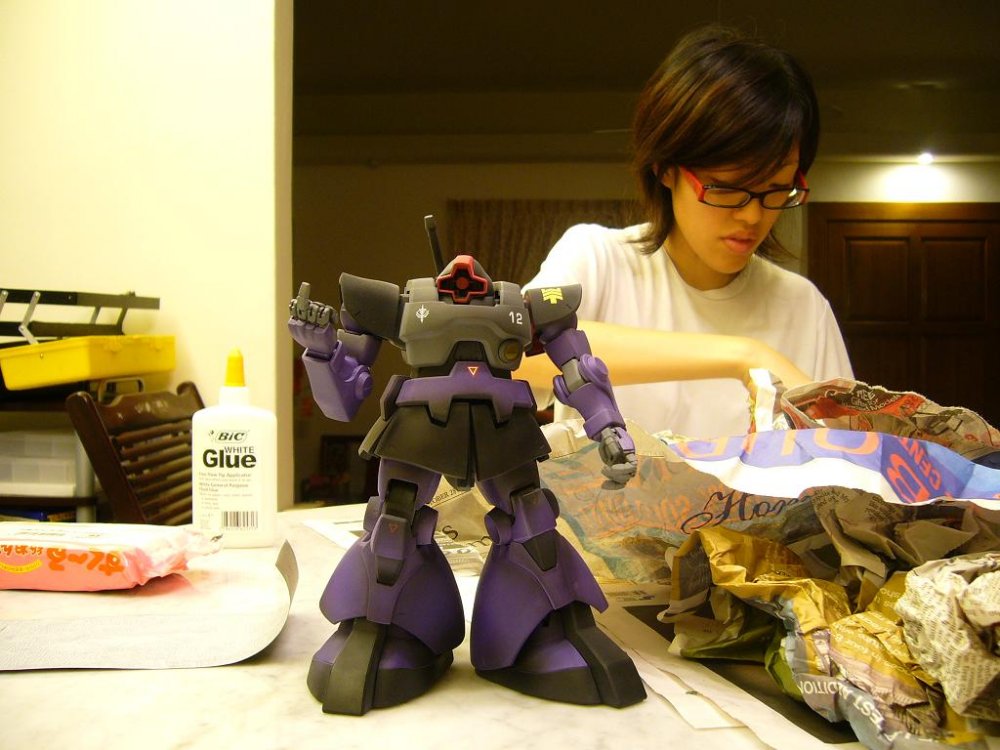
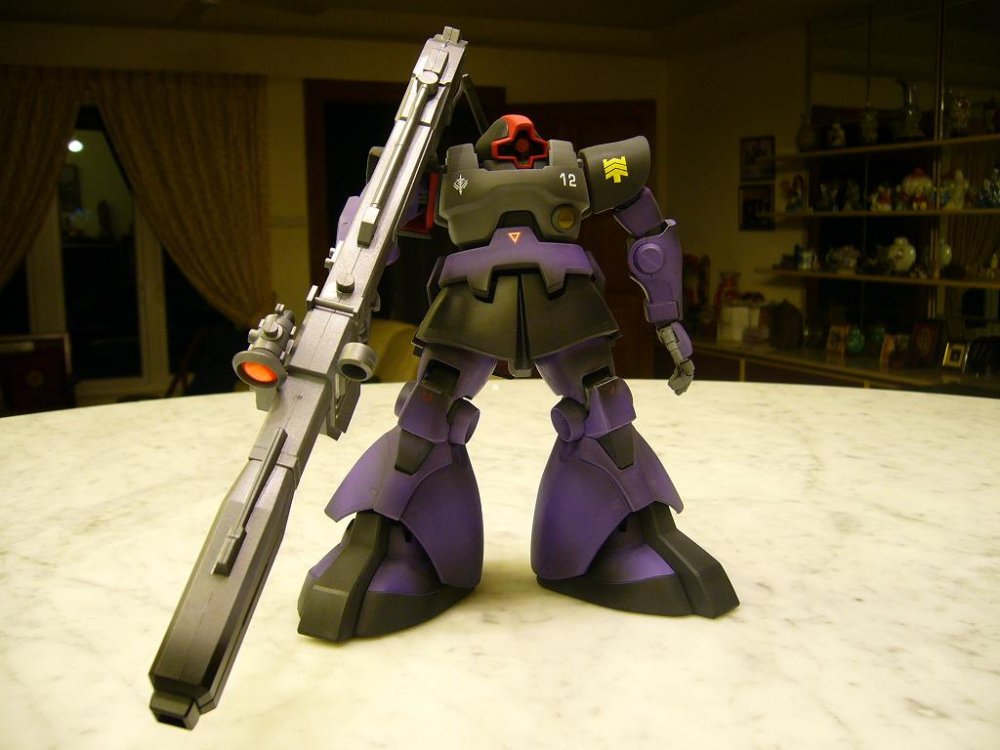
nice milia .. pity about the deep purple (good band though)! here's my (arguably) completed Dom. he says hi very succinctly! diorama in process ... using the newspaper + hydrocal plaster method. my first time ever, any tips anyone?

-
re the fogged over glass eyepiece: it's not acrylic paint, it's thinner. incidentally, how do you remove thinner from, say, a leather sofa?
-
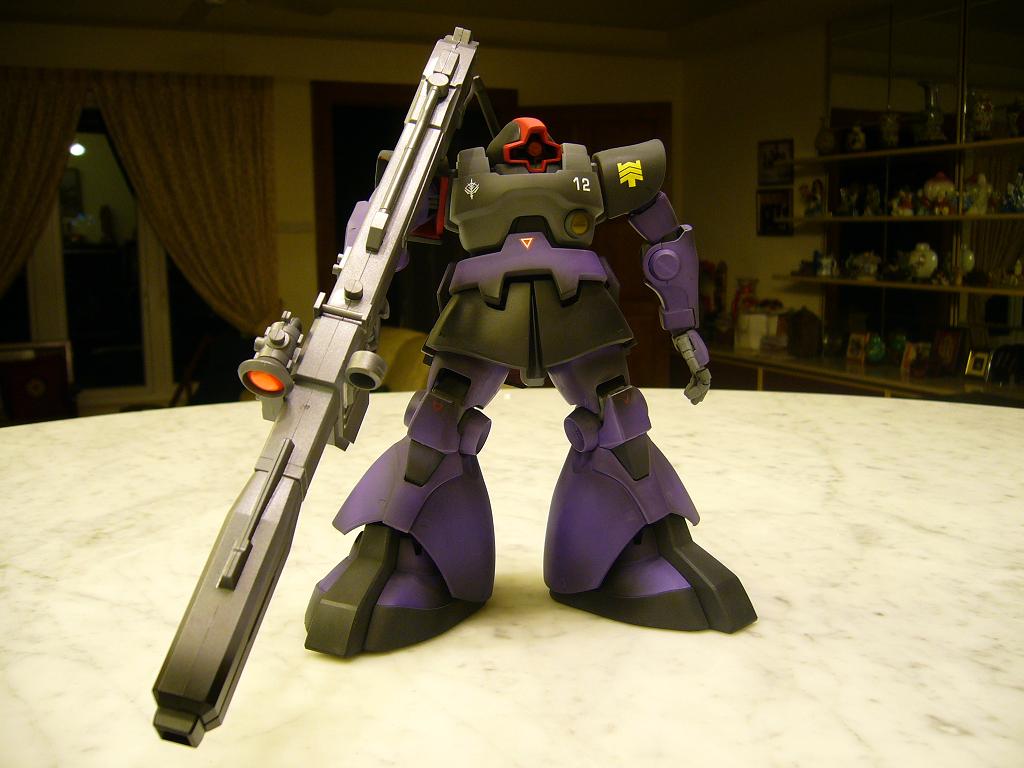
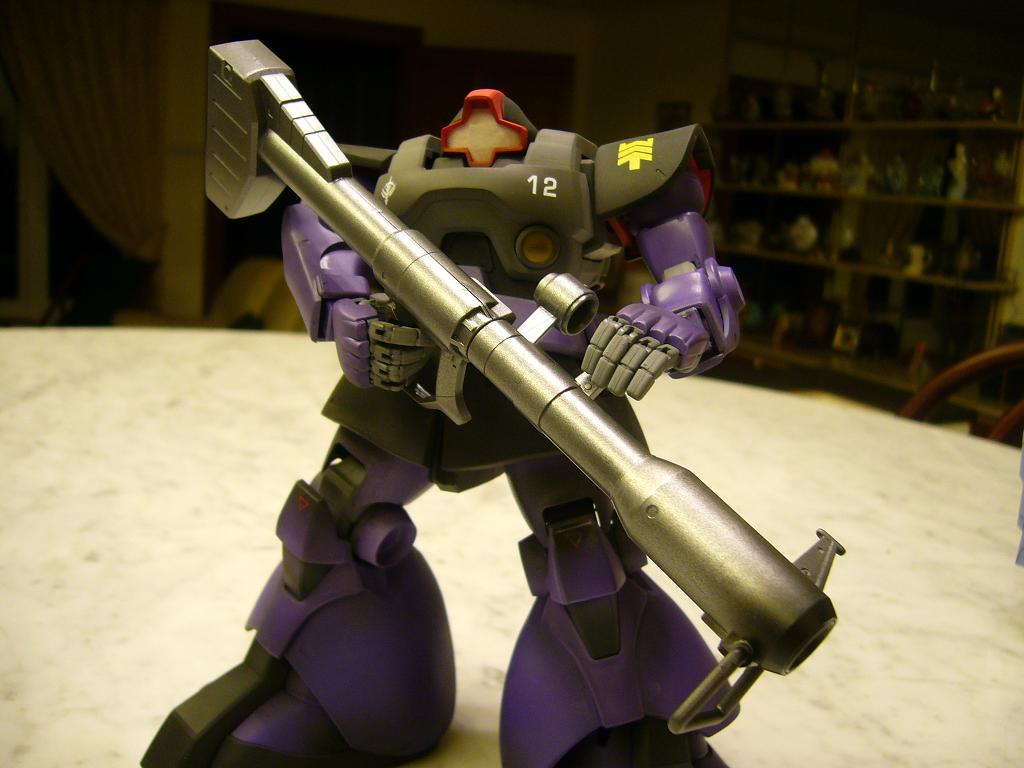
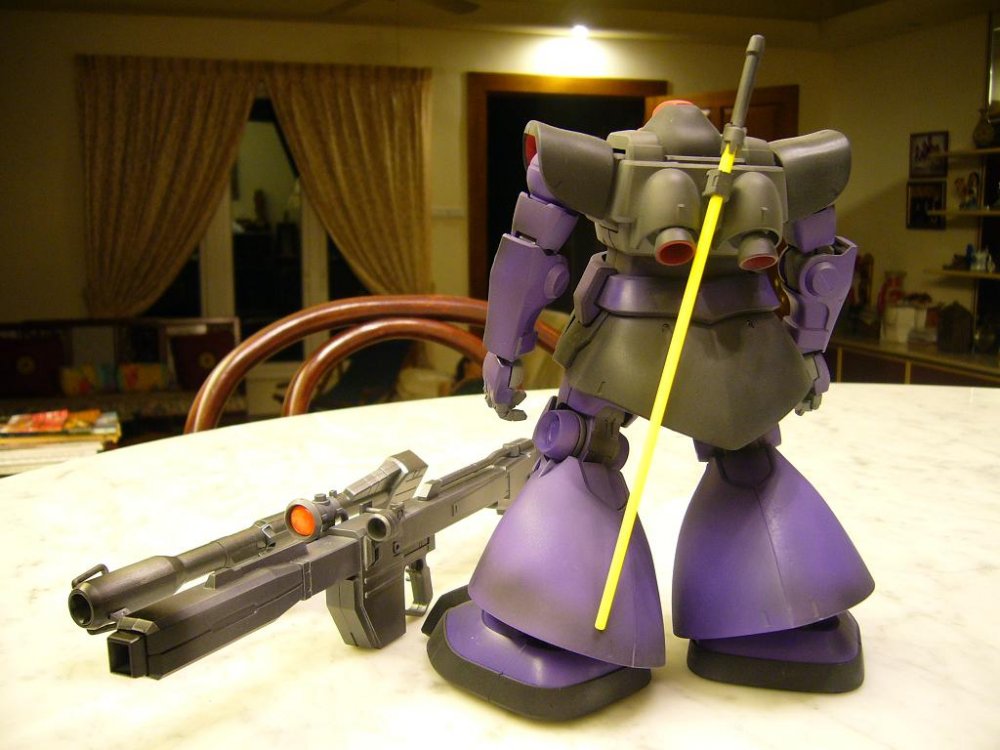
ah ... what would the asian equivalent of Future be? Tamiya polishing compound .. don't think I've seen that in my hobby store .. here's a pic of the Dom's gun. it really is quite an ugly robot ....
-
I accidentally airbrushed it mildly with some red paint. SO .. I cleverly applied thinner to it. And voila, it looks like this now.
-
I have finished my Rick-Dom. It is nothing by the standard that goes by here. BUT! I have a question. How do you fix the frosted over eyepiece? (See picture)


-
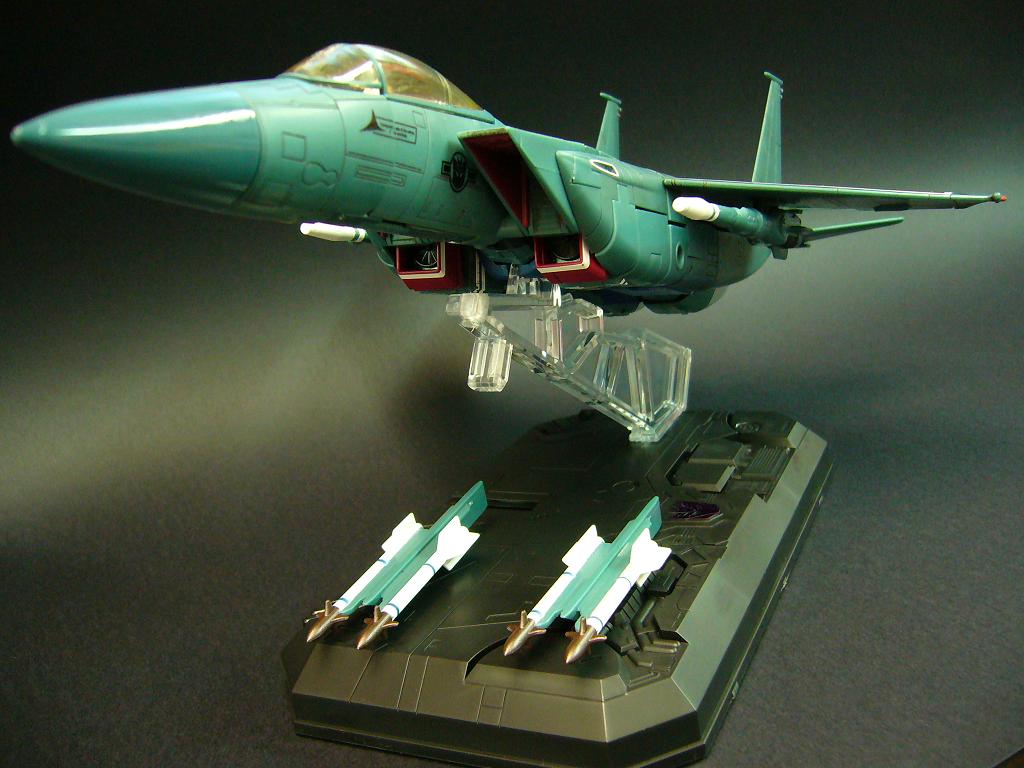
Transformers Super Thread 4: The Return
shiyao replied to Dangard Ace's topic in Hall Of The Super Topics
about 86 USD. OH NO DID I GET CONNED NOOOOOOOOOOO -
Transformers Super Thread 4: The Return
shiyao replied to Dangard Ace's topic in Hall Of The Super Topics
MINE ALL MINE!! SITTING ON MY DESK NOW MINE MINE MINE *edit: another pic of jet mode. haven't yet had time to transform him. *edit 2: just to be constructive - no, there isn't much diecast, if at all. starscream is one light mofo. yes he is very detailed and panel-lined. yes QC appears quite high, but i do have a small alignment issue with my cockpit window. yes professor blob is just that, professor blob. yes it is worth every cent just for jet mode.