Pat S
-
Posts
1026 -
Joined
-
Last visited
Content Type
Profiles
Forums
Events
Gallery
Everything posted by Pat S
-
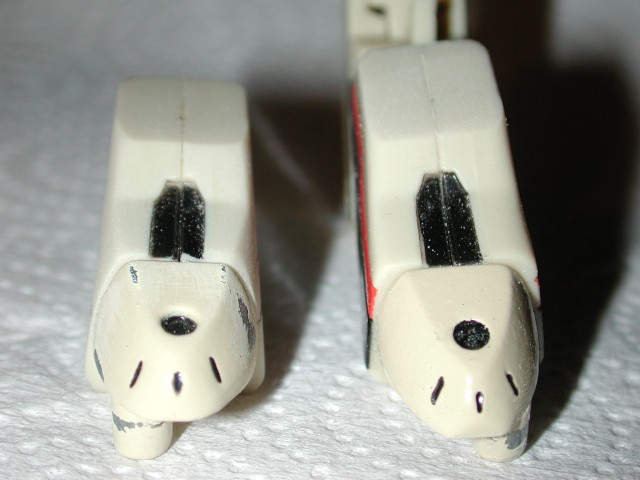
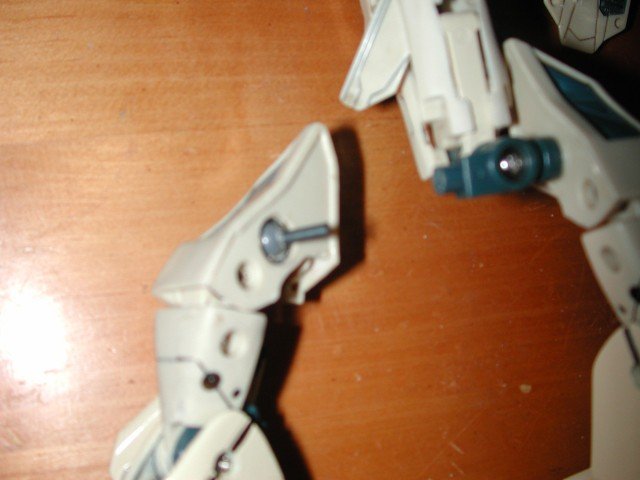
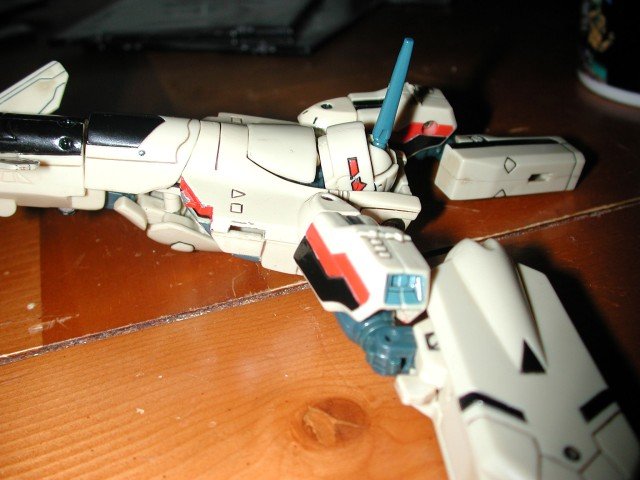
Also, from the front view, after the sort of triangle shoulder part that connects the arm to the body of the plane, the connected part is square in shape, not rounded like the triangle part. I hope that made sense, anyways, in this pic (and the one above), I've sanded down the one on the left to match the triangular part.
-
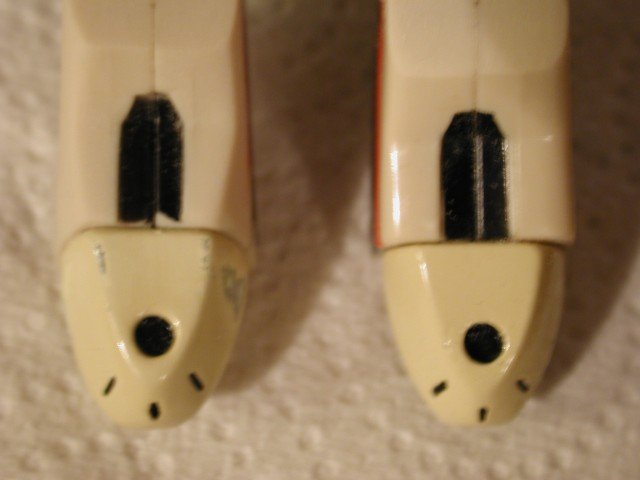
I sanded those raised areas off.

-
Notice the tops of the shoulders, the raised black areas... It's in some of the line art, but the way it came out on the toy doesn't look good to me, so...

-
Ido: I haven't been able to figure out a way to fix the legs so they are more poseable. I considered using a 1/60 leg as a skeleton for the YF-19, but the 1/60's don't bend any further forward than the YF-19. I'll keep thinking on this one, because I'd love to be able to get them to bend further forward, and also bend toe out. I've already sanded the knee area down to get them to go further forward, but it didn't help that much.
-
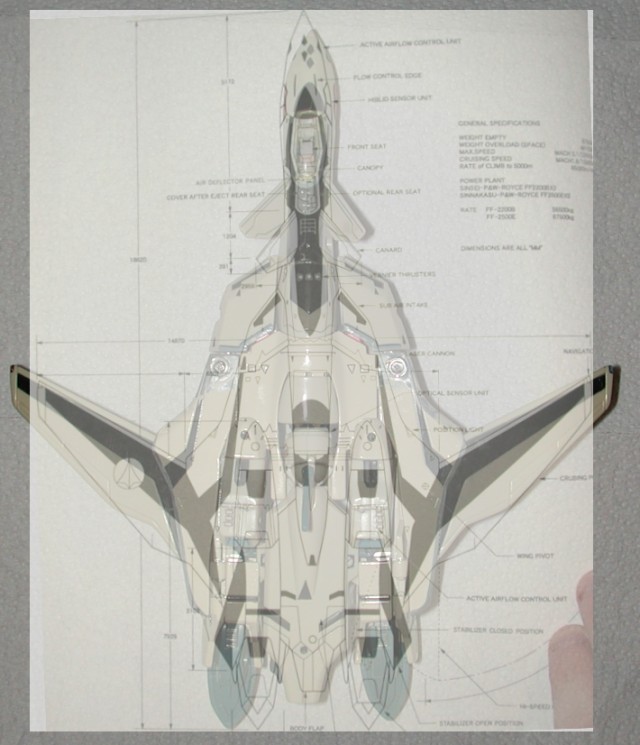
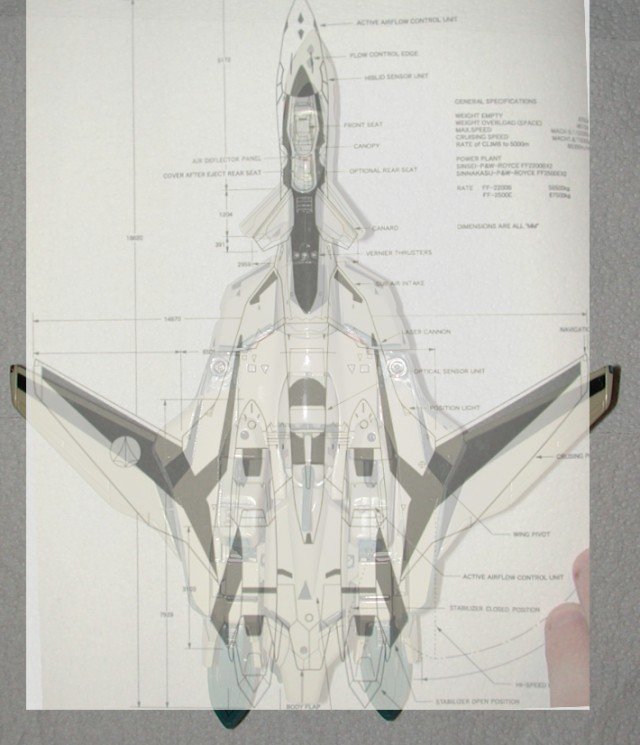
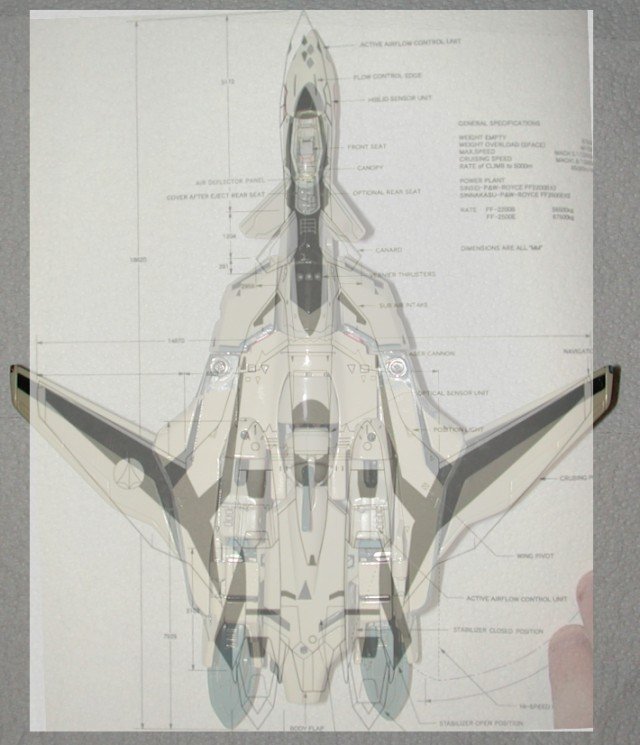
Here's another version, I moved the lineart up some. Looks a little better like this.
-
I played around with paint shop and overlayed the lineart ontop of a pic. Yamato did a decent job with the proportions, though it is a little fat. I don't think I can fix everything
-
Charlize was really fat in that last movie, hopefully she can get down to like 1% bodyfat to play Aeon A lot of people can't stand Peter Chung's style, but I love it because it is so unique. Hope this turns out well, but it reminds me of what happened with Tomb Raider for some reason. Not that Tomb Raider was any great work, but the movie seemed a little overly cheesy. I hope they go the serious mindf*ck route that Aeon Flux is known for, and she better die multiple times And please, no nu-metal soundtrack!
-
Thanks, that's what I used to seal the joint in. I filled the hollow hip section with Tamiya putty behind the joint, so it can't back out. I'll play around with it, I think I need more putty to finish this thing Thanks for the support fella's. Some of these mods are easy to do, like moving the shield, and head bar removal. If anyone tries them, let us know how it works, post pics too.
-
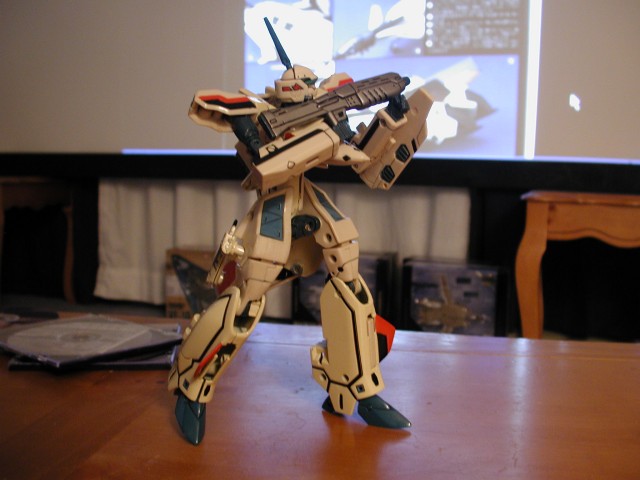
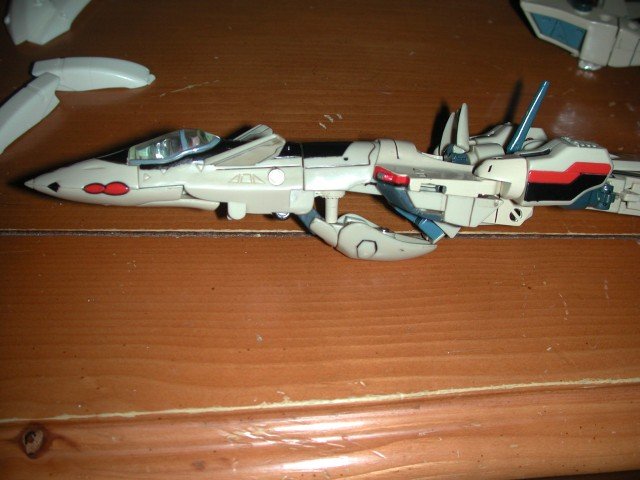
Another pose shot, looks funny without the cod piece. The feet need more poseability to keep up with the hips now...

-
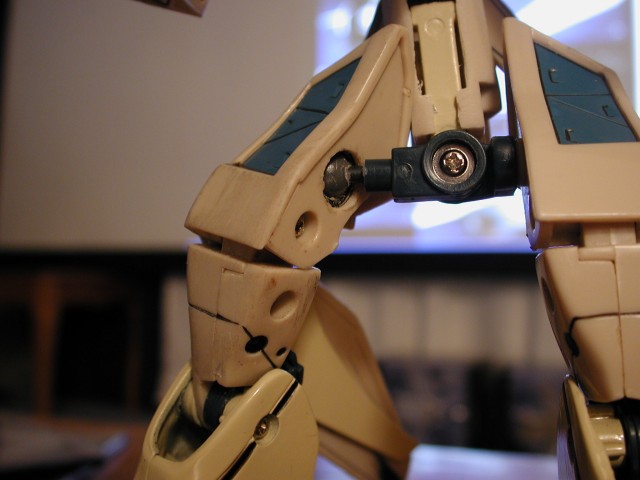
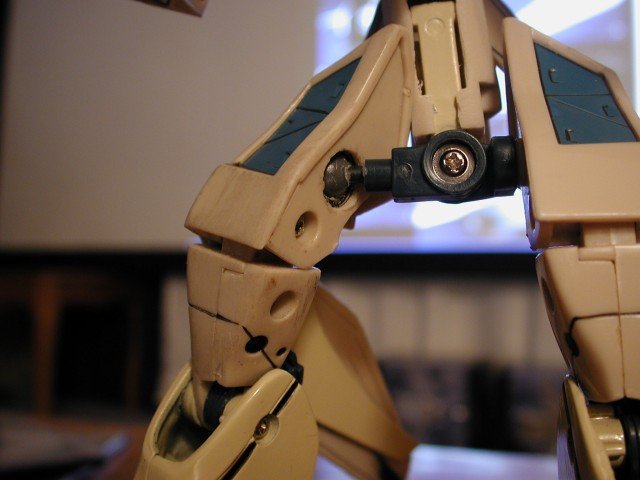
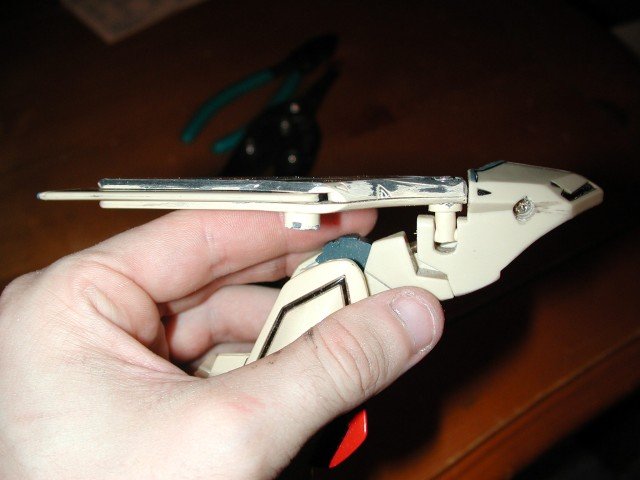
Unattatched you can see the metal rod better. Sorry about the blur.
-
I was going to wait until I had the other one done (I had to order new parts because I broke one of the ball sockets). But, I can post the one I have done. I'm going to try and change this setup to get rid of the long post, so all of the parts between the hips will likely change before I'm done. This is before cleanup mind you...
-
Yes, I will have to think of a way to do this. It would be nice if they made mini routers, with mini tables too The crotch guard... I am thinking about making it detatchable, but I may not have to yet. I would like to be able to see the gunpod from the front view in any case with no big lump between the intakes. This also means removing and recreating a different mount for the legs. I think this project is going to take a few months.
-
Doh, I assumed on that one, thanks for the correction.
-
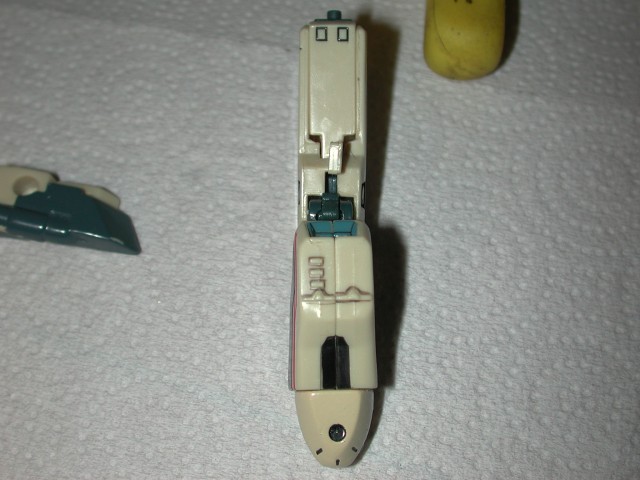
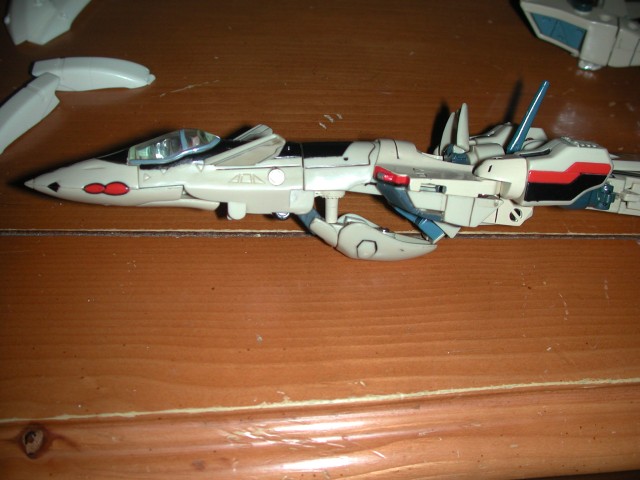
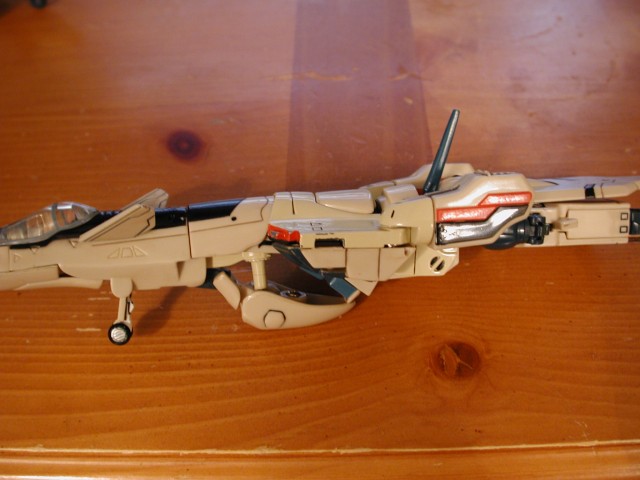
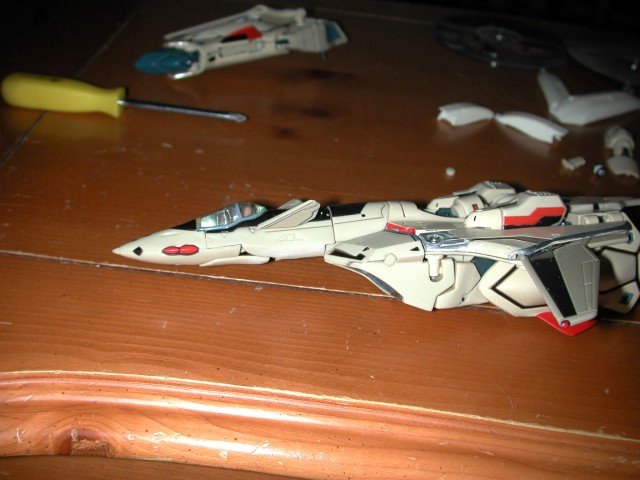
Goodbye landing gear. I will fill the holes (on the legs too), and scribe in some of those cool looking stealth type landing gear doors, but probably won't have working landing gear (I'll think about it still). I am going to do some more sanding up front here, and then add some filler under the nose from the cockpit forward, and try to get it to look more like the Hasegawa kit. I have a question though, what's a good filler to use for major mods like this?
-
The landing gear sucks, sucks, sucks. I hate it, I would never use it because it's so ugly, sooooooo....
-
4chan is back, and the mecha section is awesome!
Pat S replied to Pat S's topic in Anime or Science Fiction
-
That's my favorite paint scheme. Nice work!
-
Perfect fit now. (except the head laser points up now unless you put it underneath the shield)

-
Voila!

-
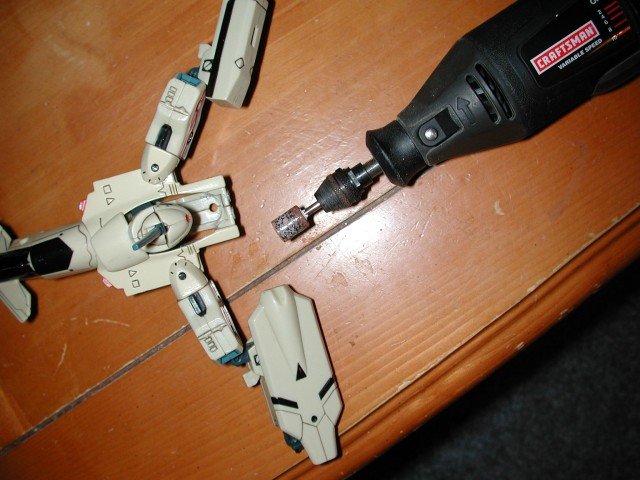
I dremeled out the bar section and some of the sides, and...
-
I wondered why this was...

-
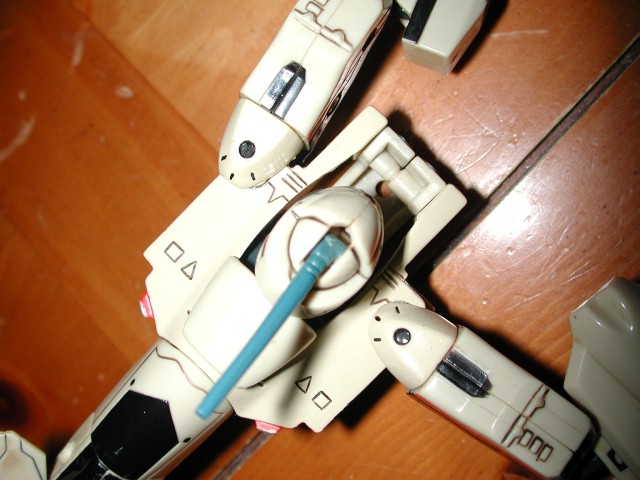
The head in fighter and gerwalk sticks up too high...
-
Tonight I sanded down the giant wint mount points, and some of the wing edges. The top mount points have been eliminated, and the bottoms have been shortened about 1/3. I will fill the top sections when all of the major mods are complete. In order for the screw to be able to sit flush you have to sand down the little arm that comes off of the leg into the wing. I also had to cut about 1/3rd of the spring off. Amazingly, the wing ratchet is tighter now!
-
4chan is back, and the mecha section is awesome!
Pat S replied to Pat S's topic in Anime or Science Fiction
-
Good idea for next time I guess, the yellow sub joints have been backordered for months... I'm already stuck with the wav/koto combo as I've just epoxied one side together