

Anasazi37
-
Posts
2029 -
Joined
-
Last visited
Content Type
Profiles
Forums
Events
Gallery
Posts posted by Anasazi37
-
-
Wow, thanks for all of the positive comments guys! It's feedback like this that keeps me making decals, stickers, and customs in my limited free time.
Sadly, the custom is already on its way to g3173. It's like letting go of a loved one....

-
I've had these for a while. I checked the mag section here first and didn't see them. Fortunately, I have a huge folder with various pics that I have found on the web. I have a few others I think. Lemme know if you need some pics (or the one I posted) for reference purposes, I'll be happy to e-mail em' to ya.

I'm also working on 1/48 versions of the BR 004 and 006. Any reference pics you can send me would be greatly appreciated. Jung, mslz22, and I have been looking for good ones for some time now....
-
Great work! Actually you can remove the missle ends on the UUM-7. It takes a bit of beating on them, but it makes painting alot easier! I have done this to all of the customs I have done without a problem. Just glue back in when your done.
Good to know. I thought about taking a whack at them but you never know just how much super glue Yamato uses and it wasn't worth the risk. I'll defintitely give it a try on my next custom, though.
-
how'd you paint the box missles?
The UUM-7 box missles were a real headache to paint. After airbrushing the base coat of sky grey and the overcoat of sea blue, I had to use a very fine brush to hand paint the yellow and gunmetal sections of the missles. Talk about tight spaces.... I had to take it really slow to be as accurate as possible. I then weathered those sections and the decals with some charcoal pastel powder on a q-tip.
-
Armored Fighter
-
Armored Gerwalk

-
Armored Battroid
-
I can't see them.

Something odd is happening with my ISP. Hopefully the problem will be fixed shortly. If not, I'll post pics some other way.
Edit: Looks like the problem is fixed.

-
Just uploaded larger pics. Graham, please feel free to add this valk to the custom toy page.
-
Just curious...how durable is the paint to frequent handling?
The paint job is pretty durable. I sanded down or used a Dremel on the parts that rub together to get rid of paint scrape and the clearcoat I use is tough. However, you should always be careful when transforming a custom.
-
I think you forgot to take out the pegs (in the nose cone) for the Gerwalk and Fighter Modes.

I didn't forget to take out the pegs, I forgot to paint them! I didn't notice the problem until I started taking pictures.
 They are drying right now and will be put back in tomorrow.
 -
Armored Battroid


-
Armored Fighter


Armored Gerwalk


-
Gerwalk

Battroid


-
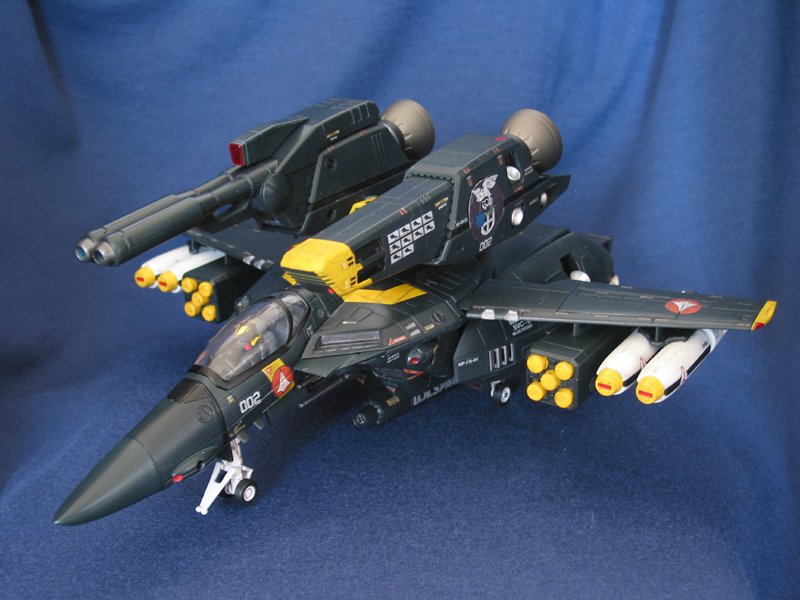
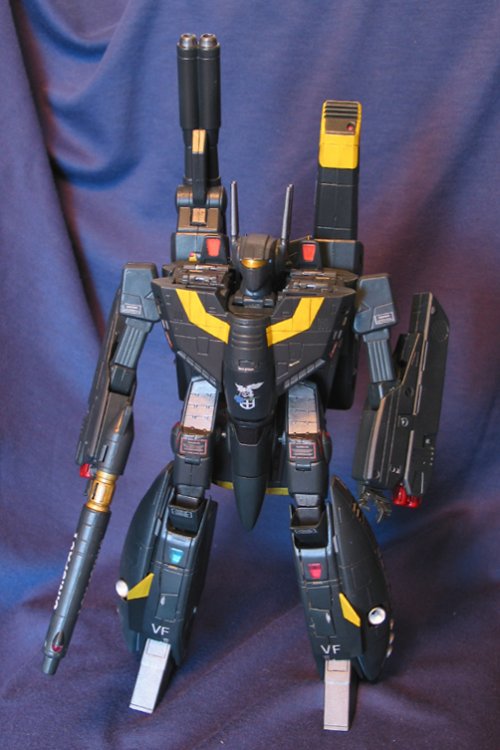
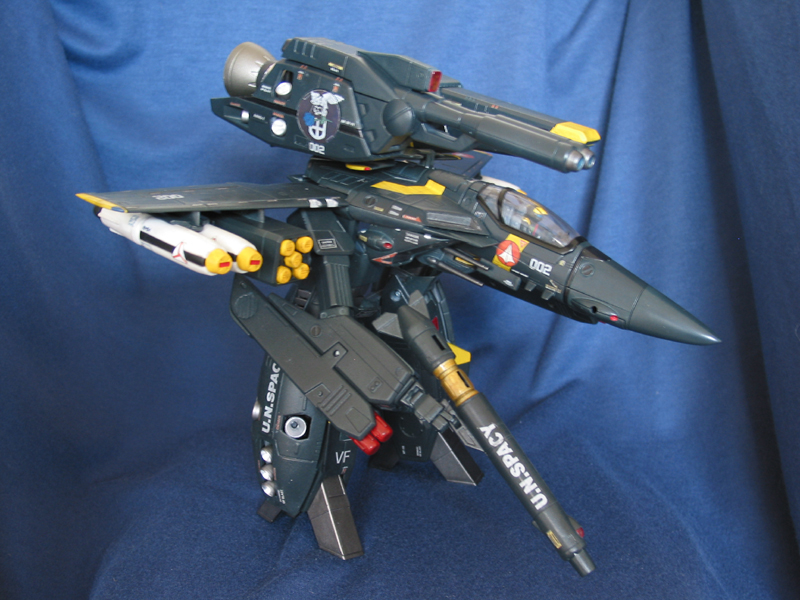
This was a commission from g3173. He asked that I not only recreate the Blue Roses 002 Strike in 1/48, but also give it a paint job with a "broken in" look. I started with a solid undercoat of sky grey and then applied sea blue, varying the intensity so it looks like a well-used valk. All metal and yellow colored areas and all of the decals were distressed/weathered using charcoal pastels. It's hard to see all of this in the pics because I prefer more subtle effects, but it's there.
While the Minmay Guard Strike was more challenging to create, this has to be my favorite custom. It's going to be really hard to send this one to its new home....
Some of the pics are a little blurry--sorry about that. My digital camera wasn't behaving today....
Fighter


-
So *that* is what Gene and you had up your sleeves when you ordered the DYRL decal sets. I was wondering if you were doing a full repaint or just adding details. Nice work! The fully armored trio is going to be one heck of a sight to behold....
-
Anasazi's decals are sold in Twin moons
FYI: Even though Twin Moons shows my sets as preorders, they are in stock. Tamim's been way too busy to update his site lately. The sets have been available to ship for about three weeks now.
-
And a far shot. For beginners, like me, the pencil is nice, because there's always the eraser if you get too much on. Airbrush is hard to erase!
What also works well is using charcoal pastels (available at most art supply stores). You take a q-tip and rub it along the length of the pastel chalk, then use the q-tip to apply the weathering where needed. Takes some of the guesswork out of this "advanced" technique. It's pretty similar to smearing pencil on cardstock, but a lot more accurate.
-
Do you get better quality if you do a colour photo copy on the decal paper instead of inkjet print ?- Anasazi37
I just bought a few pages to try out this weekend .
I have seen this in my local hobbyshop - Micro Format's SuperCal Inkjet Decal System
Wow, that reviewer doesn't really know what he's talking about. I've tried pretty much every printing technique and paper type out there before I settled on the system I use now. First of all, you should NEVER use ALPS inks on paper designed for inkjet printers. The ink might stay put on small designs, but just try using the decal. Bad, very bad.
There are about five or six inkjet decal paper suppliers out there. The paper is specially coated to "trap" the ink on the surface of the paper. Unlike with traditional paper, the ink is not absorbed into the paper so it can smear or run very easily. You also have to wait for the ink to fully dry before applying the protective coating. This can take hours or even days depending on the humidity where you live. The "fixative" they sell with that kit is nothing more than a clear acyrlic top coat which you can buy from Krylon for a few dollars in a much larger size (Crystal Clear). I'd actually recommend using Microscale's Liquid Decal Film for small decal projects. You can even brush it on by hand.
Laser decals never look as good as inkjet printed decals (most color laser printers max out at 600 dpi whereas inkjets go as high as 2400 dpi), but the advantage is that they don't use water-based inks. The colors are also less saturated.
Here are the supplies I recommend:
HPS PAS/2 laser decal paper (www.papilio.com)
HPS IAS inkjet decal paper (www.papilio.com)
Microscale Liquid Decal Film (www.bare-metal.com)
HPS also sells another type of laser decal paper called PAS/N but it's not for the novice.
Shin, what Neova describes is essentially the process I use to create decals. It can be a lot more complicated depending on the project (like the Minmay Guard sets), but scanning in orginals, rendering new ones in Illustrator, then resizing them to fit properly is the basic process.
-
I read here before that they were available and there was a link to a site, but I can't seem to find it. If anyone has the link or knows where to get them, please let me know.
PS
A link to custom 1/48 parts would be appreciated as well.
Thanks
I sell custom stickers, as does Takatoys. The catalog of my sets can be found here:
Waterslide Decal and Sticker Catalog
Takatoys sells his sets through Twin Moons Anime (tmpanime.com). I sell some of my decal sets through TMP as well, but not stickers.
-
One more thing though: The contest for Koenig Monster box art submissions has been pinned in the fan works section of MW. The contributions so far: zero
Any ideas how to generate more interest in the contest? All help will be much appreciated!
I am willing to add a few sets of decals/stickers to the prize pile if that might help generate more interest. Minmay Guard, Blue Roses, Enigma, whatever. Let me know.
I'd enter the contest myself but I'm insanely busy with way too many projects right now....
-
I officially volunteer my VB-6 recast for you to use when you make the decals. I'll have Ken (Valkyrie) mail it straight to you. Of course you'll need to get it as soon as possible so you can finish the decals to be included with the other kits that are sold.
I don't need a pristine kit to make the decals, so if Valkyrie can get me one of his "cleanup" casts that should be great. While he's casting the final pieces I can be designing the decals. The last thing I want to do is hold up the distribution of these kits. Your offer is greatly appreciated, though.
-
Great to have you on board, Anasazi!
As soon as I'm able, I'll get you a kit cast from my clean-up molds (as I've taken to calling them), so you can get going on the decals while I clean up casts and make final molds.
I was going over my VF-X2 art book the other day, and I didn't see a lot of decals which obviously need to be added. But there are at least a few. And also, the red 'eye' decals included with the kit are incorrect. The inside part of the eyes should be white.
And by the way, there looks to be at least two different VB-6 paint schemes in VF-X2! One in the game, the other in the opening movie.
Will I get to keep the kit you send?
 Seriously, though, I'd be willing to do the work in exchange for one of the final kits. I couldn't justify the expense of purchasing an original when they came out. If my design work ends up costing less than the price of a kit, I'd be more than willing to pay the difference. I have no idea when I might get around to building this behemoth, but that's besides the point. It can keep my unbuilt Blackaces recast USV and Tanmen models company.
My guesstimate is that the "stock" decals probably won't take up more than a half sheet, which would cost approximately $10 or less to produce. If we start throwing in numbers and custom markings, we're looking at closer to a full sheet ($20) per kit.
I don't have access to either the VF-X2 art book or the game, so at some point I'll need someone to email me scans, screen captures, etc.
-
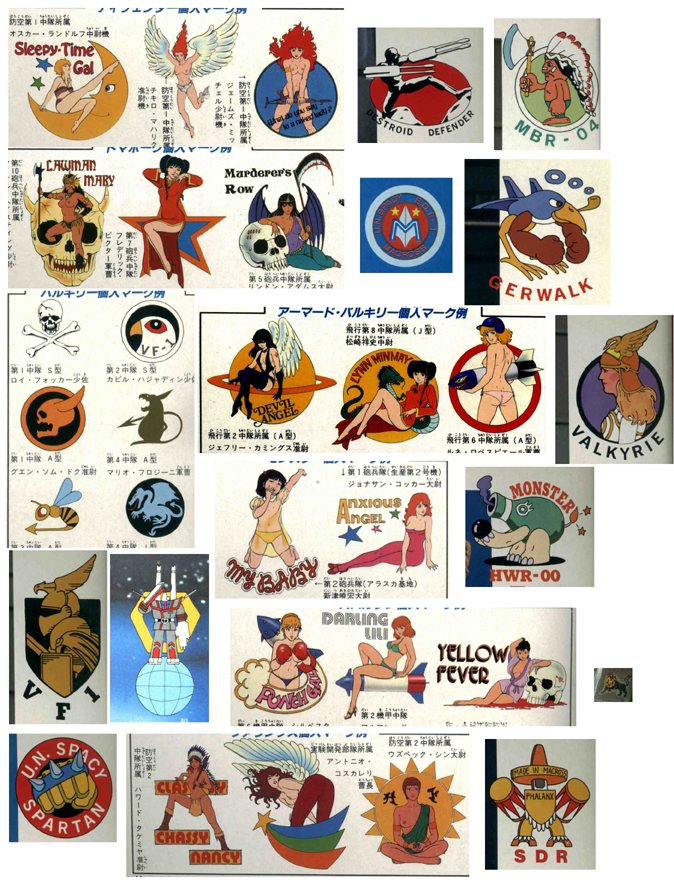
Here's all of the artwork from the Macross Hobby Handbook. Most of it could be used to dress up a Monster. There's also a TON of WWII-era aviation artwork out there that we could "appropriate" for this project.


Question about clearcoating Anasazi's decals
in The Workshop!
Posted
That's right--you had one of my really early sets before I figured out what protective coating works best. My decals don't suffer from that nasty cracking and peeling anymore.
You can get away with applying the decals to your valks without laying down a glossy clearcoat if you use Micro Set and Micro Sol in tandem. Heck, you should use them anyway but they really help the decals adhere to the bare plastic. As for a top coat, if you are going to handle your valks on a regular basis, I would suggest coating them because no decal (even professional ones) are designed to stand up to repeated handling. If you plan on leaving them displayed a shelf, then you won't necessarily need to coat them.
If you have access to an airbrush, I'd recommend Future Floor Polish for the glossy base coat and Micro Flat for the top coat. If you need to go the spray can route, Krylon Crystal Clear is a good base coat and Krylon Satin is a good top coat.