Grayson72 Posted July 23, 2004 Share Posted July 23, 2004 I thought I would share this with you guys. I'm taking the Hasegawa Battroid and the Arii Armored battroid and meshing the two. This is my first custom/kitbash so it'll prolly take me a long time to get it right but it's something I've always wanted to do. The Armor won't be removable but that's ok, I don't play with my models anyway. I started with the arms, I'm using the whole arm for this part because it's pretty much visible from all angles. Quote Link to comment Share on other sites More sharing options...
Grayson72 Posted July 23, 2004 Author Share Posted July 23, 2004 Here's the back of the arm armor, I filled in the sides with two part putty and then coated it with Mr. Surfacer to smooth things out. Quote Link to comment Share on other sites More sharing options...
Grayson72 Posted July 23, 2004 Author Share Posted July 23, 2004 Here's the top part of the arm, I finally figured out a good way to get at the seems in those little ridges. I wrapped an old credit card in a piece of 400 grit sandpaper and used the edge, works like a charm. Quote Link to comment Share on other sites More sharing options...
Grayson72 Posted July 23, 2004 Author Share Posted July 23, 2004 Here's the arm from the Hase Battroid, I had to cut off the top part to make it fit right. Quote Link to comment Share on other sites More sharing options...
Grayson72 Posted July 23, 2004 Author Share Posted July 23, 2004 Here's the two together, the fit is pretty good so far, but I'm far from done. I figured out a technique were I fill the voids with Tamiya putty and let it set for awhile, once it's dried up a bit to where it's not sticky but still soft I jam the arm in the armor and it forms around the piece. Then I sand off the parts that goosh out after it's hardened. Quote Link to comment Share on other sites More sharing options...
dyowelb Posted July 23, 2004 Share Posted July 23, 2004 (edited) oohhh.. i can't wait for this project to be finish. thanks, d Edited April 23, 2005 by dyowelb Quote Link to comment Share on other sites More sharing options...
jardann Posted July 23, 2004 Share Posted July 23, 2004 This looks like a great project! I have one of those old ARII 1/72 batts sitting in a box somewhere. I'll be very interested to see how this finishes up. It looks like you are going about it the right way so far. Keep up the good work and keep us posted please! Quote Link to comment Share on other sites More sharing options...
Grayson72 Posted July 24, 2004 Author Share Posted July 24, 2004 Another shot of the arm, I primered it with gray tamiya primer from a spray. Man that stuff dries fast. Anyway it really helps to highlight the defects but I'm almost there with the front. This has been the hardest part because I had to build up the gray part with putty and then sand it flat inside that recess. Quote Link to comment Share on other sites More sharing options...
Grayson72 Posted July 24, 2004 Author Share Posted July 24, 2004 I scribed some panel lines to give it a little more interest, I'm also gonna add a few rivets here and there. Quote Link to comment Share on other sites More sharing options...
Neova Posted July 24, 2004 Share Posted July 24, 2004 Awesome Grayson! I have the Arii kit here too waiting to be kitbashed... Hopefully one day when I can actually find the time to do this between my jobs! Quote Link to comment Share on other sites More sharing options...
Myersjessee Posted July 24, 2004 Share Posted July 24, 2004 Excellent! ...and he moves from straight models to customs....soon scratchbuilds?!?! Quote Link to comment Share on other sites More sharing options...
astromanED Posted July 24, 2004 Share Posted July 24, 2004 I'm excited to see where this project is going to go. Keep it up. I look foward to your next post. Quote Link to comment Share on other sites More sharing options...
Grayson72 Posted July 25, 2004 Author Share Posted July 25, 2004 Here is the arm with the rivets or whatever they are. Quote Link to comment Share on other sites More sharing options...
Grayson72 Posted July 26, 2004 Author Share Posted July 26, 2004 Here's what I did for the feet. I thought the feet from the Hasegawa kit would look too small so I decided to use the ones that came from the original Arii kit. Unfortunately the stock feet are way fugly so I sanded off the goofy looking bumps and then I needed to cut down the thickness of them. I used the feet from the Hasegawa kit to mark the right thickness. Quote Link to comment Share on other sites More sharing options...
Grayson72 Posted July 26, 2004 Author Share Posted July 26, 2004 Here's me using the razor saw, these are great for cutting straight lines. Carefull, plastic isn't the only thing they'll cut. Quote Link to comment Share on other sites More sharing options...
Grayson72 Posted July 26, 2004 Author Share Posted July 26, 2004 Here's the foot after I was done cutting the foot and my finger. Quote Link to comment Share on other sites More sharing options...
Grayson72 Posted July 26, 2004 Author Share Posted July 26, 2004 (edited) Unfortunately after I got done cutting the stock foot down I tried it on the model and it looked even fuglier. It was just to spread apart from the front and back. Sooo... I went back to the stock Hase parts. I wasn't about to try and fit the whole leg into the armor (it's not removeable so what's the point?) so I cut off the part I needed. Edited July 26, 2004 by Grayson72 Quote Link to comment Share on other sites More sharing options...
Grayson72 Posted July 26, 2004 Author Share Posted July 26, 2004 (edited) I then had to cut away some plastic on the underside of the armored leg to make it sit correctly. Edited July 26, 2004 by Grayson72 Quote Link to comment Share on other sites More sharing options...
Grayson72 Posted July 26, 2004 Author Share Posted July 26, 2004 (edited) So after all that here's where I wound up, it's still a little small but looks better then the first option. Edited July 26, 2004 by Grayson72 Quote Link to comment Share on other sites More sharing options...
Grayson72 Posted July 26, 2004 Author Share Posted July 26, 2004 Someone did a battroid conversion in one of the Hobby Japan mags that I have and he counter sunk the leg lights so I figured I'd give it a shot. I stole the leg lights from the Hase battroid kit and white glued it to the leg where I wanted it. Then after it had dried I took my scribing tool and lightly traced around it. I kept going over and over it a little harder each time till I had a nice groove to act as a guide when I went to chisel out the middle part. Quote Link to comment Share on other sites More sharing options...
Grayson72 Posted July 26, 2004 Author Share Posted July 26, 2004 I cleaned up the edges several times with Mr. Surfacer 500 (man I love that stuff). Once I had it pretty clean I just needed to close up the gaps so I used my goosh technique again to get a perfect fit. Quote Link to comment Share on other sites More sharing options...
Grayson72 Posted July 26, 2004 Author Share Posted July 26, 2004 Here it is with the lens in. Quote Link to comment Share on other sites More sharing options...
Grayson72 Posted July 26, 2004 Author Share Posted July 26, 2004 (edited) Well the light was just one small part of the leg modifications I did. I scribed some panel lines along the big missile covers to give them the appearance of where they opened. To do the lines I cut some of the thick label maker tape, makes a nice line and sticks really well and is not easily gouged when scribing. Edited July 26, 2004 by Grayson72 Quote Link to comment Share on other sites More sharing options...
Grayson72 Posted July 26, 2004 Author Share Posted July 26, 2004 (edited) Here's a before and after shot with the other leg that has yet to be modified. I got rid of the raised panel lines and big bumps which I suppose were rivets but I thought they looked kinda silly. I gouged out the corners of a raised detail part and used one of my rivet scribers to make better looking bolts. Edited July 26, 2004 by Grayson72 Quote Link to comment Share on other sites More sharing options...
Grayson72 Posted July 26, 2004 Author Share Posted July 26, 2004 Here's a closeup of the front of the leg armor after primering. The light is snug and you can see some of the panel lines I did, the one near the foot came out the best, the long oval ones on the missile covers...well... not so good, I may just fill them and leave them out. Quote Link to comment Share on other sites More sharing options...
dyowelb Posted July 26, 2004 Share Posted July 26, 2004 what tool/s did you use to do the panel lines? any tips, sepcial techinques??? thanks, d Quote Link to comment Share on other sites More sharing options...
Grayson72 Posted July 26, 2004 Author Share Posted July 26, 2004 (edited) Well I have several templates for making the shapes, one from Verlinden and one from Hasegawa. Here's my panel line and chiseling tools from Hasegawa. I just use scotch tape to tape the templates on the model and then very carefully and lightly I trace the shape and I just trace it over and over again. After it's scribed in there pretty good I remove the template and sand off the bumps with some fine sandpaper and then clean the panel lines with the scriber tool again. Oh can't stress enough how great a pair of those opti-visor magnifying glasses you wear on your head are, makes all the difference. I'm new at this so anyone have any tips on scribing feel free to share. Edited February 8, 2006 by Grayson72 Quote Link to comment Share on other sites More sharing options...
Grayson72 Posted July 26, 2004 Author Share Posted July 26, 2004 (edited) Here's a cheapy set of wood carving tools that work well too, I got them at Michael's crafts. Oh and a wet stone for sharpening is a good thing to have as well, I got one at Home Depot. Edited July 26, 2004 by Grayson72 Quote Link to comment Share on other sites More sharing options...
hirohawa Posted July 26, 2004 Share Posted July 26, 2004 Looks great! Where did you get the Hasegawa templates and scribing tools from? Was it an online store? Quote Link to comment Share on other sites More sharing options...
Grayson72 Posted July 26, 2004 Author Share Posted July 26, 2004 Looks great!Where did you get the Hasegawa templates and scribing tools from? Was it an online store? Hobbysearch www.1999.co.jp/eng/ Quote Link to comment Share on other sites More sharing options...
tom64ss Posted July 27, 2004 Share Posted July 27, 2004 Does anyone else need this ARII 1/72 GBP kit? I was going to attempt this same kitbash a while back, but I both lack the skills and the time. Anyways, I got the kit, box is a little rough, and no decals, but if anyone reading this wants to attempt it too, please PM me. Otherwise, I'll probably list it in FS in a couple days. I'm pretty sure I paid $45+shipping for this so that how much I'll let it go for. Back on topic. Great work Grayson71, I can't wait to see it done. Quote Link to comment Share on other sites More sharing options...
Ignacio Ocamica Posted July 27, 2004 Share Posted July 27, 2004 Good work so far!!!! Keep us updated Quote Link to comment Share on other sites More sharing options...
Grayson72 Posted August 7, 2004 Author Share Posted August 7, 2004 (edited) Ok time for an update, in this next series I kinda wander around the whole model doing small modifications while I wait for other parts to dry etc... Here's how I'm doing the lower torso where the legs attach. I cut the section of the main body off that have the leg stubs. Edited April 16, 2005 by Grayson72 Quote Link to comment Share on other sites More sharing options...
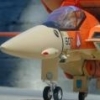
Grayson72 Posted August 7, 2004 Author Share Posted August 7, 2004 The lower part I cutoff fit pretty well into the lower torso of the armored kit. I had to cut the very tip of the nose cone to get it to sit right in there. Quote Link to comment Share on other sites More sharing options...
Grayson72 Posted August 7, 2004 Author Share Posted August 7, 2004 (edited) I filled the gaps with two part epoxy putty, this stuff is turning out to be pretty darn handy. It dries pretty hard but you can still cut and sand it as well. In this shot the two halves have been closed and the stubs centered. The putty pretty much takes over night to harden which gives me a long time to work with it. Good thing I'm not in a rush Edited April 16, 2005 by Grayson72 Quote Link to comment Share on other sites More sharing options...
Recommended Posts
Join the conversation
You can post now and register later. If you have an account, sign in now to post with your account.