PsYcHoDyNaMiX Posted April 13 Posted April 13 (edited) Meant to start this last year, but started last month, been working on this and going through the process... just a little teaser. Edited April 13 by PsYcHoDyNaMiX Quote
PsYcHoDyNaMiX Posted April 17 Author Posted April 17 2 hours ago, Bolt said: That's cool. Did you print the parts? Yup, printed test versions already. Going through iterations, adjustments and the such. Should have another update by the end of the week hopefully. Quote
PsYcHoDyNaMiX Posted April 21 Author Posted April 21 I was going to post an update on Friday, but got pretty busy. I have the next iterations to be printed for tomorrow and I'll post the results then. Quote
PsYcHoDyNaMiX Posted April 27 Author Posted April 27 (edited) I've been dialing in the colors, making more adjustments, and calibrations. Not tiny pics but not high def (sorry)... I'll have hi res pics hopefully sometime by the end of the week when the first (this) phase of the project is almost done. Edited April 27 by PsYcHoDyNaMiX Quote
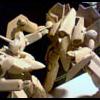
PsYcHoDyNaMiX Posted 3 hours ago Author Posted 3 hours ago (edited) TLDR: Just an update. I've been working on dialing the blue some more and started with the light blue-gray parts. I have to make some more adjustments due to the exposure settings because of the different mixtures of resin and colors. Sorry just took some quick shots with my phone's crappy camera. I didn't want to pull out the DSLR for pics just yet. Quick note: everything is held together with blu-tak. Yes parts are slotted and keyed and yes there are clear parts for the forehead sensor. I didn't add them in because they are small (they do fit no issue at all). The left is the first blue part (from last week), the right was printed up this past Friday. I know it looks a bit washed out and lighter (I had the overhead LED desk light set on high). On the light's first setting it looked more correct, the 2nd blue printout is still connected to the supports, the first blue color is the top of the VF1R head (and the spare/scrap support/raft next to the YF-21DX head): Yea the desk LED light's high setting really washes out the colors. I'll try to add a bit more blue/black to the light blue-grey for the second test/set: Spoiler for a little write-up and some earlier WIP pics: Spoiler I've included a reference palette I put together for the modeling process. from the image I started with one (not shown) similar to the upper left pair shown, then the second attempt I modeled the pair on the second row (from top down), and the third version is actually the one in the upper left. All of the first three iterations I modeled up were referenced heavily on the Yamato VF22S head. I hit a hard wall and burnt out for a weekend and went back to the drawing board. I put together the palette/collage and gathered more reference material (there really isn't much out there, lol). I started again but remembered I had the VF1Riders' conversion kit and used that battroid head (I guess more for practice). I did surprisingly well with that. The colors used on the VF1Riders' battroid head is/was the color scheme I'm aiming for the VF22S on the YF-21 Body. Blue head, light blue-gray, red visor, green sensor. NOTE: I have not posted the 3d model renders/pics for the printed version yet*. I probably will post the 3d render pics when the project is near its first phase completion. I've probably gone through 6 printed/different batches (not pictured) for the VF22S head, around 10 versions not including the colored version(s). All the versions/iterations were for sizing/spacing, positioning and they have a great range of movement (due to the ball joint). YES, the version I modeled up (hoping to finalize) can stay on between the transformation process fighter>gerwalk>battroid without having to be removed. *Eureka moment* it closed! Other versions had a slight gap, parts colliding preventing transformation. Yes, sizing was crucial... 0.5mm threw it off, lol. I was going to originally go with a version that was scaled evenly, but it looked a little on the thin/narrow side (top-row/first set). The VF1Riders is the middle row/second set. The bottom row/third set is the extra wide version I modeled/designed and it fits the look very well (imho). It's actually a little bigger X/Y/Z in comparison to Bandai's default YF-21 DX Battroid head. With the VF1Riders VF22S head that I modeled and printed... that version can only be used for battroid mode because of it's shape/design. I tried to scale it to accommodate the transformation process but the side perspective looked too weird (as pictured in the bottom row of the palette/collage). Canopies, check the following spoiler: Spoiler The top row/set is the second batch of clear canopies printed. I've included them in the pic because I used some really great manual supports that broke away very cleanly, however they did not fit (imho) perfectly... they were off by about 0.5mm. The bottom row/set is the third batch of clear canopies printed. I actually messed up because I went overboard with the supports and made a mess, but they fit perfectly well with the YF-21DX. I also modeled up Custom Replacement Antennas (yes I got lazy, I went quick and dirty by printing them in clear, nor properly orienting them and with horrible supports but the clear is resilient enough to withstand flex. I guess that was the real test aside from fitting. The normal length Custom Replacement Antenna is 0.5mm short (I've since corrected this and will print the updated version in the next batch): VF1R head with Custom Replacement Antenna, Concept Canopy III (L), VF22S Canopy III (R) VF22S Max head with Custom Replacement Antenna: VF22S Canopy III (L), right Concept Canopy III (R): VF22S Max head with X-Large Custom Antenna, left is Concept Canopy II, right is Concept Canopy III. I included the mounted CCII in the pics to show the slight gap in fittment and also the clean look with correctly done supports: And modeling up more parts... Spoiler for more pics: Spoiler Currently working on rear stabilizer replacements, bay door covers (modeled for the VF22S) and other ideas, while I don't have any project priority/eta for these yet, but I know the baydoors are going to be the more challenging part because looking at Bandai's design for the YF-21 (bay door) fastpacks, they were really fitted with a lot more curves than anything else I've worked on so far for this project. We'll see. Edited 1 hour ago by PsYcHoDyNaMiX Quote
Recommended Posts
Join the conversation
You can post now and register later. If you have an account, sign in now to post with your account.