

Chronocidal
-
Posts
10130 -
Joined
-
Last visited
Content Type
Profiles
Forums
Events
Gallery
Posts posted by Chronocidal
-
-
Judging by that comparison, I'd say that factory fresh aircraft are definitely fully painted. Also, from a modeler's perspective, if you research certain aircraft, they are painted in specific shades of colors, mostly flat shades of grey. That top Tomcat looks completely dull. Actually, they both do, but the lower one seems much darker.. I'd attribute this to a combination of things, mainly, accumulated dirt, oil, grease, etc (you can't run a Tomcat through your local Chevron auto-wash after all). The paint may also be wearing thin, and we're seeing through slightly to the metal underneath. Also, one thing about flat paint: if you rub it enough, it polishes to a dull shine. Simple friction with the air would probably be enough to polish planes to some extent, while panel lines would probably catch more air, and either shine up the paint quite a bit, or wear it off entirely. If you look closely, on those worn Tomcats, the nose cone is the shiniest part, while on the freshly painted one, the nose doesn't reflect at all (the shine on the canopy stops suddenly at the edge of the glass). Since the nose and leading edges of the wings receive the brunt of the friction during flight, it makes sense that they are glossier than the rest of the plane. Imperfections in the smoothness of the metal may also play a part... if some section of the fuselage is even a millimeter above the section behind it, that higher portion will receive much more friction in flight, and will probably wear faster. Newer aircraft may indeed use bare composite parts, but in the case of a supposedly stealthy aircraft like the F-22, they most likely have a special "stealth paint" they use that reduces radar returns, and those parts would probably be coated with that. Now, whether that coating is clear or colored, I couldn't say.
Seen in that light, weathering would probably have to be done in two parts: one, in the color map, where paint is visibly darker from dirt, or visibly blotchy where paint has worn off part way, and two, in the specular map, where the specular level will be higher on high-wear surfaces like control surface edges and nose cones, blending to darker shades in the less exposed areas. Also the two types would have to interact somewhat.. ie, you're not going to find much dirt on the leading edge of a wing or tail, since these areas get blasted by the full force of the air (and any pollution, dust, etc. that's in it
 ).
).So, in the case of the Valkyrie, that means several key areas will be noticeably shinier than the rest of the plane... the nose cone and the leading edges of the wings and tails should be obvious.. but also the area around the upper intakes of the chest plate should be included (it's very exposed) as well as any other obvious thing that would cause drag: the fronts of the small pods on the sides of the nose and intakes, the leading edges of the intakes themselves, the front and top of the battroid's head, even possibly the tops of the shoulders, since they're flat and facing forward in flight. You could probably get a good idea where the air would wear down the paint with a spotlight.. just set up a spotlight directly ahead of the plane (in line with it's normal, level flight angle of attack) in an otherwise perfectly dark environment.. the places that are lit should be glossier, and as the light fades, so should the glossiness. It's a rough model, but I guess it could work to give an idea of which parts get the most wear from friction.
-
About the hud level.. I have noticed one thing about a few aircraft, mainly the F/A-18E... If anyone here has flown Janes F/A-18 sim, you'll probably know what I mean. Since the plane doesn't fly perfectly level, the hud is actually below eye level when sitting on the ground. When you start a mission on the ground, your view is pointed down quite a bit, aimed at the center of the hud, and not at the horizon. Planes, especially delta wing designs like the VF-4, tend to fly at high angles of attack naturally. I've built quite a few model kits of various planes, and the hud usually is not centered in the pilot's view. For many planes, it seems that the top edge of the hud is level with the pilot's eyes. Some aircraft it's lower, some it's higher, probably depending on the AOA needed for level flight.
Aside from that, this model is shaping up beautifully.

-
K, thanks, I'll see if I can make it animate that way... gonna be pretty complex. I need to add that book to my christmas list for this year...
-
I'm in the process of building a YF-19 model for Flight Simulator 2002, but I can't quite figure out the landing gear. I'm going from the Hasegawa kit, and it seems they kind of used a placeholder type of landing gear. There aren't really any hinges visible on it, so I can't see how it would ever fold into the wheel well. I could always just make up a set of landing gear to use, but I'd like to be accurate if it's at all possible. Does anyone have any reference pics of the rear landing gear that show how it folds?
-
Ooooohhh... I'm gonna have to try that one... I like big.
-
Heheh.. I know a front view exists somewhere of the YF-19... I saw it in someone's model pictures in the 3d thread. I'll have to check back in there...
-
Of which fighter?
-
Hi, I've been working on a similar project as of late, but there are a couple of different versions for pics of the YF-19... You can either use the canon schematics, or use the instructions from the Hasegawa model kit.. I found that the hasegawa diagrams are more consistent overall, so I stuck with them. I could never find a decent front view, but I do have top, bottom, and side views, as well as NUMEROUS shots of the plane from various angles. I also have a nice full top blueprint in high res that comes from one of the Mac+ books, and shows all the dimensions of the plane, so that can be helpful, but if you use that, don't expect anything based on the Hasegawa kit to line up correctly. I'll post some pics later, as soon as I find them.
-
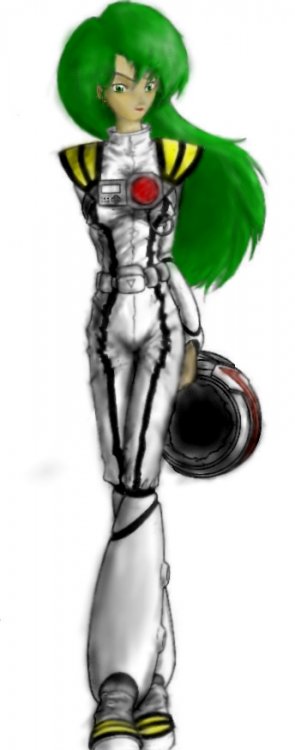
Well, leave it to loads of math homework to leave me incredibly bored...It's pretty blurry, but I like the look the airbrush tool gives when you color stuff with it. Just needs to be cleaned up a little.
-
I heard there was one video done to "Christmas at Ground Zero" by weird al... and maybe another to "Trigger Happy," but I'm not sure.. I'd love to see em if anyone could find a link.
-
True, they couldn't really use the actual teams.. I just thought it was funny to combine the names like that, instead of coming up with something entirely original.
-
Heheh.. neat idea. Only thing is, they wouldn't bother painting all those little yellow panels, and the plane wouldn't carry the gunpod for demonstrations. Personally, I always thought they should've done this.. combining Thunderbirds and Blue Angels to get the "Angel Birds" is a horrible pun.
-
Ahhh, another ST modder
Never played SFC though, just Bridge Commander... Looks really detailed though... what project is it for? -
LOL... What's funny is what that decal would actually say on a real plane.. Considering the position, it'd probably be some kind of warning about getting sucked into the intake....O_o
-
Well, I finally got my YF-19 in the mail, and finished up the main model.. still got lots of details to work in, and no textures yet, but it should look great if it actually runs in any games.
-
Well, with nurbs solids, you can use boolean operations and perform subtractions.. see, you draw the panel lines on with a curve, then make a small square at one ene, and run it the length of the curve to make a square rod.. then you subtract that shape from the solid, and you've got a square indentation in the surface
I've never actually done it that way, but it should work. I never did much with nurbs, since most of my work is game oriented anyway... simpler to make them in the correct format instead of converting them. 
Btw, Rodavan... what program are you using? The toolbars look like Rhino.. but I imagine those are kinda standard. If so, you HAVE to tell me how you're doing that. I never could get the nurbs commands to work for me, they always give me nasty distortions. I'm probably doing something wrong, but I don't know what.. so I've been sticking to polygons. But I would like to see what else I can do.
-
Whoops... yep, you're right that is just about the later differences.. oh well.. that explains why you see so many C model tails with the old engine.. I think the Thunderbirds still use the old engine, or they did the last time I saw them fly (which was a while ago), as does the airbase near my home, so that would explain that.
David, I'm guessing you work with aircraft in some way? Either that, or you've got an incredible memory for aircraft trivia. -
Mainly, most C models upgraded to a new engine... can't remember which.. but the nozzle is visibly different. They also enlarged the intake ducting for the newer engine, and enlarged the base of the tail, making it wider to hold more stuff, and longer, and added a small fin-like antenna to the leading edge of it.
Edit: k, this link pretty much sums it all up: http://www.f-16.net/reference/versions/f16_cd50.html
-
Jawjaw, I heartily agree.. the canopy is really the only feature I dislike on the YF-21... But then, I don't think the VF-22 is any better. I still don't understand that idiotic canopy frame. It would make much more sense to replace the whole thing with a single frameless bubble, or at least something streamlined.. that nasty bulging dome on top just looks ugly, and kills the sleekness of the design... not to mention the aerodynamics of it.

-
I still love that design.. I'm holding my breath that they'll pull a "Cobra" maneuver (in a different way) and revamp the F-23 to be a carrier based fighter... they could do it. It's not any bigger than a tomcat, I'm guessing... it's shorter too.. shoot, the tomcat's old, as much as I love it, what better to replace it than the F-23? They'd have to adapt it to work as an interceptor, but it could probably be done...
-
Well, remember.. they had to replace the dish after ROTJ
-
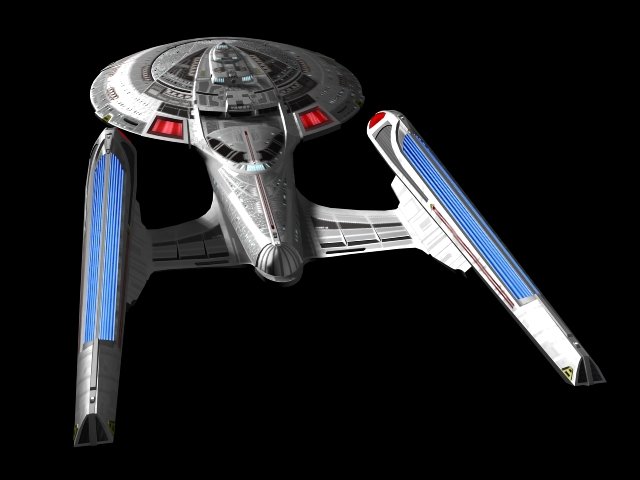
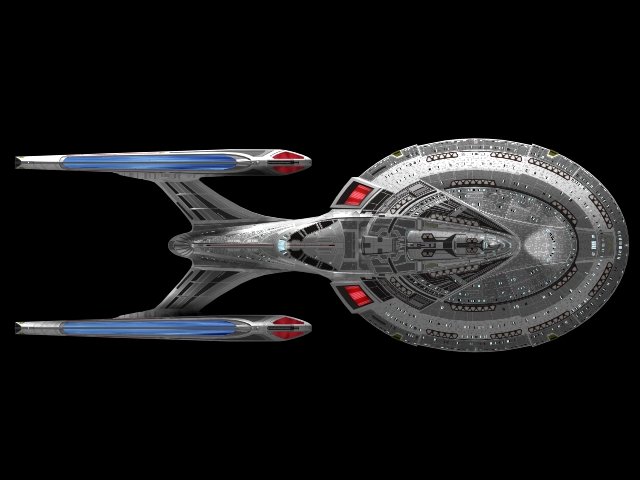
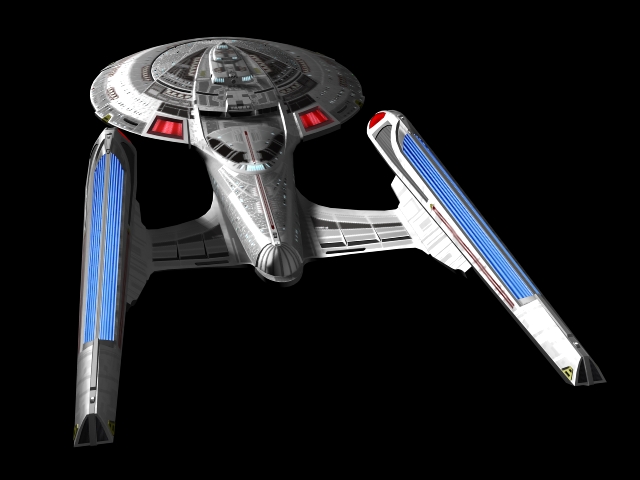
Heheh.. I wish I could be paid for this. This is actually a model that I made to put in some games I have. It kind of went a little beyond that, but it still works as an in-game model, although it makes most games run like a slug (it's 13,000 polygons). I don't have any actual renders of it up, but there are a few in-game shots of it I can link to. I'll just have to zip up the big renders and attach em.
There are a few screenshots of it in Bridge Commander as well, at these links:
I've got more shots as well, I made a full 5 view plan set. I just couldn't fit the rear and bottom views in the zip.
-
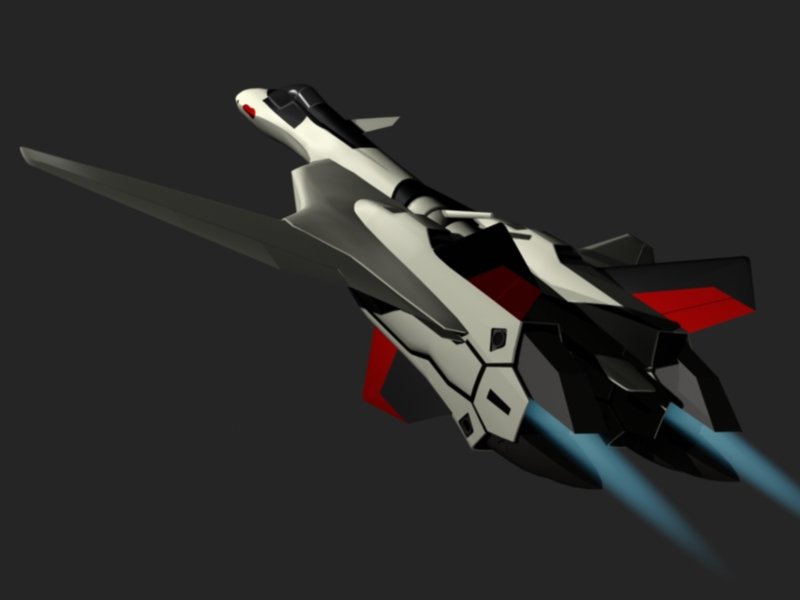
Here's a perspective view of it.
-
heheh.. I gotta go shrink the pics.. they're huge.. hmm... well, he'res one that used to be about 1600 pixels across... lost a lot of detail, but I think you can get the idea.


VF-19 or YF-19 sideview lineart
in Fan Works
Posted
Hehe.. I've actually got a ton.. but they're all back in my dorm. None of em are actually line art though, they're all black and white scans from the Hasegawa kit instructions. They're quite a bit different from the version above though... the proportions of the kit are changed somewhat from the original design.