Berttt
-
Posts
659 -
Joined
-
Last visited
Content Type
Profiles
Forums
Events
Gallery
Everything posted by Berttt
-
Thanks Cowie, but my WLM days gave me the opportunity to get a couple of bottles of the proper future. I am down here at ALB for the next couple of years, and work wise it is a great place to be. I haven't had a lot of time at the bench lately, and what little I have done has been focused on destroying the monster's feet some more. I did manage to get another image of the scout after I cleaned off the 5 or so years of dust
-
Thanks Cowie. It's been a long time since we spoke. I have decided to go ahead and tint the lens with some future tinted with tamiya clear blue. For some reason I alwYs get crap stuck on whenever I try to spray those clear colours. Cheers MT. She's a labour of love - I am sure you get it. Berttt Oh an thanks for the scan Cx. It will be very useful.
-
Nice SF3D kits ther man - the original Nitto boxings too which is pretty cool. Berttt
-
Sounds perfect :-)
-
Looking great Mike. I was just wrestling with the issue of how to avoid having the kit wheels down, as the VF-1 super/strikes look goofy on their undercarriage. I have done in flight standd before but this is way better. Also since I am lihhting my valk, is there any way to run power up the arm? I cant use batteries for my set up unfortunately. Cheers, Berttt
-
I have been wiped out for the last week or so thanks to illness, but I managed to get some more done between rides on the vomitron and bouts of tap arse The destruction continues as I continue to hack and drill away into a rare and expensive resin kit: That last shot shows how I have split the toe in order to widen it, as I thought the original was a bit too narrow and pointy. I'll joint the two halves with rod or tube and smother in putty, ready for reshaping. Also while I was rummaging around for something else I found a plastruct sphere that I had ordered for another project. First I filed off the molded on nipple: Then I set to with a razor saw and some wet and dry: A bit of a test fit: Then a polish with various micromesh polishing cloths, and some Future, and voila! John had done such a great job with all of the greebly detail behind the lens that it would have been such a shame to use the semi transparent item that came with the kit: As it turns out I also prefer the slightly more shallow profile as well. I can't decide if I should tint this a very slight shade of blue of just leave as is. So if anyone has any opinions chime in. That lens was the only thing holding me back from finishing the scout - that was five or so years ago that I decided to try something else with it. I had tried vac forming or plunge molding a replacement, but the dome was so tall that it made the edges of any material plunge molded off the original to thin to work with. That plustruct thing was a dream to work with and didn't take very long. Five years procrastination ruined by an hour's good work That means I can finish that up soon and post some decent images in a separate thread. Regards, Berttt
-
Love the filter technique. Is that Tamiya NATO Black your using there? What did you use to thin it? Bertt
-
Thanks MT. You have to love Anime Magic, because while I will stick to the line art as much as possible, I want to add my own touches here and there as well. Mainly to try add some functional aspects to the details. I had a chance for a small step forward. But big jobs call for big tools and I had to resort to a bastard file in order to make shorter work of rasping back the automotive filler. Both of the arm aft blocks have had an initial pass: Cheers, Brett
-
I had another go and came up with a better version.... I think.
-
Welcome aboard. Do you plan on filling and sanding any seams where the parts join? If so you may want to wait and paint individual parts after sub assembly. Cheers, Brett T
-
A yeah I remember you mentioning that once before. And yeah it is heavy, any falls or drops are either going to the handler of the kit. I've been messing about with the idea of getting the arms exhaust ports 3D printed and have been flailing about with Sketchup. This is what I have so far but will have to tweak it a bit. It is not easy to learn 3D modelling while teaching yourself but I would really like to be able to take advantage of this new technology so I am going to force myself to learn.
-
Feel free to post any pics and tips here Sean.
-
Mmm I am pretty sure that there is more than just scaling up the 72nd scale parts. The breakdown is different and from the CAD it look more detailed.
-
Thanks for the extra line art. In fact I was looking at the colored line art yesterday and only just noticed what lloled like an antenna sticking out between two barrels. I had never noticed that before, but that font schematic clears the matter up nicely. Also I was re reading some of my posts and I realised that I come across as bashing Mike's kit. I just wanted to make it clear that is not the case. You only have to look at the build up of HWR-00-MKII's kit to see that. As I mentioned I just can't leave well enough alone and just build. And I can see that I am making life so much more difficult than it needs to be. I totally respect Mike and his work in mastering this kit. And at this stage all I can say is that I have done more damage to than anything. And I am not 100% convinced that I can pull it off. Cheers, Brett T
-
That's a good point, well made. But 45 quid for just the FAST packs? That is pretty steep. Plus I have not seen it advertised any where that the base kit is needed. I guess we will have to wait for the box art etc to tell for sure. That's right Hasegawa, Im looking at you. Berttt
-
Thanks for that link. I had seen those images before bu lost the url. There's lots of great stuff going on their on that Monster. Maybe a little too much creative licence for my taste, but certainly plenty of food for thought. Speaking of which, In the five or six years since this kit cam out I have seen exactly one built. Where are all the other builds - come one people!
-
That is what I was thinking. Since this.....this monster is a cross between a AFV and a ship, I will have to use both as references. Small update. I removed the molded on detail on the top of the torso and applied filler to the seams. And in a mad effort to completely ruin this kit I removed the molded on vents on the back of the arm. I'll either detail up these or find some replacements. Anyone know where I can find 30mm diameter thrusters? It will be a week or so until I can get back to this as I will be away from home over the next week or so. Cheers, Berttt
-
Thanks guys, I'm glad you like it. @ Captain America - Wow thanks John, to get a compliment like that from you is quite humbling. Now on to the Monster. I dragged out the arms and started clean up. I will work on these for now until I can work out what I am going to do with the feet. I don't have any pics at this stage because I took the parts to work today so I could use some of the facilities , but hopefully by tomorrow I will have a slight update on those. There are some pretty gnarly gaps to fill, and I think I'll take Sean's advice and use auto body filler. I'll also pin all the parts and use epoxy glue for a nice strong bond. I have taken a few shots of the torso and am hoping that someone can help me out with what the little ribbed detail is to the right of the writing. I think they are engine compartment vents but at the moment they are solid lumps. I am not sure if I will improve these or just fake it. Also if anyone has any ideas on how I can jazz up all of the open space on this kit let me know. For now I am just going to be cleaning up the excess and removing some of the molded on details. I've also included Neville in this picture. Neville and his mate Chuck are going to help with making sure added details stay at 1/72 scale. I think the detail on the top here is supposed to be some sort of hatch, so I'll scour the net for AFV images and come up with something a but more jazzy. That will mean getting rid of the wonky lumps in place right now. The nose of the beast. Chuck showing off some of the soft detail that I would like to improve at the rear of the gun breach. This thing has been sitting in an open box for the best part of six years so there is plenty of dust. And some shots compared to the SD I have on the bench ATM: I'll be back with more tomorrow. Time: 3 HRS Berttt
-
So back in 2008 I said that the Star Destroyer was about a month from being finished. Man was I wrong. Here we are many years later and it is still not done. But it is close. Rather than start new threads I am going to use this as a V bench and host all my builds here. Featuring of course the Monster. I haven't touched it since the last update looong ago. But since this is almost finished it is only fitting that I drag it out and start work again. I did try and contact Mike to see if I could get a set of feet from his V2.0 Monster. It would save me a heap of work, but I guess he gets a lot of PMs as I never heard back. Brett T
-
Impressive collection. Especially the Tanmen F203 and 72nd scale Q-Rau. I am jealous.
-
Dammit! Why do I keep getting a "failed to create parent directory" error with this torrent? It the only one I have had do that.
-
Yeesh. There are certainly some fit issues there. That said it's looking good.
-
Ha ha damn. I actually had an idea similar to this but hadn't had a chance to get to it. That said this bloke went way beyond what I . envisioned, or could likely have achieved. I was going to paint a MKIII RAF Mustang in a comic book coloured line art style. But as they say "no photos = never happened." This kit is very very nice, I hope he get lots of kudos. May I ask that a member here that is able, please post our collective congratulations on that forum? Cheers, Berttt
-
Thanks guys. This is my first effort with FO and it has been a love hate experience. Brett
-
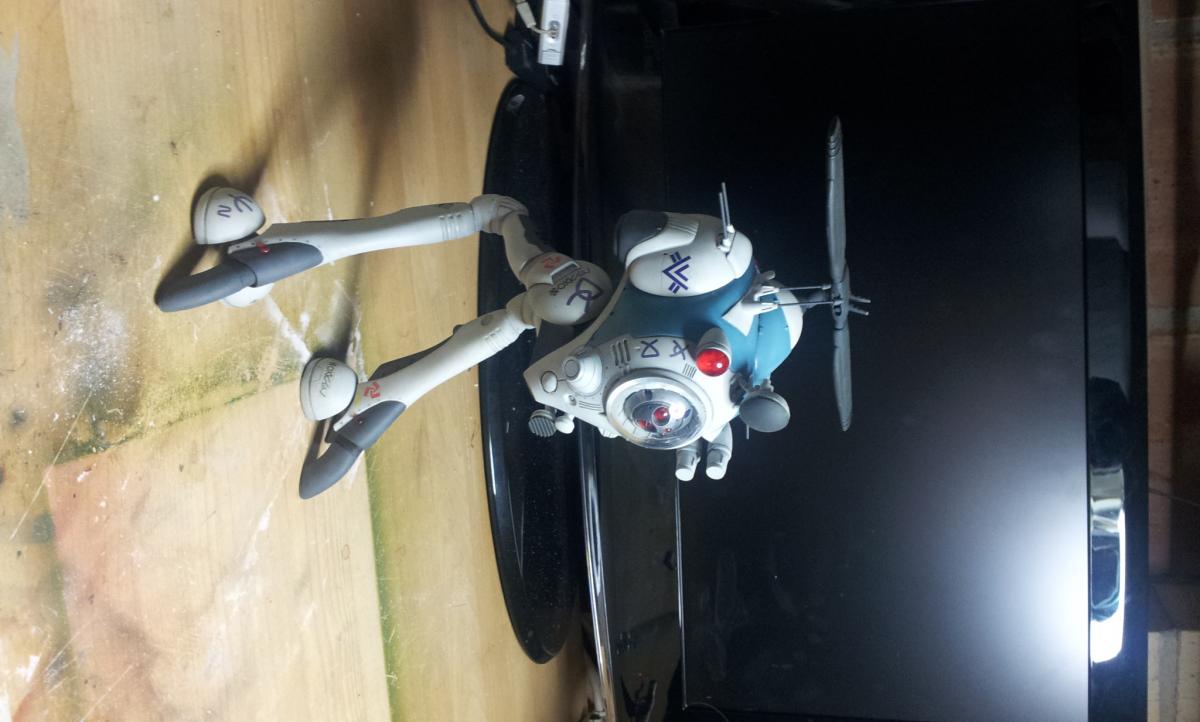
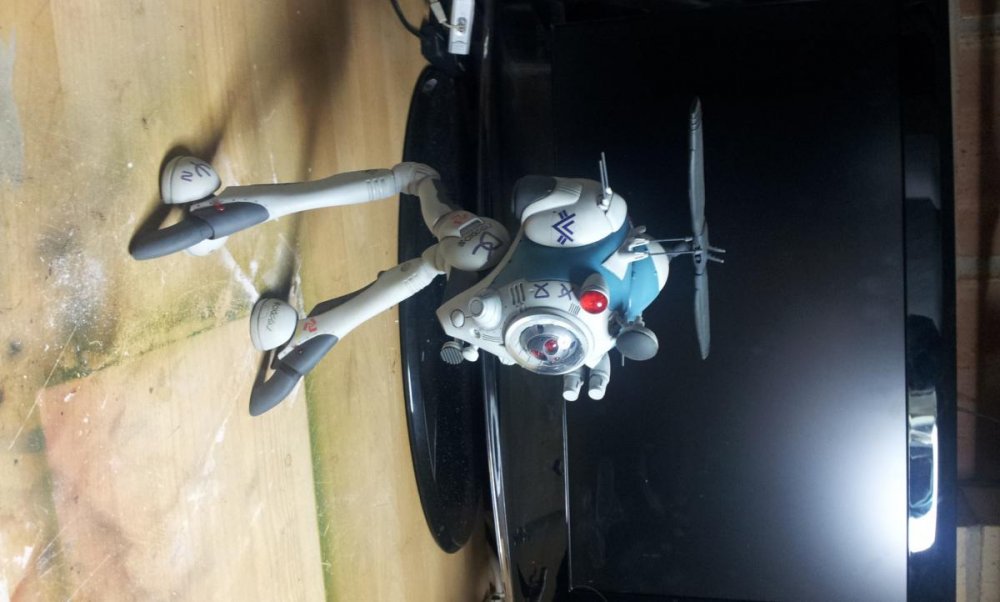
I have been chipping away at this: