

captain america
-
Posts
3549 -
Joined
-
Last visited
Content Type
Profiles
Forums
Events
Gallery
Everything posted by captain america
-
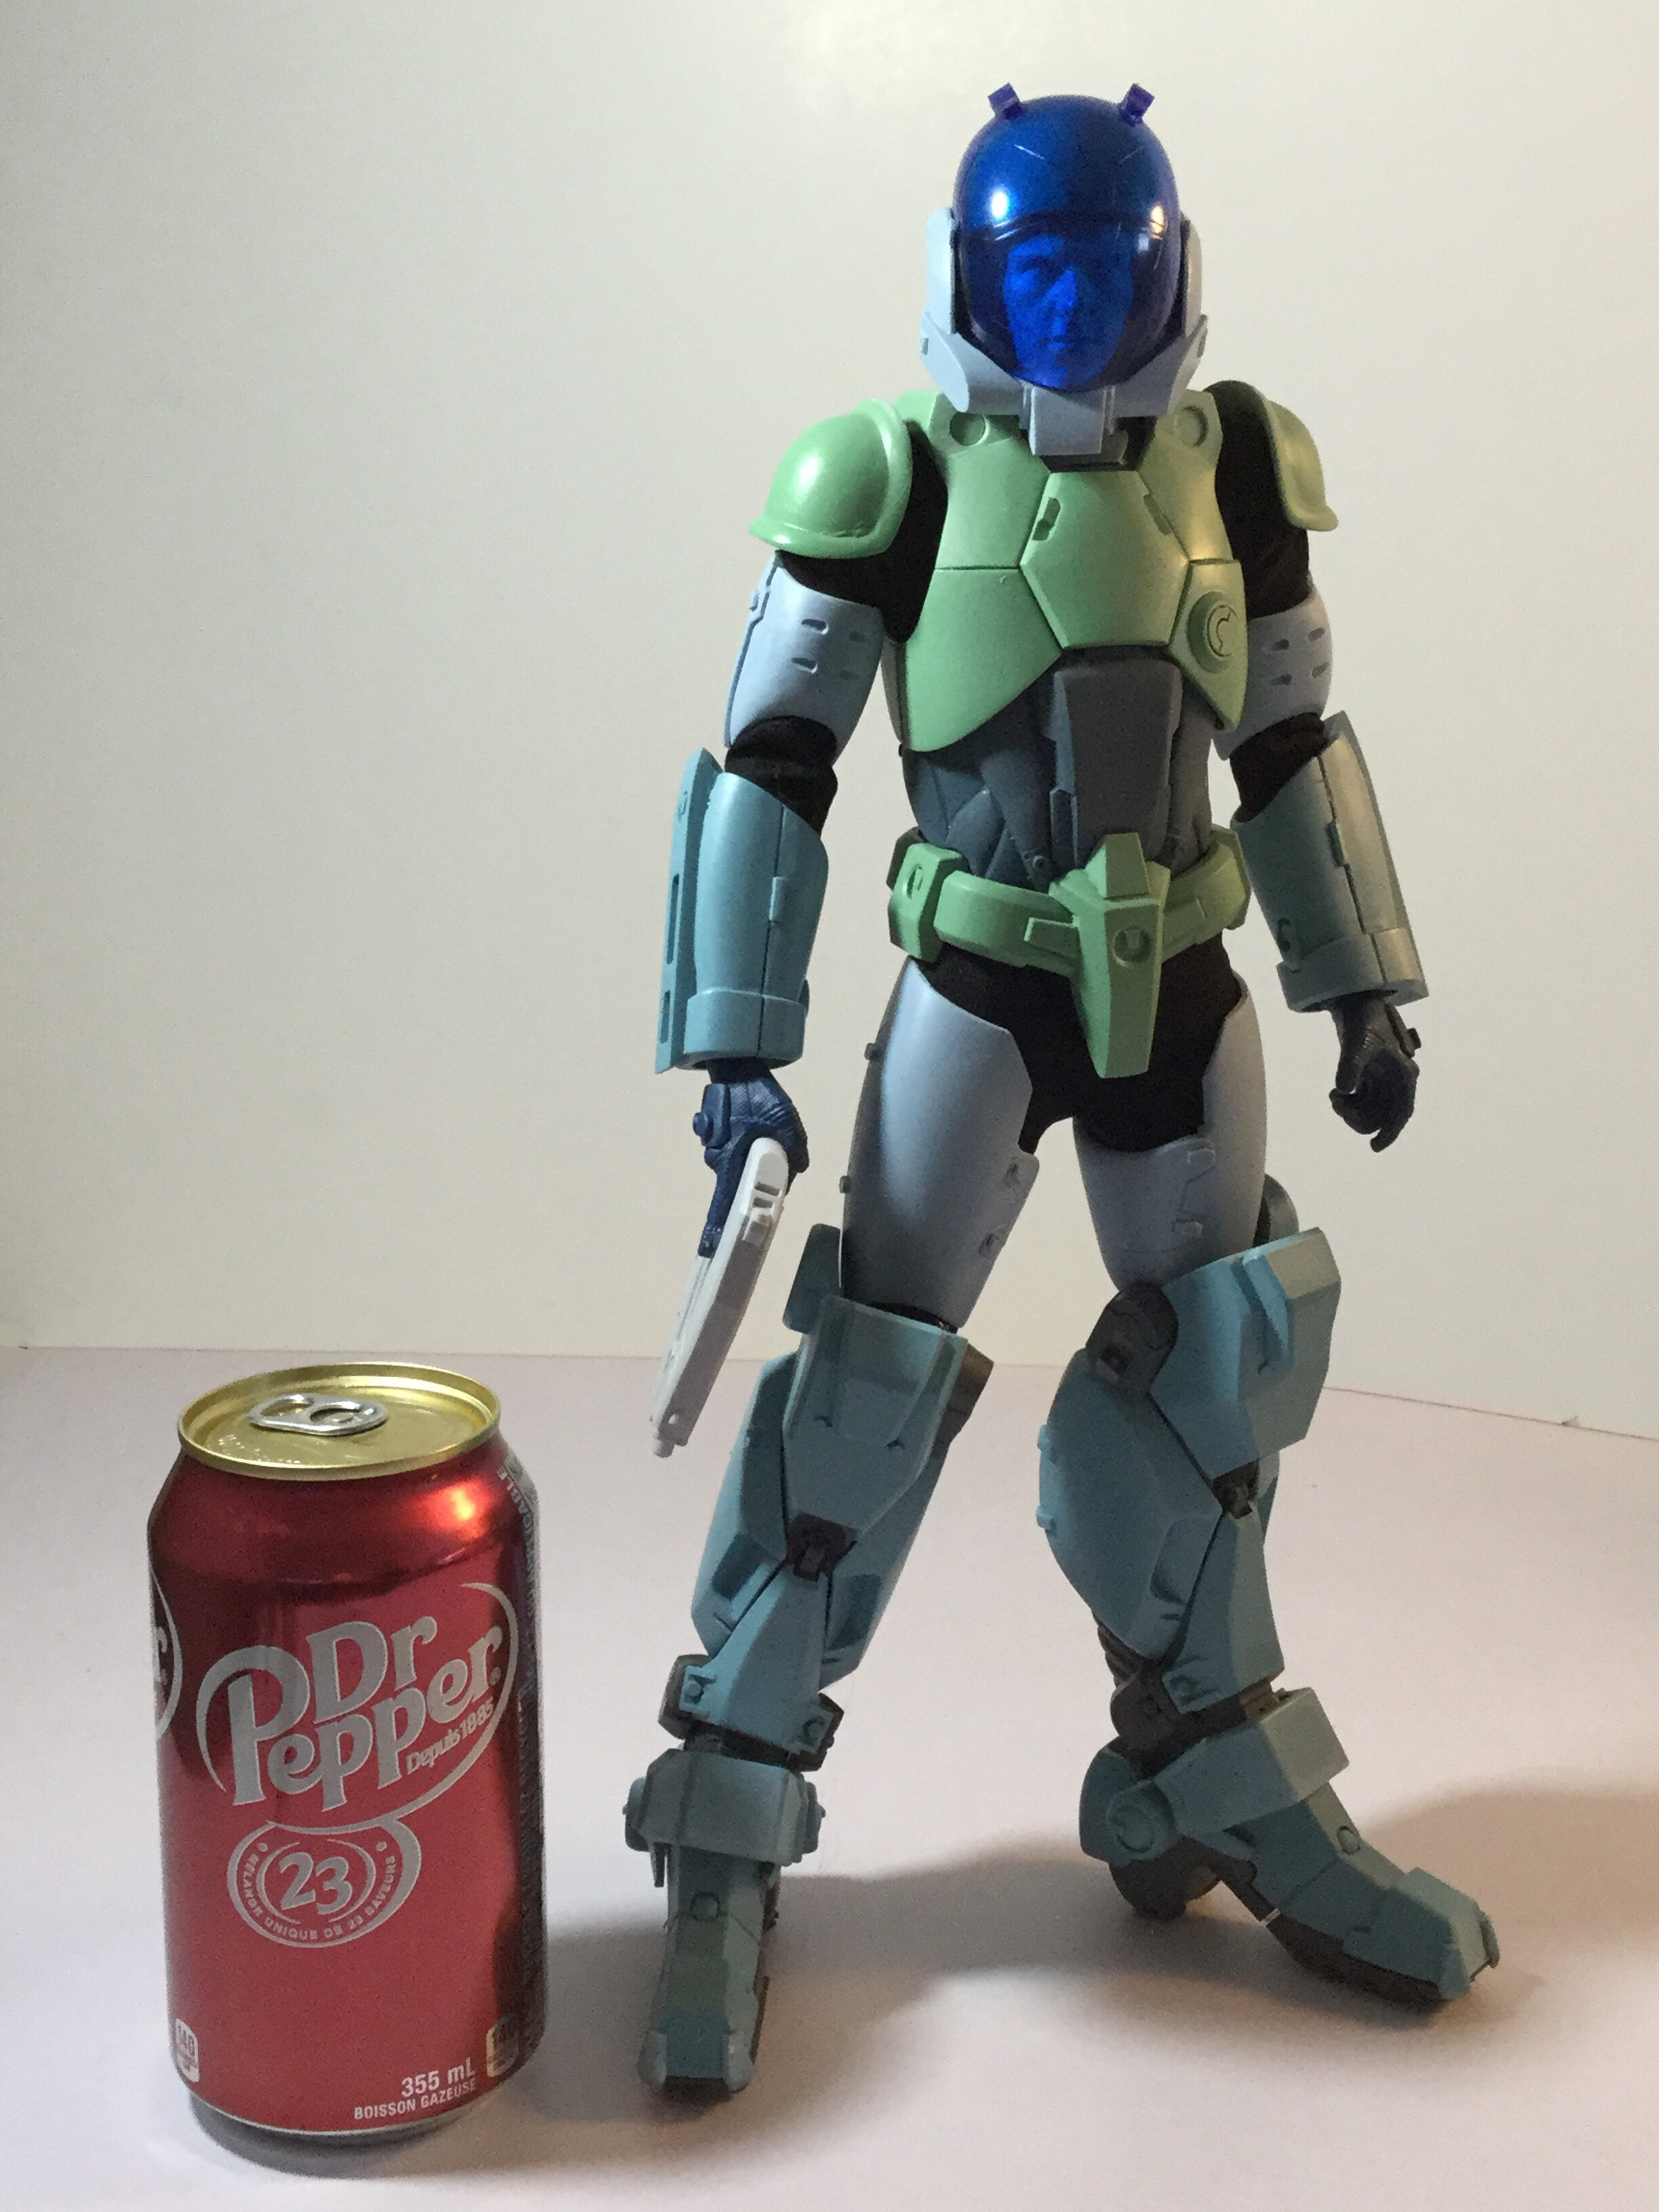
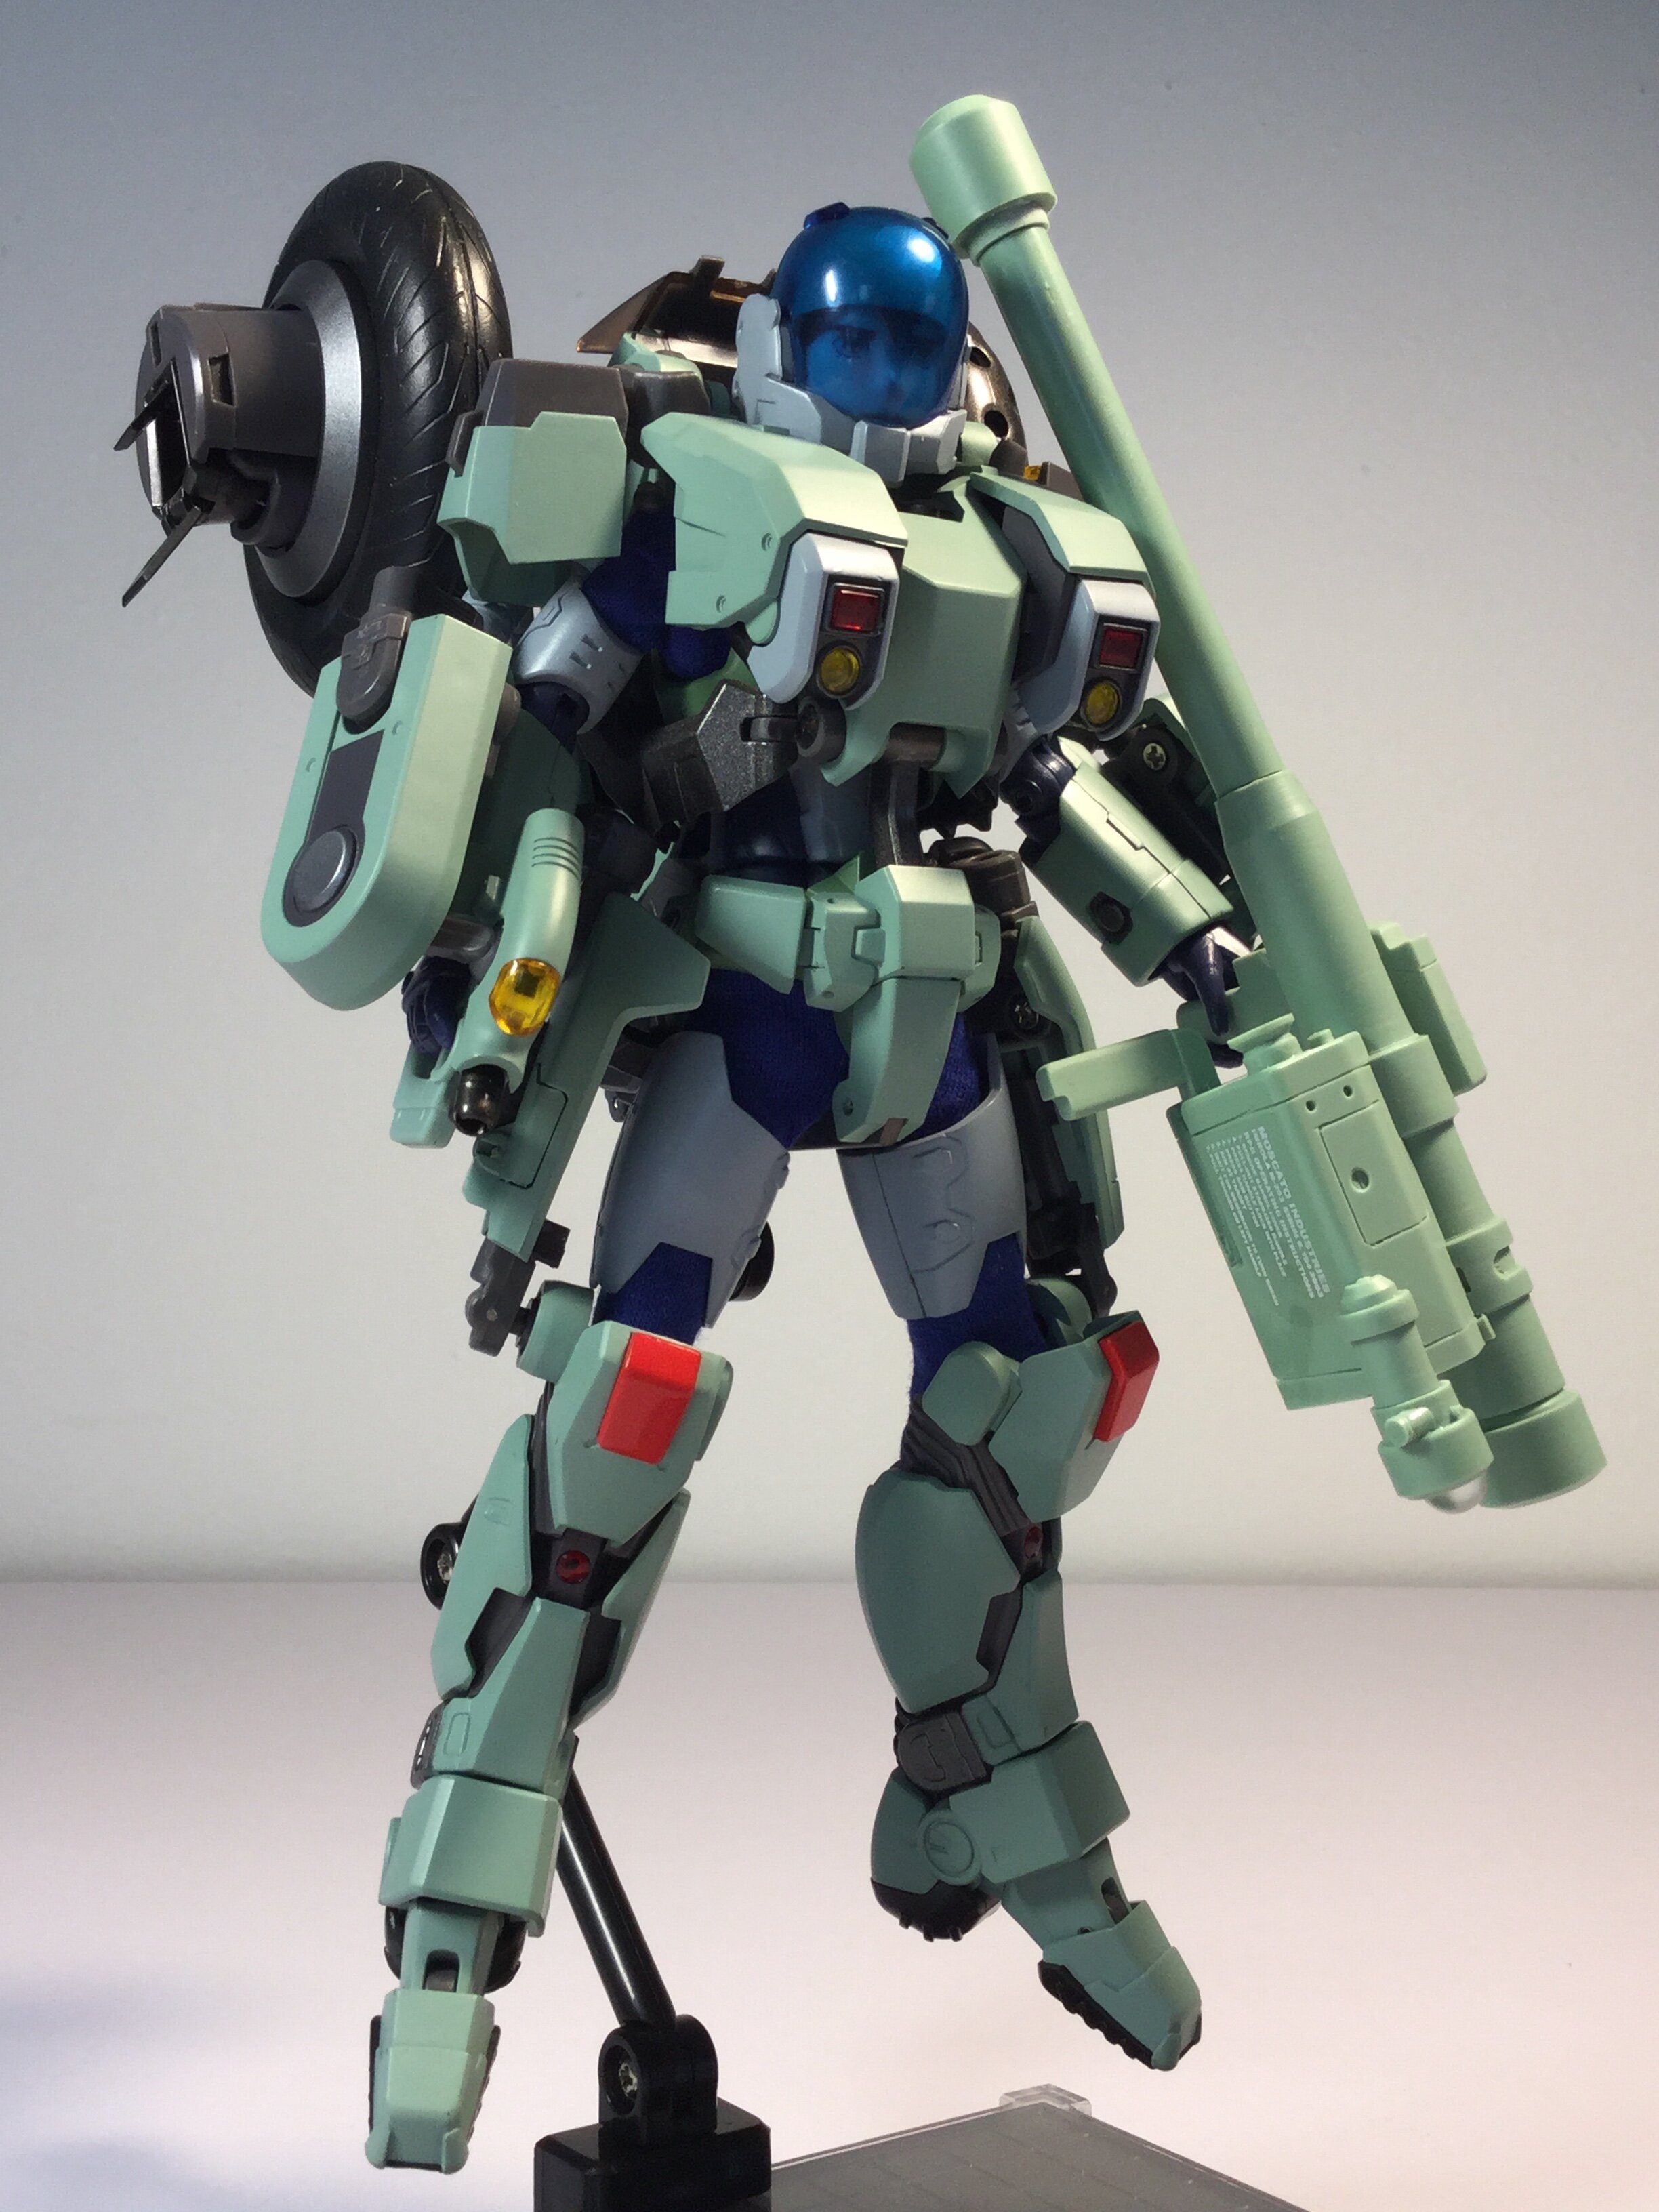
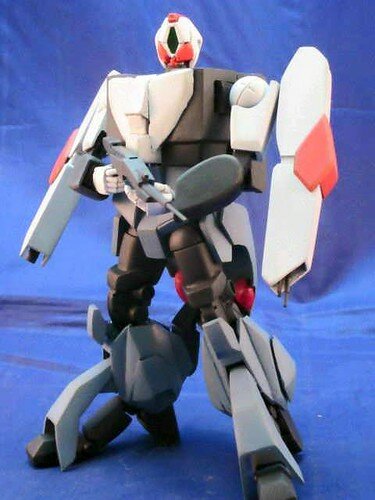
That's putting it nicely! They managed to take a fantastic Aramaki design and butcher it because they have no sense of aesthetics, to say nothing of the figure's ridiculous child-baring hips! A properly proportioned MOSPEADA rider is completely feasible, and I proved it.
-

1/48 SOUTHERN CROSS BIOROID
captain america replied to captain america's topic in Anime or Science Fiction
Mold-prep is done and molds are poured. Should be ready to go early next week.IMG_1952.HEICIMG_1951.HEIC -
Aircraft Super Thread Mk.VII
captain america replied to David Hingtgen's topic in Anime or Science Fiction
Nice publicity pic, but in reality, I doubt you'll ever see the Superhornet carrying more than two of these at a time in anything other than full-on war. It might be able to take-off with that loading, but it sure can't land with it, especially on a carrier at sea with a pitching deck. -
No Love for Southern Cross?
captain america replied to blacklotus's topic in Anime or Science Fiction
Hi Ted. I see you relied more on the technical schematics than the 3/4 view beauty shots. I originally did that with my 1/72 Destroids, but went the other way for the 1/48 Tomahawk and IMHO came away with a more aesthetically pleasing result. Might be worth considering.- 1465 replies
-
- 1
-

-
- Southern Cross
- anime
- (and 8 more)
-
1/48 SOUTHERN CROSS BIOROID
captain america replied to captain america's topic in Anime or Science Fiction
Can this come back for a limited time? I already have 7 requests.
-
Maybe blue is better?

-
No worries, might as well leave them up. That way people have the JPG option if HEICs are troublesome.
-
Hey Shawn! Thanks for the kind words, it's still a work in progress. I actually think it's not a bad thing with the HEIC images not loading, since the instructions need to be downloaded anyway. It's actually wonderful that all the instruction plates can be crammed into one message with this format, as opposed to having to post 5 different times to upload them all in JPG.
-
The destructions are ready!! 55 HANDS.HEIC54.HEIC53.HEIC52.HEIC51.HEIC50.HEIC49A.HEIC48.HEIC47.HEIC46.HEIC45.HEIC44.HEIC43.HEIC42.HEIC41.HEIC40.HEIC39.HEIC38.HEIC37.HEIC36.HEIC35.HEIC34A.HEIC33.HEIC32.HEIC31.HEIC30.HEIC29.HEIC28.HEIC27A.HEIC26.HEIC25.HEIC24A.HEIC23.HEIC22.HEIC21.HEIC20.HEIC19.HEIC18.HEIC17.HEIC16.HEIC15.HEIC14.HEIC13.HEIC12.HEIC11.HEIC10.HEIC09.HEIC08.HEIC07.HEIC06.HEIC05.HEIC04.HEIC03.HEIC01.HEIC
-
What could have been.

-
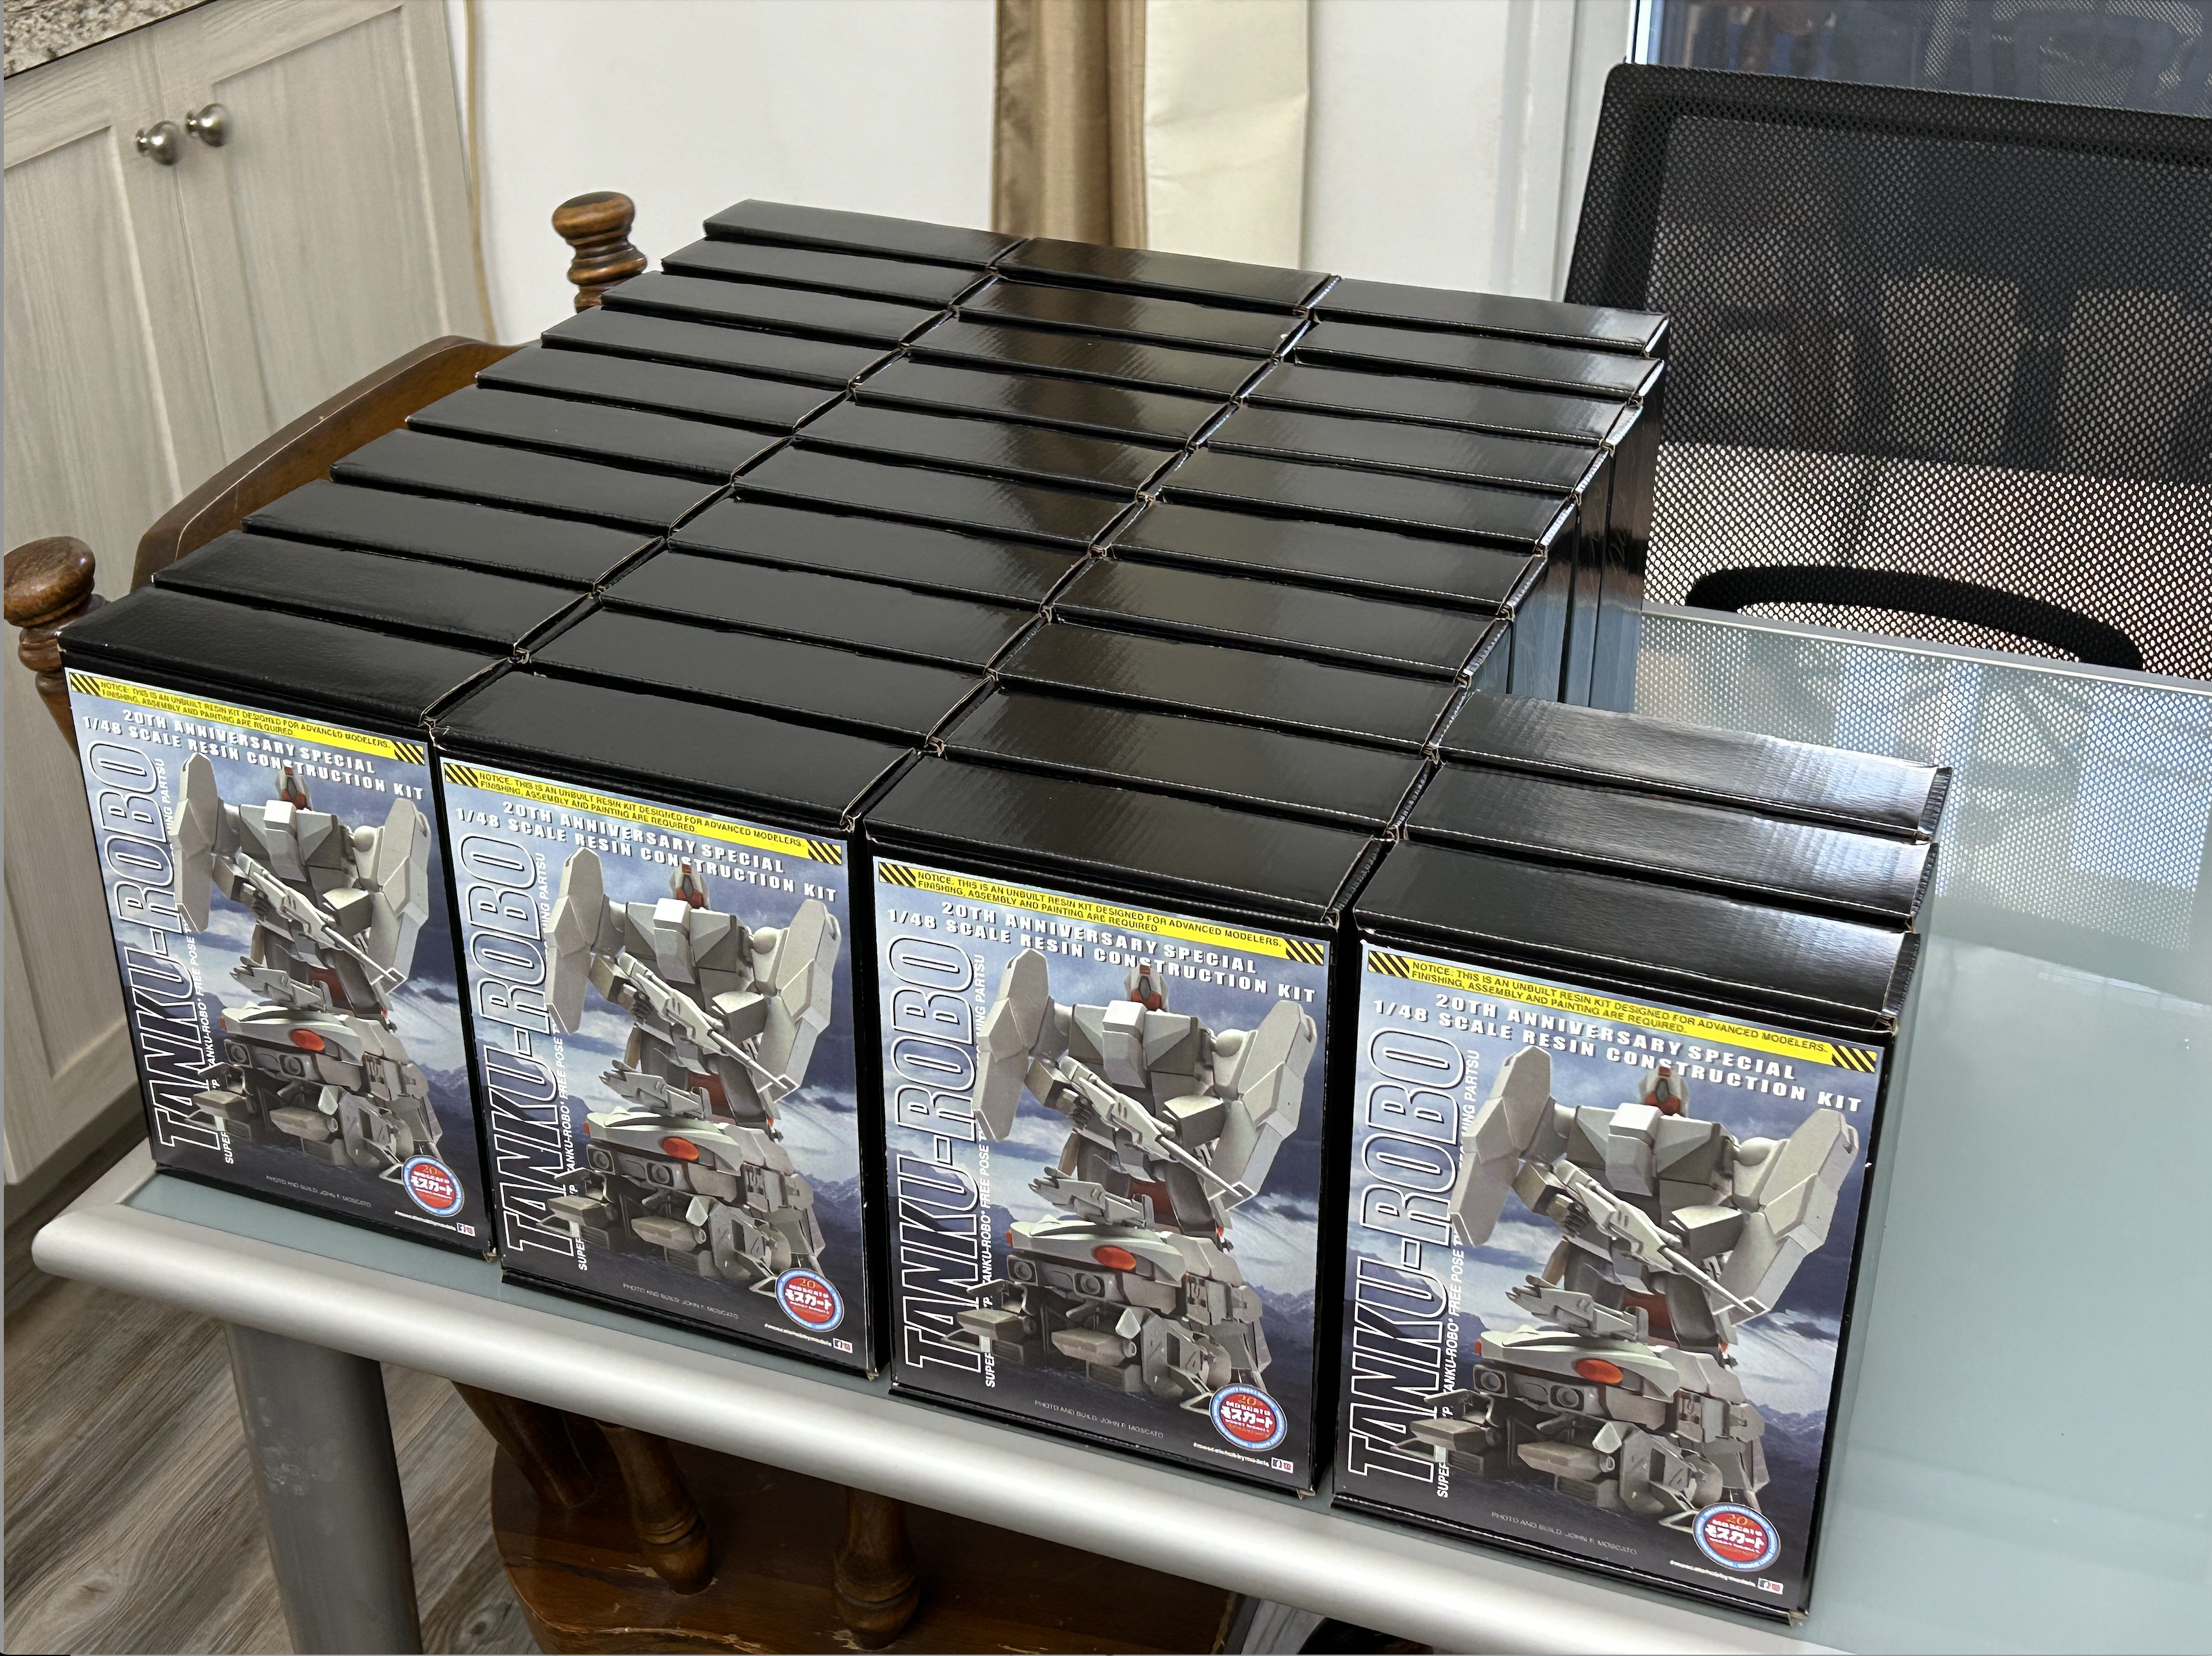
Hey all! For those who are part of the second run, the kits are ready, I'm just waiting on the aftermarket hands to arrive from Asia, which should be in about 2 weeks. Instructions will be ready by late next week, but in the meantime, enjoy these extra beauty shots!
-
3rd party labels for Sentinel Mospeda Riobots?
captain america replied to armentage's topic in Anime or Science Fiction
Discontinued, but I did make a glow-in-the-dark dash panel along with my update set.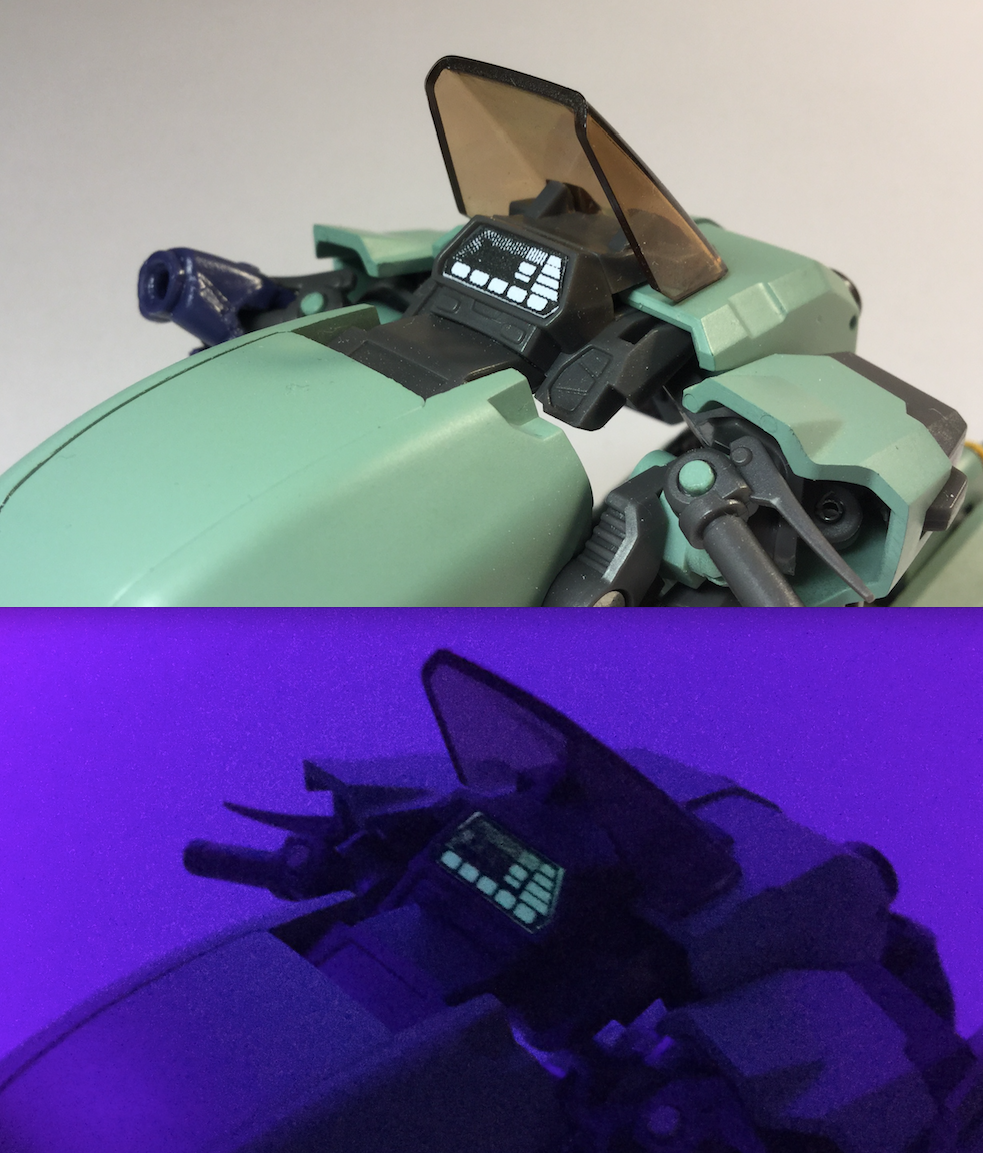
-
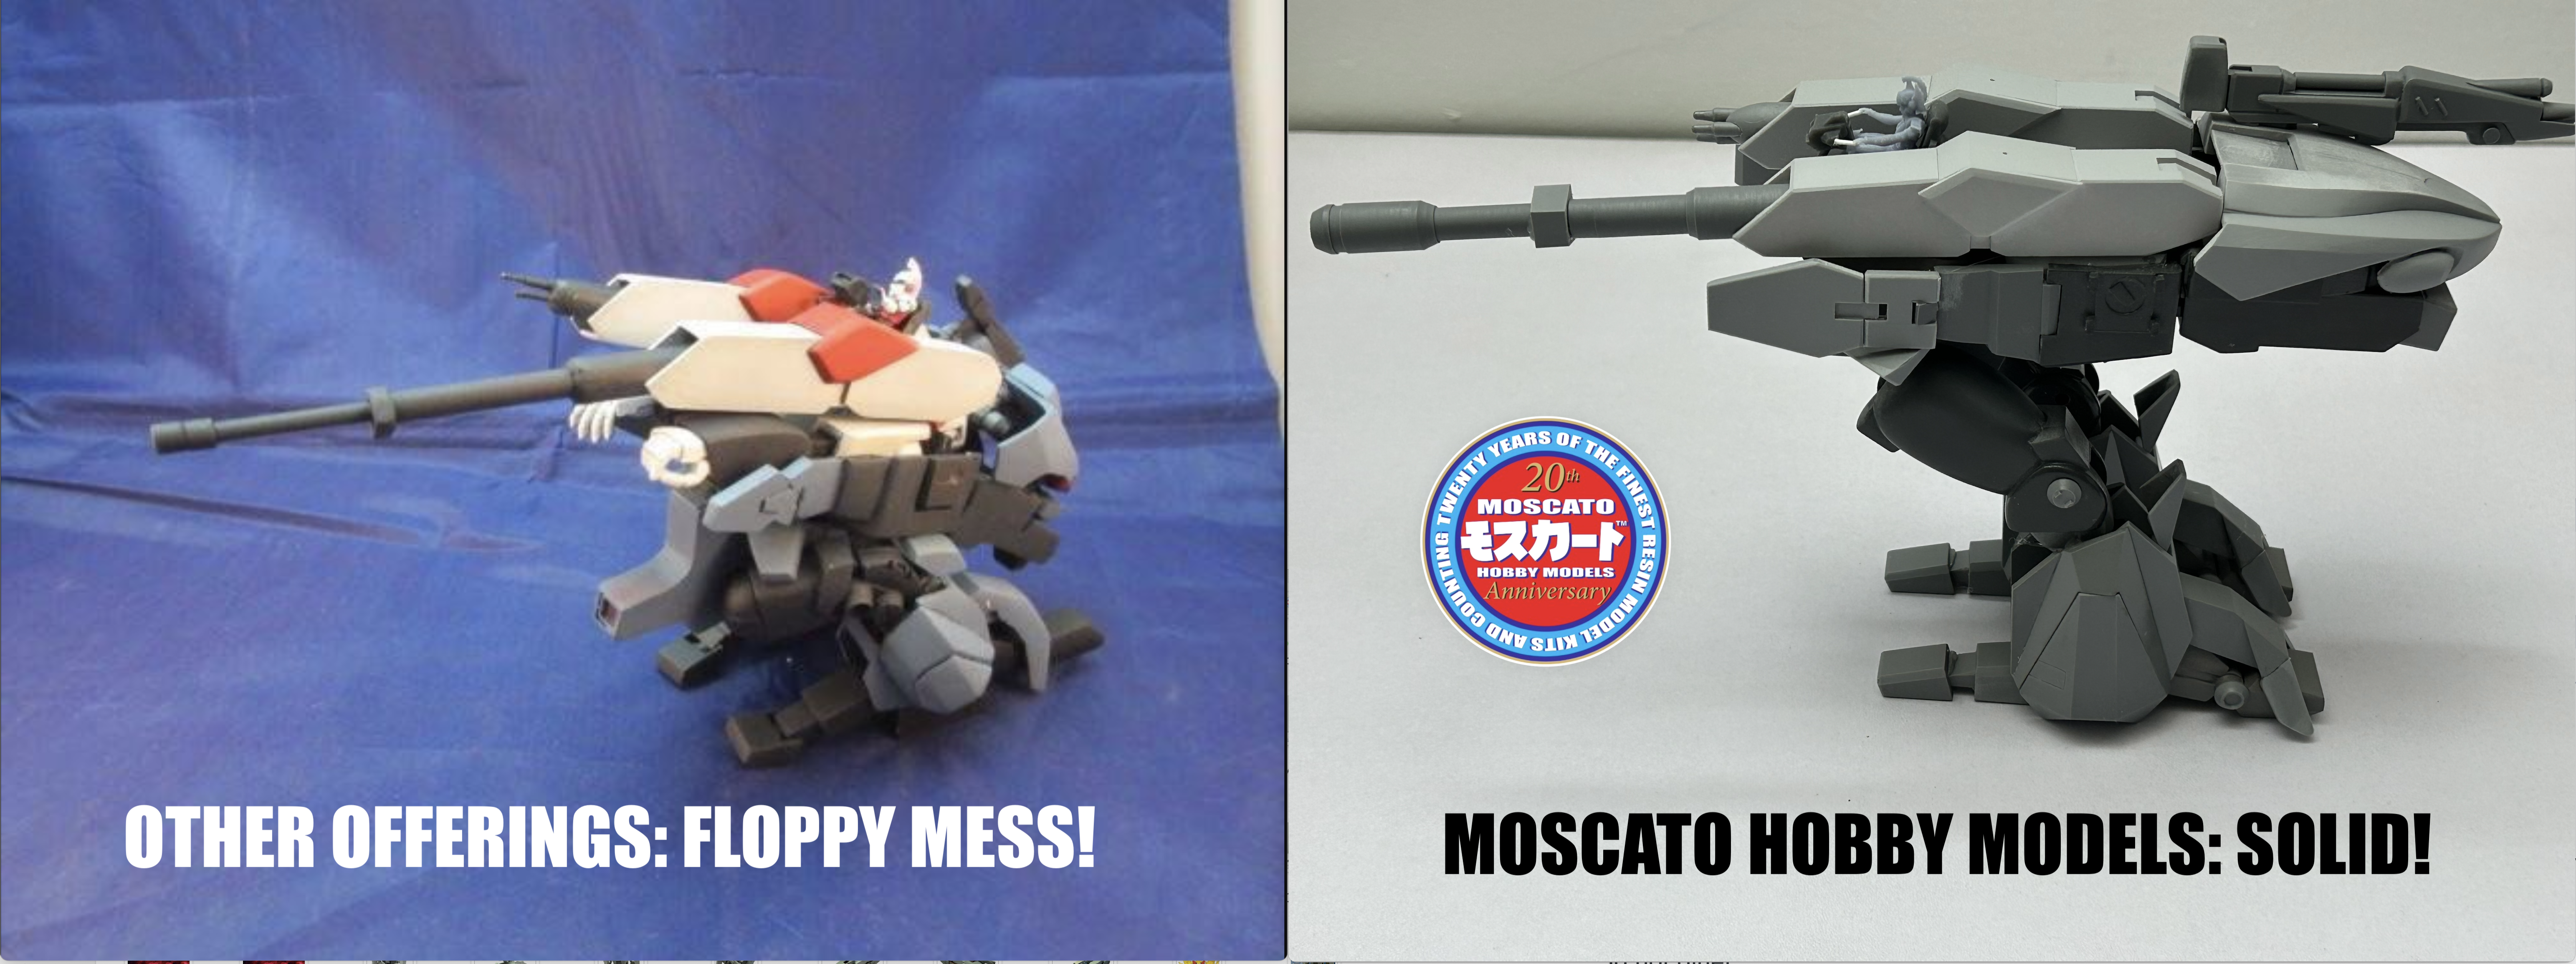
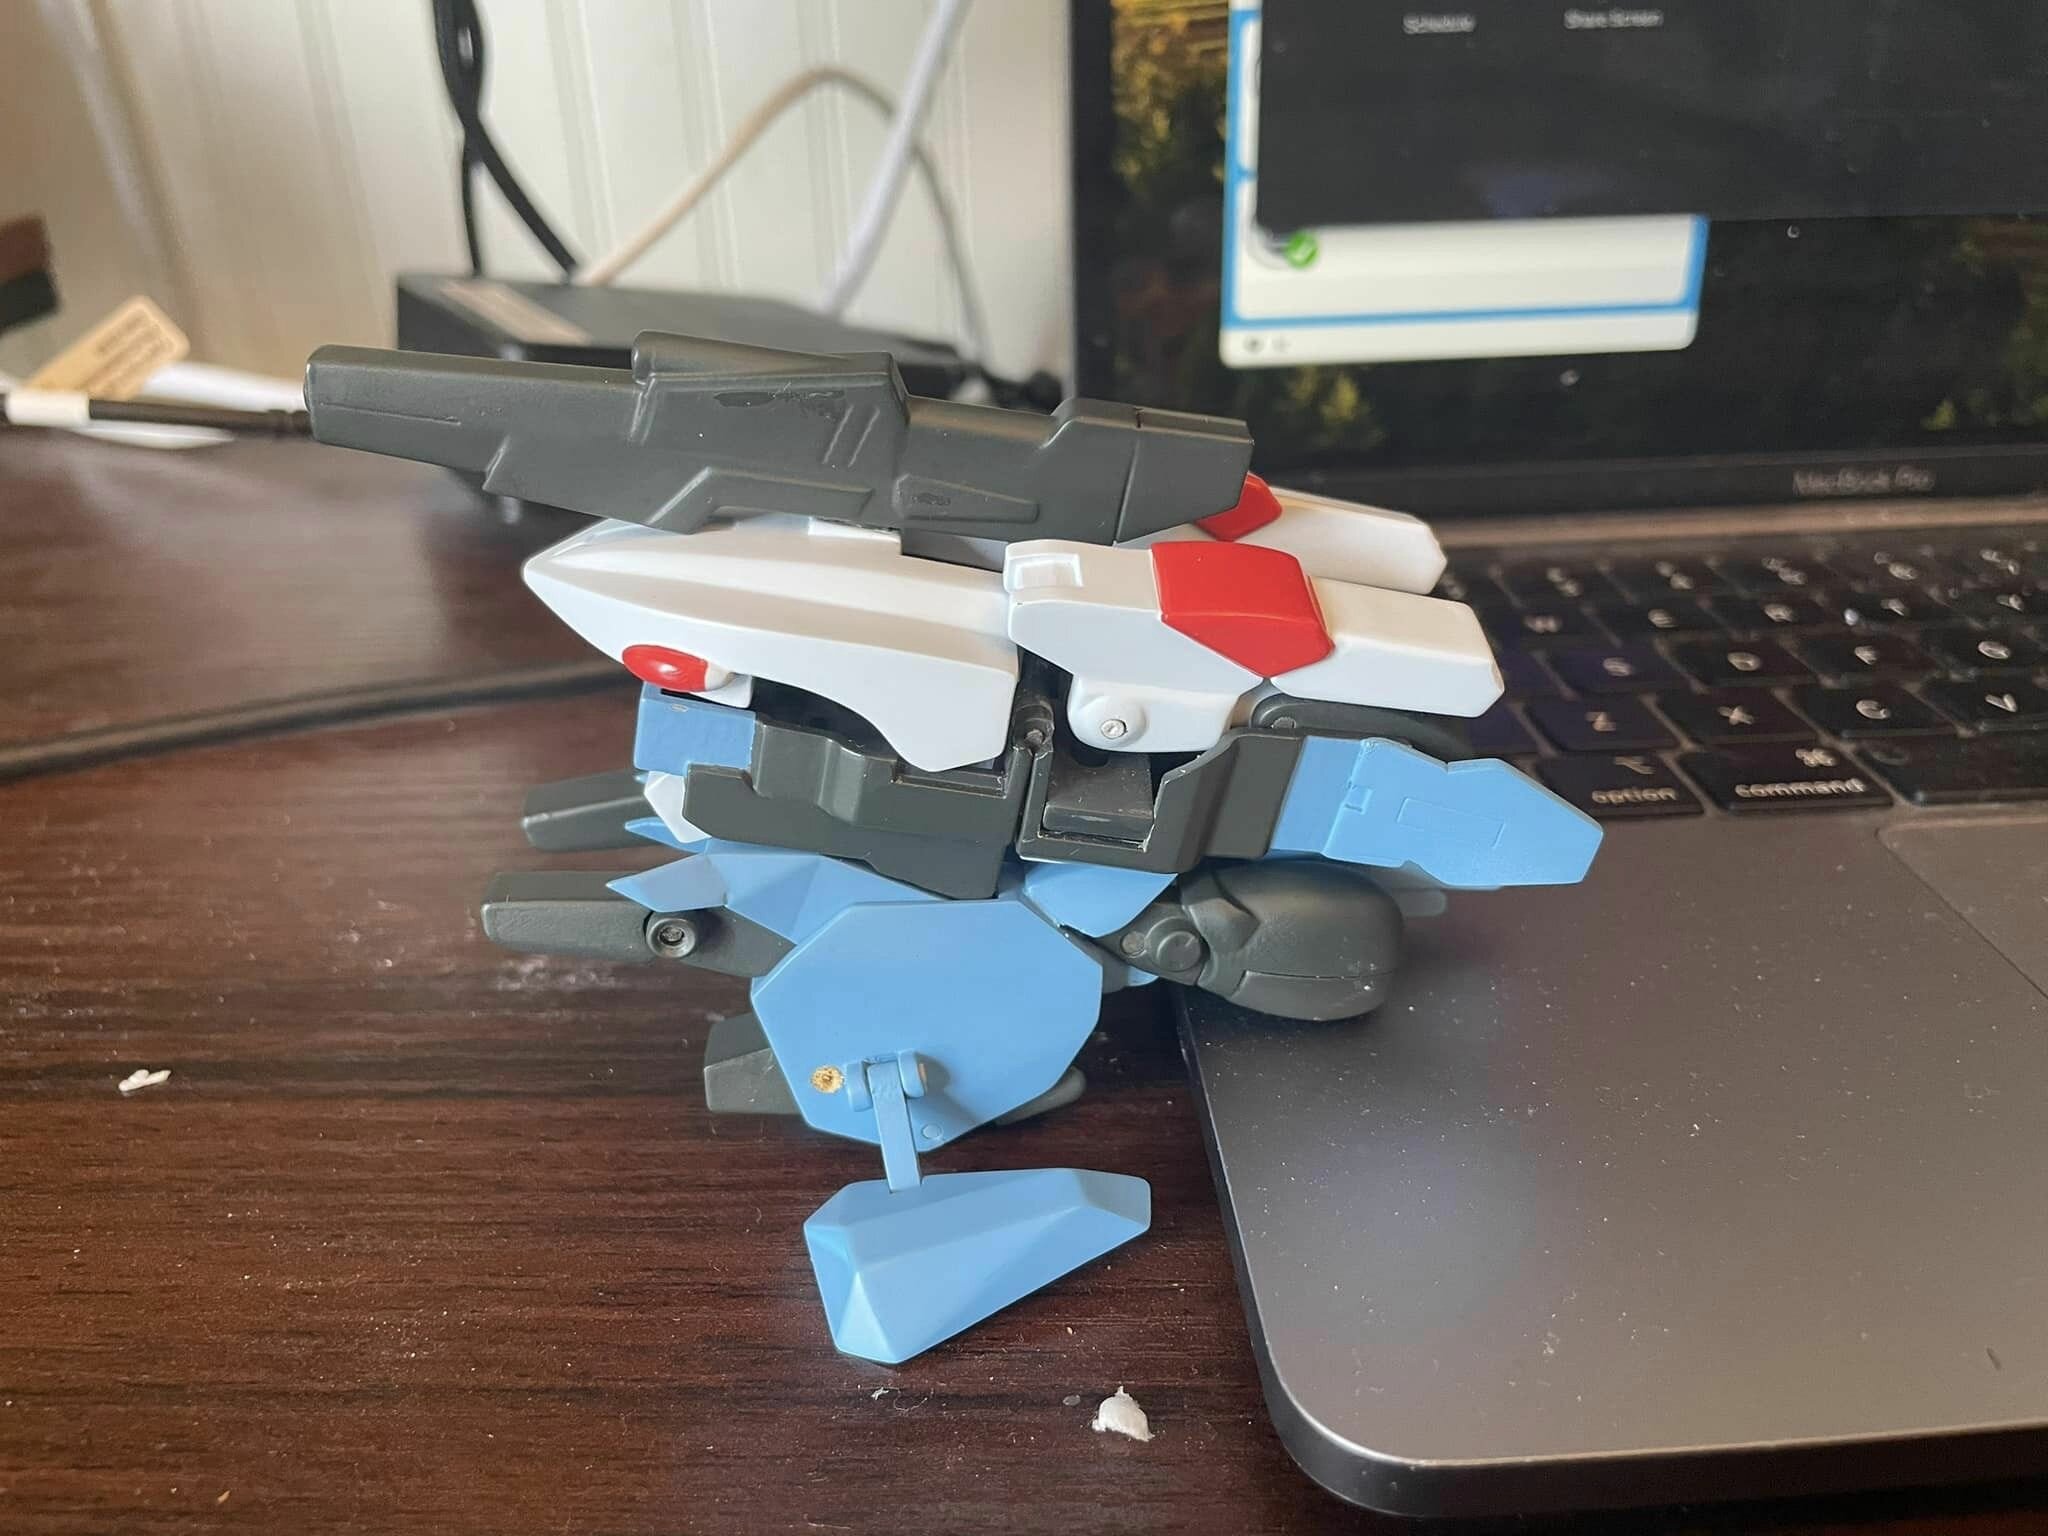
Hey guys, guess what? Batch 1 kits are already shipping! I received the figures from Carlos a few days ago and have been getting kits prepped to go out. I think I can have all of batch 1 expedited by tomorrow evening. Also, some pics of Gerwalk mode! FYI, it balances exceedingly well, and what you see here is just holding together using hot glue; no floppy mess like with other offerings! IMG_1664.HEIC IMG_1667.HEIC IMG_1670.HEIC IMG_1673.HEIC IMG_1678.HEIC
-
Looking good, Ted! On my end, I've caught-up to all current orders. Literally just waiting on the pilot figures to arrive.
-
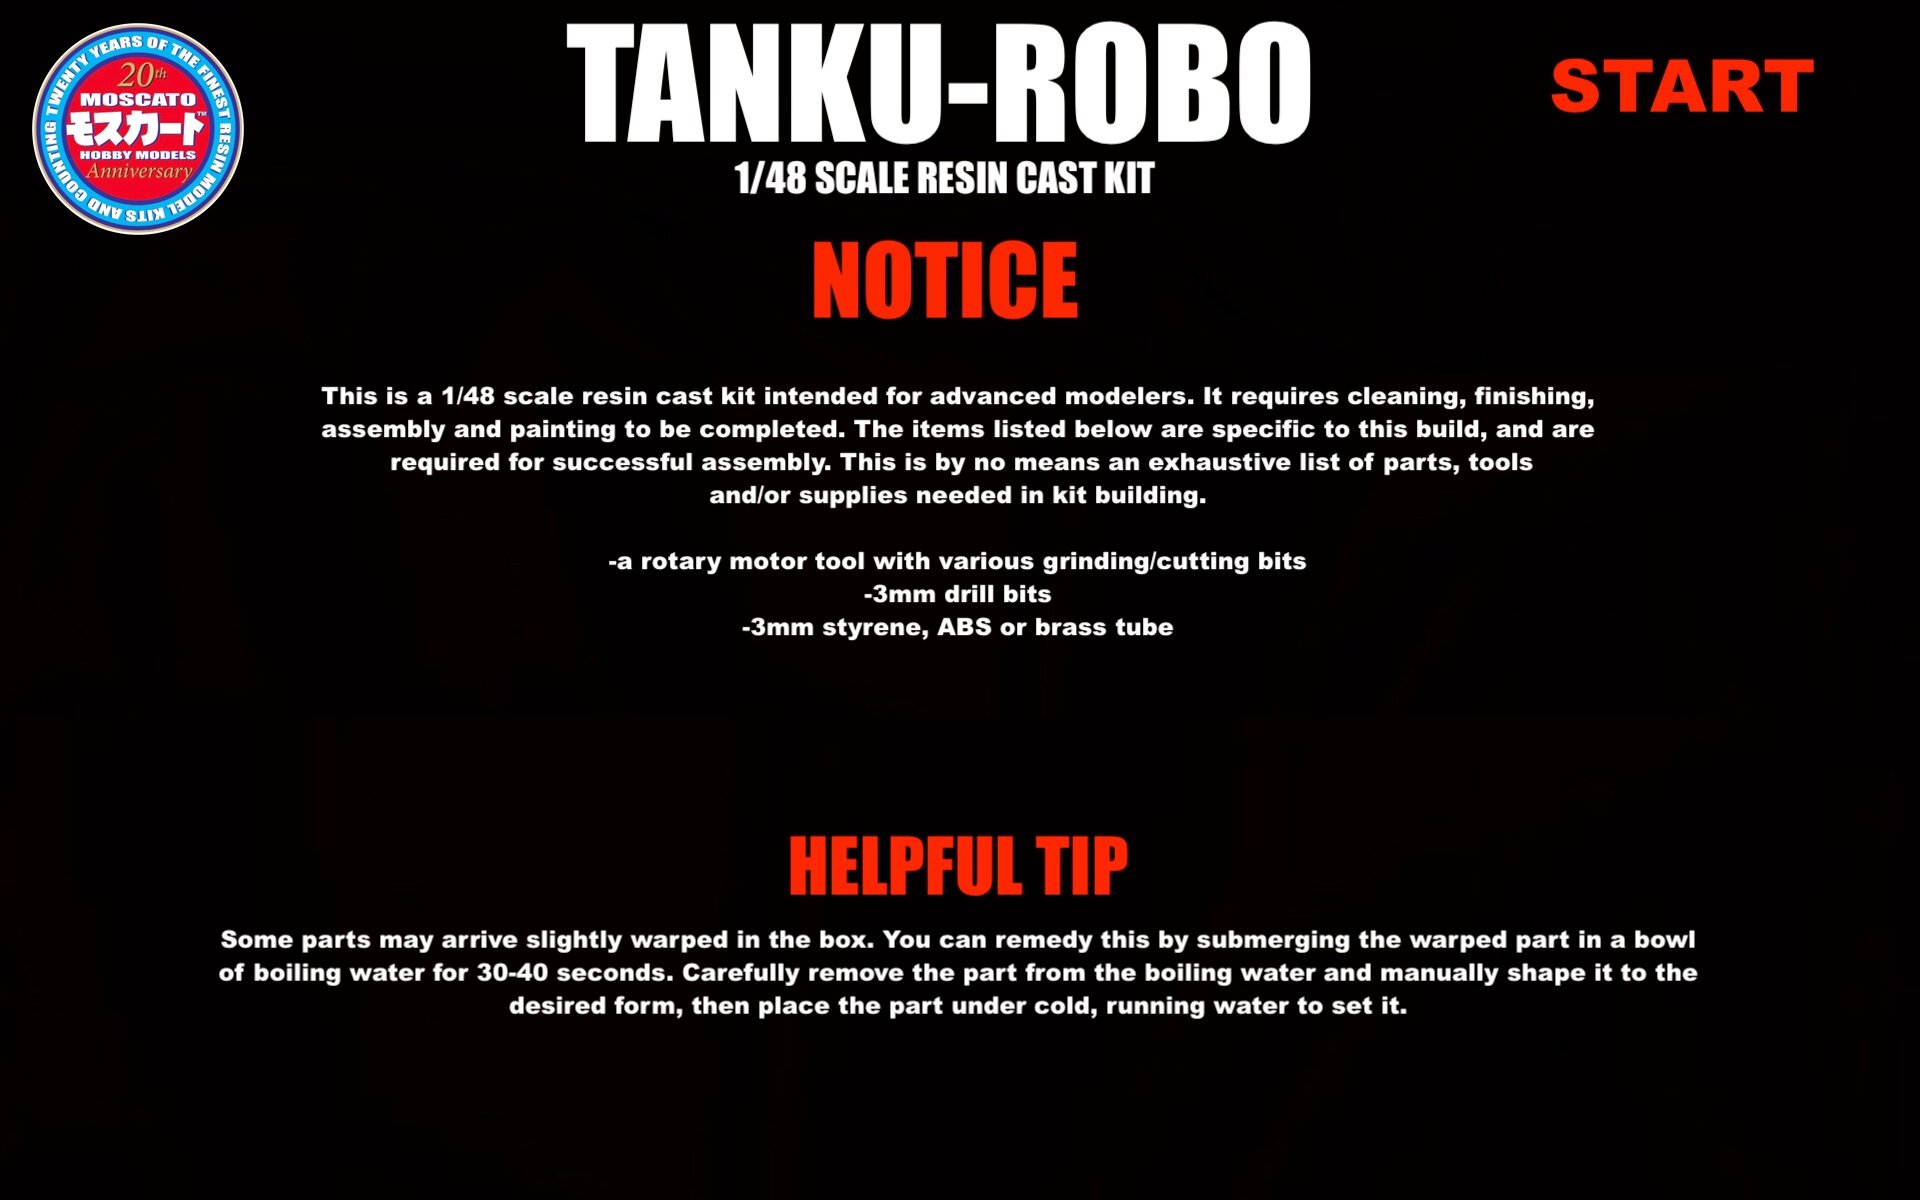
Hello all! Casting of the 1/48 Tanku-Robo kits (batch 1) is almost complete, but I'm still waiting on the 3D printed pilot figues/seats. This is the only thing preventing me from shipping. Please forgive me for this delay.
-
Hey @everyone This is just me giving you guys a progress update on the 1/48 TANKU-ROBO kits: production is already underway, with the 9 first full kits and 10 partial kits are cast. My resin shipment is backordered, so I'm casting up all the flexible elbow parts while I wait. With that said, the first kits will start shipping in about 10 days!IMG_1422.HEICIMG_1421.HEIC
-
To be fair, there are other offerings on the market. These two, for example. And then there was this thing, which may have been a one-off: So I stand by what I said: The very best you can get!

-
The very best you can get!
-
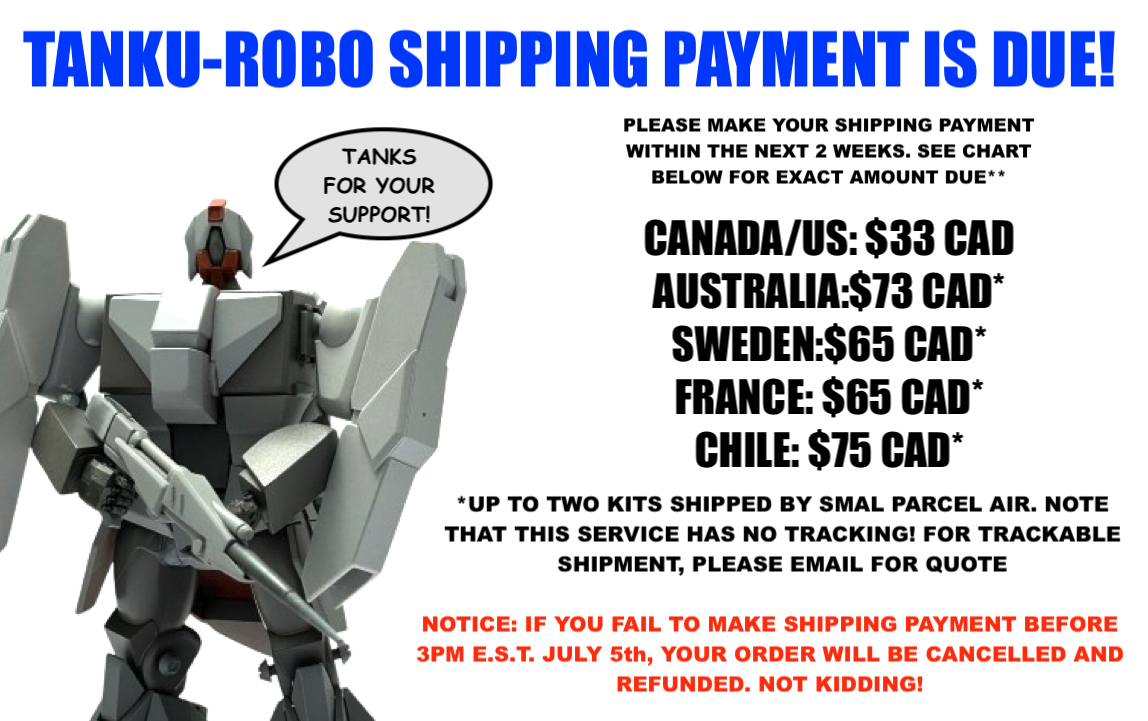
Hood gap: I added a plate to the opening which can be removed for robot mode. IRL the panel would simply retract into the hood. Shoulder: as stated above, the chest (and all abdomen parts) are masters and I didn't want to press the shoulder joint in for fear of damaging it: it's holding with friction only in the pic, and when glued properly, will be more than sturdy enough. Hands: these are aftermarket posable hands which are included in the kit, and the tab in the palm is made to fit the slot in the handle of the rifle. I would have liked round hands, but I couldn't find a vendor who supplies them. Also, shipping payments are due!
-
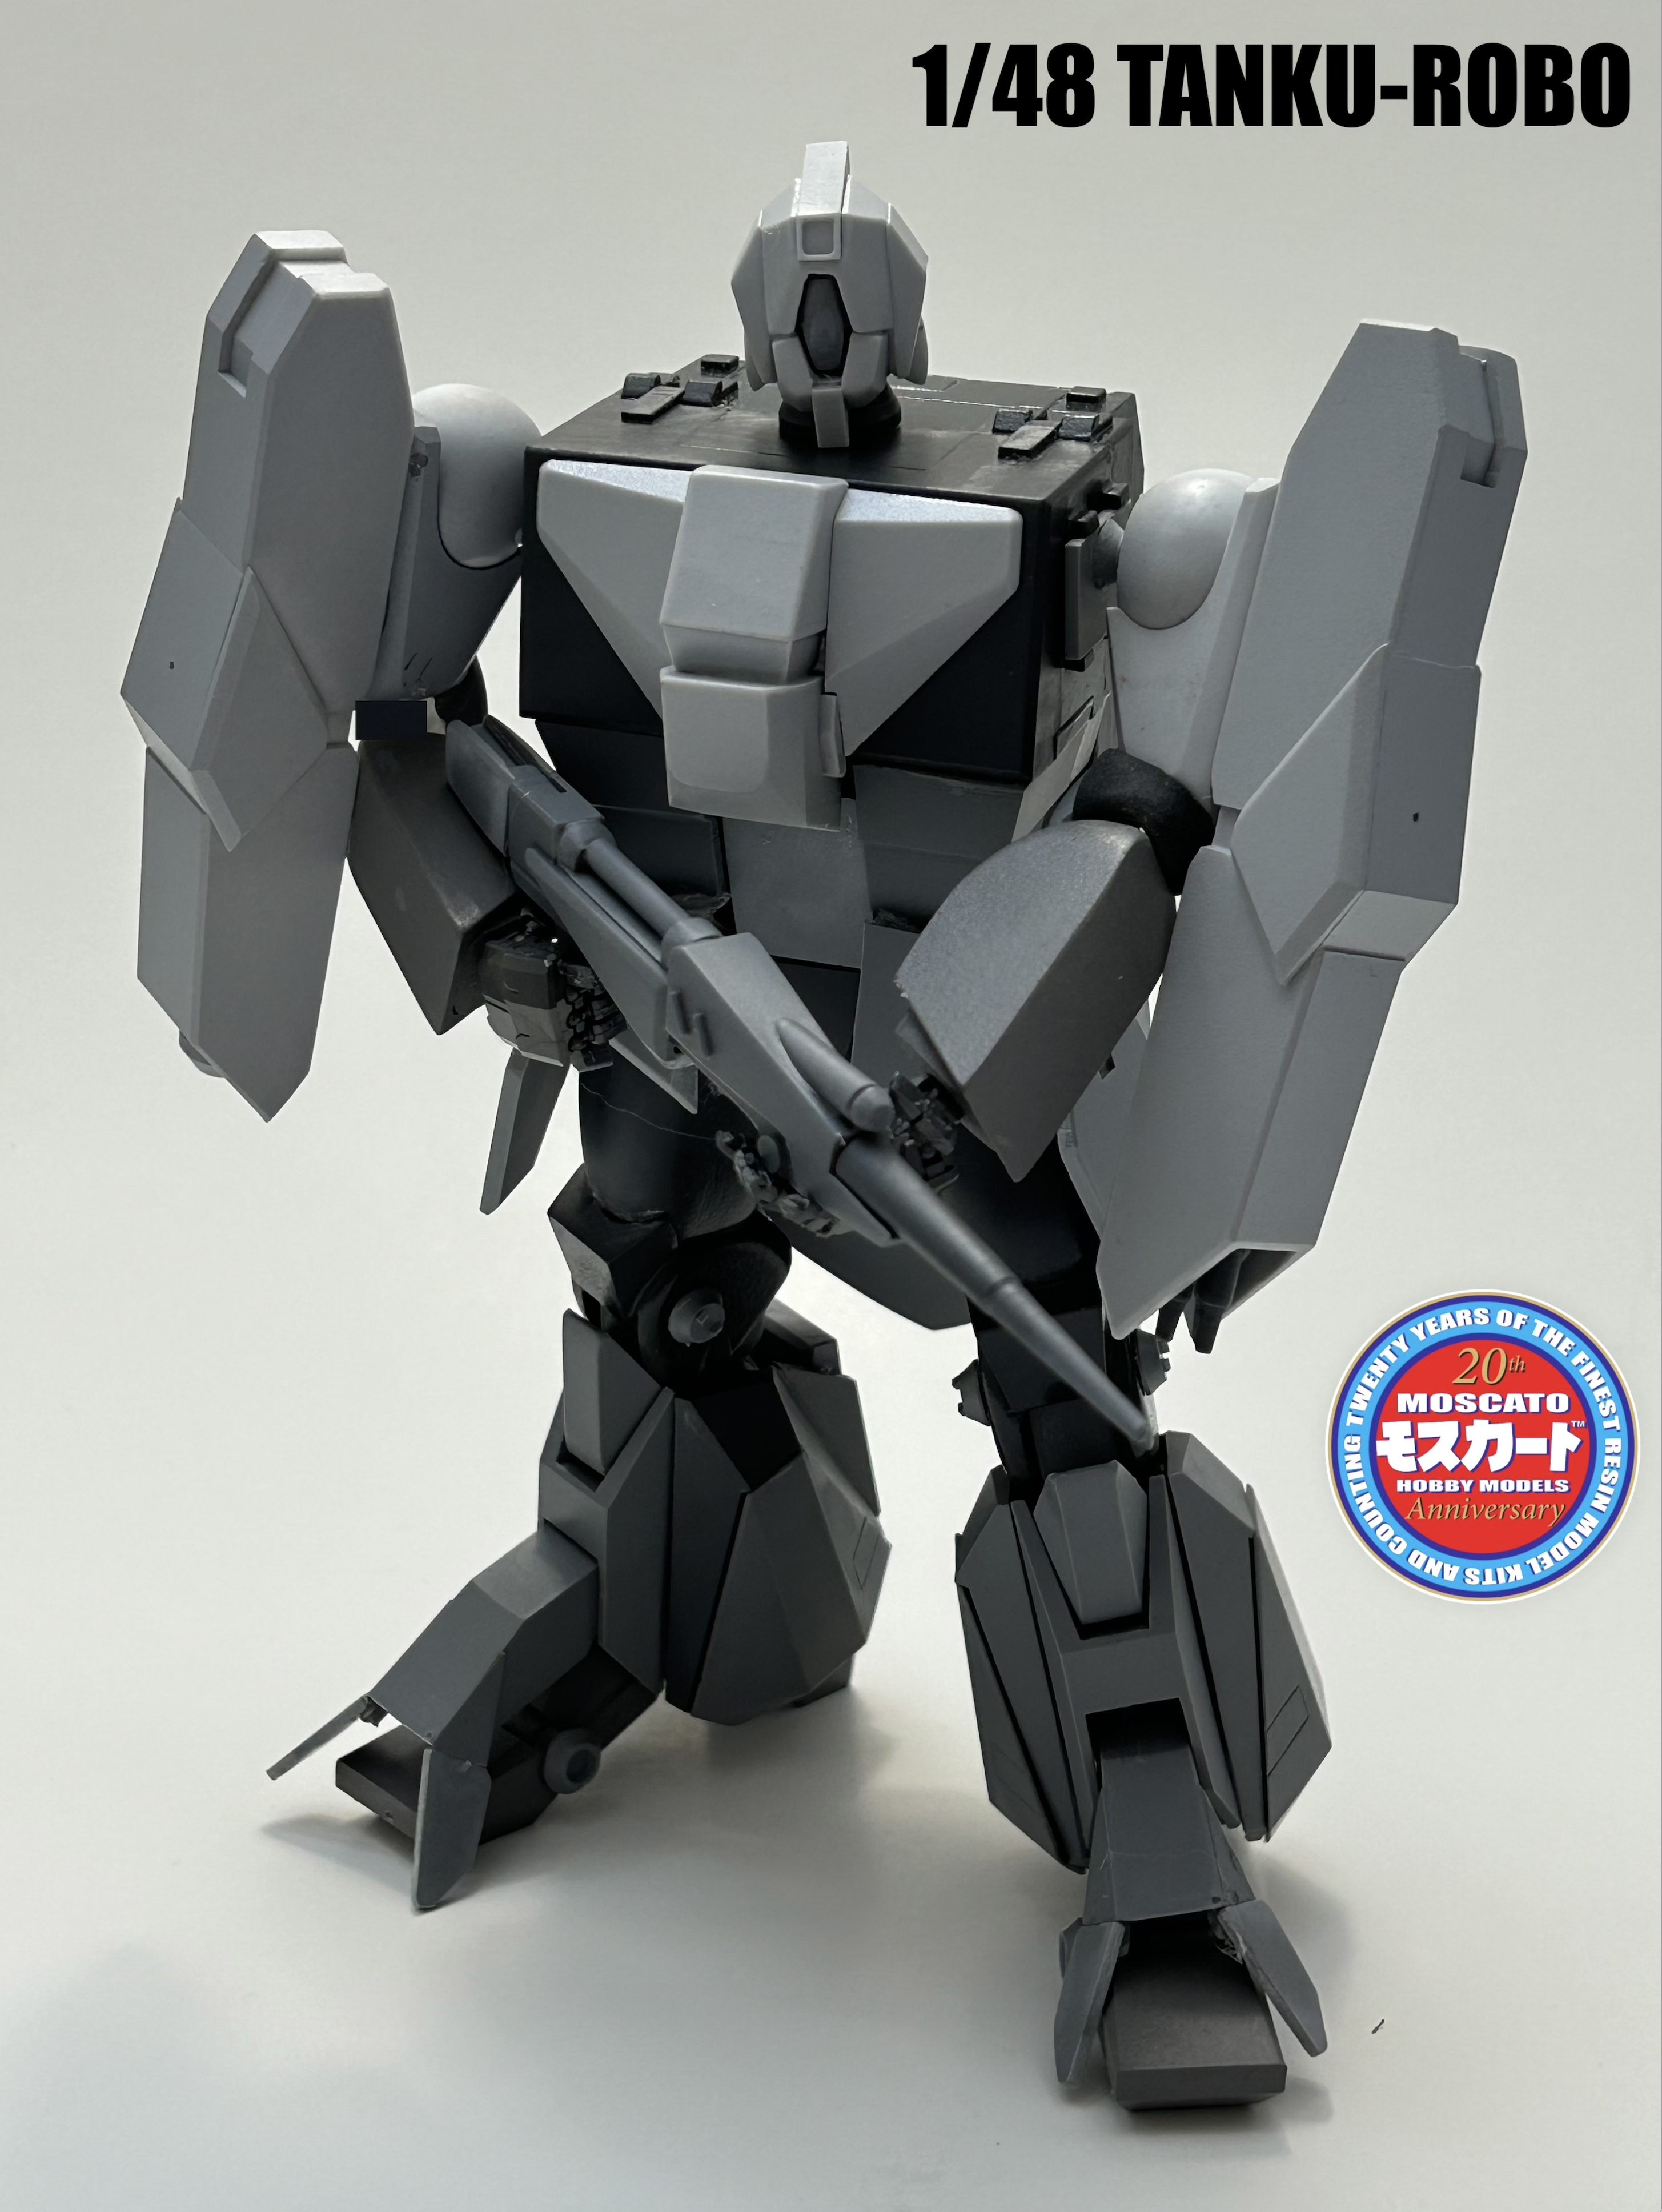
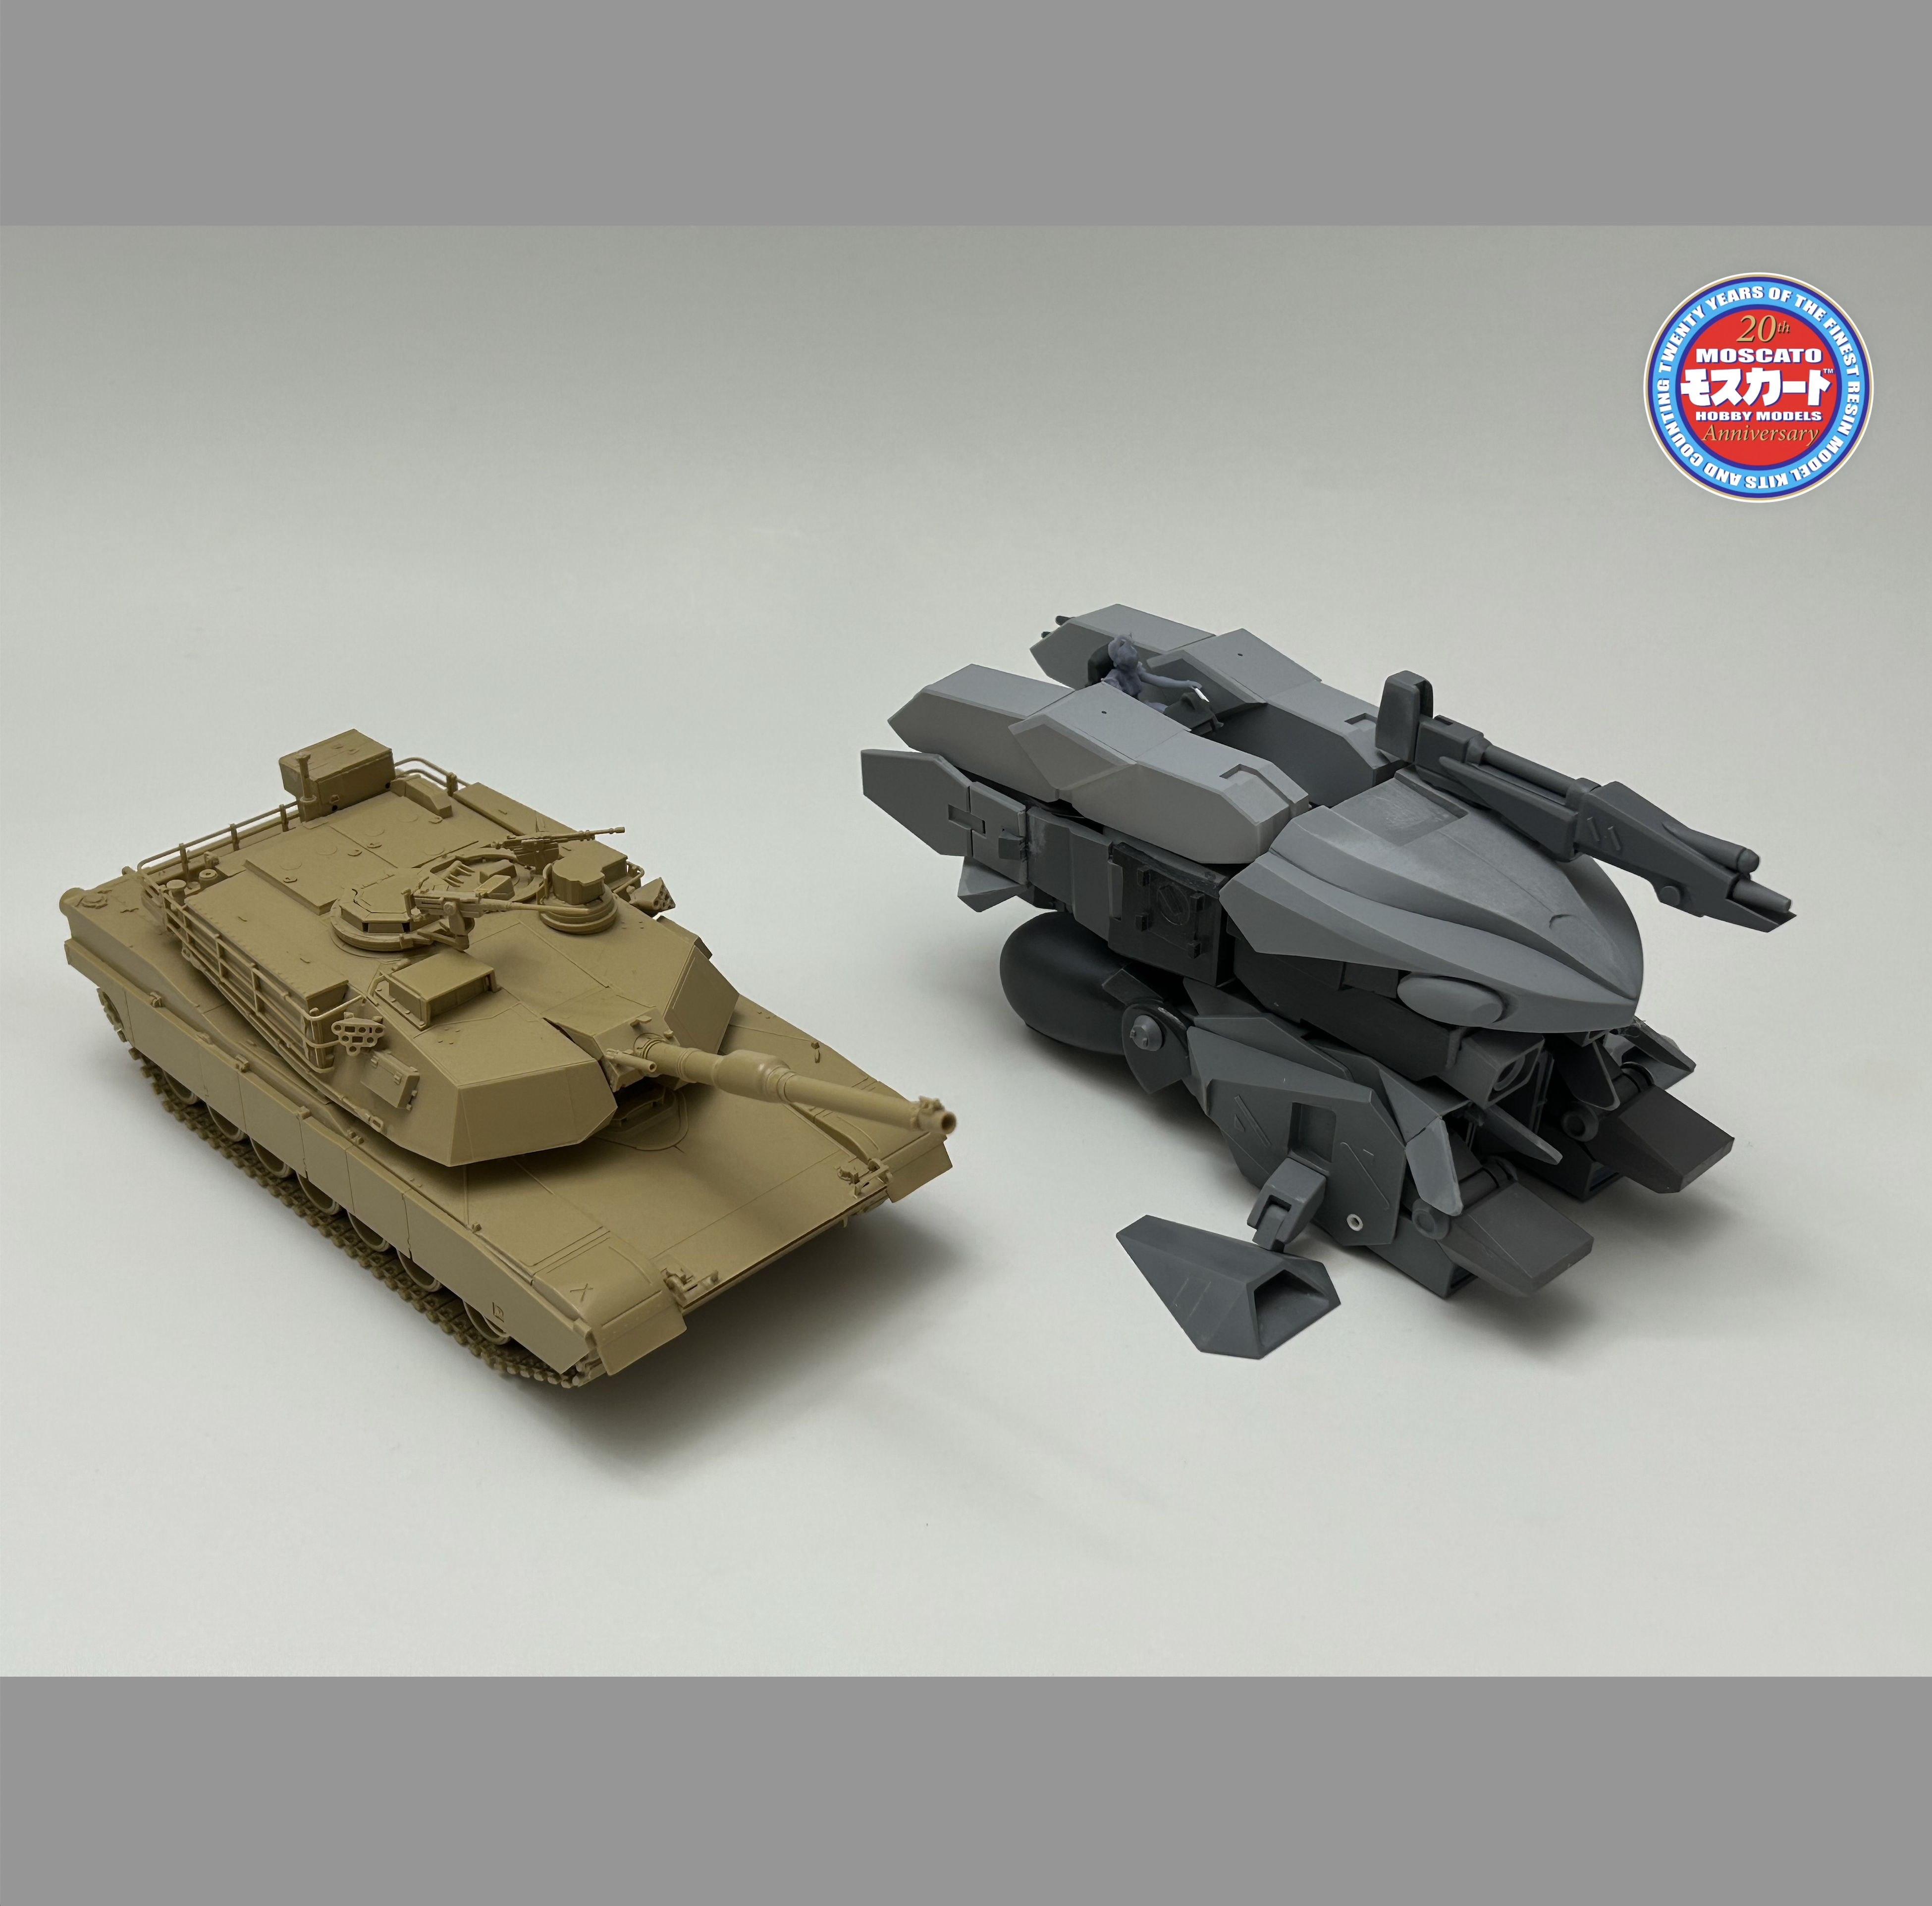
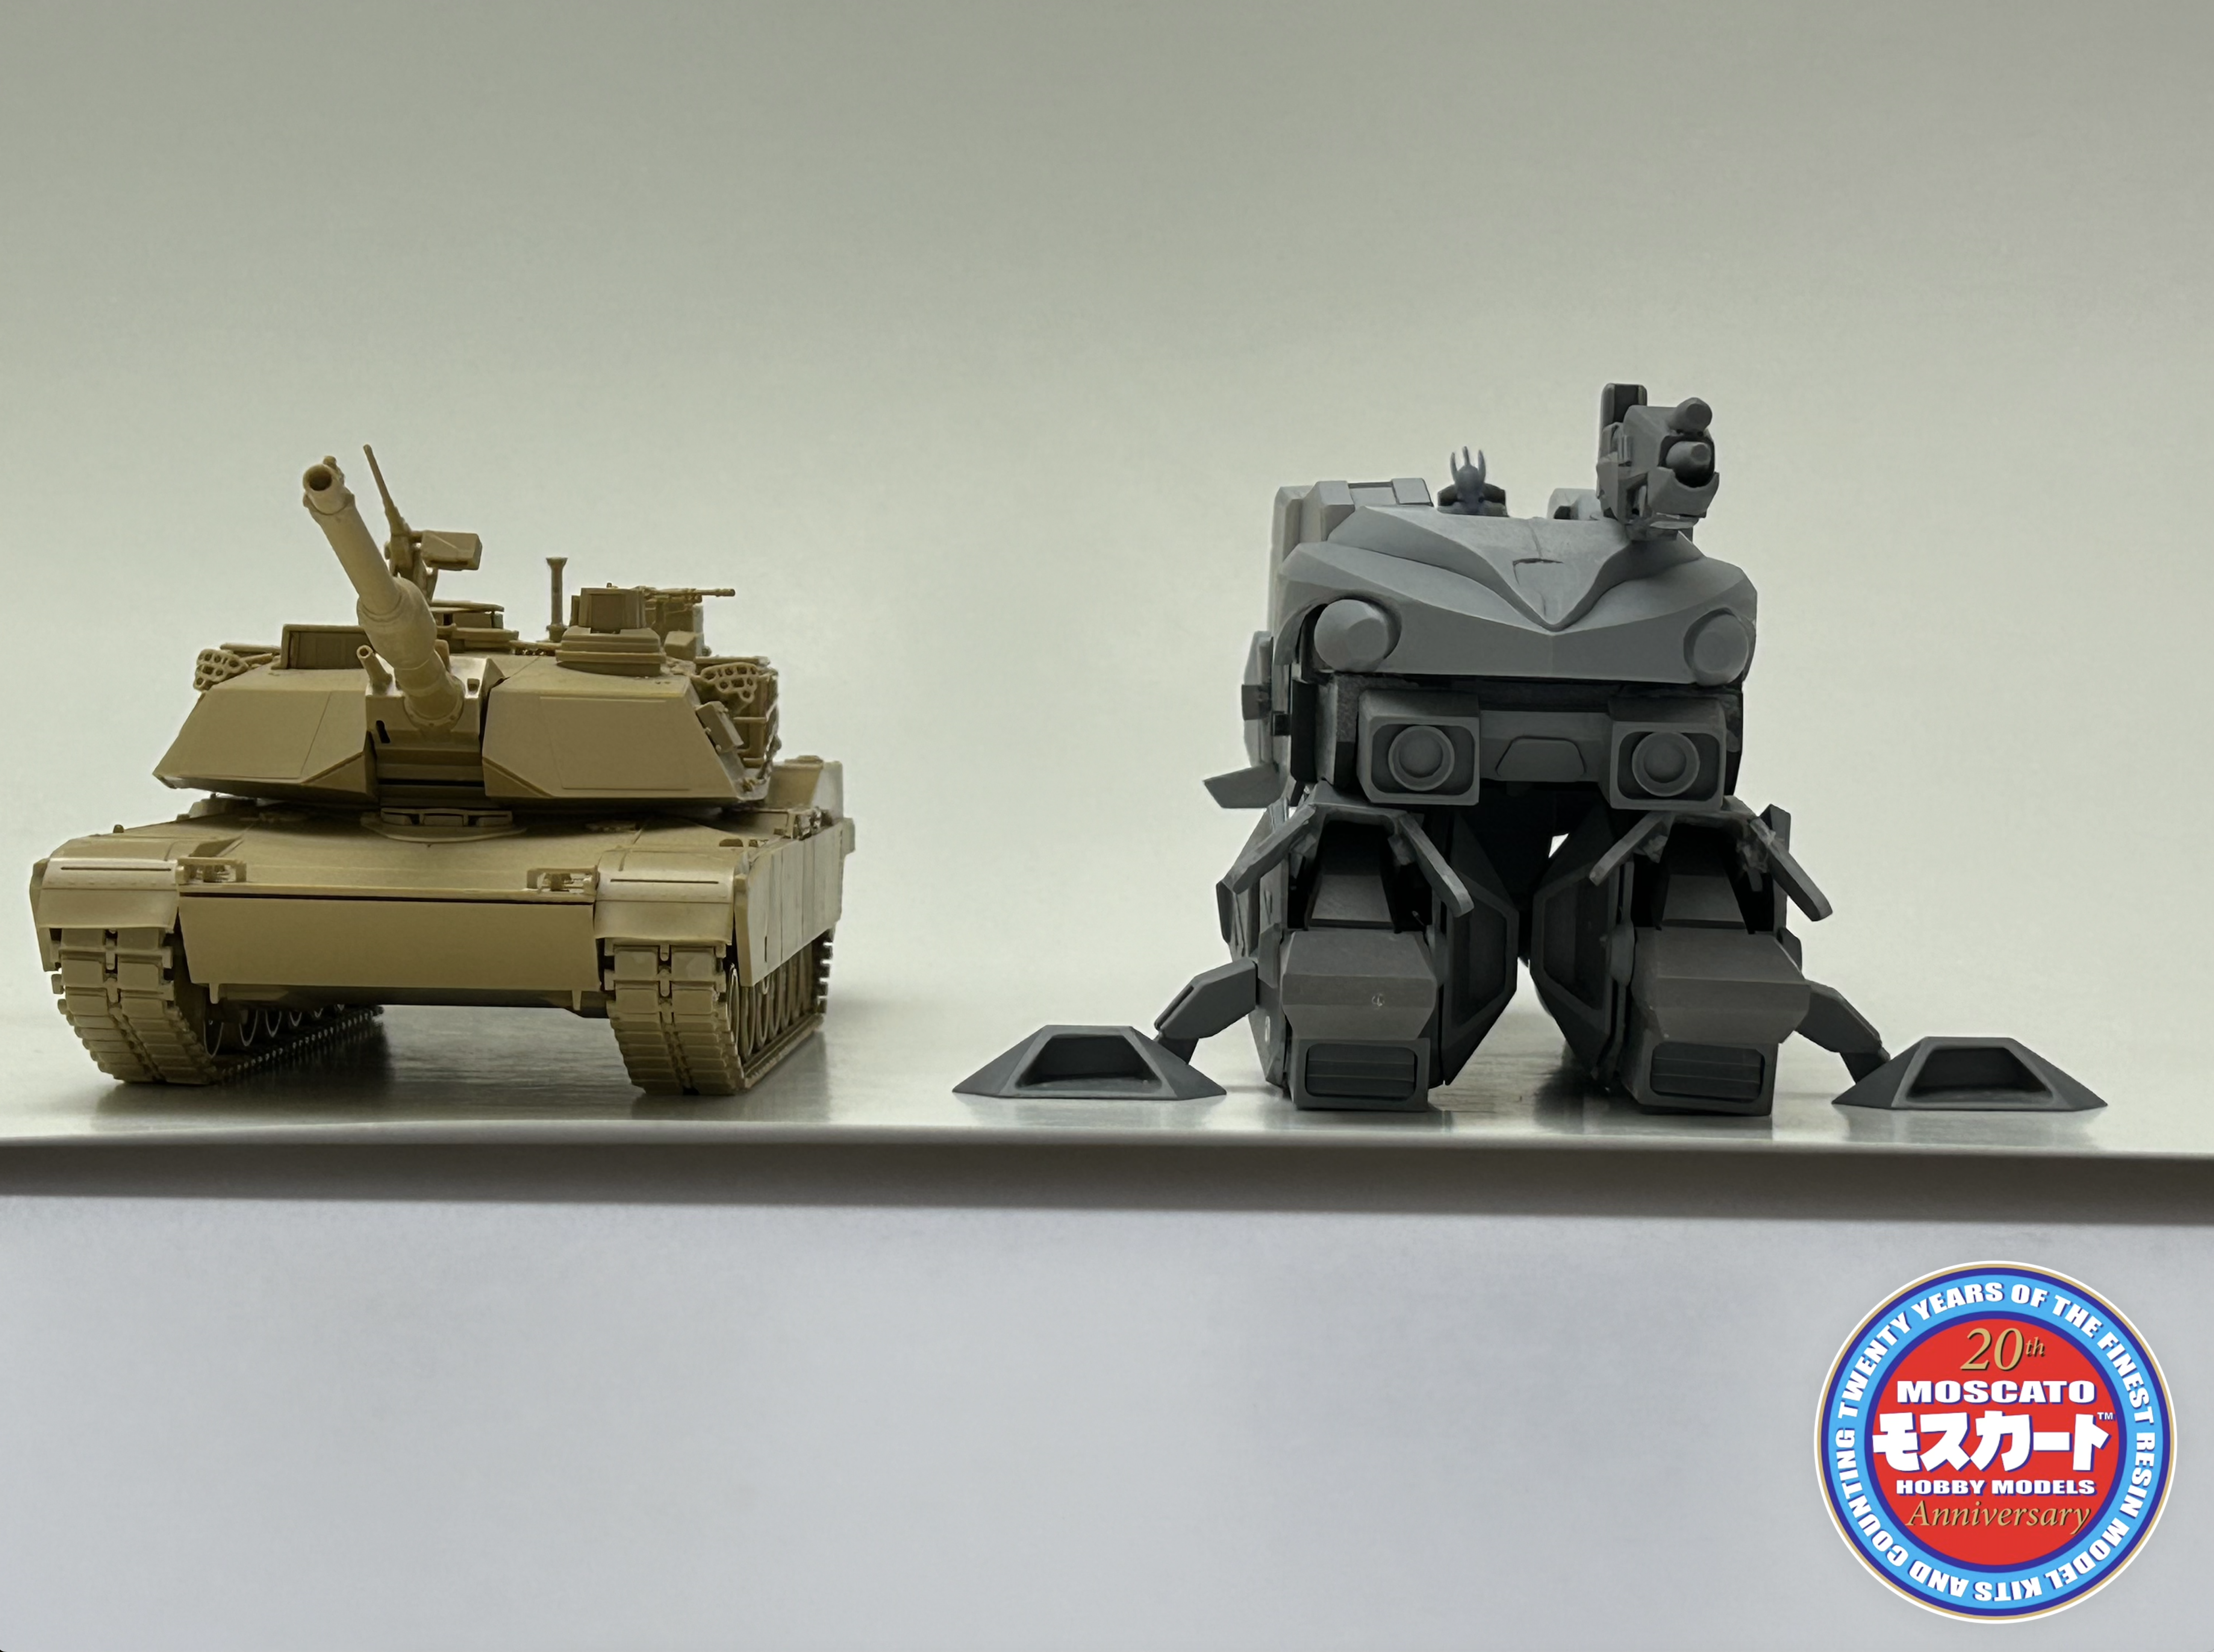
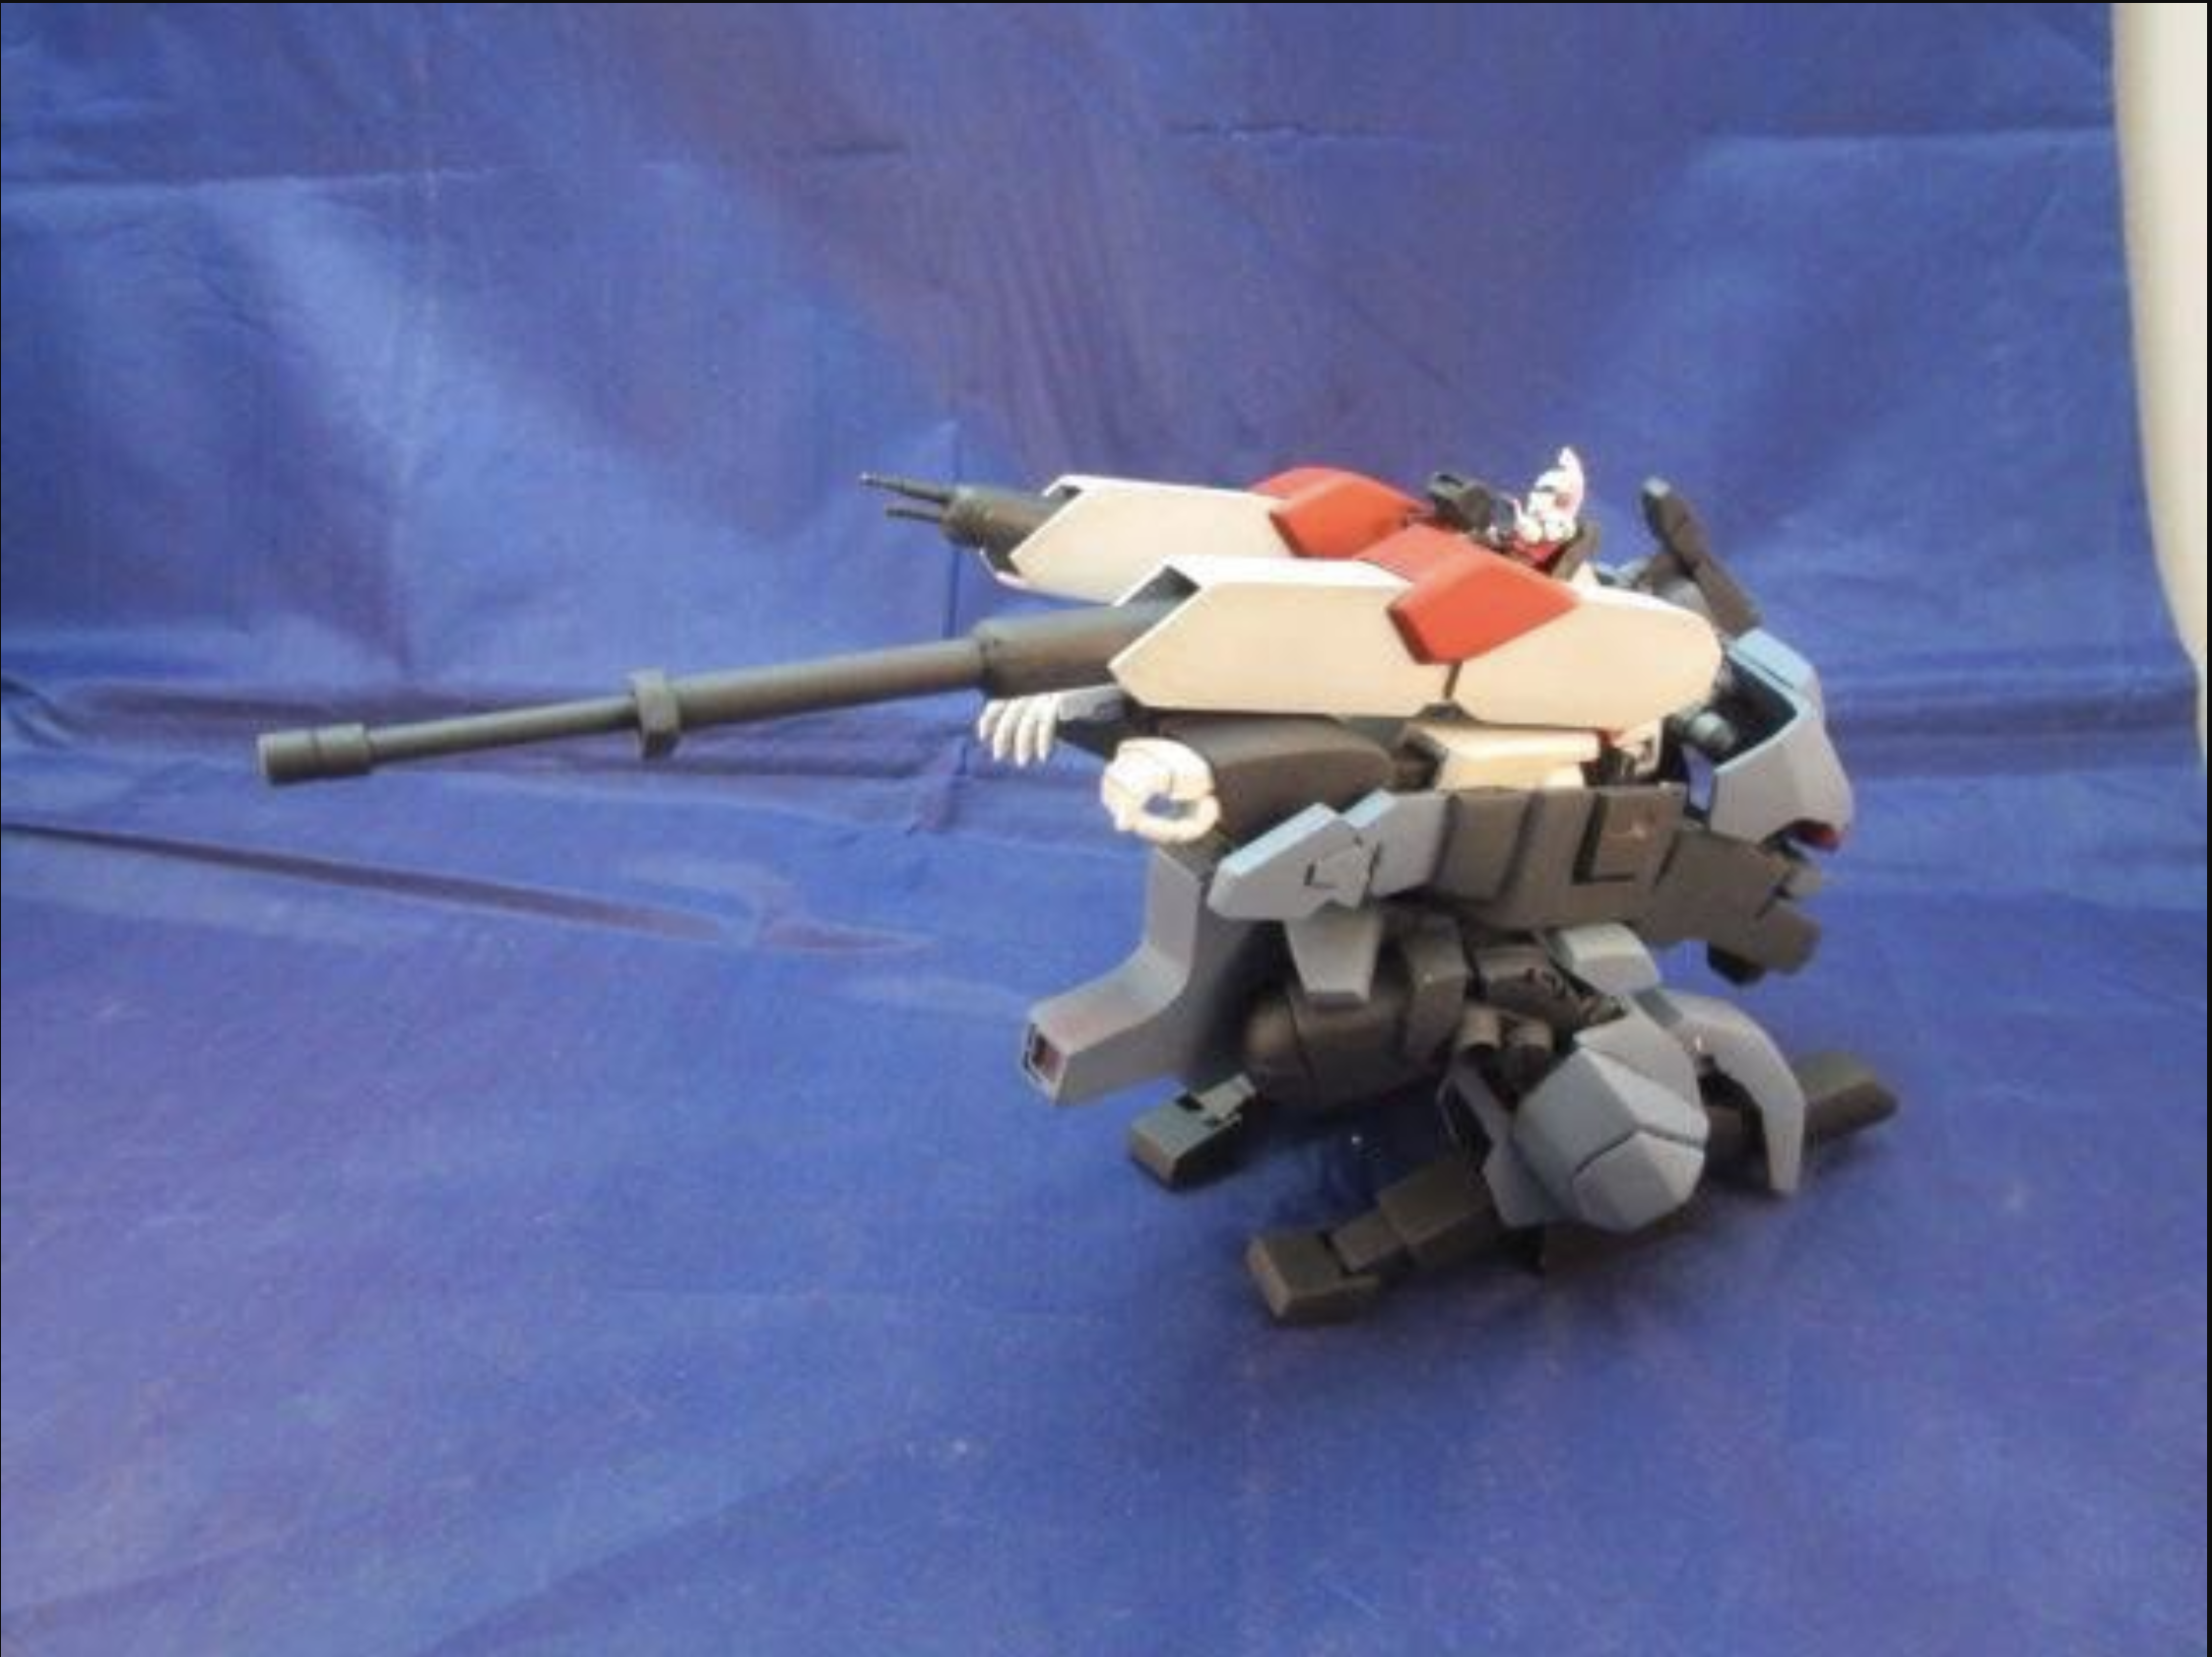
Here it is: the 1/48 TANKU-ROBO in all its glory! Please forgive the gappy abdomen and stiff posing: I'm using a mix of cast parts and freshly primed master-patterns which fit very tightly and I don't want to damage them. I did not attempt a full "Walker Cannon" mode for the same reason, but it is fully feasible! FYI: the gaps in the elbows are because the flexible covers are still being cast, and I'm still waiting on the pilot figure/seat to be delivered. I will posting the shipping fee details on Friday and re-opening the orders for batch II early next week, so keep a very close eye on this page so you don't miss out on this once-in-a-lifetime 20th Anniversary kit! IMG_1260.HEIC IMG_1262.HEIC IMG_1263 copy.HEIC IMG_1264 copy.HEIC IMG_1265 copy.HEIC IMG_1268 copy.HEIC IMG_1269 copy.HEIC IMG_1271 copy.HEIC IMG_1272 copy.HEIC IMG_1273 copy.HEIC IMG_1275 copy.HEIC IMG_1277 copy.HEIC IMG_1278 copy.HEIC IMG_1279 copy.HEIC IMG_1280 copy.HEIC
-
Captain's Log: Friday, June 14th. Just a quick update today: I have successfully cast all the parts requiring duplication (arms, lower legs, feet, etc.) and while I was very close to showing a fully symmetrical model today, it was a bit too tight on time, so I will push that to next Friday. In the meantime, I have made some detail tweaks which you will see then. Will the model be able to hold the rifle with both hands: most likely yes, and that will be shown. Support autocannon missing tips: this is by design, as very thin barrels will not cast properly, so only 2 of the 3 barrel stages are present. I will leave it to the OCD modelers to add the final tiny segments in styrene. The front portion of the rifle has been tapered to match the line-art; will show this with the extended barrel. As for the rifle and making it sit more sunken into the hood, this would require the addition of a channel in the hood which would ruin the look of the latter. Lack of forethought in the original design means the best option for a physical model (IMO) is to have the rifle sit slightly higher. This also makes the inclination of the rifle slightly adjustable, giving it more usability in hover mode. 76.HEIC 77.HEIC 78.HEIC
-
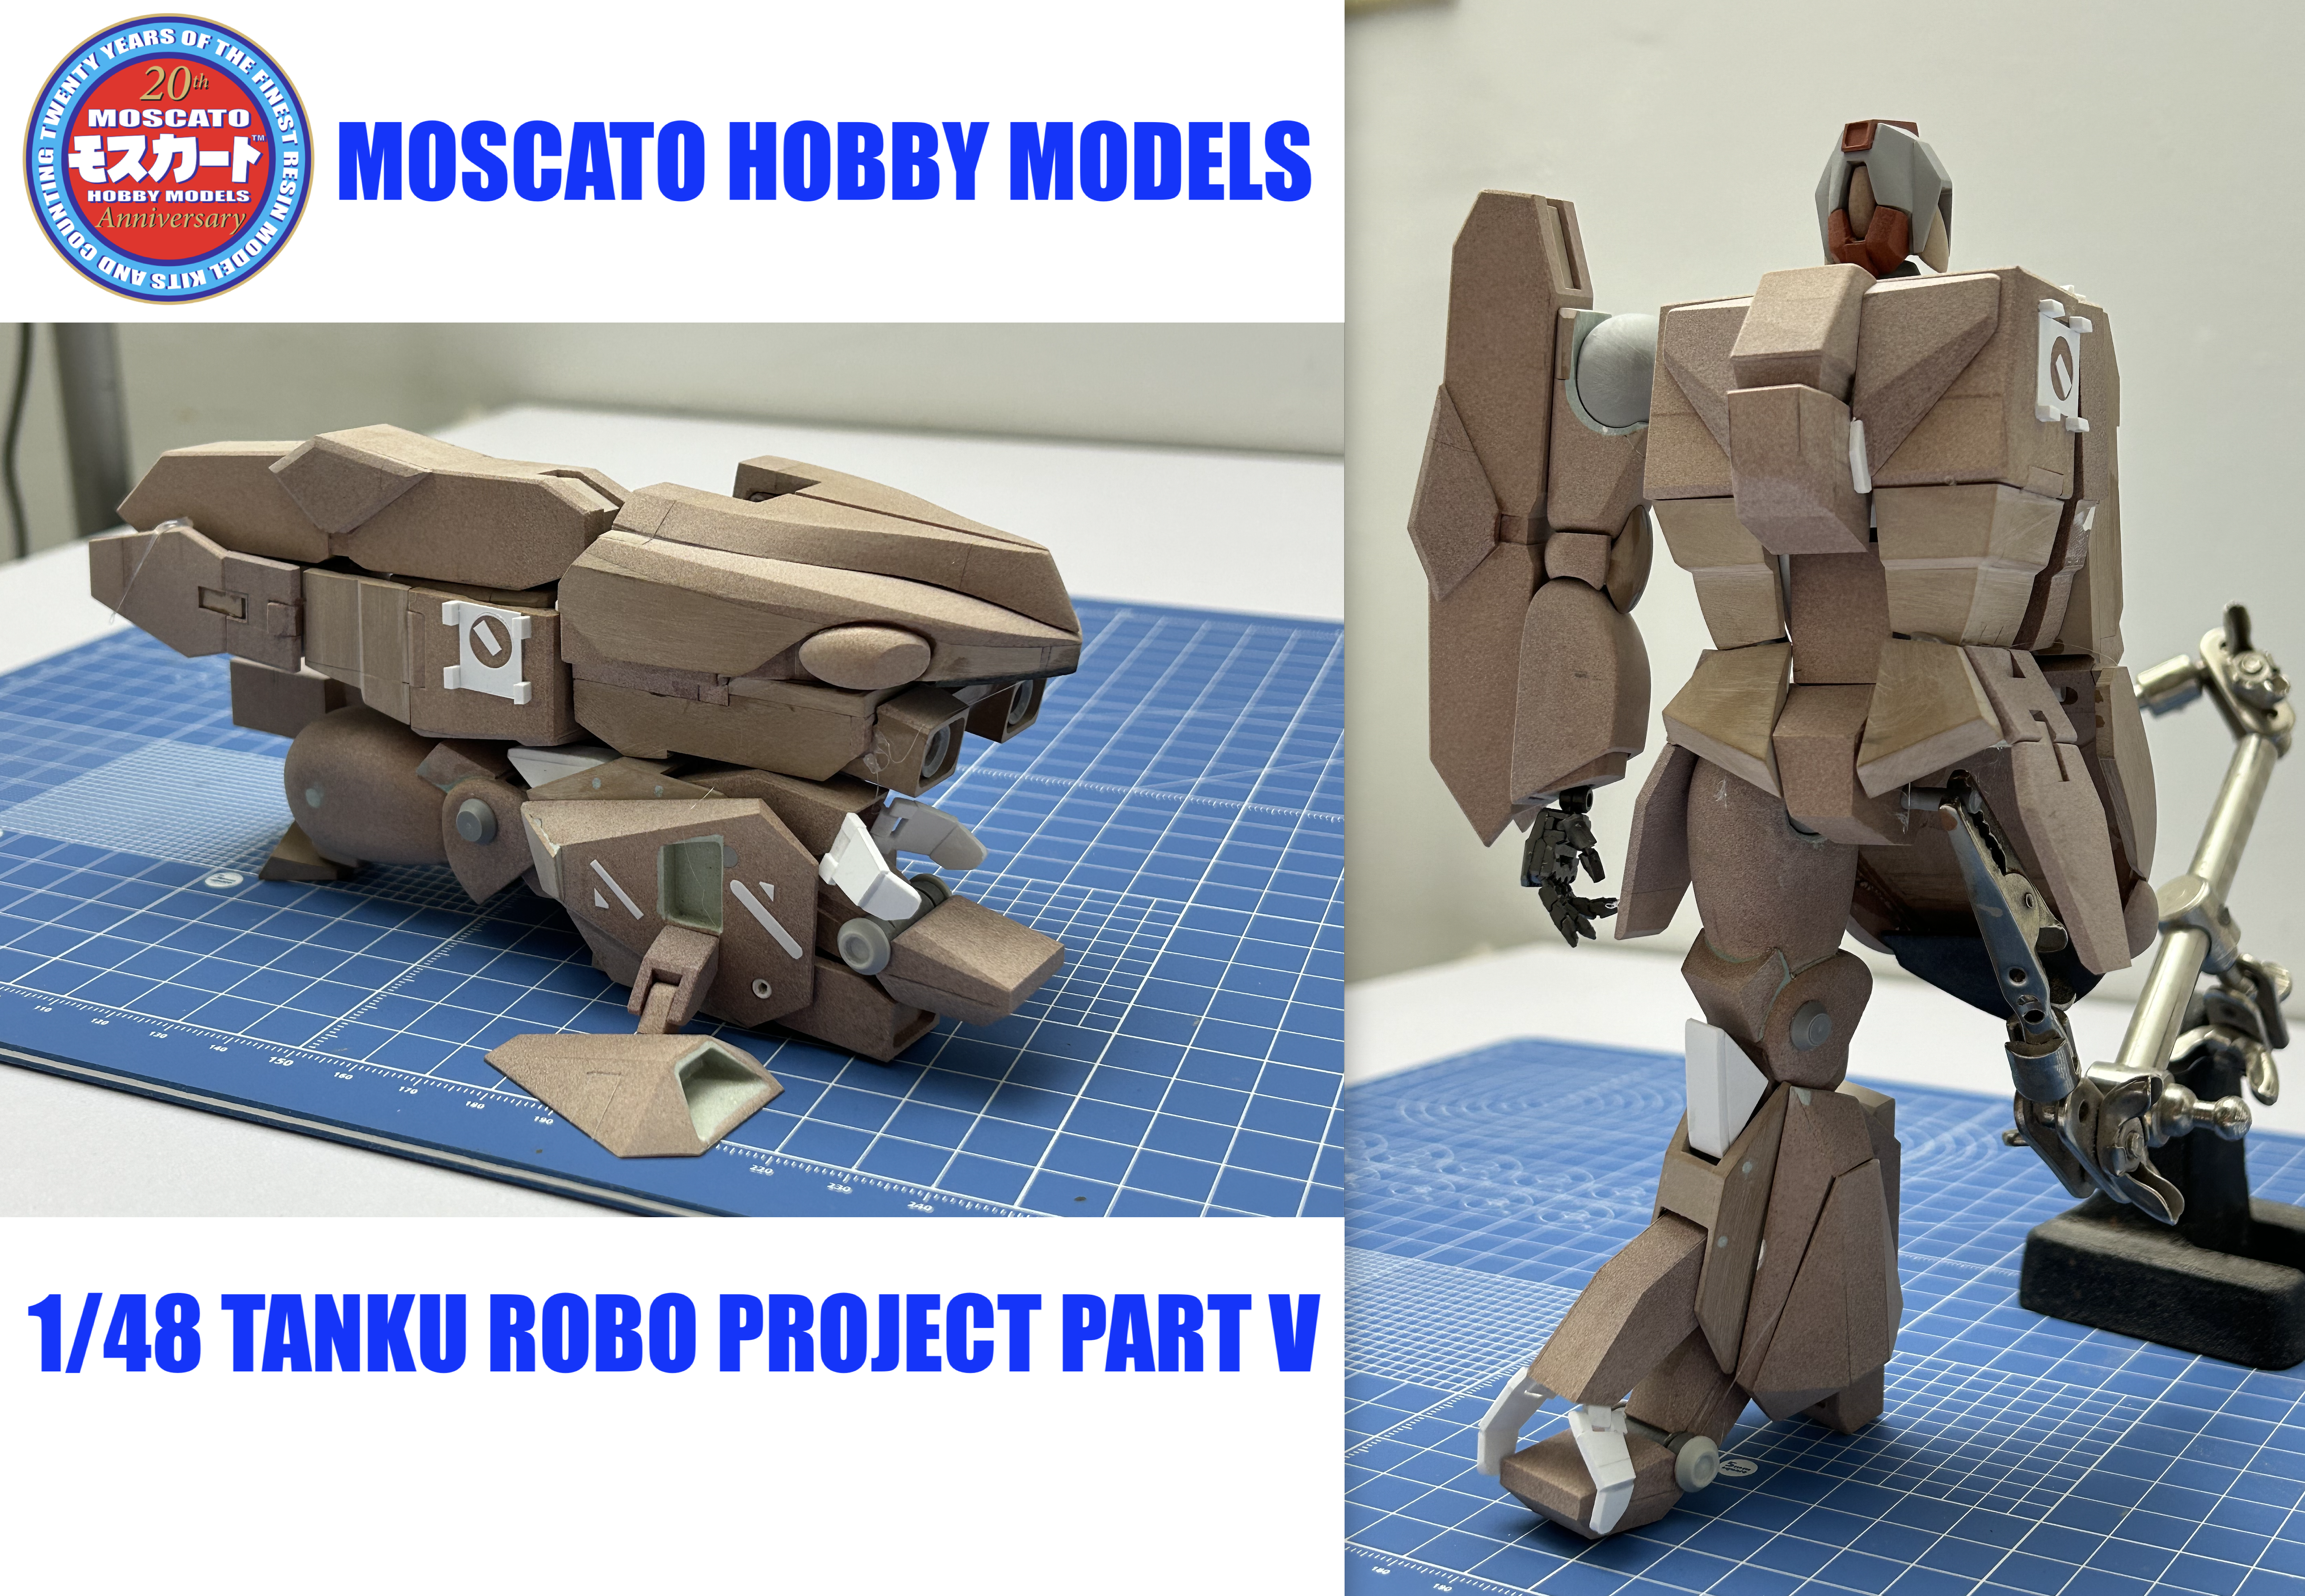
Captain's log: Friday, June 7th, 2024. Closing stages of construction have arrived. I made a few alterations to some of the parts to make them more conformal to the source material, and am now at the priming stage, getting ready to mold all the parts which require duplication. The first is the foot armor cover thingamabob, which you can see in pics 68 and 69. Admittedly, the pieces you saw last week were place-holders, but now I have a far better solution which looks right! That was a bit of a sticking point for me, because the clearances in the lower leg/foot area are very tight. The lateral armor pieces are separate (held with tack putty!) which will be needed to avoid binding the foot in robot mode. Pics 70 and 71 show the deployed main gun and support autocannon. The kit will also include plugs to reproduce these in retracted mode inside the arm nacelles. Pic 72 shows the rifle unit in hovercraft (stowage) mode with the raised stock and retracted barrel, but will have the optional long (extended) barrel and lowered stock. Pics 73-75 shows the hood fairing, now sloped down as per the line-art. I did like the previous version with the squared nose, but apparently it was really bad for gas mileage!! With these mods done, I can now begin mold-prep for the duplicate parts as I await the arrival of the pilot figure from Carlos. If the castings aren't ready by next week, (which is doubtful) I may simply skip an update, though the odds are pretty good that I'll be able to show a fully finished figure in the next 7-10 days, so stay tuned!! 67B.HEIC 68.HEIC 69.HEIC 70.HEIC 71.HEIC 72.HEIC 73.HEIC 74.HEIC 75.HEIC
-
Thanks for the kind words, and thanks for taking an interest in the project! As you might imagine, a project like this poses many hurdles, (what transforming mecha doesn't?!?) not the least of which is the animation style sheets, which not only conflict with the animation, but with themselves as well. Admittedly, I don't mind a bit of constructive criticism because there are so many elements to keep track of, and an extra set of eyeballs helps to redirect me if I stray. You can be a maker or you can be the art director, but it's hard to do both. With that said, all the issues Ted pointed out are not major and have already been addressed, and you'll get to see that in tomorrow's update.
-
Captain's log: Friday, May 31, 2024. After a long two weeks of grinding, puttying, sanding and adjusting, I'm finally getting there! Now it's reasonably close to a final product. There are still a few tweaks to made here and there for optimal fit, and still lots of surface finishing, but I elected to leave the primer off most parts to let you see just how little putty work was needed despite such a complex project. I'm happy that Ted pointed out the flaws in the initial head design, and I was even able to enlarge the backpack without severely affecting the overall geometry! Pics 49-52 show the leg in its various configurations. I am still tweaking the toe which stores in the calf and deploys for Walker Cannon mode, cos it's not quite right yet. The ankle tilt is not as steep as the Bio Lloyd, but is still quite good. If anything, I think that actually works into the storyline of the series, as I had always imagined the bad guys having a more nimble/advanced mecha. Pics 53-58 show the hovercraft configuration from various angles. Please forgive the floppyness: it's mostly holding with friction and a bit of hot glue and I don't want to damage the masters by manhandling them. Once I cast a few mirror parts I will be able to pose everything properly and show you how everything lines up nicely! Pic 59: the head before and after corrections! While it looks drastically different, I was able to retain the same core module and alter the peripherals. I think the new head looks way better and is far more faithful to the artwork. Pics 60-66 show robot form in all its glory! I skipped Walker Cannon mode, simply because the parts would need to be glued securely to achieve it, but the geometry is sound! I still want to slightly lower the butt-cover hinge, but otherwise I think she's looking fantastic! Still waiting on Carlos to finish the pilot figure, which I don't think will be a a major factor ATM. The next 2 weeks I'll be sanding/priming the current parts, making the final adjustments, finishing the weapons and molding some duplicate parts so Tanku-Robo can stand unassisted. I may one again skip next week's update for the sake of productivity, but it's only so I can provide a better update!! 49.HEIC 50.HEIC 51.HEIC 52.HEIC 53.HEIC 54.HEIC 55.HEIC 56.HEIC 57.HEIC 58.HEIC 59.HEIC 60.HEIC 61.HEIC 62.HEIC 63.HEIC 64.HEIC 65.HEIC 66B.HEIC
-
The Tanku-Robo is following (largely) the same mindset I employed for the construction of the 1/32 Legioss: the model is not be made to transform outright, as the fragility of resin parts makes that completely impractical, but the geometry and dimensions are sound in that there is no cheating required in the form of parts-swapping to represent parts which morph dimensionally (differently sized/shaped parts, etc.) Because of the small size of this project compared to the Legioss, some minor parts-swapping will only be employed to achieve what cannot be done by mechanical means due to the limitations of the material and technology: tiny working hinges, thin overlapping structures, etc.) One example of this is the hips/crotch module: you will have one set for robot, and one(wider) set for the two other modes. Had parts been made of metal, they would be easily expandable/collapsible, but not in resin. I can tell you that if you study the line-art sufficiently, there are so many cheats between all modes that if you want silly accuracy, the only way to achieve that is to have a separate, dedicated static kit of each mode, like what Imai did with the 1/72 Legioss plastic models. That is not now, nor has that ever been my design philosophy, as everything I've made has had a foundation in practical reality. I do believe that's part of the appeal of my models. With that said, there's still some possibility for adjustment, even for the challenging backpack issue; let me see what I can do.