

captain america
-
Posts
3545 -
Joined
-
Last visited
9 Followers


Recent Profile Visitors
34236 profile views


captain america's Achievements
")
SMS Squadron Leader (11/15)
804
Reputation
-
@tom do Just PM me.
-
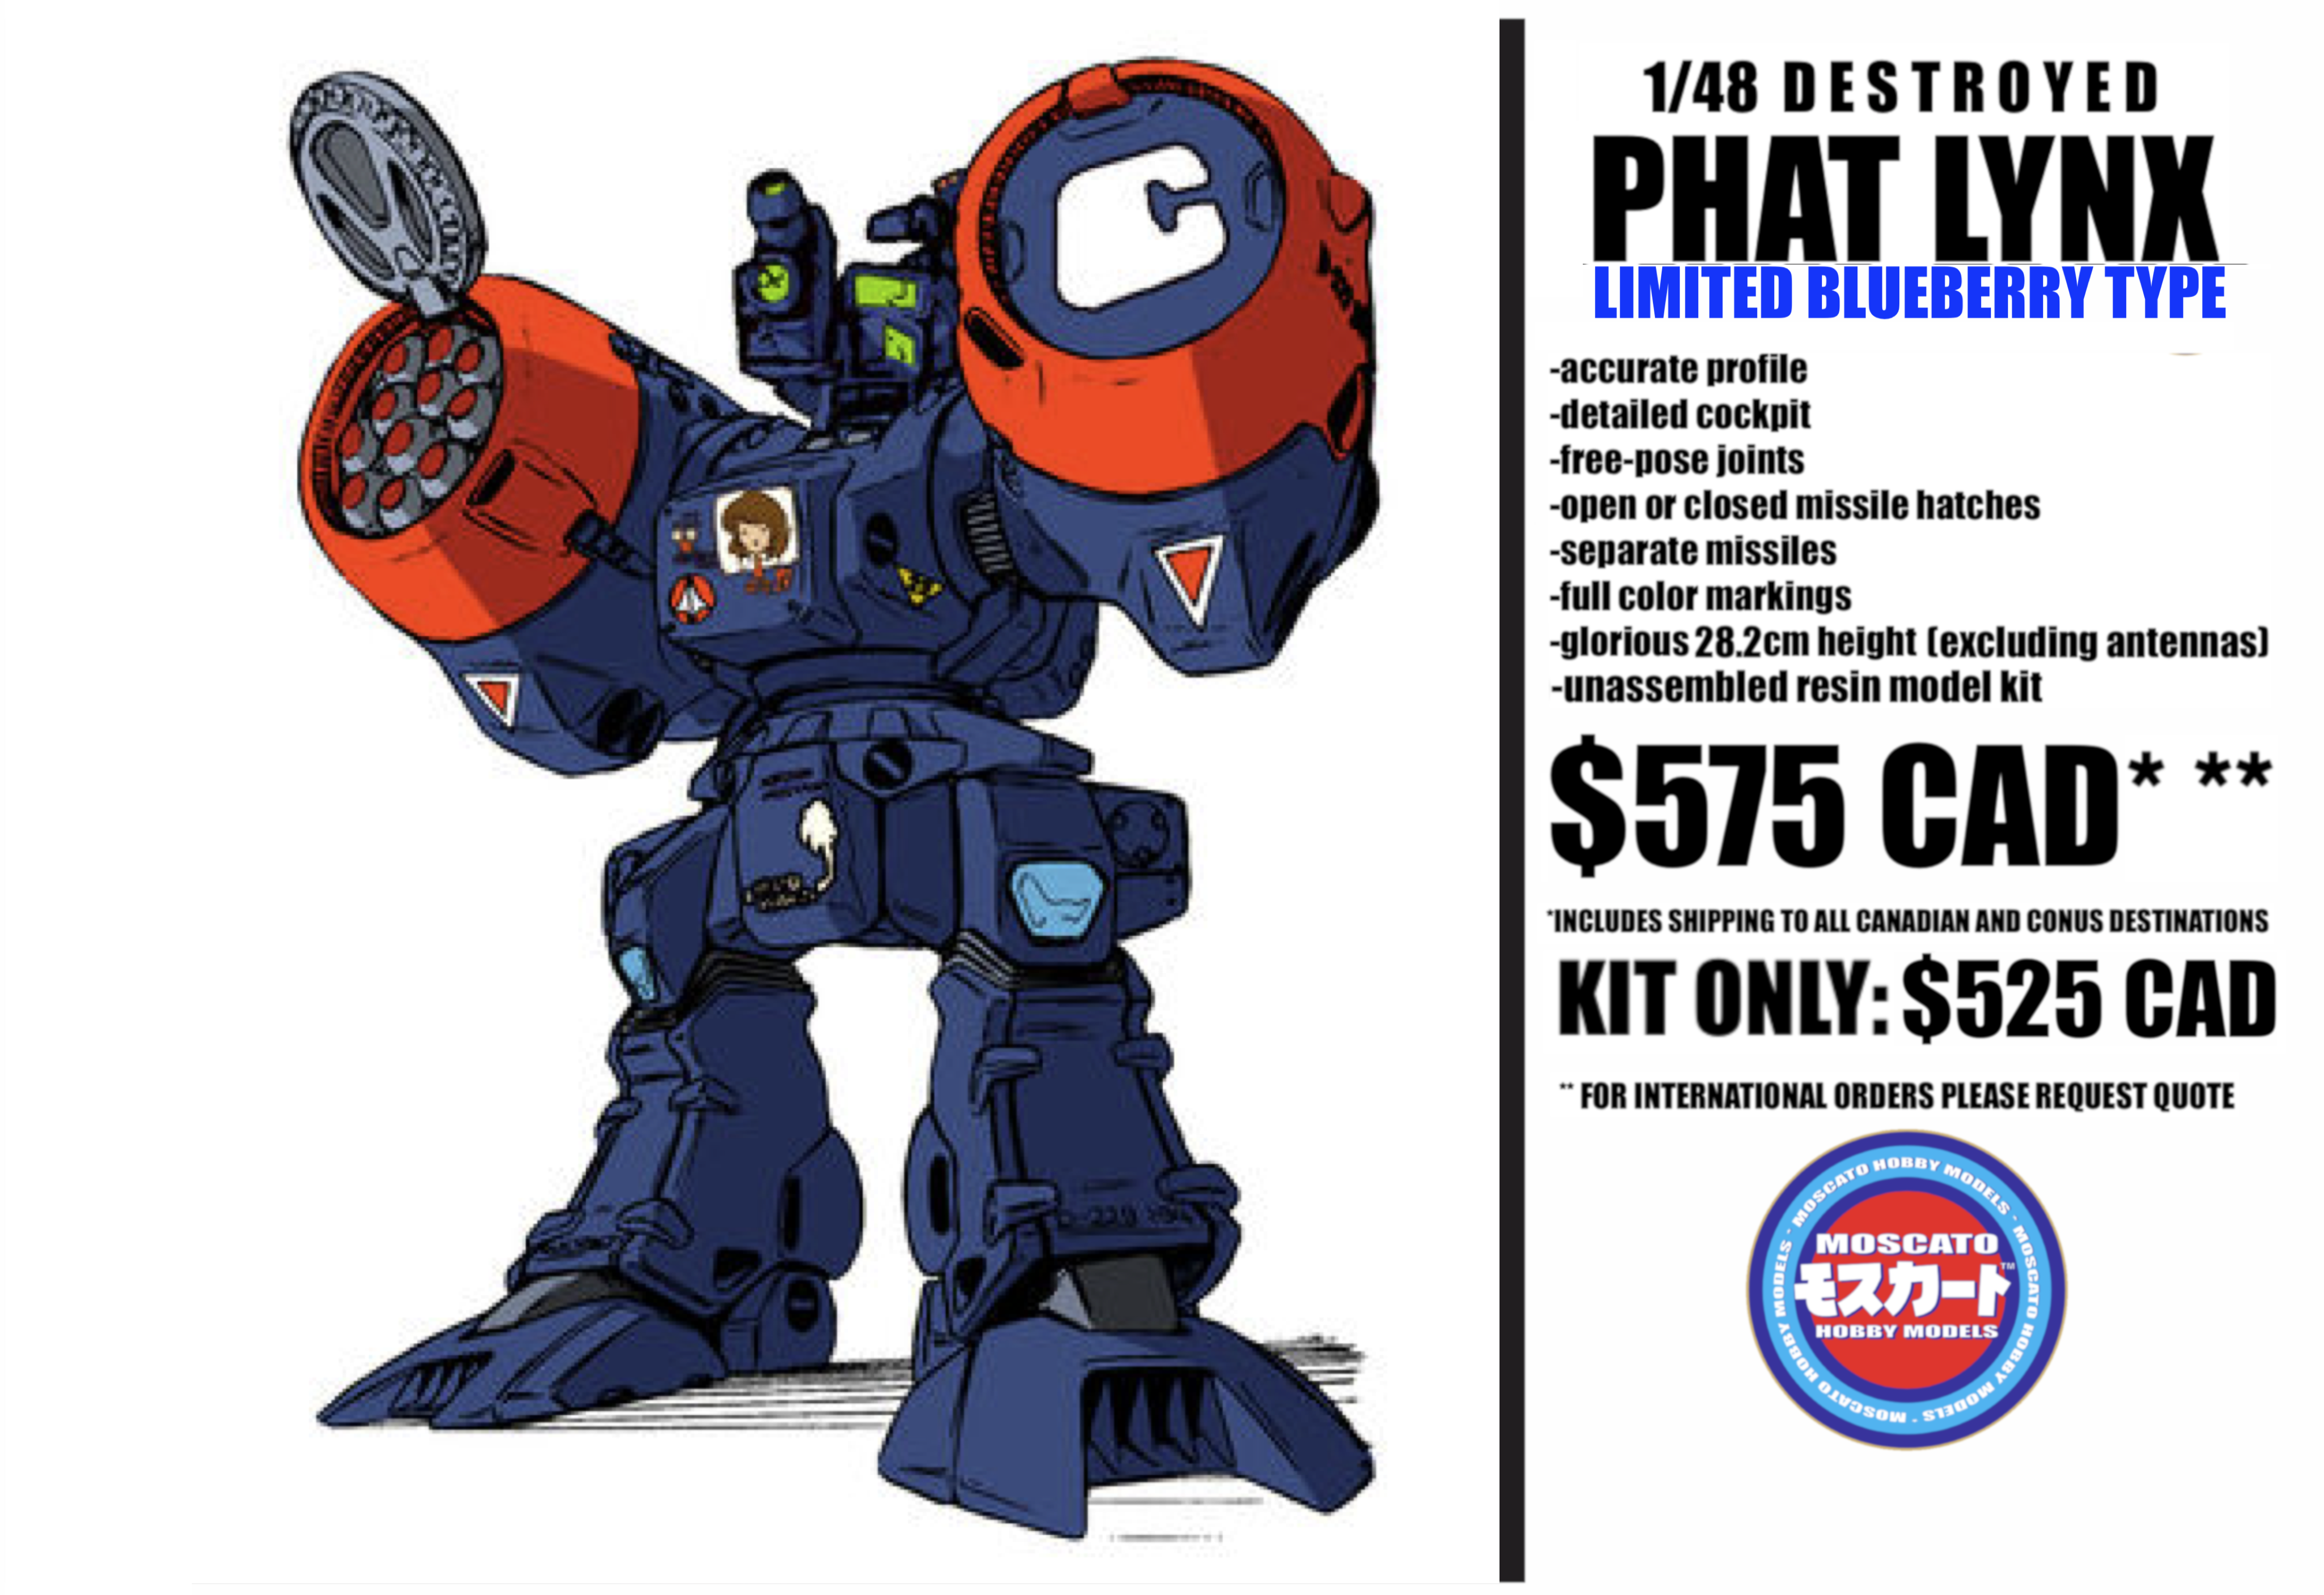
The Limited Blueberry Type is cancelled for lack of interest; the standard searchlight version will be shutting down production in the next week-10 days.
-
Destructions are ready to download! 08.HEIC 09.HEIC 11B.HEIC 12B.HEIC 13B.HEIC 14B.HEIC 15B.HEIC 16.HEIC 17.HEIC 18.HEIC 19.HEIC 20.HEIC 21.HEIC 22.HEIC 23.HEIC 24.HEIC 25.HEIC 26.HEIC


-
Greetings @everyone Now that most of the 1/48 PHAT LYNX orders have been shipped, I'd be curious to know if there would be sufficient interest to offer the (blue) PHAT LYNX variant with the alternate head seen in the anime? I would offer just a few examples of this kit (5-8 maximum) just enough to complete the mold cycle. It would consist of the same body parts/weapons load-out as the existing PHAT LYNX, but with the old head searchlight replaced with the alternate camera head. Please note that the new head is not being offered separately on its own, but as a complete kit only. Can I get 5-8 people out there to commit to this project? Please DM me to ket me know, thanks
-
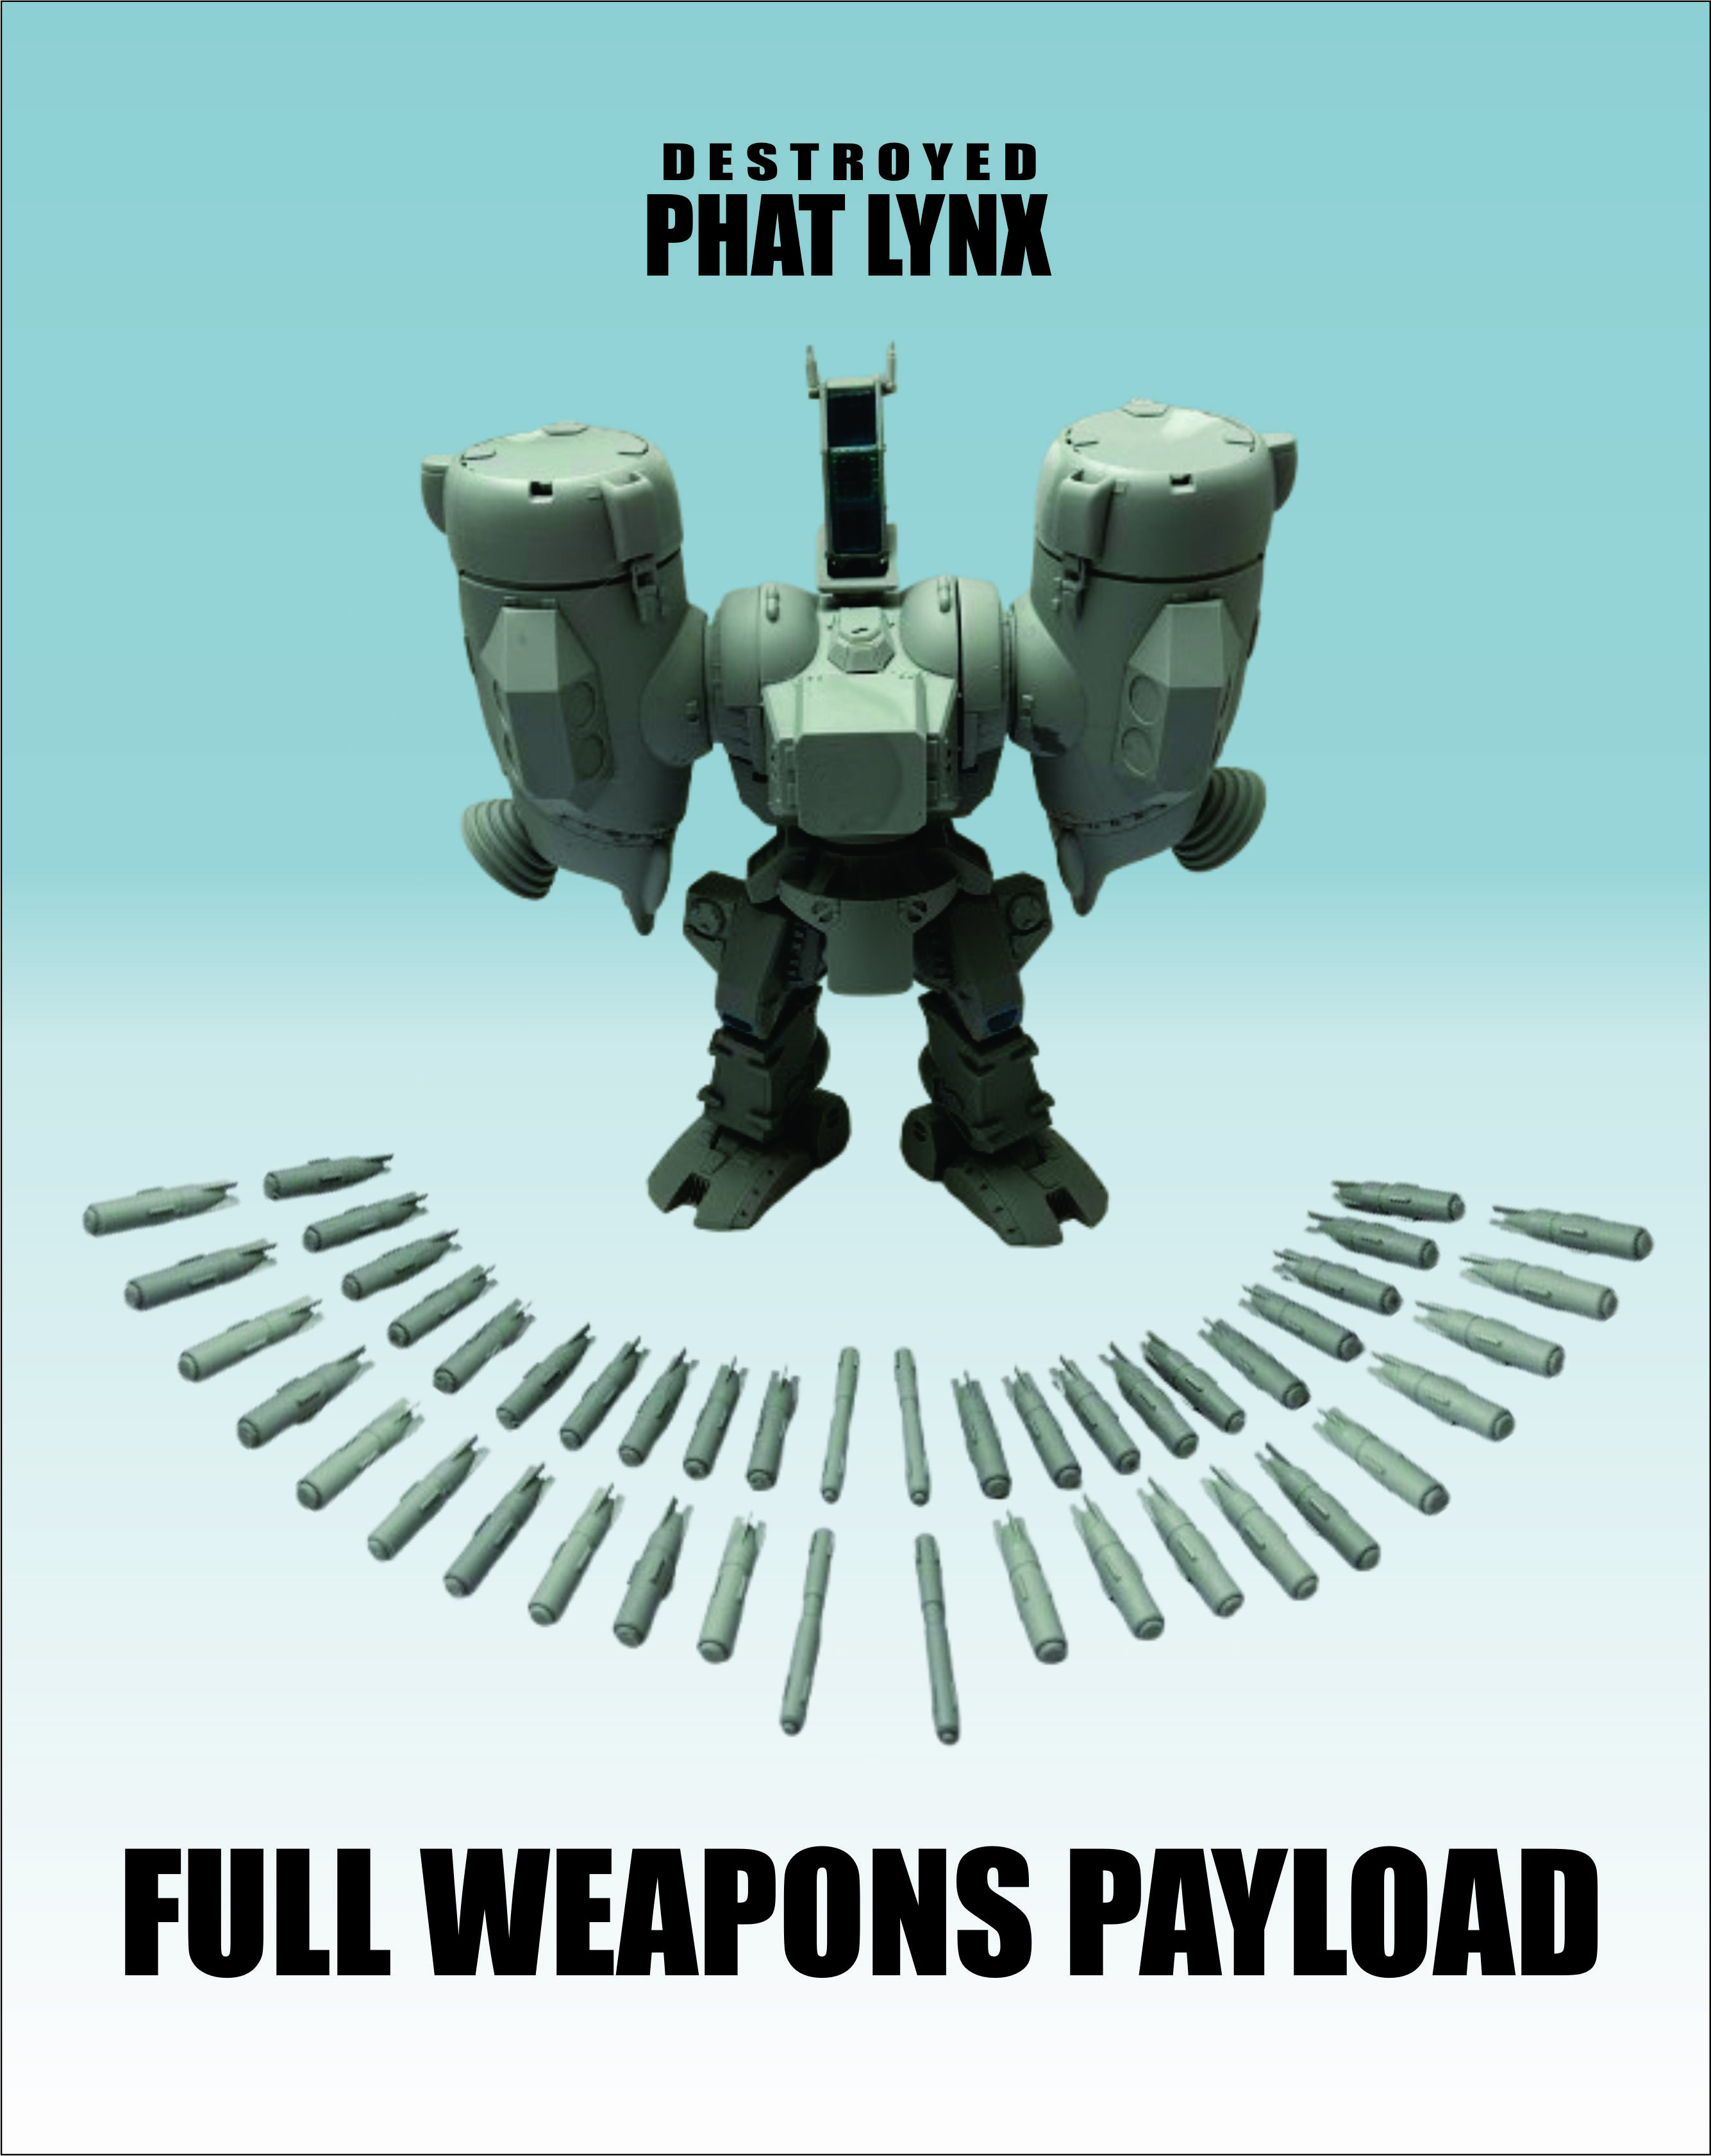
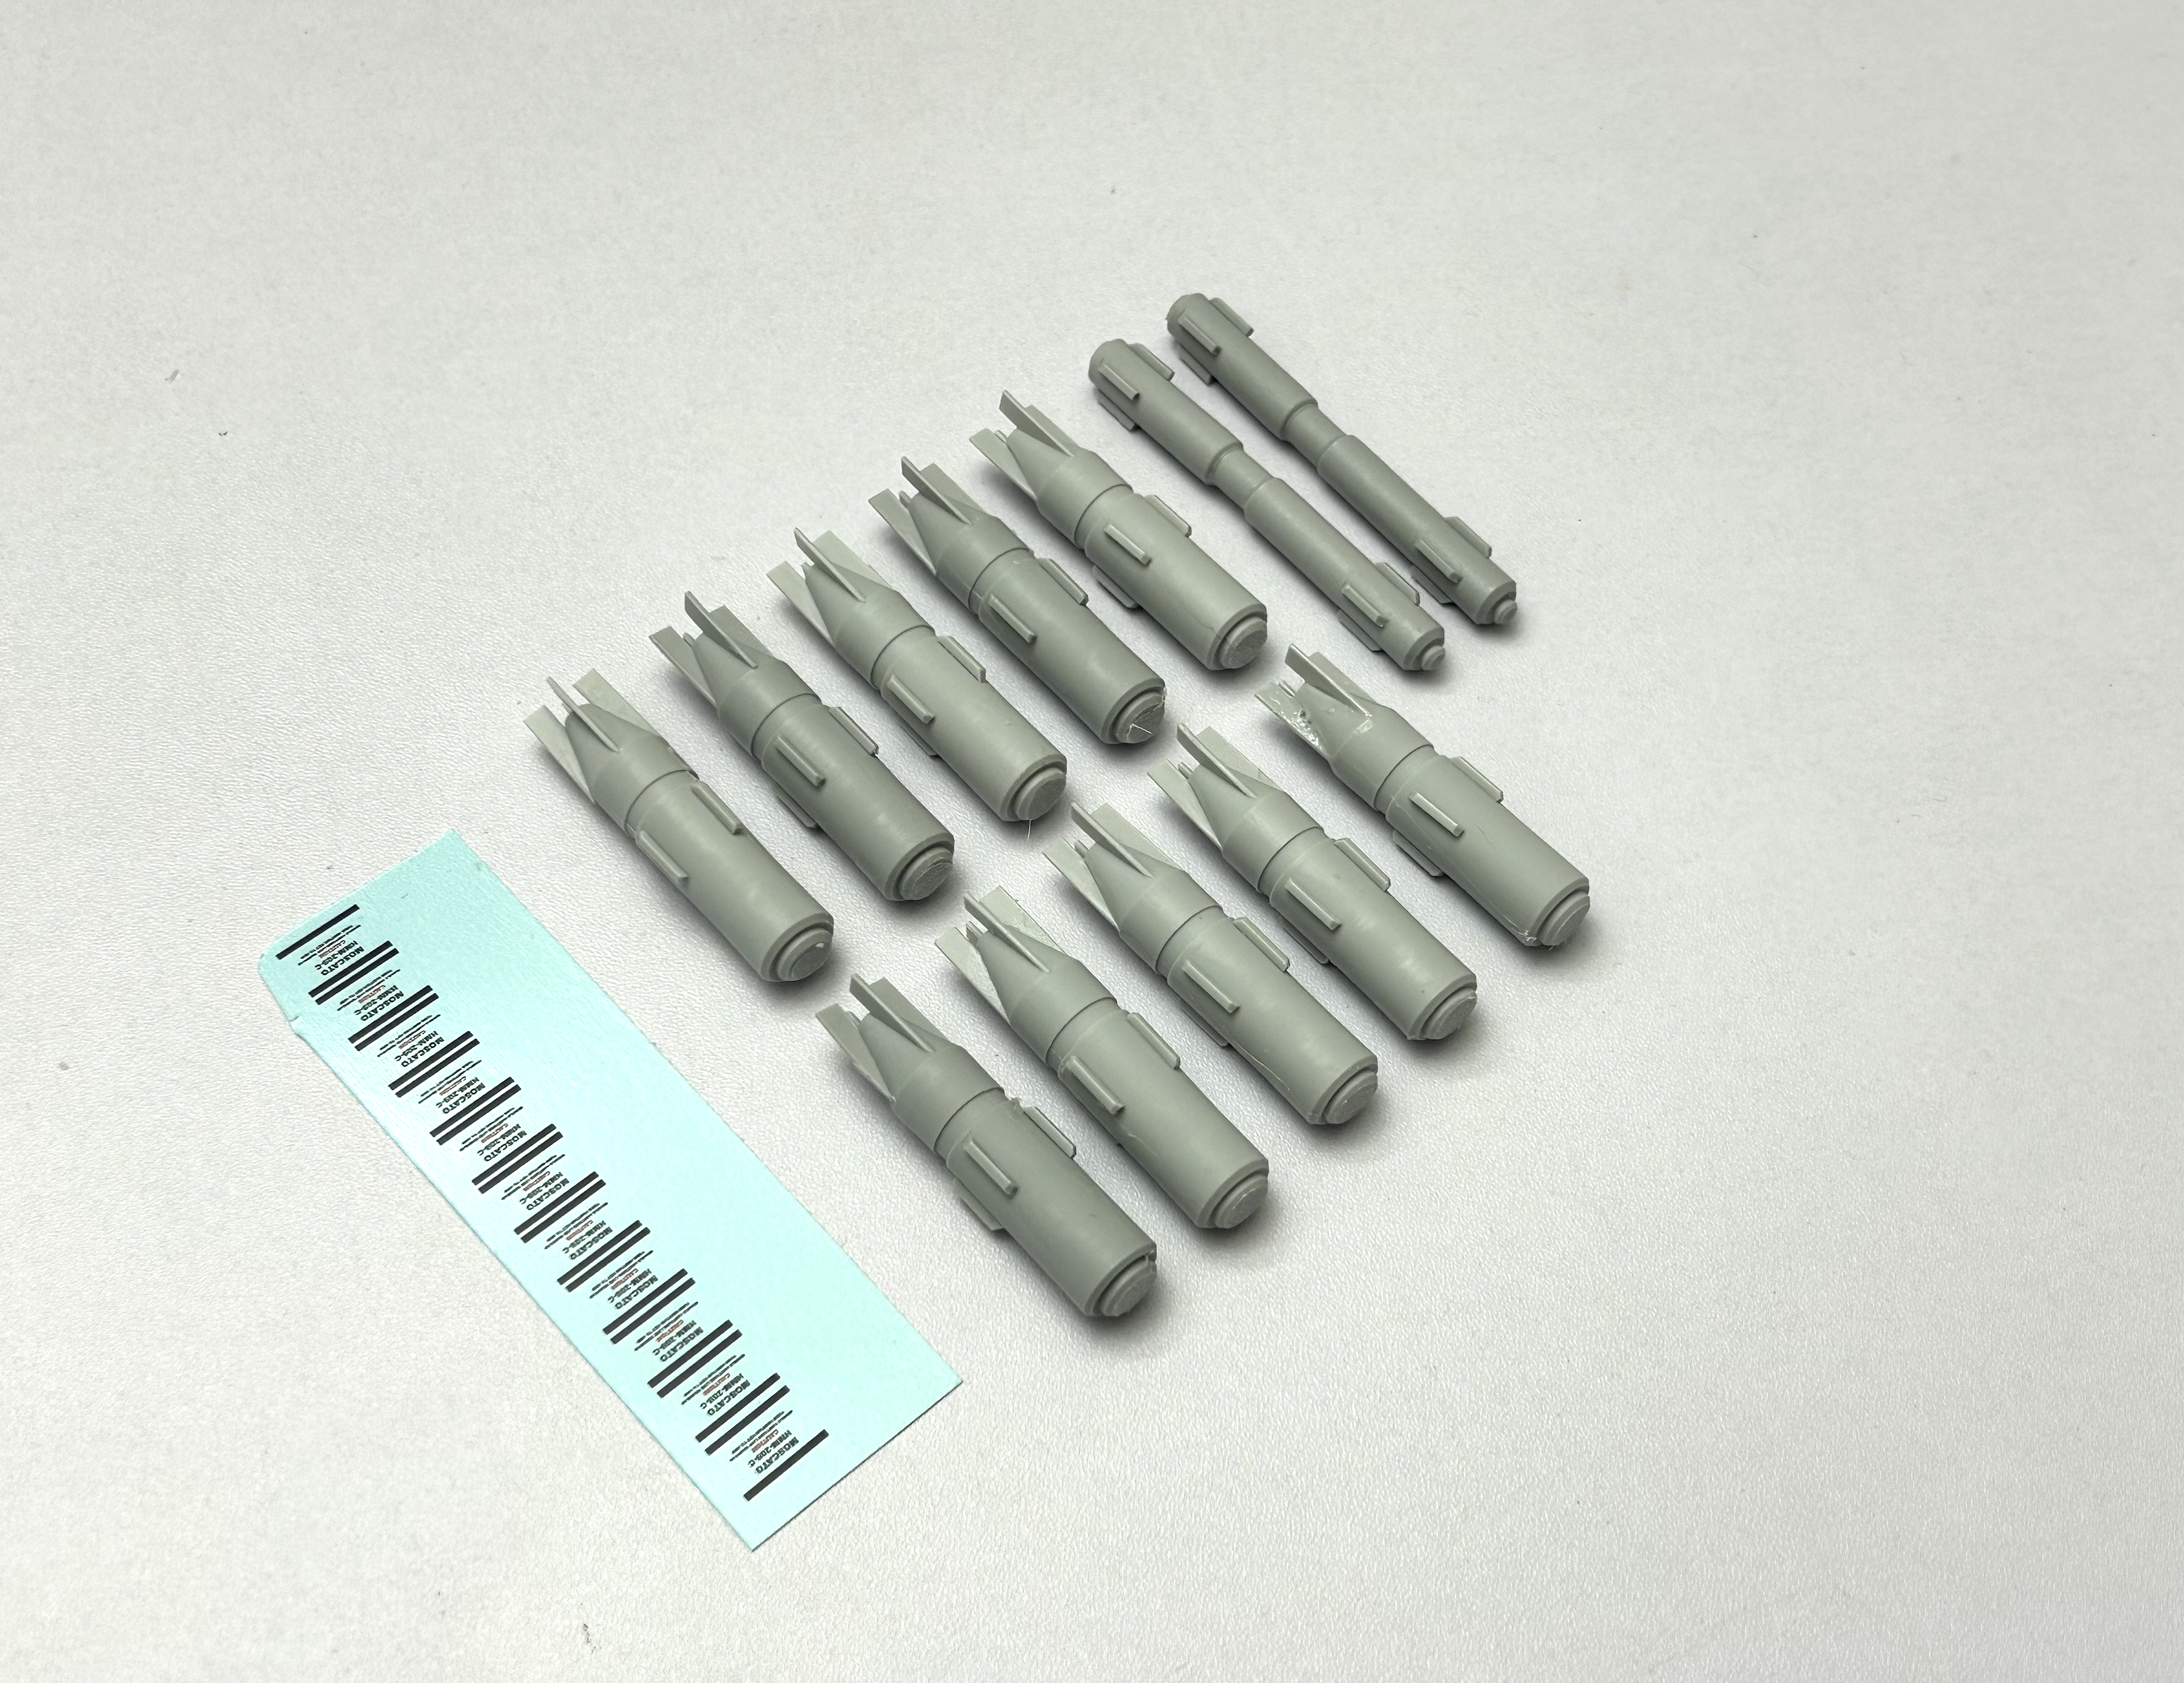
Hey guys! While your PHAT LYNX kit is equipped one full salvo of missiles (and the markings associated therewith) you also have the option to order extra missiles, should you require them, or just to show-off its massive 44 missile load-out! All paid orders have already shipped; will hold the ordering window open for a little while longer.
-
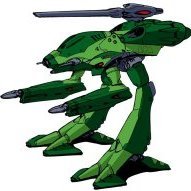
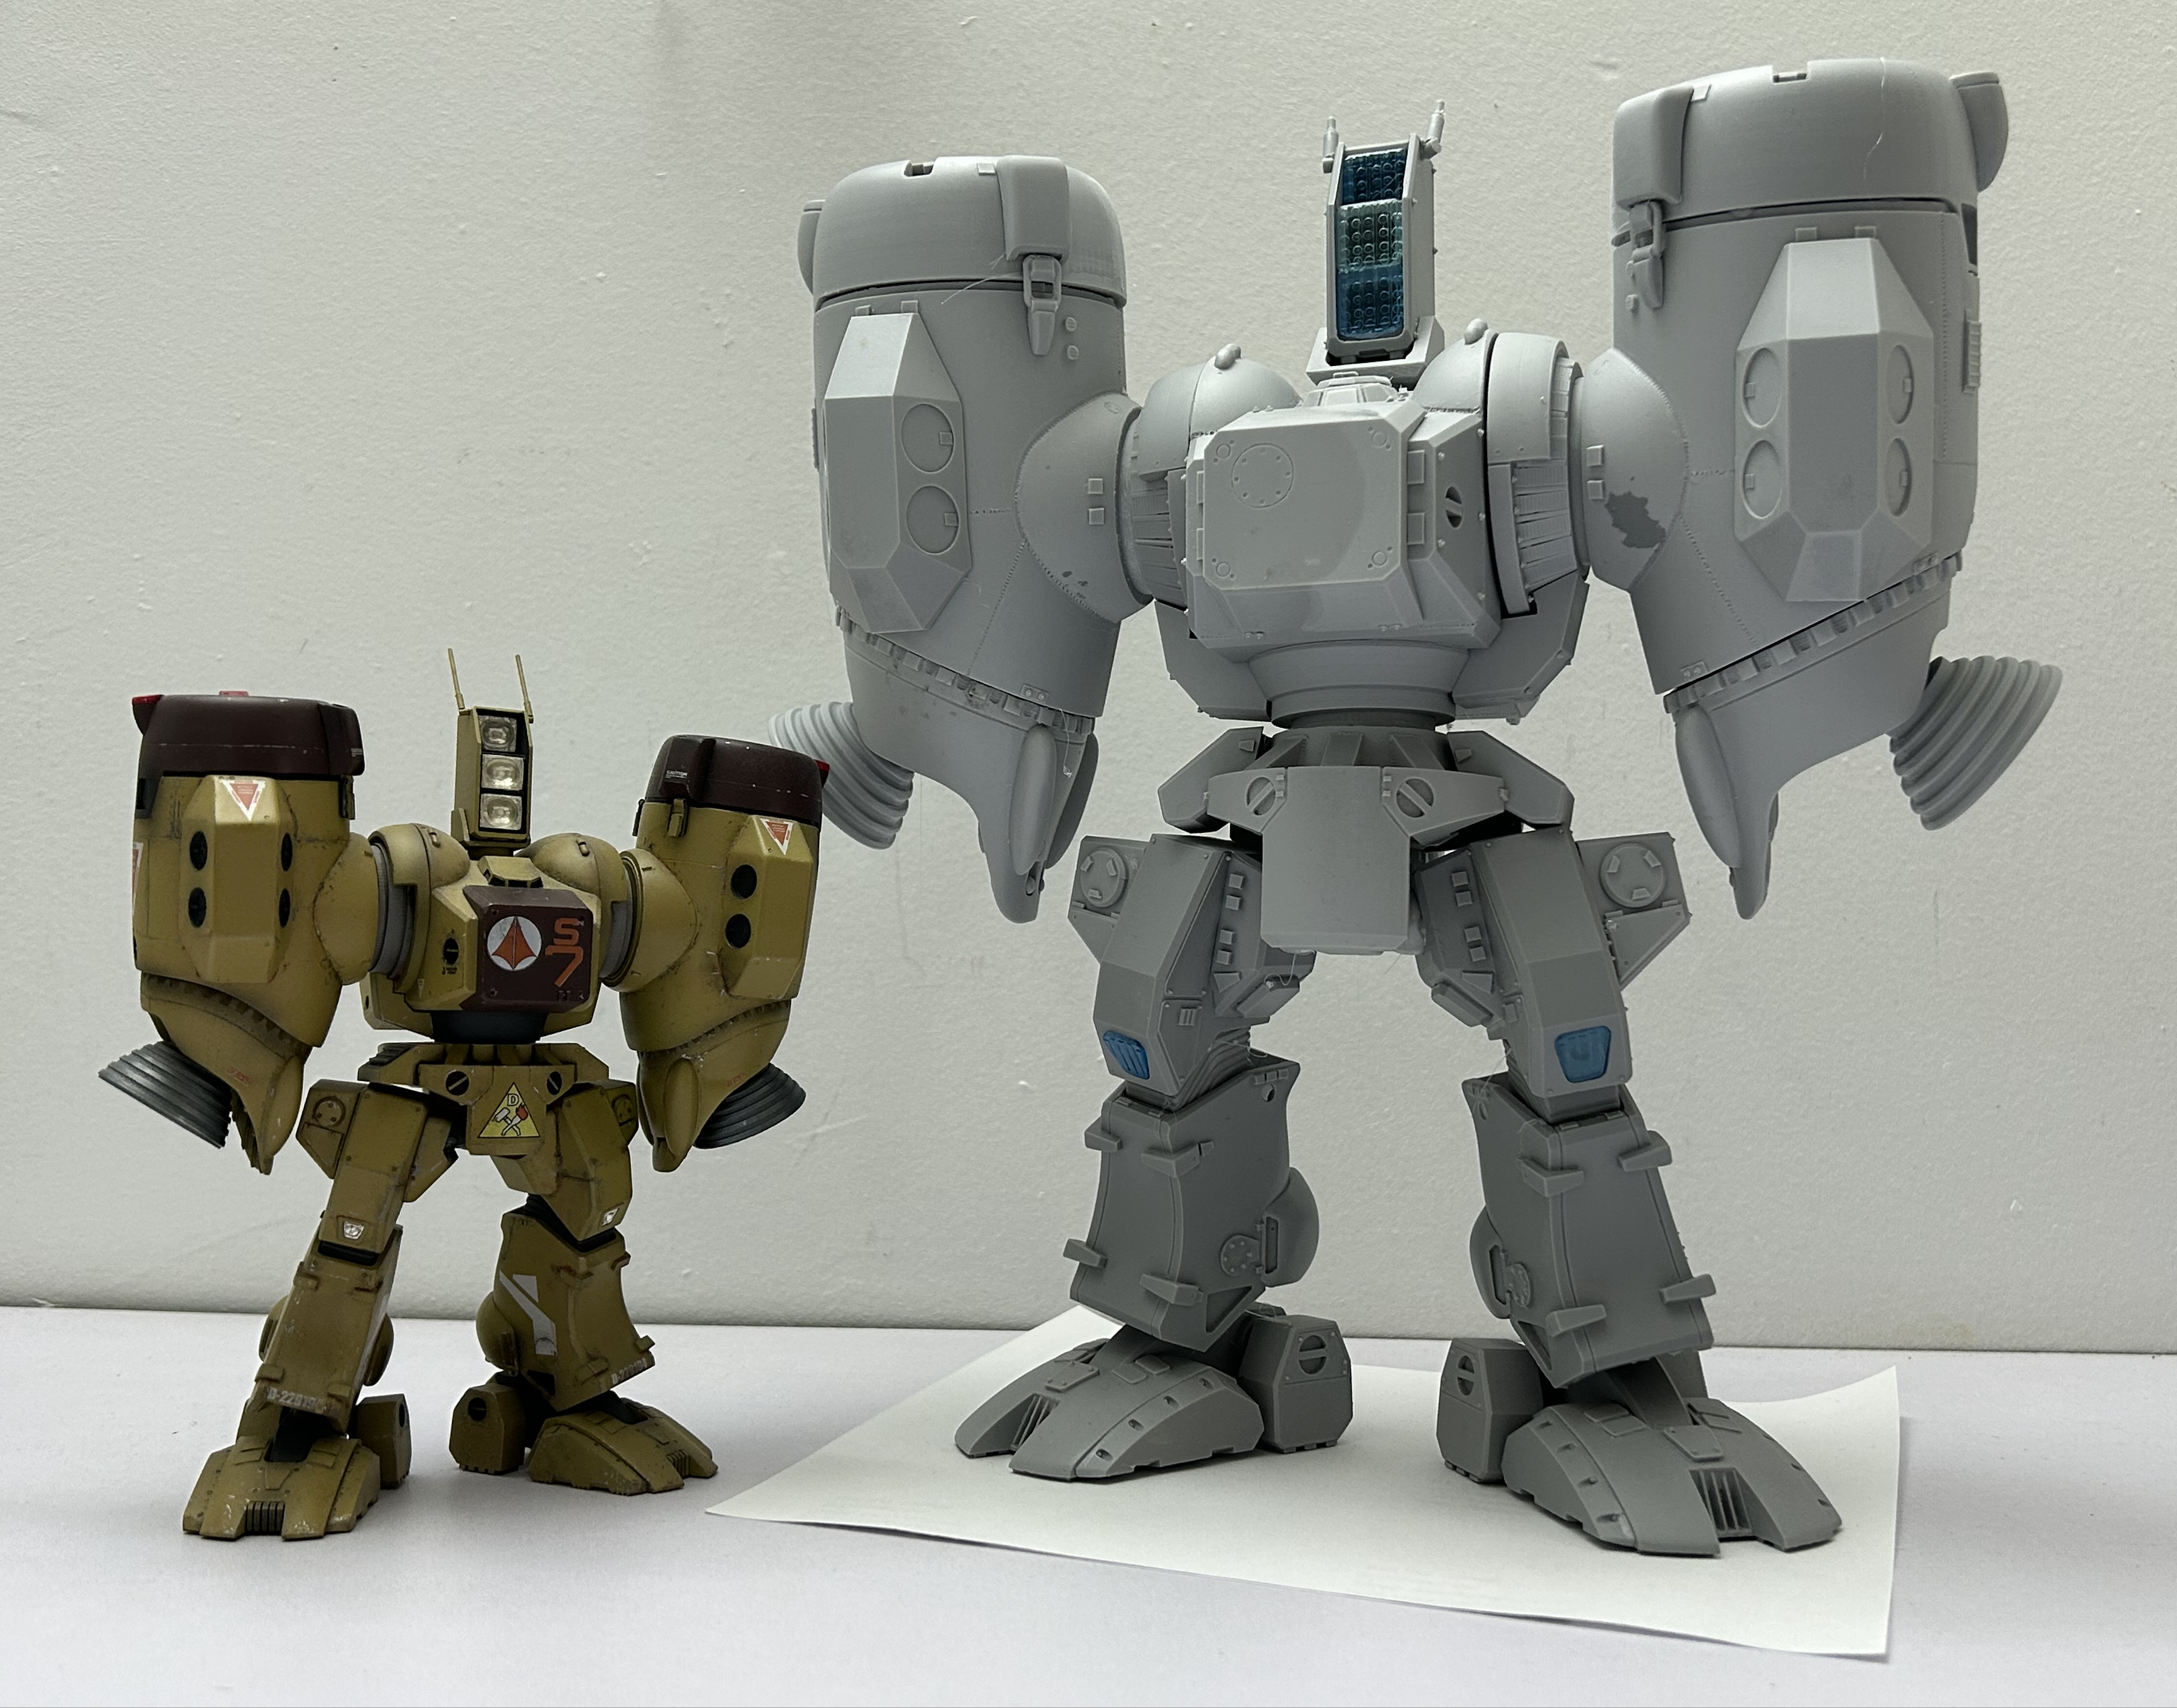
1/72 vs 1/48
-
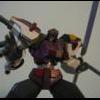
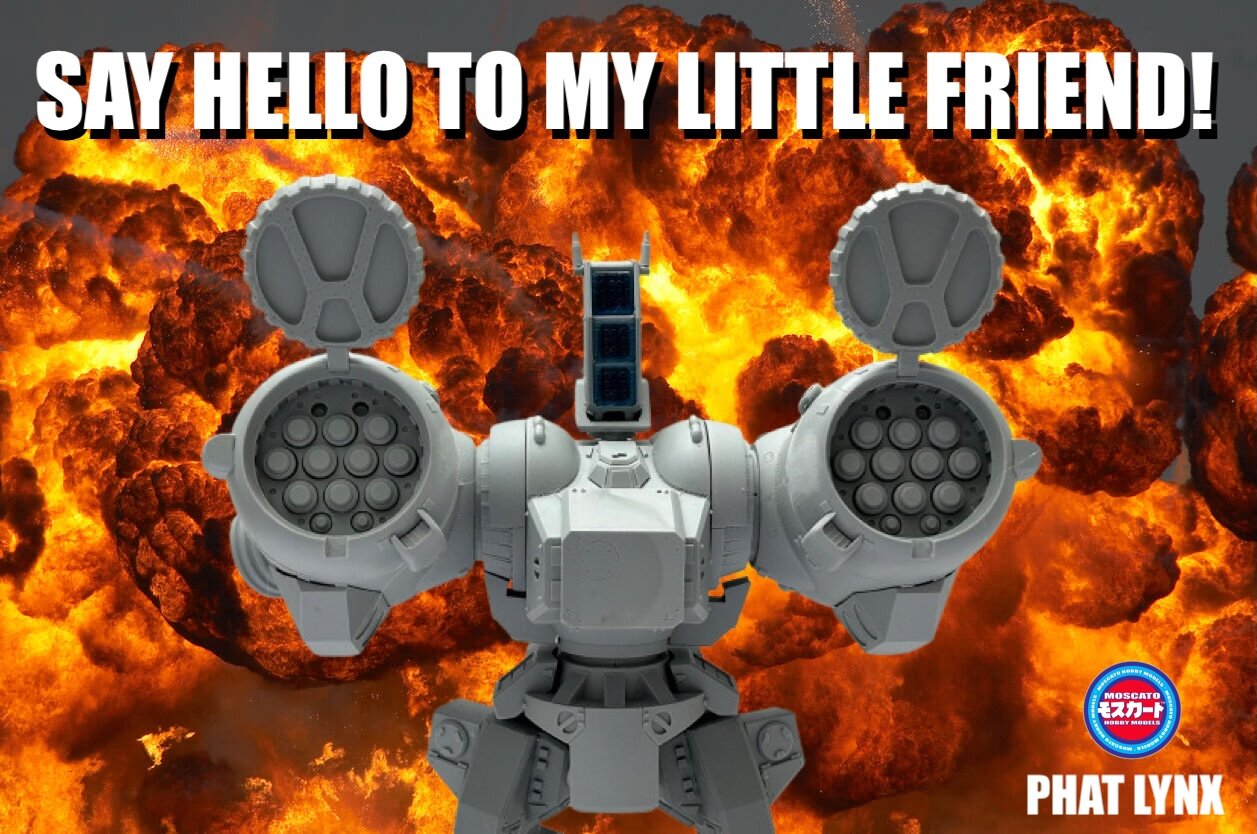
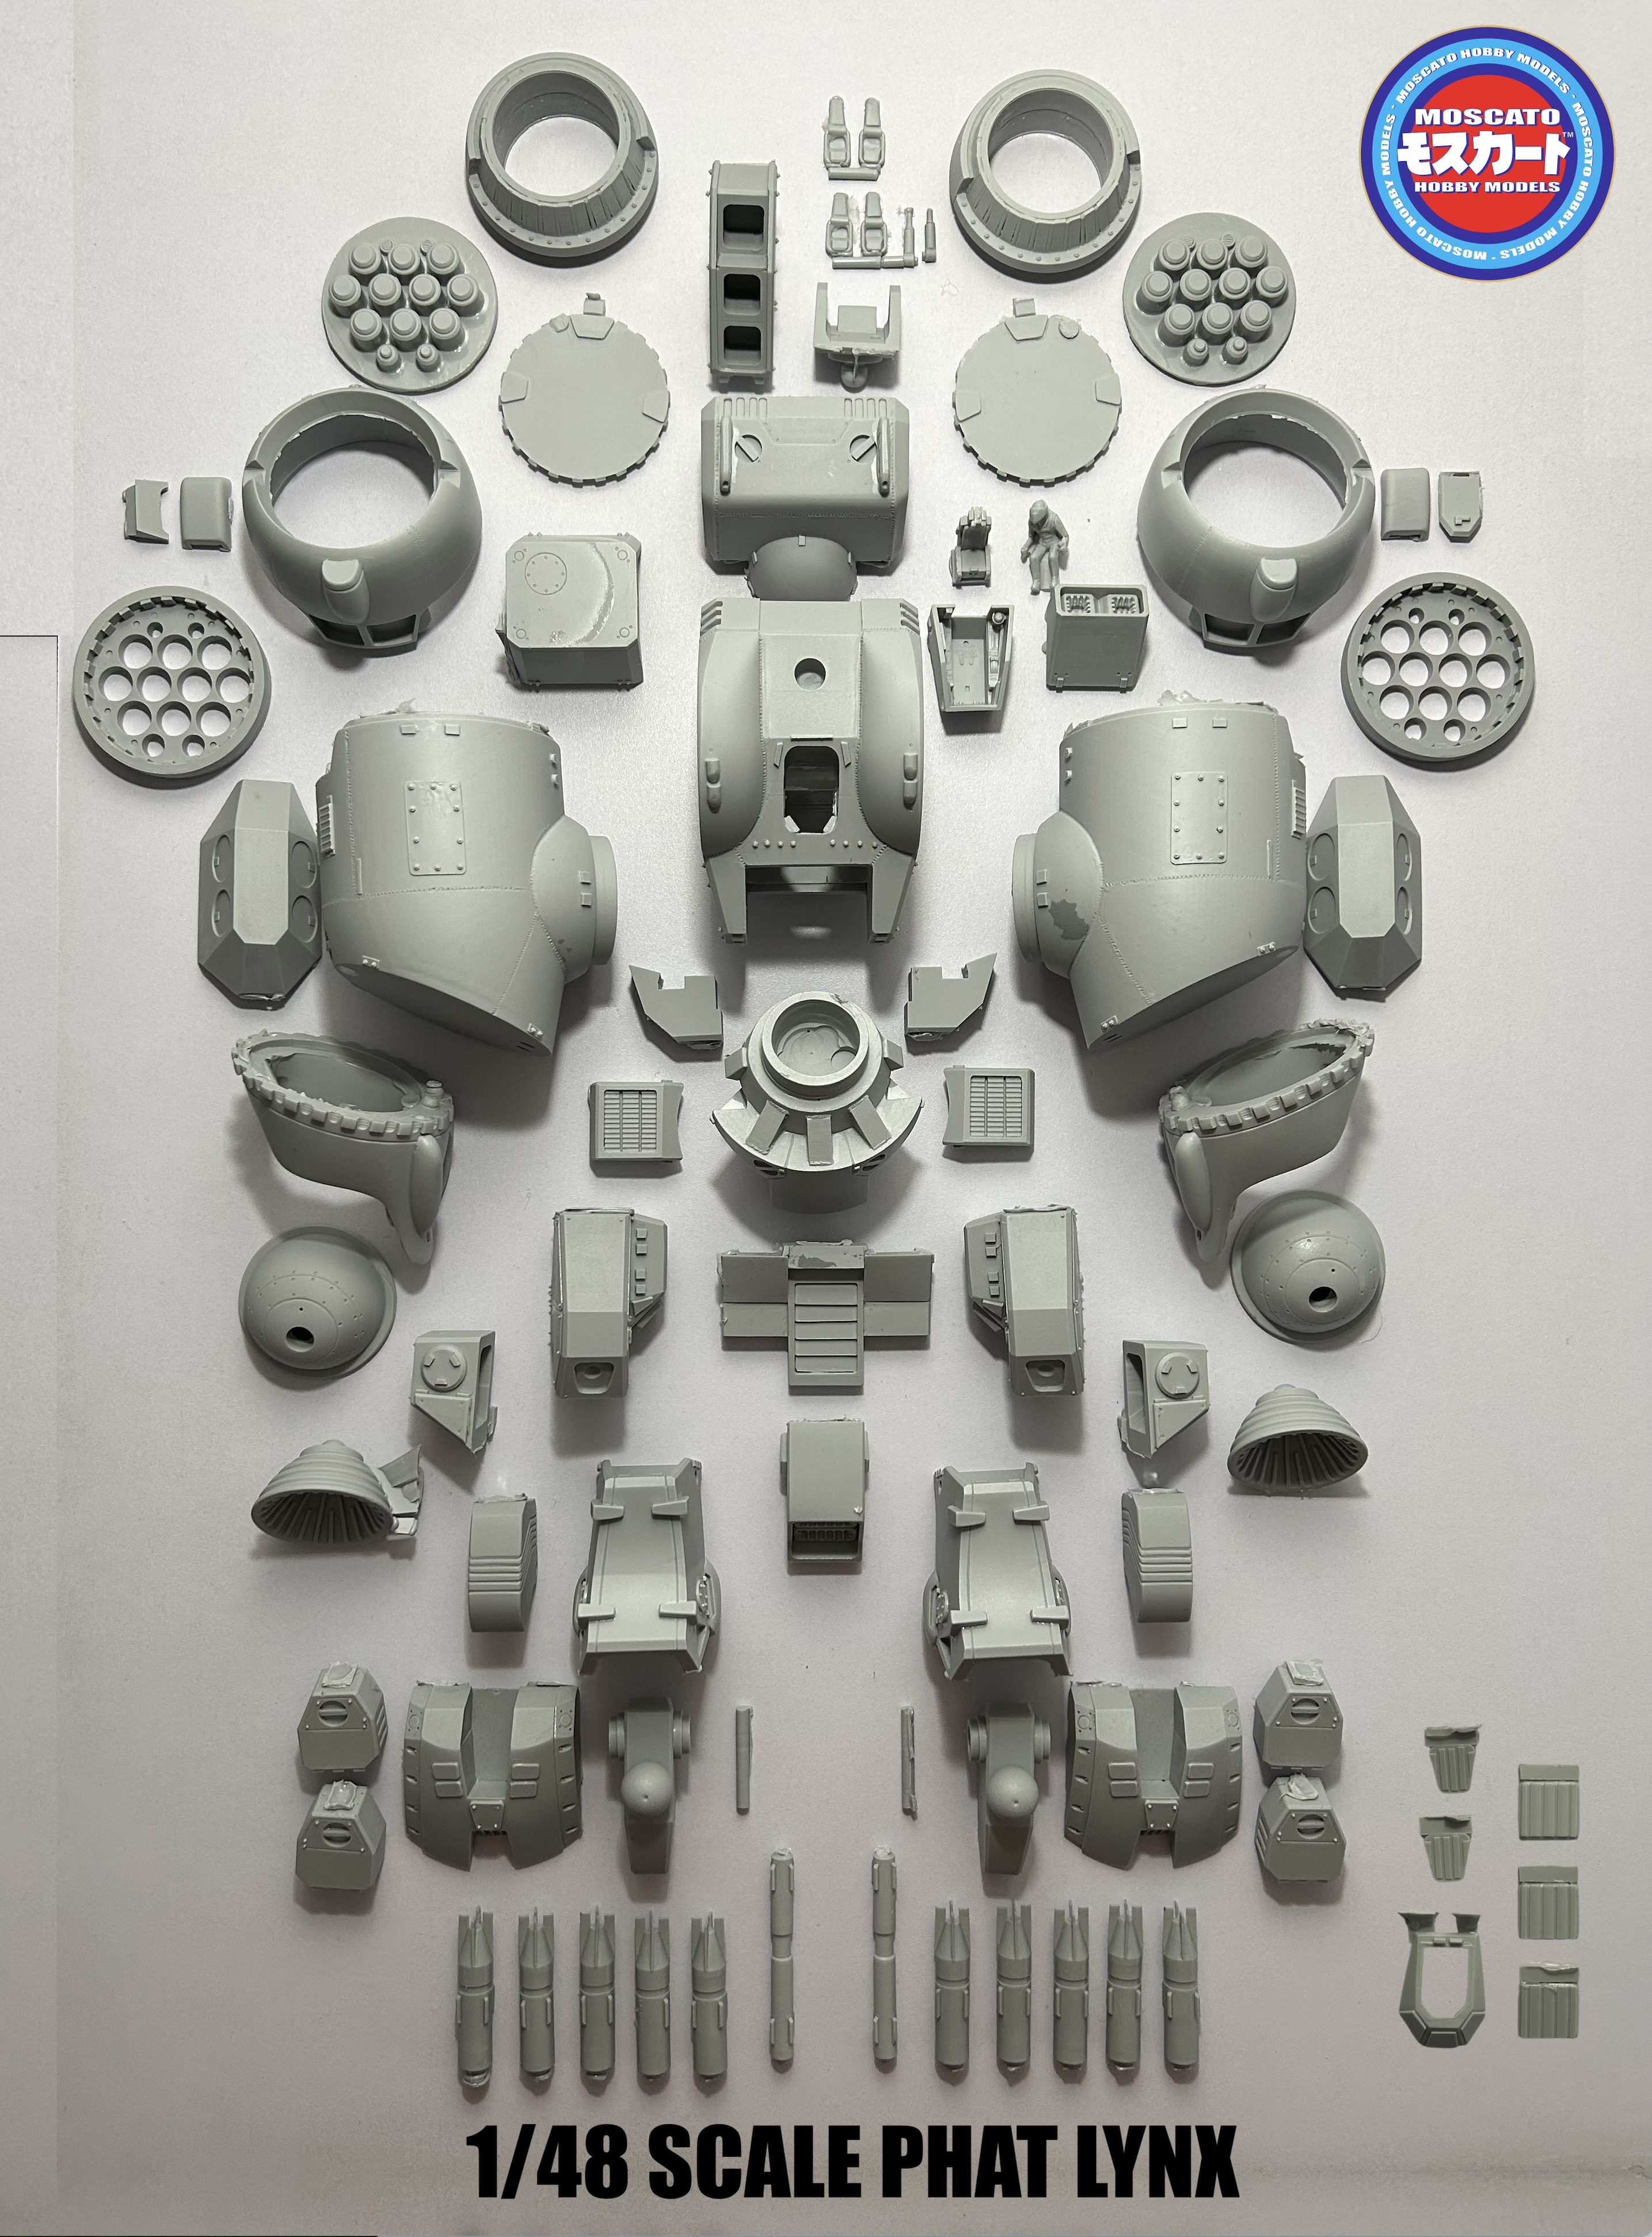
Hey @everyone say hello to my little friend... and he's not so little! At over 30cm tall even without the antenna extensions, this kit's shelf-presence is second only to the massive Graug. Behold the 1/48 PHAT LYNX in all its glory!!! The kit holds together pretty well, even with just hot glue, despite its 1.2kg of weight. Kits start shipping next week! IMG_3612.HEIC IMG_3614.HEIC IMG_3616.HEIC IMG_3617.HEIC IMG_3619.HEIC IMG_3622.HEIC IMG_3627.HEIC IMG_3628.HEIC IMG_3631.HEIC IMG_3634.HEIC
-
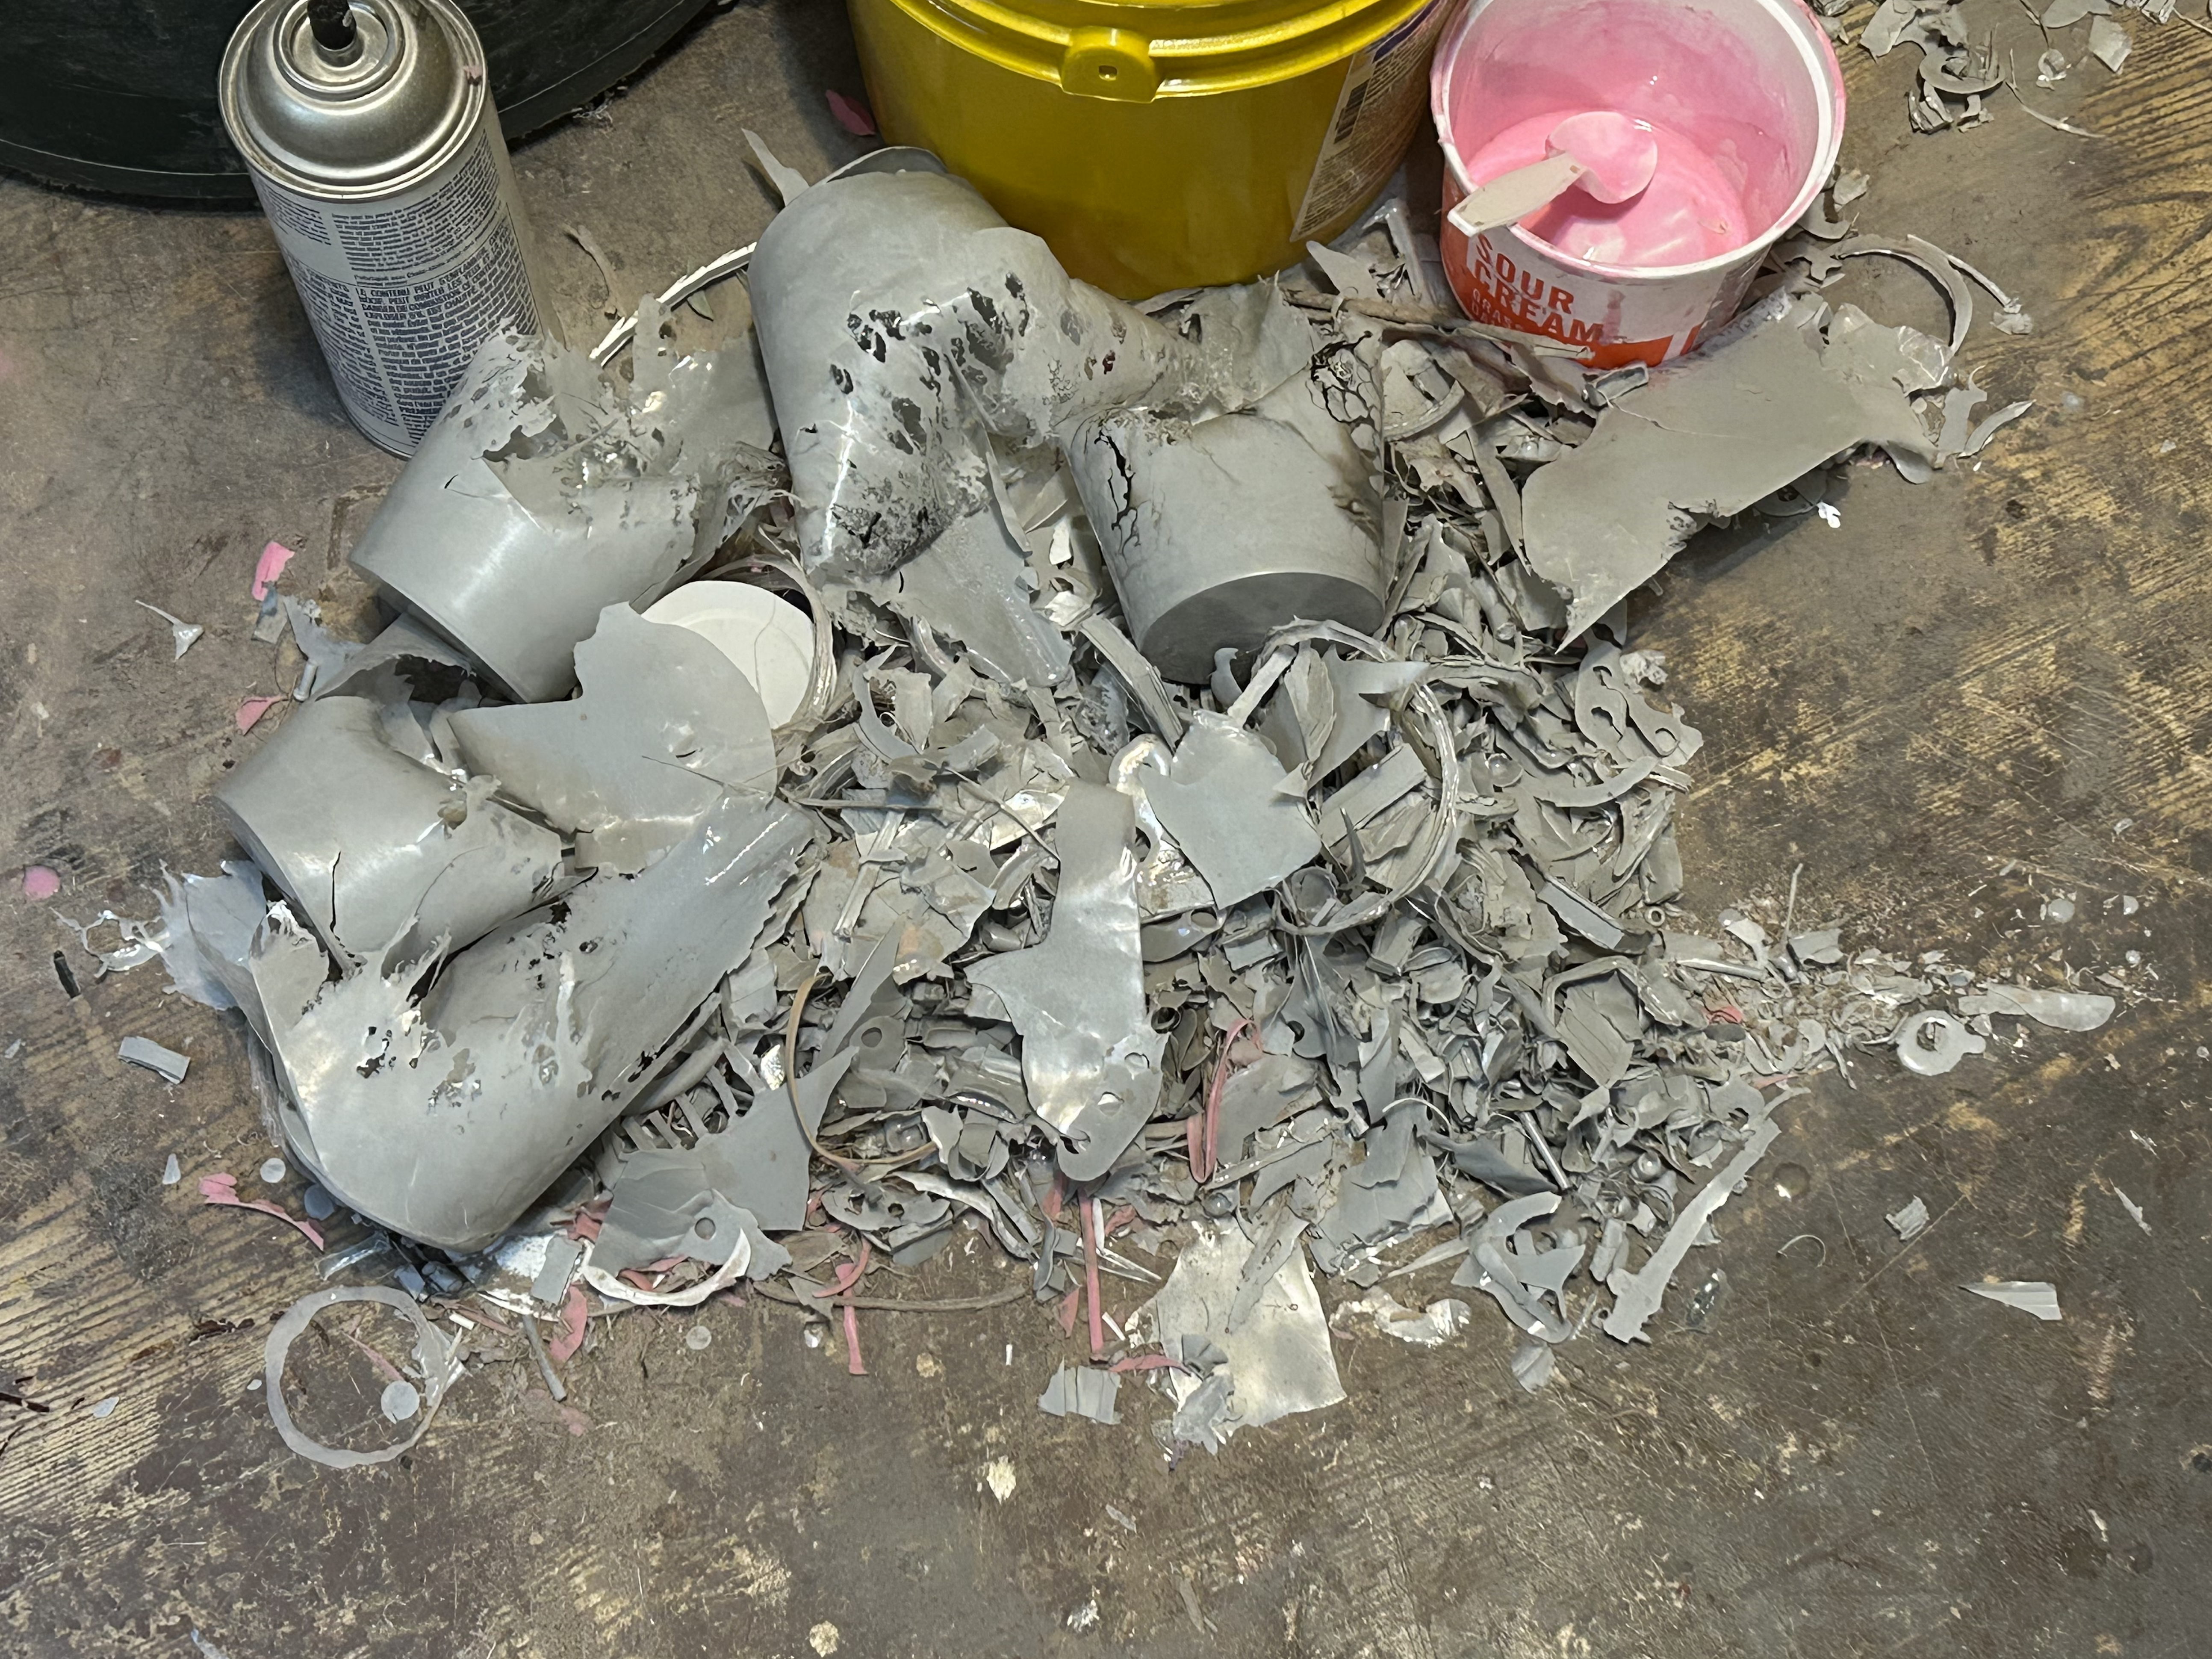
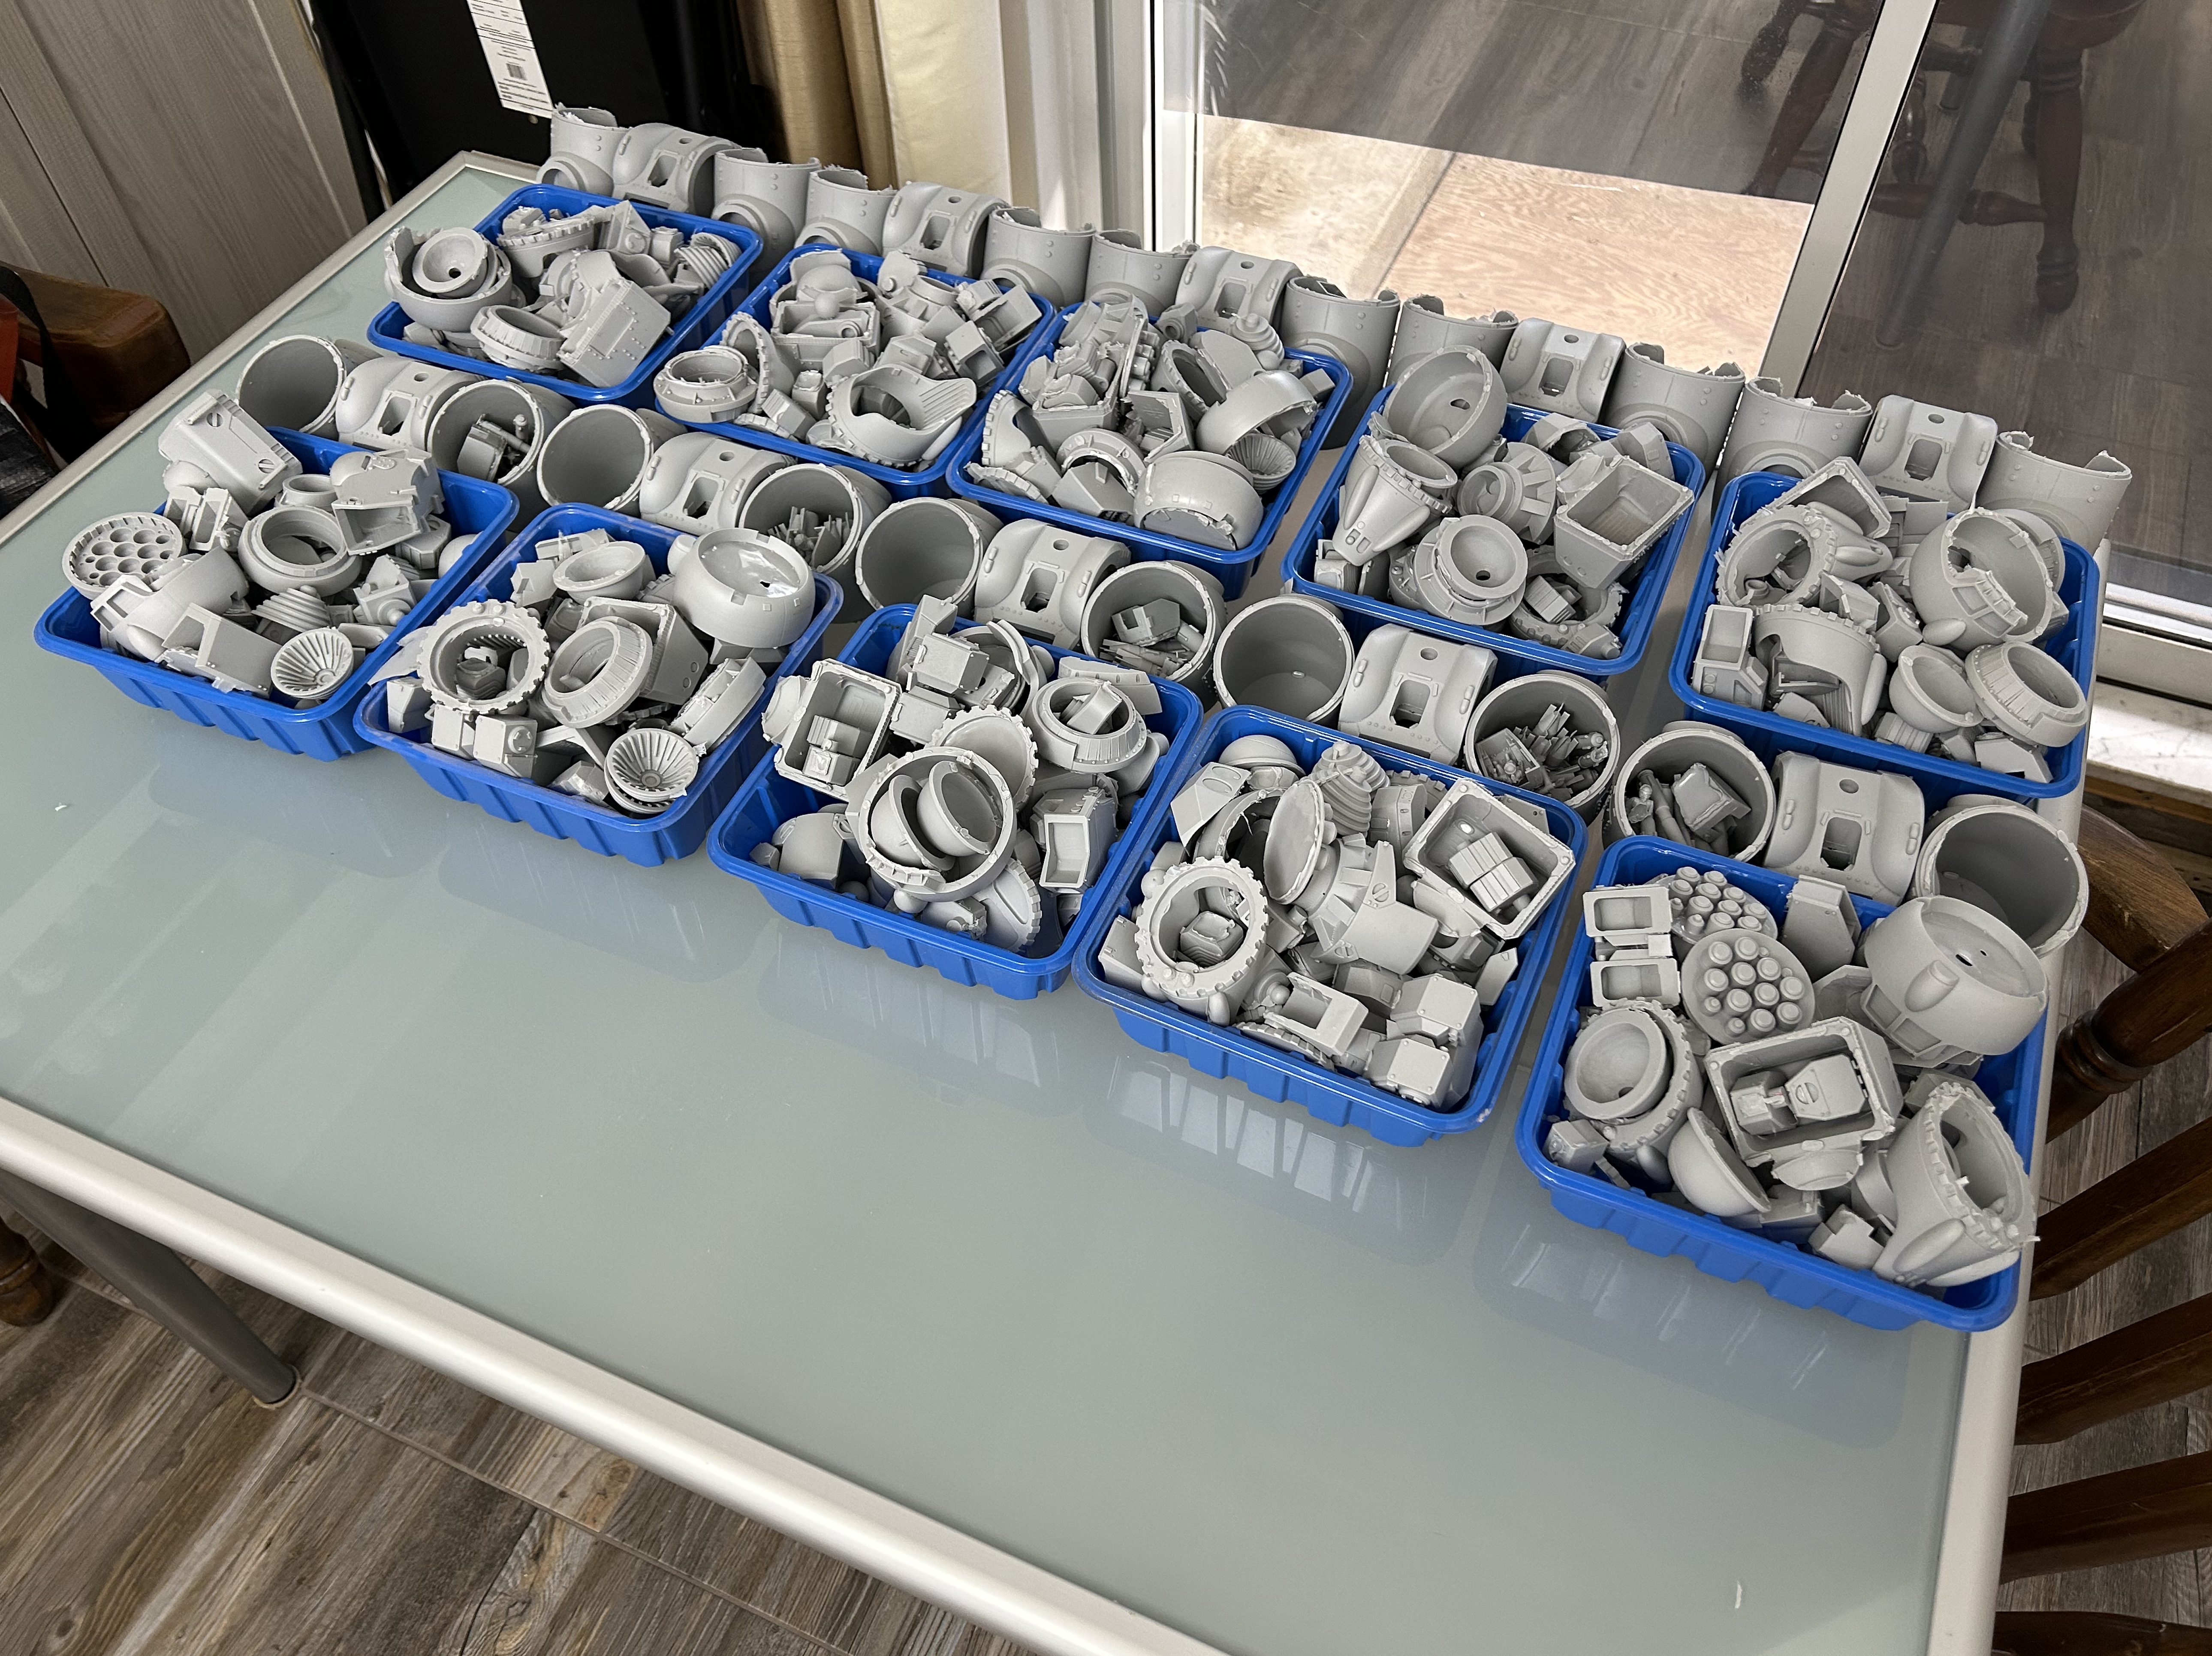
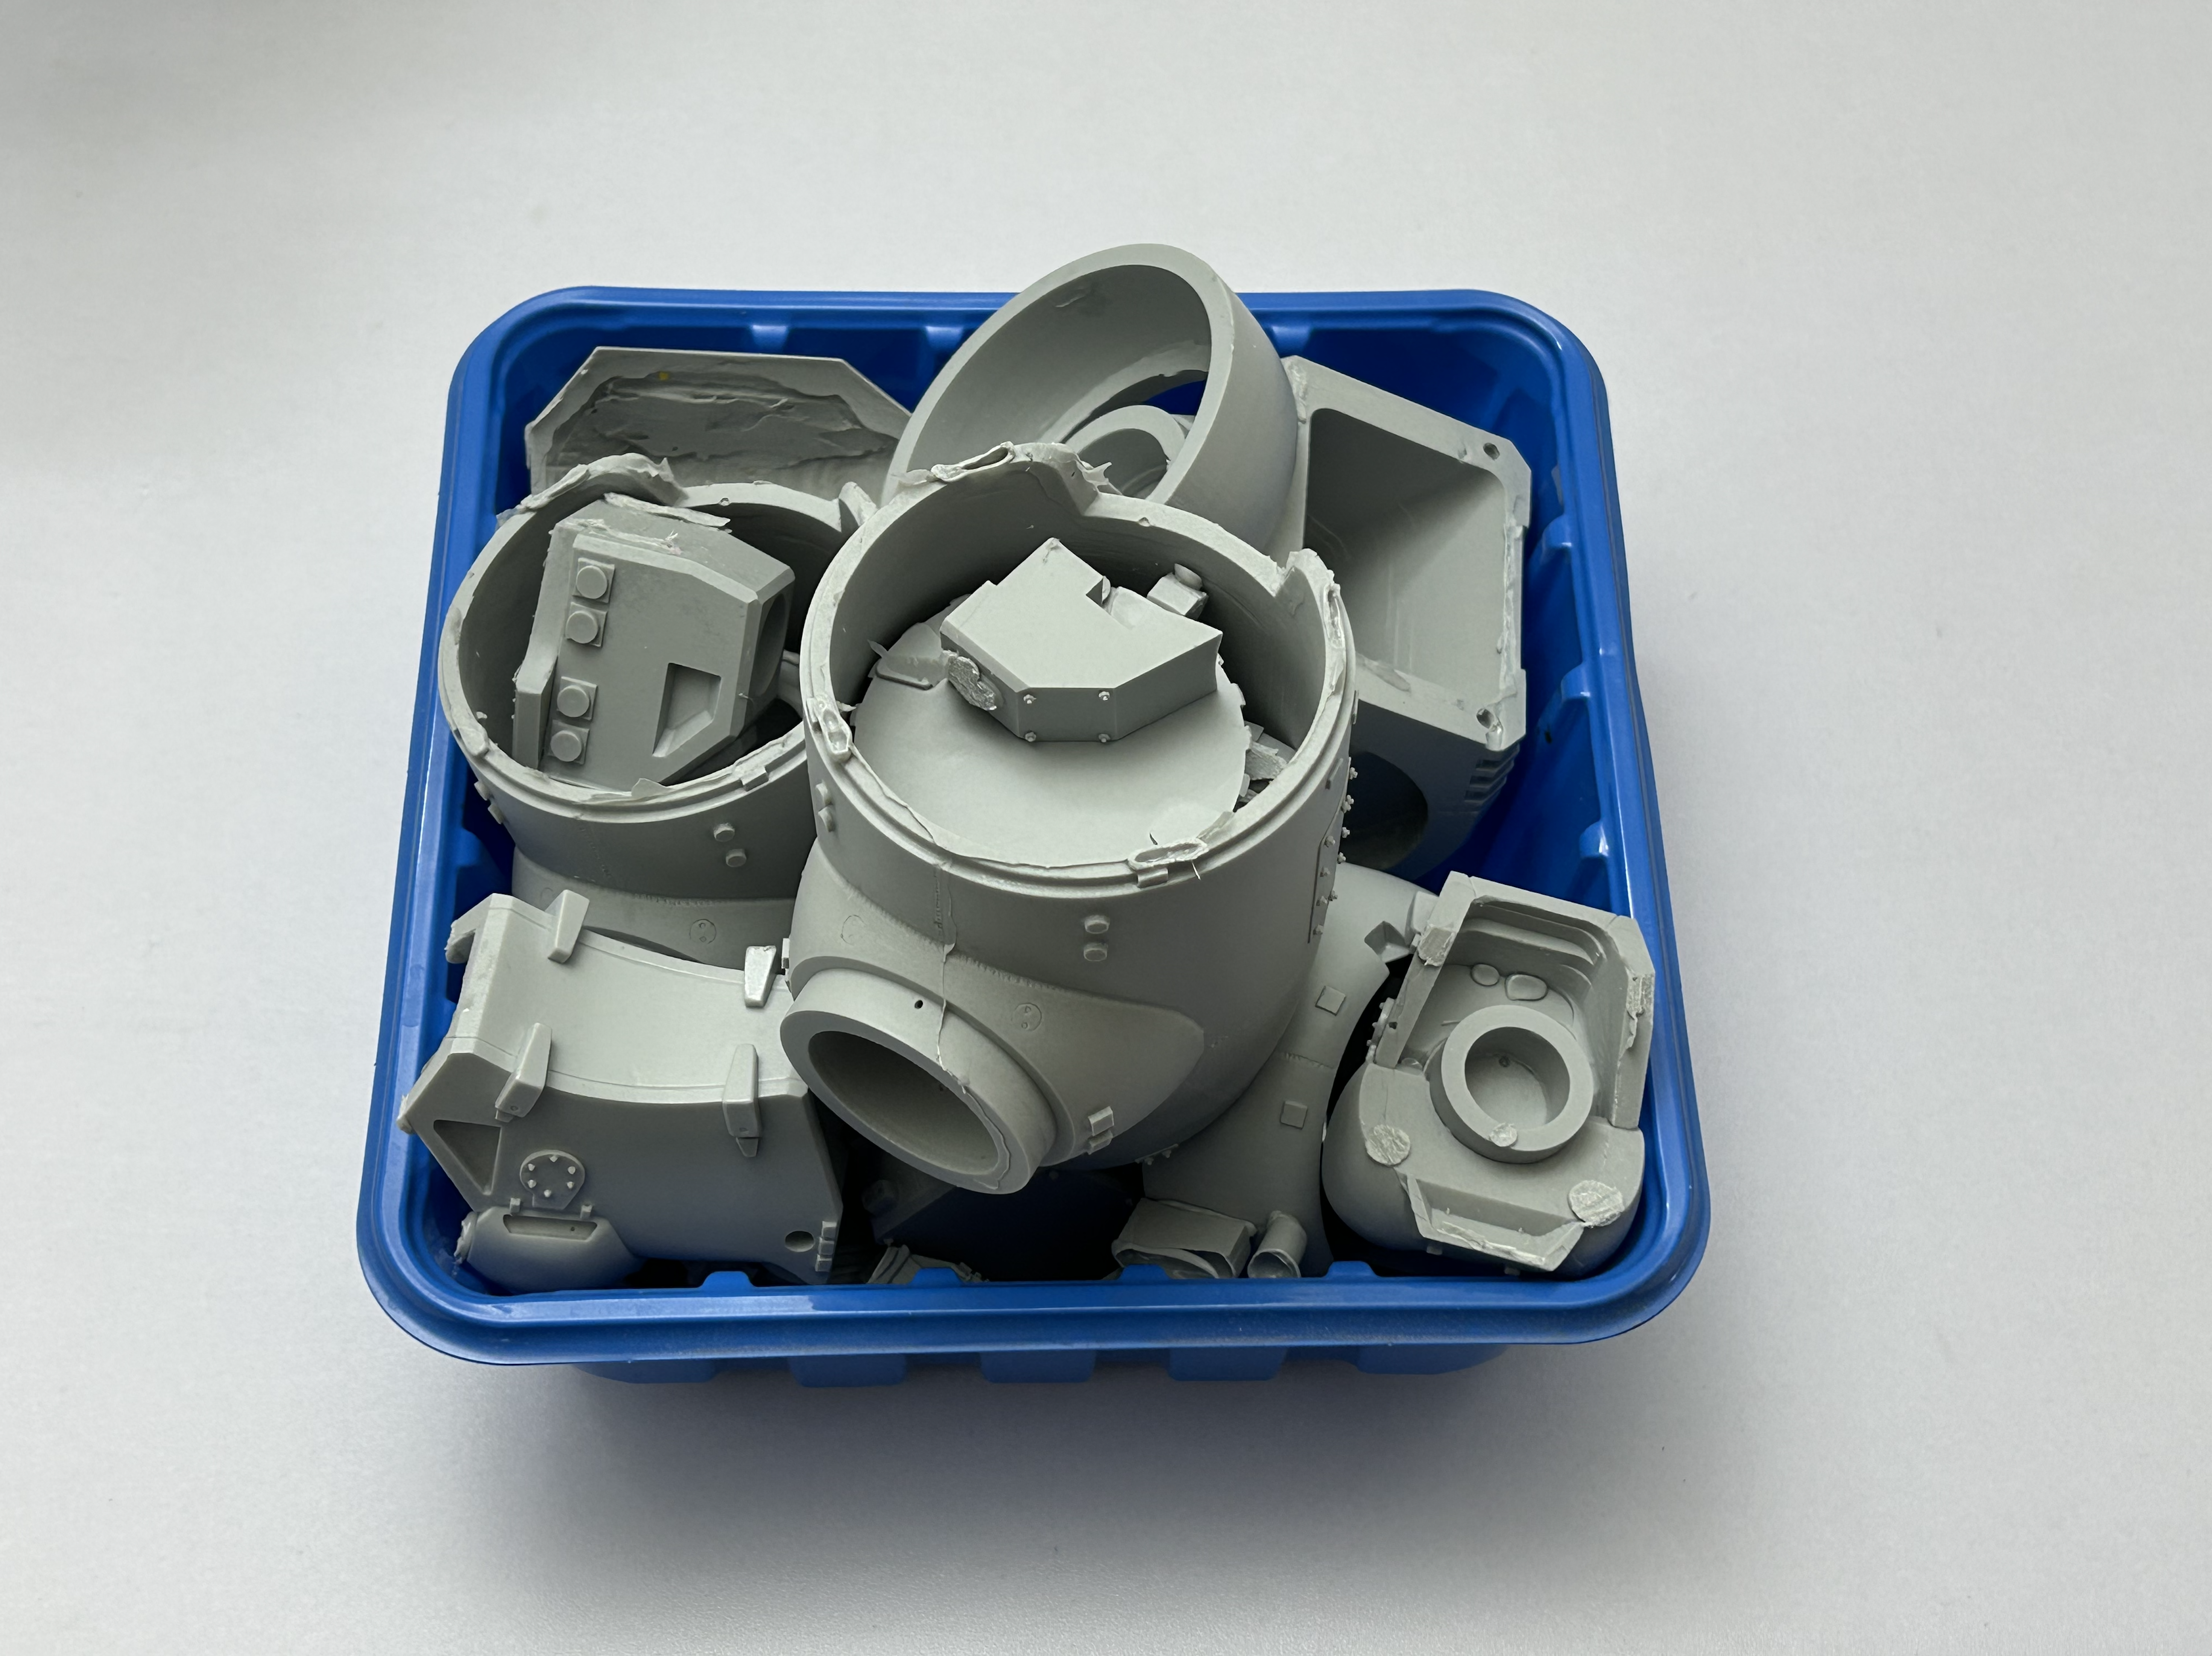
Hey @everyone production has begun in earnest and proceeding splendidly! Even the ballistic glass castings look great! The flip-side is that growing pile of discarded sprue gates, vents, and mixing cup residue which is all part of the casting process! The first kits are ready and should begin shipping in the next 10 days or so.
-
Thanks, Ted! I tried to make them look as organic as possible. The kit has a lot of parts, and they're casting beautifully!
-
Captain's Log--supplemental. Again. I'm happy to report that preliminary casting has begun, and the castings are looking phenomenal, as usual! The final molds are just about done, and the extraction process has left me with a few parting "gifts". Sometimes that's the cost of doing molds right.
-
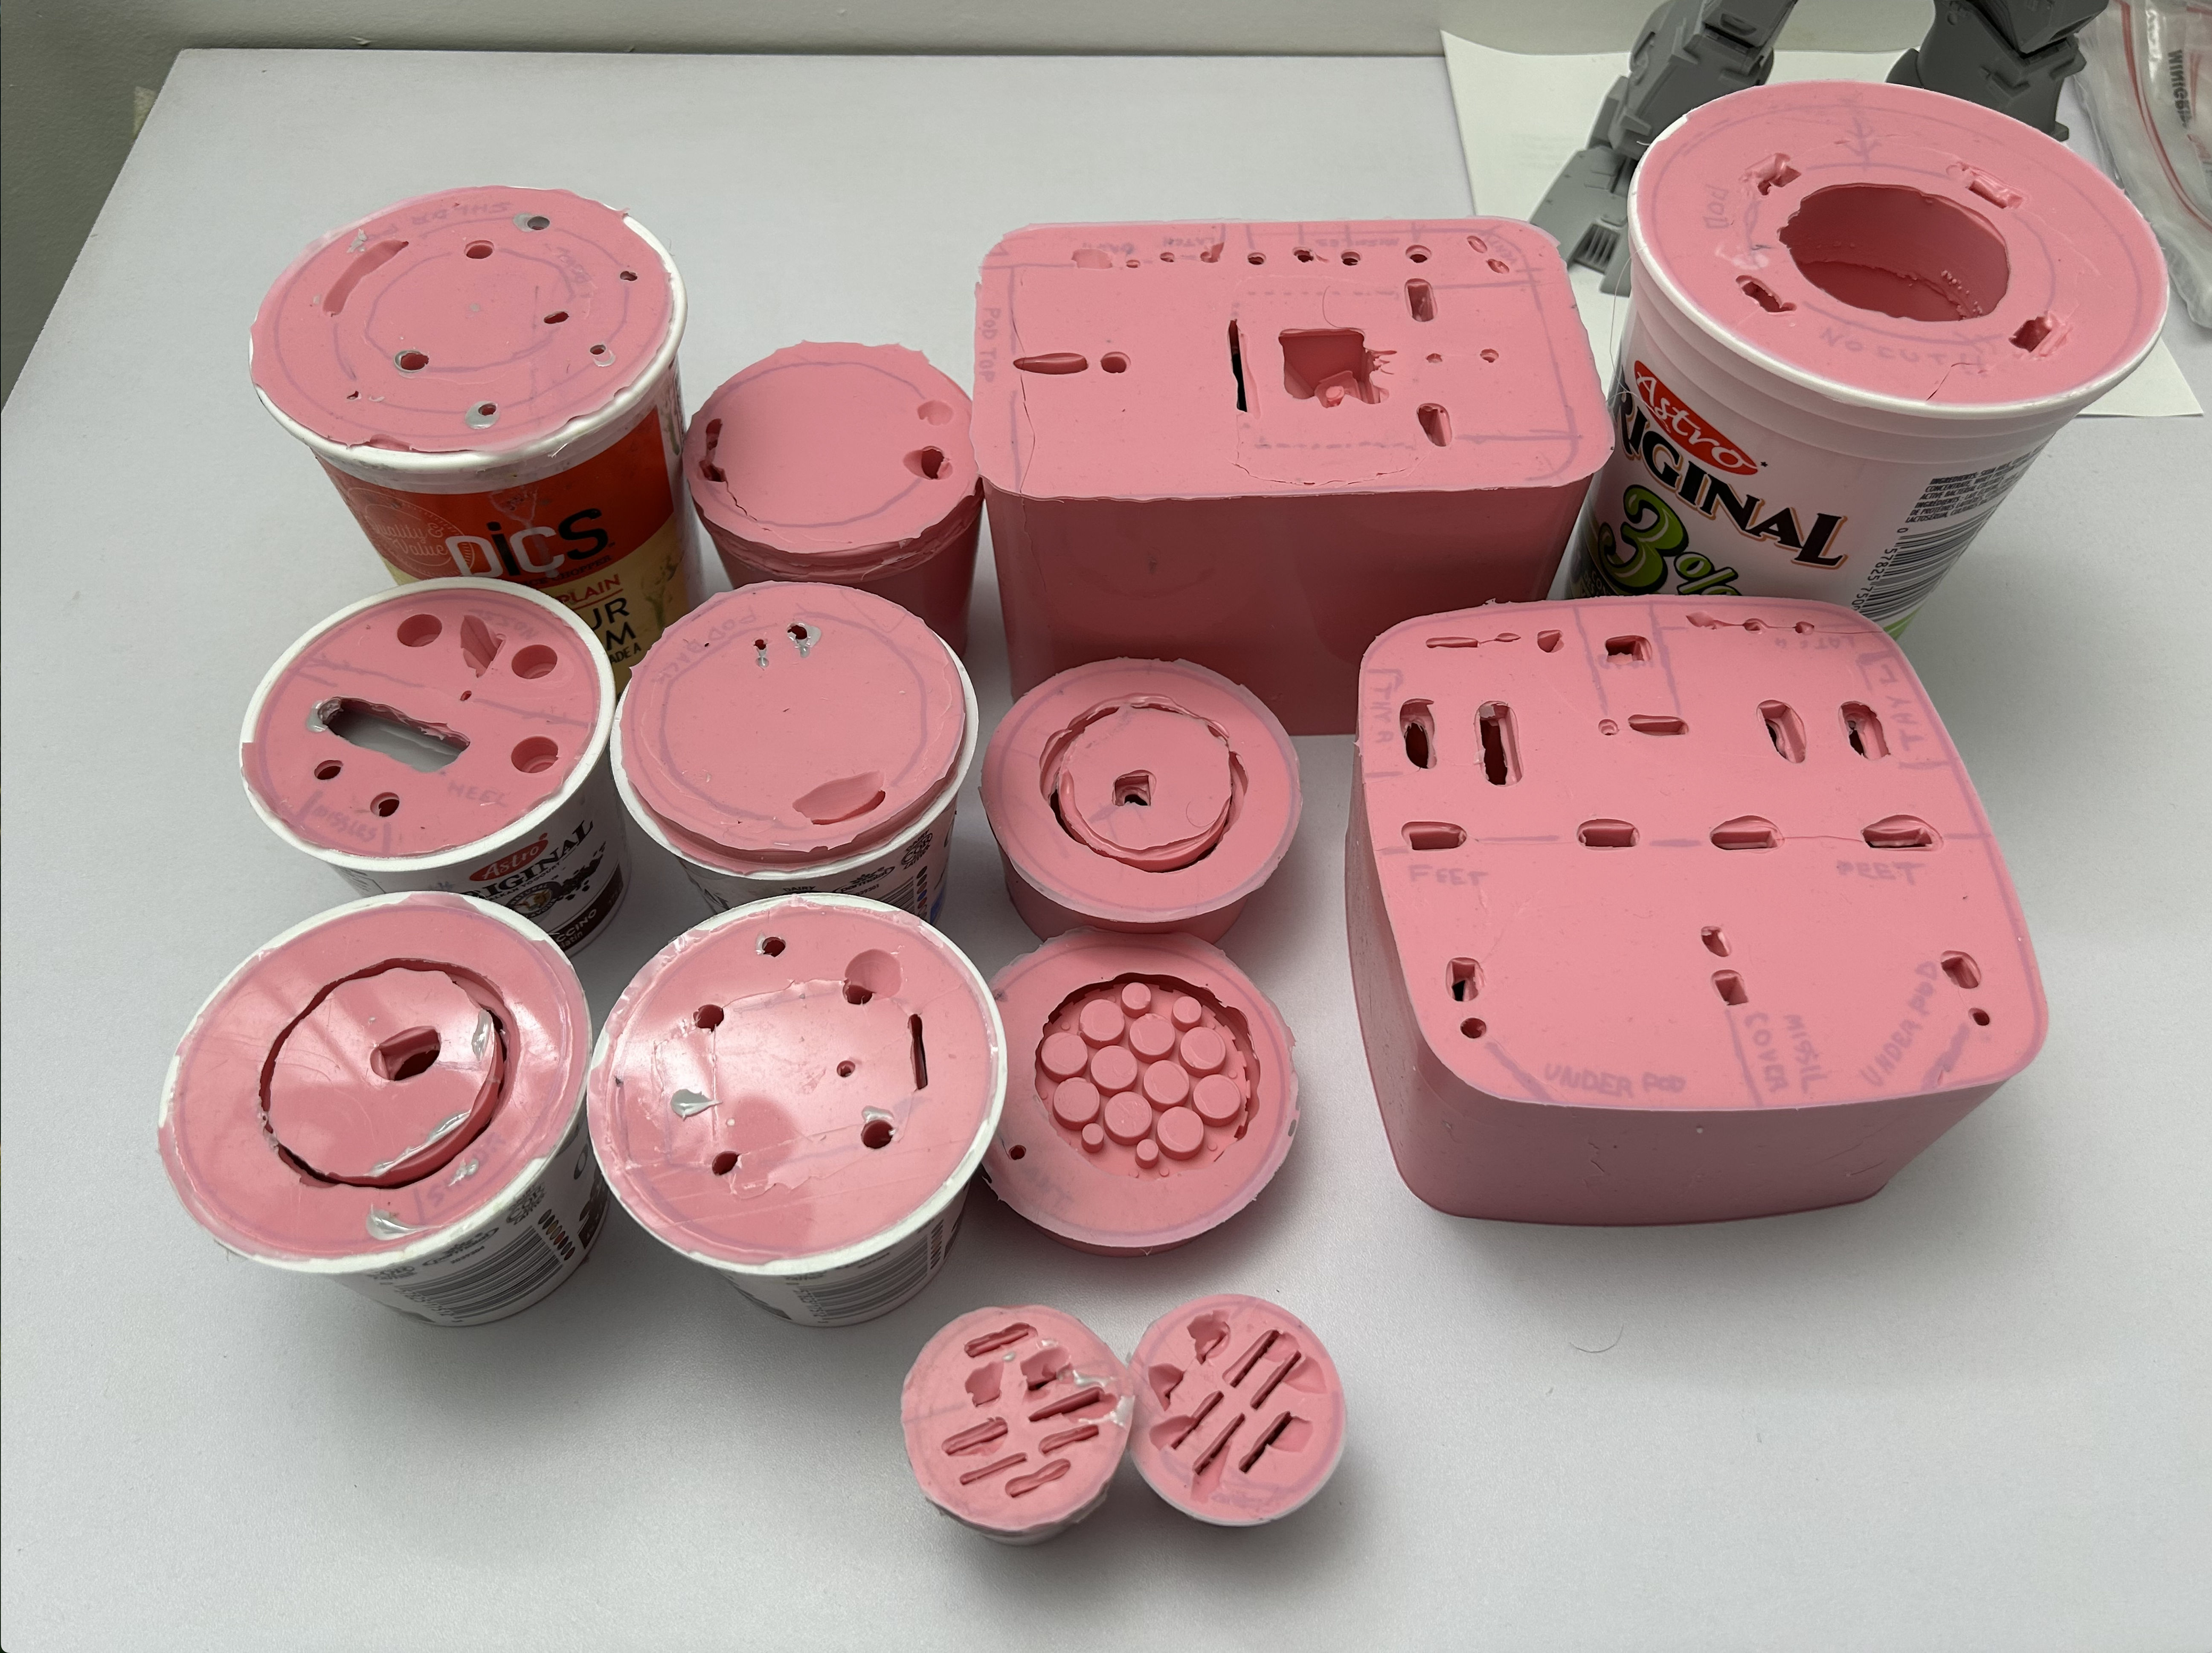
Captain's Log--supplemental! I'm still here, just very busy with the molding process! These are all the molds I have so far, with 4 more about to be opened and another four left to be poured! It's utter molding madness, but casting will start next week, praise God!!
-
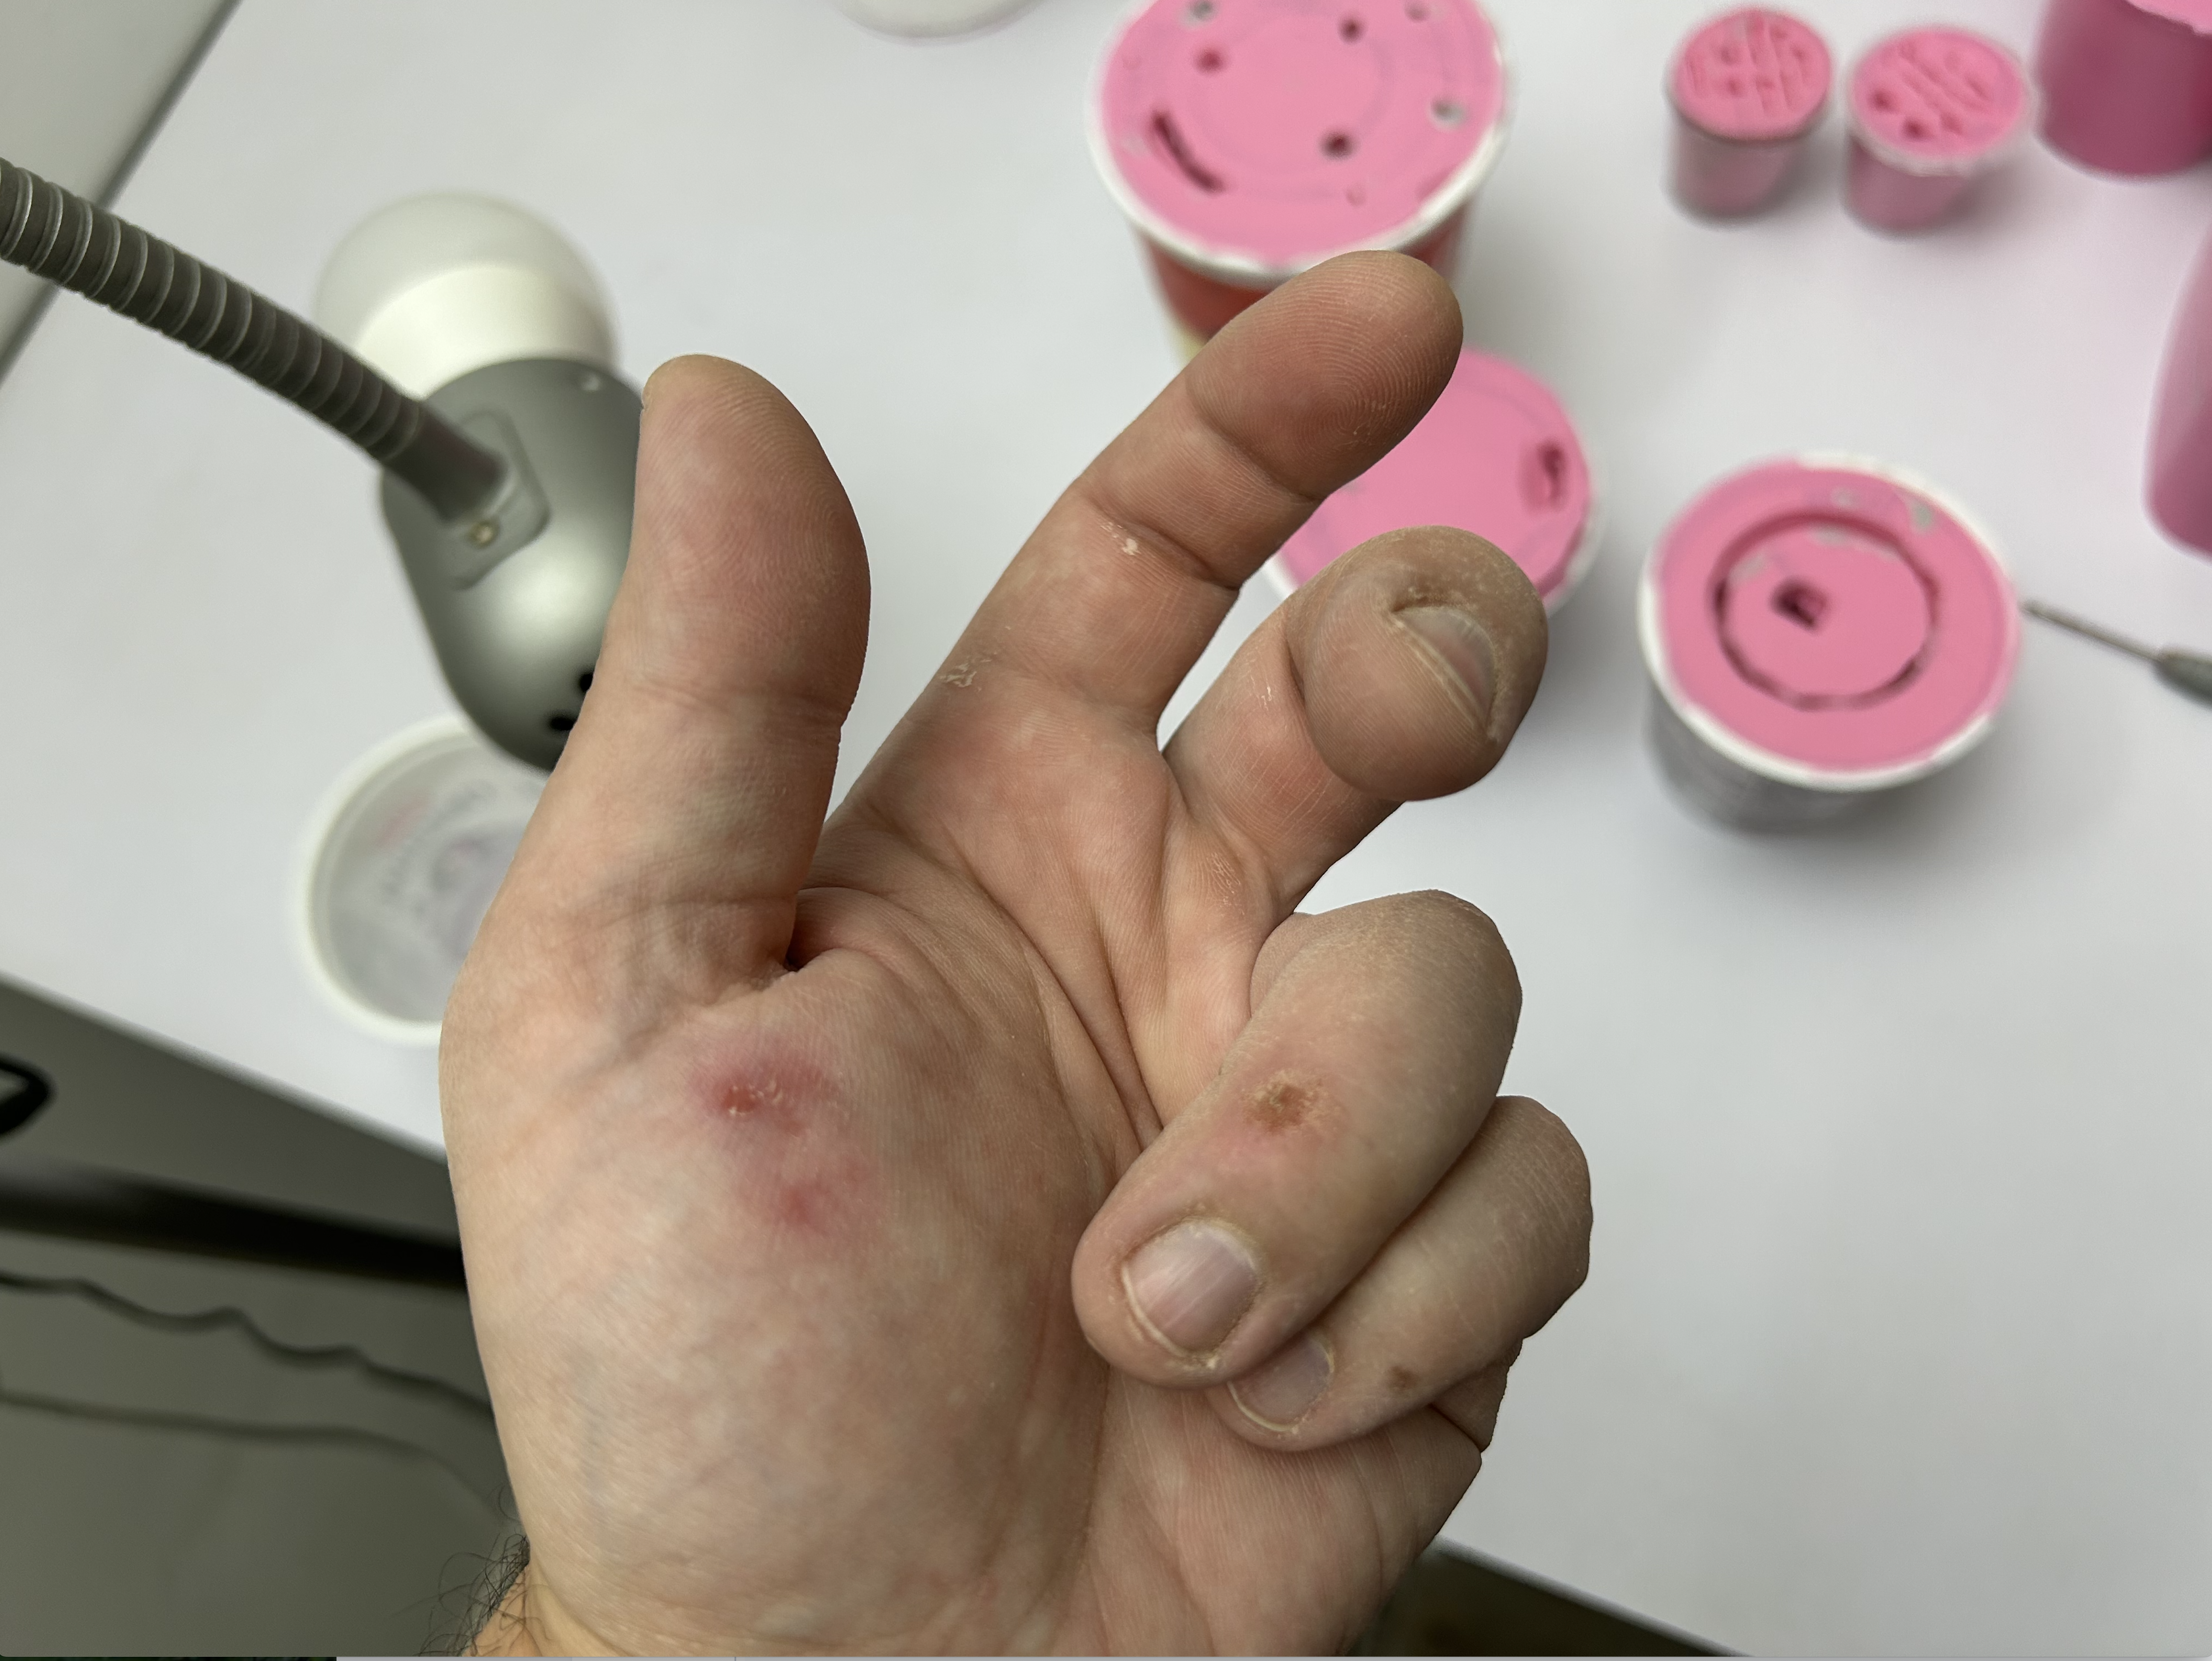
Captain's Log: Thursday, June 12, 2025 With all the master-patterns completed, I can now turn my attention to the tedious task of prepping all those masters for the molding process. Pics 68-72 show various components in various stages of preparation: because some parts have channels and complex geometries (openings, etc.) a plastic membrane needs to be added to strategic areas to allow the parts to be demolded without destroying them. What's not apparent in the images is that I also have to vent these membranes so that air doesn't remain trapped underneath them, so very tiny, surgical punctures are made in strategic locations to allow for proper venting. Pic 70 shows one part attached to a clear acrylic base. The gates are secured to the base with hot glue. This will allow the gates to detach cleanly from the part during demold and avoid damage. The last step involves gluing a mold box around the part(s) using that same hot glue. Pic 74: I've got my trusty mold material ready, along with a gram scale to accurately measure-out the silicone and catalyst. When thoroughly mixed, it will be a bright shade of Pepto-Bismol. When the mold rubber is thoroughly mixed, it then needs to be degassed, as the mixing process introduces a lot of air into the mixture. To that end, I employ a vacuum pump (pic 75) and a vacuum chamber (pic 76) to draw all the air out. Because I use an industrial pump, the process only takes a few minutes. With the rubber thoroughly degassed, I then carefully pour the rubber over the parts and let them set. This is a long process, so I may not have an update next week as I busy myself preparing the (almost fifteen!!) molds, but rest assured I will be very busy! 70.HEIC 69.HEIC 71.HEIC 72.HEIC 73.HEIC 76.HEIC 75.HEIC 74.HEIC 77.HEIC
-
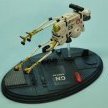
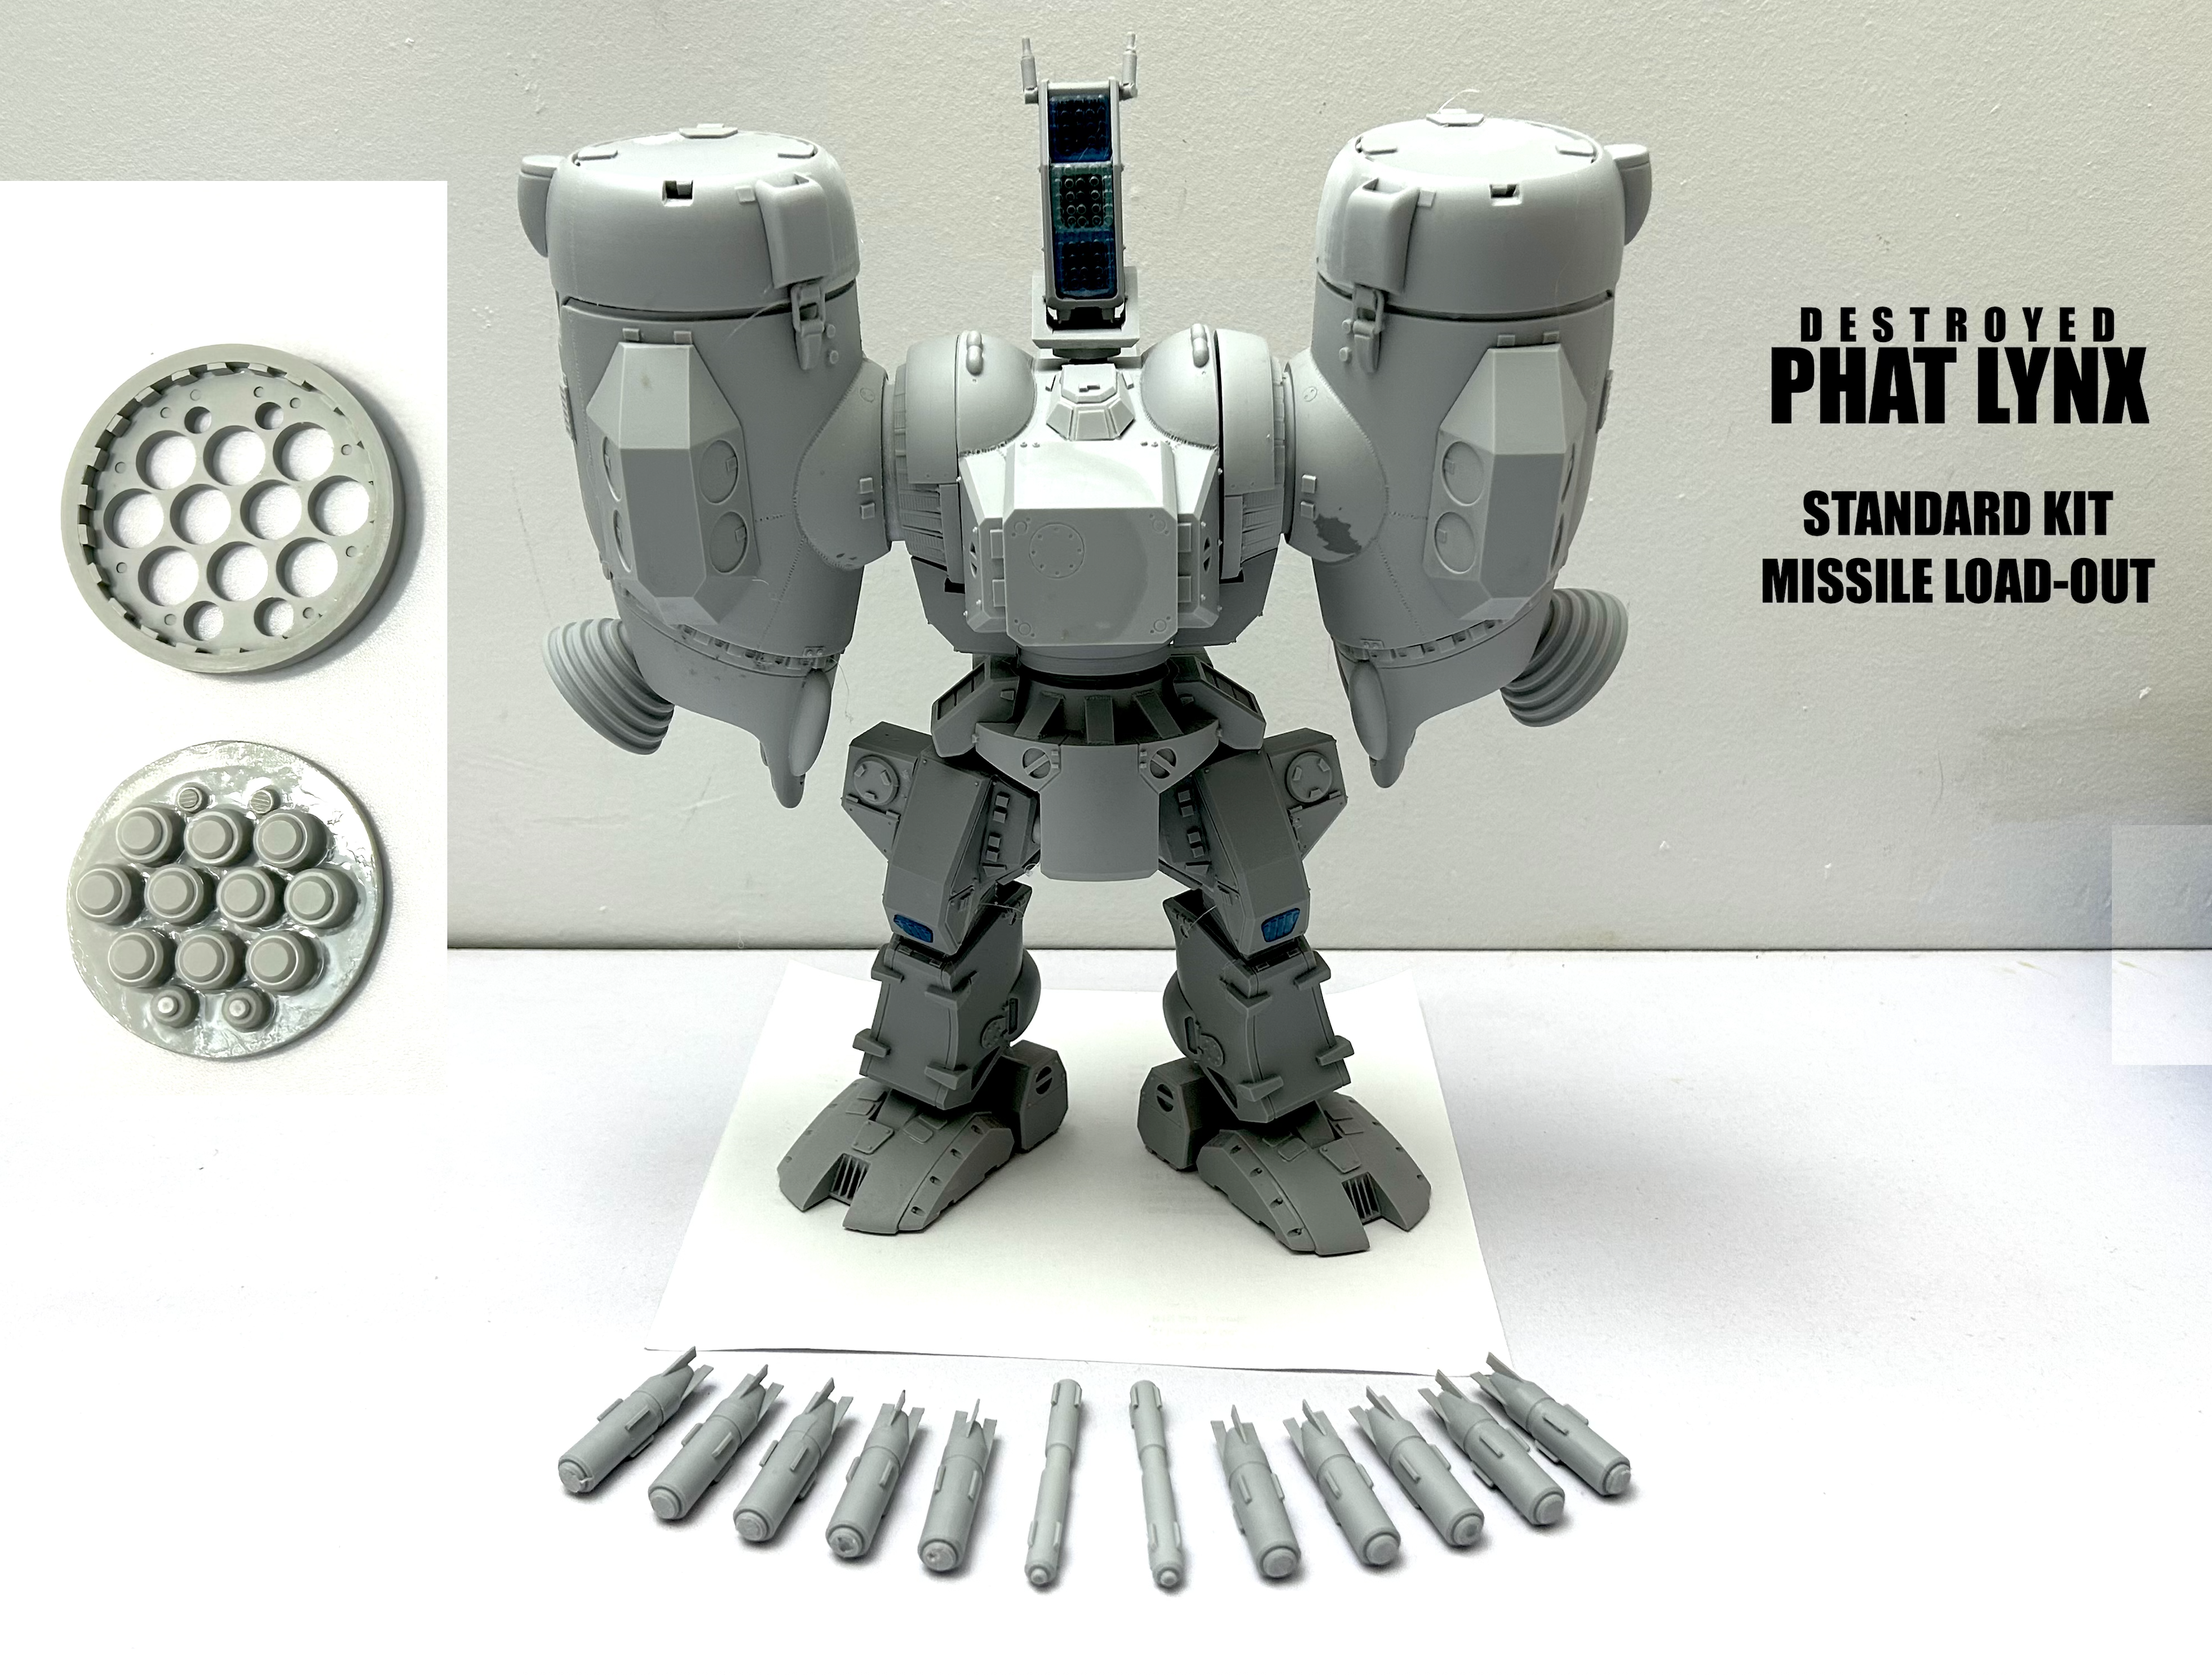
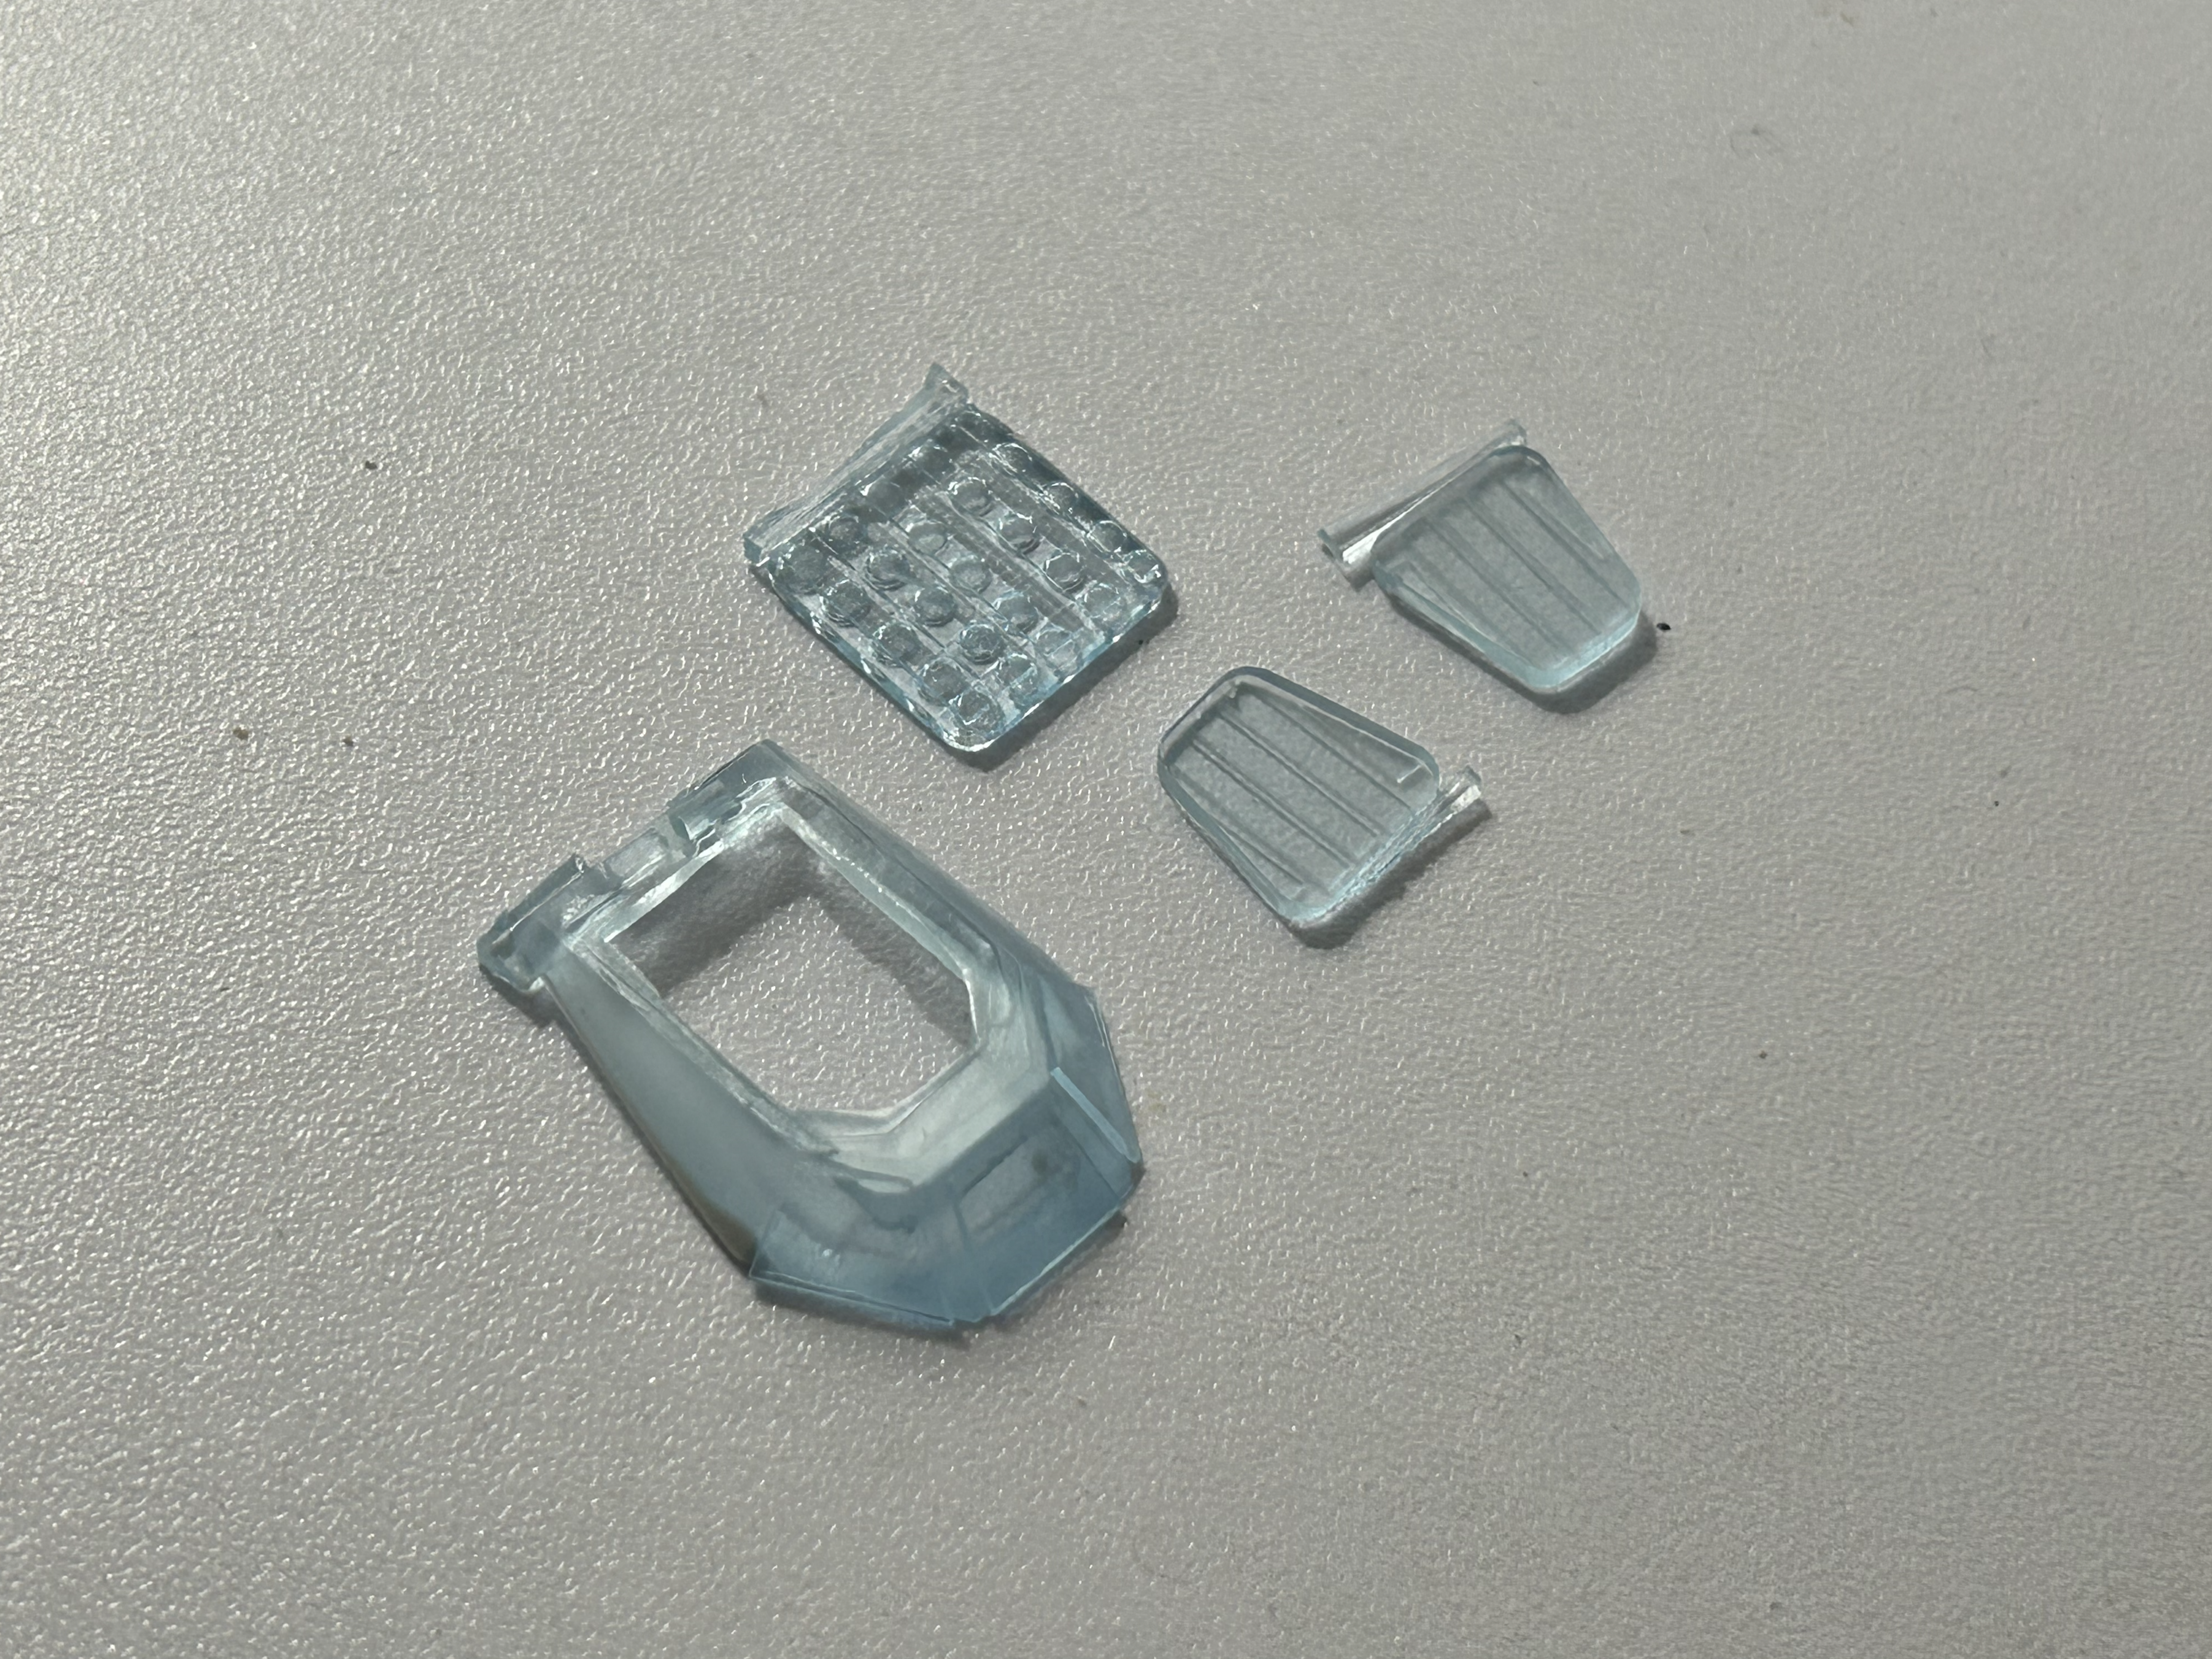
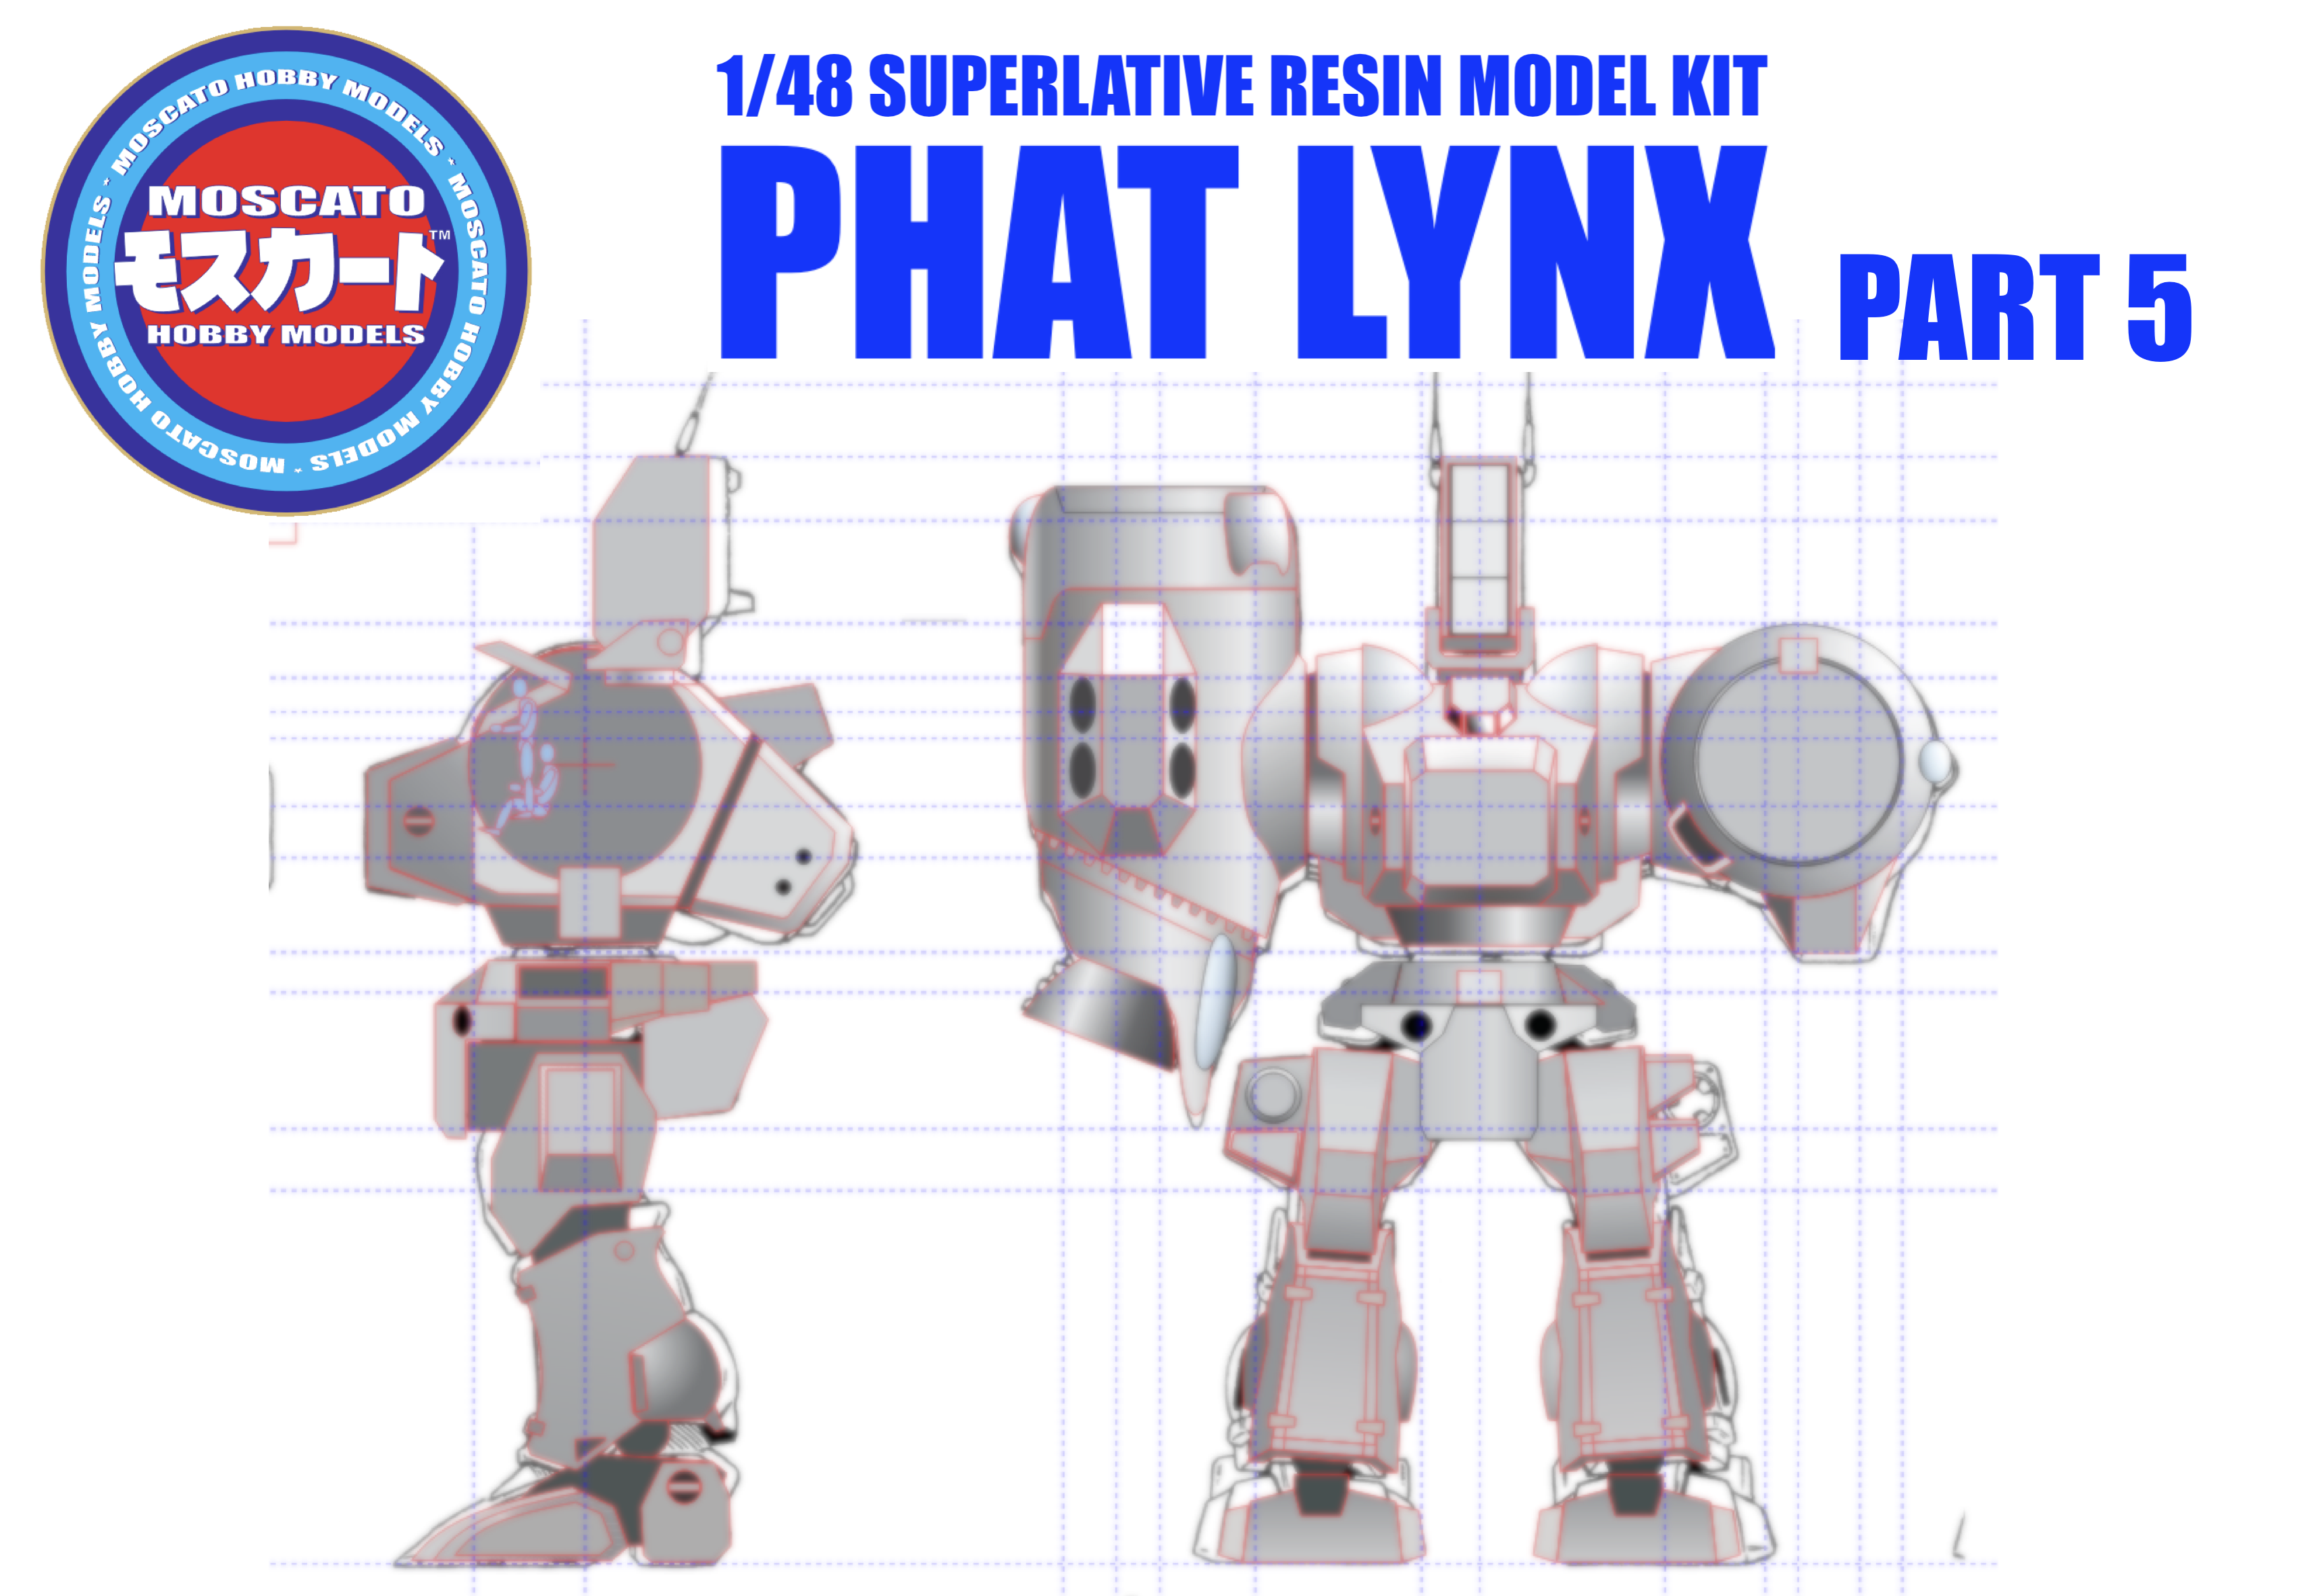
Captain's Log: Thursday, June 4, 2025 Hey @everyone the 1/48 Destroyed Phat Lynx masters are done! Have a look at this glorious (and seriously massive) beast of a kit! Some fun facts about this new baby: -the vision block housing and searchlight lenses will obviously be molded in clear, but I will also add a tiny hint of green to the clear resin to create the look of thick armored glass. -With the missile drums tilted to 45 degrees and the hatches open like in the pic, the kit stands almost 33cm tall There is a detailed cockpit and a pilot, which is similar to that of the Thomas Hawk, but is very difficult to photograph due to being very deep into the chest (and heavily armored!) The missiles drums can be built with a full payload, partial payload, and also firing (for the more ambitious modelers). Additionally, the missiles can all be displayed next to the mecha, so you'll have several display options. For those who like to add lighting effects to their kits, this baby has AMPLE room for that! Now that the masters are done and mold-prep will begin next week, I am formally requesting the $200* CAD balance payment. *for Canadian and contiguous US destinations only. For overseas/Hawaii delivery, please refer to the quote I provided to you earlier for the exact balance due. IMG_3466.HEICIMG_3465.HEICIMG_3464.HEICIMG_3462.HEICIMG_3461.HEICIMG_3460.HEICIMG_3458.HEICIMG_3457.HEICIMG_3455.HEICIMG_3454.HEICIMG_3453.HEICIMG_3452.HEICIMG_3451.HEICIMG_3450.HEICIMG_3449.HEIC
-
Captain's Log: Thursday, May 22nd, 2025 You wouldn't think so by looking at the pics of this latest update, but the masters are close to complete! Because I opted to do more fabrication and fewer beauty shots, this update will be shorter than usual. Pics 64-67 show the grueling puttying process I use to mate two surfaces together perfectly, and the fairing on the bottom of the missile pods has been a tough subject, but alas, the worst is done! Once all the puttied parts are sanded, I reckon I will have about a week's worth of super-detailing, and then the masters will be done! Pic 68 shows the first step in the detailing process (in this case the thruster nozzle) and I was just getting warmed-up! Be advised that I may skip next week's update to finish all the patterns and prime them. I'm pretty confident it will be worth the wait. 63.HEIC 64.HEIC 65.HEIC 66.HEIC 67.HEIC 68.HEIC
-
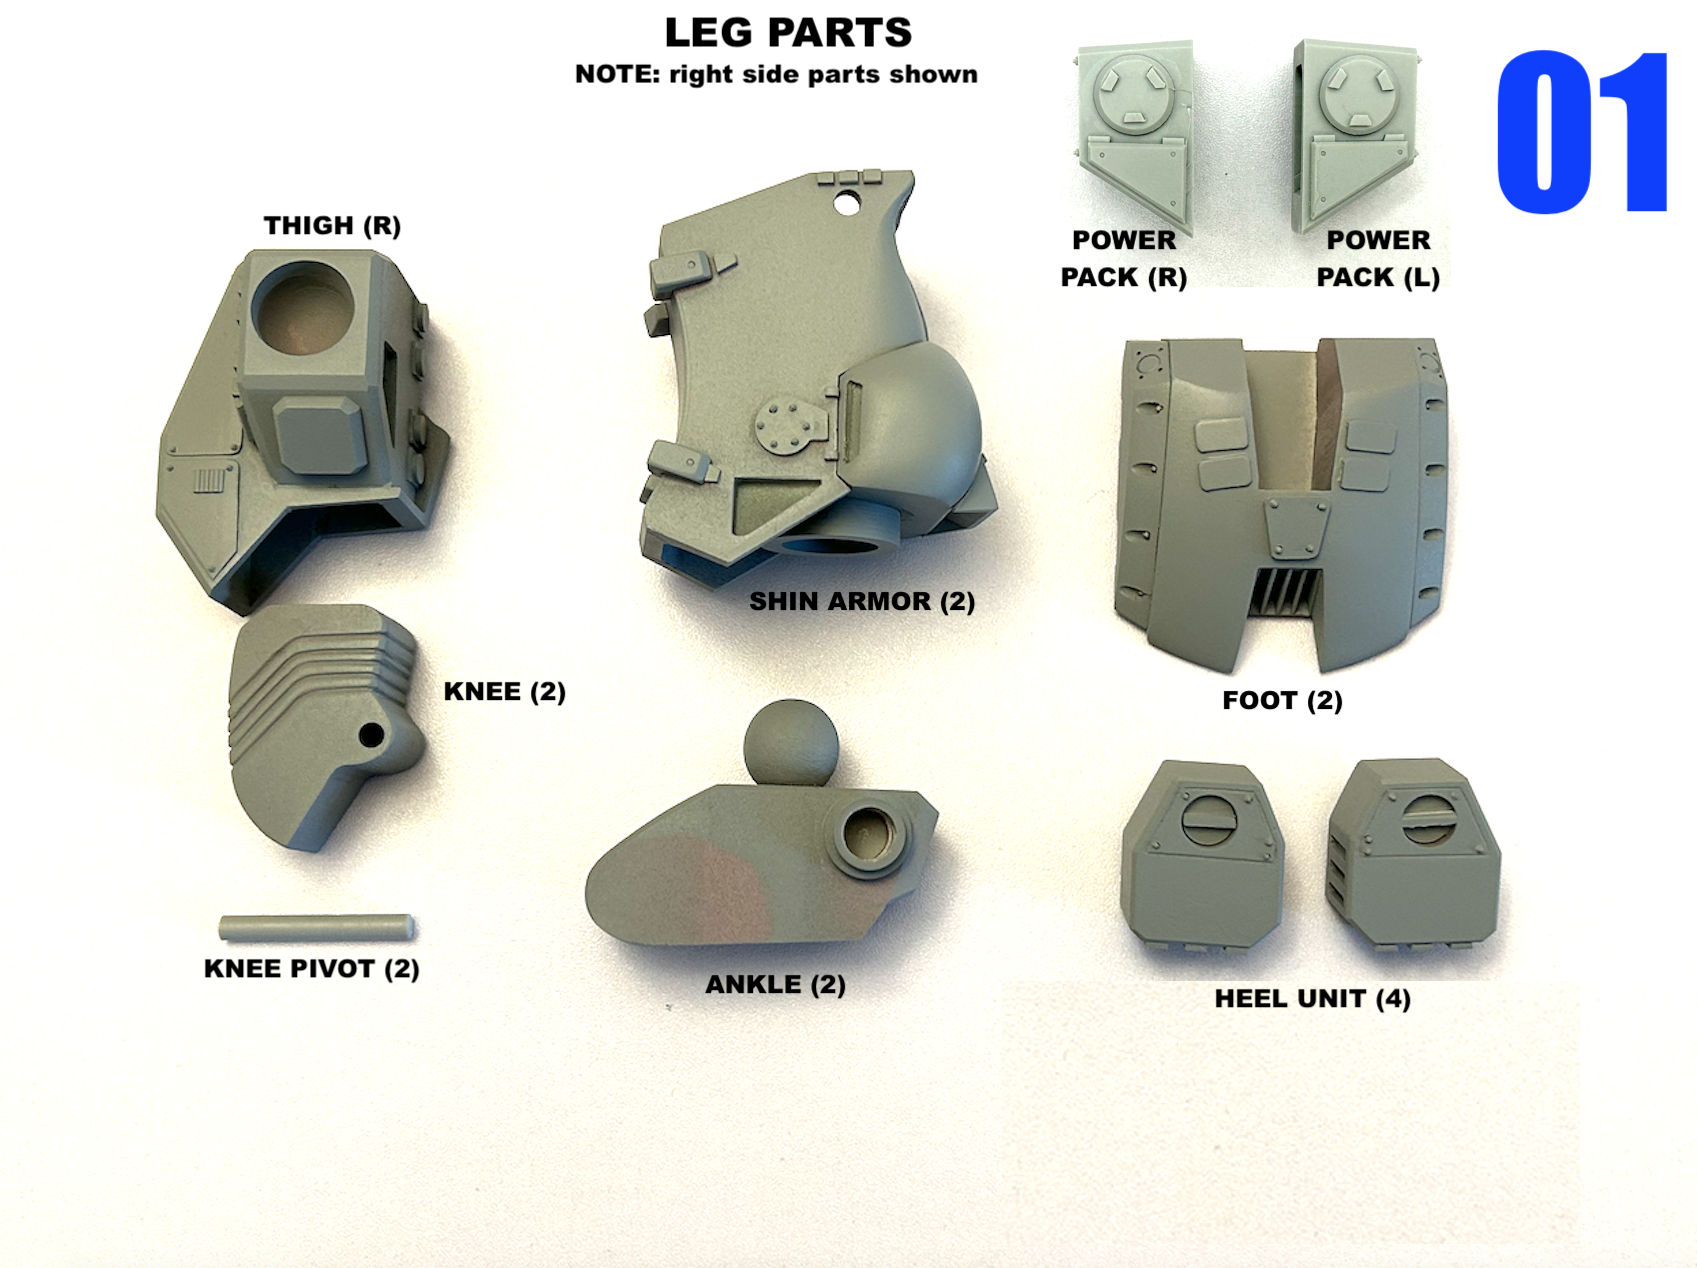
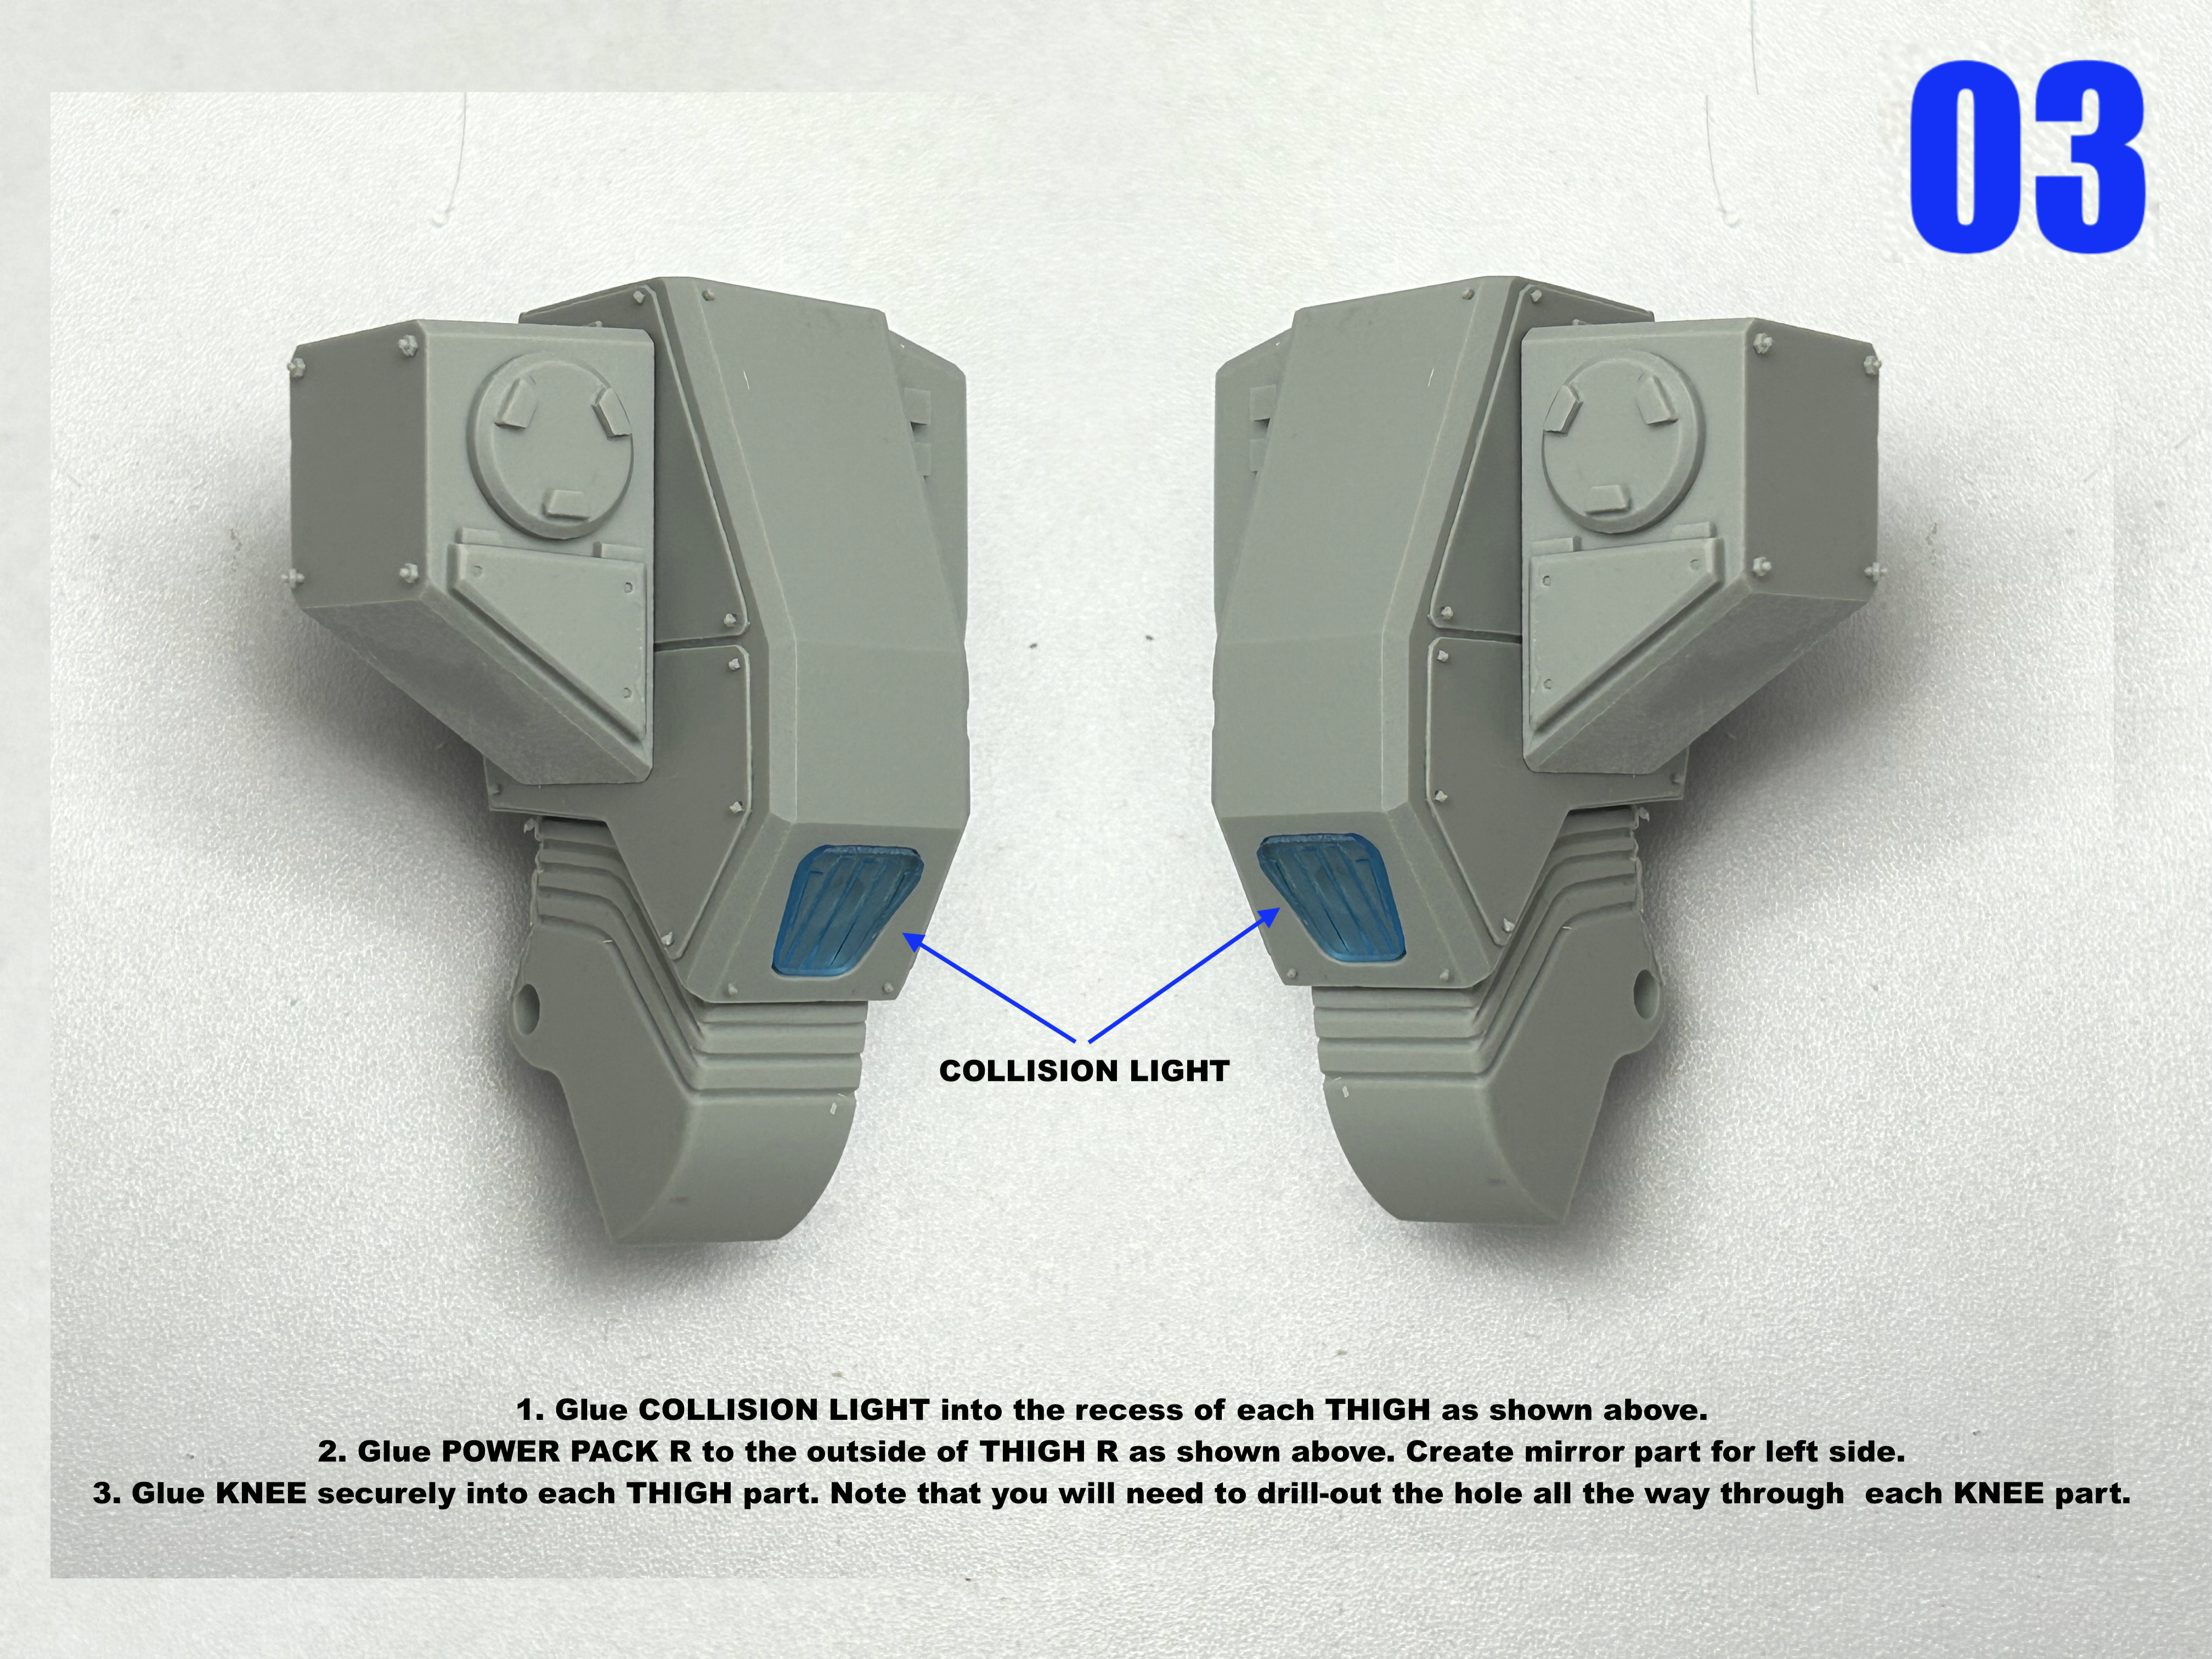
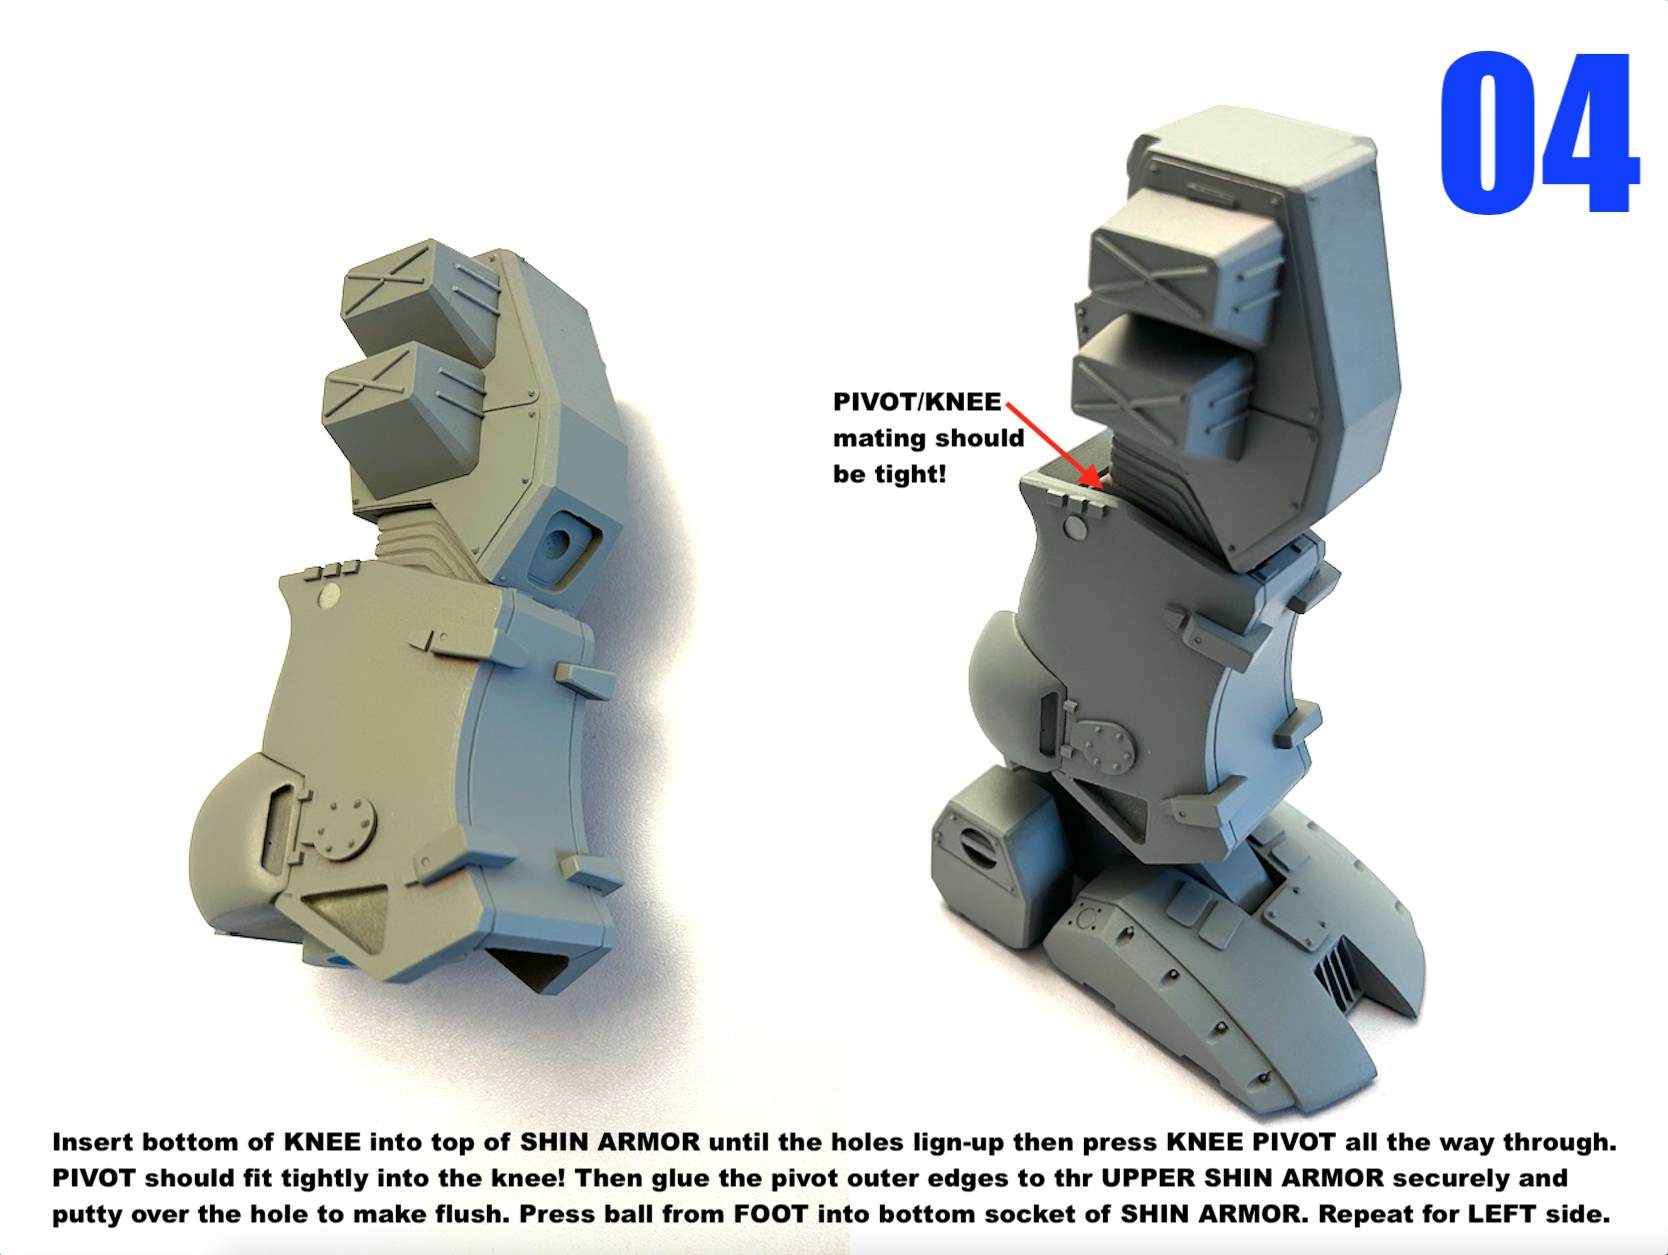
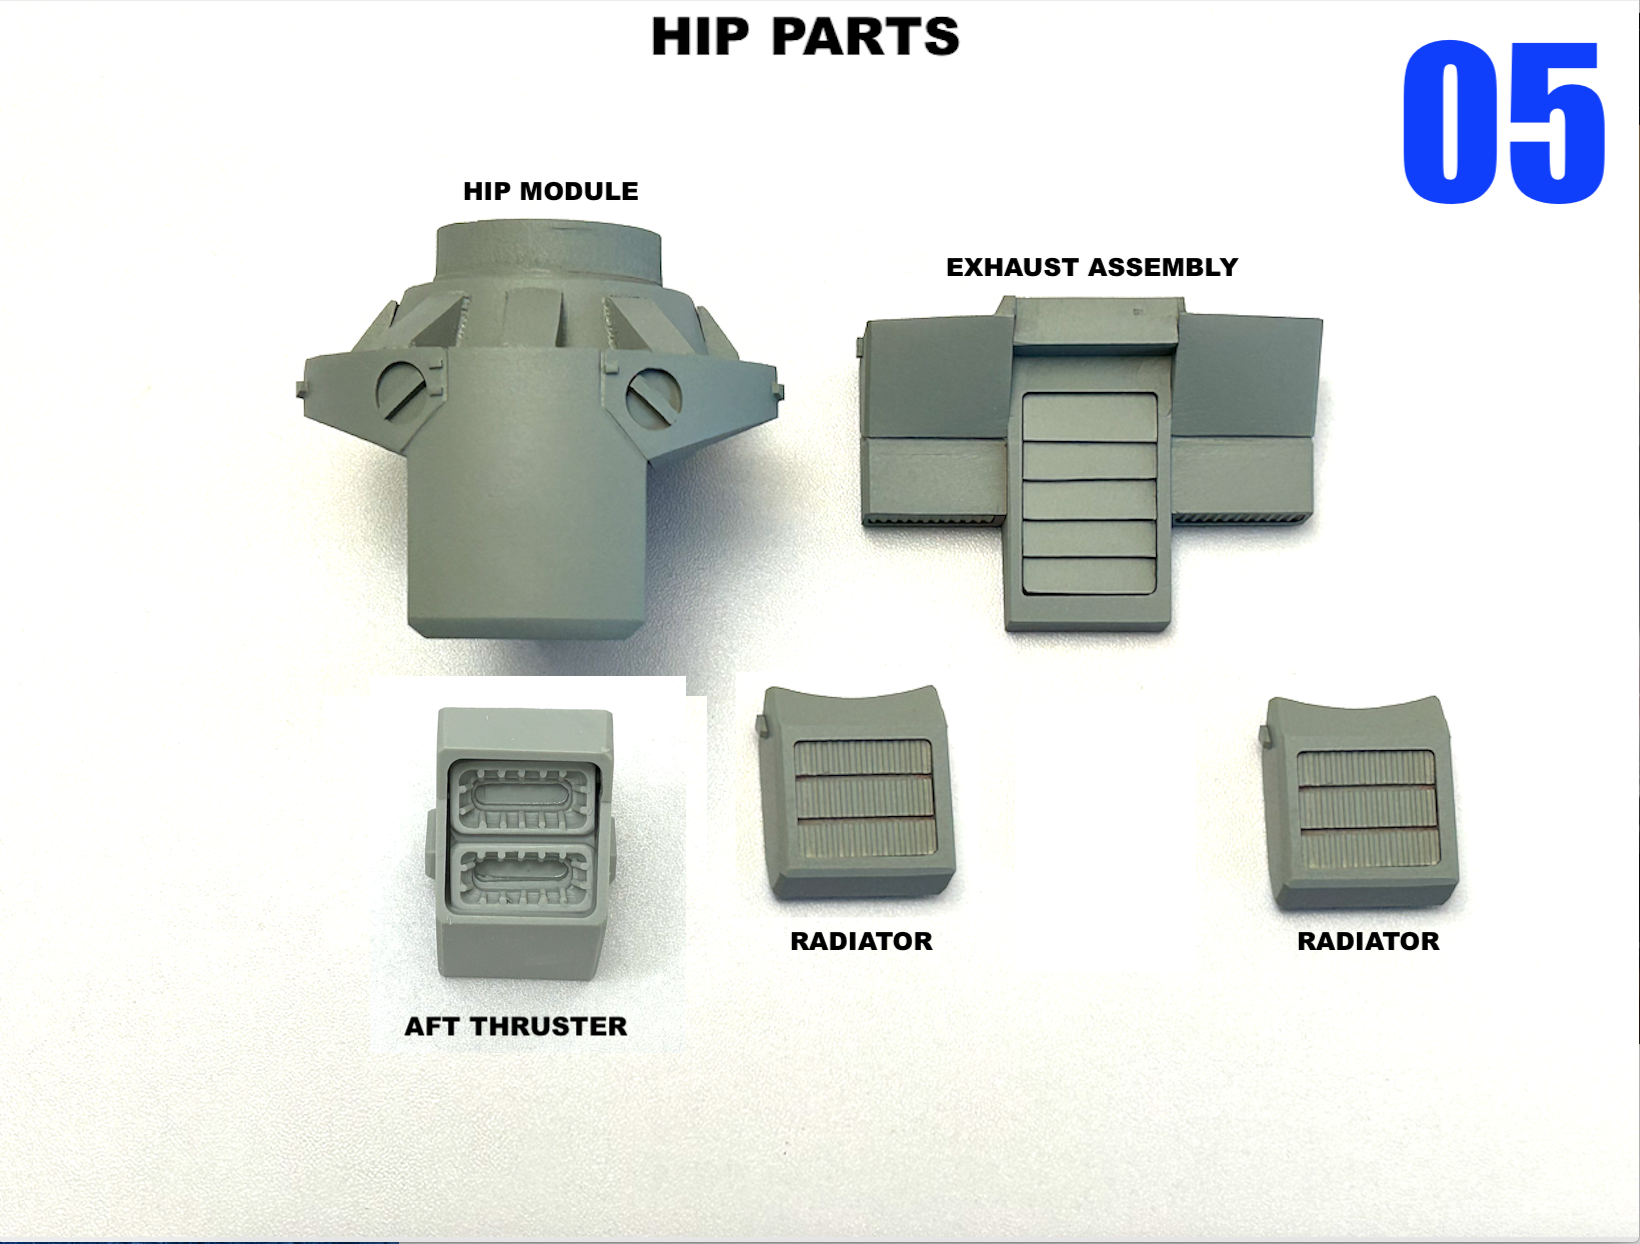
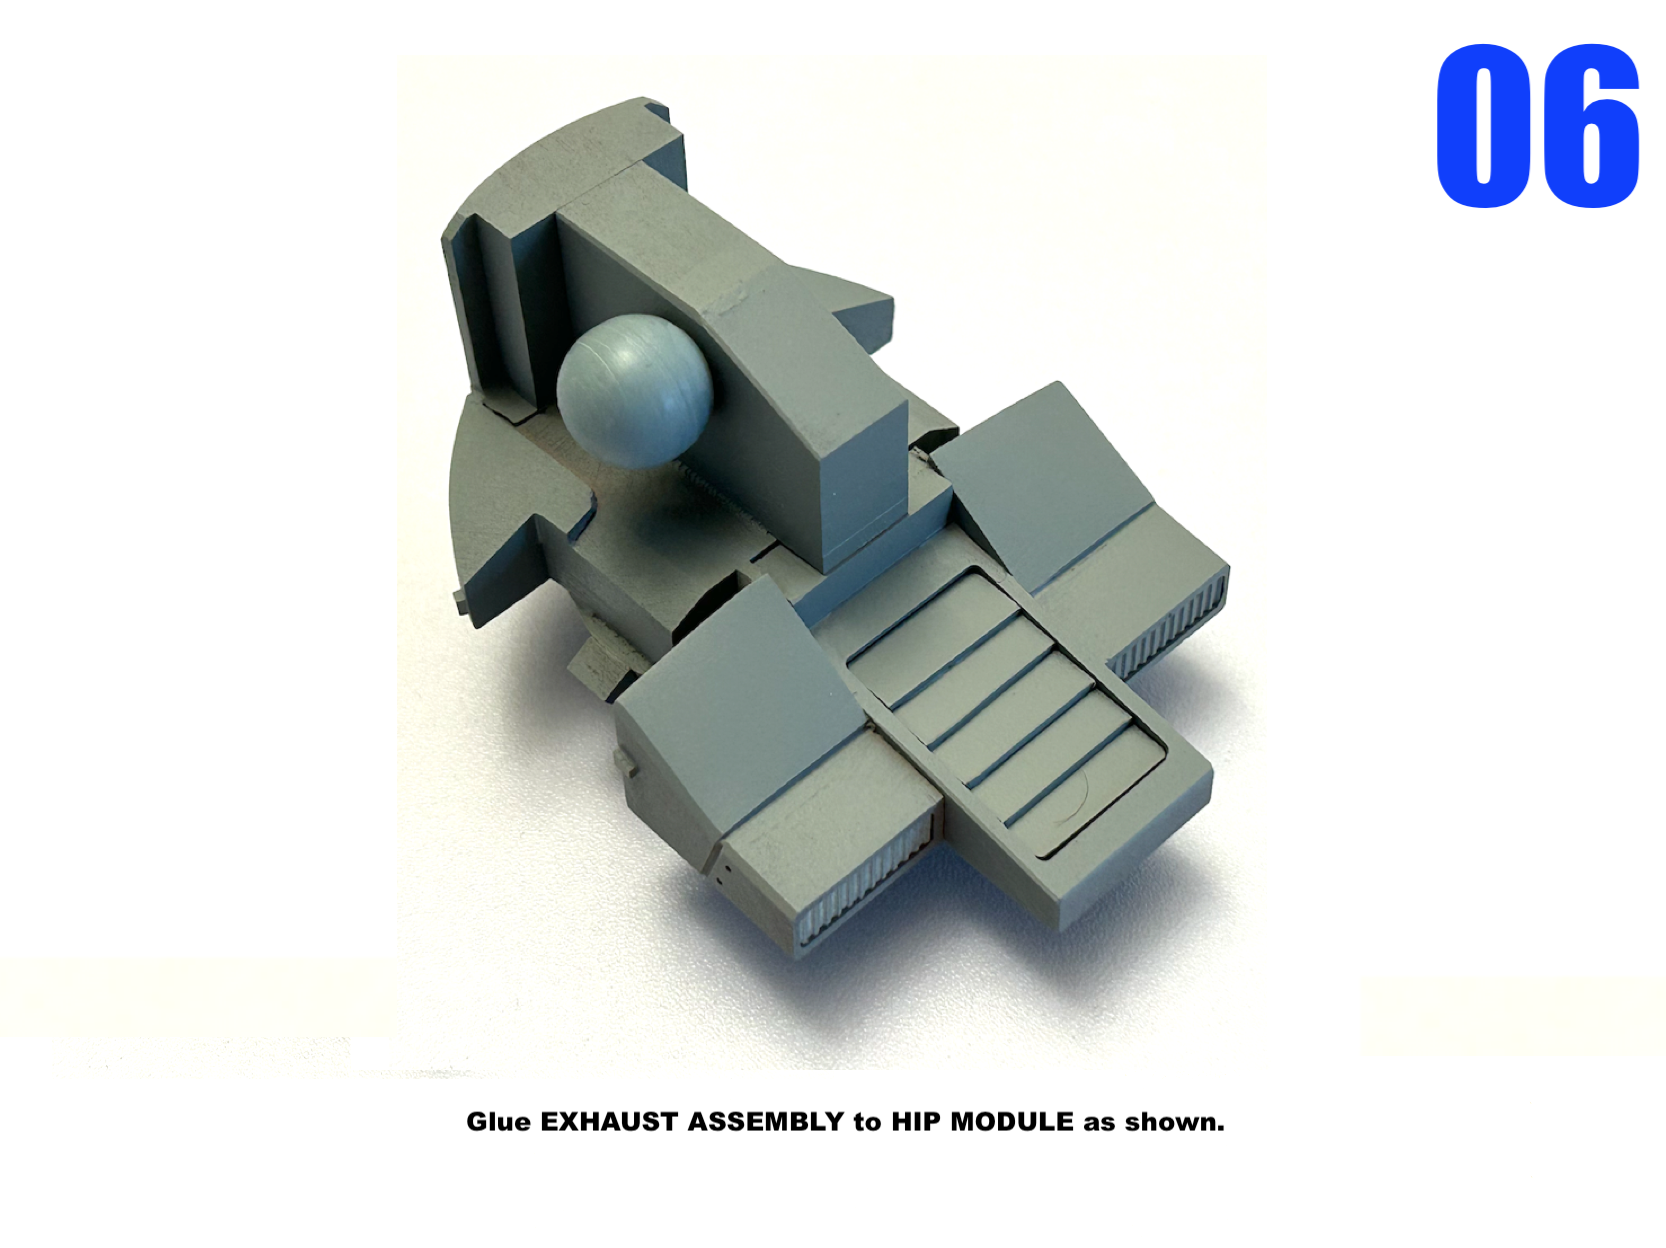
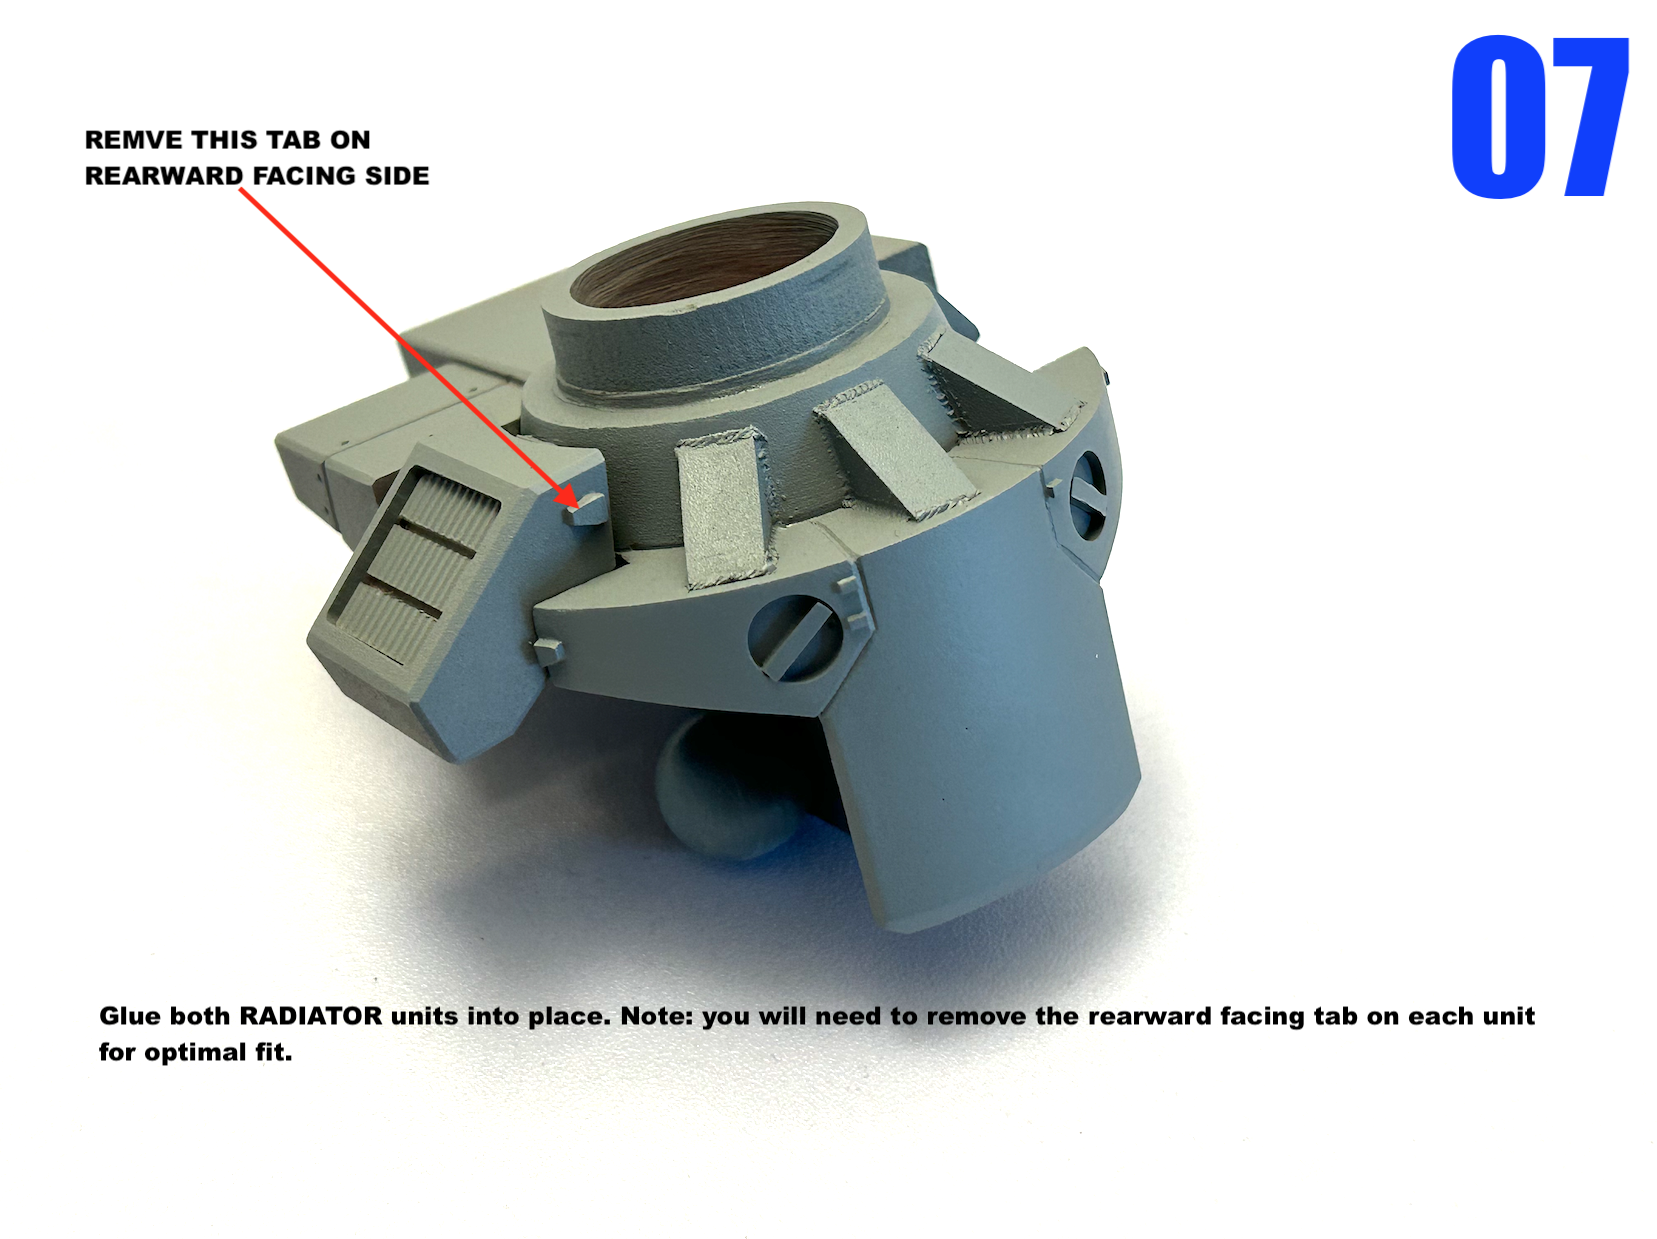
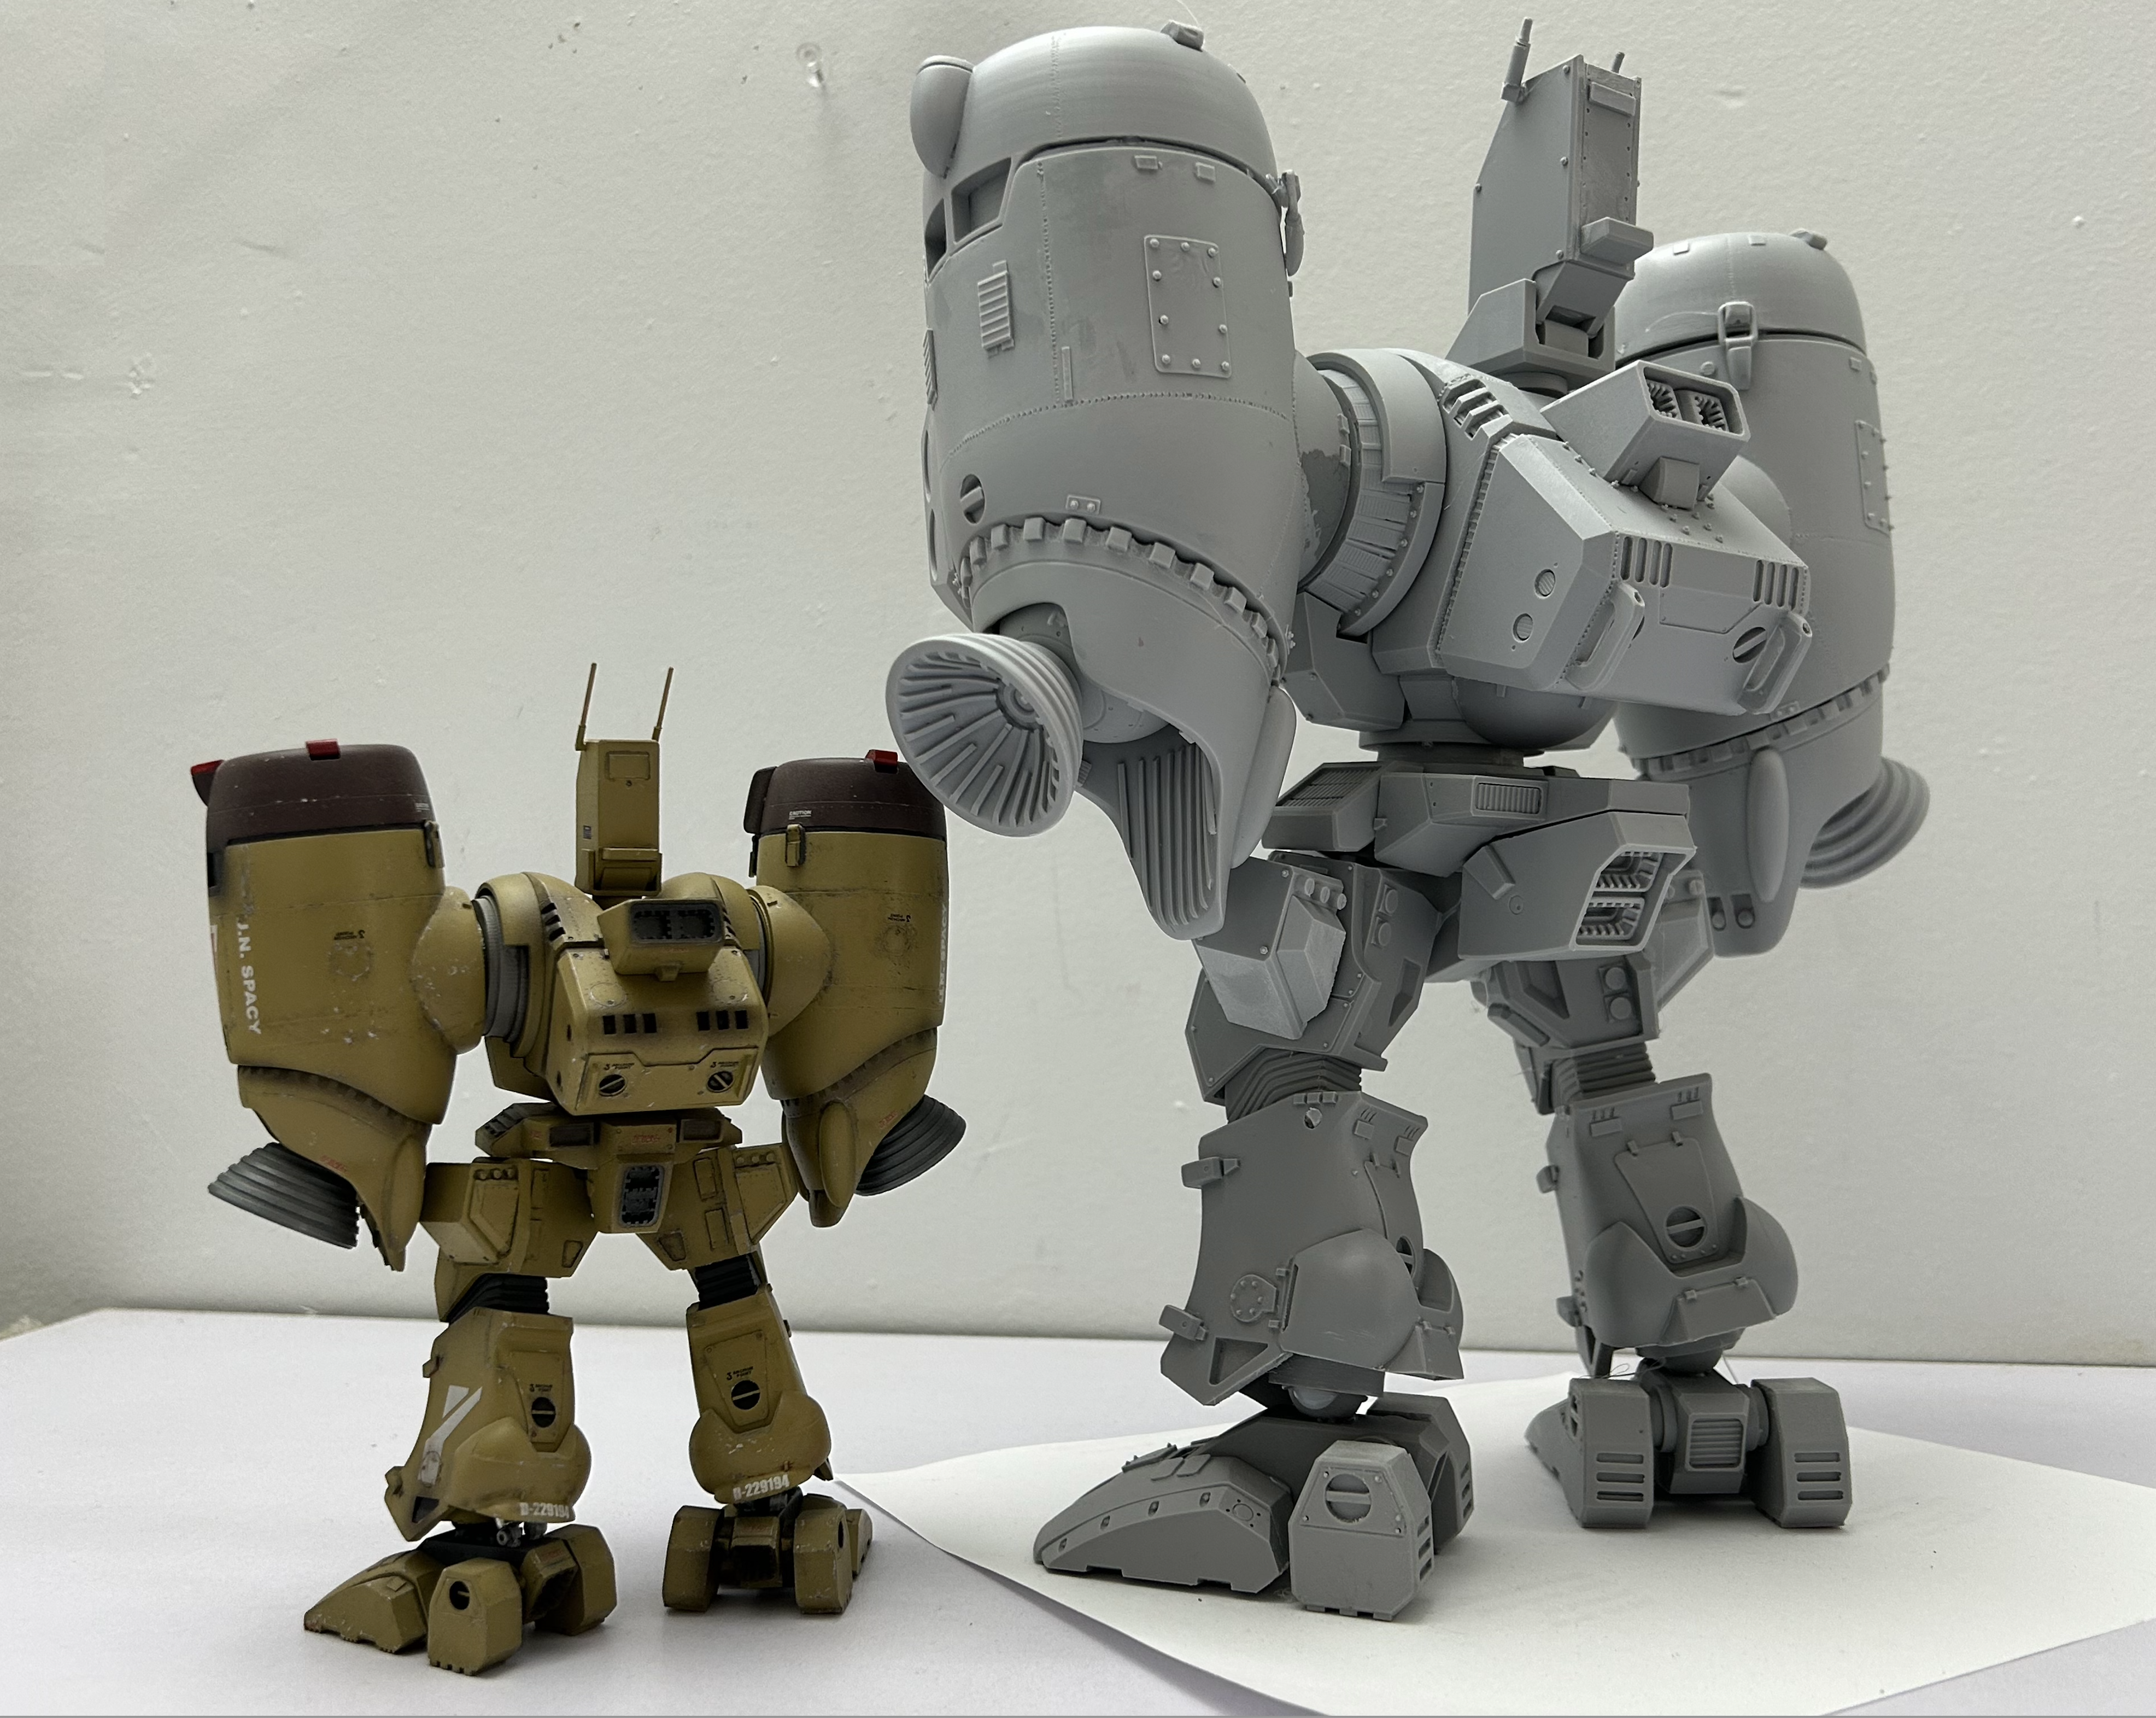
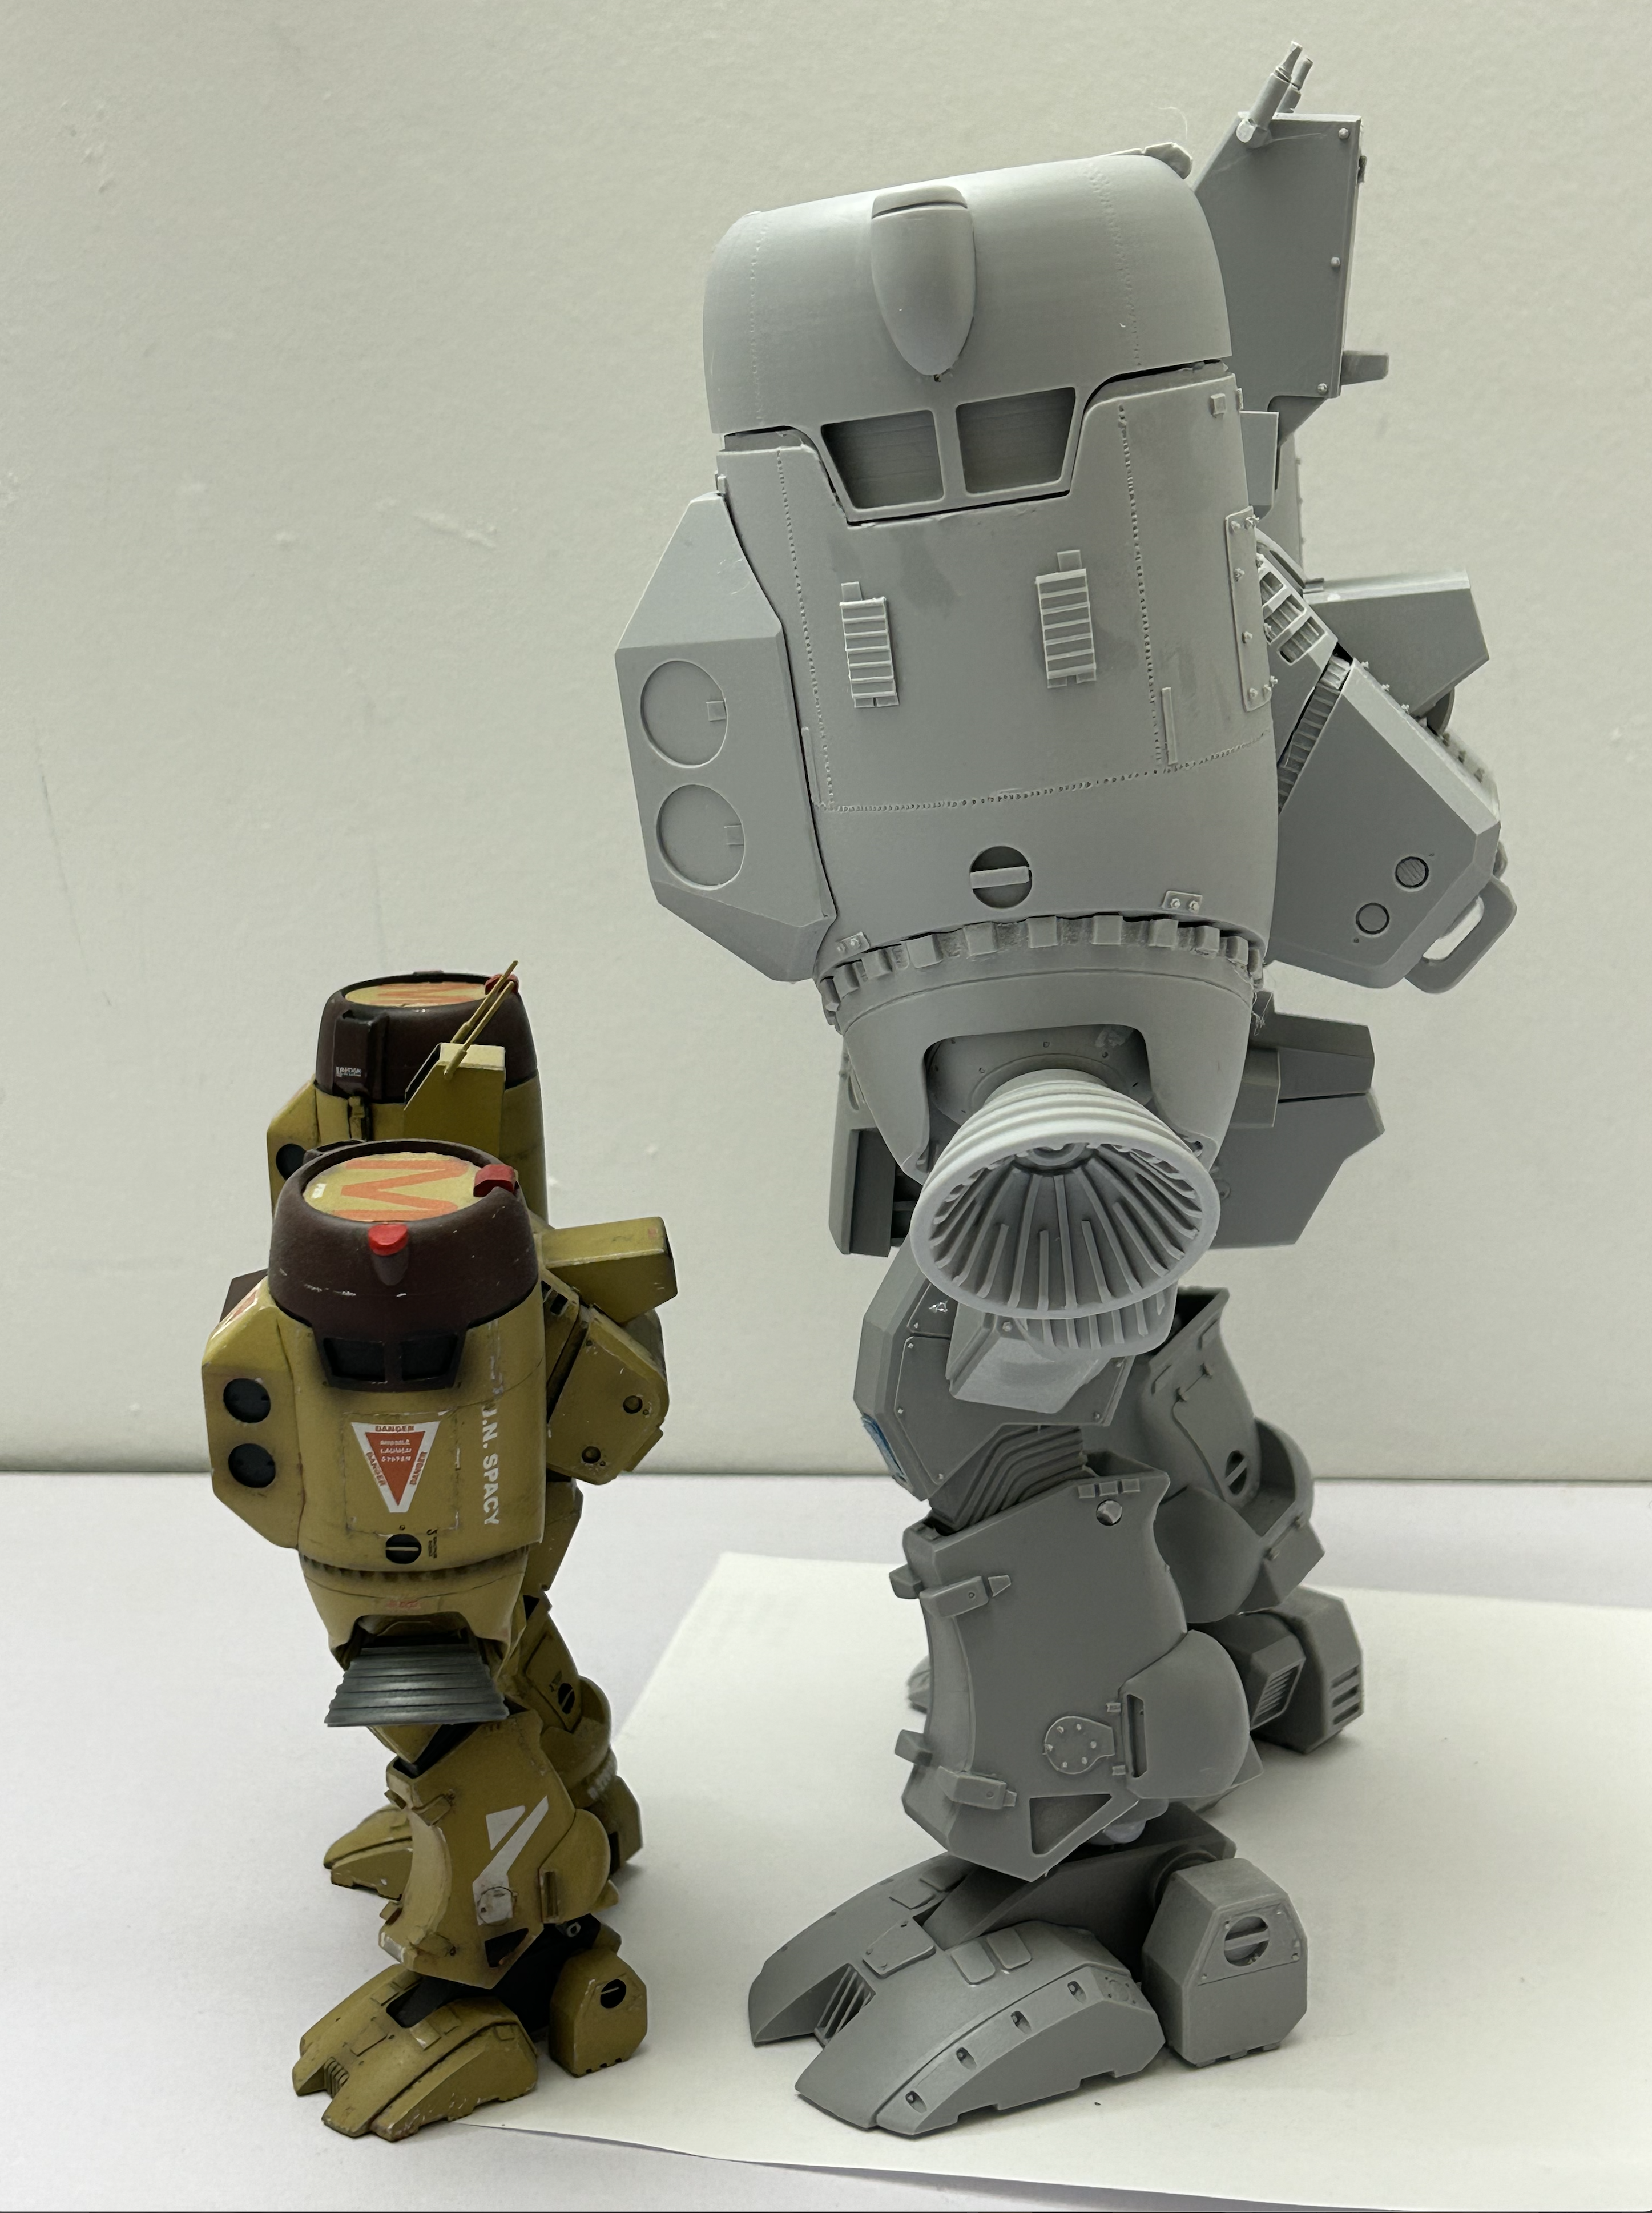
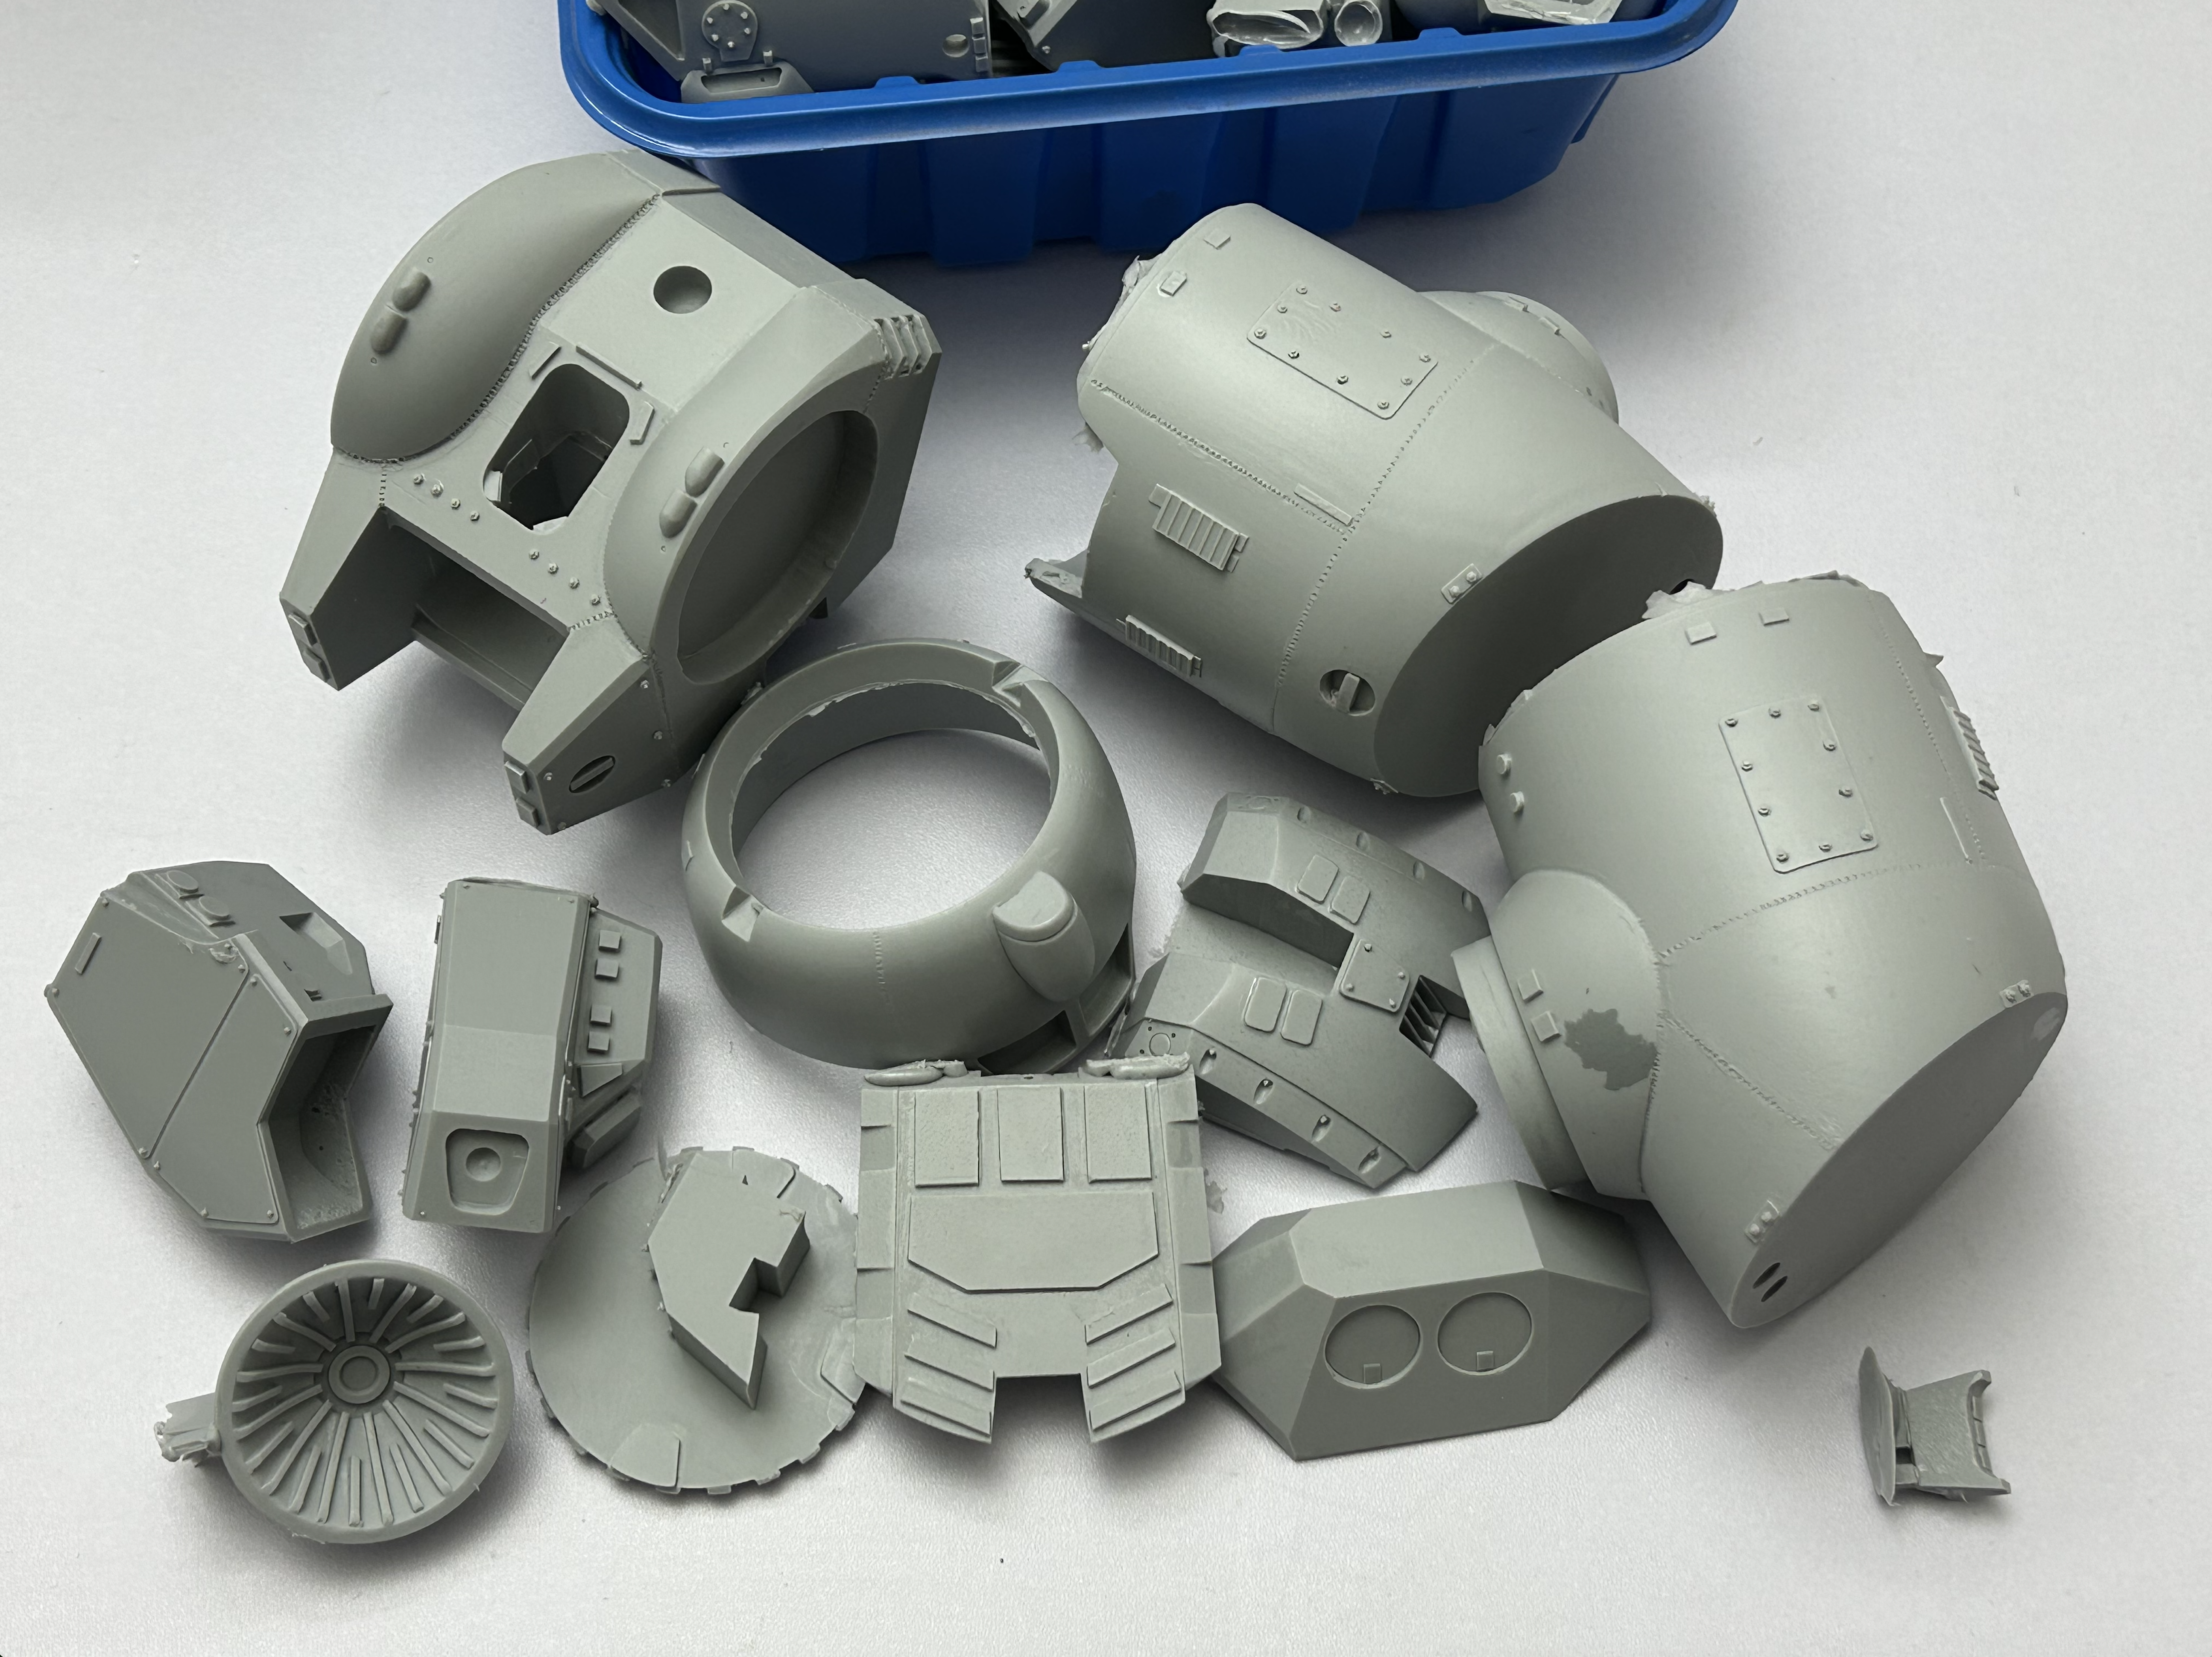
Captain's Log: Thursday, May 15th, 2025 Because this model project has so many large components, it's important that I hollow therse components out as much as possible, and that';s what's happening in pic 49. There are several reasons for this, and not all of them are immediately obvious. 49.HEIC -Firstly, it saves on casting resin, which immediately affects the cost of the kit -It also saves on overall shipping weight, which affects the total cost to the customer -Thirdly, it makes a kit easier to build, since the parts need much less structural reinforcement at the joints -Lastly, it improves kit balance. Because it's a very top-heavy design, all of the lower body component will be cast solid, and the weapons drums and main gull will be hollowed, making it easier to pose and less likely to topple-over. In pics 50 and 51, we see the first appearance of polyester putty to manage the complex curvatures and shapes around the shoulder protrusions. I always add extra putty, then when it starts to harden, I can trim-away some of the excess with a knife, then allow the rest to harden and sand parts to the desired shape. 51.HEIC50.HEIC Pics 52 and 53 show the creation of smaller detail parts: I take smaller pieces of Renshape and carefully cut, shape, and sand them before adding them to the kit surface. 53.HEIC52.HEIC This follows in pics 54 and 55, only with styrene. In reality, I will use many different materials to achieve the desired result. This particular component is the shoulder joint, which was neglected by the line-art, and most of the commercial offerings. I thought this would be an ideal component to “greeblify”. It provides just enough realistic, mechanical detail while still fitting-in with the overall aesthetic. 55.HEIC54.HEIC Pics 56 and 57 show the back-end of the huge missile containers, which went through the whole line of operations: the band saw, the mill, drill-press, the Dremel and then hand-shaping. It was a component I was worried about due to its complex shaping, and yet I was able to make it symmetrical and didn't even need to use any putty! 57.HEIC56.HEIC Pics 58-62 show all the progress I have so far. It's hard to convey just how massive this model is with the camera; it really dwarfs the Thomas Hawk in terms of shelf-presence! At this point, most of the major components have been fleshed-out, so next week's update will consist of small, but important refinements. Stay tuned! 62.HEIC61.HEIC60.HEIC59.HEIC58.HEIC

