

Jasonc
-
Posts
6227 -
Joined
-
Last visited
Content Type
Profiles
Forums
Events
Gallery
Posts posted by Jasonc
-
-
5 minutes ago, Halfstep said:
How are the hip joints? Loosey goosey?
The one I opened seems solid, and I don't plan on opening up the second, so I am happy for now. If it gets loose, I have ways of permanently fixing it.
-
Got my two today. Love the matte finish.
-
19 hours ago, Anasazi37 said:
I'm currently printing the finalized set of parts. First will be the front and rear canopy sections in clear (multiple copies, in case I run into an issue with air bubbles), then the wings in standard grey, then everything else in standard grey. Will post pictures when done.
Can't wait to see it. I just printed two for orders, and I'm really happy with the outcome. Definitely not a beginner's kit, but seeing it put together is joy for me.
-
I wanna print this on the Elegoo Jupiter once it comes in. Nice and LARGE!!!
-
On 7/20/2022 at 10:29 AM, arbit said:
Nice. Which clear resin are you using?
I was using a mixture of Saraya Tech Blu Clear V2 and their Tenacious brand. I also used a little bit of blue alcohol dye to eliminate any possible yellowing. The clear blu v.2 is extremely tough, while the Tenacious resin adds a bit of flexibility to it. I think my ratio is about 90% blu and 10% tenacious, but even at 80/20, that works well.
On 7/20/2022 at 5:21 PM, Xigfrid said:That’s a great price considering the work and numerous prototypes involved!
I would be interested by the stl but I need to find a painter first
")
I have two tips I would like to share with you:
i didn’t see any display stand option, but I have noticed that it can save a lot of place by displaying the toys mid air on a flight stand. The most practical stand I have found is the Gundam / 1:12 figure display stands which have a plastic pin. They sell for 2-3$ each on aliexpress and can be found in any Gundam stores. And it is easy to design the hole or drill it.
Buy pins! I have bought hundreds of 1mm diameter pins in different lengths: 3mm, 5mm, 6mm, 8mm, 10mm. 12mm. And never regretted it. Each time I am running short of one size I can’t imagine myself to cut the pins, sand them smooth etc. So I just buy them over and over.
I didn't put a hole in the body because of the ability to build it where parts can be interchangeable. I don't have any of those stands, so I would need to have the correct size of the hole to make for the display stands.
-
On 7/20/2022 at 11:13 AM, jvmacross said:
I think at one point it seemed like Macross poster collecting was dead or dying...good to see collectors still interested in Macross posters....
Well that was great for us during that slow time. It was easier getting a lot of the posters I couldn't find. I think my collecting of them has slowed quite a bit, since I haven't really had any other posters that grab me. Although, looking on this thread, it does sometimes draw me to get one I don't have here and there.
-
3 hours ago, Anasazi37 said:
And for what it's worth, I can attest to the high quality of @Jasonc's work. I volunteered to do some test prints of his original files and provide feedback to improve the final version. Design, fit, and finish of the parts, even at that early stage, were exceptional. I basically just had to figure out how I wanted to orient and support them for printing, which is both an art and a science. @Jasonc, if there isn't already a plan to do so, offering STL files with the supports in place as an option, based on what you've determined works well with your printer, could save folks a bunch of time and guesswork. That way all they have to do is slice and print.

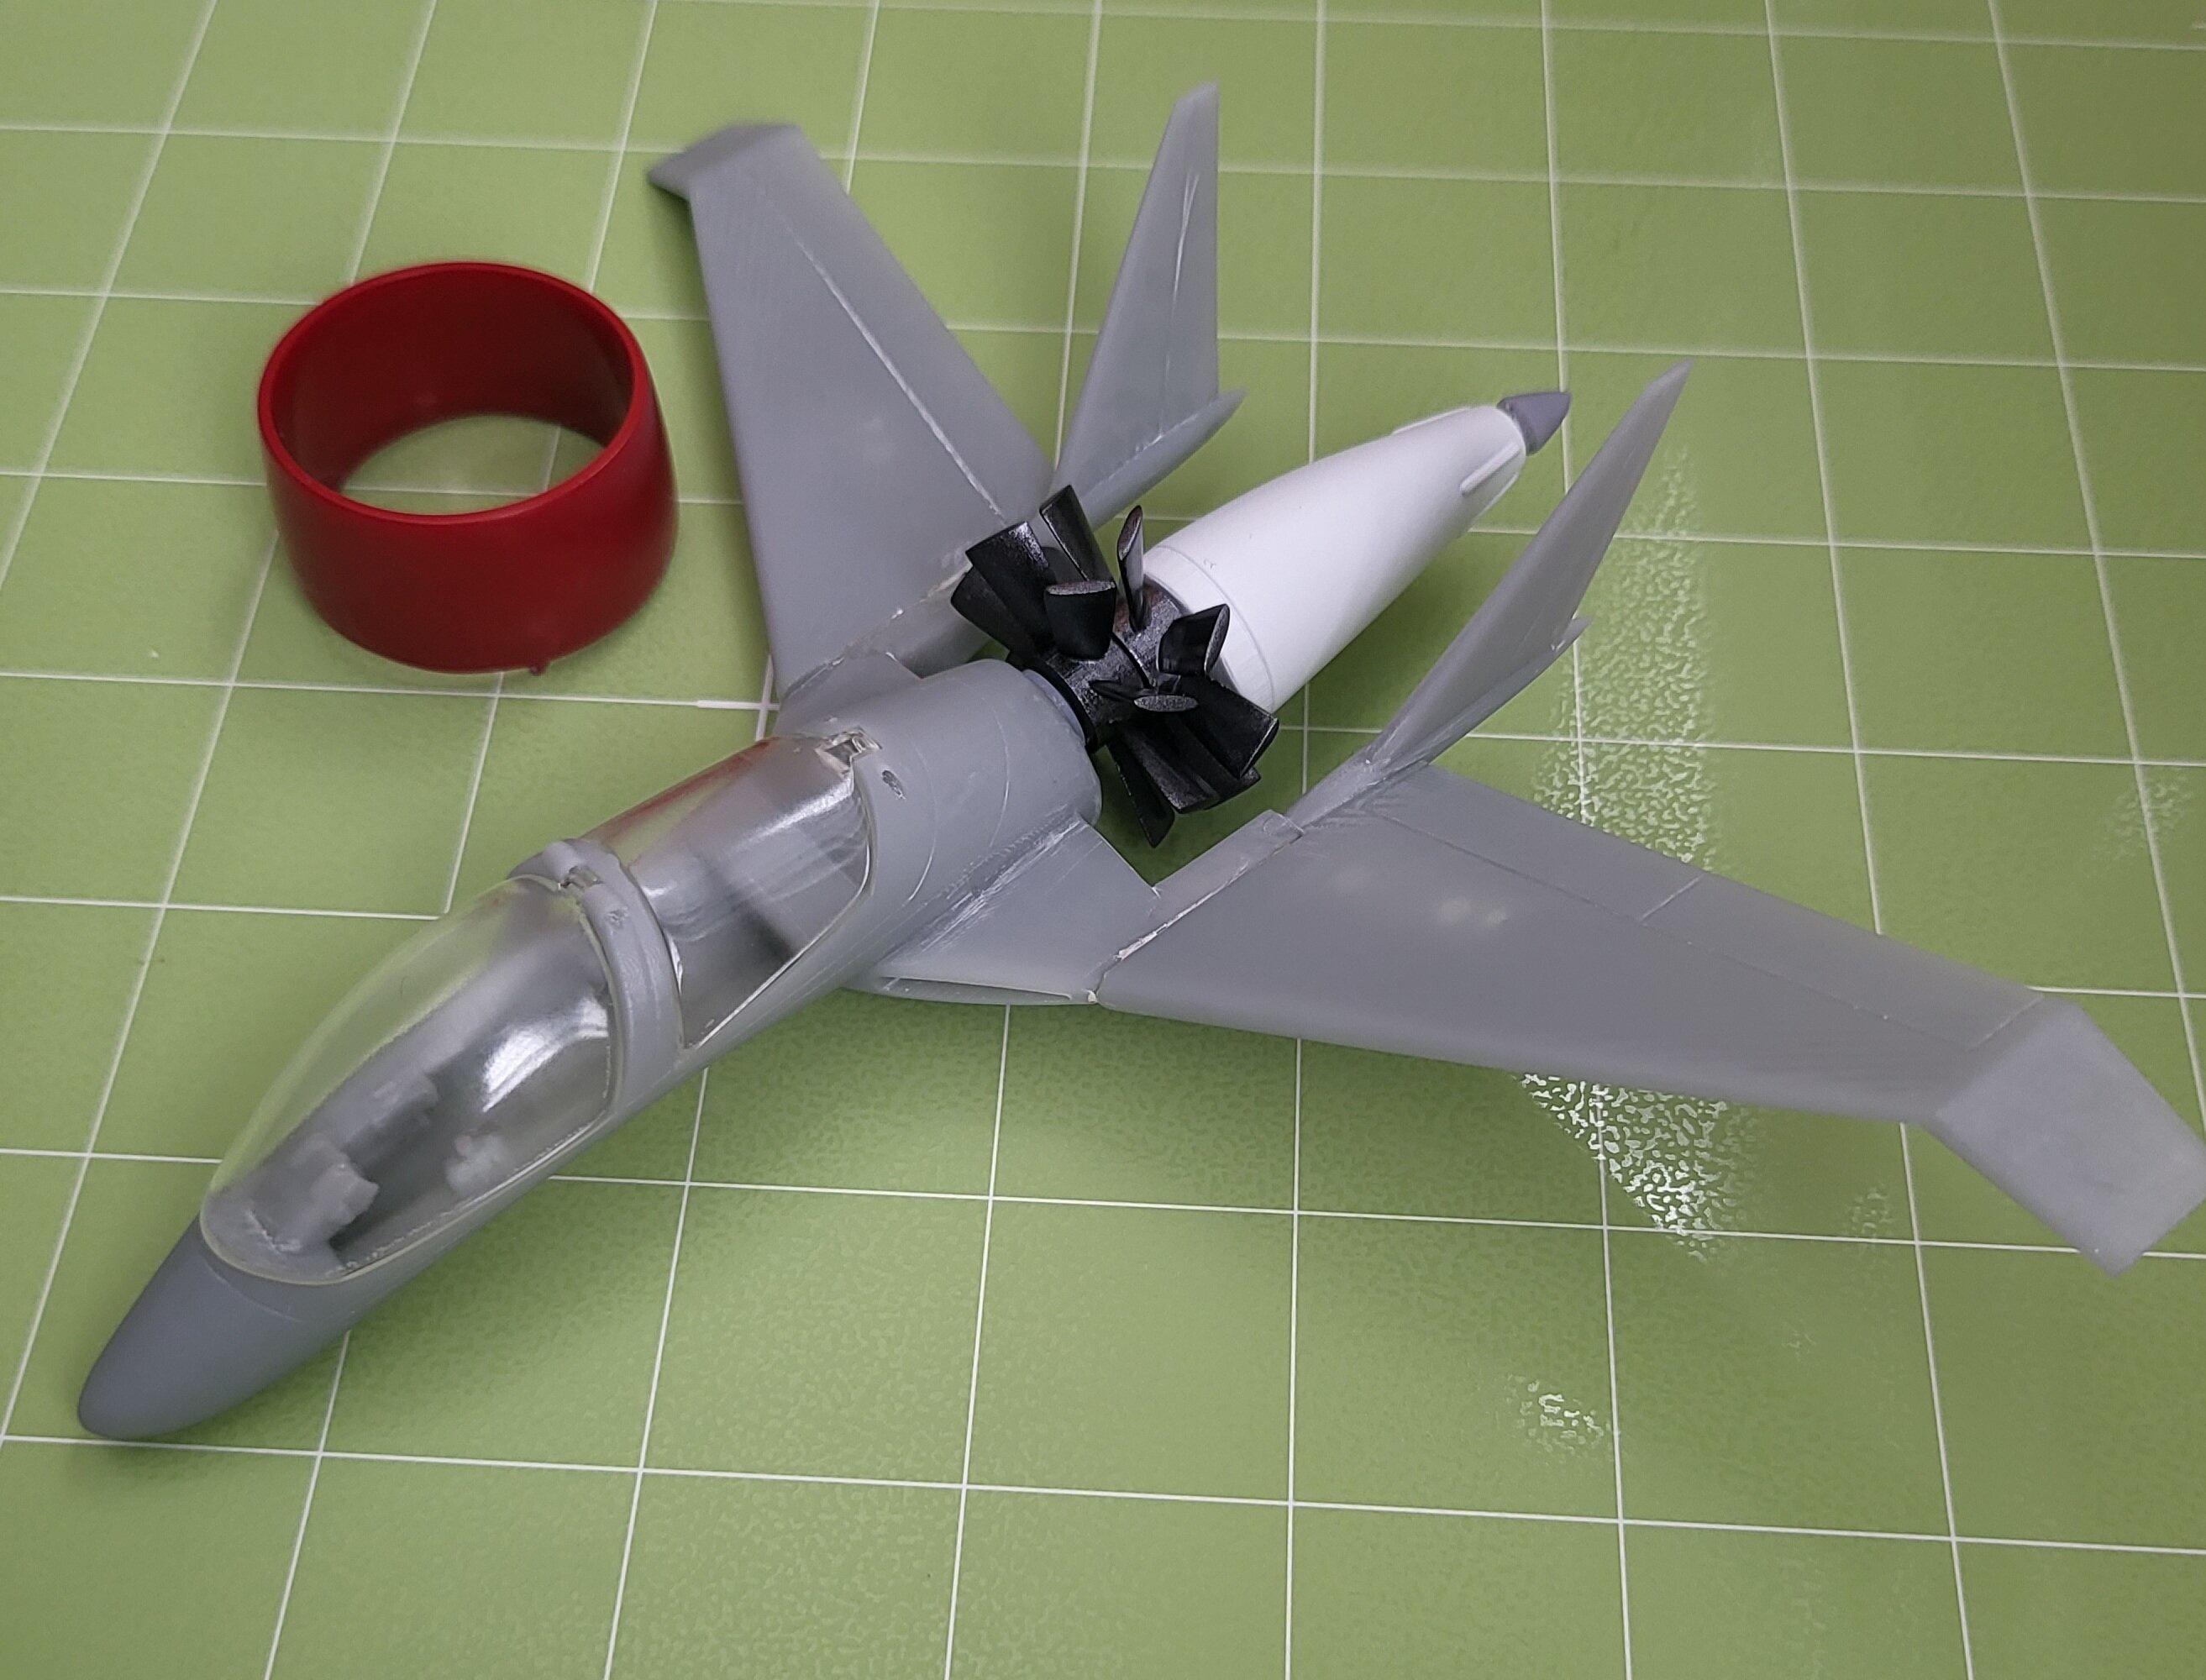
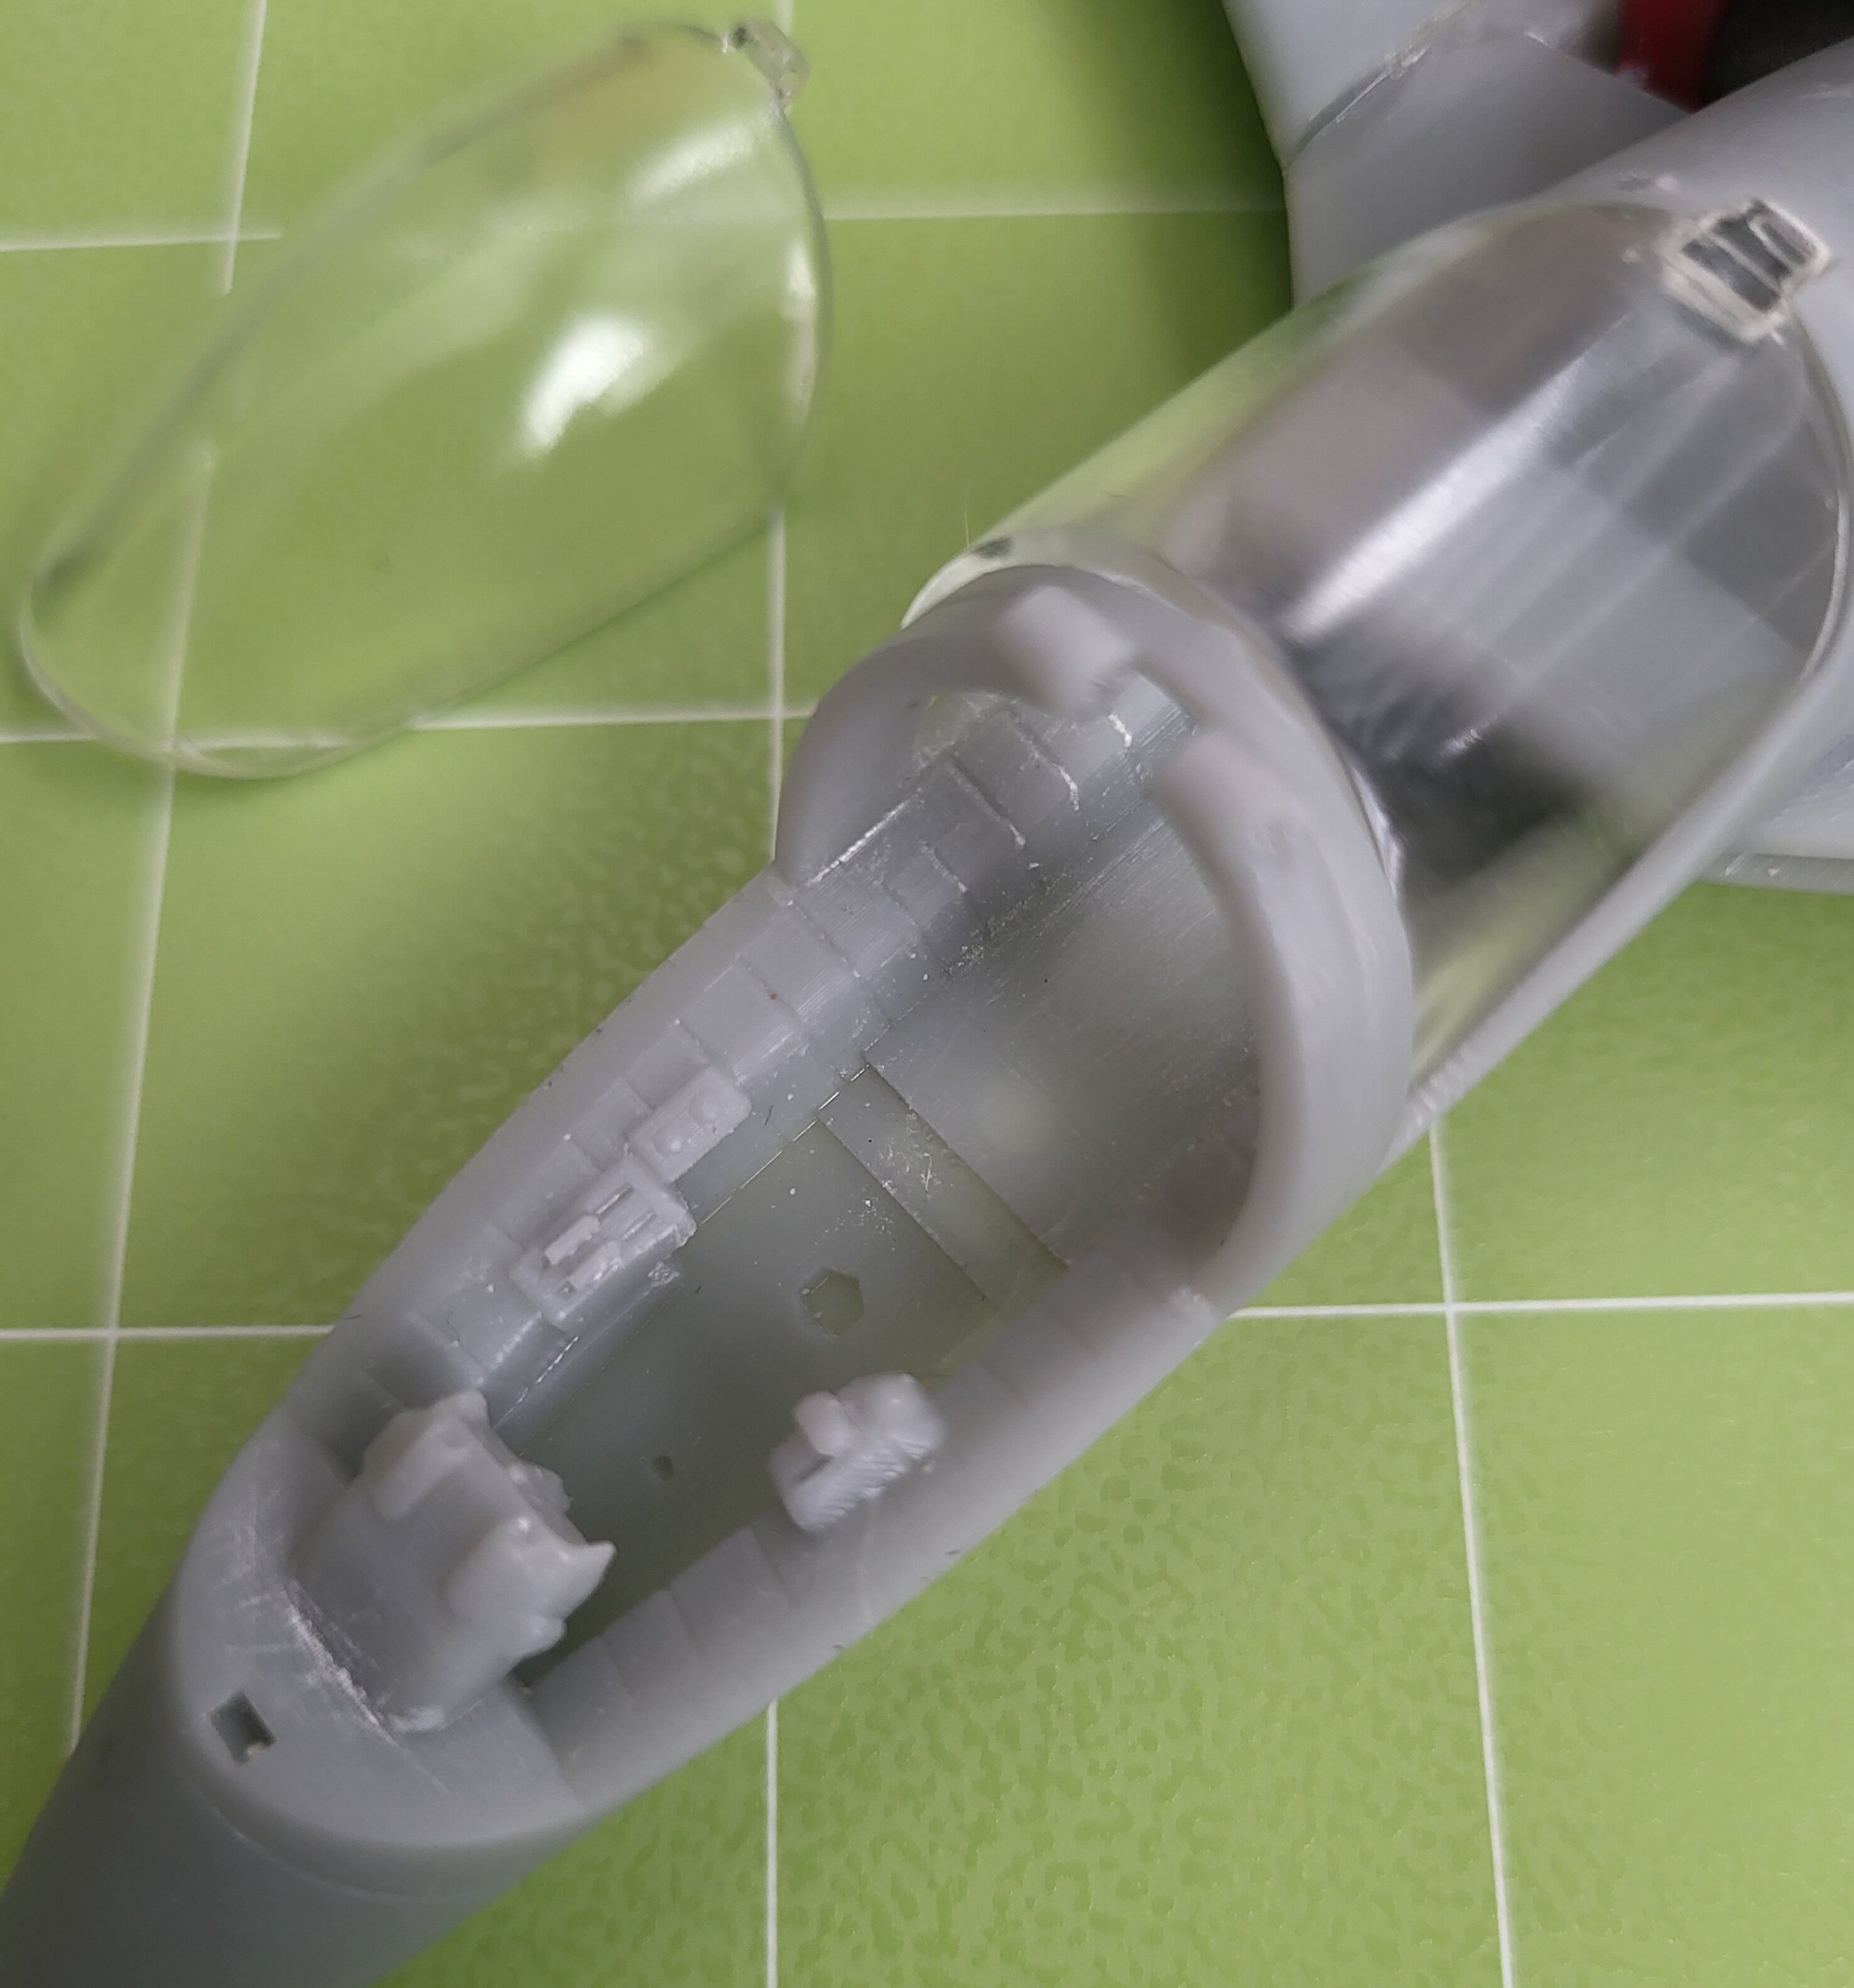
Now for a little eye candy. Using the standard progressive wet sanding approach for canopies, and after a dip in Future at the end, this is what the front canopy section part looks like for me:
I can post pics of the other parts, if anyone is interested, but they're basically standard grey versions of what's already been shared in this thread.
Wow, that canopy is very clear. I should send you the updated body and canopy. I've updated it quite a bit so that the rear canopy opens much easier, and I kept the "roll bar" on the main body attached. I also adjusted the size of the rear section that attaches to the main body. I'll send it all over to you.
As for doing the supports for people, I don't want to do that only because based on what resin people use, it may not be feasible to use the supports I do. I also try to keep my supports medium, but keep .35mm (in general) tips and them 5mm long. That works for my printer, but it may not for older resin printers.
-
I need to do a video documenting my posters like that, but I first need about 3 or 4 more of those B2 poster galleries.
-
I can't wait to get my kit of this. It looks great.
-
That is one great looking Wonder Fest figure. I really want to look for that.
-
OK, with some time on my hands, I did my final testing (canopy alignment, and the ability for it to open and close) and it is successful. With that, the files are now available for purchase. Fee for the .stl file is $26 including Paypal fee, $25 with Friends/Family. If anyone wants one printed because they do not have a printer, I can print it, but due to the fact that it does take time from other projects, and there are at times print failures for various reasons, I can print it the set for $75 personal payment or $80 with Paypal fees shipped (in the continental U.S.). I will also include pins (which will need to be cut to proper size), so all you have to do is do the cleanup, paint, etc. Just message me if you're interested. I'm happy that all this finally worked out. I can't tell you how much work I put into making this work properly.
-
On 7/13/2022 at 8:44 PM, Bolt said:
Great job , mate ! Really love the design.
Thanks. It's still a work in progress. I have the bulk of it done now, and parts seem to fit the way I want them to. It looks like I should be putting the file up for sale very soon.
-
On 7/3/2022 at 6:45 AM, Xigfrid said:
Very nice! How did you do the canopies? We’re they printed?
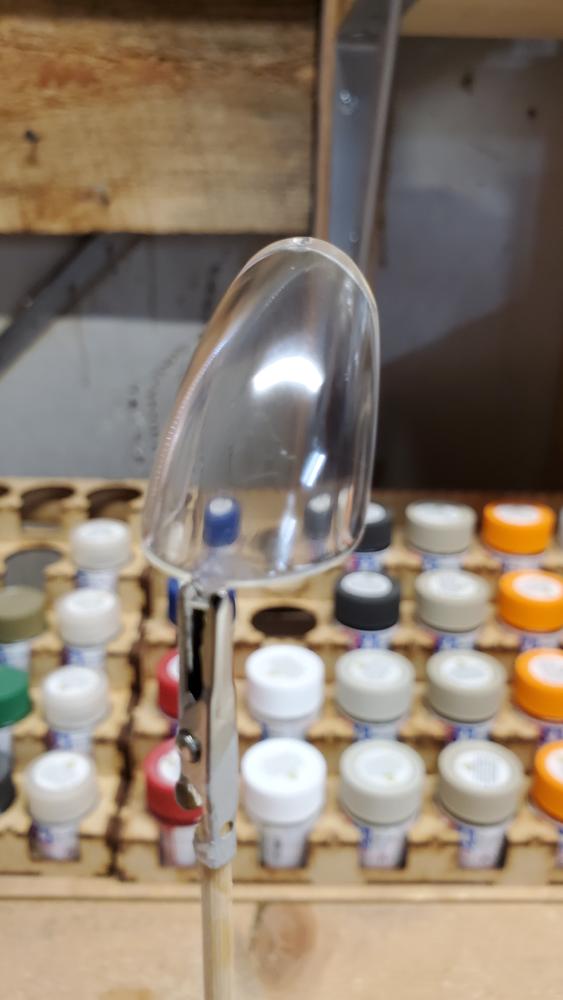
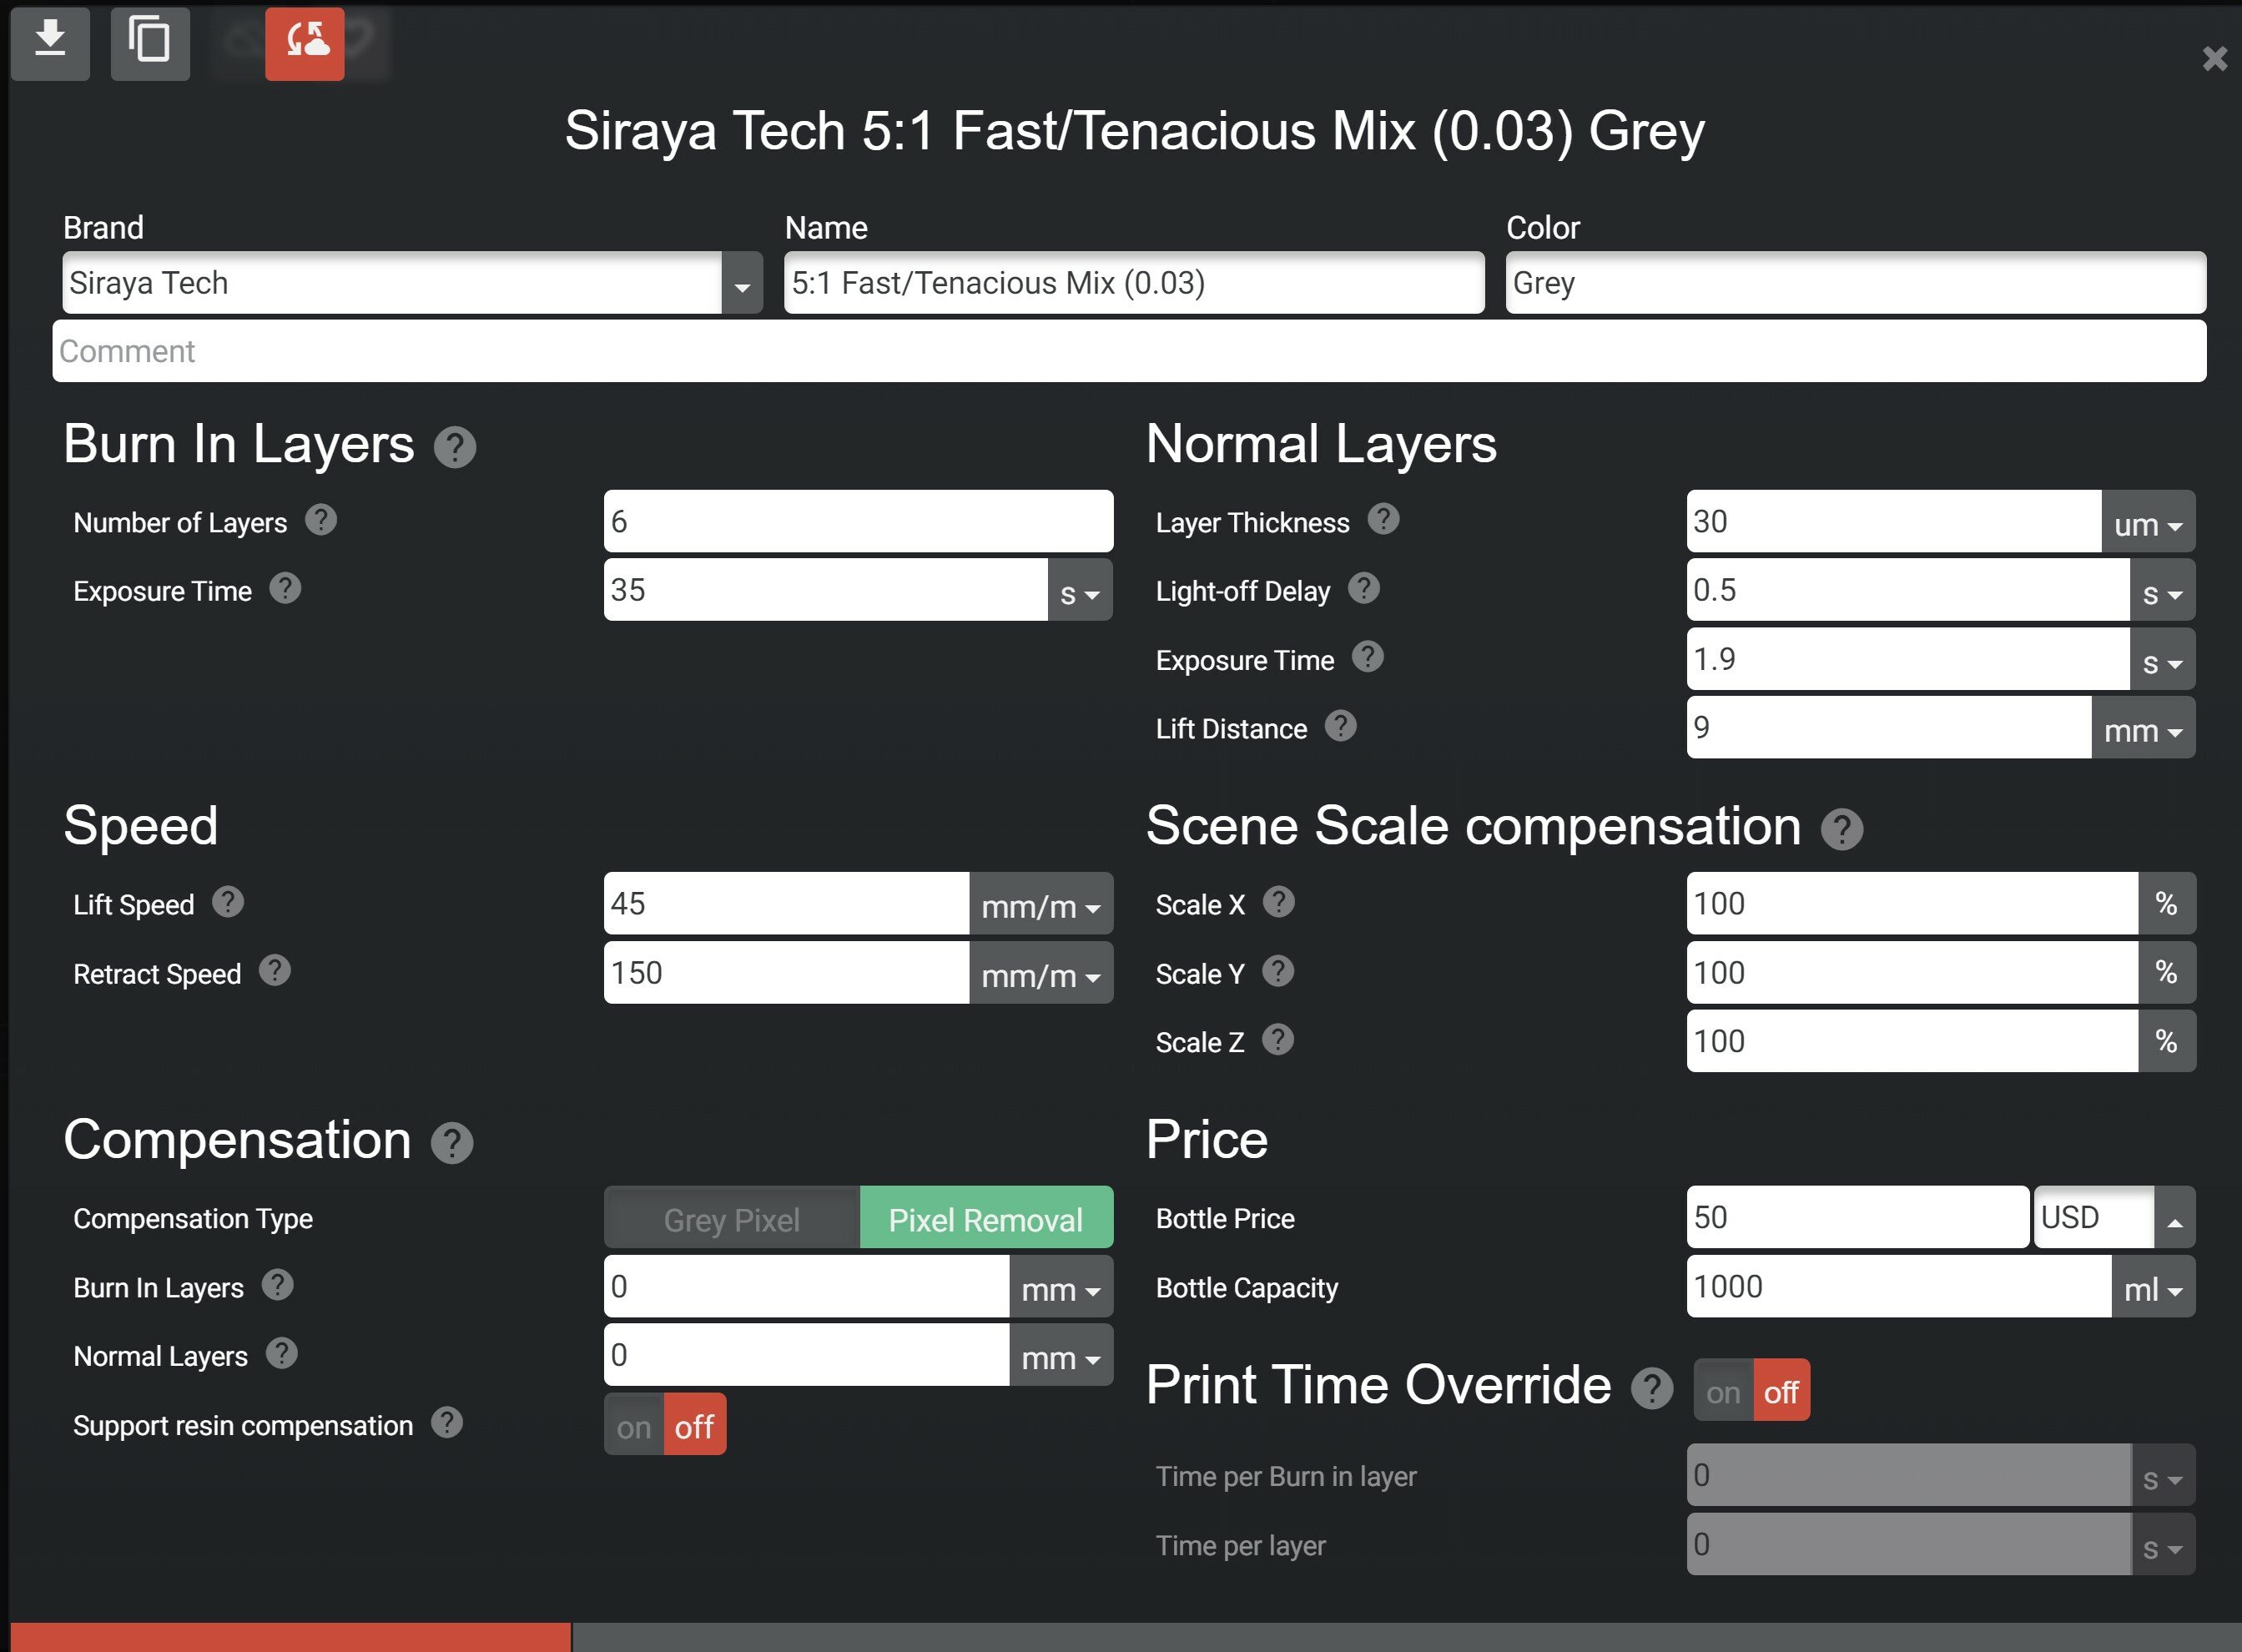
Yes, canopies were printed. I still need to polish them more, but they are coming out pretty clear. here's a few images of my settings for printing them.
-
It looks great so far. Although it's not the feet I look at first, it looks promising.
-
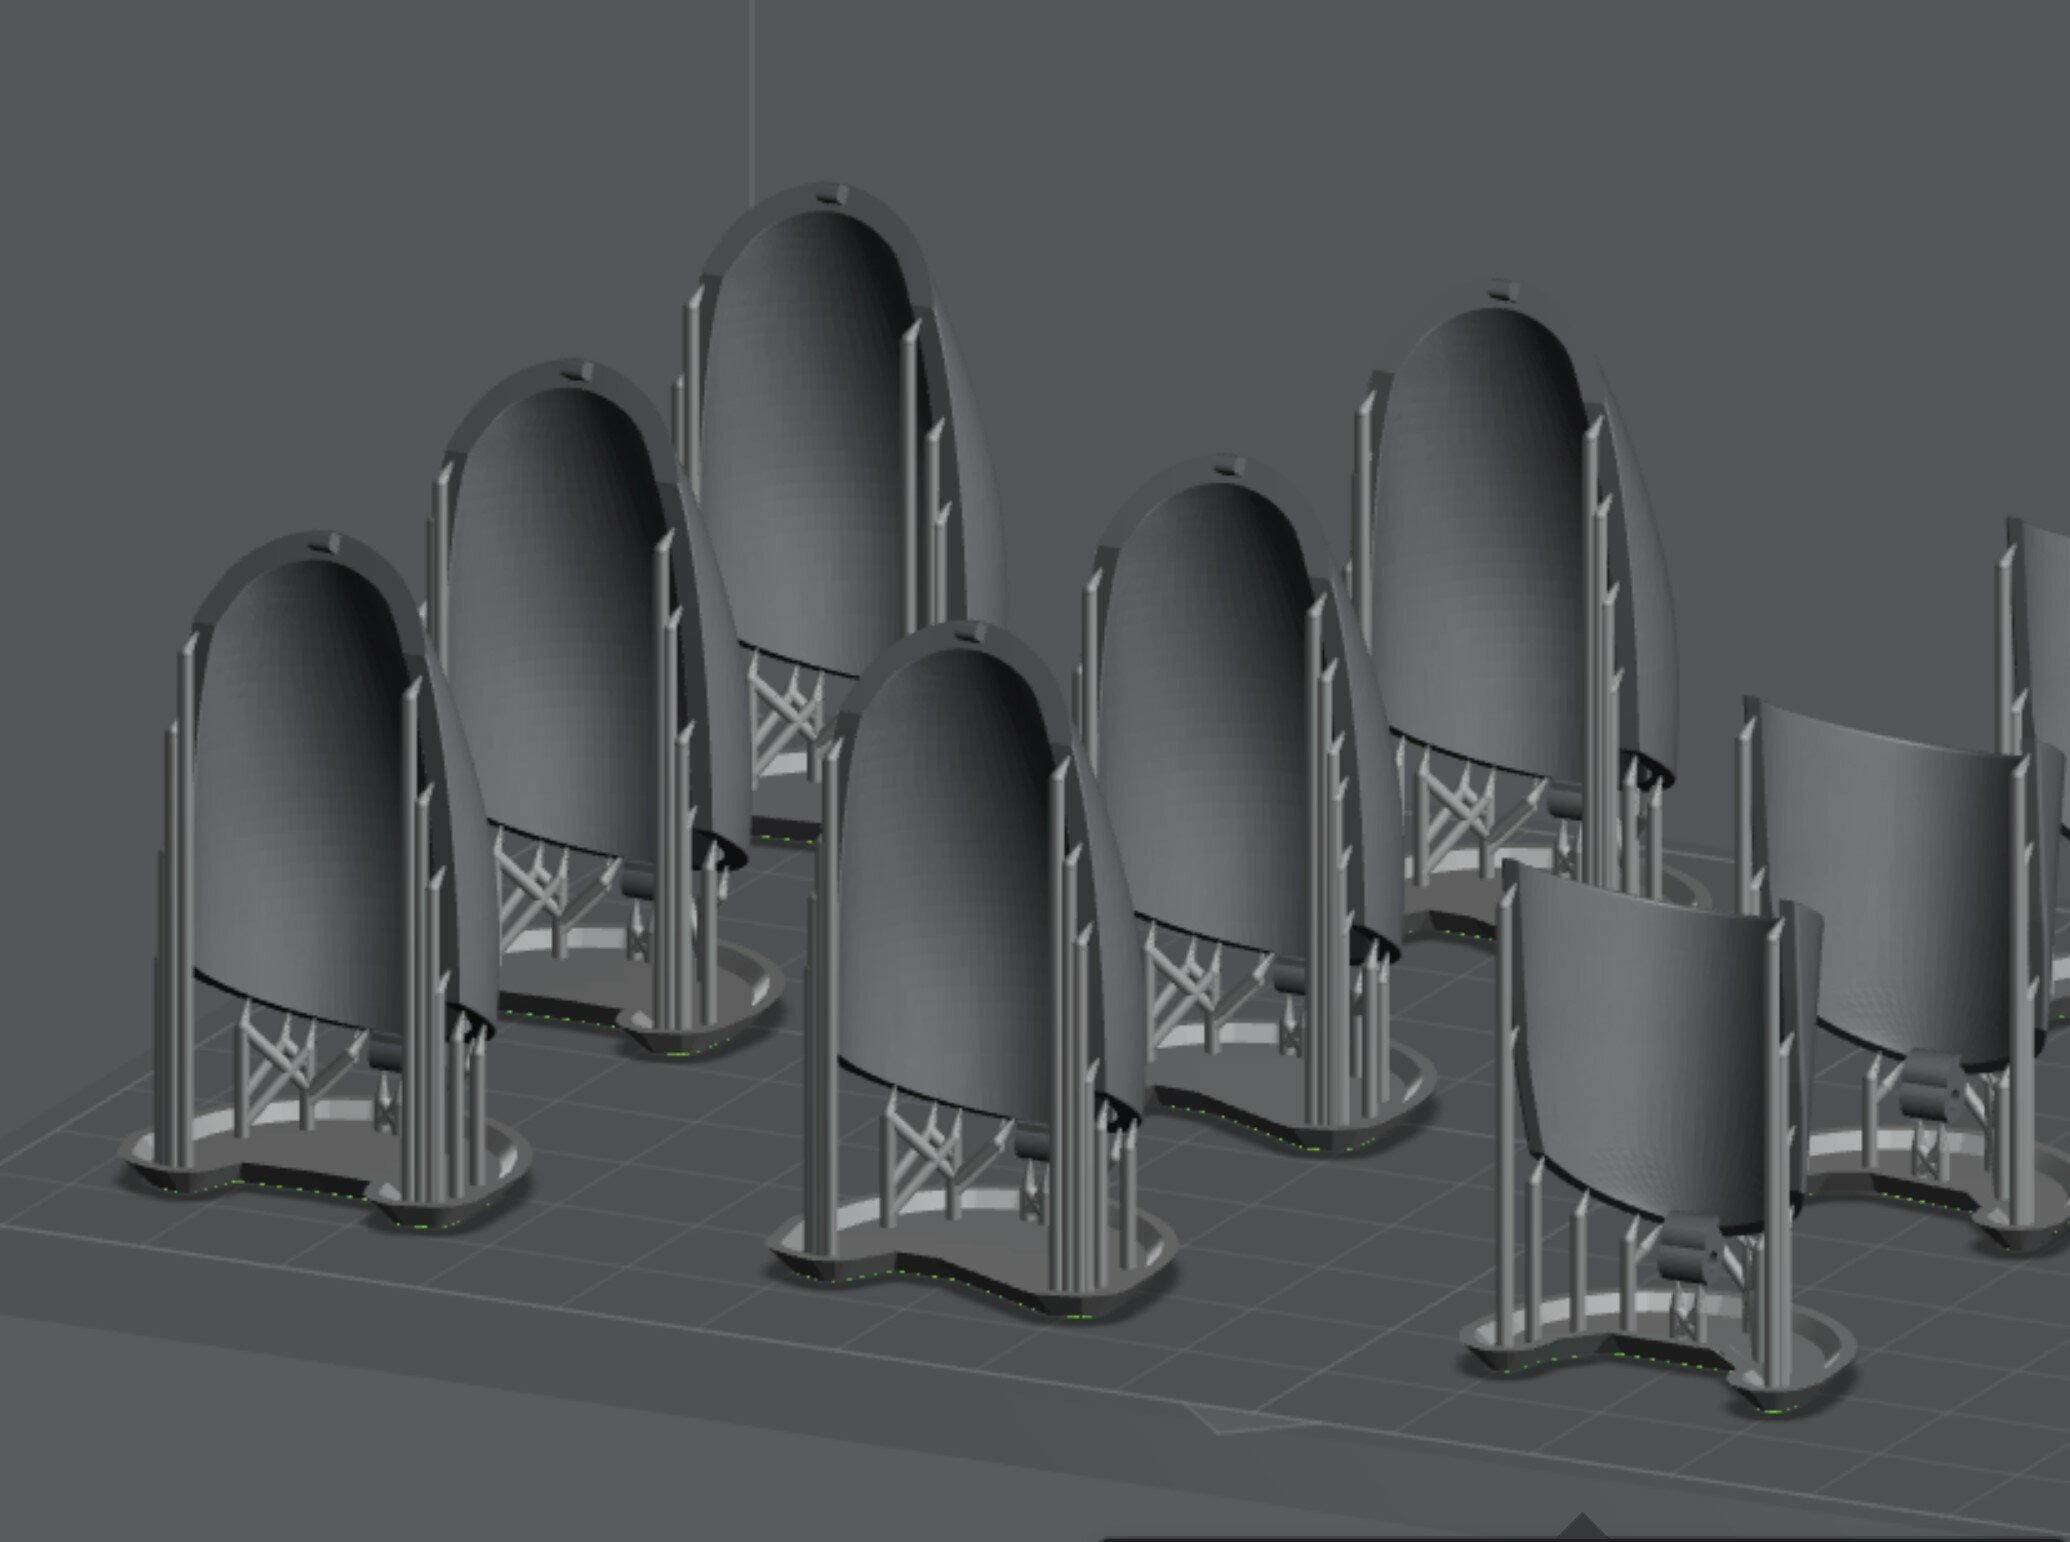
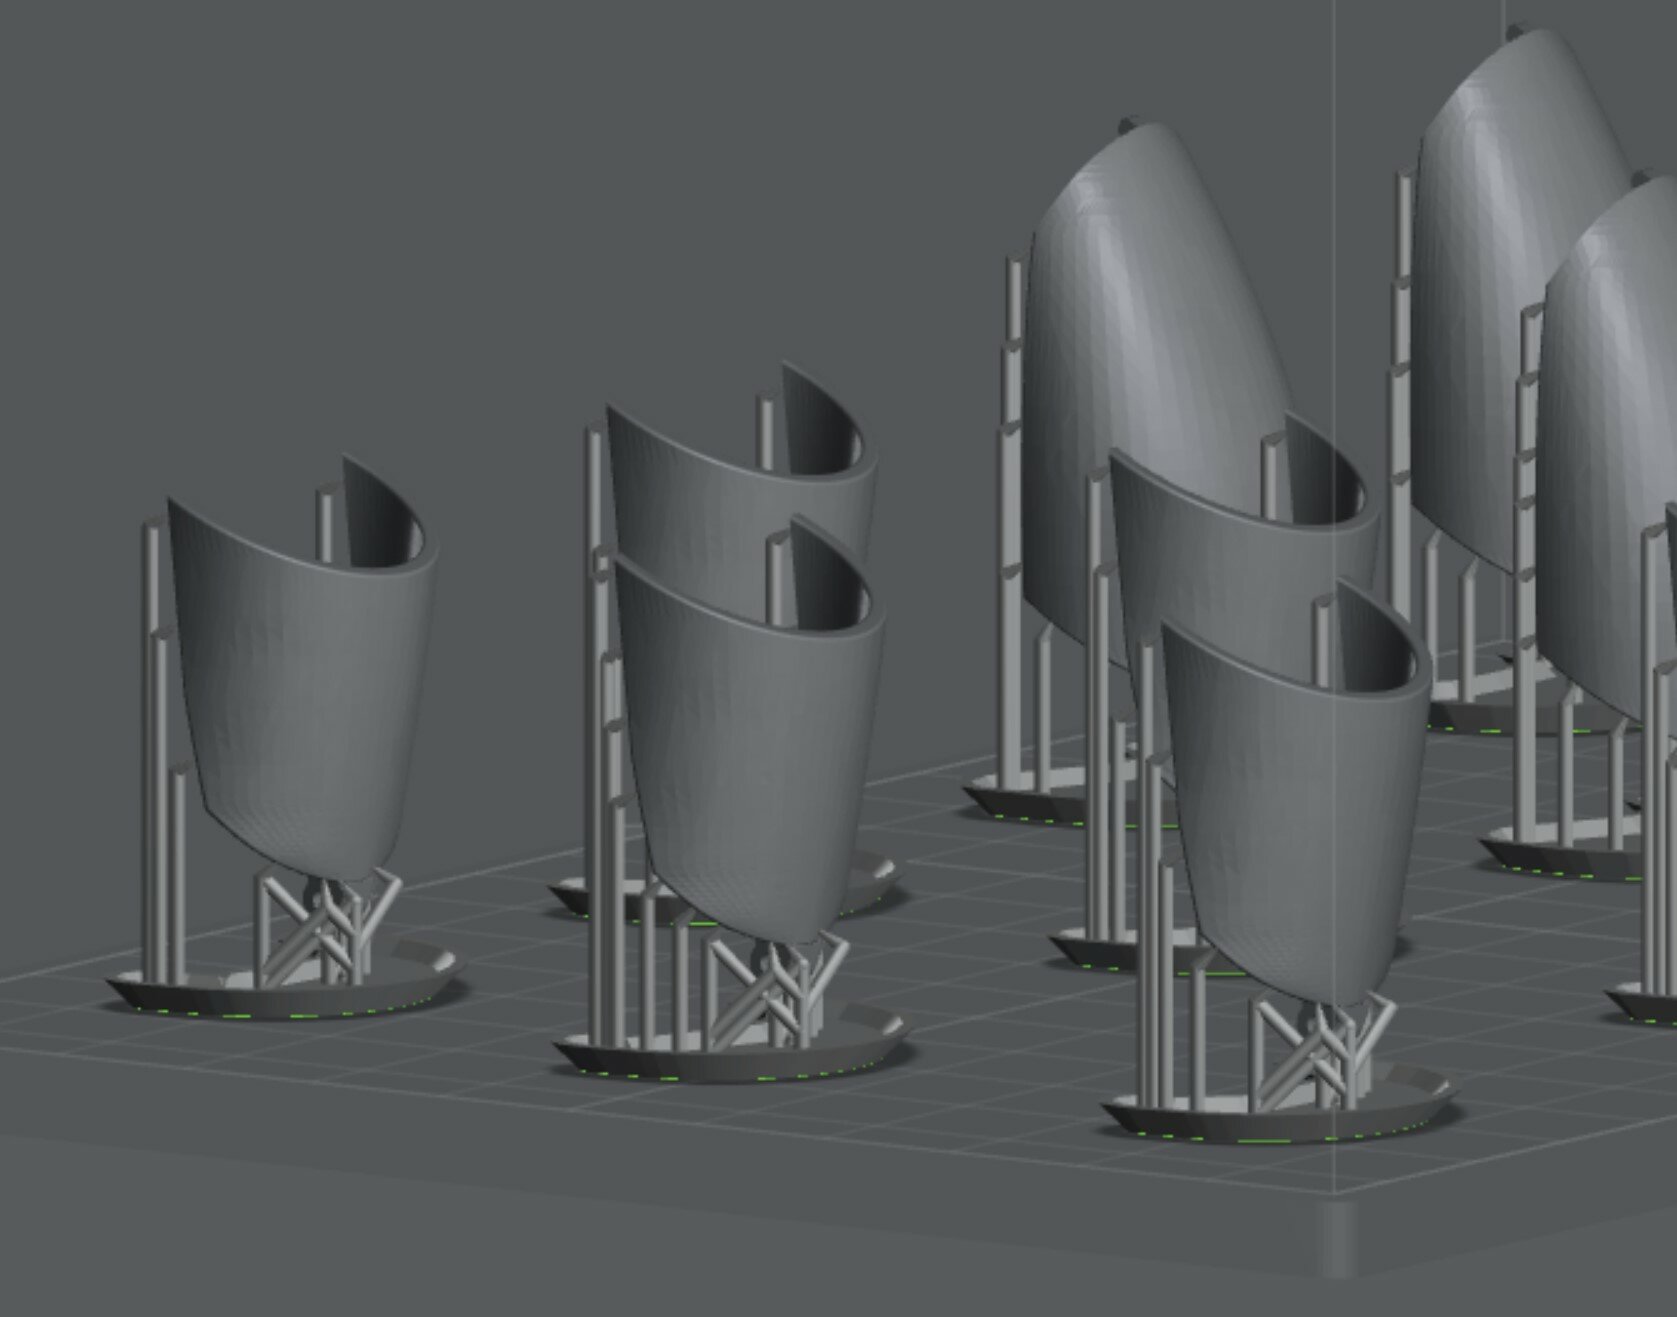
Here's a couple pics of parts printed after a good number of tweaks.


Today I'll be adding the magnets to the landing gear sections
-
I should be seeing the Nora SV-51 in about 2 days. I am looking forward to it.
-
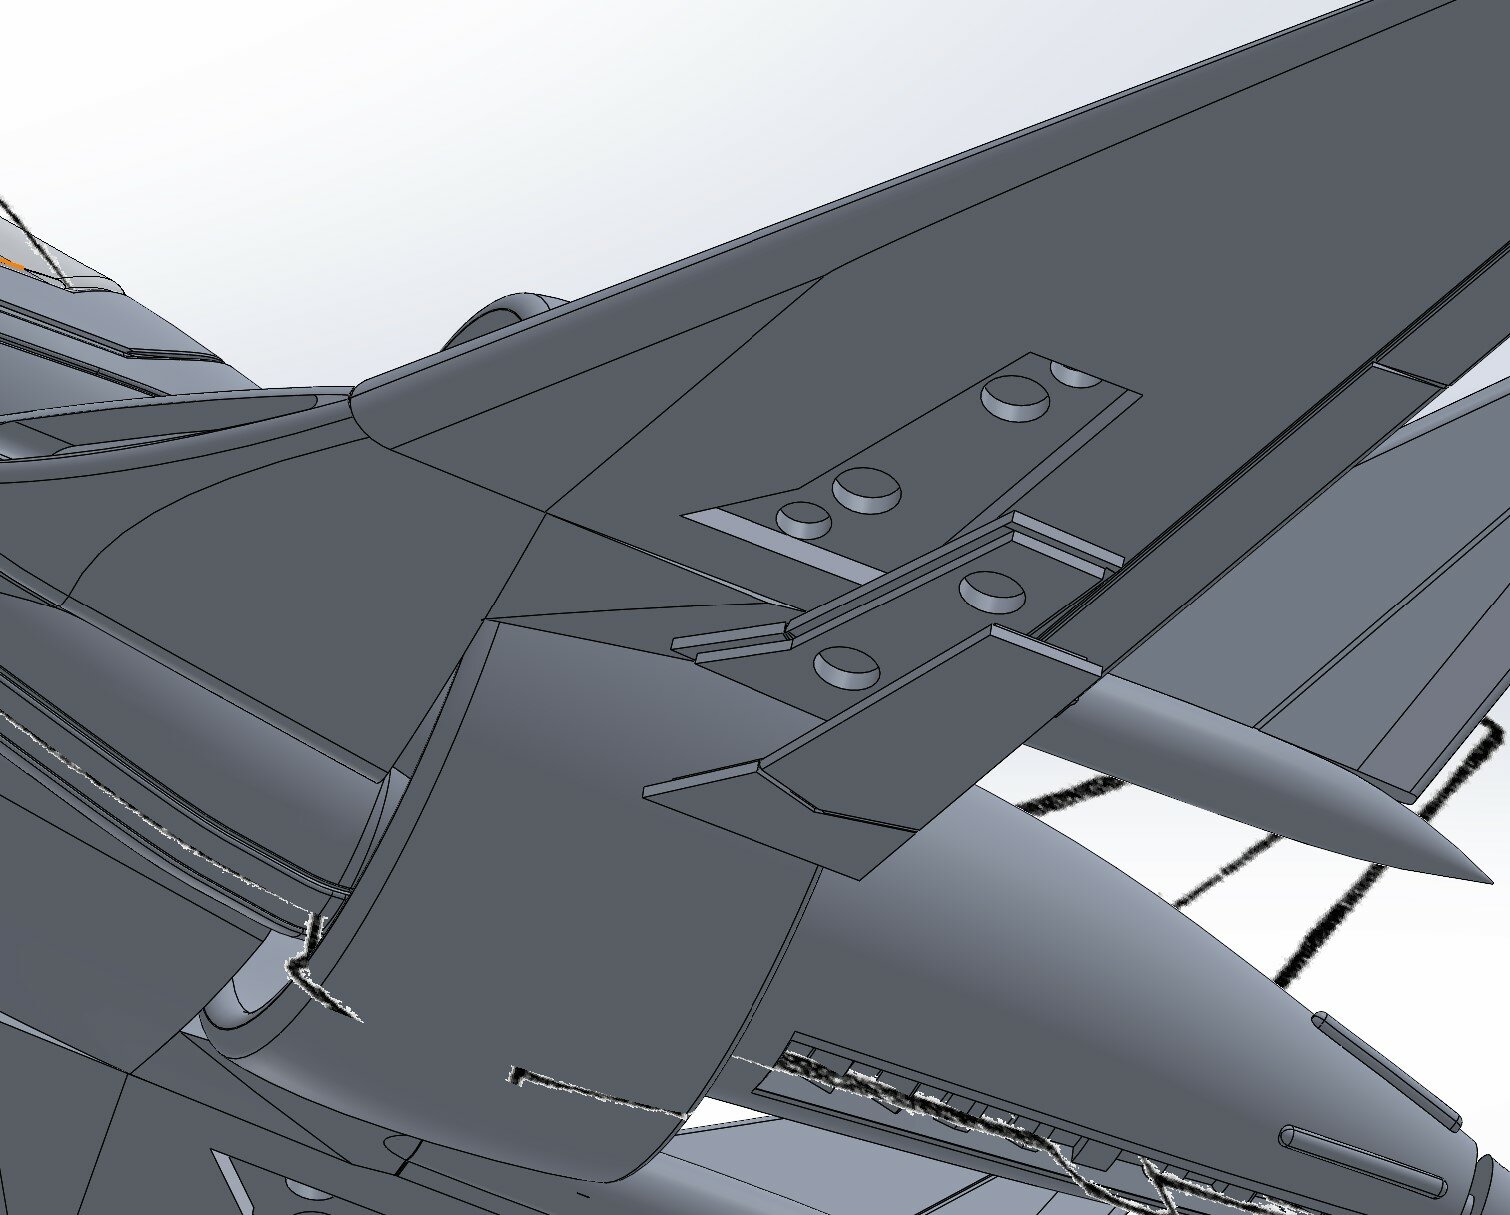
I've been redesigning the canopies (now on my 4th run I believe). The angle of the bar that separates the 2 is a bit tricky, and I don't want to put the pin in an unsightly place. That said, I just printed, new set of the main body and canopies, and it seems to work quite well. I could redo the back canopy and really design it to where it's guaranteed to work, but TBH, if this works, I'm just sticking to what I have already. I also changed the wings and they look much better. I managed to slice this file to where each piece prints out with very little work needed for cleanup, so I am happy with that. I keep saying it to people, but pics coming soon of the actual print.
-
On 5/29/2022 at 9:53 AM, wmkjr said:
Did you get a flexible build plate for your printer? For FDM printers, it's less of a hassle than scraping the model off. Might have to print a bracket for the Z end stop though for the change in thickness.
I bought a flex plate that is waiting for the Elegoo Jupiter to show up. Luckily, the latest prints have bee just fine, so they haven't been too much trouble.
12 hours ago, Chronocidal said:It might seem silly, but a lot of the prints I've gotten to come out well have been positioned with end blocks and bases that I manually added in, almost as if I was designing pour stubs for a resin mold. They help stabilize the model, and can do a lot to preserve hard edges when you need them.
I will have to try this out. Luckily, the prints have been coming out OK. Once I started looking at these as a recast mold, it helped me to custom the supports, and they've been doing pretty well. the main issue, is that some of these parts are a little thin. Not too thin, where they won't work, but if so, I can always do some redesign and fix the issues.
-
On 4/5/2022 at 2:35 AM, arbit said:
I like your enthusiasm, but unfortunately no, it's not on my to do list yet.
Did you see my video with the other Sharon figures?
Those came out quite well. Excellent job on them.
-
I finally got my first printer, which is an Anycubic Photon Mono X (4K "ish"). I just now got it set up, and will be doing a test run of settings to get the best print with various support settings. The first run already came out, but I wasn't happy with how I set up the parts for print (kinda just starting out). I do have some pieces that I can cure and save for building, so that is always a good thing. I hope to have parts ready to go for my first dry fitting.
-
10 hours ago, Podtastic said:
Do you mean ALL of it or just the UN Spacy?
ALLLLLLLLLLL!!!
-
I should also add that image that Yamato was teasing years ago...
-
On 5/10/2022 at 6:22 AM, spacemanoeuvres said:
I have been picking up the yamato's here and there but PO'd an arcadia as well.
With some of the fixes incoming for this toy, I'm very excited to get a new one. I hope Arcadia is hinting at making the Phalanx, since it does share the bulk of the bottom half with the other 2 releases, and would require minimal design because of that. Also, I remember seeing some hints that it was in design already, so if Arcadia got those, then it wouldn't be too much work to get it done. I'd love to see a 1/60 Spartan, as well as the Cheyenne, but TBH, Xigfrid's Cheyenne design was really good. JUST MAKE ALL OF IT, ARCADIA!!! (I know, it's not realistic)
-
4 hours ago, Knight26 said:
Looks sweet, can't wait to see it printed.
Thanks. Since I've been at home recovering from a car accident, I had some time to wrap it up late last night. At this point, I won't know what tweaks it needs until I start printing, and with a good 3D printer en route, it's just a waiting game at this point.
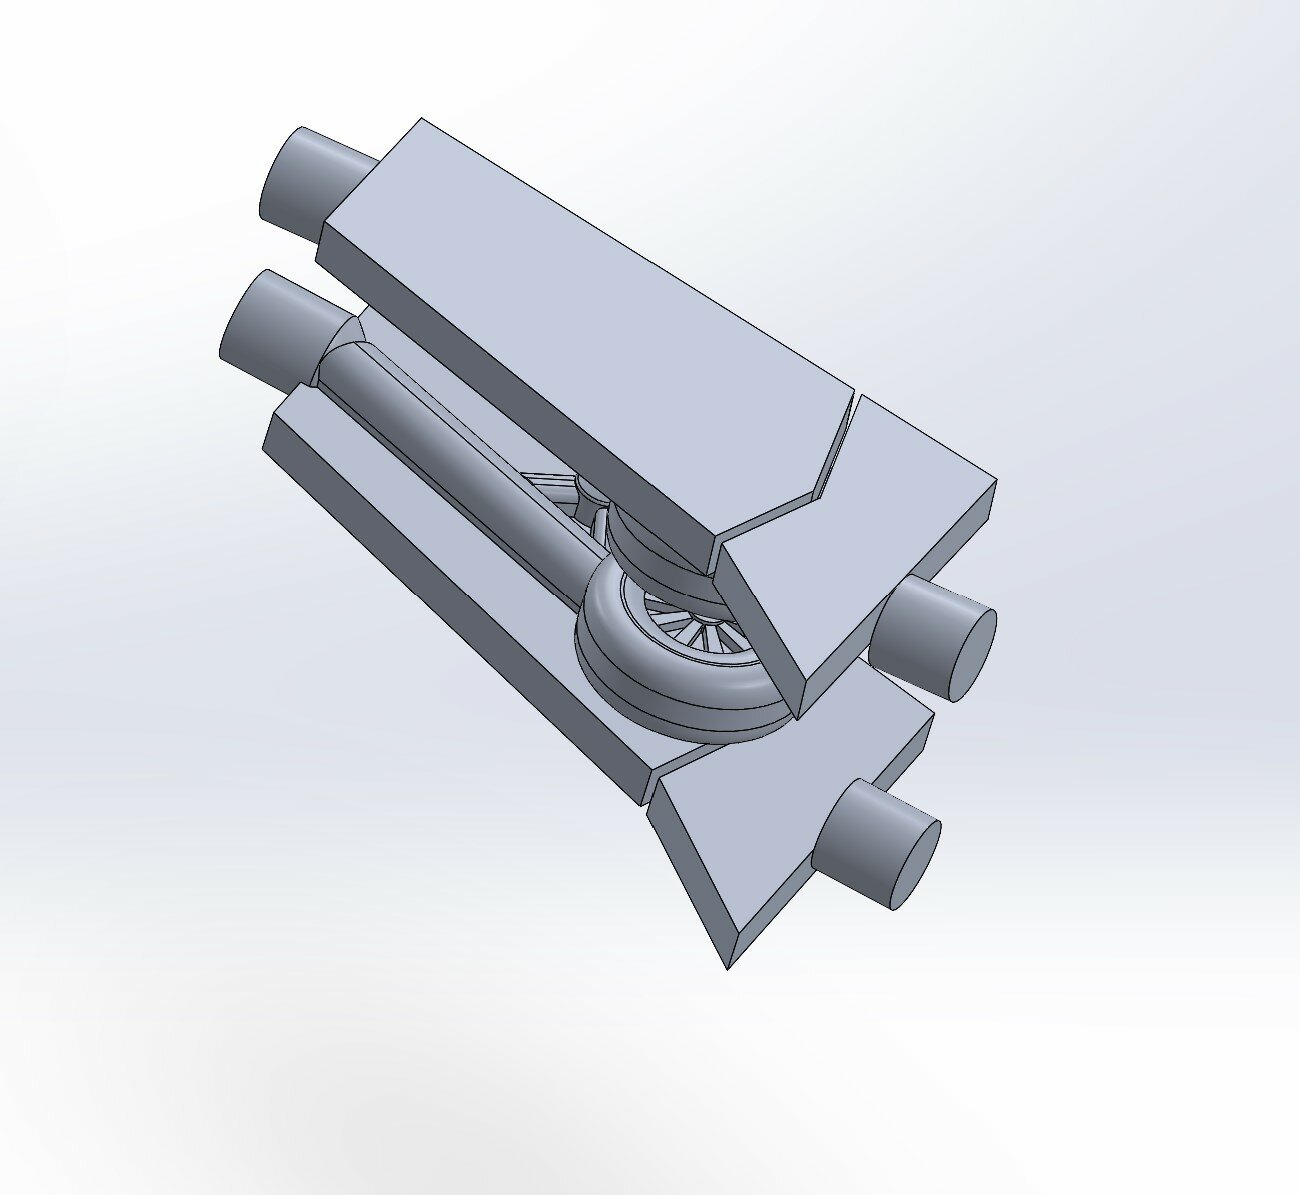
So, the detail of the rear landing gear are done. These will work the same as the front landing gear options, as there just isn't a lot of room at 1/60 to make functioning landing gear with this material. Nevertheless, they should fit quite well, and HOPEFULLY, the pins in the gear parts will work well for the grounded option. I'm tempted to upload the files and pay to get it printed, but that's just my anticipation more than anything. I may start on the F203 Dragon II.
SENOVIS 1/4000 & 1/8000 SDF-2 "MEGAROAD-01"
in The Workshop!
Posted
I do include the blue alcohol dye because I also add 10-20% Saraya Tech Tenacious. It has a clear but slightly yellow tint, which doesn't affect the blu clear v.2 too much, but I like being a bit cautious. Tenacious mix adds strength, but also flexibility, which is a property that is needed in some parts like a canopy. Those setting looks quite good. I've noticed that I have had to use a longer exposure time going from the Anycubi Mono X 4K to the Elegoo Saturn 2. I am still waiting on the Elegoo Jupiter, but I may end up biting the bullet and getting Anycubic's Photon M3 Max, which has about a 7K resolution.
What I do like about Anycubic, is that their build plate doesn't use a ball joint to level, but 4 screws, which secures it extremely well, and doesn't require leveling all the time. I know I'm going off topic, but I will probably try these settings on the Saturn 2 to see how the canopies come out on my end using the same resin you are.