Darrtallion
-
Posts
102 -
Joined
-
Last visited
Content Type
Profiles
Forums
Events
Gallery
Everything posted by Darrtallion
-
Nice work there Jason let me know if you want some models to pull apart and play with. I can send the lot I have over so you can check them out.
-
Well I was just commenting how it looks lego like and how that stands out from the rest of the other types of ships. Having detail is great but it didn't seem to match well with the other items previewed so far. Not to mention we do have a bit of knowledge of how aircraft carriers do look. To me it just seemed odd and didn't match up with other works and to be honest I am not privy to the entire project but it was something I was trained to do in the game industry which was to make sure the flow of the animations and models matched each other and did not look out of place. By the way great looking ship you just posted.
-
Have to say it is a nice model and such a lot of hard work put into it. But it looks like the bump mapping really reduced its quality. It looks legoish from the bump mapping making the quality of the model reduced. But really is a lot of fantastic work on the model. Also to comment on the video. I like the animation to the firing it seems to line up really well. But i noticed it doesn't have the particle charge on the cannons like in the original animations. I have to re=assure you that i like all the hard work you have done and everything. I also love all the models you have made and the art work on most of them. Just the SDF seems to be more like a lego after the bump mapping.
-
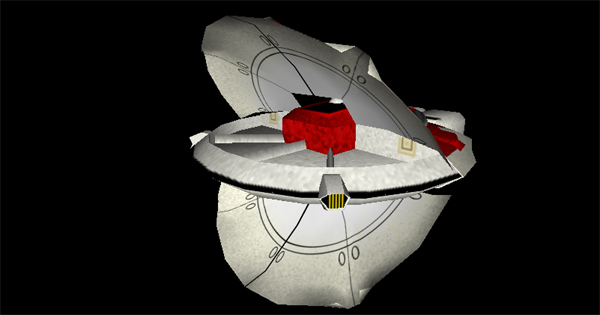
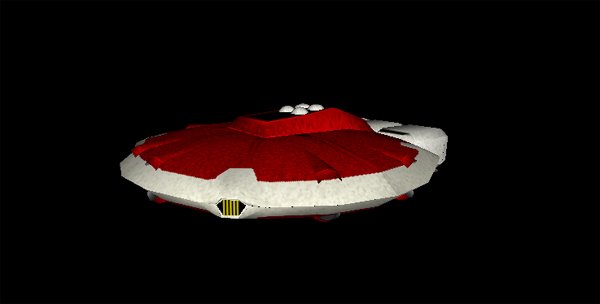
yea I was working with him for a while then a Project leader got overly busy and really slowed down the project maybe even halted it. But AA has finished the Ikazuchi. Or at least the bulk of it. I still have to go through get rid of some collisions. But I really enjoy watching his work get better and better. Yea it seems like AA isn't on much anymore. Which is a really shame or he is like me and doesn't turn on the messenger services anymore. But I don't see him on websites much either. Ohh I guess I should show some of my full complete stuff. Have tons more but just an example of some of the stuff we where working on.

-
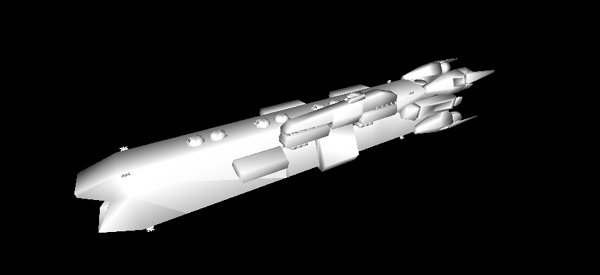
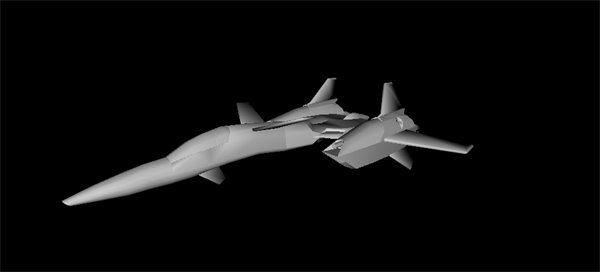
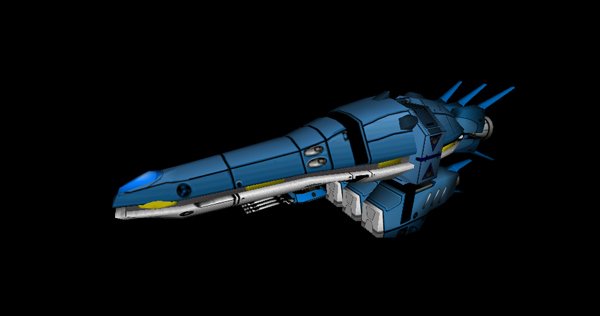
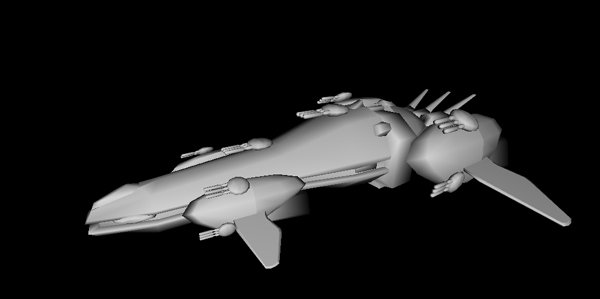
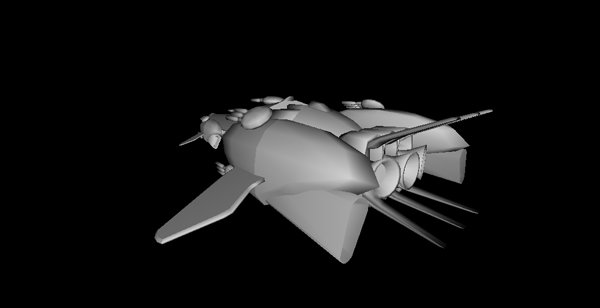
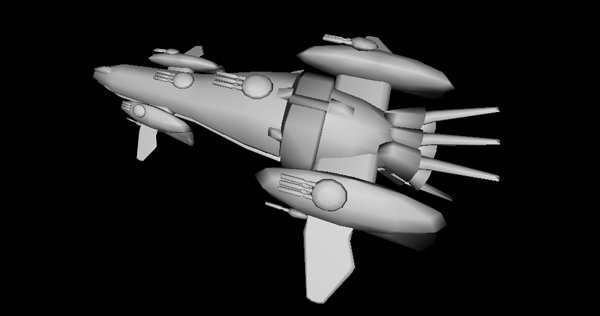
Nice work I know what it is like to piece together ships. One of the fan projects I was working on we had to create a bunch of new ships. We came up with Modifications to the RT New Generations ships Garfish. Making Multiple types here is one we called it the Tigerfish. First the Original Design of the Garfish Then the Modifications for an attack class the Tigerfish It can be a lot of fun working on the models. Fortunately for me I can use all the modeling programs I have. Most of the ones for the game were built in Milkshape 3d though. A simplistic program and easy to learn makes it easy to transition to other programs.
-
actually I know of 2 other renders of this particular item though they are game level detail. But this rendition is looking to be the best one so far.
-
Have you thought about making the models yourself? They are probably not that hard to make.
-
you might want to check out www.turbosquid.com, But the most likely place to have more luck is to try there fan sites.
-
I wonder if you have a sound blaster sound card there was a issue with that card on windows 7. I think they made an update for the drivers not sure but my roomate had a problem with the sound card and windows 7 when it ran games.
-
I love this topic the best because almost everytime I look in it I see a lot of great and talented work.
-
now I Must first start off by saying these are great works and Sculpting I have done in the past and no where near as good as these but as an artist or a student of art I must say the feel of the Milia character is all good until you get to the Face. I believe it has to do with more of the shape and mainly the eyes. I don't get the feel of Milia from it. It seems more like the suit with some other head attached to me. Just an honest opinion and such. I don't want to discredit your talent far from it. There is tons of talent there. But as a observer to the Milia Figure that is the feeling I get when I look at it.
-
Question is what kind of models are you using and such and what texture format would you like and do you have a picture of the models you want textured?
-
thats better then any that I have. Most of the ones I have are for low poly games.
-
hey dante check turbosquid they might have one. www.turbosquid.com ifnot then i will see what i have on file that might be made better into a higher quality.
-

Macross Frontier theme for PSP (PlayStation Portable)
Darrtallion replied to ButzYung's topic in Fan Works
Well I was asking because there are some new features in the the 5.50 settings. So there are more items and such. -
Macross Frontier theme for PSP (PlayStation Portable)
Darrtallion replied to ButzYung's topic in Fan Works
for what software version pack is it?? is it for the new version 5.50?? -
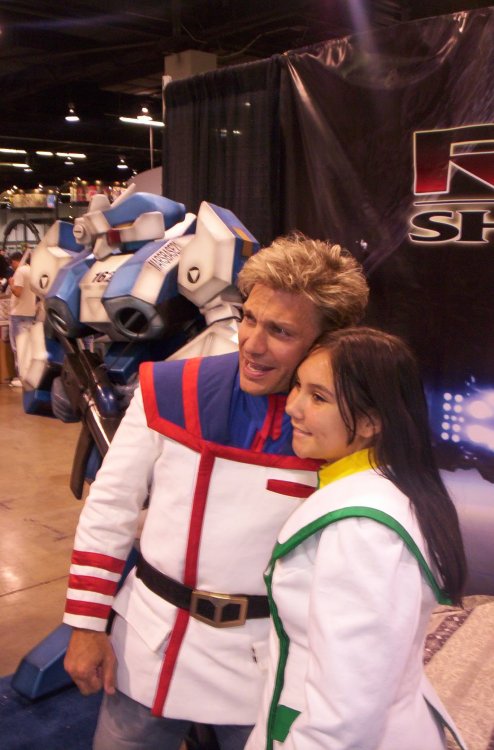
It was 2005
-
Yea I have Vic's pic

-
well I have pictures of the outfit from when Tom borrowed them and I can post pics up from then if you don't mind. Non of them have your wife in them Just Tom and my niece and another girl from the convention.
-
lol Jason but why wasn't your wife posing in the Misa outfit???.
-
Thought I would share this youtube vid. http://www.youtube.com/watch?v=U9_1jnCS8lU
-
well Bond can be found at any auto part store and they do have a version for plastics and stuff like that. if the holes on the helmet are just decorative then it might be an easy fill. I was thinking they where holes all the way down not divets.
-
maybe I should just start making helmets and cosplay props and putting them up on ebay lol. Um as for a filler maybe get can of filler foam tap the inside and then fill the hole leaving enough for some bondo you can smooth on it. Probably cost about 3 to 5 dollars for the can of expanda foam and then 5 to 10 dollars for the bondo. That should give it a smooth surface to paint. Like the foam here Just fill cover with bondo sand and paint. Not really hard and cheap to boot.
-
How to make Isamu's Helmet. This can be done in many ways. Personally I would probably go by the approach of how I make Fiberglass Fit parts for interiors of cars. Materials: Foam: High Density Foam probably Urethane Liquid foam. You can substitute getting Liquid for a premade block but more carving will be needed. Box: card Board Box large enough to store the size of helmet you want to create. Might want a few just in case. Balloons: Large Enough to form the cavity well your head would go in. Hot Foam wire Cutter. Files. Yes you want a regular hand held file kit. With different shapes and grades. Sand Paper. Tool dip. This can be found in local hardware stores it applies a light smooth coat to foam. Fiber Glass resin and Cloth. Safety Equipment. Goggles, Gloves "Usually Rubber latex multi pack" Old cloths to ruin. Industrial hand cleaners. "Trust me its a must" Here is what I would do. 1) I would first Blow the balloon up to be large enough to make a cavity well the size of your head basically you want additional length past the width of your head. I would probably get a couple of cans of spray foam and blow it up with that. This will give you a solid object for the first time user but you must remember not to make the point of the balloon that it has to come out to you can not pop it if you do this. It would be easier to be able to pop the balloon so I would say use air and be cautious. Or you will have to wait for the balloon to harden and then cut it at the the largest width to be able to pull out. Wax solid balloon before putting in box. Spray on wax would be the best. 2) Stick Balloon in Card Board box. Make sure its set in position to allow for the length of the bill as well. so it will have to back some. Once set pour in liquid foam as directed by brand directions or spray in foam. This will take time to harden probably 48 hours or as Direct if a weekend project then wait a week between patience is key. 3) When Foam is set remove box from around foam. Pop Balloon and check cavity well. Note that you must leave this intact to work right. No carving through it unless designed. I would then start of but using measuring devices or cardboard tracer and map out the design of the carving on the foam with a black marker. Cut out your pattern carefully you want to use both the main pattern and the scraps. Remember that the cut off piece is a reverse of the pattern and will allow you to use to check carving status. Multiple patterns of the width would be good as well. Use a Drawing compass if you want to make the different widths of the curve match. Note you will want to measure the Cavity well and find center and then mark your center accordingly. You want to keep it always center. All Pen Marks will be covered later any remaining guide marks will be removed. 4) Start cutting off the big chunks with the hot wire foam cutter they are really cheap and battery operated so they are not that dangerous. Or at least the ones I use are not. Usually 10 dollar deal from Michele's craft store. This will allow you to get a boxy type shape started to the foam. Cutting out features of were they will be with out actually getting into features. 5) From this point I would then start marking again with my patters and making the first pass with files. Note I would use for the curve of the helmet the largest points. This will allow you to have more accuracy. Follow the pattern guide always checking to make sure its centered. Be careful not to use to much force with the files. Foam is not metal or would and these files will shave off a lot at a time. Continue to shave of foam until you have the primary rounded shape of the helmet and its features. I would also have a motor cycle helmet near by to make sure you are keeping to dimensions. 6) Once you have the primary features and you need to Slow down. This is when you do you fine detail with small files and sand paper. Making sure you adjust to the smaller patters for each section. Follow your art layout and make your guild marks. if you over gouge you can fix with a filler. Usually a Foam filler or Bondo. Yes regular car bondo will work. refill your error and sand again. If you get to far and mess up you will have to pour a new box. Never hurts to spares even spares prepped just in case and if you do well the first time you can make spares. 7) One you completed your shape of your helmet you will want to use a foam hardener. This will increase the strength of the foam. Then you will want to Tool Dip it. The dip will fill all the micro holes of the foam and give the surface a smooth area in which you can either paint or what have you. Personally I would not stop with the tool dip. A fiber Glass helmet is much cooler. Tool dip is used as well to prevent the resign from eating the foam. it gives it a light coat that prevents the resin from destroying the foam. I use a Fiber Glass Sprayer but you can use the sheets because honestly you don't want to buy the sprayer unless you got the extra extra extra cash. Use safety equipment when working with fiber glass the resin is very problematic and such. Follow training guides and instructions when applying fiberglass. Make sure to keep it smooth and remove all bubbles underneath. I would for a helmet probably apply multiple coats but it is not necessary if it is just a show piece. Finish Sand the Fiber Glass when dried. Primer the helmet. Yes PRIMER. You don't want to put on a regular coat of paint which will not adhere. You need a bonding coat first. Note if you find that your fiber glass still left some areas that are not correct and need to be filled you can use bondo again. Make sure its Fiber Glass bondo and that the surface is sanded and clean. Apply light coats and sand again. This will give a smooth surface. Make sure all surfaces are clean and free from dust or loose particles. Then Paint with Primer then let dry. After 2 to 3 coats of Primer then tape off your colors and do each one individually. I would probably start with a White Base all across let dry then do the colors. After colors are applied and dried I would then spray on a clear coat. About 6 to 7 is my preference. To apply paint I would either get a spray gun or cans with special nozzles. Like listed here Spray Nozzles When painting is completed you will then go back to the craft store and get comfort foam. This is the cushioned foam and will be adhered to the interior of the helmet where your head goes to make a snug fit. As for Visor I would probably go down to the Local Hardware store and ask about plastic sheets usually a lexan or MCM. The plastic can be head against a curved pot or pan of similar size and mounted on the inside of the helmet. Either using a resin or high glue or can even have small short screws to hold it in place. Then add the comfort foam. lol I should have put that first but hey I don't make this kind of stuff I make door panels and custom speaker boxes and center consoles for car's. Well at least on a hobby level I don't own a shop but I do work with a boat shop and other fabricators when I do this. But I usually do all the work myself except for the pleather stitching which is a fabric overlay that goes on the things I make. or at least part of the things I make. But this is how I would do it. This is just a suggestion and there are probably many other ways to do it. But this is how I would make it.
-
I know that leather working is something that really goes with the territory. I have had a lot of leather work done and a lot of materials that are leatheristic in nature. Yea I know Leatheristic is not really a word but I think you all get it as a substitution of realistic and leather combined. But anyways. I know that leather can be very difficult to work with if you have no experience. So I often find it better to have it done locally in the states then to have it shipped out. There are a lot of European companies that do a good job but I have not ran across any Asian countries that I have found great leather works done. No offense there are a lot of talented craftsmen out there and Women just to be politically correct. But I have had poor experiences with leather. I know I am being a little one sided on the topic but it just has been through my experience. Heck I have to return Items and eat a lot of cost because customers don't like the quality or the feel of the leather. So I just stick close to home. But thats based on my experience. And that is just for leather work that I have dealt with. By the way that Jacket would look awesome with a leather setup. Probably a dual material The Black the leather and maybe something a little less bold or a soft leather with the Red.